Plowboy
-
Posts
3,434 -
Joined
-
Last visited
Content Type
Profiles
Forums
Events
Gallery
Everything posted by Plowboy
-
Thanx! I only had a couple in Photobucket.
-
Thanx! I cut right where the rear of the fenders meets the body like a full scale would be done. I had to also narrow the hood slightly to match the cowl. I cut down the middle 3/4 of the length and glued it back together. It's really simple.
-
Thanx! I did quite a bit of fitment work to the front. The louvers was also quite a bit of work. The sides are simply Revell '32 sides with styrene added to the ends, cut and shaped to fit. On the hood and trunk, I used the same louvers cut into individual strips and grafted them in. These are actually resin copies.
-
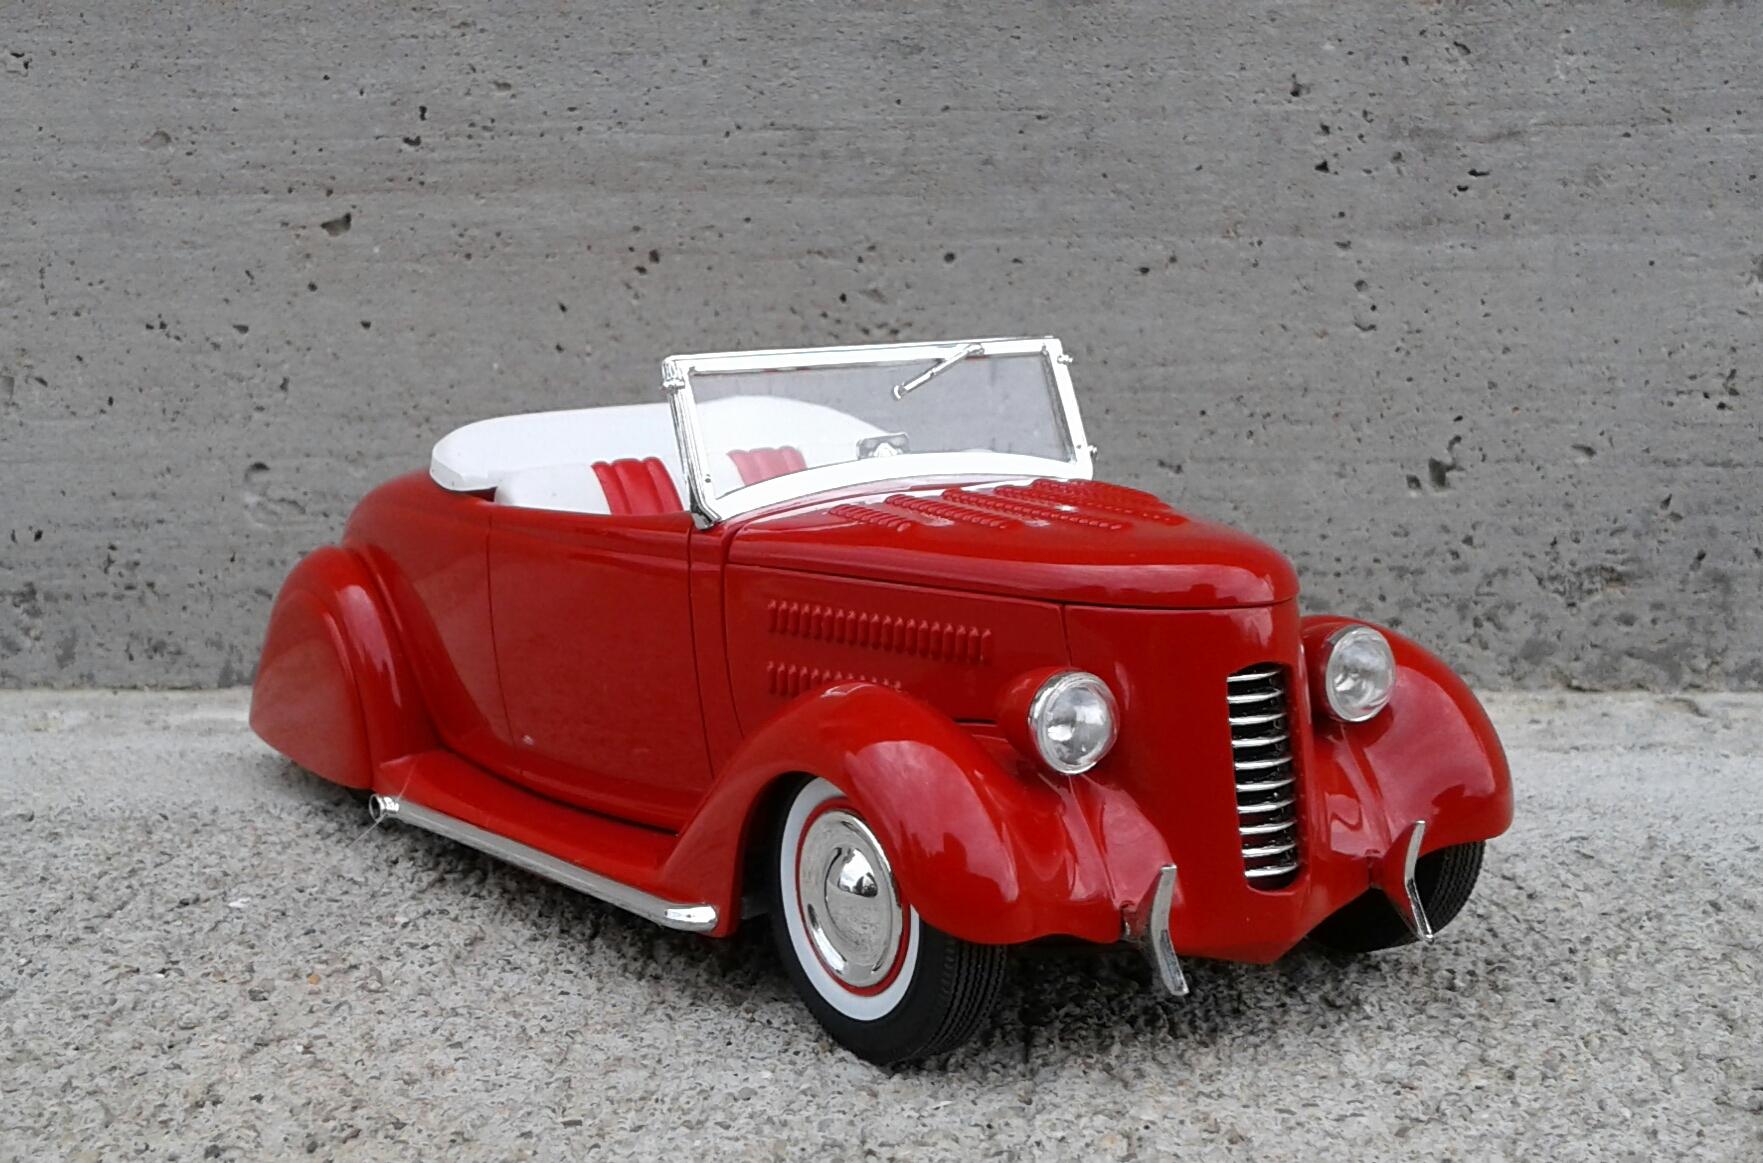
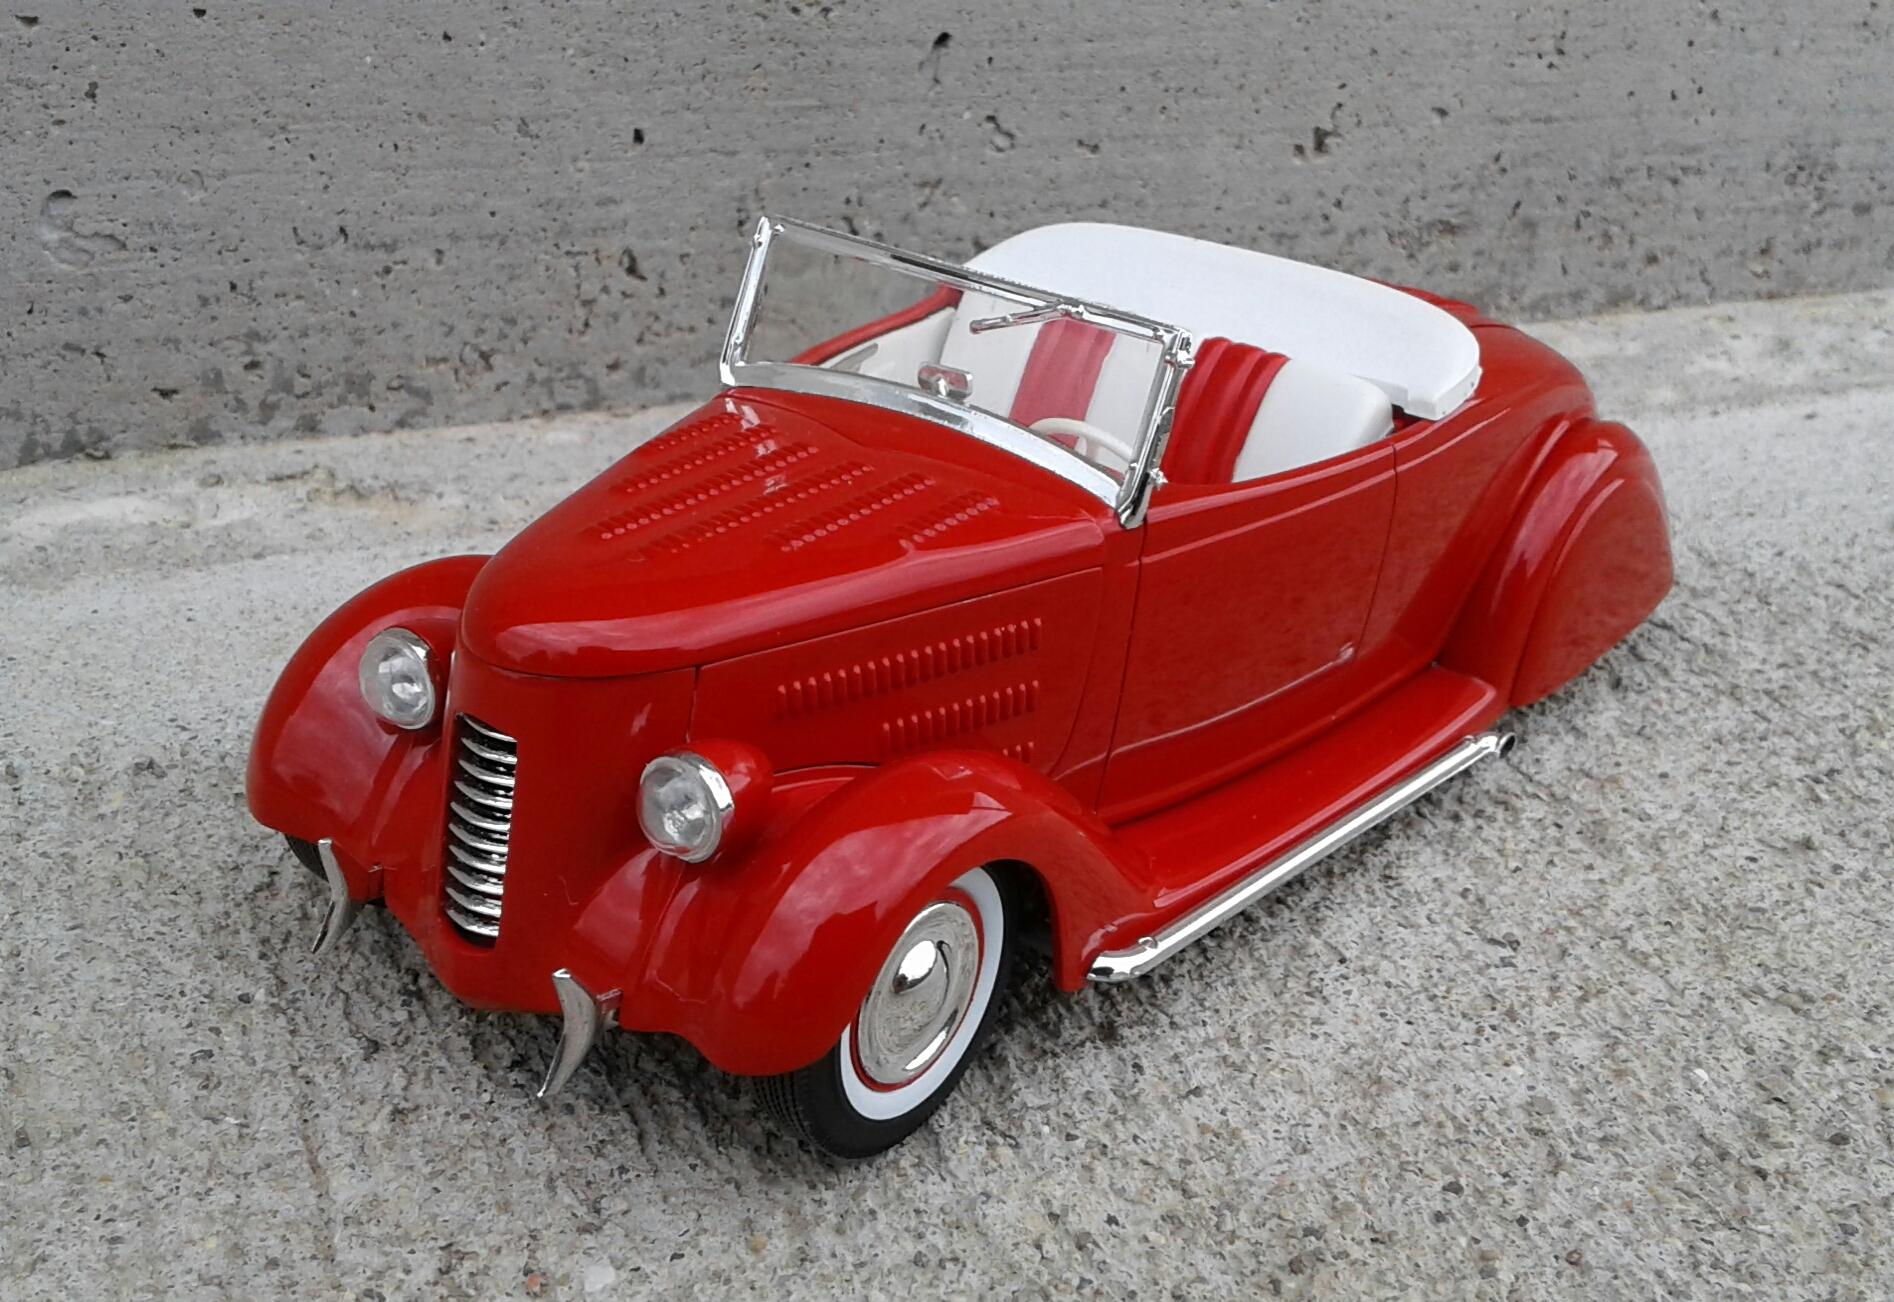
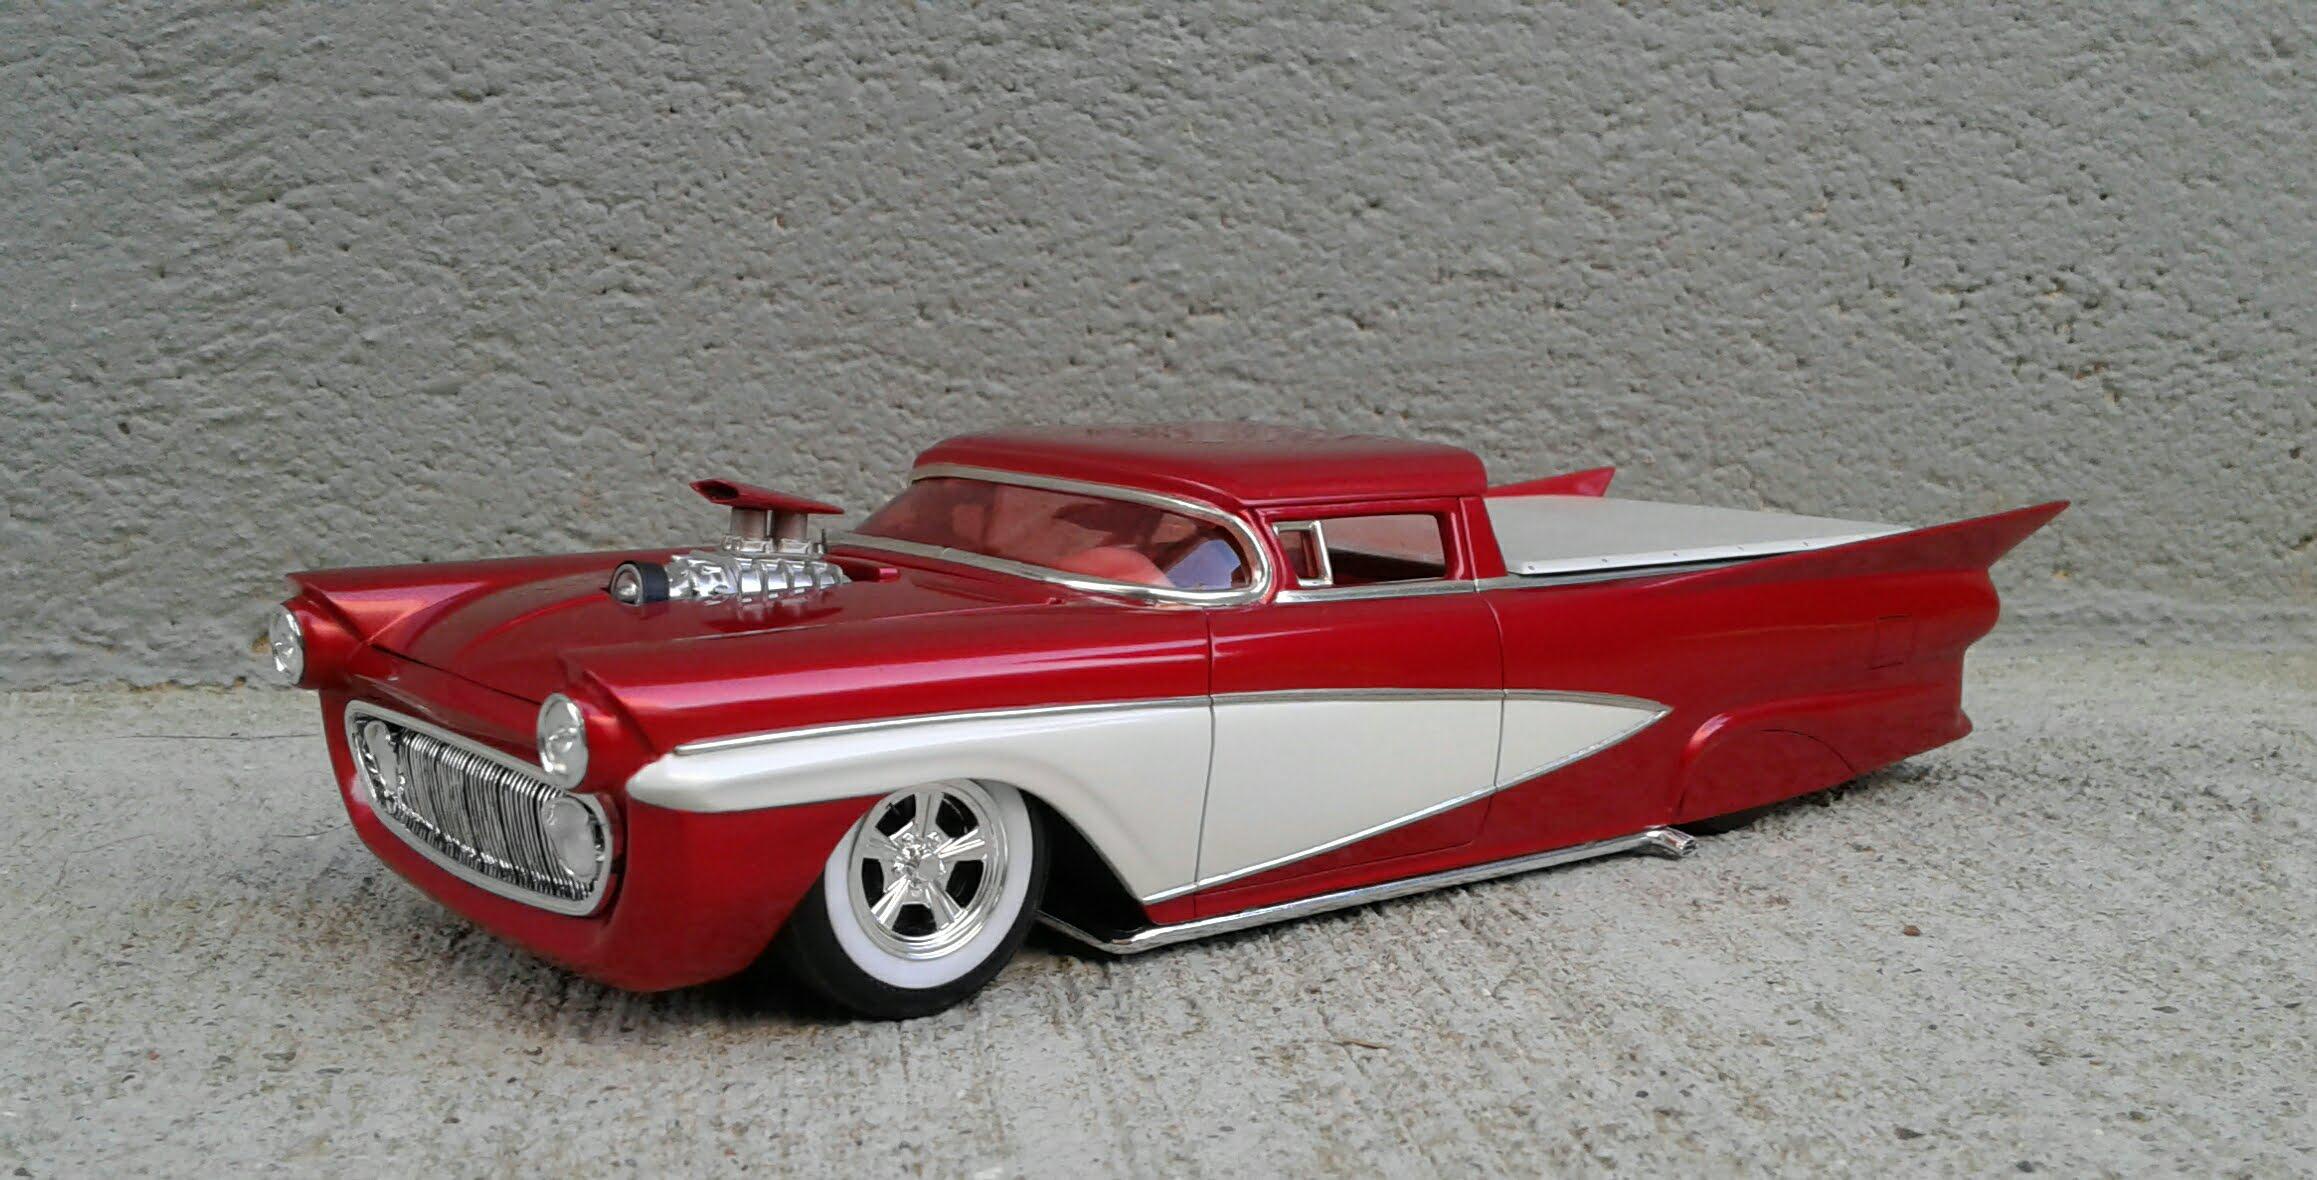
I built this years ago when the last reissue came out. At first, I had it like the side boxart sans the goofy headlights. But, it had the tail down stance and I added the fender skirts. Then, the chrome reverse wheels didn’t seem to fit with the skirts. So, I changed those out to the smooth wheel covers. Finally satisfied. It's just a simple build of a simple kit and while it didn't come out like my original vision of it. It did finally come around. Paint is Dupli Color Bright Red with Tamiya TS -13 clear. Thanx for checking it out!

-
Thanx! I like the semi gloss black idea! I have some black foil. So, I could do a test run with it before committing to paint. That may be the best option. I like to have a backup plan whenever possible. I'm very close to having it ready for final primer. I've been making some final tweaks and touch ups. Then I can concentrate on the interior and chassis. I don't know how it will look. But, I'm gonna do it anyway. I'm planning on painting the engine yellow and the valve covers white. In my mind, it'll look cool. In reality, it may not. Only one way to know for sure.
-
I clear over every color. This is the only black one I have.
-
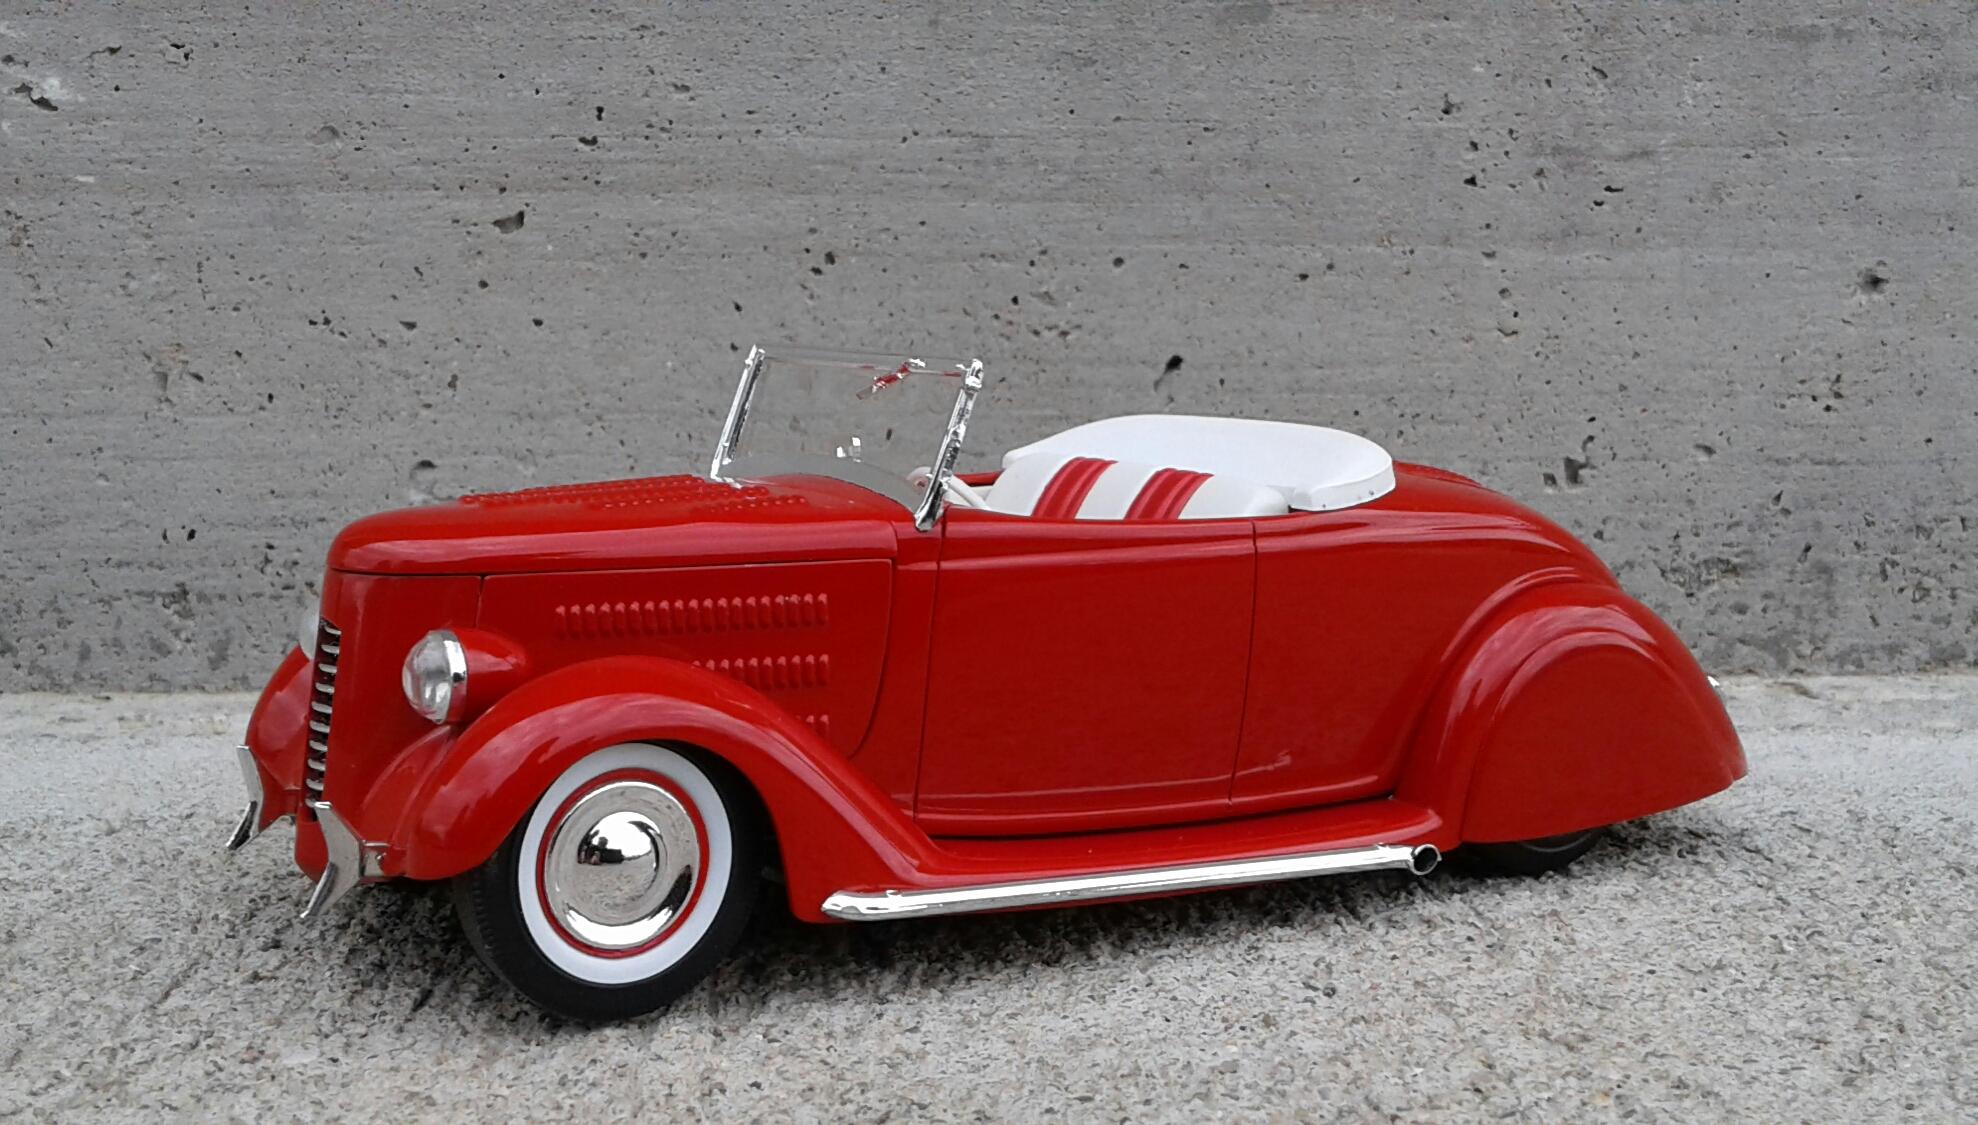
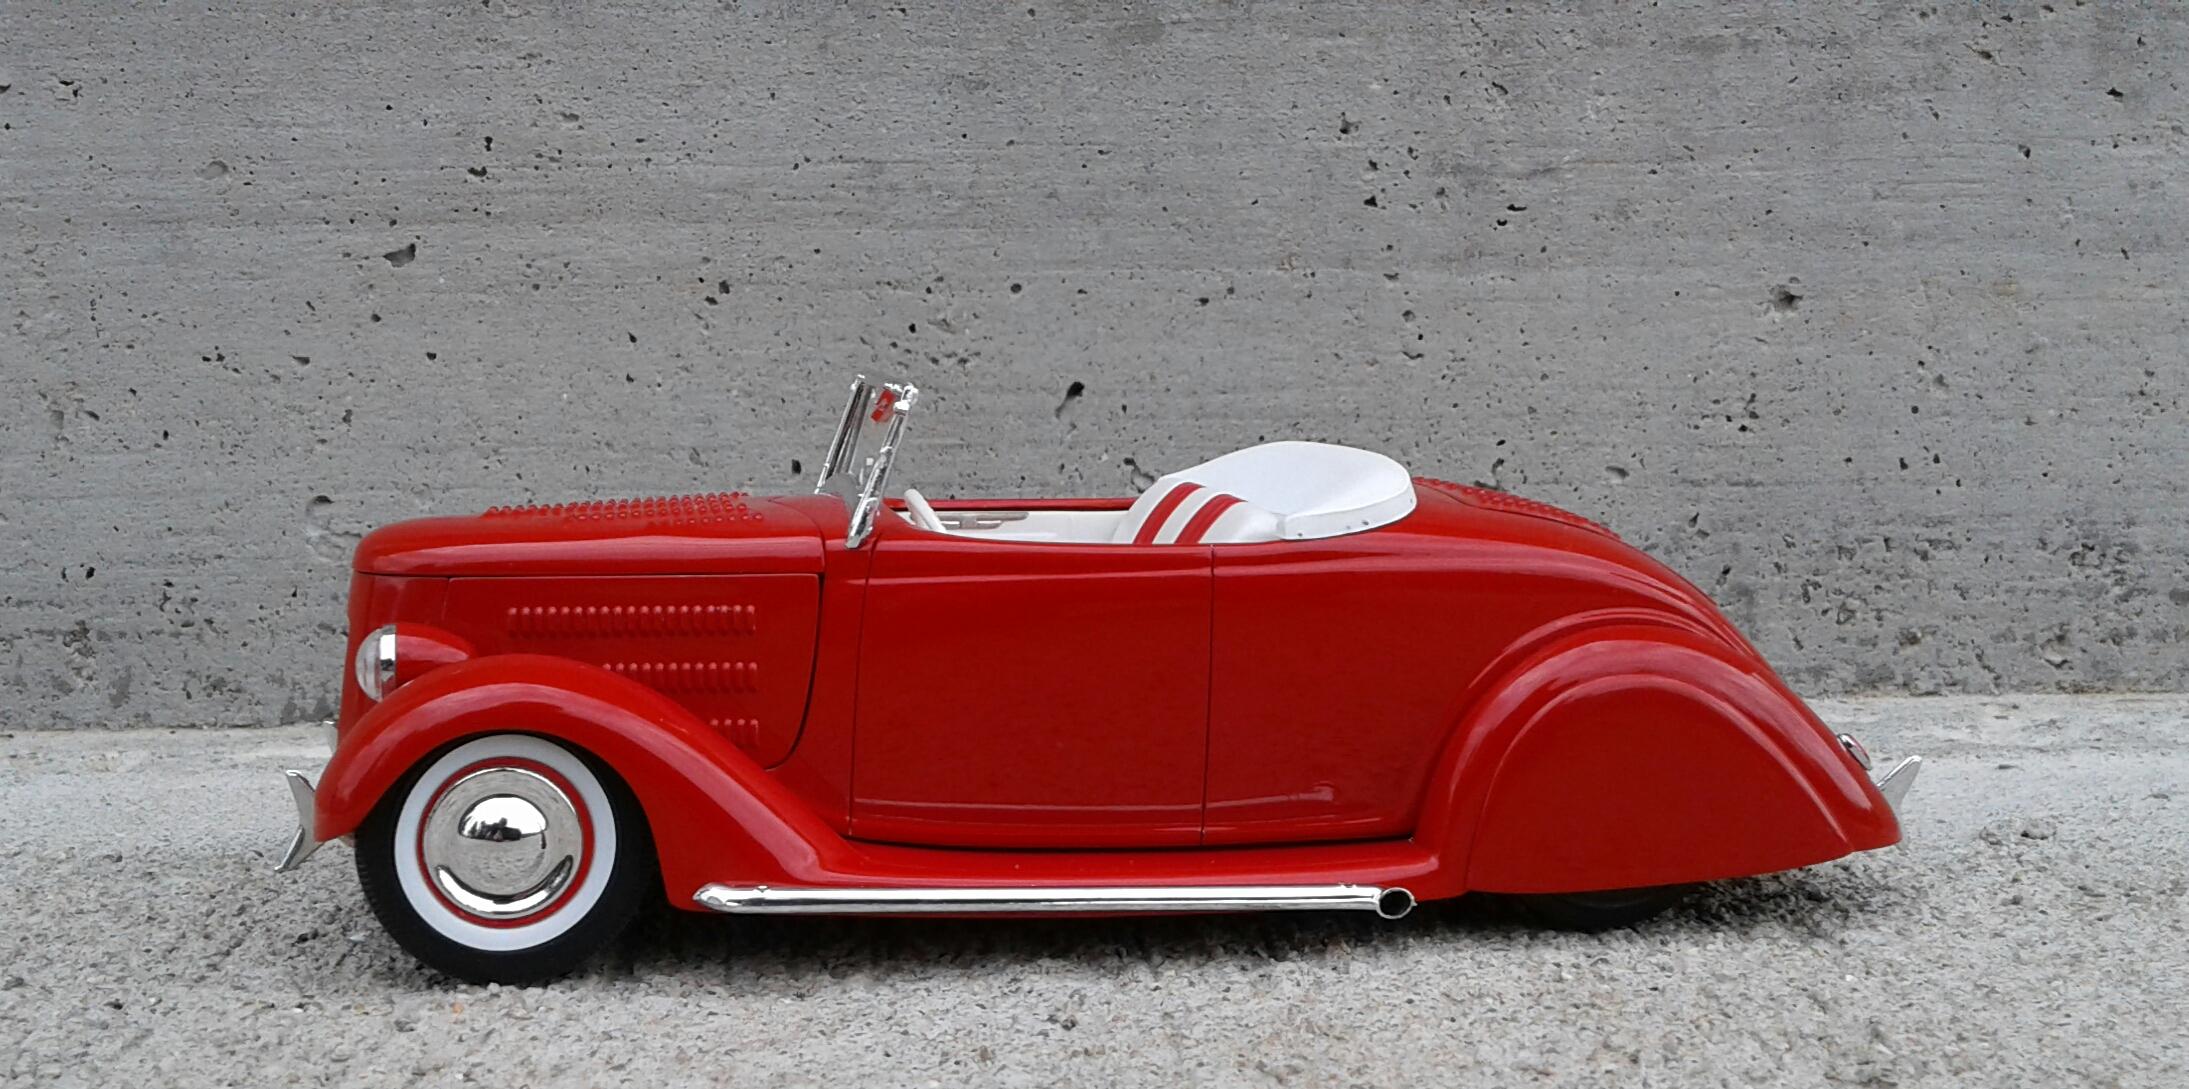
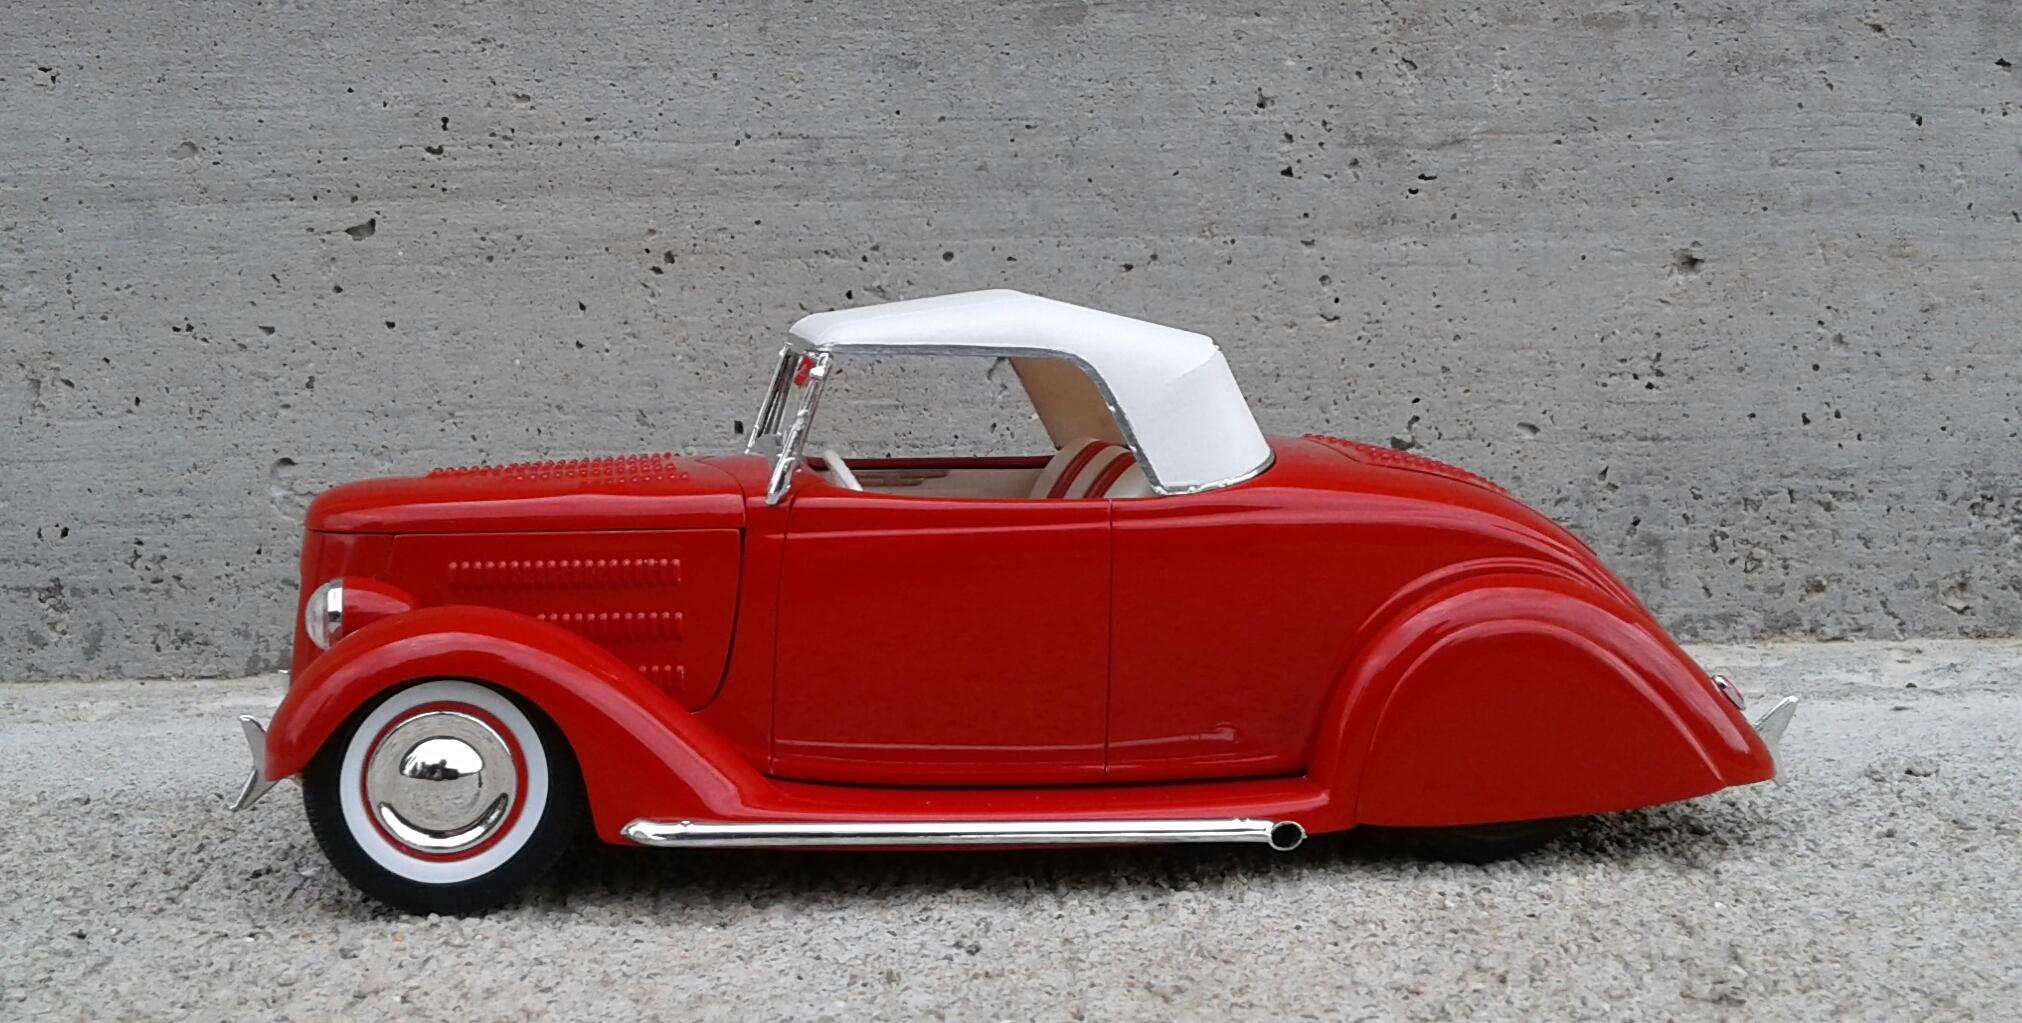
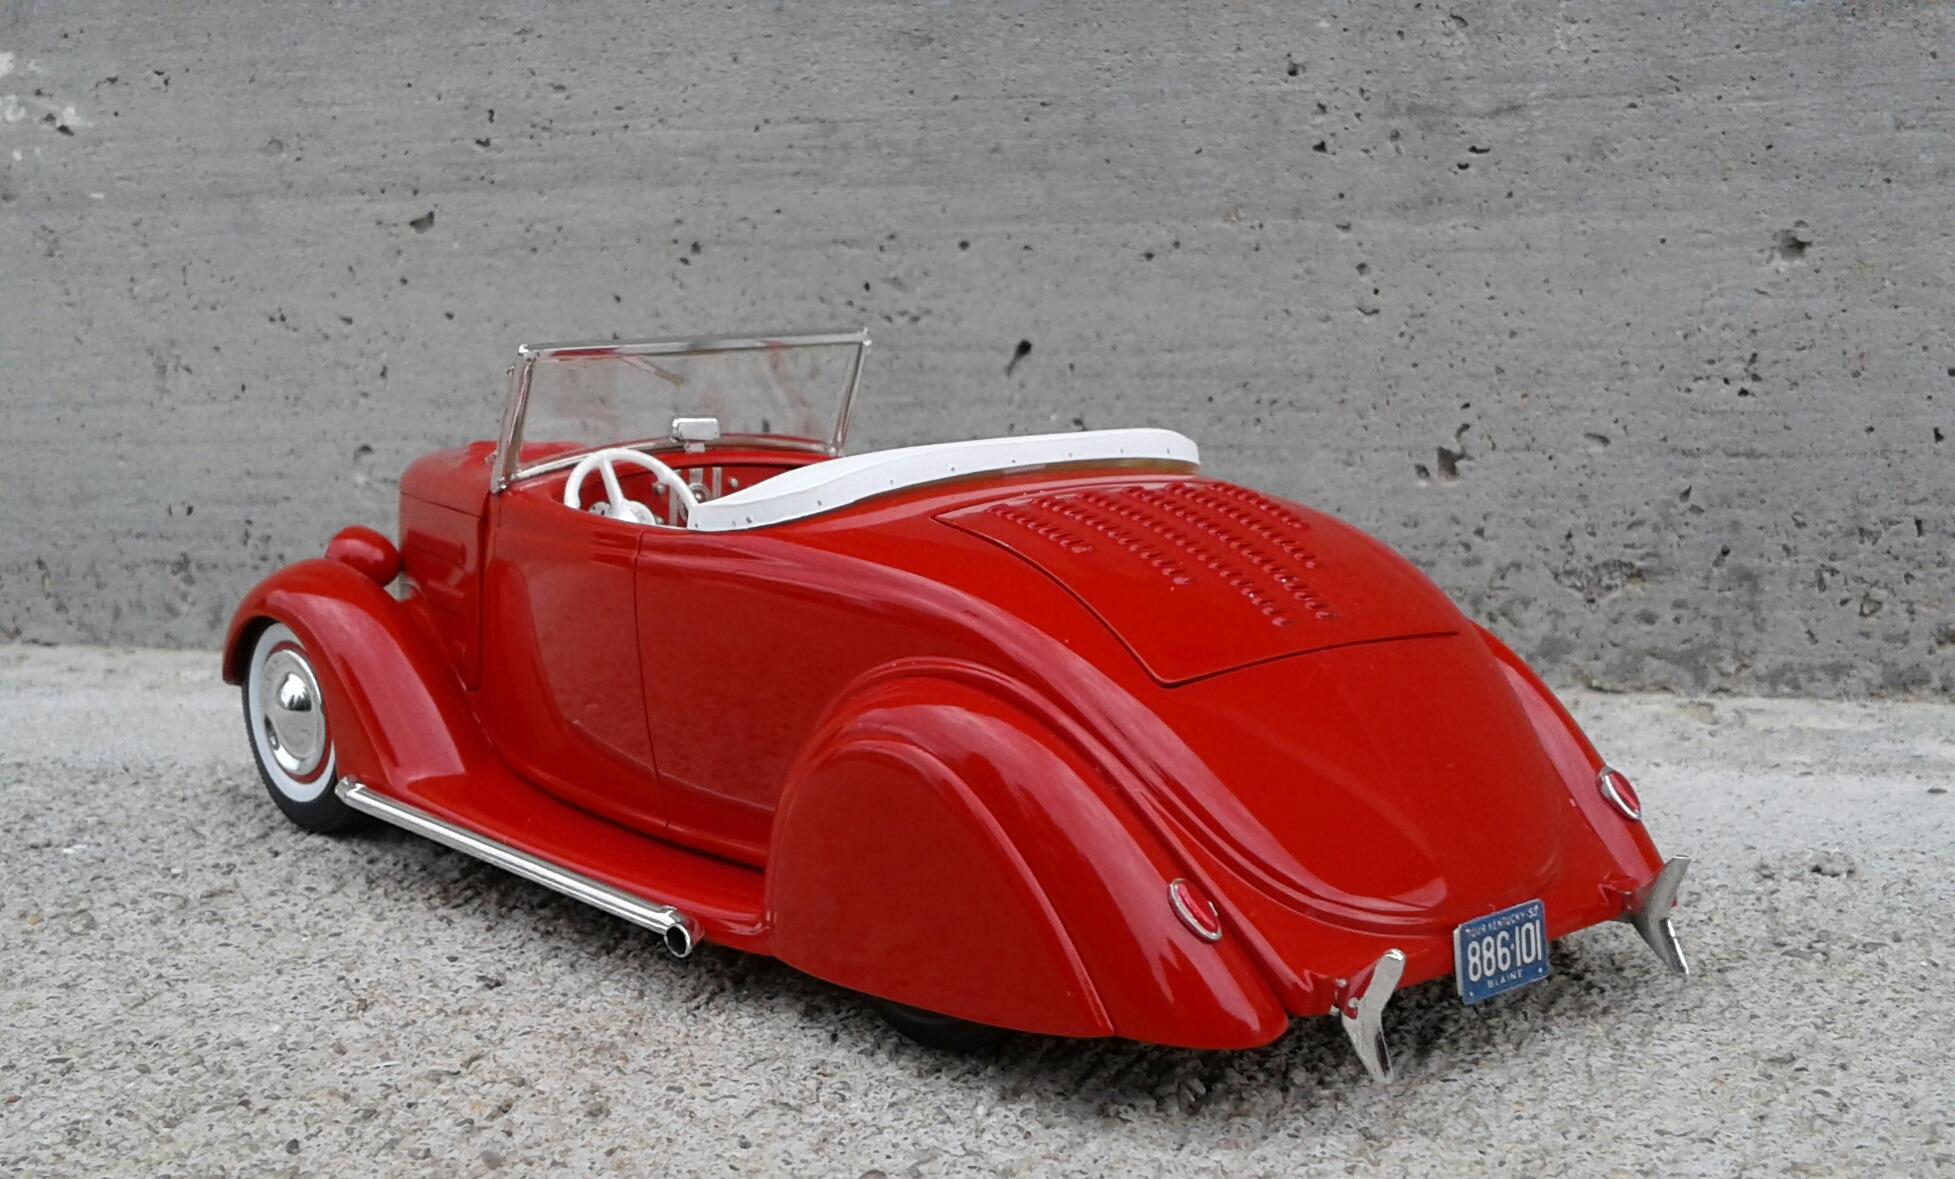
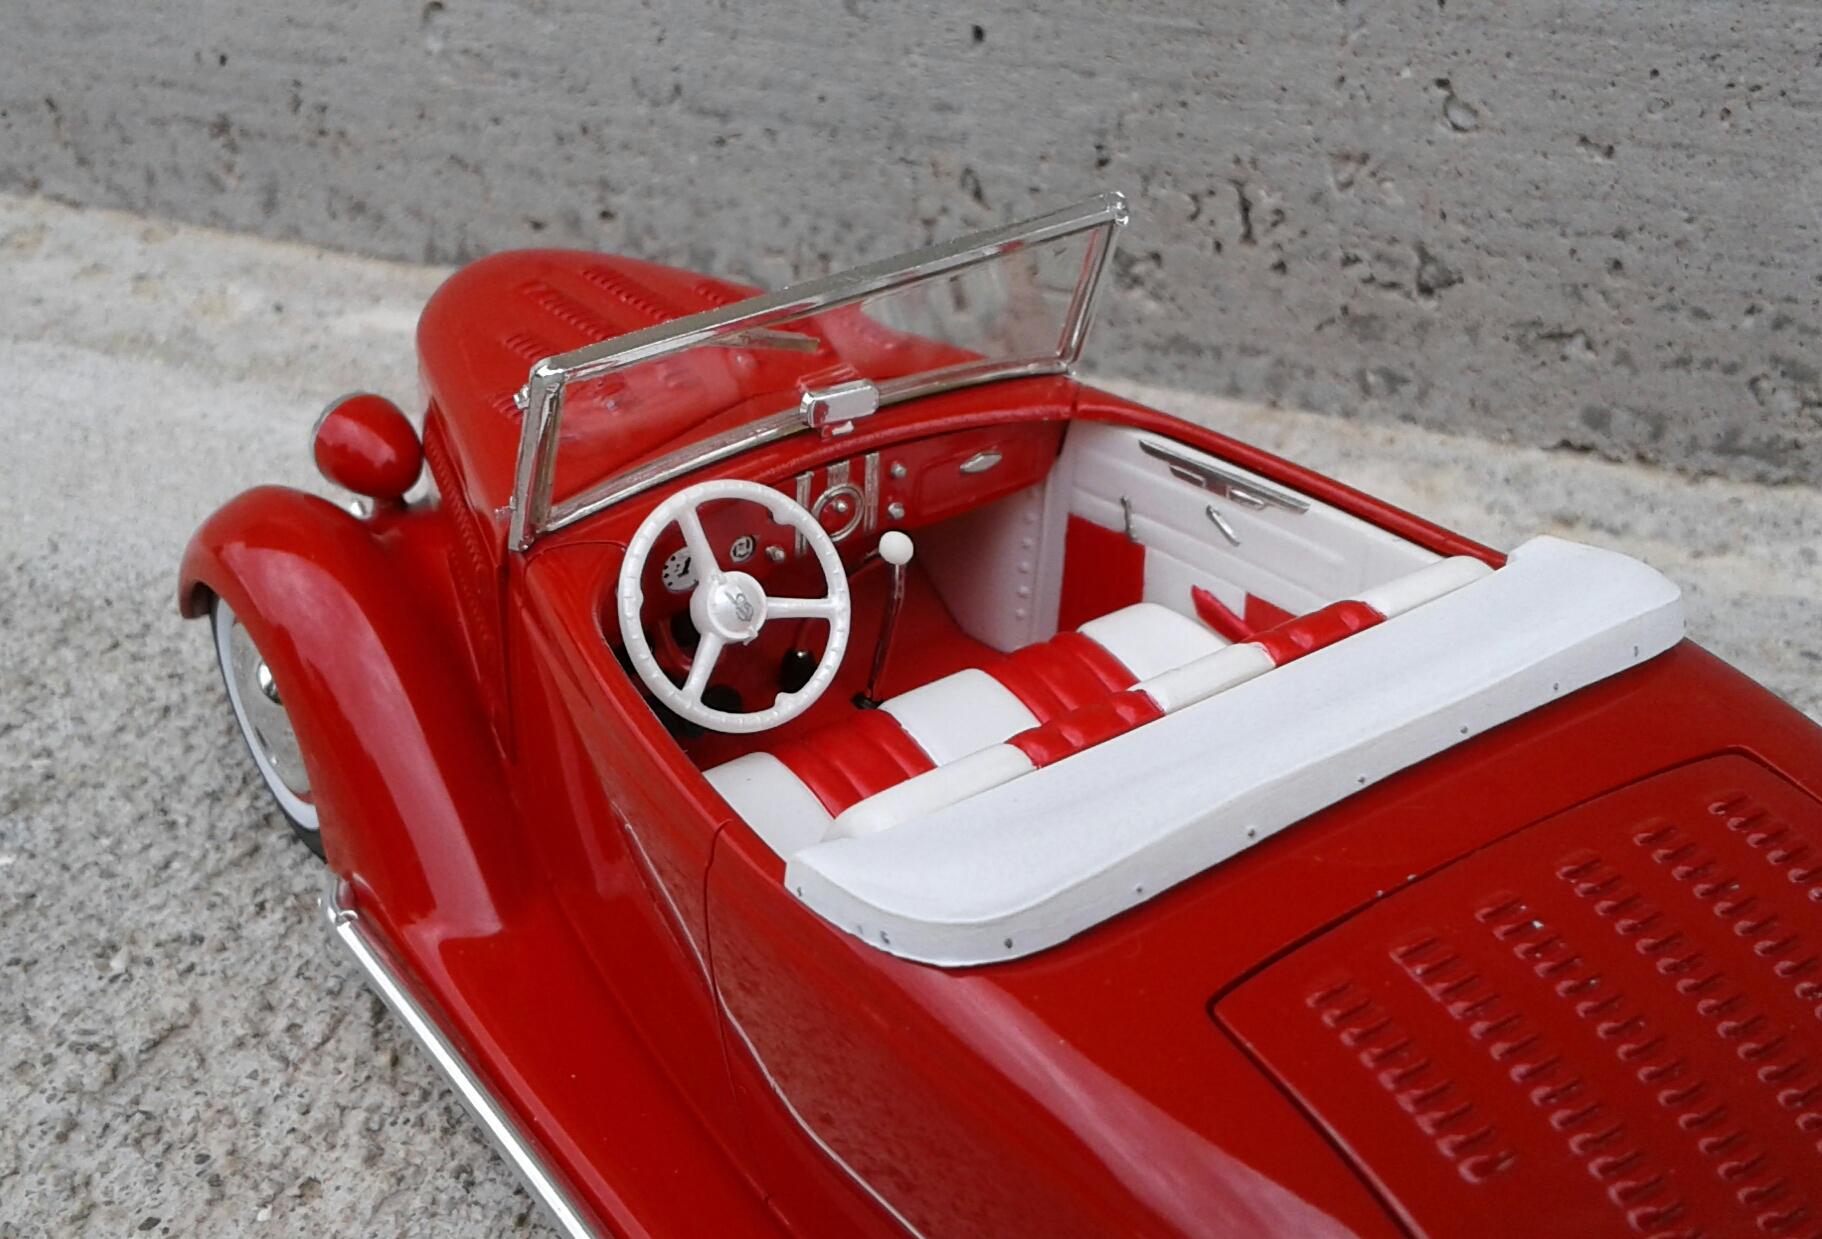
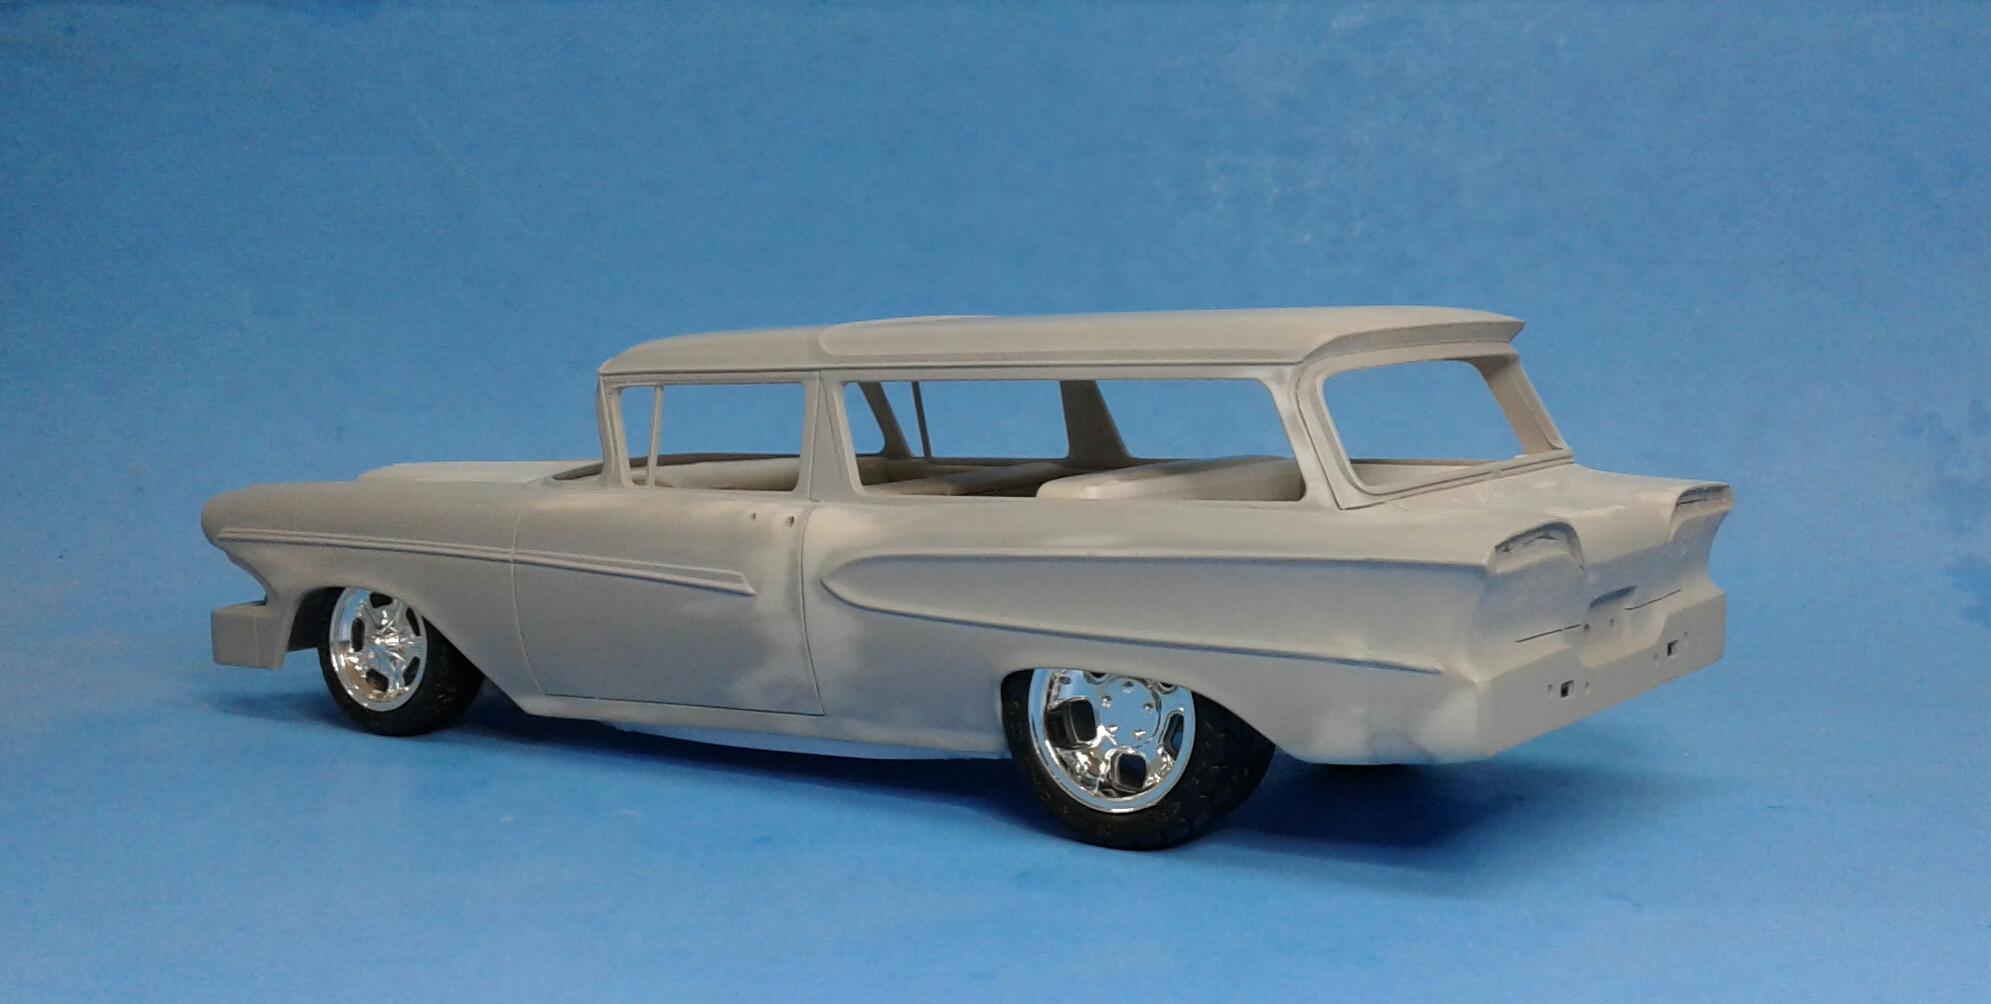
Yeah, I know red seems like a cop out no thought color. But, in my vision of it, nothing else will work. This model is painted with Tamiya Mica Red over gold. It's a beautiful color as are the other Mica colors. I hope Tamiya expands on the Mica line of paints. This photo shows the effect of the side skirts. No frame showing! I may foil the whole piece. I want to see what it looks like with just the half round done and go from there.
-
The Start To Finish is something I don't like personally. It's the same way at SA's forum. If a project goes on for while and racks up a few pages, you have to wade through those pages to find the finished photos. I much prefer a separate section for finished models.
-
'72 Chevy Stepside
Plowboy replied to Plowboy's topic in Model Trucks: Pickups, Vans, SUVs, Light Commercial
Thanx! I'd like to see a new tool of of the '67-'72s also. I would rather see Revell or Round2 do it though. The Moebius Fords have too many accuracy issues for me. -
Thanx to Mark B., I found out this model came out in '75-'76. So, it's not that old and it certainly has no historical value. I'm gonna use it for the bed parts, rear glass surround and bumpers on another build.
-
I keep coming back and looking at this model! It's so deceptive in it's look and execution. It kinda reminds me of the Phantom Vickie I built a while back. But, it's so much better conceived! Makes me want build something in the same style.
-
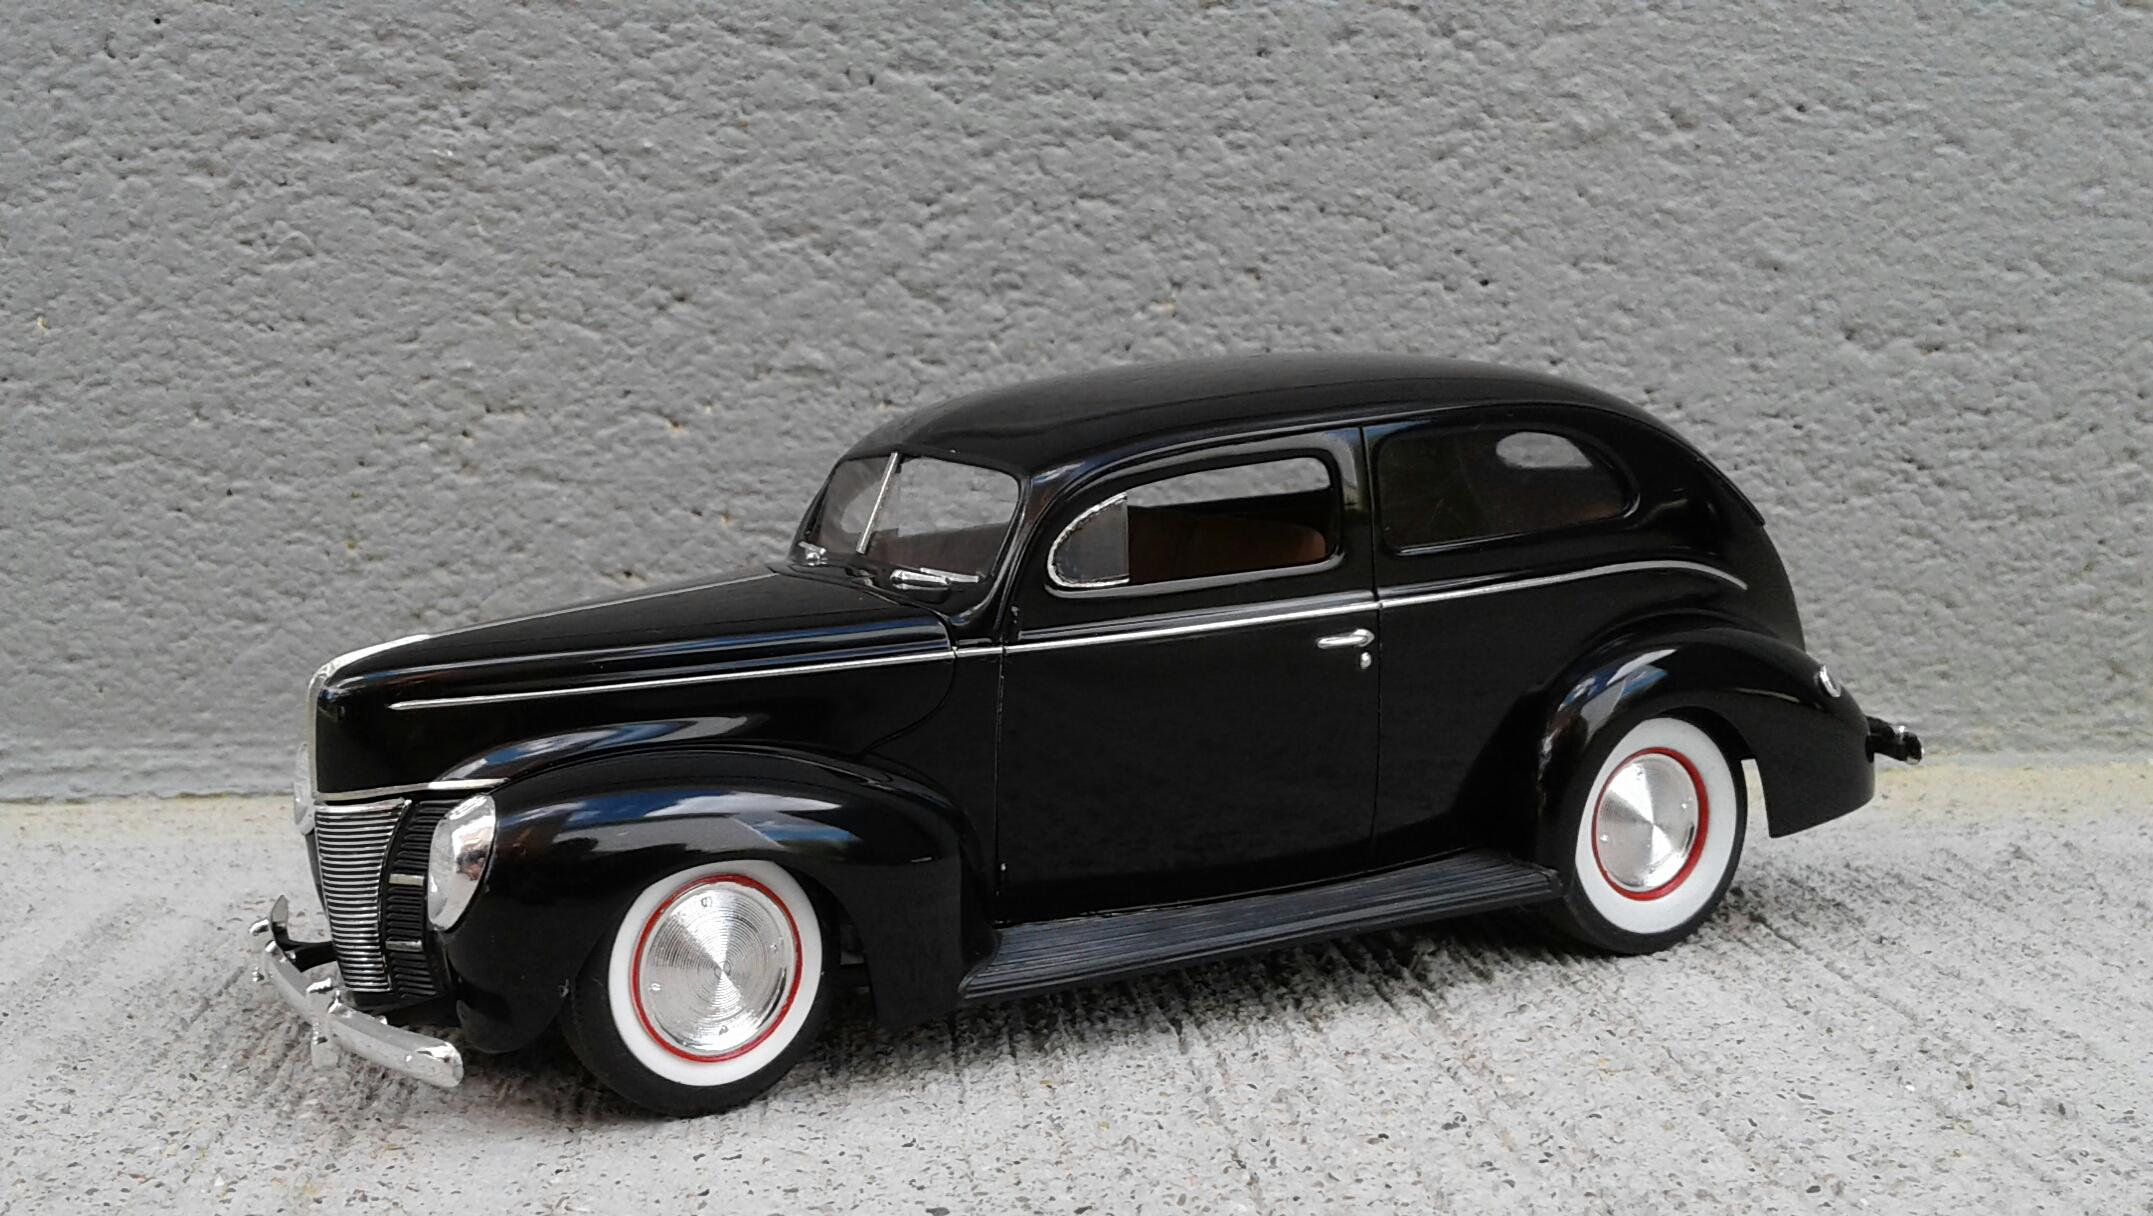
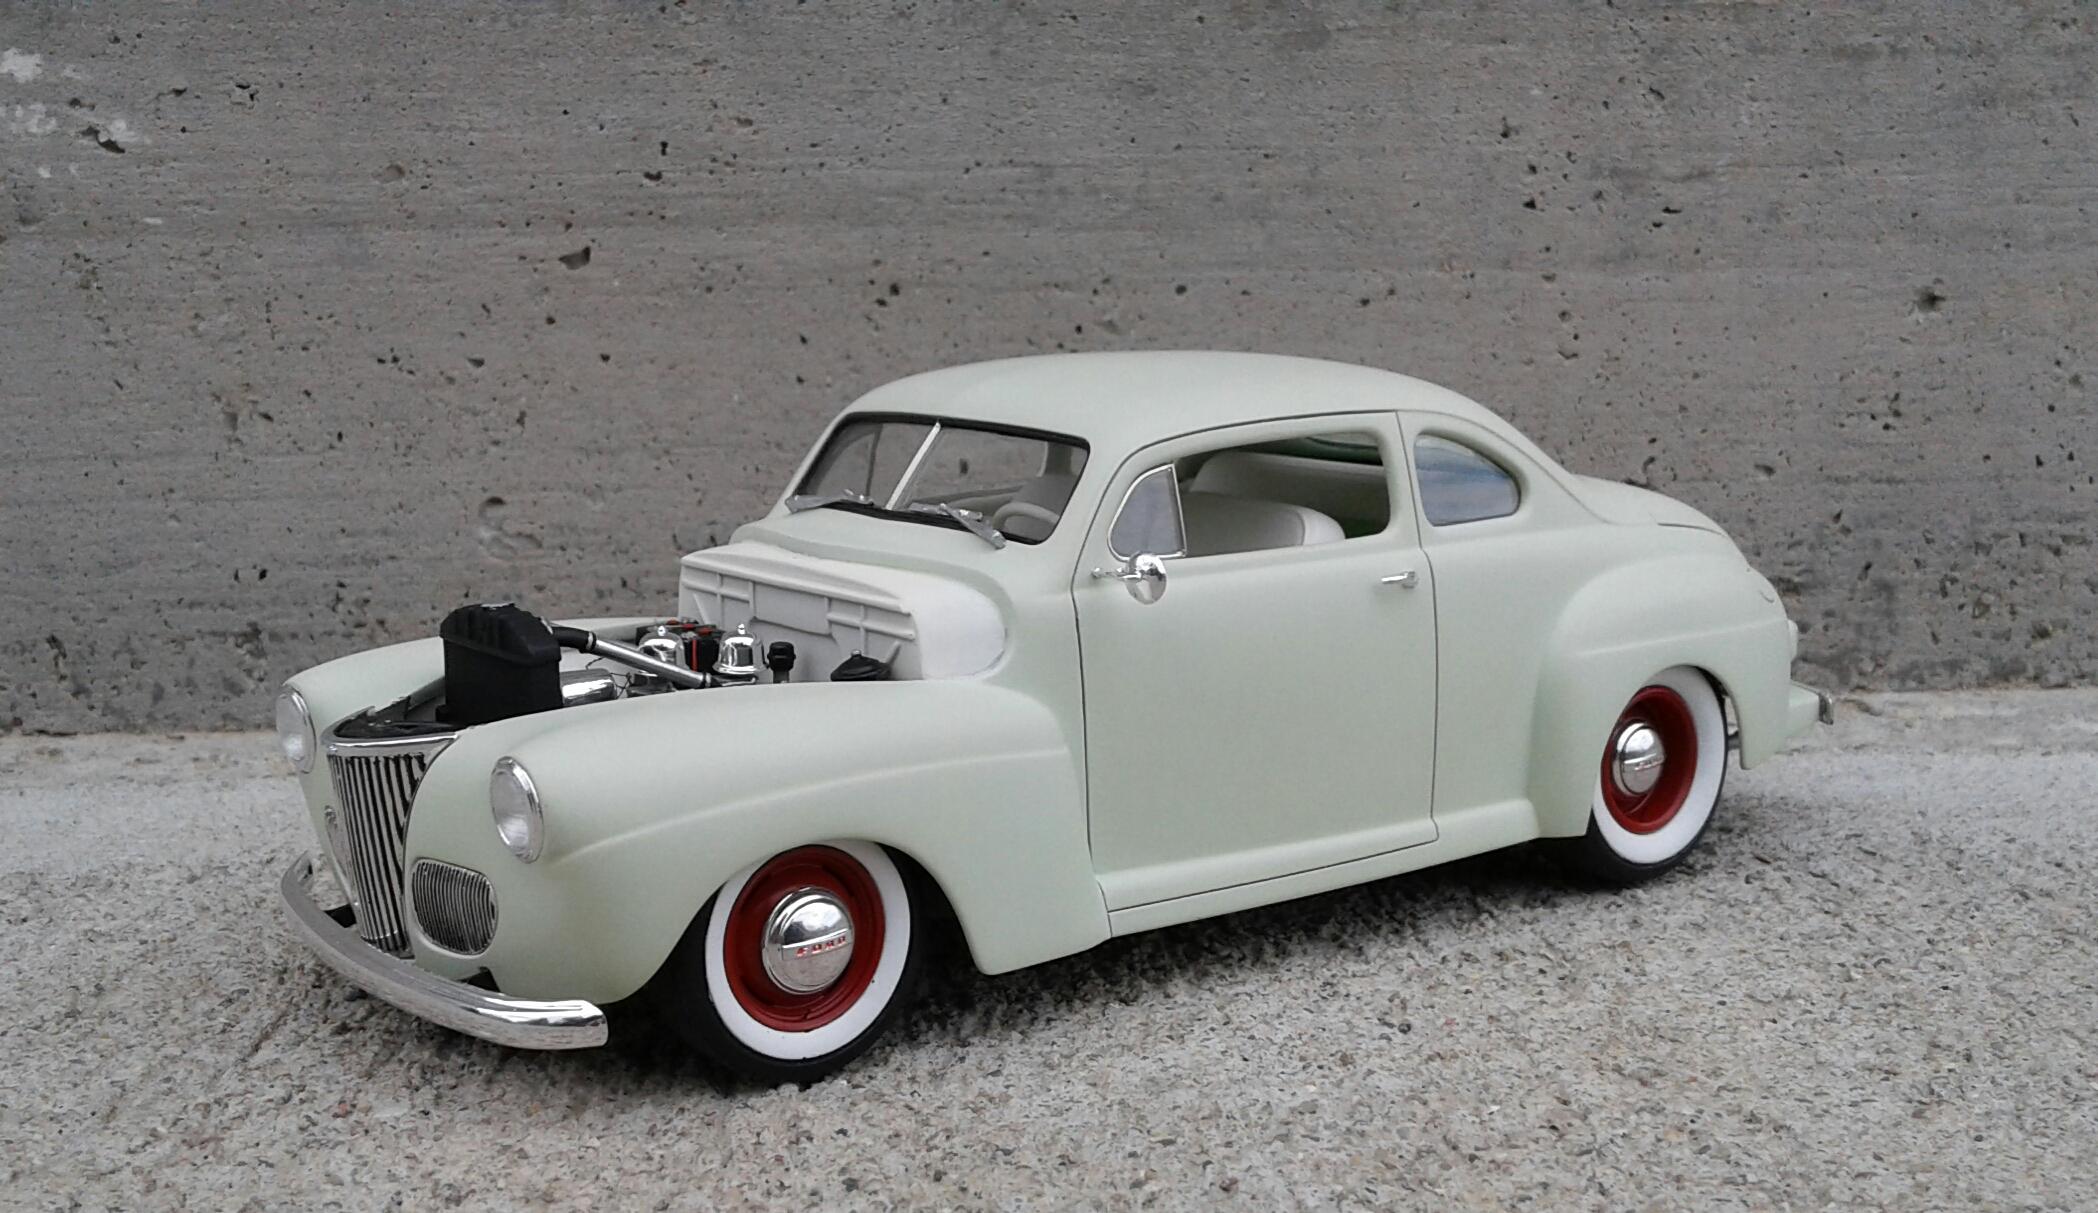
Thanx! To me, the chop on the Revell '48 has more of a hot rod look than it does a kustom. So, it made more sense to build it as a hot rod. I honestly don't know why the vent windows stand out like they do. But, my eye always goes to them for some reason. Weird.
-
This model is so nice! I love the colors and it's subtle touches! Nice work!
-
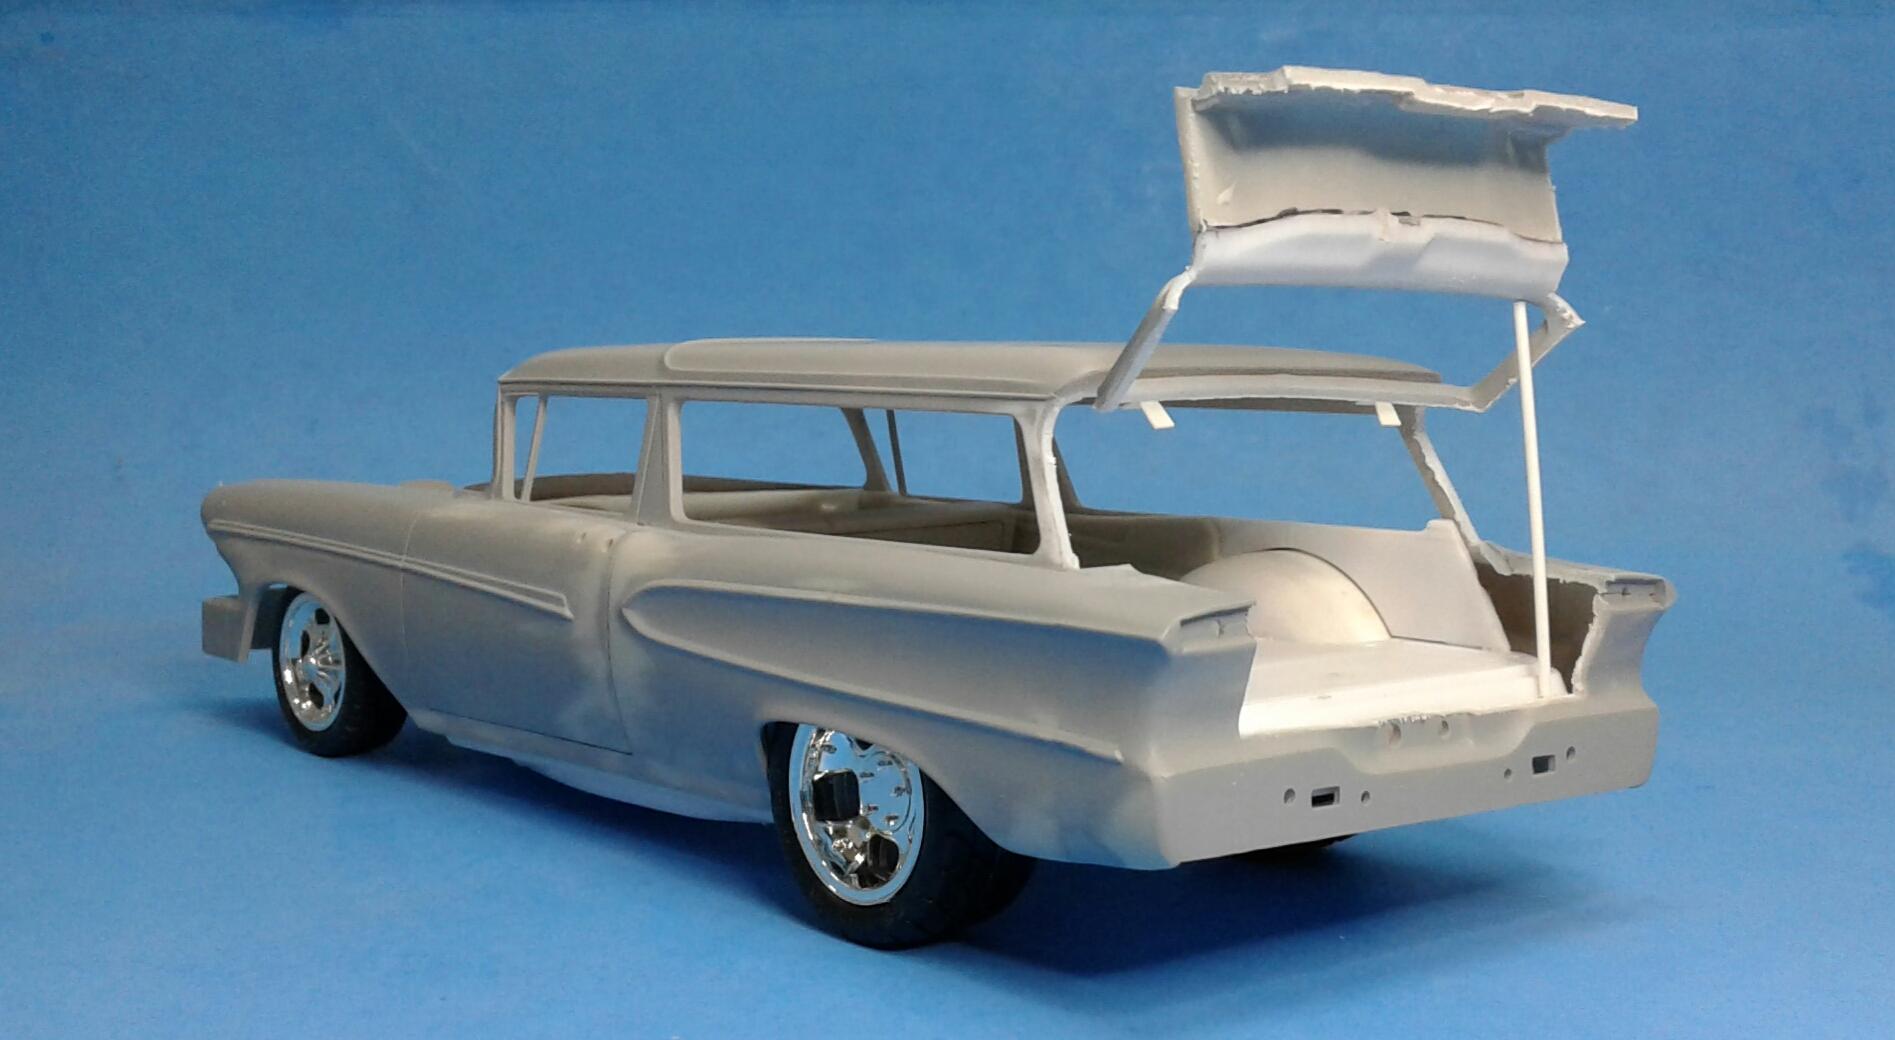
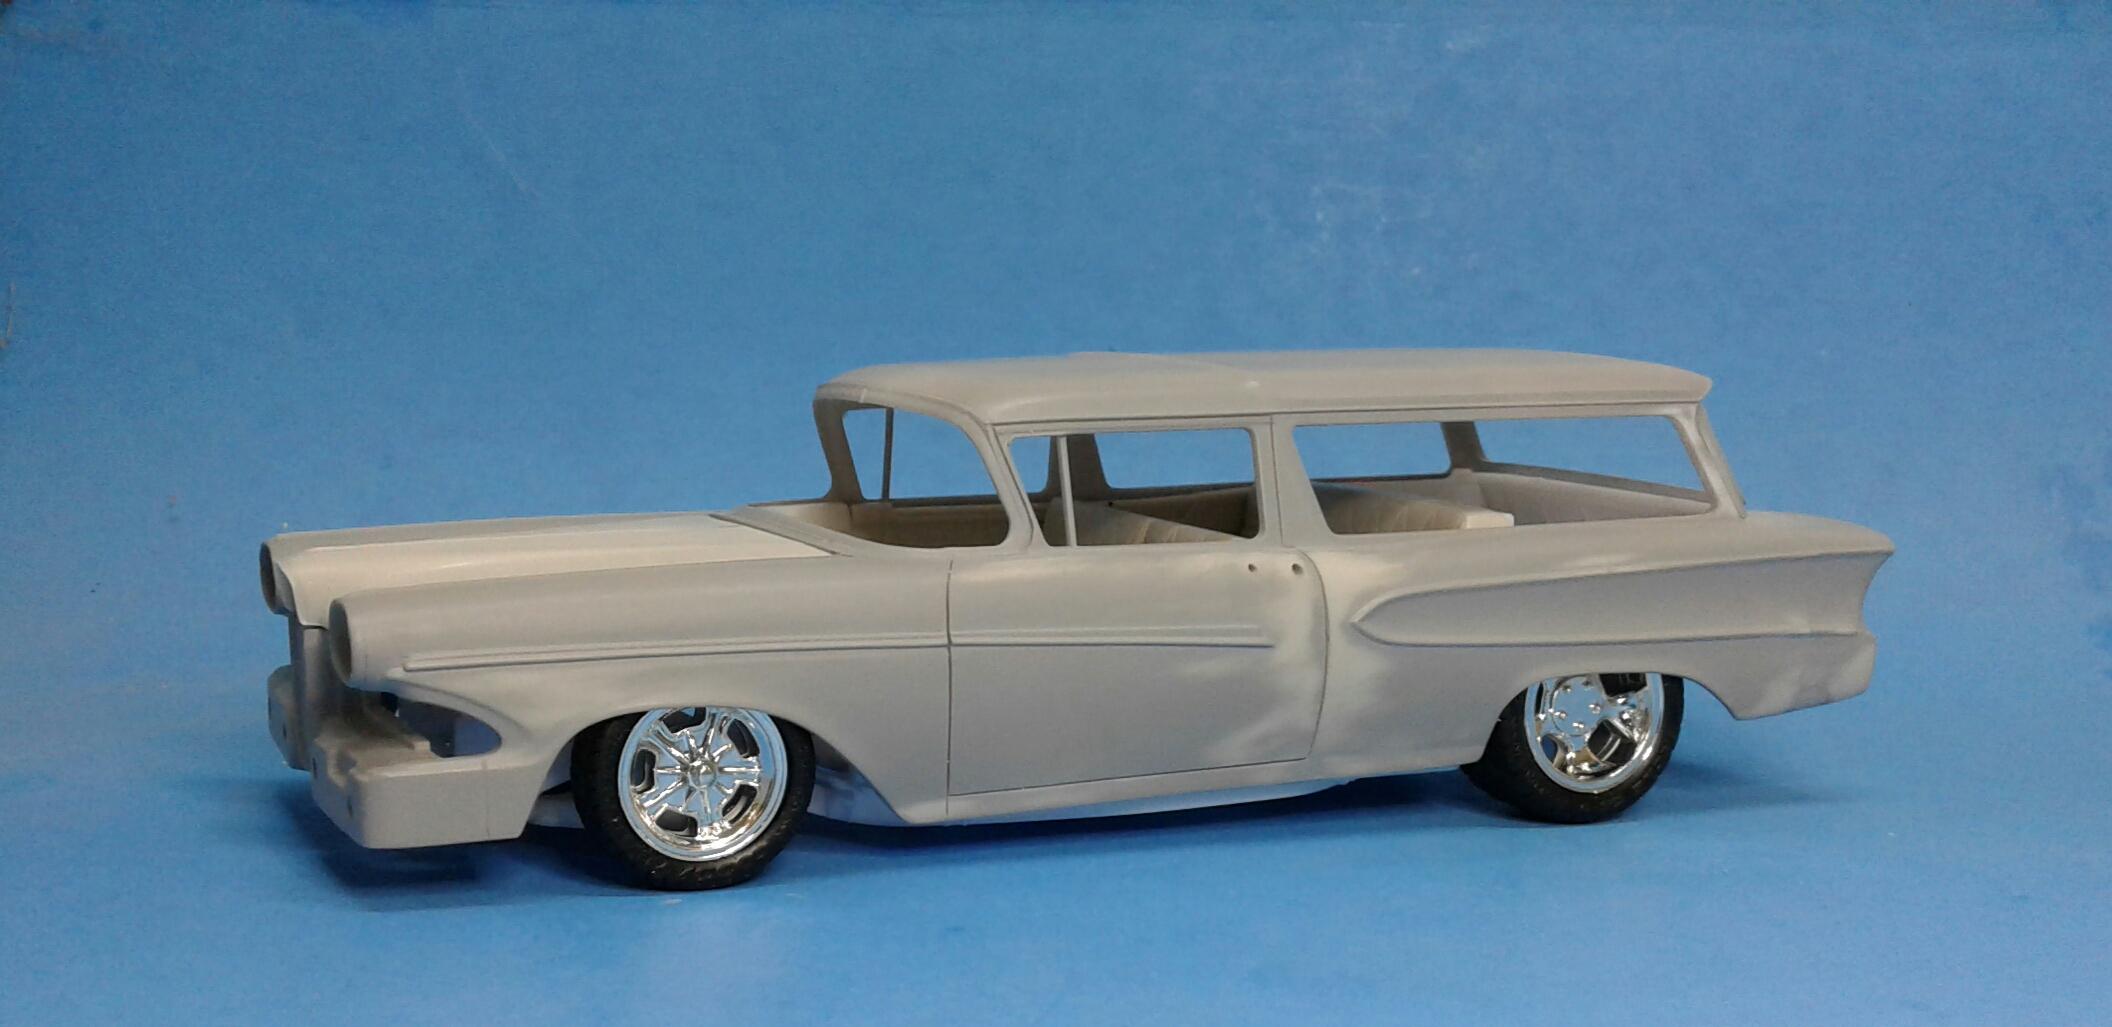
Right now, the plan is to paint the whole body with Tamiya Mica Silver, mask the cove and lift gate off (possibly the roof), shoot the rest with Tamiya Mica Red. But, I also want to paint it something very different from the norm.
-
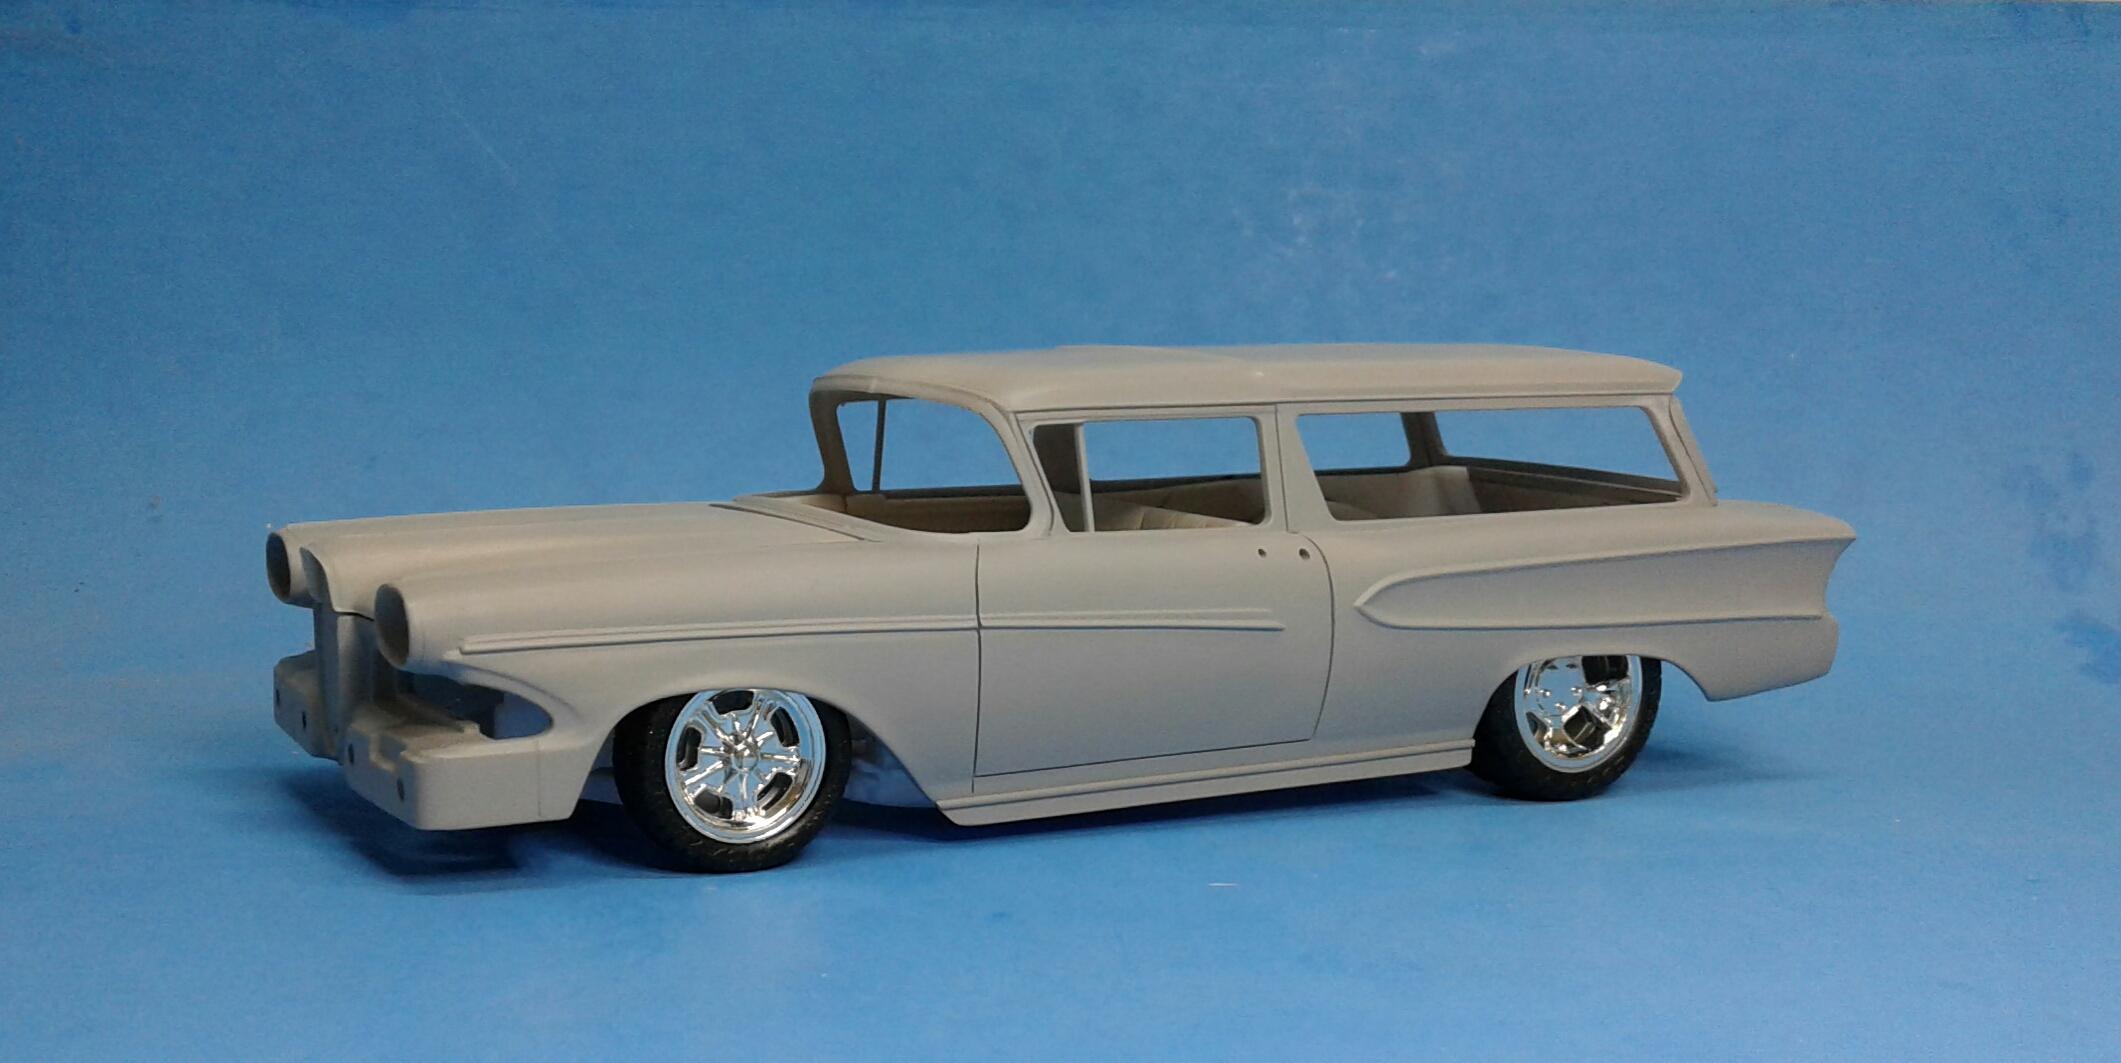
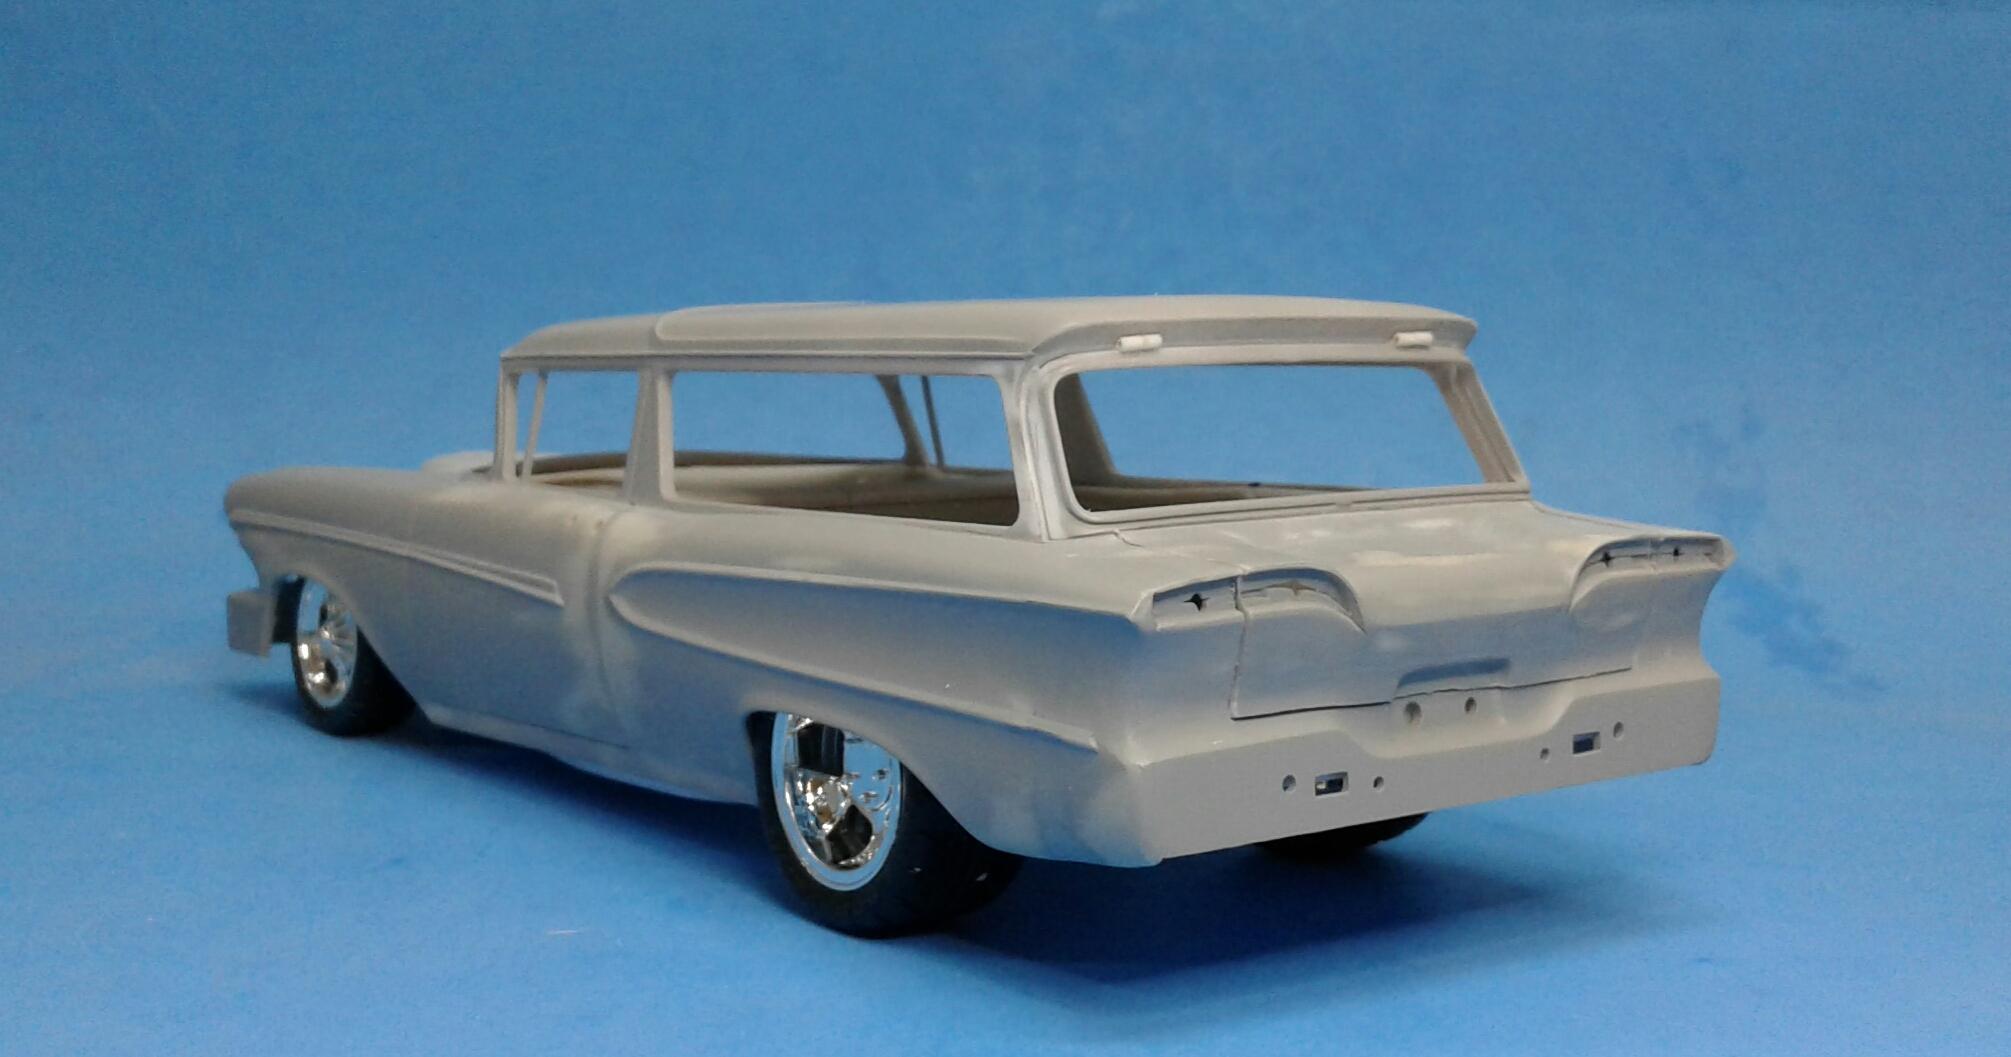
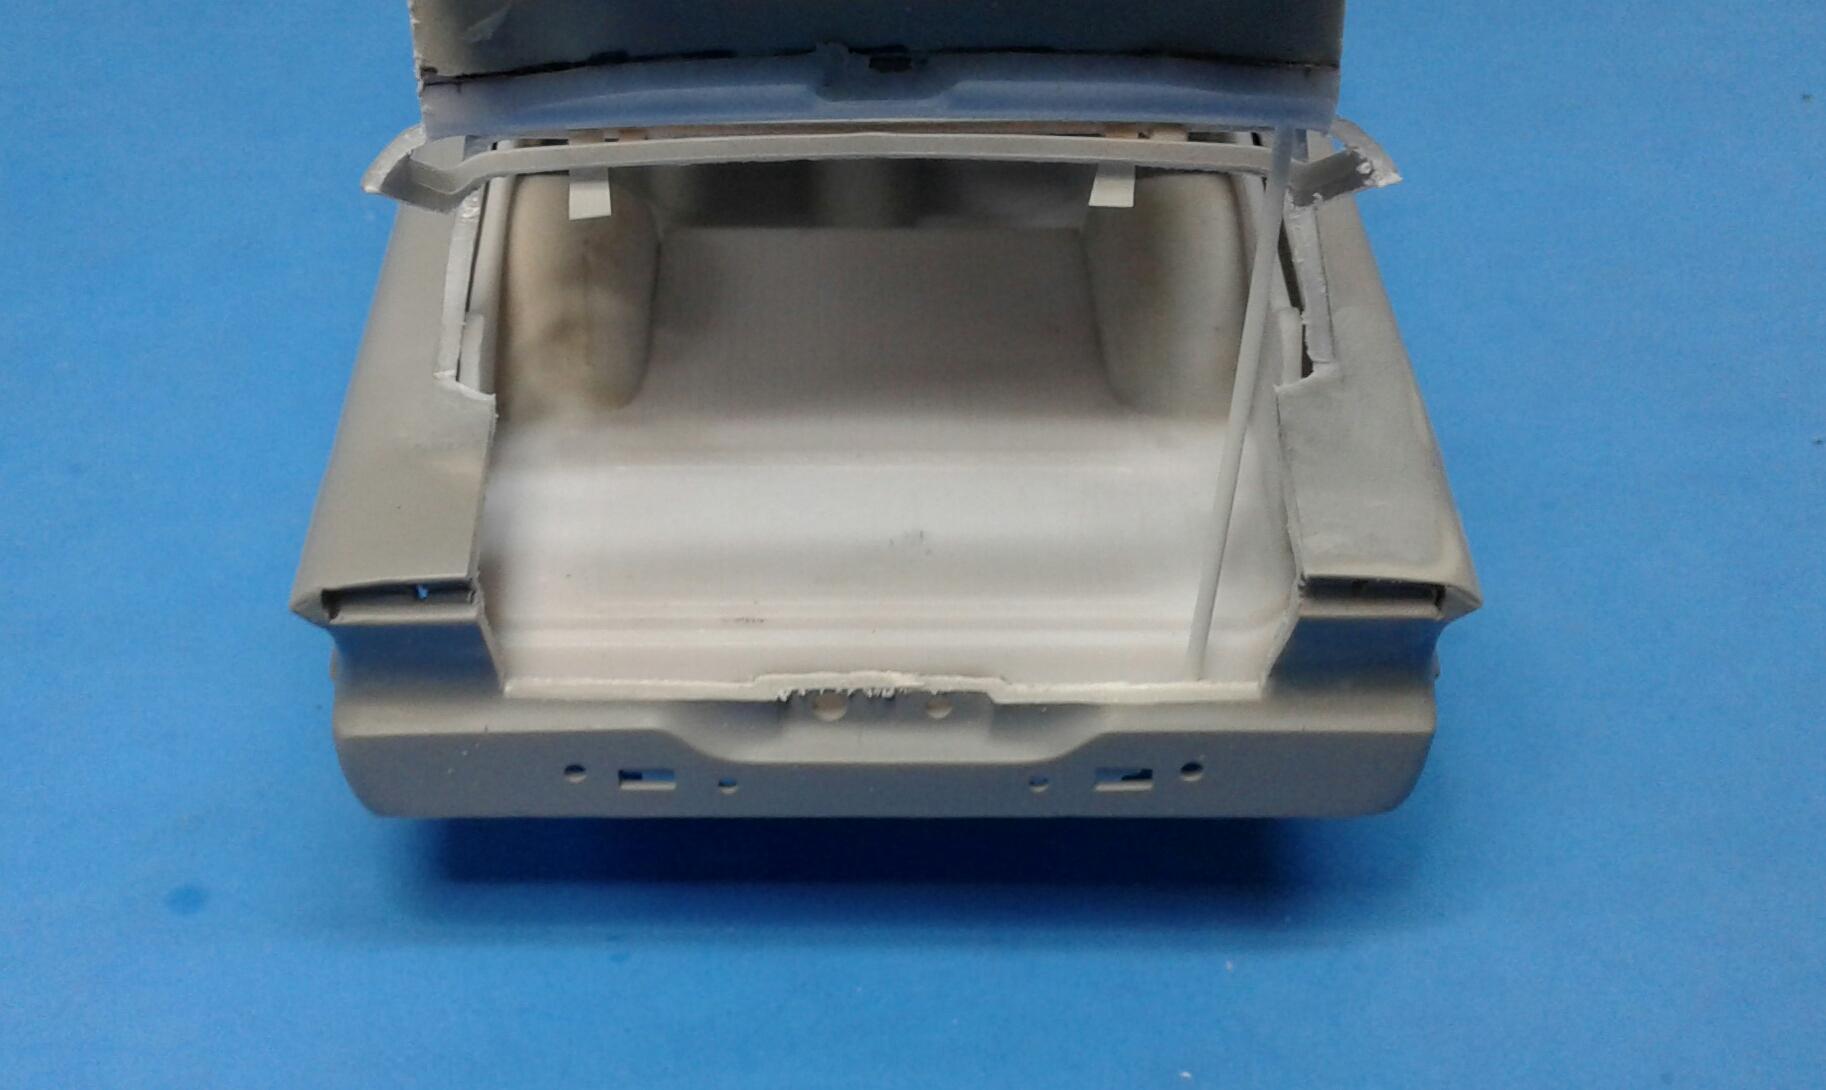
Thanx! I doubt it would be much, if any, heavier than the lift gate on a modern SUV. Especially if it were made from fiberglass. One thing that's really been bugging me with this model is the frame. It hangs down too far and shows too much. Last night, I took care of that issue by installing 2.5 mm skirts to the bottom of the body. I then added a strip of .040 half round over the joint. No body work! The plan is to foil the half round after paint. It made a huge difference in the way it looks! The frame is now hidden and it visually looks lower even though it isn't.
-
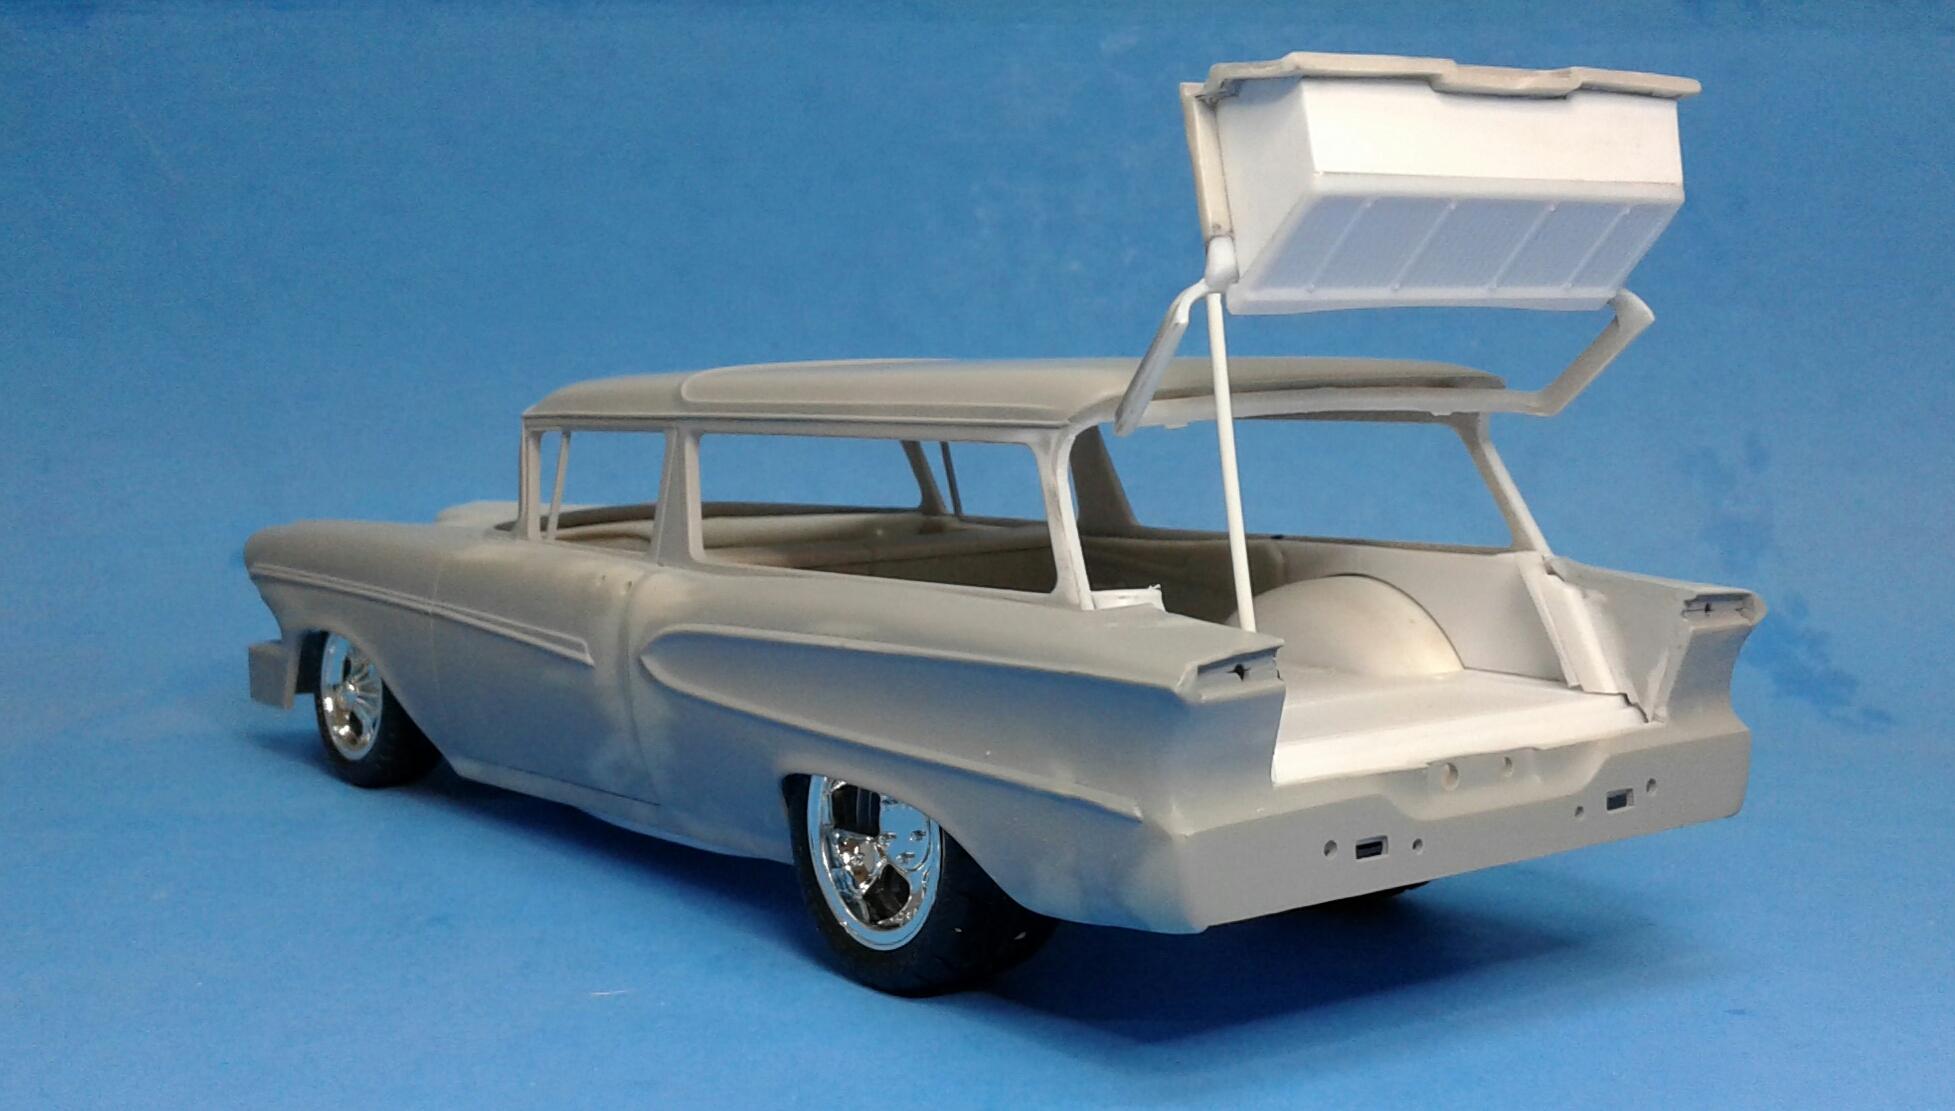
Thanx Sam and David! I got the hatch and body filled in. Still some tweaks left to do. Also have to add the latch details. But, I'm getting close to being able to concentrate on the body only and get it into paint.
-
Ever heard of making a parts request? Truth is, it wouldn't matter how Revell had done this kit. There will be those that aren't happy. Some are fine with it out the box. Others make changes to suit themselves. It's impossible for one kit to make everyone happy. The factory stock builders can't do anything with this kit. This kit doesn't seem to be designed to be as versatile as the '32s are. About all that can be done between the kits is swap engines and wheels. With the '32s, you could have fenders and a hood if you wanted or simply leave them off if you didn't . The only way those could be used on the '29 is if those pieces were lengthened.
-
You can still get those tires. The fronts were in every lowrider kit and the rears came in just about every Monogram muscle car made. So, they're still easy to get.
-
I built this five or six years ago. It's a kitbash of the Revell '48 coupe and the AMT '41 woody. Basically, I just grafted the '41 front clip to the '48 body. I also narrowed the front track 4 mms to tuck the tires in a little better. Inside the interior, I just added the '41 dash and steering wheel to the custom interior and painted it flat white and Krylon Pistachio Green. The engine is from the '48 and was my first flathead. The body was painted with Model Masters Diamond Green with a coat of Testors dull cote. Thanx for checking it out!
-
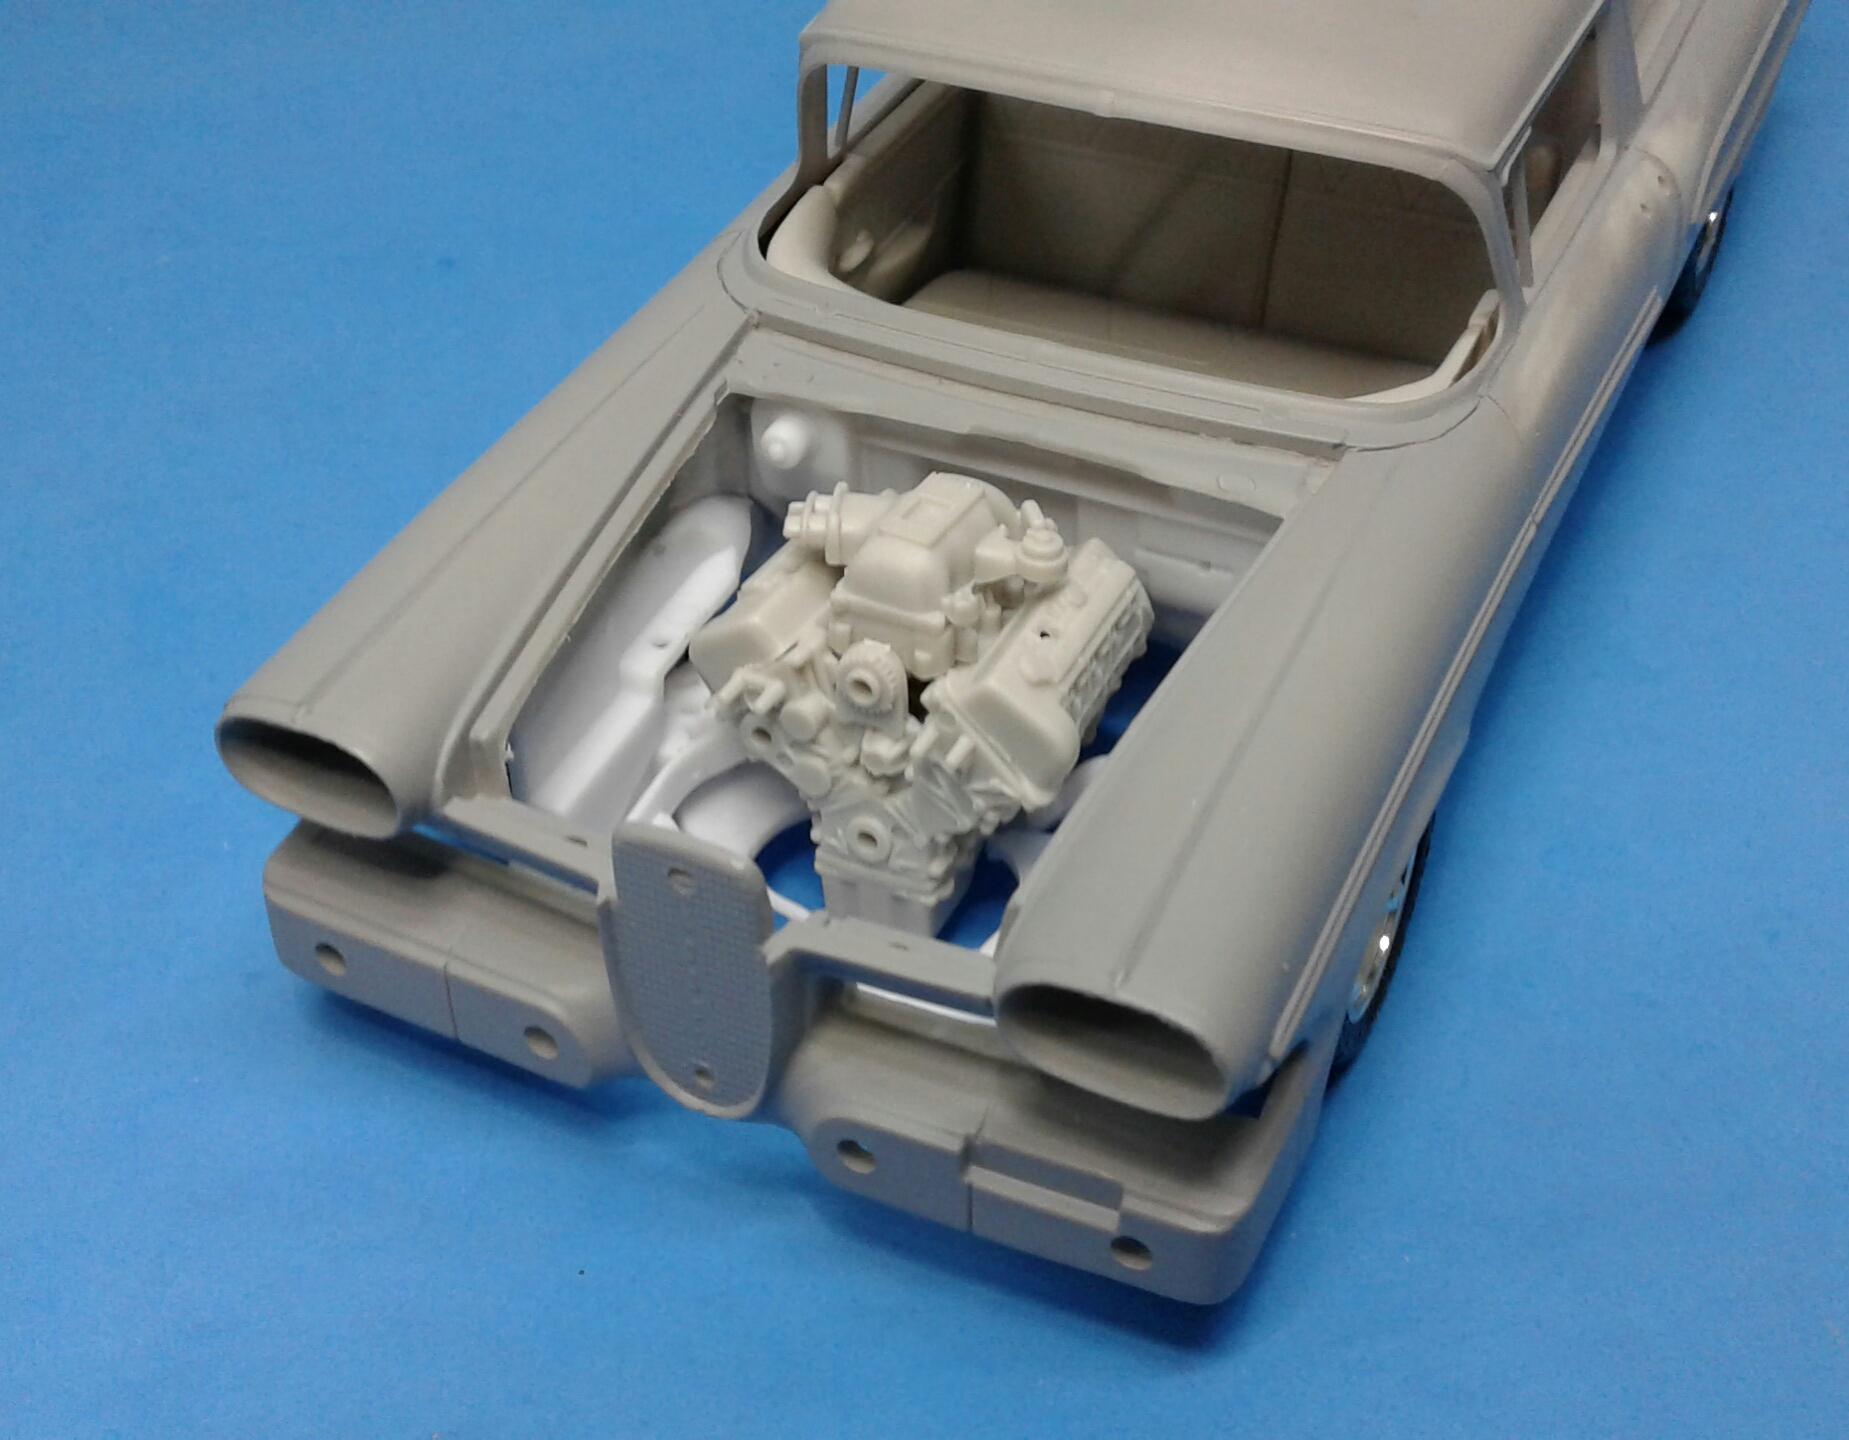
I got the hatch opened and hinged today. I designed the hinges so that the hatch can be removed. I haven't deburred anything yet as I want to wait until everything is dried well before I try to remove it. But, it works! The cargo pan came right where it should be. I got the engine together enough to test fit. I had to flip the oil pan around to make it a front sump and it slid right in. I just have to make motor mounts to be finished with the fitting. I dread making a set of headers for it. I may have to make changes to the frame to make room.
-
Very cool Woody Phil! It's kinda like a sleeper. Only better!
-
Help with Revell Thunderbolt hood
Plowboy replied to Fat Brian's topic in Model Building Questions and Answers
Another option is to just leave it loose. Take it off when you want to install the hood. Put it on when you want to take the hood off. Another issue is the fitment between the breather and induction pipes.
-
I got the suspension worked out. The track on the front needs to be narrowed. That's an easy fix. I'm using the kit suspension and just going to add a rack and pinion. The rear needs to be a little lower. Maybe a couple of mms. But, I can work with this! Now I just gotta get an engine and transmission together. Then I can make some real progress!
-
Pile O' Parts RPU
Plowboy replied to Modlbldr's topic in WIP: Model Trucks: Pickups, Vans, SUVs, Light Commercial
Something I've done also Tom, is cut the cross member loose, turn it a quarter turn (bottom of the cross member will face forward instead of down) and glue it back to the frame. Then mount the spring inside the recess of the cross member. Hope this makes sense. -
That is a cool looking old Chevy truck! I really like the weathered paint! I also like how you made the engine look new and kept the wheels and tires looking nice instead of weathering them also. Really makes them stand out! Nice work!