RCprofile.JPG.6b95b19b856bf00a3becd6aeaaa48f3b.JPG)
Ian McLaren
-
Posts
1,360 -
Joined
-
Last visited
Content Type
Profiles
Forums
Events
Gallery
Everything posted by Ian McLaren
-
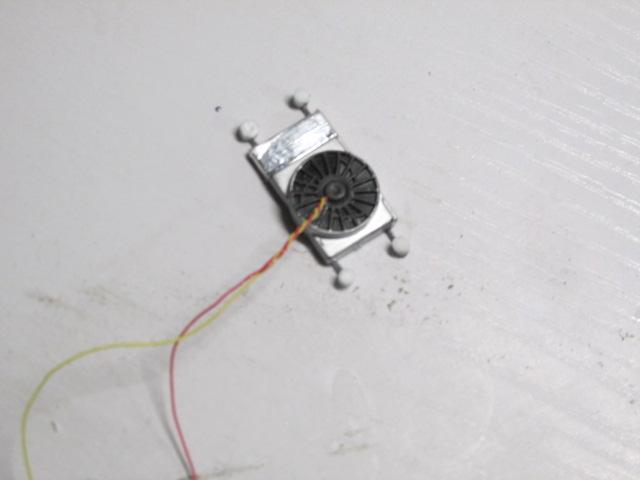
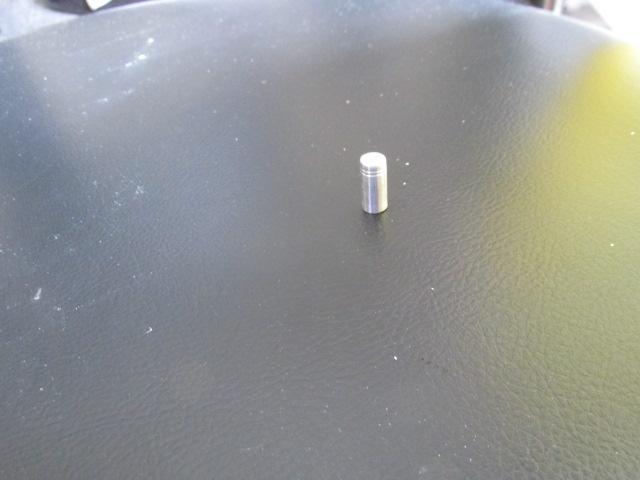
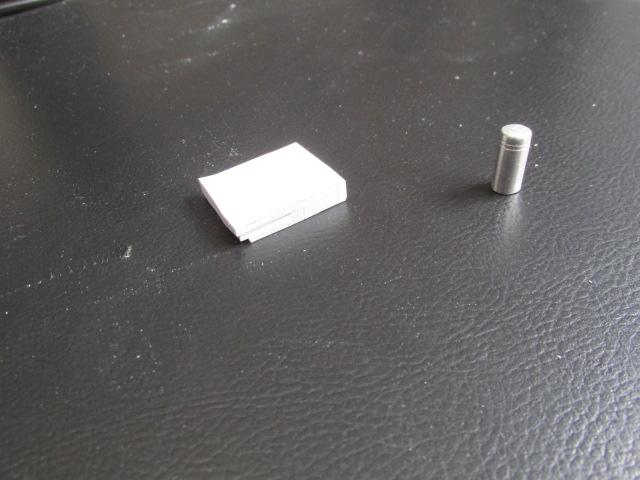
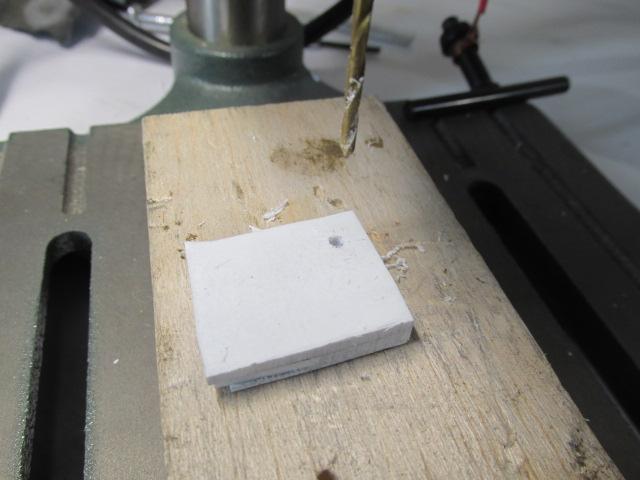
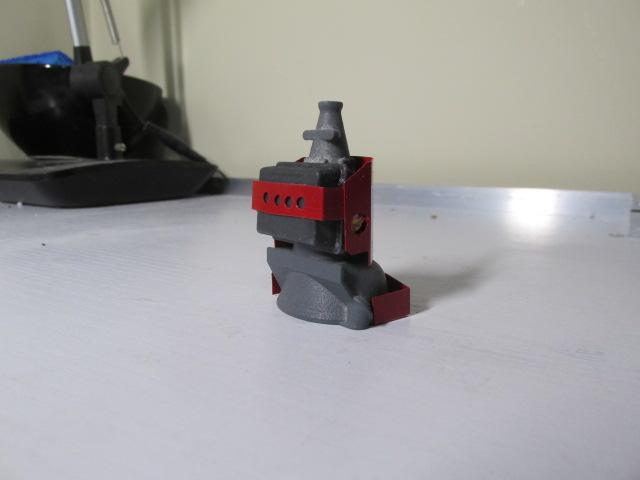
RCprofile.thumb.JPG.1691ea753d0f0897fdc1b2510cf06775.JPG) Working on details and fuel system, Scratch building an Aeromotive 11202 350GPH fuel pump, working on the fuel tank, rad, trans cooler and fan assembly
Working on details and fuel system, Scratch building an Aeromotive 11202 350GPH fuel pump, working on the fuel tank, rad, trans cooler and fan assembly
- 352 replies
-
- 3
-

-
- brass
- tube chassis
- (and 2 more)
-
Nostalgia Fuel Dragster--Blower Manifold (01/28/23)
Ian McLaren replied to Straightliner59's topic in WIP: Drag Racing Models
I love the final outline on the dash panel, and I really want to see the chassis in paint. The details are coming along very nicely, as always great work my friend. -
Ok, that is definately in the ballpark. I read an article in a model railroad book on scale effects and have seen similar thoughts on armour modeling sites that related to the effect of the scale viewing distance on size and colors. The theory goes models should be painted slightly lighter in color and smaller details should be slightly under scale to look "right". I don't know if I fully endorse this line of reasoning but I never use black on my models, always a very dark grey and if I can't use or get the correct scale size material I always error to the next smaller size available, never up. Plug wires and injector hoses always look more correct when slightly under scale, especially when they are photographed. I do try to use correct scale materials when available but I think about this most times that I'm working with smaller measurements
-
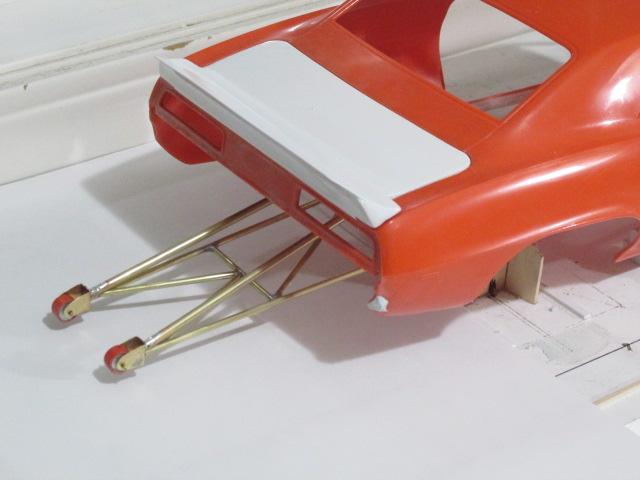
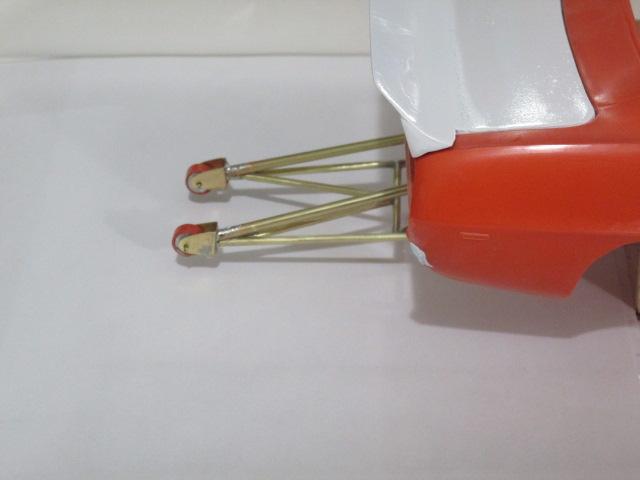
The design on your wheelie bars looks correct, what size tube does your material scale to. Bars that long are usually 1 1/4" for the lower and 1 1/2" for the upper tubes.
-
’72 Dodge Demon Drag Racer 1/25 scale
Ian McLaren replied to AmericanMuscleFan's topic in WIP: Drag Racing Models
I really like your approach the this model, obviously very well thought out and exicution to the highest level. Waiting to see where your drive line choices end up. -
A little more progress today. The glide is sitting in the chassis supported by the mounts and the blank is in the dash replacing the stock instrument cluster. Now just waiting for the Racepak display unit to be printed, installed and wired.
- 352 replies
-
- 4
-
-
- brass
- tube chassis
- (and 2 more)
-
Thank you very much Terry, I'm glad you are enjoying this, I'm having fun on this one.
-
Interiour detail and drive line parts now underway,delay box wiring and nitrous system starting to take shape. Bottles and bracket from Nick Bradshaw rear wheels and tires from Jeff Faris everything else scratch built.
- 352 replies
-
- 2
-
-
- brass
- tube chassis
- (and 2 more)
-
Great work here Marcos on the wheelie bars, they really represent the real deal well, very believable!
-
Nostalgia Fuel Dragster--Blower Manifold (01/28/23)
Ian McLaren replied to Straightliner59's topic in WIP: Drag Racing Models
I really like the dash and Racepak set up, nice work! Are you going to re-profile the lower edge for clearance to allow room for the driver to get his legs in and out, it looks pretty tight. The Racepak is certainly the most recognizable unit out there and it is up where it would be a great added detail, especially with the wiring. -
Anothere detail for the Camaro. TCI short tail shaft powerglide (by Ron Olsen) and flexplate and transmission shields (by me). Decals and SFI tags to be added.
- 352 replies
-
- 2
-
-
- brass
- tube chassis
- (and 2 more)
-
Thanks Bob it's starting to look like how I envisioned it initially, still a long way to go. Thanks for the kind words Francis but ironically it was your truck that inspired me to even try to open the doors on this.
-
WIP D/Gas 1956 Chevy from Monogram hardtop kit.
Ian McLaren replied to larman's topic in WIP: Drag Racing Models
Headers are never the same side to side due to the offset of the left and right banks. Next set, build one side first, then start the other side with the inner most tube, easy to get the end points the same. Then just add in the three remaining tubes inside to outside and from back to front. -
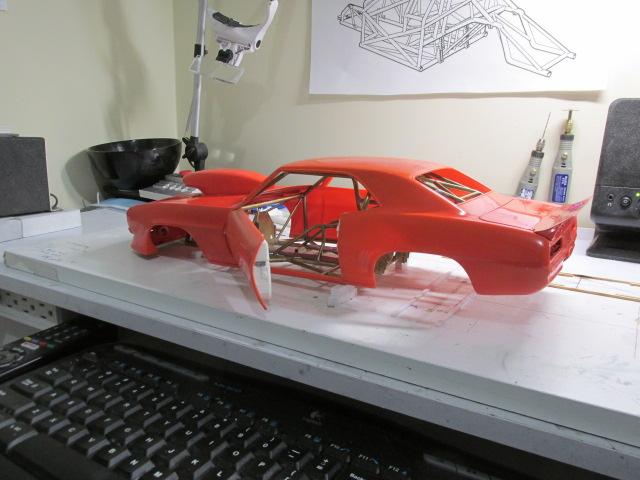
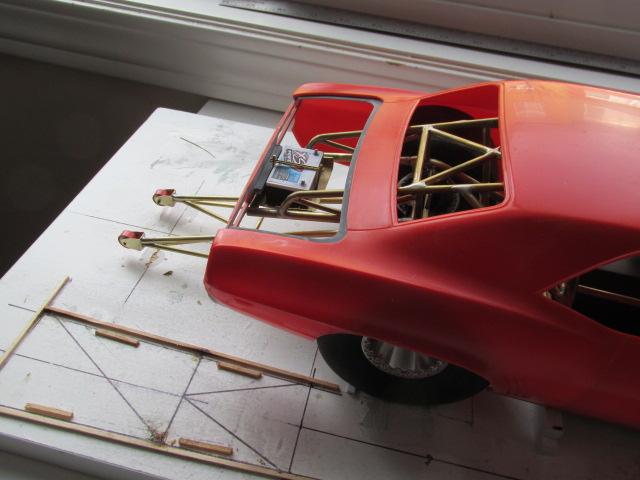
I've been thnking about the doors on this thing for a while, it took a few tries and a couple of good rare earth magnets to get it close, It now opens, closes firmly latches and is removable. It still needs some minor tweeking but they are minor fixes and easily done.
- 352 replies
-
- 4
-
-
- brass
- tube chassis
- (and 2 more)
-
’72 Dodge Demon Drag Racer 1/25 scale
Ian McLaren replied to AmericanMuscleFan's topic in WIP: Drag Racing Models
Other than the 1 to 1 guys using a cutting torch instead of a mill this is exactly how this would have been done, so this looks absolutely like a real installation. And even though it was againsl the rules a lot of the Mopars had the welds ground for appearance, especially if they doubled as car show particpants. Judged a lot of these in the day. -
Nostalgia Fuel Dragster--Blower Manifold (01/28/23)
Ian McLaren replied to Straightliner59's topic in WIP: Drag Racing Models
Looking great Ireally like the wings. -
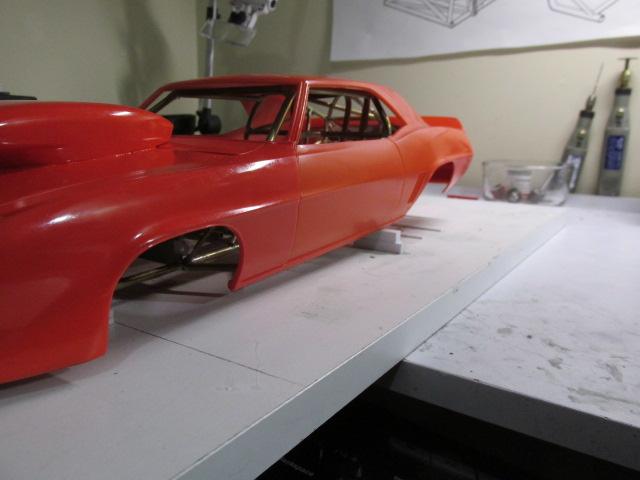
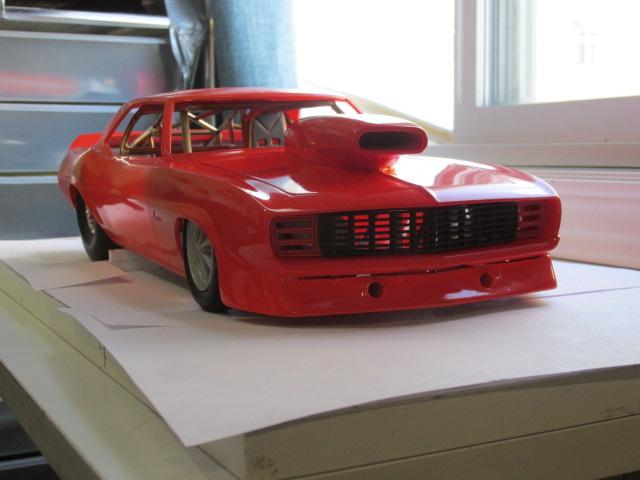
Quick body mock up with a glorified guide coat to check surfaces and contourers, needs a little additional work in both areas. Letting the body sit now to assure the surfaces are fully cured. Back on the chassis, drivetrain and details details.
- 352 replies
-
- 4
-
-
- brass
- tube chassis
- (and 2 more)
-
Nostalgia Fuel Dragster--Blower Manifold (01/28/23)
Ian McLaren replied to Straightliner59's topic in WIP: Drag Racing Models
The chassis is oh so close, exciting stuff. You mentioned a resistance welder, I've been considering one. What are the pros and cons of these units? -
Great progress Marcos, the added details are certainly bringing this model to life, excellent.
-
Nostalgia Fuel Dragster--Blower Manifold (01/28/23)
Ian McLaren replied to Straightliner59's topic in WIP: Drag Racing Models
Another fine update, and another trick learned, the way you made the brackets for the puke tank is so easy and much more accurate than trying to herd 4 individual brackets into position. I can't believe I never thought of that. Thanks Daniel. -
Thank you Francis for the kind words. I build jigs for a couple of reasons. For one thing if I draw it properly it ensures that the final product is straight, level and most importantly symmetrical. The second reason is that they save assembly time by securing the tubes and putting pressure on the joints for easier soldering or gluing (the time saved far out weighs the time spent making the jig). I also keep the jigs as I may need, (for example) another FED chassis and then it's just cut tubes and solder or I could duplicate the same part in plastic for a different project.
-
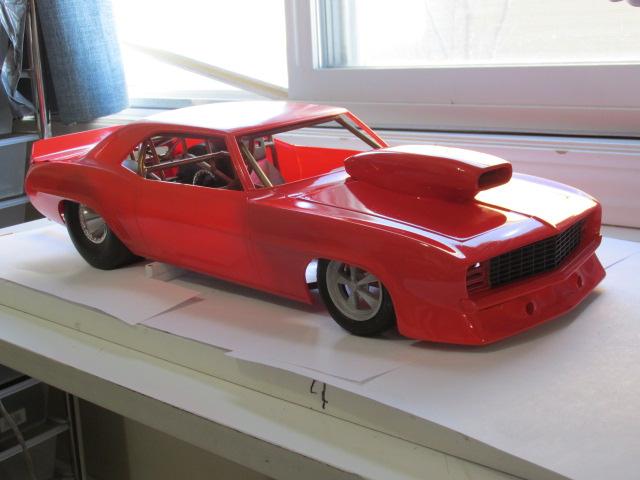
Yes it is Roger, but even though it was custom built for the Camaro body there are influences from Chris Alston and Tim McAmis. It has been built as close as possible to the NHRA class rules for this kind of car. Also a couple of friends who currently run Pro Mods in the area have provide invaluable help.
-
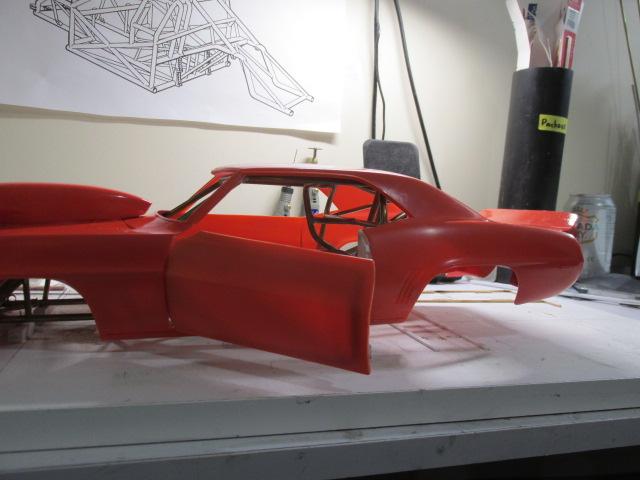
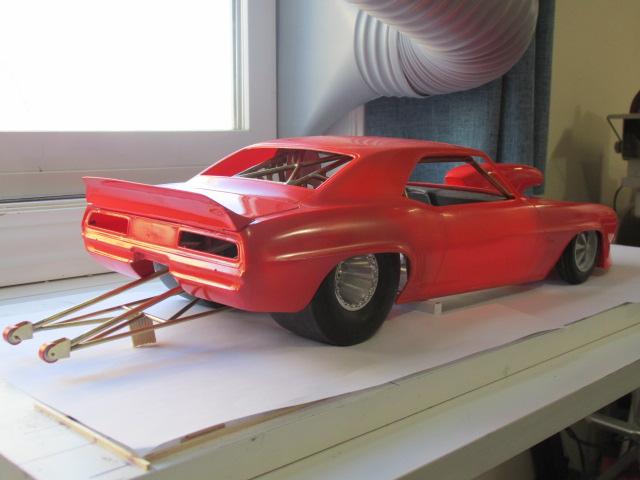
Wheelie bar structure fabricated and mounted, clean up detailing and hardware to follow. Now I can also do the required modifications to the rear valence for clearance for the bars and the parachute lanyard mount to the frame.
- 352 replies
-
- 3
-
-
- brass
- tube chassis
- (and 2 more)
-
’72 Dodge Demon Drag Racer 1/25 scale
Ian McLaren replied to AmericanMuscleFan's topic in WIP: Drag Racing Models
Great update Francis! Especially the process for the wheel tubs. I've seen this done in furniture making with wood, but it never occurred to me it would work with styrene. I have a pair of 43 inch 1/12th tubs I had no good idea how to fabricate them, brass just seems too complicated to get a good result. Plastic it is. THANK YOU!