RCprofile.JPG.6b95b19b856bf00a3becd6aeaaa48f3b.JPG)
Ian McLaren
-
Posts
1,360 -
Joined
-
Last visited
Content Type
Profiles
Forums
Events
Gallery
Everything posted by Ian McLaren
-
Great start on this one.
-
RCprofile.thumb.JPG.1691ea753d0f0897fdc1b2510cf06775.JPG)
Nailhead powered VW cabrio Beach Buggy
Ian McLaren replied to Claude Thibodeau's topic in Model Cars
I love this one, such a complete model with every part so well done and cohesive to the theme. You are the man. -
Very nice job on this one!Excellent work
-
Nice job on this one, the Vega Panel body does present some unique challenges. Well done!
-
Great job on this one!
-
ROYAL CANADIAN 1/16 SCALE TOP FUEL DRAGSTER
Ian McLaren replied to Ian McLaren's topic in WIP: Drag Racing Models
I can't take and credit for the texture, Revell got it right on this piece, their kit of Prudhomme's Wynn's Winder ( which was a Don Long Chassis) was not all that accurate in most places but there were parts that were close, unfortunately the chassis was not. Hence the building of an accurate chassis in brass to duplicate this car. The paint color took a few tries but having access to the car ( it's fifteen minutes from my house) certainly helped and not just with the paint. And thank you for the kind words Brad it means a lot! P.S. I have added an extra picture.
-
ROYAL CANADIAN 1/16 SCALE TOP FUEL DRAGSTER
Ian McLaren replied to Ian McLaren's topic in WIP: Drag Racing Models
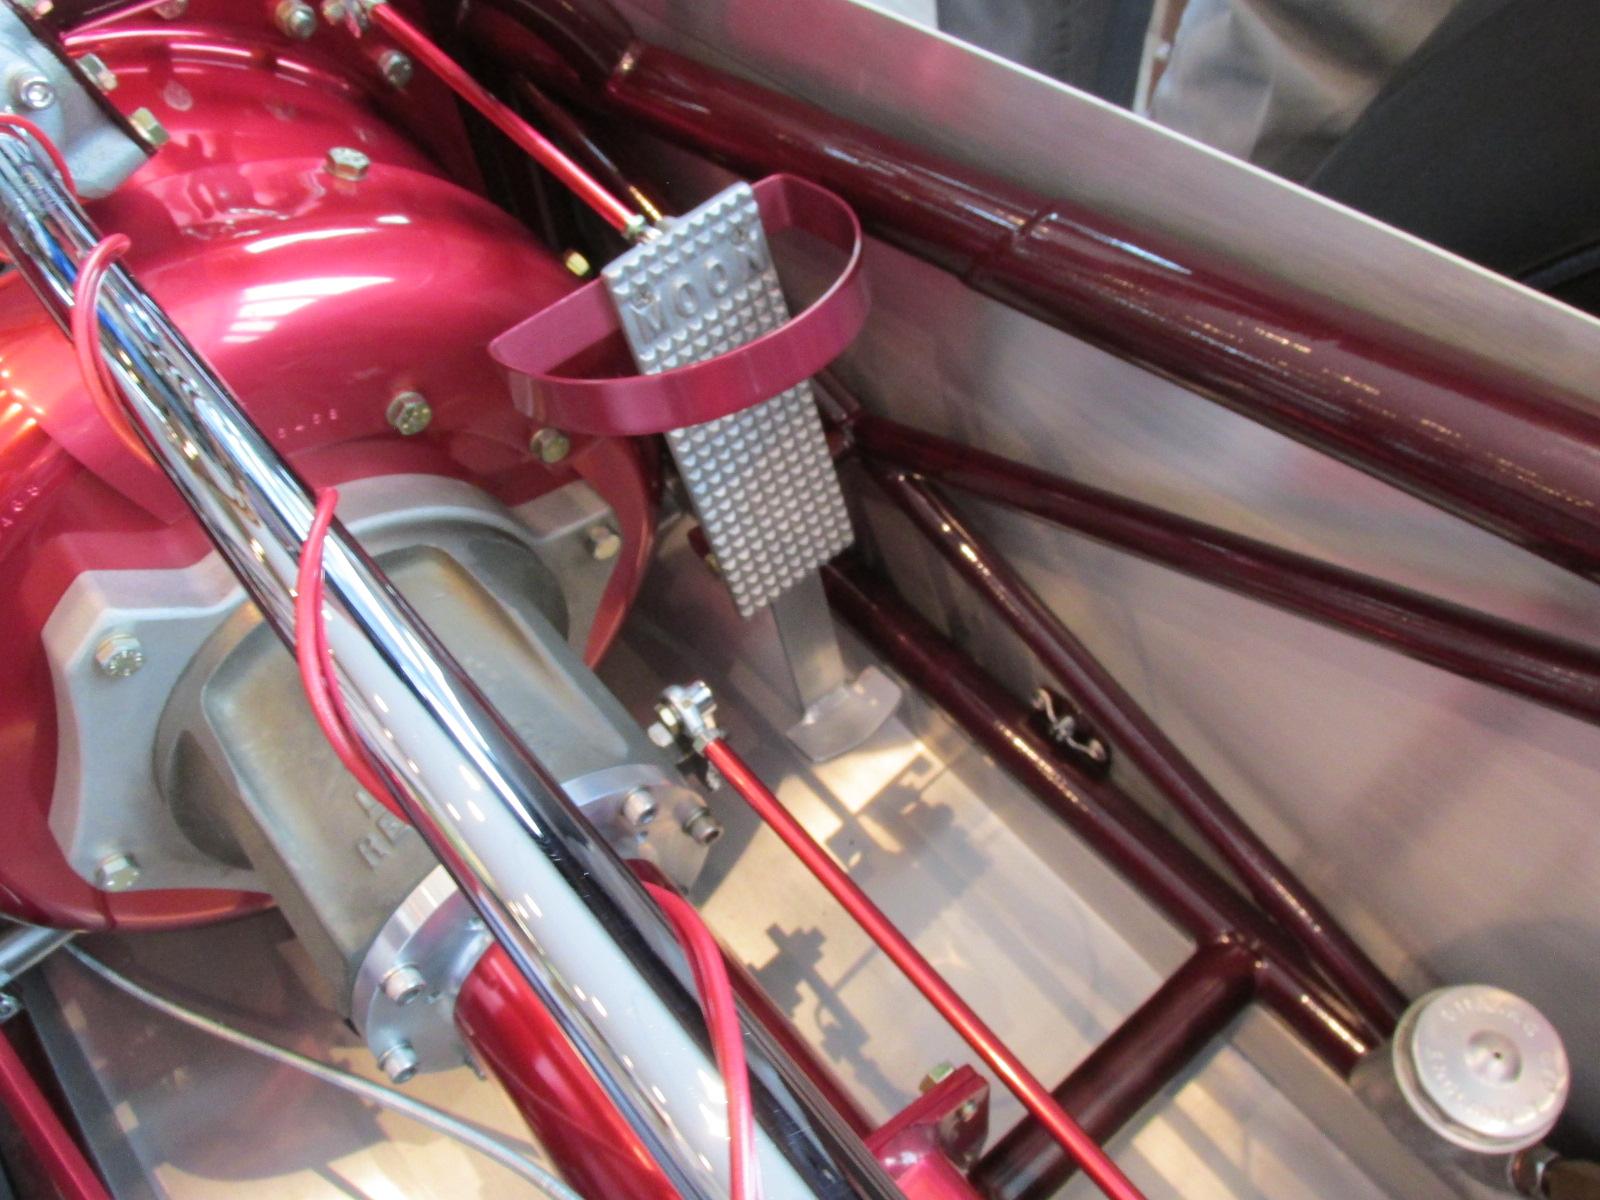
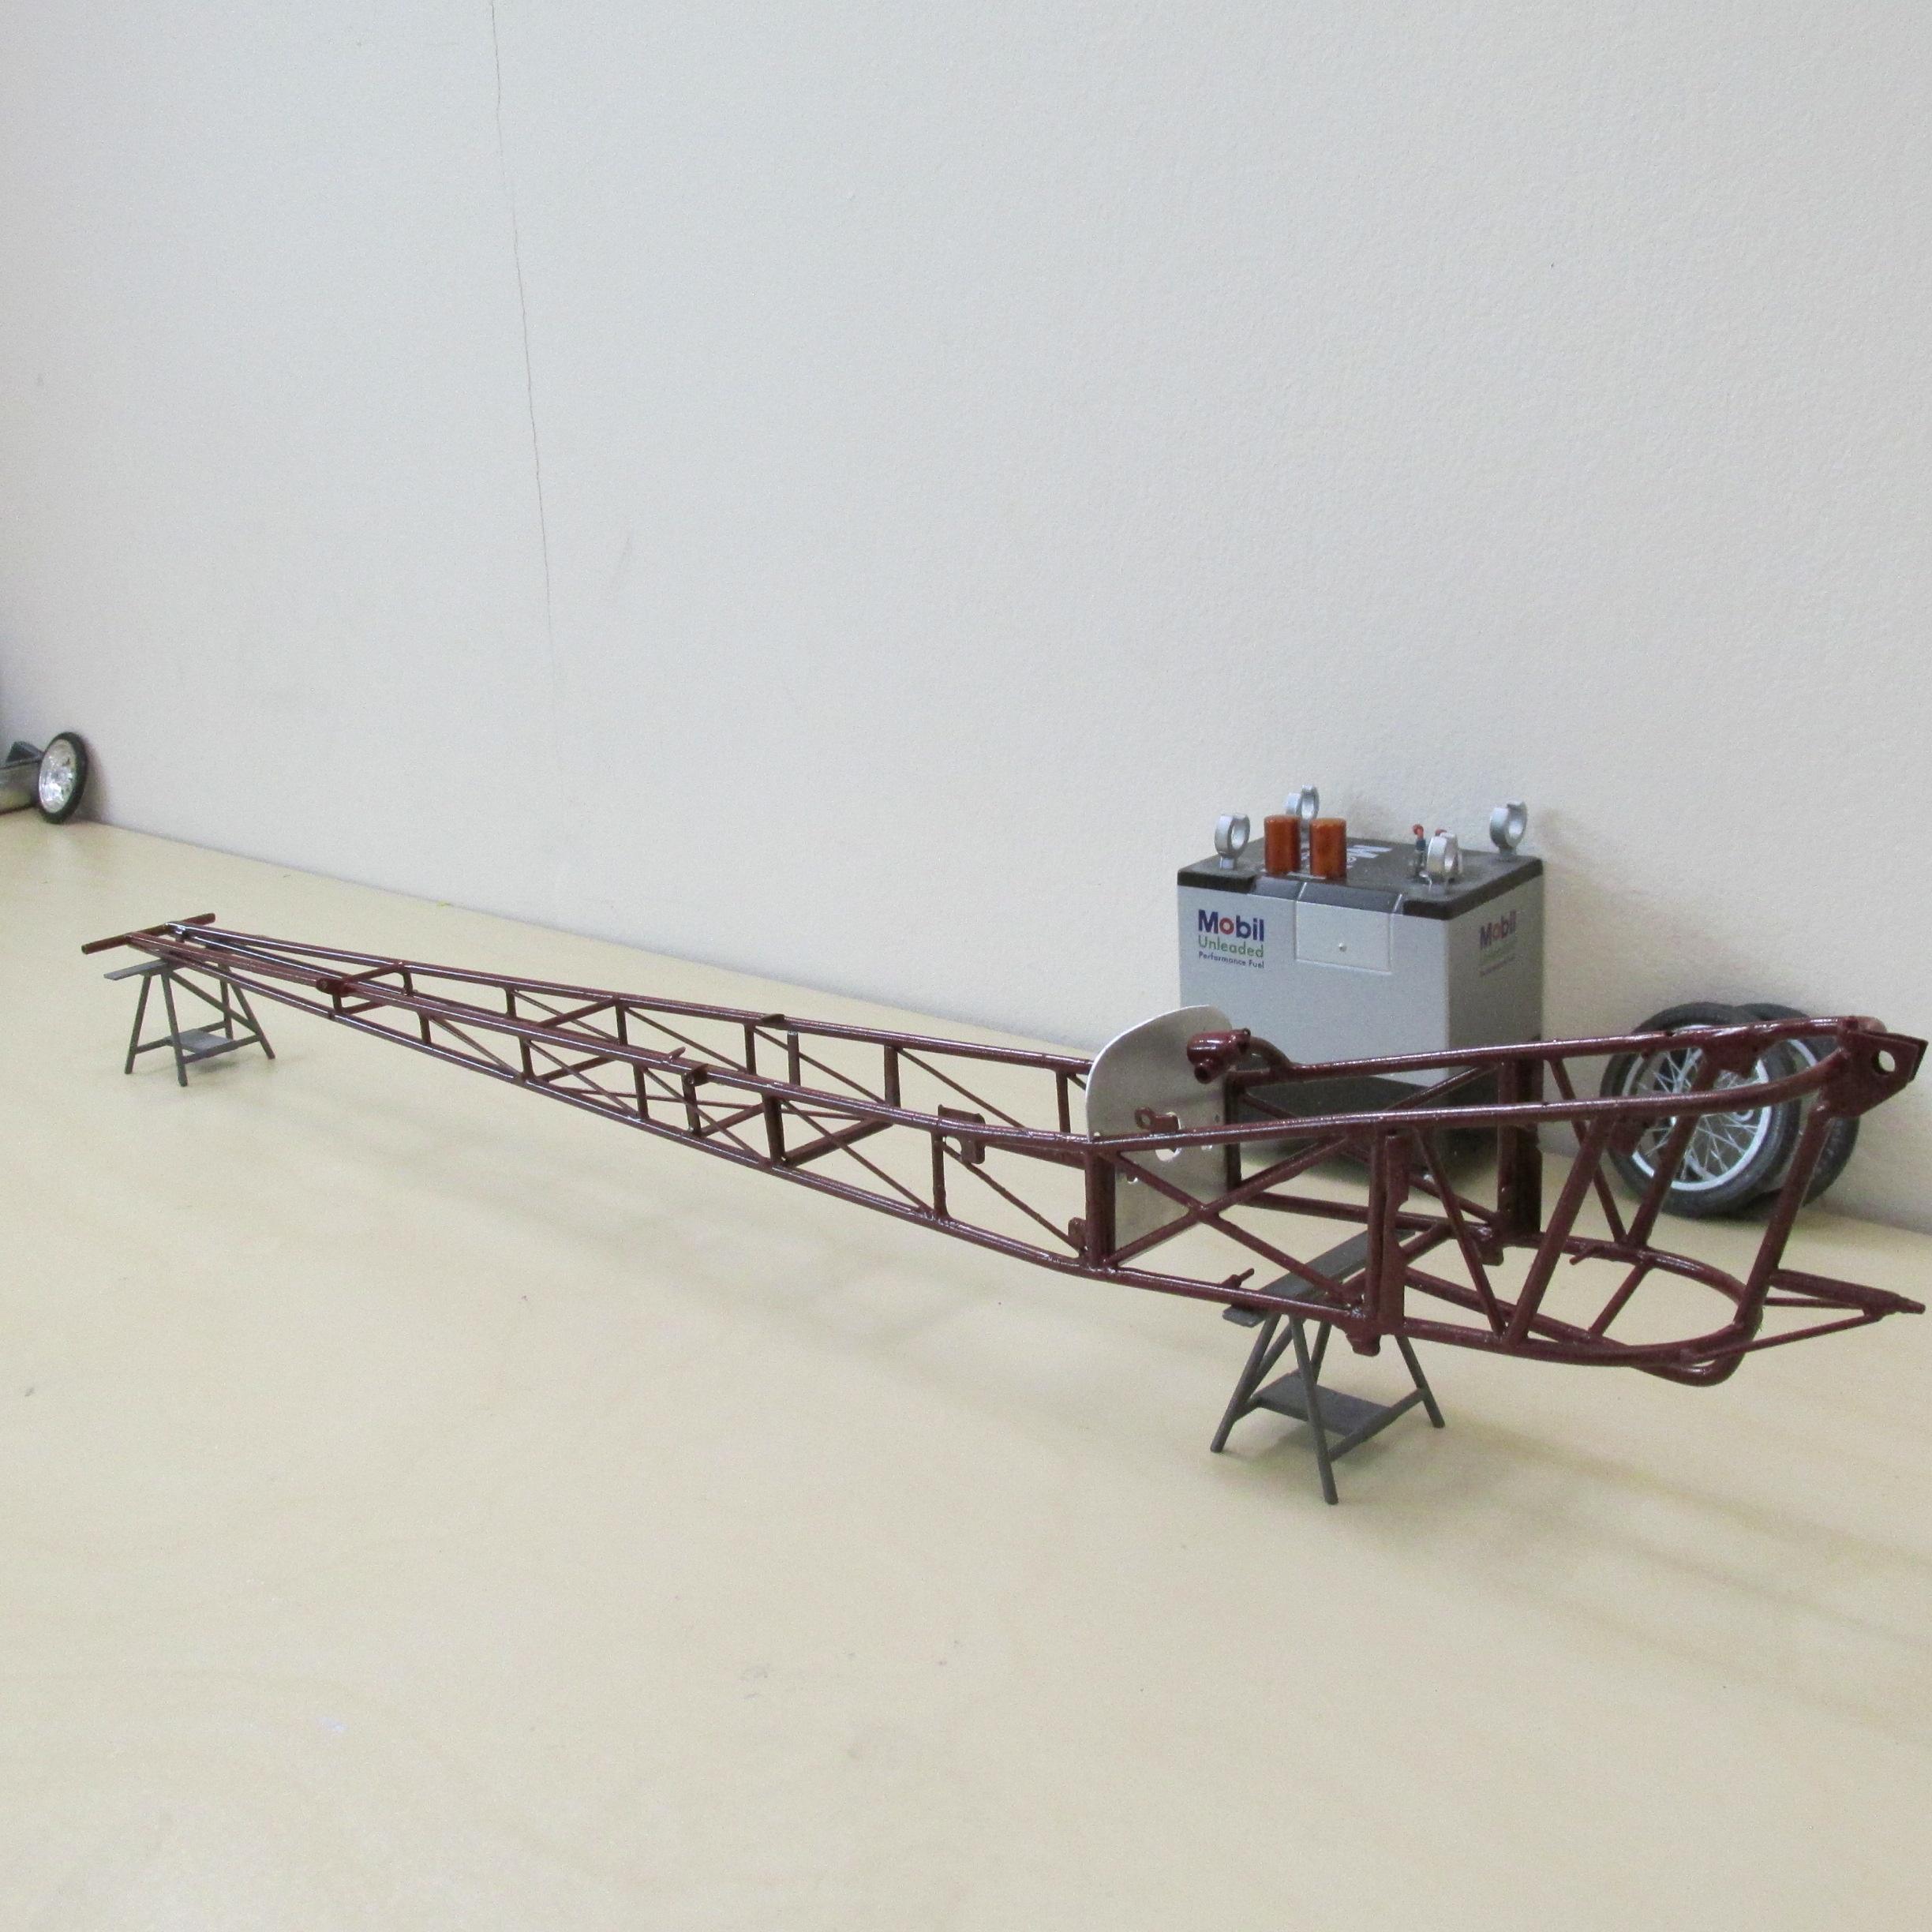
Starting to go together, modified kit throttle pedal, steering gear housing ( has to be painted aluminum yet) and modified front spindles are the only parts used out of the kit (Wynn's Winder) that was supposed to be the basis of this project.
-
Petty '64 Plymouth
Ian McLaren replied to restoman's topic in Stock Cars (NASCAR, Super Stock, Late Model, etc.)
Nicely done -
Looking really good
-
ROYAL CANADIAN 1/16 SCALE TOP FUEL DRAGSTER
Ian McLaren replied to Ian McLaren's topic in WIP: Drag Racing Models
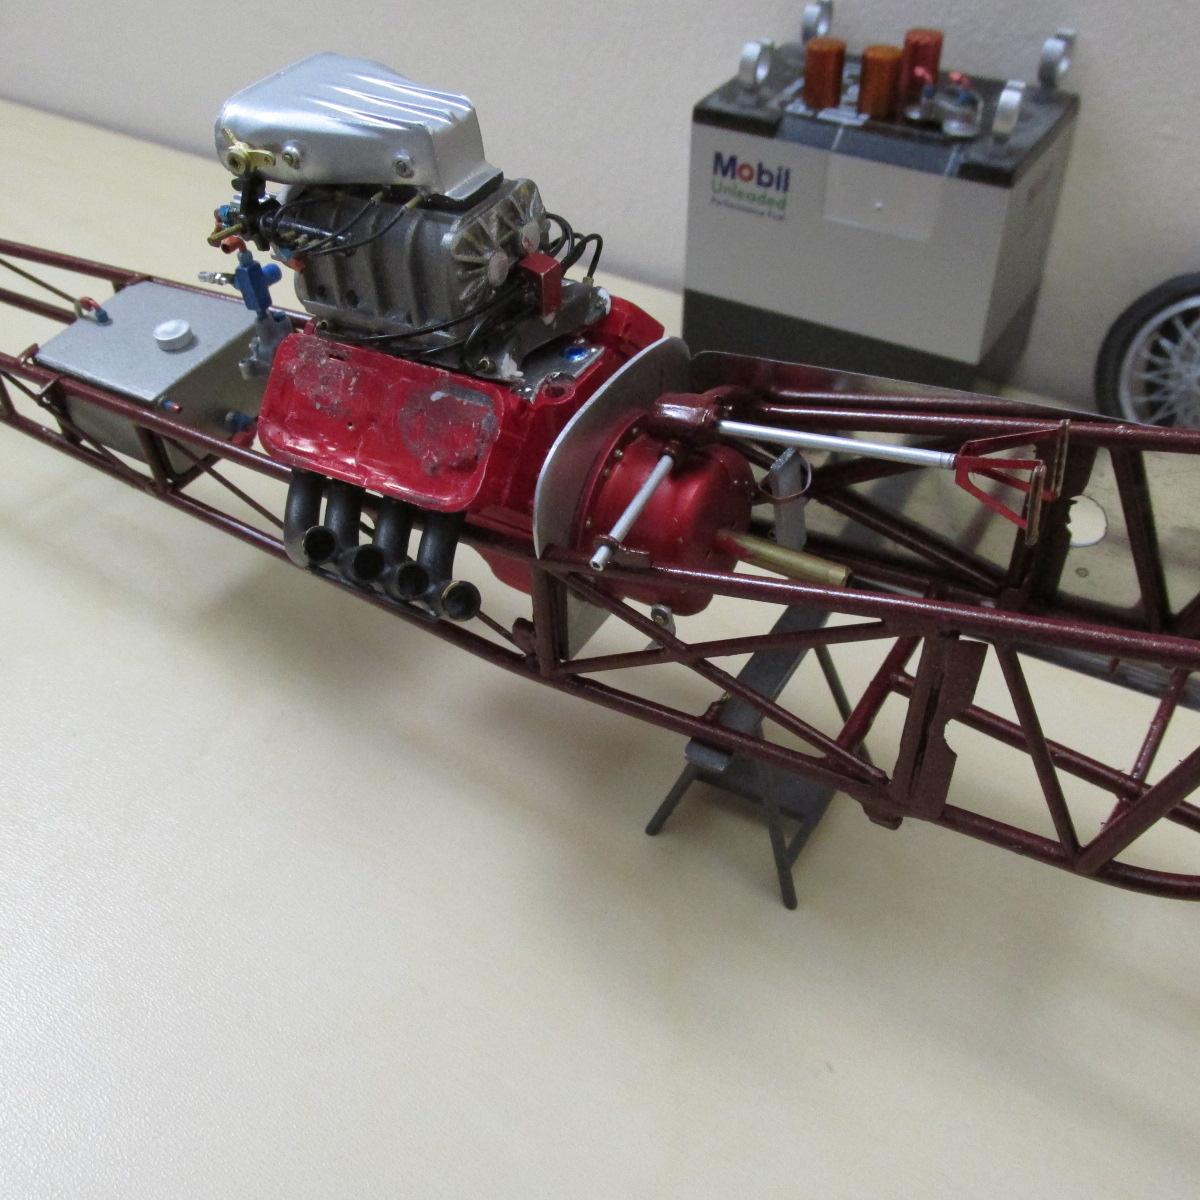
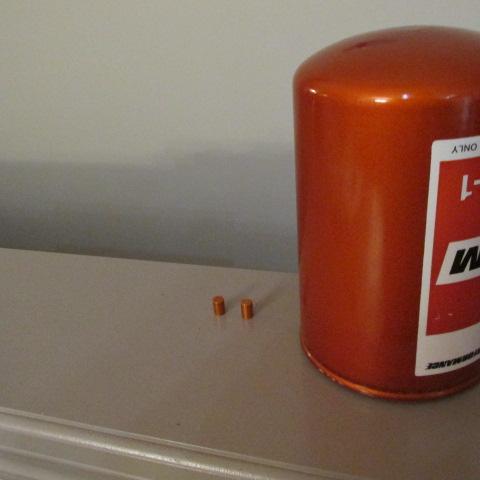
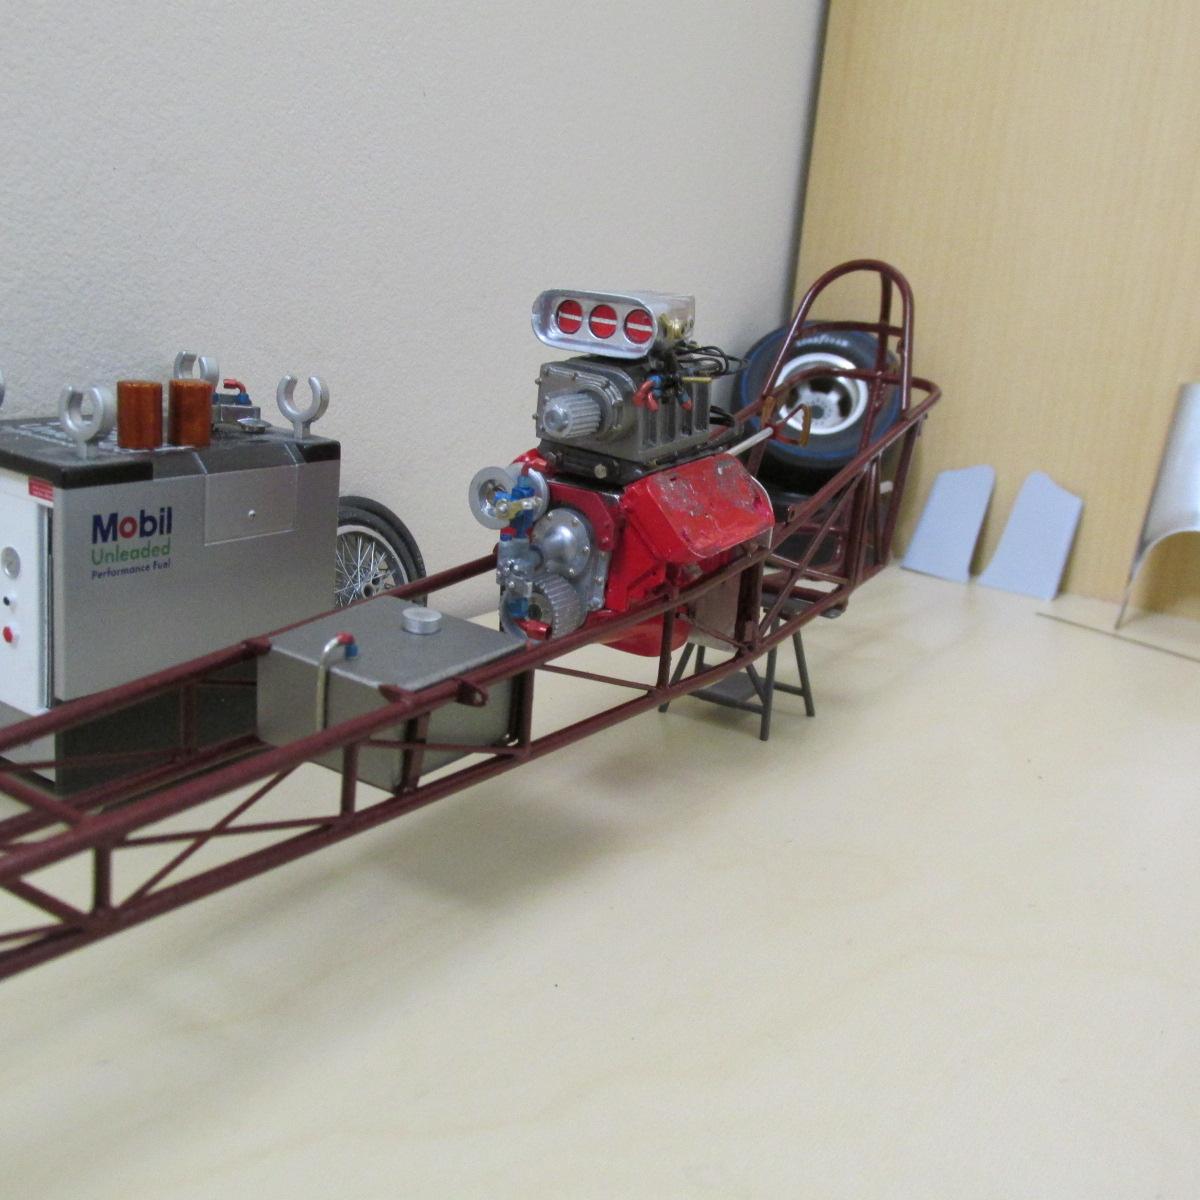
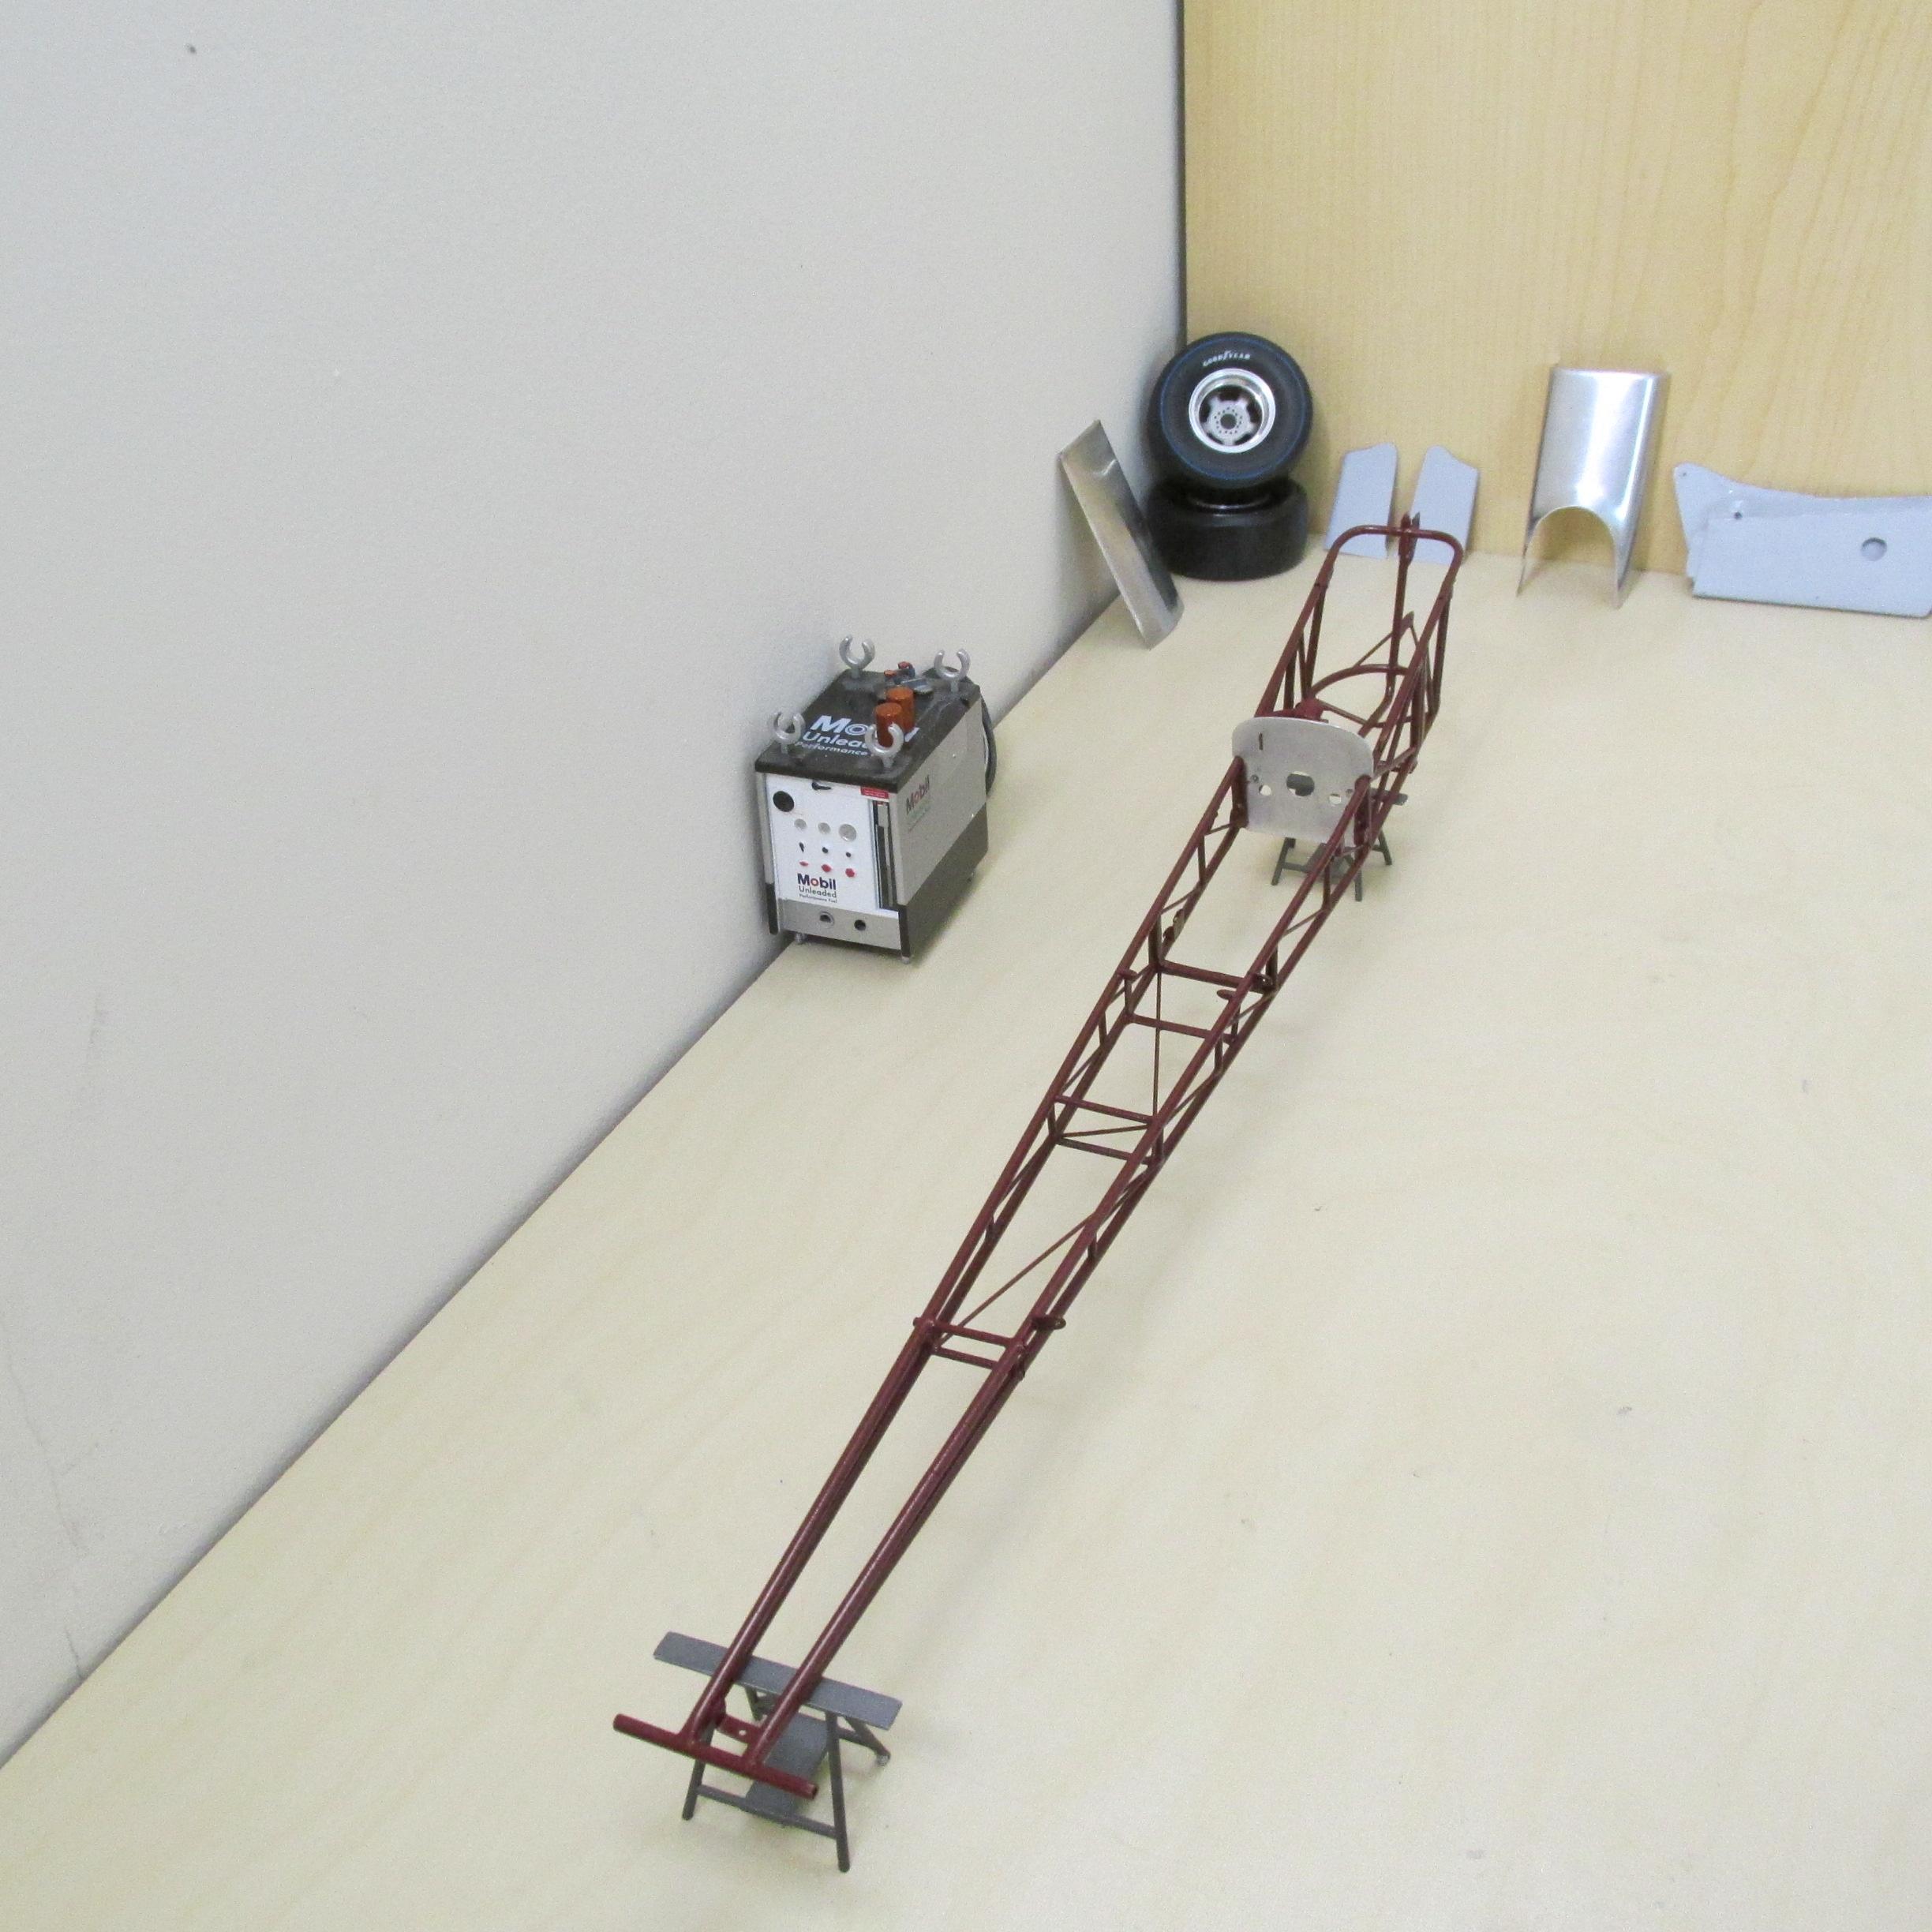
Now that the chassis is painted and curing I've been working on small parts. Fuel shut off handle, made up of five pieces, tube, rod, nuts, O rings (to be replaced with more nuts once installed) and the cable, oil filters machined aluminum and believe it or not 20 coats of paint to get the correct candy tangerine (original in period HP1s weren't Fram Orange) who knew, you can see the filters on top of the Mobil fuel filler along with the remote filter housing. The fuel pump and shutoff valve assy. ready to plumb. Now working on the throttle linkage (wish these guys had use a cable) The body panels should be White this week.
-
ROYAL CANADIAN 1/16 SCALE TOP FUEL DRAGSTER
Ian McLaren replied to Ian McLaren's topic in WIP: Drag Racing Models
Thank you Francis that means a lot. -
64 Dodge D100 Pickup Pro Street
Ian McLaren replied to AmericanMuscleFan's topic in WIP: Drag Racing Models
Simply amazing! That's all I've got. -
Shirley Shahan’s Hornet Pro Stock
Ian McLaren replied to dragcarz's topic in WIP: Drag Racing Models
Good progress -
64 Dodge D100 Pickup Pro Street
Ian McLaren replied to AmericanMuscleFan's topic in WIP: Drag Racing Models
I hope you are going for a more conventional belt material, if you show up with a machined aluminum belt with the correct angles, I'm selling all of my modeling BLAH_BLAH_BLAH_BLAH and taking up Parchese. LOL The scary thing is that I'm pretty sure you might actually be able to pull it off. -
ROYAL CANADIAN 1/16 SCALE TOP FUEL DRAGSTER
Ian McLaren replied to Ian McLaren's topic in WIP: Drag Racing Models
Thank you Daniel, it's been a long haul to this point. The owner of the real car is pleased with where I'm at so that's a good thing and I have learned a ton of new skills doing this one in brass (first time ever) At least from here it's details paint and assembly. -
ROYAL CANADIAN 1/16 SCALE TOP FUEL DRAGSTER
Ian McLaren replied to Ian McLaren's topic in WIP: Drag Racing Models
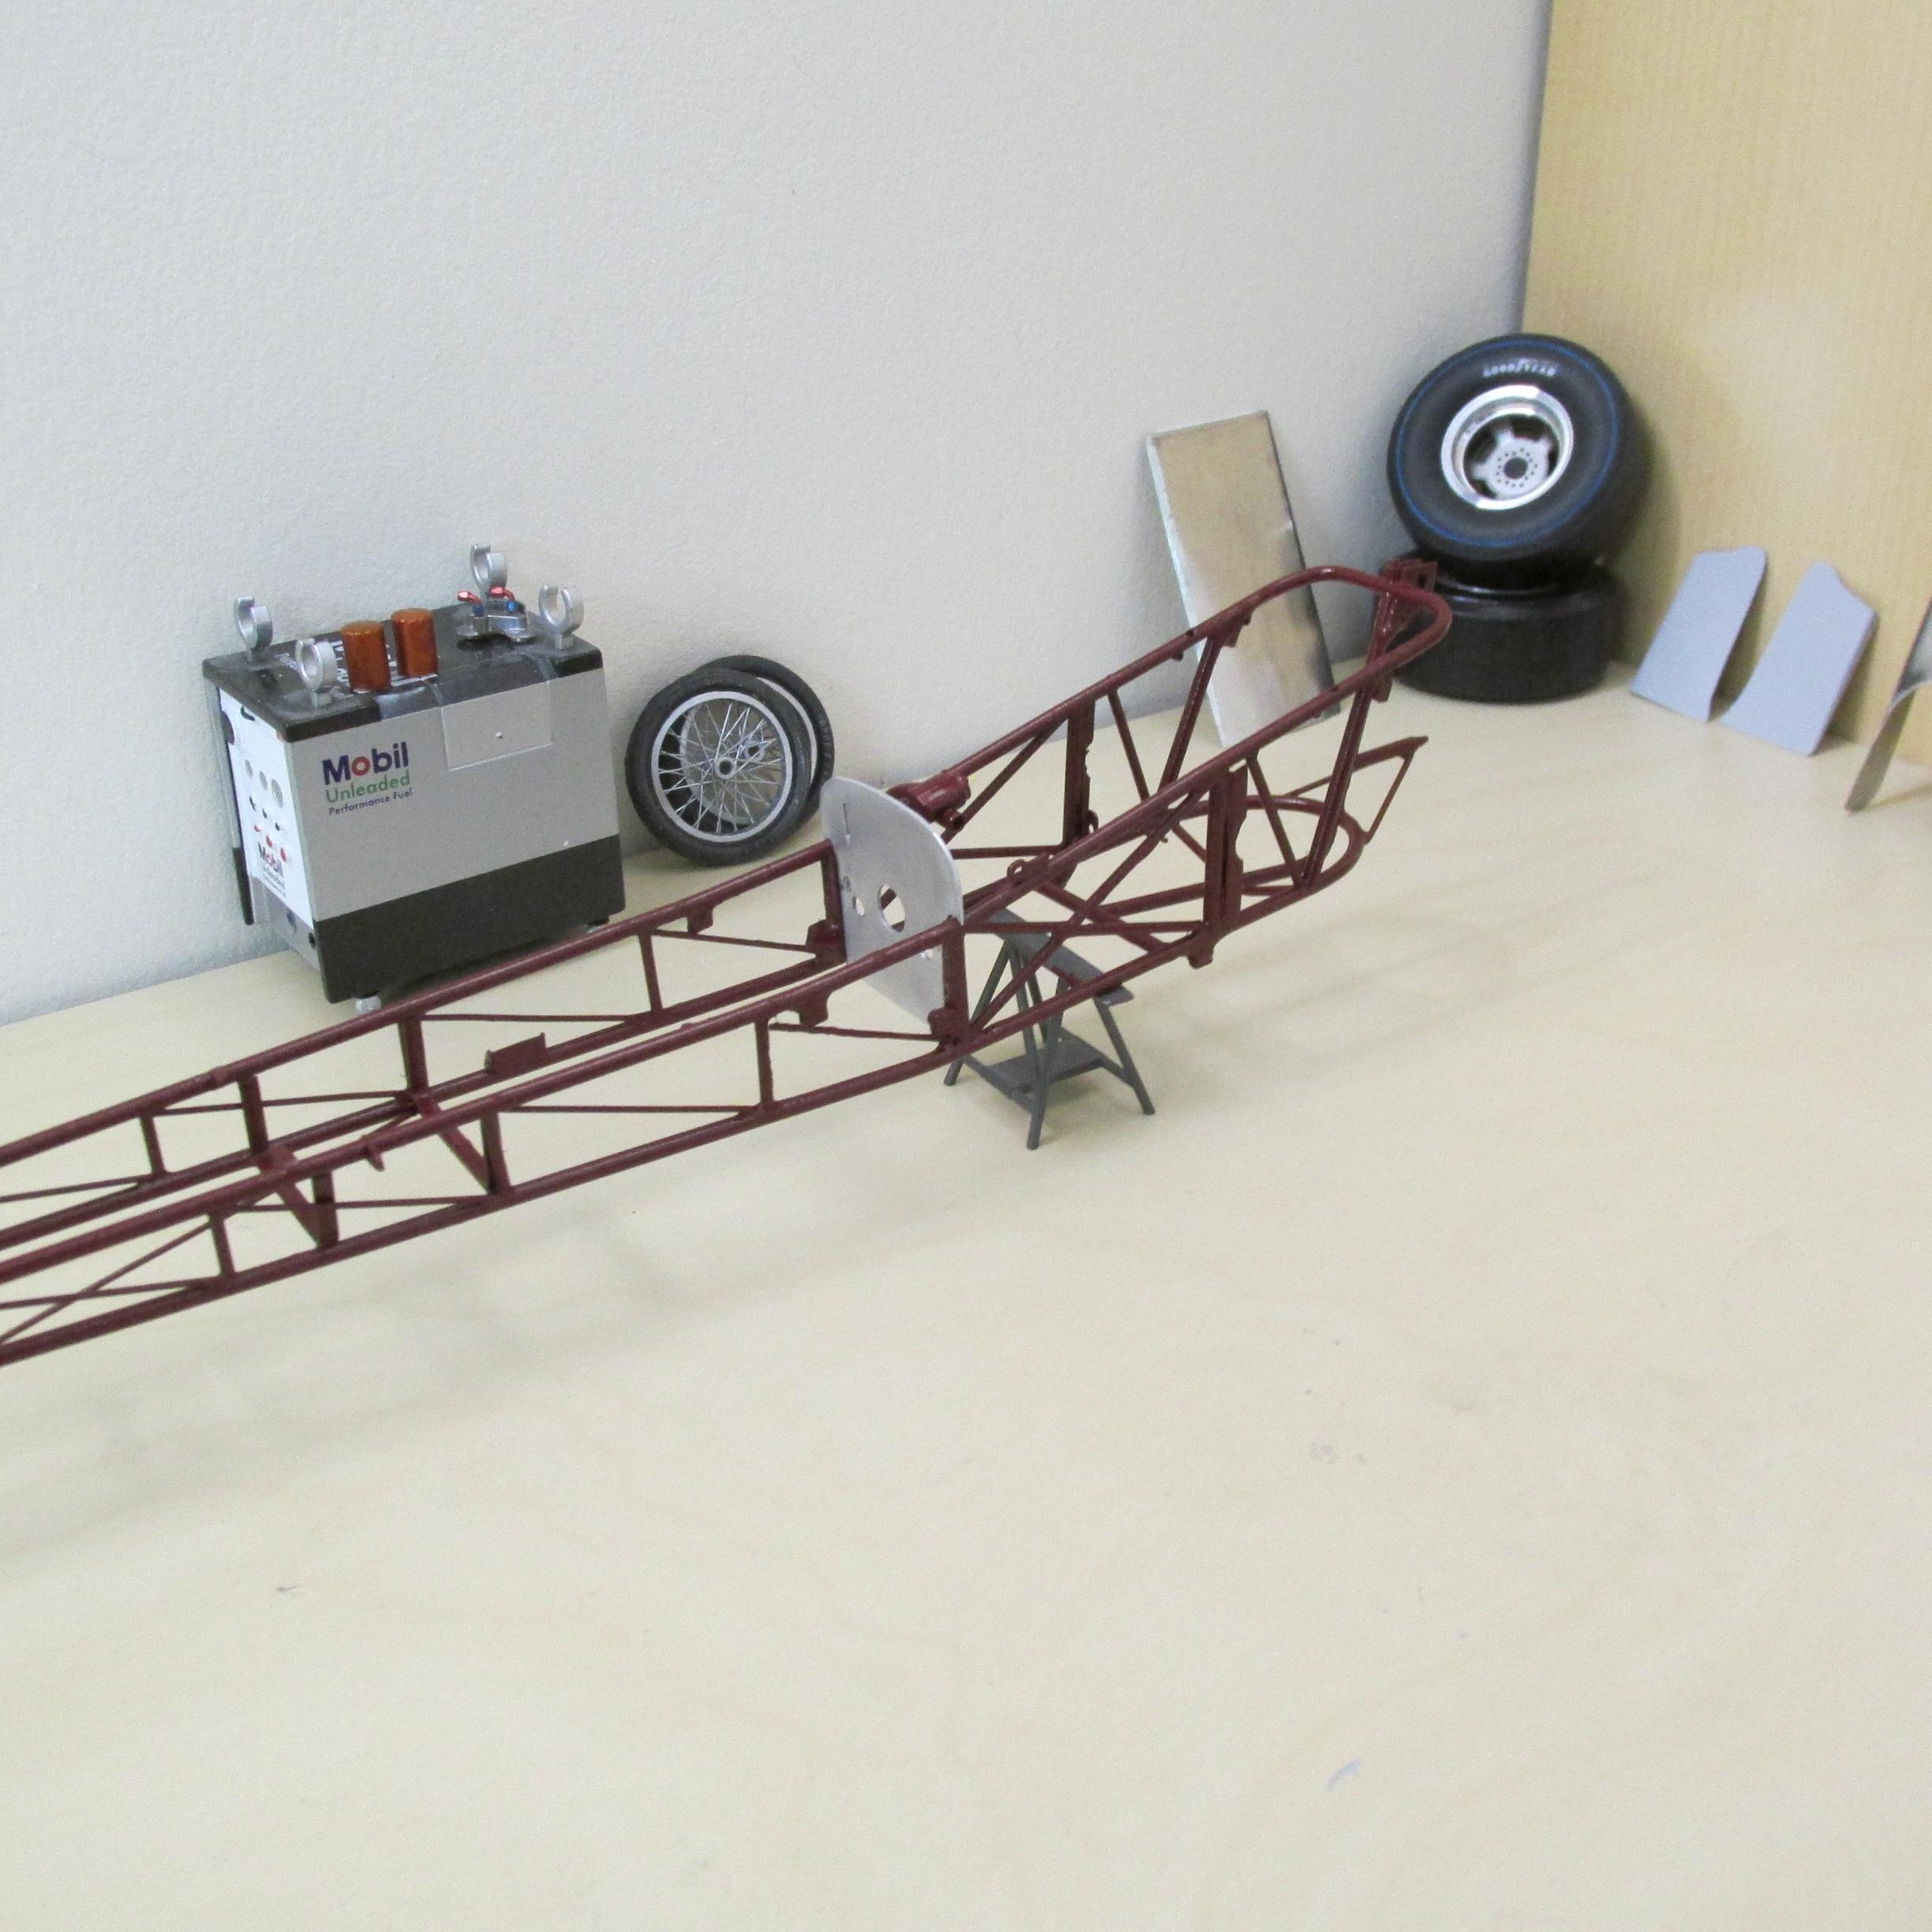
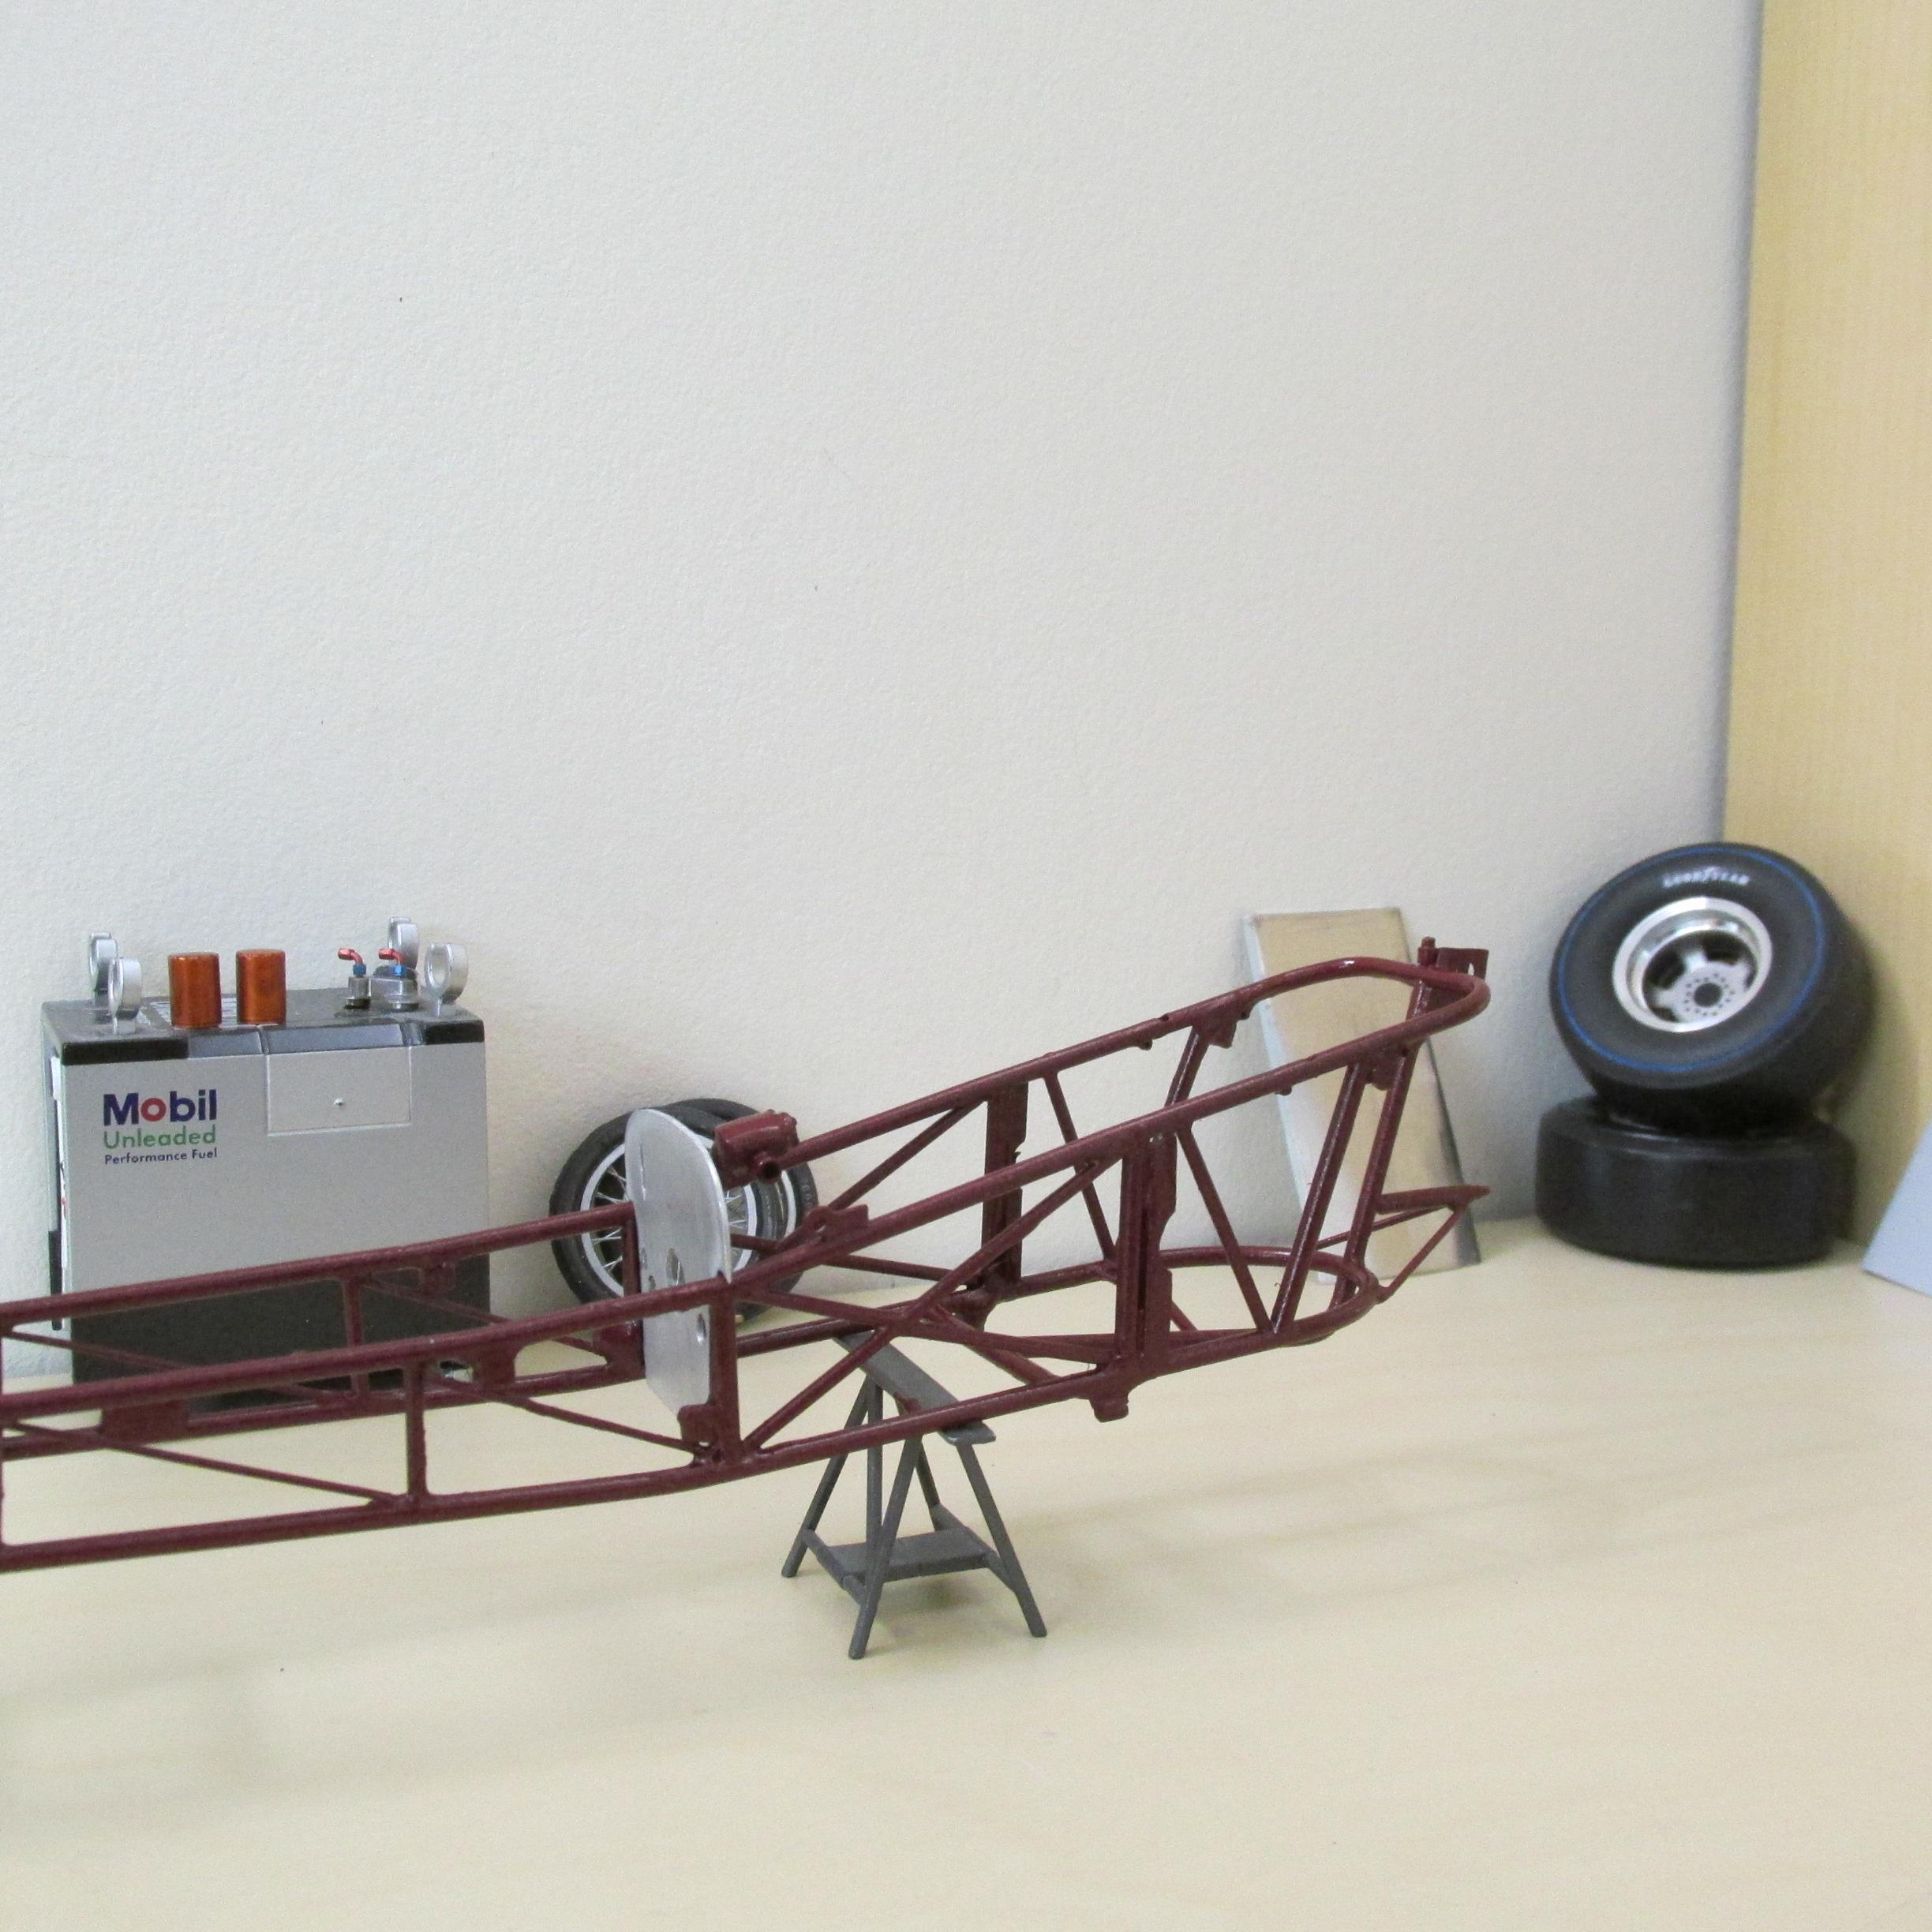
Got the paint on the chassis today.
-
Looks good!
-
Interesting
-
Great job!
-
Very well done, great model!
-
Nicely done
-
Looks good
-
64 Dodge D100 Pickup Pro Street
Ian McLaren replied to AmericanMuscleFan's topic in WIP: Drag Racing Models
Francis the alternator is just amazing. -
Looks good.