RCprofile.JPG.6b95b19b856bf00a3becd6aeaaa48f3b.JPG)
Ian McLaren
-
Posts
1,360 -
Joined
-
Last visited
Content Type
Profiles
Forums
Events
Gallery
Everything posted by Ian McLaren
-
RCprofile.thumb.JPG.1691ea753d0f0897fdc1b2510cf06775.JPG)
ROYAL CANADIAN 1/16 SCALE TOP FUEL DRAGSTER
Ian McLaren replied to Ian McLaren's topic in WIP: Drag Racing Models
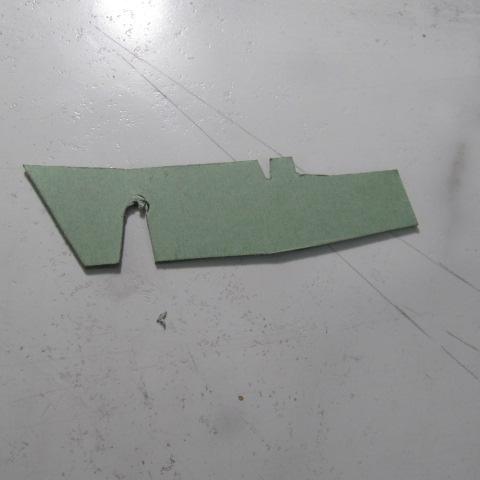
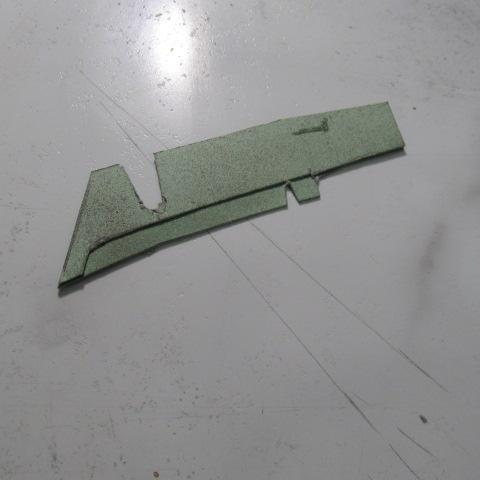
Good afternoon Daniel I have been thinking about the side panels and dreading it for a few months. I have tried in vain to really successfully duplicate the offset seen on a lot of cars and nothing I had tried worked particularly well. Three weeks ago I had a thought as seen in the original cardboard templates pictured. The panels on the car are .008 K&S tin plated steel each side made in two pieces, an inner including the step and a outer with the step cut out, Glue the two pieces together with extra thin CA on all edges and you have a scale .008" step. Then trim the outer edges of the laminated panel to the final shape and your done. The reason for steel rather that aluminum is that I have purchased 1/8 x 1/16 x 1/16 rare earth magnets that scale out very close to standard Dzus plates to make the panels removable without the need for tools. Other wise using Aluminum I would have used plastic for the plates and self tapping 1.0 mm screws to secure the panels as I did on the 1/16th Banzai A/FC I just finished.
-
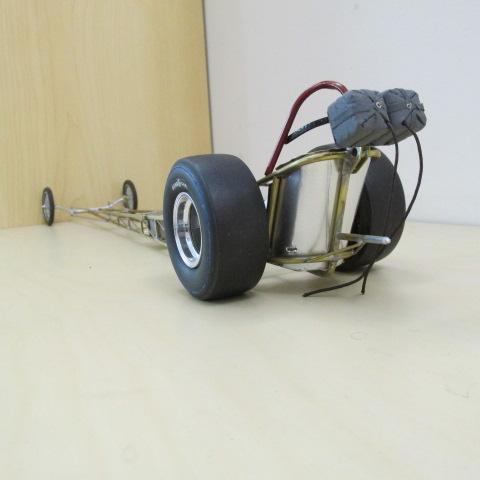
ROYAL CANADIAN 1/16 SCALE TOP FUEL DRAGSTER
Ian McLaren replied to Ian McLaren's topic in WIP: Drag Racing Models
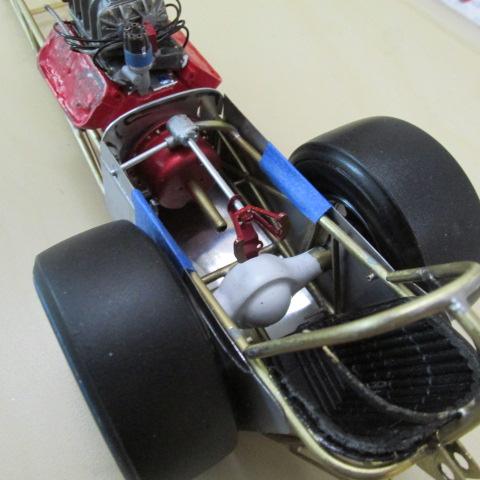
All body templates now fit including belly pan, quick mockup to check clearances. Happy with the progress. Refining refinishing and starting to assemble next on the agenda.
-
64 Dodge D100 Pickup Pro Street
Ian McLaren replied to AmericanMuscleFan's topic in WIP: Drag Racing Models
Francis you just keep raising the bar, well done my friend! -
This is the kind of modeling I really appreciate, well done and looking forward to seeing it completed
-
New take on an old formula, different but in a good way. Great start
-
Great progress
-
I really like this well done.
-
Automotive Restoration and Machine Shop
Ian McLaren replied to The Modeling Hermit's topic in WIP: Dioramas
Great job with fantastic attention to detail. Well done! -
Great looking model, well presented in all aspects.
-
70’ Duster Pro Mod chassis…WIP…
Ian McLaren replied to Dirt Demon's topic in WIP: Drag Racing Models
Great looking chassis, very clean work well done! -
Tamiya McLaren M8A
Ian McLaren replied to Safire6's topic in Other Racing: Road Racing, Salt Flat Racers
Great job on rescuing a sub par kit. The end result very good, we'll done. -
I know this is way after the fact but this is a superior model and I had to commend the quality of the work. It is also a testament to a model can always be completed even after sitting for years, something we all can relate to I'm sure.
-
Very nice
-
Great progress.
-
ROYAL CANADIAN 1/16 SCALE TOP FUEL DRAGSTER
Ian McLaren replied to Ian McLaren's topic in WIP: Drag Racing Models
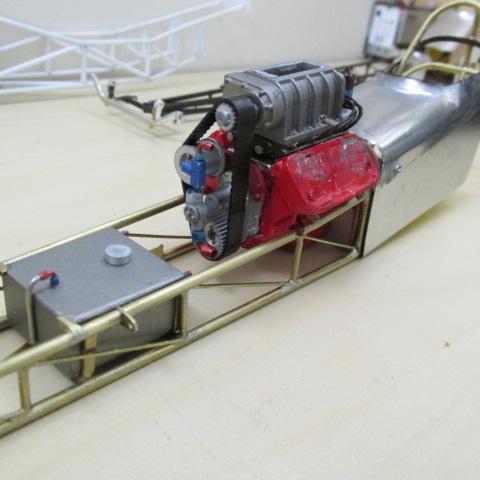
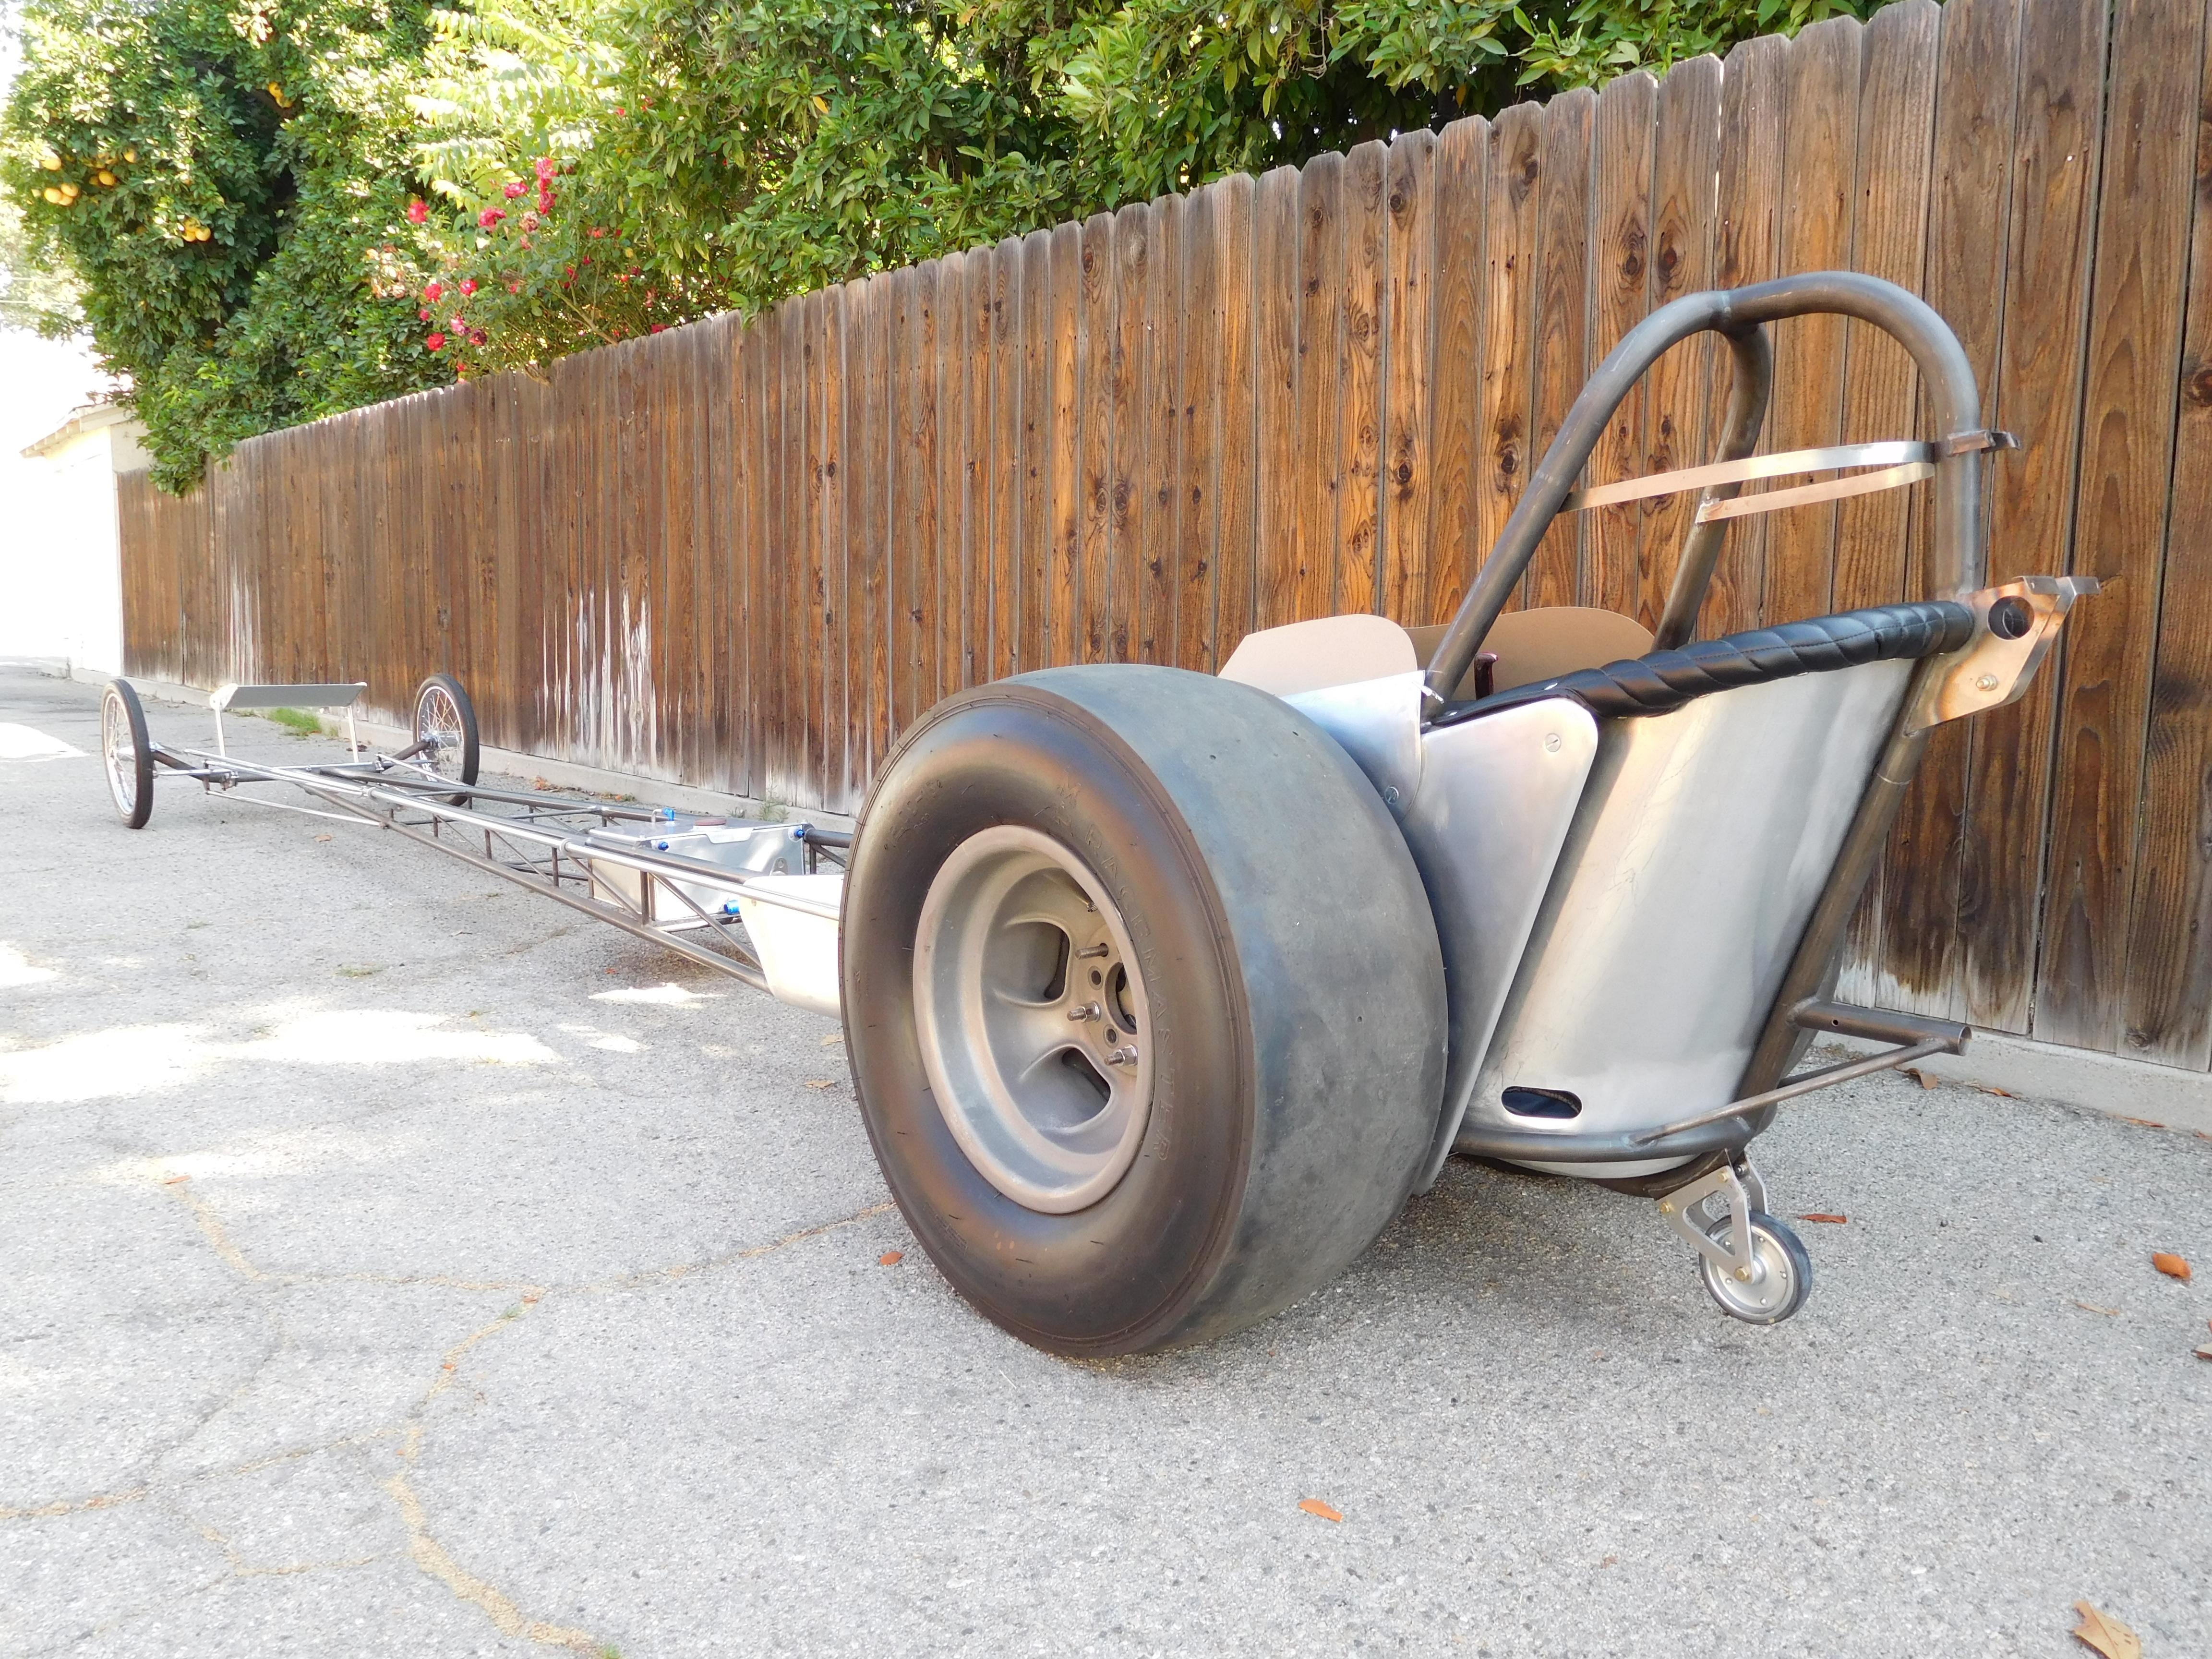
Starting to add details during final mock up before chassis paint, Body panels have been templated and final parts are in progress
-
Good morning Daniel, I just went through this entire thread and I have to say your scratch building skills are impressive. I will be following along from this point. Well done!
-
Question about the NASCAR Cars of 1970
Ian McLaren replied to smartdriver's topic in WIP: Drag Racing Models
Hello Harry, I think you may have taken a wrong turn when you posted to this thread. This is a drag racing thread and the Daytonas and Superbirds are rare beasts indeed on the drag strip and the few there are are nothing like their NASCAR brothers. There are some fantastic modelers here that might have some answers for you but the NASCAR thread may be a better source of information. I would however suggest you look around at some of the models here, perhaps we can lure you over to the dark side of the hobby. -
PACERS, Fuel Altered, 1:16 brass, 1965
Ian McLaren replied to Mike Williams's topic in WIP: Drag Racing Models
Mike this is just simply an outstanding model and tribute to the real car. Very well done indeed my friend! -
ROYAL CANADIAN 1/16 SCALE TOP FUEL DRAGSTER
Ian McLaren replied to Ian McLaren's topic in WIP: Drag Racing Models
Just a test piece to see how I'm going to build the cowl piece, and a special thanks to Mike Williams for sharing some of his metal working processes with me, immeasurable help!
-
ROYAL CANADIAN 1/16 SCALE TOP FUEL DRAGSTER
Ian McLaren replied to Ian McLaren's topic in WIP: Drag Racing Models
Thank you so much Francis, I always look for your updates and as I have said before I am never disappointed just fantastic modeling. -
ROYAL CANADIAN 1/16 SCALE TOP FUEL DRAGSTER
Ian McLaren replied to Ian McLaren's topic in WIP: Drag Racing Models
Tim, coming from you that really means a lot. Likewise I always check for updates on your build because of the spectacular machining and modeling you constantly produce, truly inspirational. -
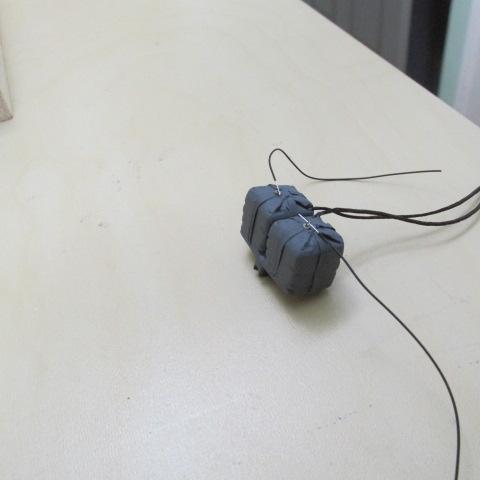
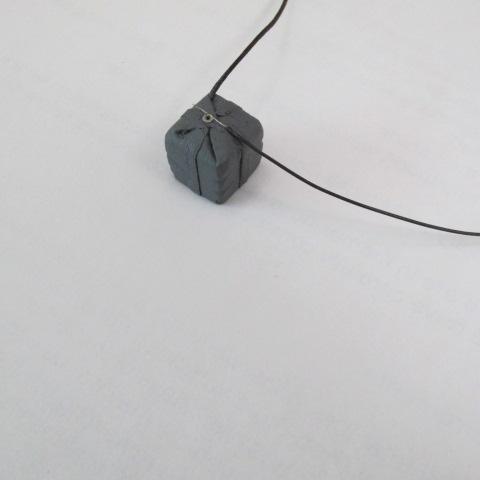
ROYAL CANADIAN 1/16 SCALE TOP FUEL DRAGSTER
Ian McLaren replied to Ian McLaren's topic in WIP: Drag Racing Models
Chute packs ready
-
64 Dodge D100 Pickup Pro Street
Ian McLaren replied to AmericanMuscleFan's topic in WIP: Drag Racing Models
Francis it looks like I'm in the minority here but I agree with your thoughts on painting the tank. You already have an astounding amount of machined aluminum on the vehicle. I'm speaking from almost 20 years as an ISCA Official, too much of any finish, polished, chrome, machine turned or engraving looses it's effect without contrast. The tank is stunning but it will still be so painted, due to the detail you have incorporated into it, and the contrast will make the other machined parts stand out more. As usual a fantastic update. -
ROYAL CANADIAN 1/16 SCALE TOP FUEL DRAGSTER
Ian McLaren replied to Ian McLaren's topic in WIP: Drag Racing Models
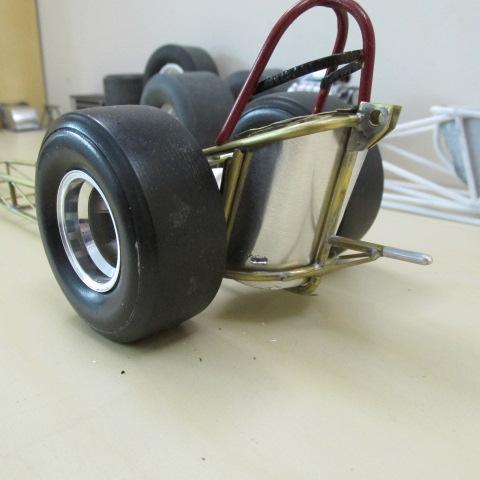
Just a rough mock up.
-
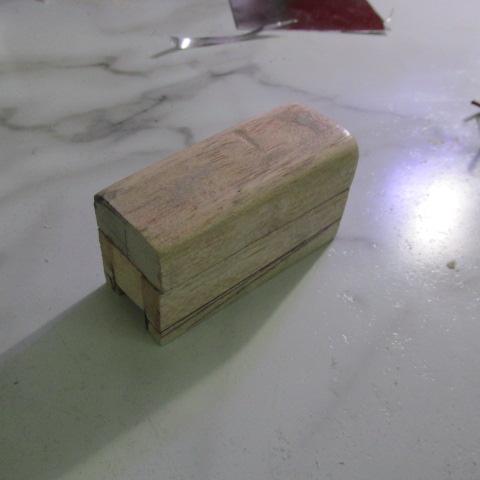
ROYAL CANADIAN 1/16 SCALE TOP FUEL DRAGSTER
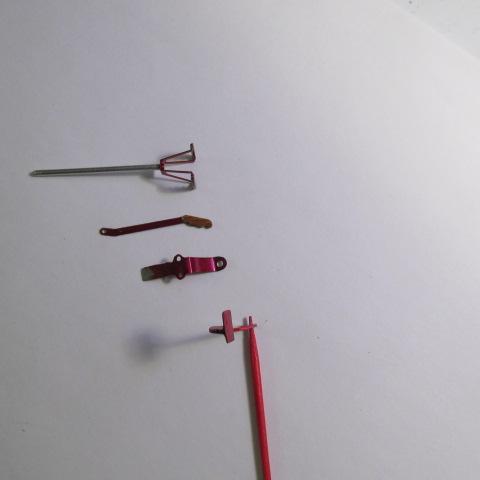
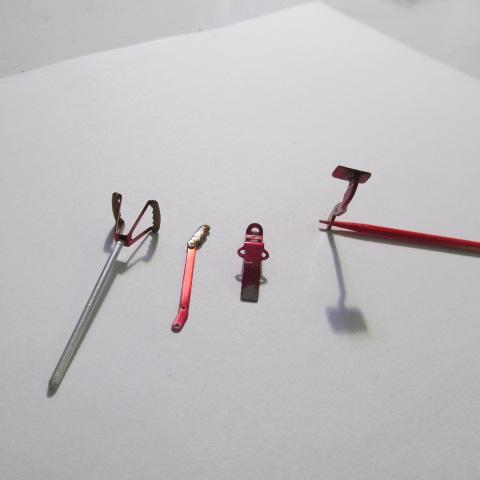
Ian McLaren replied to Ian McLaren's topic in WIP: Drag Racing Models
Just a bunch of bits and pieces not really the stuff of updates, but here are a couple. Chute pack hand carved and a mold made, this is the first casting out of the mold also my first attempt at this procedure. Aluminum rear face on the seat added. Happy with the wood on the steering wheel