AmericanMuscleFan
-
Posts
3,058 -
Joined
-
Last visited
Content Type
Profiles
Forums
Events
Gallery
Everything posted by AmericanMuscleFan
-

64 Dodge D100 Pickup Pro Street
AmericanMuscleFan replied to AmericanMuscleFan's topic in WIP: Drag Racing Models
Thanks for your comments Lorne! Most of my machined parts are made from reference pics and technical data found (measurements) on internet. I can also validate my measurements from the 1/25 scale parts from any kit if it make sence. Many 3D printed parts available right now could be good or sometime more accurate (instead of the original parts from the kits) but I do love making these by myself (it's my favorite part of the hobby) and I try to improve them on every new project. You don't have to be embarrassed about your work because everything you make is of EXCEPTIONAL quality and cleanliness! Eastern Habs, Francis -
1966 Ford F250
AmericanMuscleFan replied to Chuck Most's topic in Model Trucks: Pickups, Vans, SUVs, Light Commercial
That's a real nice job Sir! Perfect weathering job. I had never seen a 4 doors FORD cab of this era before and I must admit that's very cool. This is to be confused with a real one!!! -
Hello Mister Teresi, I will certainly follow your newest project! I'm relatively new to this forum but your reputation precede you and I can't miss the opottunity to learn something new from your skill. Great unusual subject!!!
-
1955 Big Block Truck
AmericanMuscleFan replied to Lorne's topic in WIP: Model Trucks: Pickups, Vans, SUVs, Light Commercial
WOW!!! This engine is fantastic and the rack and pinion looks like the real thing! Will be a killer truck Lorne! Great update!!! -
I love this Dart/Duster body style! Nice FM3 Pink Panther paint with the black hood Robbie! I like the black wheels on the back too.
-
64 Dodge D100 Pickup Pro Street
AmericanMuscleFan replied to AmericanMuscleFan's topic in WIP: Drag Racing Models
Thanks Scott! I will working on the water pump and the front engine mounting plate now in order to setup the engine position under the hood. Take care, Francis -
64 Dodge D100 Pickup Pro Street
AmericanMuscleFan replied to AmericanMuscleFan's topic in WIP: Drag Racing Models
Thanks Mike! I do have a lot of respect for you and your work so your suggestions are welcome! I must say that in my vision, I try to keep the parts as sharp as possible precisely because of the scale (parts are indeed 25 times smaller than those I'm trying to reproduce). Also, I think that I don't give much chance to the rendering by using my Nikon Coolpix on macro setting so close to the object I'm pictured because it reveals all the swirls done by the end mill. Sanding and polishing these parts is also challenging since I don't want to ruin a part that takes me countless hours to make (it's easier to remove material than adding some...). One thing sure, I can't reject out of hand the good suggestions of an OUT OF THE ORDINARY modeler with that much experience! Your are more than welcome for your input and be certain that I will take it in consideration on the next parts. Truly yours, Francis -
64 Dodge D100 Pickup Pro Street
AmericanMuscleFan replied to AmericanMuscleFan's topic in WIP: Drag Racing Models
Thanks Bob! I'm always happy to share because I learn a lot from the other on this forum! Cheers, Francis -
64 Dodge D100 Pickup Pro Street
AmericanMuscleFan replied to AmericanMuscleFan's topic in WIP: Drag Racing Models
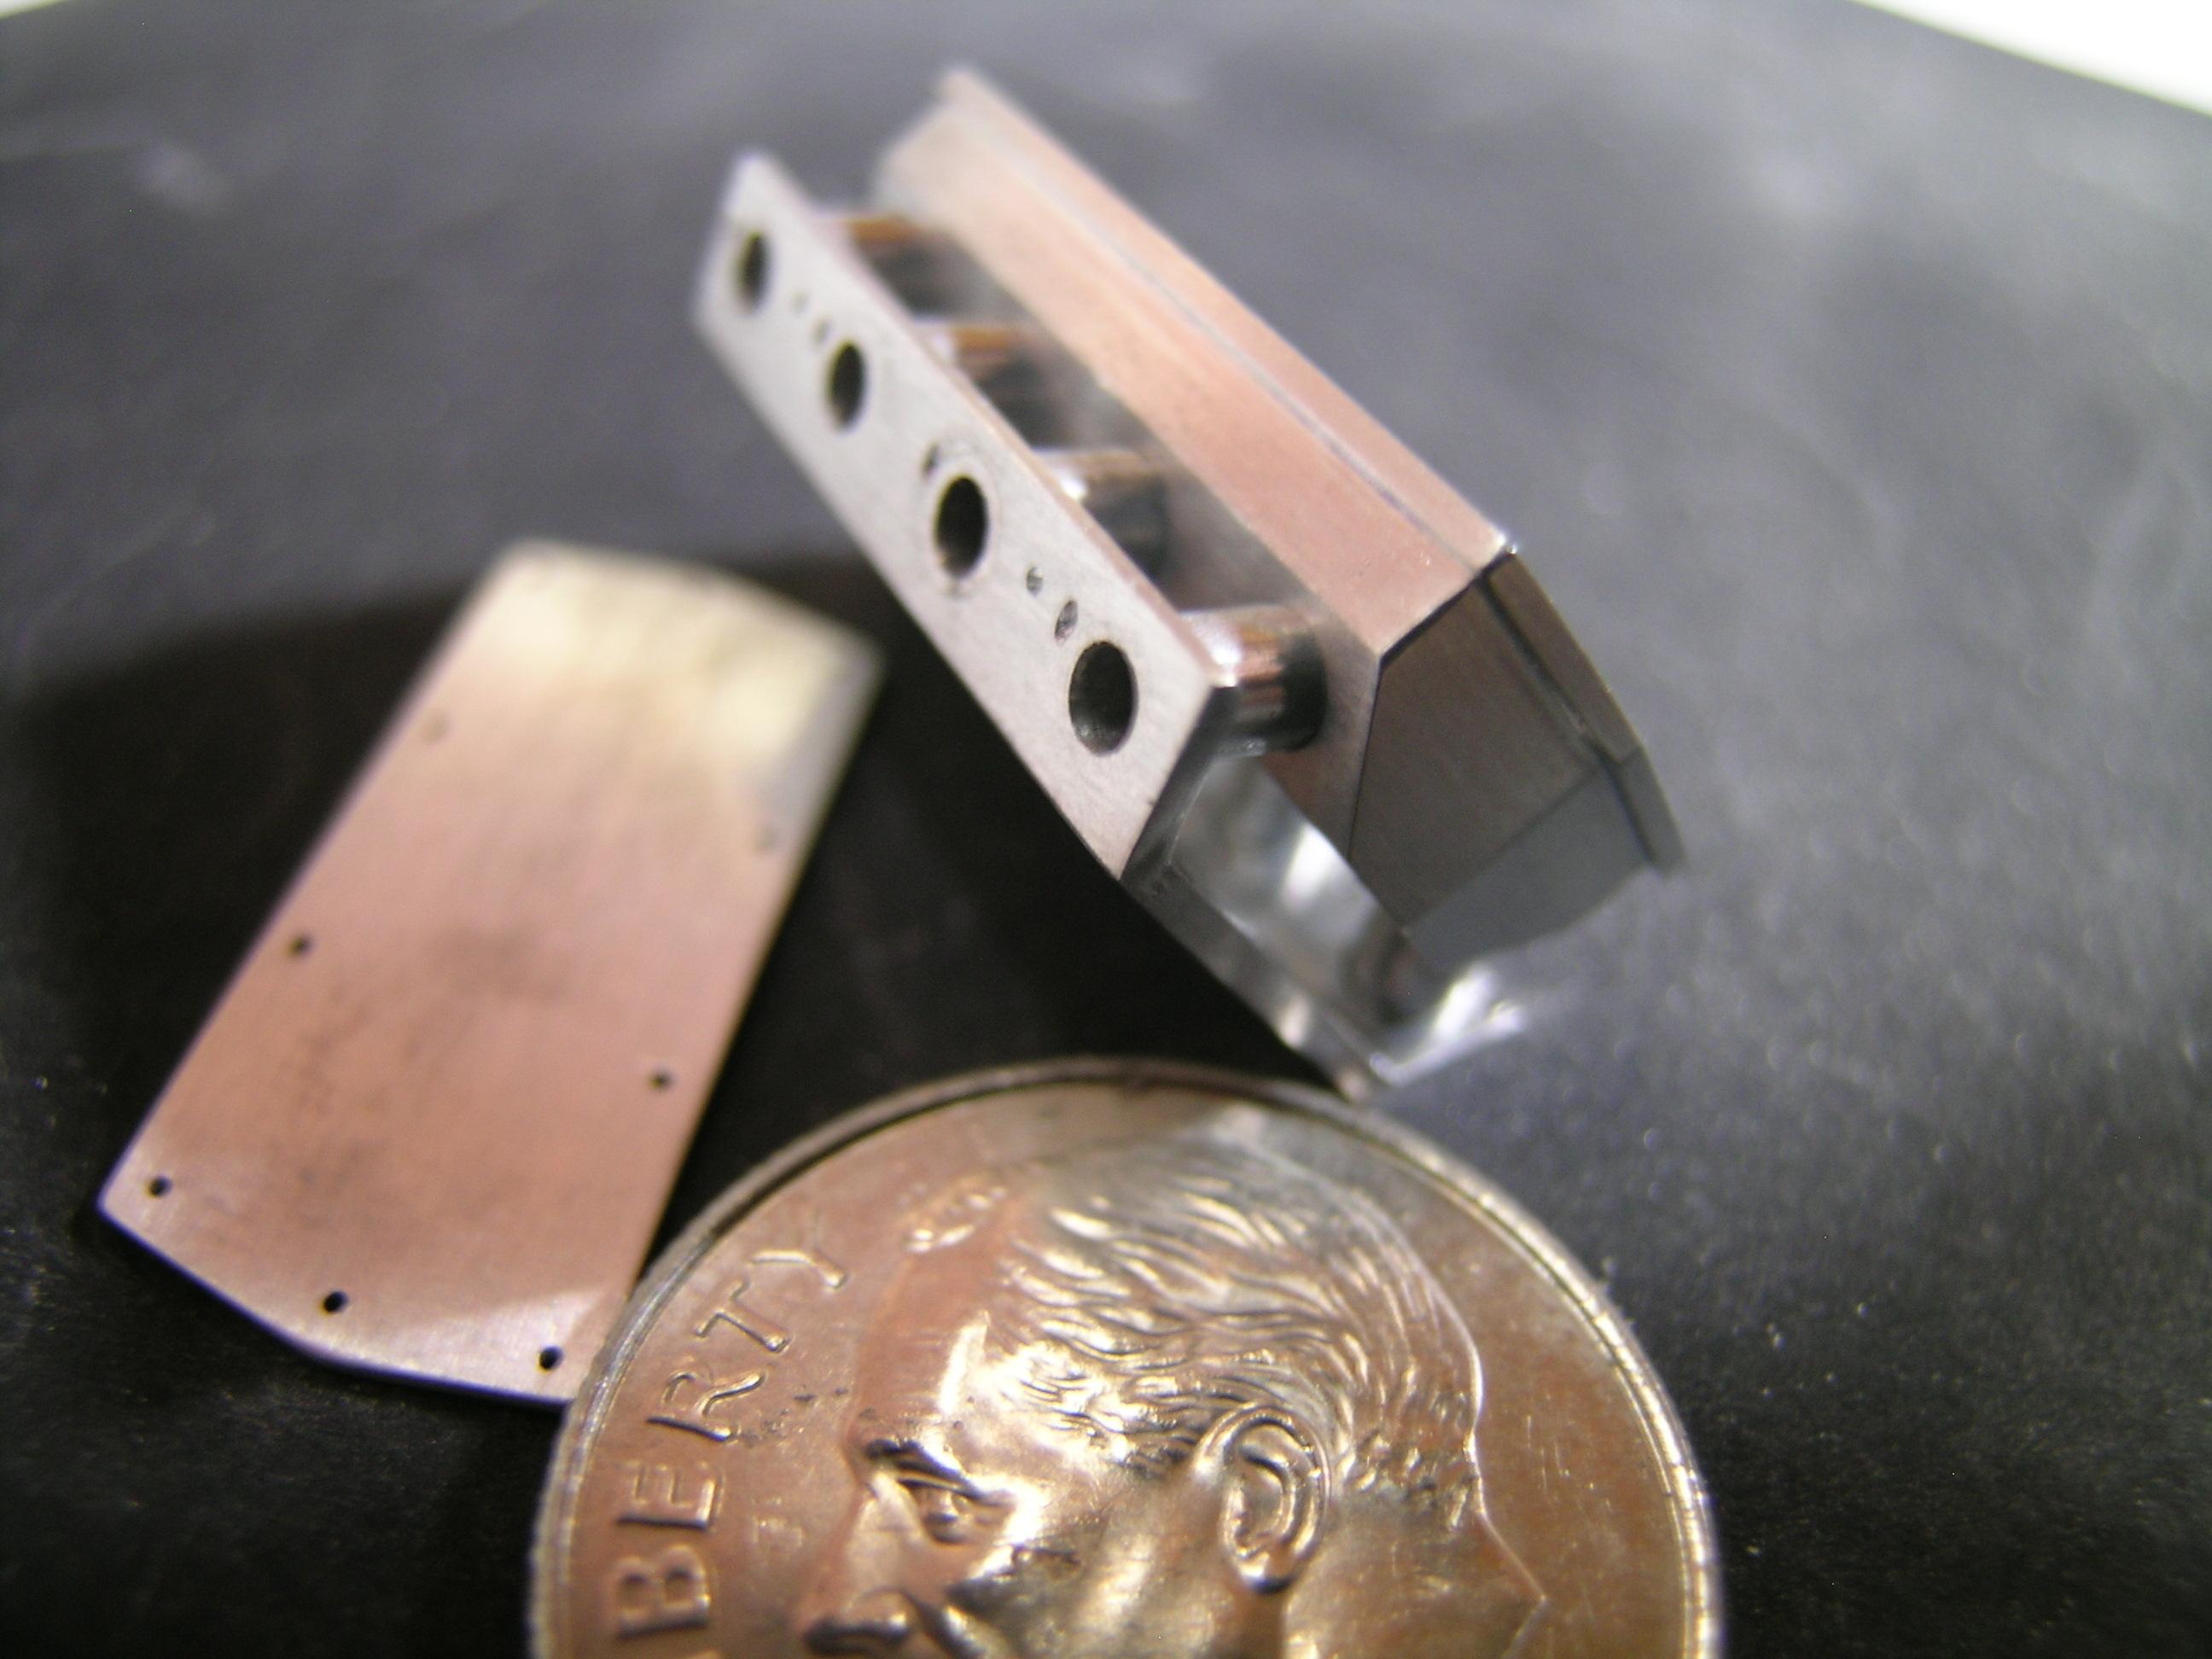
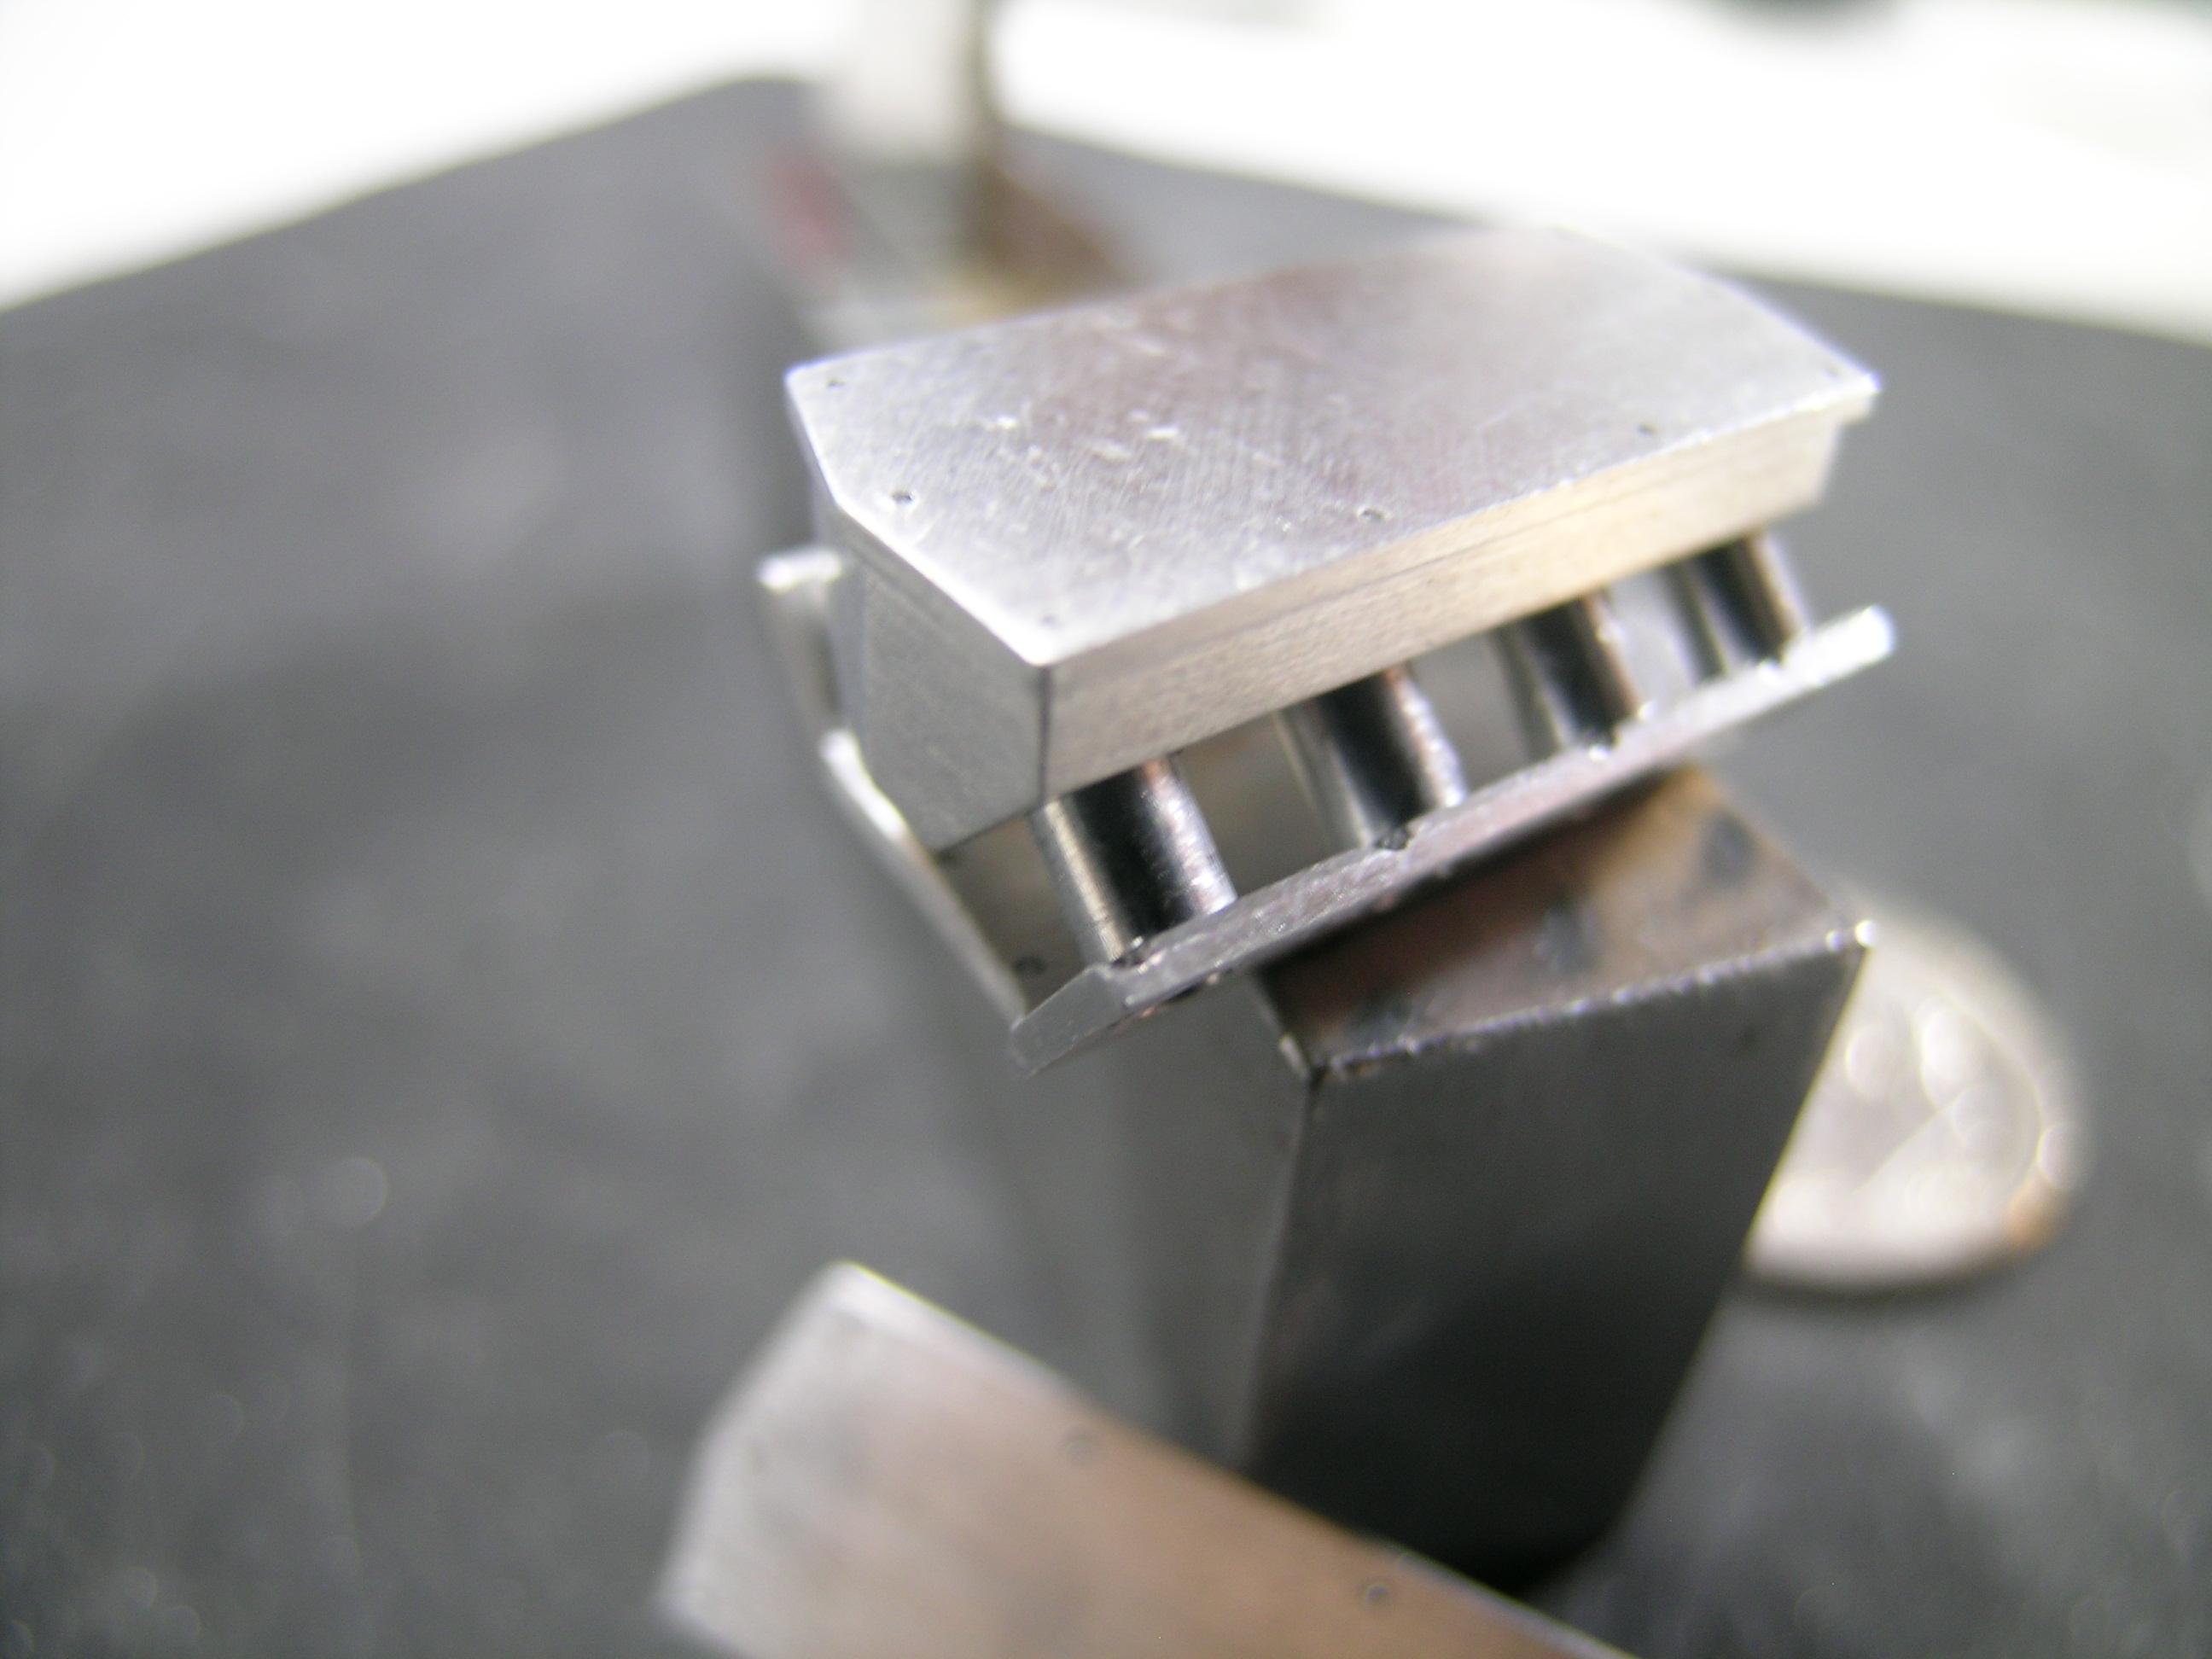
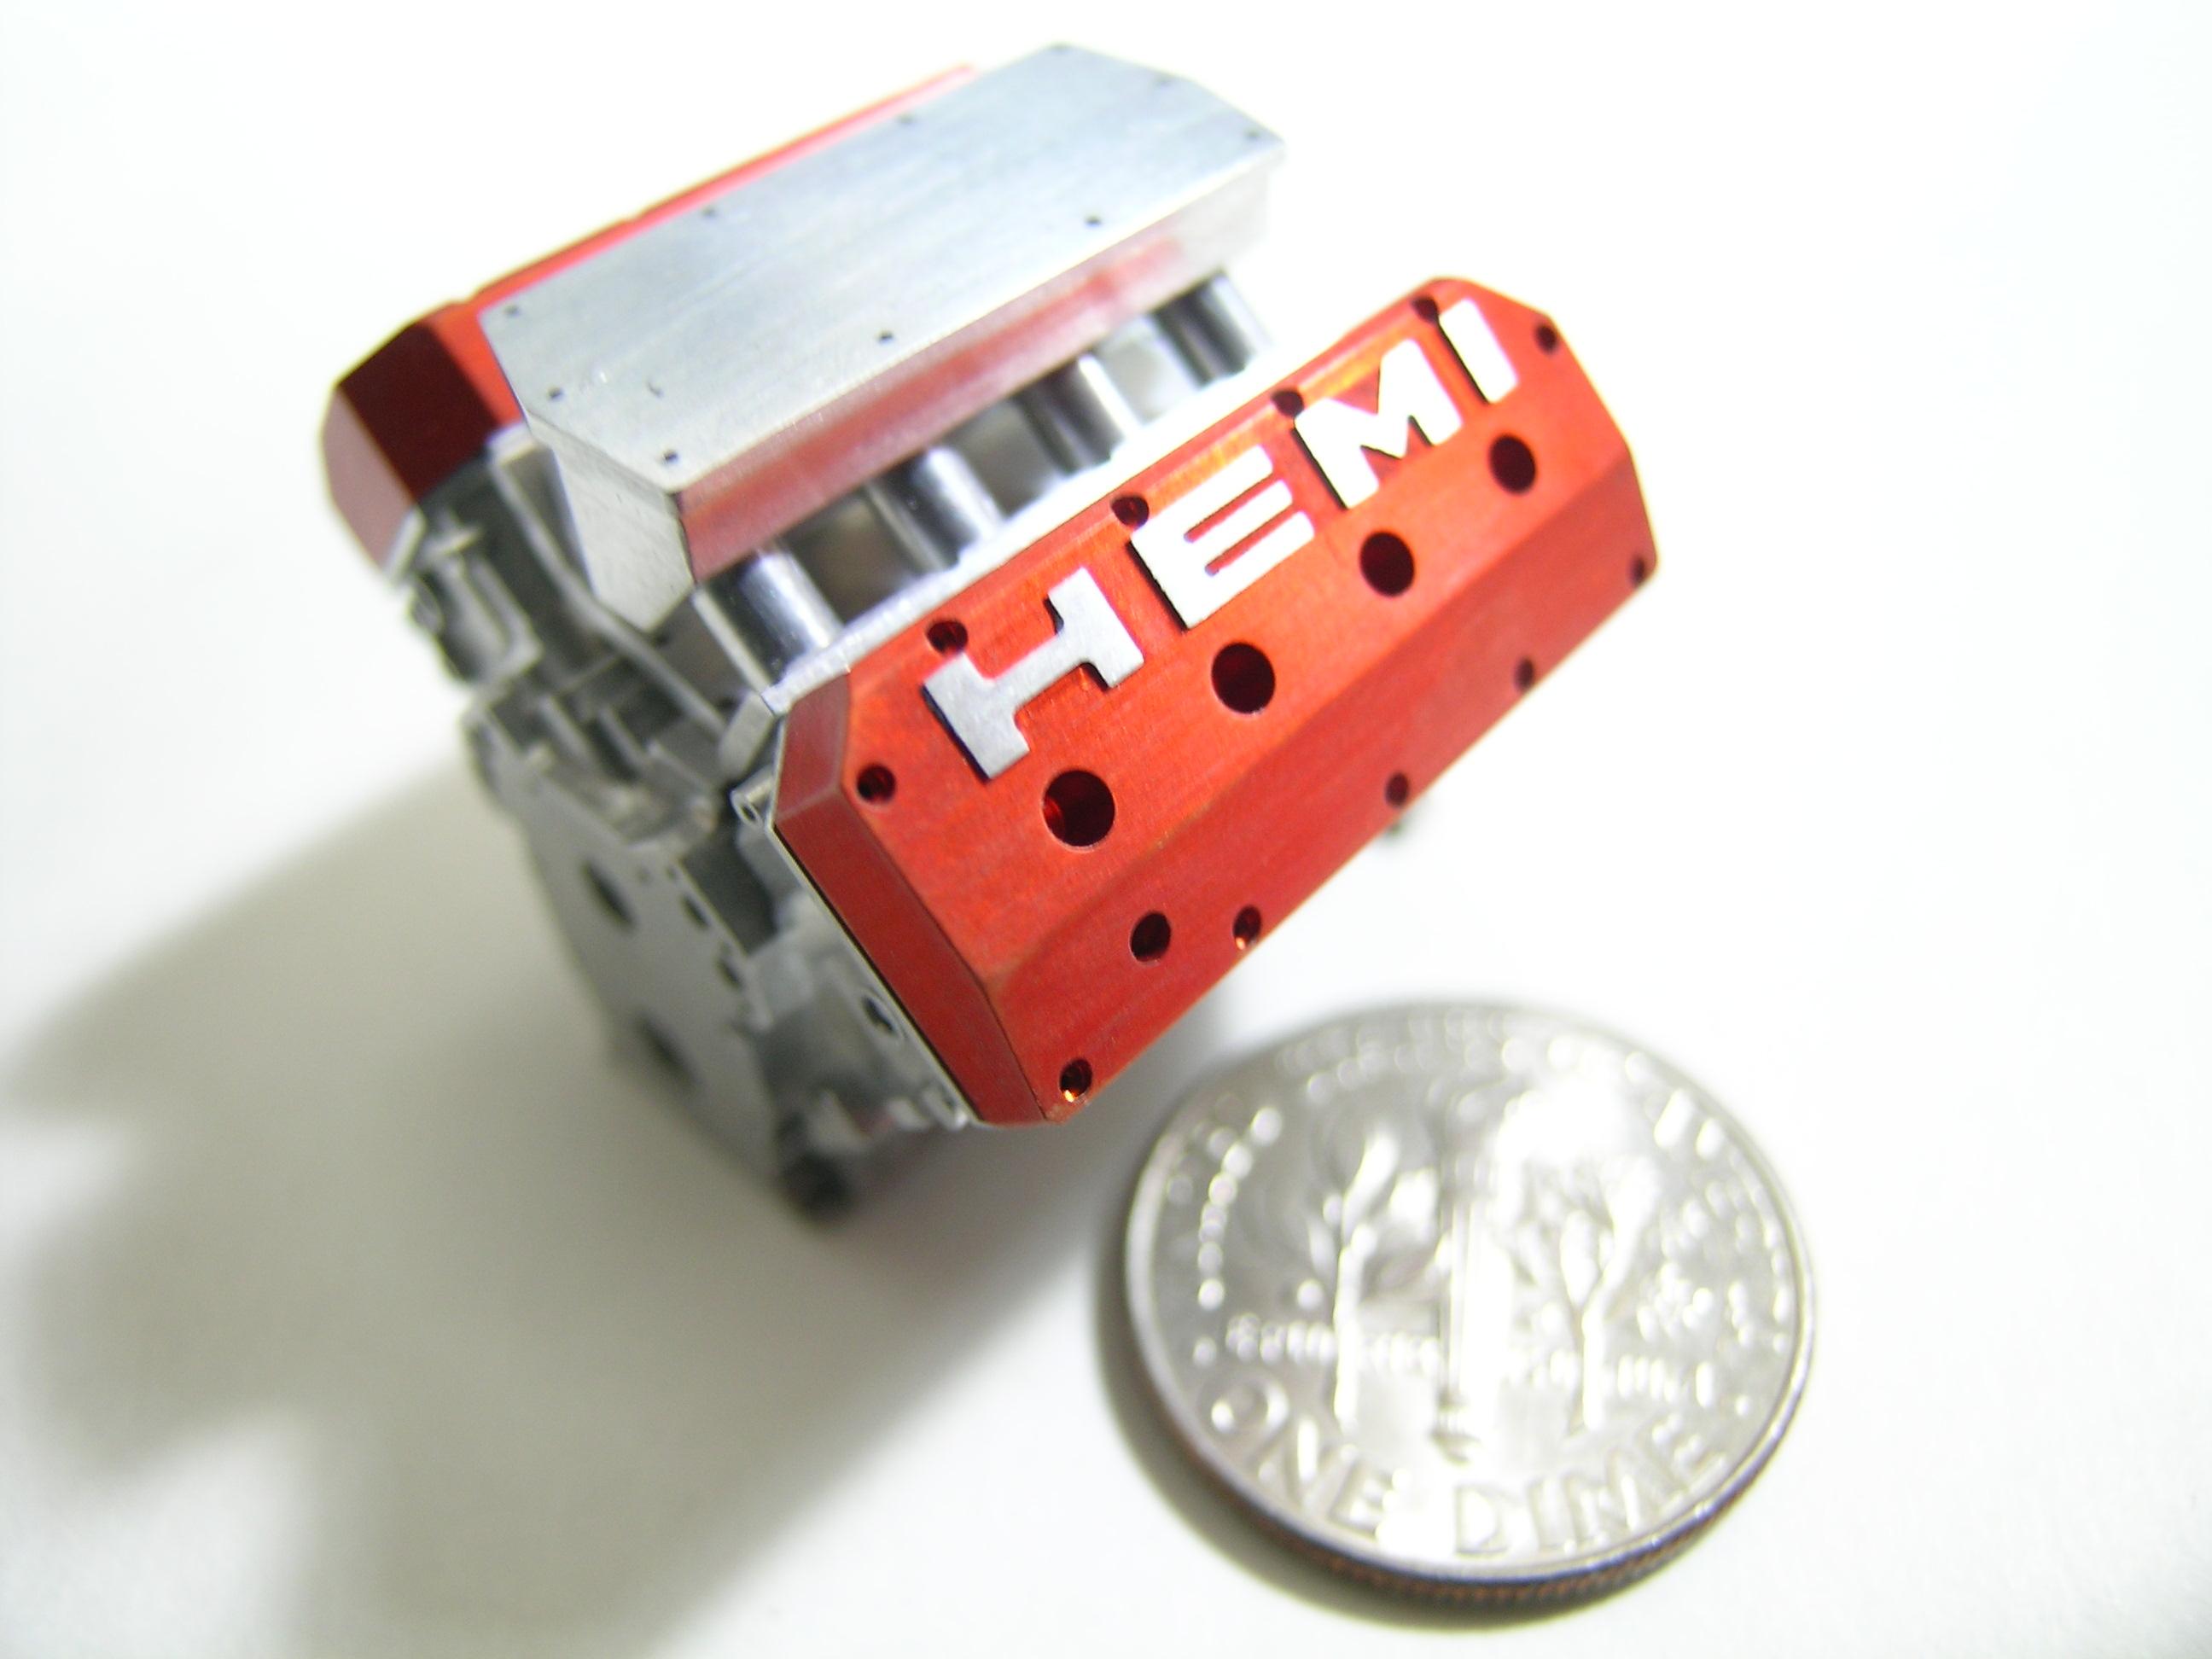
Hello every one! Time to add an intake manifold to feed this engine with racing fuel!!! I'm not 100% sure about the alimentation system yet (carburetor or injected) but the base intake system will be good for both options. I need it done first anyway in order to set-up the engine height under the hood. This is not the most difficult part to make (to me at least) but it must be straight and symmetric to fit perfectly between the engine heads. As usual, feel free to make your comments, they are very appreciated and real fuel for my engine...lol. Happy Easter to each of you and take care, Francis Intake manifold base plate in the milling chuck settled at angle to fit the heads intake ports side. Intake base plate in progress with 0.093’’ holes for aluminum connector tubes. Front of base plate adjusted to heads and the engine block length. Same part different view. Head bolts holes drilled using 0.016’’ drill bit along with bolt head seats using 0.031’’ end mill for bolts clearance. All intakes components including base plate, connector tubes (8), intake plenum and the cover. Intake final. Intake final different angle. Intake final top view. Holes for the carburetor (or injection system) to be made later. View between the red valve covers. It will be detailed by adding brass bolts on the top plate.
-
64 Dodge D100 Pickup Pro Street
AmericanMuscleFan replied to AmericanMuscleFan's topic in WIP: Drag Racing Models
Thanks Ray and Craig! Seem funny what you stated about your abilities to drill simple holes in plastic kits but it's not that easy in fact... that's why I do use a milling in order to keep them perfectly straight...!!! Take care, Francis -
64 Dodge D100 Pickup Pro Street
AmericanMuscleFan replied to AmericanMuscleFan's topic in WIP: Drag Racing Models
Thanks Tim! Yes, a little bit of color under the hood will embellish this all metal like color engine... Take care, Francis -
64 Dodge D100 Pickup Pro Street
AmericanMuscleFan replied to AmericanMuscleFan's topic in WIP: Drag Racing Models
It can't be said nicer than that! What does age mean when we can still have fun creating the toys of our childhood with our adult hands but with much more satisfaction... what a beautiful hobby! I appreciate more and more this forum everyday that enable me to be in contact with people like you Mike!!! Take care, Francis -
This is an amazing project! The subject, the story behind this drag car and all the respect of the NHRA regulations... another masterpiece in the making! I love the stance!!!
-
Vintage FED, 1:25, motor works...
AmericanMuscleFan replied to Mike Williams's topic in WIP: Drag Racing Models
Hi Mike! Great progress on the engine injection setup! You do have good hands and sight for a guy who pushing 70!!! You're right about detailling this engine as it will be the focus point but no one will miss all the spectacular work done on the tubular frame of this beauty! As you mentioned, it's a bit tad disappointing that you weren't able to add this update on your original thread but it does not diminish your good work in ANY WAY! Take care, Francis -
64 Dodge D100 Pickup Pro Street
AmericanMuscleFan replied to AmericanMuscleFan's topic in WIP: Drag Racing Models
I understand your feelings and I feel the same! I just want to make all the main drivetrain components first so I will be able to show you later a glimpse of what the final product will look like. I think that I might have more building weeks coming in front of me... thanks for the current pandemic situation! I'll be back next weekend with an update of the intake manifold. Take care, Francis -
Very nice body modifications so far Bill! I also love that huge Demon motor in the engine bay! TorRed will be perfect color for this build. Will be an insane asphalt grinder!!!
-
Very clean build and nice looking Corvette! Great paint job from an old spray can! Well done Adam!!!
-
Will be a very interresting and rare subject! I recall seeing one on "Pass Time" (Fox channel) few years ago and it was powered by a big Nitro HEMI... that thing was ridiculously fast and a real ground shaker! No doubt, you love building drag cars Wayne!!!
-
94 Trans Am Pro Mod....Complete!!!
AmericanMuscleFan replied to 1320wayne's topic in WIP: Drag Racing Models
Very nice Pro Mod! Close to the ground it looks mean and fast!!! Well done Wayne! -
Red, White, and Blue Thunderbolt
AmericanMuscleFan replied to Flatout's topic in WIP: Drag Racing Models
Very nice and clean build. One of my favorite FORD body! The stance is perfect, well done!!! -
64 Dodge D100 Pickup Pro Street
AmericanMuscleFan replied to AmericanMuscleFan's topic in WIP: Drag Racing Models
Thanks Pat! It's not over yet... more parts to come! Next part the intake manifold. Take care, Francis Thanks Jim! As long your not too impatient... this is a long term project but I'm happy that you stick with me! Cheers, Francis -
64 Dodge D100 Pickup Pro Street
AmericanMuscleFan replied to AmericanMuscleFan's topic in WIP: Drag Racing Models
Thanks Mark! It's a pleasure to share and I do have a lot of fun to move forward in that build!!! Take care, Francis -
64 Dodge D100 Pickup Pro Street
AmericanMuscleFan replied to AmericanMuscleFan's topic in WIP: Drag Racing Models
Thanks Mike! For seeing what you can do with aluminum and brass I take the compliment with a lot of consideration! Now I plan to anodize more parts (no too much however...) in order to add some life on the drive train because a lot of aluminum will be used on this build. Take care, Francis -
64 Dodge D100 Pickup Pro Street
AmericanMuscleFan replied to AmericanMuscleFan's topic in WIP: Drag Racing Models
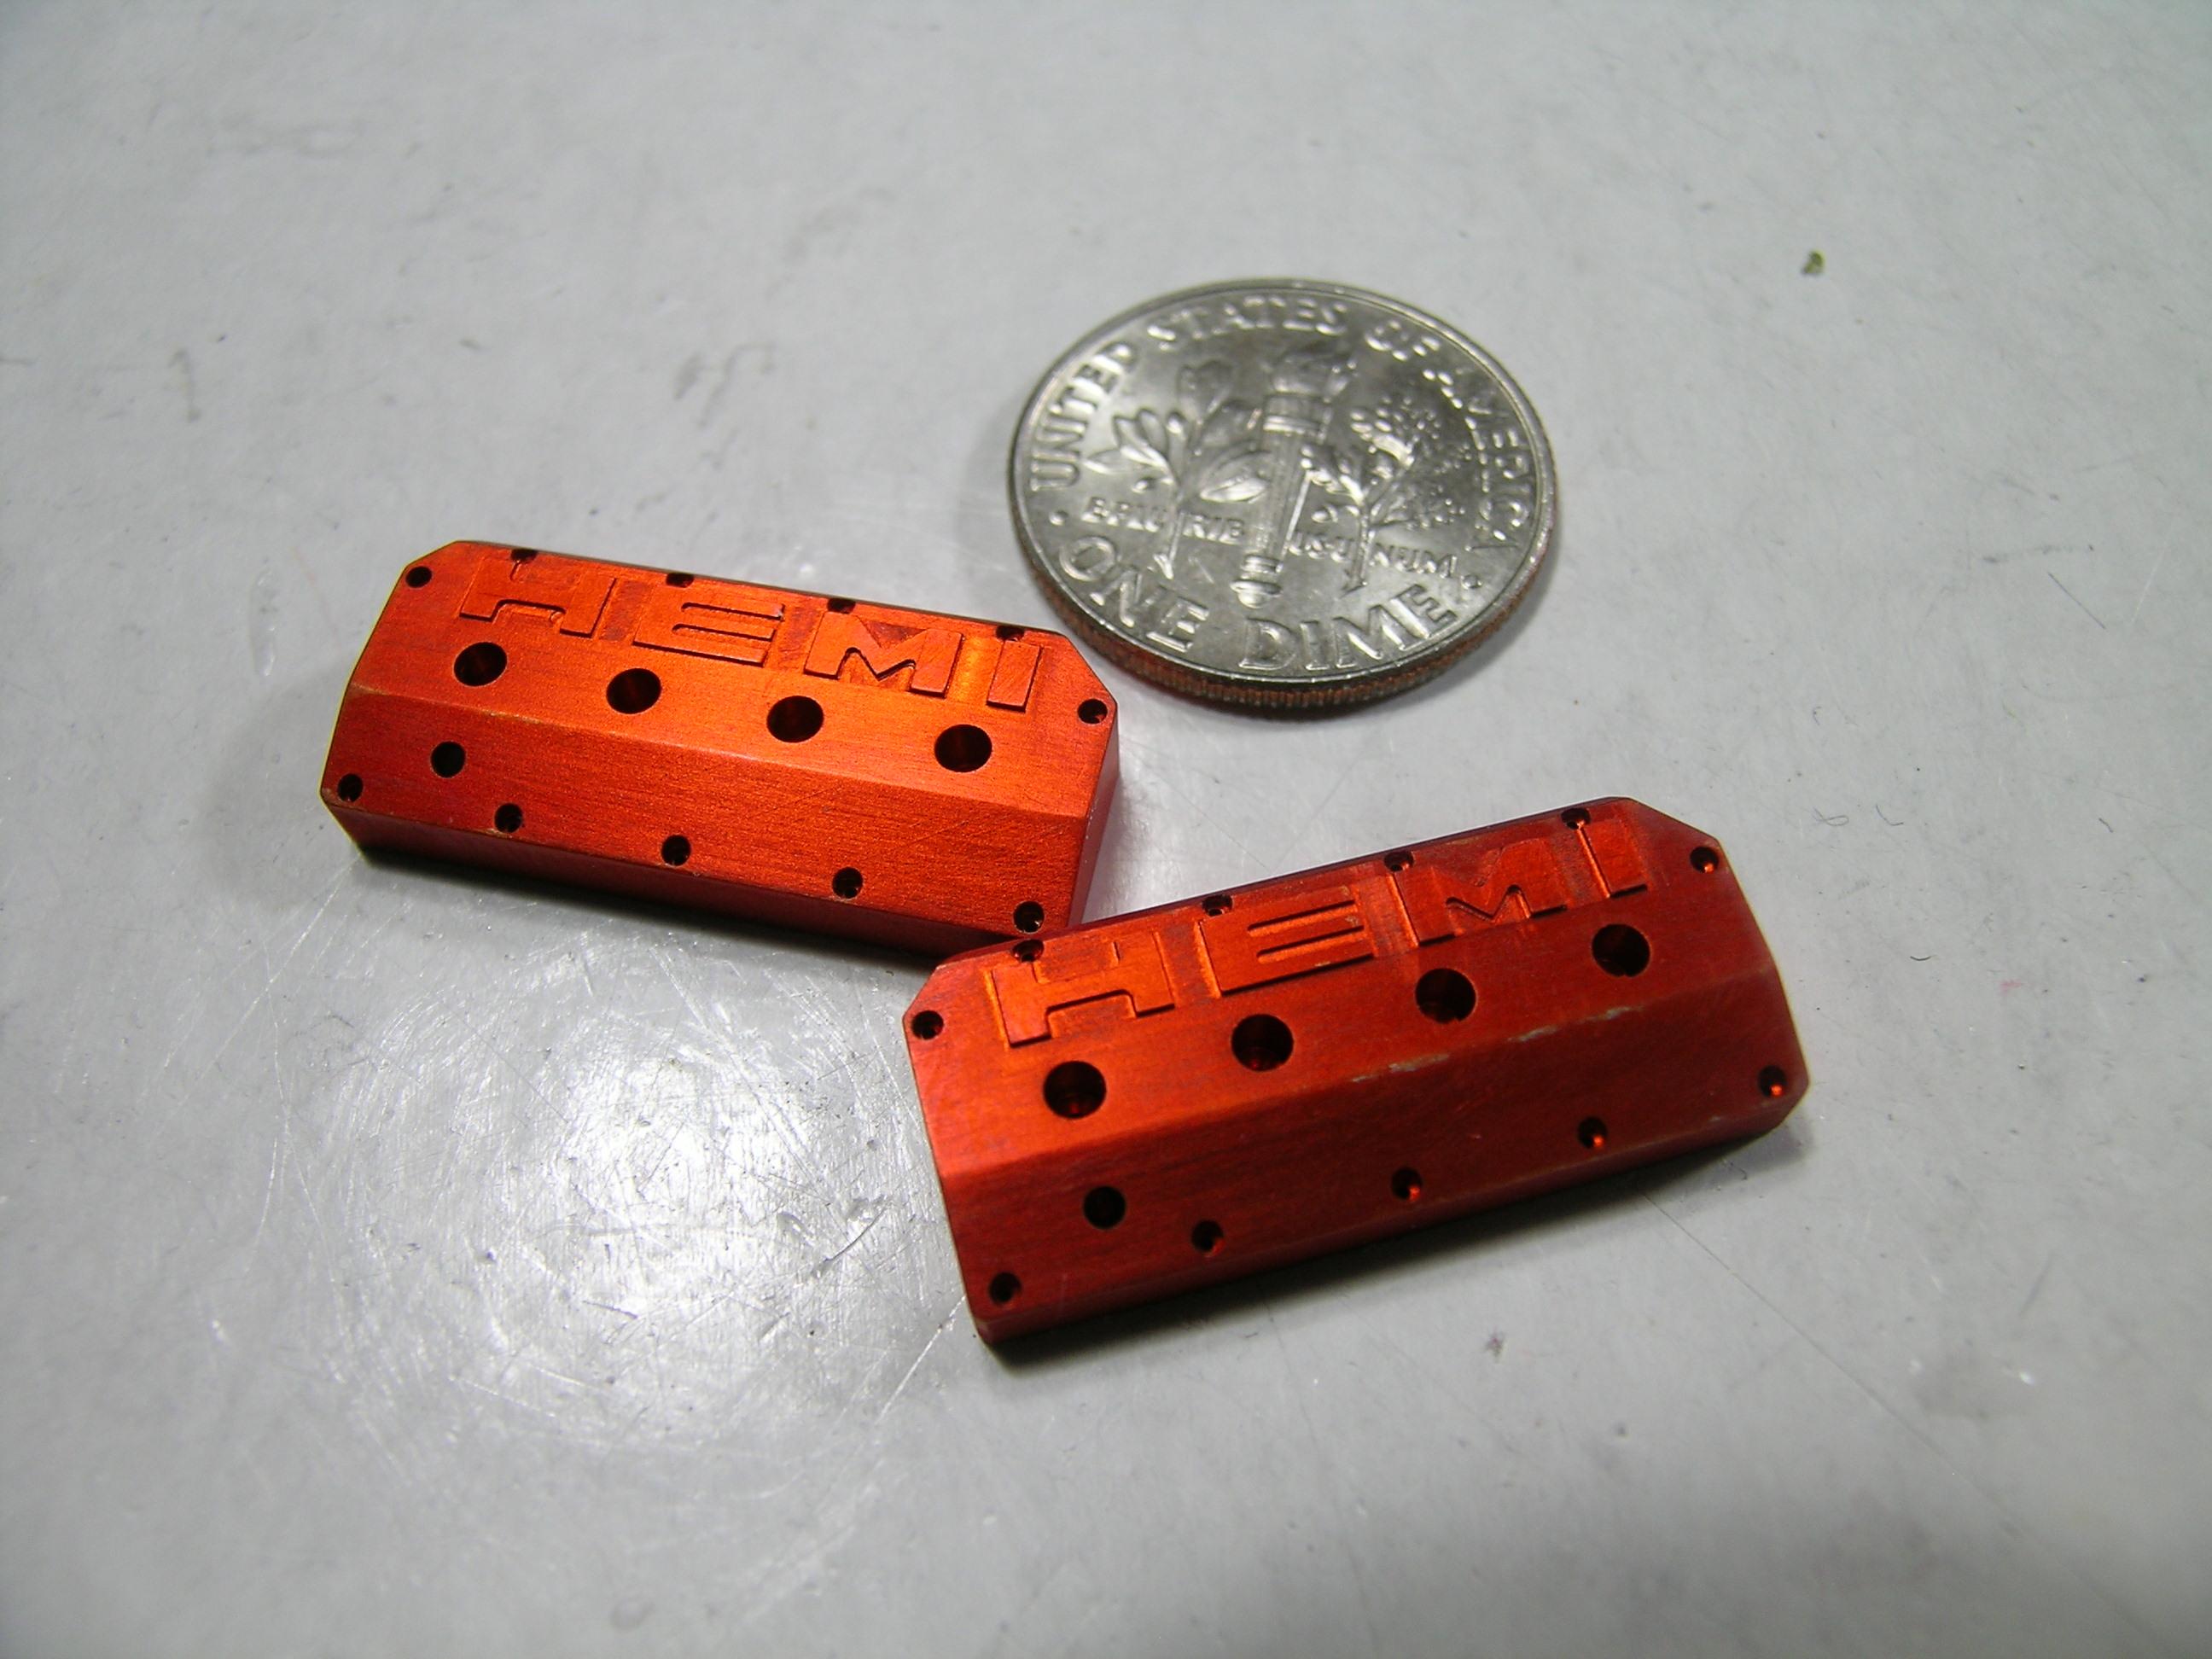
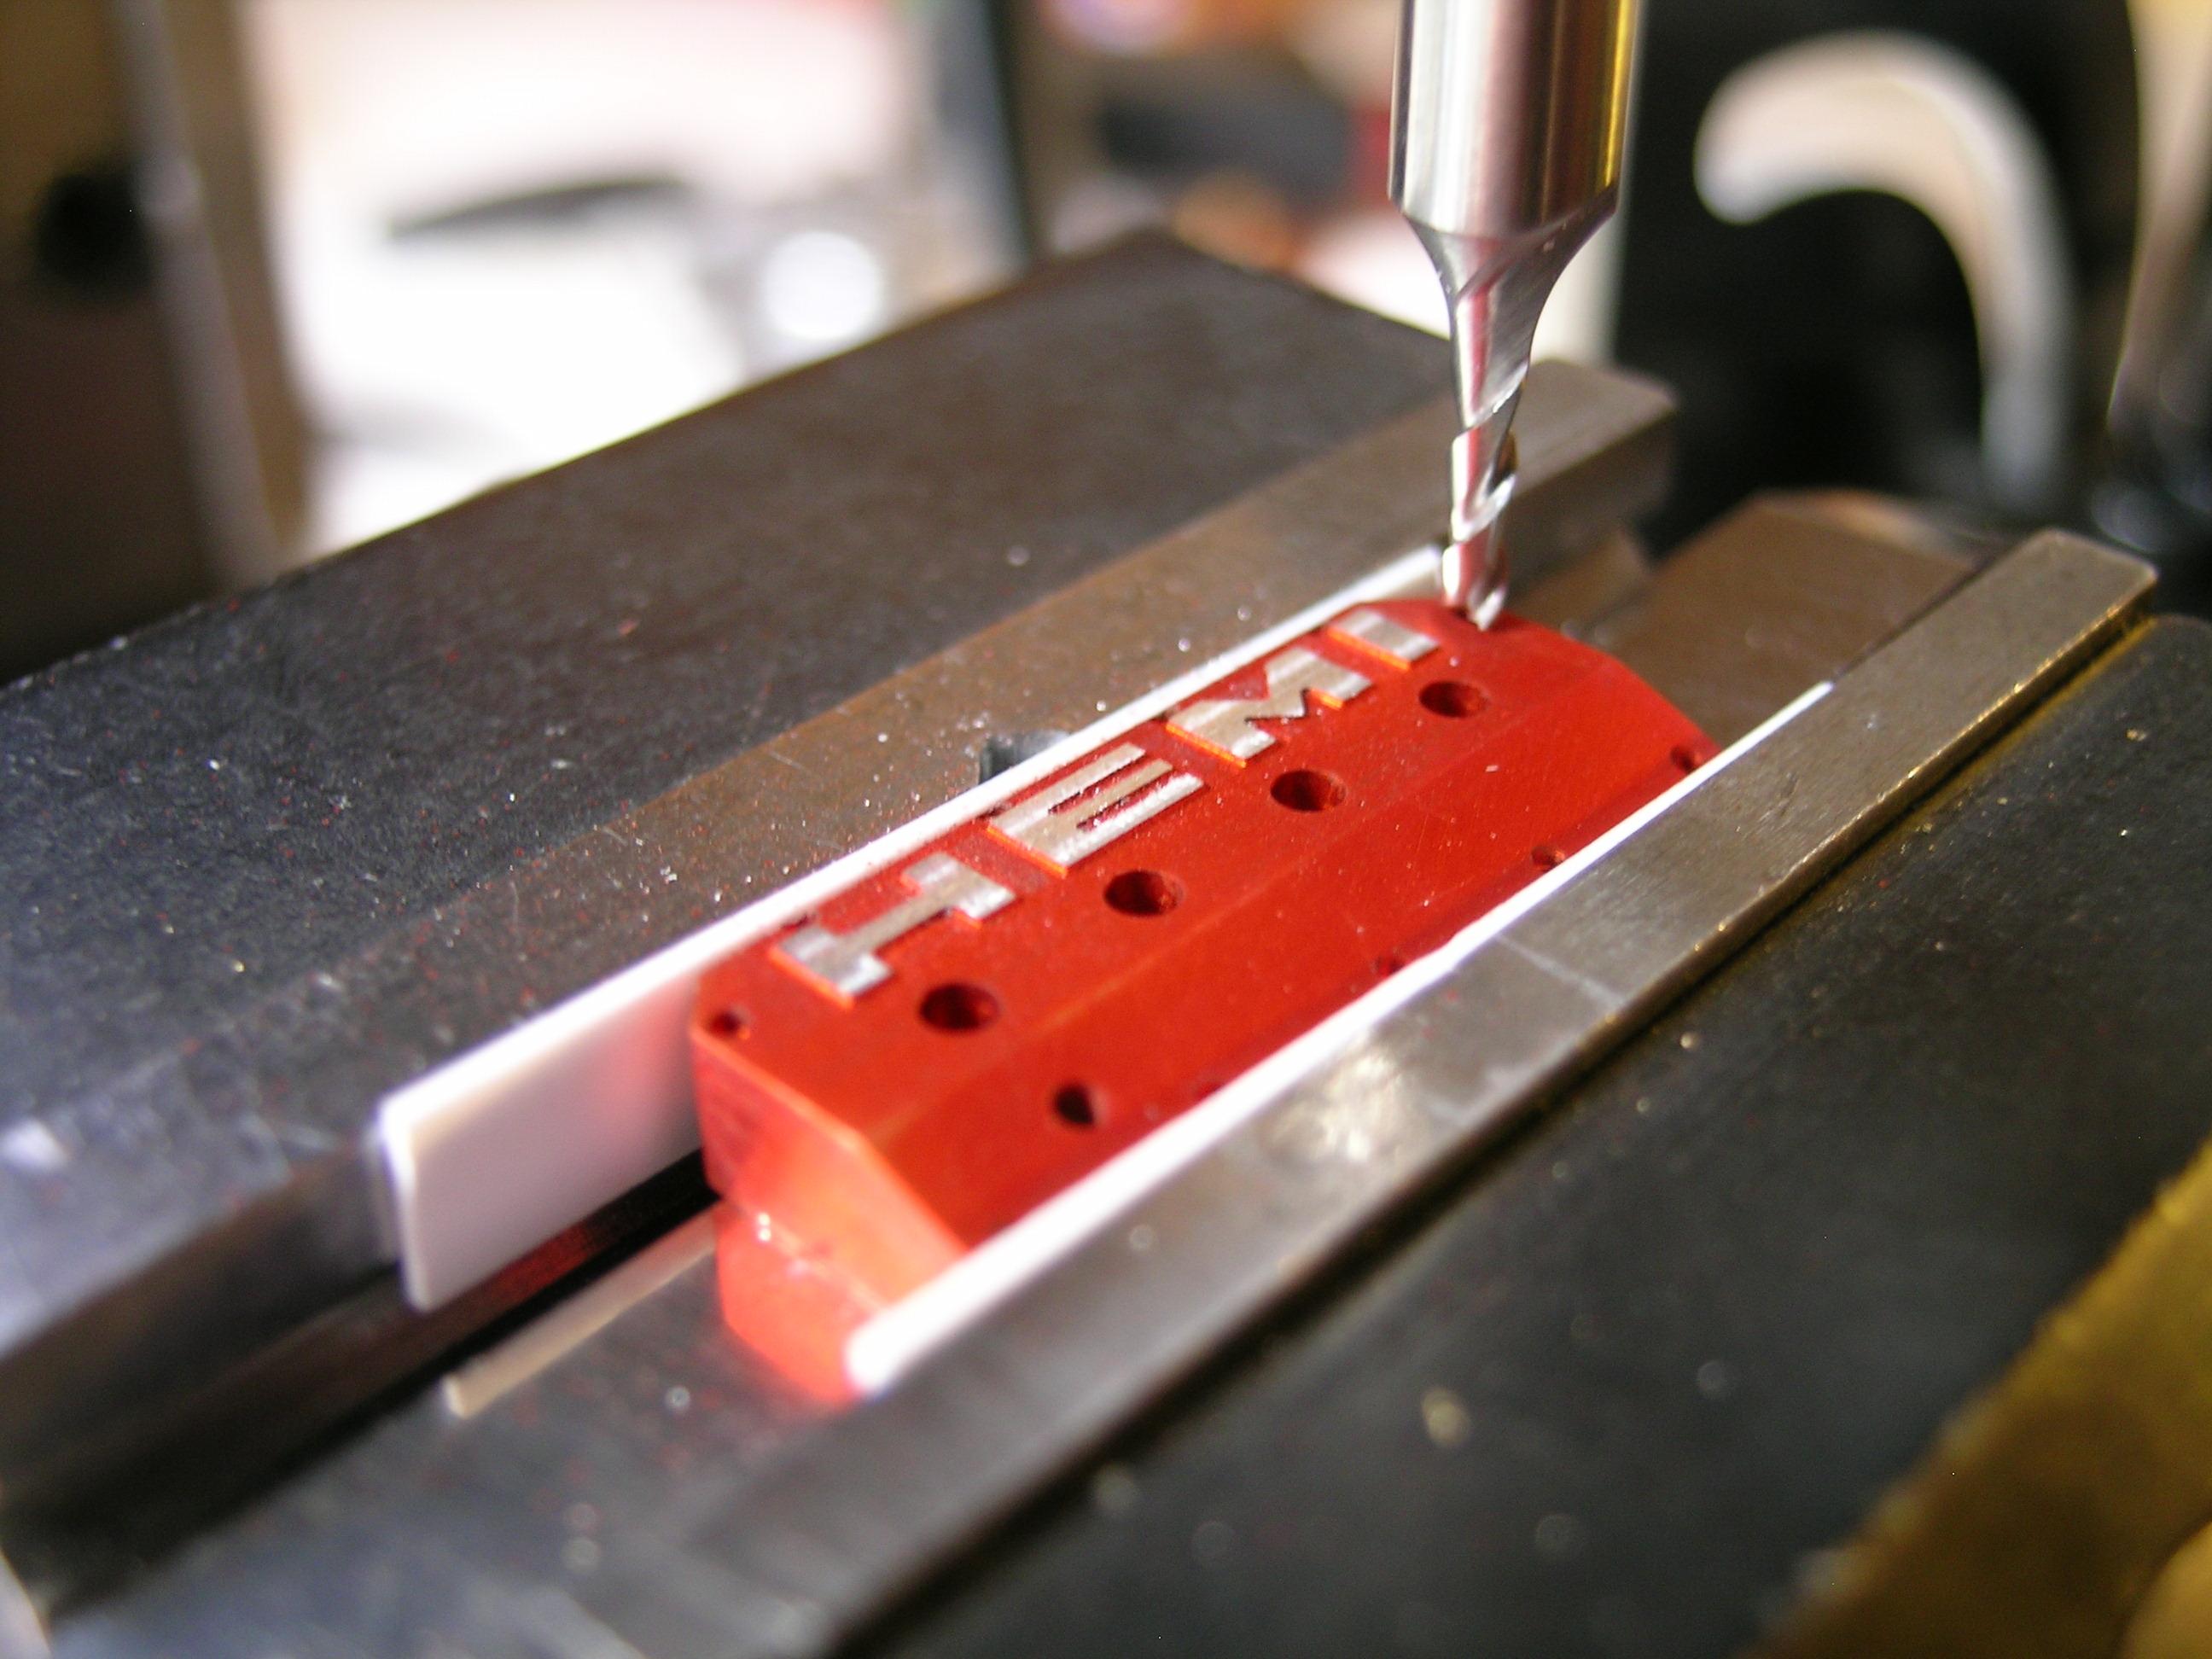
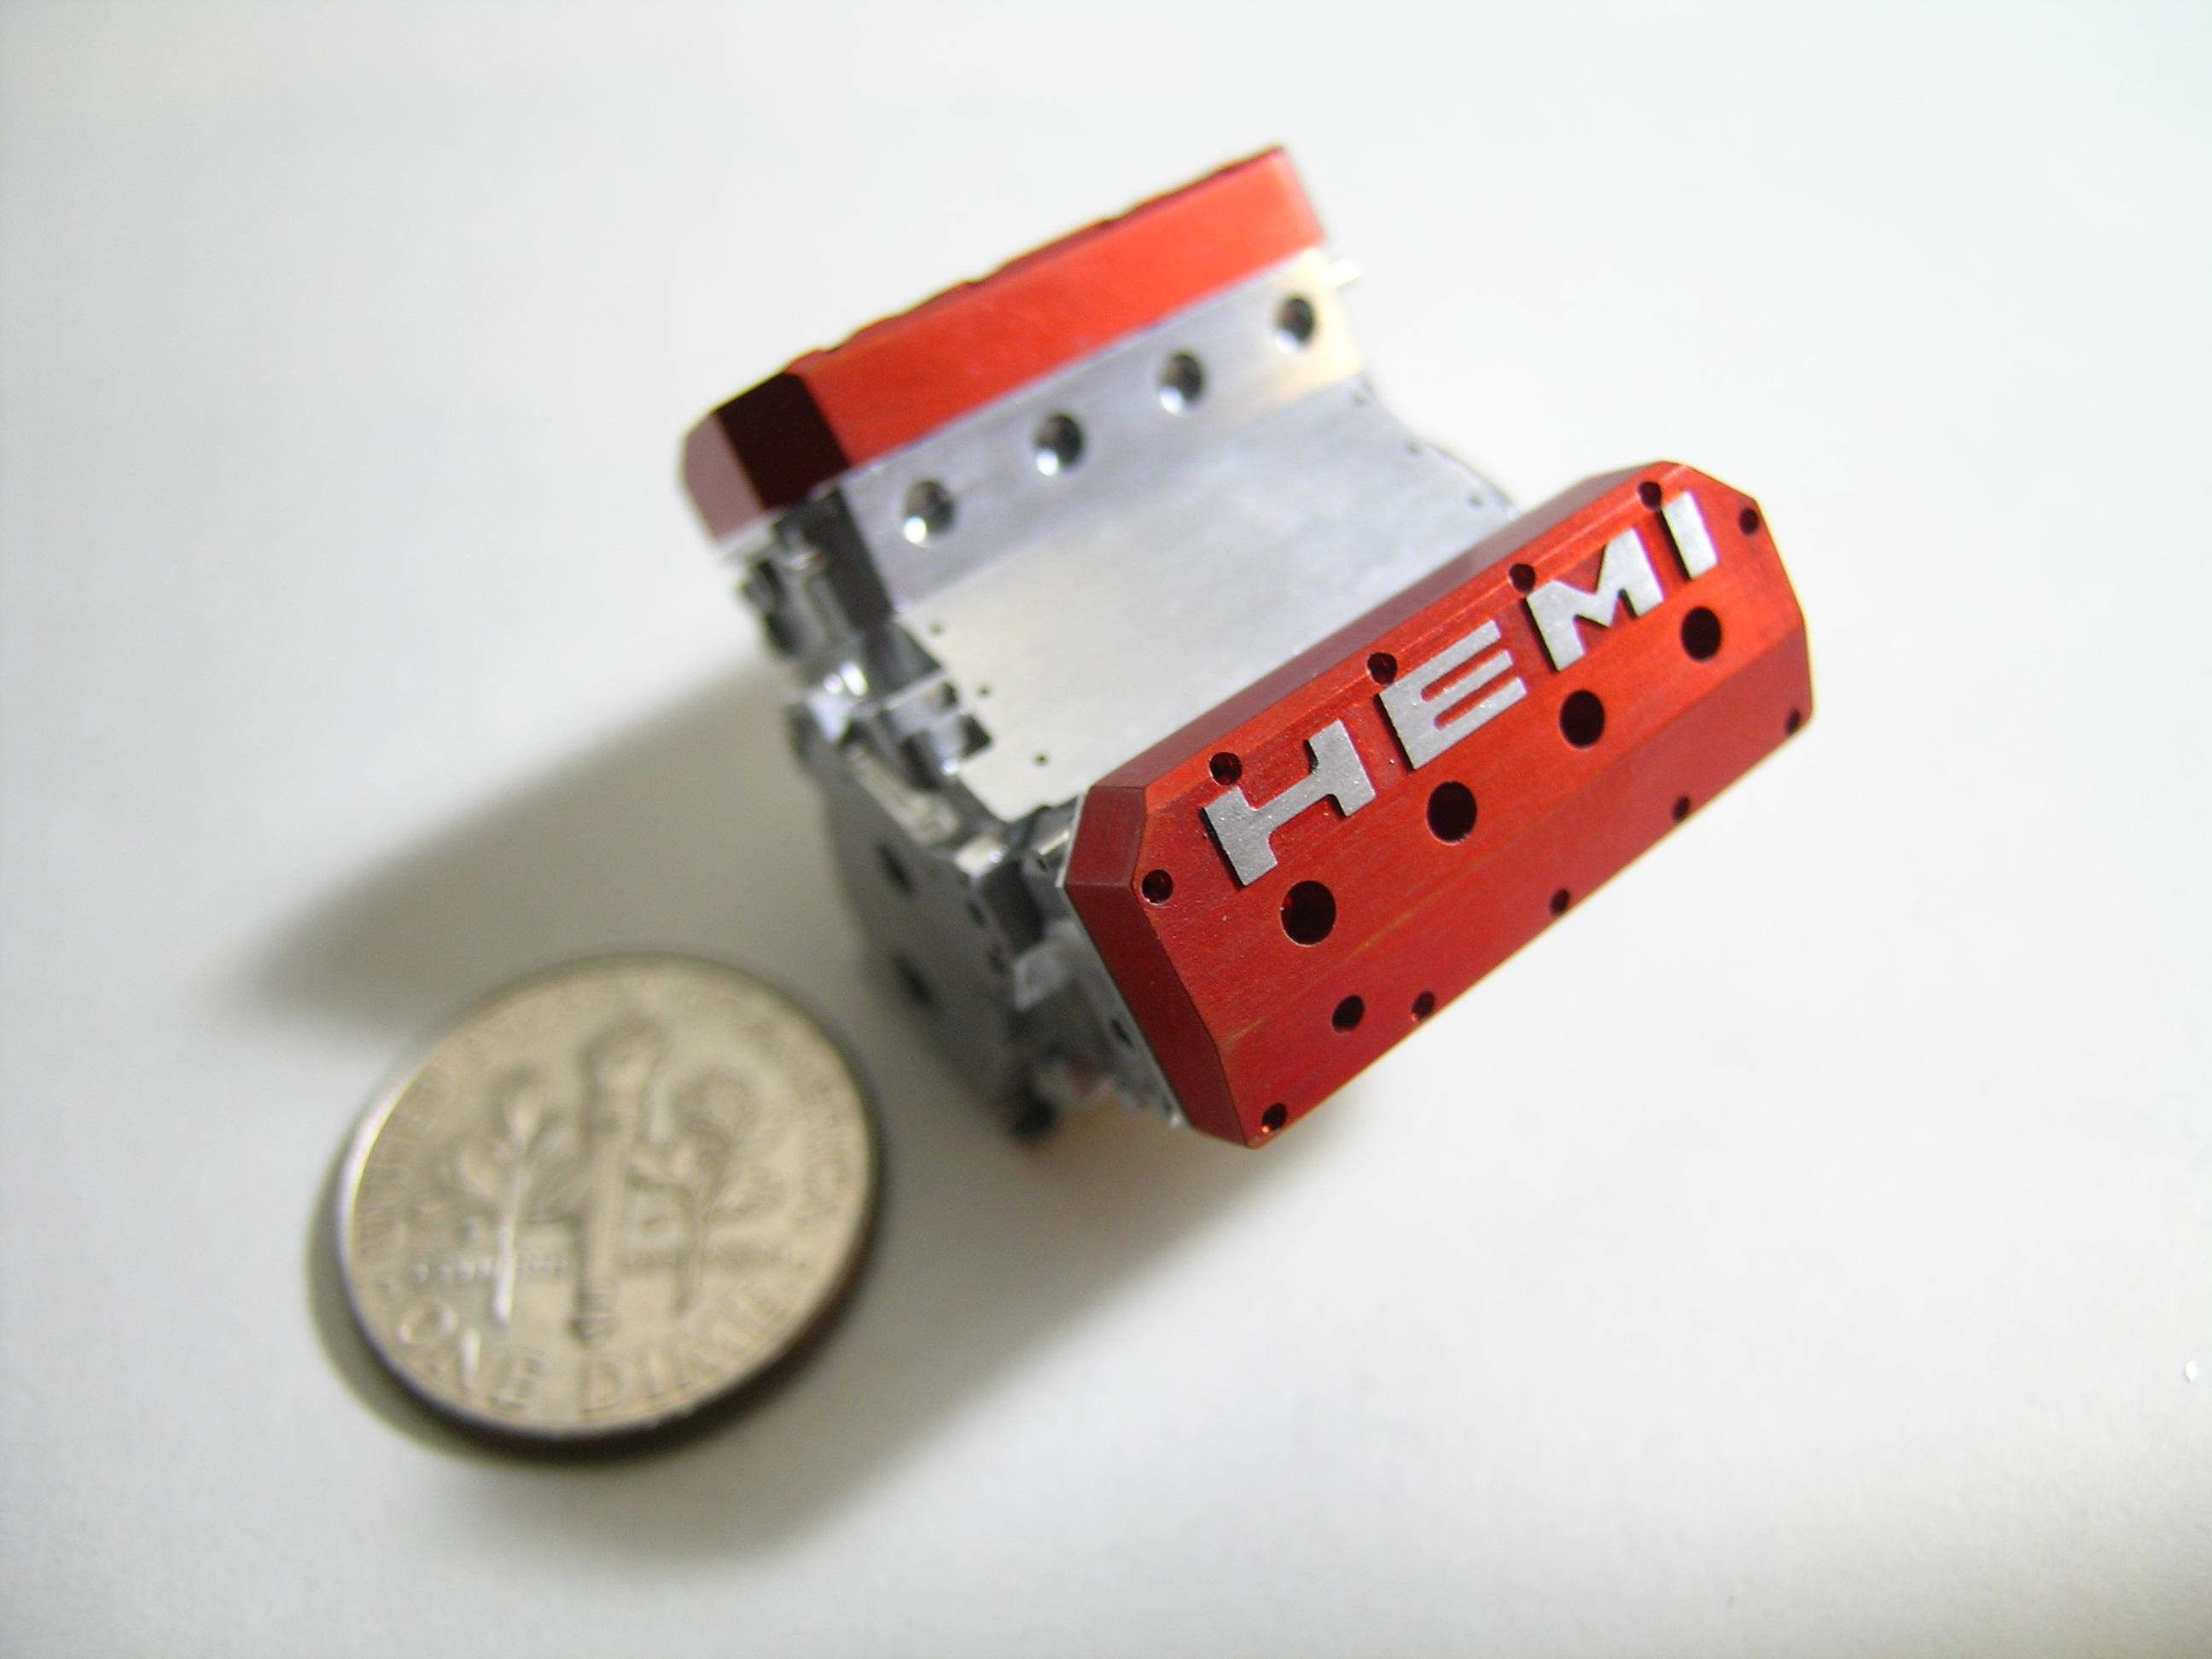
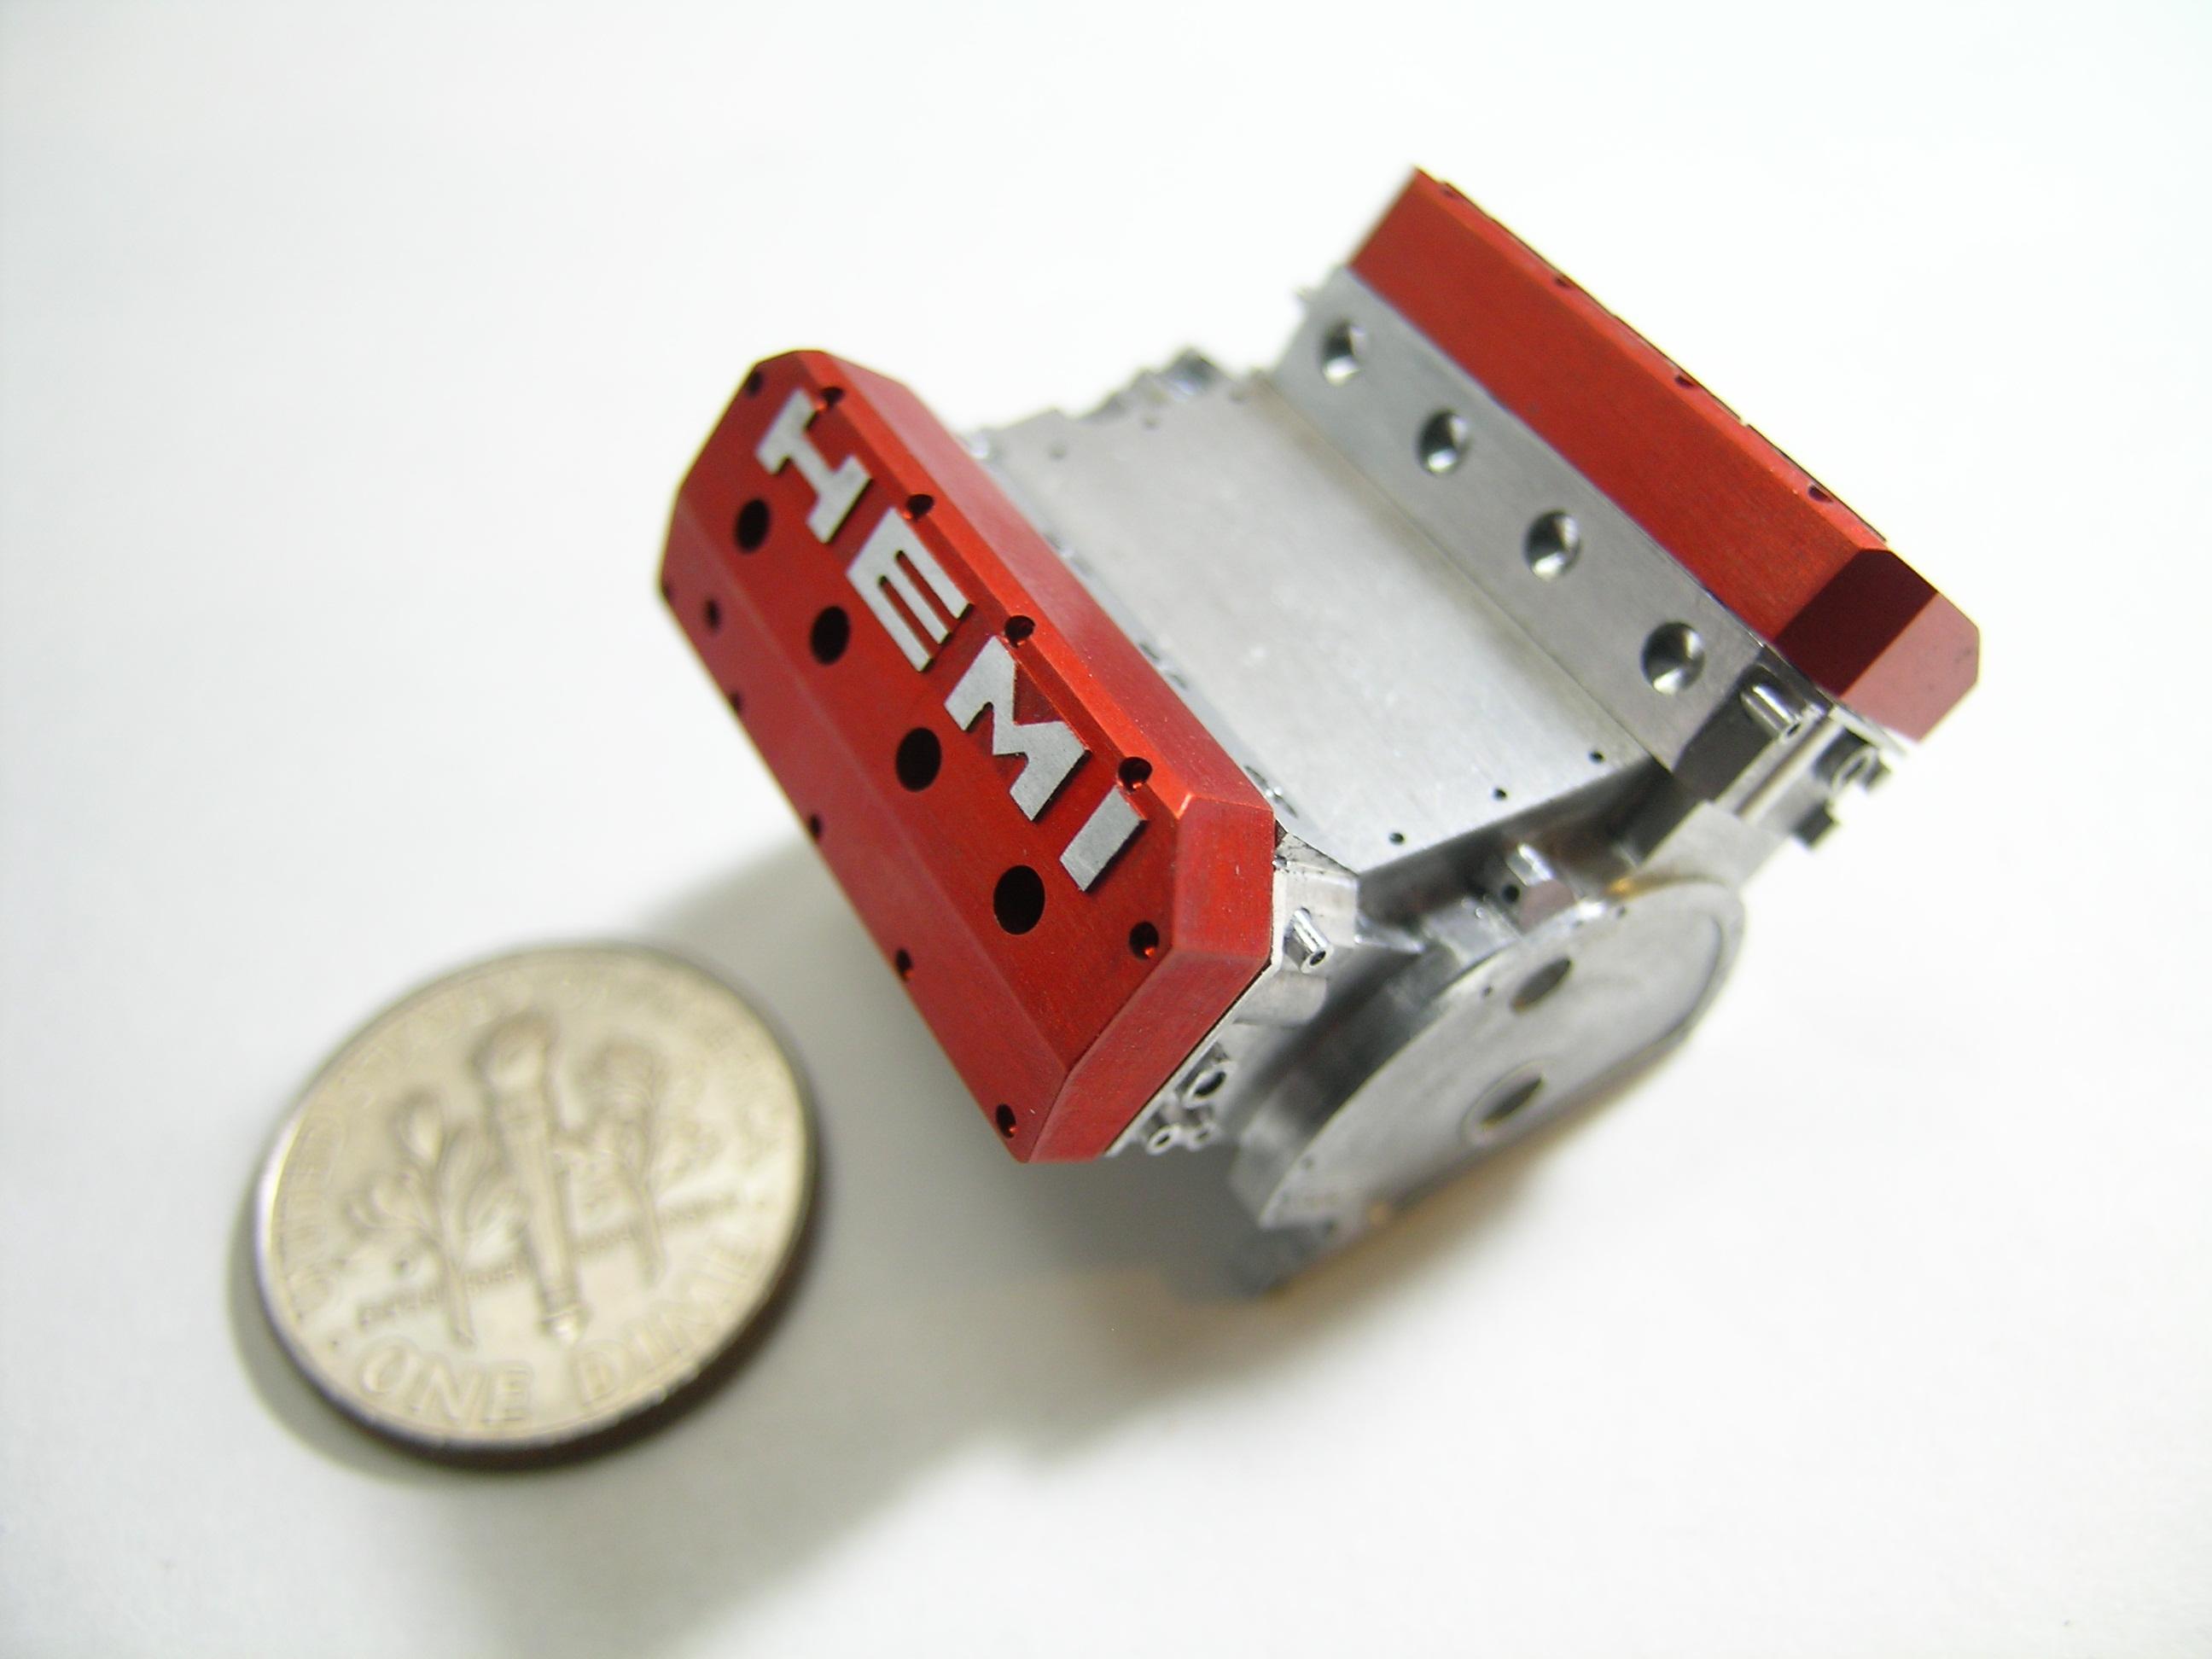
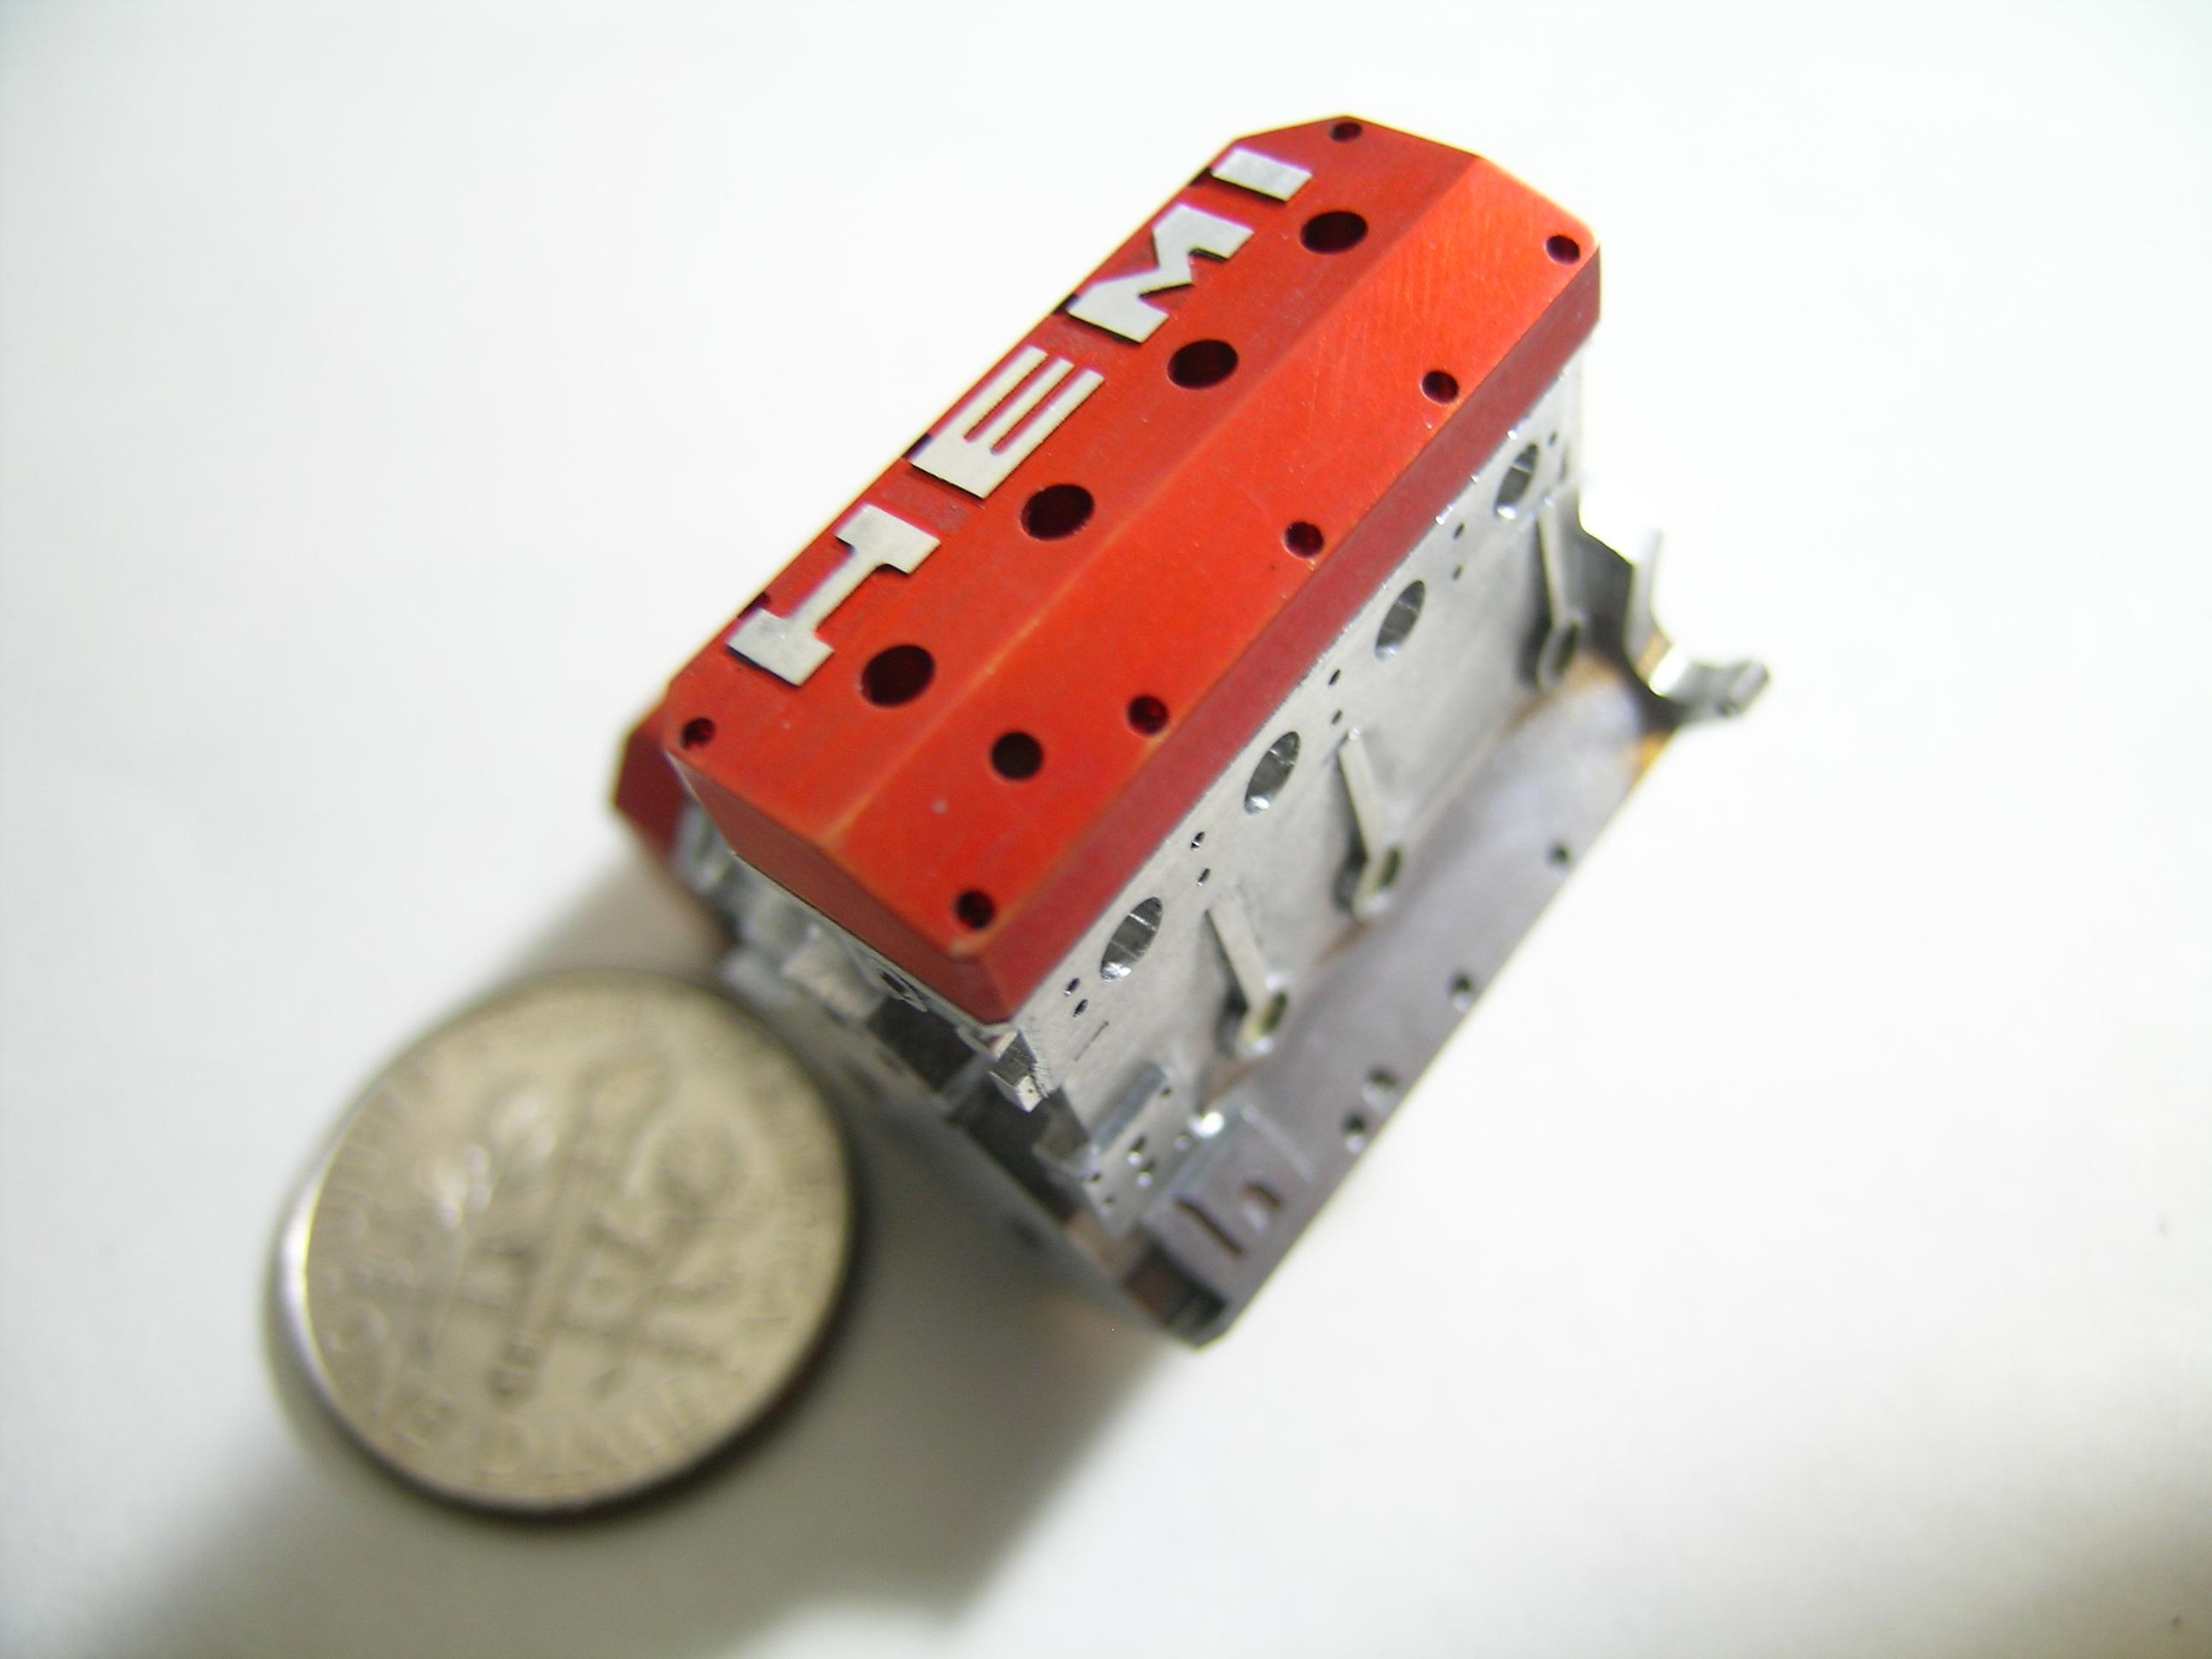
Hello everyone, Just another small update on the valve covers. I mentioned that I wanted to anodized them so I gave a shot yesterday afternoon and I must say that I'm pretty happy the way it ended. I was very nervous because it was my first try on final parts and there's no way (at least I don't know any) to reverse the process so it must be successful the first time. I had planned to sand the HEMI letters but the finish is so hard that I had to return to the milling to bring them back to the aluminum finish. The color and finish look way better in person but the pics will give you a good idea. As usual your comments are welcome! Take care to each of you, Francis
-
Jo-Han Maverick-Dyno Don's Ride
AmericanMuscleFan replied to mustang1989's topic in WIP: Drag Racing Models
Great improvement on the pedals set-up Joe! Even if they will not be very visible on the finished build, it's good for the soul to make that kind of modification and you did it the right way! Talking paint, I agree with you regarding Tamiya primer, it's pretty expensive but the best IMO as foundation for model paint. You heading the right direction my friend!!!