Beans
-
Posts
735 -
Joined
-
Last visited
Content Type
Profiles
Forums
Events
Gallery
Everything posted by Beans
-
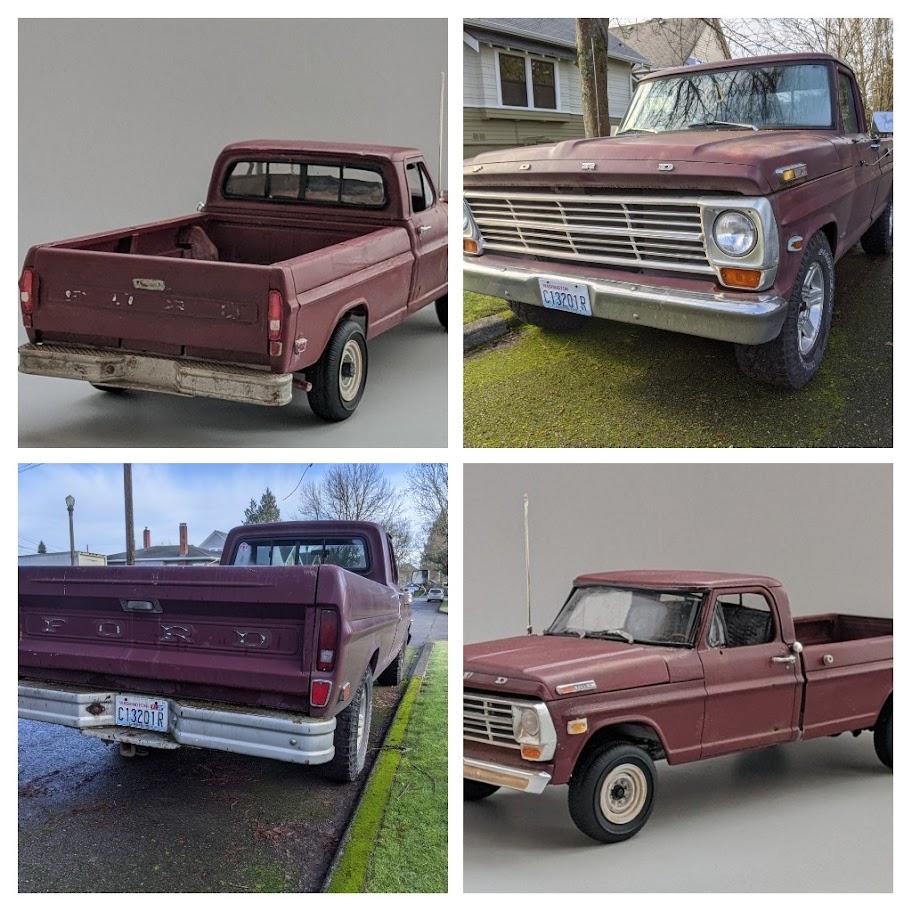
 Didn't put mirror on yet. The kit ones are wrong for my specific replication and haven't sourced new ones yet. Here are a couple comparison pictures from the model to the real thing .
-
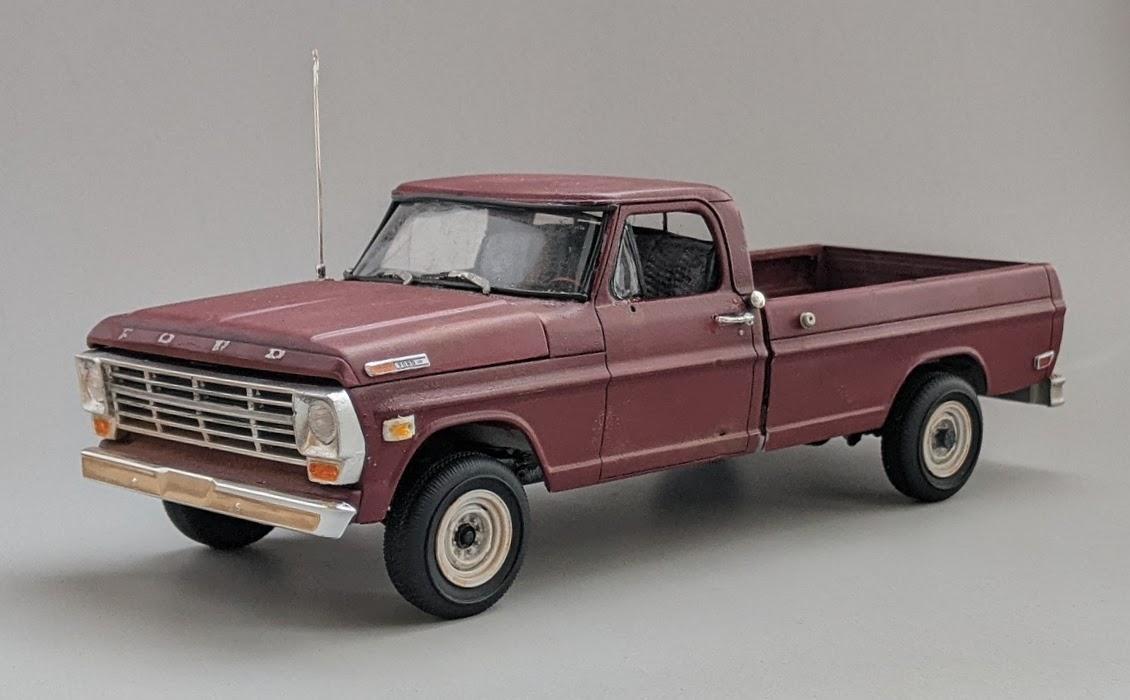
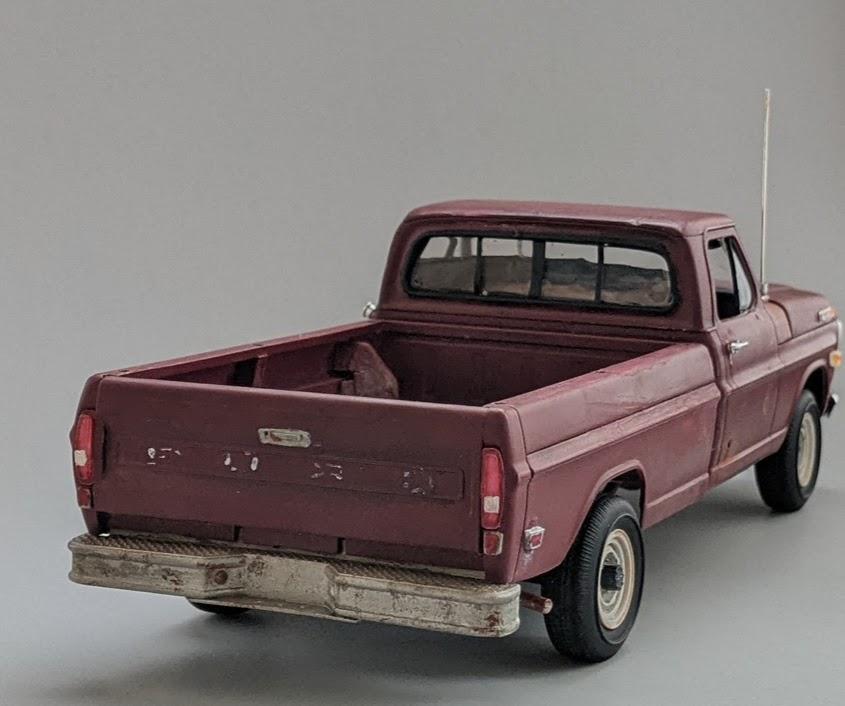
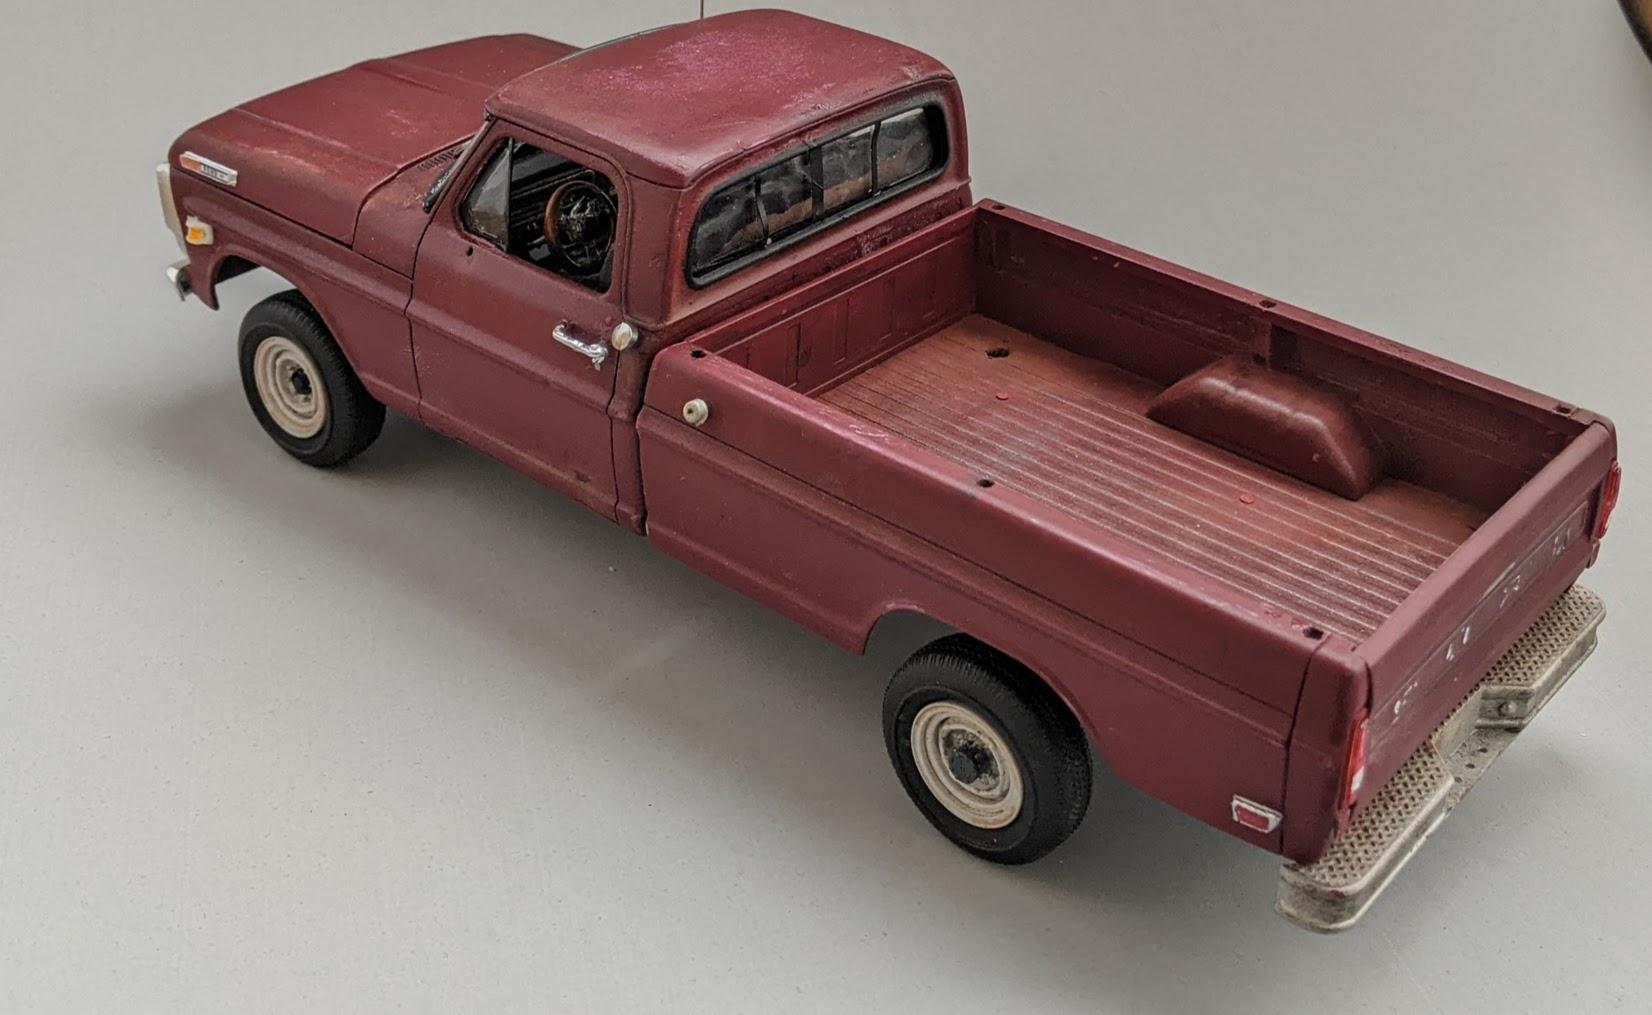
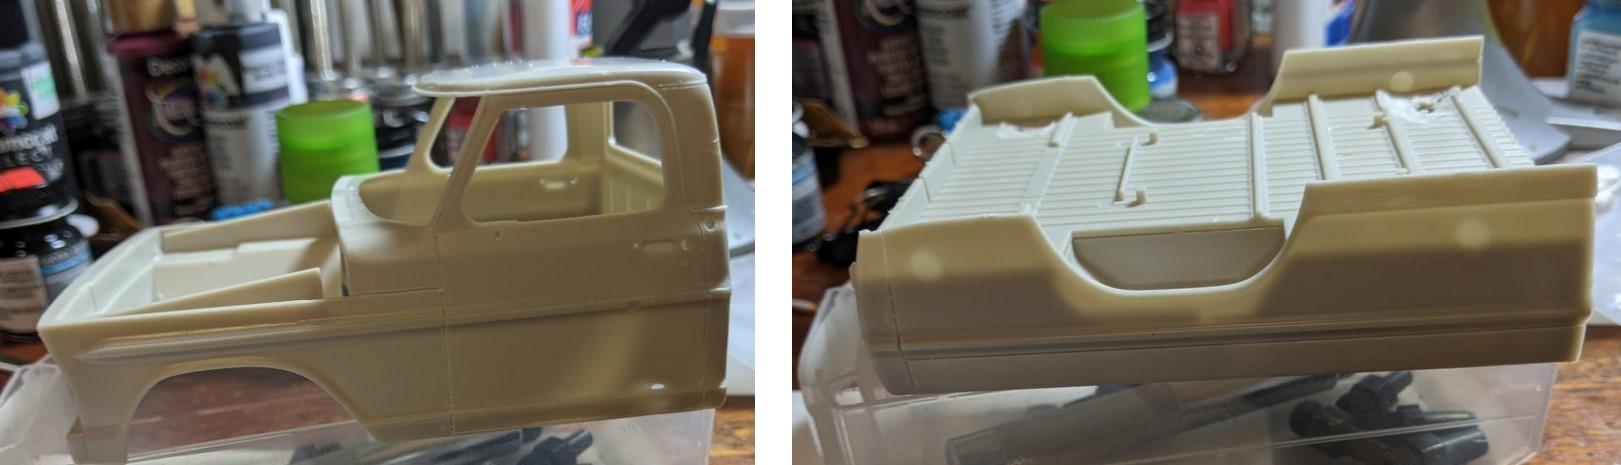
I plumbed and wired everything I cared to under the hood. On the outside I added the auxiliary fuel cap and fuel line cover to the bed interior. I also cut in the bed rail holes which are never present in truck models for some reason. I had to modify a 1968 grill with a wider center piece since I couldn't find a 1969 grill and modified the rear tail lights to fit without the chrome trim. Added front and rear side marker lights and an antenna and used the Olson Brothers rear bumper. I used some black tape to replicate the rear slider window and had to build a whole new windshield because I destroyed the kit one.
-
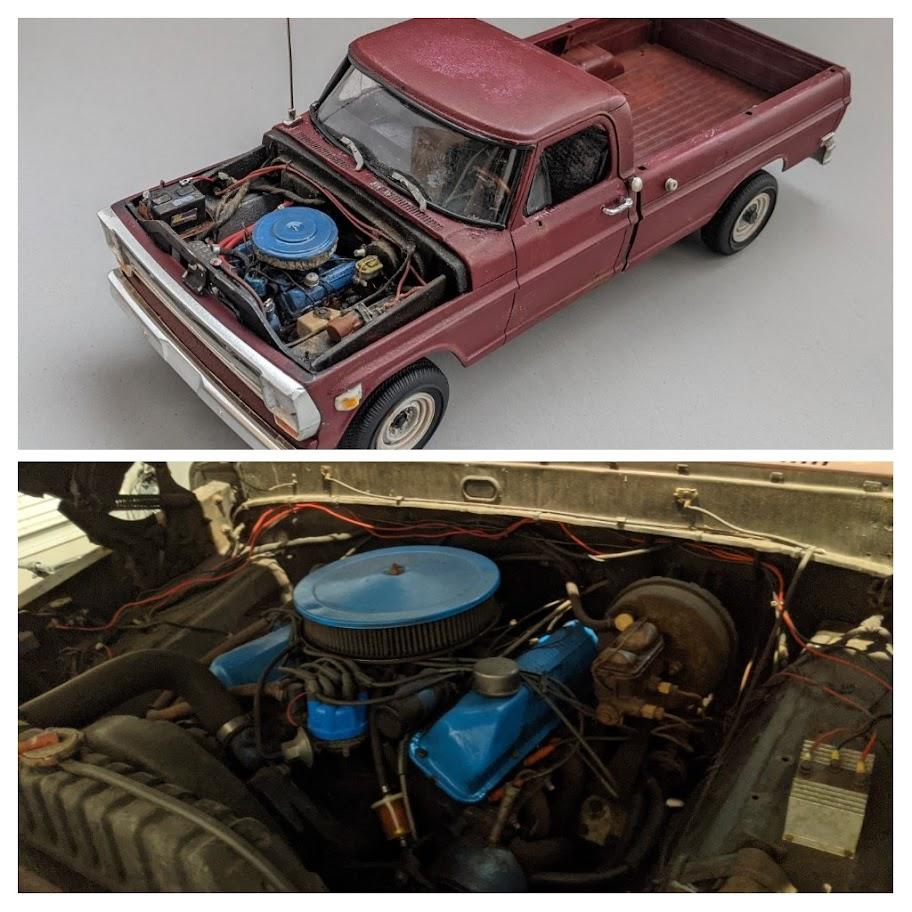
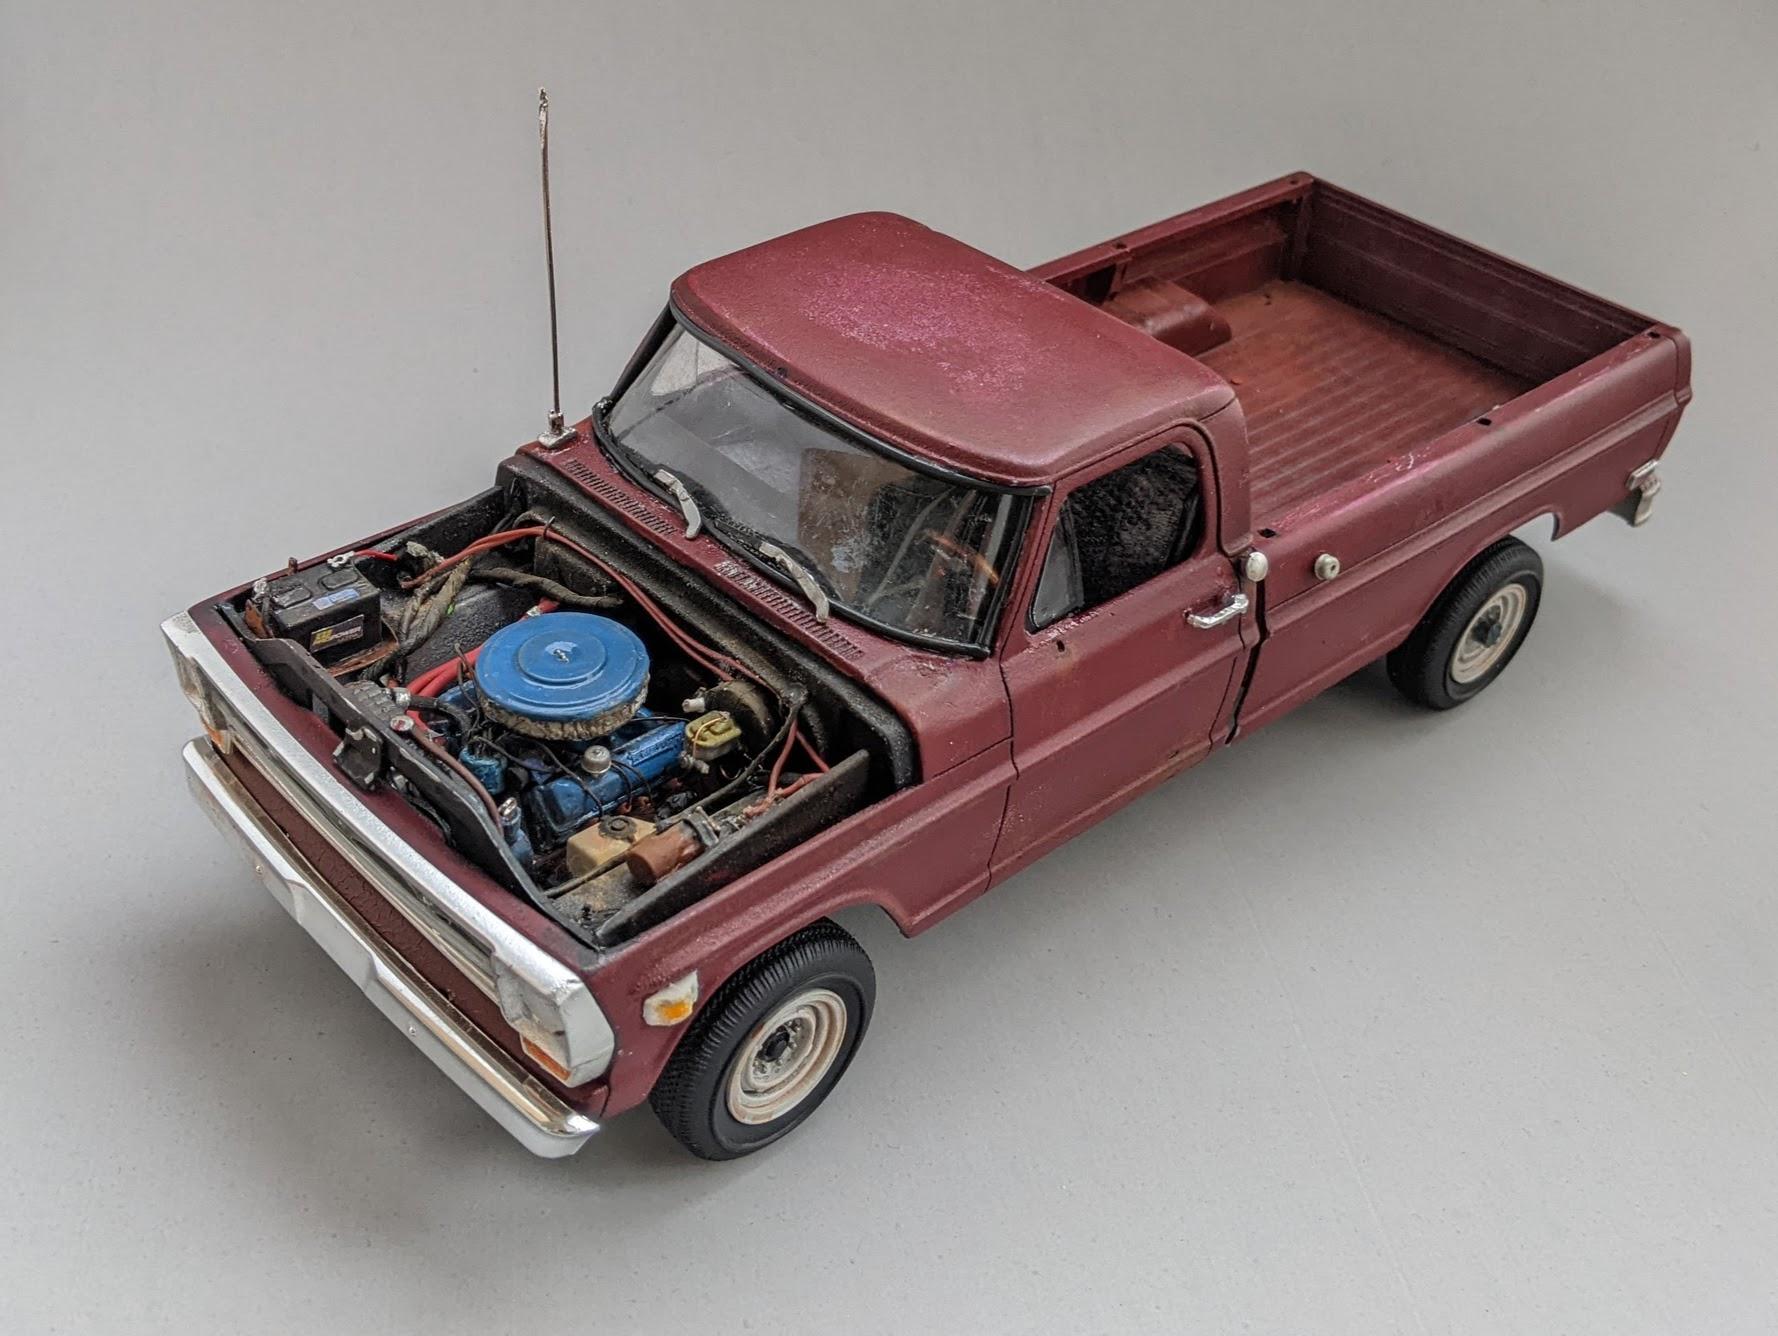
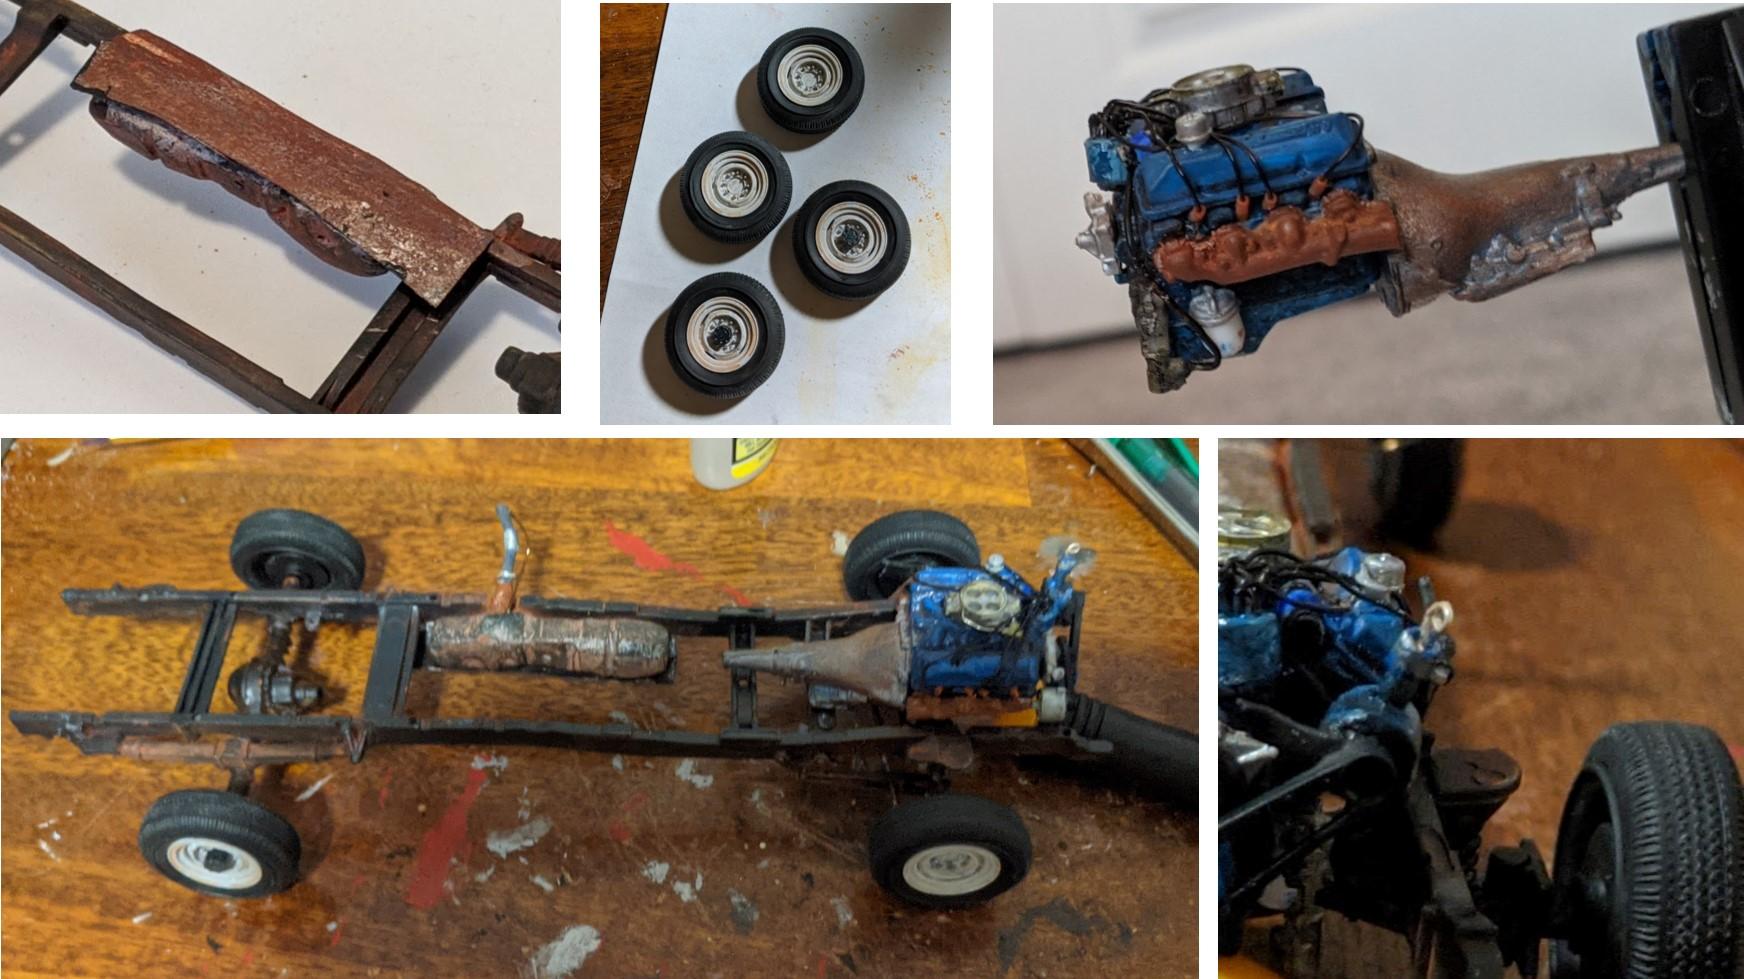
I used the B n L Resins Ford 390 engine to replace the kit engine but modified the kit air cleaner and used that. I used the front end from a 1971 kit for the front suspension and drive line and added an auxiliary fuel tank. Put the kit tires on a set of Scenes Unlimited 16" 8 lug wheels and changed from two into one to dual exhaust. Also scratch build a power steering pump and added that to the engine. I had to sand off the molded on trim on the body.
-
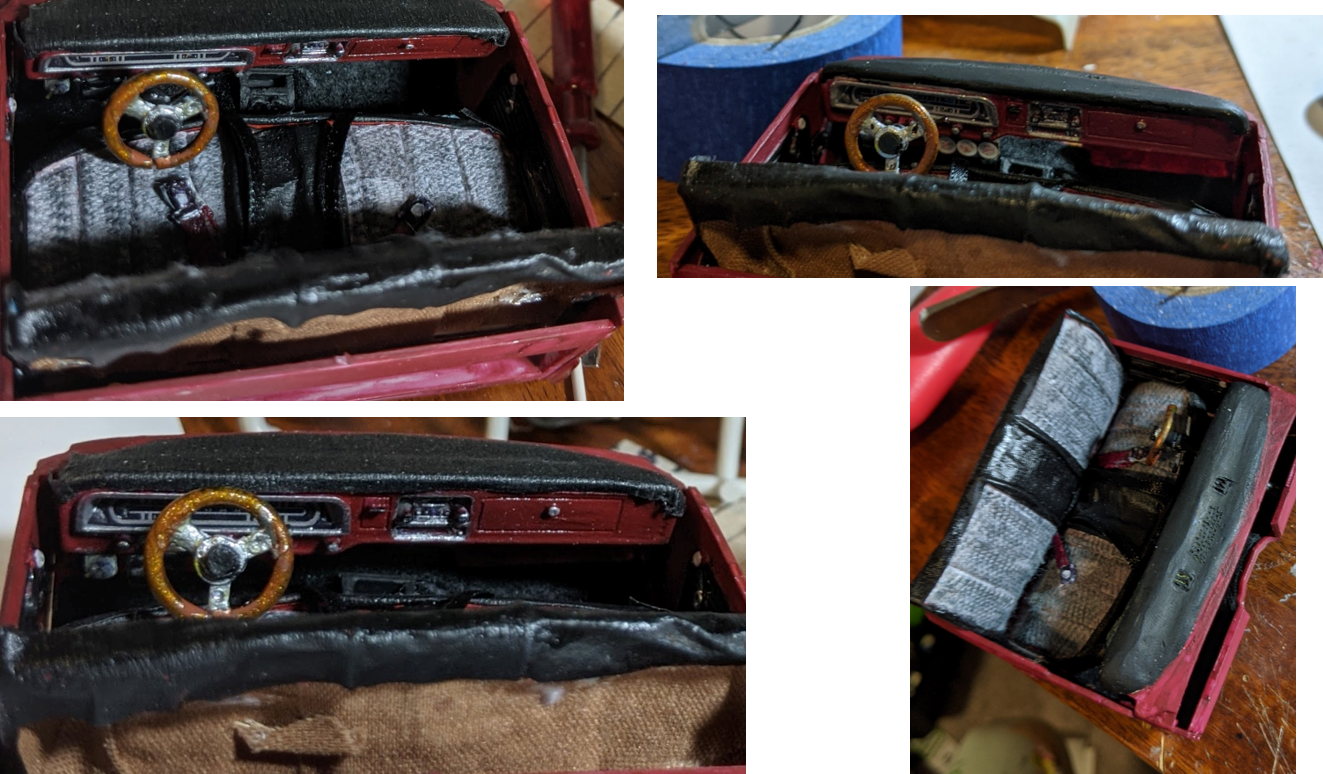
Replicated my 1:1 project truck with the 1/25 scale Moebius 1970 kit. Made some modifications along the way to turn it into my 1969 F250 On the inside I upholstered the seat, added a dash pad, scratch built steering wheel, added column shift (automatic trans) and turn signal lever, added triple gauges, trailer brake box and fuel tank selector switch. I built a floor storage box thing and changed clutch pedal to parking brake pedal. Finally I added seatbelts, a headliner and dome light.
-
Plasticville refurbished
Beans replied to Beans's topic in All The Rest: Motorcycles, Aviation, Military, Sci-Fi, Figures
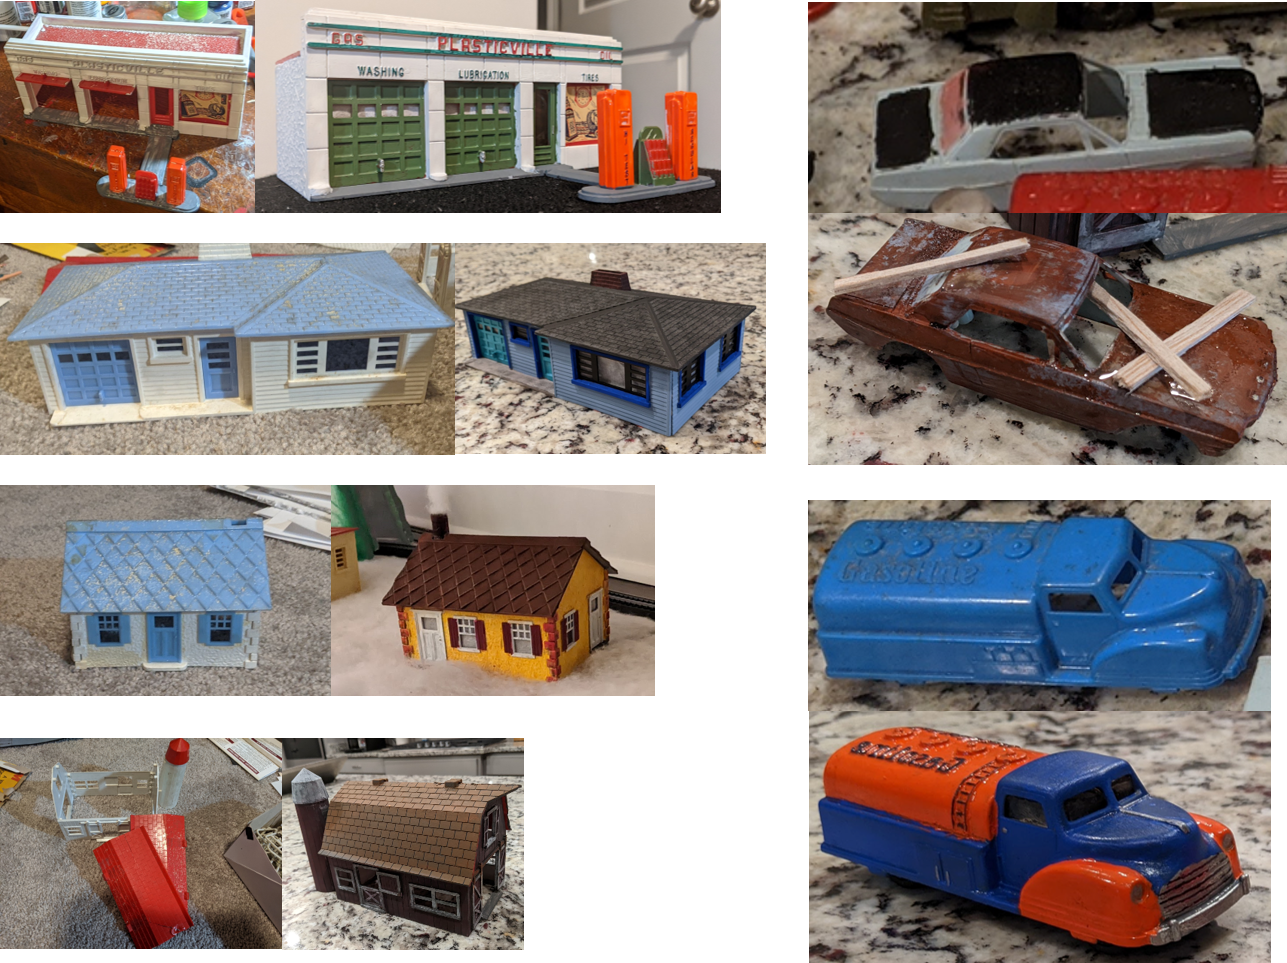
Thanks all! It was fun doing it. Although I have learned that I am not going to get into model railroading in this lifetime. I can't keep the thing on the tracks. And you could go broke just buying track alone.. I am somewhat obsessed now with the whole Plasticville village line. So many more things I never knew existed. I ended up adding a Diner and 5 & 10 cent store. Gonna have to find some 1/48 scale cars to build next... -
The interior mod looks great. At first glance I thought you used a truck tailgate. Those seats are going to look good.
-
The 2022 Cannonball Run Year of Birth Build Thread
Beans replied to disconovaman's topic in Community Builds
Count me in with the 70 1/2 Camaro.
-
Stuffed fables
Beans replied to kpnuts's topic in WIP: All The Rest: Motorcycles, Aviation, Military, Sci-Fi, Figures
I needed a break from a kit that was getting on my nerves and had the idea of doing some figure painting. That is an art unto itself.... Remember these basic steps and you should be good to go. 1. prime 2. base coat 3. wash 4. highlight. The repeat the shadowing and highlight as much as possible. And Youtube is your best friend..although it can also be immensely overwhelming. -
Inherited some Plasticville pieces from my Grandfather years ago. They sat for a long time. This year while helping a friend who just lost her dad, clean out his house, I was given three model train sets. Figured this was as good a year as any to fix up the old village pieces and have a while under the tree scene for Christmas. These are some of the before and after photos.
-
Looking awesome!! This is similar to a project I have planned so definitely following.
-
What did you see on the road today?
Beans replied to Harry P.'s topic in General Automotive Talk (Trucks and Cars)
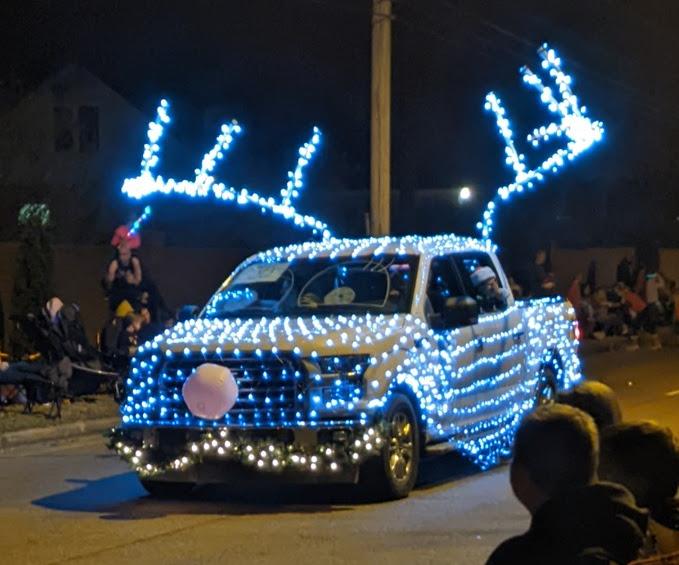
Christmas parade....
-
Resin accessories wanted, where to buy them?
Beans replied to Oldmopars's topic in Model Building Questions and Answers
+1 or Etsy has some. -
AMT '67 Mustang Fastback-Now in Under Glass Section
Beans replied to mustang1989's topic in WIP: Model Cars
Looking awesome! Glad to see you back in action. -
2022 Cannonball Group Build theme suggestion thread
Beans replied to Fat Brian's topic in Community Builds
Nice find!! That is going to be really cool. Can't wait to see it built. -
2022 Cannonball Group Build theme suggestion thread
Beans replied to Fat Brian's topic in Community Builds
Ahhhhh. gotcha. -
2022 Cannonball Group Build theme suggestion thread
Beans replied to Fat Brian's topic in Community Builds
Noticed you hadn't mentioned this one of the 70 lot.
-
2022 Cannonball Group Build theme suggestion thread
Beans replied to Fat Brian's topic in Community Builds
I thought of that song too when that theme was being thrown around. Would be cool to see you bring that to life. Maybe use the 1970 galaxie taxi kit -
What Did You Accomplish Today? (Model Car Work)
Beans replied to Snake45's topic in General Automotive Talk (Trucks and Cars)
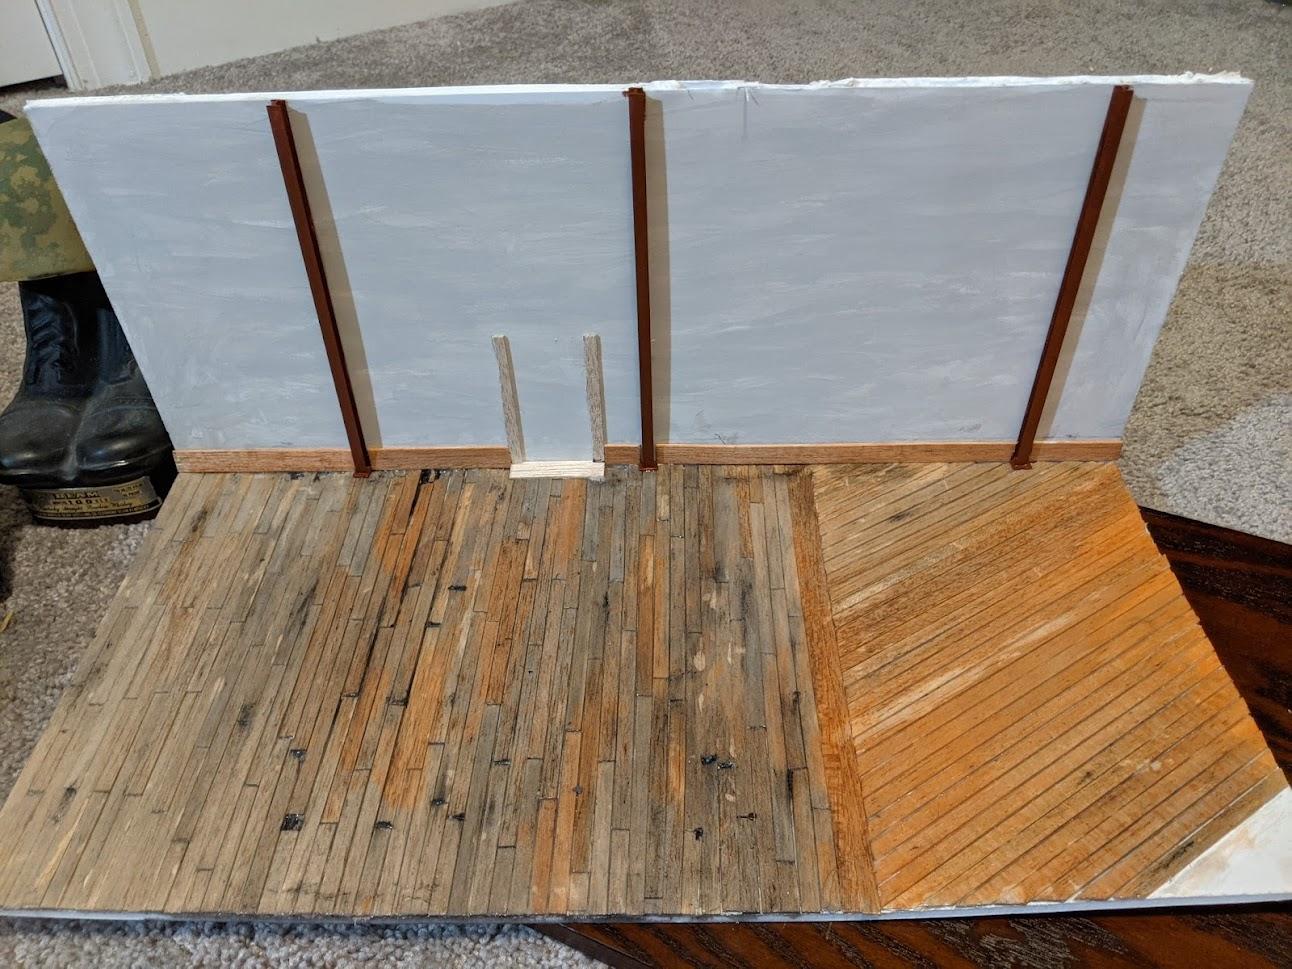
Made some progress on my display diorama. Wouldn't ya know I ran just short on wood....
-
The Official EBay Discussion Thread
Beans replied to iamsuperdan's topic in General Automotive Talk (Trucks and Cars)
I noticed that within the last month or so, the average price for models and kits has increased. It almost seems like everybody worked together. I think a lot of it has to do with the cost of shipping now. The idea of listing something at less than the price to ship, I believe, doesn't psychologically sit well with sellers. -
2022 Cannonball Group Build theme suggestion thread
Beans replied to Fat Brian's topic in Community Builds
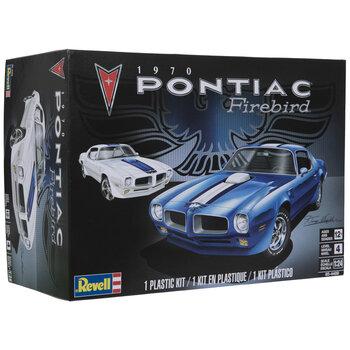
Well I think I finally found my inspiration Another 1970 birth year here. There is always a bunch of 1970 models available. I struggled with coming up with something new and inspiring to me. Definitely found it. Lets see if I can turn this: Into something like this:
-
2022 Cannonball Group Build theme suggestion thread
Beans replied to Fat Brian's topic in Community Builds
Yeah of birth...hmmmmm. I'm in although I don't know quite yet what I will be building. Lots of options but most have been done to death. -
Looks great!! nicely done
-
Exactly that. If you are going to be spending that time building and your are building for the sake and enjoyment of the build then your time spent is a wash. So anything you make above what you spent for materials is profit. This, of course means you have to watch your overhead. Limit the amount of aftermarket stuff and really watch what you spend on paint and such. You may end up with enough to cover the kit and materials and add a couple bucks. I also do a lot of (or did a lot) of leatherworking and made a good try of turning that hobby into profits. It didn't work out in the end. I was making things that had no interest to me and starting to count every mm of thread and oz of dye. I did make money. Not enough to live from, but everything I made I came away with more than I put in (including time). But I got very burned out very quickly. What was once fun and relaxing lost it's appeal rapidly. And trust me, no matter how great the product, there is always at least one person who will complain about it and a lot more who do not understand "hand made" and wonder why they can't get something custom for the same price they can find from China. If you can keep it a side gig and still enjoy the hobby, then awesome!! I applaud you. But once the business portion takes over watch out.
-
X2. leather punches work great. Just be sure to have something underneath so you don't damage the end all to heck. A small leather cutting board or stamping board works well.
-
What Did You Accomplish Today? (Model Car Work)
Beans replied to Snake45's topic in General Automotive Talk (Trucks and Cars)
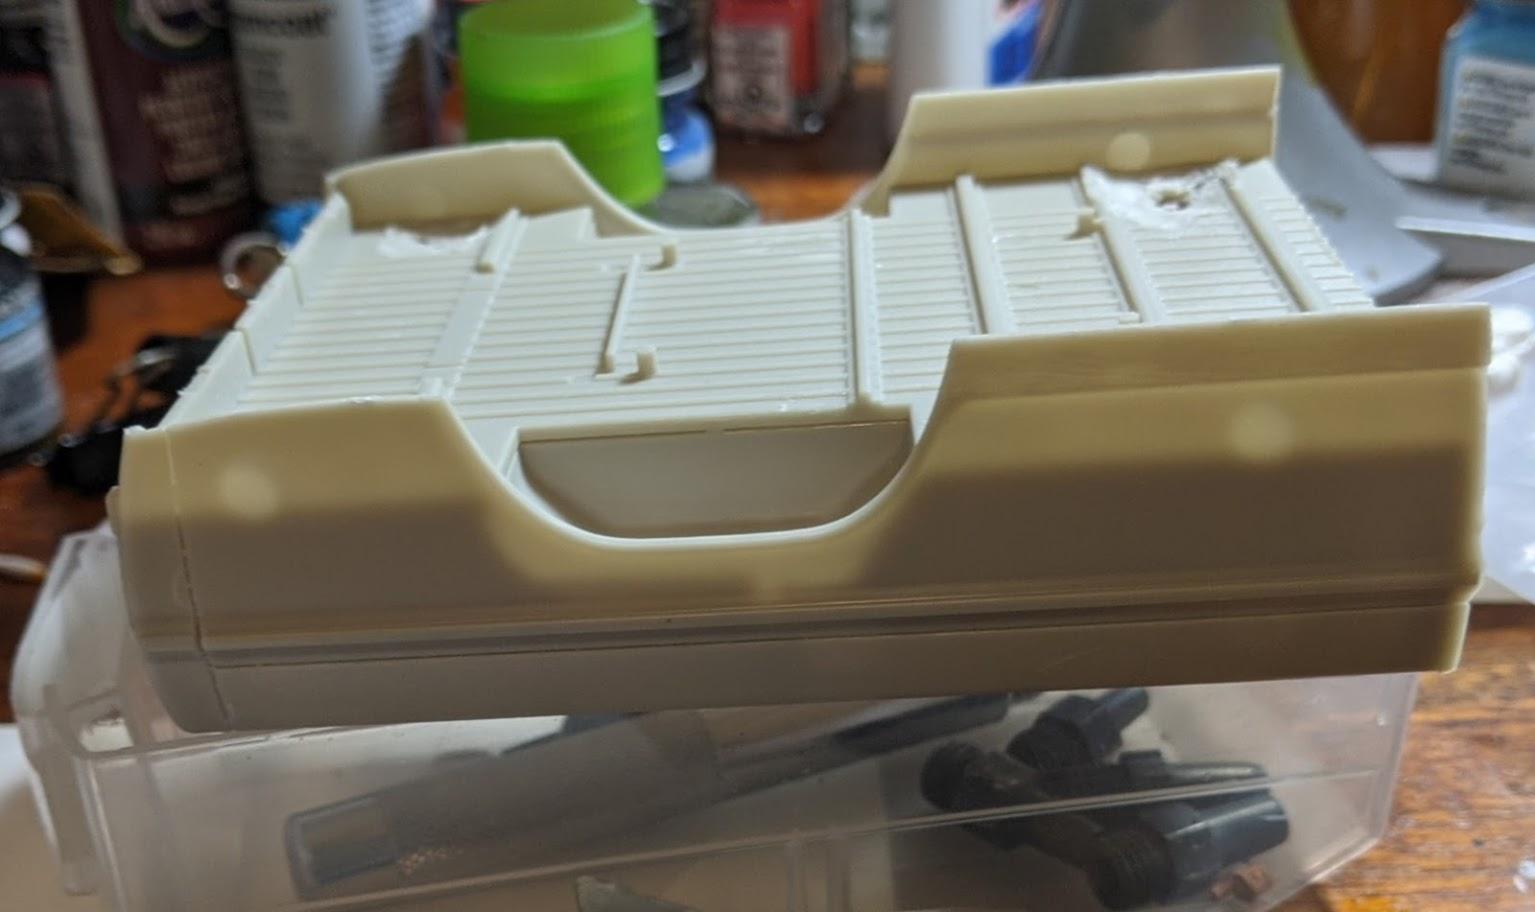
sanded off the bottom side trim and the chrome side trim line. The holes are intentional.

.jpg.af3f8746e311d6013f6490978125dff0.jpg)