EngineerBob
-
Posts
144 -
Joined
-
Last visited
Content Type
Profiles
Forums
Events
Gallery
Everything posted by EngineerBob
-

55 Chevy Rat Rollback
EngineerBob replied to mchook's topic in Model Trucks: Pickups, Vans, SUVs, Light Commercial
WOW, that's got to be the most authentic looking weathering I've seen. Great job! -
I too grew up in SoCal in the 50's-60's, didn't make it to Lions but went often to Irwindale and OCIR. I loved the variety of cars and ingenuity of the local independent racers.
-
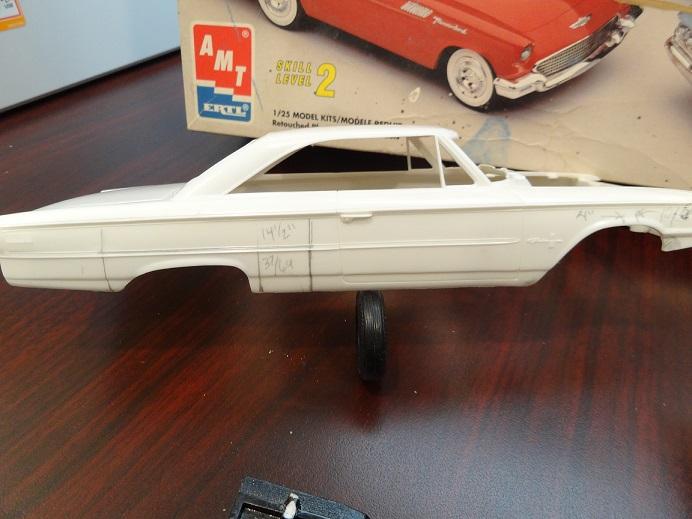
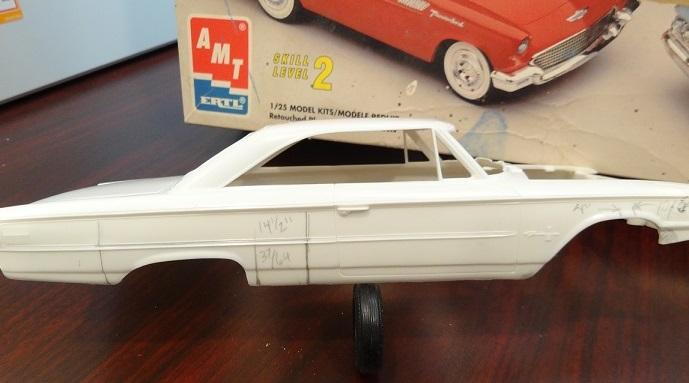
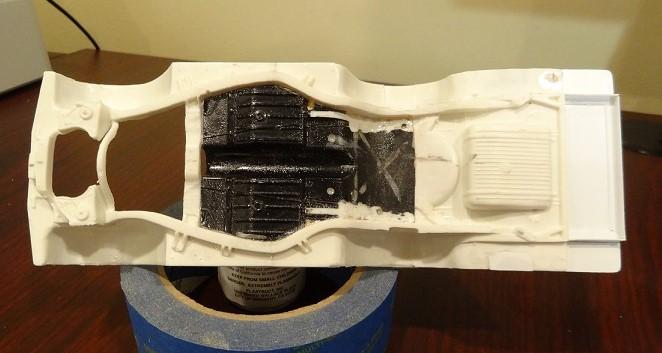
Glad you appreciated the build. I wanted to capture the '60s altered wheelbase look and this Galaxie model is what I had to work with. I don't show my models so they only need to look cool on a shelf. This model did not have very much chassis detail to work with so I took the easy route to achieve the stance I wanted. I cut loose the "A arms" and simply added styrene strip spacers to get the front end height. After I glued in place the raised A arms, I drilled and glued in pins in the "spindles/uprights" to hold rims (I put the pins in the rims with tires and used them to scratch/mark the drill location for each spindle). This allowed me to fine tune the ride height. Here's the before chassis follwed by the spaced front end:

-
Thanks for the kind words. Finishing the Galaxie gave me some energy to finish a couple more models. I'm to the paint stage for Bonneville racer and body work stage on an Austin-Healey replica so I'll post something new soon.
-
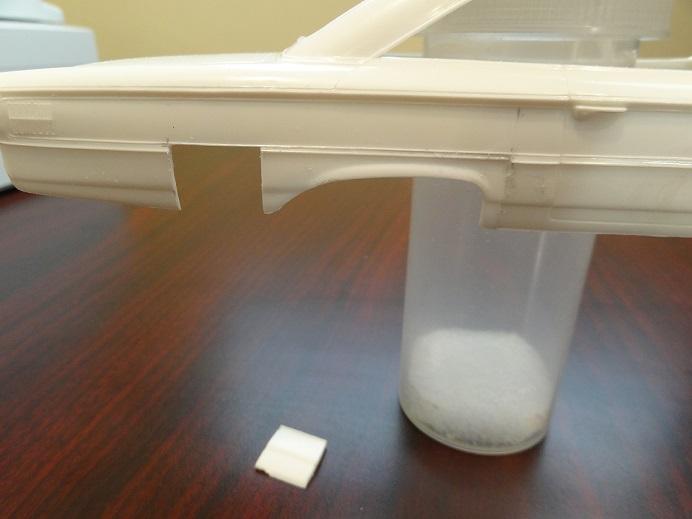
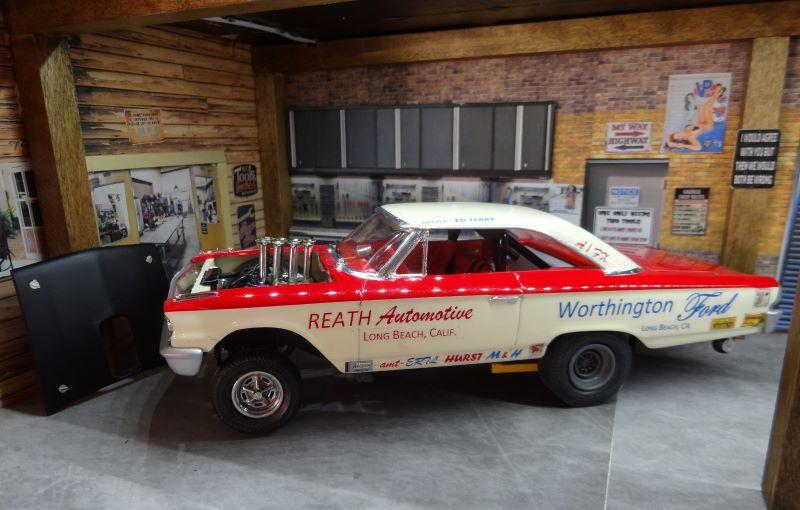
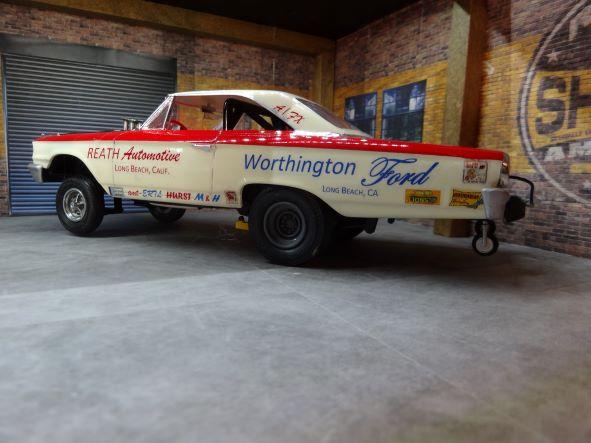
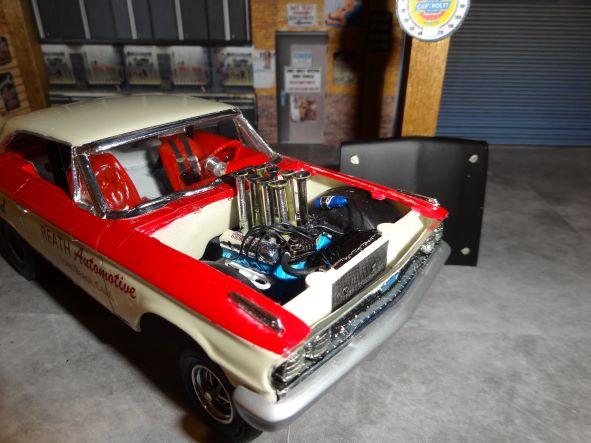
Hi All. Haven't posted a new model for a while. The various race car models posted here inspired me to finish some of my stalled projects. I built 7 models during the worst of the pandemic but I slowed down when we finally could get out. I just finished my version of a '63 altered wheelbase A/FX drag racer. I created my own decals to represent an independent SoCal racer circa '64-'65. Moved the rear wheelwells forward 14 1/2 scale inches and the front about 4 scale inches. I used spacers under the kit front suspension and created new leaf spring/extended shackle rear suspension. Had to insert a different floor pan to eliminate the molded-in exhausts and extended the frame with styrene. Have a look.
-
Ready for BOOT HILL EXPRESS - The DRIFT edition?...
EngineerBob replied to Claude Thibodeau's topic in Model Cars
I love your re-imagining of this kit and your excellent execution. Very inspiring! -
Has anyone channeled a Revel '37 Ford pickup?
EngineerBob replied to BadJuju's topic in Model Building Questions and Answers
Previous posters provided excellent advice on how to channel a car/model but, in regards to your initial post, if you are going to channel the body over the frame then, by definition, you aren't building a "highboy". A highboy hot rod sits on top of the frame like originally from the factory. What you're describing is a "lowboy" or just channeled hot rod. -
Looking good so far! Nice job on the asphalt. I'd suggest that you don't keep too perfect an edge on the asphalt against the landscaping, especially where dirt would wash down from the raised wall over the asphalt towards the low spot at the drain.
-
Love the creativity! I admire anyone who thinks a model kit is just inspiration for what it can become.
-
By the way, I forgot to say to Old Coyote "Great Early Funny Car Model!"
-
I, too, would be interested to know how John did his modification but if I was to alter the wheelbase as the Seaton's Shaker I would use the body piece removed in moving the entire intact rear wheel opening forward to fill in behind the moved forward front wheel opening. Then I'd make a new filler piece for behind the rear wheel arch out of styrene sculpted to match the body contours. I modified the wheelbase of a '63 Galaxie but, in my case since I didn't move the front opening, I was able to use the removed piece to fill in the rear.
-
Looking forward to seeing how your Hudson turns out. I've always liked how custom looking those Hudson's were from the factory. I took a slightly different approach to lower my Moebius '53 Hudson mild-kustom model. I replaced a portion of the rear frame with a step notch (more radical lowering than a C-notch) and replaced the leaf springs with "airbags" (actually, model aircraft tires). Modded the frontend to use the Oldsmobile grill out of the Revell '48 Ford Custom 3in1 kit and streamlined the Hudson bumper by removing the over-rider/license frame.
-
What Putty or Fillers to Use
EngineerBob replied to Chevy II's topic in Model Building Questions and Answers
Yes, the Evercoat catalyst is blue (and the putty is a cream color) that results in a pale blue hardened filler. For what it's worth if you have leftover Bondo, I haven't specifically tried Evercoat putty with Bondo catalyst but in years past I successfully mixed other brands. -
What Putty or Fillers to Use
EngineerBob replied to Chevy II's topic in Model Building Questions and Answers
Evercoat does have a small 3oz tube of two-part glazing putty which works great on models and lasts a long time. Inexpensive and easy to get at most autoparts stores, too.
-
Hairspray weathering
EngineerBob replied to NWRMorpheus's topic in Model Building Questions and Answers
Ditto that you need the hairspray between the top coat and the base coat to allow the top coat to be removable. This is the same thing that the salt method does as the salt dissolves with water taking some of the top coat with it. You can spray on the hairspray, thicker where you want more removal and you can also dab it on with a brush to get the more localized splotches such as on the side of your example car. I find that the hair spray provides a 'finer' effect and the salt provides more of a coarse chipped effect. Don't forget about sanding through the top coat to show a primer coat with fine sandpaper to get a lighter weathered effect. Finally, add brushed/spotted on acrylics with a fine brush to add depth, highlights and rust streaks. Combine a variety of methods to get the most realistic look. -
Very nicely done and well detailed model. I tried to build that model many years ago (got it 90% finished) as a copy of the one that my Dad flew and gave up because the specific markings weren't turning out well (before I knew about making custom decals).
-
Beautiful finished model! I bought this kit to make a version of my 1:1 '61 Tbird but haven't started it yet. Hopefully it will turn out close to as good as yours.
-
I use a cordless butane soldering iron (such as the one from Weller but Harbor Freight carries one also) that has an attachment to turn it into a pin-point heat gun for bending styrene rod. Allows you to precisely heat a very localized area. Like all heat sources, you have to learn how much is just the right amount of heat for the bend that you are making.
-
I can't speak for others but in, my case, I chose to cut the body much like you would have done with a 1:1 race car. Used a scribe for the horizontal cut and a thin blade saw for the vertical cuts. Glued the removed fender piece behind the arch which was moved forward and filled the saw kerf gap with a small piece of sheet styrene. Don't forget that you'll also need to correspondingly modify the chassis/floor pan too.
-
Incredible level of detail!
-
So far so good! Looking forward to seeing how this custom bird turns out. I'm building the same 57 Tbird but as a land speed racer.
-
What's there to be un-sure of? Looks like a fantastic start to me! I love imaginative kit bashing.
-
Love the vintage-racecar look and the creativity. Thanks for sharing.
-
Building a model from SPARE PARTS ONLY!
EngineerBob replied to steveracer's topic in Model Building Questions and Answers
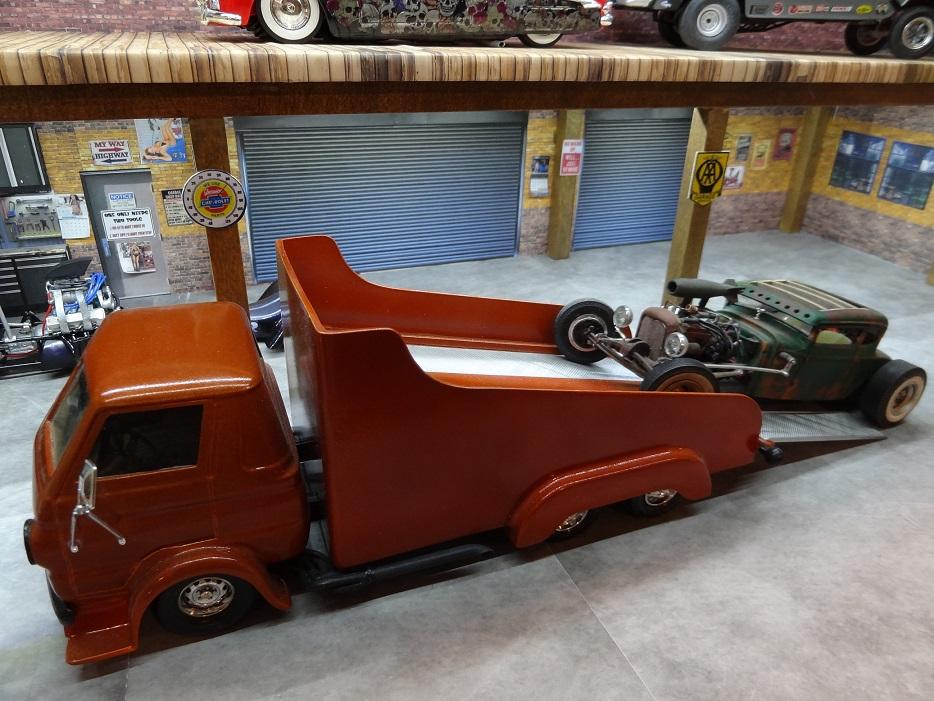
I think I get the most satisfaction modeling by making something different out of my left-over parts or bodies of cars that I have no desire to ever build. I've shown a couple of my previous builds along this vein. Here is a Dodge COE hauler that I made out of a 69' pick-up cab, '30 Ford Coupe rear fenders, engine from the Daytona Transporter, and the sides/bed from a Show Trailer. I'm also turning a left-over '48 Ford Coupe body into a retro-future Flying Car ala The Fifth Element. Seats/interior out of the Daytona Transporter, 'jet' engines from a B17 plane model, etc.
-
Similar to SfanGoch, I spray paint the part with a base of dark metallic or red oxide (depending on how rusty I'm going for) and then stipple paint a variety of rusts, oranges, and yellow inexpensive craft acrylics and then top coat with flat clear.
.JPG.d347e07dae80621fd57913a3fb180e9f.JPG)
.JPG.324b4662ba8dff422d3492754b84d852.JPG)
.JPG.9b27c2dbf29f5e367a88286140b2eb55.JPG)
.JPG.36a030b7fb2d0607857d71244d679981.JPG)


-Copy.JPG.9bedbf8ed31d77ab08cb194a8ff84b3e.JPG)