Just Jim
-
Posts
235 -
Joined
-
Last visited
Content Type
Profiles
Forums
Events
Gallery
Everything posted by Just Jim
-
Nice work. The weathered engine bay looks especially good
-

1982 Chevrolet Camaro Z28-E (overseas version) - Arii 1/24 scale
Just Jim replied to Tommy124's topic in Model Cars
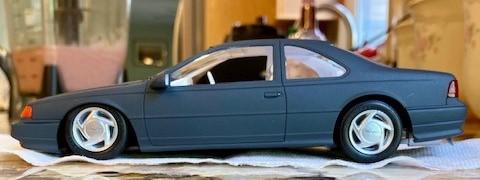
Very nice. I think the view from the side could easily be mistaken for a 1:1 Camaro -
Beautifully done. I hope to have one in my collection some day if I can find one at a reasonable price.
-
That turned out great. I have seen and read about several folks who had difficulty getting the body to sit correctly on the frame but yours looks just fine. Love the detail work on the body with the hand painted black stripe and silver around the wheel wells and bottom.
-
This was an old open kit I bought off eBay. All the pieces were there as advertised. However, when I went to place the window glass it became obvious it had spent some time under something heavy. Thus, the windshield doesn't fit exactly like it should. Nice kit, easy to build as most of the pieces fell right into place. I was disappointed with how poorly the rear taillight bar fit but that may not have been the case when it was new. OOB other than the lowered frontend. Thanks for looking.

-
Final 3 WIP pictures. Now it's Under Glass.
-
Thanks for the pictures. Both cars look good. Are the rear wheels on the white one glued in place or mocked-up? Once they are permanently in place can you post a picture of how you lowered the rear-end? I wanted to lower the front and back of mine but the intricate rear suspension proved to be more of a challenge than I was ready to take on. Would like to see how you handled it.
-
Thanks neighbor, I appreciate the reply and encouragement. Are the models you mentioned above on the forum? I looked through your profile but didn't see any pictures of them. It is possible I wasn't looking in the right spot.
-
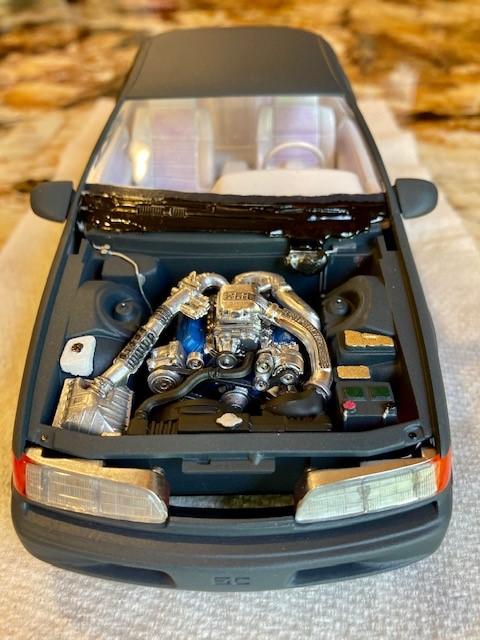
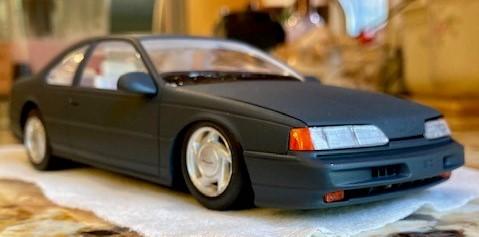
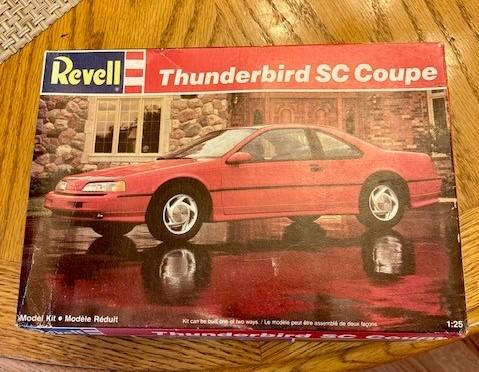
So not much love out there for the old Thunderbird ? but here's some updated pictures for the Captain and anyone else who may be silently following. Just about ready to call this one finished. All that's left is to put the bottom, middle and top together. Maybe one more picture here later this week and then it's under glass by this time next week...I hope!
-
Looks cool, turned out great! I can't believe you were able to find a Maverick. I can't ever remember seeing one for sale.
-
Looks great, beautiful color!
-
Nice car. Really like how the front grill turned out with the black on chrome and the small red badge. Those tiny details (like the FORD on the hood) are the kinds of things I'm still struggling to get right. Thought about picking this one up several times. Your build may finally inspire me to pull the trigger. Of course I will probably pull-in and smooth the bumpers, lower it, and put drag slicks on the back. Just can't seem to get past that little kid in me that wants every car to be a race car! ?
-
Challenger looks great. I have seen several models like yours where the chassis was over sprayed with body color on the edges. Is that a late 60's / early 70's GM thing? I admittedly haven't spent much time under many old cars so I've never seen this in real life. However, I do have a 69 Charger and a 70 Challenger working their way to the top of my build rotation so would like to get it right.
-
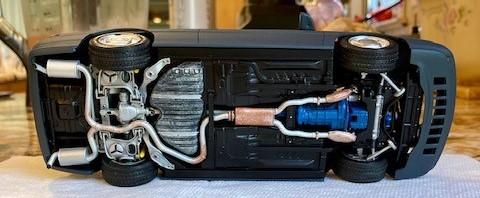
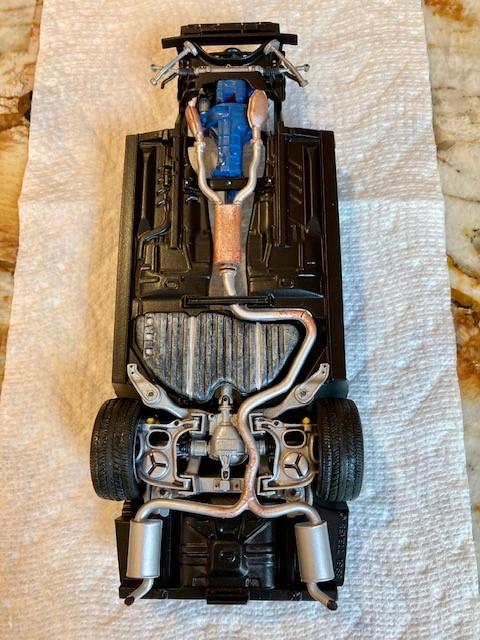
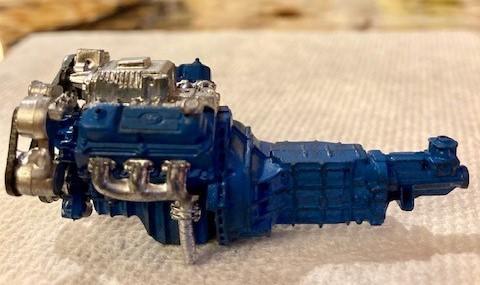
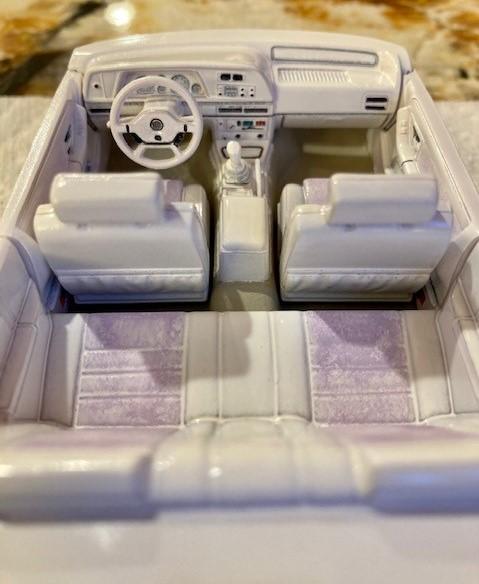
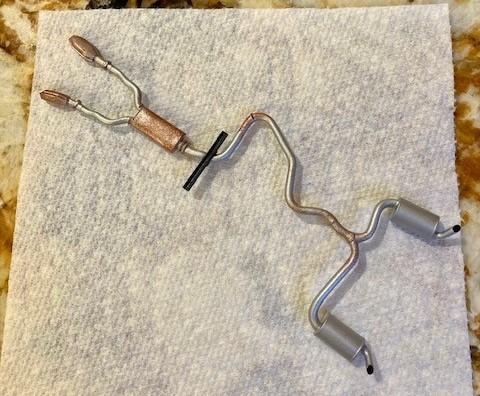
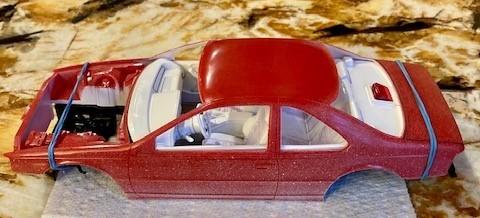
Been working on this for a few weeks now. Mostly OOB but I am going to lower the front end as far as I can without doing any major body mods (i.e. not planning on cutting out the wheel wells). The gaps in the seats are driving me crazy. Looks like going forward I'm gong to have to become one of "those" guys who bondo's over the unnecessary lines. The peer pressure of looking at all the professionally built models on the forum is causing me work to up my game.? More to come, thanks for looking. After receiving some inspiration from another thread here on the forum, decided to try my hand at making the exhaust look a little more realistic. ? Painted the interior portion of the body. Did a quick mock-up to ensure everything was fitting like it's supposed to. So far so good. Would have put the wheels on but the paint on the suspension is currently drying.
-
78 GMC 4x4 Wrecker
Just Jim replied to mchook's topic in Model Trucks: Pickups, Vans, SUVs, Light Commercial
Looks great, thanks for sharing! -
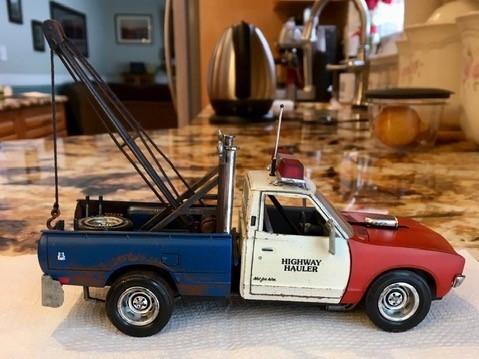
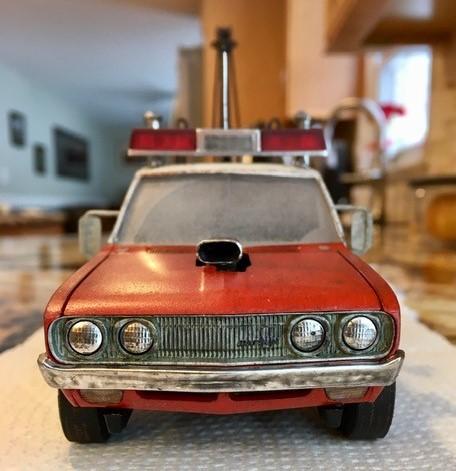
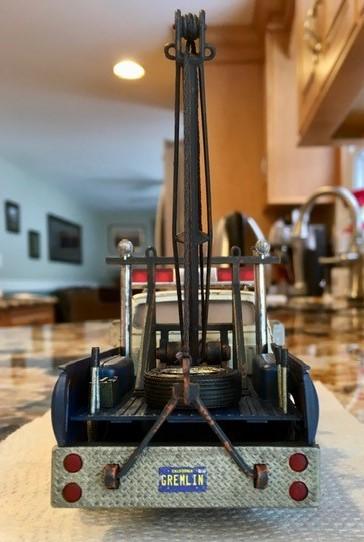
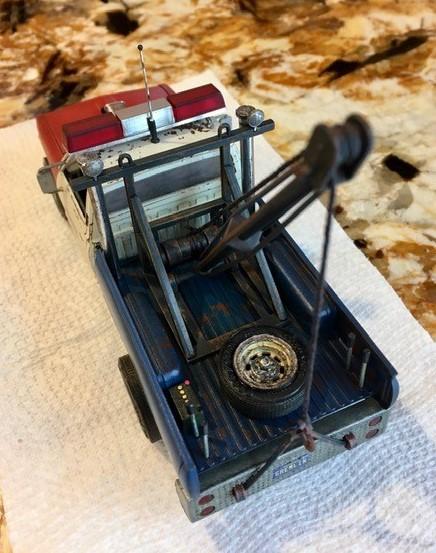
This is a kit bash between an MPC Datsun Scavenger Monster Truck and an AMT Gremlin X. I used the truck frame to create a Gremlin Monster Truck. Now I’m attempting to build the truck on the Gremlin frame. Since this was kind of a throwaway project, I decided to try my hand at weathering. Attempted to weather the windows (shout out to Dr. Cranky for the excellent YouTube video). Would have turned out great except I forgot to mask the inside of the window when spraying the dull clear coat.? Thus, it's hard to see the wiper marks especially in the pictures. Paid tribute to its Gremlin heritage with decals of gremlins on the truck bed and the gremlin license plate. This was a large undertaking for me with lots of firsts. In the end I think it turned out okay. As always, thanks for looking.
-
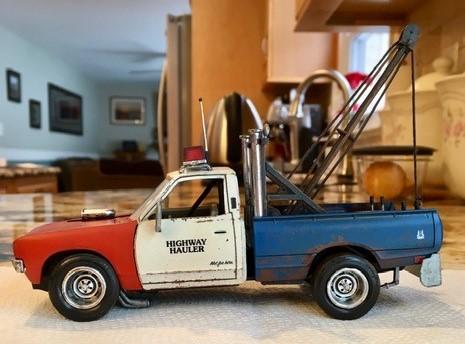
1975 Datsun Pickup
Just Jim replied to Just Jim's topic in WIP: Model Trucks: Pickups, Vans, SUVs, Light Commercial
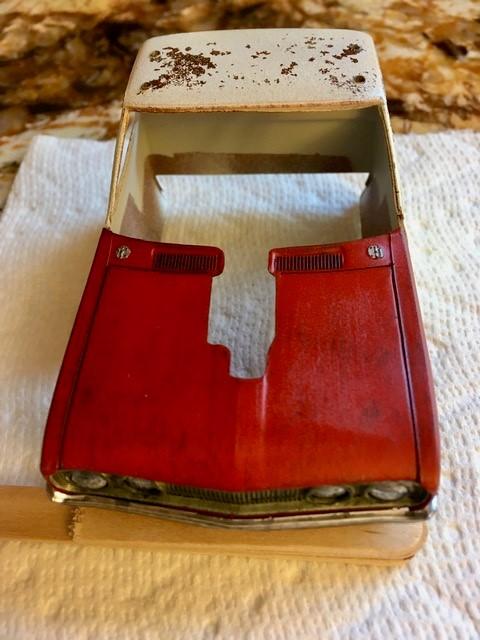
Uploading these last few pictures to the WIP thread. Once I have the wrecker stuff in the bed I will post a few pictures in the under glass thread. Keeping the truck bed sides steady long enough to dry was a real challenge for me. In hindsight, it would have been smarter to build some braces to square it up and then place it on the chassis to dry. Well, I’ll know for next time. This was a large undertaking for me with lots of firsts. In the end I think it turned out okay. Definitely not great but not too bad either. As always, thanks for looking.
-
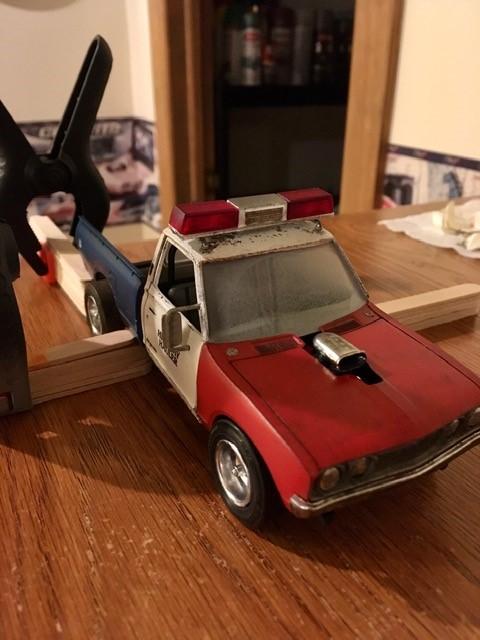
1975 Datsun Pickup
Just Jim replied to Just Jim's topic in WIP: Model Trucks: Pickups, Vans, SUVs, Light Commercial
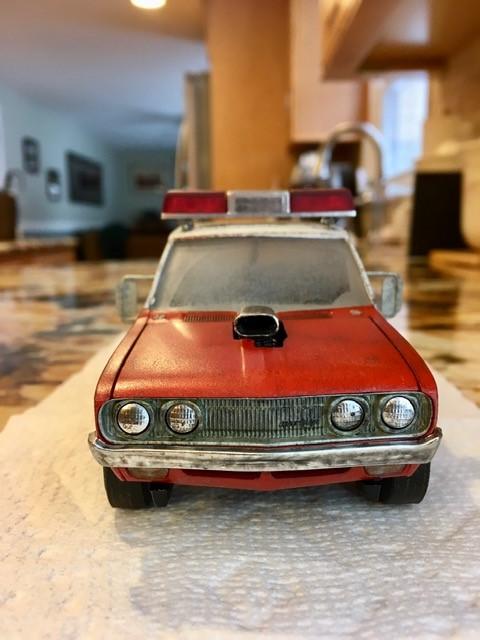
Okay, got the front clip and cab on the frame. Tried my hand at weathering the windows (shout out to Dr. Cranky for the excellent YouTube video). Would have turned out great except I forgot to mask the inside of the window when spraying the dull clear coat.? Thus, it's hard to see the wiper marks especially in the pictures.
-
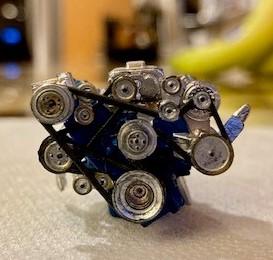
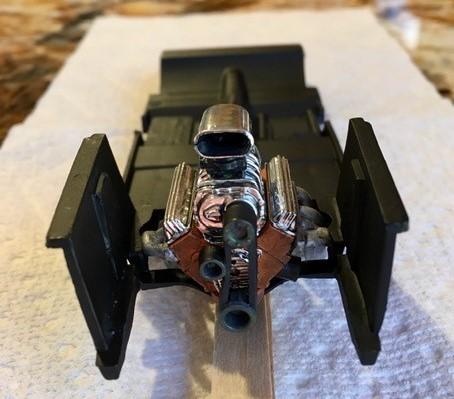
Your engine looks amazing
-
Awesome idea. Can't wait to see how it turns out. Any car with a big engine and slicks in the back has my attention!
-
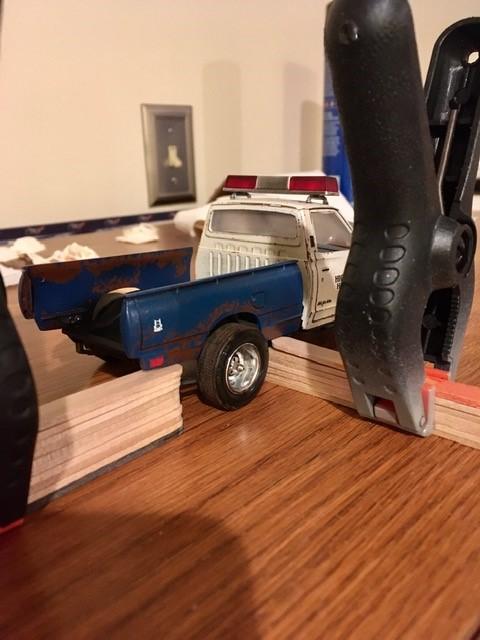
1975 Datsun Pickup
Just Jim replied to Just Jim's topic in WIP: Model Trucks: Pickups, Vans, SUVs, Light Commercial
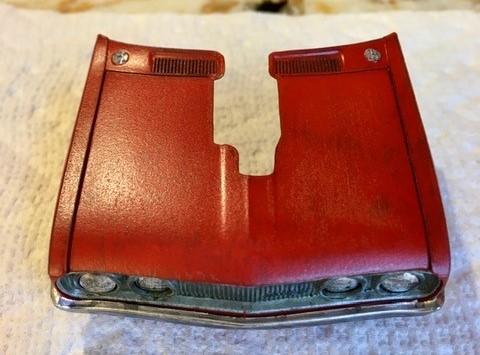
Sharing what I got done this weekend. My first time rusting a model. Still have a fair amount of detailing to do on the cab but I’m happy with the initial result. Thanks to all the MCM members out there for their inspiration and encouragement and the Youtuber’s for showing the way.
-
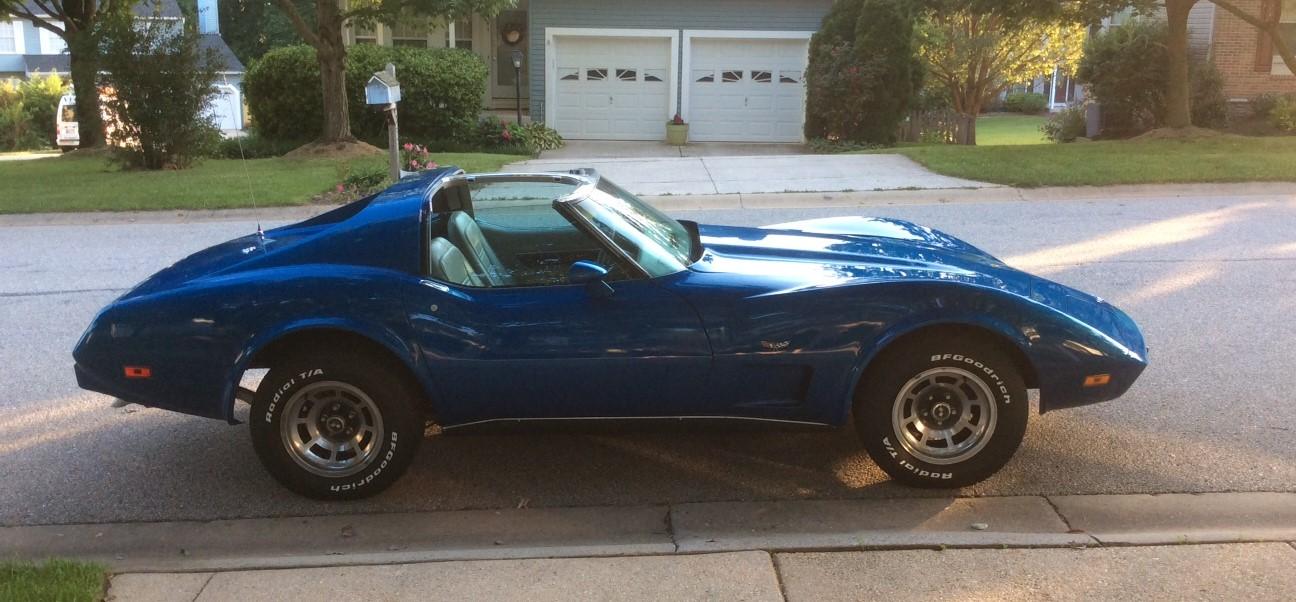
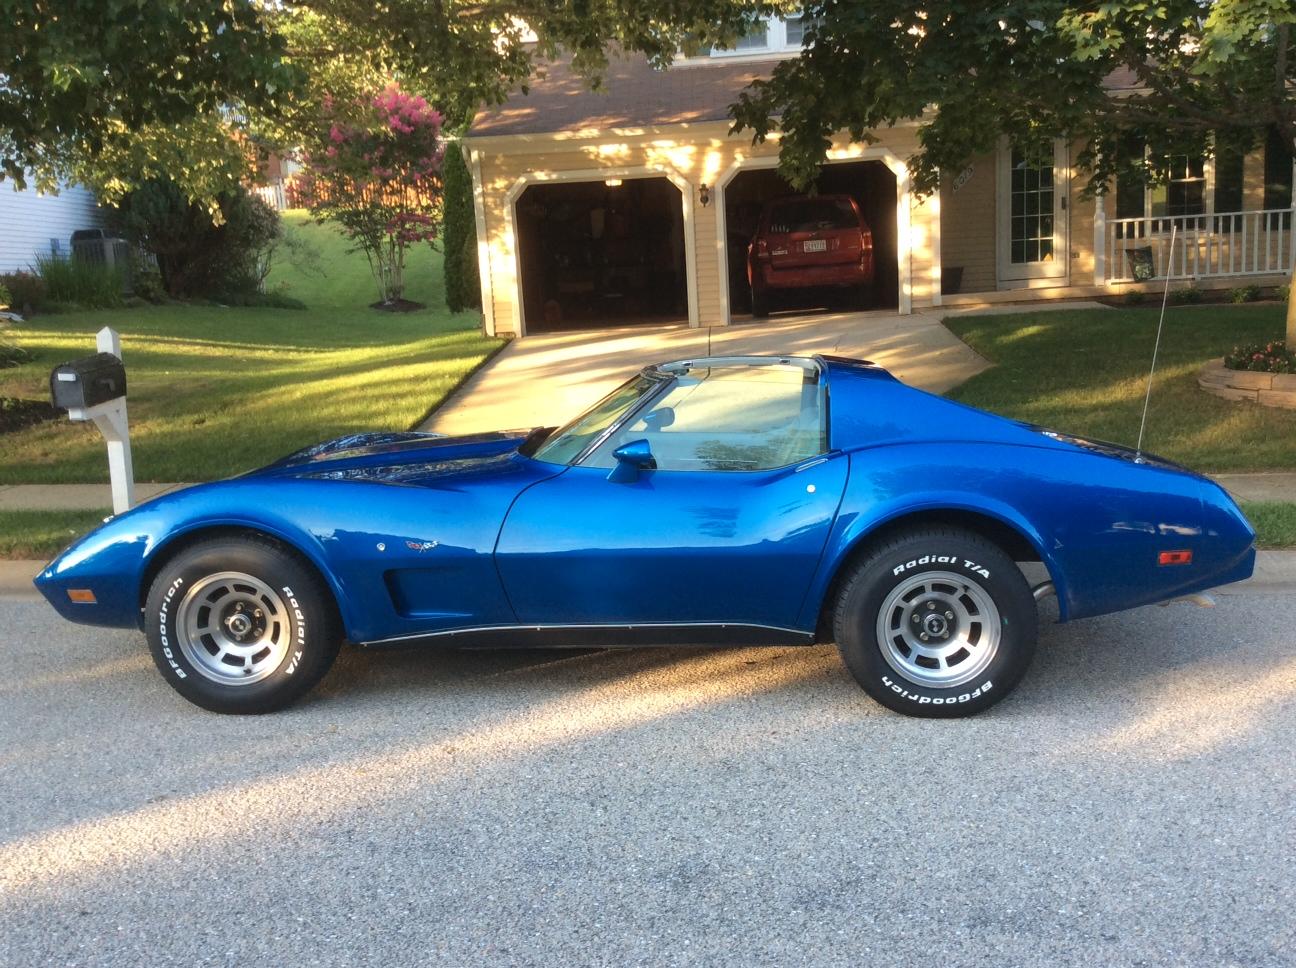
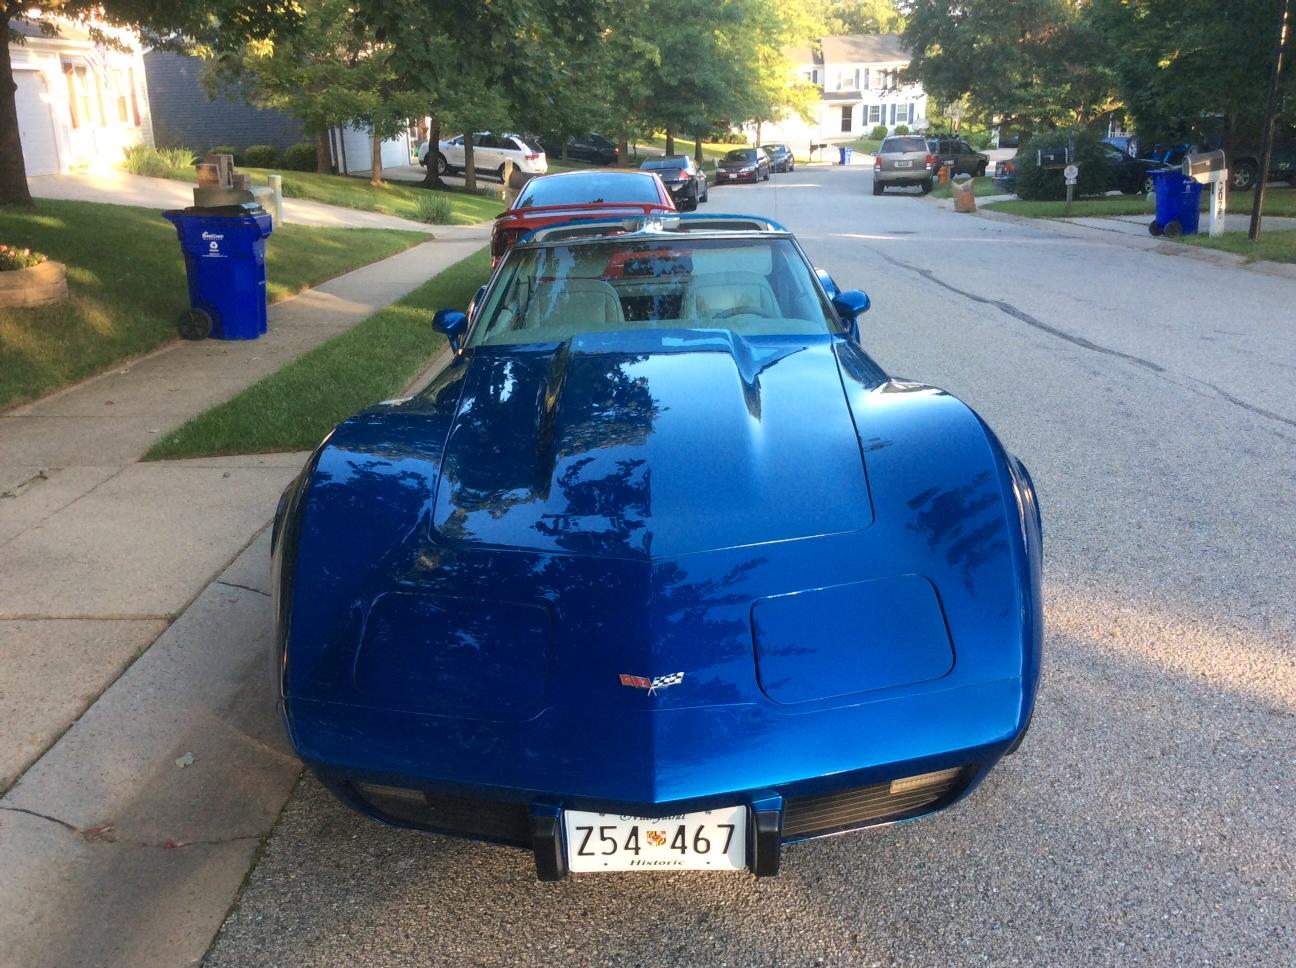
1977 Corvette
Just Jim replied to Just Jim's topic in 1:1 Reference Photos: Auto Shows, Personal vehicles (Cars and Trucks)
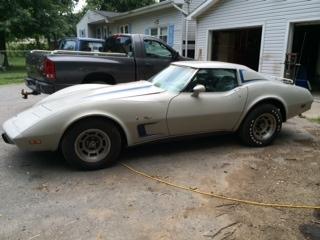
This is what it looked like when I picked it up about 5 years ago for 3K. It ran (not well), didn't stop, and the interior was in pieces. Not going to admit how much I've spent on it since then. It's about the love for my first Corvette and not the money spent or value (or at least that's what I keep telling myself). ?
-
Tamiya 1/24 Honda CR-X 1.5i Ballade Sports
Just Jim replied to Italianhorses's topic in WIP: Model Cars
This is fantastic! Thanks so much for taking the time to post all the pics. Just found one online for a "reasonable" price but wasn't sure what I would be able to do with it. Now I know it can be awesome. -
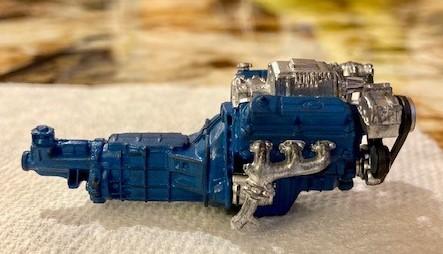
For reference, my factory stock (except for the color) 1977 Corvette. This was the last year for the vertical back window, the year engine color changed from orange to blue, and the year the Vette lost it Stingray badge. She’s not going to win any car shows or races (sadly my Honda Accord has more horse power) but she’s mine and I love her.
-
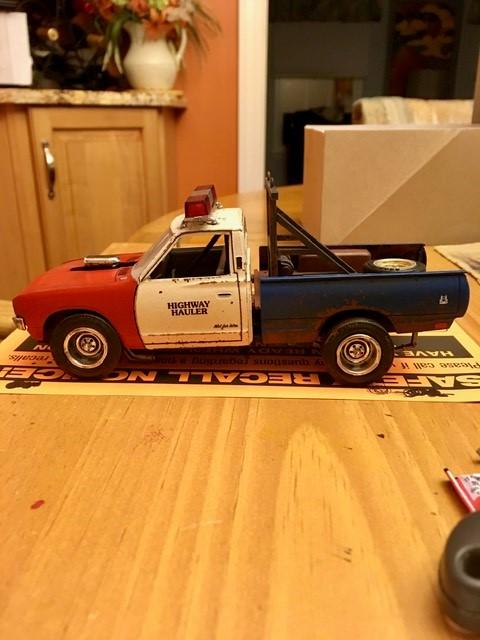
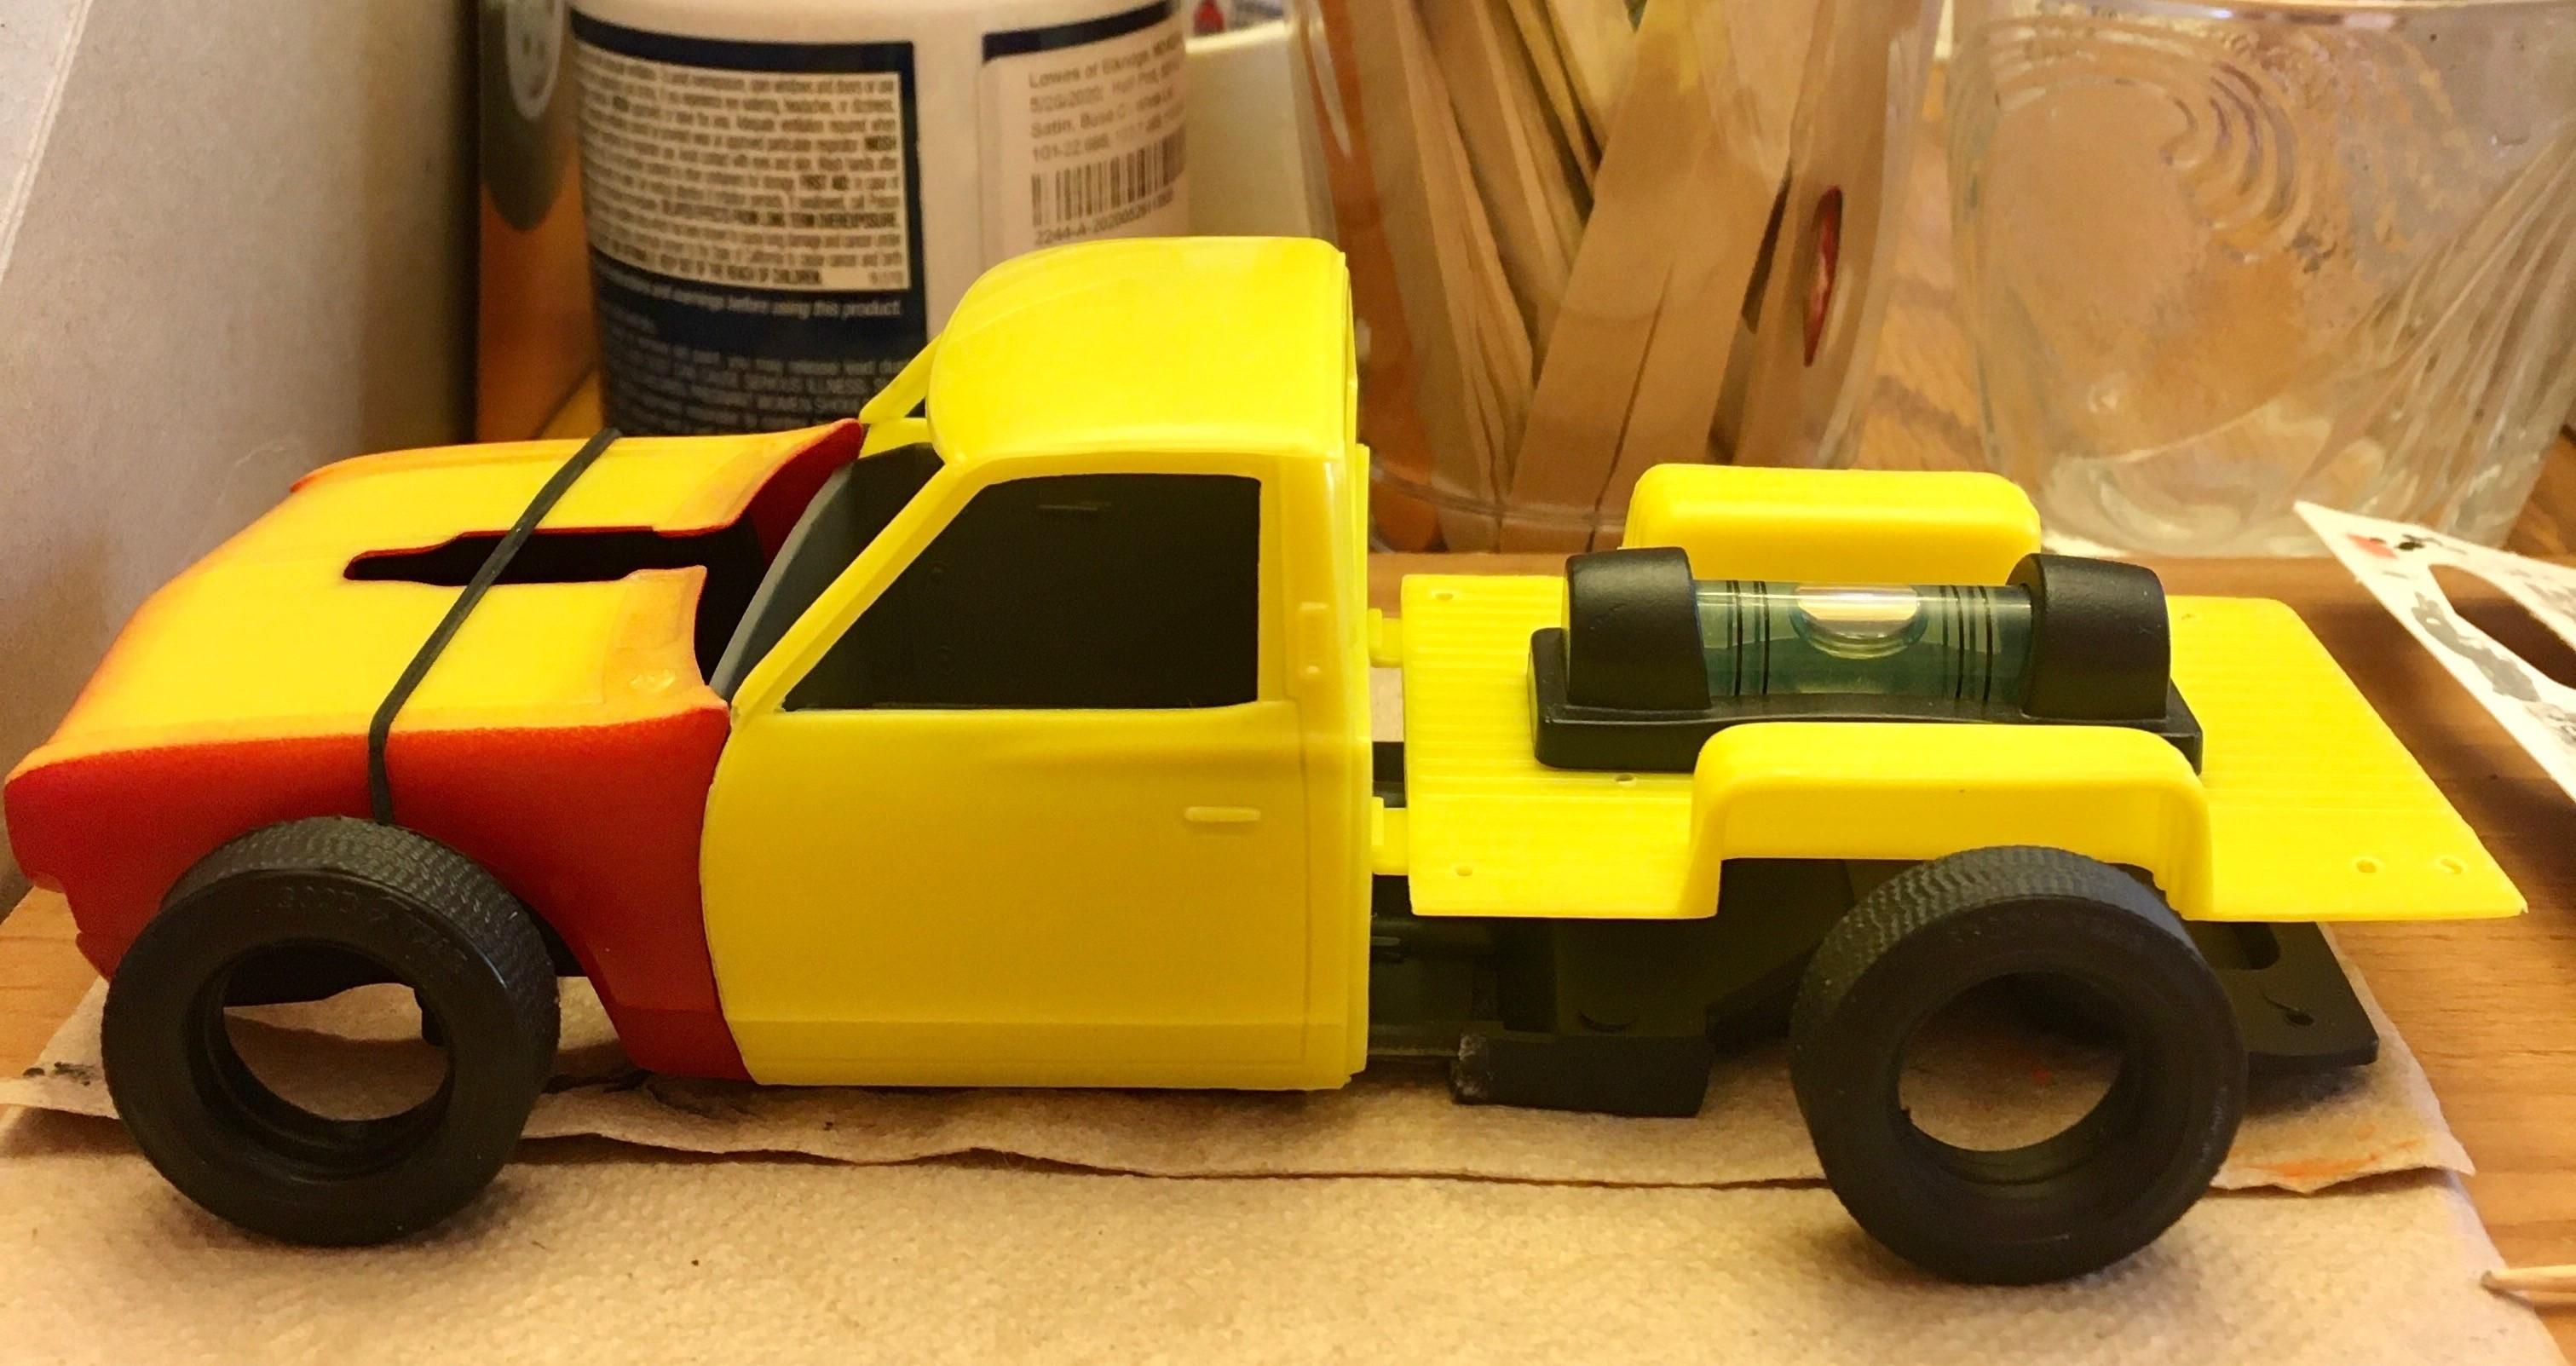
1975 Datsun Pickup
Just Jim replied to Just Jim's topic in WIP: Model Trucks: Pickups, Vans, SUVs, Light Commercial
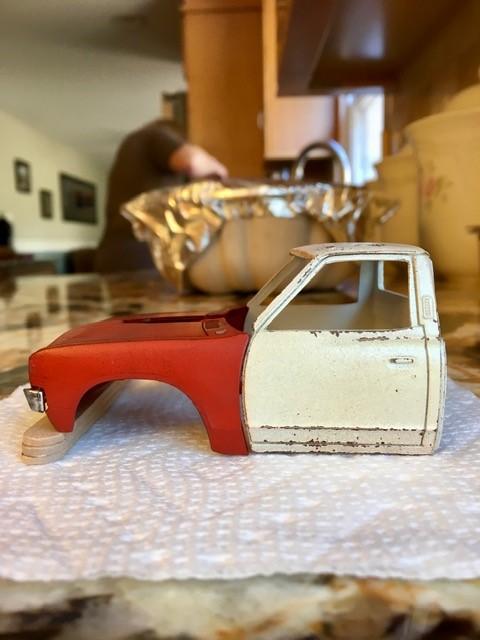
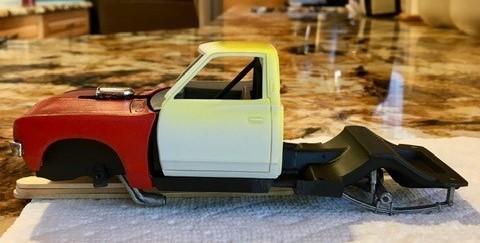
Did a quick mock-up to see how well the body fits my newly stretched chassis. Truck bed is going to sit a little higher than it should but shouldn't be that noticeable Finished the front clip. No rust just dirty since this part would be fiberglass Engine Installed Drivetrain Installed So far so good