Leica007
-
Posts
410 -
Joined
-
Last visited
Content Type
Profiles
Forums
Events
Gallery
Everything posted by Leica007
-
75 Chevy Street Van
Leica007 replied to Leica007's topic in Model Trucks: Pickups, Vans, SUVs, Light Commercial
Thank you all, I appreciate your viewing and taking the time to comment on the van, that's part of what makes this forum interesting and enjoyable. Thanks again!! -
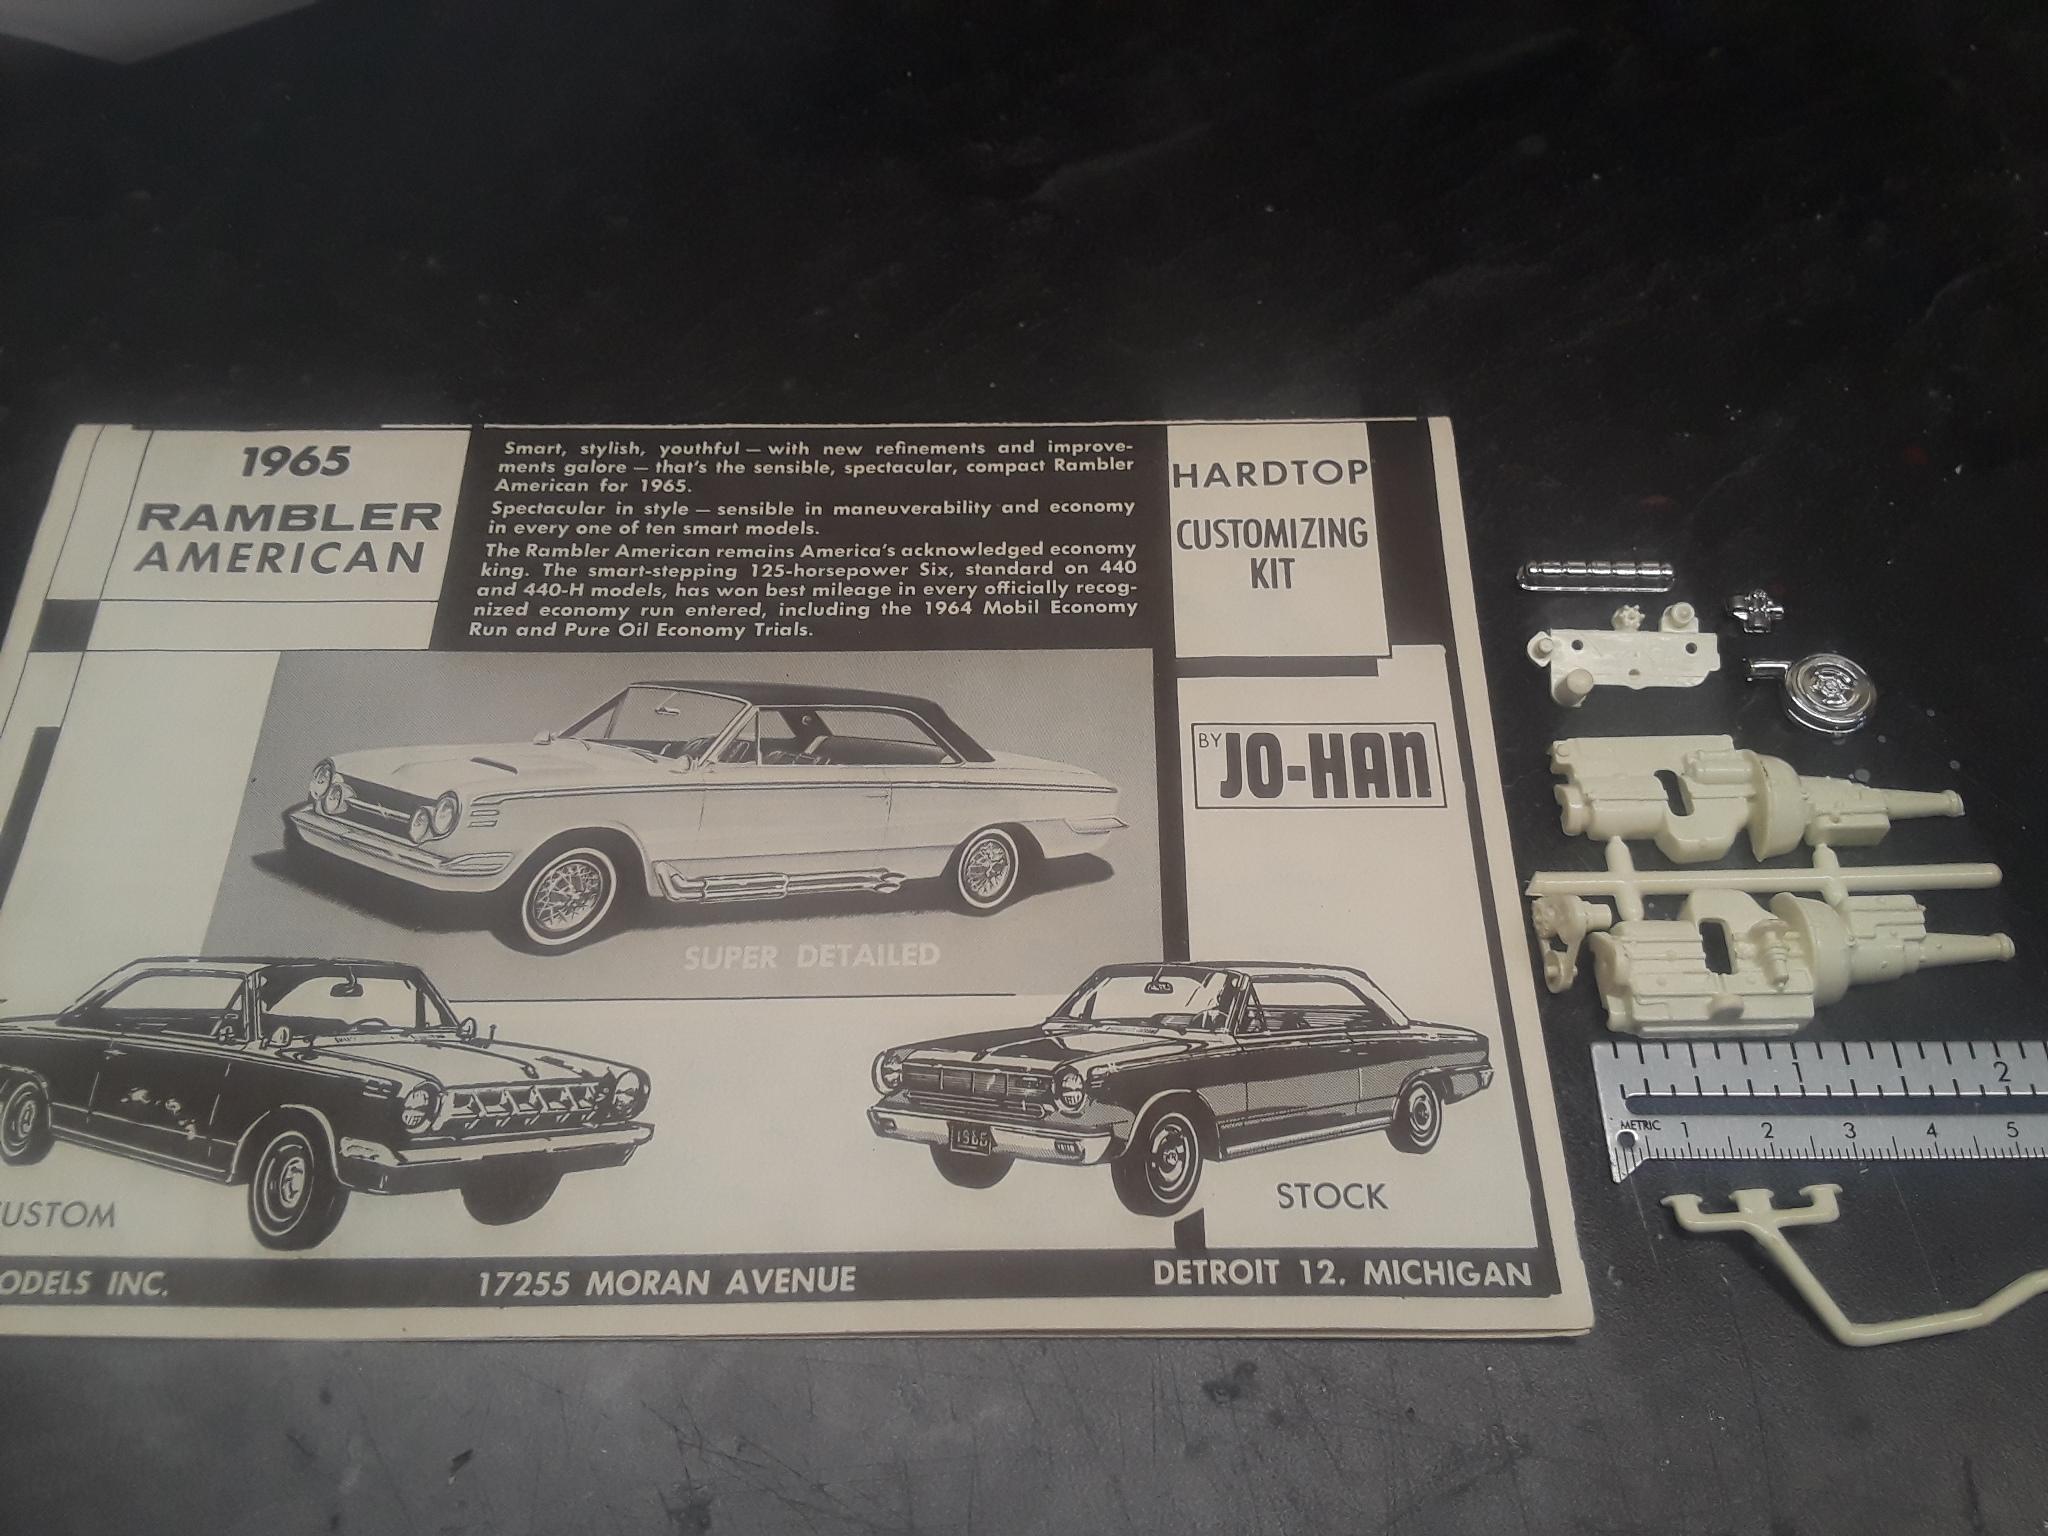
I've a inline 6 from a 65 AMC American kit that I didn't use. Looked at the box and instructions but could not find the scale (1/24 or1/25. The only part missing is the chrome fan blades. Look at the photos and let me know if it would work on your build.

-
Howdy and welcome to a great forum, enjoy being back in the hobby.
-
The flames and stance really make the truck pop. Nice.
-
Howdy and welcome to the forum, Michael.
-
Howdy and welcome, Alex.
-
Welcome to the forum, Slobodan.
-
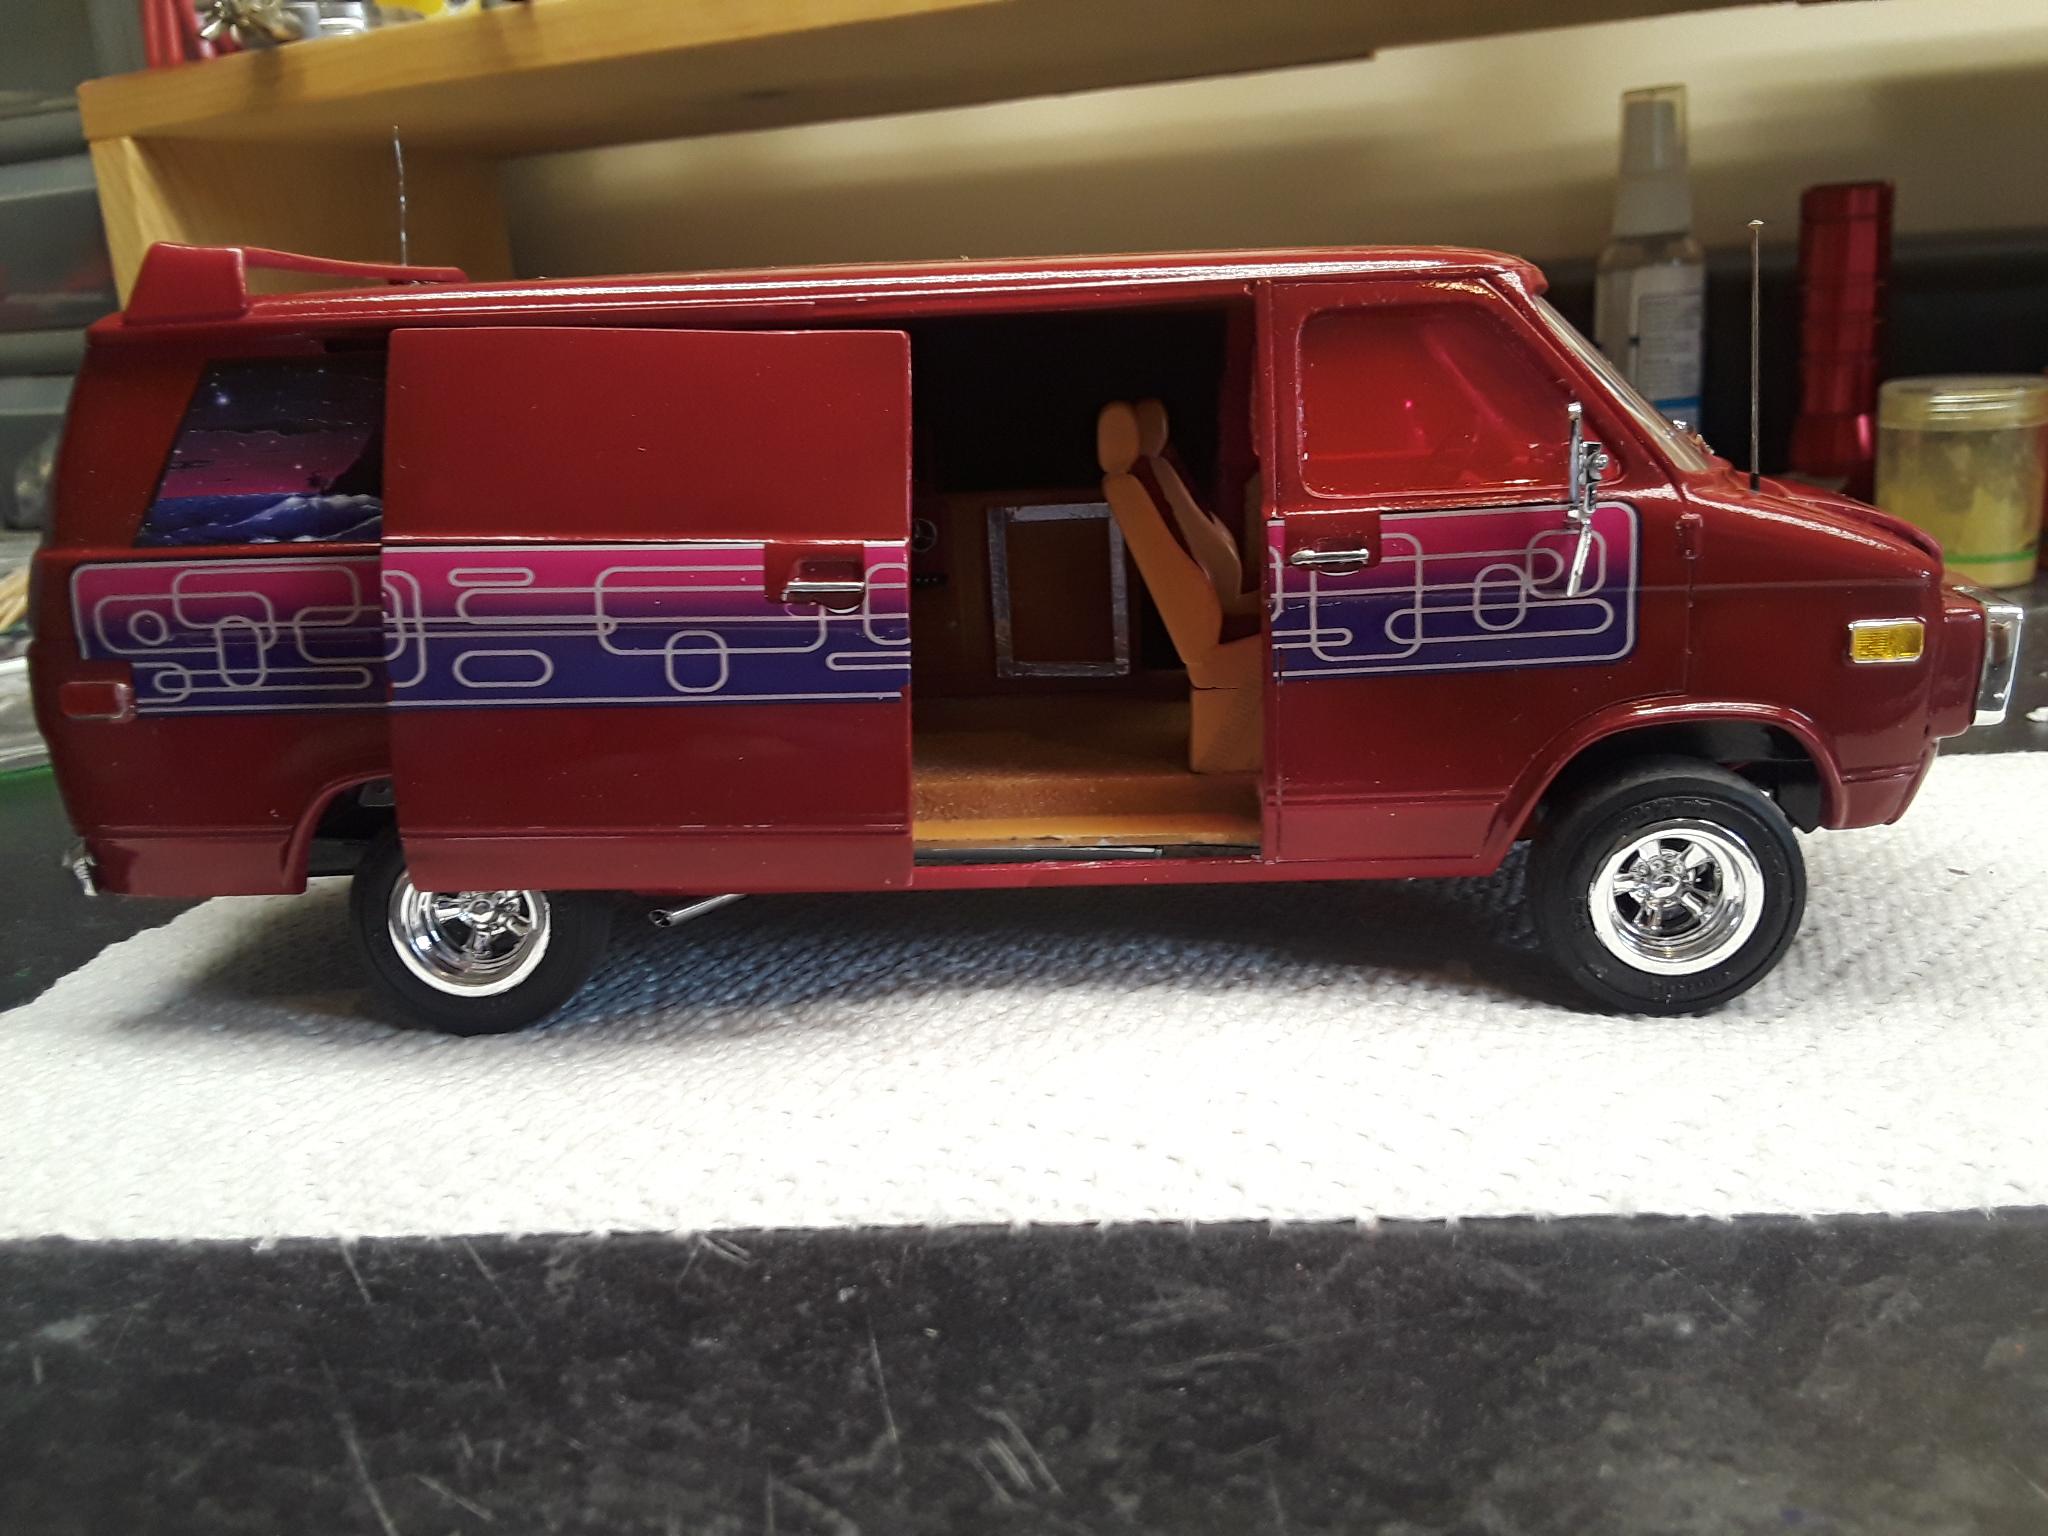
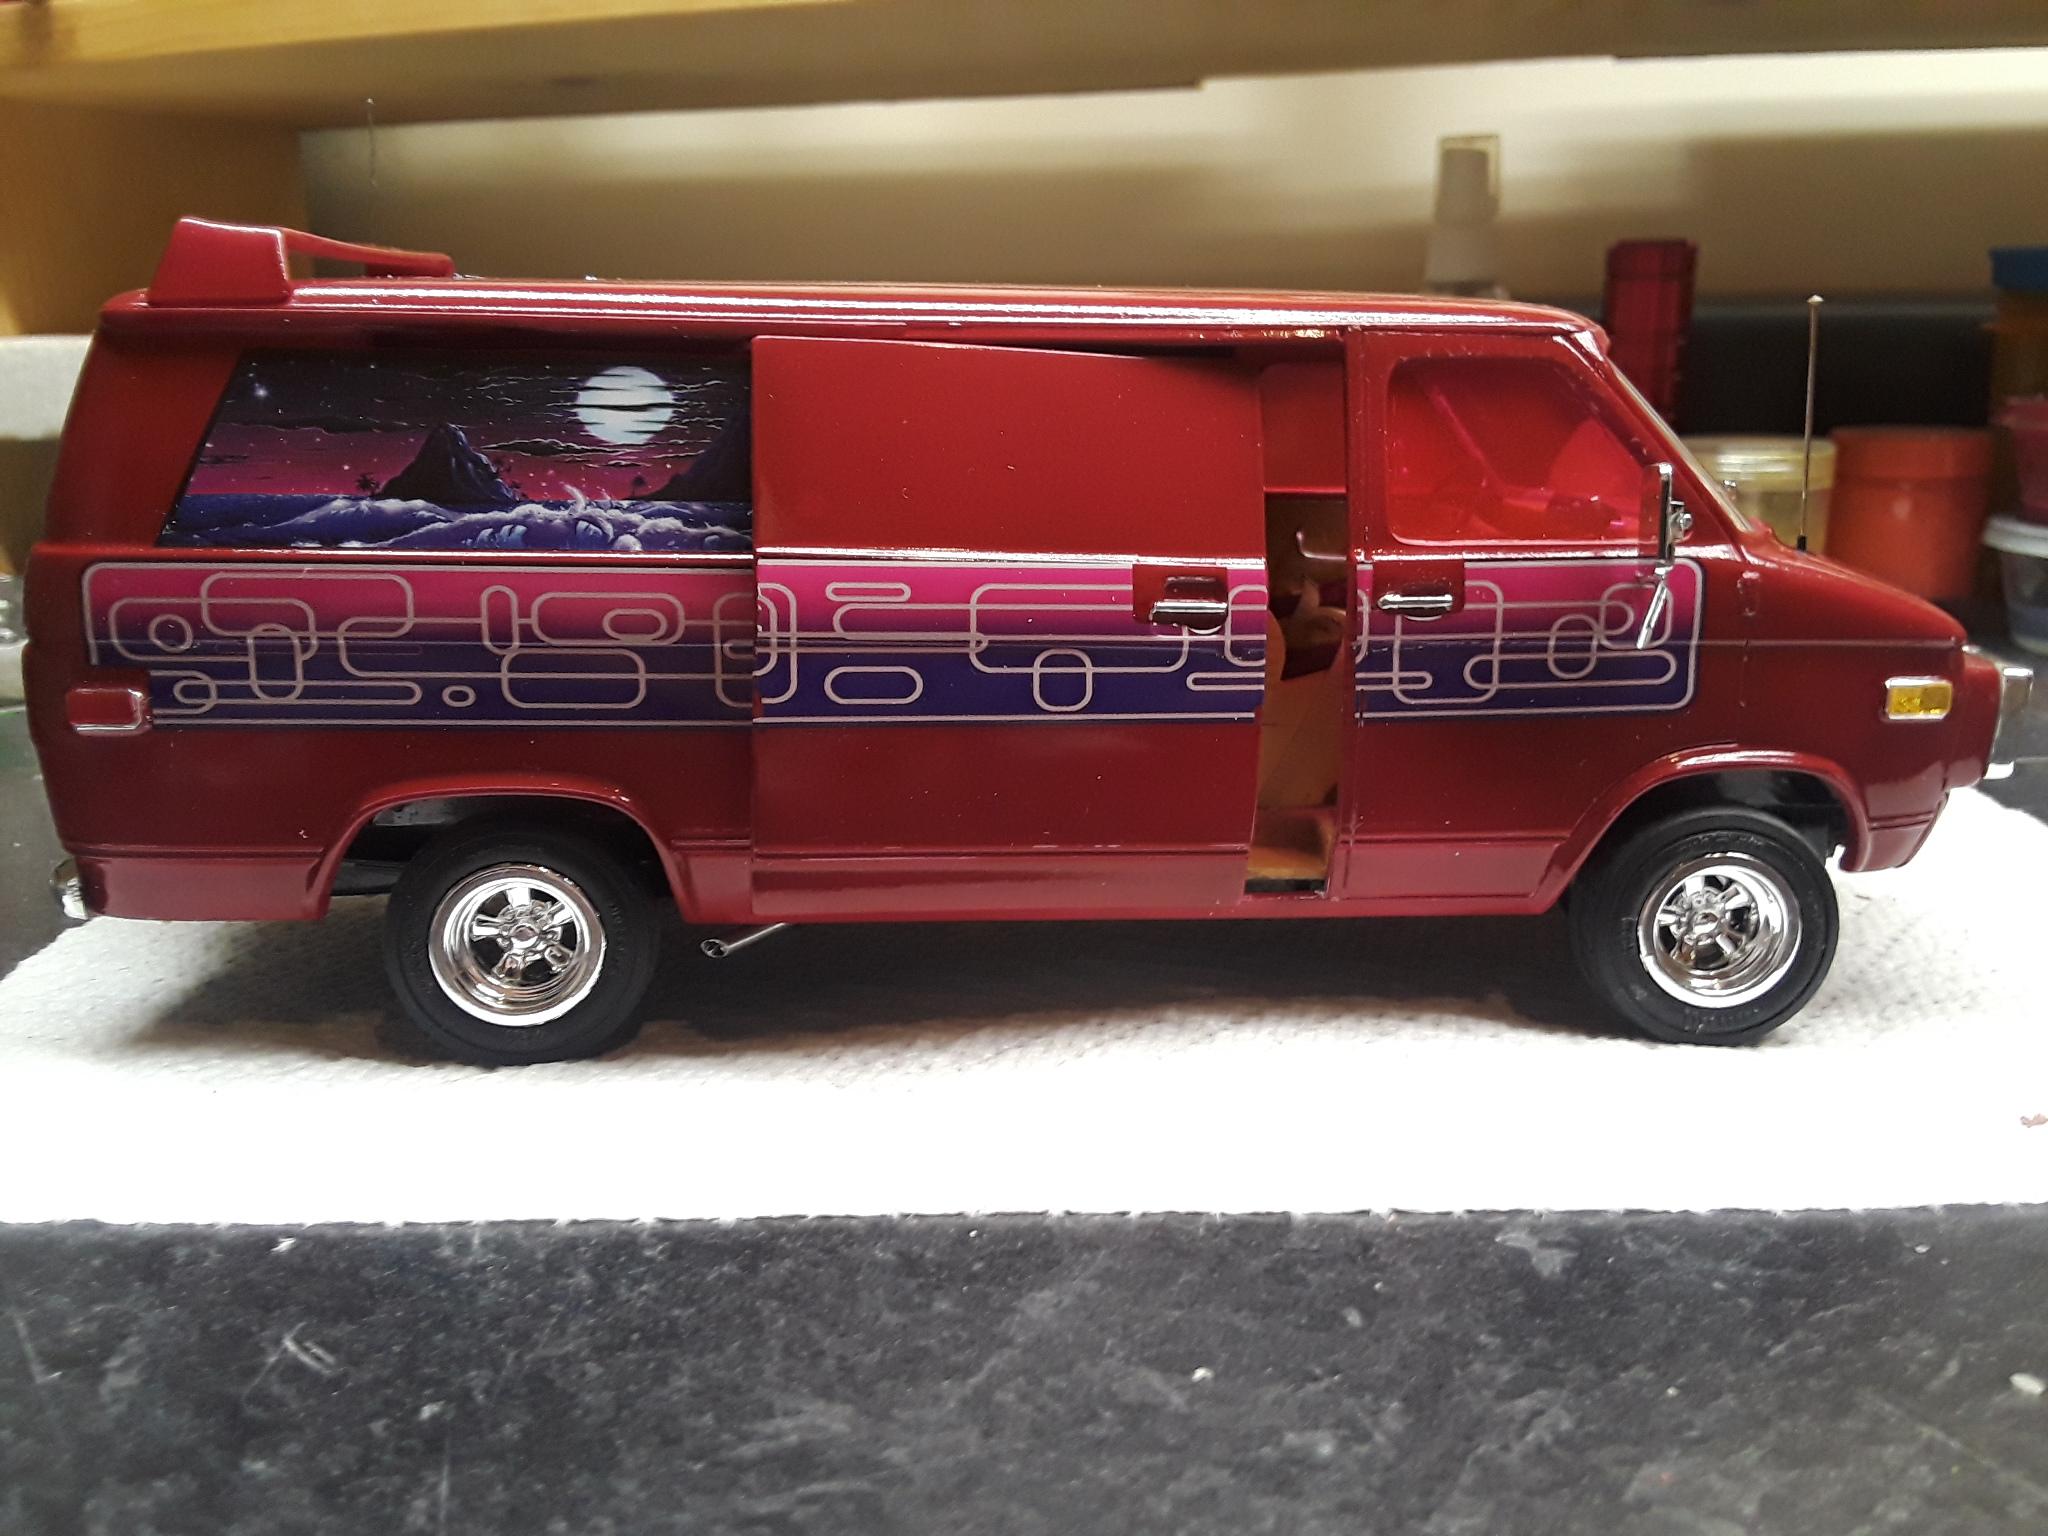
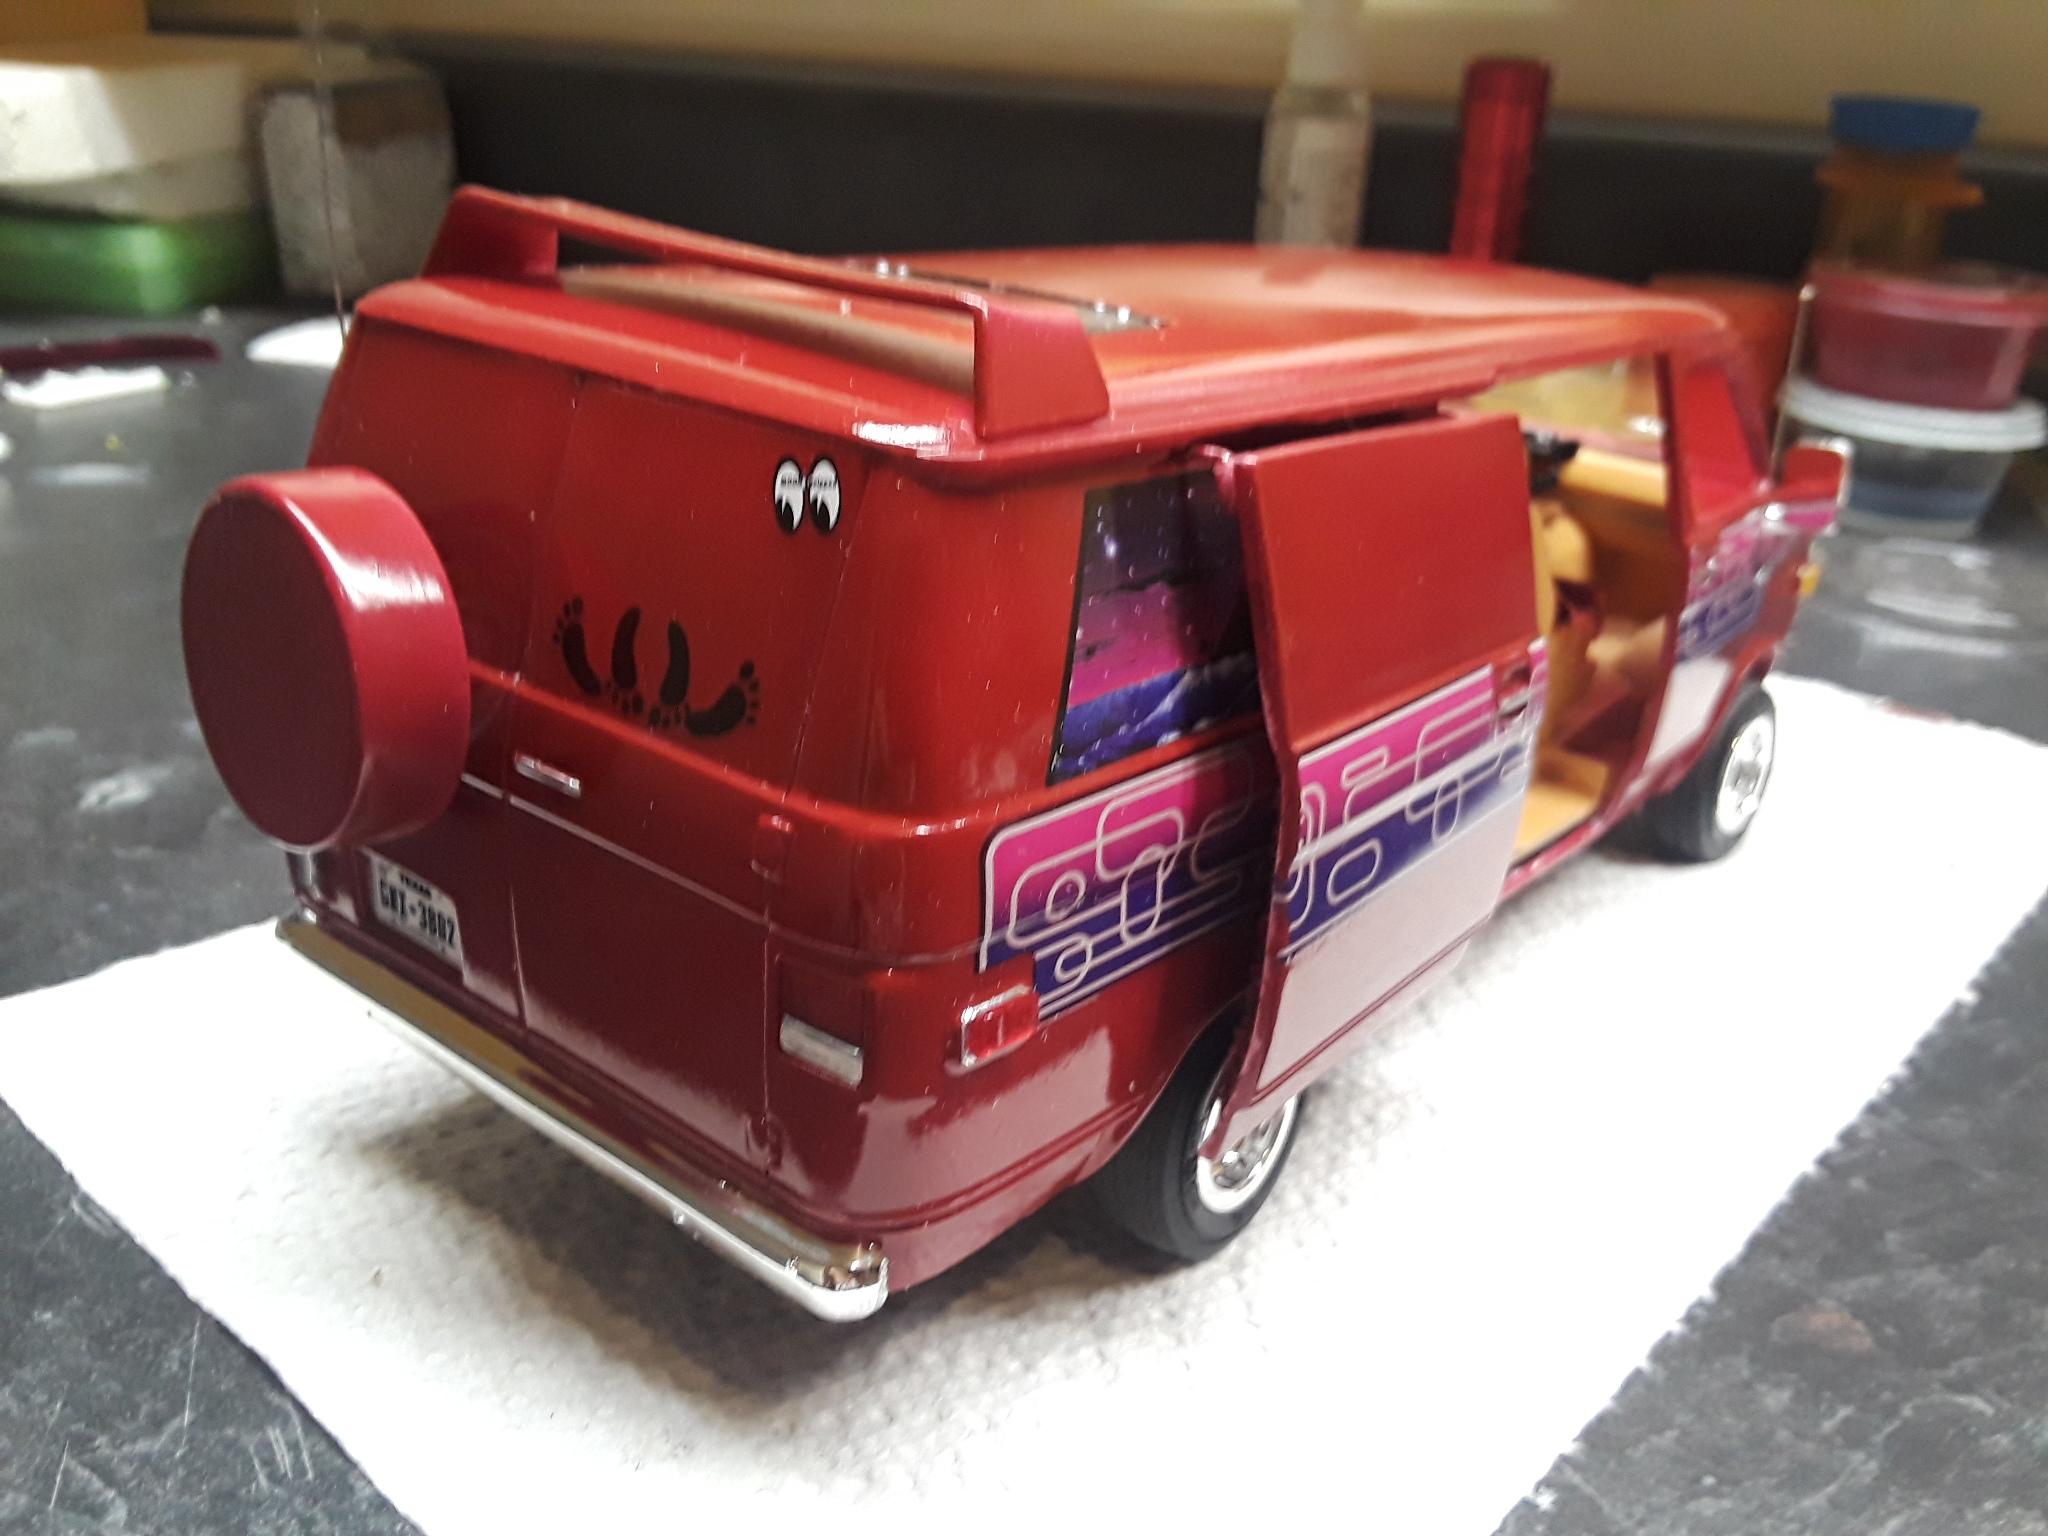
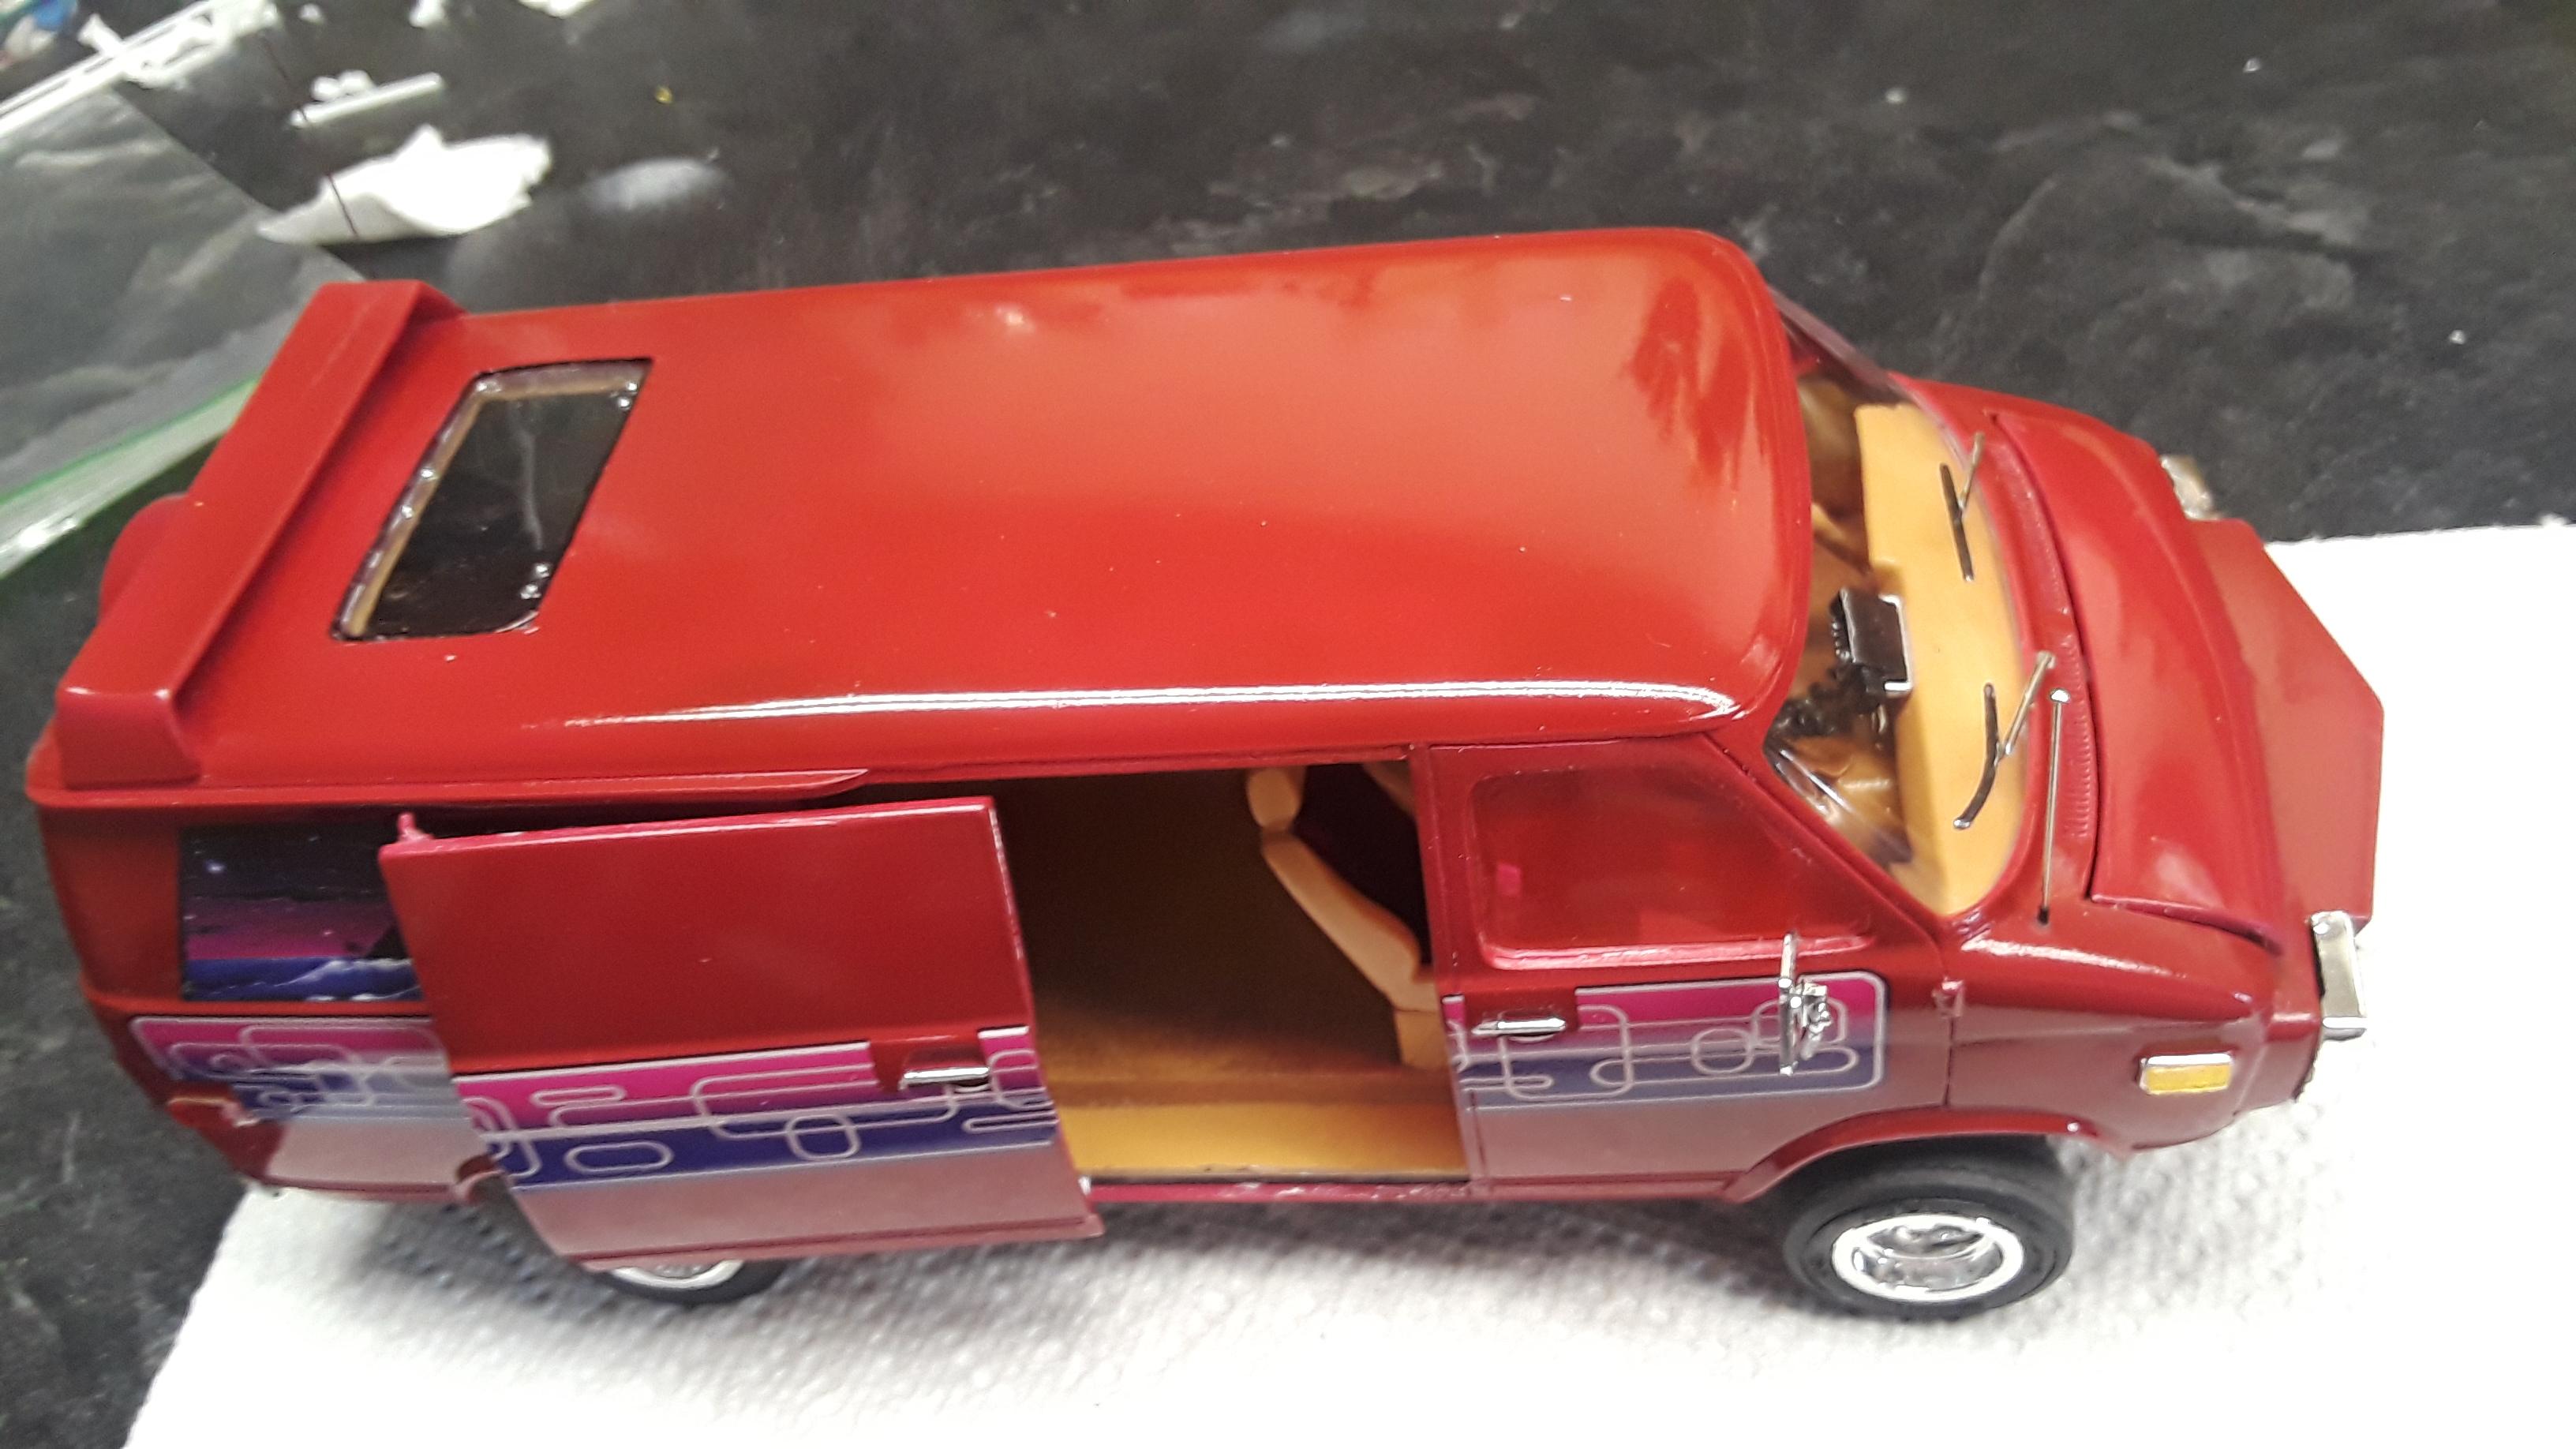
Completed AMT "Dirty Donnie" kit. Painted with hobby acrylics and Testor's clear lacquer. Wood, fabric, flocking, and styrofoam was used on interior. TV, tape deck, seats, steering wheel & column from parts bin, most of the rest of interior was hand made. The sliding door is functional. You can see more in the WIP forum. Comments welcome, hope you enjoy looking.
-
75 Chevy Street Van
Leica007 replied to Leica007's topic in WIP: Model Trucks: Pickups, Vans, SUVs, Light Commercial
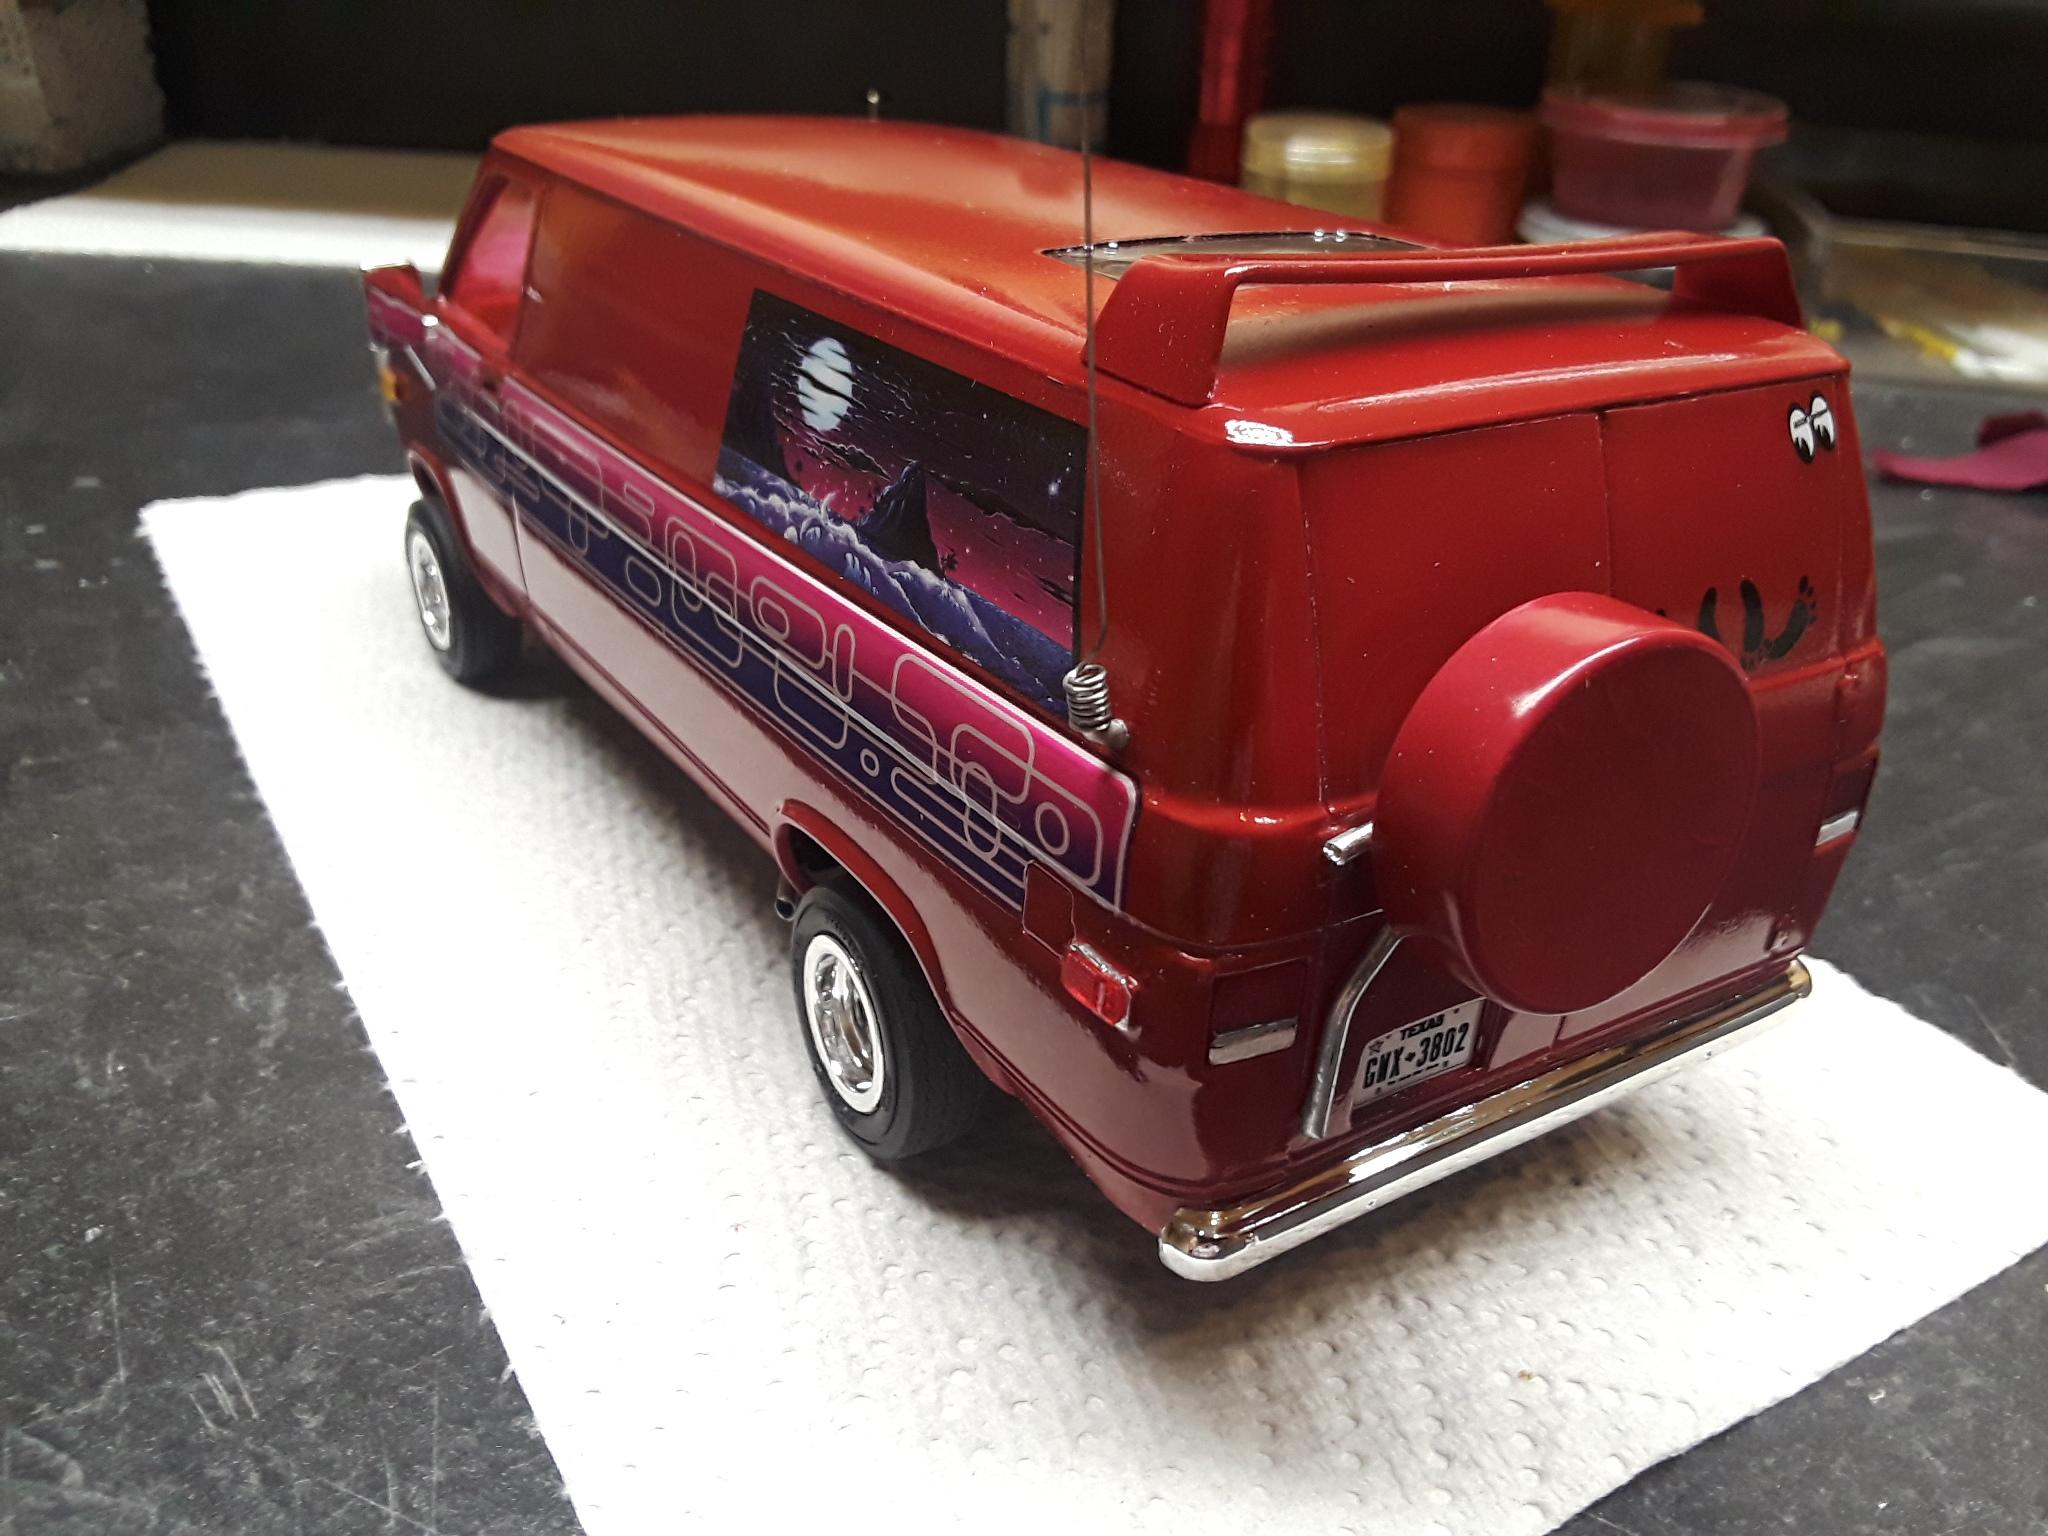
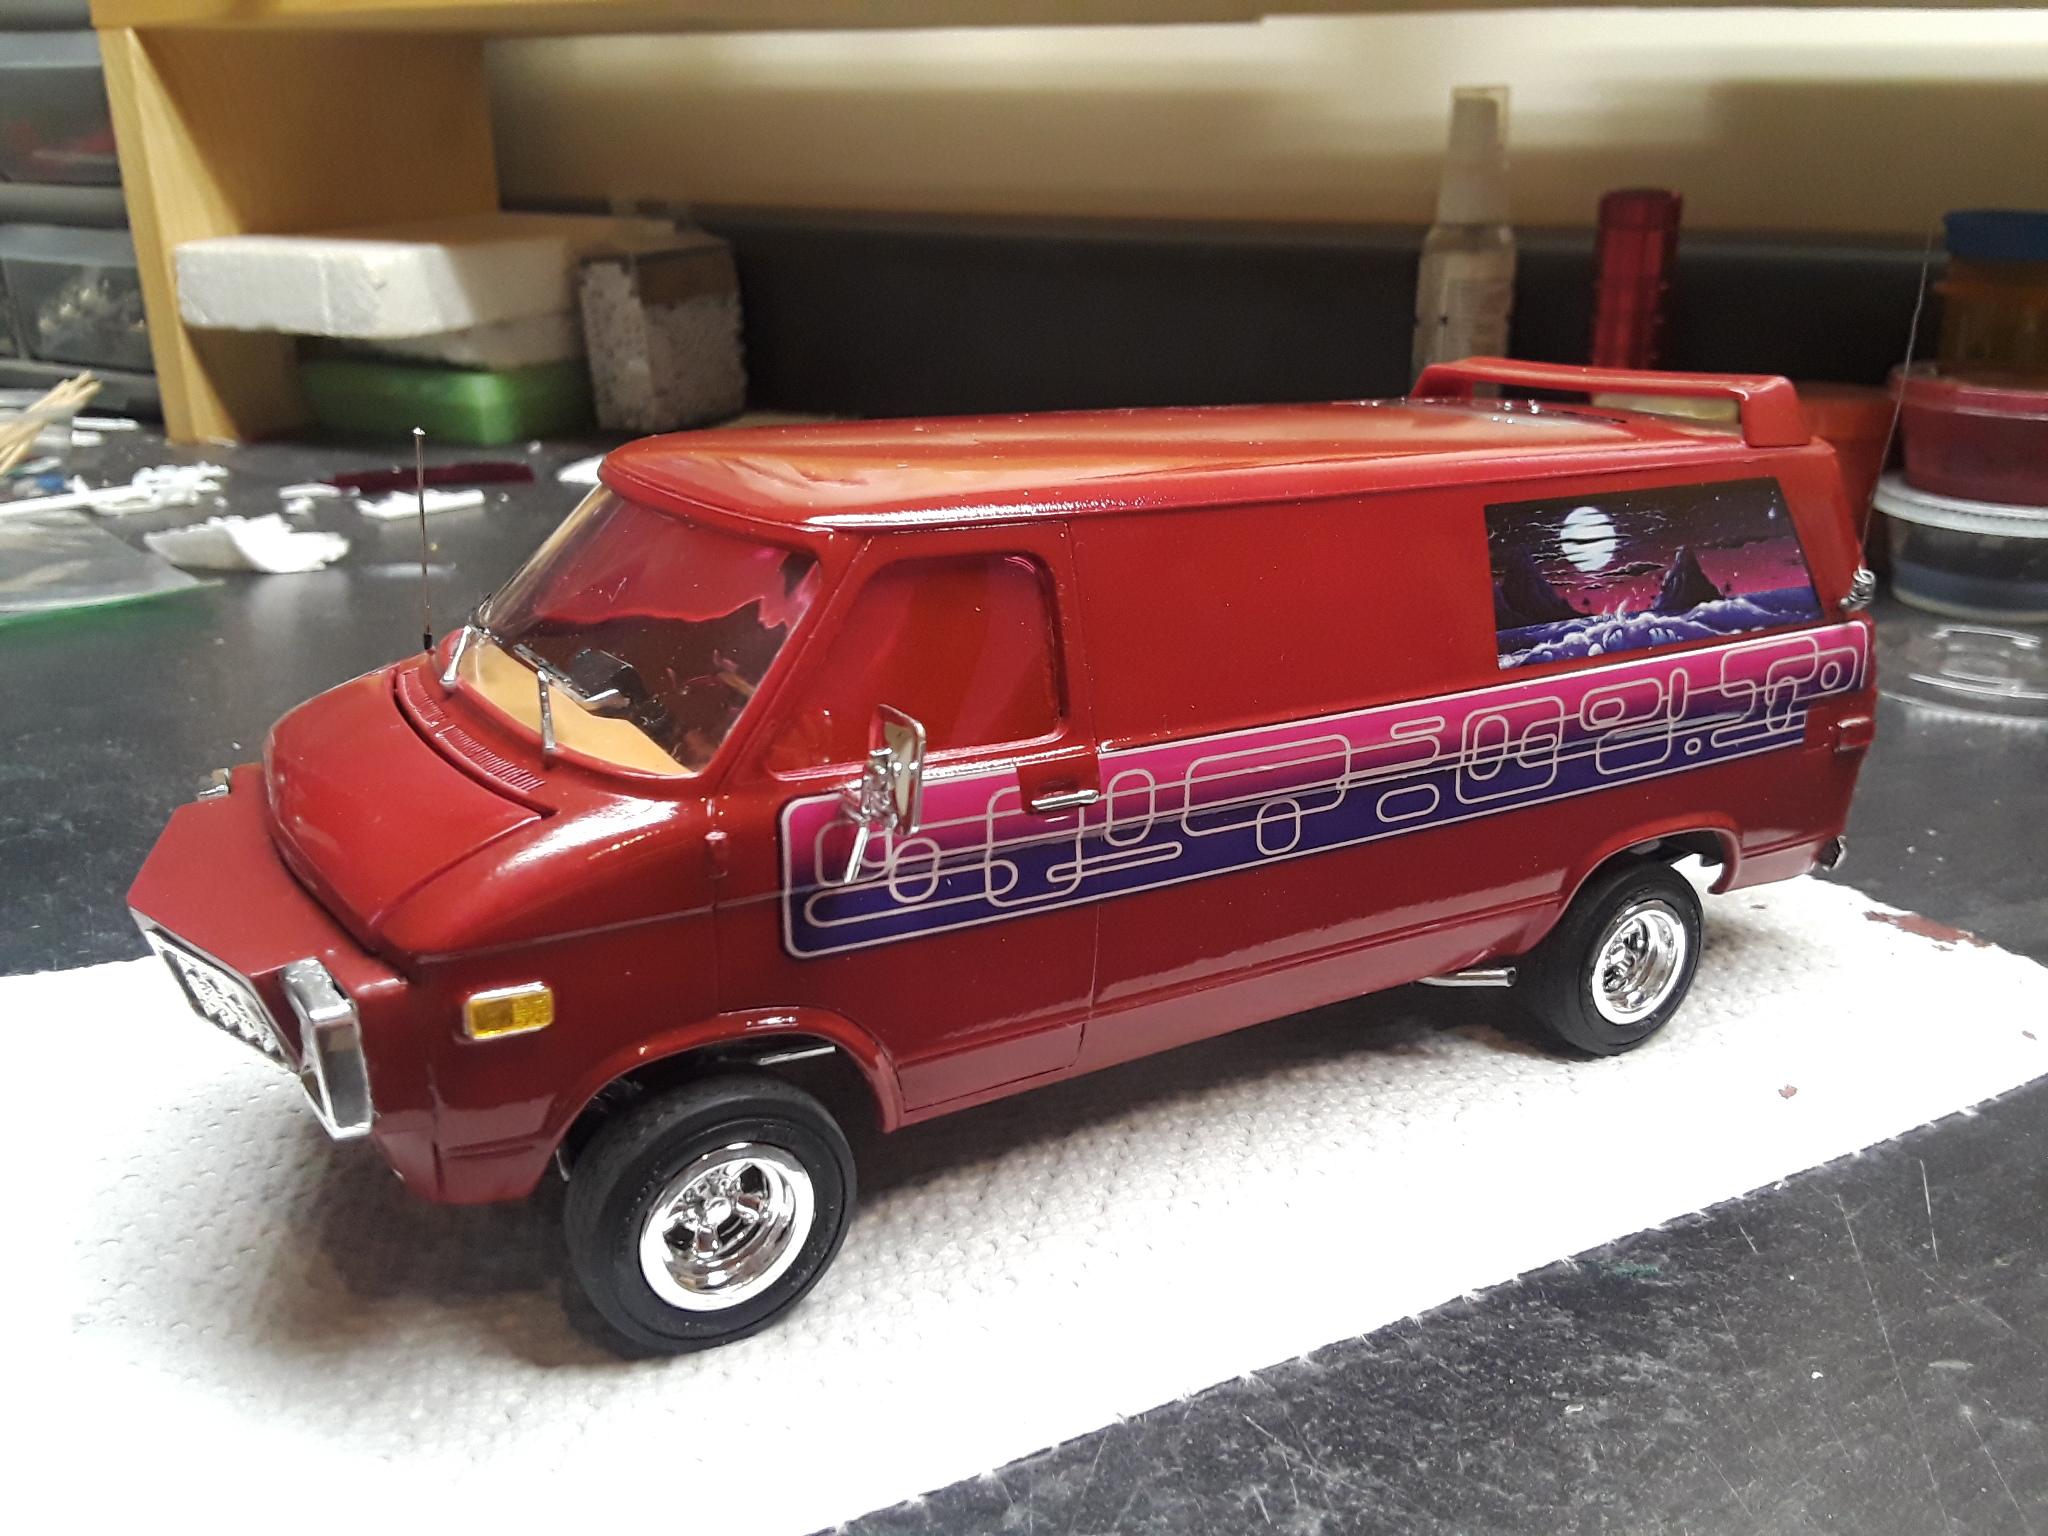
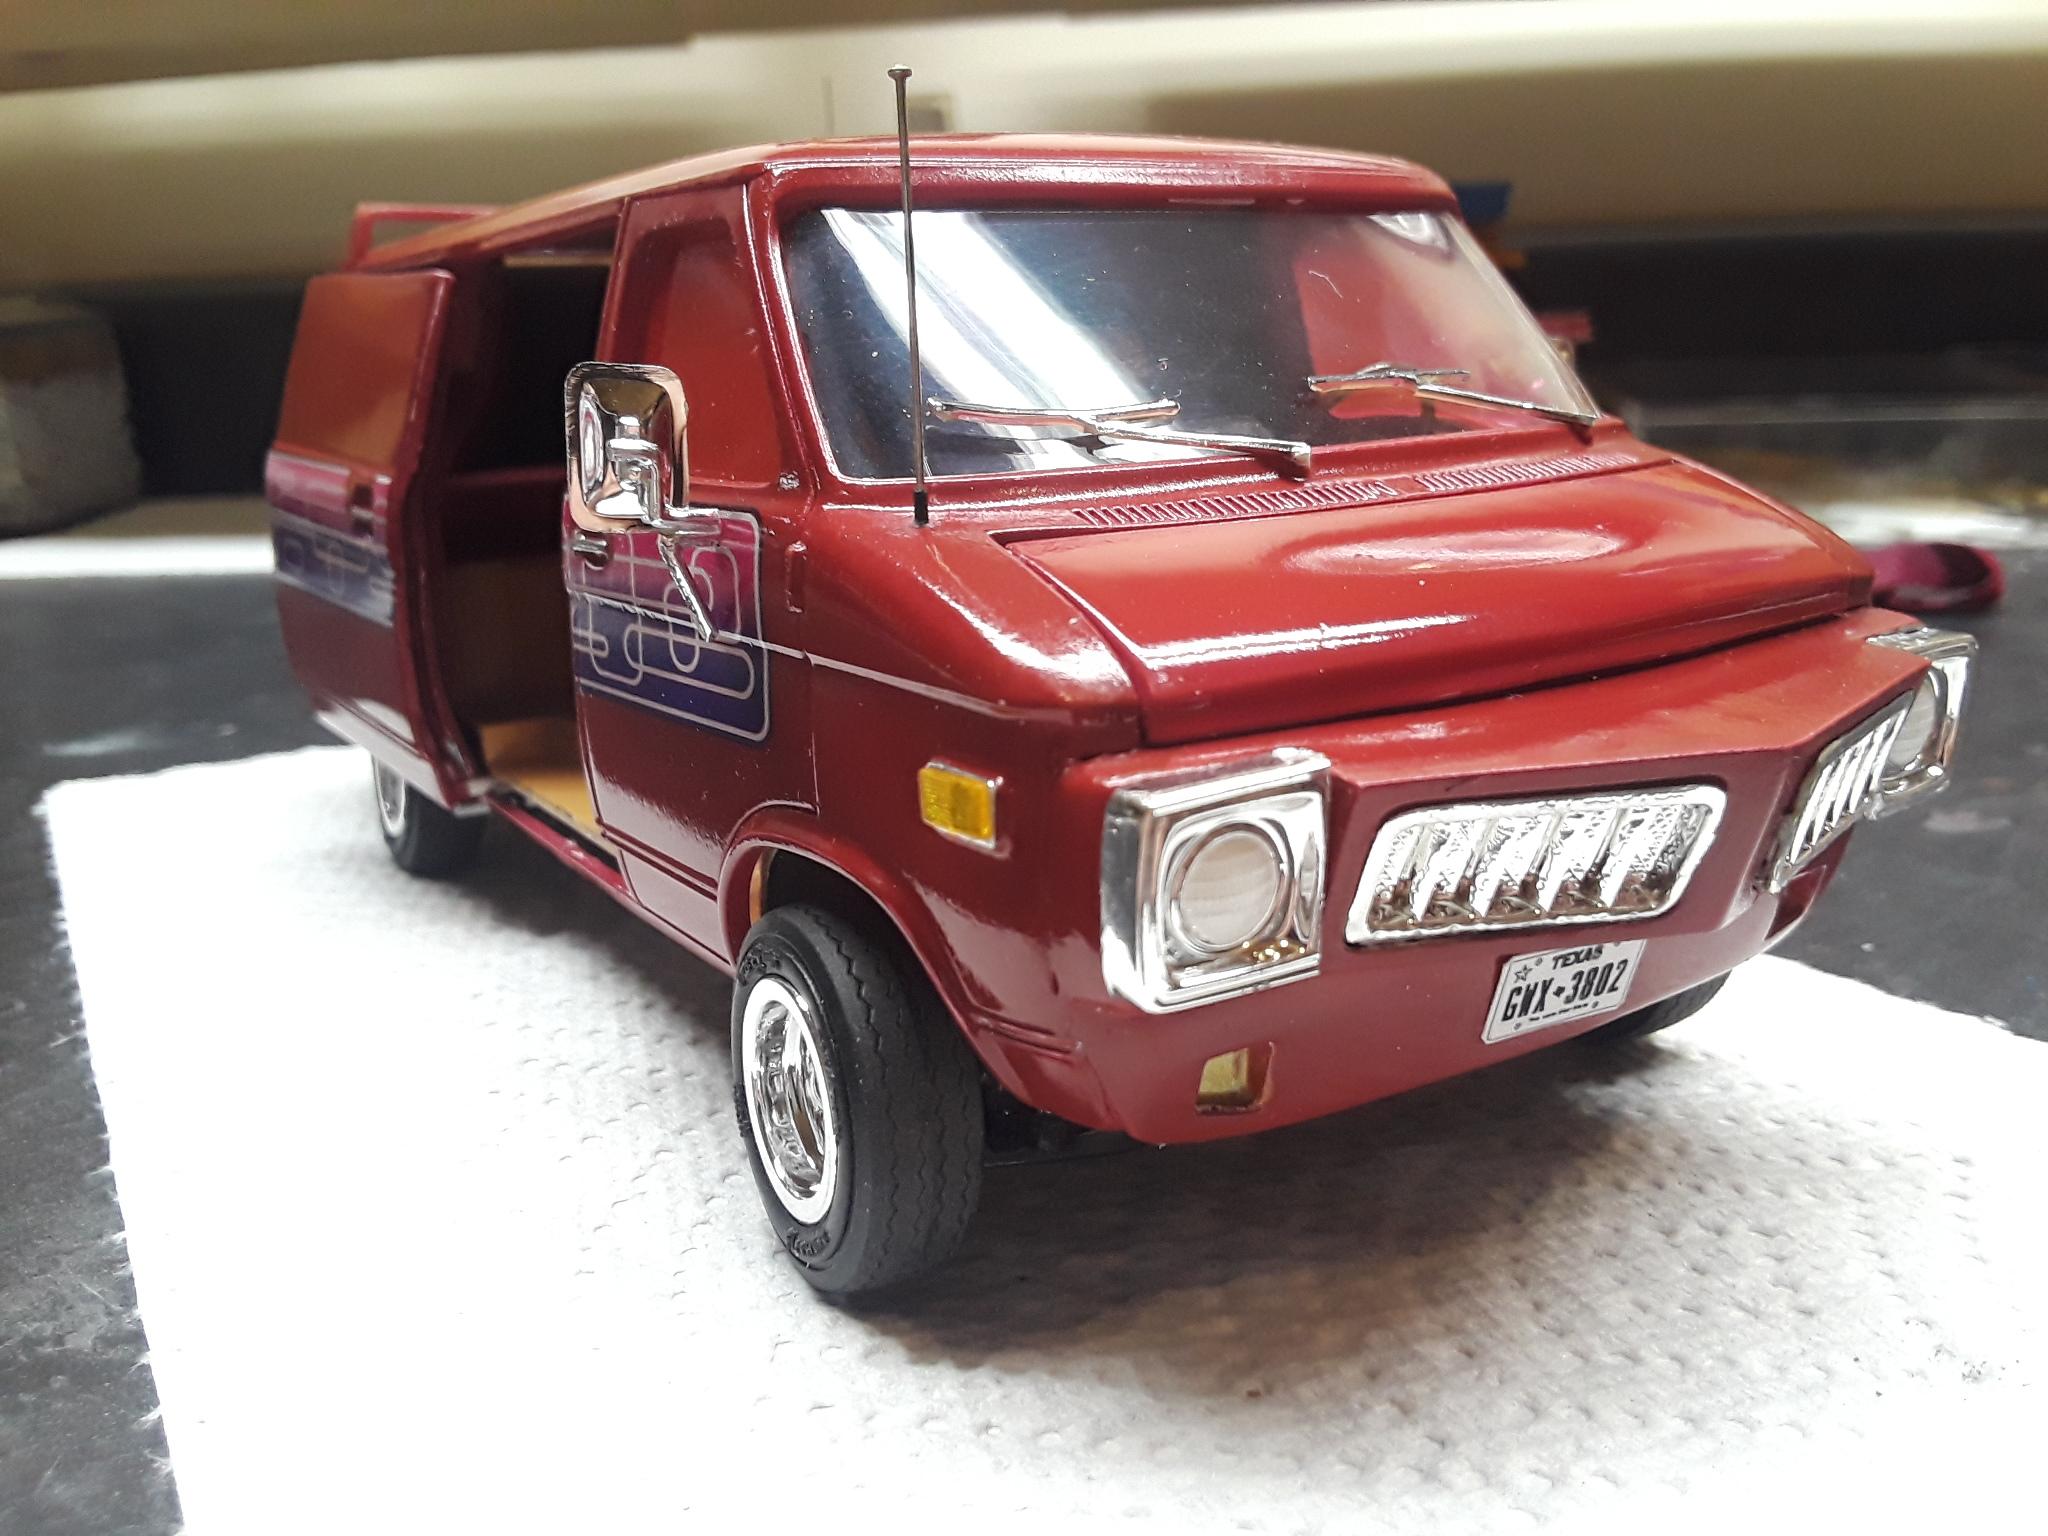
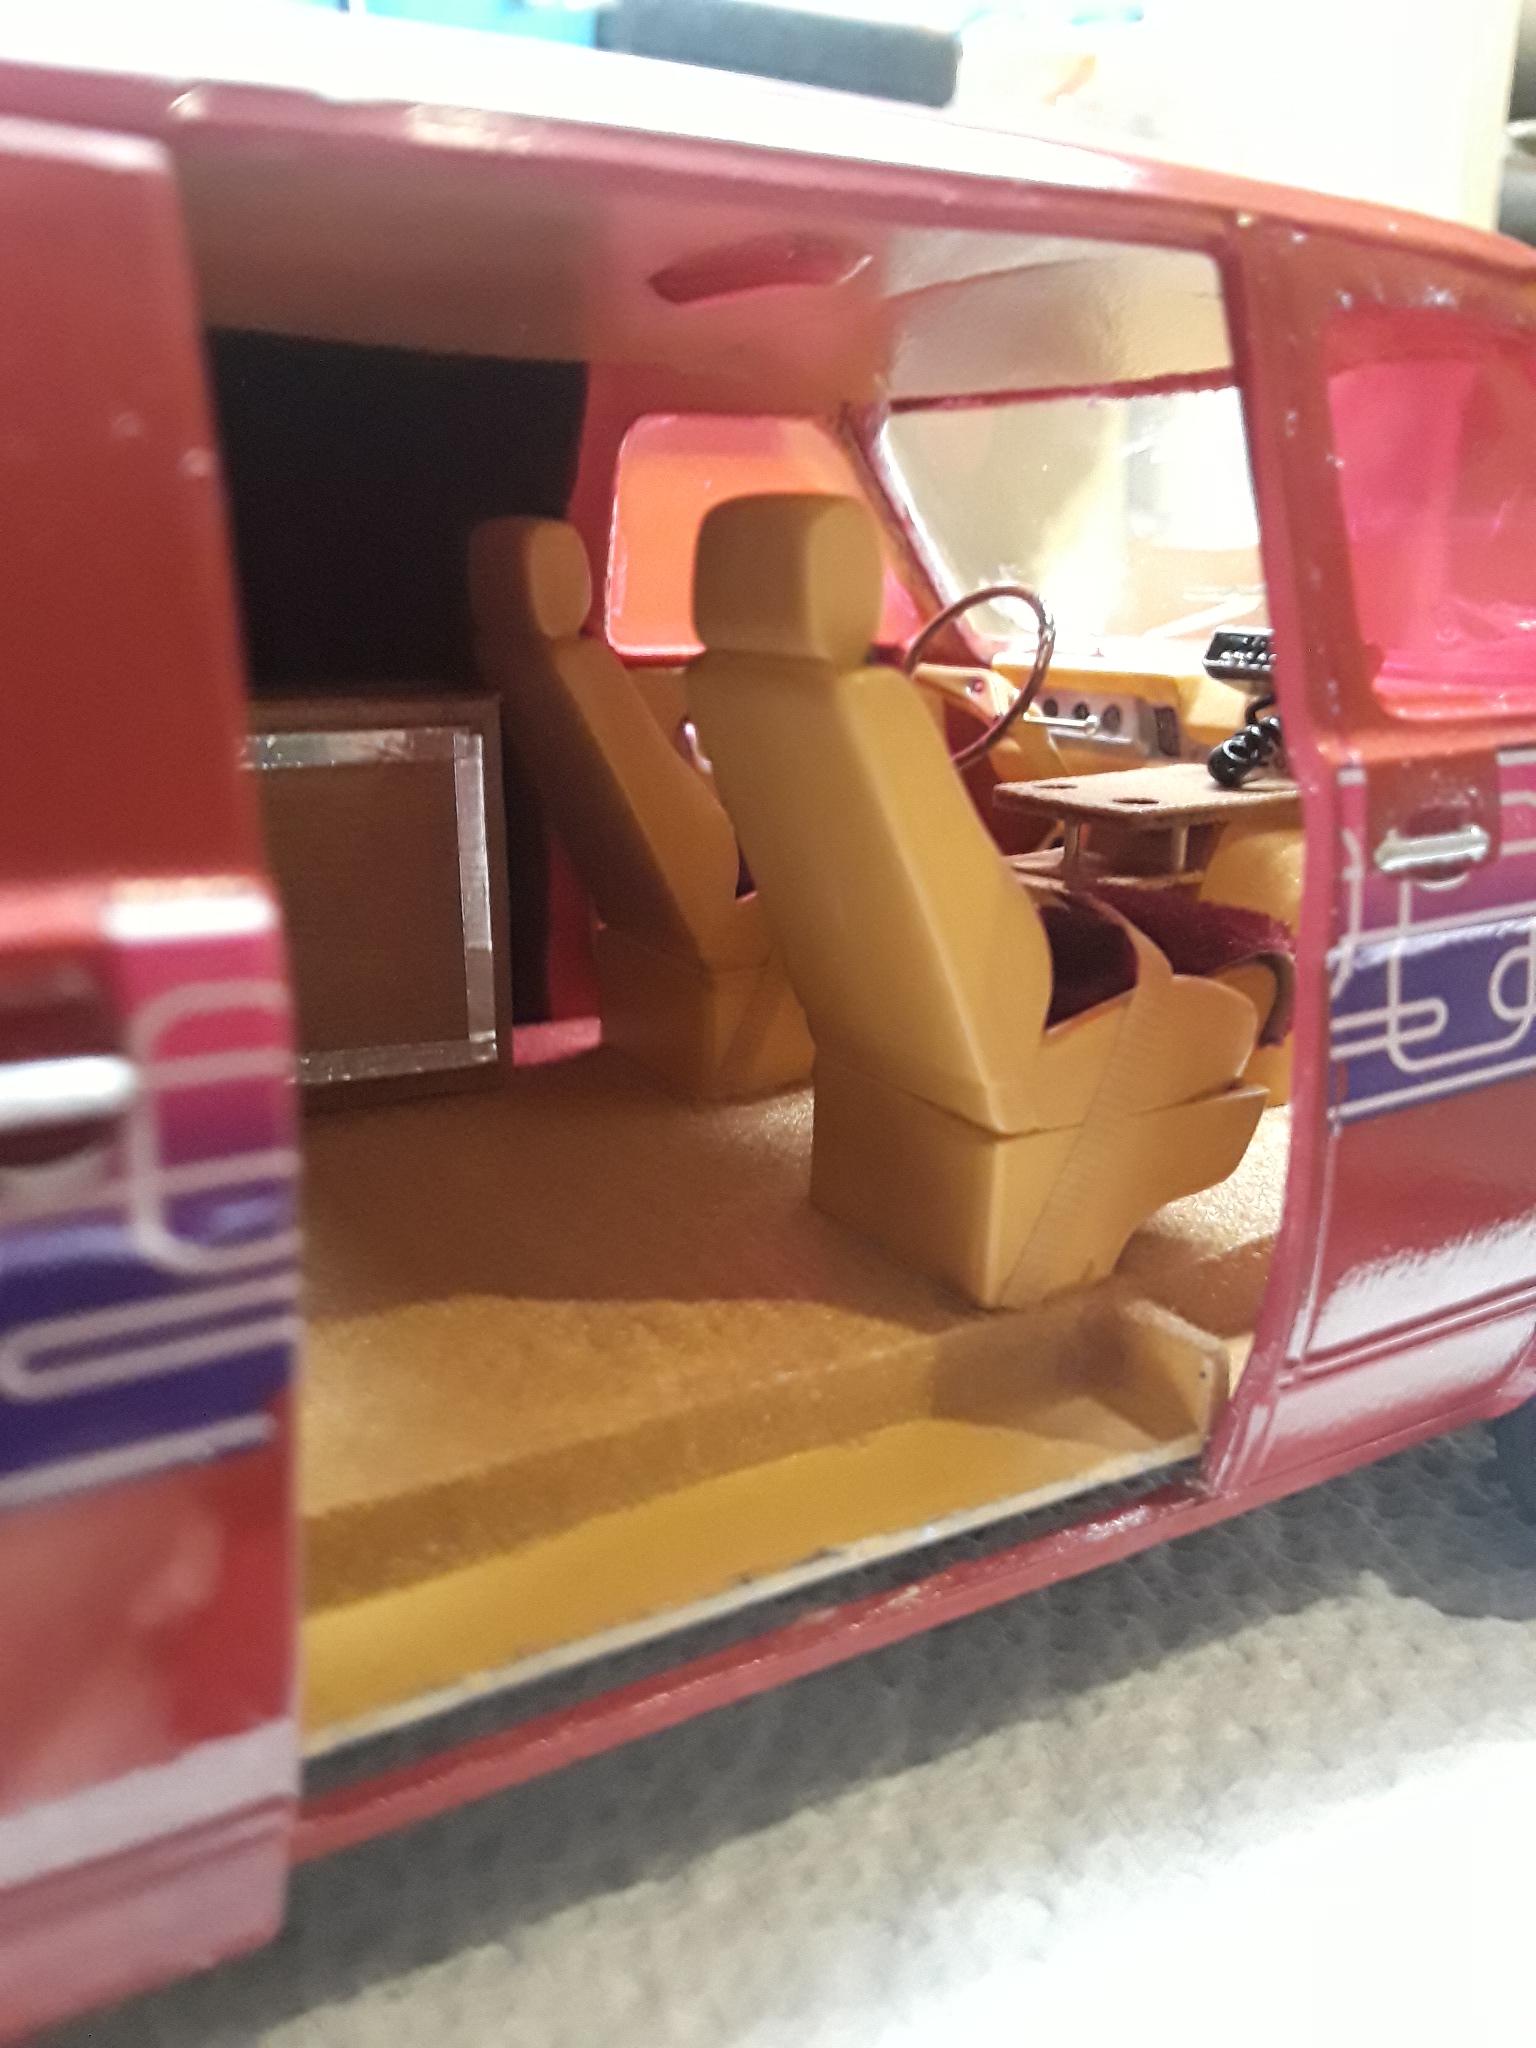
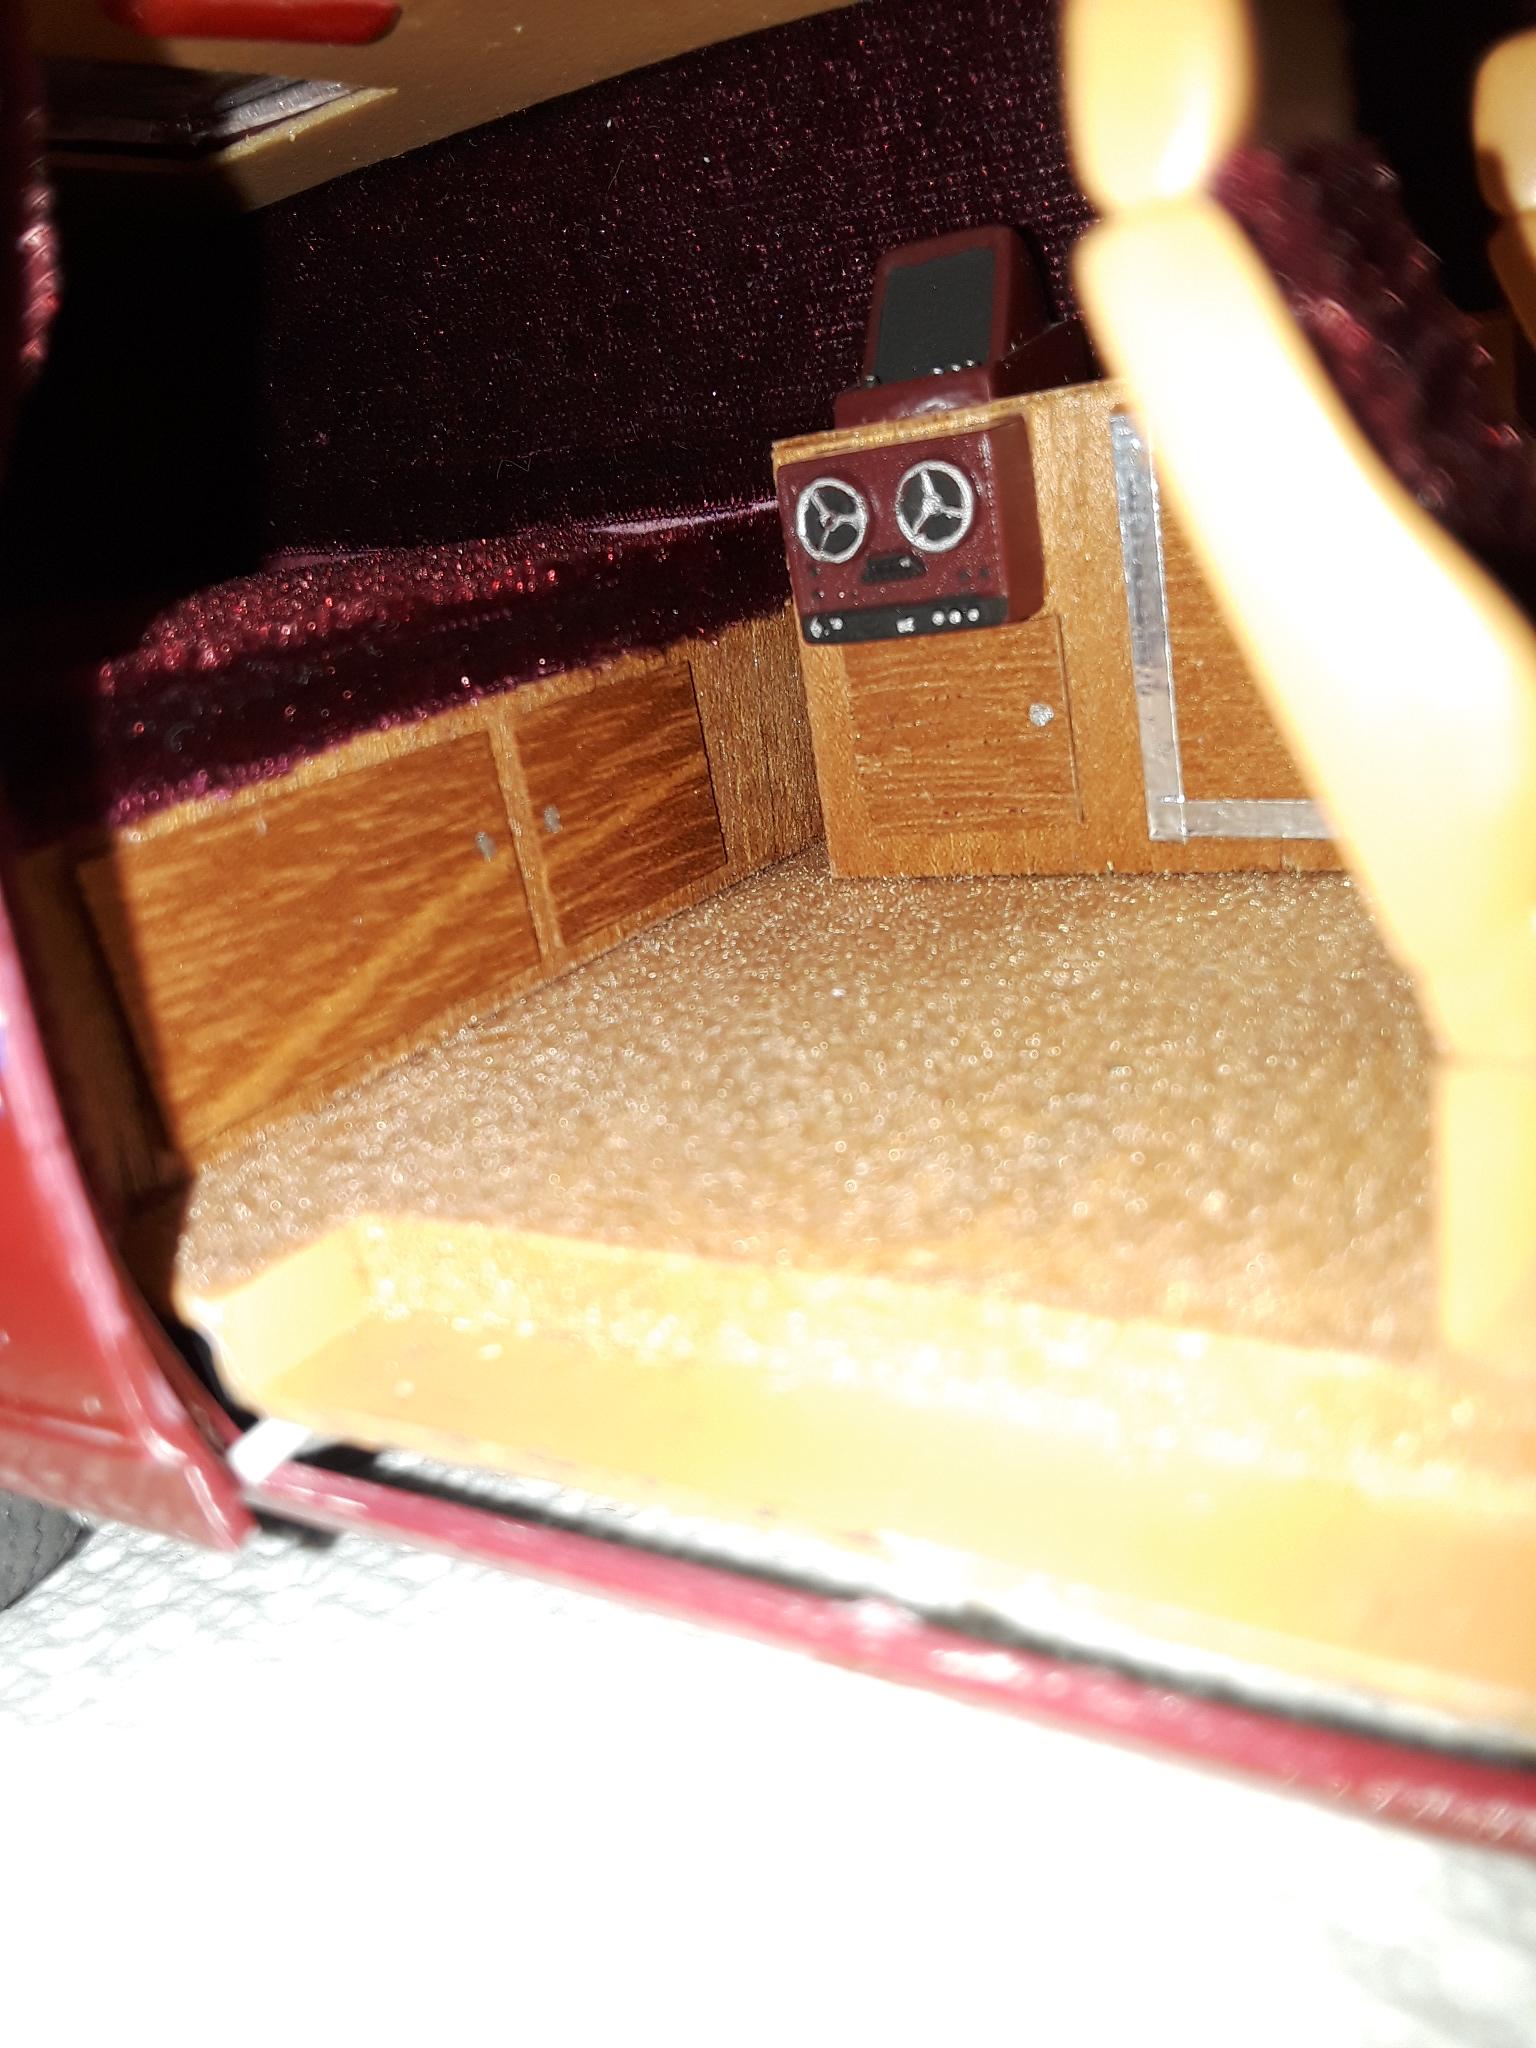
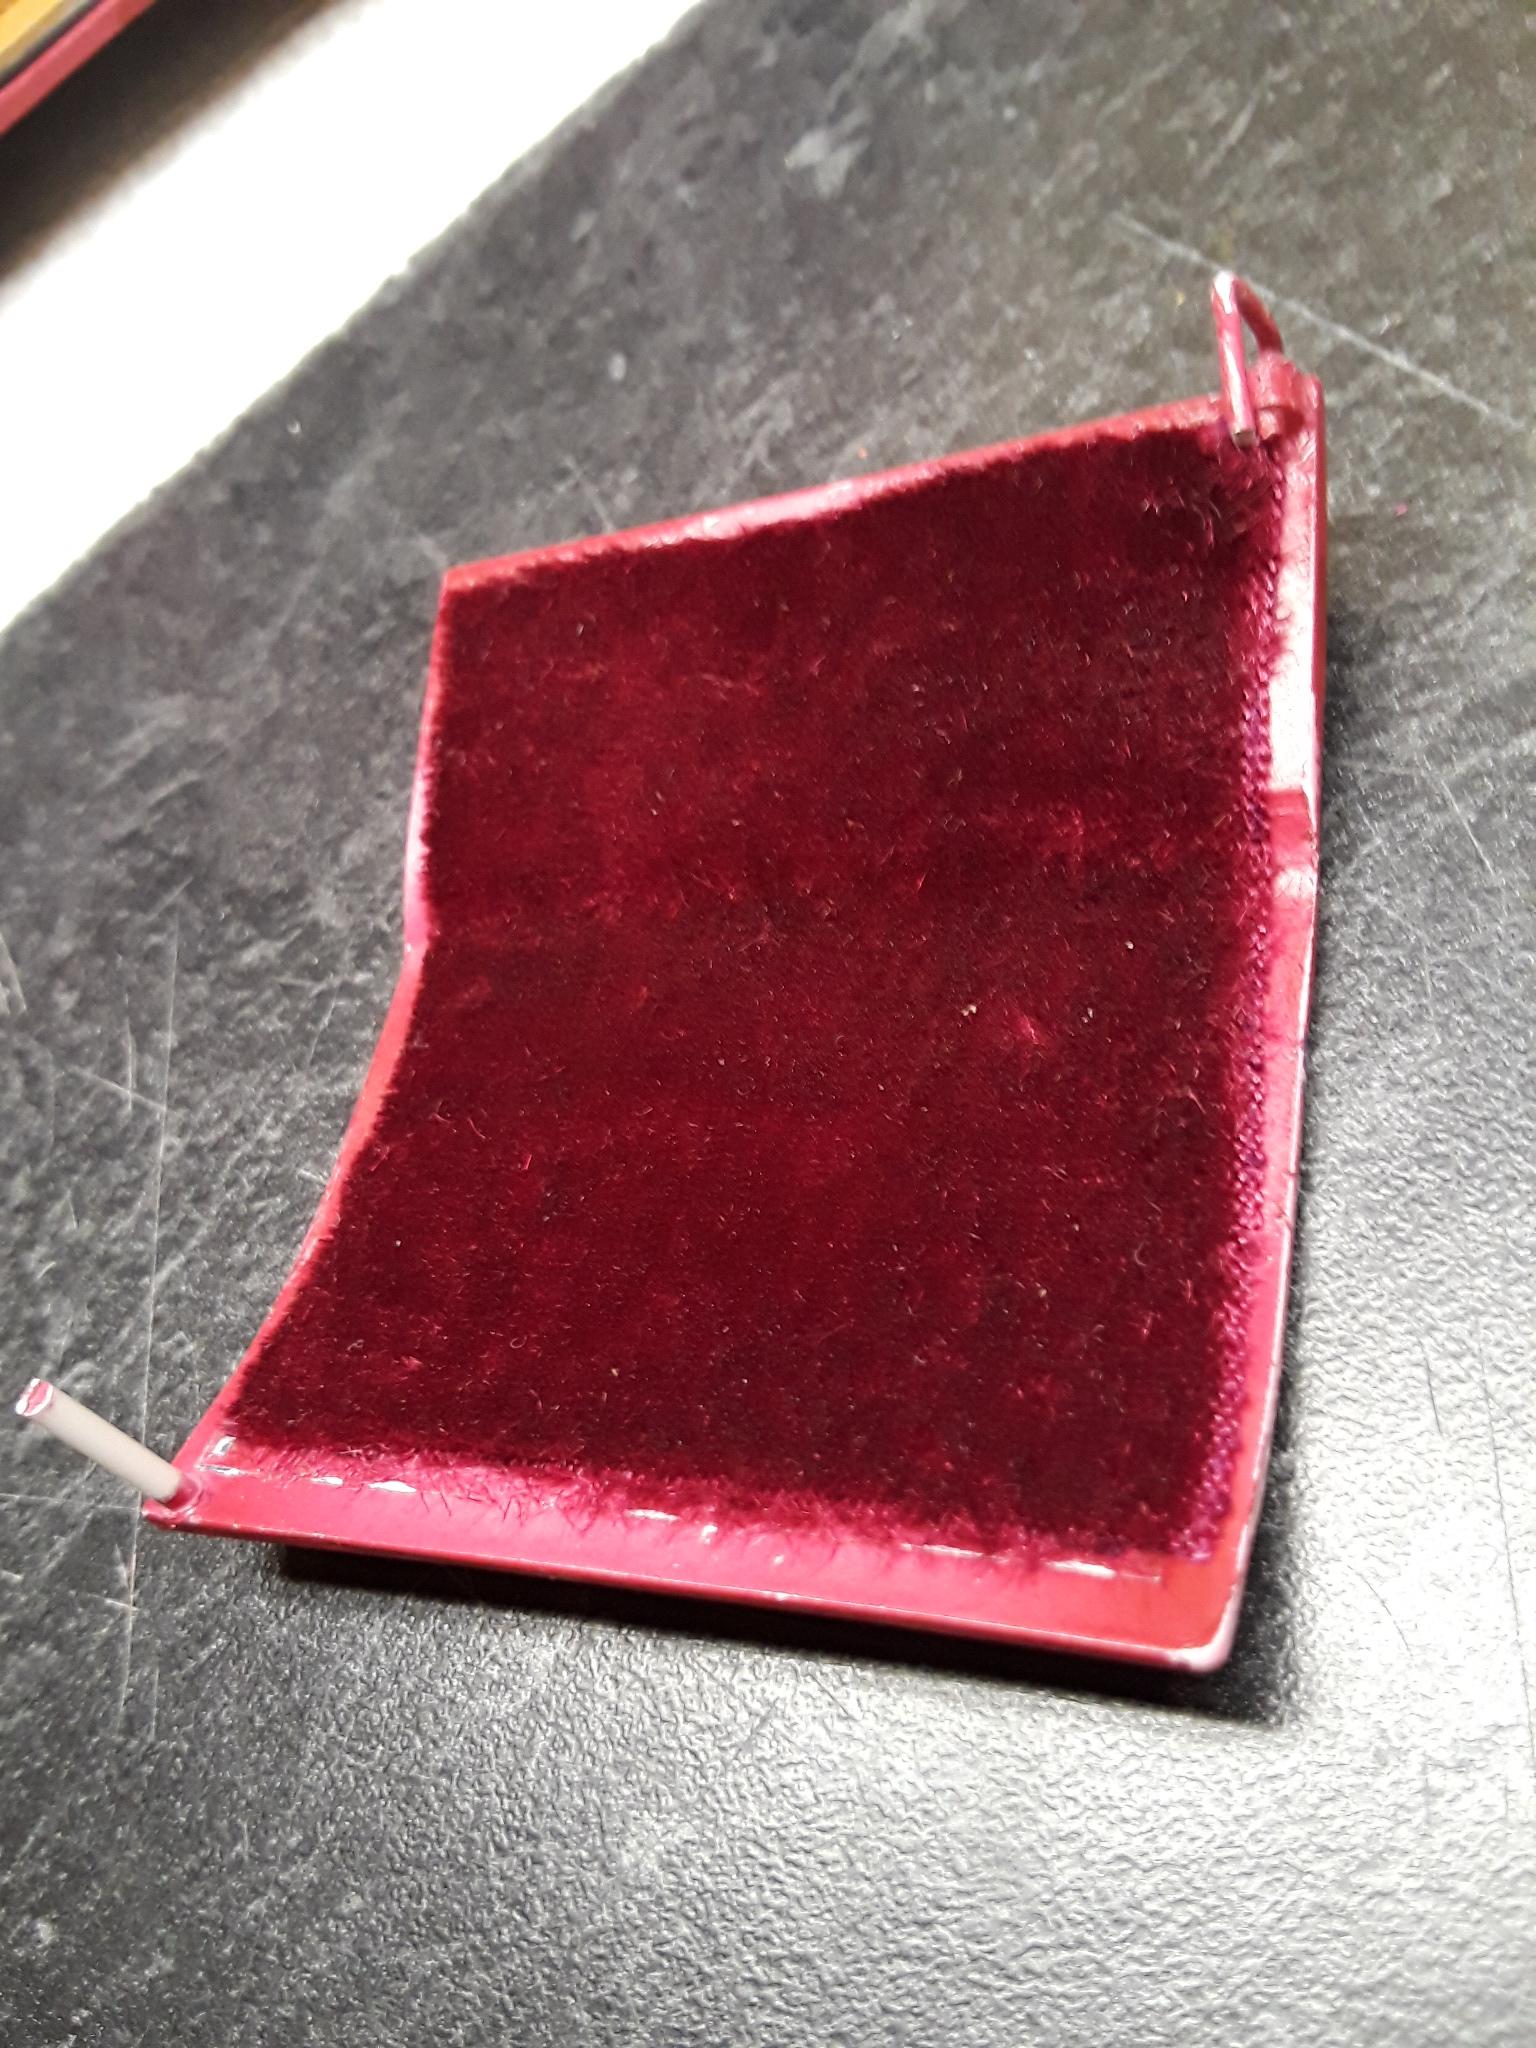
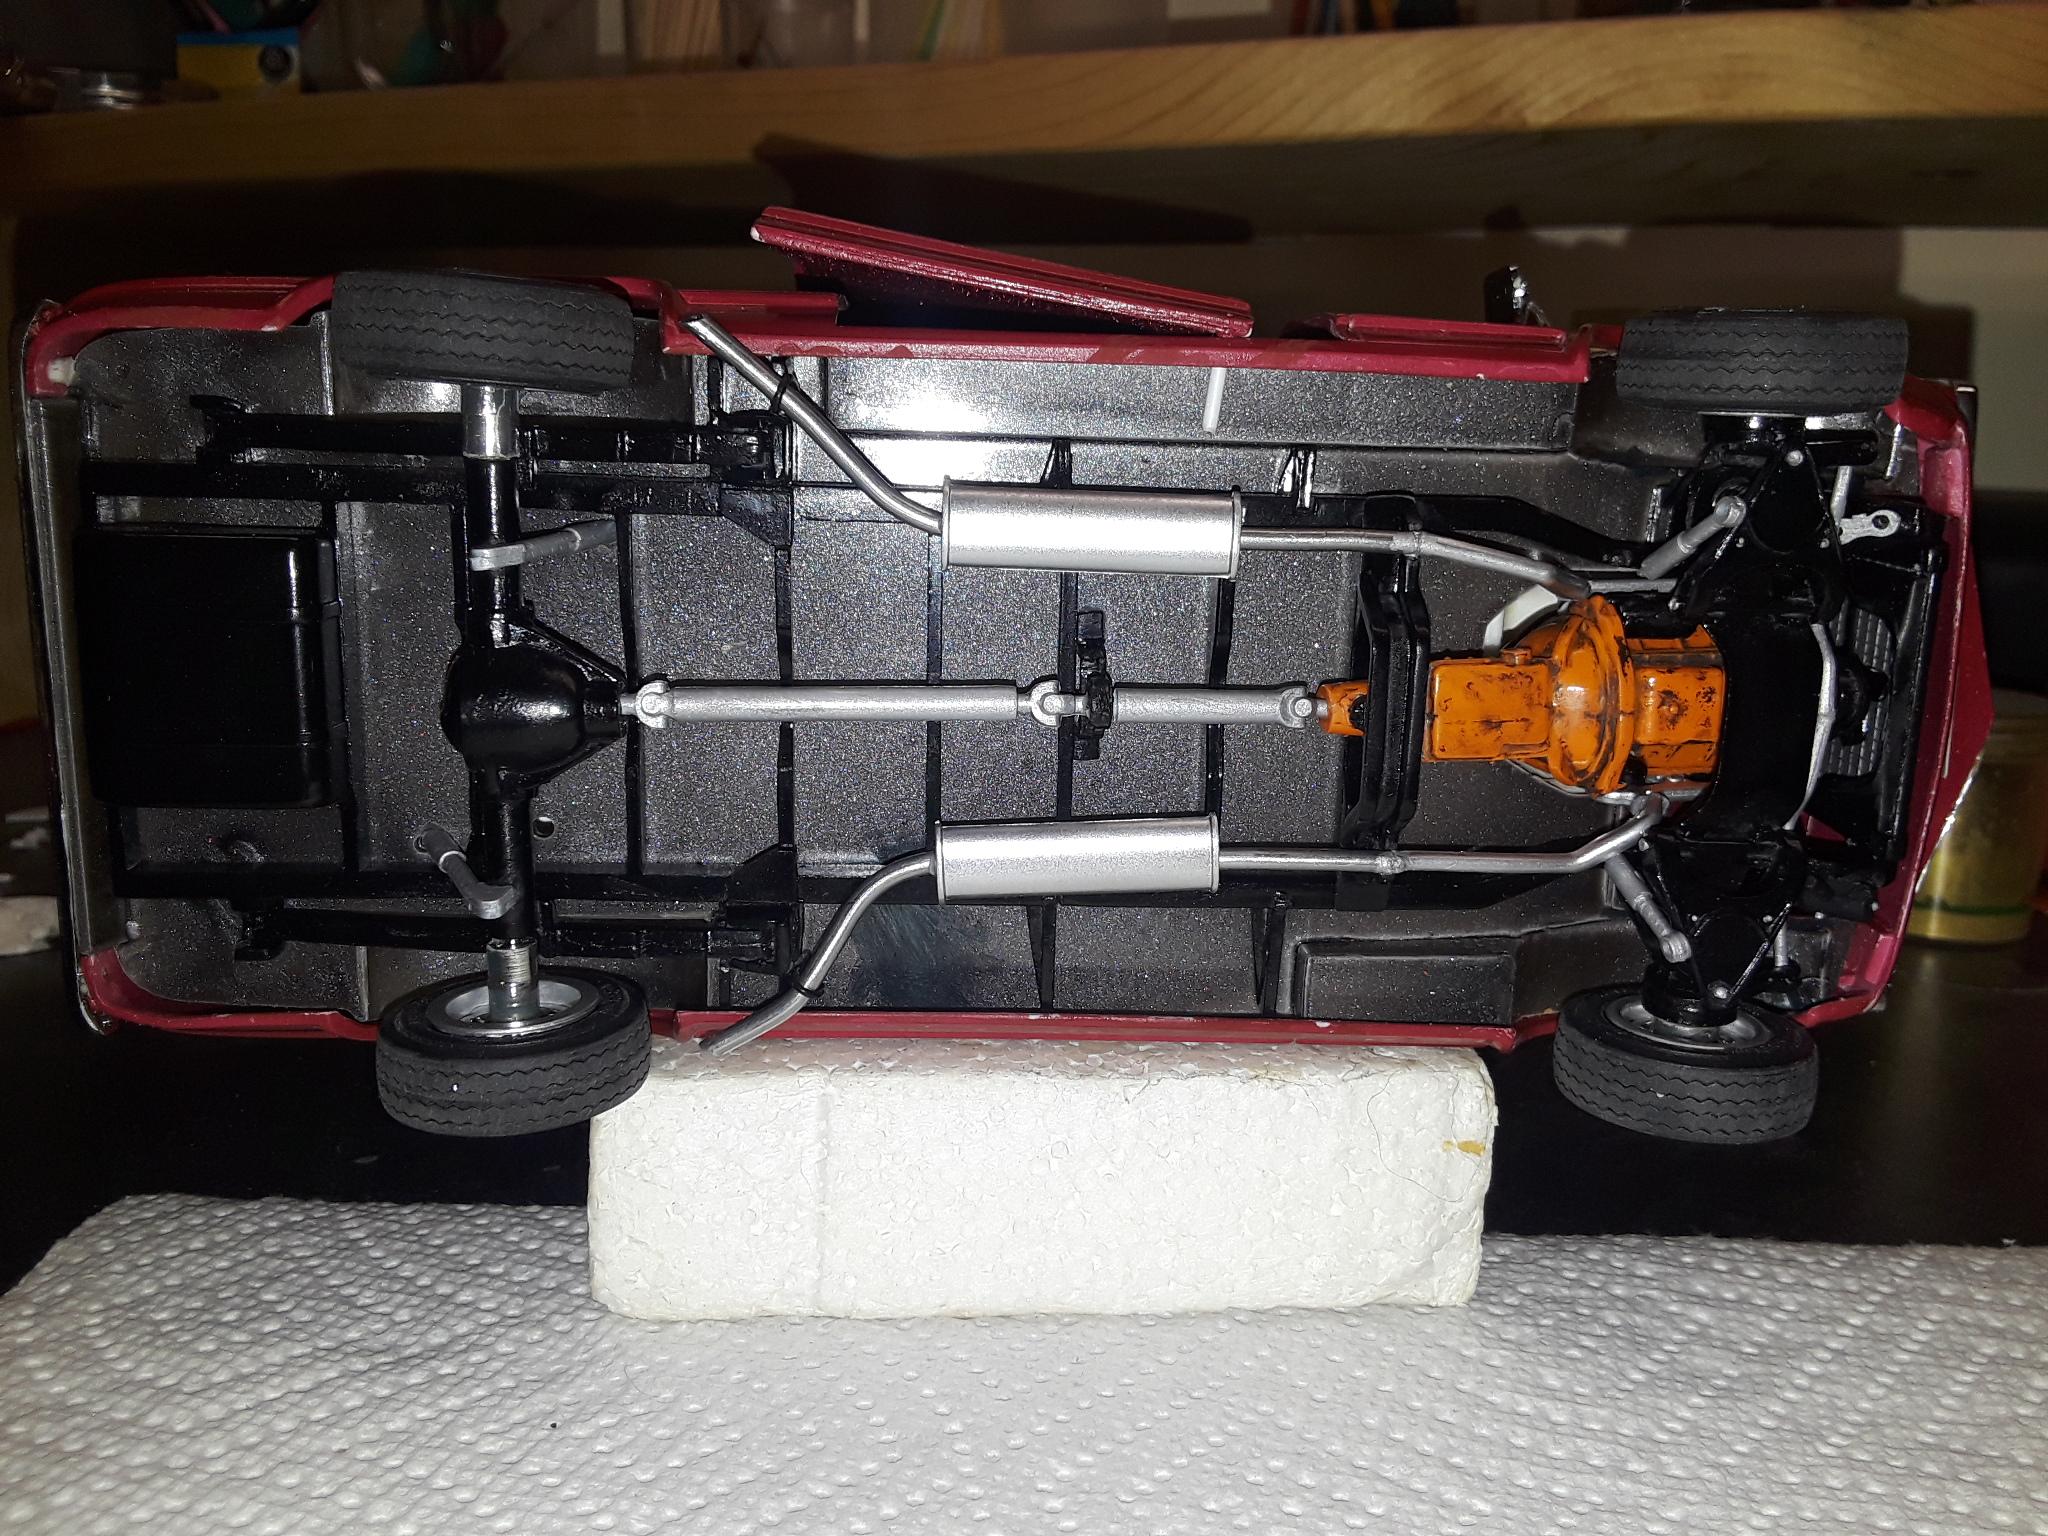
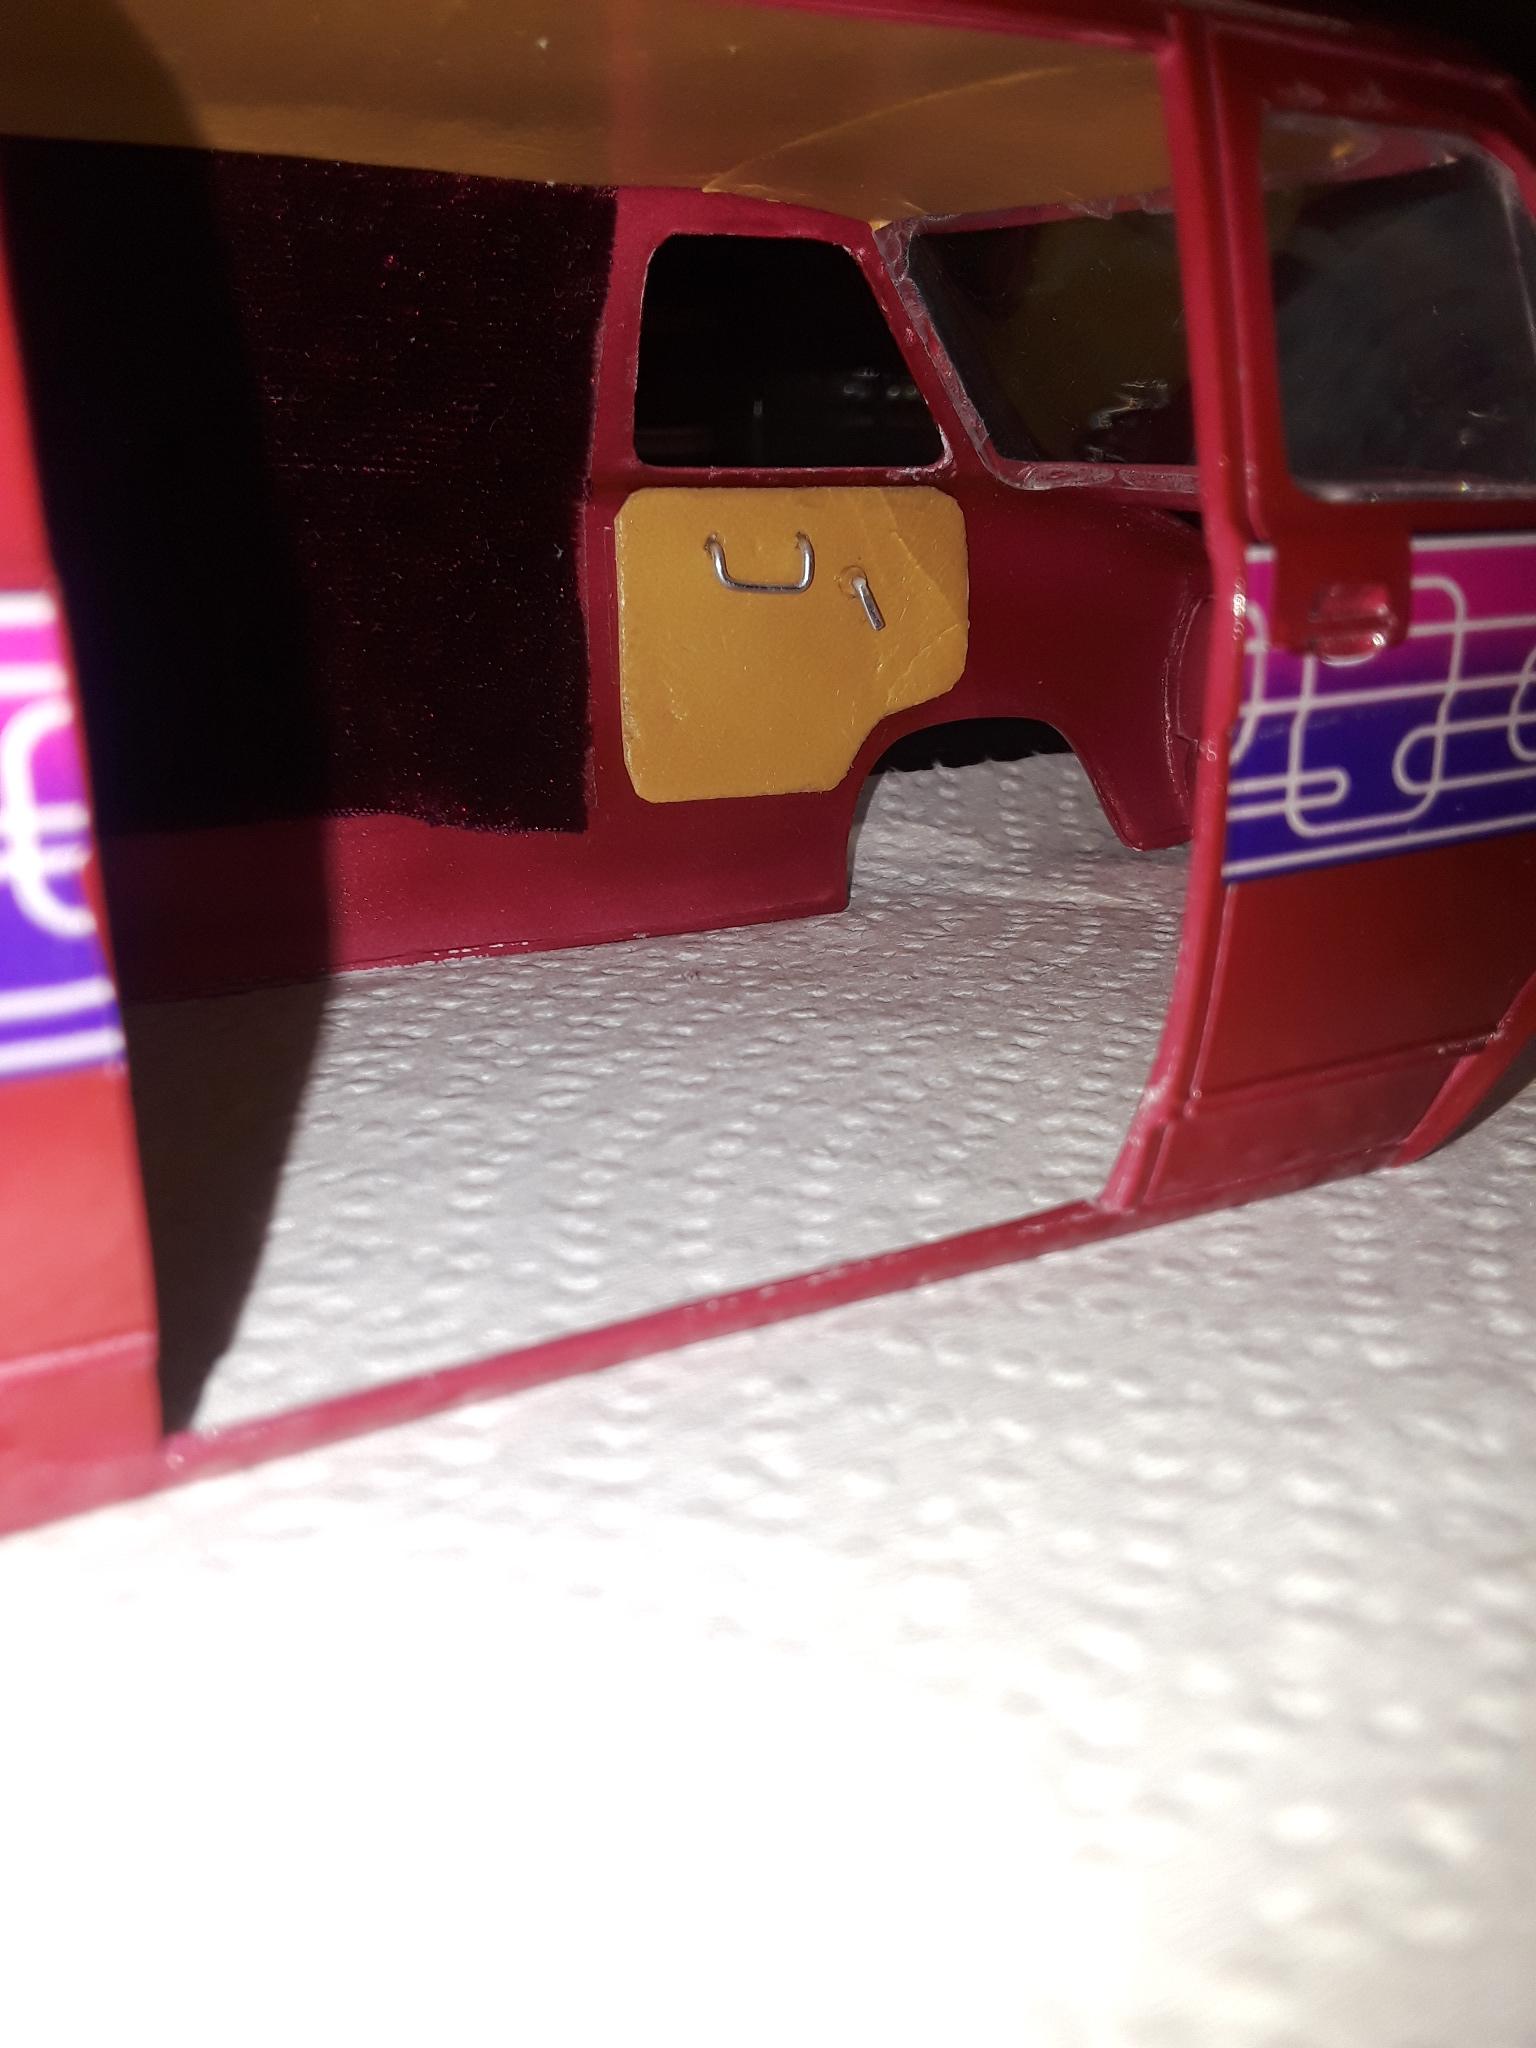
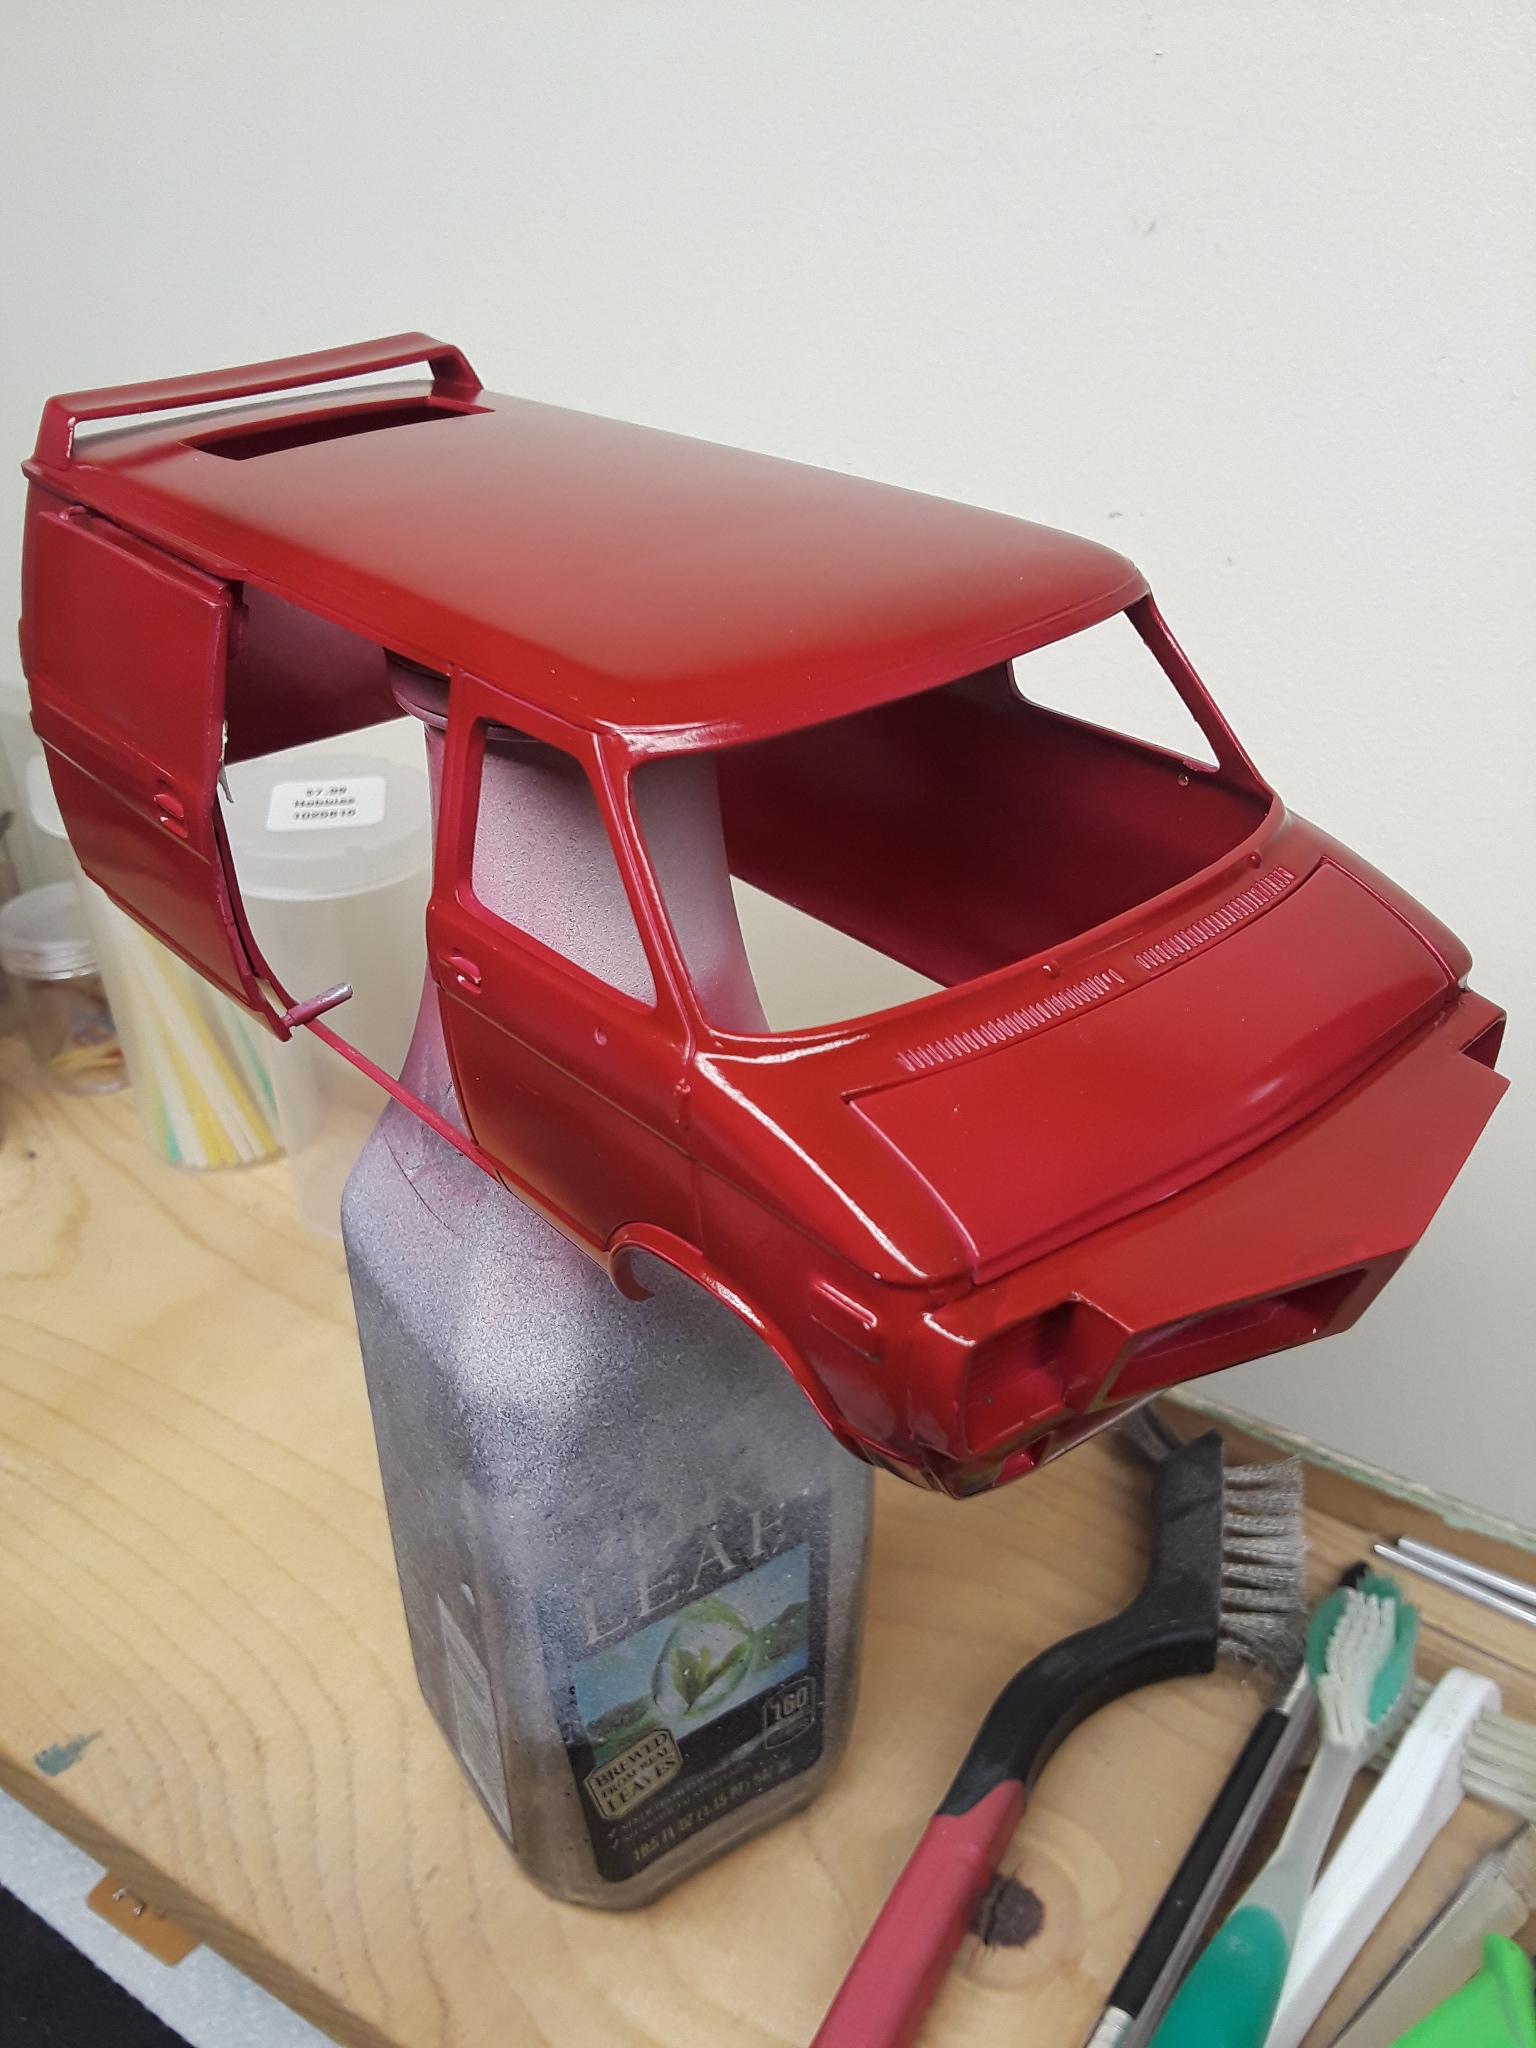
Wanted to show a couple of details. This is the inside of the sliding door, used double-sided tape to attach fabric, the lower slide pin is plastic rod inserted into the door, the upper is 18ga wire inserted into plastic tube. One of the fun things was assembly of the 3 piece door mirror, but they turned out ok. I drilled the door to insert the upper arm (had to trim it to get the vertical alignment) and just let lower arm rest against the door. Changed to spare tire from the earlier photo, used old wheel and drilled out center to fit cover hub instead of supplied half cover. Finished tire mount Molotow over gloss black. The mufflers are from parts bin, the exhaust are solder from the trans mount and drilled at the end with homemade brackets. Had to cut the shroud drastically to install from the top after fitting body to chassis. You can see the lower door pin and where it slides under floor pan. Here's couple shots of the finished van, the rest will be in completed section. Hope you enjoyed looking as much as I did building. Thanks for the feedback comments, they helped. Lei
-
Really like the color too and the finish looks great. Been wanting to try the nail polishes, just need more practice with my airbursh. Nice detail on the dash and interior, the black sets it off. Is that a Revell kit, the windshield looks different that my AMT kit body?
-
75 Chevy Street Van
Leica007 replied to Leica007's topic in WIP: Model Trucks: Pickups, Vans, SUVs, Light Commercial
Thanks for the feedback Slusher, I've seen several of you great builds, never disappointed. Agree with your belief, I give thanks for my accomplishments. -
75 Chevy Street Van
Leica007 replied to Leica007's topic in WIP: Model Trucks: Pickups, Vans, SUVs, Light Commercial
Thanks Chaz and Ricky for checking out the van and your comments. Getting close to finishing it. Lei -
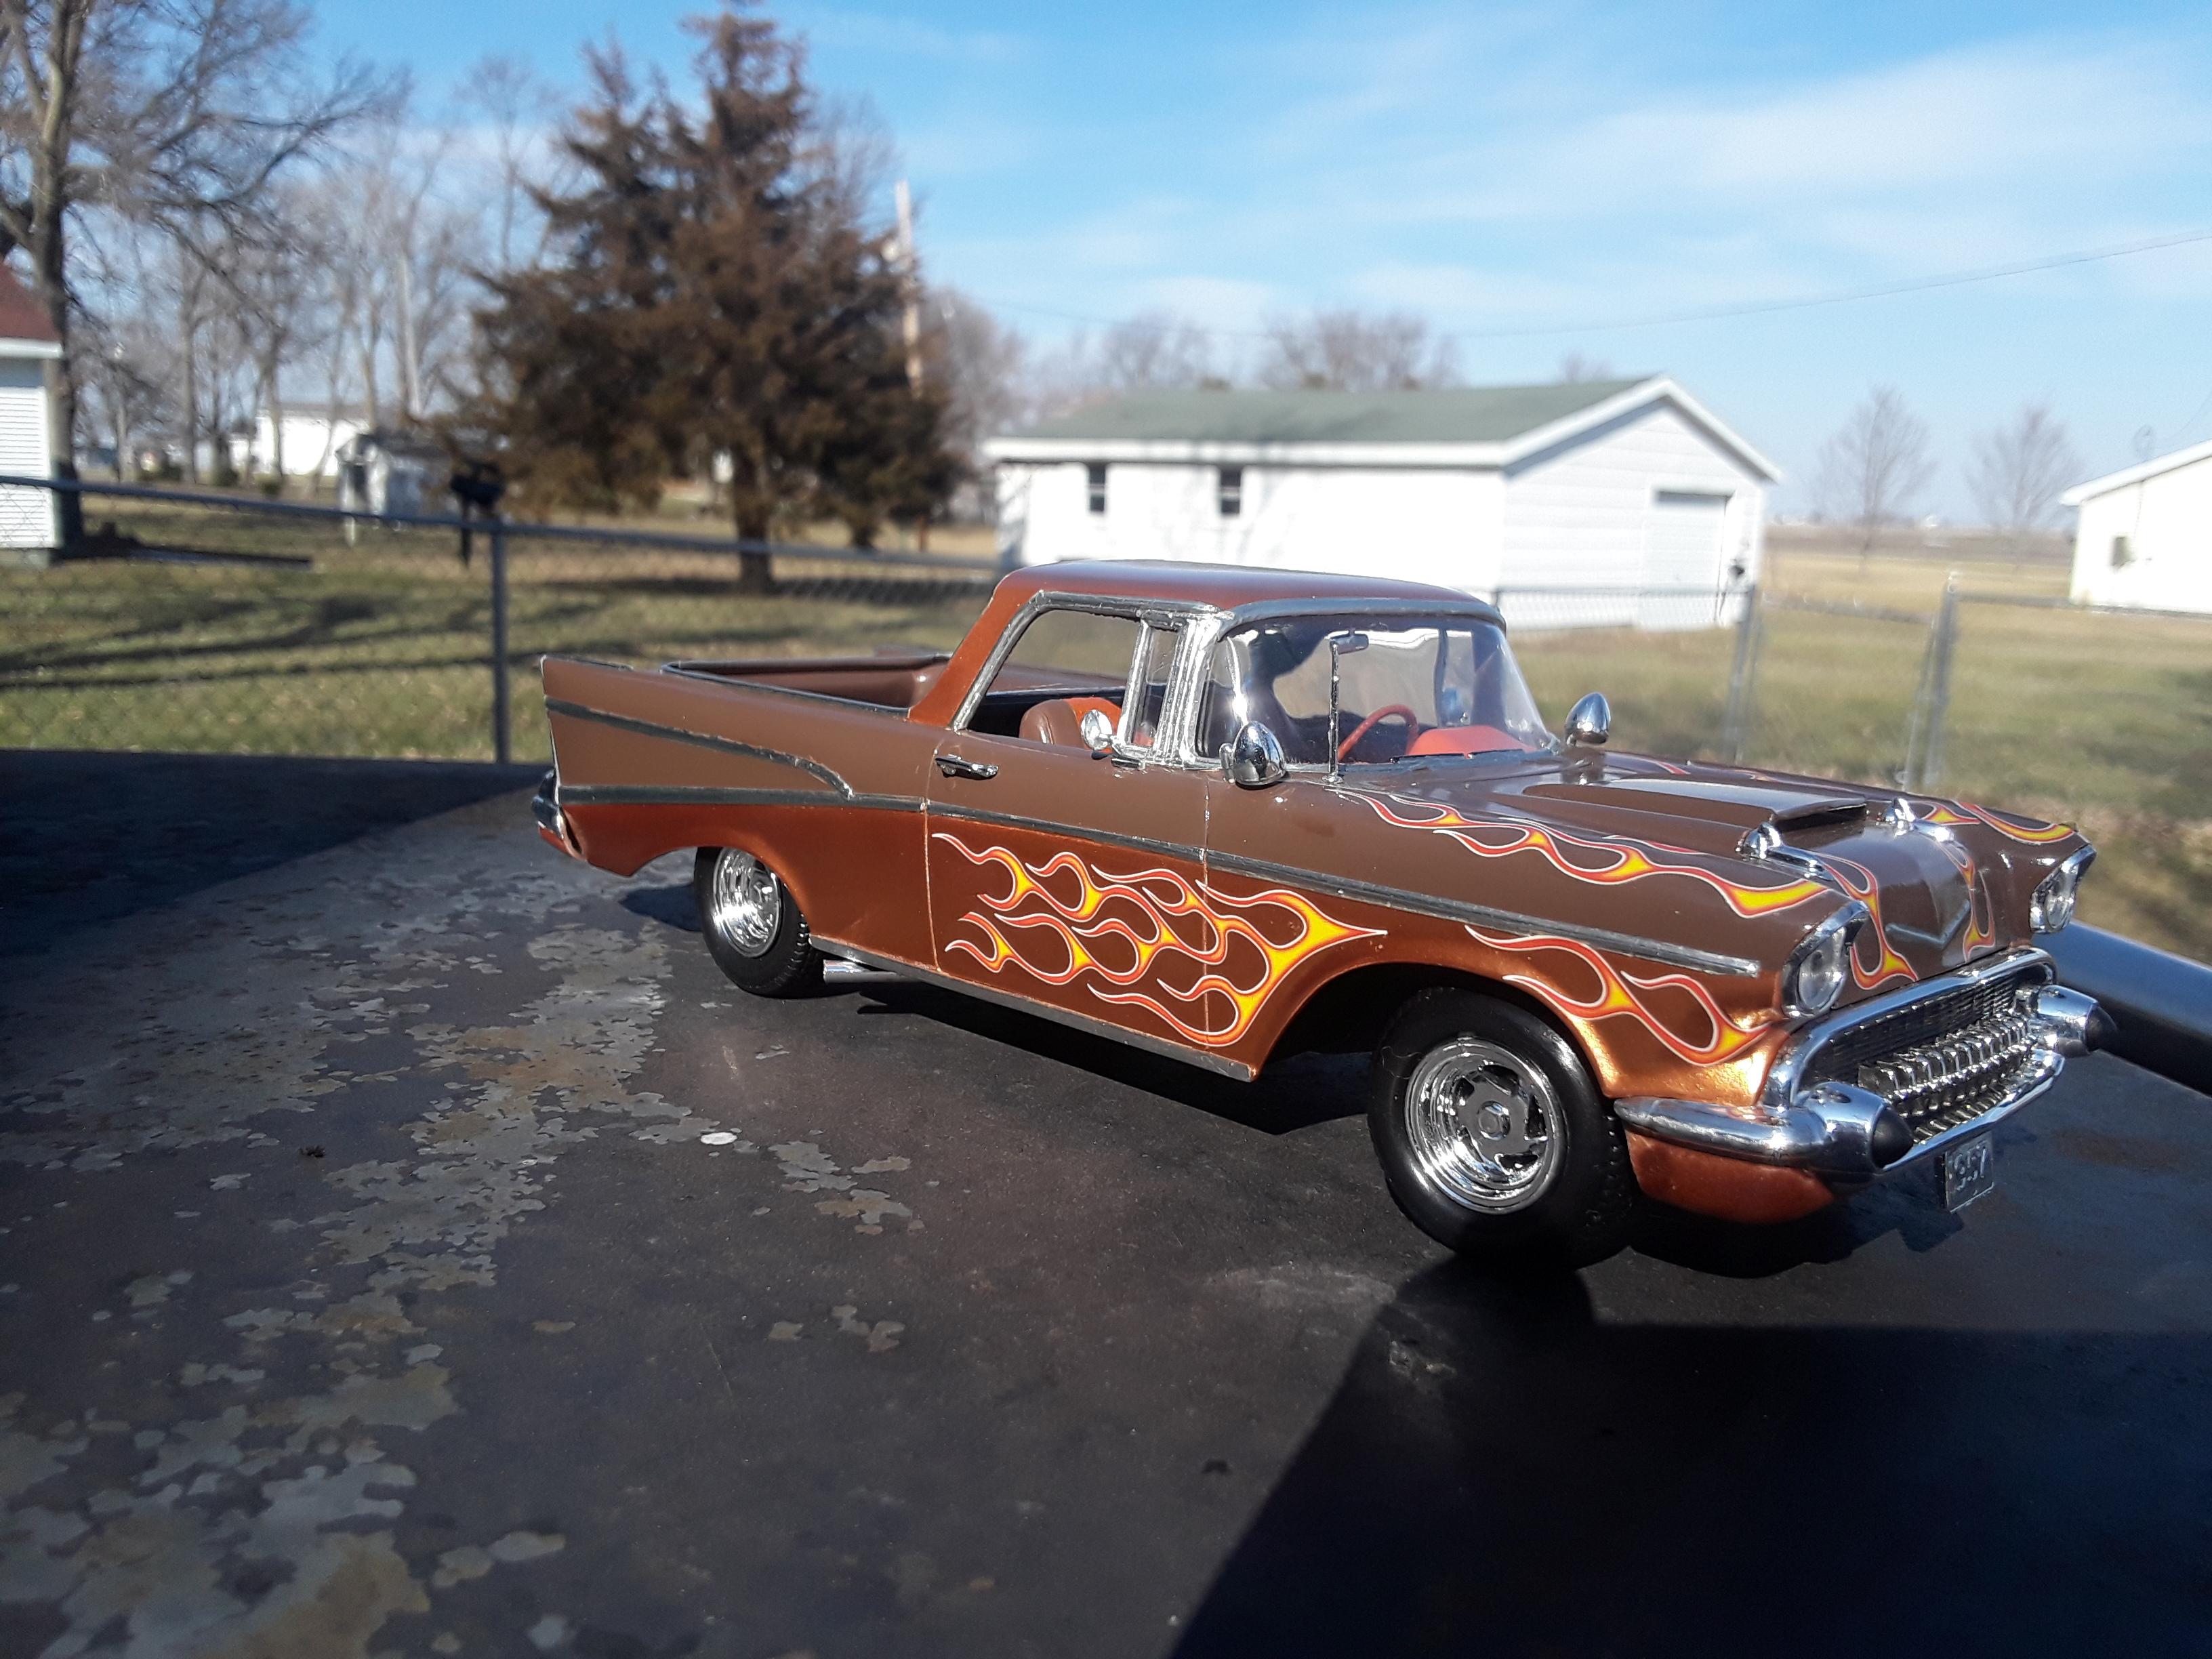
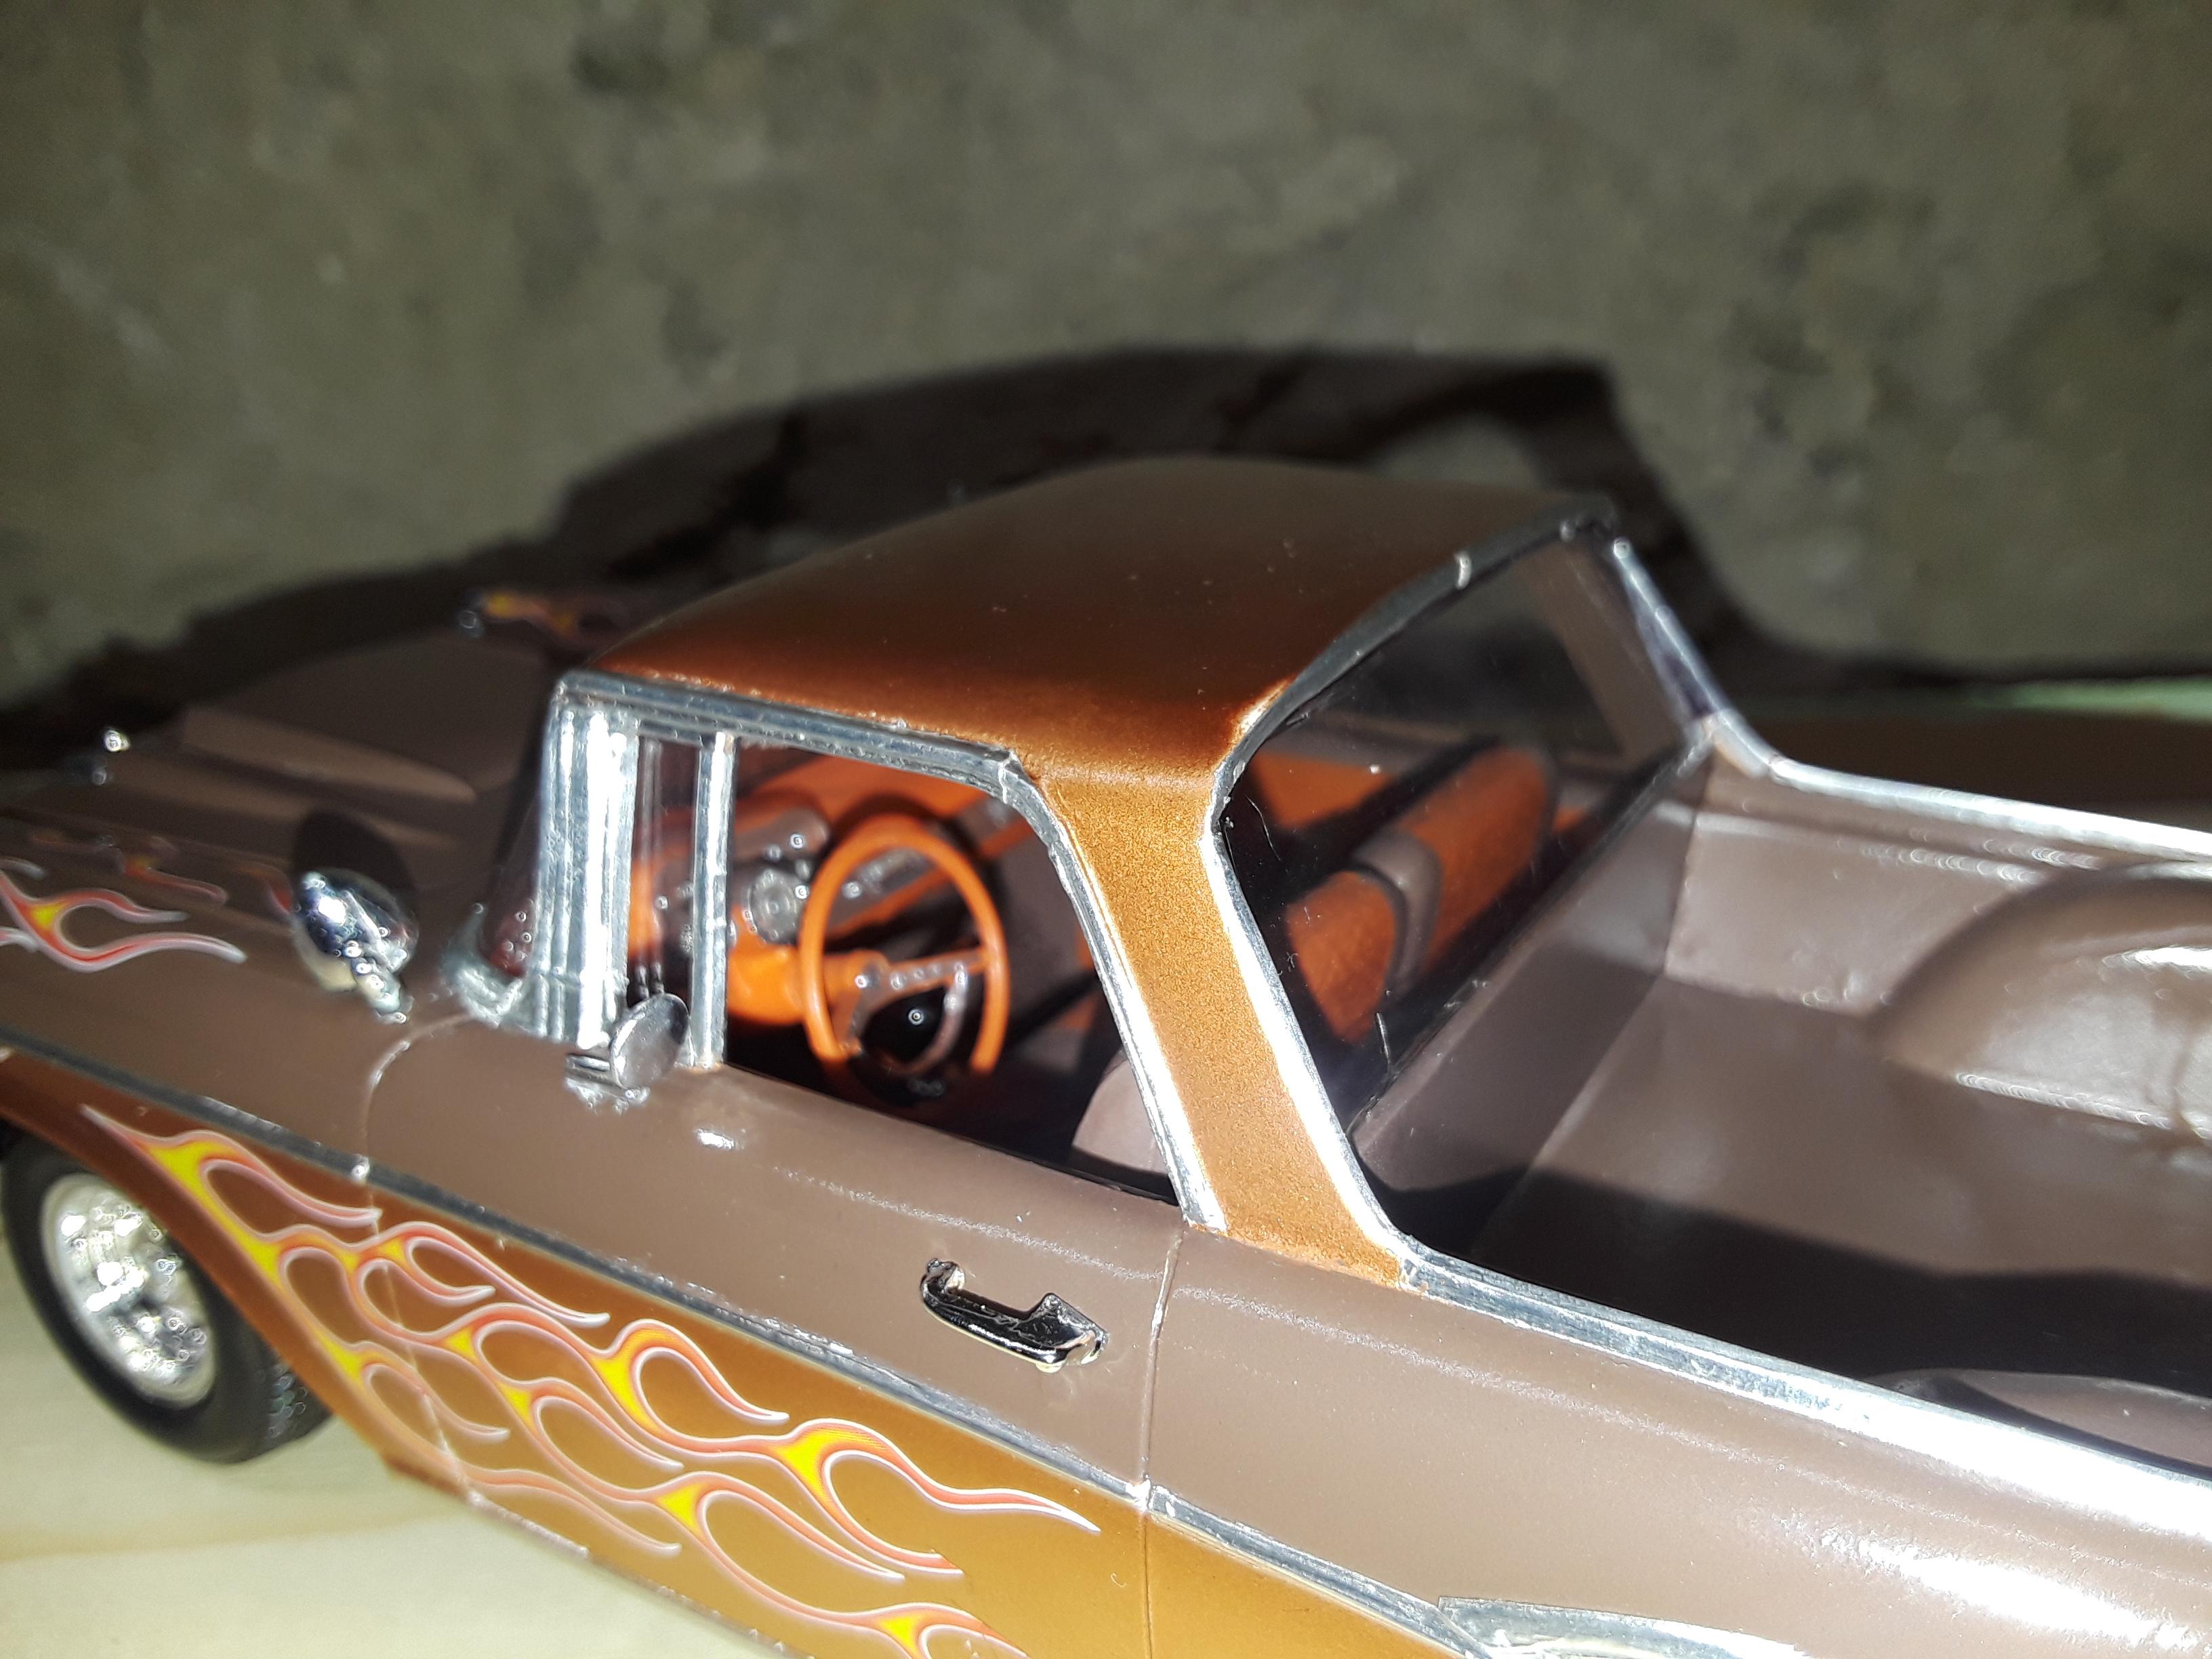
Built this back in 2018 and named it "Nomad No More".
-
Good looking Dart, nice work on the interior colors, really appreciate the front plate (where did you find it?) Welcome home.
-
Just had say WOW !!!!! The idea and execution are outstanding. I drive a 2006 and I'd like to know who makes the kit you used, haven't seen one anywhere before.
-
No Camino
Leica007 replied to mgbdriver's topic in WIP: Model Trucks: Pickups, Vans, SUVs, Light Commercial
Very ambitious undertaking and your execution is remarkable. Really looking great!! -
75 Chevy Street Van
Leica007 replied to Leica007's topic in WIP: Model Trucks: Pickups, Vans, SUVs, Light Commercial
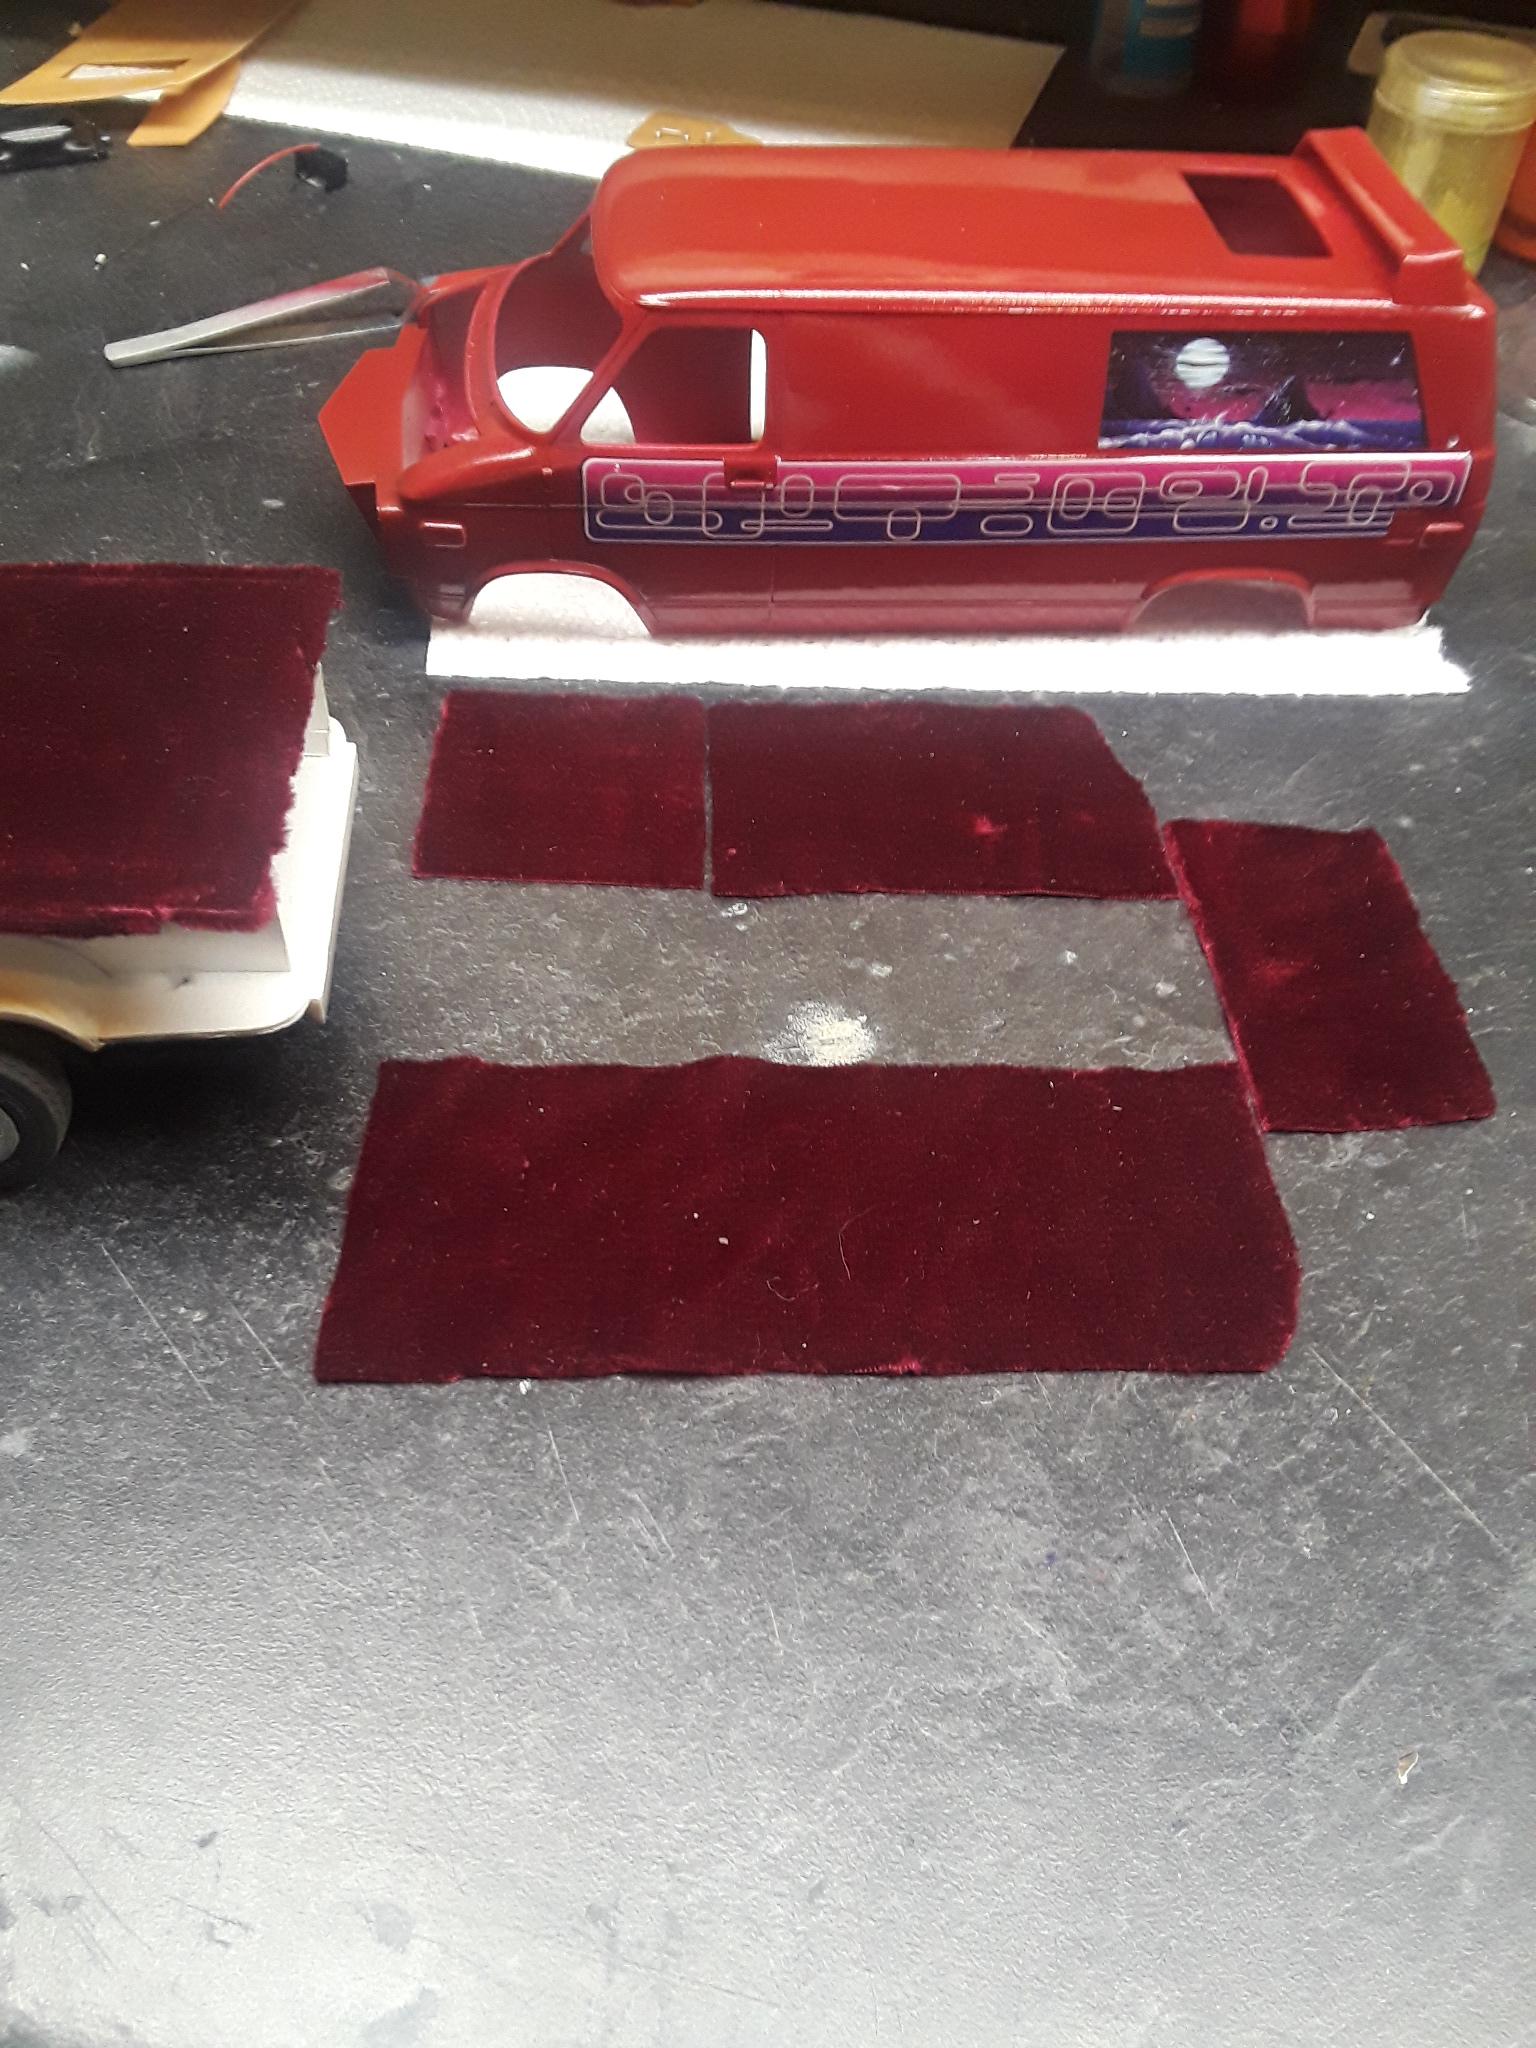
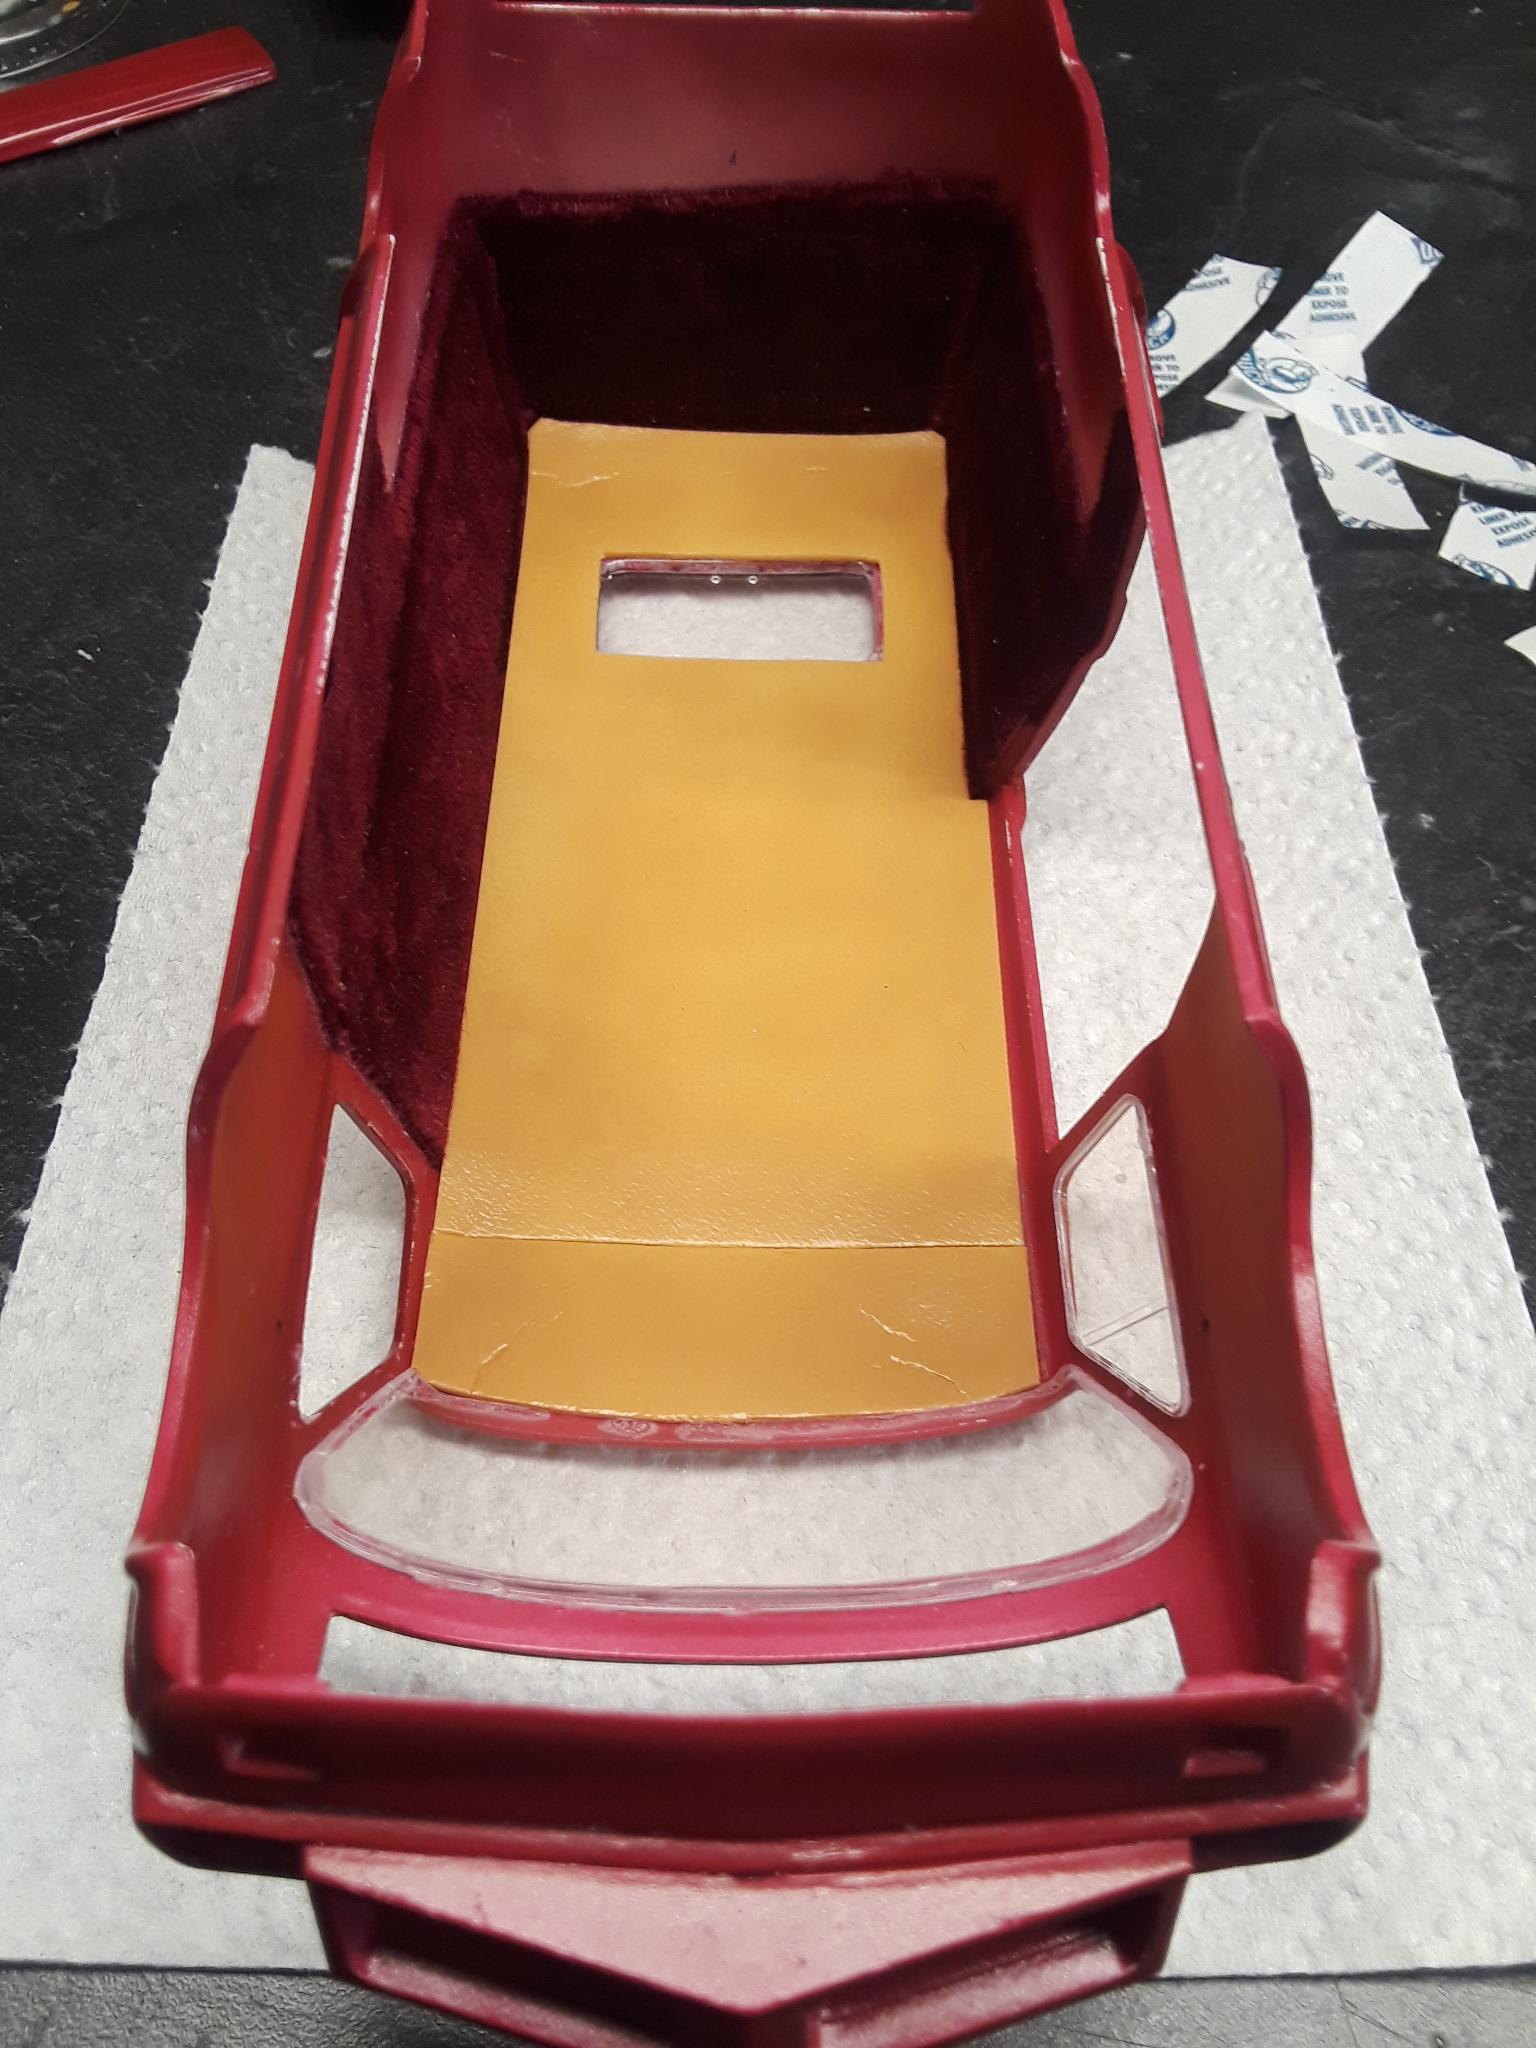
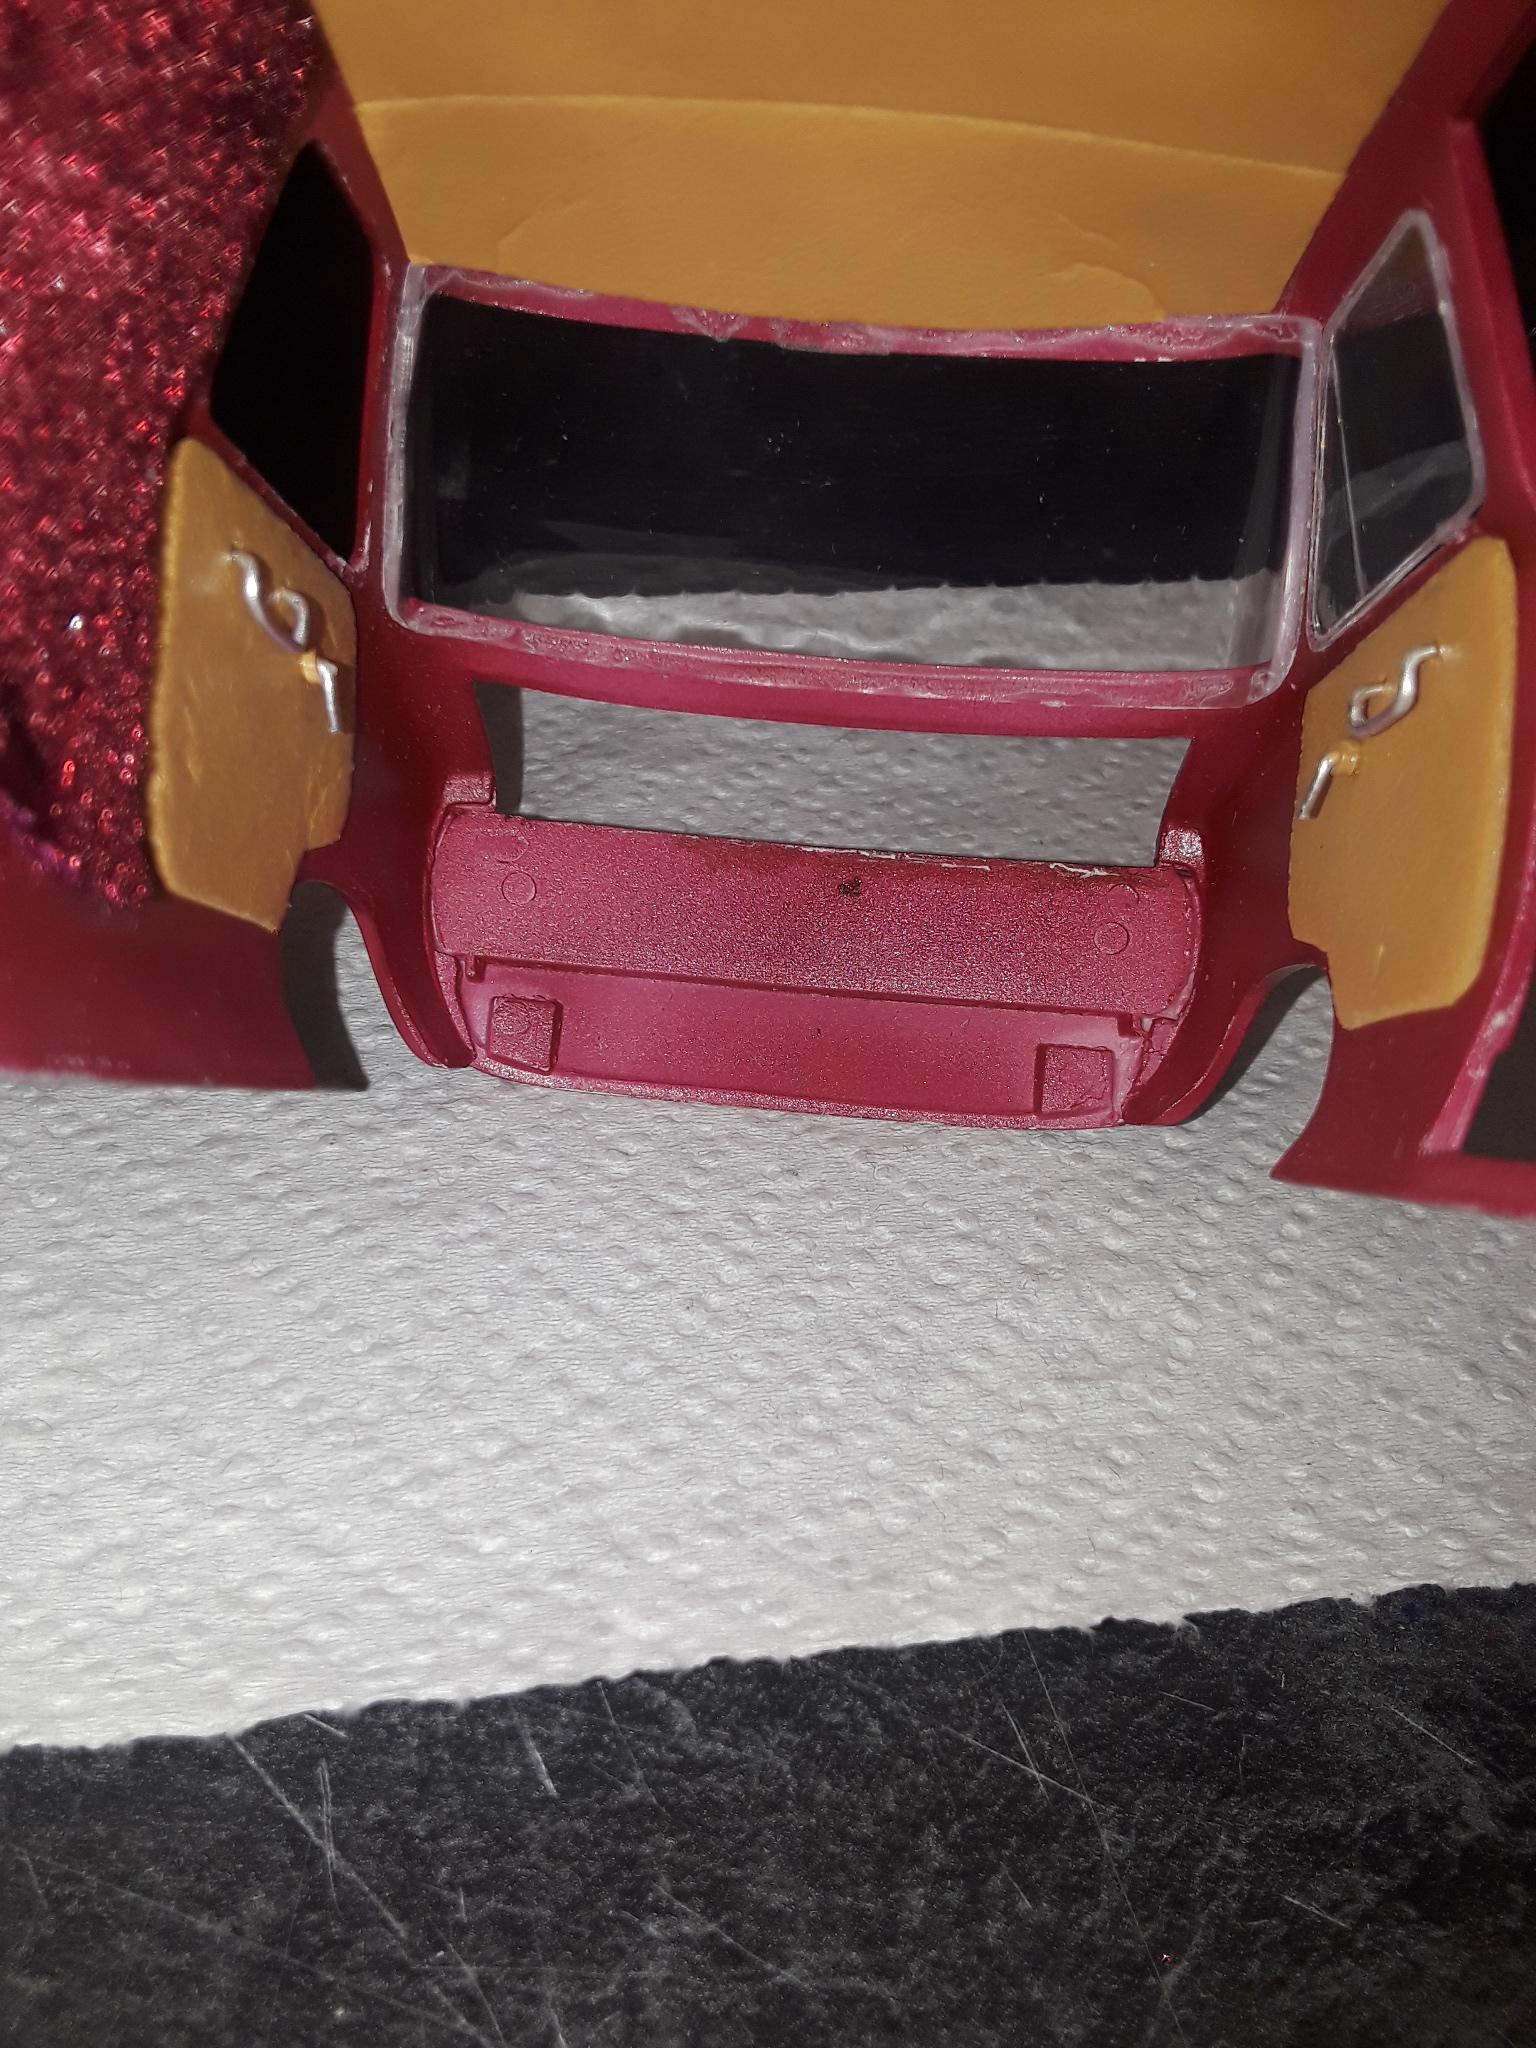
Sorry, the above photo entered in wrong spot. Here's the latest updates. The first is layout of the interior wall covering pieces with a shot of the graphics on the van. Second is the headliner added, it's styrofoam plate painted with Apple Barrel satin acrylic. I spray both sides to deepen the color without hiding the vinyl texture. I cut two pieces since I wasn't sure if I wanted to put an overhead console up front. Third pic is with the walls, headliner, and door card mounted, used the flash to show the color better. Four is better look at the door panel. Fifth is showing the tinted windows and headliner lights I'm adding. I didn't like the kit door windows. These were cut from some food cover pan I saved. Thanks for looking, advice and comments welcome.
-
75 Chevy Street Van
Leica007 replied to Leica007's topic in WIP: Model Trucks: Pickups, Vans, SUVs, Light Commercial
Hi David, thanks for following and your comments. The door will actually slide, just have to be careful, but I put a stop to keep it from fully closing. -
75 Chevy Street Van
Leica007 replied to Leica007's topic in WIP: Model Trucks: Pickups, Vans, SUVs, Light Commercial
Thanks for your encouragement, Steve. The springs are cut down ballpoint pen springs, I've used them on several vehicles, both as the front coils and as coilovers on shocks. The do come in various sizes, so I save them when the pens run out. -
Good looking build, those wheels really set it off. Reminds me of my father's, which I never got to drive. LOL
-
This is the only tv/movie car I've built (it was on clearance at HL back in 2018). I do have the tv Vegas 57 T-Bird stashed away.
-
75 Chevy Street Van
Leica007 replied to Leica007's topic in WIP: Model Trucks: Pickups, Vans, SUVs, Light Commercial
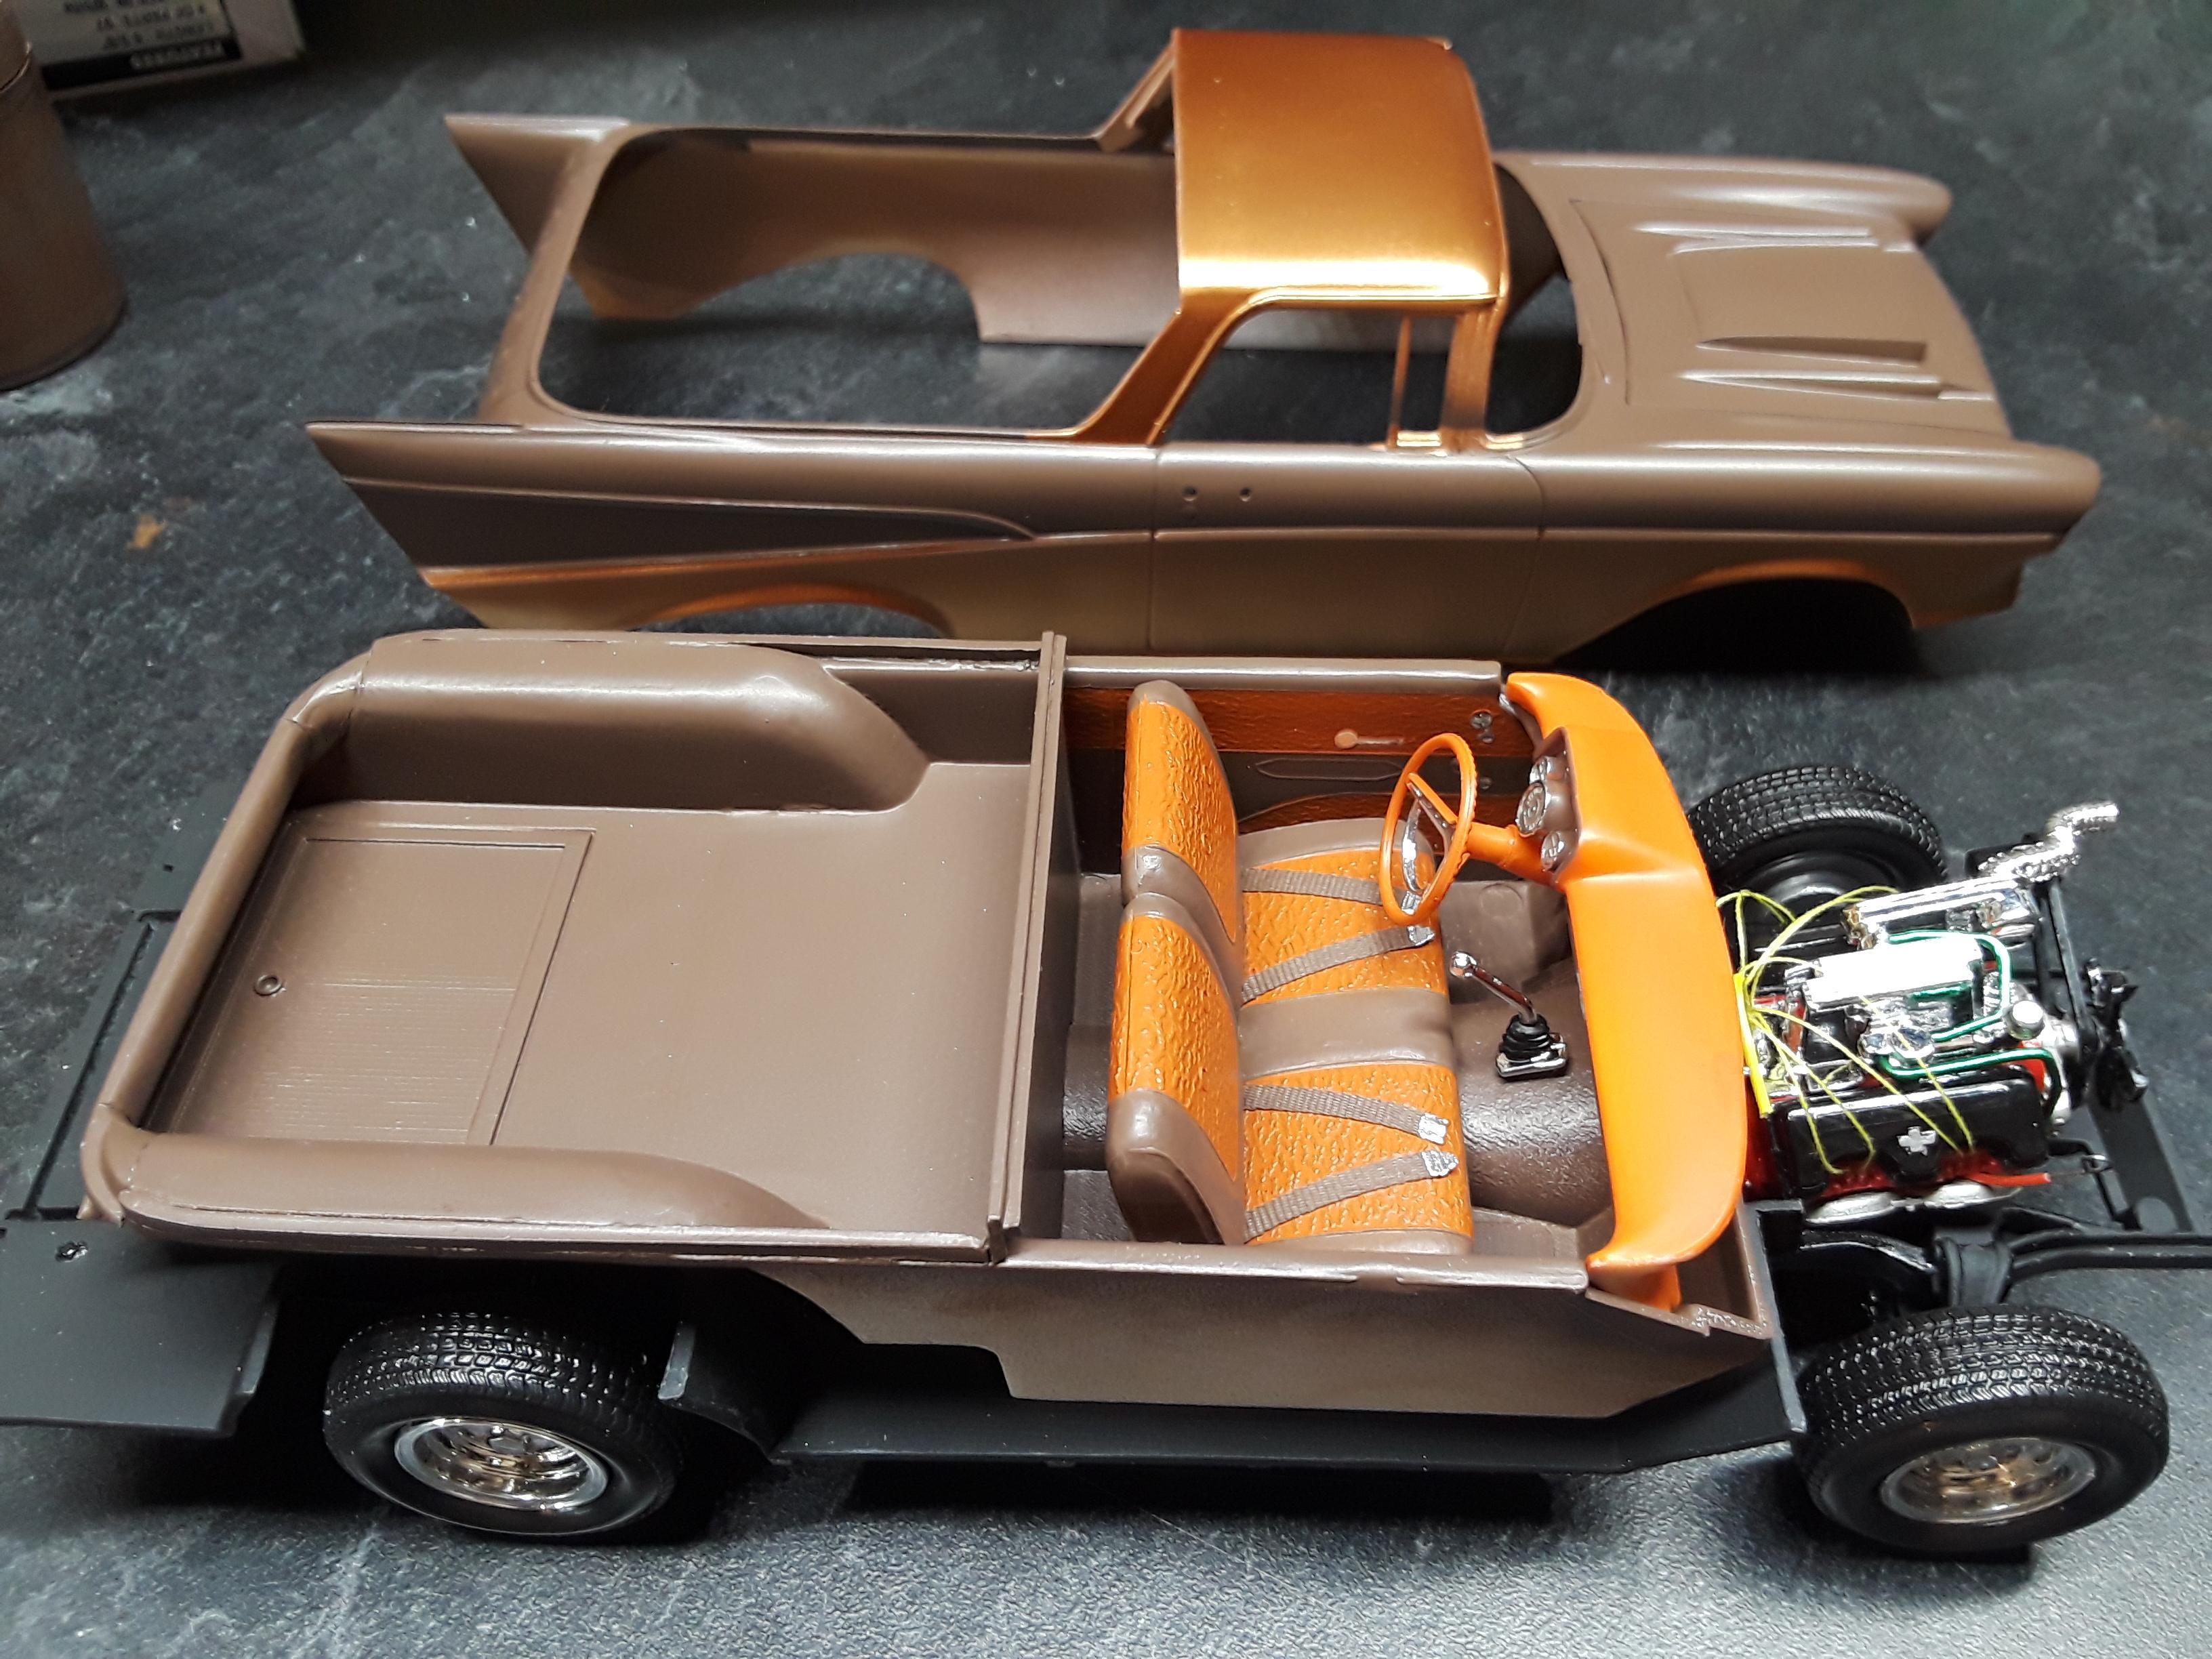
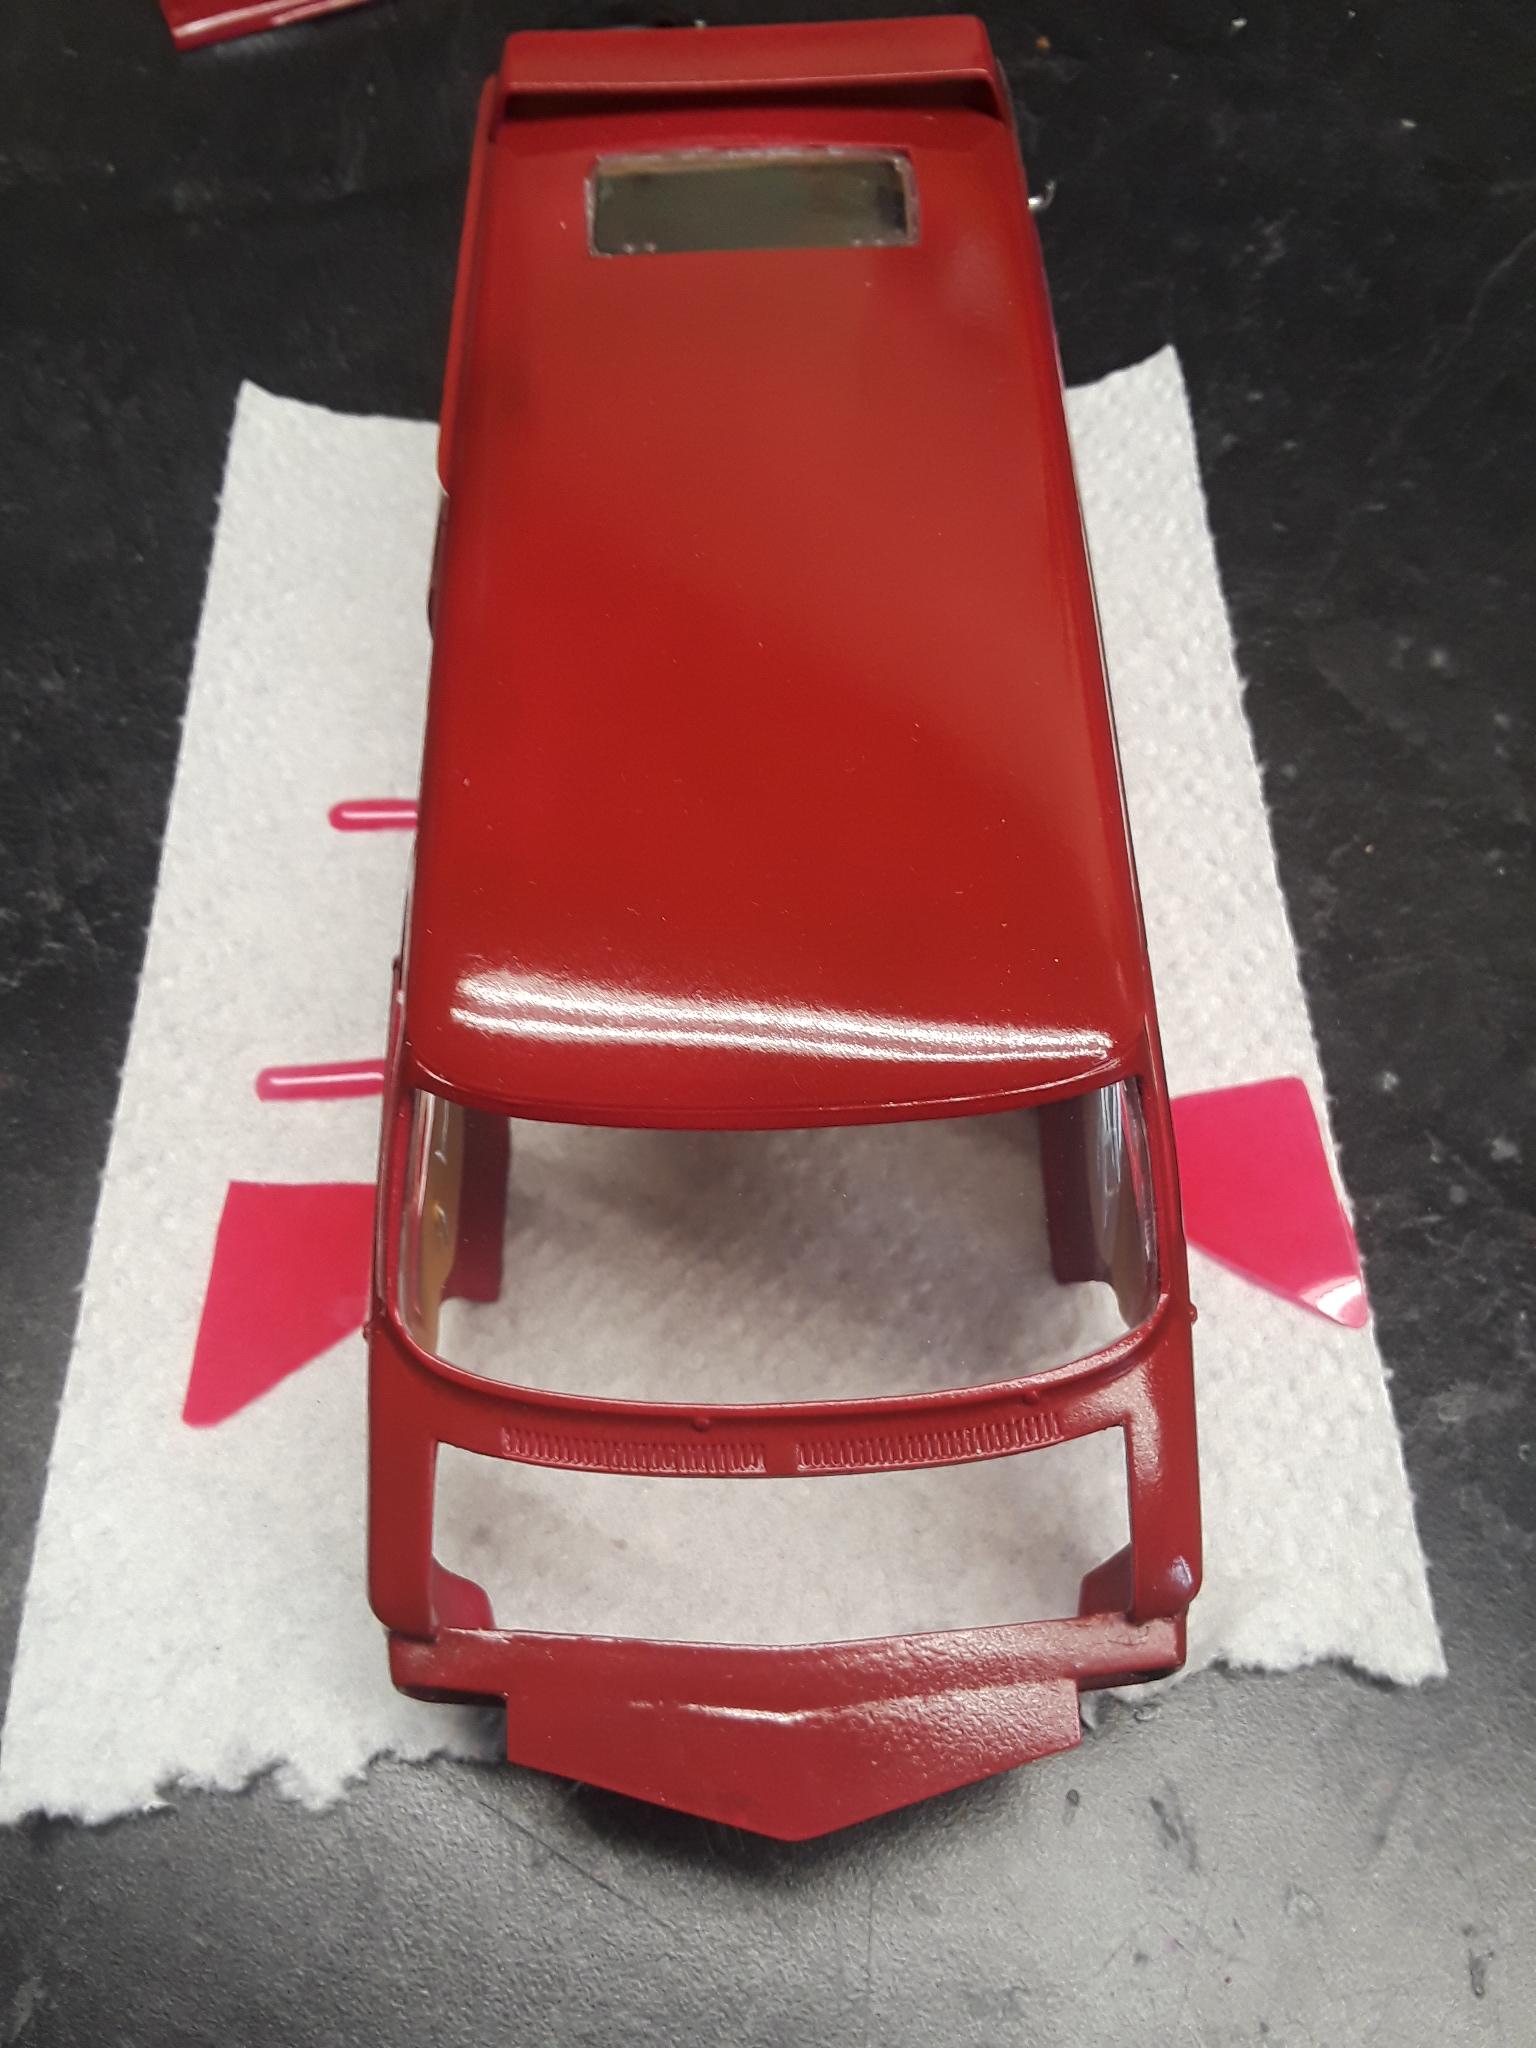
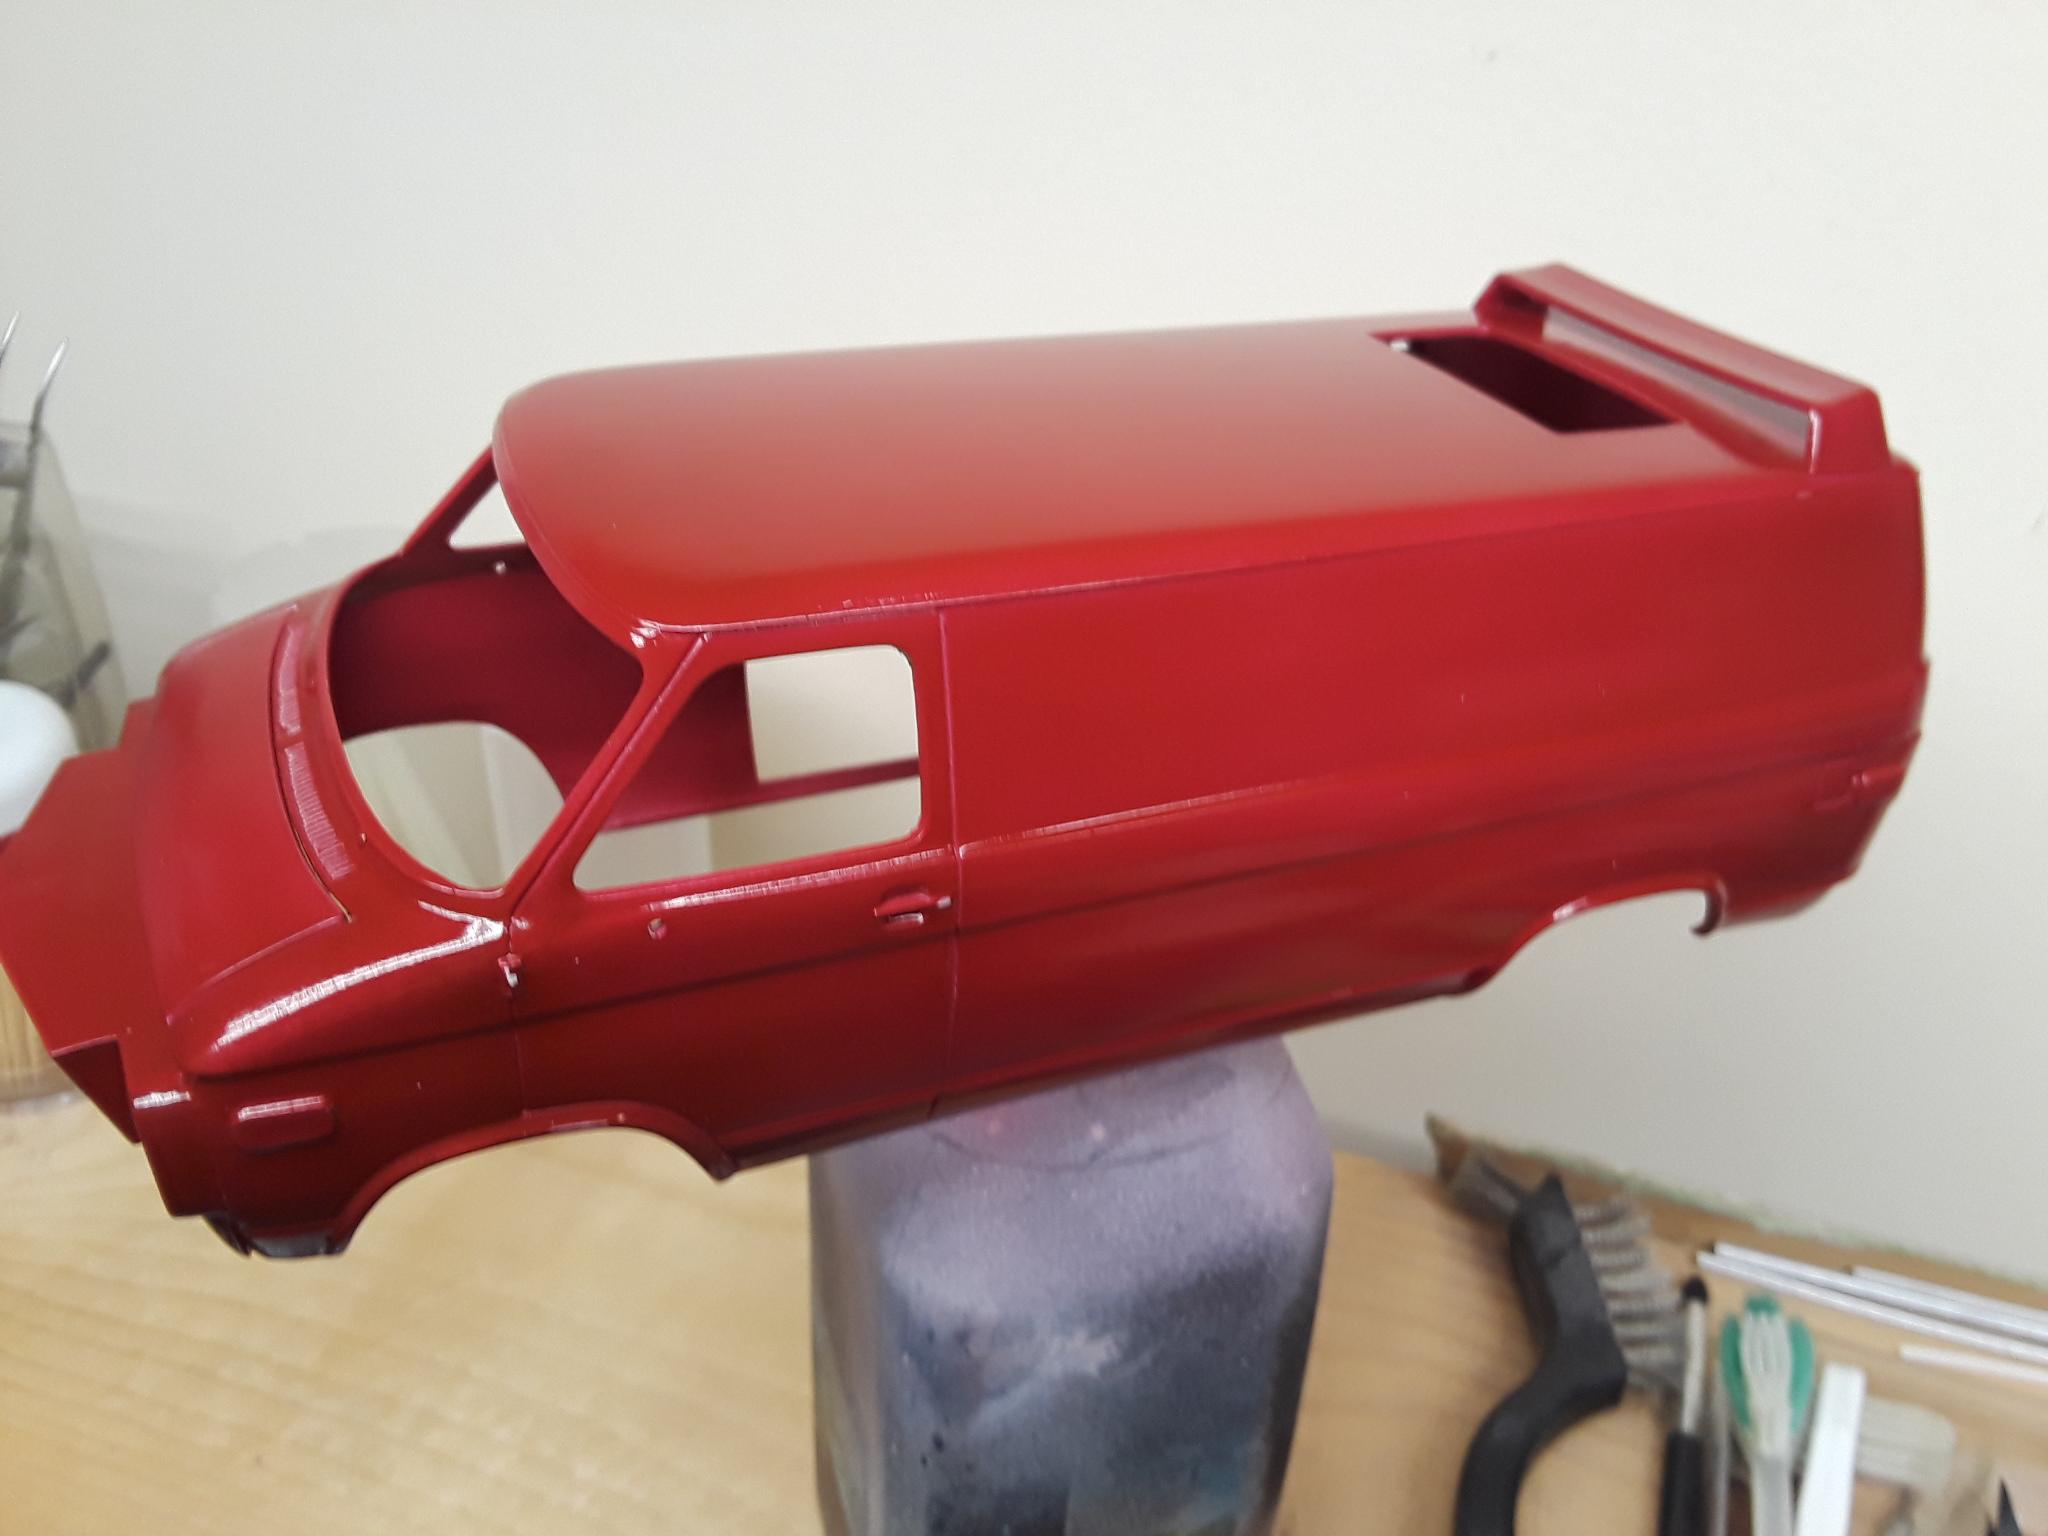
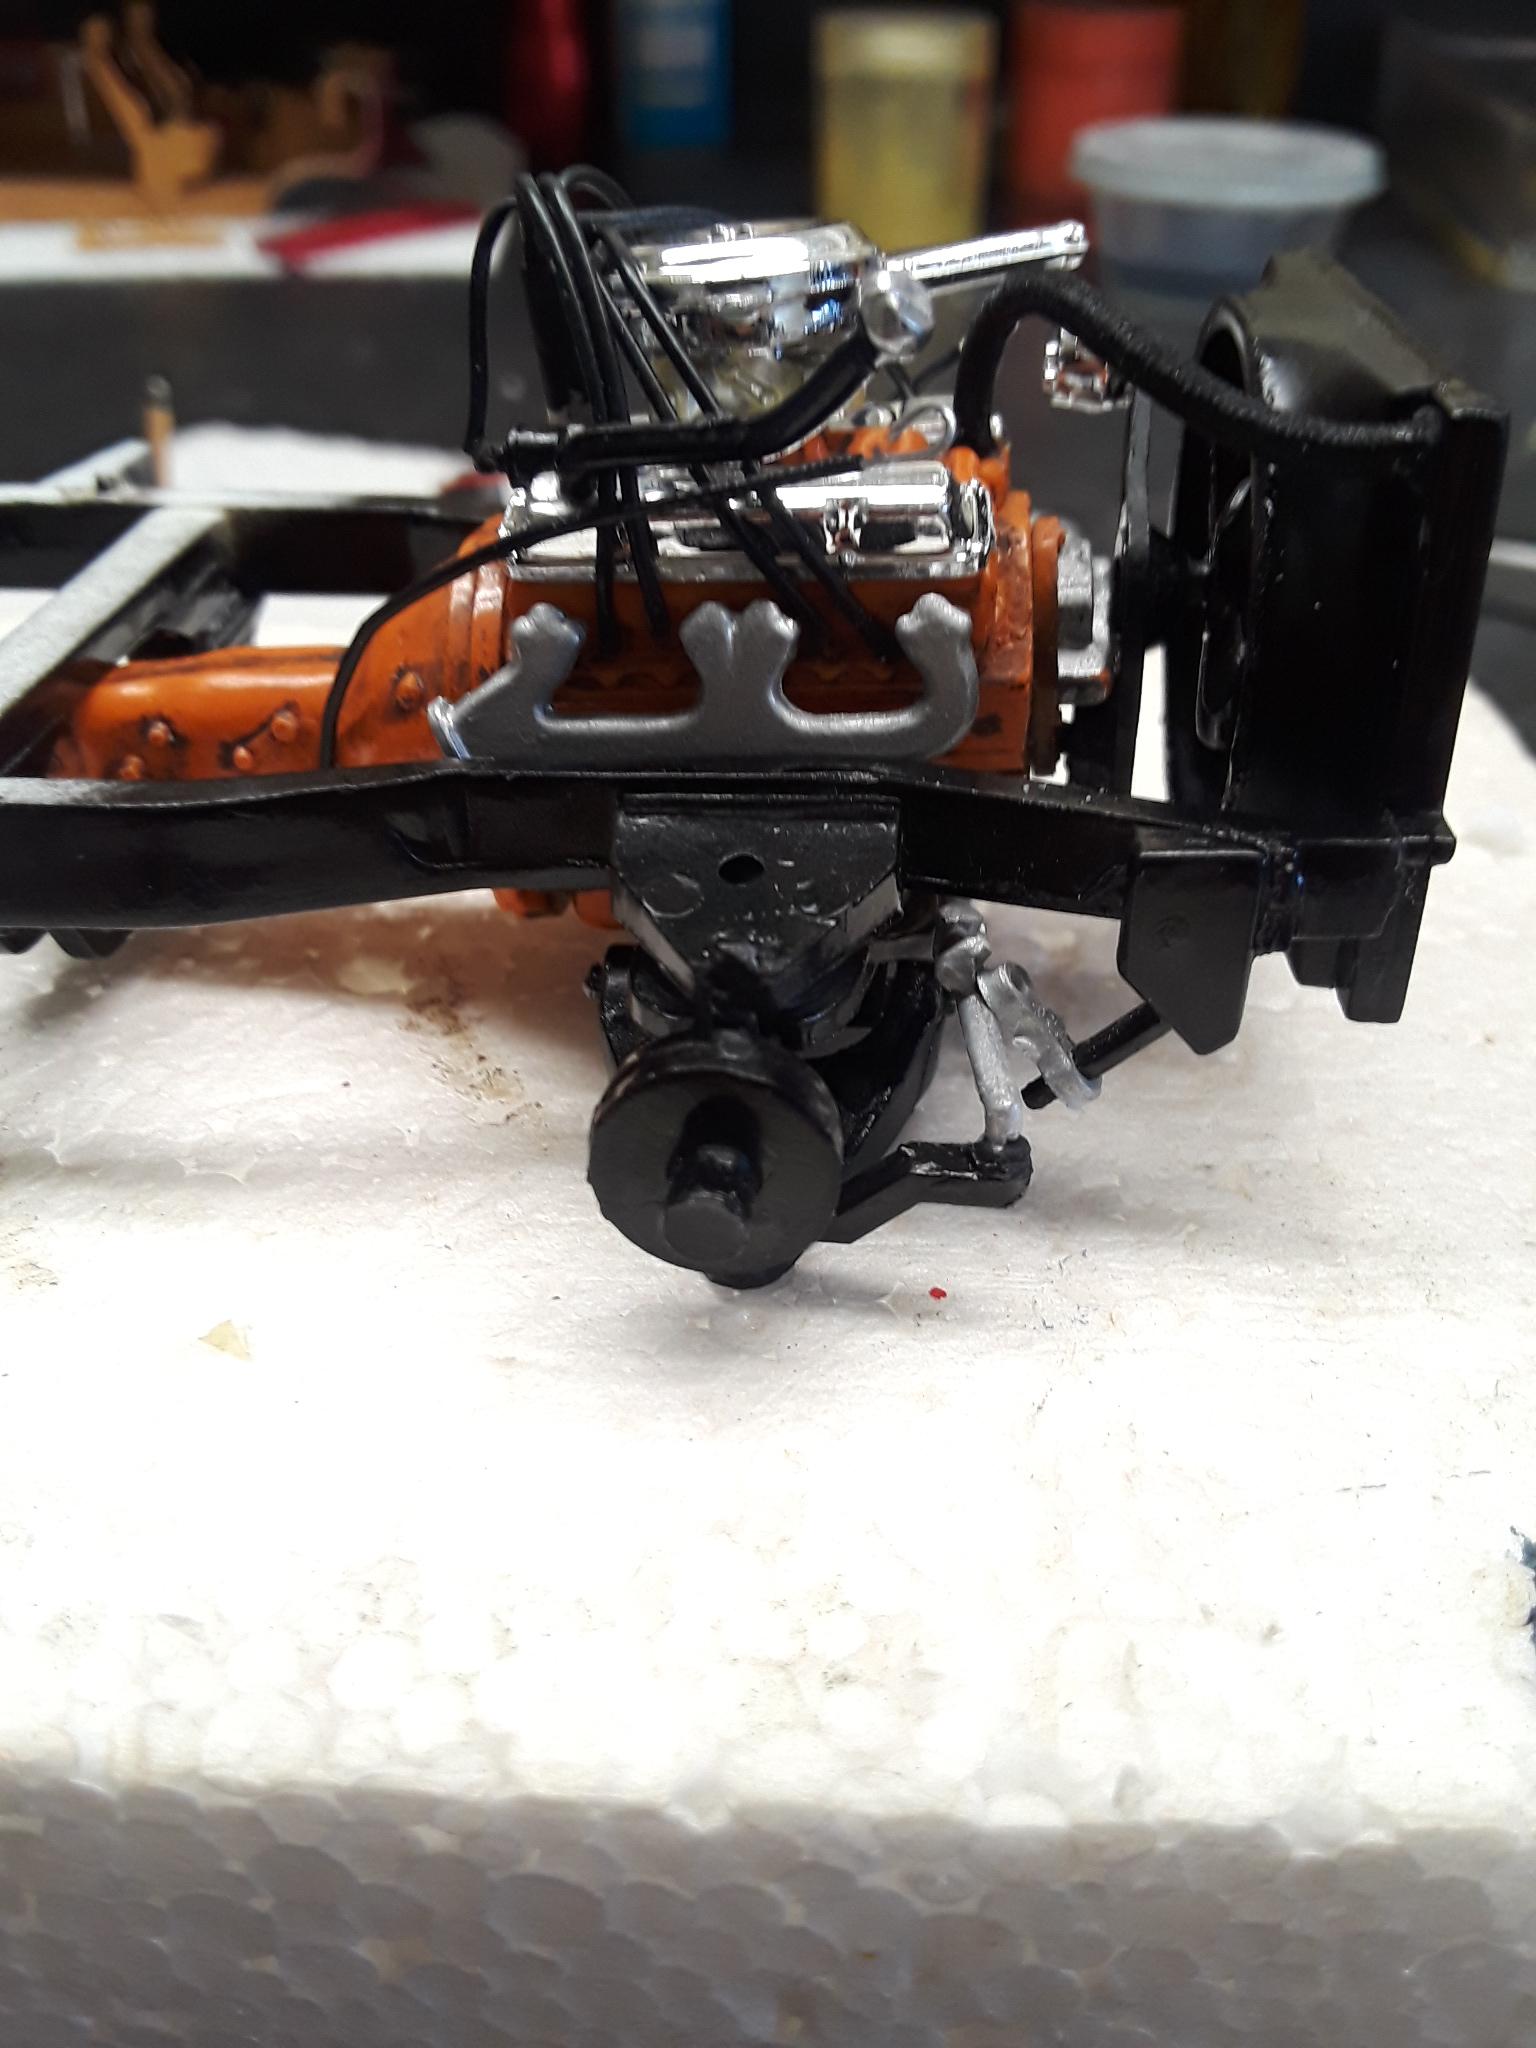
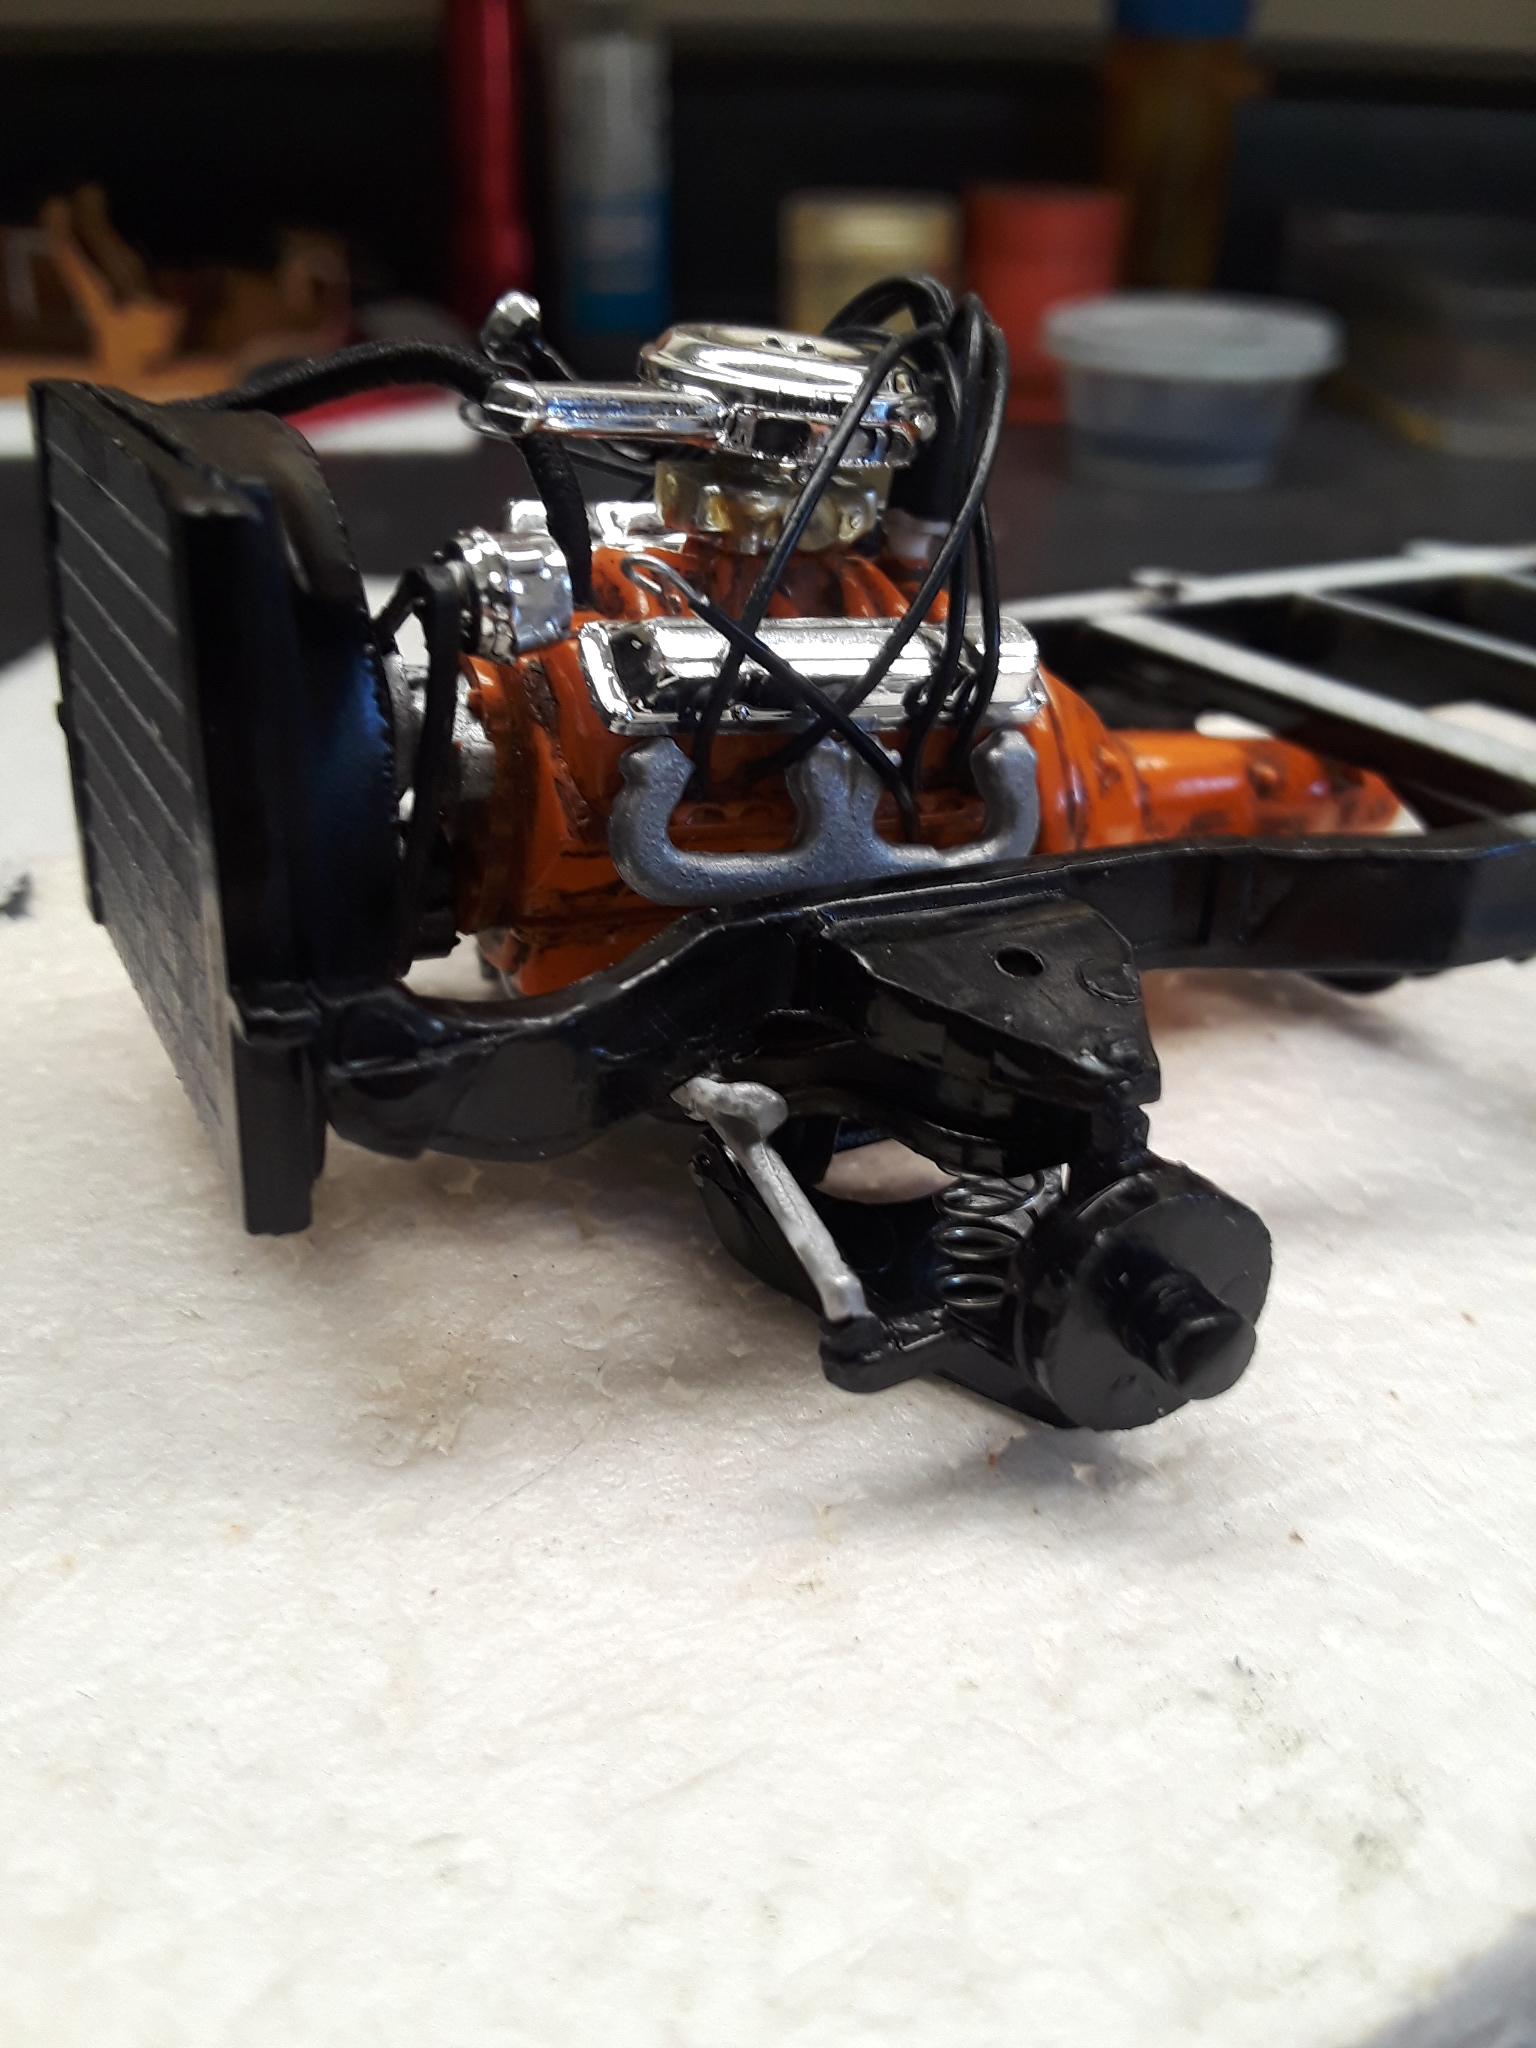
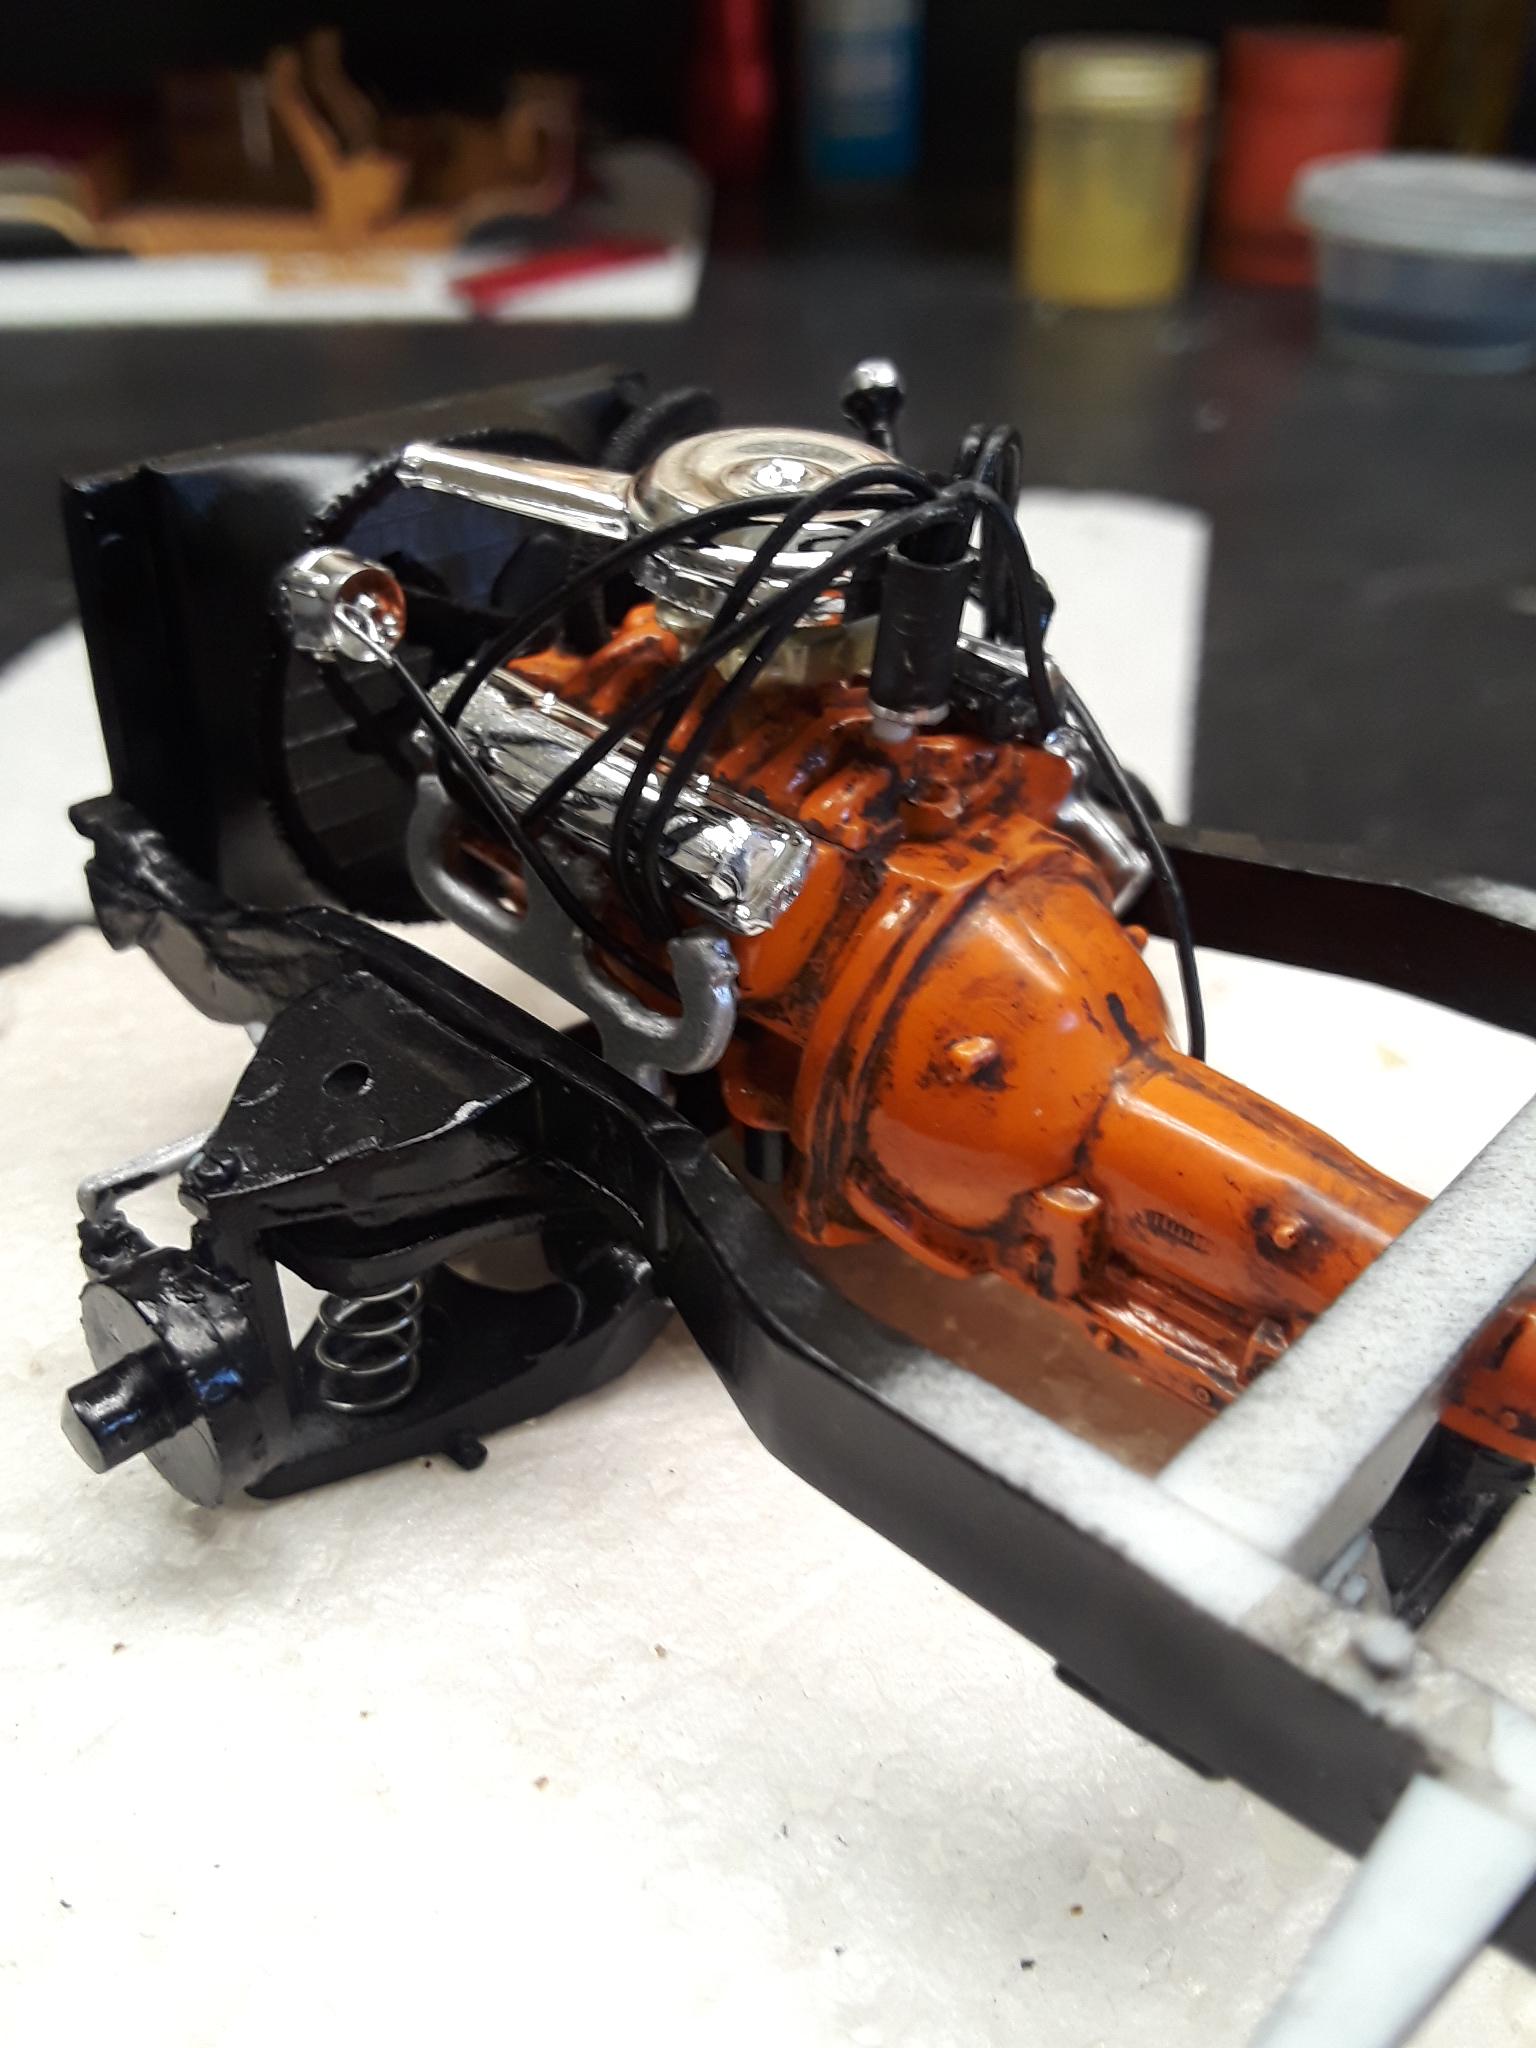
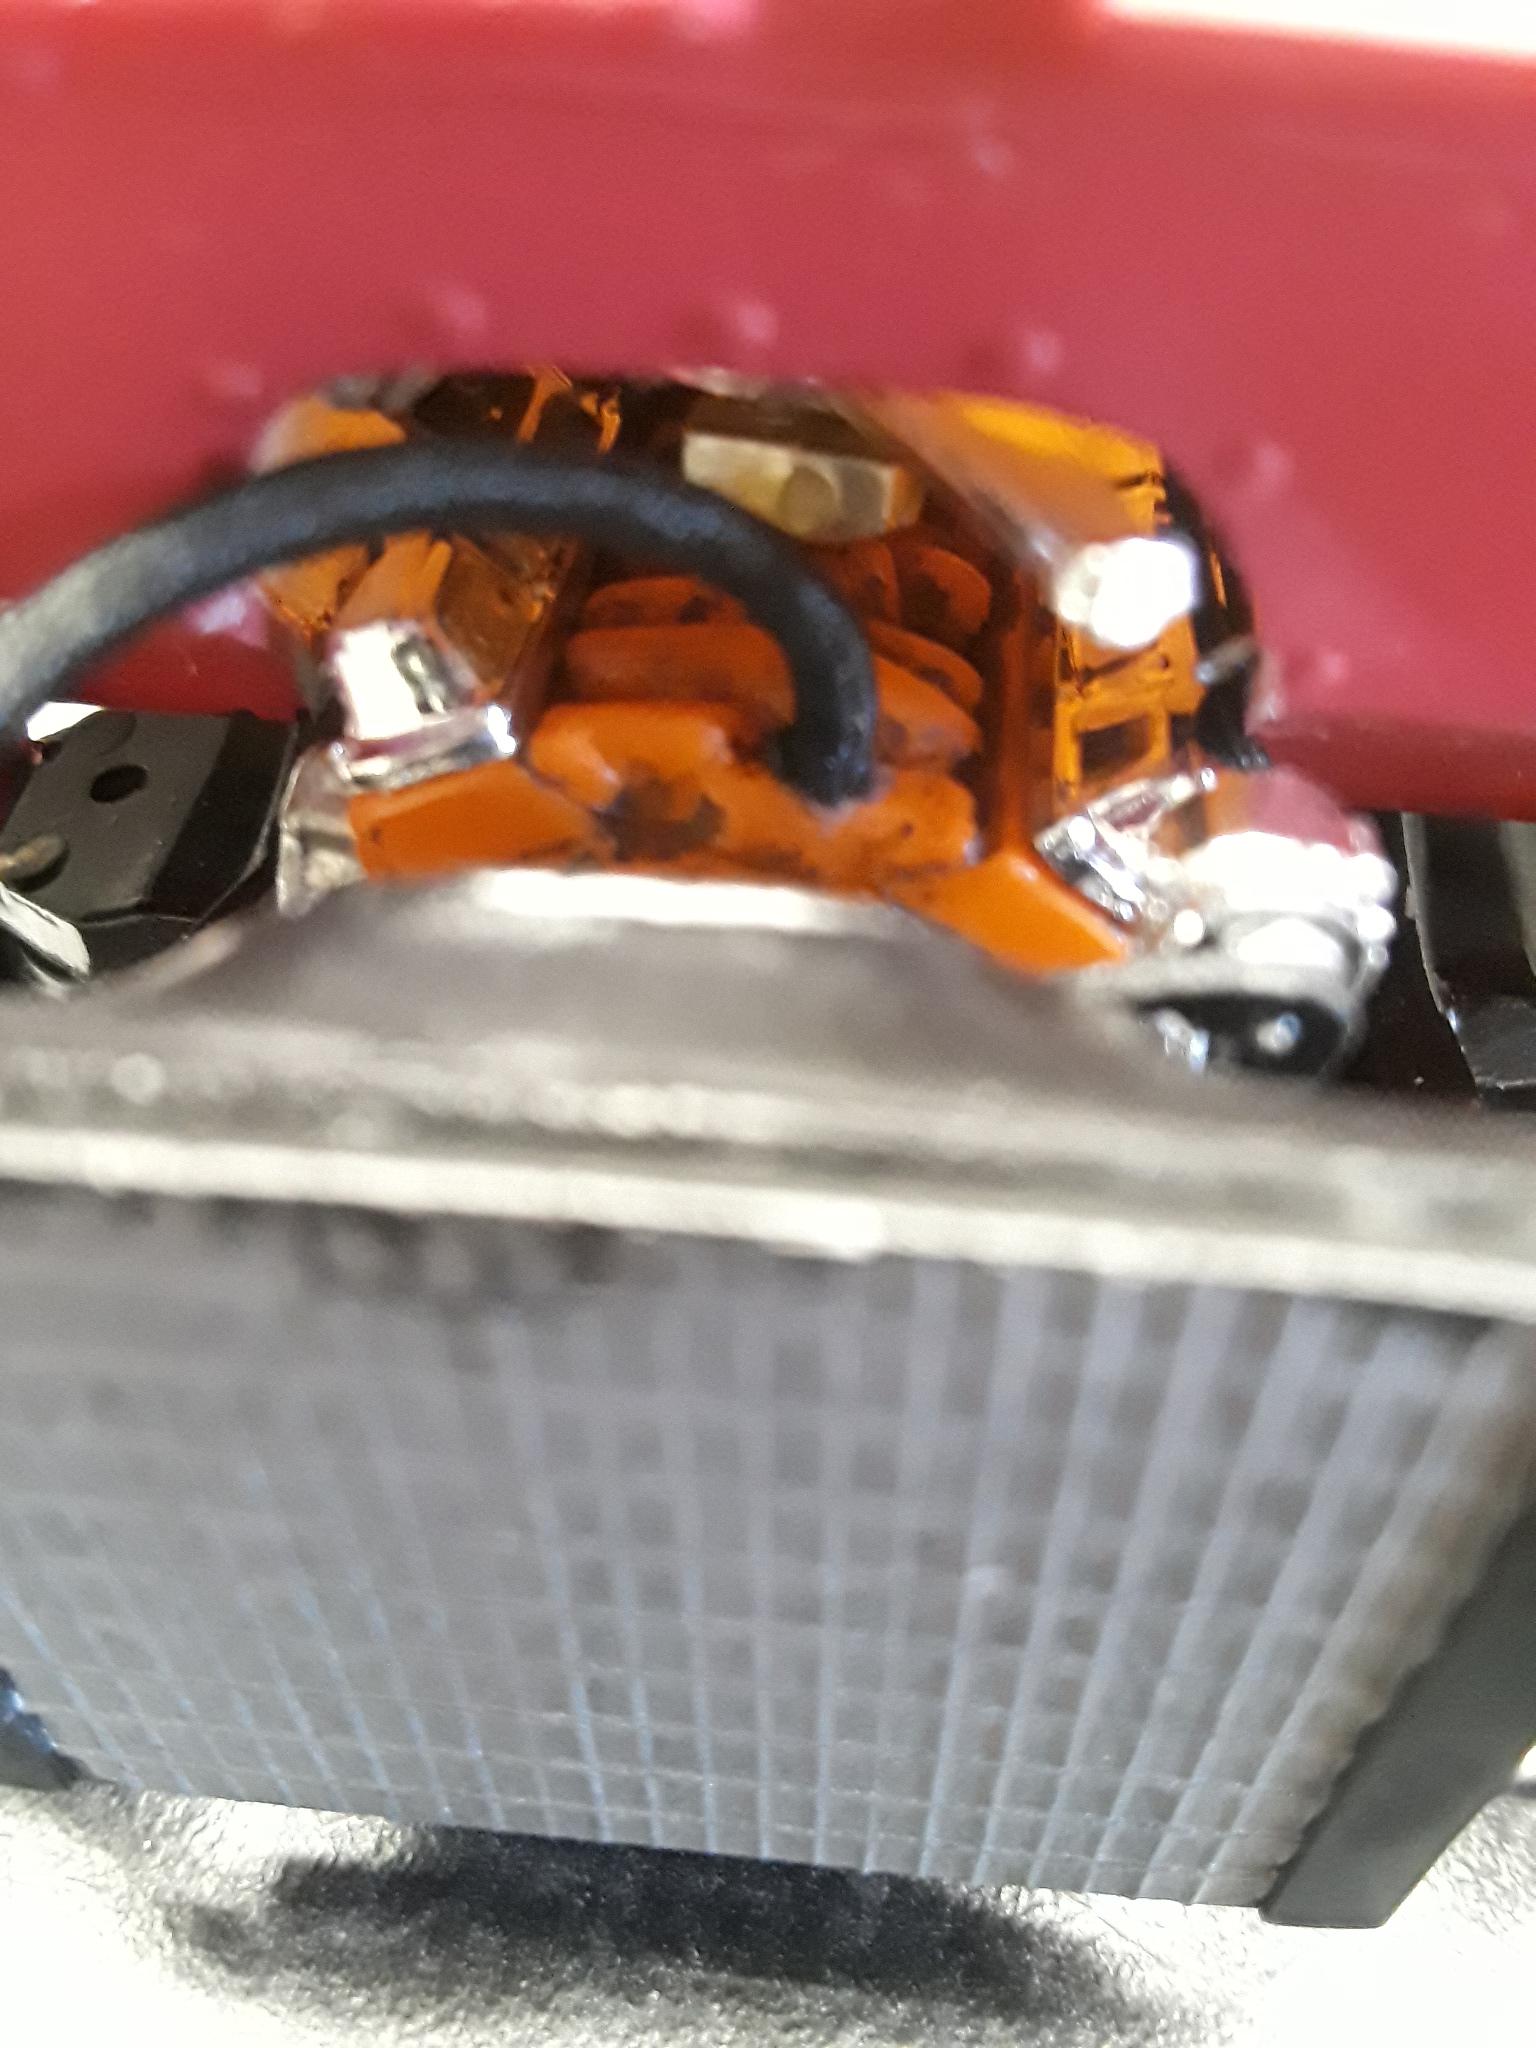
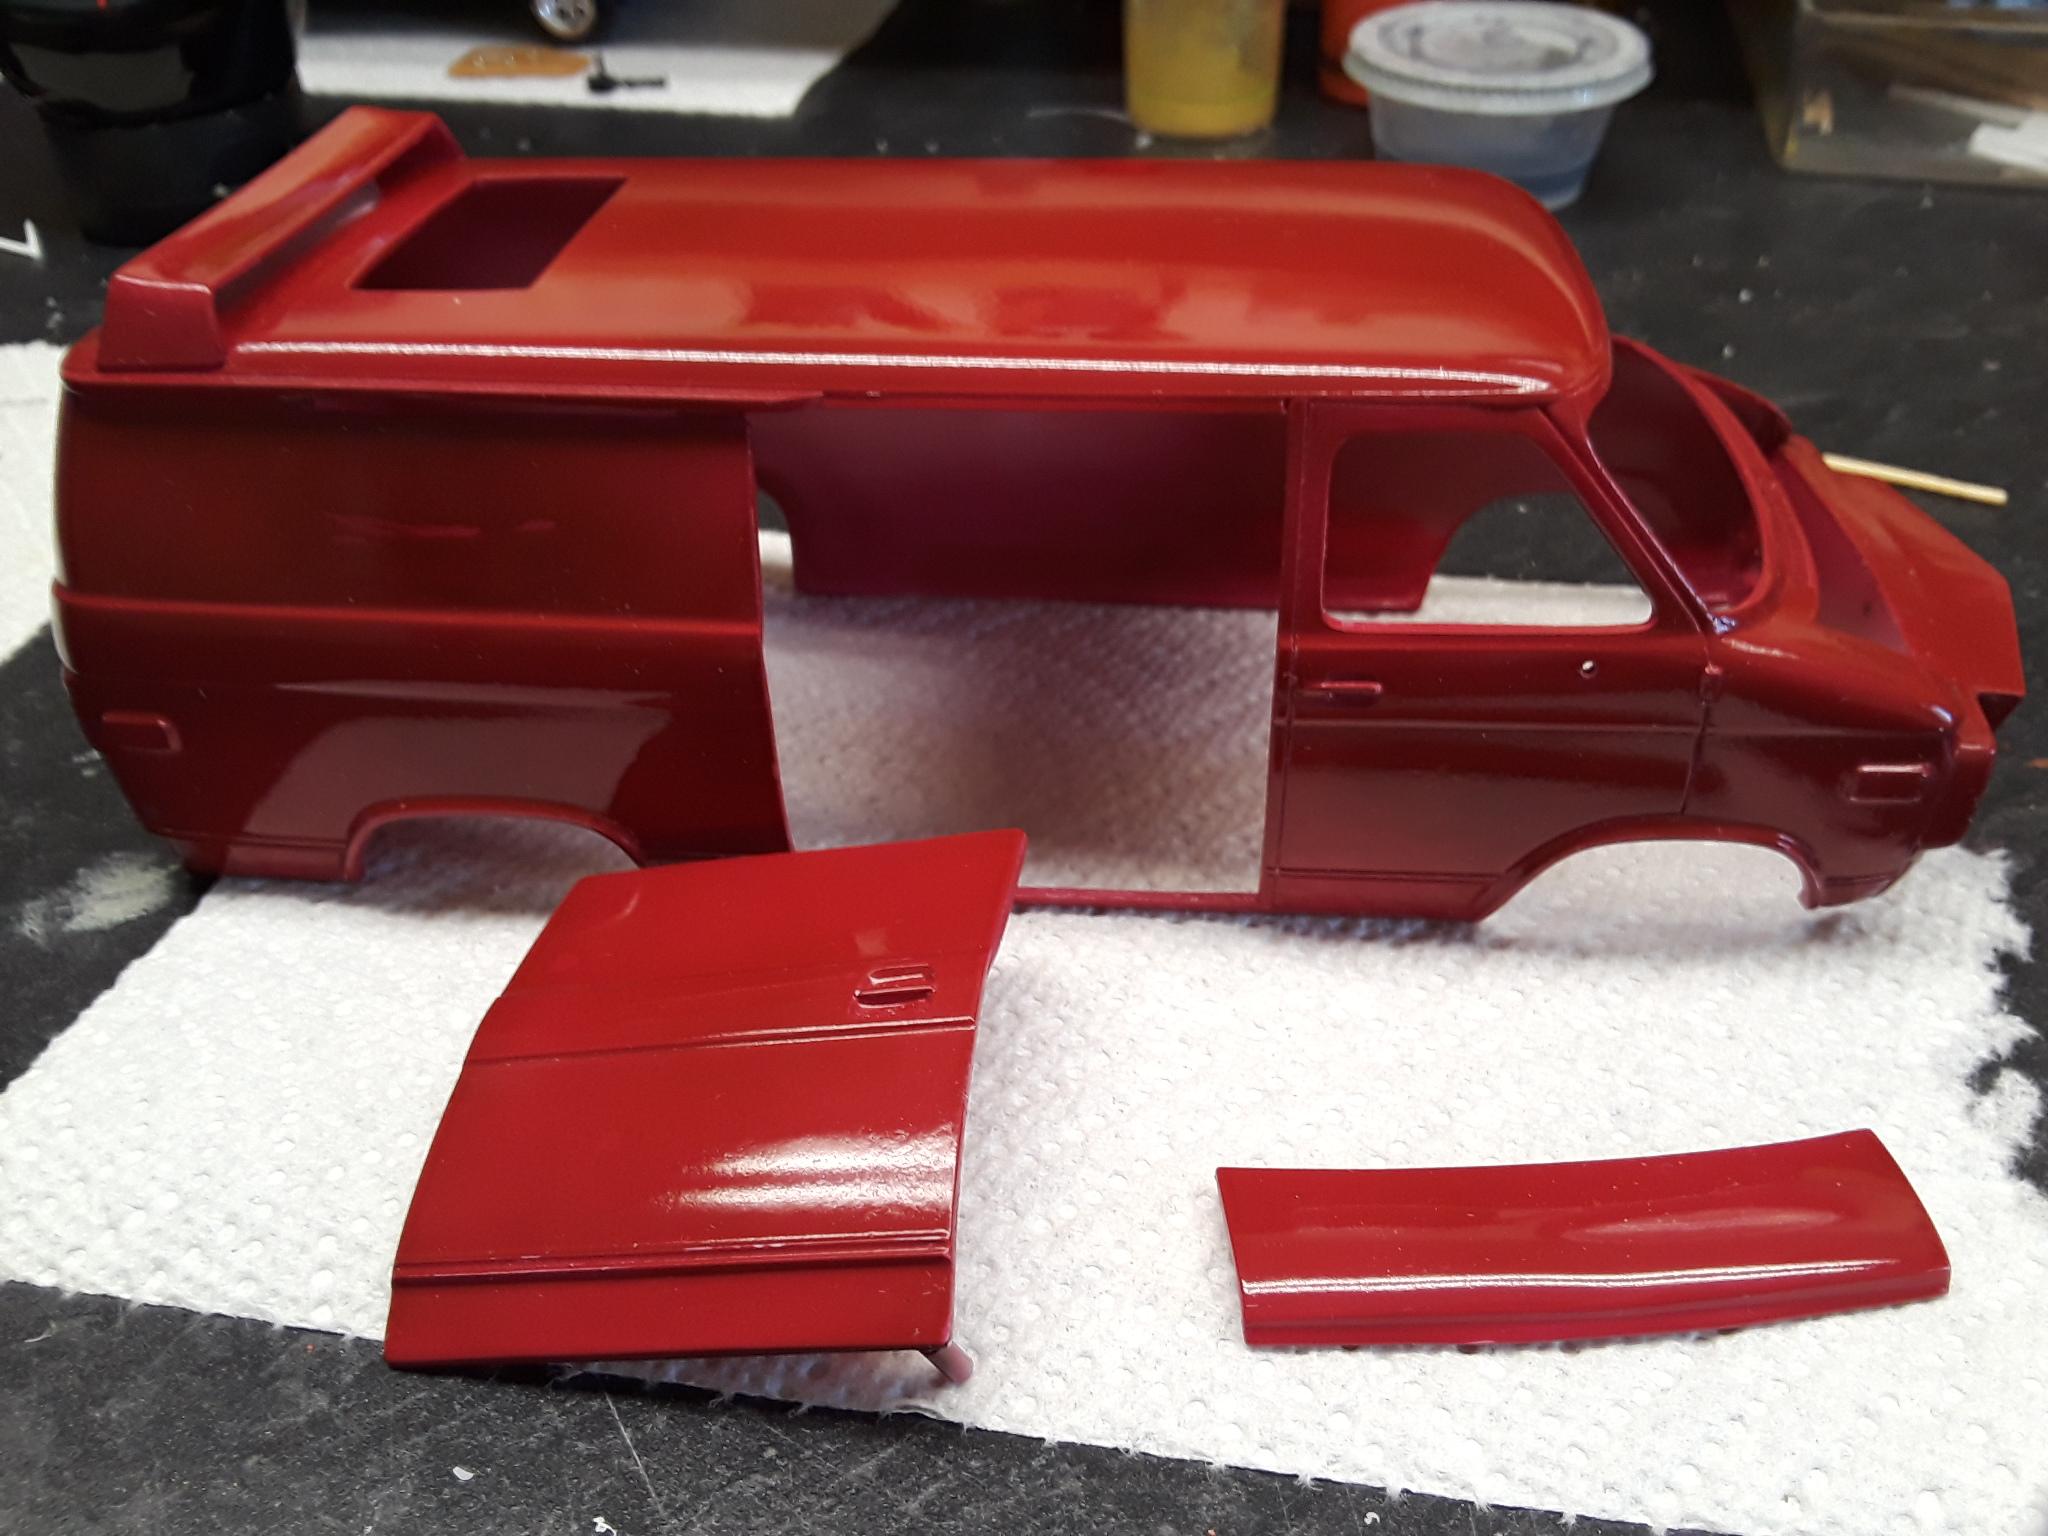
Here's photos of the van after using Testor's rattle-can lacquer, before polishing. This 3 coats so I can polish, then apply some graphics. I got the engine finished, and wanted to test fit to see how the chassis fit into the body with motor in place. It looked good, so I installed and mounted the radiator and the hose. Also added the transmission/oil dipsticks. Had to make a distributor because the kit part wouldn't fit with the cleaner. This shows how little can be seen through the front. Anyway, after getting the engine, radiator & hose, and the battery installed, I decided to follow the suggestions on the instruction sheet and completed the drive train assembly which worked well. So I thought now the wheels can be mounted and I can do another test fit. That's when I ran into problems. The radiator wouldn't clear the front end, knocked it loose so had to cut the hose and take it out of the way. Then the battery was about 2mm too far off, so it had to come out (I'll put in in from the outside). I also found out the the inside front of the wheel wells need to be trimmed to clear the custom front grille shell (it fit fine during the other 2 or 3 times I did a mock up). After this, decided to concentrate on the body for awhile again. Polished the base coats of clear. I'll upload and post them tomorrow after transfer from my phone. Got a good bit done on the interior also, but need to transfer those pics too. Thanks for looking.
-
Good job, thanks for sharing. I enjoyed your video and showing by class was appreciated. Nice photography and composing.
-
Welcome back to the hobby and to the forum. Hope you enjoy and share some of your work.
-
Nice work, it's builds like this that sparks creativity for others. Thanks for sharing.