Pierre Rivard
-
Posts
2,579 -
Joined
-
Last visited
Content Type
Profiles
Forums
Events
Gallery
Everything posted by Pierre Rivard
-
All great feedback. The problem to me is that the model by design sits too high. Add to this the oversized tires and it looks like a 4x4 toy. If I am to proceed with this build I need to find a way to mask these issues. My thinking has been to find ways to lower it as much as possible and then thin the lip of fender flares to improve the wheel opening to tire proportions. If I can't make that work then I need to find better proportioned wheels & tires. Maybe HRM stuff but to get that in Canada... So I'm gonna try to make plan A work. All the input from you guys is fantastic.
-
Thank you all for the valuable input. I'll take any advice coming my way, especially with this "delicate" kit. Thanks Bill for pointing out the thickness of the fender flare lips. I'll add it to the list for body work. besides it will help grow the fender opening and hide a bit tires that appear a bit oversized in diameter. Good point JC on ride height. Ride height is a pet peeve of mine and a race car that sits high looks odd to me. Besides I can always shim it up if I have gone a bit too low. Realism over accuracy I guess.
-
New stuff to try. Cool!
-
Achieving paint scaling
Pierre Rivard replied to landman's topic in Model Building Questions and Answers
Pat, many ways to do this. Here's mine. I brush a coat of mixed Tamiya silver and flat gray to achieve the dull metallic underside I coat it with the desired color, usually with Vallejo acrylics. Light sanding with 400 grit dry, carefully as the paint goes off easily. Add brown/mud color washes. Optional, but not done on this pic, you can add little spots of rust using the Vallejo...Rust.
-
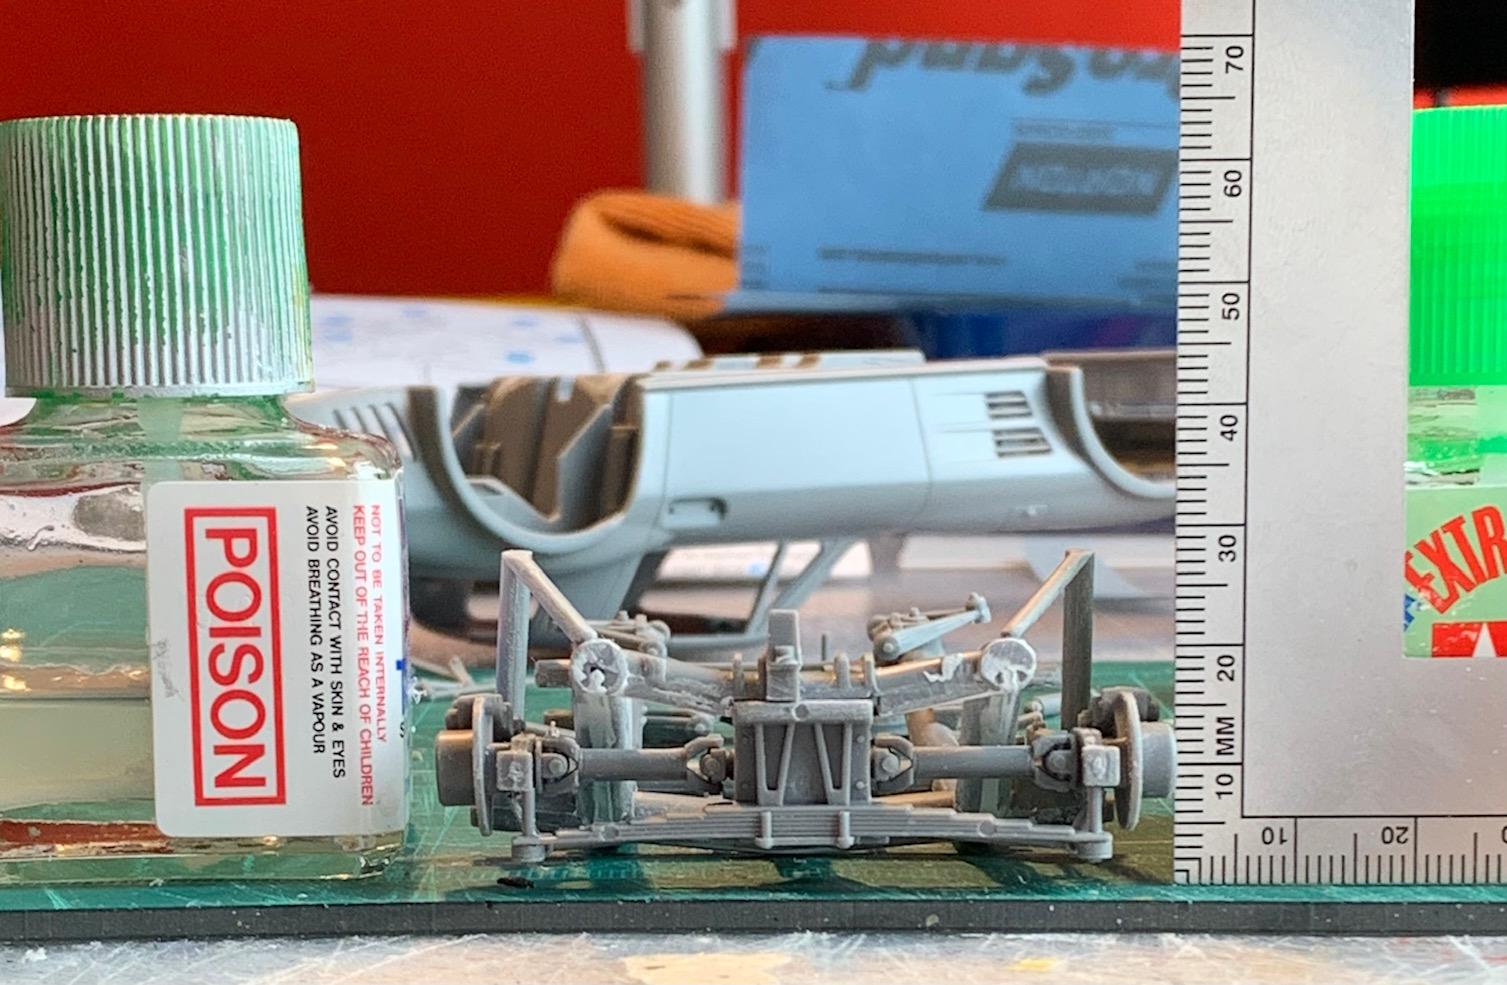
The last step of fixing the rear chassis is that it rides higher on one side. This is more an issue of how the assembly of parts does has a single vertical control with the diff/spring leaf unit attaching to the chassis in the center. I spent considerable tine measuring and moving parts until I felt I was level to the chassis measured side to side. I then proceeded to adding cement to the preassembled the rear unit mated to the chassis in the following order. Radius arm to chassis, Diferential to chassis, and then radius arms to half shafts and cross links. Check again, adjust and lots of curing time.
-
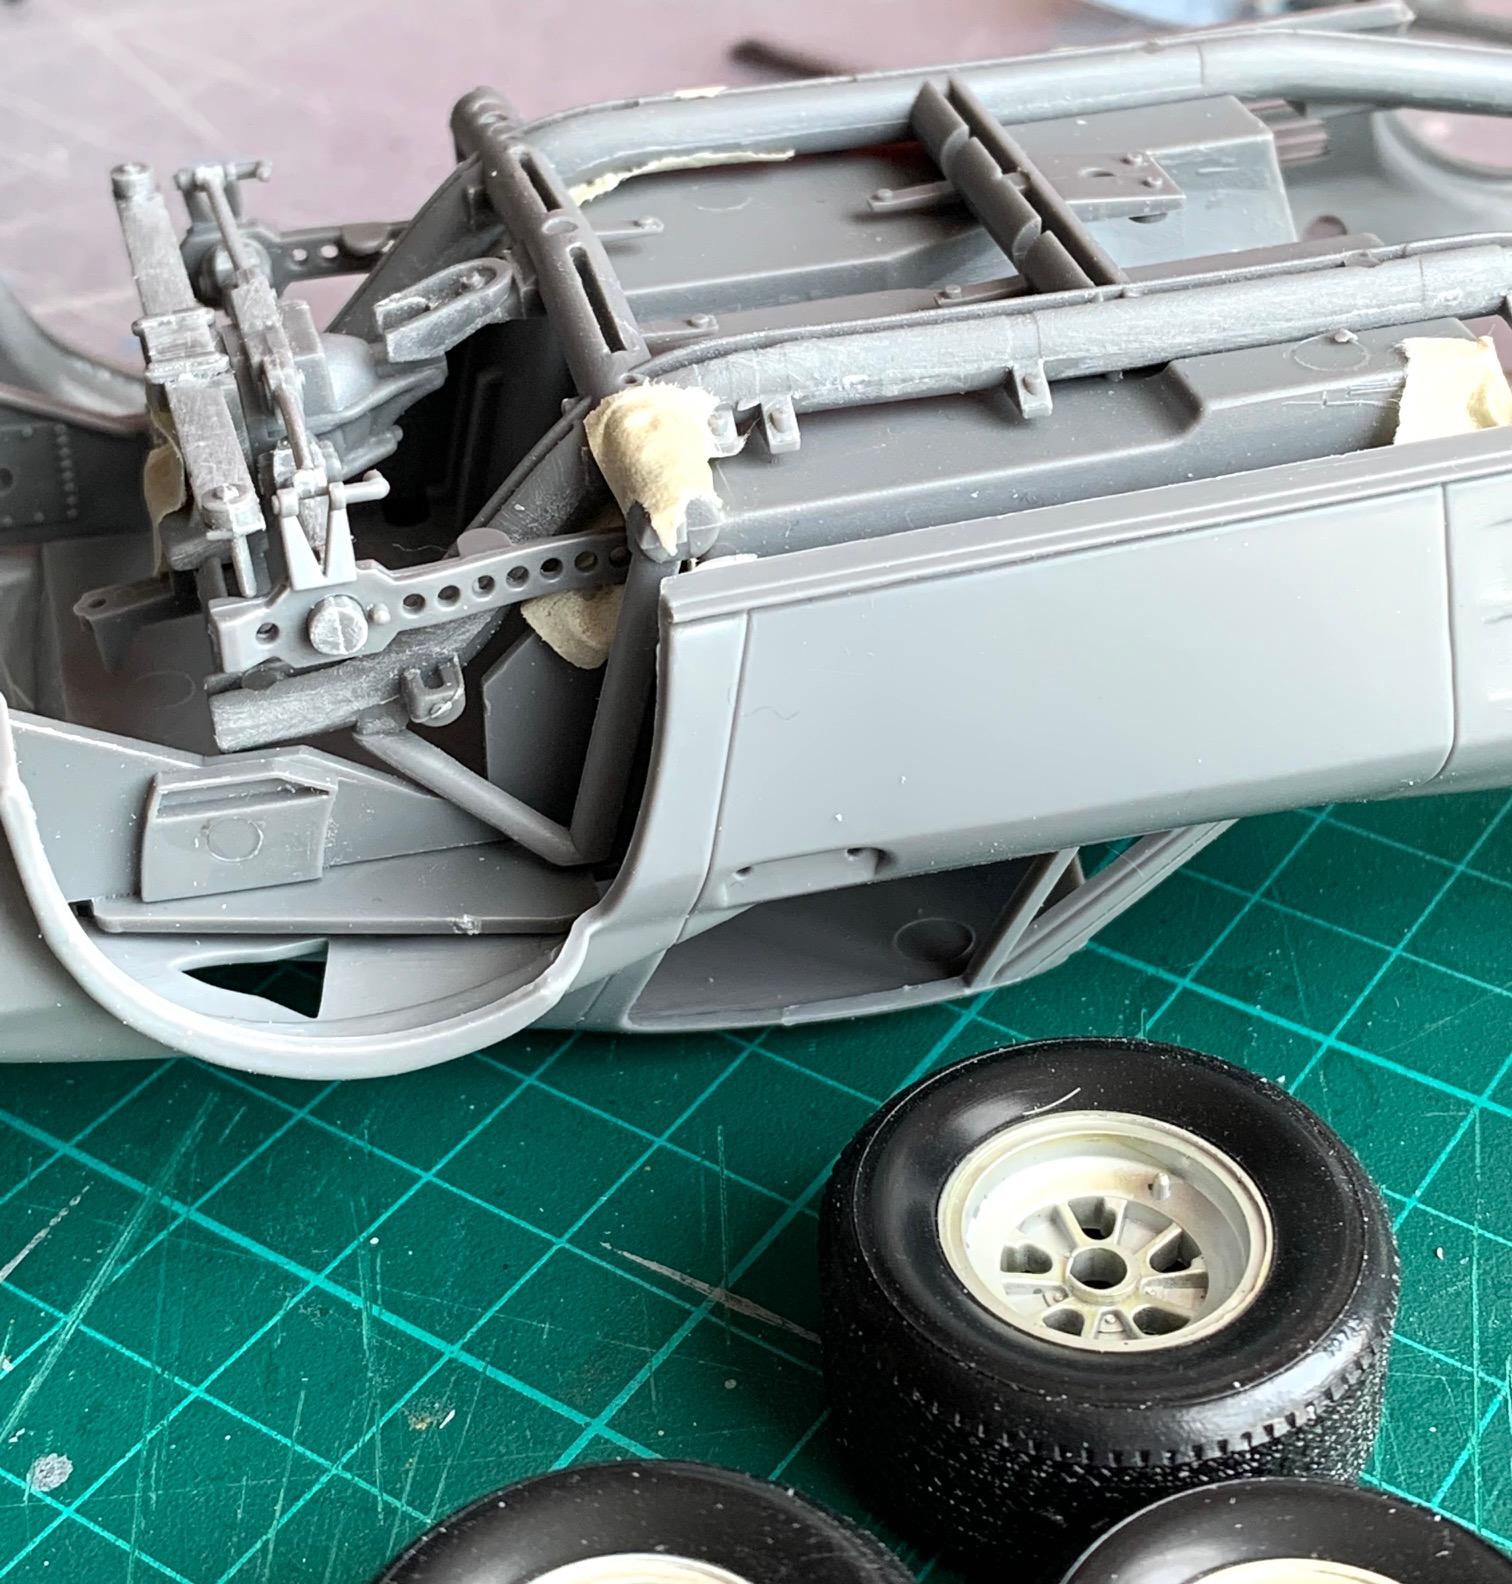
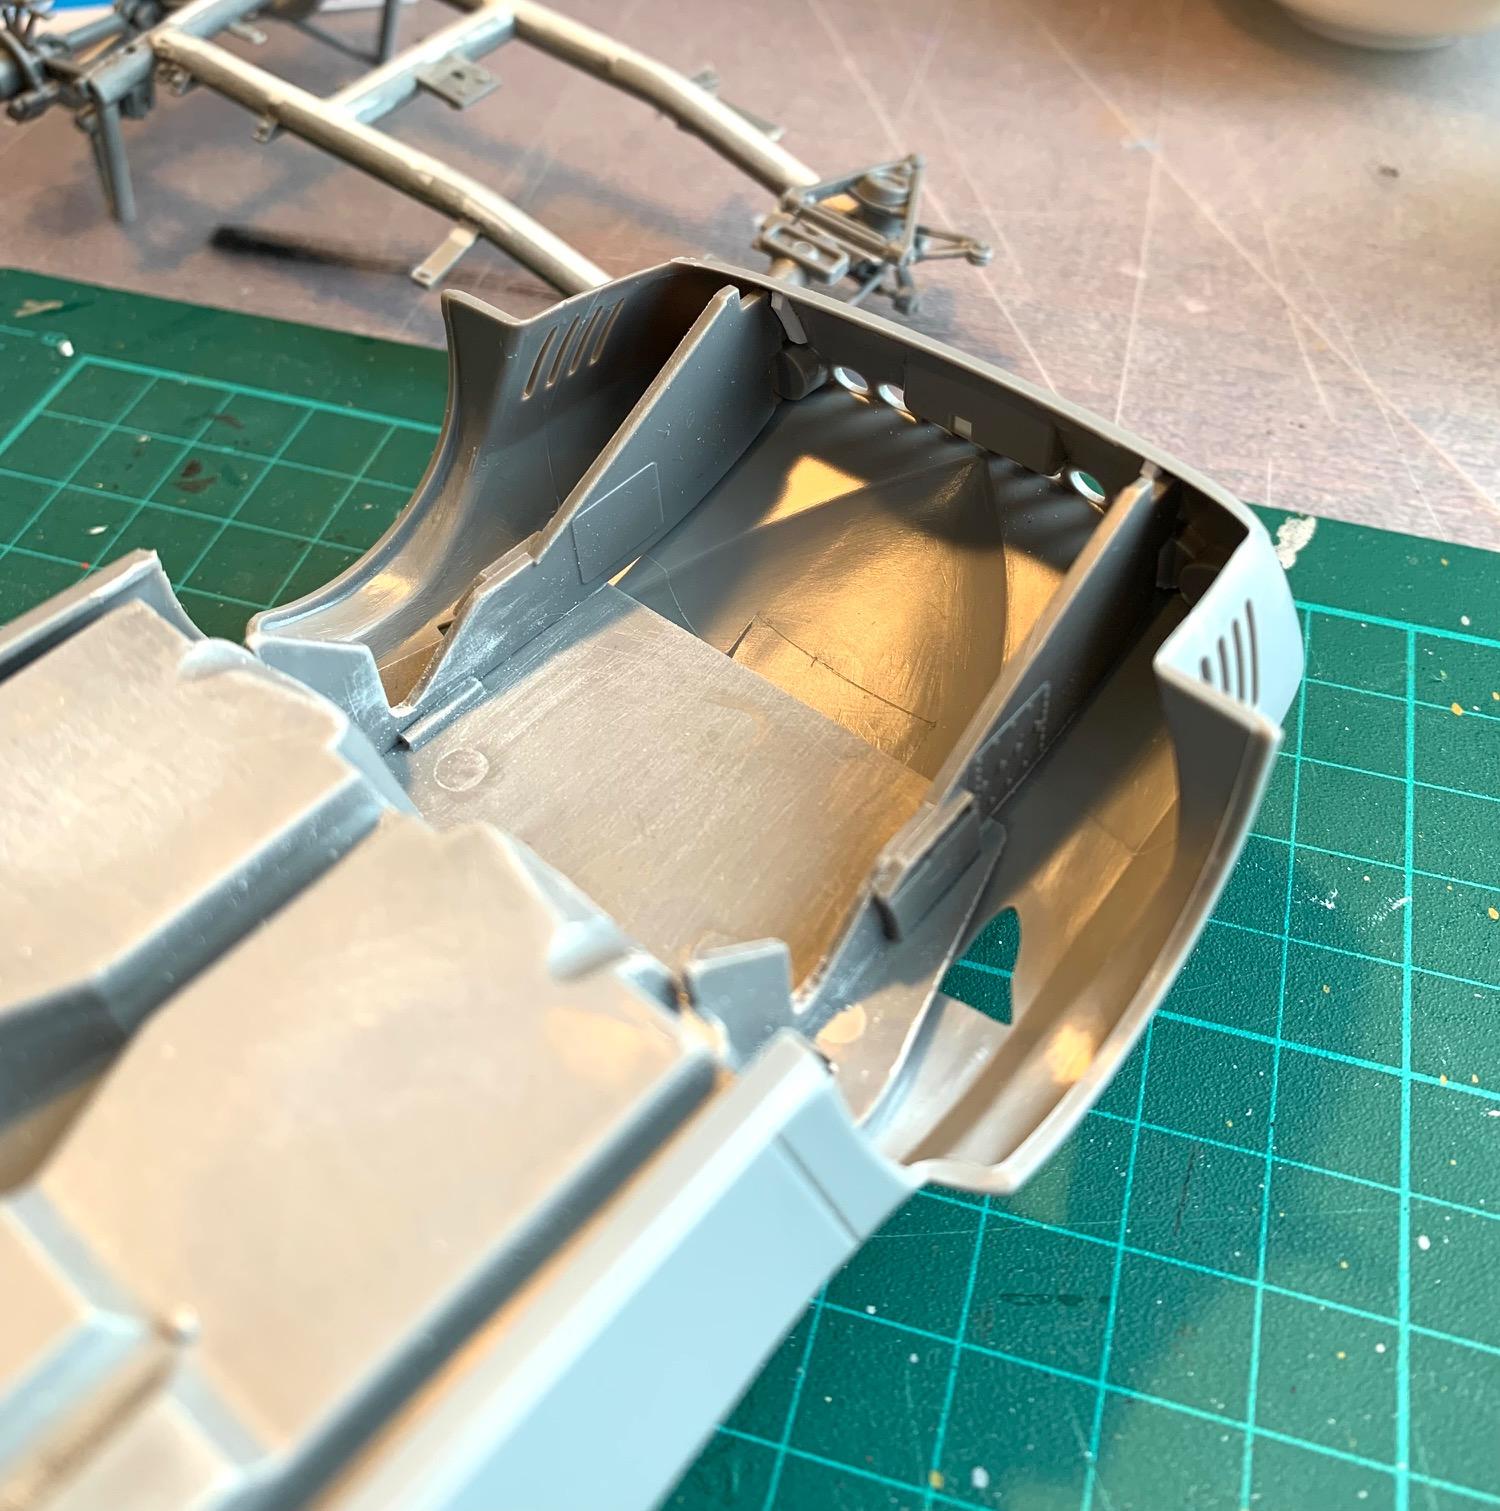
Next step was to mock up the rear suspension chassis and mate the chassis to the floorpan. Yep, it rides too high. The gap of the chassis bracket to floorpan give me an indication there may be interference (first pic). I located and removed (fancy word for...sanding) interferences between the roll bar support and rear wheel well cutouts and between the chassis crossbar and floorpan where it transitions to the vertical wall behind the seats. I now have a nice snug chassis to floorpan fit and the ride height is much lower (pics 2-3)
-
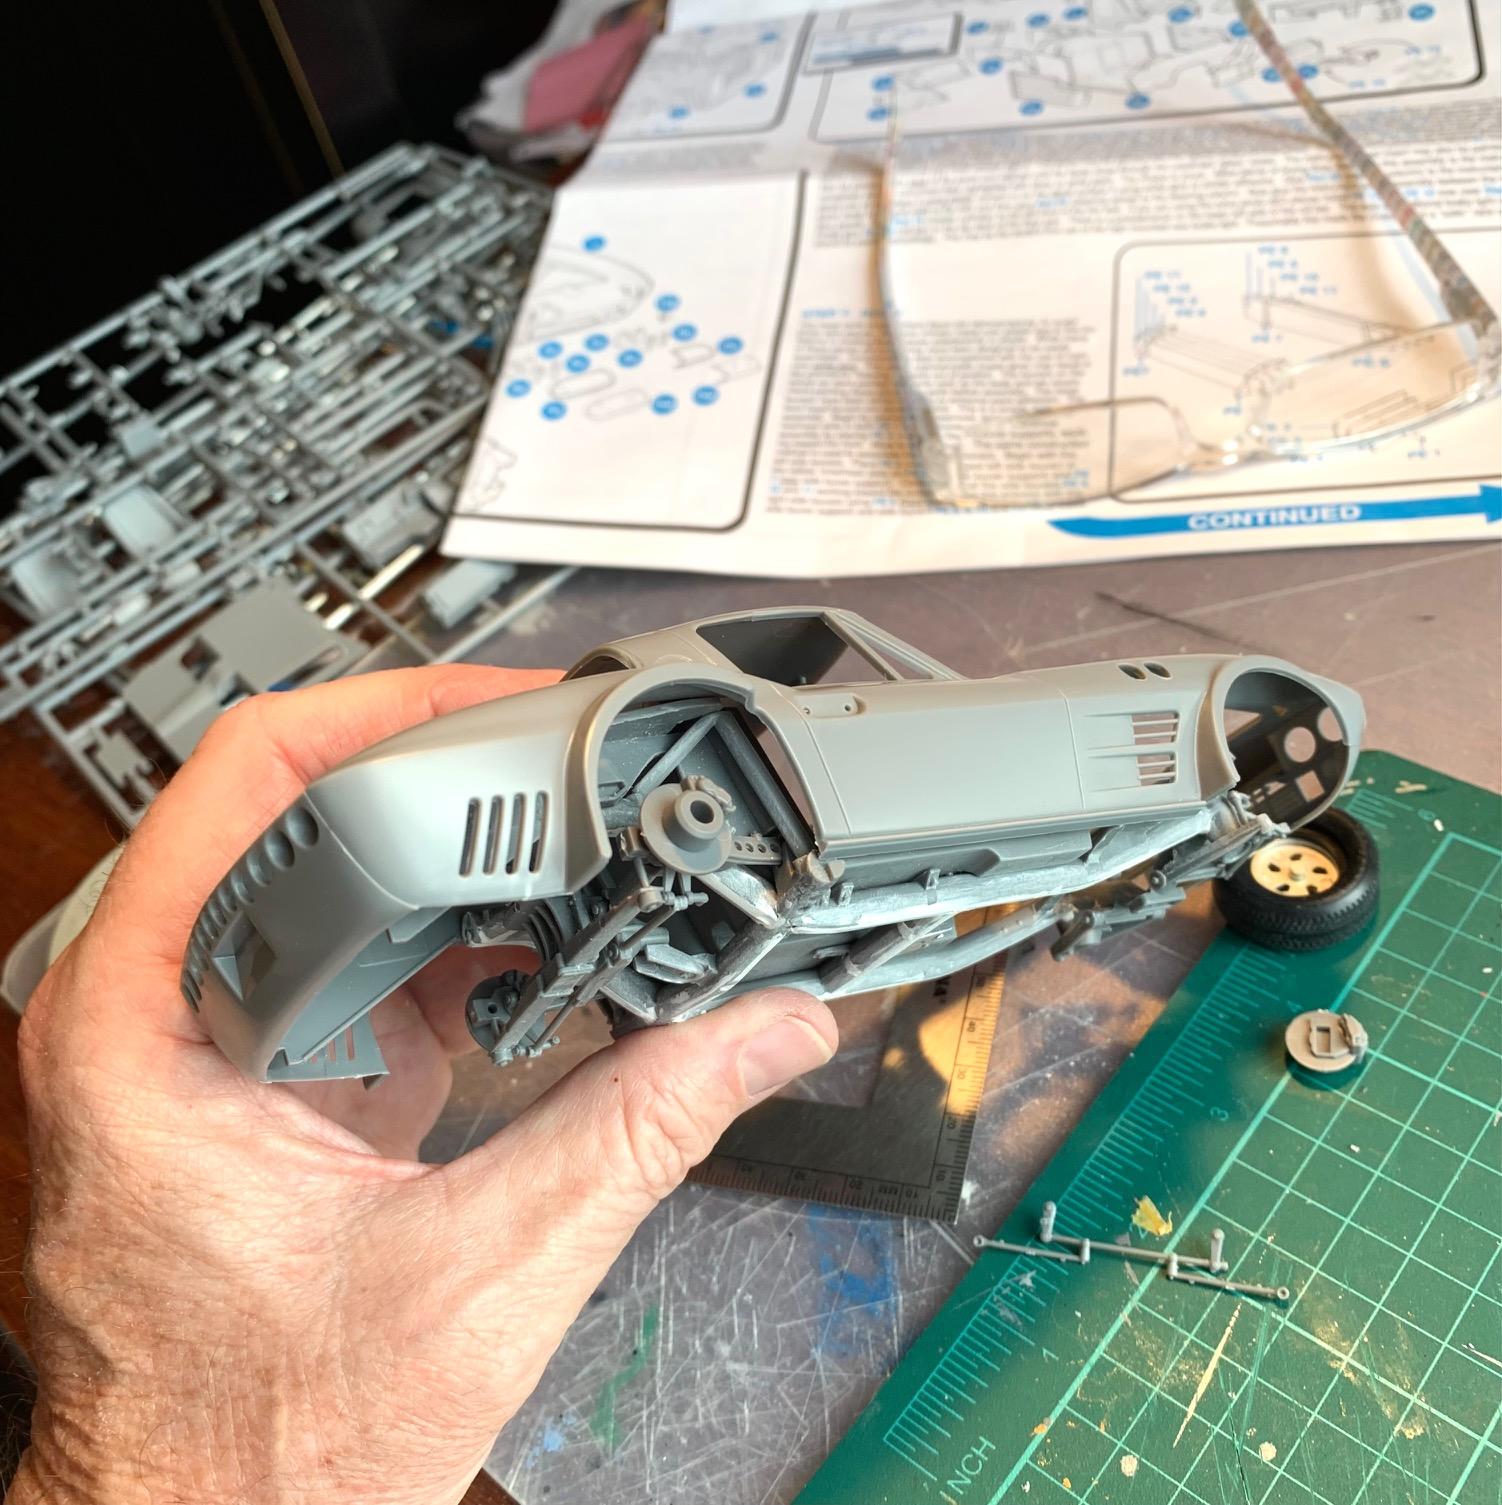
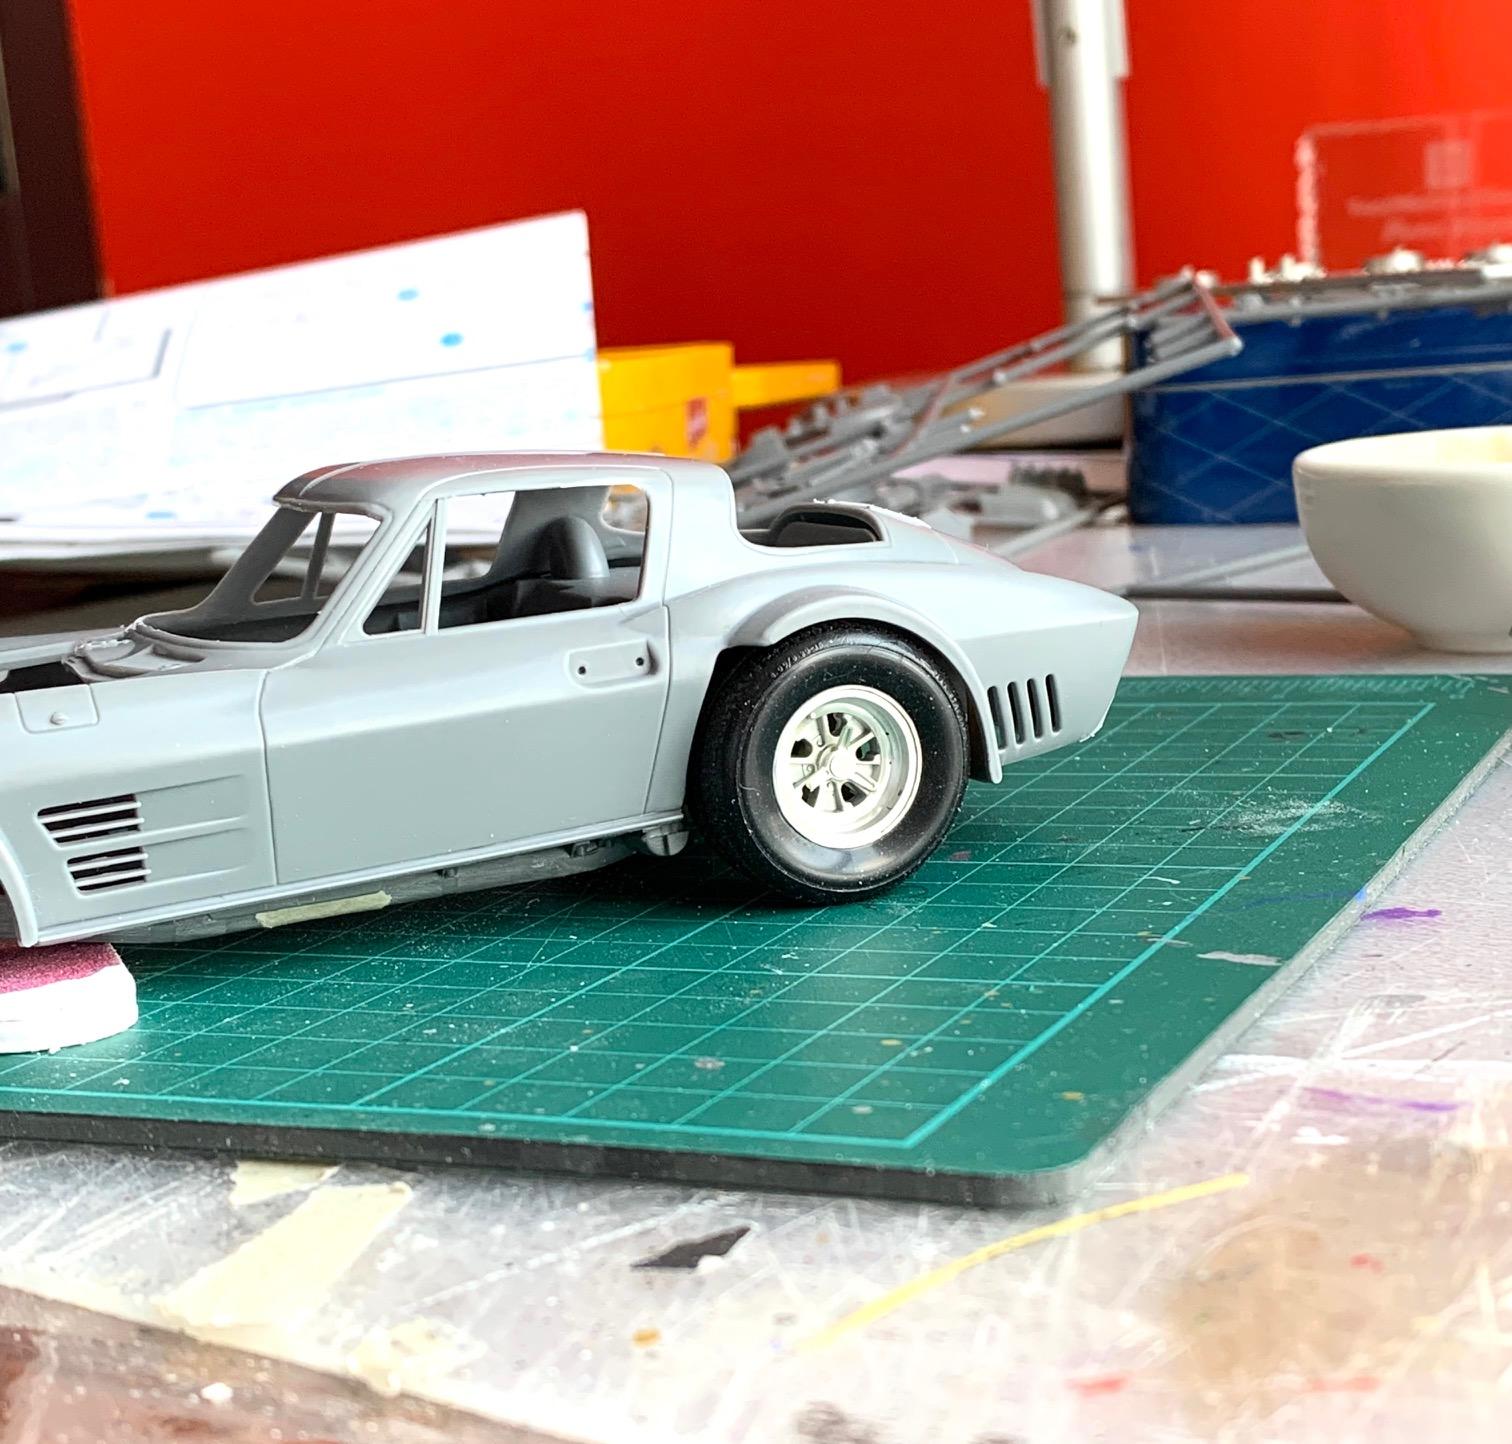
This one has been on my bucket list from day 1. The AM kit looks like a good one but one issue I see in many builds is that the car rides rather high. I don't know if it is by design of issues with assembly but it's a must fix for me. Instructions are of a different style but not as bad as what I had read on various forums (so far...). However there is a definite lack of part positioning visuals so I am doing a lot of test fitting to figure it out. I am changing the order of build a bit. To get the ride height I am looking for I want to make sure I deal with any fit/interference issues starting with the interior to body fit. I mocked up the interior pan, door panels and IP and test fitted to the body. Looks ok but it needs something to fix the location better so I glued in the firewall to interior tub and the rear wheel well to the tub and added guides to the rear of the body for lateral location control. A a later point I will need to make sure the glass does not add interference.
-
Thanks JC for the invaluable advice and showing me a path to follow.
-
Thank you Gary for the advice and sharing pictures of your beautiful Cobras. I will post when I start this project.
-
Gentlemen, I am overwhelmed by the response. I did not expect so much help. Thank you. As I was waiting for feedback I did some online search to start understanding the rich but complex history of the Cobra. I have a long way to go. So far here are my thoughts, and please chime in if you think I am losing my way. Since I want some slab sided cars as the foundation and I want one scale for all cars I have to go 1/25 scale AMT takes care of the narrow cars...the only game in town. The Revell re-issue of the Sunny/Minicraft could form the base of the 289 FIA with a nose job The same kit could also be a modified into a 427 with an engine swap, coil over front and 4inch frame. I think the MkIII 427 cars were a bit longer but that's ok. You do what you can. I still need to do some work on getting good wheels (wire and mags), decals, etc Again, thank you all for getting me started. Definitely doing a Cobra after I finish my AM Corvette GS.
-
This is a very nice way to combine a better chassis with that great body style. Beautiful build!
-
A question for Cobra experts. I've never built one. looking for the right kit to get started. I want to build a race version. I plan to eventually build a few and all the same scale, so direction about 1/24 or 1/25 will be foundation for the whole collection. I have a preference for early narrow body cars but I plan build more variants eventually. Looking for the first kit I could build into a racer. Something "findable" and with a reasonable chassis/engine representation. Thanks.
-
1966 Mercury Comet
Pierre Rivard replied to MarkJ's topic in WIP: Stock Cars (NASCAR, Super Stock, Late Model, etc.)
Thinking we each build our own but share info/tips along the way. Currently starting work on Accurate Miniatures Corvette Grand Sport. No w.i.p. yet -
1966 Mercury Comet
Pierre Rivard replied to MarkJ's topic in WIP: Stock Cars (NASCAR, Super Stock, Late Model, etc.)
I agree, we aim for accuracy but depend on what info can be verified. Might be fun if we both built 64 Galaxies at the same time after you finish this one and when I'm done with my current build. -
1966 Mercury Comet
Pierre Rivard replied to MarkJ's topic in WIP: Stock Cars (NASCAR, Super Stock, Late Model, etc.)
Great work Mark. It's great to see your research and dedication to replicate the specifics of the actual race car. The essence of scale modeling. -
Thank you all for the nice feedback. Lots of carving & sanding but happy I really wanted this one done. I have a 64 Galaxie kit, need to decide which car to do with it. Junior Johnson, Fred Lorenzen, Marvin Panch, Ned Jarrett...so many to choose from.
-
Monogram Ferrari 308 GTB Racer
Pierre Rivard replied to JTalmage's topic in Other Racing: Road Racing, Salt Flat Racers
Beautiful build...and quick! That yellow body was obviously a very nice clean one for looking that good with only a seal coat. -
Not much but a few things to ease the build. The weak point is the headlamps, I would paint an edge line under the covers (like I did on the windshield and door glass) to hide the bond to body and find a way to make the lamps look better. Other than that improve the guides for upper to lower body interface and maybe drop the front suspension 1 or 2 mm.
-
Thank you all for the nice feedback. I feel welcomed to a new group of fellow builders. This move to diversify away from Nascar was in the works for a while. The 917 is the first build with more to come. I have a few in the stash and need to decide what to do next. Tamiya Tyrrell P34, Tamiya Alpine A110 1971 Monte Carlo rallye, Fujimi 1966 GT40, Ebbro Lotus 72C and Ebbro Tyrrell 002.
-
Tamiya AMG GT3 Merc .
Pierre Rivard replied to Silver Foxx's topic in Other Racing: Road Racing, Salt Flat Racers
Superb build. This one is for sure made for decal experts! -
1960 Ferrari 256F1
Pierre Rivard replied to Chris Smith's topic in Other Racing: Road Racing, Salt Flat Racers
This is a restored full scale car, the real thing right? Seriously I know these MFH kits have huge potential but only in the hands of the very best builders like you sir! I would say mighty impressive but that feels like such an understatement. -
1966 Mercury Comet
Pierre Rivard replied to MarkJ's topic in WIP: Stock Cars (NASCAR, Super Stock, Late Model, etc.)
Lots of scratch building on the interior and it look mighty good. That's where the fun is with these "converted" 60's cars. -
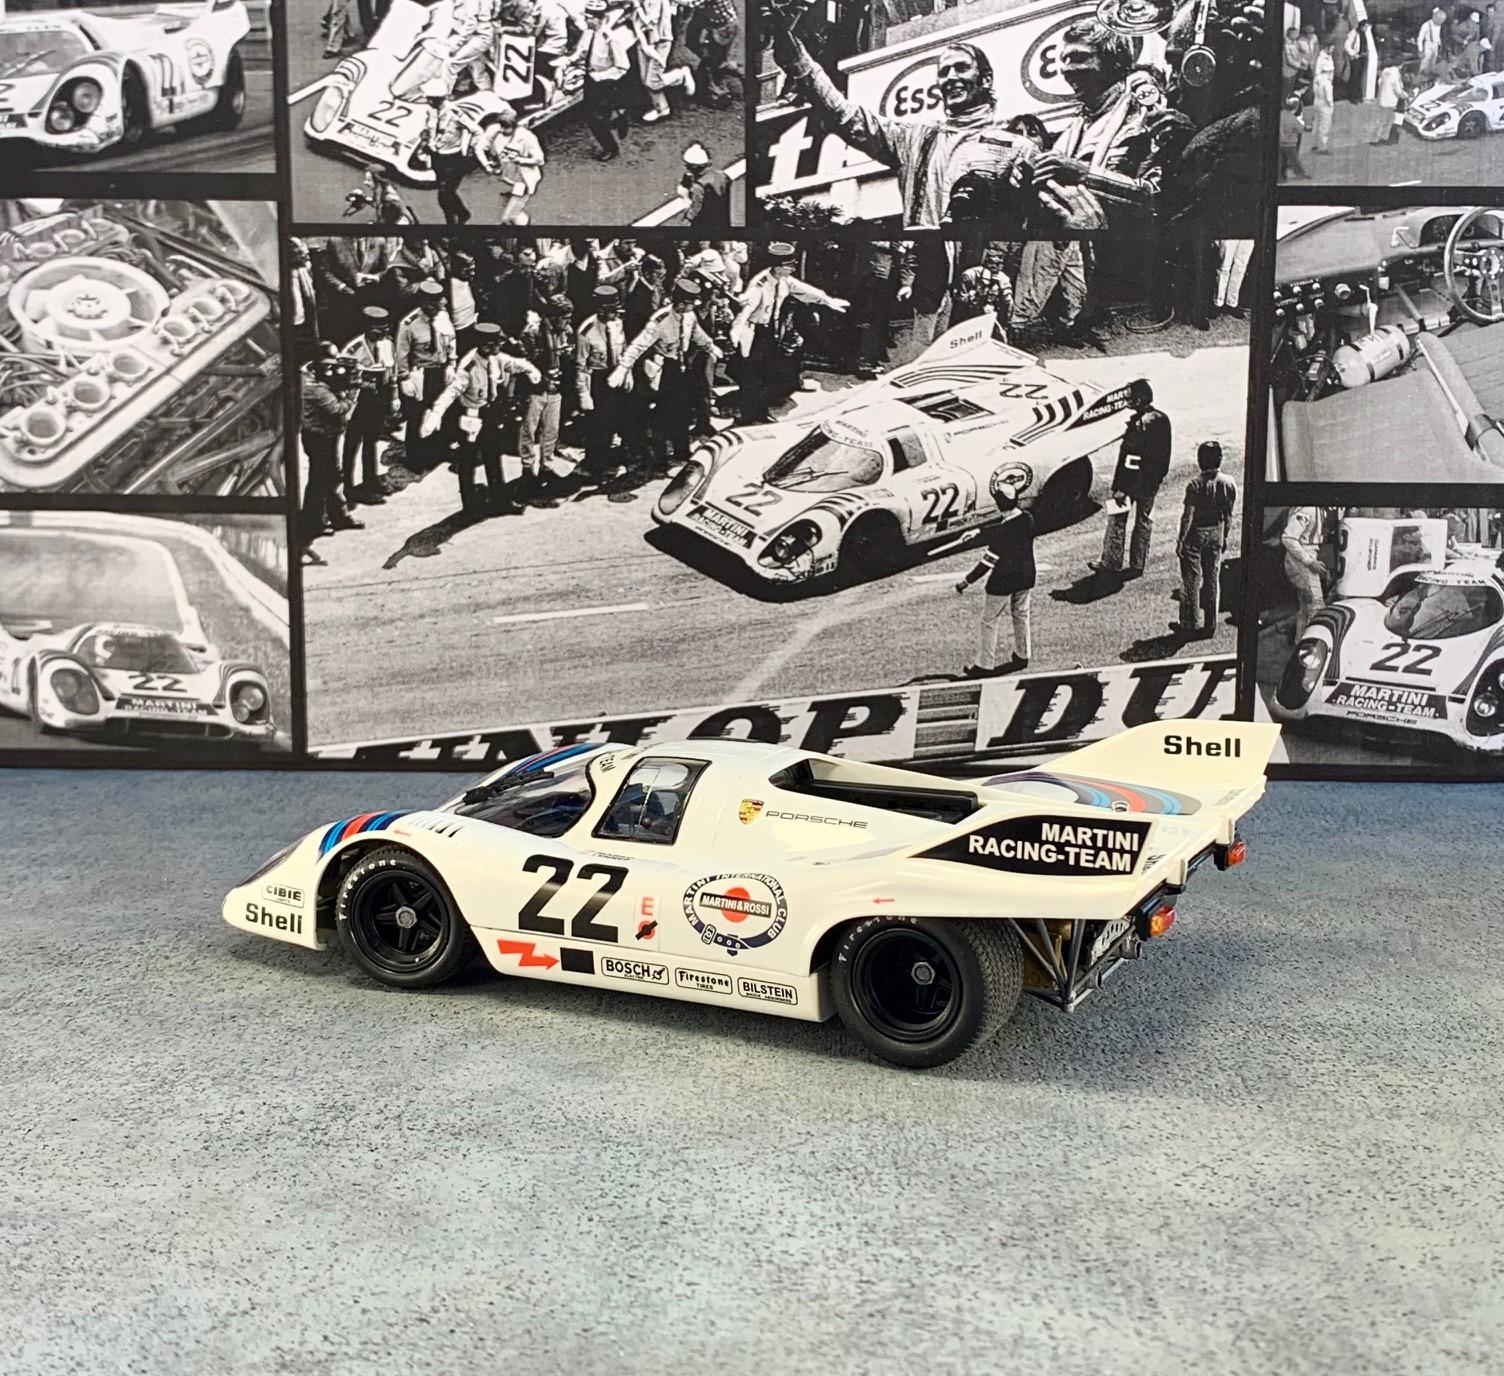
Since joining the hobby 5 years ago I had only built Nascar from the dark side i.e. lots of carving, sanding and scratch building I decided I needed a change so I decided to go for this one. Fujimi kit and I kept it a simple OOB with only seat belts added. I just followed the instructions with the only change of color being the exposed frame bits done in silver + weathering to replicate the magnesium frame which was unique to this specific car. Remember the little high school experiments with burning magnesium? No surprise Porsche never informed the drivers but luckily they are still around. (Helmut Marko is the grumpy one in the Red Bull F1 garage) All finishes have been brush painted. Vallejo primer, sanded and polished, Vallejo base color, Tamiya acrylic clear, polished with 6000-8000-12000 cloths, decals and a coat of Future to seal them. This was my first non-Nascar project and I learned a lot. I would do a few things differently but I am still pretty happy with it.
-
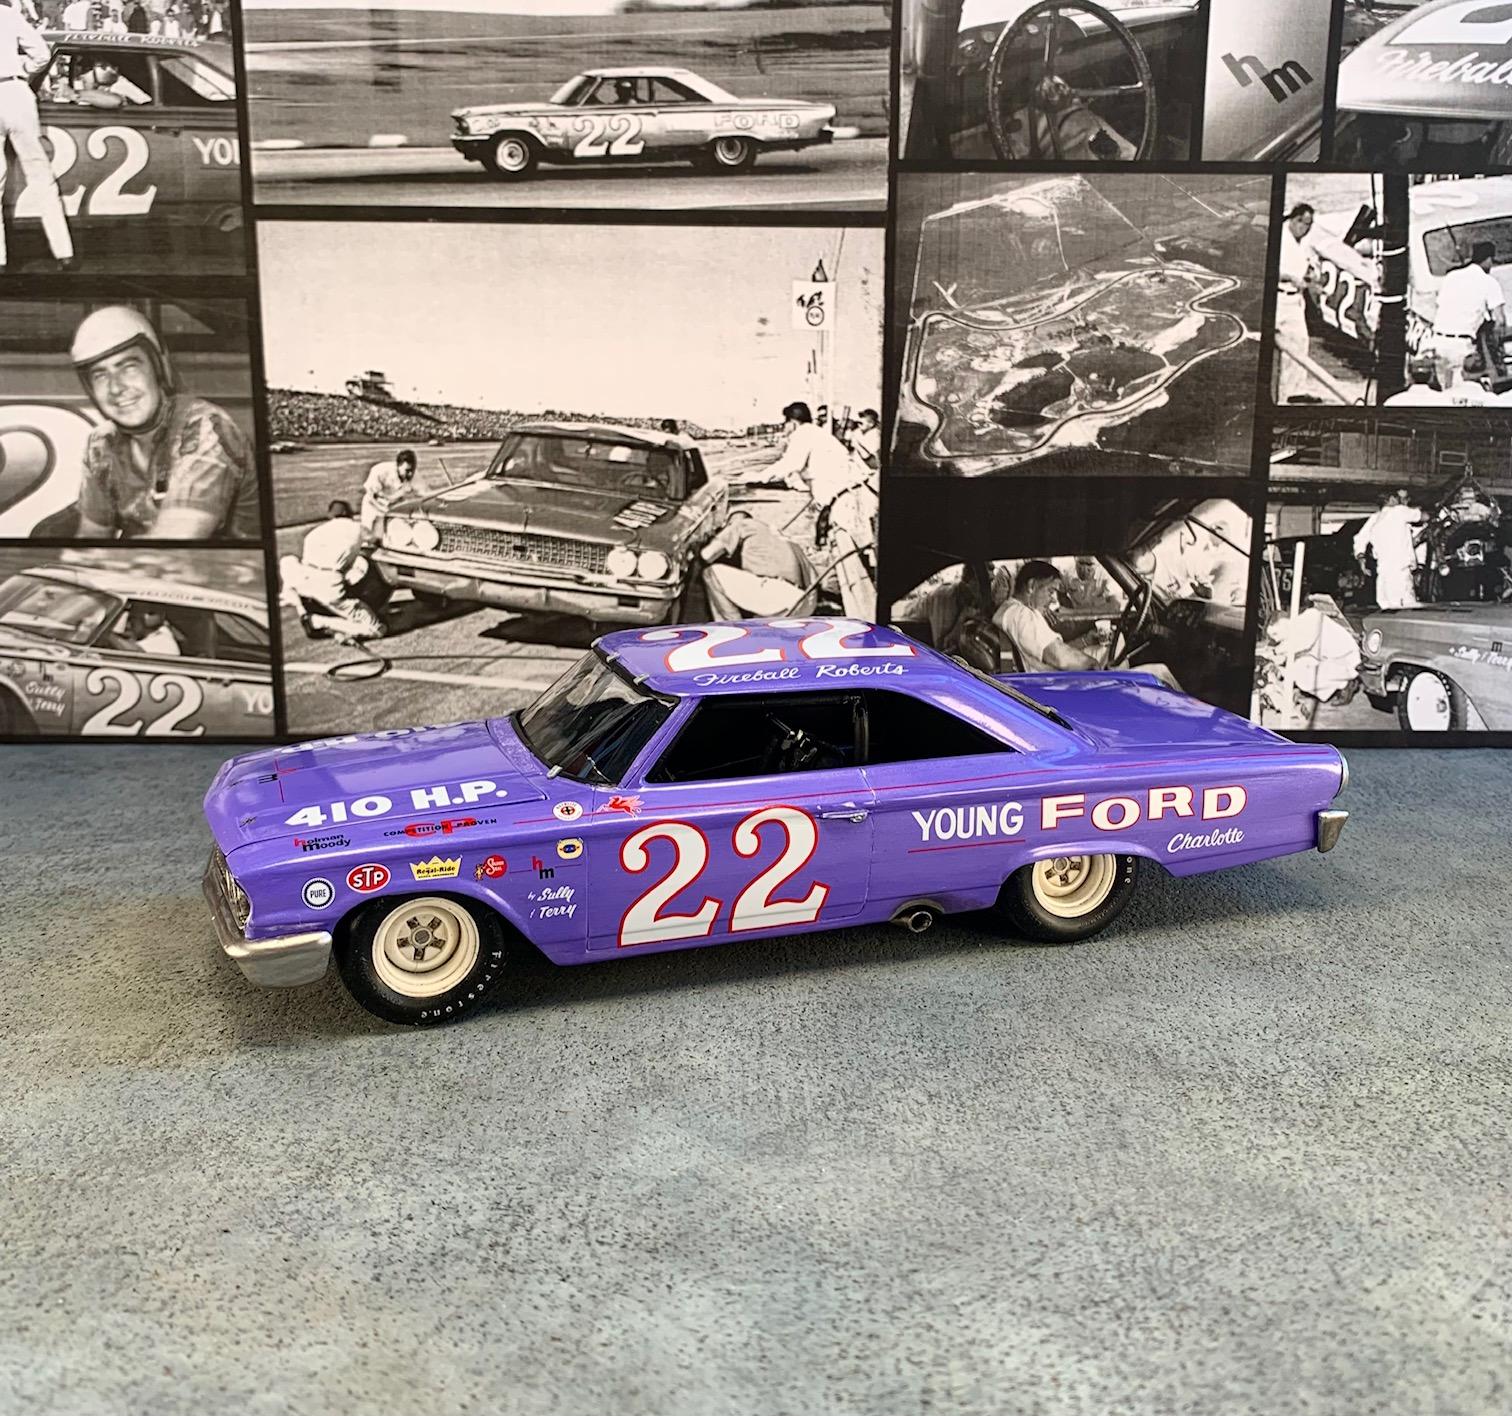
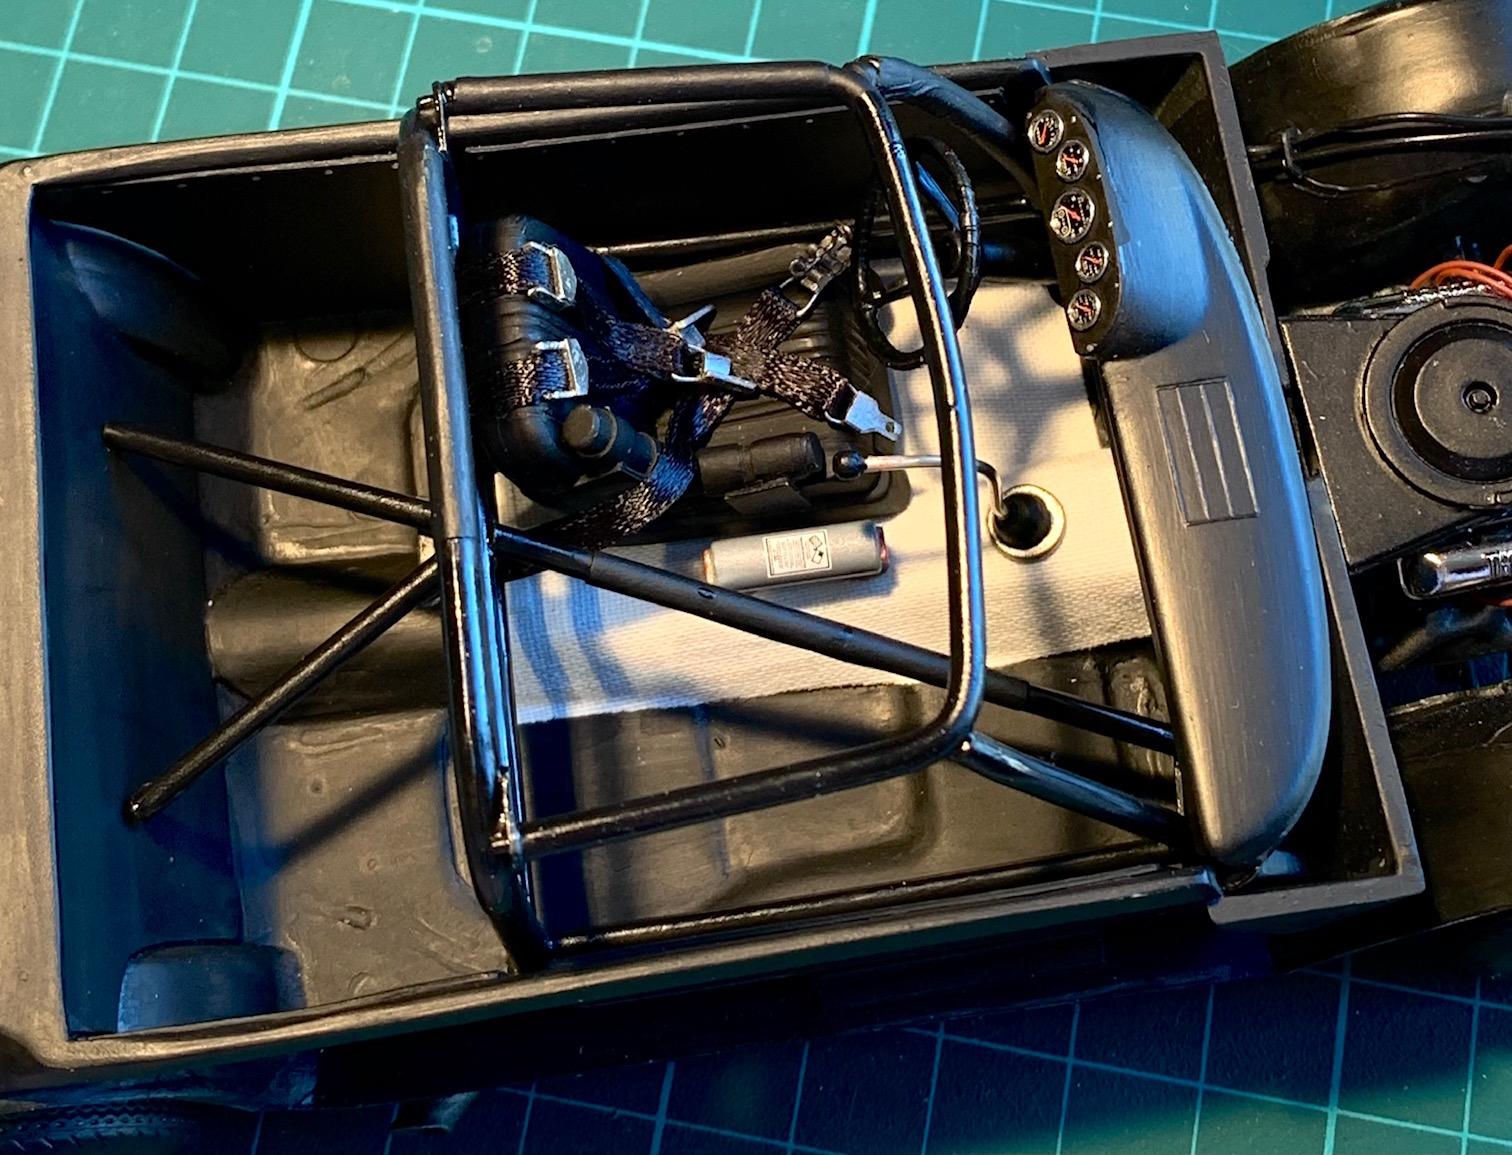
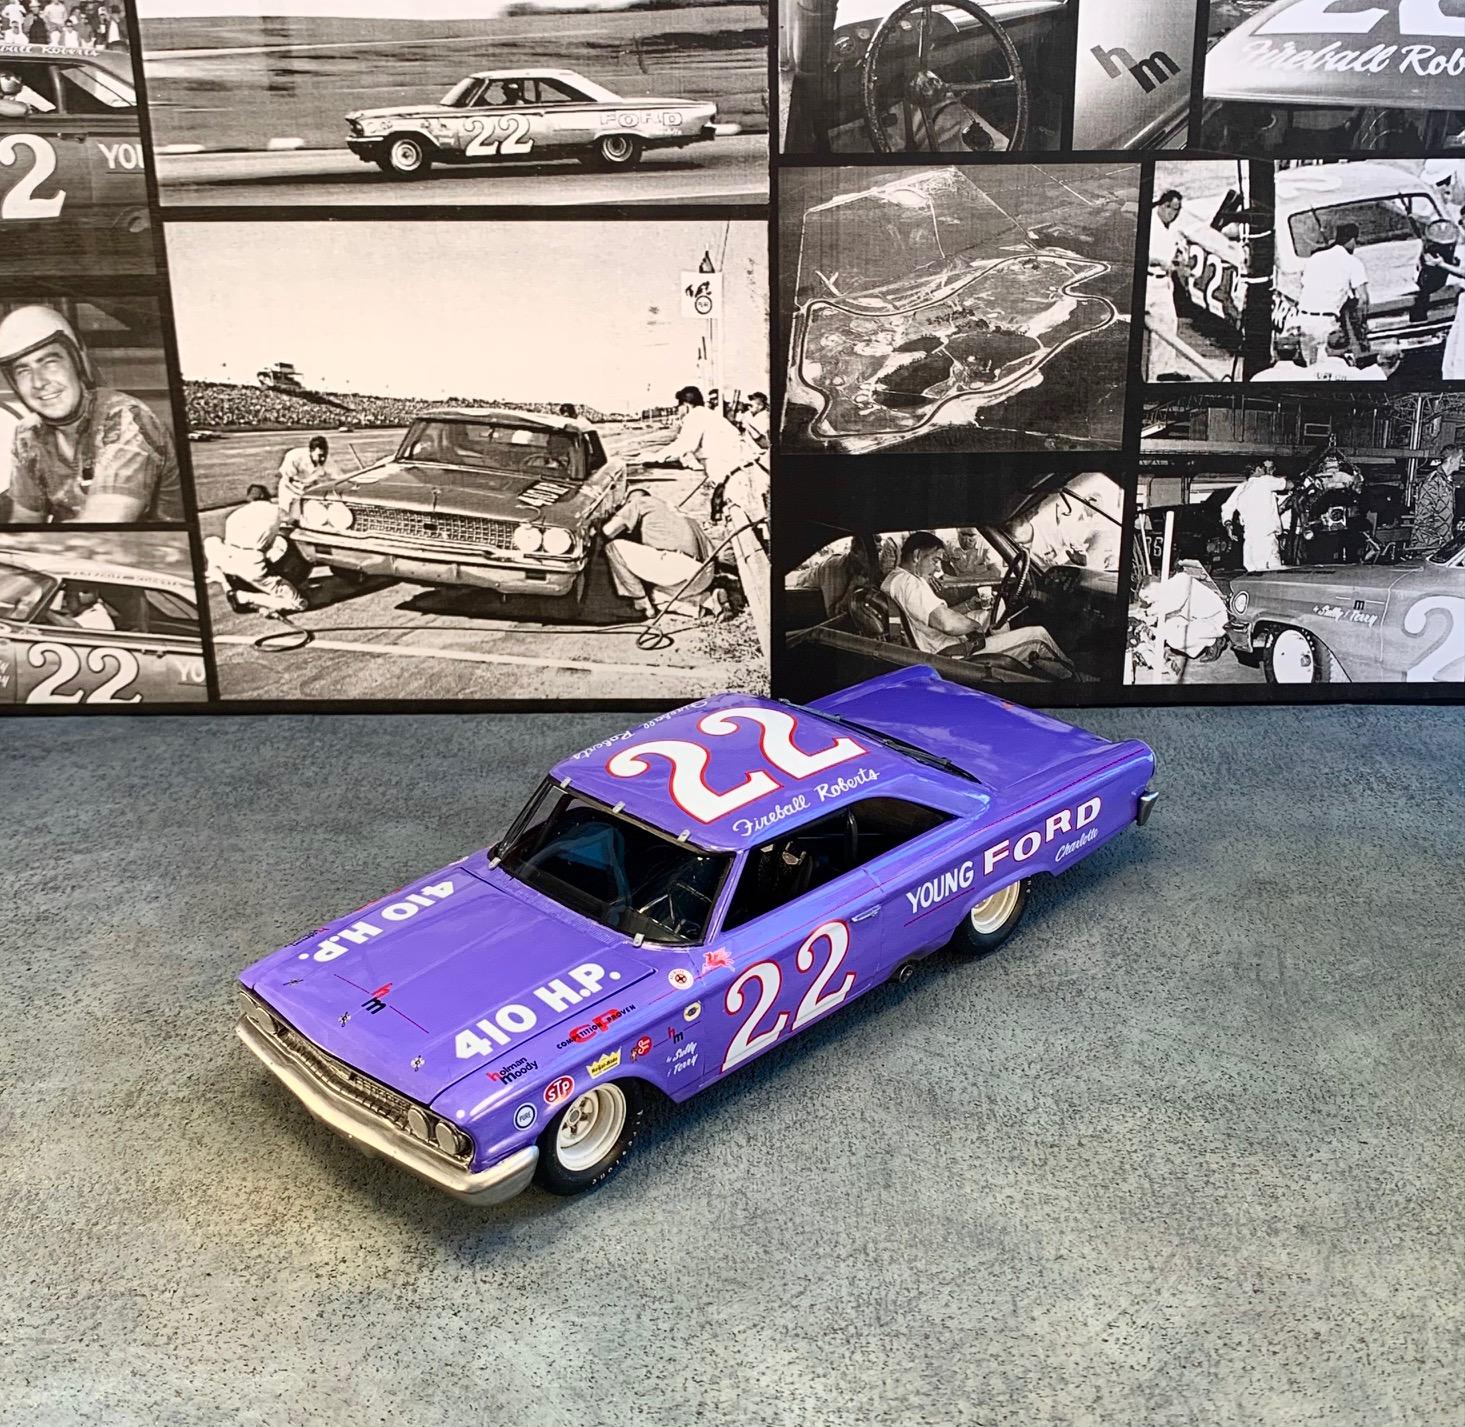
This build was completed 6 monts ago and posted on another site but I was unhappy with the photography. kit.I have reworked my setup before posting on this forum, so here it is. Fireball Robert's 63 Galaxie based on the AMT road car kit. Livery is my best estimate of Fireball's last win at the Augusta 510 (Nov 1963) I did not have a nice Starliner chassis so I had to manage with the basic one piece kit chassis. Chassis mods: chiseled out molded exhaust and built in dumps with 4mm Evergreen, Removed rear passenger footwell tubs, built fuel tank tub, Added front suspension from spares and extra rear shocks. Chassis painted black with some metalizers here and there, brushed in pigments for weathering effects. Underhood/engine area dressed up a bit: fabricated Holman Moody oil filter/cooler combo, race style air cleaner & some wiring/blumbing Interior: modified seat, IP and door panels. Scratch built roll cage with Evergreen tubes Gauges made with craft wire, PS decals and Krystal Klear. Safety belts scratch built from Evergreen and craft wire. Body: sanded down all moldings and emblems, built rear close out panel, windshield clips, rear window straps, fuel filler, lamp covers. All finishing brush painted: Vallejo light gray primer, 3 thin coats, 6-8-12k polished Vallejo color coat is my own mix of violet, dark blue and metal medium 2 step clear process: first 2 coats Tamiya with thinner and retarder, 6-8-12k polished, then one Future coat, decals and a final Future coat. Bumpers recoated with Metal Color, dry brushed + washes for weathered effect. Excellent ACE decals, 64 livery rearranged to reflect late 63 theme. Thank you again to all the collaborators helping with research and advice.
-
1966 Mercury Comet
Pierre Rivard replied to MarkJ's topic in WIP: Stock Cars (NASCAR, Super Stock, Late Model, etc.)
Wow, that's a tight fit. The mechanics must have loved working on this one. Are you going straight OOB on the front end / motor comps or adding some eye candy like extra shocks, oil cooler etc. You know where my vote is going right? ?