bluestringer
-
Posts
2,276 -
Joined
-
Last visited
Content Type
Profiles
Forums
Events
Gallery
Everything posted by bluestringer
-
Ok. I get it. More photos soon. Thanks.
-
Looking good Bob.
-
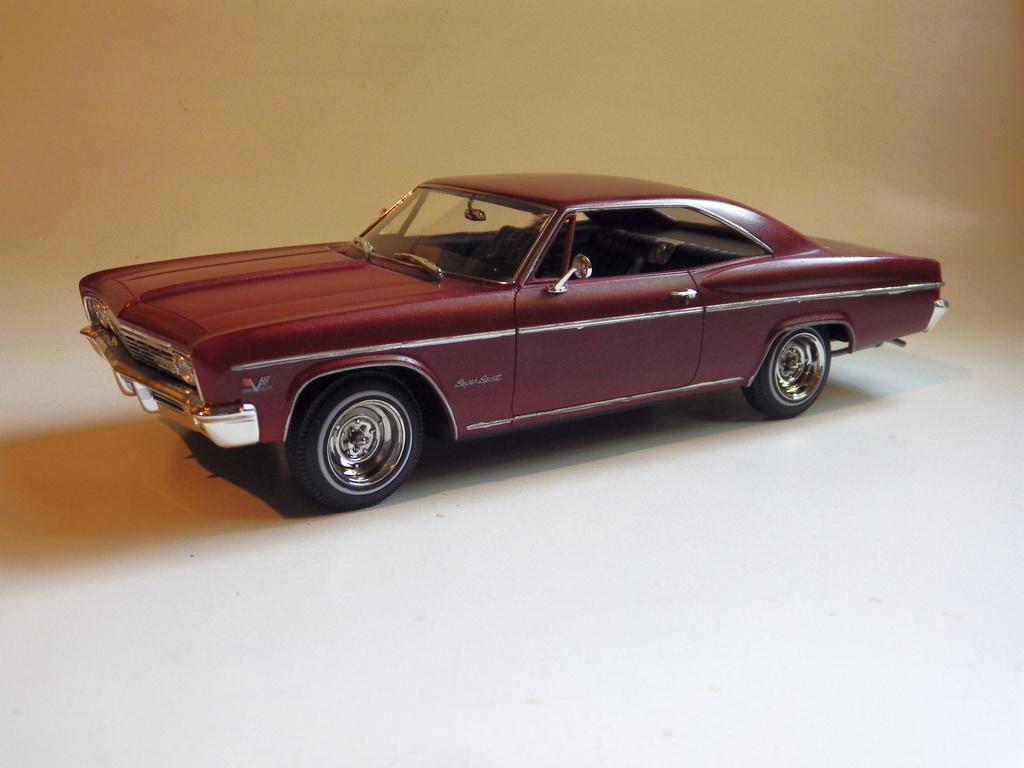
My favorite Chevy, and my first car I got when I was 17. I built a replica of mine with this kit.

-
Looking sweet Jim. Nice work.
-
Looking good. Nice work.
-
Also watching. I've never seen this kit. Need to look for it.
-
No more WIP photos. Not enough interest.
-
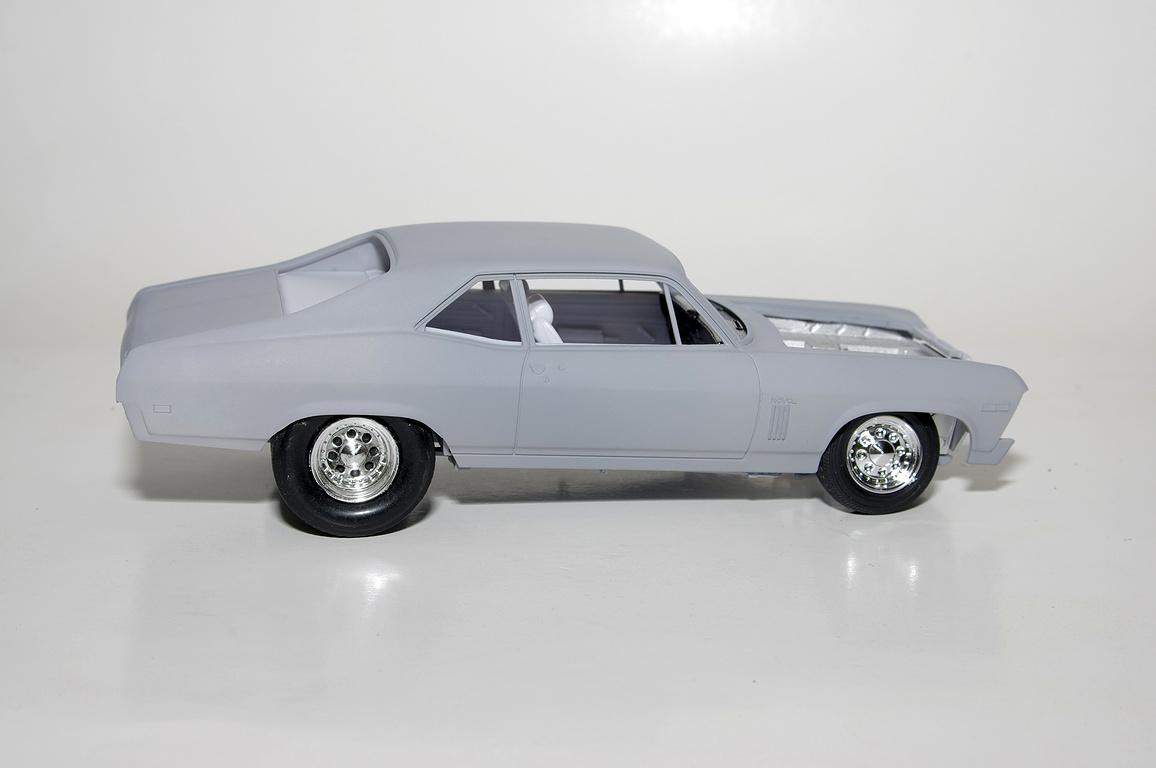
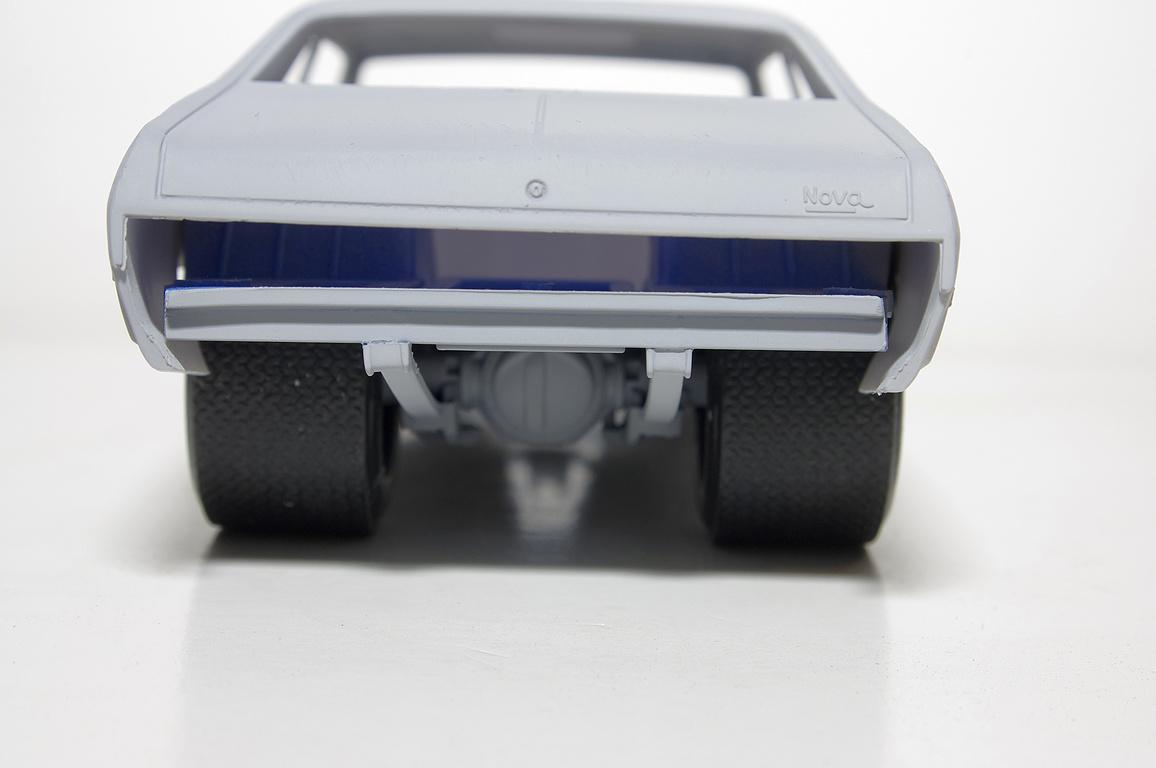
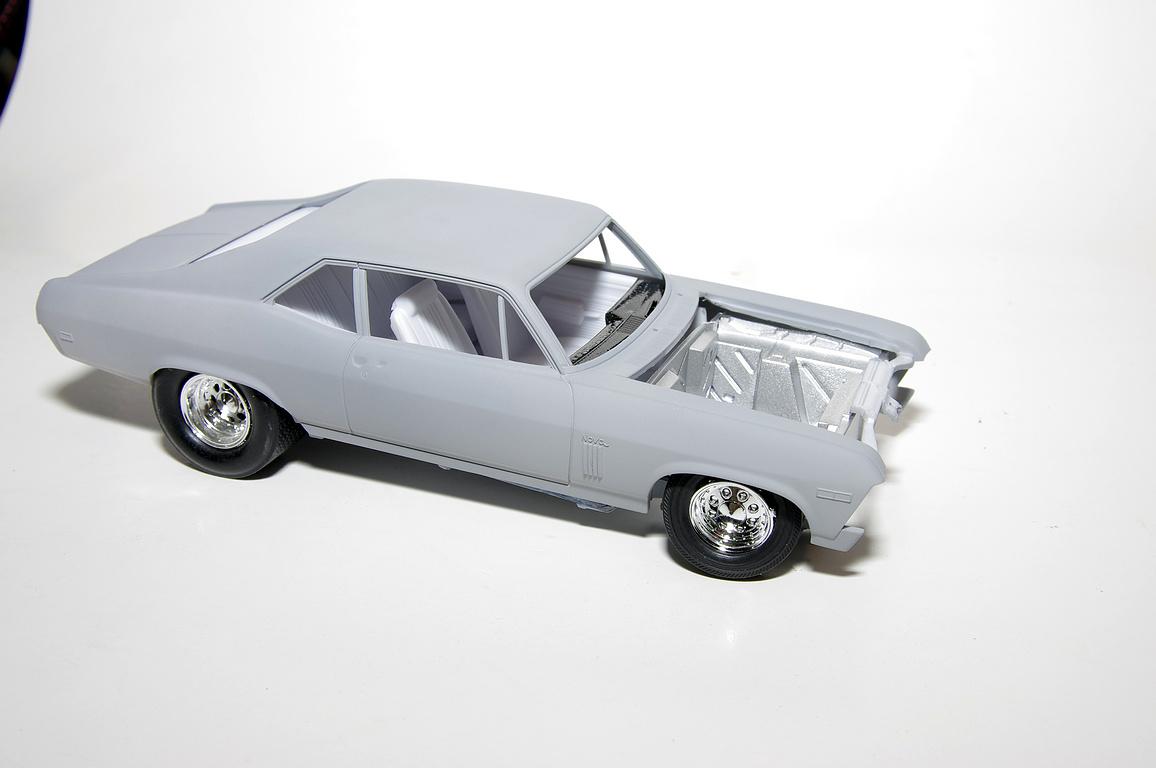
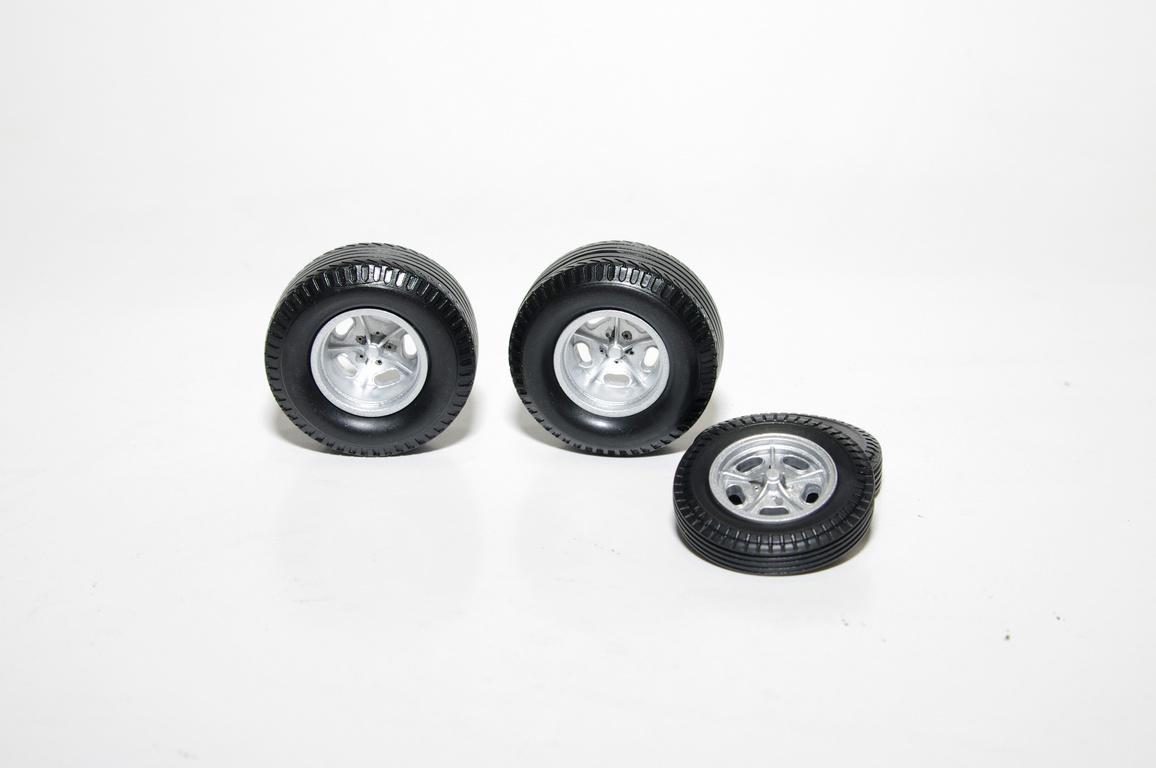
Moving along slowly. I'm trying to use the frame, suspension and engine from the 66 Pro Street and the body+interior from the 69 Yenko. Having to make some adjustments to make it fit. Got the rear looking ok, got to work on the front. This will be a street/strip car. Got the big treaded tires on the rear.
-
Looks sweet Bob. Nice work.
-
I am going to try kit bashing a 69 Yenko Nova with a 66 Nova Pro Street. May not work out, we will see.
-
Thanks guys for the comments. It is done. Under glass here..................
-
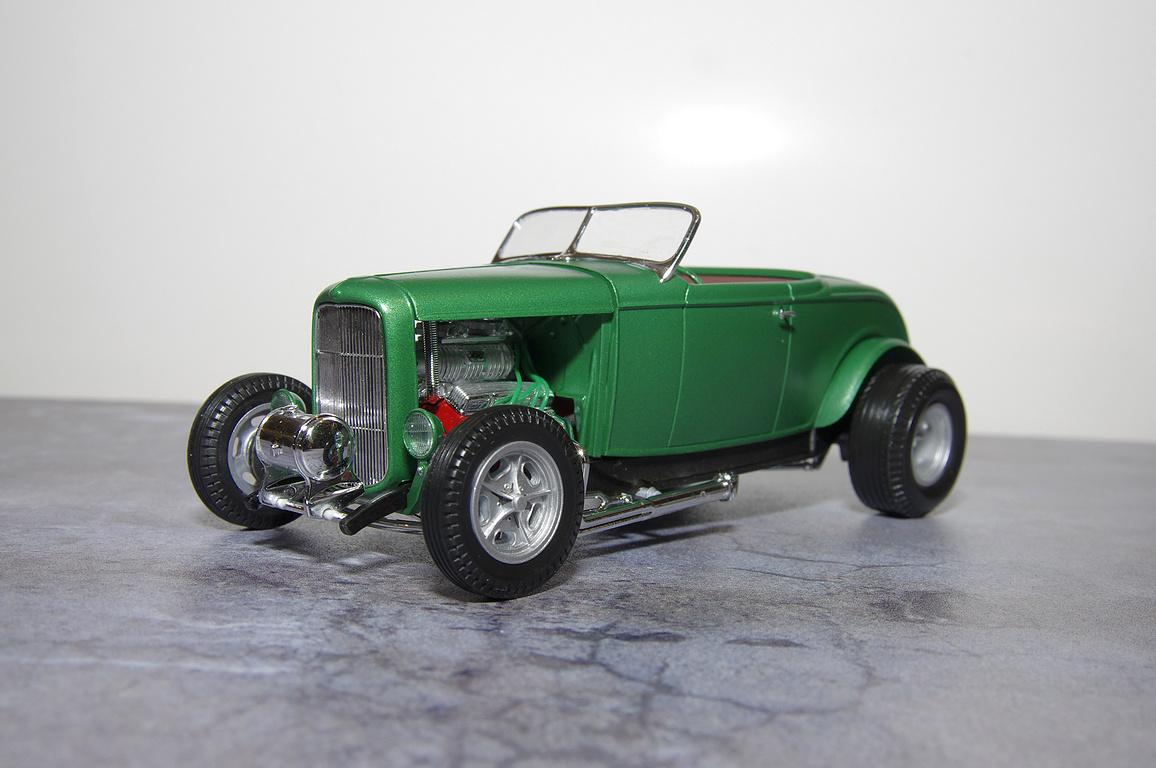
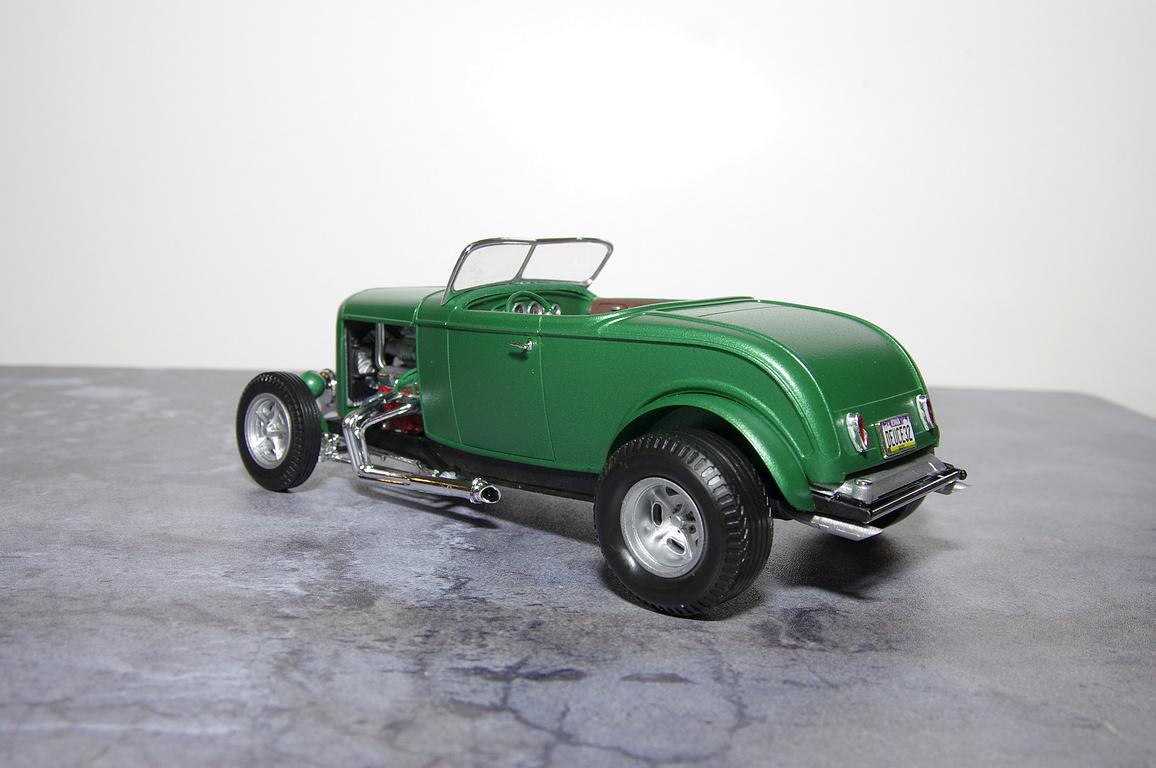
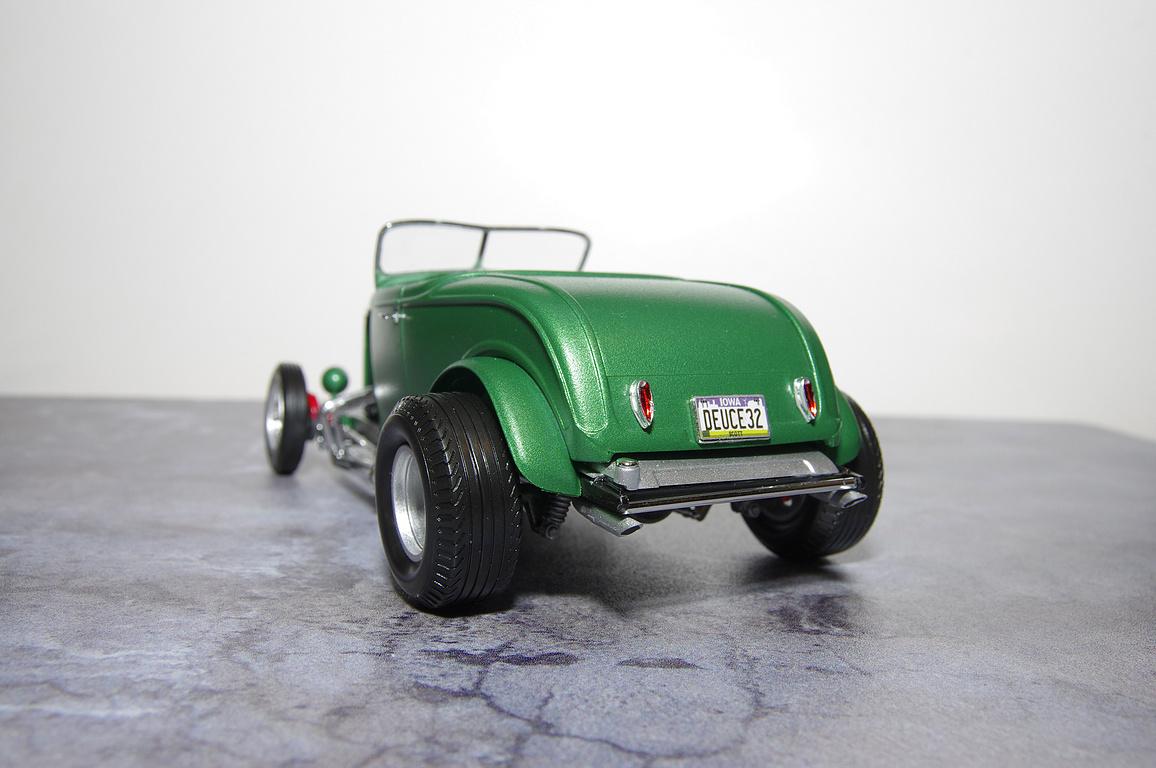
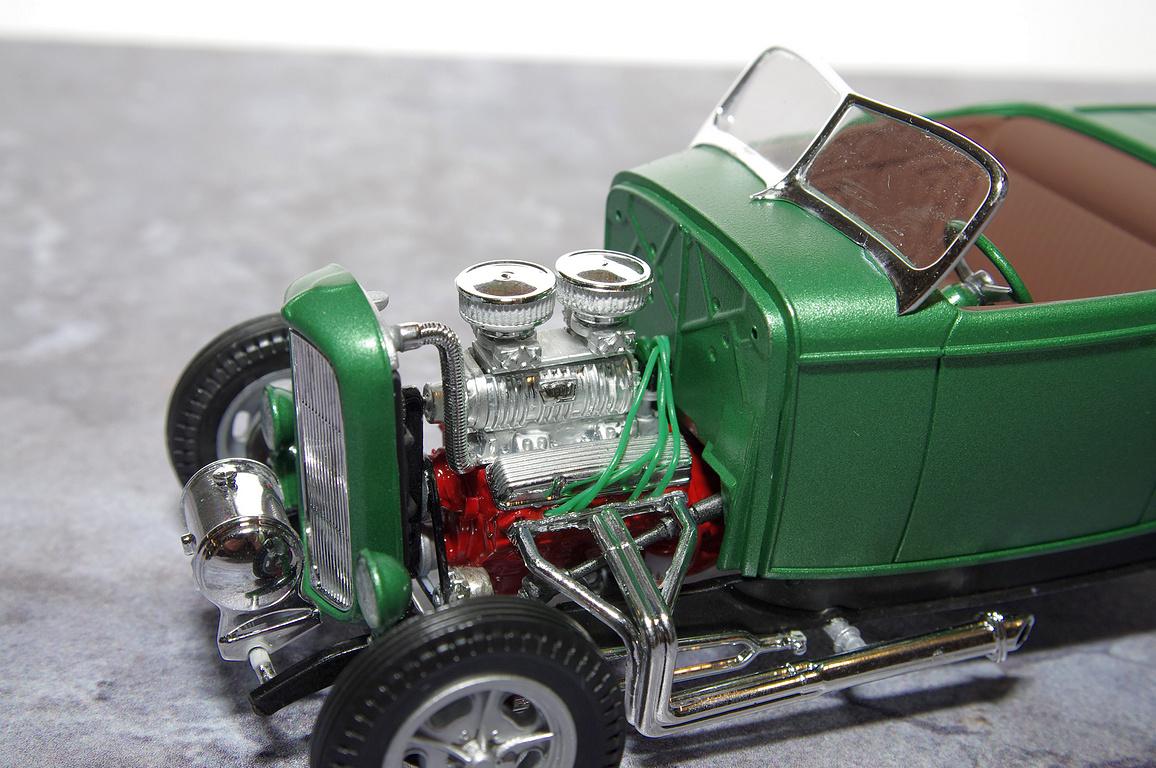
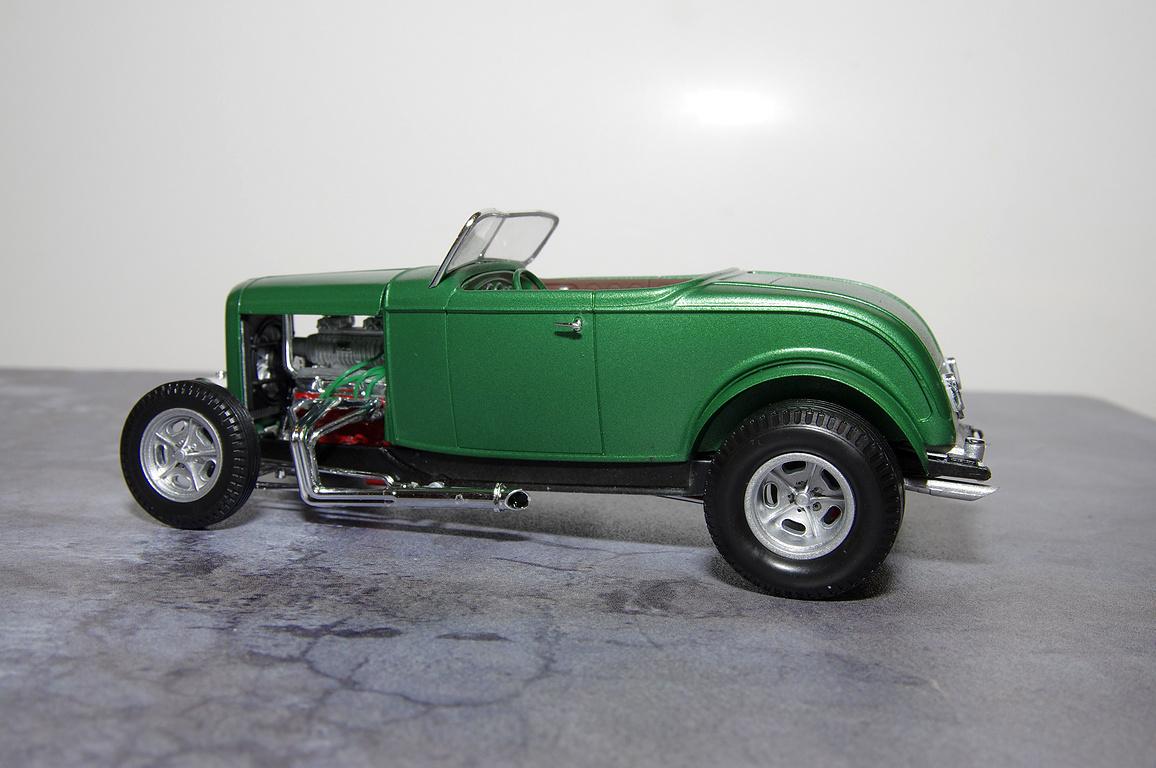
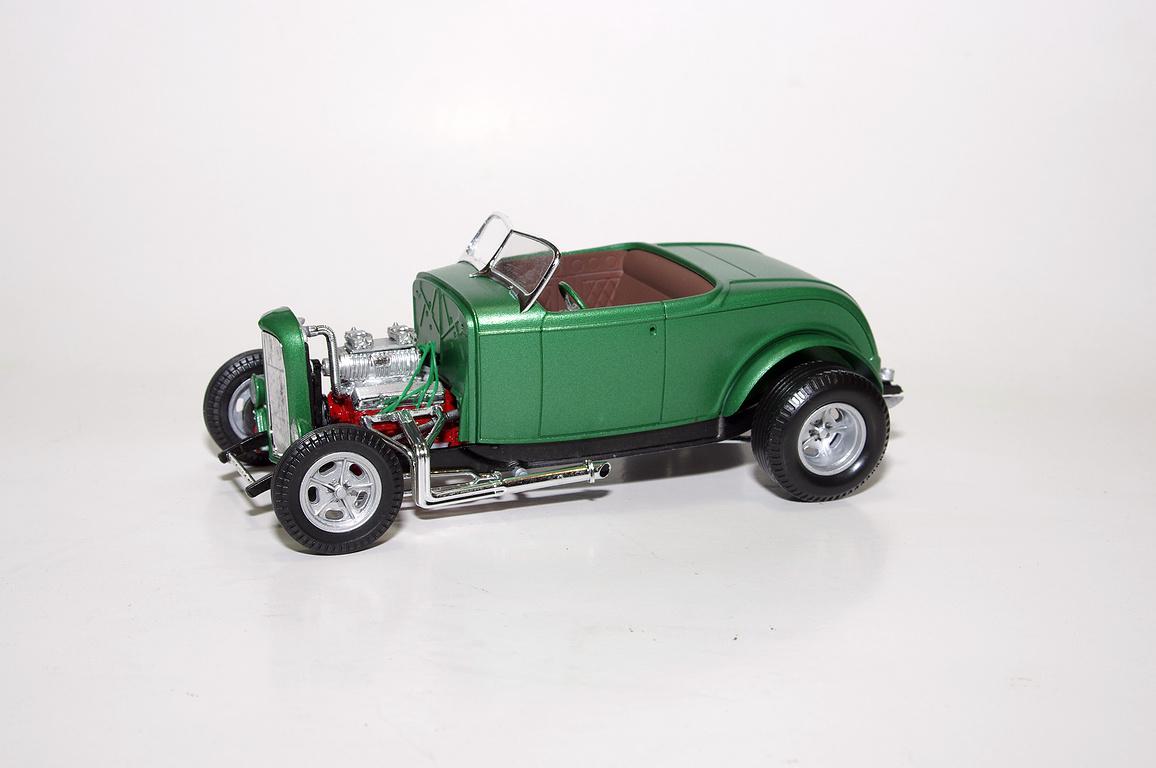
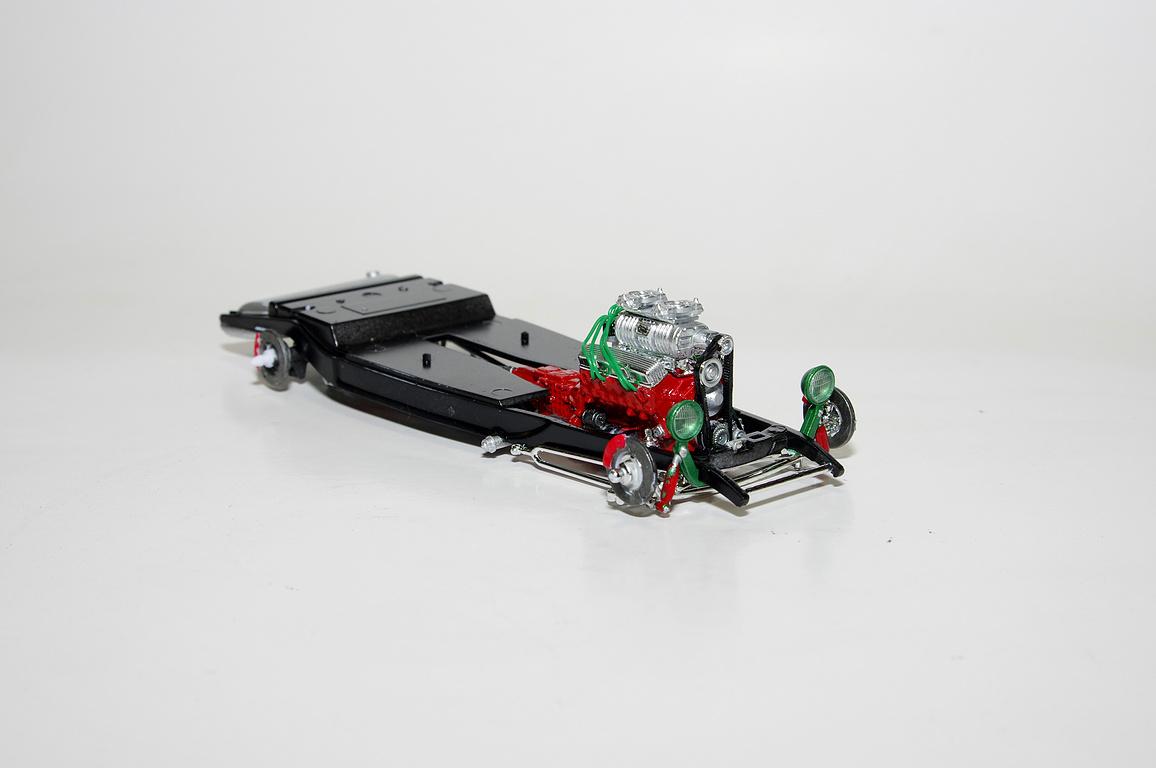
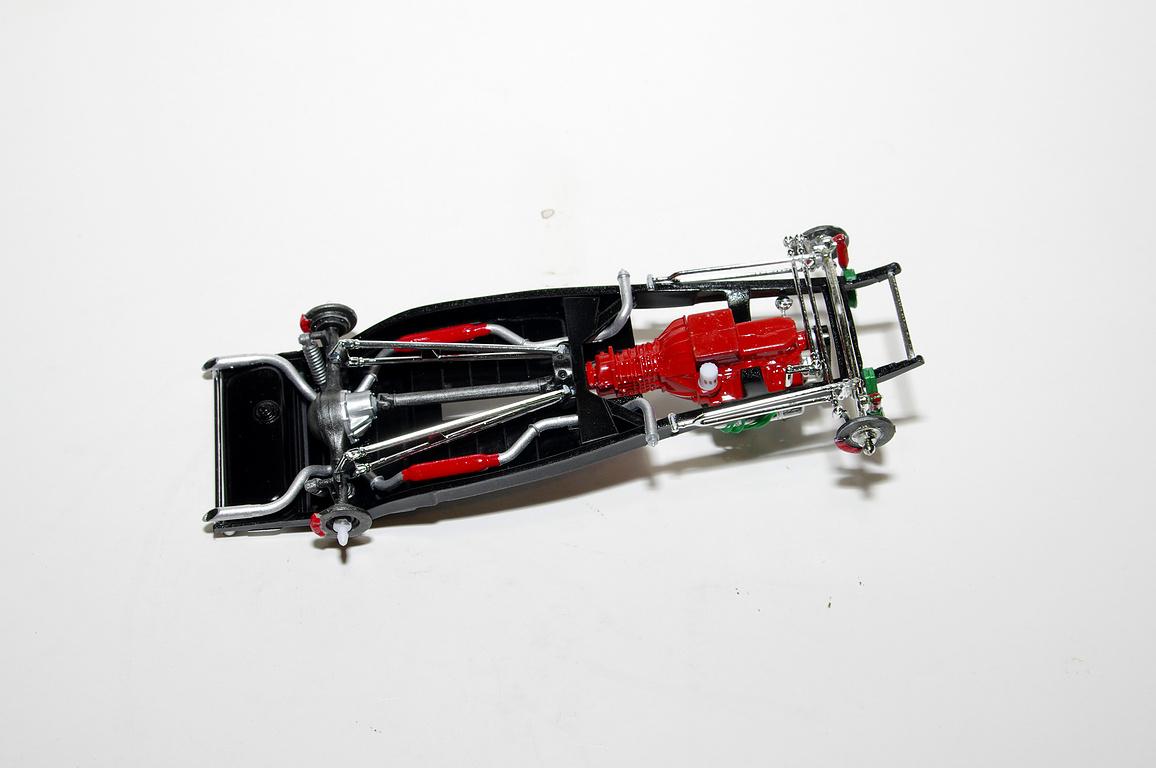
Finished this one. Nice kit. Paint is a 50/50 mix of Tamiya green and Tamiya silver. Interior is Tamiya Deck Tan. Basic out of box build, added plug wires on the engine. The chrome on the wheels was in bad shape so I stripped them and shot them with Rustoleum Bright Coat Metallic. All comments welcome, thanks for looking.
- 15 replies
-
- 17
-

-
A few more bits and it will be done...........................
-
Been working on this one for the last couple months. Getting ready for final assembly. Paint is a 50/50 mix of Tamyia green and Tamiya silver. Interior is Tamiya deck tan. The chrome on the wheels was in bad shape so I stripped them and shot them with Rustoleum Bright Coat.
- 8 replies
-
- 11
-
-
Finally finished this one. Second one for the year. My building skills have deteriorated this year so it's not one of best builds, especially painting as I am shaking more than I use to. The decals in this kit were terrible or at least they were for me. The strips broke so had to leave them off. The rear panel decal also broke but I left it on anyway. But it is what it is, hope to improve my next one.
- 16 replies
-
- 10
-
-
Got toe mighty. That's awesome michelle. I love Buicks.
-
Looking great Bob. I've been away from the forum for a while, but I see you are still building some nice kits. The wife and I have had some medical issues this year and I have not been building much. Only finished one so far, a 39 Chevy Van, and I didn't do a good job with it as my building has suffered somewhat. Trying to get back to it. Looking forward to seeing how this one turns out.
-
I'm back. Anyone miss me? The wife and I have had some medical issues this year so I haven't been doing much building. I did finally finish this one. Working on a 70 Plymouth now, hope to get it finished sometime this year.
-
Nothing special, just OOB stuff..................
-

Salvino jr Hemi Installation Question
bluestringer replied to CPJ's topic in Model Building Questions and Answers
I built the Salvinos 71 Charger kit ( not sure if this is the one you are building) and had no problems with the headers. I think there were 2 sets of headers, make sure you are using the right set. -
Model building on youtube.
bluestringer replied to Force's topic in Model Building Questions and Answers
I admit I watch HPI now and then. Mostly to see a kit I may be interested in. But I mostly build out of the box anyway, and don't do much prep or detailing. I used to put up on the bench photos of my builds here but found that building out of the box and just doing simple builds does not get much attention. Not really worth the time and effort to take the photos and post if no one is interested in a simple OOB build. Really a shame though as the hobby has something for all, the elite builders, which I really enjoy seeing the builds that are done, and the simple builders like me that just get joy and relaxation from building a model even if it is just a plain jane build. -
This is the Revell kit. Nice kit, no real problems with it. Instead of building the delivery van I just kept it a custom 39 Chevy Van. The paint is Tamiya Copper. Interior done with black and green. All comments welcome and thanks for looking.
-
Fuel line size and fasteners
bluestringer replied to Stephen Bailey's topic in Model Building Questions and Answers
I get the aluminum craft wire from hobby lobby. Comes in different gauge sizes and colors. And it bends easily.