BK9300
-
Posts
1,989 -
Joined
-
Last visited
Content Type
Profiles
Forums
Events
Gallery
Everything posted by BK9300
-

The Same but “ a little “ Different
BK9300 replied to Biggu's topic in WIP: Model Trucks: Big Rigs and Heavy Equipment
Photo-etch is marvelous! -
Western Star 4900 FA plow truck
BK9300 replied to BK9300's topic in WIP: Model Trucks: Big Rigs and Heavy Equipment
I do appreciate the comments, guys, but I'm pretty confident there won't be any museums! Just doing this like everybody else - good fun, good therapy and, if lucky enough, good camaraderie along the way! -
Roanoke Railhouse Beer GMC General
BK9300 replied to Gary Chastain's topic in WIP: Model Trucks: Big Rigs and Heavy Equipment
Great proportions, Gary - the wood treatment inside the van body will look awesome! -
The Same but “ a little “ Different
BK9300 replied to Biggu's topic in WIP: Model Trucks: Big Rigs and Heavy Equipment
Nice refurbishing of the old tank - sure looks better than the way we used to put them together 30 years ago! -
Western Star 4900 FA plow truck
BK9300 replied to BK9300's topic in WIP: Model Trucks: Big Rigs and Heavy Equipment
I appreciate your comments, Steve! I’m happy with the results so far, but, like I mentioned awhile back, I’ve had my share of ‘do-overs’ along the way. Thanks for taking a look! -
Beautiful car and an excellent build - car looks like it’s sitting in the shop that did a restoration on it,
-
Western Star 4900 FA plow truck
BK9300 replied to BK9300's topic in WIP: Model Trucks: Big Rigs and Heavy Equipment
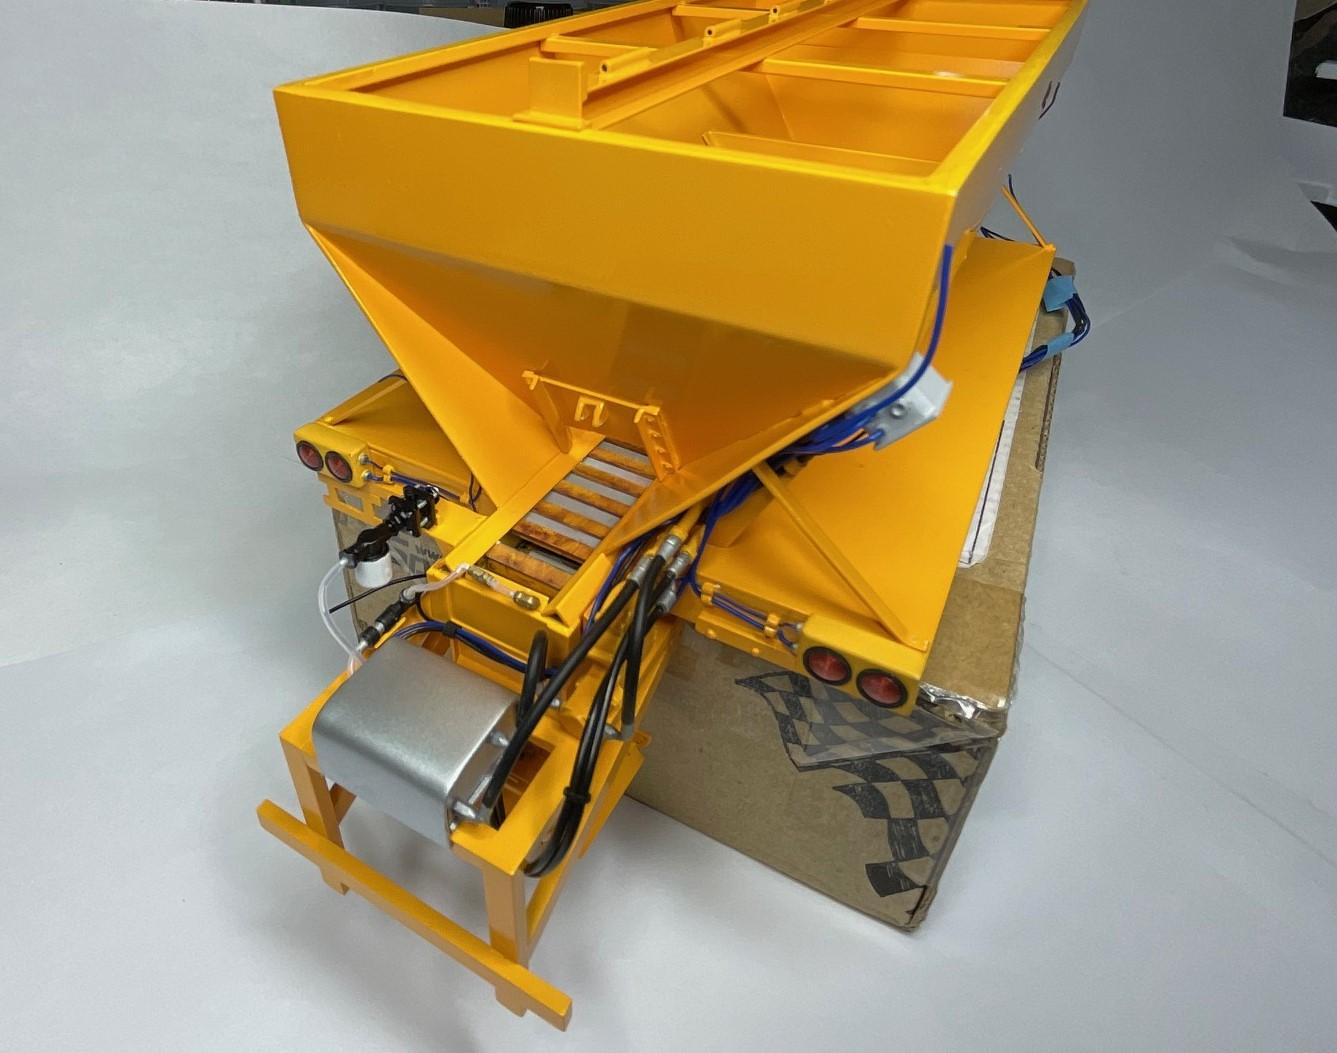
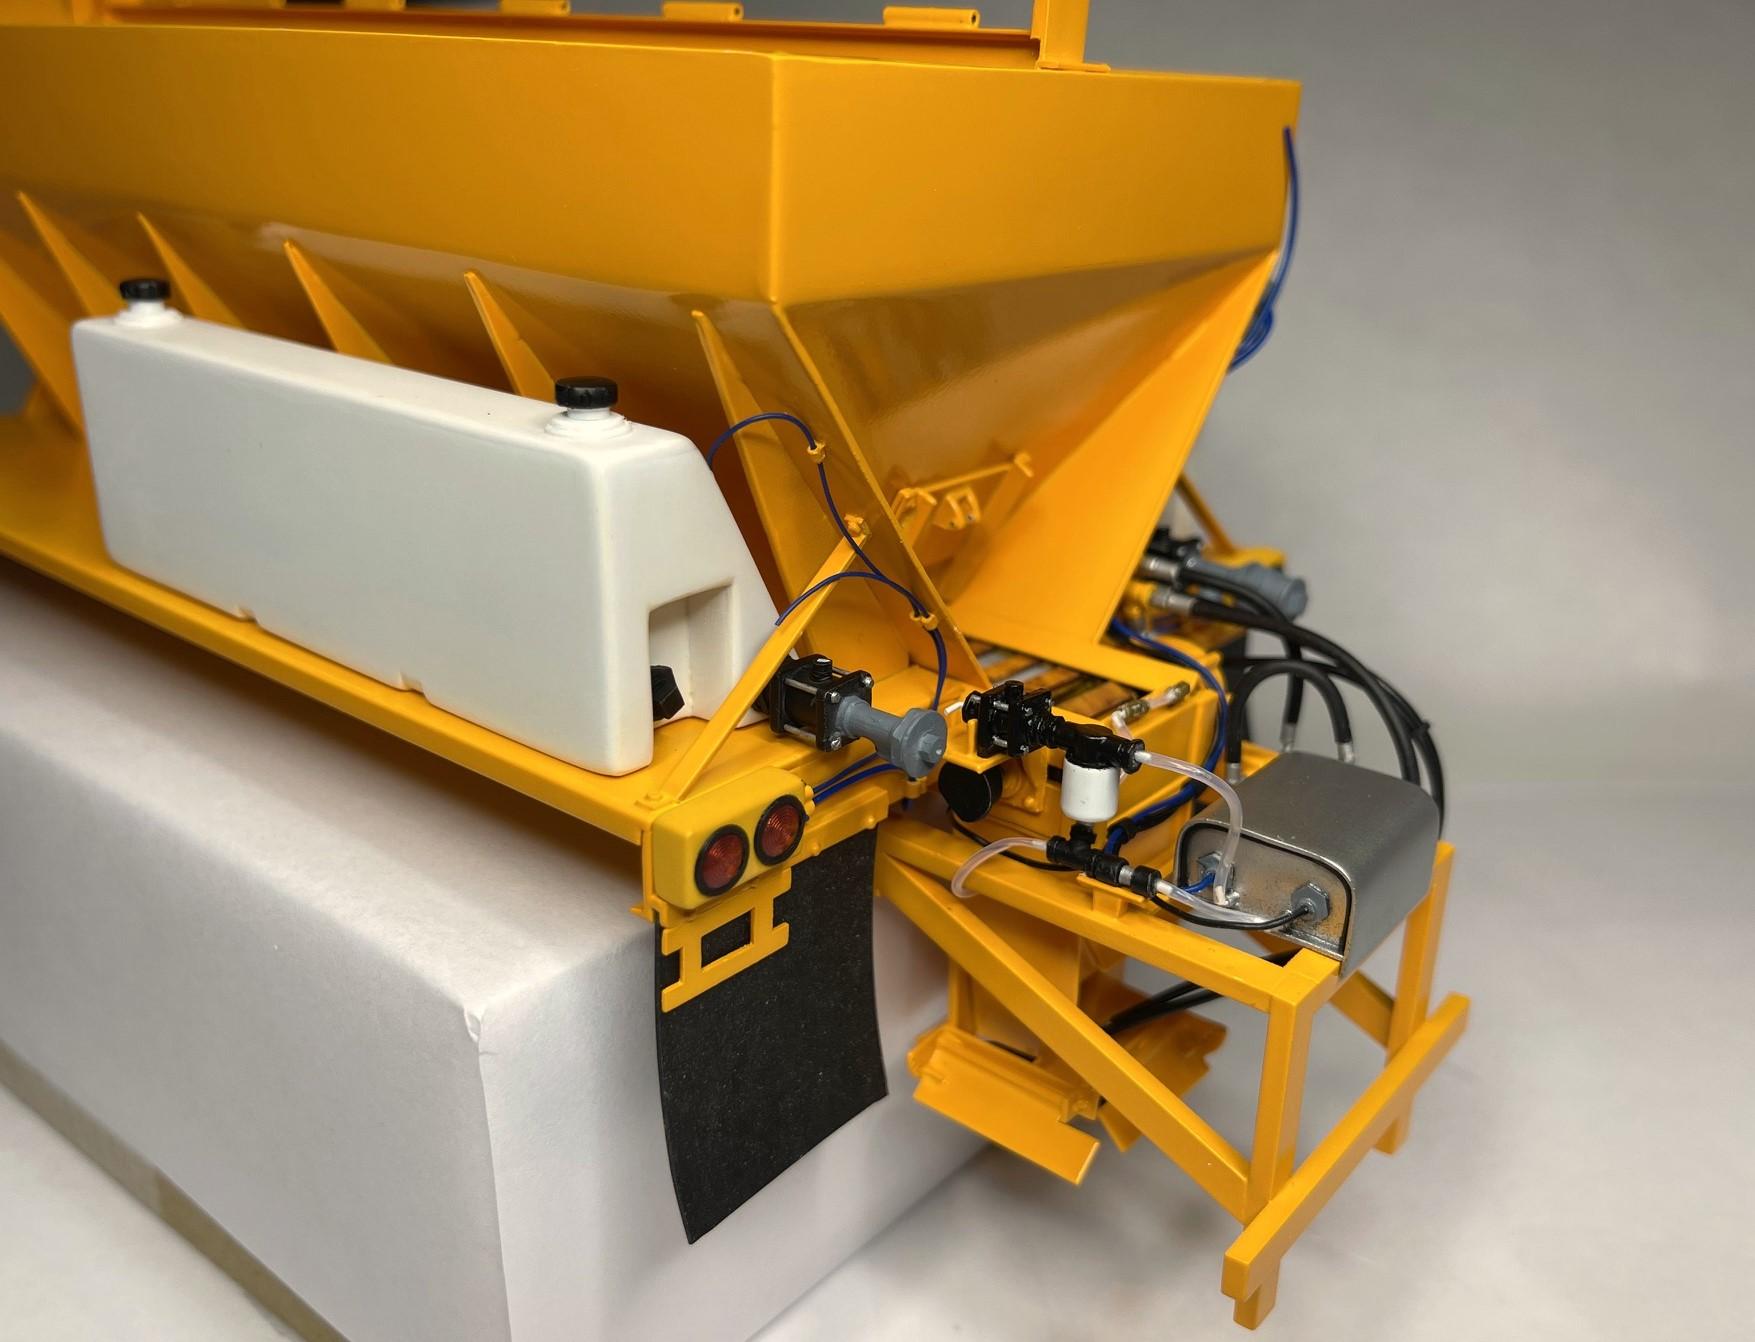
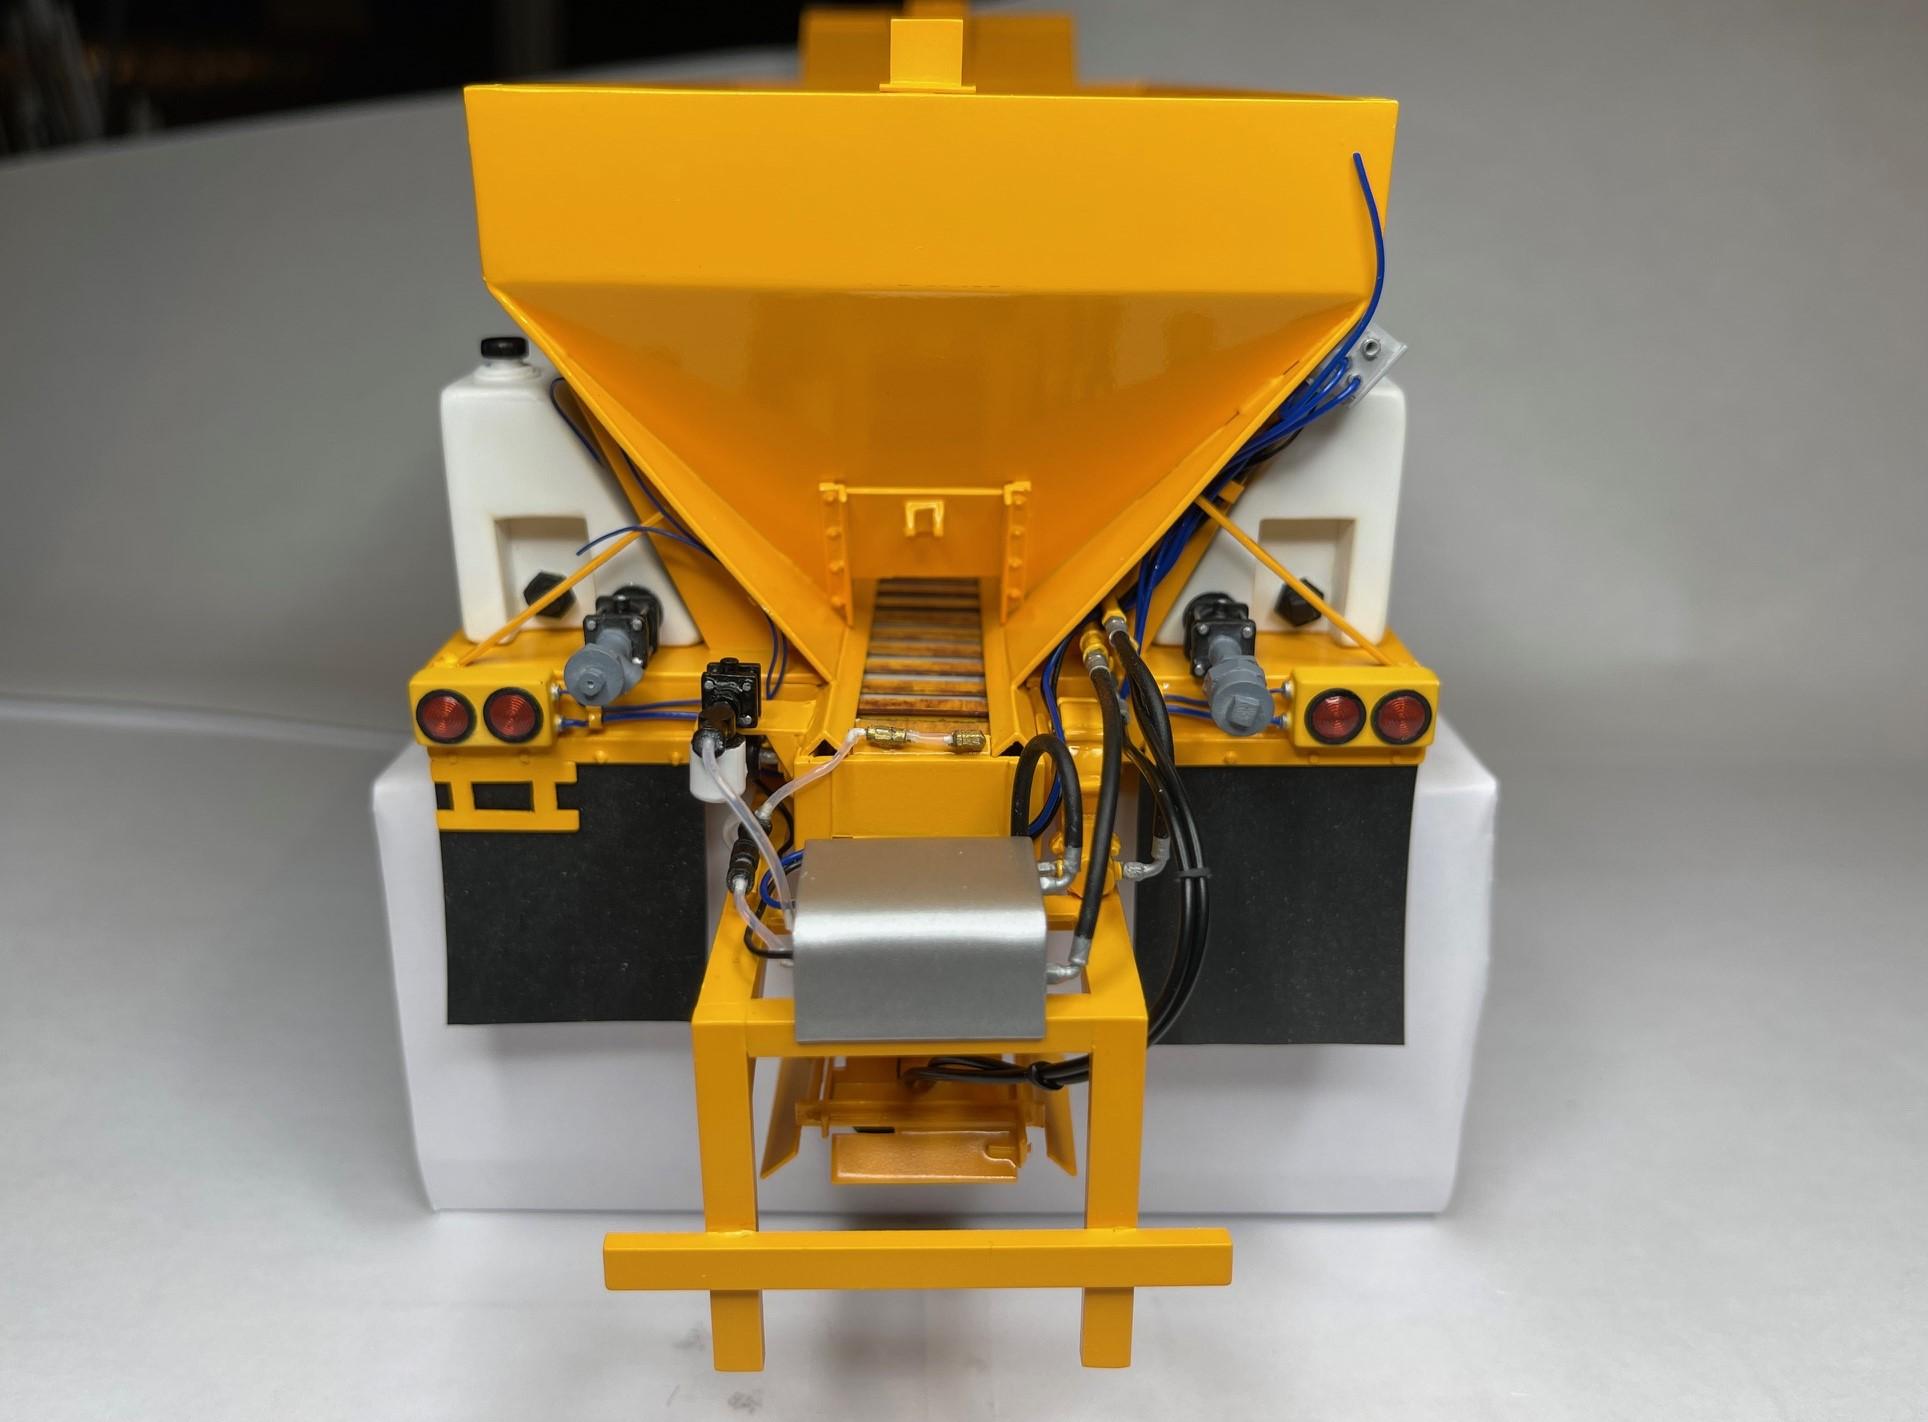
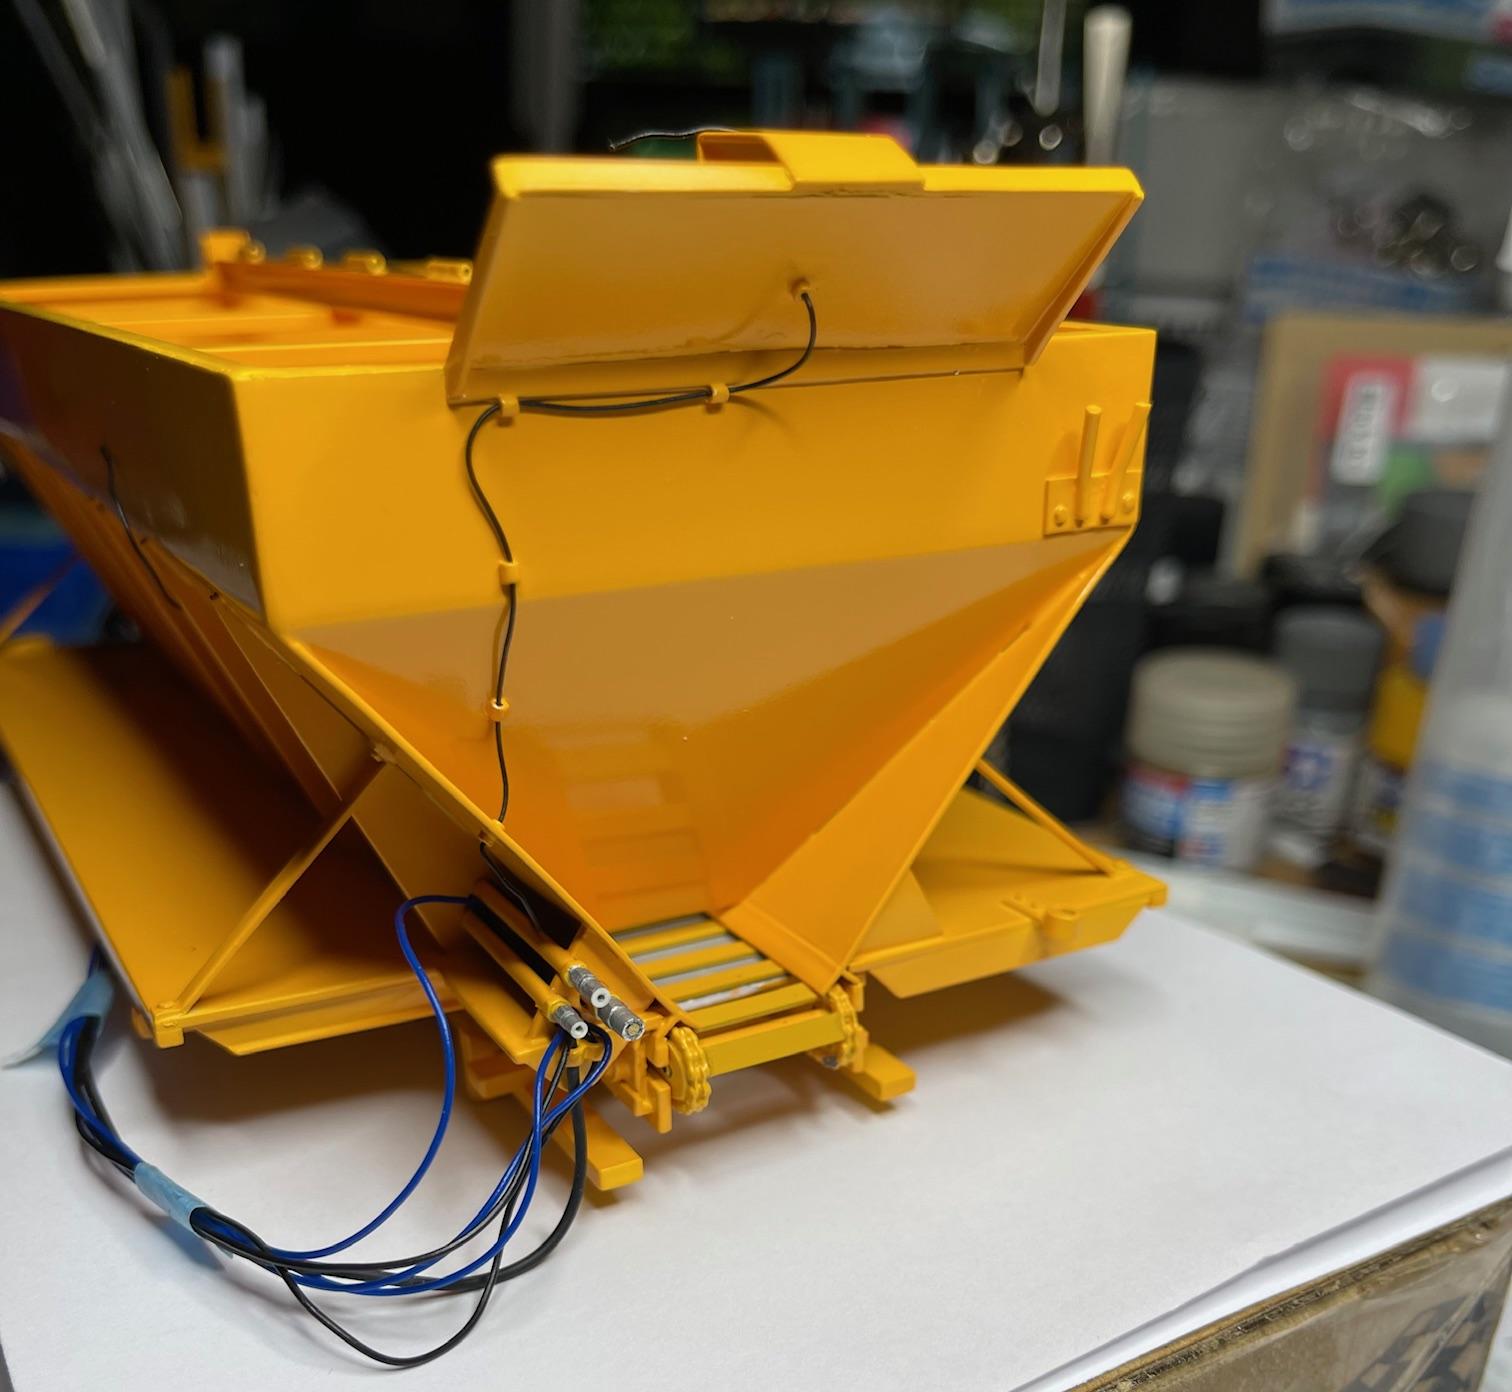
Was able to finally get the sand conveyor installed. One of the other new trucks in the yard had a new sander on it but the sand conveyor cross bars were already rusted up pretty good. Turns out, during the process of calibrating the conveyor speeds and application rates, a load or two of sand is run through the hopper (with the truck backed up to the sand pile). Seems the paint on the bars doesn't last very long! I had a go at this on my sander, plus 'lubed' the chains with a wash, installed and wired the conveyor speed sensor and ran the final line from the pre-wet pump down into the side of the spinner chute. I also added the two rear mud flaps and glued the side tanks in position, for better or worse - now the remaining equalization hose running between the tanks will need to be figured out. Conveyor finally in place Even though this is a 'brand new truck', will still be more 'grease' to add to outside bearing/tensioner assembly on each side of the conveyor Conveyor speed sensor in place and wired (circular black module opposite side from conveyor motor; can also see the clear pre-wet fluid line heading down under the sander frame and into the side of the spinner chute; side pre-wet tanks and valves glued in place Rear mud flaps in place - used 0.5 mm silicone rubber (had to scuff them up to remove a shiny surface, but they look ok now and are quite flexible) The sander has taken a long time to get to this point and still has a decent amount of work to go yet. I don't want to mount the sander on the truck frame until I get the decals for the back of the sander, but I may need to so I can move on with finishing the hydraulic runs from the front of the hard lines back to the return manifold on the hydraulic tank. Lots (and lots) of pictures so far and I do appreciate you looking in and commenting - thanks!
-
Roanoke Railhouse Beer GMC General
BK9300 replied to Gary Chastain's topic in WIP: Model Trucks: Big Rigs and Heavy Equipment
Looking good, Gary! Where did you find door parts? -
Pete 352 day cab
BK9300 replied to Jürgen M.'s topic in WIP: Model Trucks: Big Rigs and Heavy Equipment
Great looking truck, Jurgen - it’ll be a sight hooked up to your upcoming trailer! -
Great idea for the banged up panels - enjoying your build!
-
Great job! Got to see a lot of detail added in this build and, a little humor along the way (you know, the rear view mirror saga!)
-
Marvel's Hydra coupe 1/12 scale full scratch build
BK9300 replied to François's topic in WIP: Model Cars
Not sure when you sleep . . .amazing! -
Great looking build, Scott! Was the Jiggler a rare engine?
-
Very impressive!
-
To me, body work at this scale seems so daunting - its amazing to watch it being done well!
-
Your detail painting certainly improved the look of the engine. Maybe a bit of curved/bent brass rod might help hold the shape of the tube?
-
Great back story and a well made project vehicle (vehicles) - lots of detail keeps me going back over each pic, looking closer to see it all!
-
Tigercat 880E longer 1/48 scale
BK9300 replied to François's topic in WIP: Model Trucks: Big Rigs and Heavy Equipment
Just like your Bentley's printed parts, these high resolution prints have very fine detail - looks intriguing! -
Superb build, Claude!
-
In spite of kit, you've produced another beautiful car (your photography shows it off well, too)!
-
Great looking car, Bob!
-
Western Star 4900 FA plow truck
BK9300 replied to BK9300's topic in WIP: Model Trucks: Big Rigs and Heavy Equipment
Yeah, that's another thing that driver on shift before you was supposed to take care of, right?! -
Roanoke Railhouse Beer GMC General
BK9300 replied to Gary Chastain's topic in WIP: Model Trucks: Big Rigs and Heavy Equipment
Great idea to get the curved edges for your box! -
Western Star 4900 FA plow truck
BK9300 replied to BK9300's topic in WIP: Model Trucks: Big Rigs and Heavy Equipment
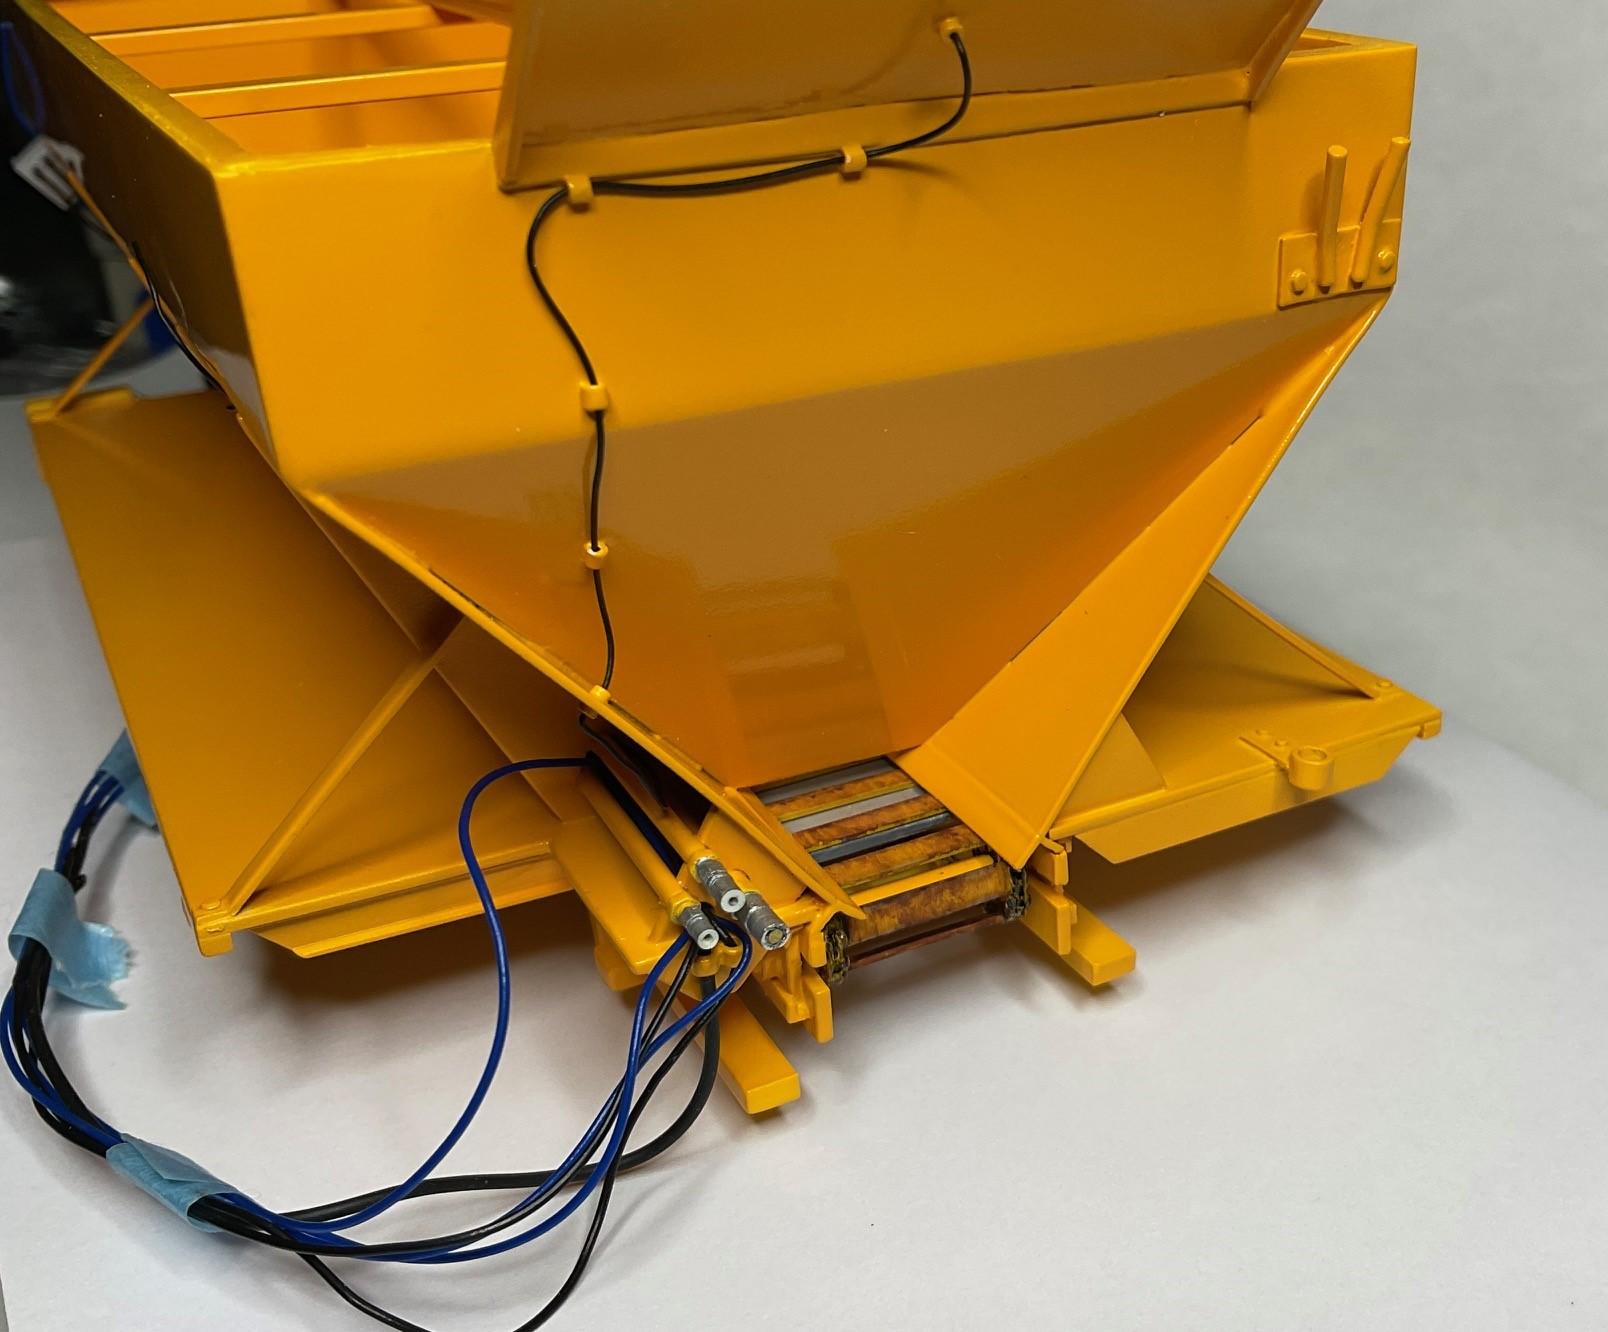
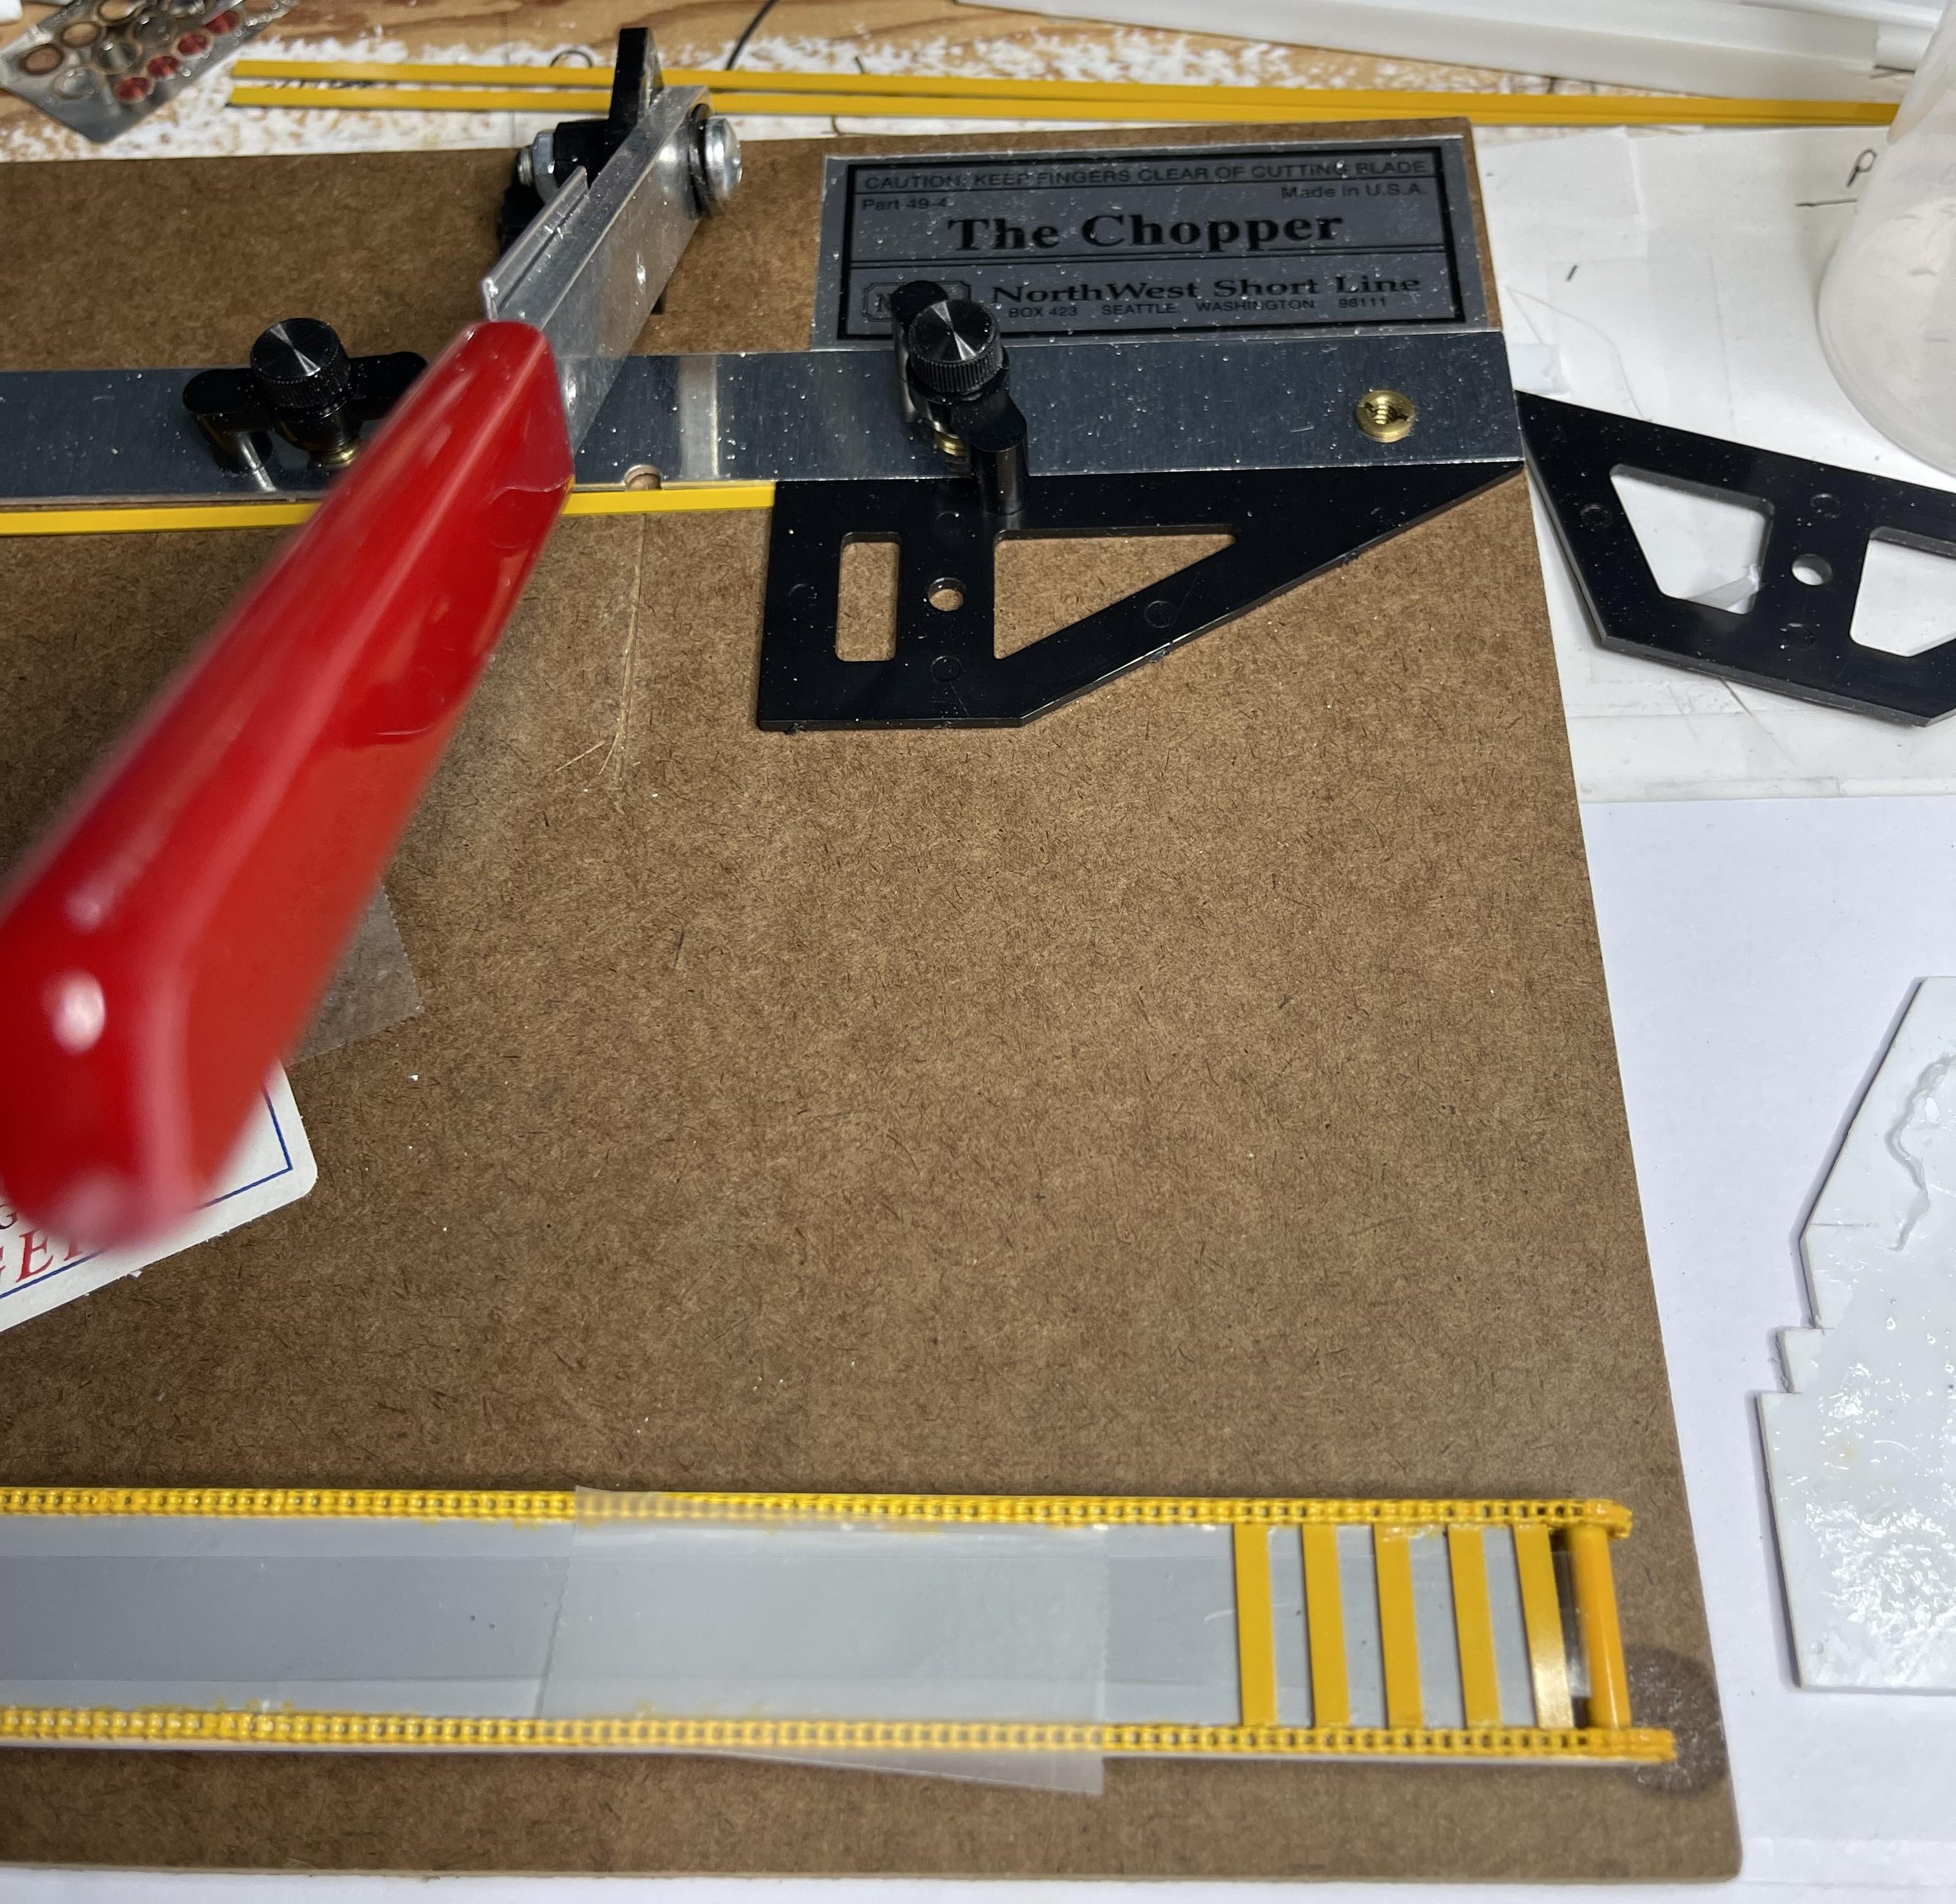
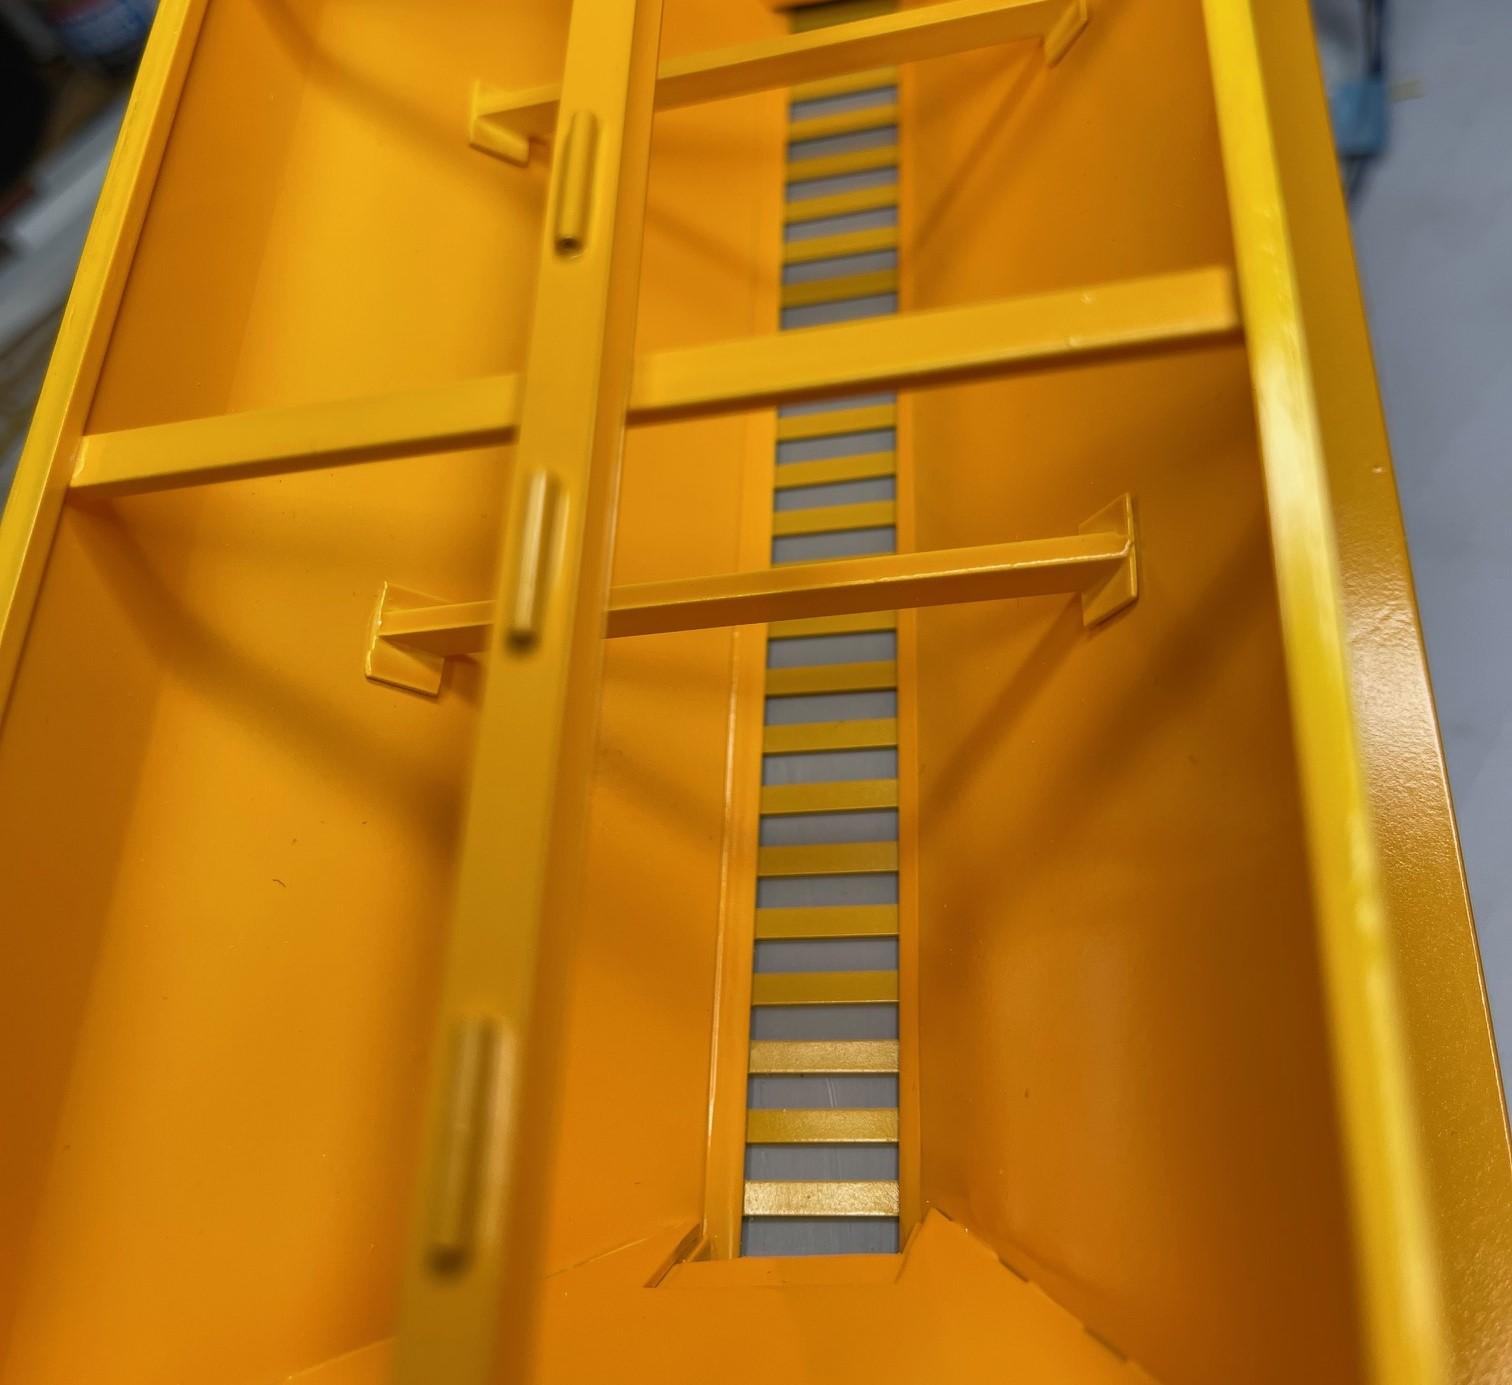
Not sure why, but I've been delaying work on the sand conveyor and I cannot put the conveyor in the sander once I have the sander mounted on the truck. So, I need to press on with making the cross bars for the chain conveyor, then finish off the sander and get on to another section of the model. Cross bars made from .5 x 2.5 mm styrene strip - a bit too thick scaled up, but width looks ok; clear acrylic strip keeps the cross bars a tiny bit off the top plate of the conveyor (appeared to be that way on the real truck, but I don't know why) Cross bars would have been a mess without checking Top side of conveyor done - need to get ends and under side done next Conveyor bars seen inside hopper Conveyor is not completely slid into place (I'd likely not be able to get it out again with the tight fit); chain links/sprockets need to be 'lubed' with something resembling grease/oil before conveyor's final install Slow going part of the build - might be that way for rest of the build - with the details that I would like to add! More to come soon (still no decals, so may need to move on to other parts of truck).
-
The Same but “ a little “ Different
BK9300 replied to Biggu's topic in WIP: Model Trucks: Big Rigs and Heavy Equipment
Will you you have to do any body work during your conversion?