ctruss53
-
Posts
496 -
Joined
-
Last visited
Content Type
Profiles
Forums
Events
Gallery
Everything posted by ctruss53
-
Alternatives to bare metal foil
ctruss53 replied to khier's topic in Model Building Questions and Answers
If you apply it with care, you can undo most of that. -
I buy flocking on Amazon. You can get big bags of it, basically a lifetime supply, for about $15 per color. The flocking available on Amazon is advertised as the stuff used to line drawers on jewelery cabinets. Think, felt lined drawers. Embossing powder looks better. If I had it to do over again I would buy some of that instead. But I got a bunch of flocking powder now. Maybe I'll eventually buy some embossing powder eventually. Something that isn't mentioned in this discussion is application. I use a metal tea strainer. Basically you open the strainer up, dump in some flocking, then let it snap closed. Then when you want to dust your part with the flocking, you shake ot tap on the strainer and the flocking falls out in an even and controlled manner.

-
Tamiya PS Paint Question
ctruss53 replied to jjsipes's topic in Model Building Questions and Answers
There is a specific answer to this. CAN you use it? Yes, you can, but you need to make sure your parts are primered with a good primer like Tamiya or Mr Hobby Surfacer. SHOULD you use it? No, not in my opinion. Paints for R/C bodies like the PS line from Tamiya dry very flat and very porous. And they cure flexible which will increase your chances of the paint coming off. Plus due to the flat porous nature of the PS paint finish, it will require extra layers of clearcoat to make glossy. Final answer. Yes you can use it, but there are so many reasons not to. Just find the same color in the TS line. -
Photo Etched Cowl How to install on Body
ctruss53 replied to Len Woodruff's topic in Model Building Questions and Answers
That could work. -
Photo Etched Cowl How to install on Body
ctruss53 replied to Len Woodruff's topic in Model Building Questions and Answers
I would glue in a couple of tabs on either end of the opening that are slightly lower than flush with the surrounding body. Then glue the PE part to those tabs, flush with the body. If I am describing that right. -
I don't know if it has been said, but if you want to stick to Tamiya acrylic, I'd just use semi-gloss black. Flat or matt will be to flat.
-
Alternatives to bare metal foil
ctruss53 replied to khier's topic in Model Building Questions and Answers
BMF takes practice. Wrinkles can happen if you don't burnish the BMF in the right way, especially on complex surfaces. And if you lay it down over a surface that is not smooth, it won't be smooth. I still do body trim with BMF, but I have started chroming parts with SMS Hyperchrome paint. HOWEVER, chrome paints are even more sensitive to surface textures. The slightest imperfections are magnified by the sheen of the chrome paint. So those same imperfect surfaces that are affecting your BMF finishes will be even worse with chrome paint. -
If you want that exact semi-glow black, all you have to do is buy Mr Finishing Surfacer 1500 black, in a spray can. It comes out smooth and clean and has a semi-gloss sheen. I use it to paint dashboards and other black interior parts that should be semi-gloss.
-
Need some help with Molotov VS Revell Chrome
ctruss53 replied to Len Woodruff's topic in Model Building Questions and Answers
I use lacquer thinner to clean any paint out of my airbrush, except enamels. For those I use enamel thinner. Chrome paints are all inks or lacquers, so you can use lacquer thinner. -
Need some help with Molotov VS Revell Chrome
ctruss53 replied to Len Woodruff's topic in Model Building Questions and Answers
You're welcome. I am sharing because I have tried 6-7 different chrome paints. I have tried several different techniques on all of the different chrome paints. I have been wasting time and money to get a good chrome finish. Now that I have found one, why not share so we all don't have to waste the time and money that I have. haha -
Need some help with Molotov VS Revell Chrome
ctruss53 replied to Len Woodruff's topic in Model Building Questions and Answers
NOTE: SMS doesn't look right when you spray it on the part. There is a process, like any chrome paint seems to have. 1. Make sure your part has a high gloss finish without any junk in it. They claim you can spray SMS Hyperchrome over any color as long as it has a high gloss finish, but I have only ever sprayed it over black. 2. SMS seems to work equally well on top of paint or clearcoat. So I don't think it matters, it just matters that the surface is high gloss and clean. 3. Apply SMS in light mist coats. 3-5 minutes between coats. Until you get the look you want. 4. SMS doesn't come out mirror finish, it looks dusty or hazy. Once you get complete coverage and it is as bright as you want it, stop applying it. Let it cure at least overnight, to 24 hours. Again, it will look hazy or dusty. 5. Once it has cured about 24 hours, then you buff it with a clean dry lint free cloth. Then it will shine up like it does in my photo. So since there is a process, practice on some spoons or spare parts. -
Need some help with Molotov VS Revell Chrome
ctruss53 replied to Len Woodruff's topic in Model Building Questions and Answers
I use the cold tone. -
Need some help with Molotov VS Revell Chrome
ctruss53 replied to Len Woodruff's topic in Model Building Questions and Answers
USA Gundam Store should have it. I think Iceman that does the 3D printing also sells it. -
Need some help with Molotov VS Revell Chrome
ctruss53 replied to Len Woodruff's topic in Model Building Questions and Answers
I think you will be happy with SMS Hyperchrome. I have tried all sorts of chromes, trying to find one that shines bright AND can actually be touched. SMS has fit the bill the best so far for me. Take a look at the engine pic I posted above. -
There is a guy on Facebook that advertised parts chroming services. I forgot his name though. I'll try to find it.
-
Vacuum Advance Line
ctruss53 replied to bluestringer's topic in Model Building Questions and Answers
On the few real engines I have built, I run the vacuum advance to the intake manifold. It has been covered, but on this style of intake, I would run the vacuum advance to that balancing "duct" between the two risers. Whenever there is not a good place already on the intake, like an old single plane Weiland intake I used, I just drilled and tapped a hole, installed a nipple, and attached the line to that. -
Need some help with Molotov VS Revell Chrome
ctruss53 replied to Len Woodruff's topic in Model Building Questions and Answers
I have been experimenting with all sorts of different chrome paints lately. I have not been happy with Molotov, Rust-O-Leum chrome spray can is a nice bright chrome, but flakes off. My favorite chrome paint right now is two different products. Green Stuff World brush on (not airbrush) Chrome, is great for small bits and pieces. You brush it on nice and heavy and it is a bright chrome. But you can't touch it at all, it will dull. The other product I really like is SMS Hyperchrome. It is a chrome paint you apply with an airbrush. They claim you can get a great chrome effect when you apply it over any color as long as you apply it onto something with a high gloss surface. I have only applied it over gloss black paint so far, and it works great. All the chrome parts on this engine are painted with SMS Hyperchrome. -
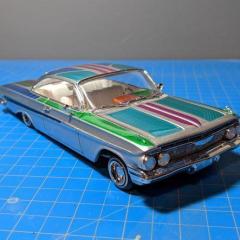
I just ordered up a whole mess of World Rally Blue, and BBS Gold, from Splash paints. I have 3 different WRX Rally cars that I am going to attempt to build at the same time.
- 39,159 replies
-
- 1
-

-
- johan
- glue bombs
- (and 1 more)
-
HAHAHAHAHAA On another note, I just picked up some Splash BBS Gold paint for the steelies that I am going to use on this. I figure Maroon and BBS Gold will look nice together.
-
Scribing panel lines. How is it done?
ctruss53 replied to conchan's topic in Model Building Questions and Answers
My tool is high quality. I think the problem is the type of tool it is. It is a sharp pointy round cone shape. It isn't a blade you run through panel lines. I think that is my problem. -
Scribing panel lines. How is it done?
ctruss53 replied to conchan's topic in Model Building Questions and Answers
I have a round pointy titanium tool I use. Got it from a gundam place. I don't like it, not at all. It jumps out of the panel lines very easily and I have to keep sanding and re-sanding the surrounding body panels when it jumps out and scratches the body. One time this happened so often that my body panel scratch removal sanding out paced my panel line scribing, and one of my panel lines got lost in the sanding. I need a better tool. -
And here is a little sample of where I am ate right now. With the body and engine sitting on the chassis.
-
And here is the engine. I have been done with the engine for a couple weeks now. I finished it while I was hunting down another kit so I could redo the mistakes I made with the body. I replaced the air cleaner on the end of the plenum with a "scoop." And instead of using the exhaust manifold with only two outlets, I made 8 straight pipes. I had to bend an "s" into the 3rd pipe from the front to get it around the intake. EDIT: Oh! That maroon color on the intake plenum is what color the body and chassis will be painted. All chrome on the engine is done with SMS Hyperchrome. My new favorite chrome paint.
-
Through the magic of time travel, I have changed the color the body was molded in. But really, I am on kit number two trying to get this just right. Here is the floor with all of the fenders and the running boards cut off. And roughly sanded to shape. Here is the chassis. And here I marked the parts I am going to remove to give it a smooth hot rod look. Chassis smoothed.
-
I'd take a look at the post above yours if you have concerns.