Jay Whittaker
-
Posts
170 -
Joined
-
Last visited
Content Type
Profiles
Forums
Events
Gallery
Everything posted by Jay Whittaker
-

CLIFF INMAN-INSPIRED KUSTOM.......
Jay Whittaker replied to Jay Whittaker's topic in WIP: Model Cars
Oh WOW!! I’m LOVING that faded panel job! You definitely knocked it outta the park!! Thank you for the kind words! 🤠👍🏻 -
CLIFF INMAN-INSPIRED KUSTOM.......
Jay Whittaker replied to Jay Whittaker's topic in WIP: Model Cars
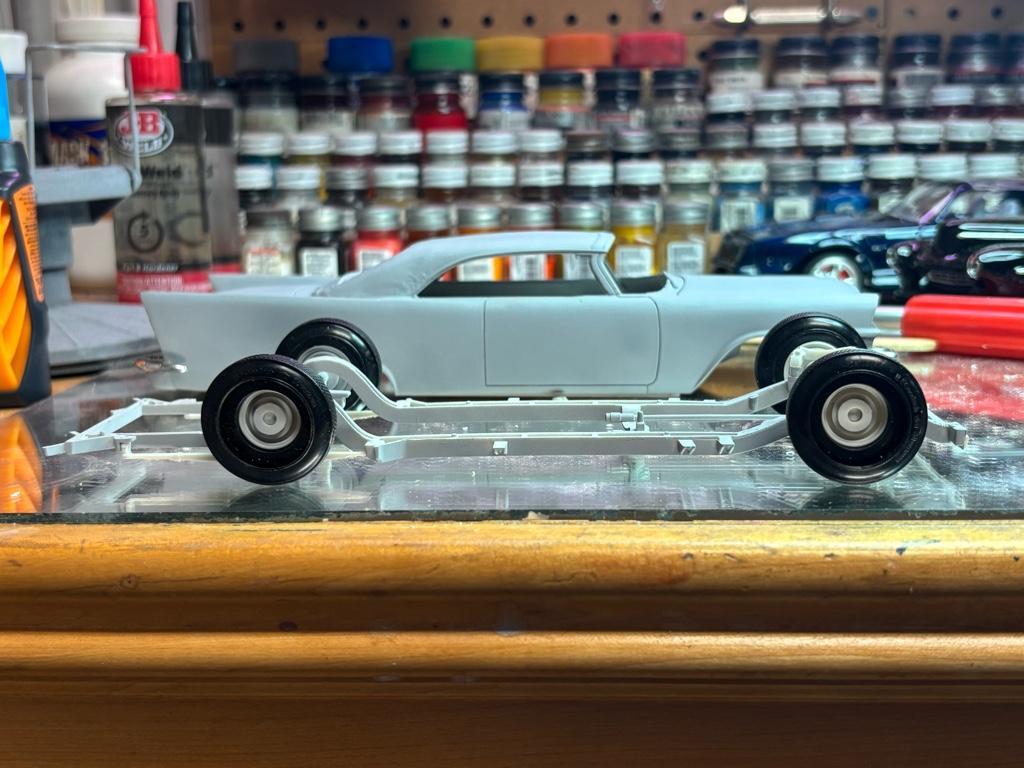
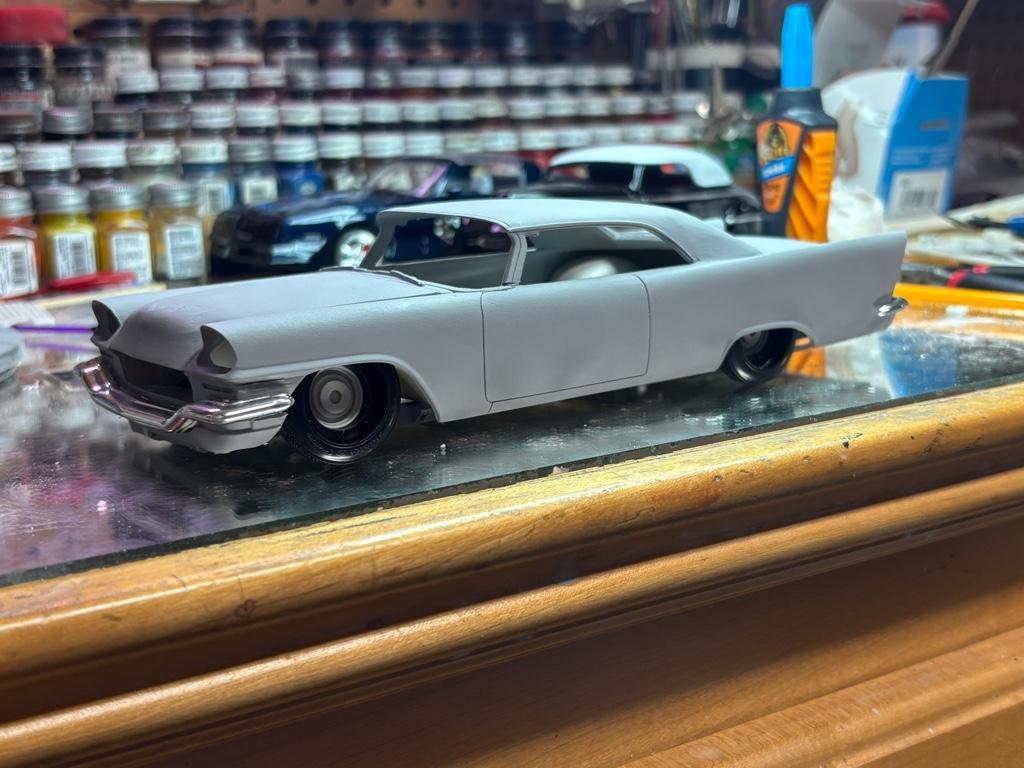
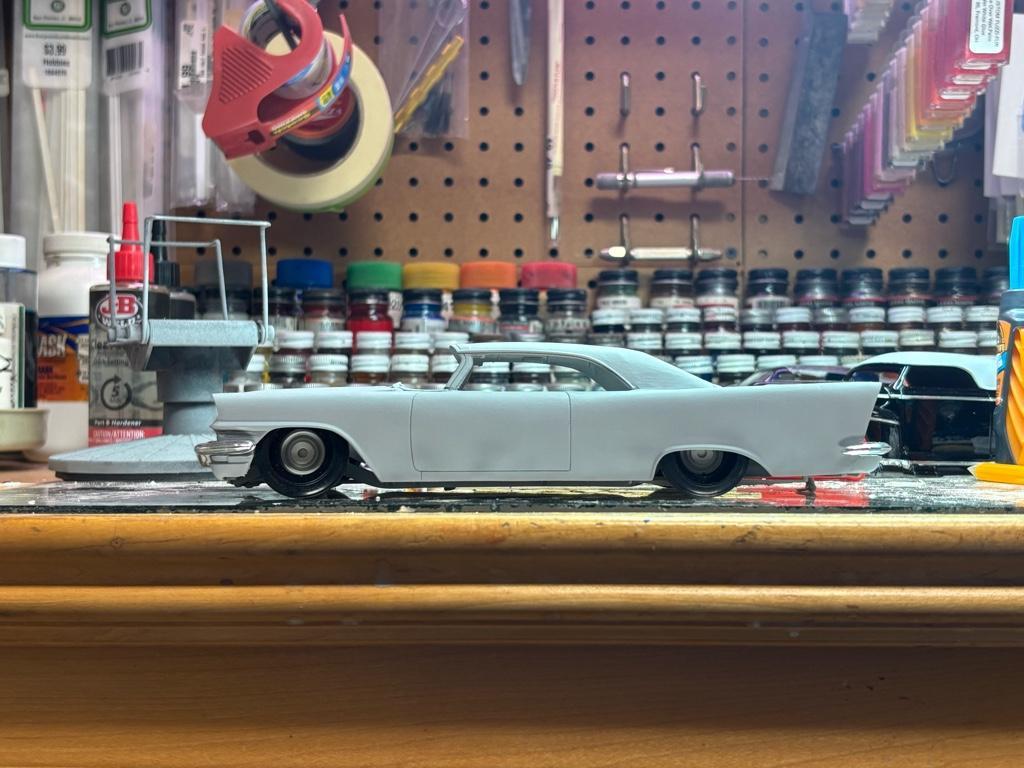
Thanks so much folks!... So the front suspension cooperated with me, once I got the fronts done I scratched up a couple of lowering blocks for the rear and I was able to get the whole car lowered and on all fours this weekend. Pleased as punch! ….And added a nice set of mock-up shots, sitting as she will on all four feet.
-
CLIFF INMAN-INSPIRED KUSTOM.......
Jay Whittaker replied to Jay Whittaker's topic in WIP: Model Cars
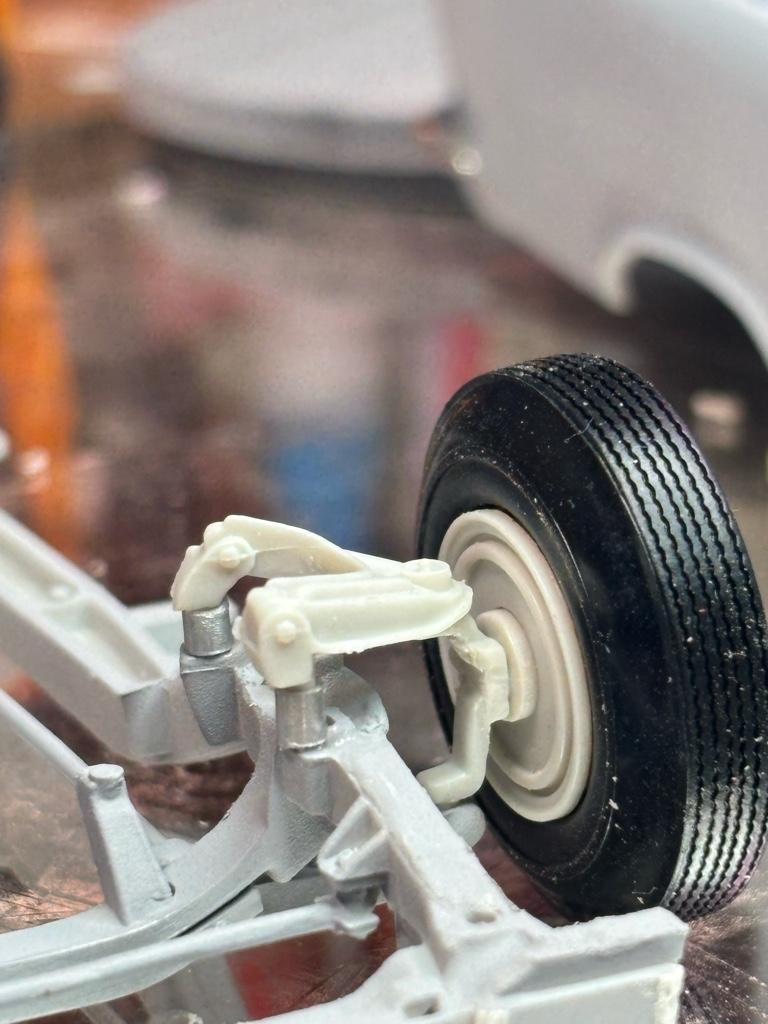
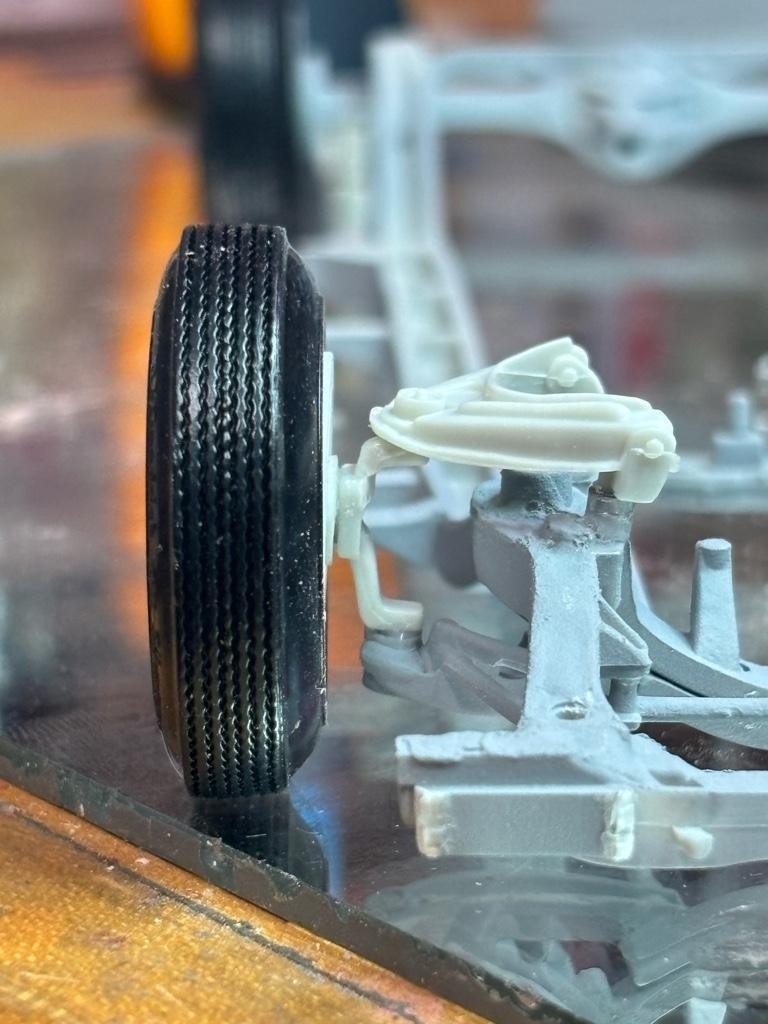
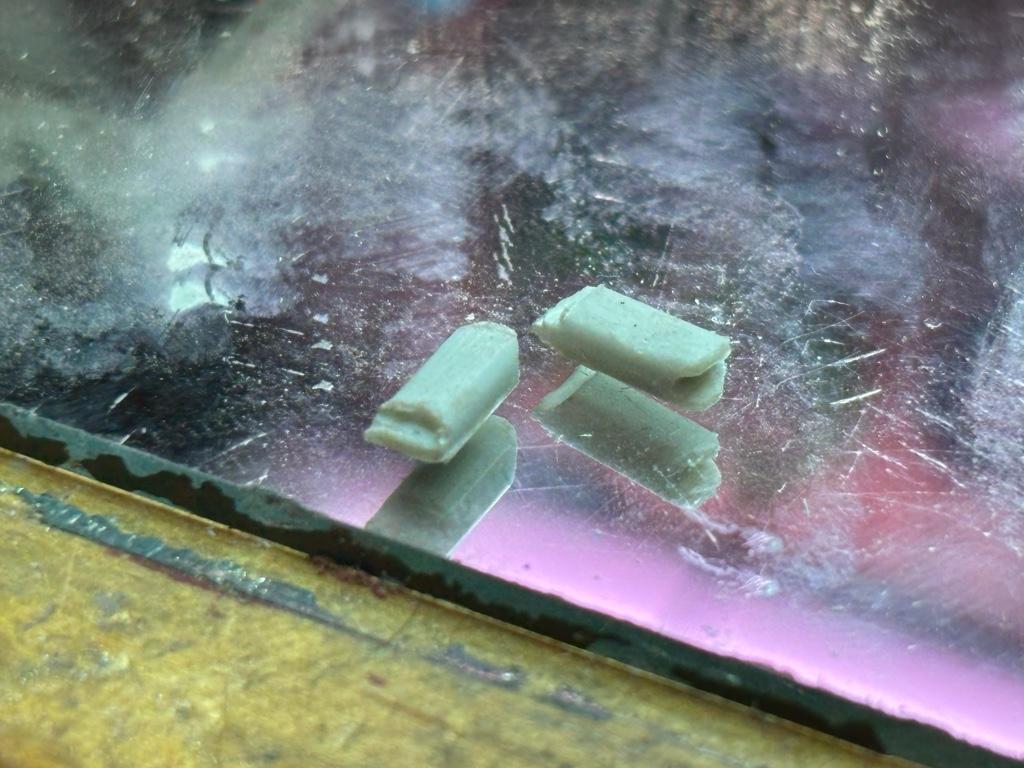
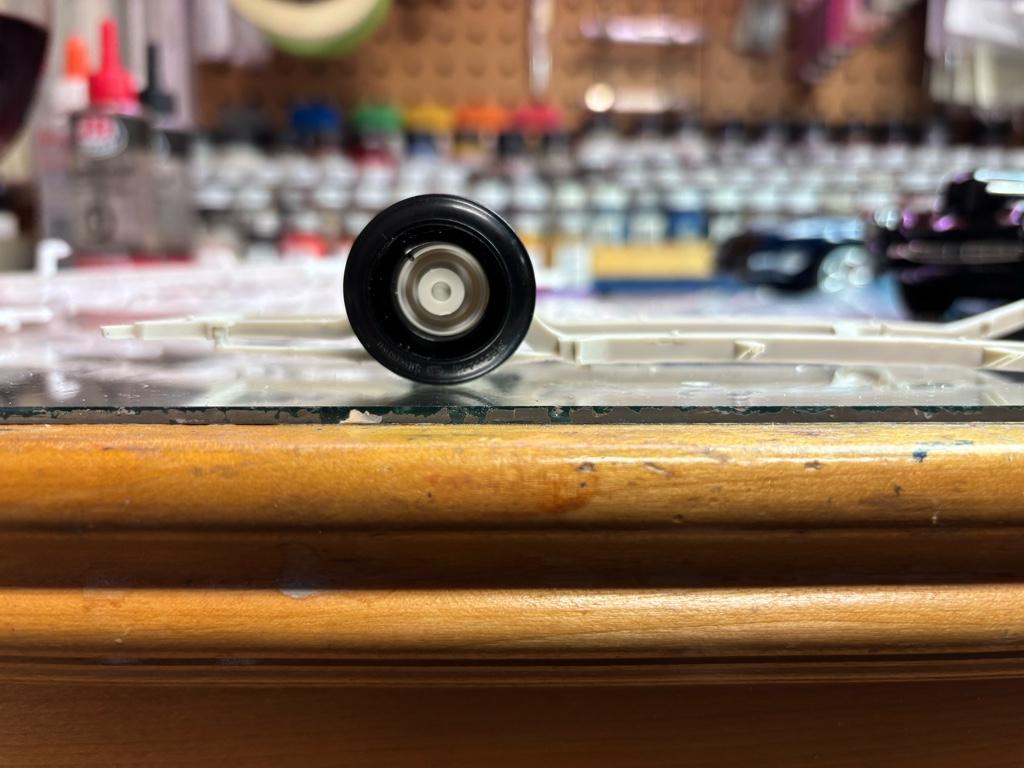
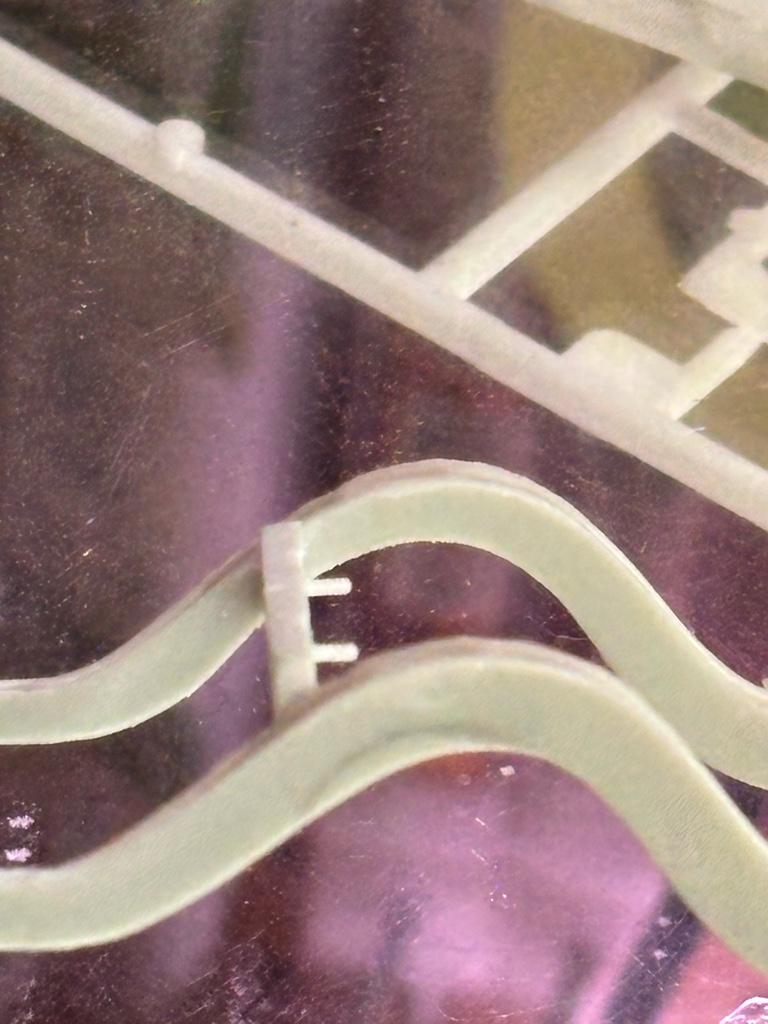
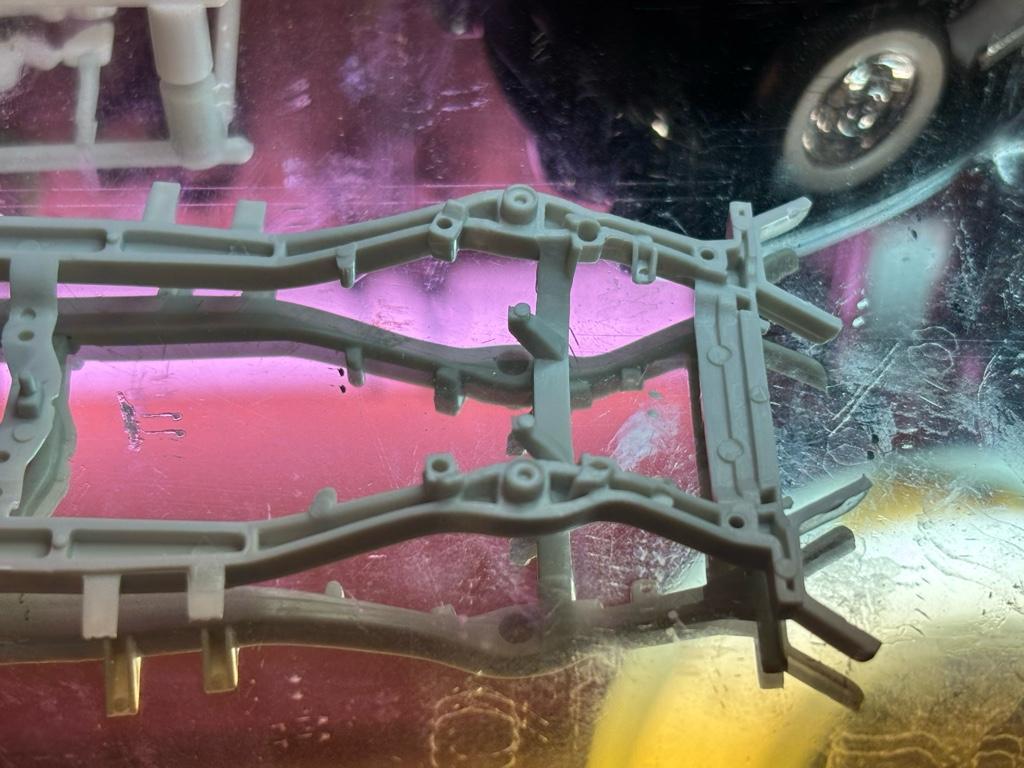
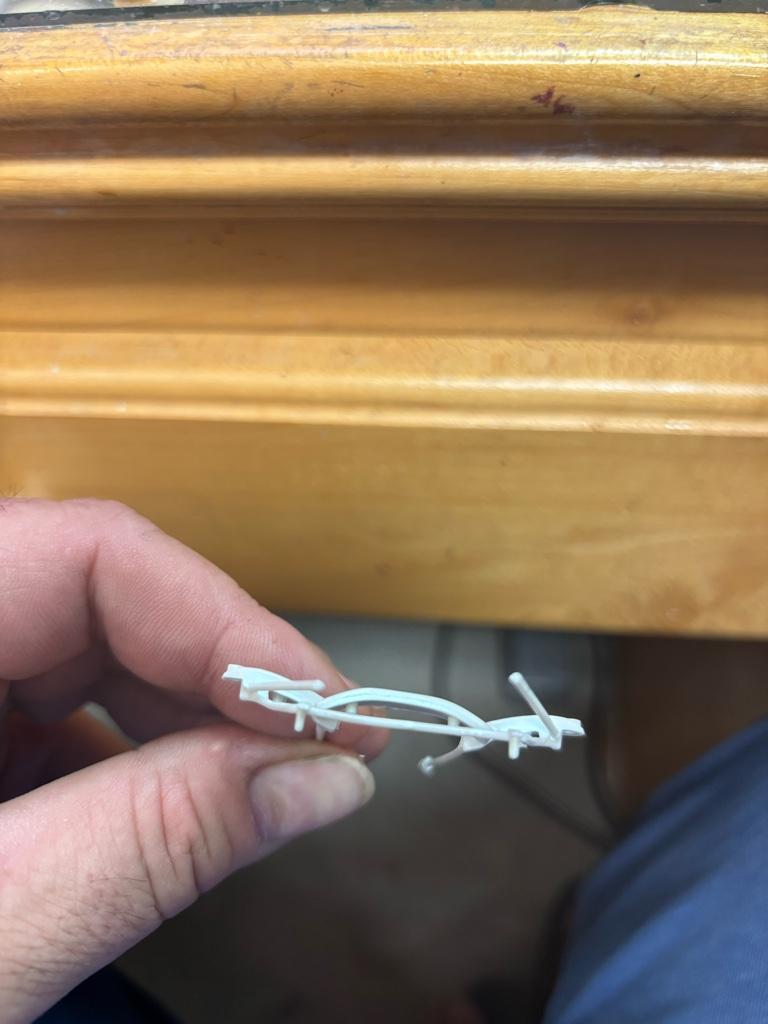
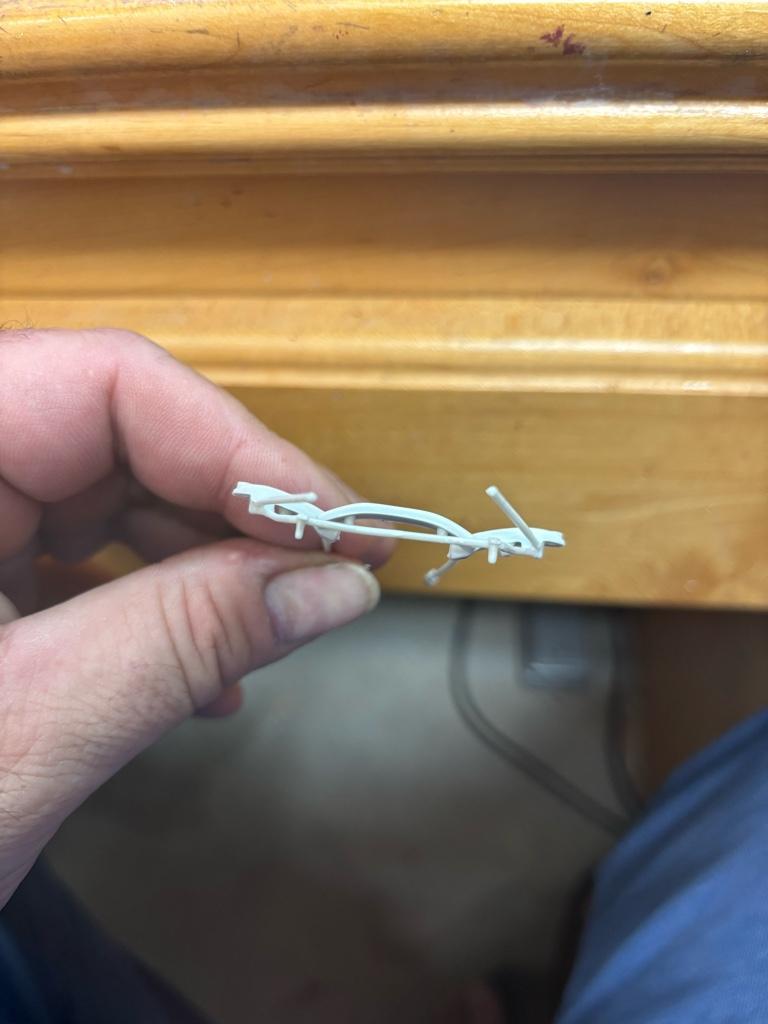
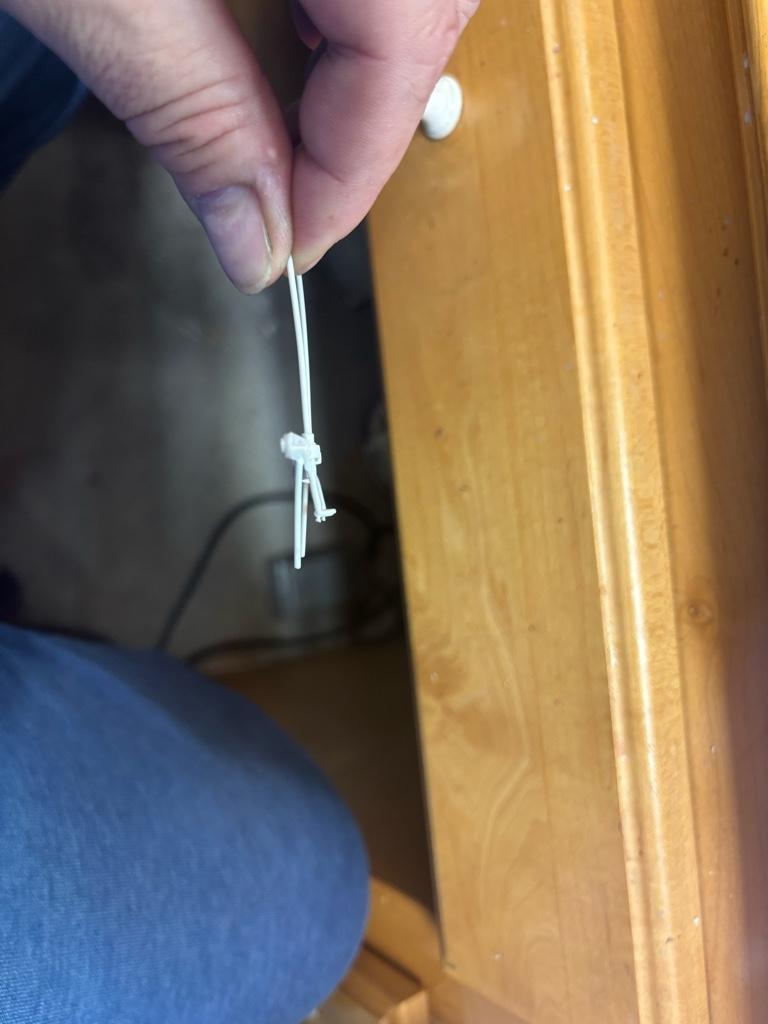
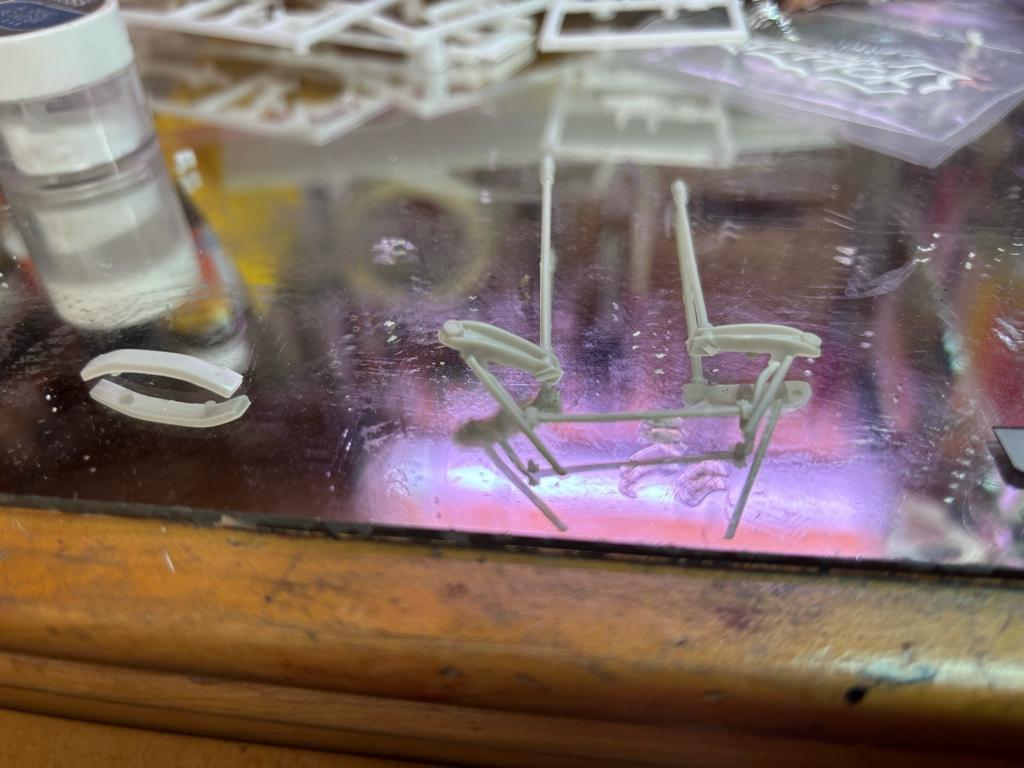
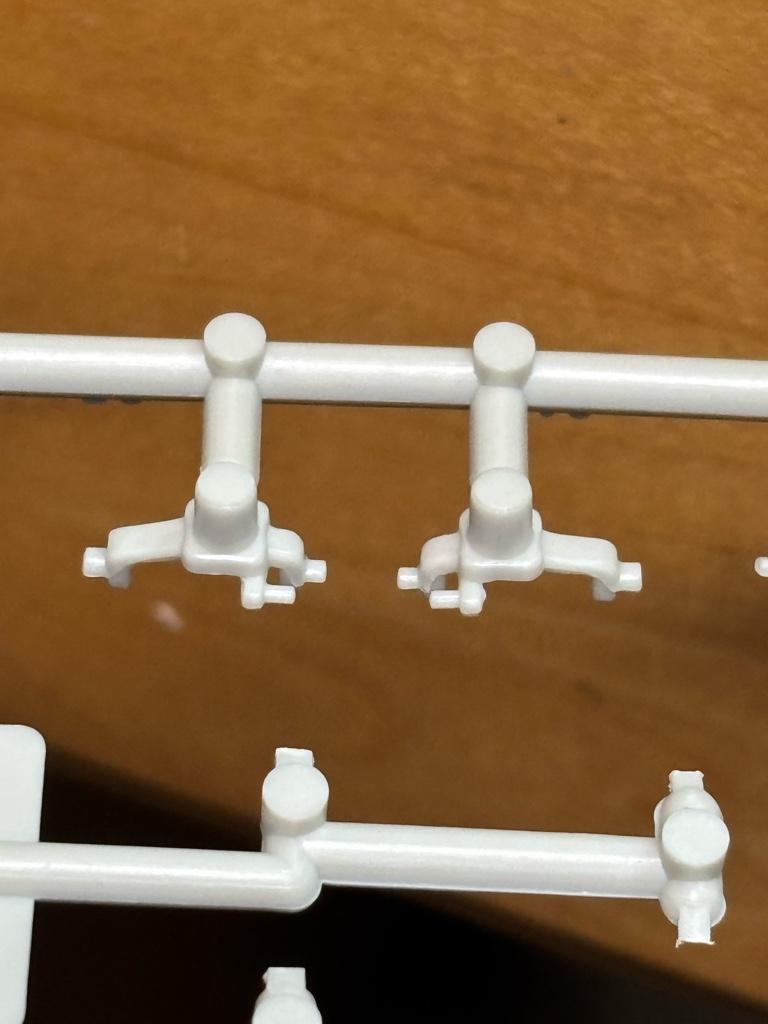
I dove into the lowering of the frame, and the rear suspension was an absolute breeze!…. It’ll be interesting to see if the front treats me as nicely. Before any mods are done though I need to fill in the top of the frame rails that will show in the engine bay. The first shot is the ‘stock’ ride height (getting a nosebleed up here).. The second pic is the rear axle propping up the frame after hogging it out for clearance, allowing it to just about lay frame (no, I’m not). The next shots show the guidelines drawn and then the fore & aft comparison of the rear rails. So setting up the lowering of the front suspension doesn’t look like it’s going to be a major catastrophe, and hopefully I didn’t jinx myself by saying that…. I started off by observing the angle of the lower torsion arms, and started bending things according to the amount of lowering I was trying to achieve. After that was separating them from the cross member attachment and re-gluing them at a more level position. This, combined with reversing the spindles, should give me what I’m looking for. The final mock-up will tell the tale.
-
CLIFF INMAN-INSPIRED KUSTOM.......
Jay Whittaker replied to Jay Whittaker's topic in WIP: Model Cars
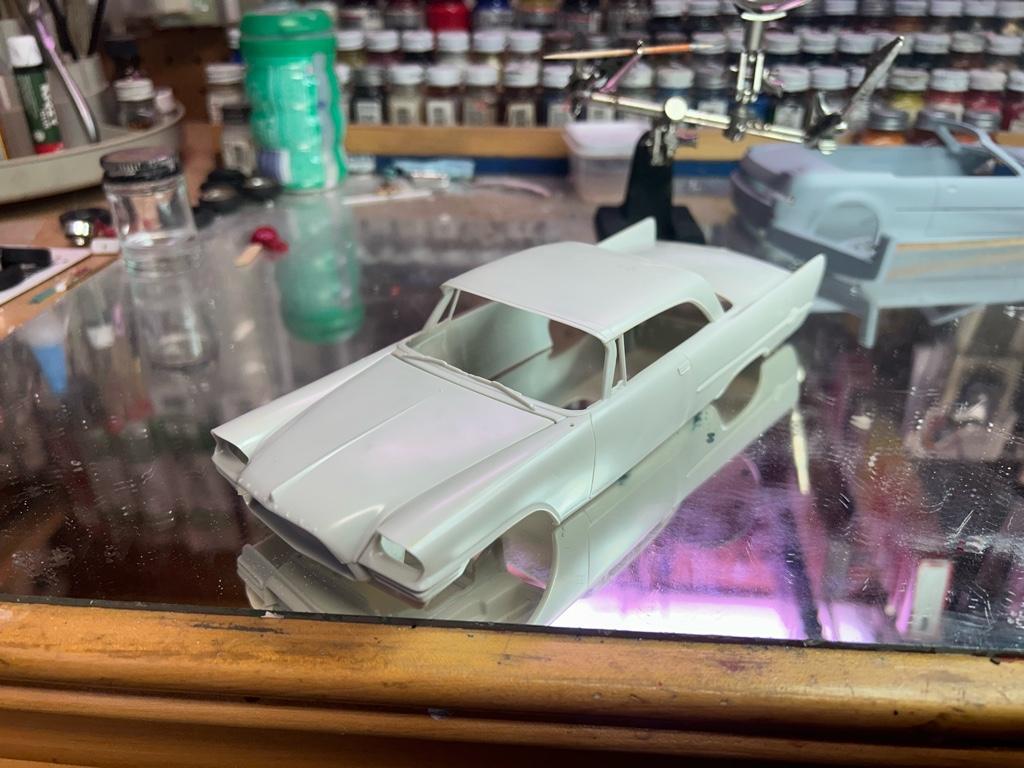
Thank you! Yessir, that is the outline of the proposed ‘57 DeSoto side trim that will be scratch-fashioned onto the sides. At the present time I’m looking to go with a deep wine color overall, with a champagne beige/gold for the inset as well as the interior. -
CLIFF INMAN-INSPIRED KUSTOM.......
Jay Whittaker replied to Jay Whittaker's topic in WIP: Model Cars
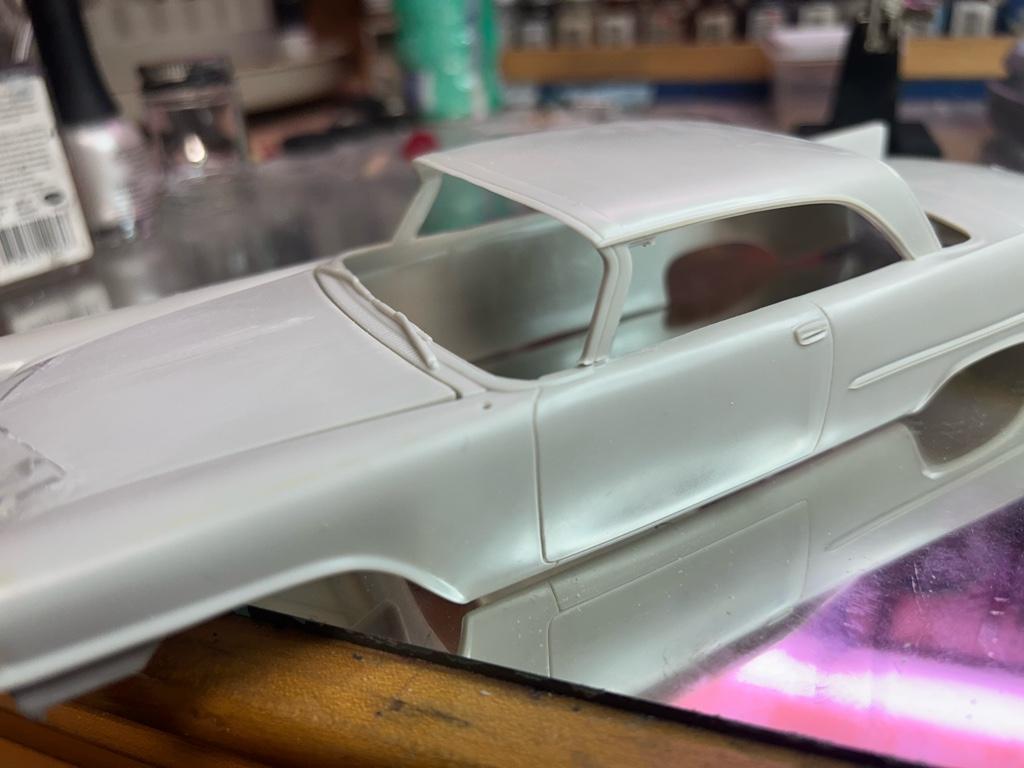
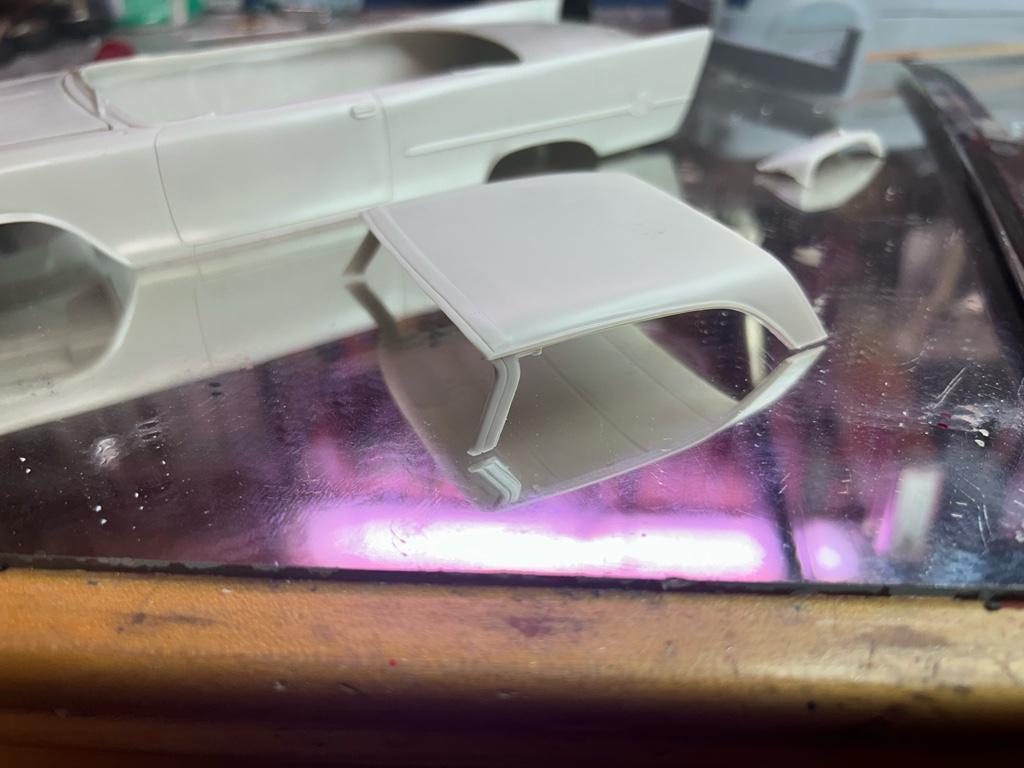
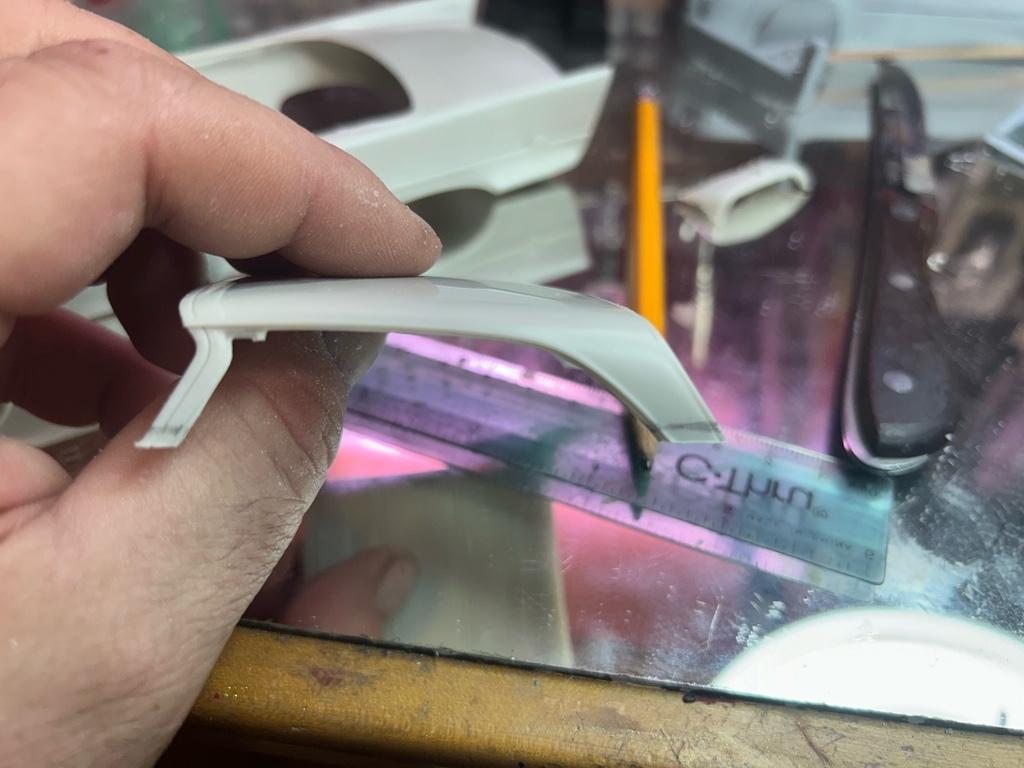
But we weren’t happy with that. After completing my “‘64 World’s Fair” GTO with the optional roof, I said to myself: “You idiot, you could’ve used that on the ‘57 300!”….. Thankfully my friend Mike Alvarez helped out huge with a spare optional roof and I was able to get my game on once more…. That factory backlight was just too wonky, and it was almost scary how close the fit of the GTO roof was.
- 129 replies
-
- 14
-

-
Your attention to detail and making sure things sit “right” is on a level all it’ own. As others have stated, the way you’ve pointed out flaws and shared your solutions will be of great help to those of us traveling the road behind you. I haven’t built a big rig since my teen years though I have more unbuilt kits than any four builders really need, this kit being one of them. Thanks so much for posting this WIP, and I look forward to its completion!
-
I admire the heck outta your fabrication skills!! This is coming out superbly!
-
I have no doubts you’re going to have a stunning results, seeing your builds of the past. Texas 3D makes a drop-dead gorgeous long ram RB Mopar. I just picked one up for my ‘57 300 custom. HTH THIS build has my attention!!
-
CLIFF INMAN-INSPIRED KUSTOM.......
Jay Whittaker replied to Jay Whittaker's topic in WIP: Model Cars
The top needed to be chopped, but ever-so-slightly, so a-hackin’ we went….
-
CLIFF INMAN-INSPIRED KUSTOM.......
Jay Whittaker replied to Jay Whittaker's topic in WIP: Model Cars
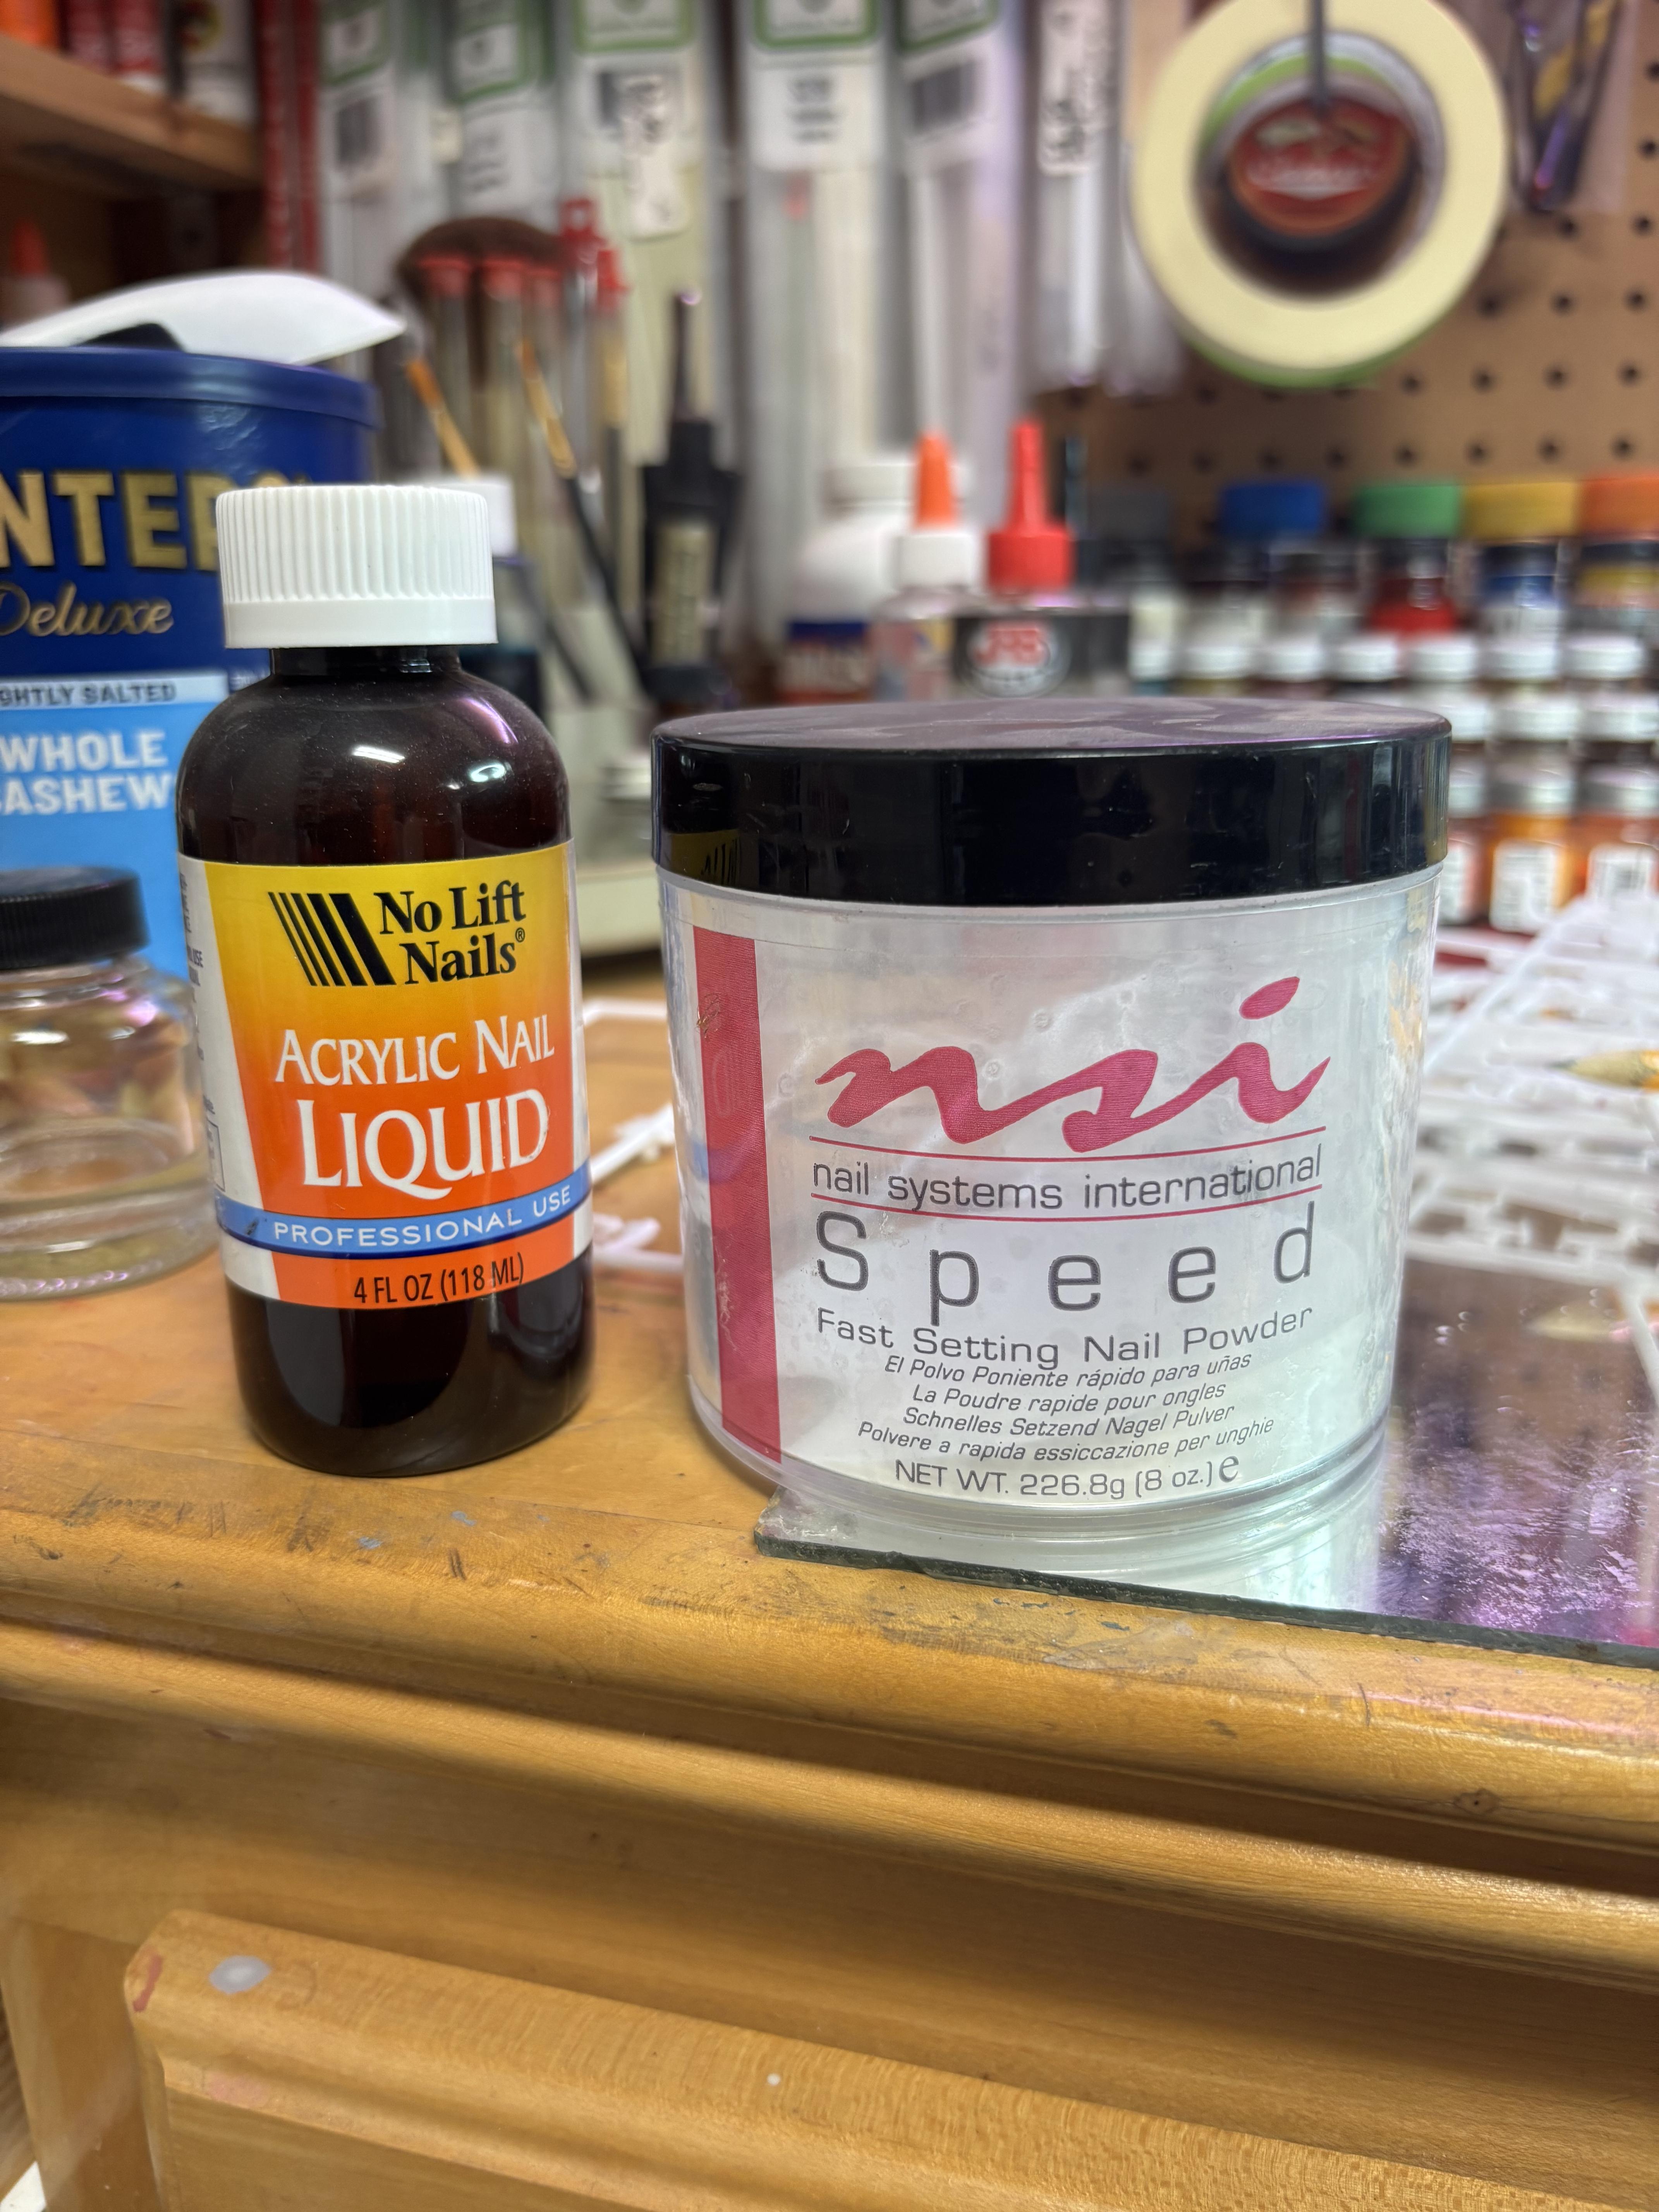
Hey thats good to know! I had no idea that there were different setting rate liquids out there. I’ll have to that a try. Thanks for sharing that tidbit. 😁👍🏻 Here is a pic of what I’m currently using.
-
I’m loving everything about this lil hotrod! You knocked it outta the park!
-
CLIFF INMAN-INSPIRED KUSTOM.......
Jay Whittaker replied to Jay Whittaker's topic in WIP: Model Cars
There’s no particular brand name I’m loyal to, I’ll get the names of what I’ve got when I get home from work later as I cannot remember off the top of my head (Geritol Deficiency Syndrome, don’t ya kno)…. As far as sanding goes, you want to get it very close to the end shape if you must sand it by hand, as it is harder than the styrene (which makes it great for reinforcement applications).I use a Dremel with the sanding drum bit initially then finish off with a sanding stick or sandpaper. -
CLIFF INMAN-INSPIRED KUSTOM.......
Jay Whittaker replied to Jay Whittaker's topic in WIP: Model Cars
The acrylic filler is a 2-part liquid/powder that when combined harden through a chemical reaction. It can be gotten at any Walmart or my favorite place is Sally Beauty Supply, as you can get larger quantities. The only catch is you must use a real animal hair brush, not a synthetic. Use lacquer thinner to clean the brush after each dip. 😁👍🏻 -
CLIFF INMAN-INSPIRED KUSTOM.......
Jay Whittaker replied to Jay Whittaker's topic in WIP: Model Cars
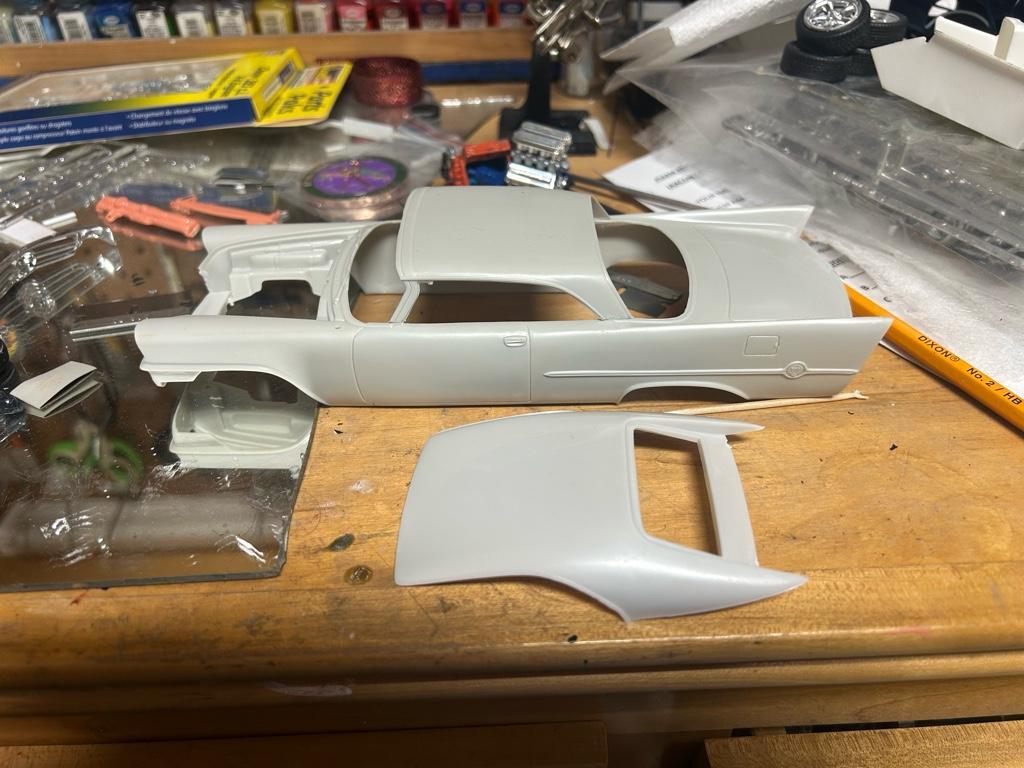
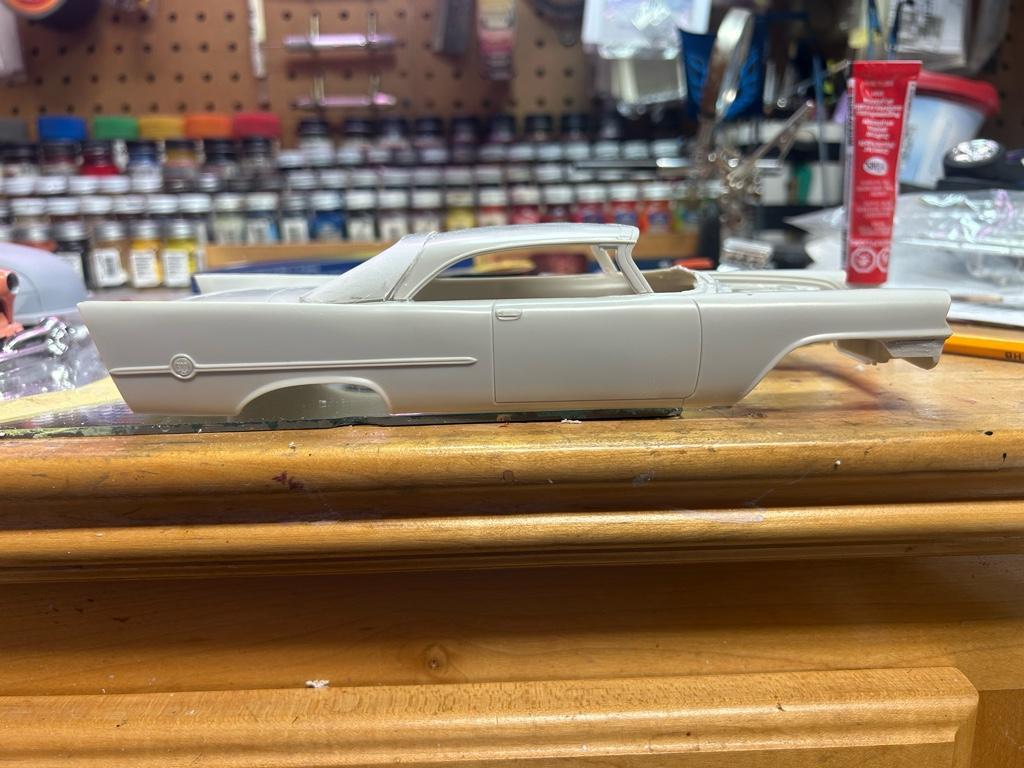
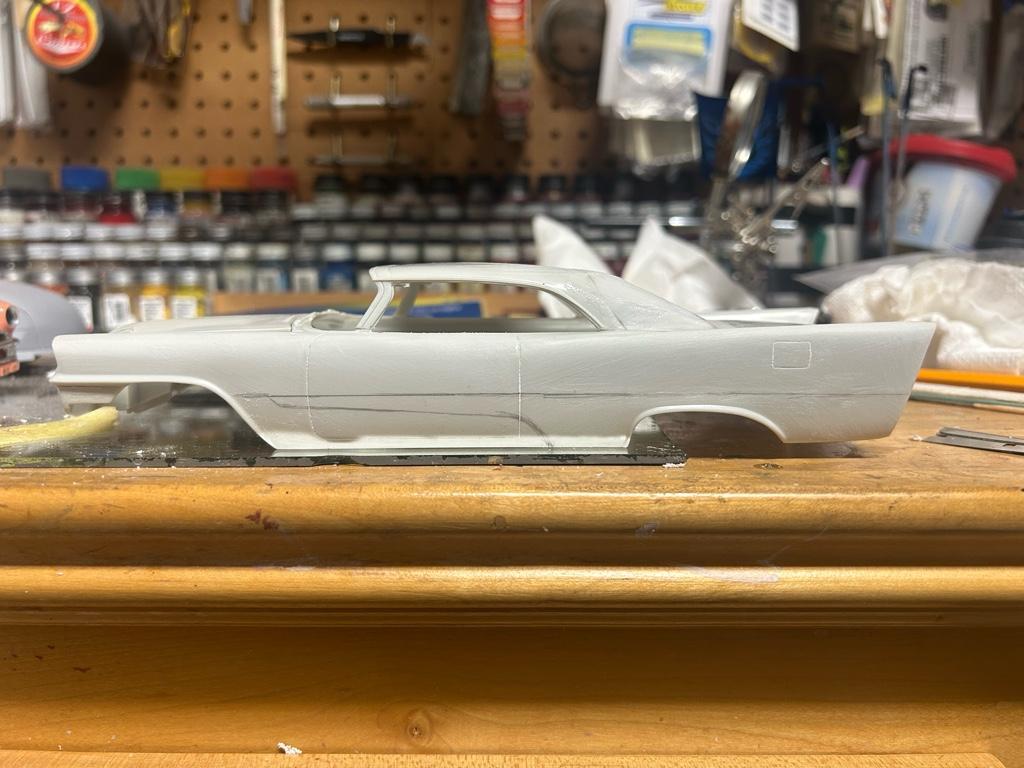
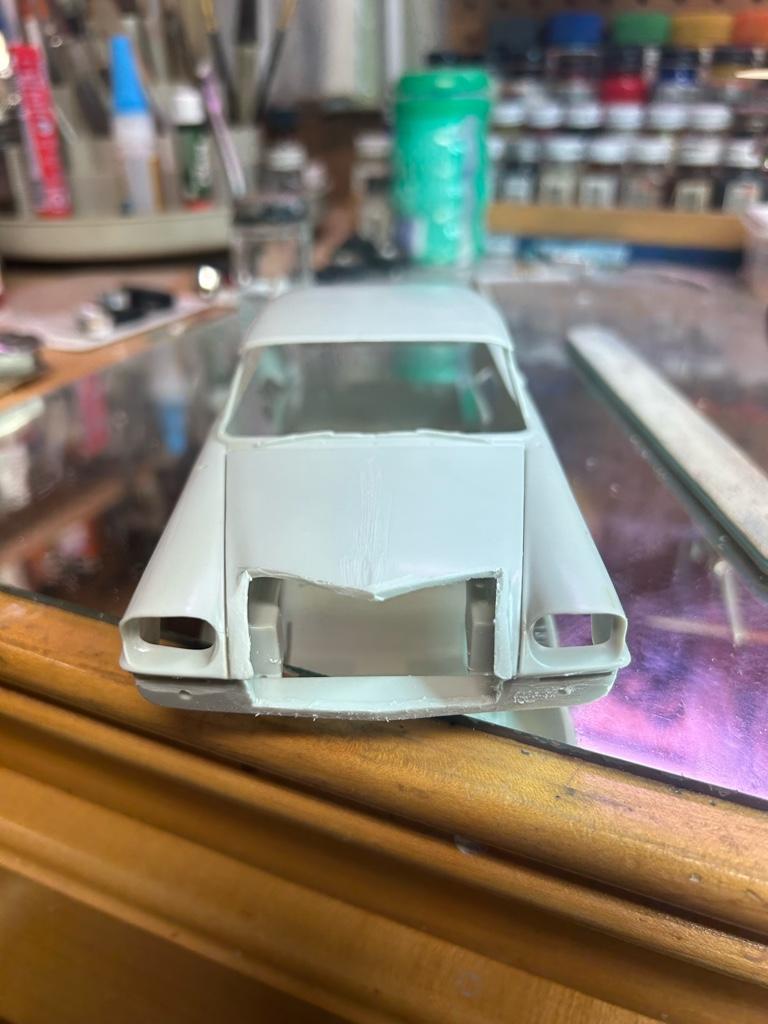
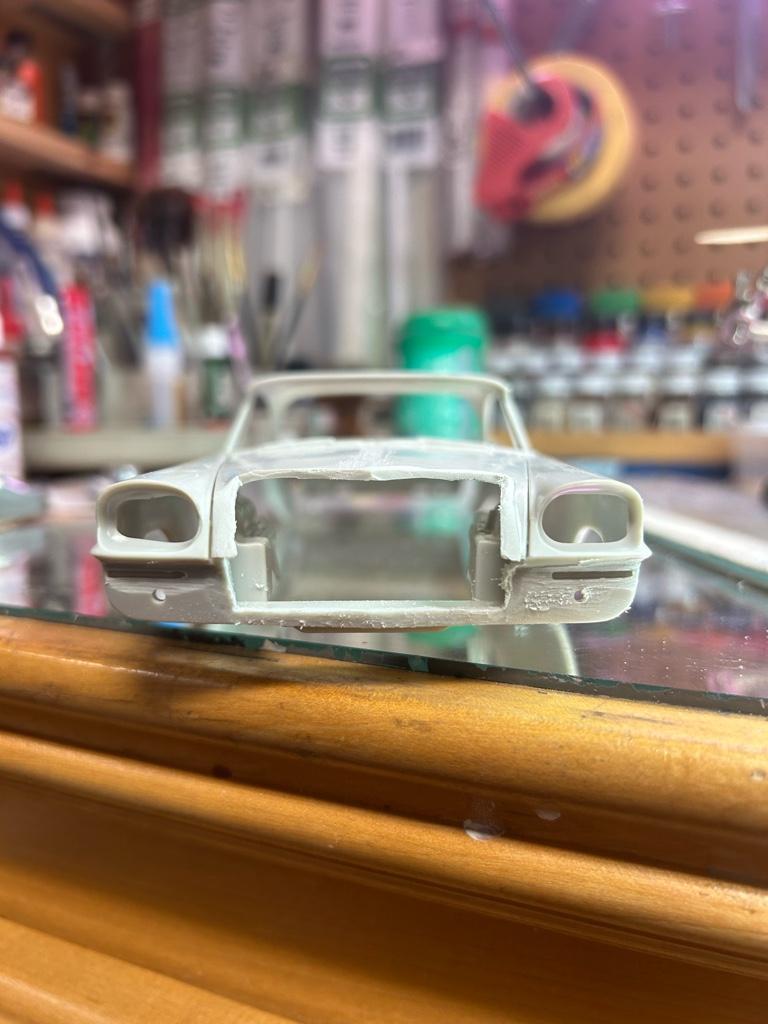
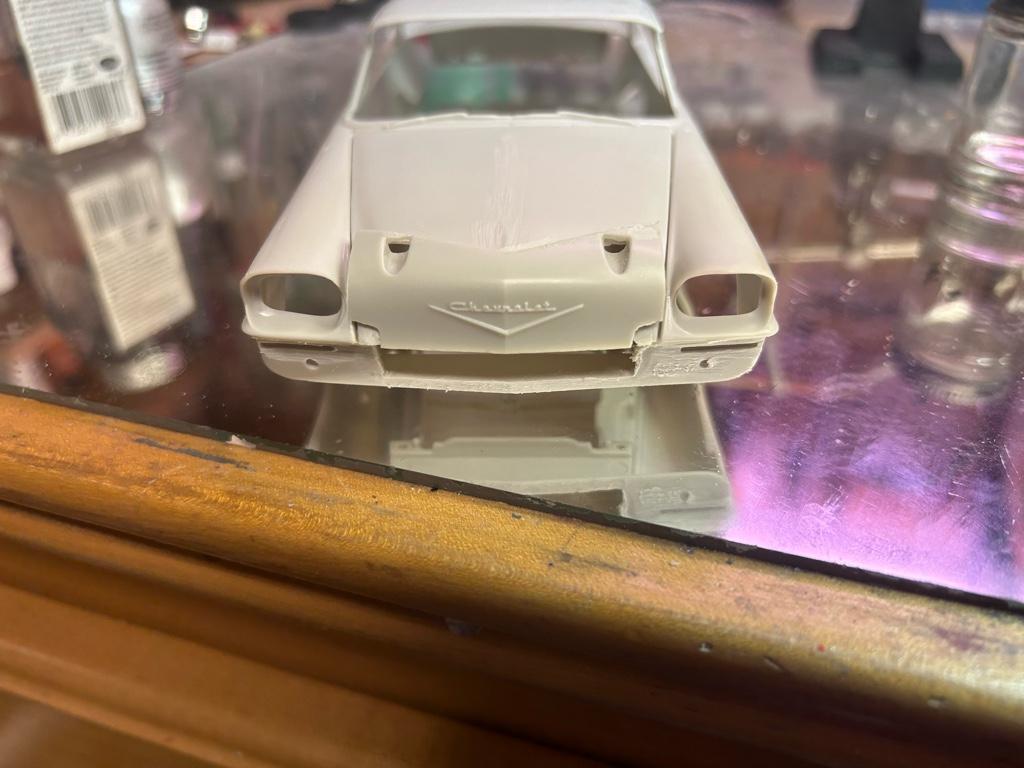
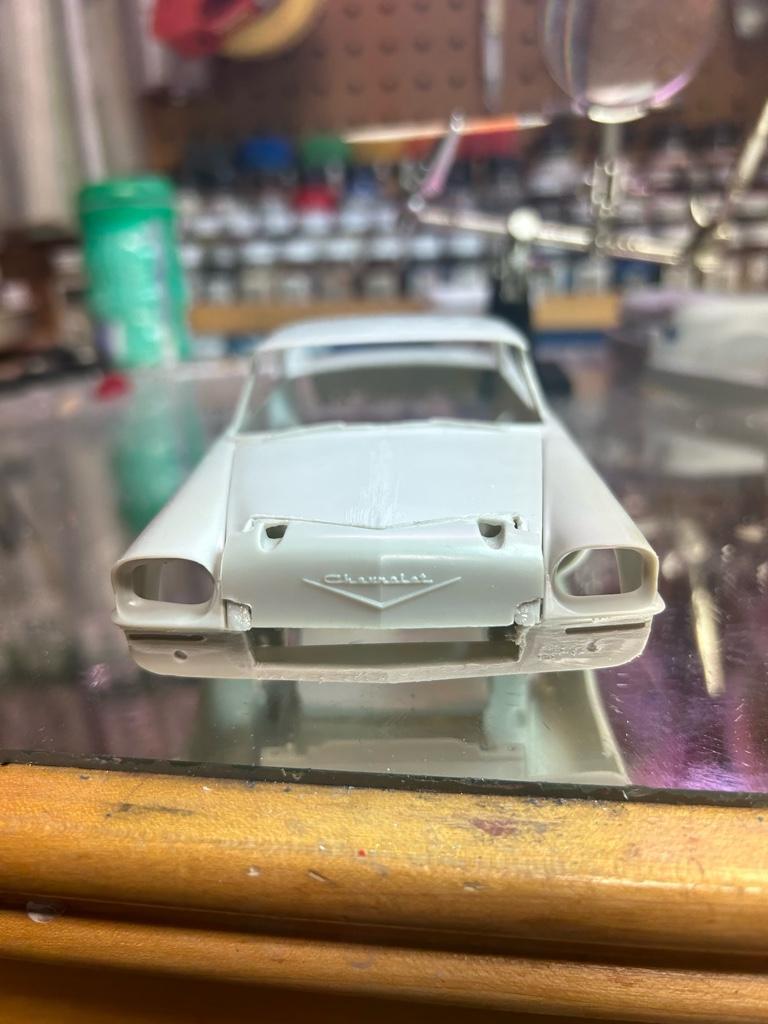
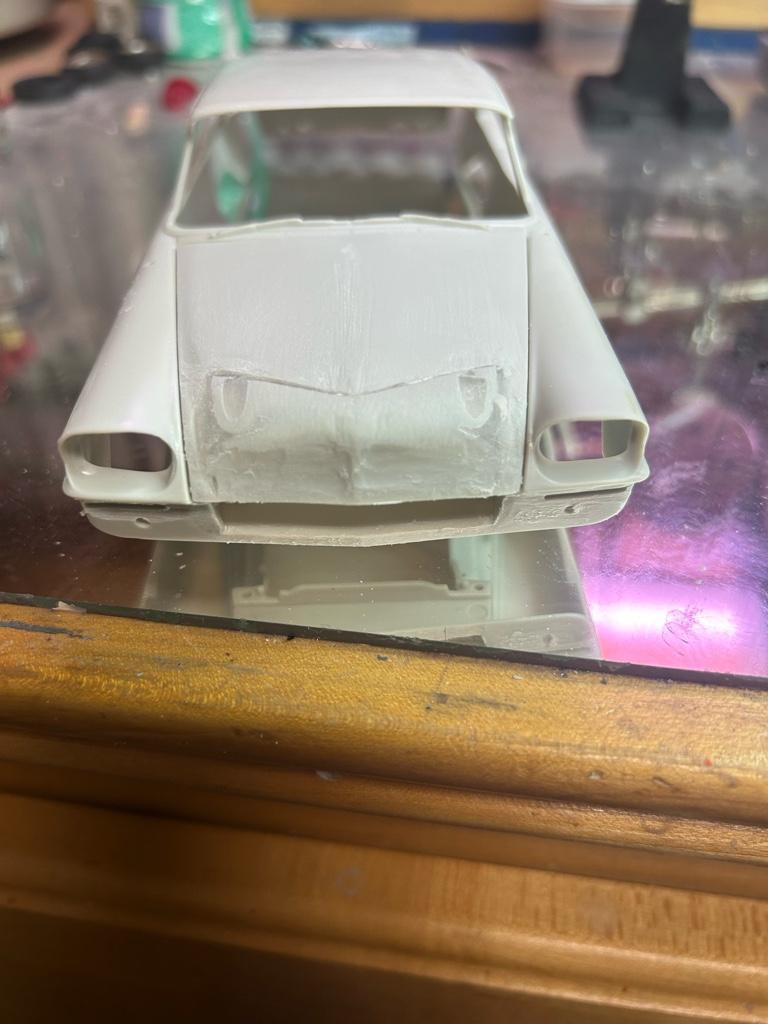
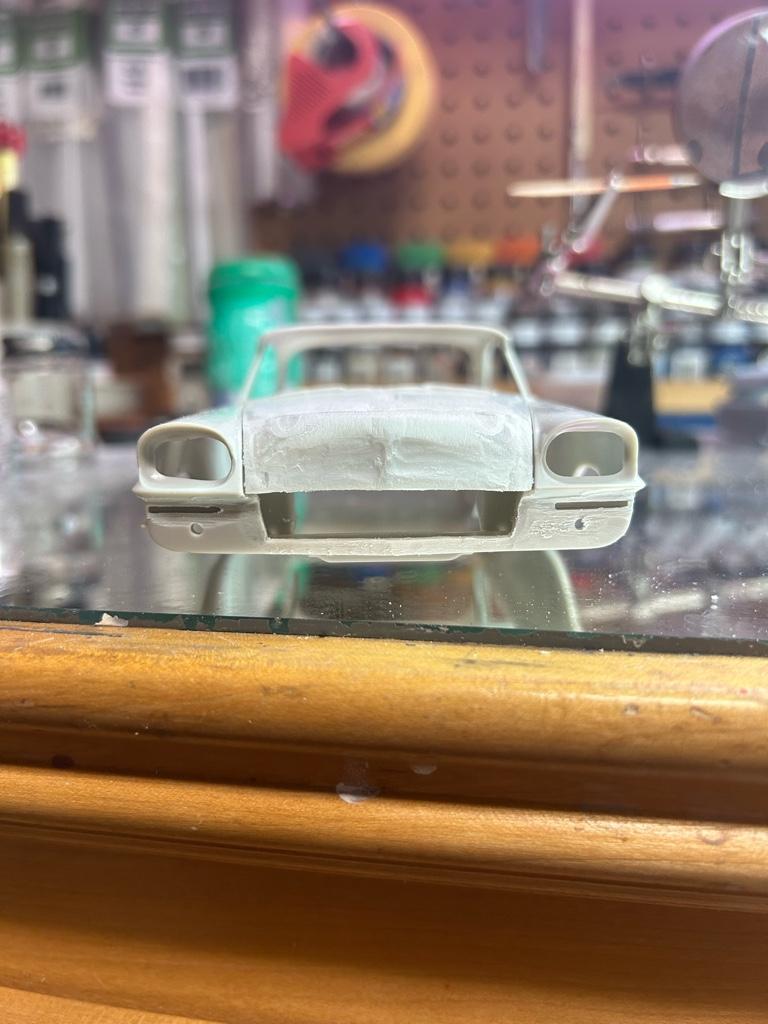
After filling-in the rear medallion relief and license plate recess with acrylic filler, I set my sights on eliminating the aircraft air intake grill that, in my opinion, greatly detracts from the overall beauty of this car. Experience has taught me to cut-away only what is absolutely necessary and to “test set” possible replacement donor pieces beforehand to make blending as seamless as possible. In doing this, I discovered that an AMT ‘57 Chevy hood fit the bill perfectly (no pun intended) and I proceeded to make the transition. You’ll notice that I built-up filler on the back side of the hood as well, as I discovered while contouring the front side that the styrene was getting thin. I can never thank Mike Sarris enough for introducing me to this acrylic nail filler because this stuff is SO versatile!!…. You’ll also notice that the lower grille opening has been ground down and the inner grill plate eliminated as was necessary.
- 129 replies
-
- 12
-
-

-
PURDY paint!!
-
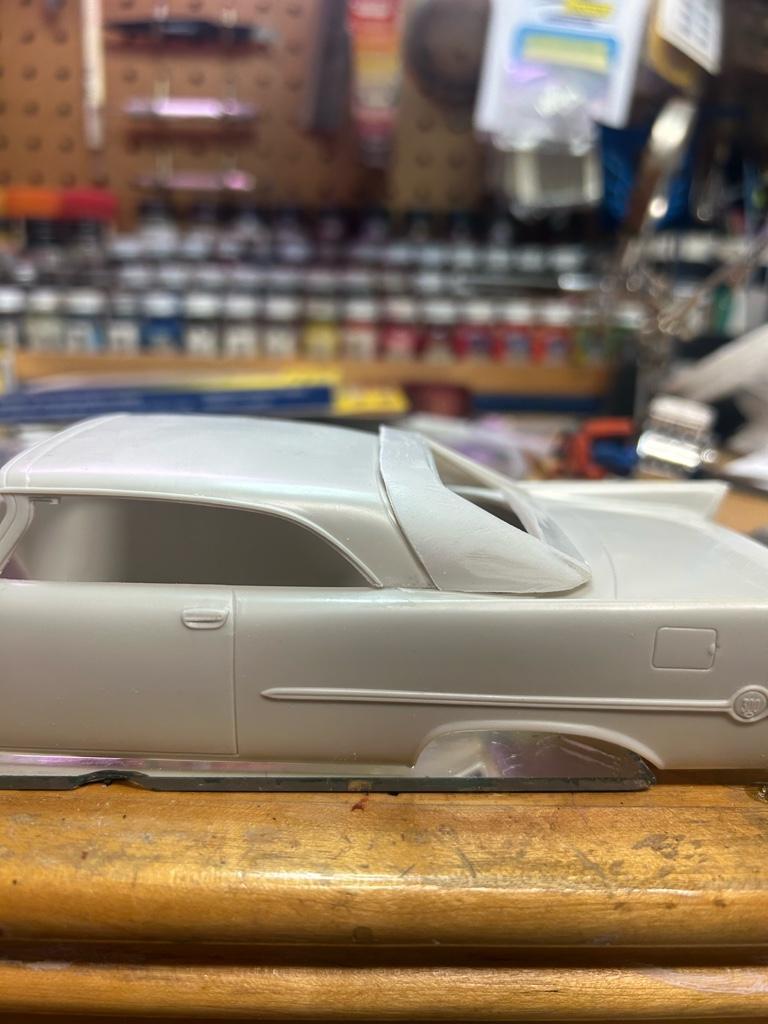
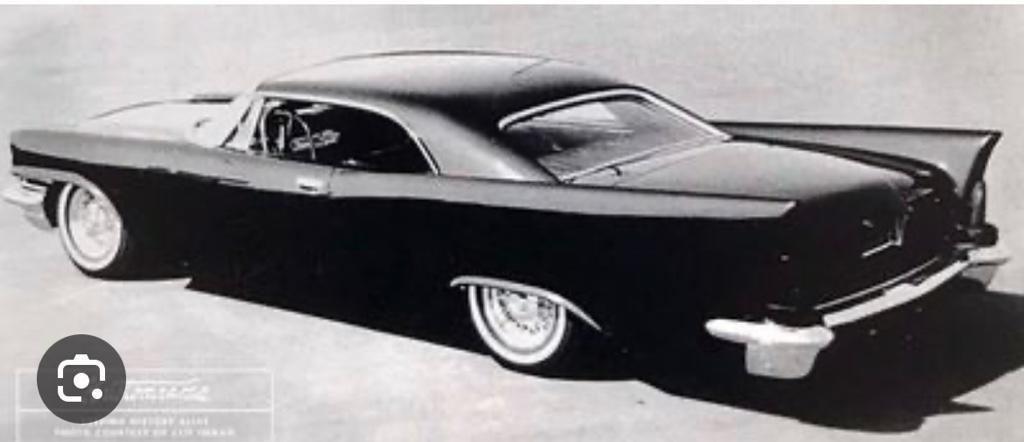
Those that know me know that I love nothing more than cutting up a perfectly good car to make it something (I feel) it should've been. One of my Brothers of the Sprue, Tony Matthews, got hold of a '57 Chrysler 300 kit and reached out for some guidance on how I do custom work on these little styrene wonders we love so much, which I was happy to do. As luck would have it, I also had one of these (albeit a different issue) sitting in the cabinet above my work bench and figured what better thing to use as the example. So we unofficially happened into an unintentional dual build, and I wanted to share it with y'all... Plans for mine are eliminating that time-honored aircraft intake opening grille, adding ‘57 DeSoto side trim, ‘56 Packard taillights ordered from R&M of MD, a beautiful long ram 413 gotten from Texas 3D, along with the Kelsey Hayes wires copped from a '56 300 kit replicating the Inman car. This is not a build of that car, but rather a build inspired by it, as the title implies….
-
Solar Productions Porsche 908/2 and "McQueen" Porsche 908/2
Jay Whittaker replied to Scale-Master's topic in WIP: Model Cars
I love watching a master at work! -
That is one gorgeous 442!
-
Atlantis Cadillac Eldorado Brougham 1957
Jay Whittaker replied to Greasefinger's topic in Model Cars
That is a really sweet build! -
Beautifully done Jim!
-
2021 dodge charger hellcat widebody general lee
Jay Whittaker replied to michelle's topic in Model Cars
Excellent work! -
This is one GORGEOUS save!! It's hard to believe it's the same car. The best day of it's life is when it landed on your bench! Just beautiful!!
-
Kickin' color and she sits JUST right!! Awesome job!
-
Absolutely LOVING the fade work on this!! Your paint has always been stunning to say the least! BEAUTIFULLY done!
-
Great looking Merc!