Moparman18064
-
Posts
609 -
Joined
-
Last visited
Content Type
Profiles
Forums
Events
Gallery
Everything posted by Moparman18064
-
Nice! I absolutely love the paint!
- 22 replies
-
- 1
-

-
- holden
- ddacollectibles
- (and 1 more)
-
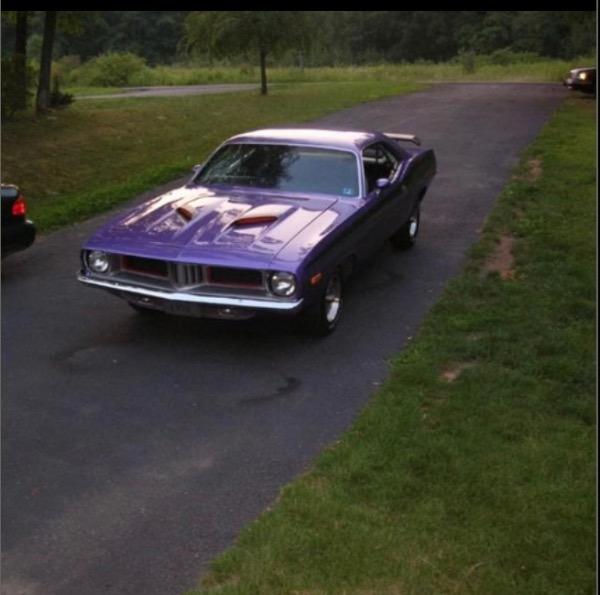
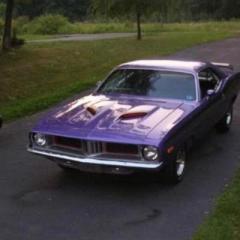
Looks great, love the Lightning rods. I had a Duster that had them.
-
Paint is wonderful. Looks great!
-
Thank you!
-
Lindberg 1931 Bugatti Royale Victoria 1:24
Moparman18064 replied to Funkychiken's topic in Model Cars
Gorgeous! Fantastic build! -
Stunning! Fantastic paint work.
-
Looks great out there in the sun. Can’t go wrong with plumcrazy!
-
That really pops in that red! Great work!
-
Looks great, as stated before, looks sinister!
-
Great looking build, interior is superb!
-
Johan 1968 Chrysler 300 convertible. The car that almost was
Moparman18064 replied to gtx6970's topic in Model Cars
Looks fantastic, it belongs in a case! You can’t go wrong with the black/ red combo! -
Came out sweet! As in your WIP, takes me back to my mother’s 75
-
Great job, love the paint
-
Sweet build! Well done, John
-
Thank you very much! As for insurance, somehow I believe, he was grandfathered in, due to being with Erie for ages. He didn’t seem to have an issue, he had a new 67 GTX convertible the year before. Thank you very much. It certainly was potent! After he modded it with Isky, Hooker, L88 parts, he had it in the 11s. Thank you! Thank you , Carl. Thank you , Mike
-
Thank you, Carl.
-
Great job on the wheels!
-
Coming along nicely! Looks really good on those rally wheels
-
Looks great to this point. Engine details, interior, thumbs up!
-
'Grandpa Special' 1/25 1974 Challenger
Moparman18064 replied to Mrchickenstrips's topic in WIP: Model Cars
Great demonstration of the conversion parts. Now I know what I will be up against. If you are looking to make the engine more correct, the valve covers have to be reshaped some. They are too squared off compared to the early 70’s small block valve covers. Otherwise, I love the VCG kit. Keep the good stuff coming!- 14 replies
-
- 1
-
-
- challenger
- dodge
- (and 2 more)
-
Thank you I did grow up in Musclecars, before that one, he had a 61 Chrysler 300g convertible, 67 GTX convertible, 62 Chevy w/ worked L88( from a Vette). Plus more after Thank you Dan Thank you, was a good looking Camaro, ran like an animal too!
-
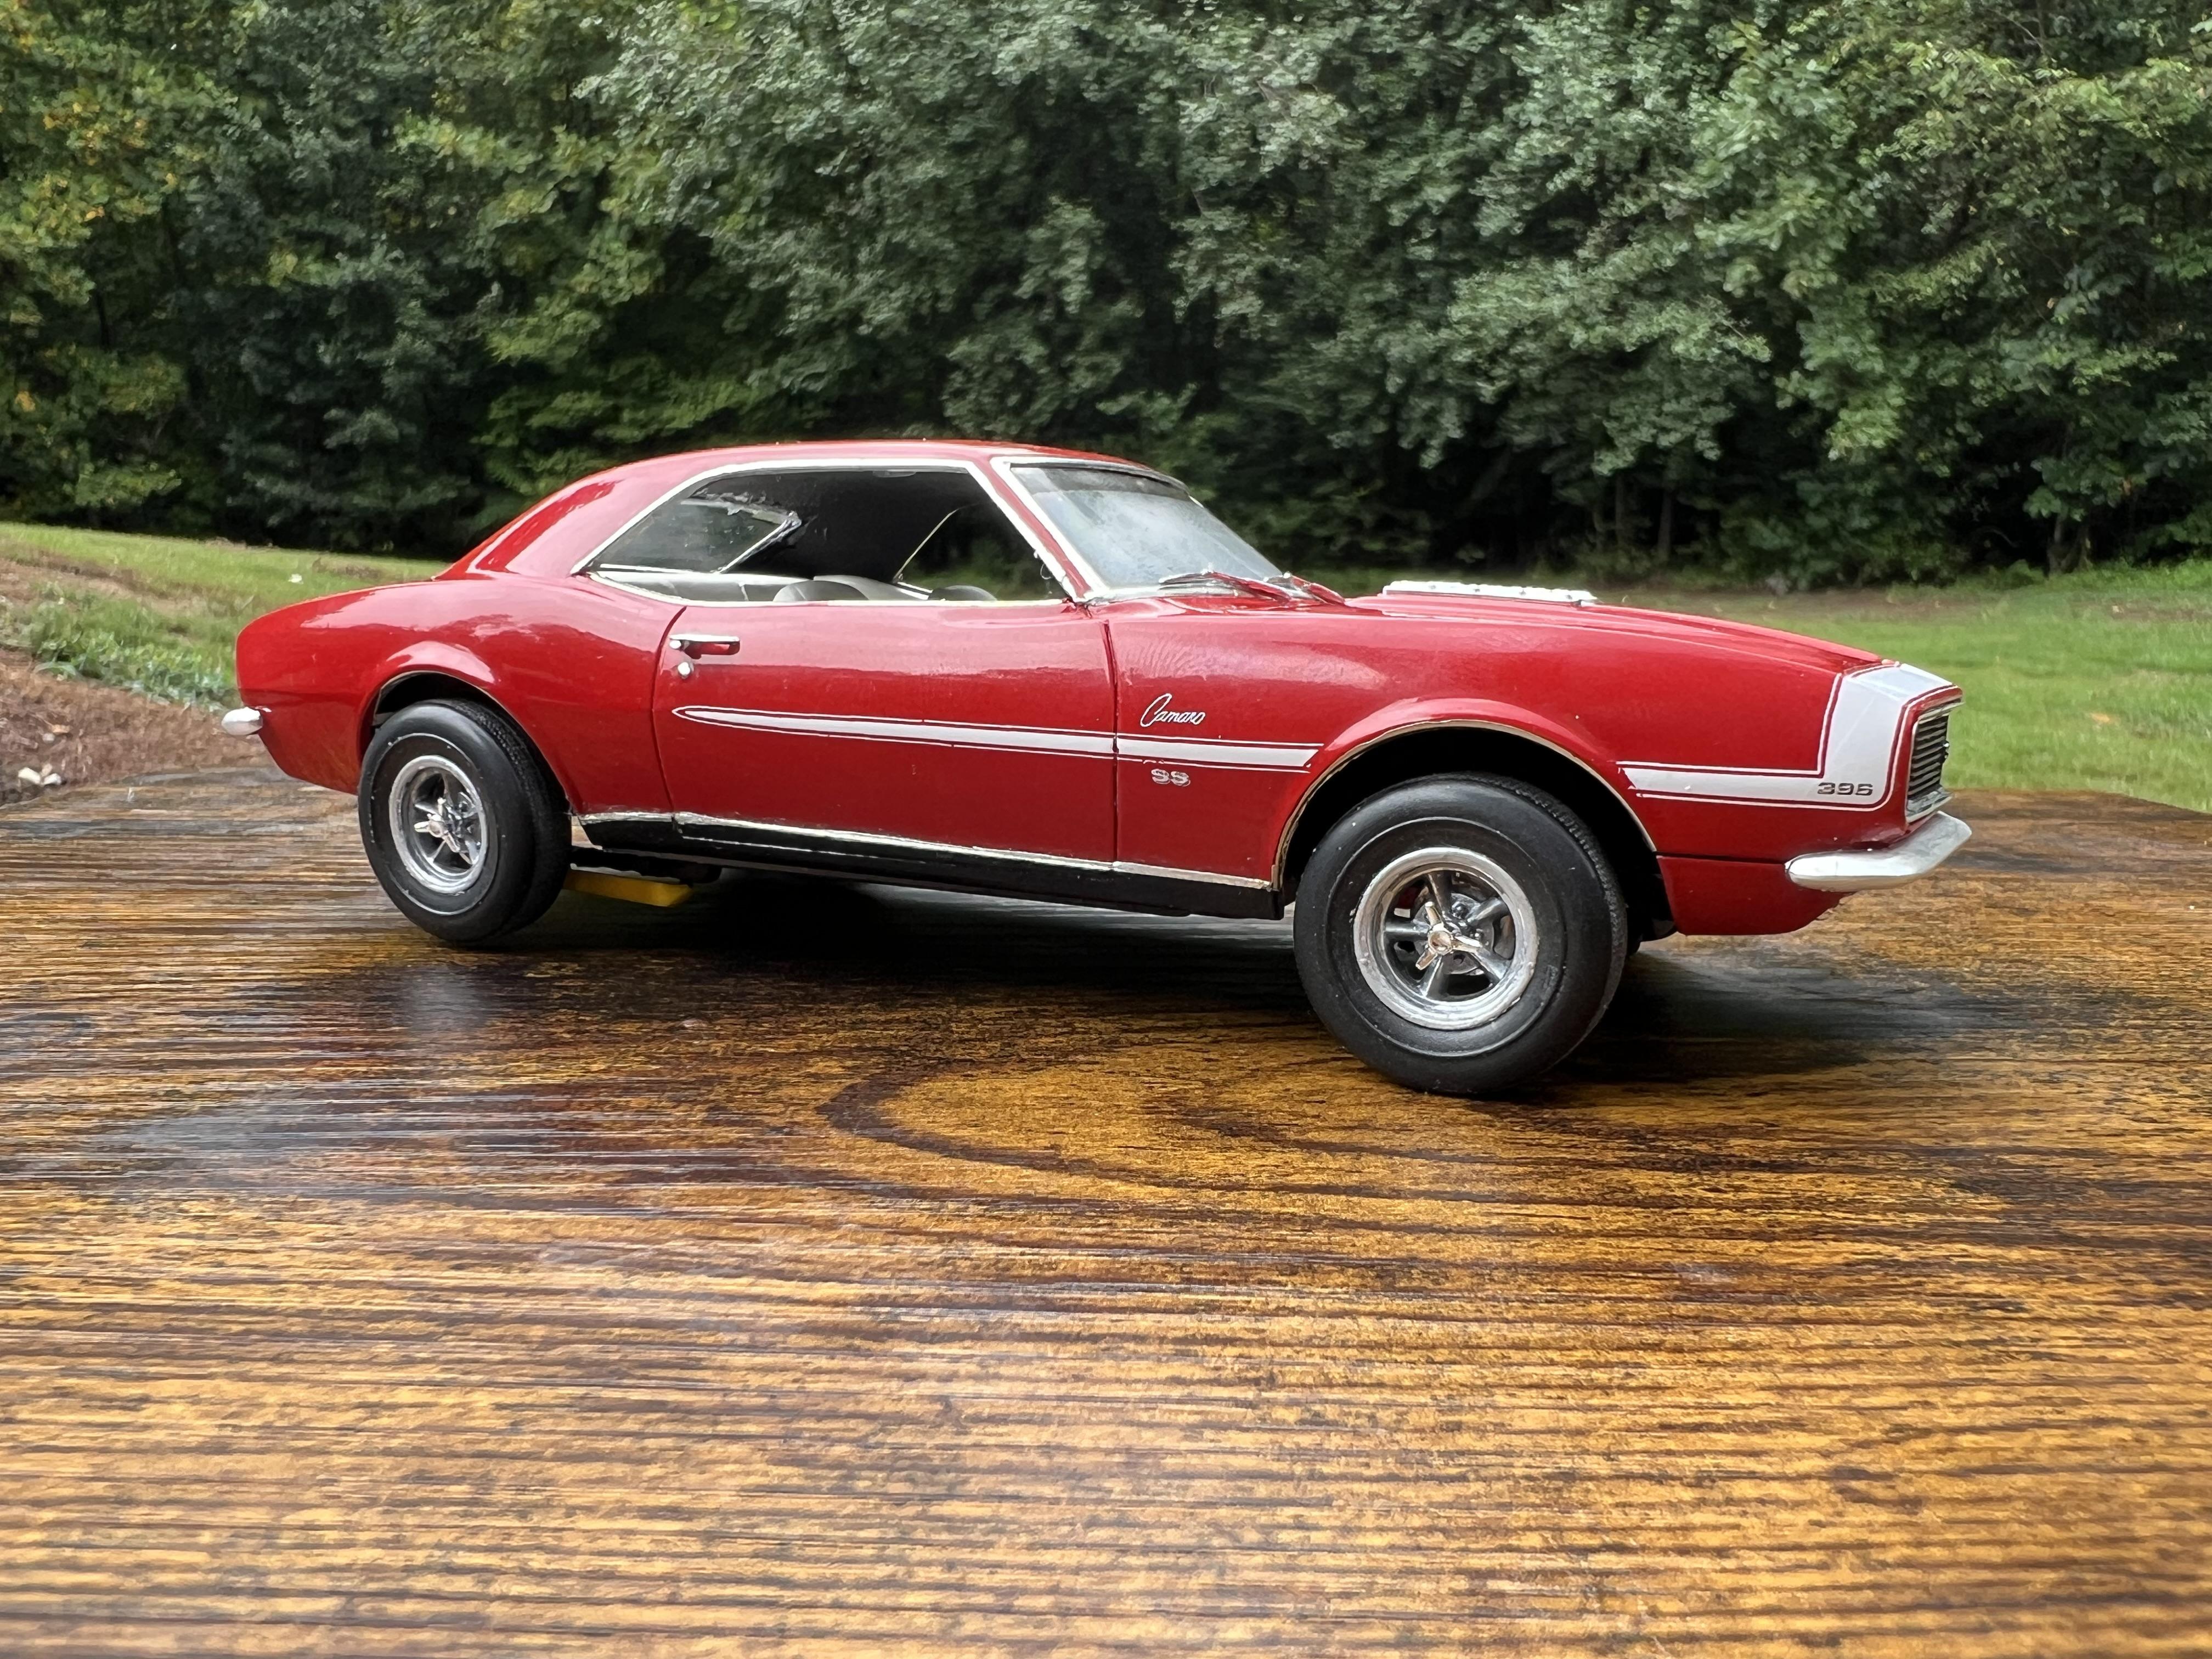
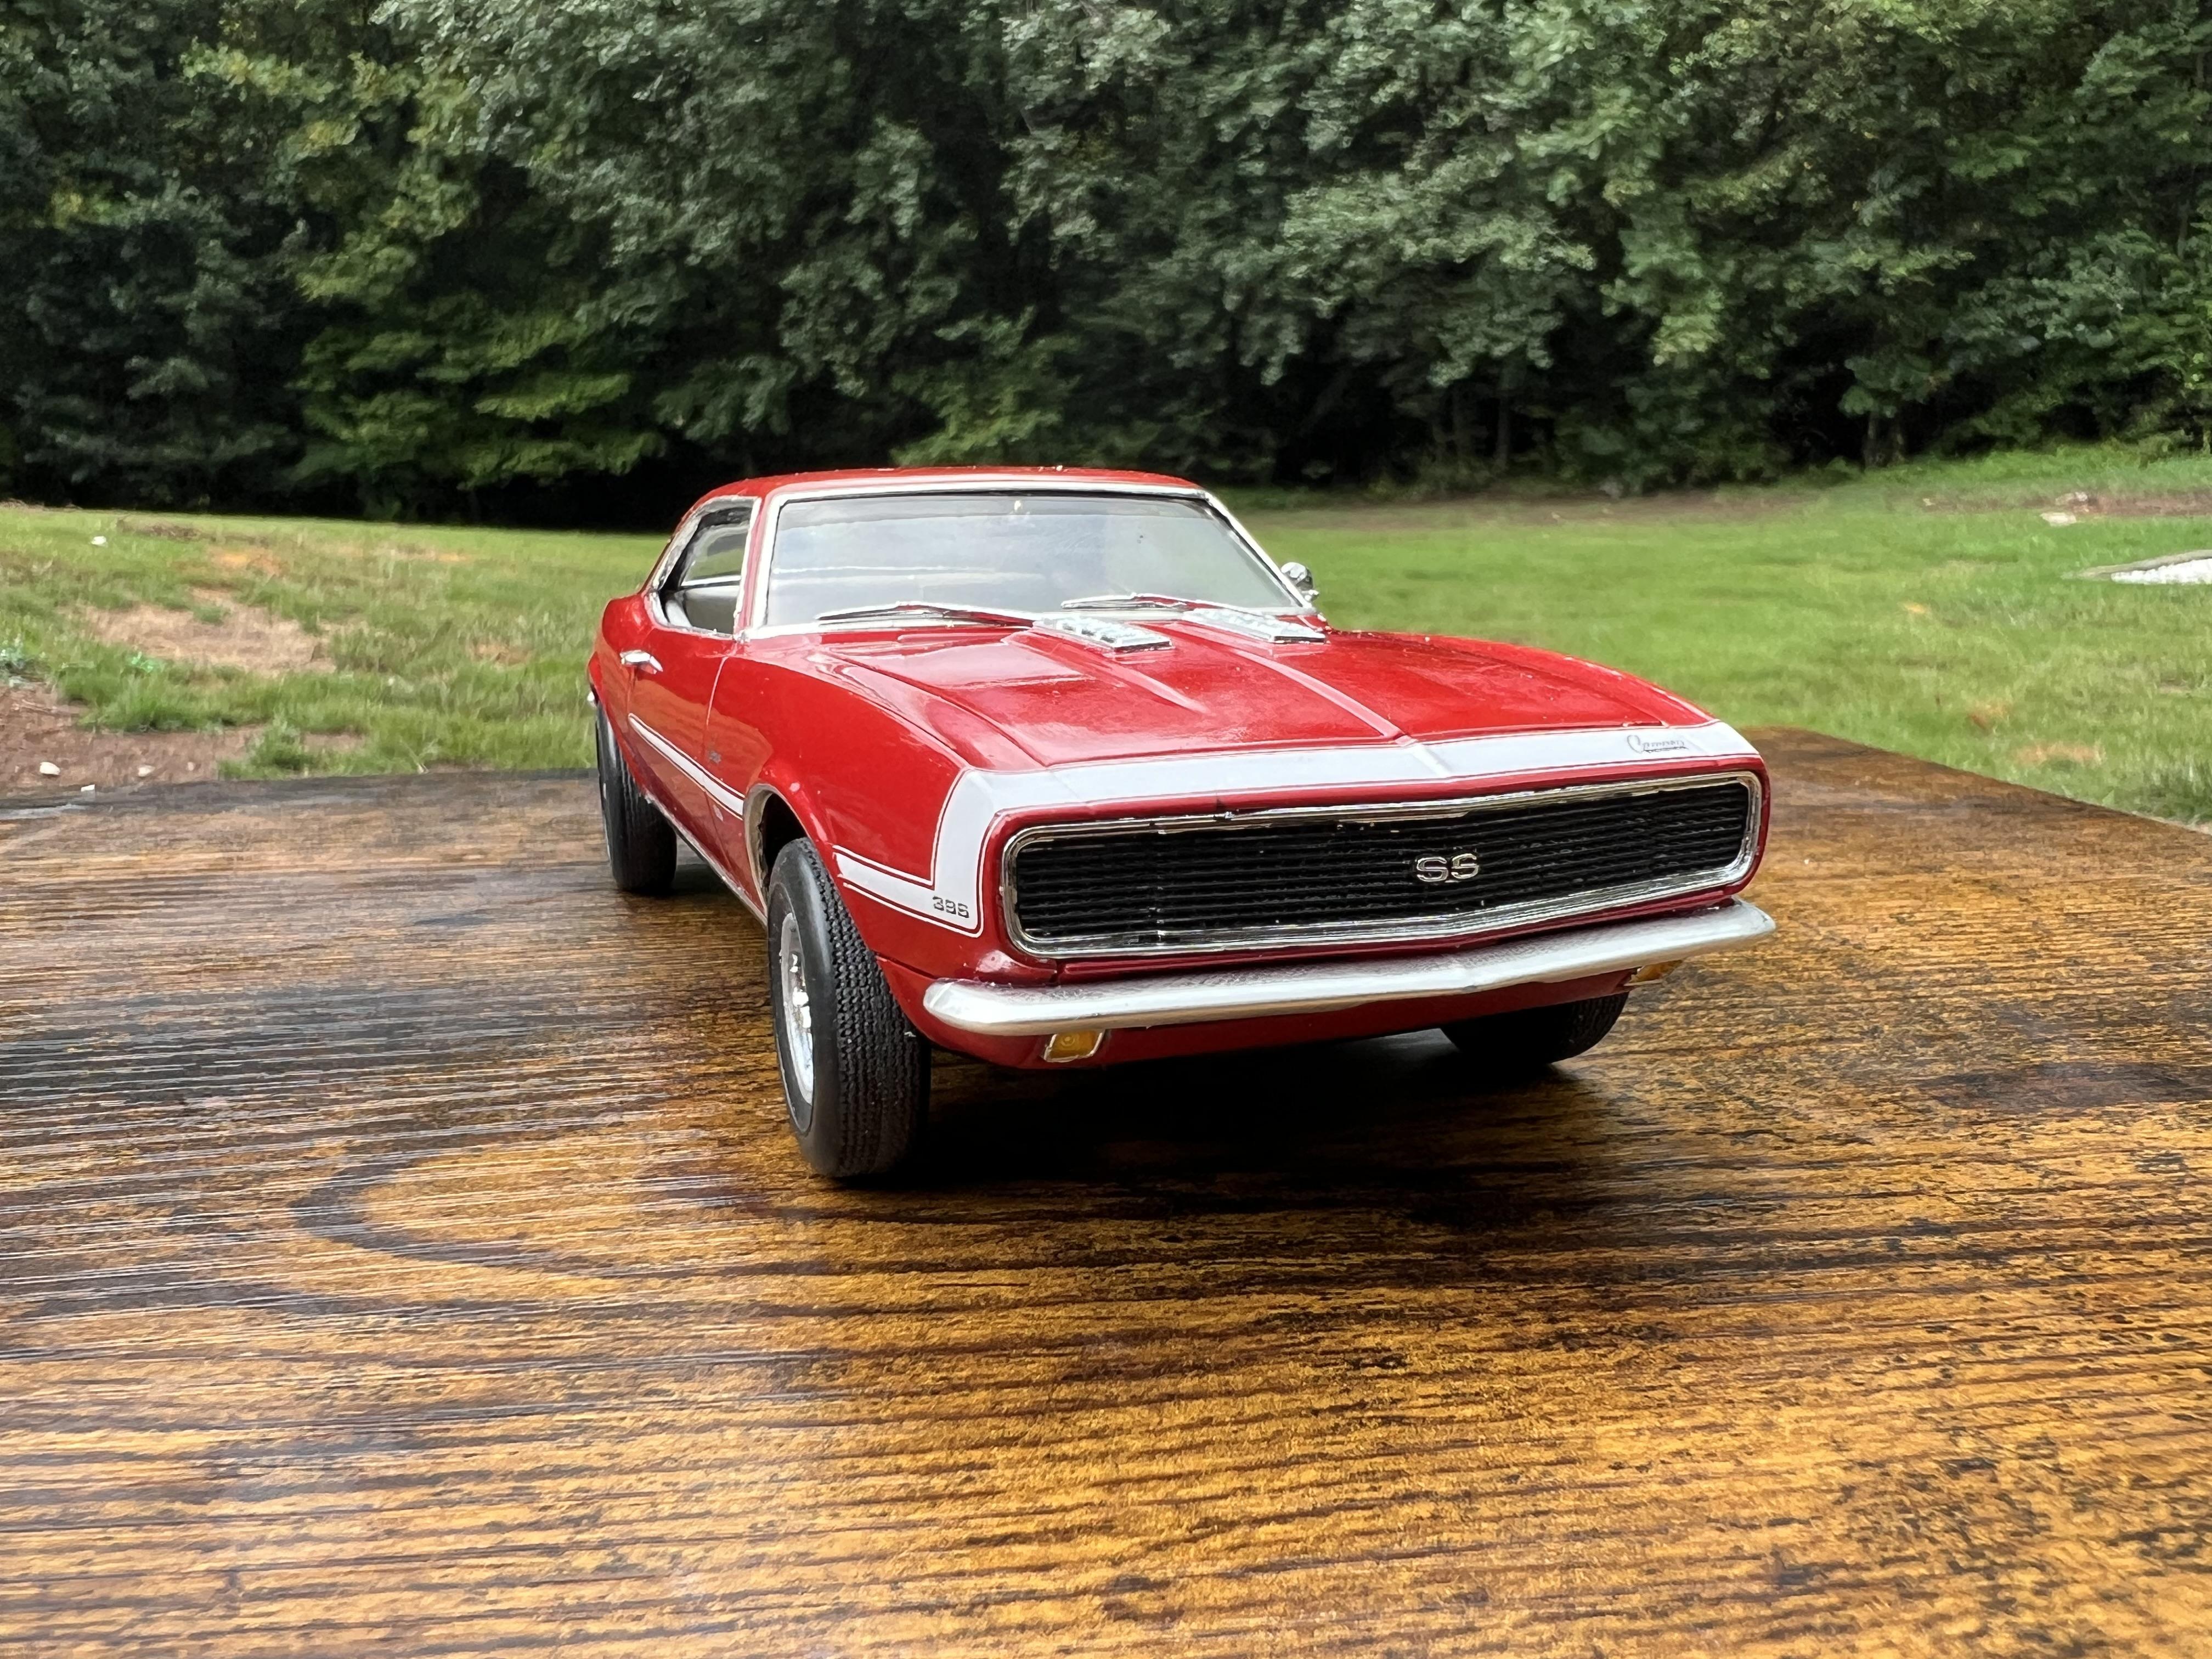
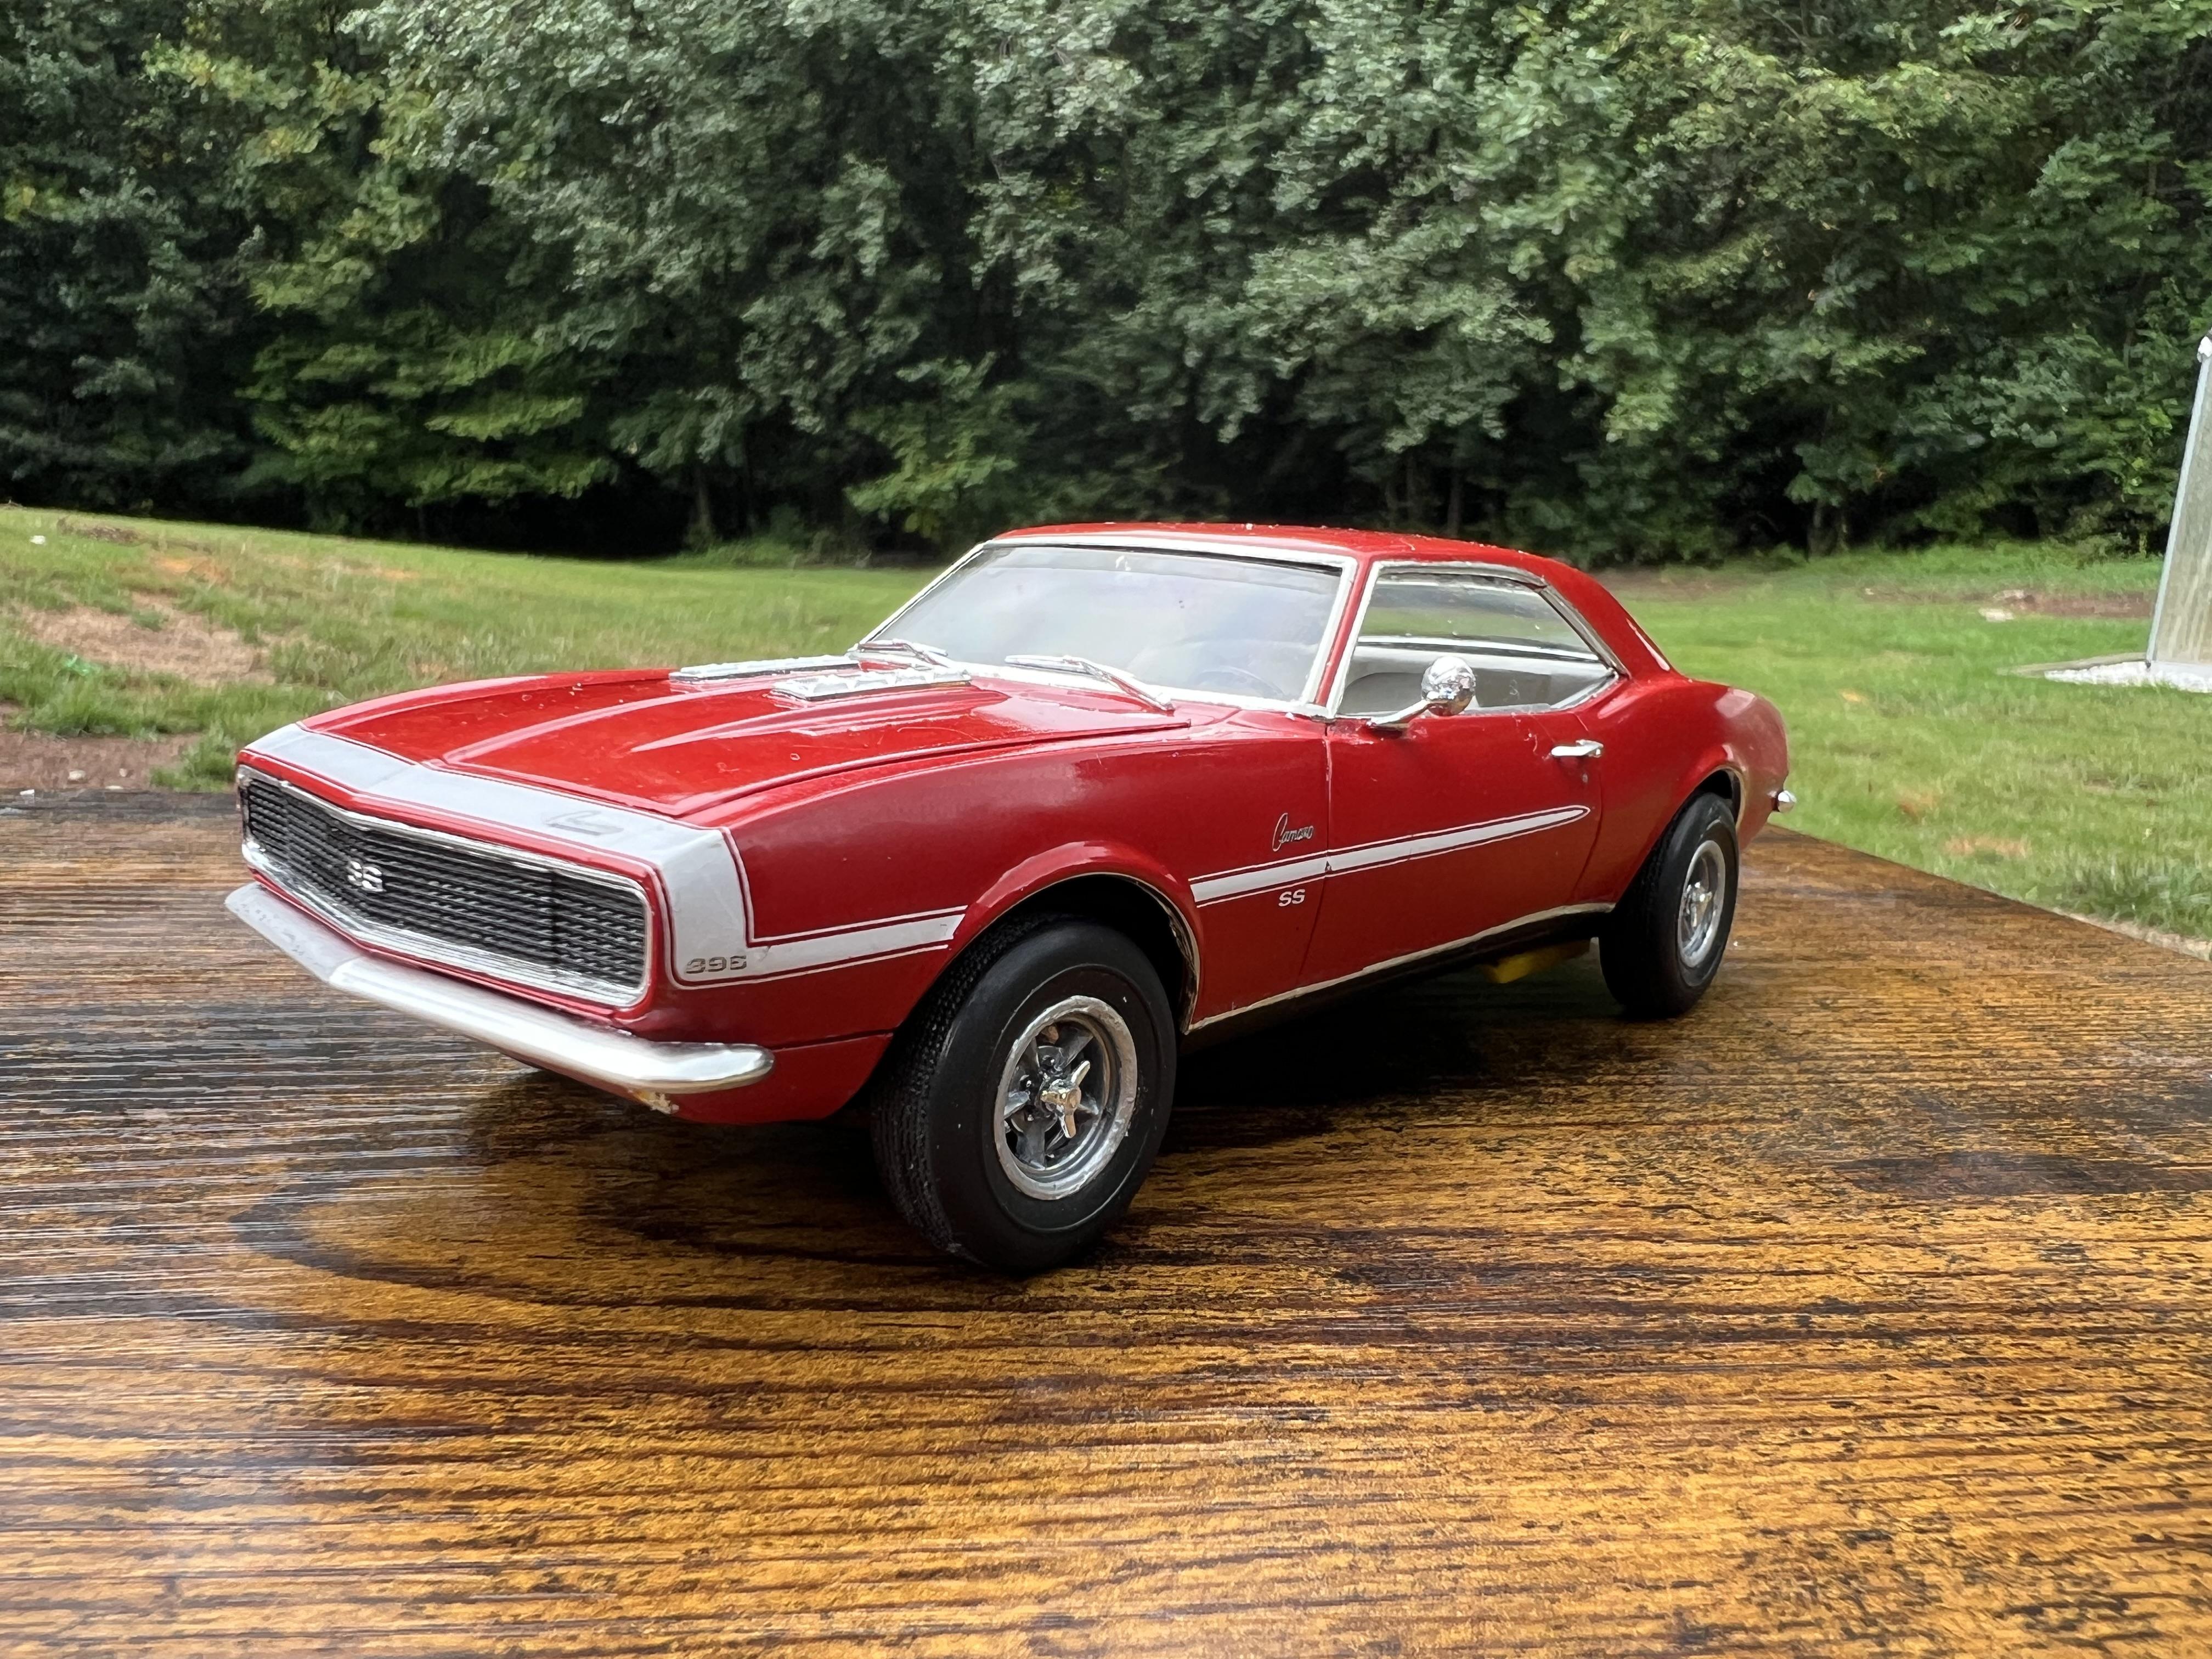
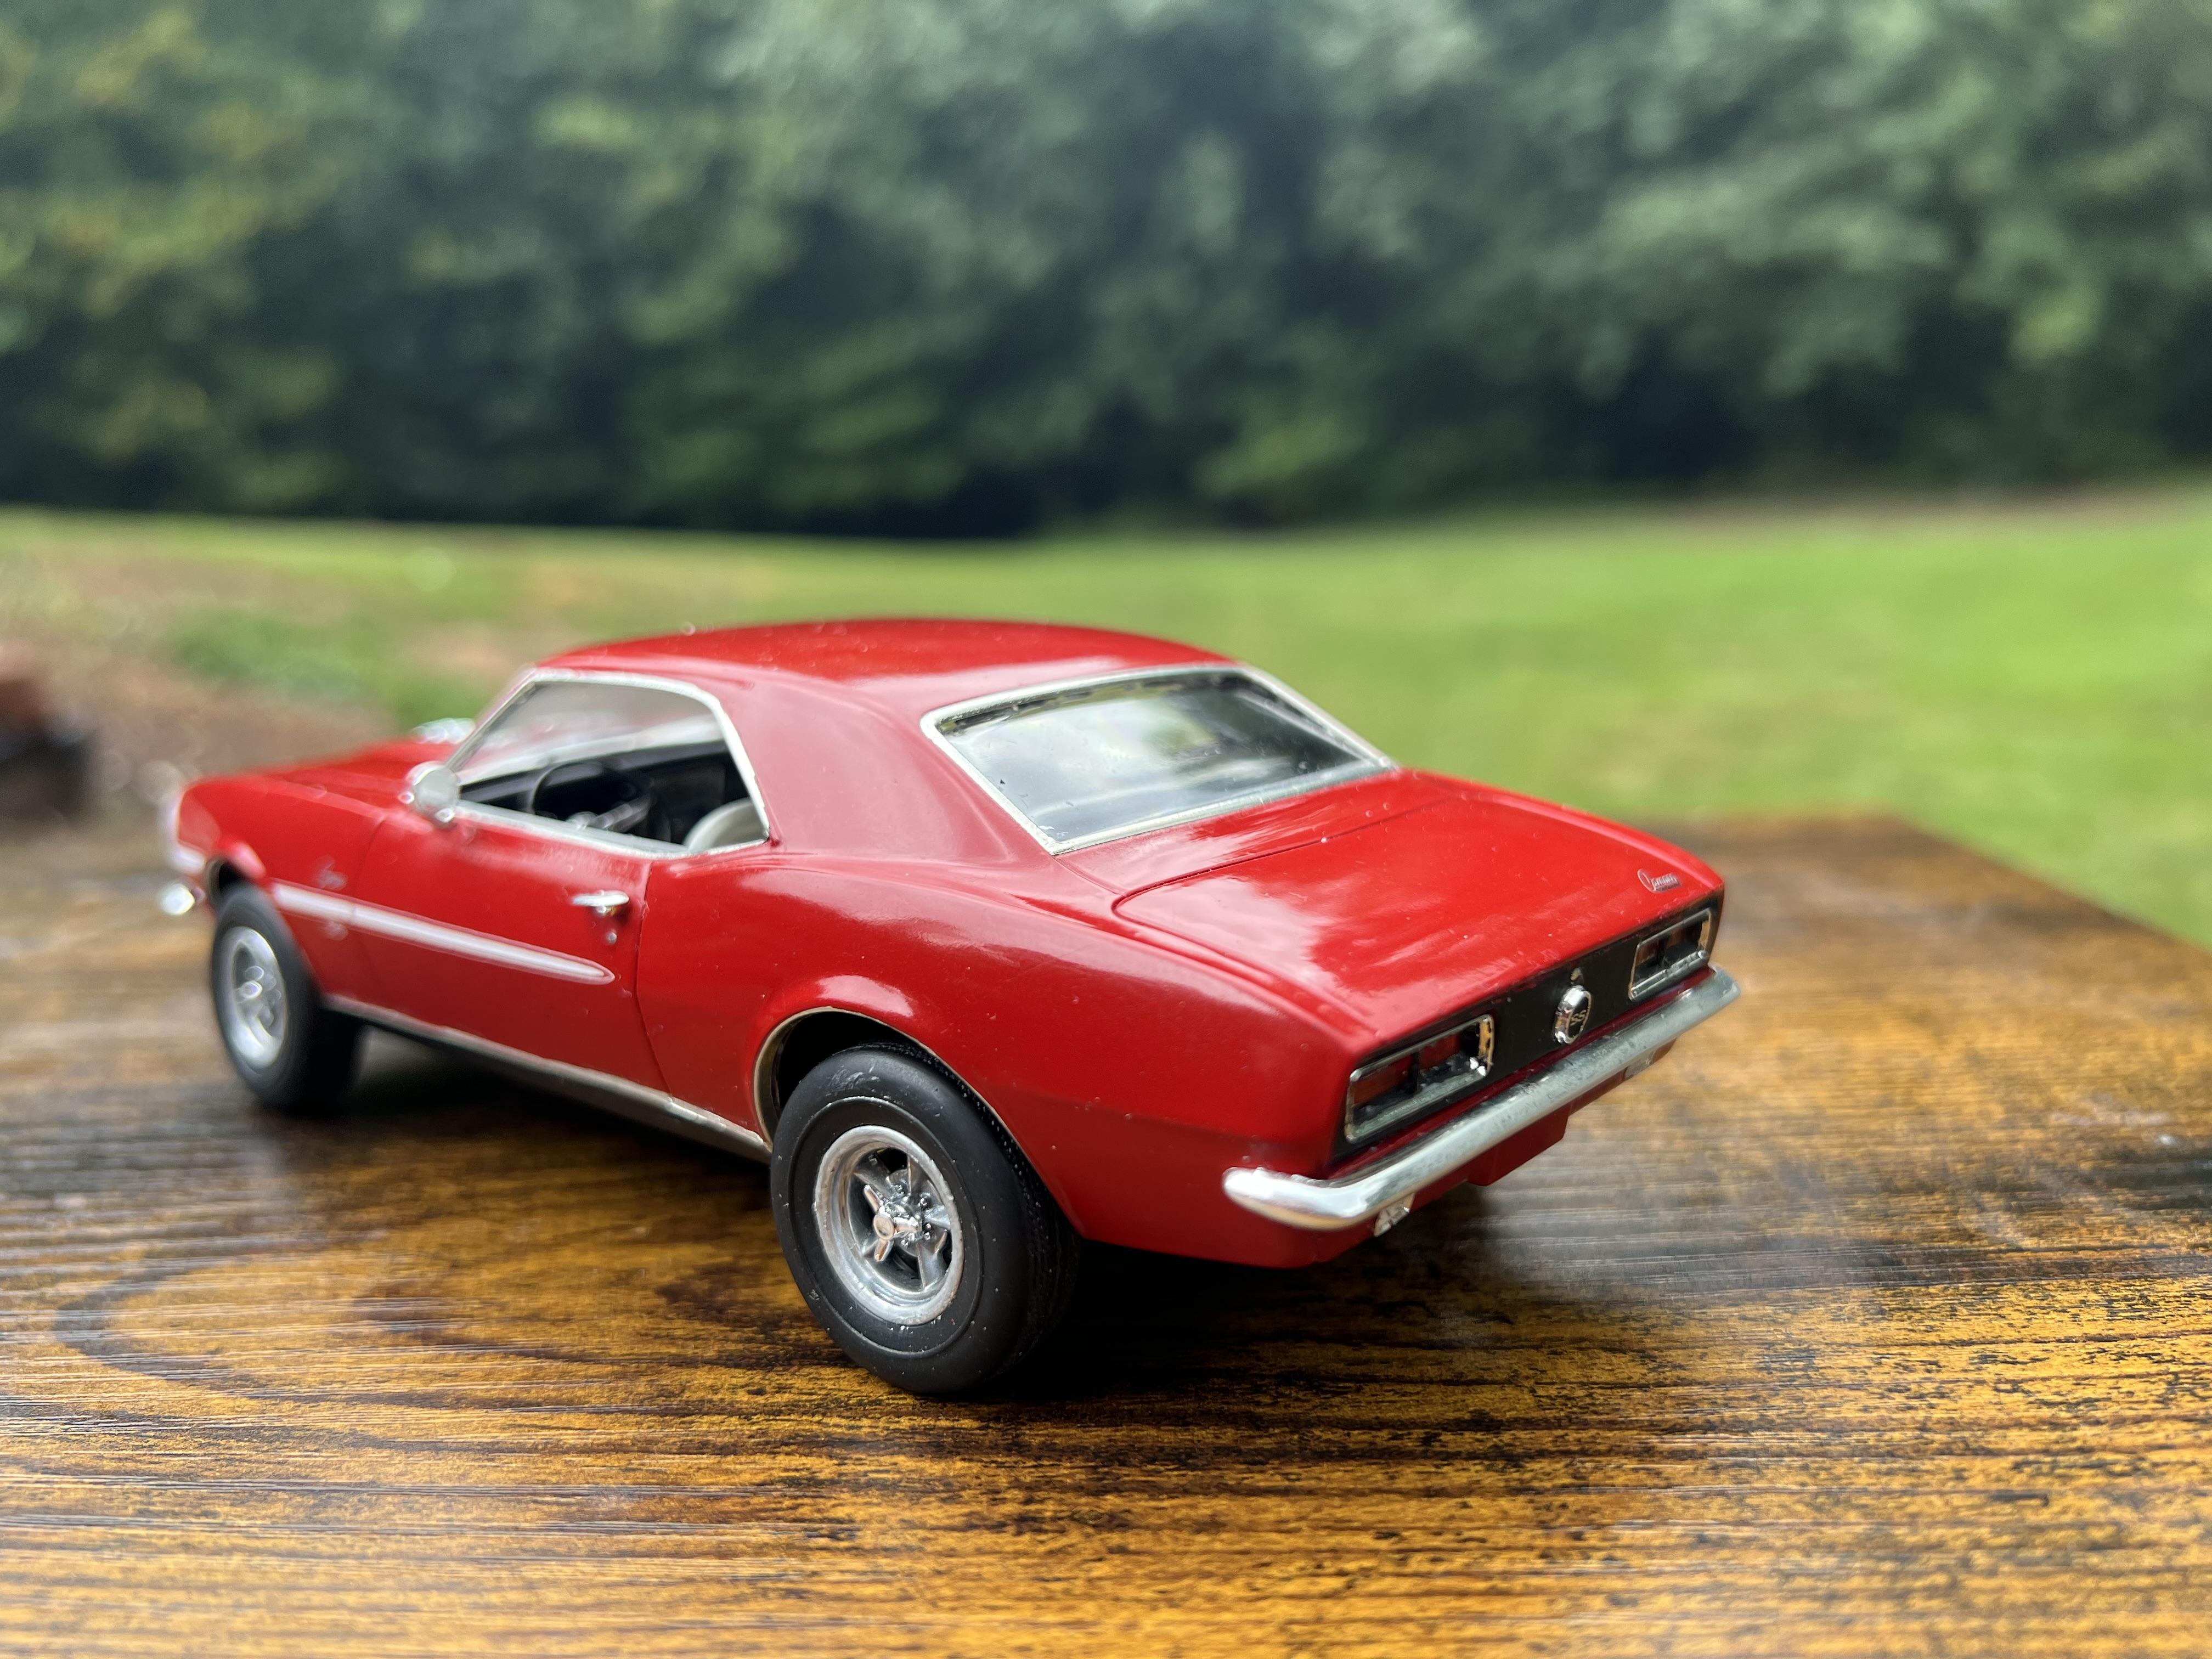
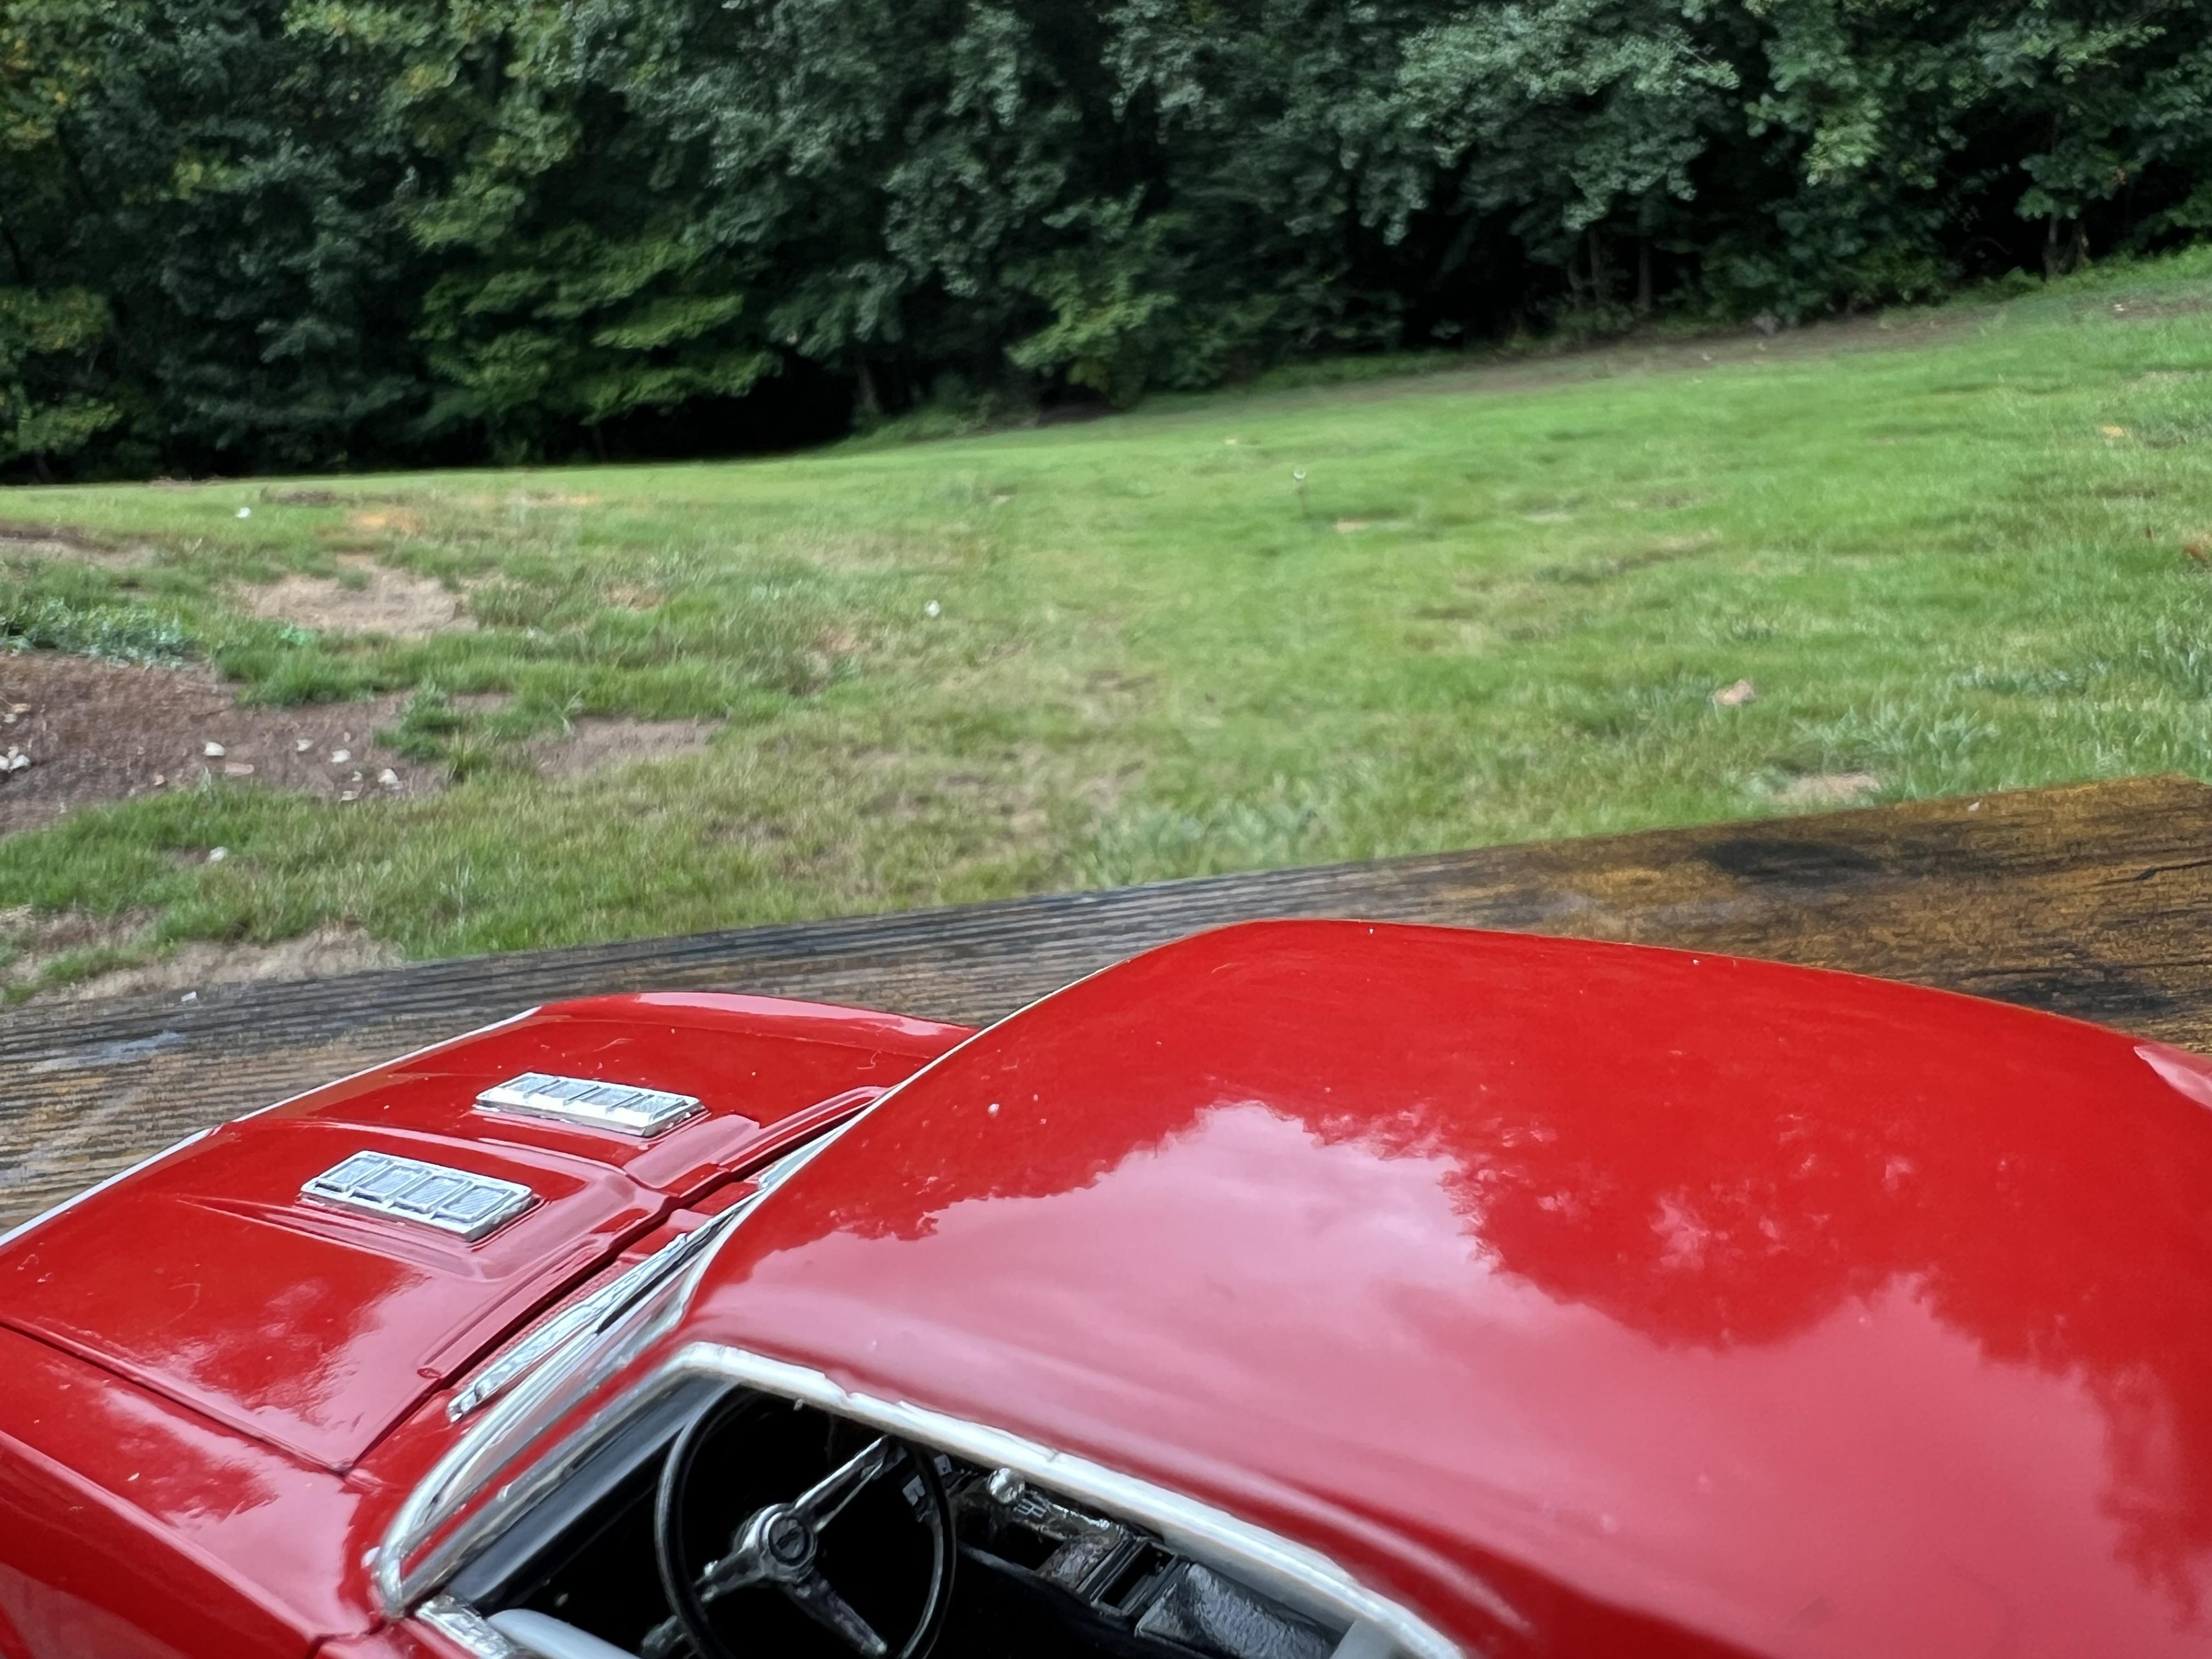
Added photo etch marker lights from Model Car Garage 68-72 Nova kit to properly complete conversion to a 1968 car. Now under glass.

-
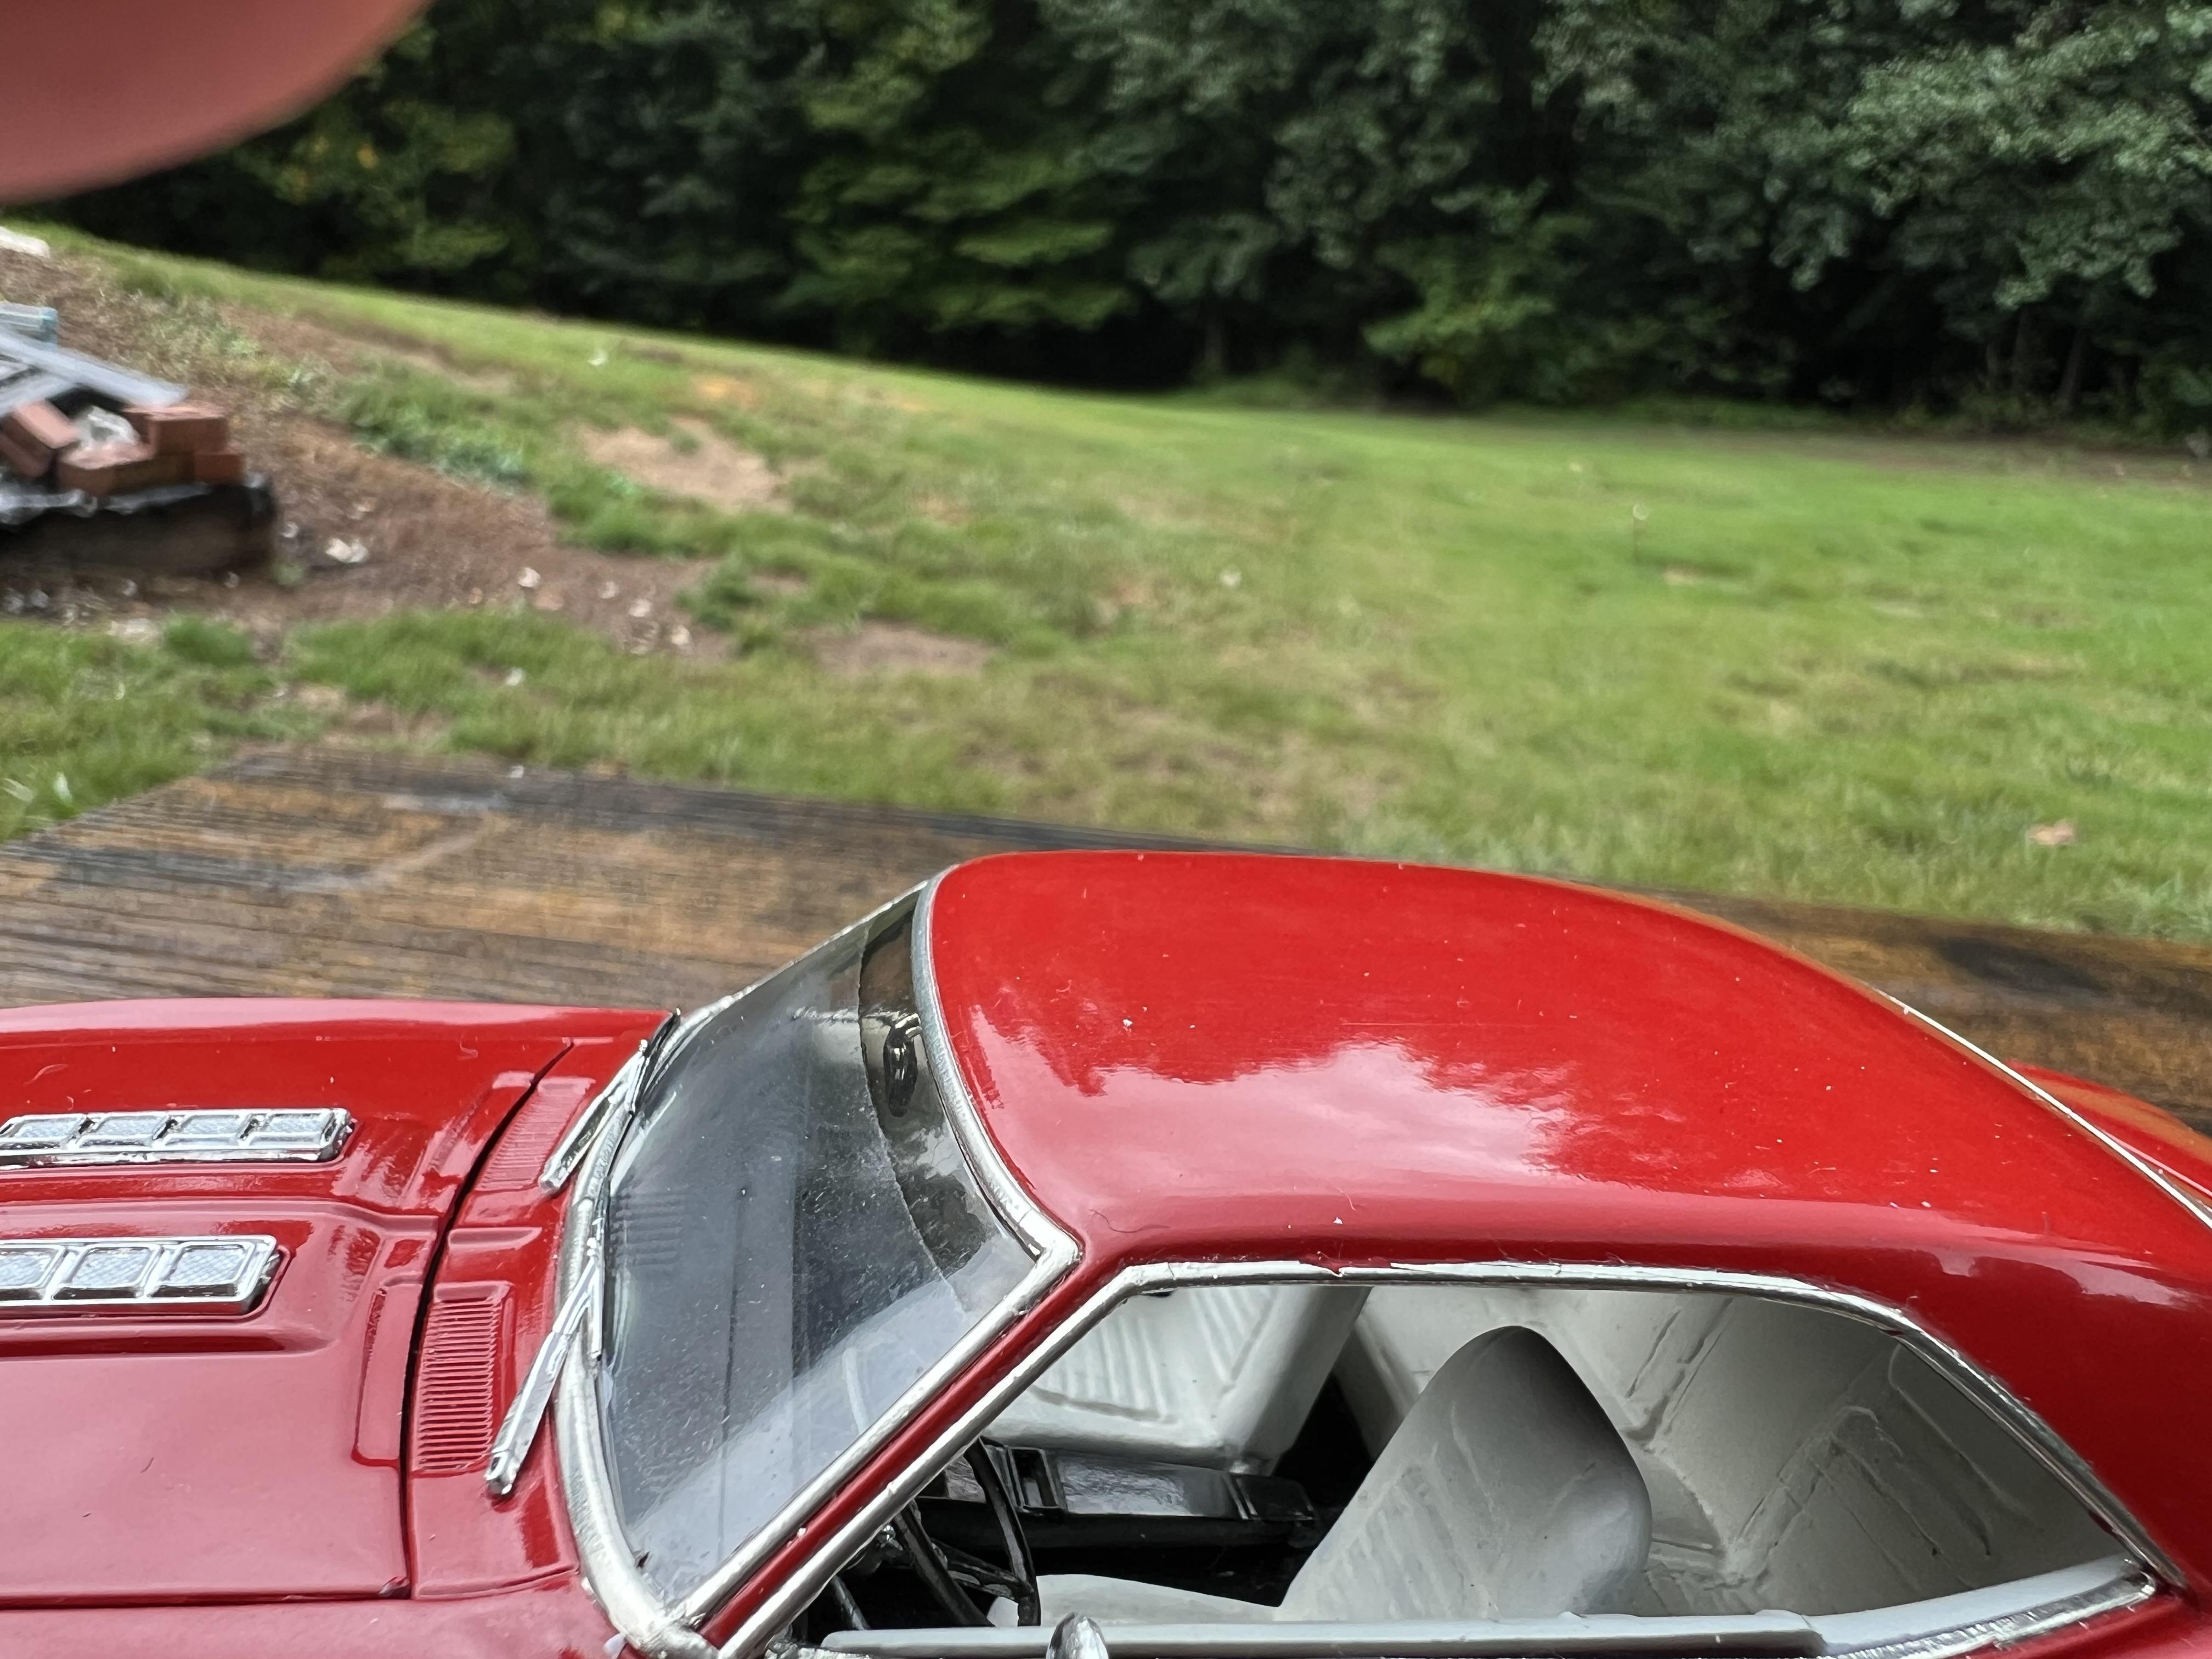
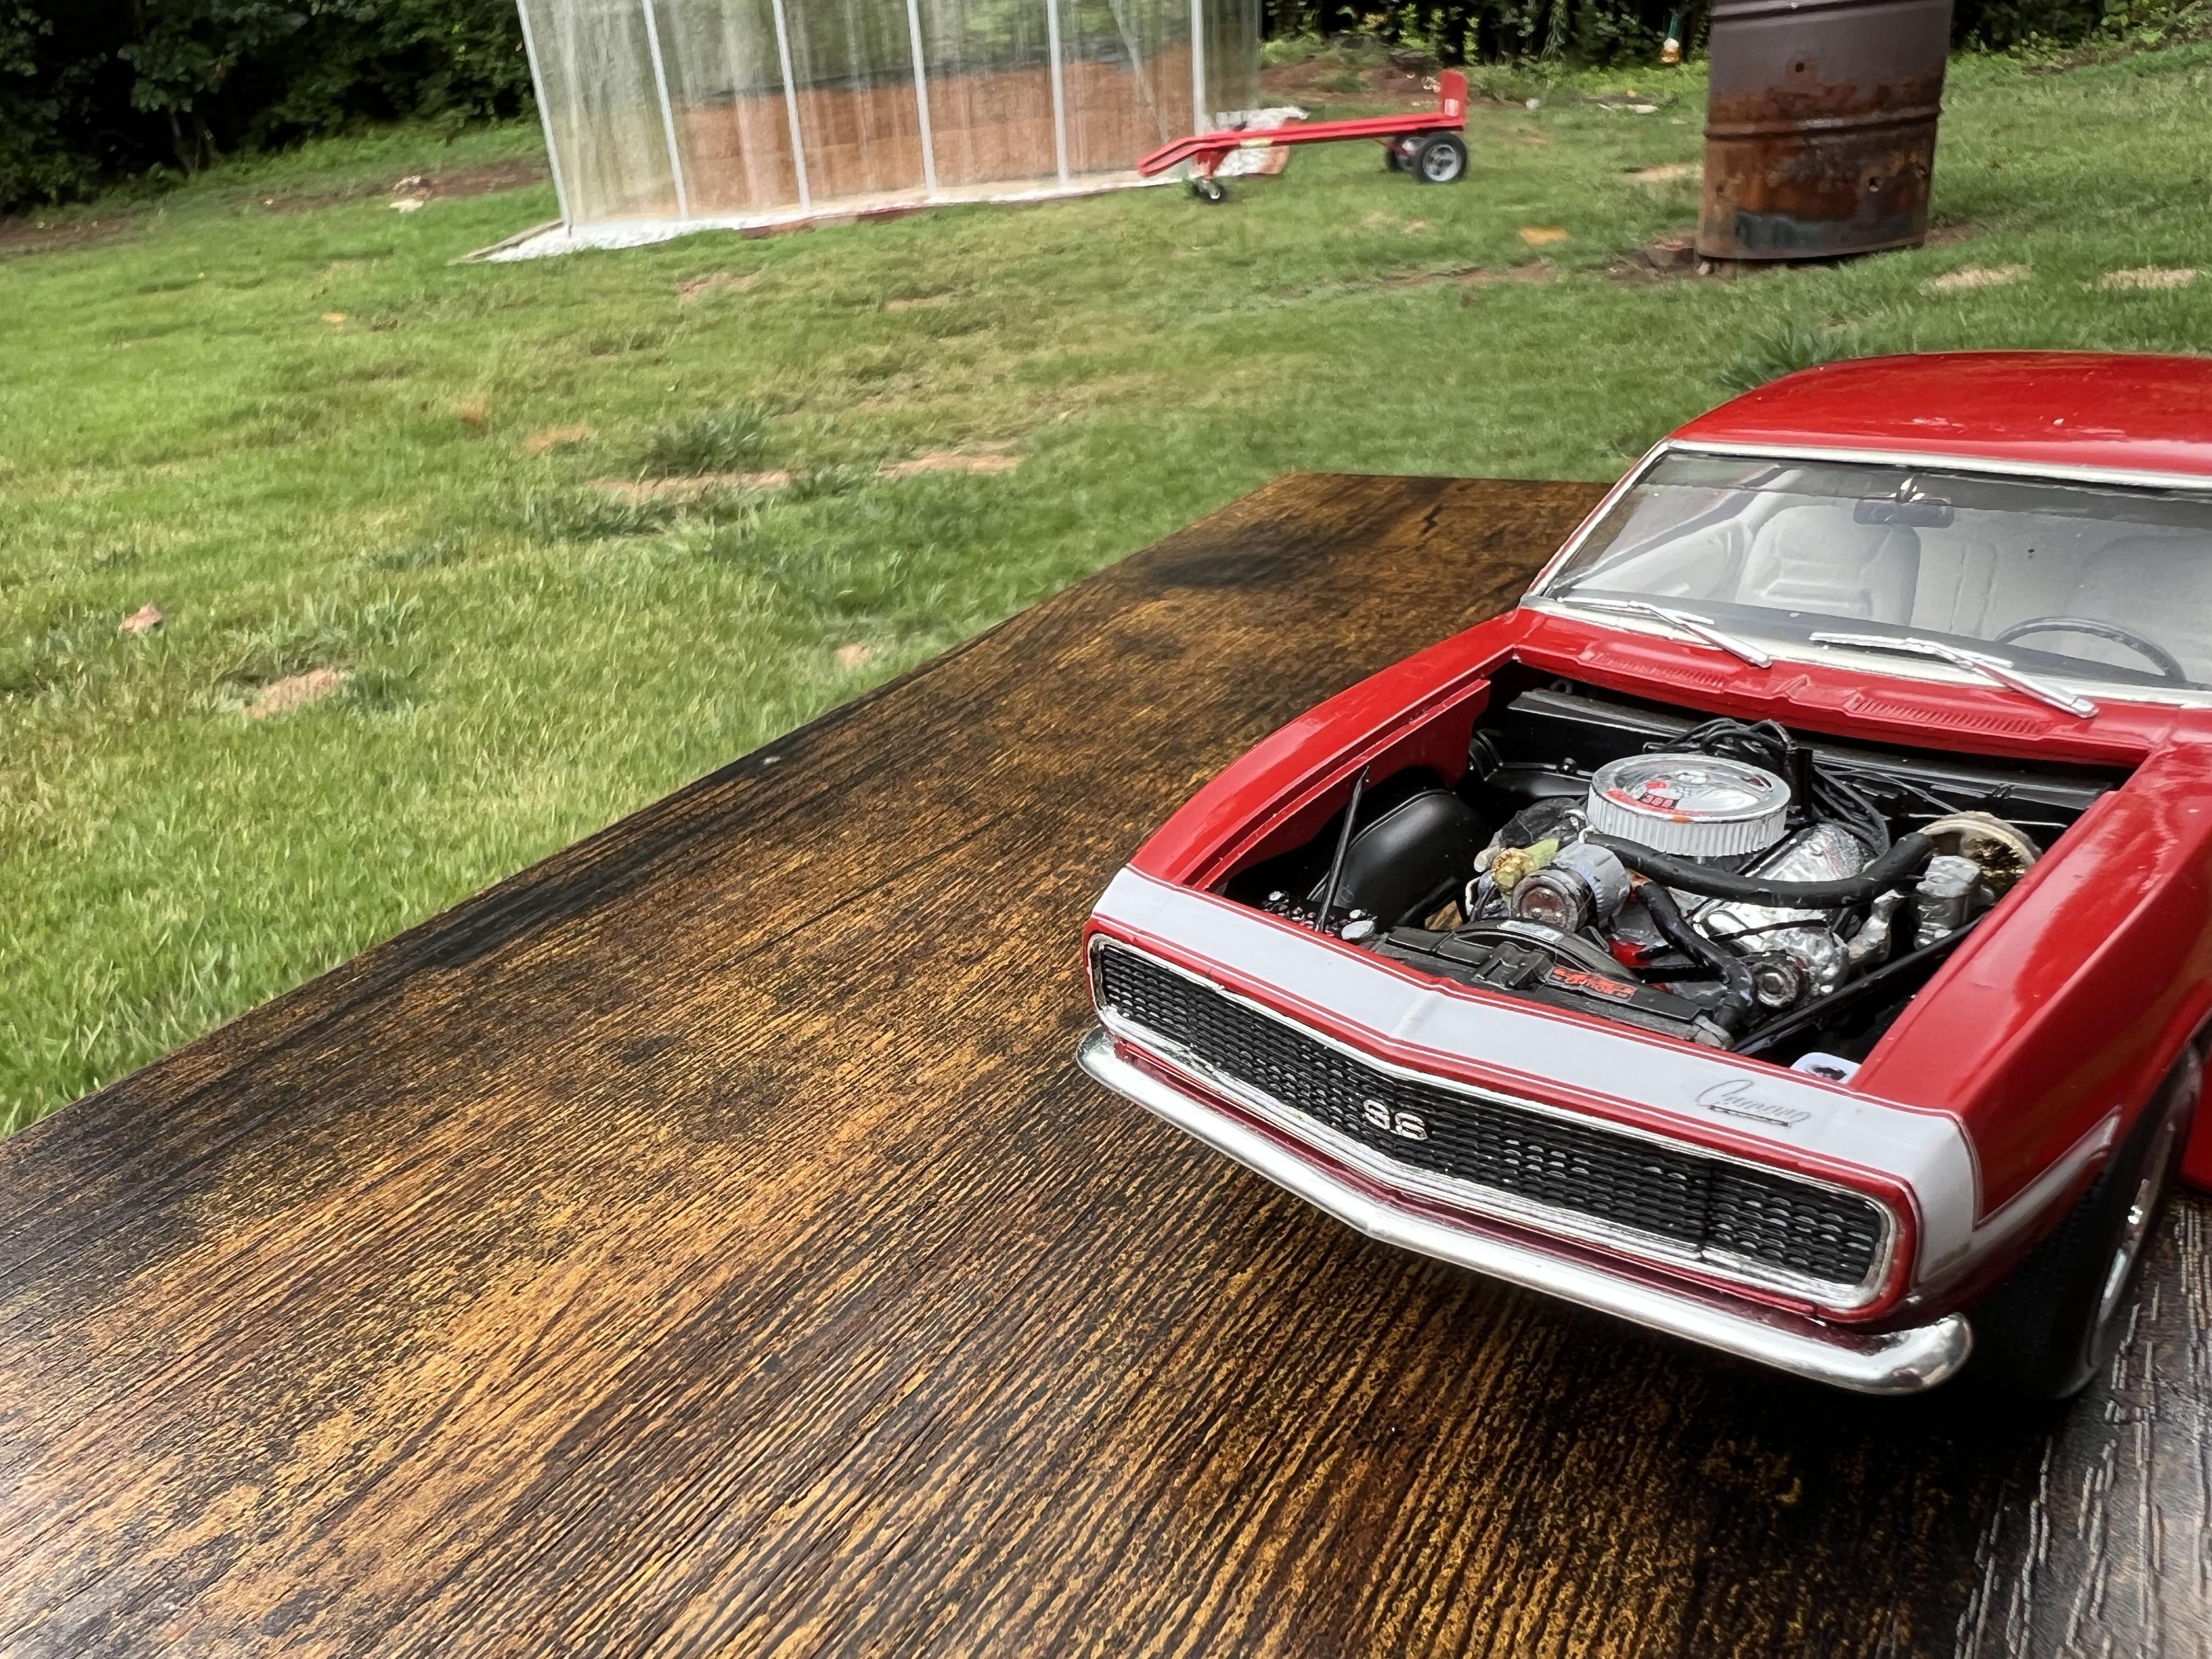
This is a replica of the car my father special ordered in 68, done as the very next day after delivery. He immediately installed traction bars and Torq Thrusts, that was it until warranty ran out, then he modded it for street racing. The car was 375hp L89 ( aluminum head) 396, Muncie M22 4 speed, 4:10 posi, ivory/ black deluxe interior, manual steering, power disc brakes. This was built from the 67 Revell Nickey kit, the Revell 67 Camaro SS kit, the Monogram 69 Camaro Pace car for interior panels, along with scratch building. The typical Revell Camaro slanted tail lights problem was corrected, the vent windows were eliminated and belt trim scratch built with styrene. I scratch built A.I.R. Tubes, used 70 Corvette LT1 belt setup to properly portray 68 L89 configuration. The paint is MCW 1968 Chevy Matador Red with White Sport Stripes from Keith Marks.
-
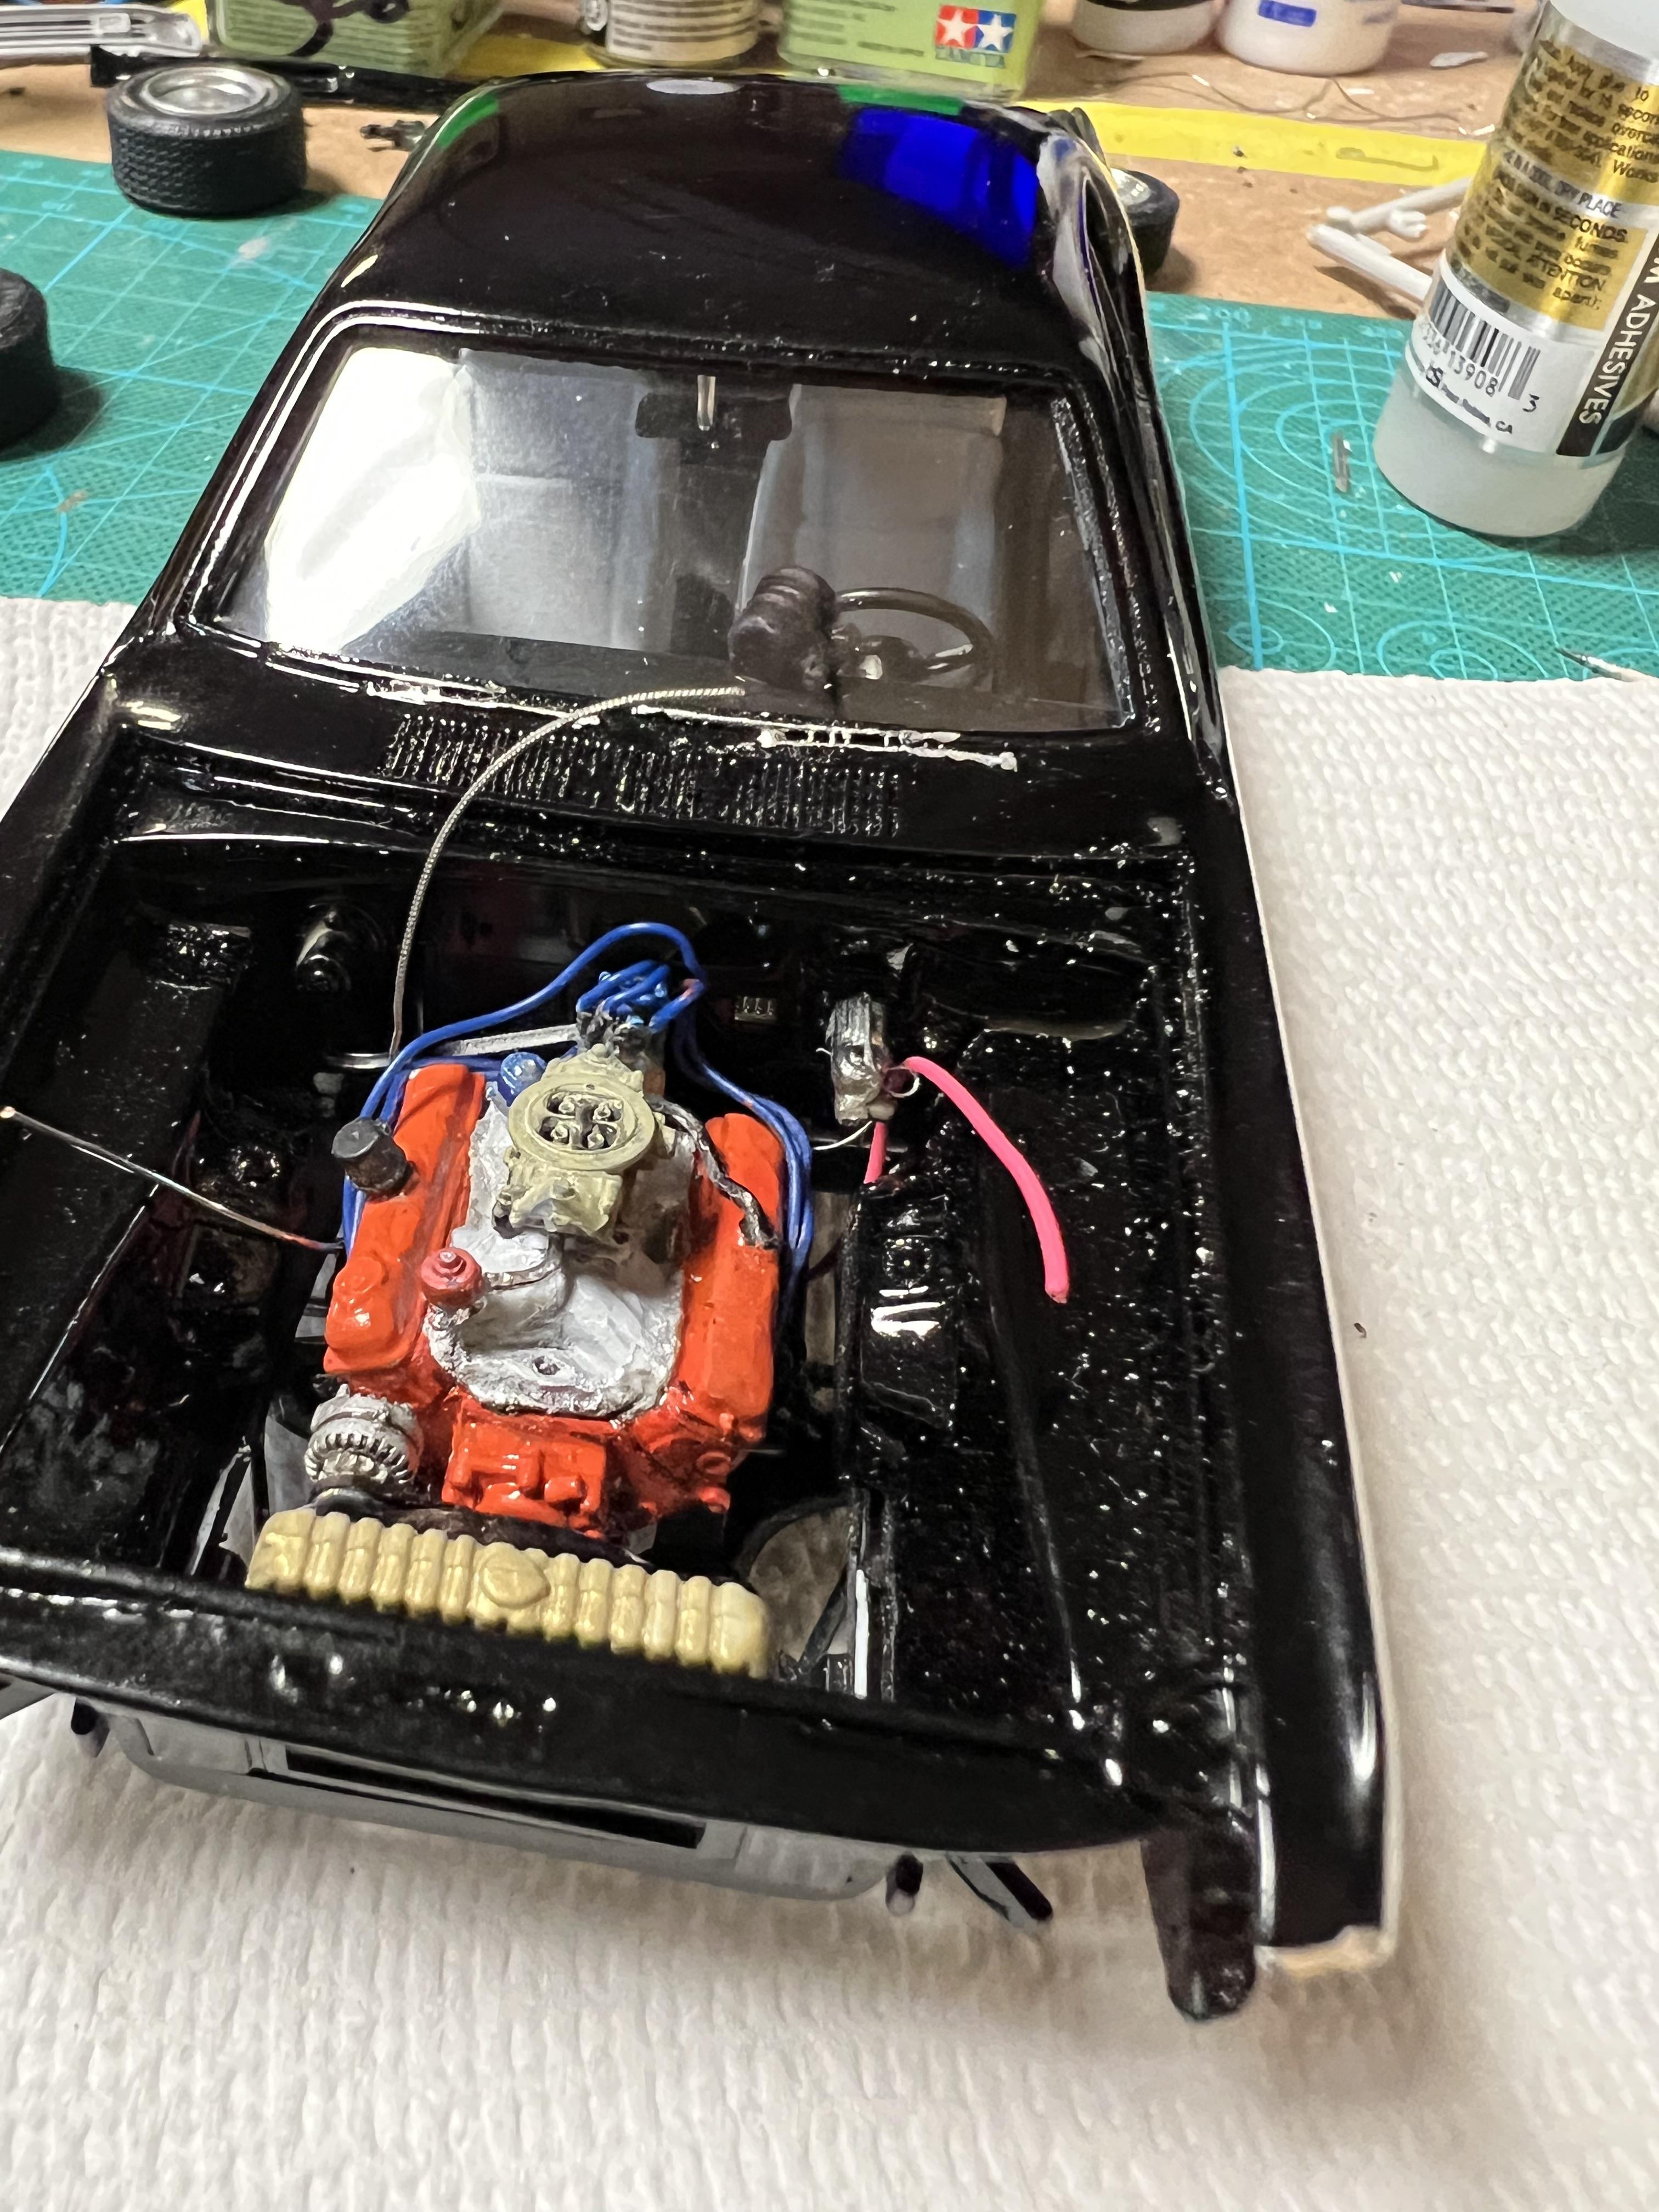
Engine/ front subframe now married to chassis
-
I’m looking forward to the paint work on this one, Scott! Following!