Scott Eriksen
-
Posts
1,219 -
Joined
-
Last visited
Content Type
Profiles
Forums
Events
Gallery
Everything posted by Scott Eriksen
-
Dick Landy 1968 Coronet decals
Scott Eriksen replied to GMP440's topic in Car Aftermarket / Resin / 3D Printed
Slixx did the 64-65 cars and there's the decals from the Revell Landy Charger I think thats as close as your gonna get
-
Finished her up today
-
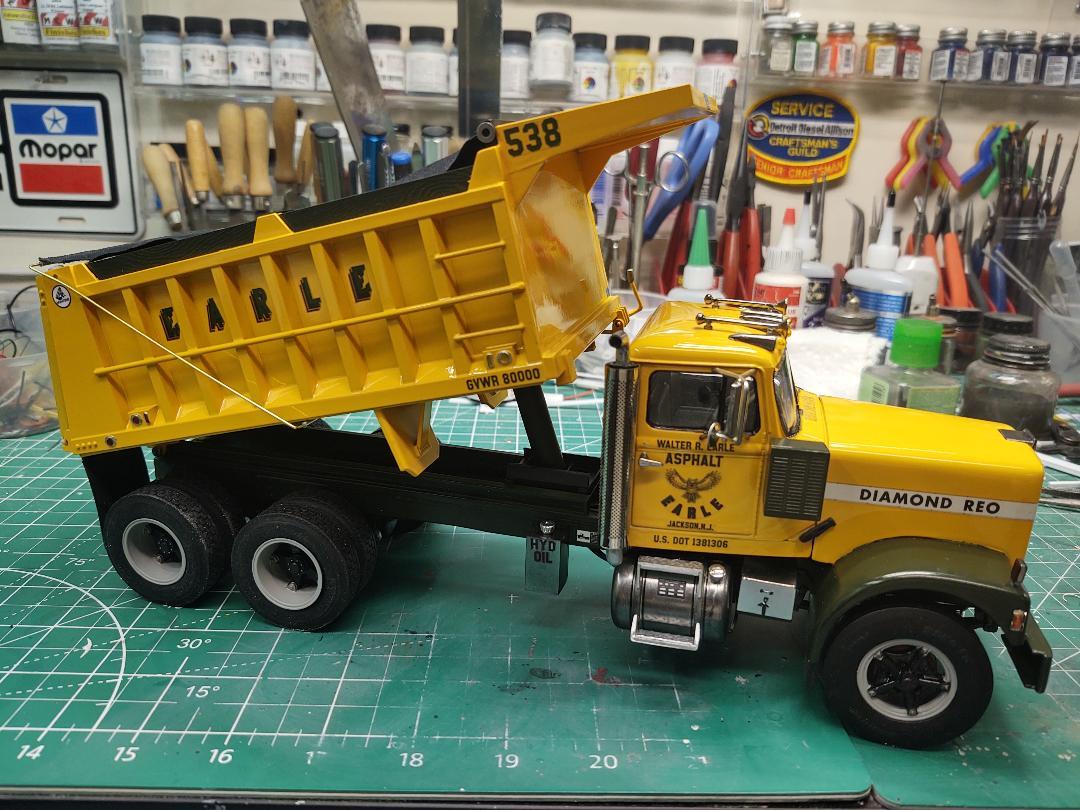
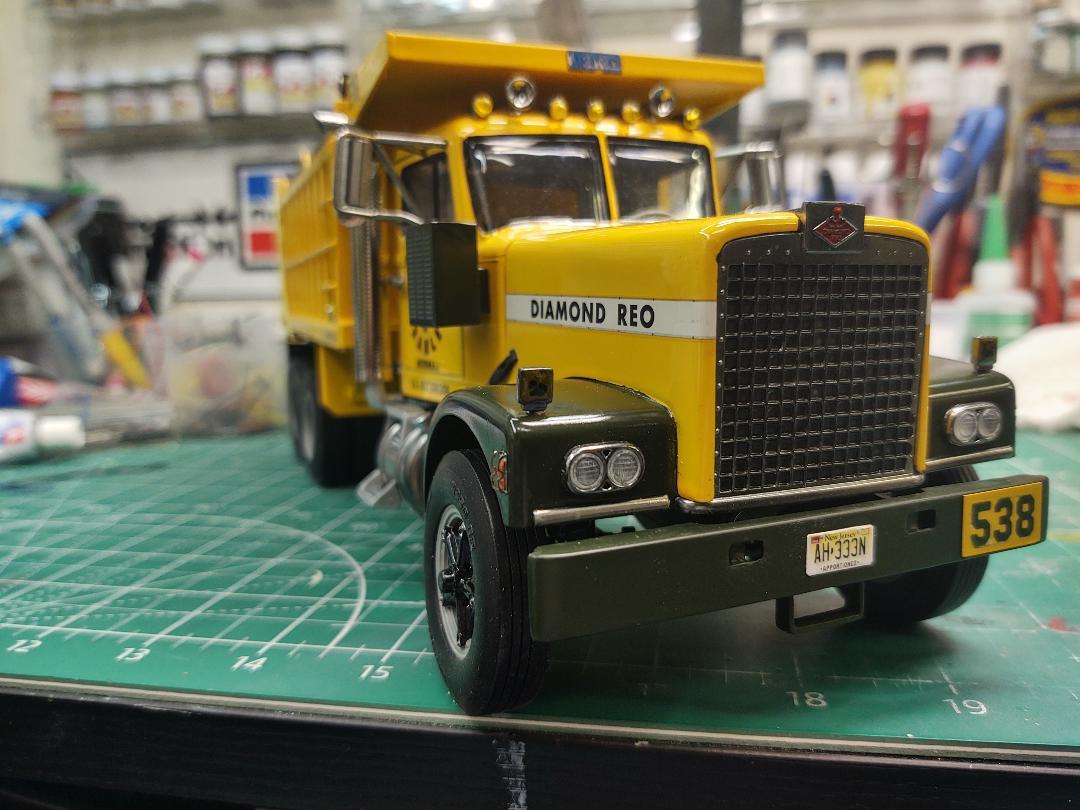
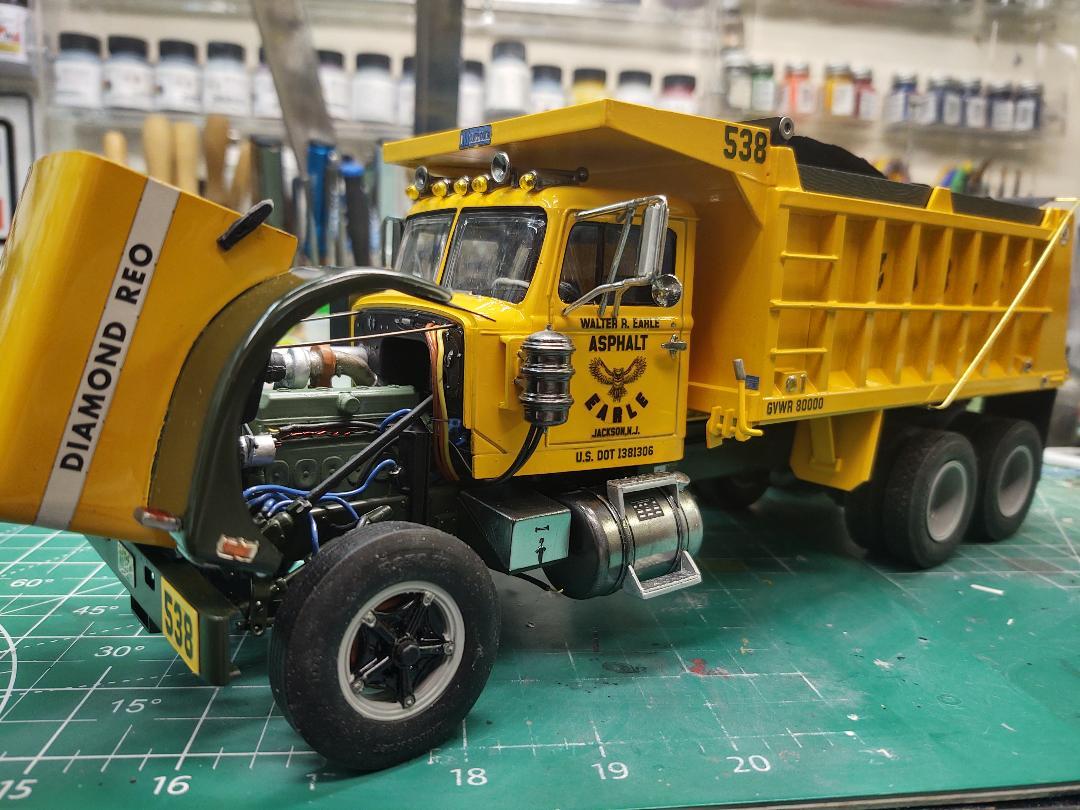
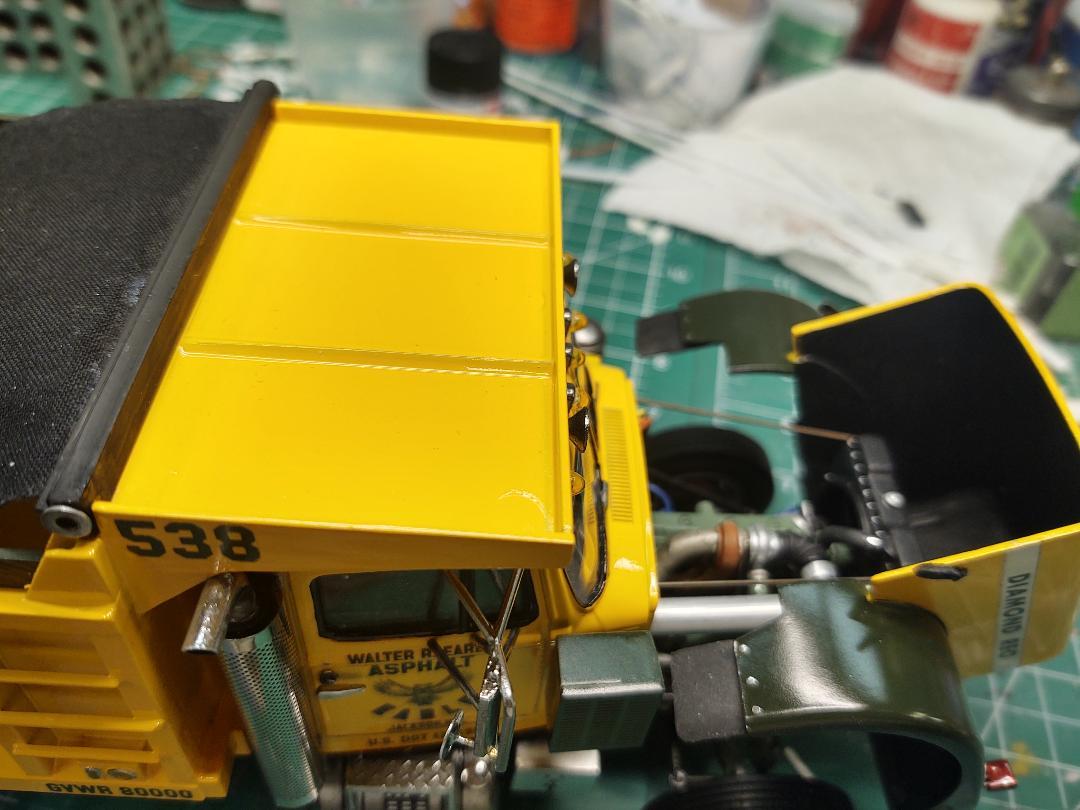
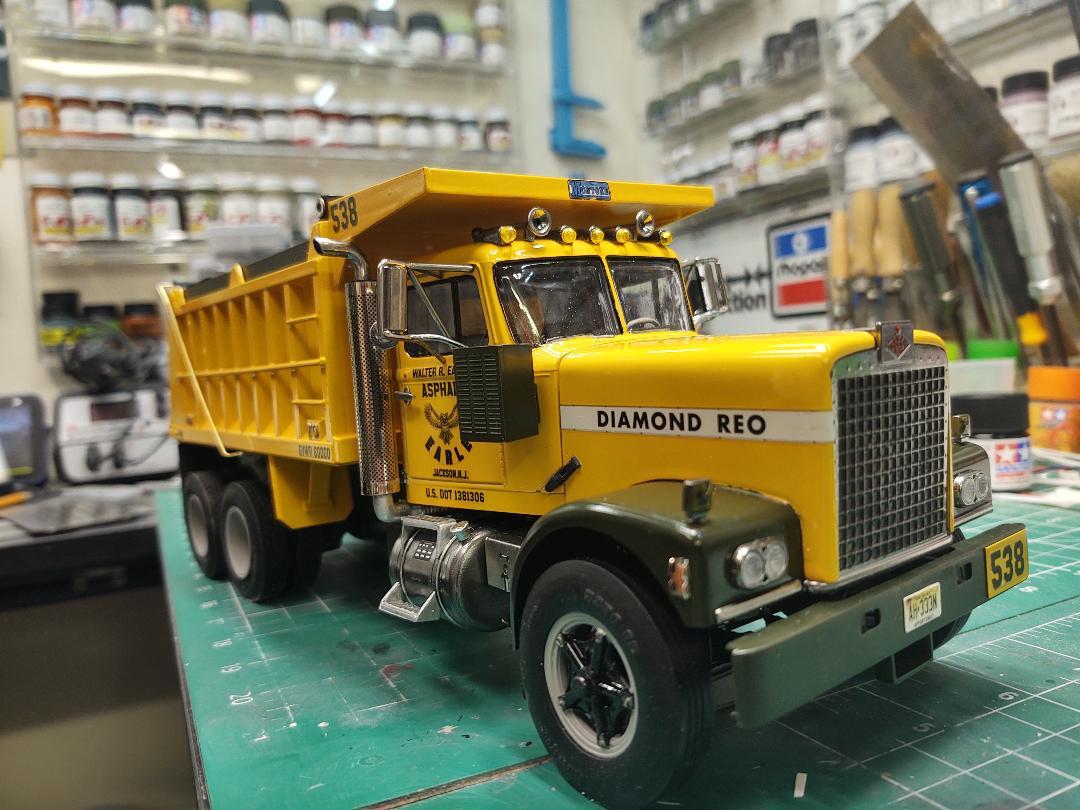
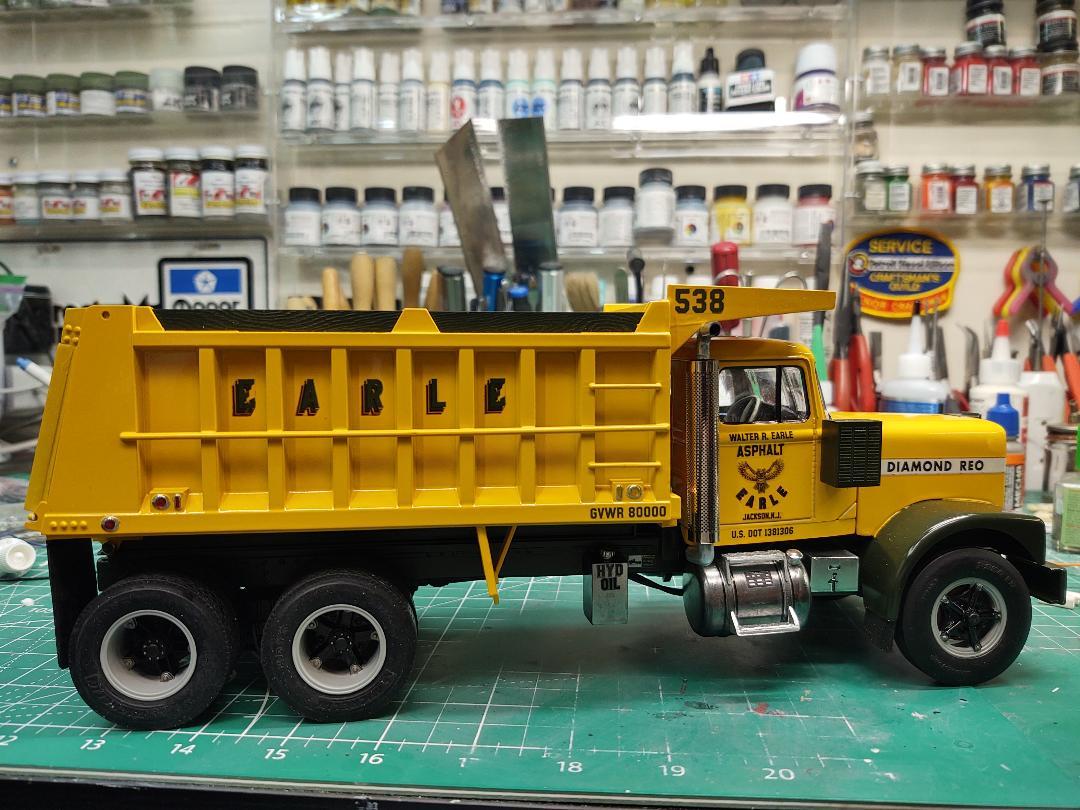
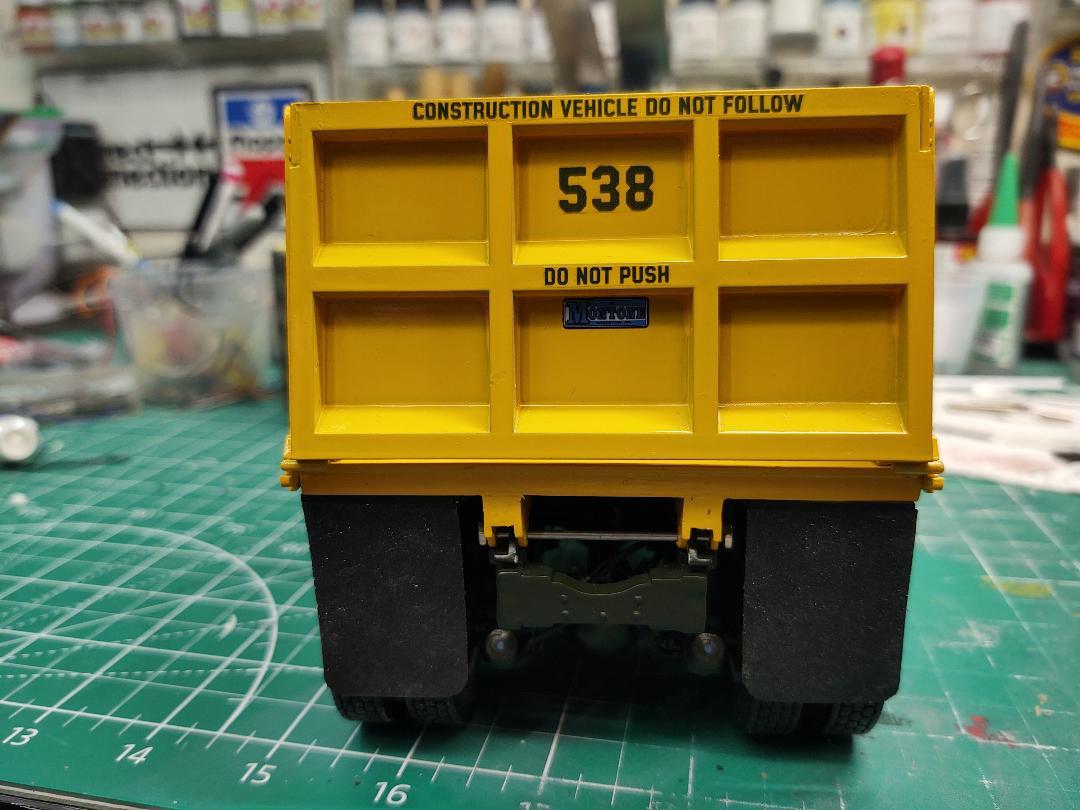
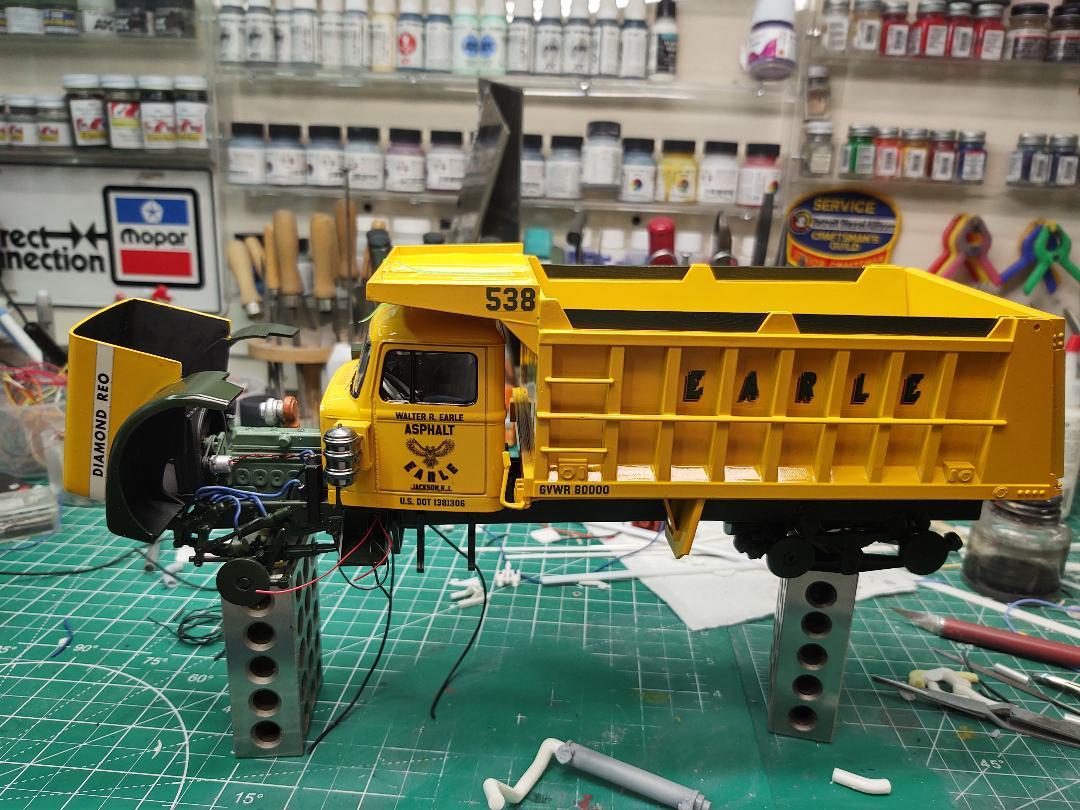
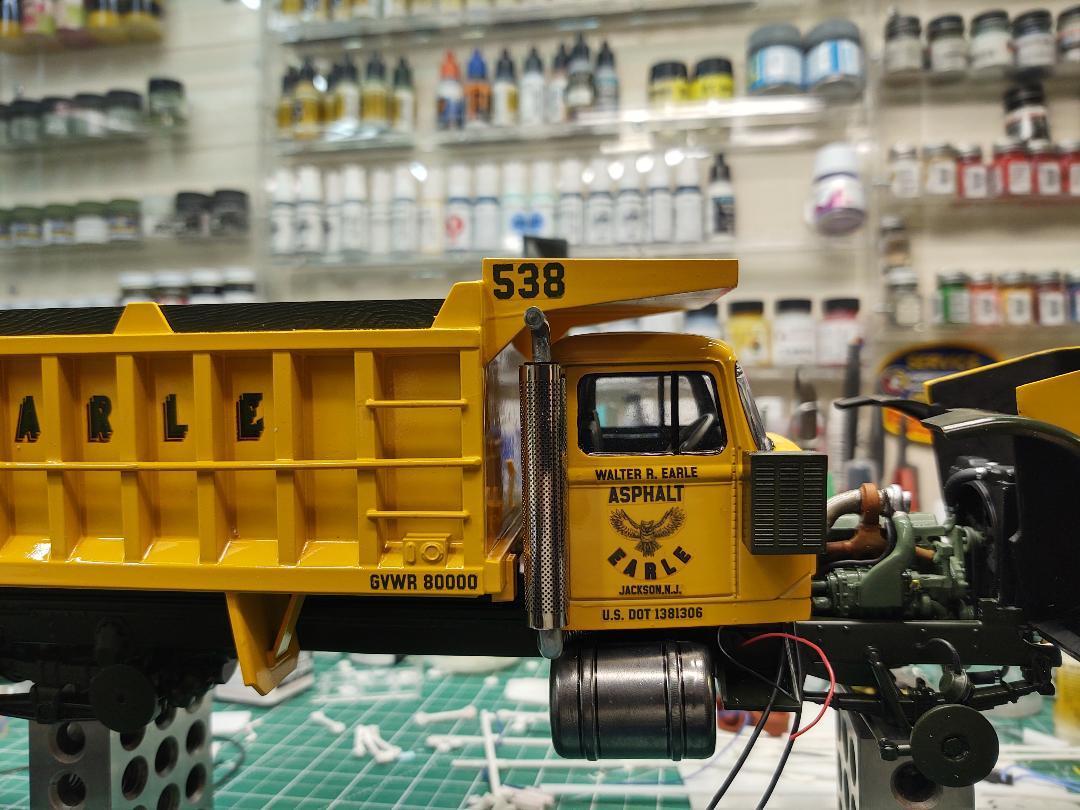
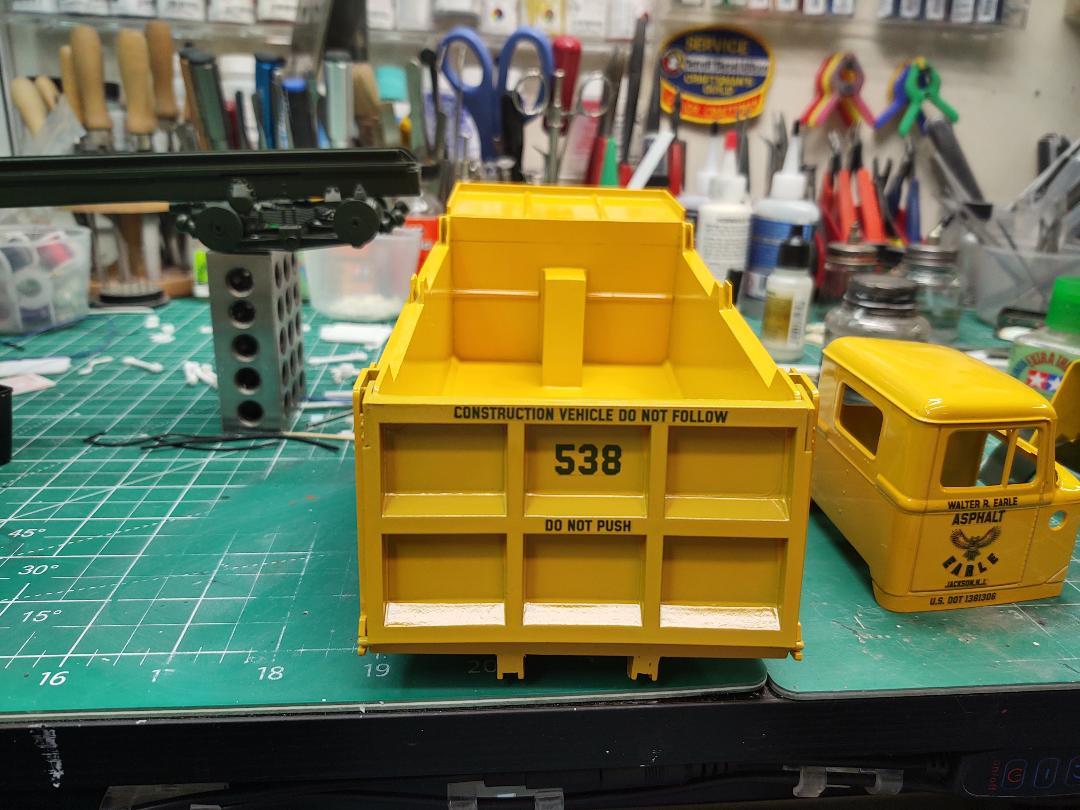
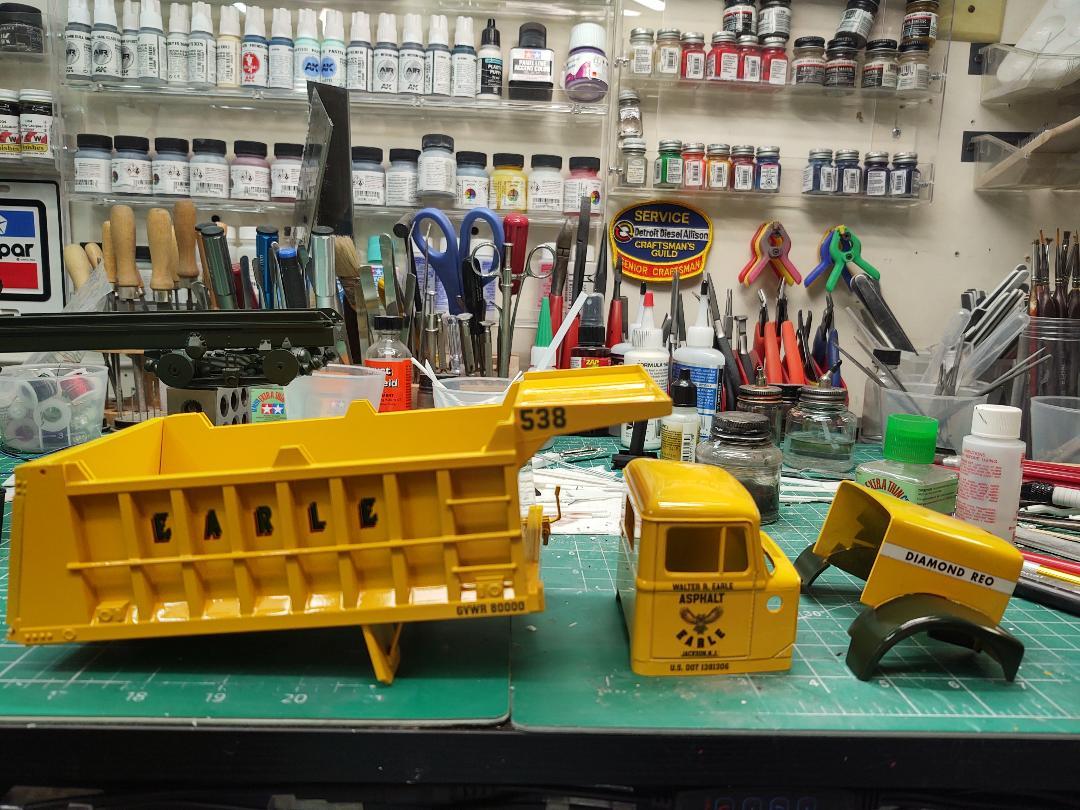
.............another crappy day ,,couldn't work outside so I finished up the Reo....put on all the do-dads ,lights..made the tarp mechanism ,,west coast mirrors with spots ,the kits mirrors weren't too bad so I used them instead of making a set out of aluminum tubing ,,,undecided on doing some weathering or not,,,maybe get some HO scale coal to use as asphalt .Think I'm going to build another Super Stock Hemi car next,a small inbetweener from the trucks
-
De-Aerodyned K100
Scott Eriksen replied to Rockford's topic in WIP: Model Trucks: Big Rigs and Heavy Equipment
Looks good Steve! -
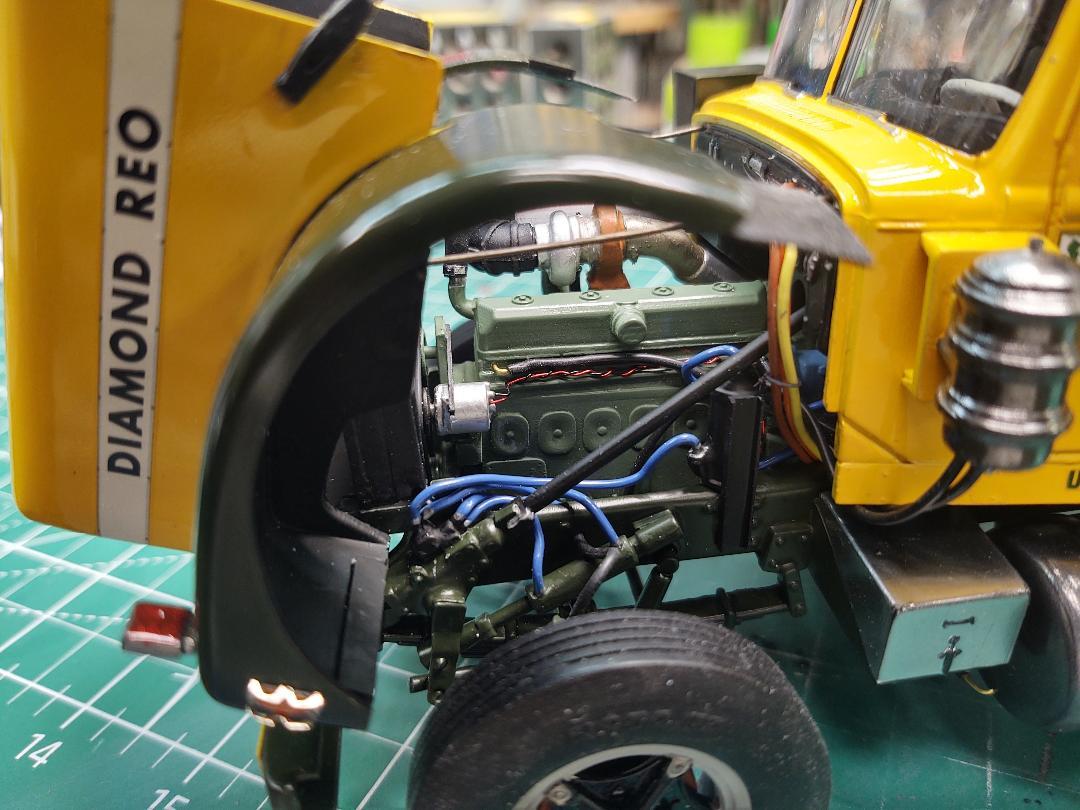
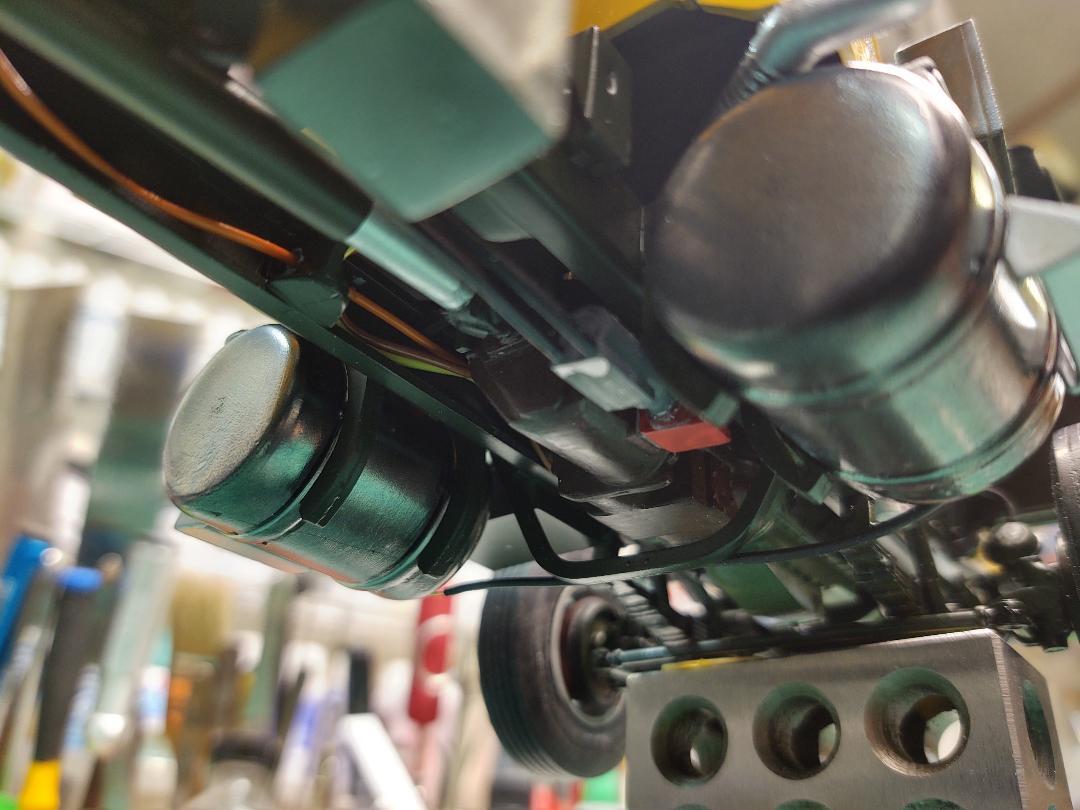
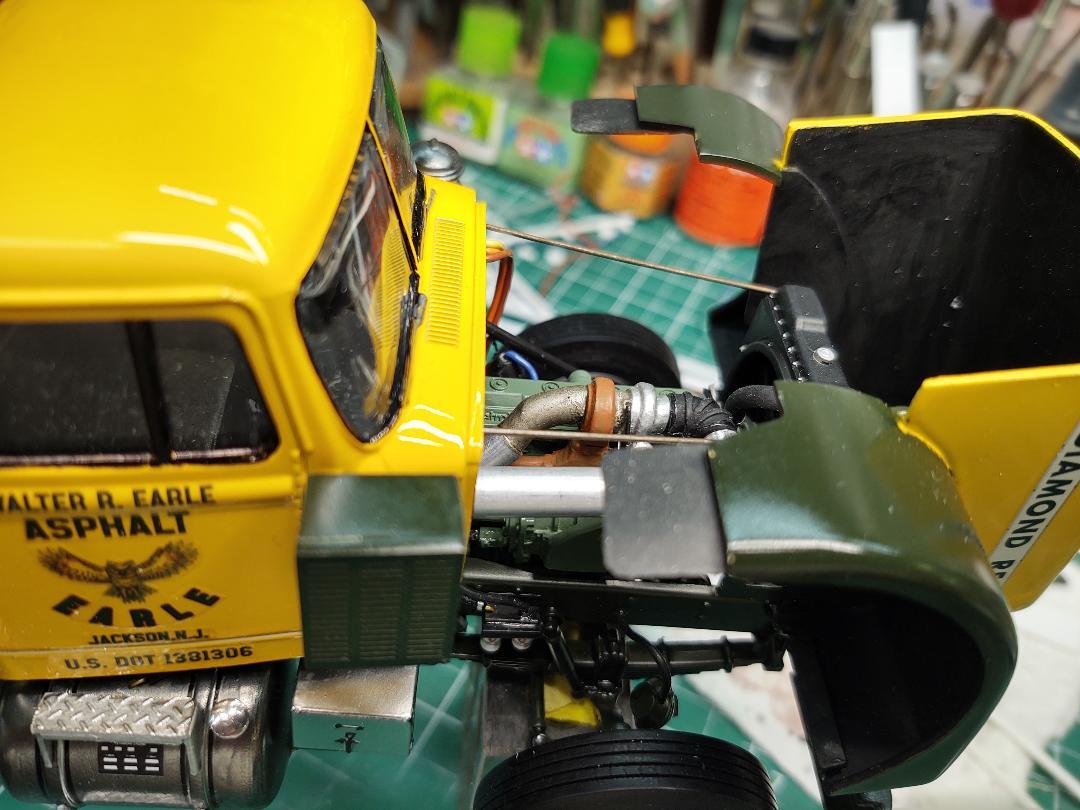
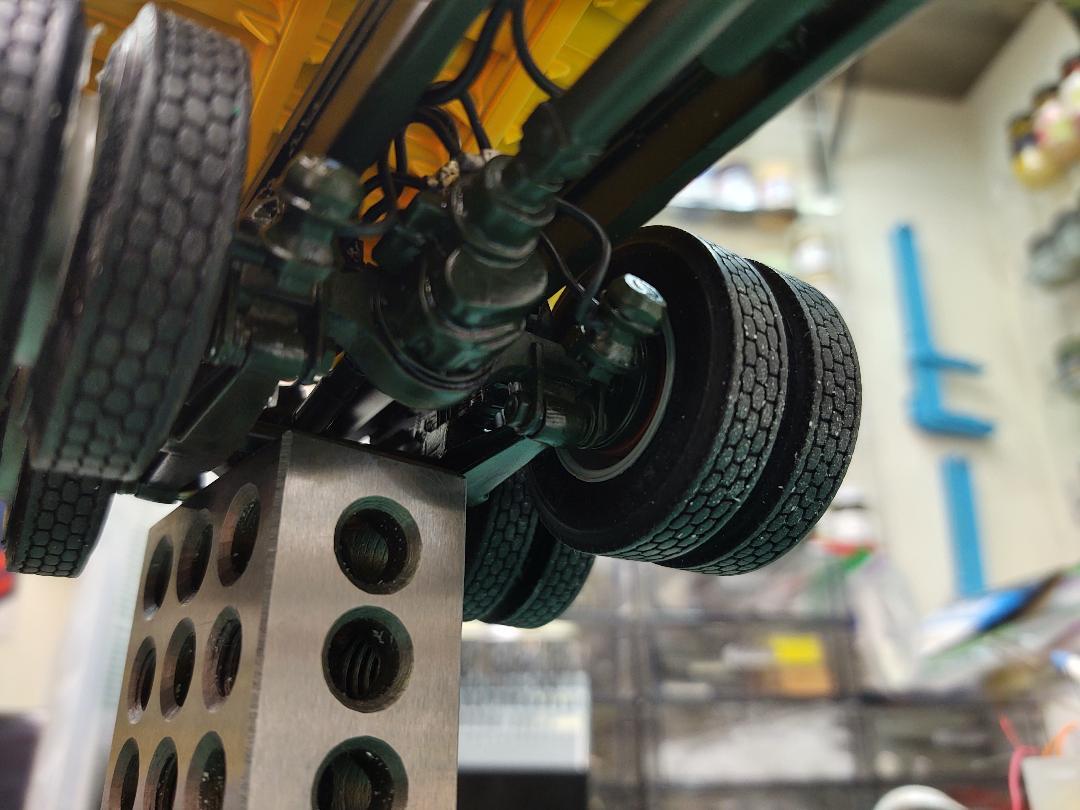
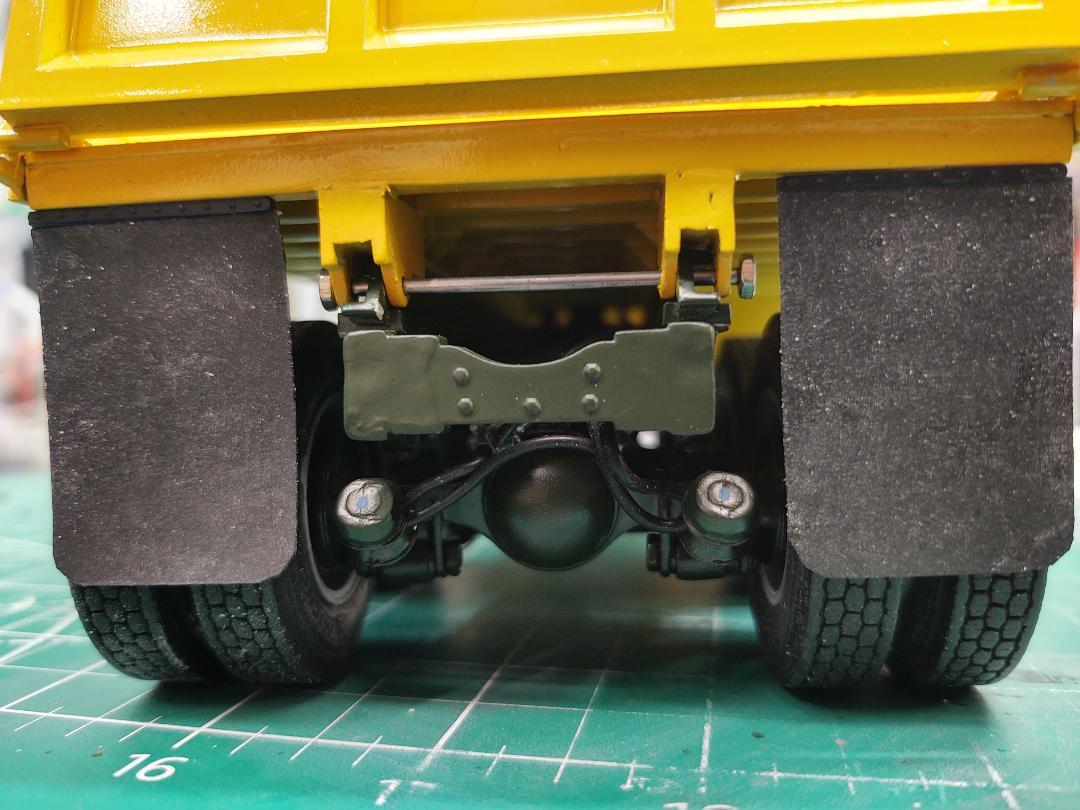
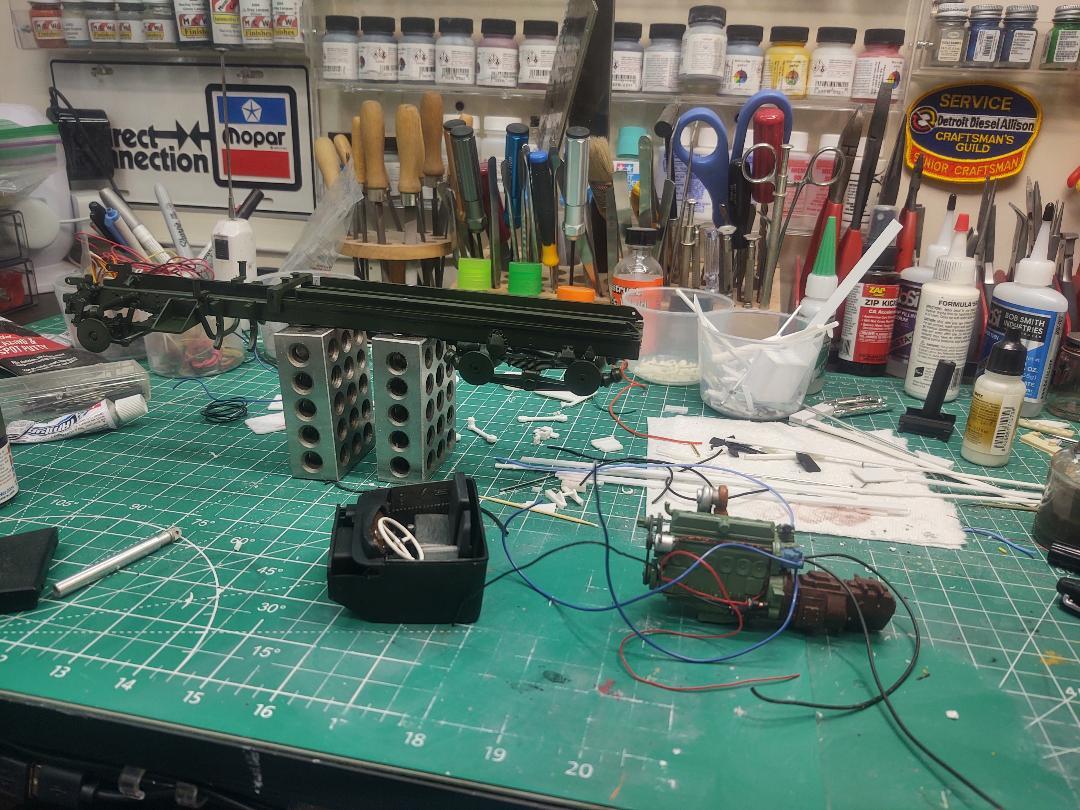
.............starting to get nice out which means yard work and sitting out on the deck,,,but anyway,,,a little more progress made- dump body mounted,,fabbed up telescopic aluminum tubing to replace the plastic hyd rams in the kit (wont stay up without a prop though) ran the air brake/fuel lines some brackets have to be made yet.Made a PTO and direct drive dump pump and hyd reservoir.Installed radiator stay rods .Made and installed rubber mudflaps-fronts need the carriage bolts in the fenders yet.Painted the Dayton spoke wheels,brake drums and mounted with Jamie's tires (I was going to use 2hole Budds but only had 20") Installed aluminum tube driveshafts with slip yokes.Front bumper mounted ,,wip making better brackets. Rain tomorrow so I'll probably shoot the mirrors/cab lights and airhorns/headlight buckets/door handles and front signals with Alclad ,,come up with some tail lights.Grill needs some more black wash ,,I was going to drill it all out but.... I'm going to make up an electric tarp deal,picked up some fabric at the Dollar Tree !
-
The mufflers and shields are Auslowe,,I made up the pipes going to them with aluminum tubing and parts from other kits
-
Yep! Same with Brockway and Mack cabs
-
Same with me yard work time!
-
Another Autocar DC9964B .. with a twist
Scott Eriksen replied to Biggu's topic in Model Trucks: Big Rigs and Heavy Equipment
Nice job!............the driver just left a ticket in the shop and says he thinks the wedge brakes need adjusting -
Thanks Rich!
-
Has anyone tried using the AMT Duster for the chassis/floor pan and driveline ?? I'm still waiting for my Demon from Hobbylinc !
-
yep,,nothing on the Moebius website either
-
Thanks Gary,did you finish the 4300 yet?
-
Any news on this and the AWB version? I see the Belvederes are out of production now too
-
Gonna look good Zip!!
-
Thanks Brian!
-
...........well in between all the rain and earthquakes this week some progress has been made ! Cab and hood mounted ,dump body mounted temporarily to check exhaust height.Luberfiner and hoses run, power steering lines run and I cobbled up a reservoir , Farr air filter and inlet piping to turbo fabbed up and installed , exhaust piping and muffler nailed on .Batteries-cables, drivers side fuel tank and fuel lines next
-
Thanks! Yep,,,AMT ,dump body from the Autocar kit ,,,and yes even the 1:1 cabs were similar
-
Thanks Dom!
-
I like it! I've done a few 1/35th armored stuff and enjoyed building ,, sort of a conundrum though,SUPER detail but then usually no engine/drivetrain to speak of
- 88 replies
-
- 1
-

-
- trackmobile
- tractor
- (and 2 more)
-
Like that shifter Brian,,,what did you use brass rod/tubing ?
-
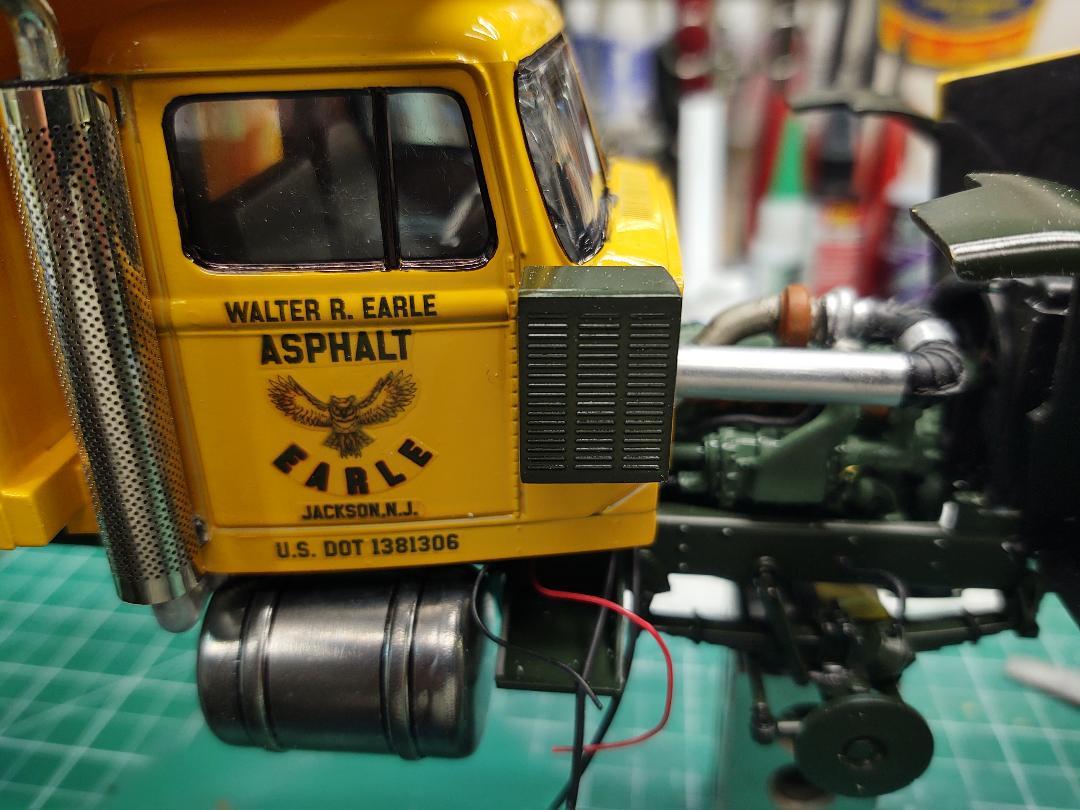
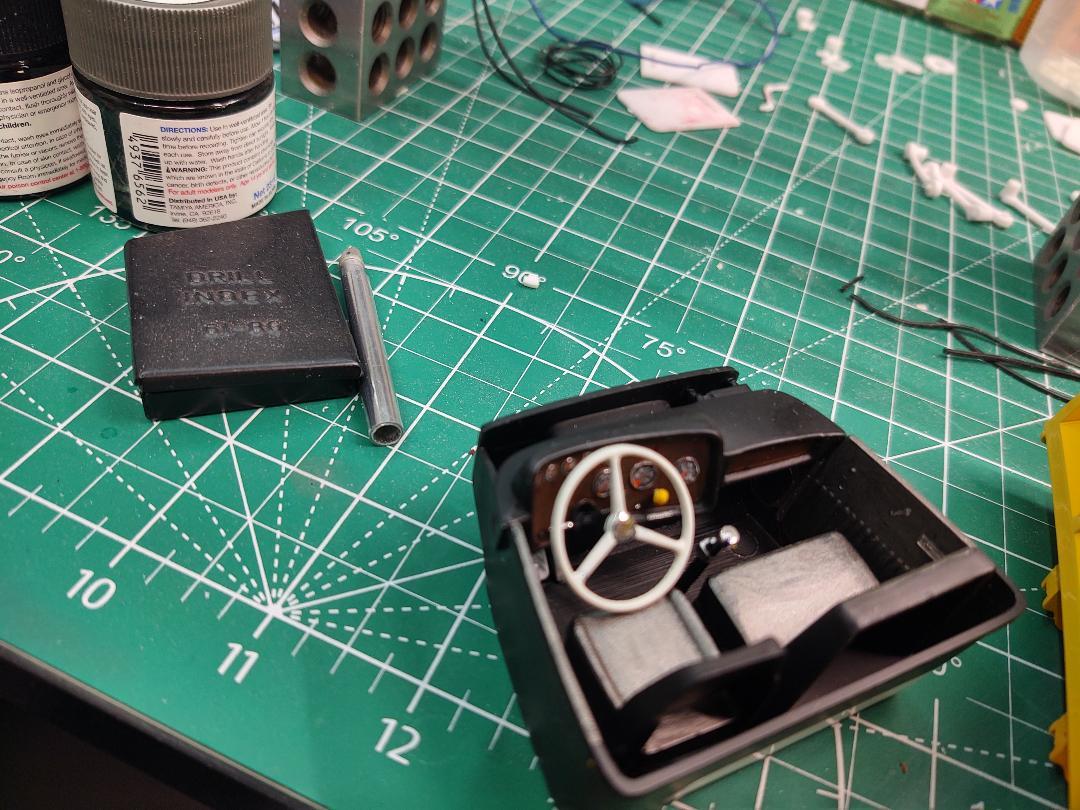
Did a little today,installed the Detroit ,decaled and clear coat,,finished the interior tub .......home brewed decals on this one too
-
Kustom pickup
Scott Eriksen replied to Rocking Rodney Rat's topic in WIP: Model Trucks: Pickups, Vans, SUVs, Light Commercial
nice! -
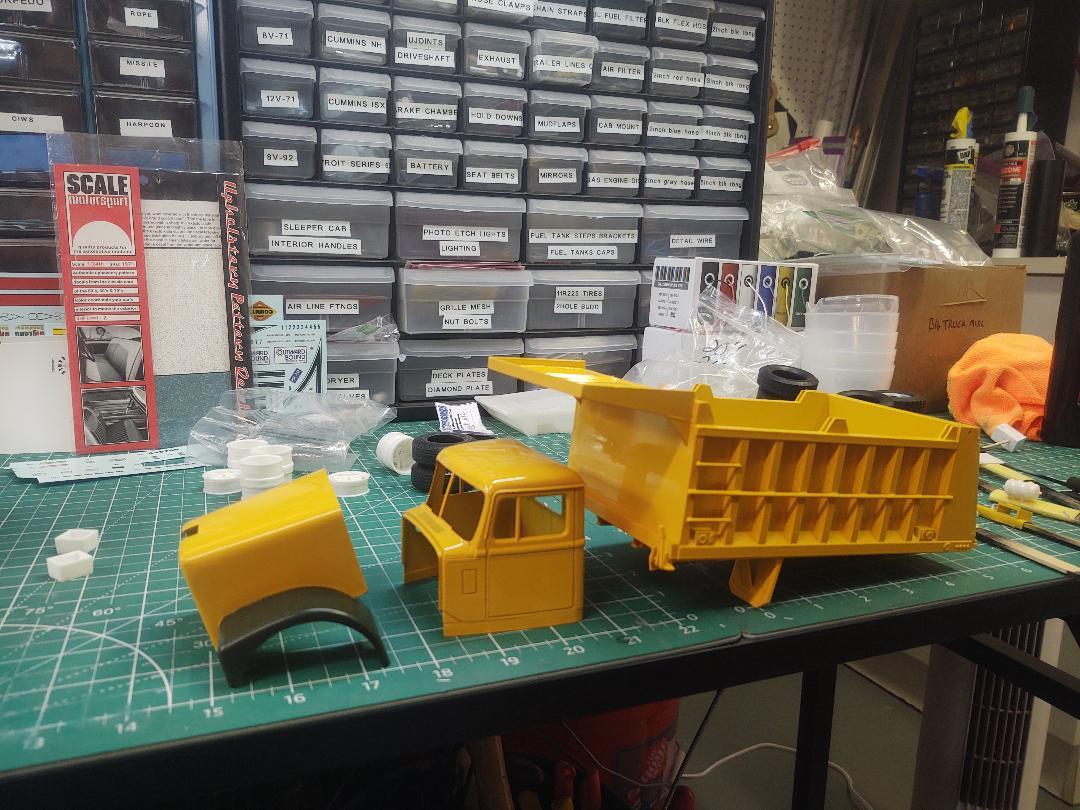
A little more progress on the Reo,,,cab,hood,dump body and chassis shot..decals next. Chassis ready for engine install and run air lines,etc . Haven't made up my mind on tire/wheel combo yet
-
Yeah,the painting and black/white stripe decals were definitely a challenge !