DJMar
-
Posts
863 -
Joined
-
Last visited
Content Type
Profiles
Forums
Events
Gallery
Everything posted by DJMar
-
Since I started building models in the Age of Enamels™, I am one of those who always lets paint dry forever between coats. Even with fast drying Tamiya synthetic lacquers, I give it at least 72 hours before top coat or re-coat. That's probably a little overkill, but I'd rather wait than strip a paint job. I will echo the suggestion that you let it dry for two days, and shoot another coat over the top. Whether you sand down or scuff the offending areas is up to you, and depends on how rough they are (it's hard to tell from the pics).
-
I've built about 6 or 7 of these in various forms since the original Z28 kit was released 35 years ago. While there are some fitment problems, most of them can be avoided with careful mock up and test fitting. The issue with the interior tub not fitting well is common in some of the versions of this kit. Tim Boyd referenced this in his buildup of this kit in the April 1994 issue of SAE, so it's been around for a hot minute. There is a 3 part solution: 1) making sure the interior panels are fitted correctly (which often means sanding the lower edges to fit) before you glue them in, 2) test fitting the rear glass to be sure it plays nice with the back of the tub (which can mean filing down the lower edge of the backlight or the upper edge of the tub for clearance) and 3) making sure the dash is sitting where it is meant to be and isn't rotated out of position. If you don't pay attention to these areas, the fit issue gets worse. As for the hood hinges not clearing the tub, this is also pretty common. You can either sand down the hinge stubs a bit so they clear, or you can use a file to open up the holes in the tub, or a little of both. You may also need to slightly clearance the notches in the firewall. Honestly, it looks like one of your hinges is bent to one side, which exacerbates the problem. But this is a pretty simple and straightforward fix. Now it's possible that the issues you're having are the result of shoddy QC on Revell's part. As I said, there are some known fit issues, and while this kit isn't at the level of "shake-n-bake" Tamiya engineering, I think it's still an eminently buildable model with some patience and test fitting. Obviously, YMMV.
-
Great minds think alike and all that. I did something similar on my original issue of the '29 kit. I noticed that when building the channeled version, those notches are visible just outside the frame rails, and it was making me unhappy. Instead of trying to build the pan and interior as a unit and filling those gaps with putty, I added some .010 styrene covers. I had to work around the existing floor framing, but the idea is the same. It's one of those engineering bugaboos that makes me love/hate these kits. Anyway, your work on this particular '30 is super clean and really inspiring. I might have to revisit the '30 in my stash with some new inspiration.
-
Weathering techniques question
DJMar replied to JerseeJerry55's topic in Model Building Questions and Answers
In my experience, washes are going to be your primary way of getting this sort of subtle weathering, especially in scale. My usual technique - taken from years of military modeling - is to use pin washes with artist's oil paints and thinner. But over the last few years I've taken to using Reaper Miniatures Core Colors paints, used over enamels or lacquers. There are a few advantages. The paint dries quickly, and is not set until you seal it, which means you can wash off any mistakes with soap and water (or acrylic thinner) without disturbing the basecoat. It's easy to mix colors with them, especially dusty or muddy browns and shades of rust. I bought a few colors (orange, brown, black and white) for about $12 and have had them for more than 5 years now. One other option that might work for you are powdered pigments, such as those made by Vallejo. You can mix these with a little water and make very convincing dirt and mud effects, especially if you want something with a bit of texture. -
2005 Chevrolet "Escalado" 3500
DJMar replied to Chuck Most's topic in Model Trucks: Pickups, Vans, SUVs, Light Commercial
This is cool. I'm digging the bazooka sized exhaust tip! -
Nicely done. Those Motormax rigs look great with your added detailing.
-
Ford Escort RS2000 Bathurst 1977
DJMar replied to ShawnS's topic in Other Racing: Road Racing, Salt Flat Racers
That is a really cool paint job. Even with all the building challenges, you turned out quite a looker. -
Looks awesome. That's a great color - what is it?
-
The Banana Splits
DJMar replied to Dragline's topic in All The Rest: Motorcycles, Aviation, Military, Sci-Fi, Figures
Fleegle, Bingo, Drooper and Snorky would be proud. Your paint work has done them justice. As soon as I saw the title of this post I started singing the theme song (in my head). -
I'm with you, Revellogram did a bang up job with their 3rd gen Firebird kits. Even the Revell SnapTite '93 T/A kit is a winner.
-
I'm digging the color.
-
That is a pretty 'Cuda. I am digging the color combo and the Mod Top is wonderful, it looks just like the real thing. Great work on the chrome too, everything is super clean. Absolutely top shelf build.
-
Kermit My AMT Chevy Truck
DJMar replied to oldcarfan's topic in Model Trucks: Pickups, Vans, SUVs, Light Commercial
STS sells headlight decals that should work for this model, you might have to use the generic set. https://stsdecals.com/collections/headlights BTW, it looks great in that green. And I really dig those wheels. -
I'm digging it. Great color for the car, and I like the painted wheels. Good call on redoing the interior so you can actually see it! As one of my favorite cars of the 1990s, I always wondered why AMT didn't release the unassembled promo as a Snap Fast kit.
-
This looks really good! Totally late 80s-early 90s street rod stuff right there. Me too, and I keep hoping they will do it with the original (1987) kit wheels, instead of the rollers found in the original convertible kit.
-
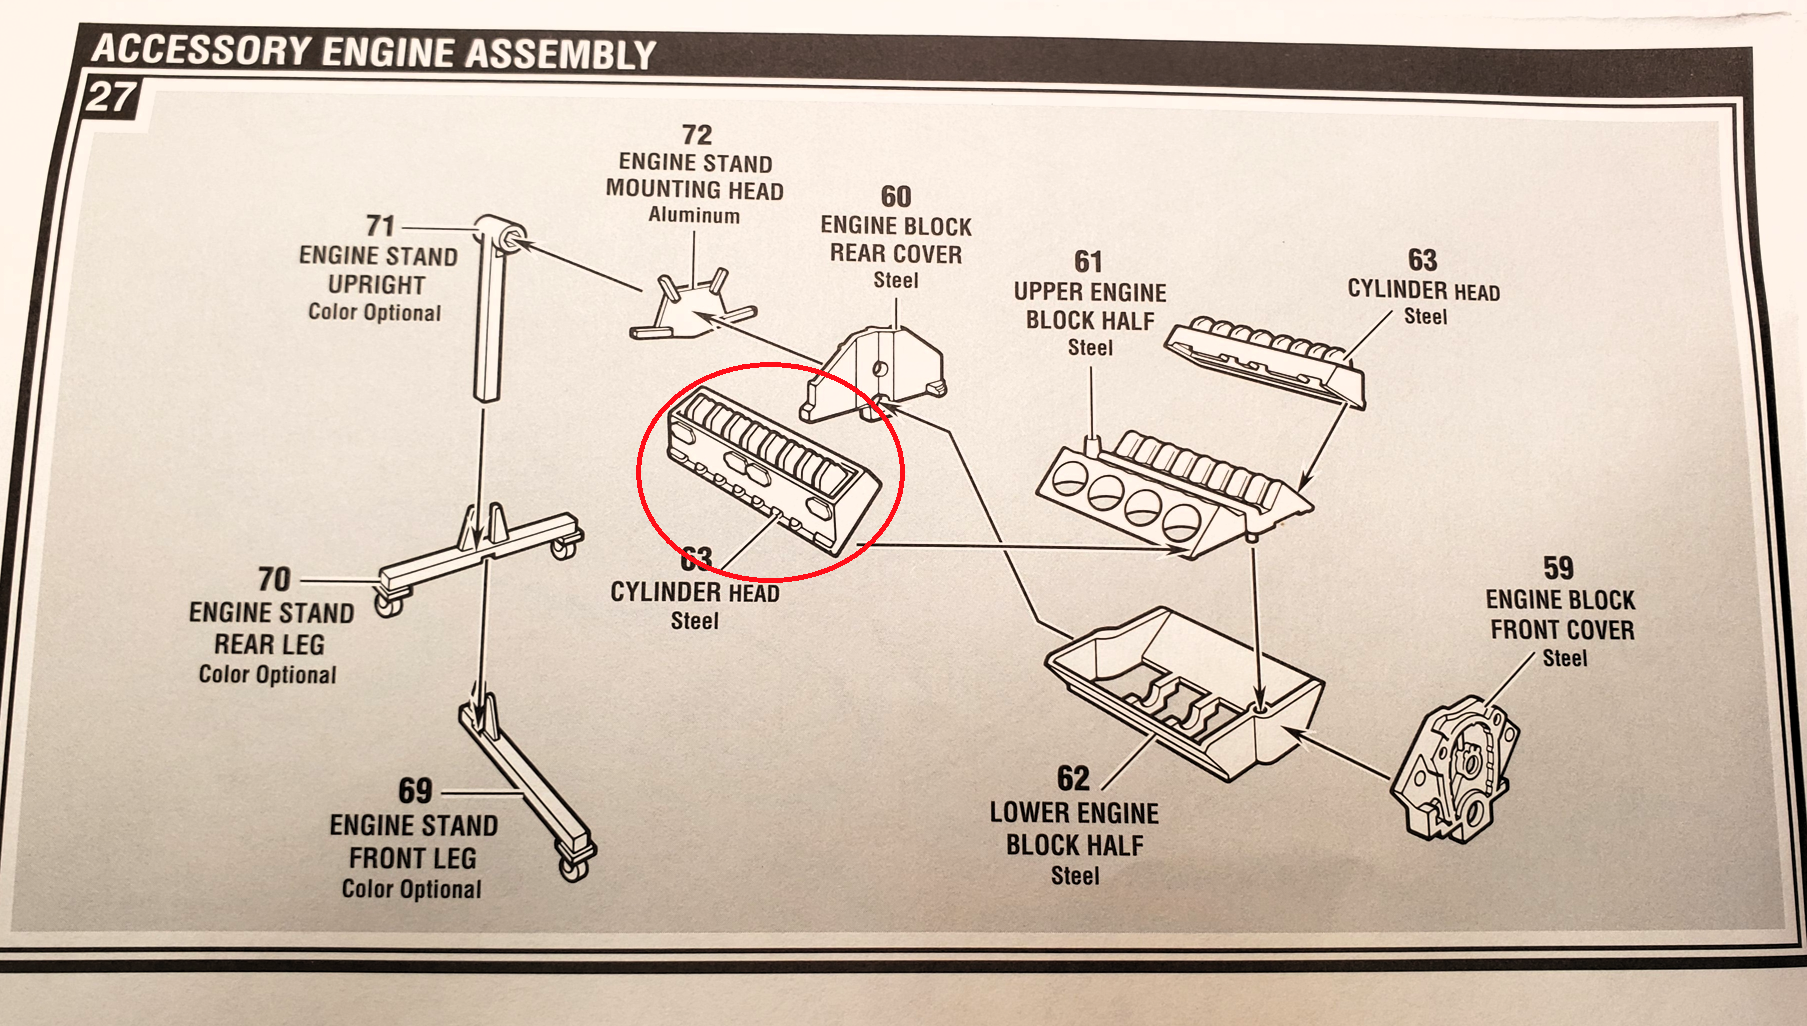
Here's a shot of the instruction sheet - you've got the cylinder heads on upside down.

-
It's not a problem until you have at least 6 of every kit, and even then... BTW, good on ya for having not one but two Revell Ferrari 308s in that collection.
-
* laughs in A45 S *
-
That first pic made me think I was looking at a full sized Ventura. That's an absolutely beautiful model. The paint is like glass. Very clean, very sharp, very tasty build!
-
1972 Ford F100 replica build possible
DJMar replied to gtx6970's topic in Model Building Questions and Answers
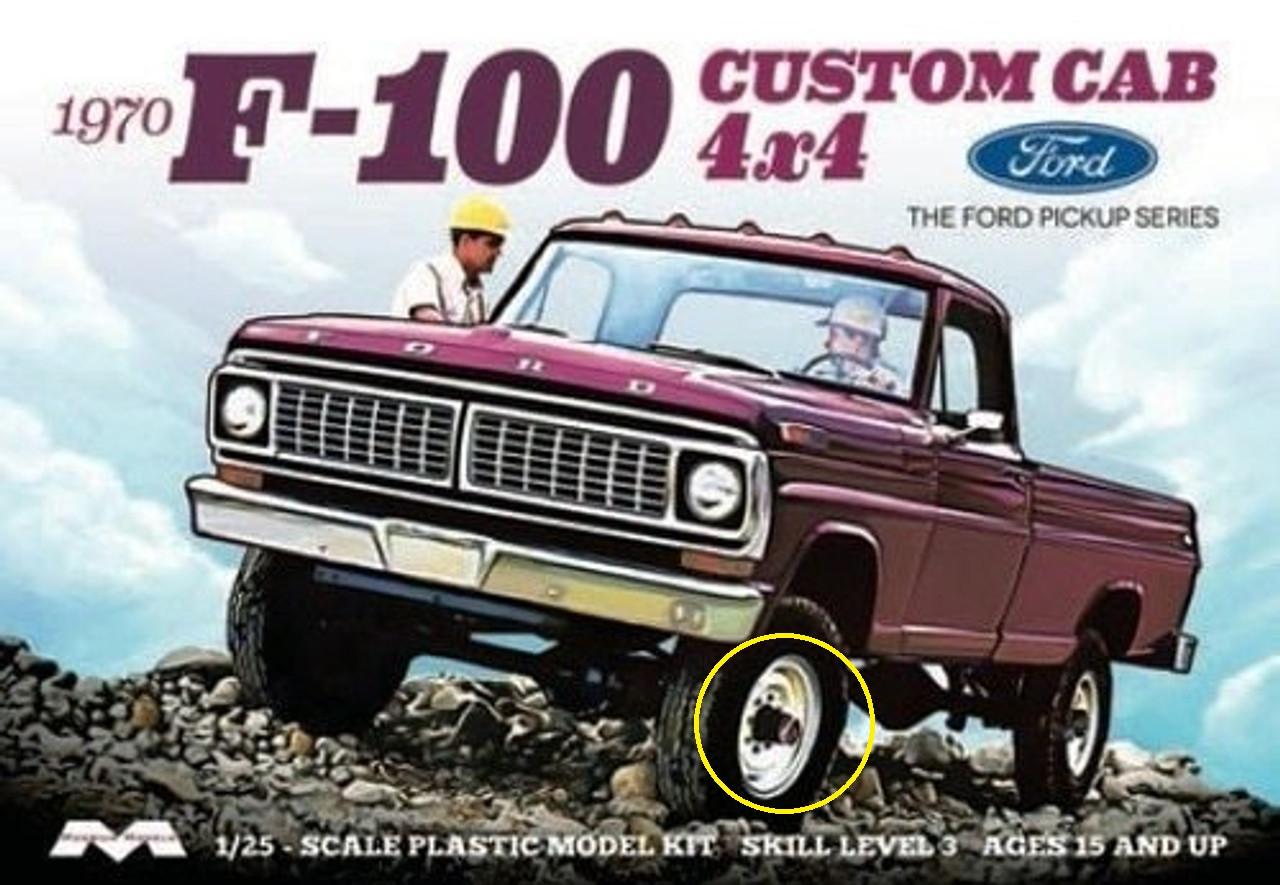
Thanks for clarifying that. It's weird because the pic that was posted above (and a few that I've seen online) shows what looks like 8 lugs on the box art.
-
That's a really, really good observation, and might be why the body feels off. The MPC kit definitely has a pronounced curve from the beltline to rocker, which is prototypical. Totally off topic, but is that a vintage 1980 Monogram Turbo T/A kit in your stash, unbuilt?
-
1972 Ford F100 replica build possible
DJMar replied to gtx6970's topic in Model Building Questions and Answers
I'm curious too, but I don't have the kit on hand. I noticed the 8 lugs too, but I was thinking more about the axles. -
She looks really good. That color is spot on, and coupled with that gray interior, it just screams '90s! Unfortunately, that body/rear apron to fender fit has always been fiddly with these kits. I've got a 5 window that I'm messing with now that has the same problem.
-
1972 Ford F100 replica build possible
DJMar replied to gtx6970's topic in Model Building Questions and Answers
Do you know if he's going to be running those wagon wheels on the final build? Because Fireball has those with the proper Ford hubs. As already pointed out, the Moebius '69 shortbed plus the '70 F-100 4x4 will get you most of the way there. What engine is he running? -
The Rally Wheel was available in '85, so you could rock these: https://www.fireballmodels.info/fmr-100.html. You might want to do a little modification to the front hubs if you're building it stock, as the Fireball pieces represent manual locking hubs and the NP208 in '85 came with auto hubs. You can get those wheels and some nice BFG tires as a set: https://www.fireballmodels.info/fmr-101.html. Those 31x10.5R15s are going to be pretty close to the height of the tires in the kit, so no additional suspension mods should be needed. There was an 8-hole aluminum wheel and a 8-hole steel wagon wheel available that year as well. Fireball makes a Ford wagon wheel (FMR-230) that might work as the Chevy piece, if you swapped out the 5-bolt pattern hubs for the proper GM 6-bolt hubs. I don't know if the hub swap would work, but you could email Joseph at Fireball if you wanted to go that route. Side note: the wheel/hubcap & tire combo in the kit isn't atrocious. There are issues with the kit wheels, but you cover up most of their sins with the supplied hubcaps & decals. IIRC, that setup was the standard wheel on the Custom Deluxe trim. Of course, all of this is for stock-style builds. I'm sure someone is already building a lifted K5 on 39s.