OldNYJim
-
Posts
250 -
Joined
-
Last visited
Content Type
Profiles
Forums
Events
Gallery
Everything posted by OldNYJim
-
I’ve tried using those - they’re really tricky to get right. Best thing I figured out was to pre-bend them around something smaller diameter than the hose you’re trying to put them on so they’re a snug fit - they’ll naturally spring back to a bigger radius than you bent them to. That minimises the need to try and glue them in place - which is hit or miss at the best of times
-
If you can get used to using metric too, it’s super easy - 1 inch in scale is (give or take) 1mm.
-

AMT Mod Rod 29 Ford RPU
OldNYJim replied to OldNYJim's topic in WIP: Model Trucks: Pickups, Vans, SUVs, Light Commercial
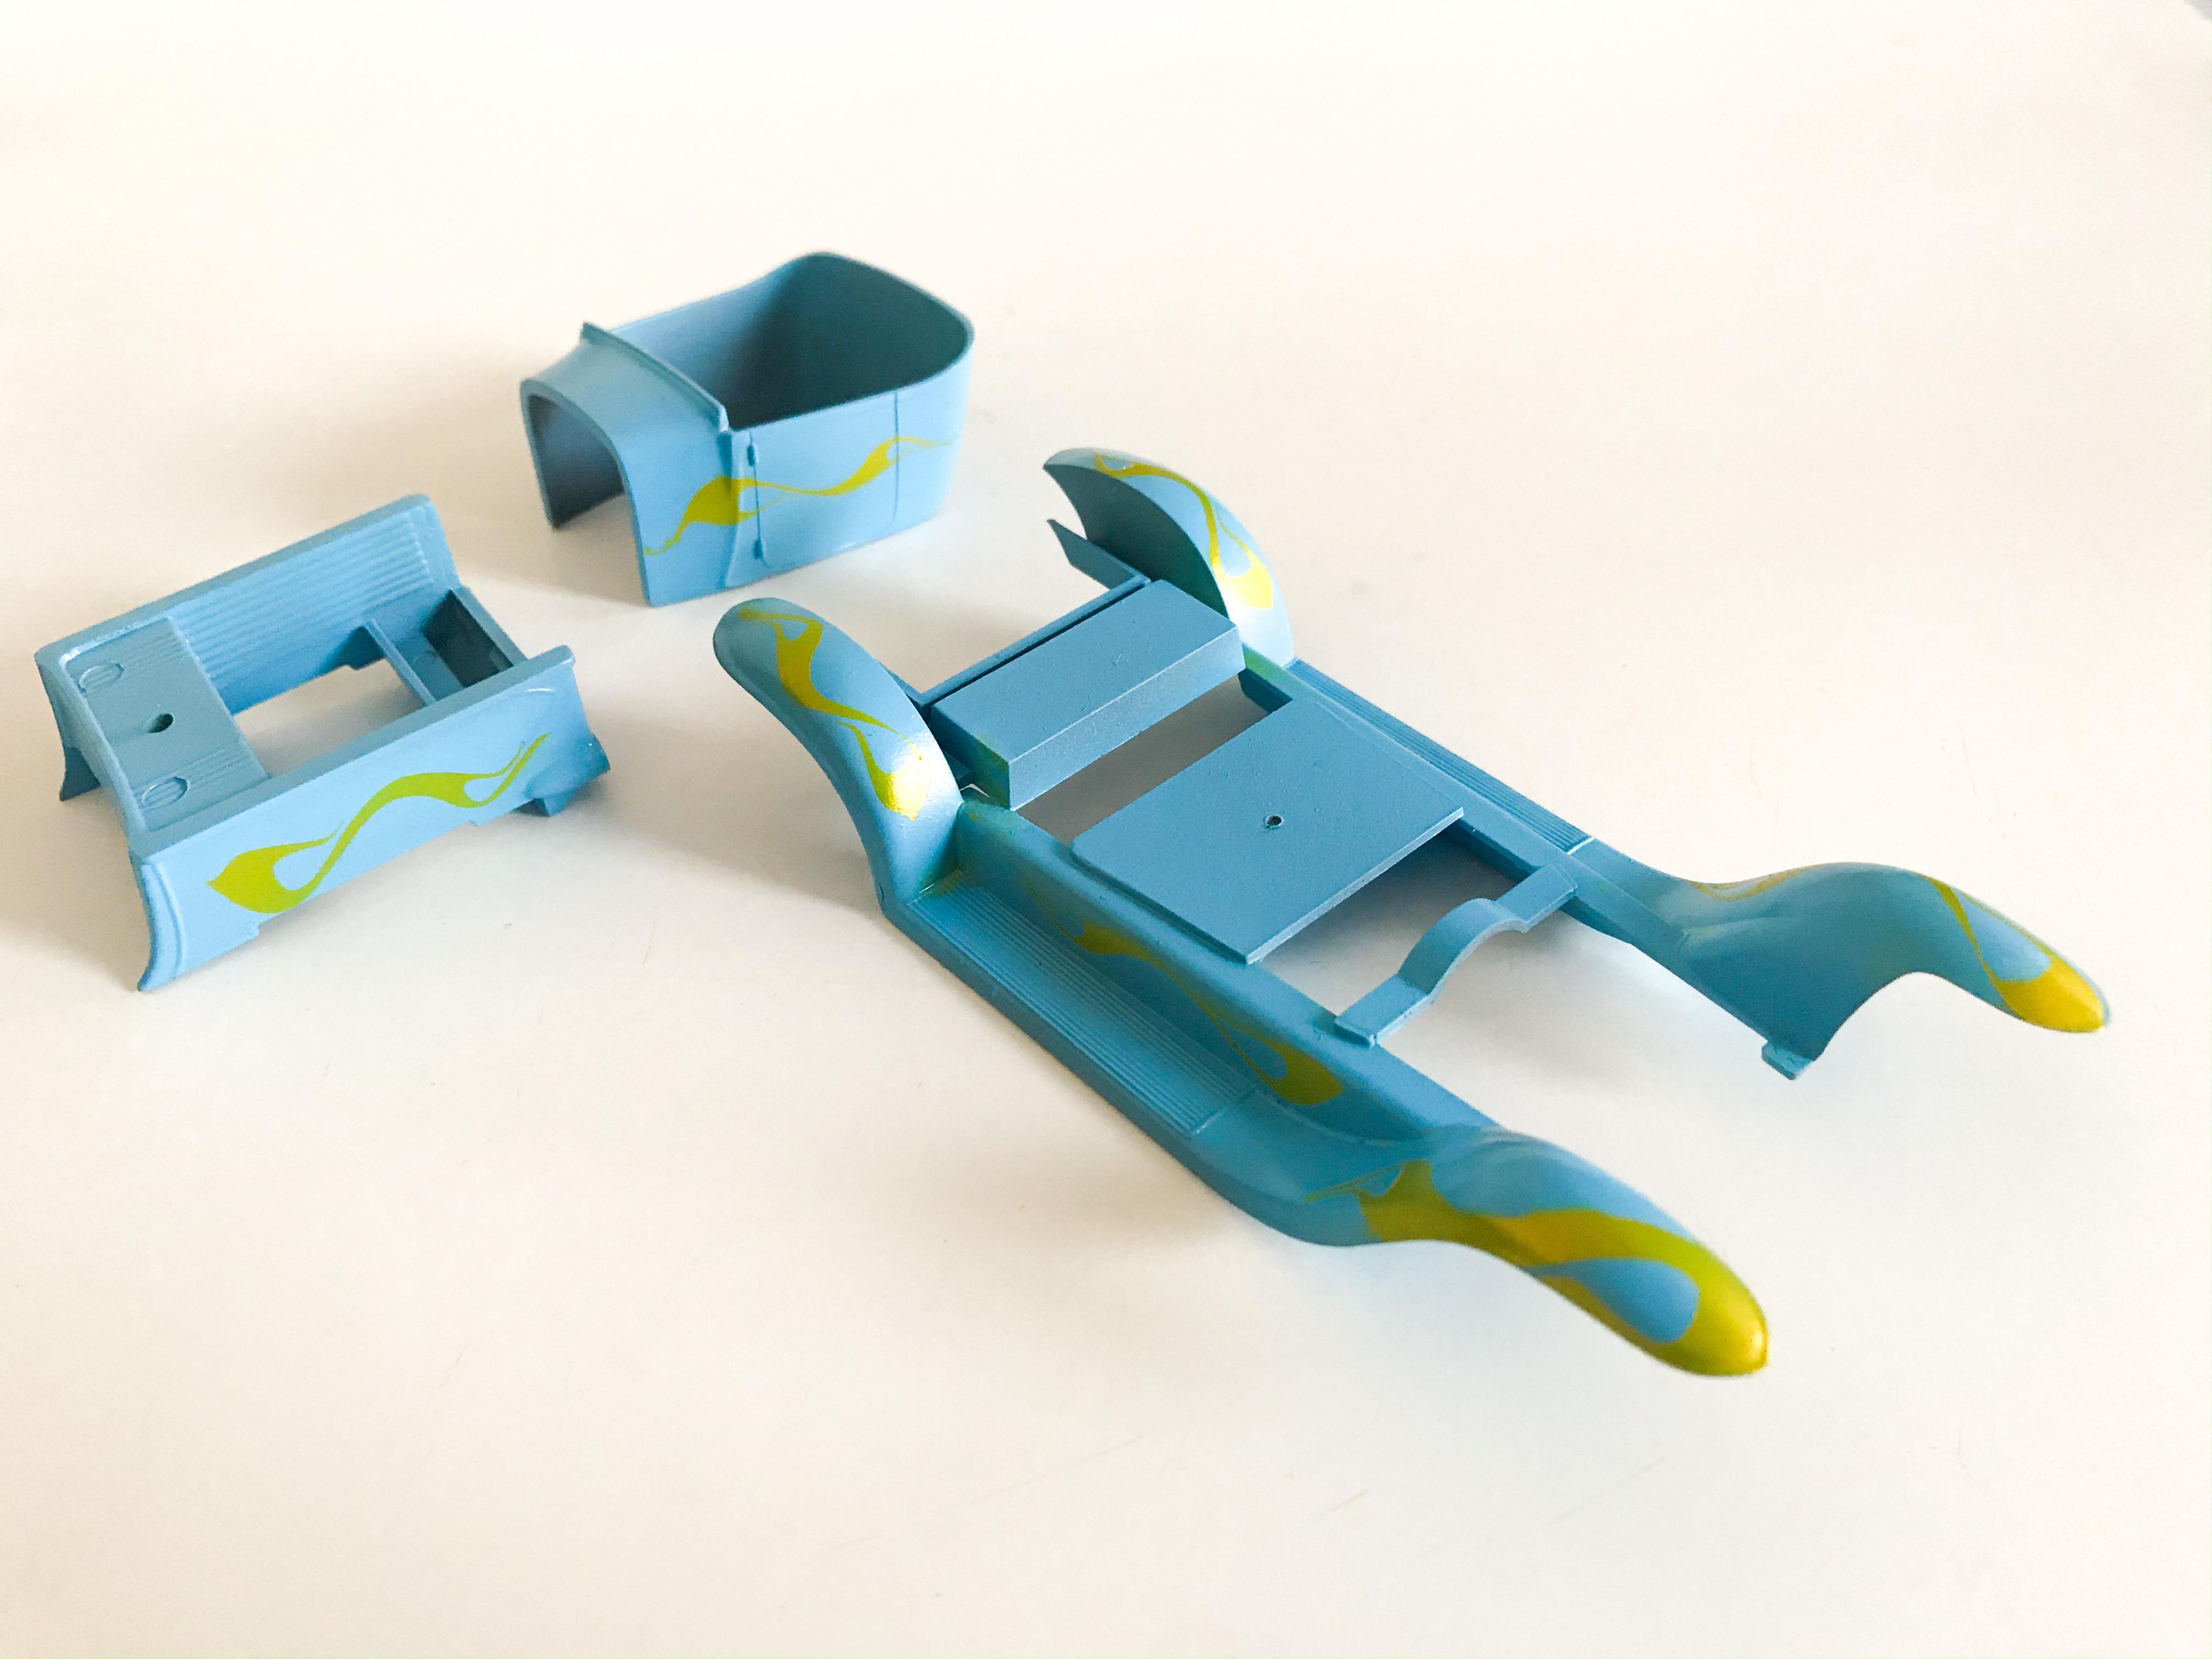
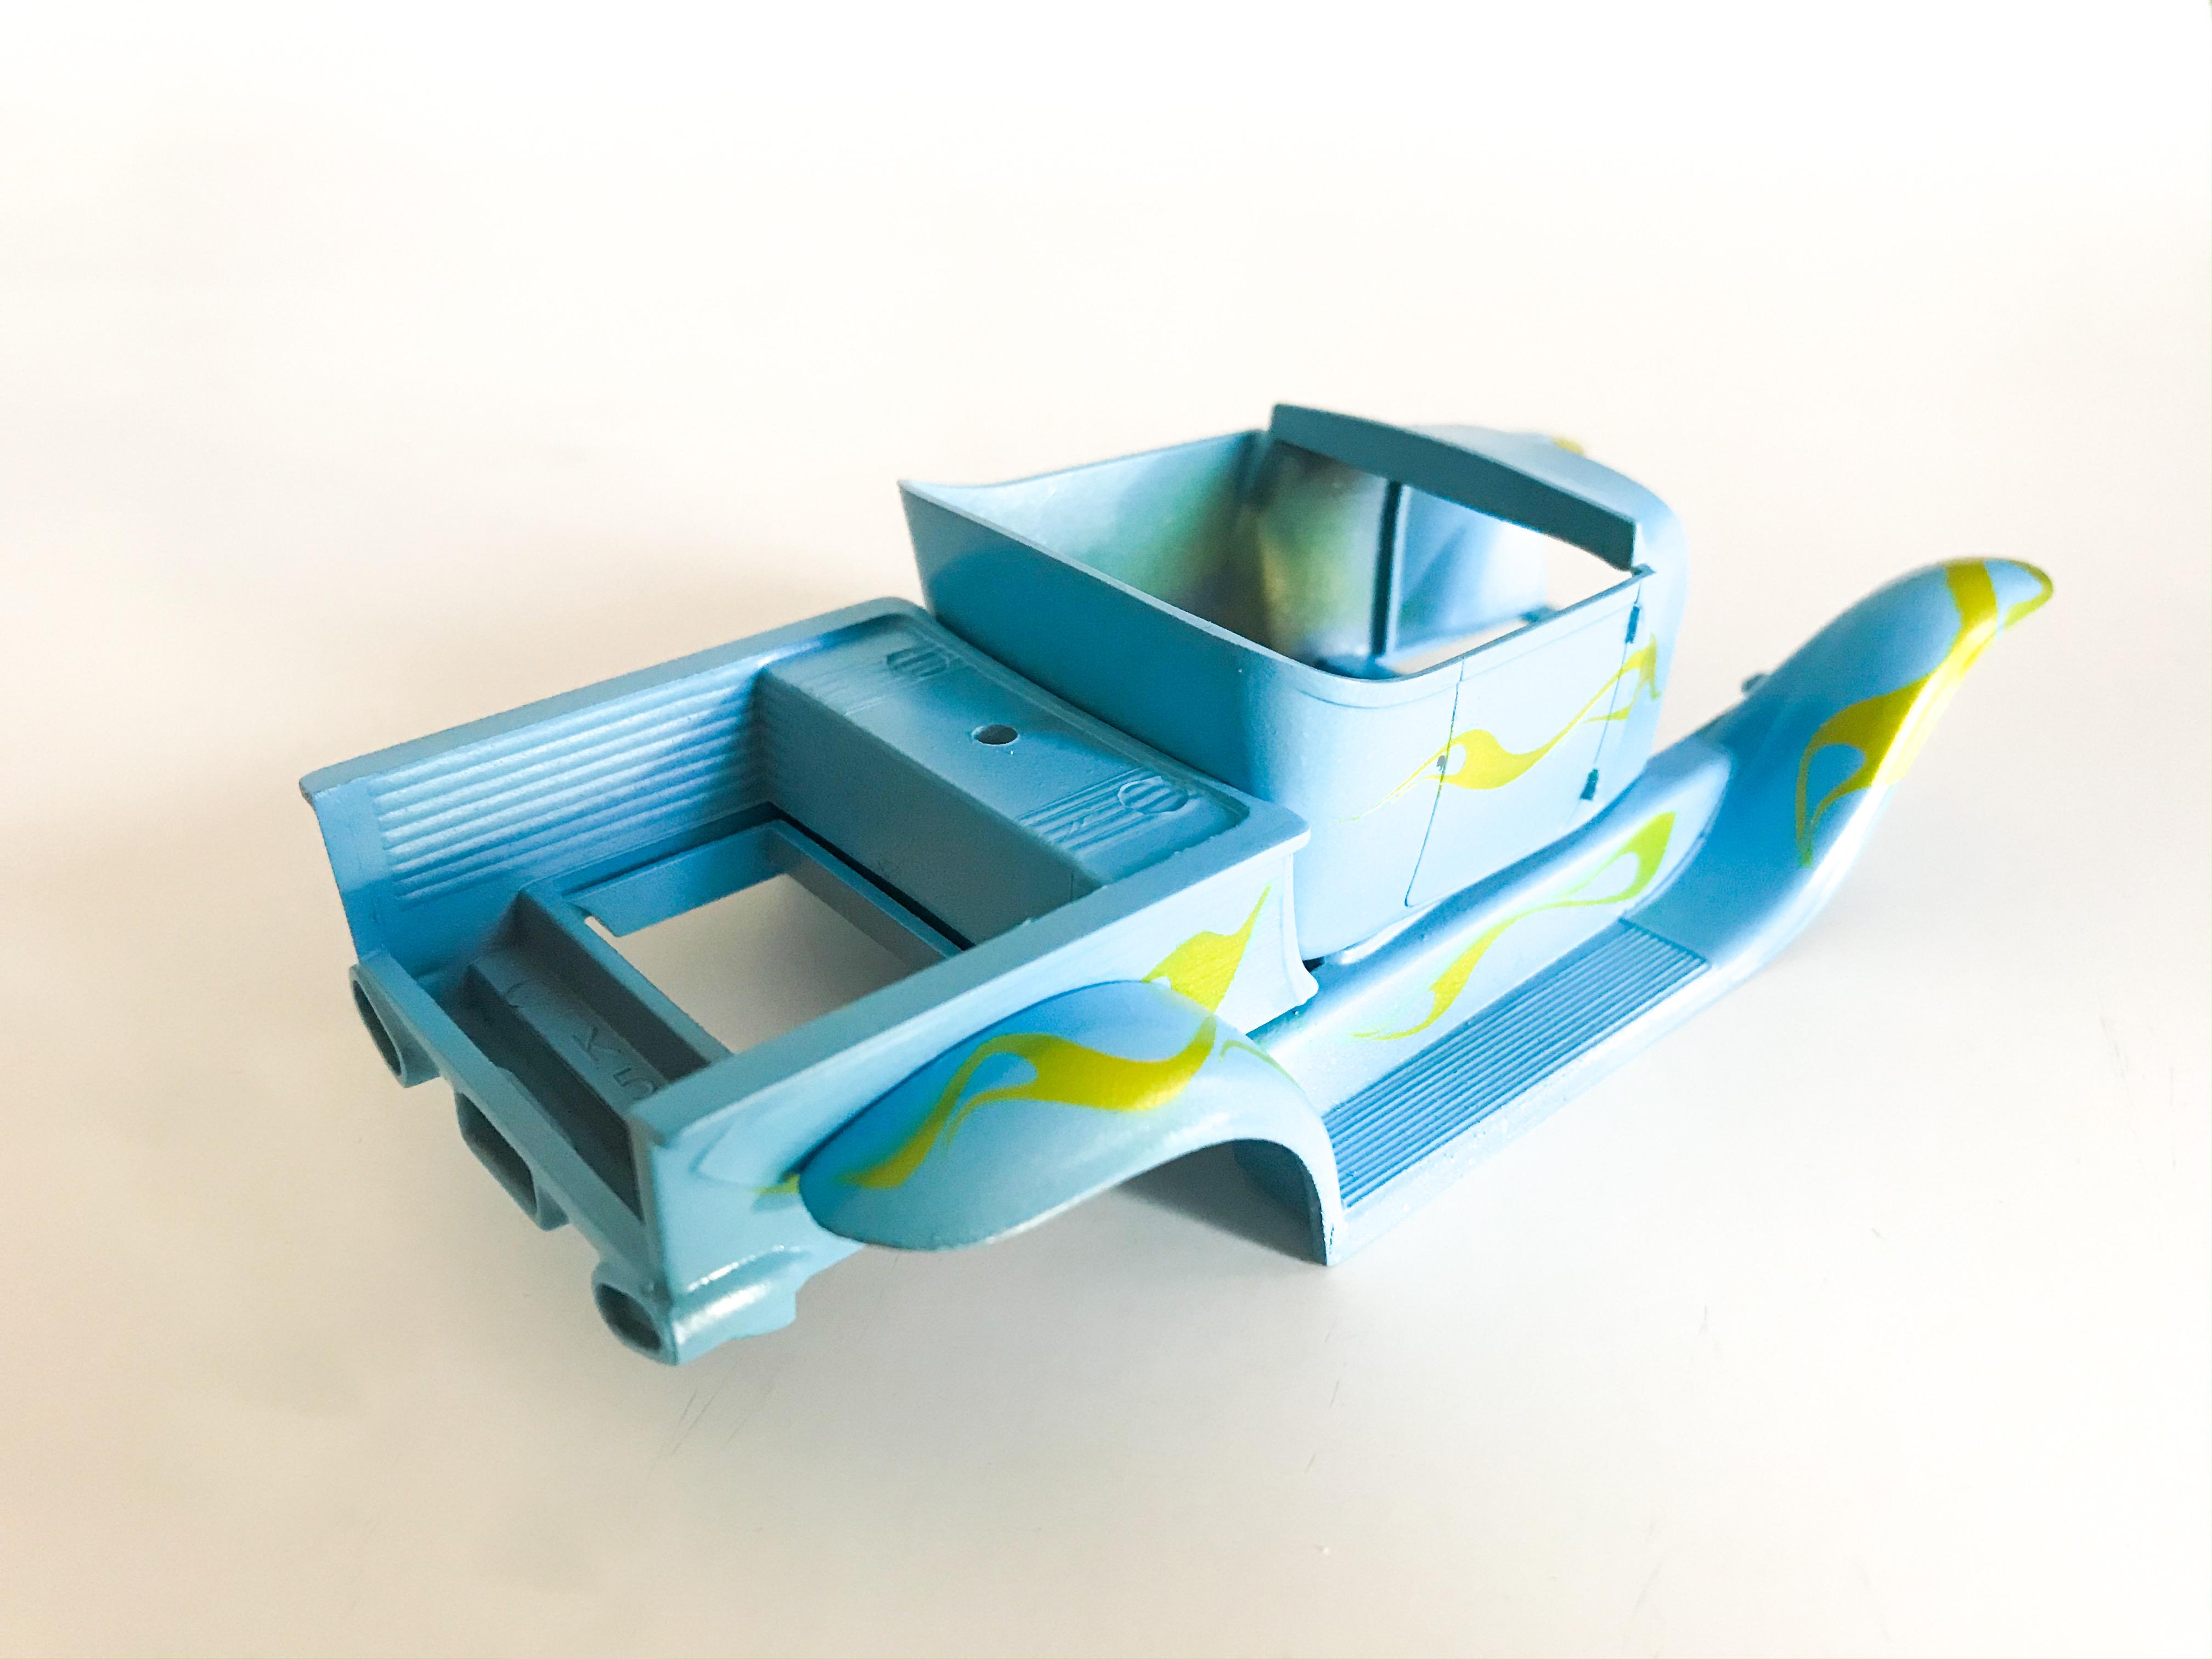
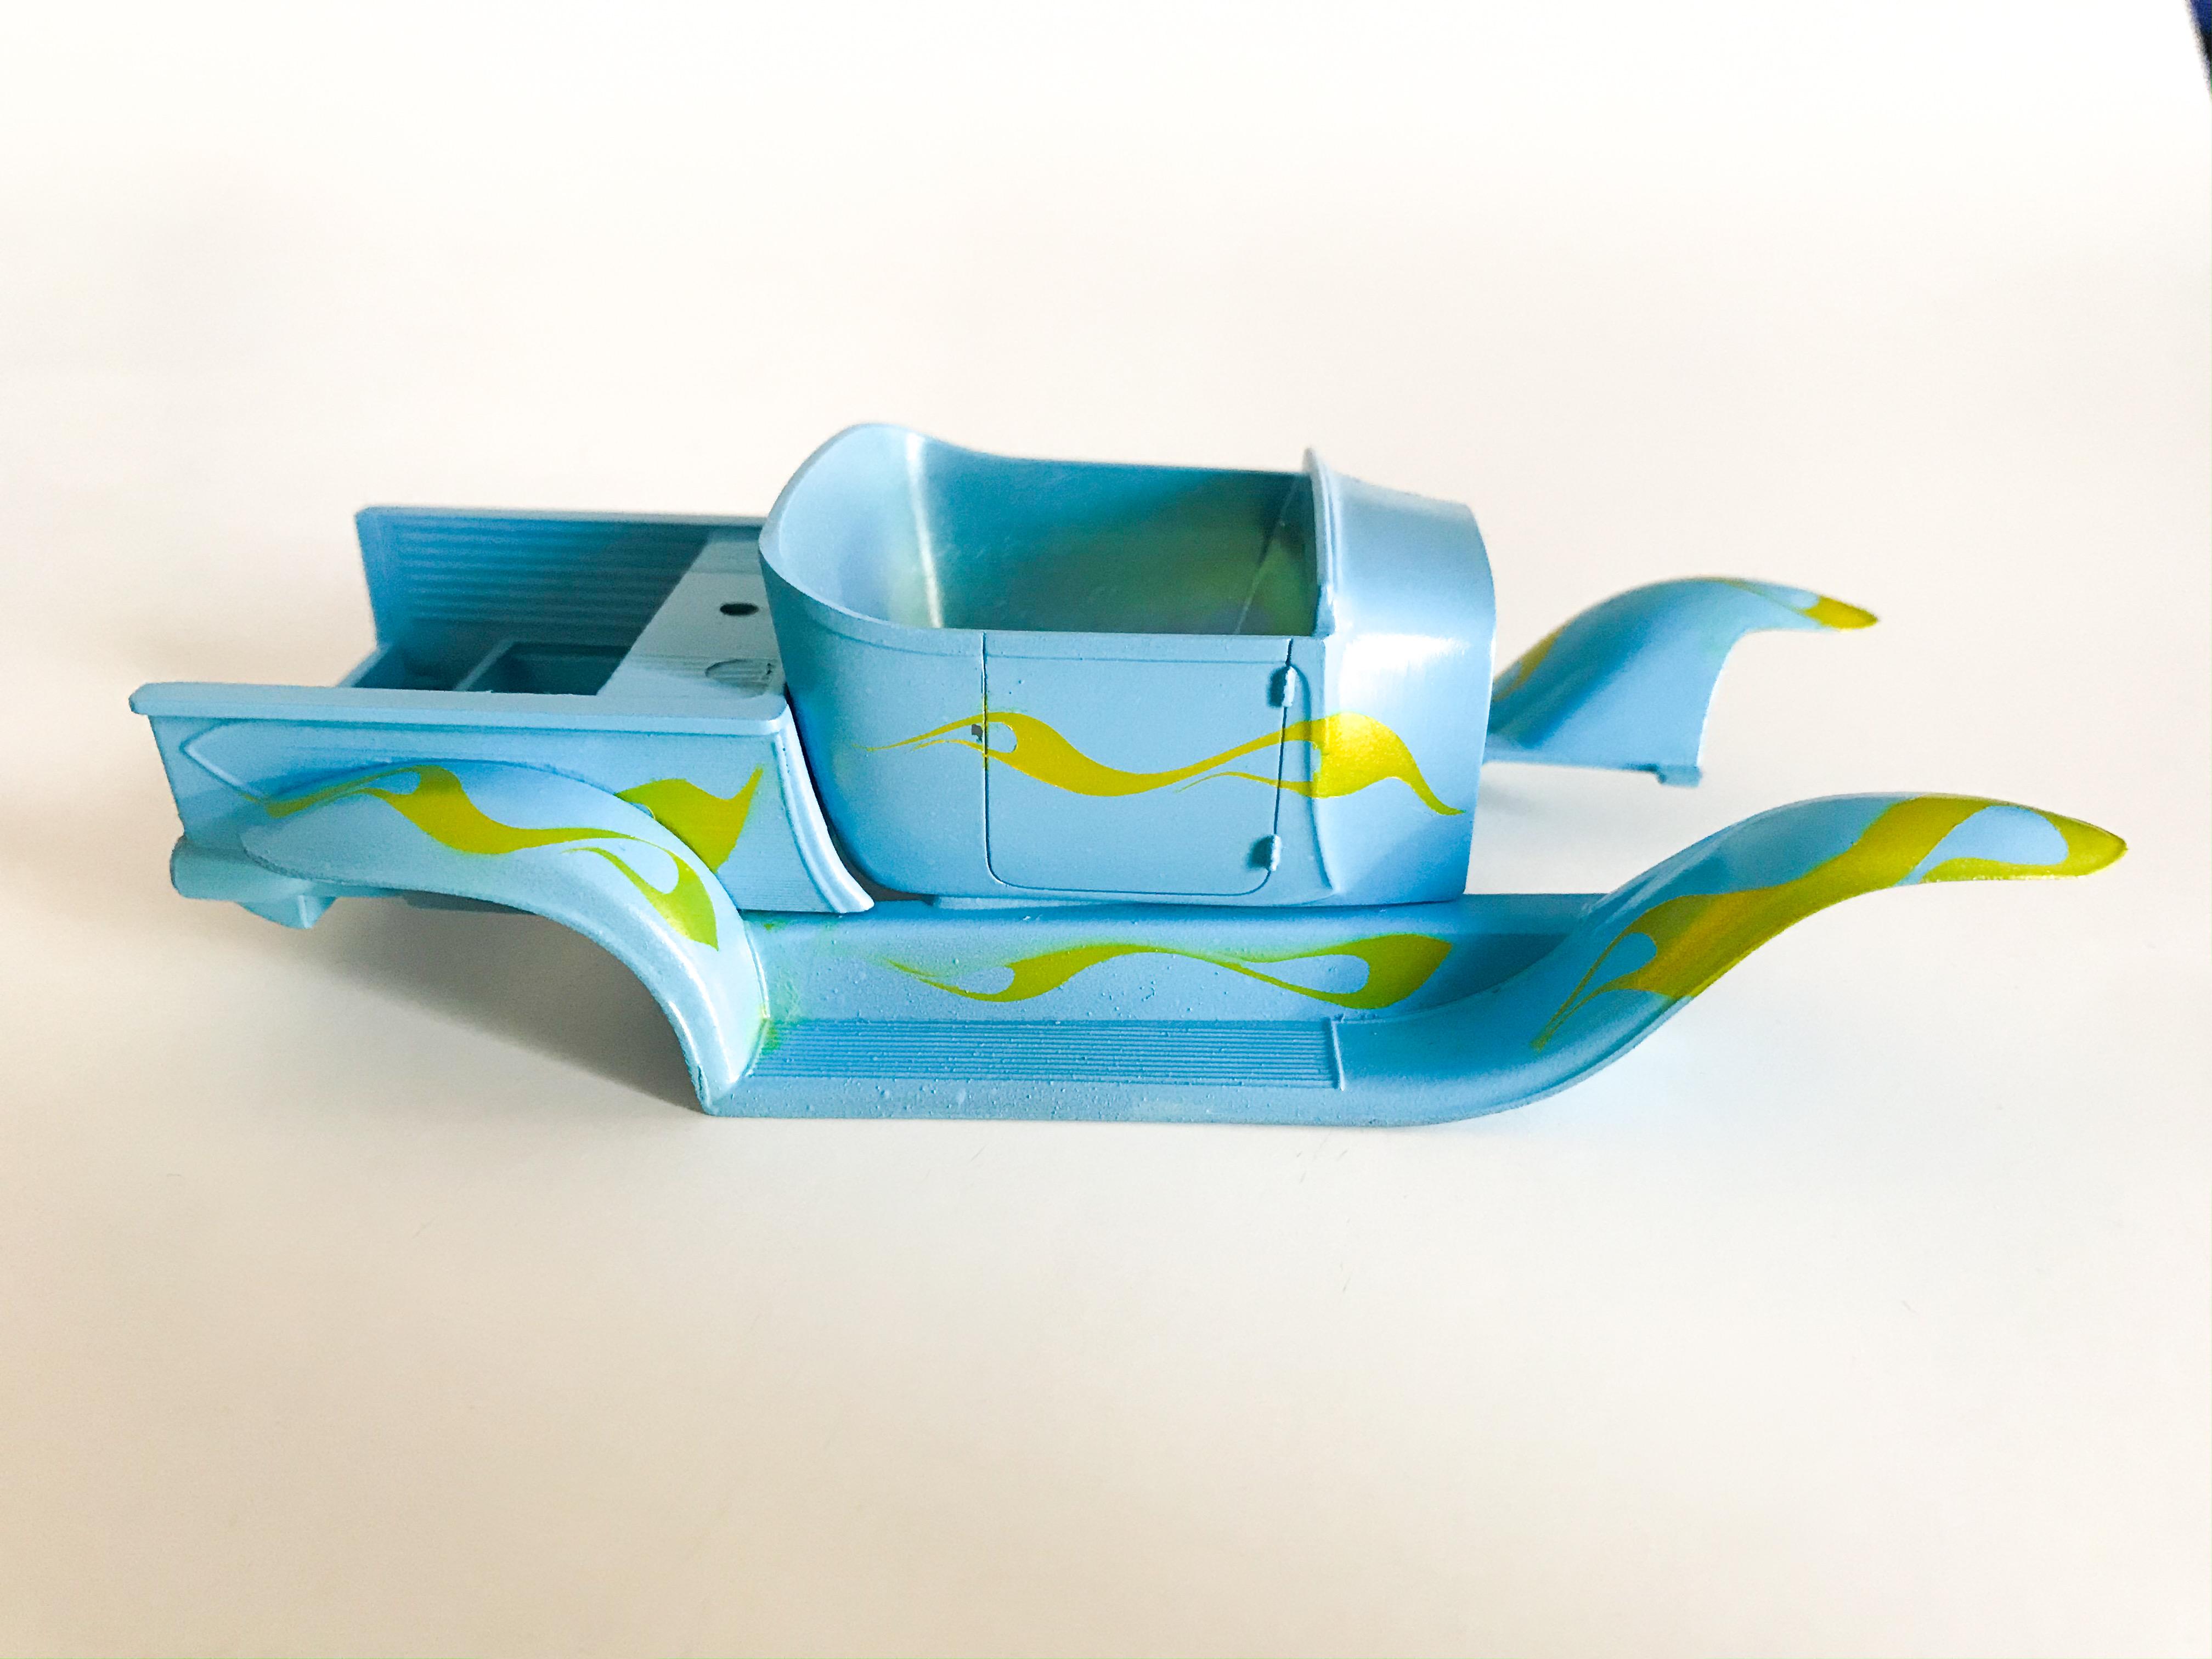
Did some more work on this one today - designed some flames and shot them over the base color: Need to do a little touch up before clearing these - but I’m pleased with the look, it’s how I imagined it! More soon!
-
Interesting! I didn’t know that! Thank you!
-
Beautiful work all round Steven - you’re one of my favorite builders and I always enjoy seeing your projects! The vinyl top looks great, and I really like how you handled the bezels. Whats the story with the red inner fenders? Why did the 1:1 have that?
-
I’d like to see a build thread on this one too! Or some more pics at least!
-
I like those 3D printed wheels! Who makes those?
-
AMT Mod Rod 29 Ford RPU
OldNYJim replied to OldNYJim's topic in WIP: Model Trucks: Pickups, Vans, SUVs, Light Commercial
They’re such a fun kit! I’ll definitely be picking up more of these - so versatile! I’ve got another build lined up for the left-over parts too, when I get that far along. Thank you for looking! Whilst I’m replying anyway...not much progress today (although I made a few little parts for the engine and ordered some machined metal pulleys for it) but I got some clear on the blue bits...I want to flame the fenders, bed and body but I was worried about damaging the base color so I shot them all with a couple of coats of Future. Hopefully have an interesting update tomorrow!
-
Looks really great! I’m really enjoying this build - and every time I see if I admire that paint again. Nice work!
-
AMT Mod Rod 29 Ford RPU
OldNYJim replied to OldNYJim's topic in WIP: Model Trucks: Pickups, Vans, SUVs, Light Commercial
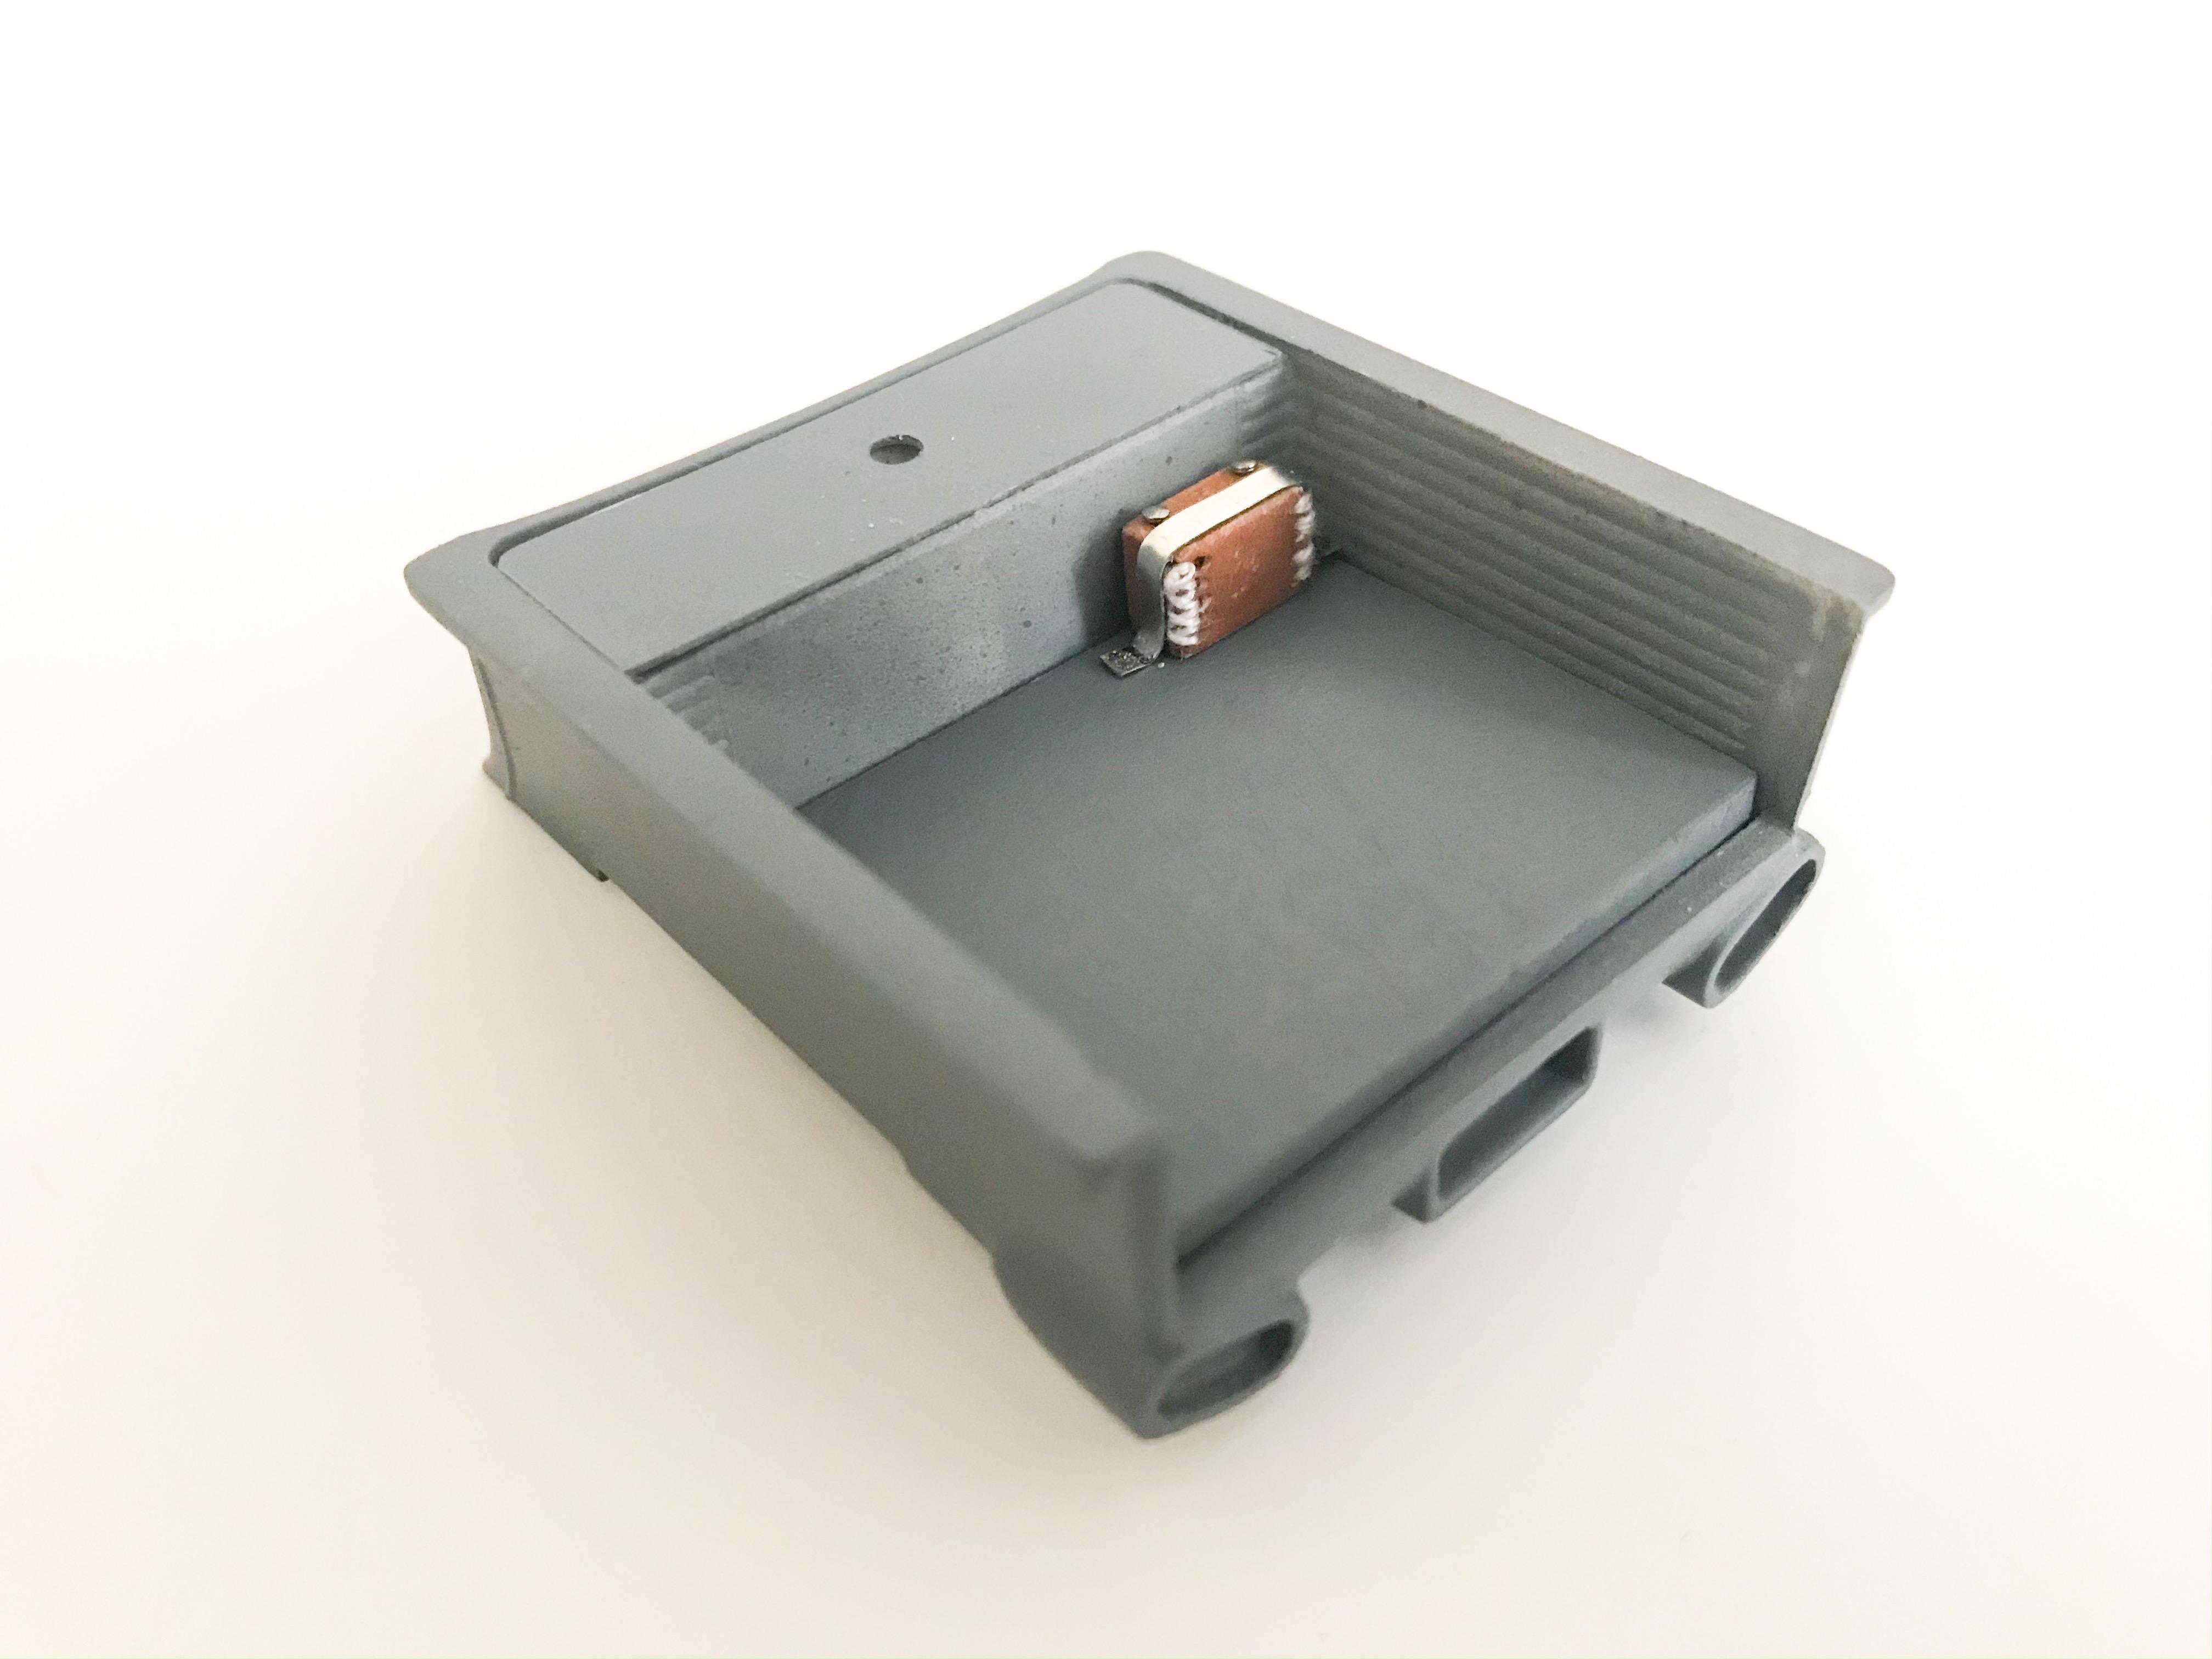
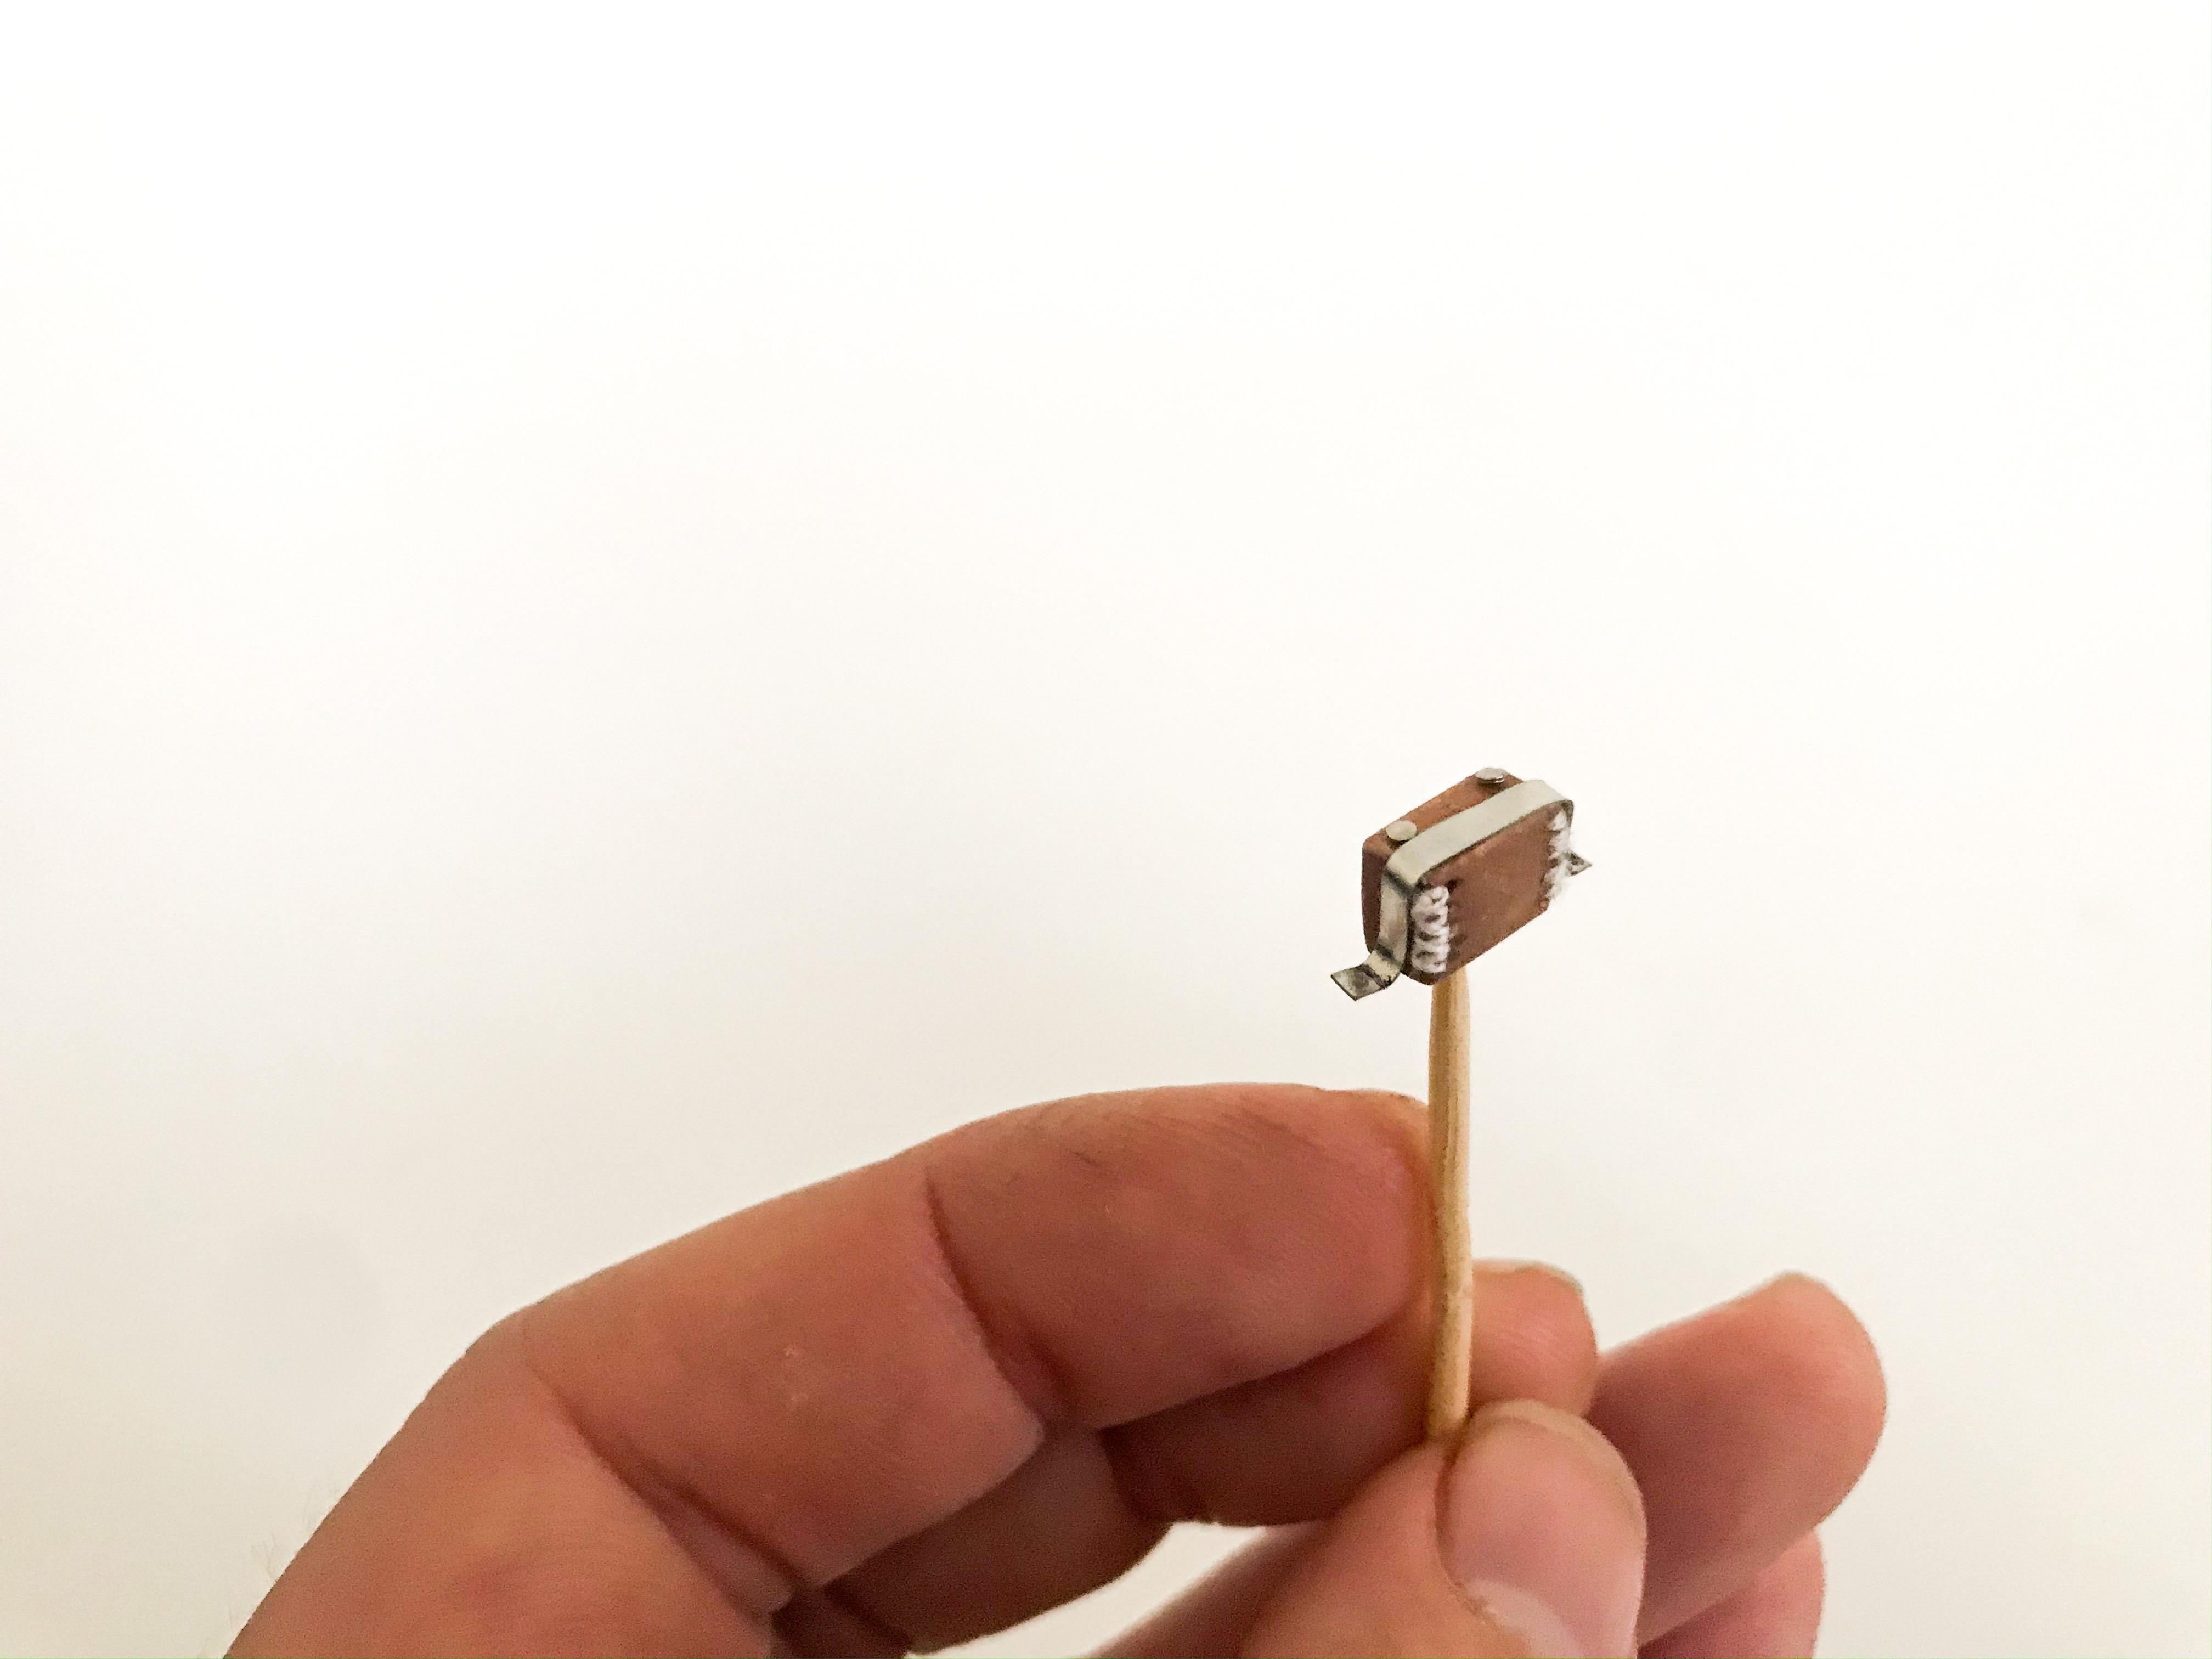
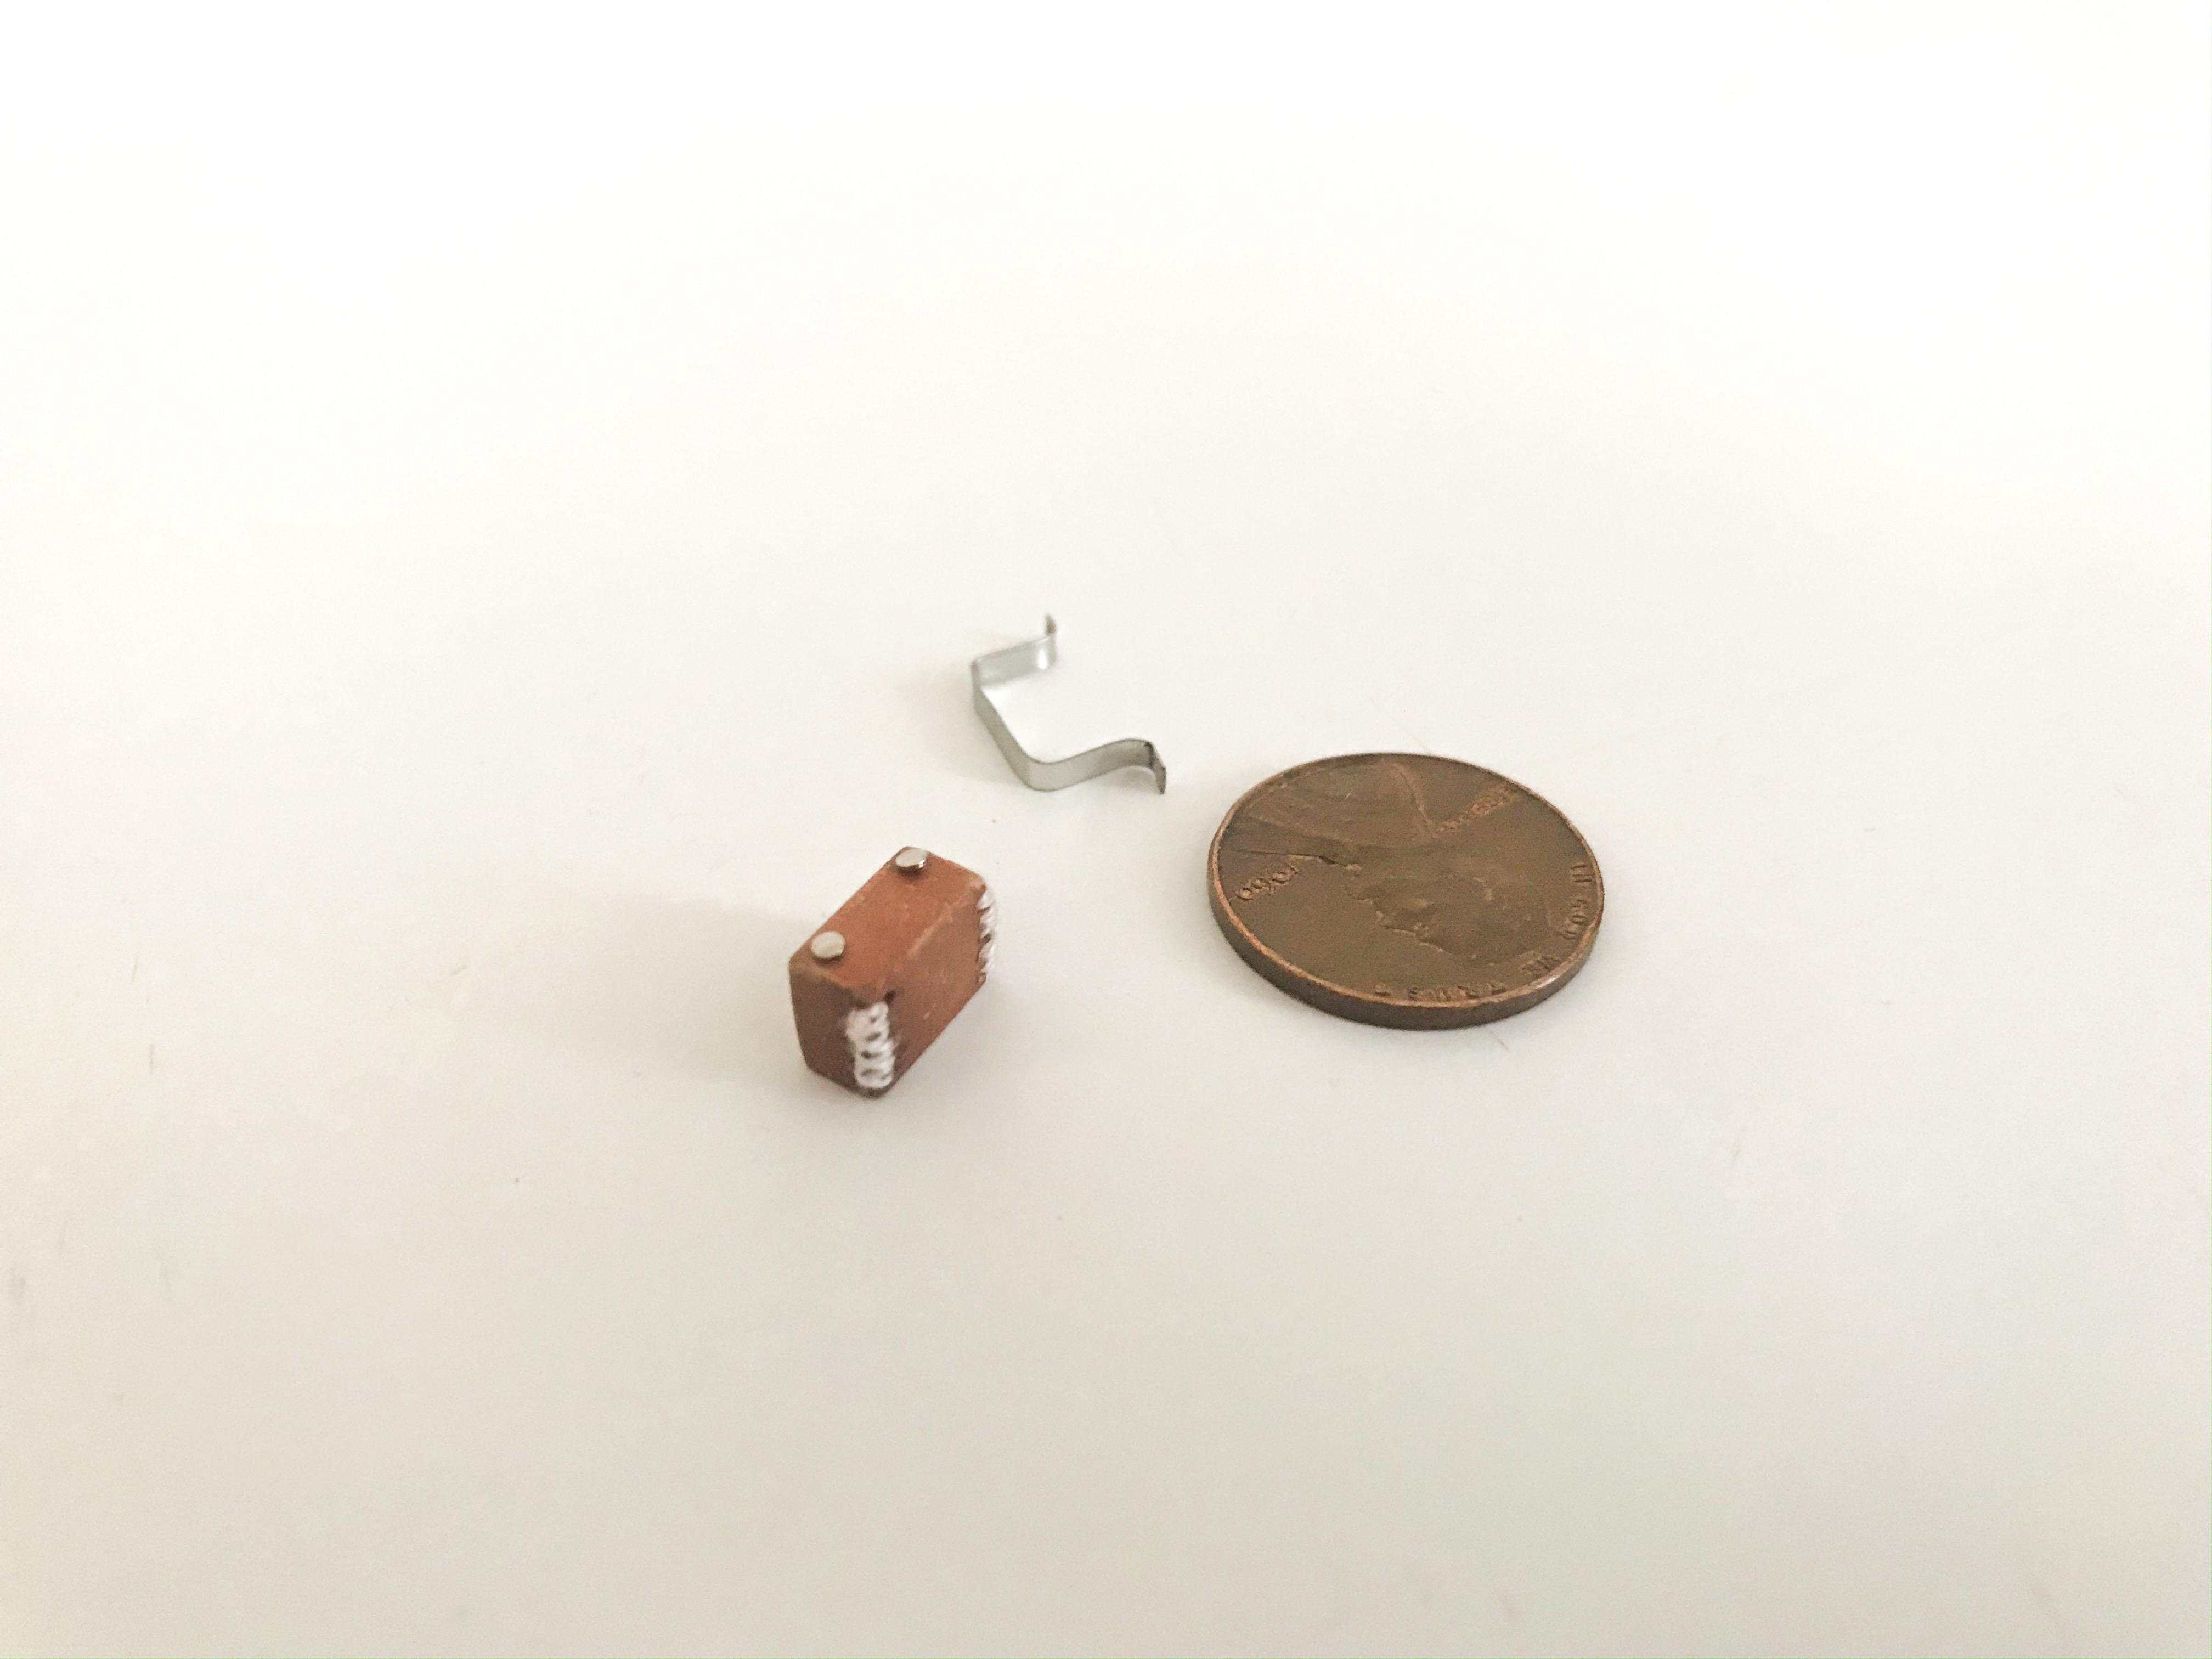
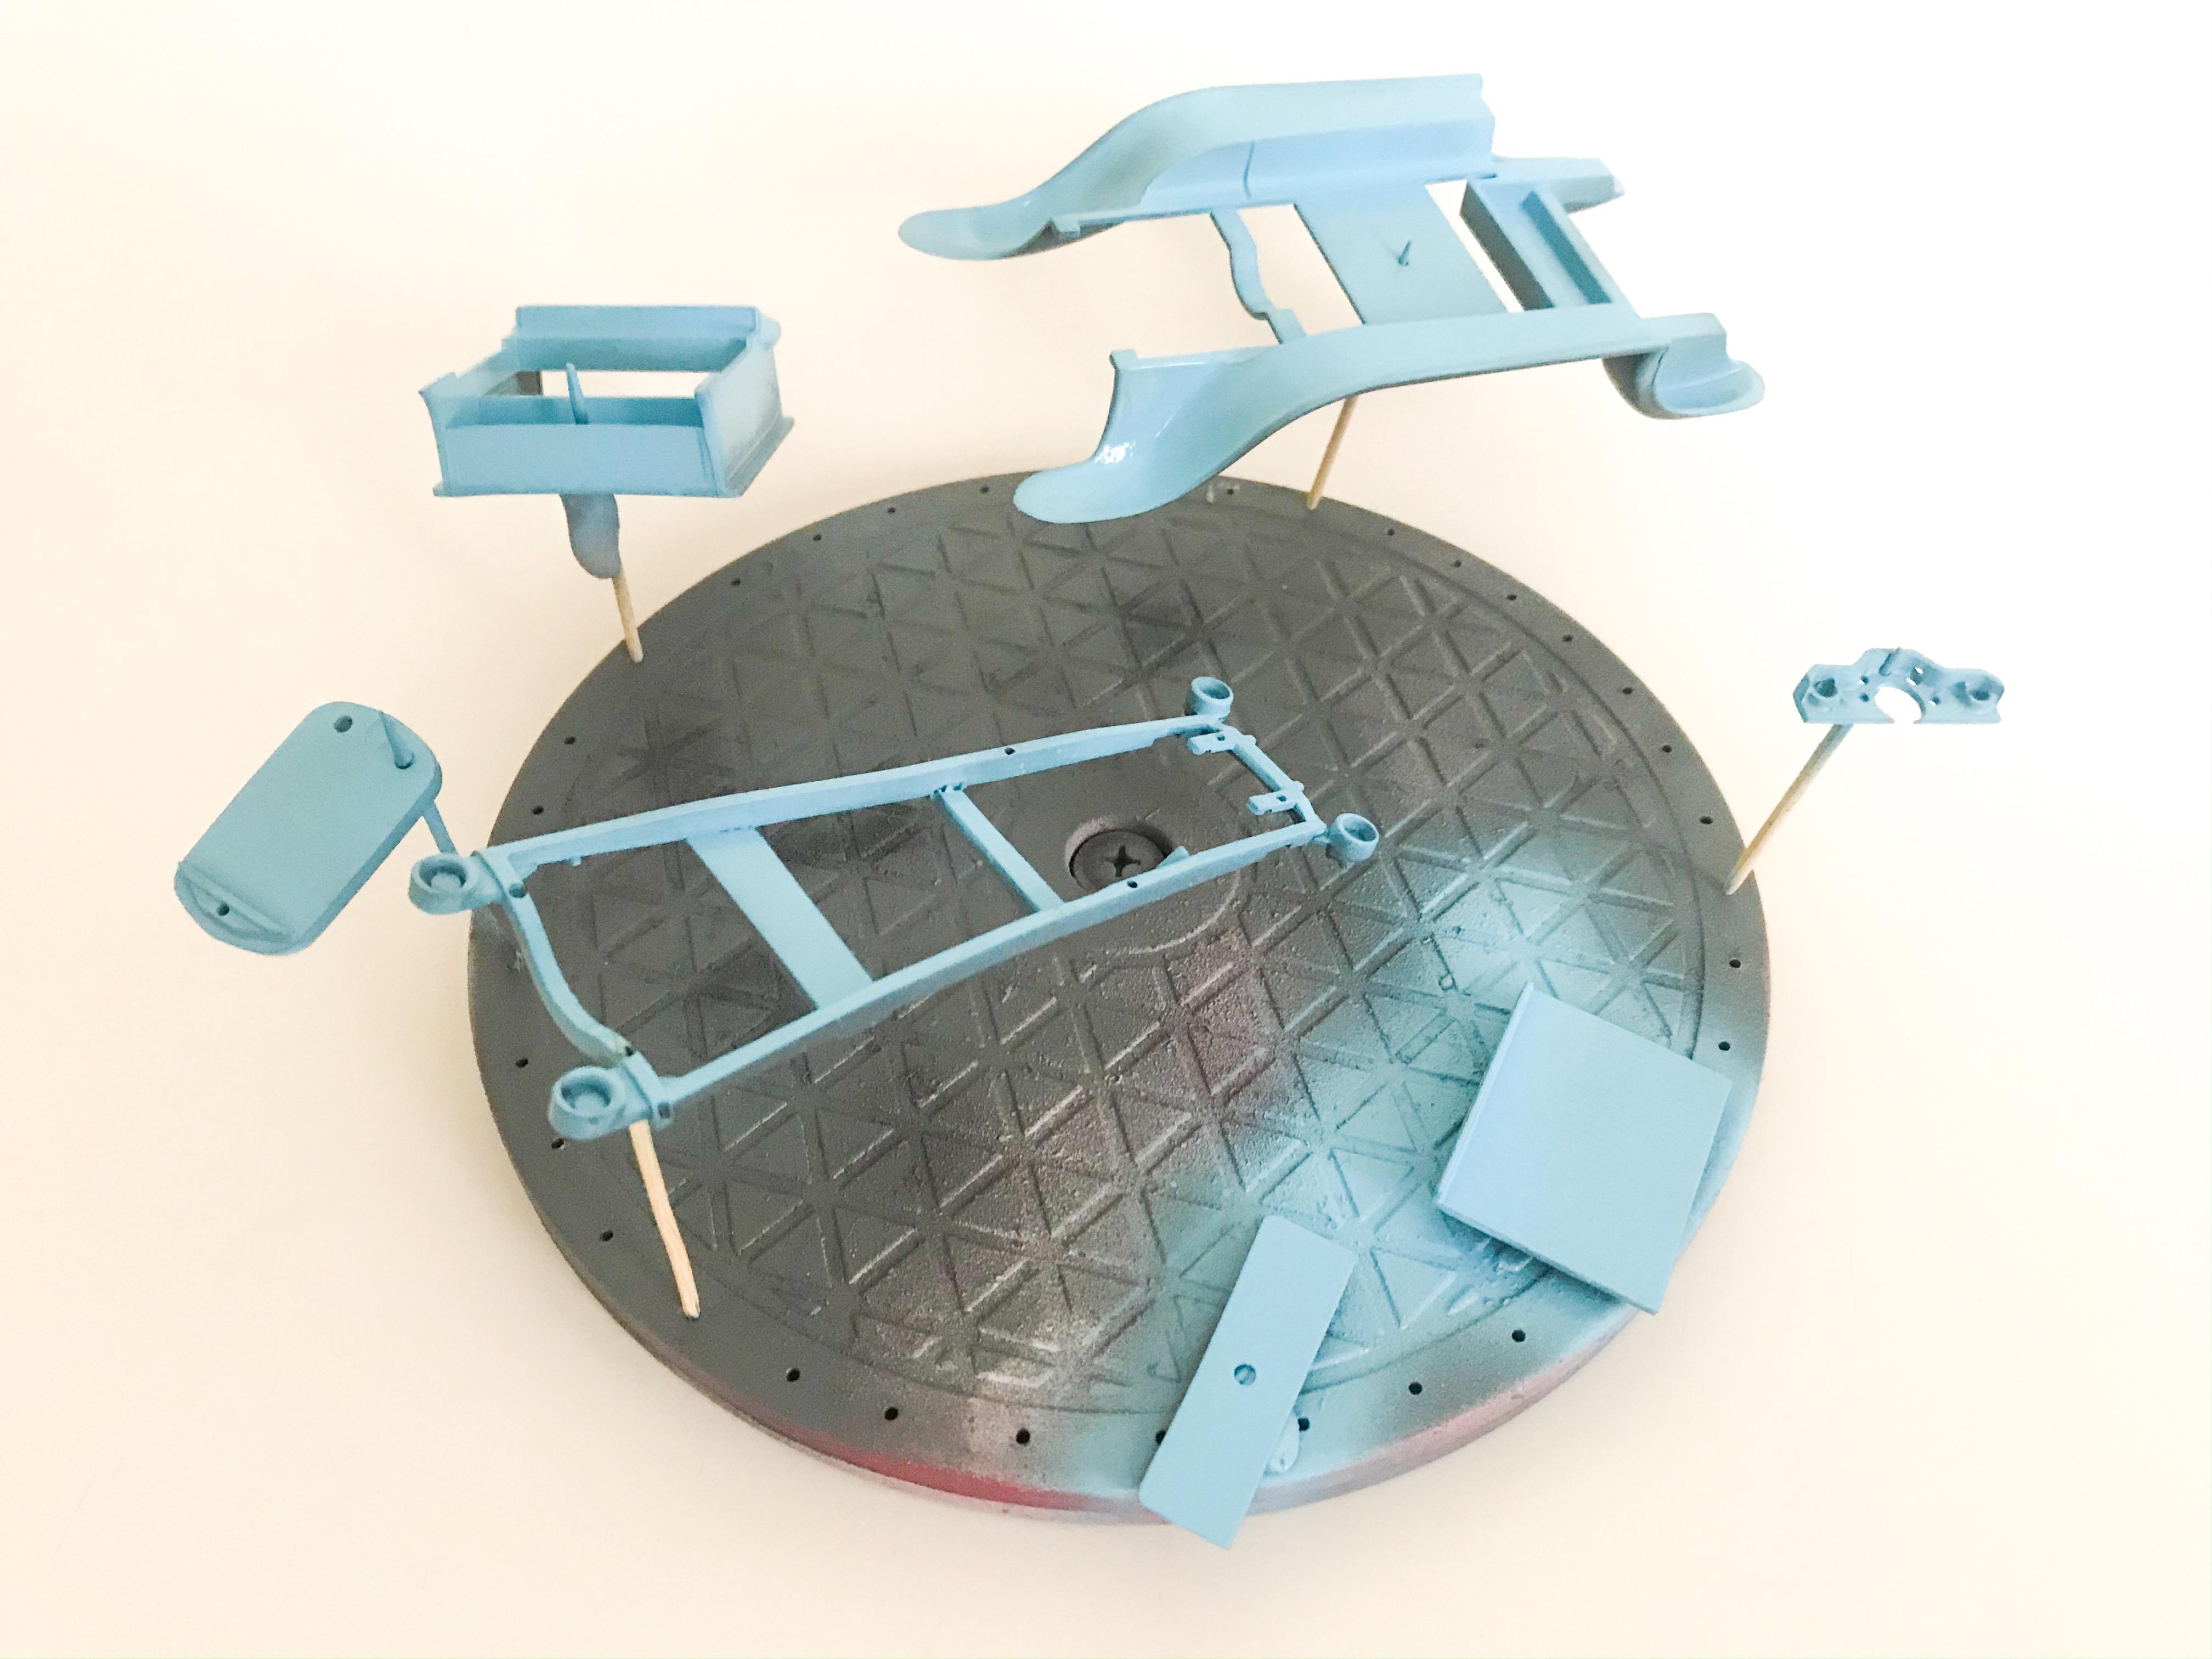
Spent a couple of days this week working on a leather battery cover - this was cut from styrene sheet, drilled and then hand stitched. Just a fun little detail that I’d seen on a bike before, but not on a car... The metal strap is made some some thin steel sheet - I’ll add some fastener detail to that further down the line when I’m doing assembly: Aside from that, I got tired of seeing the frame and fenders (and some other bits) in primer so I shot them with the same baby-blue Createx that I’ll be using throughout this build...only done the undersides of the parts so far, but when they’ve dried for a few hours I’ll flip them over and do the top bits: More soon, soon as I’ve done more!
-
AMT Mod Rod 29 Ford RPU
OldNYJim replied to OldNYJim's topic in WIP: Model Trucks: Pickups, Vans, SUVs, Light Commercial
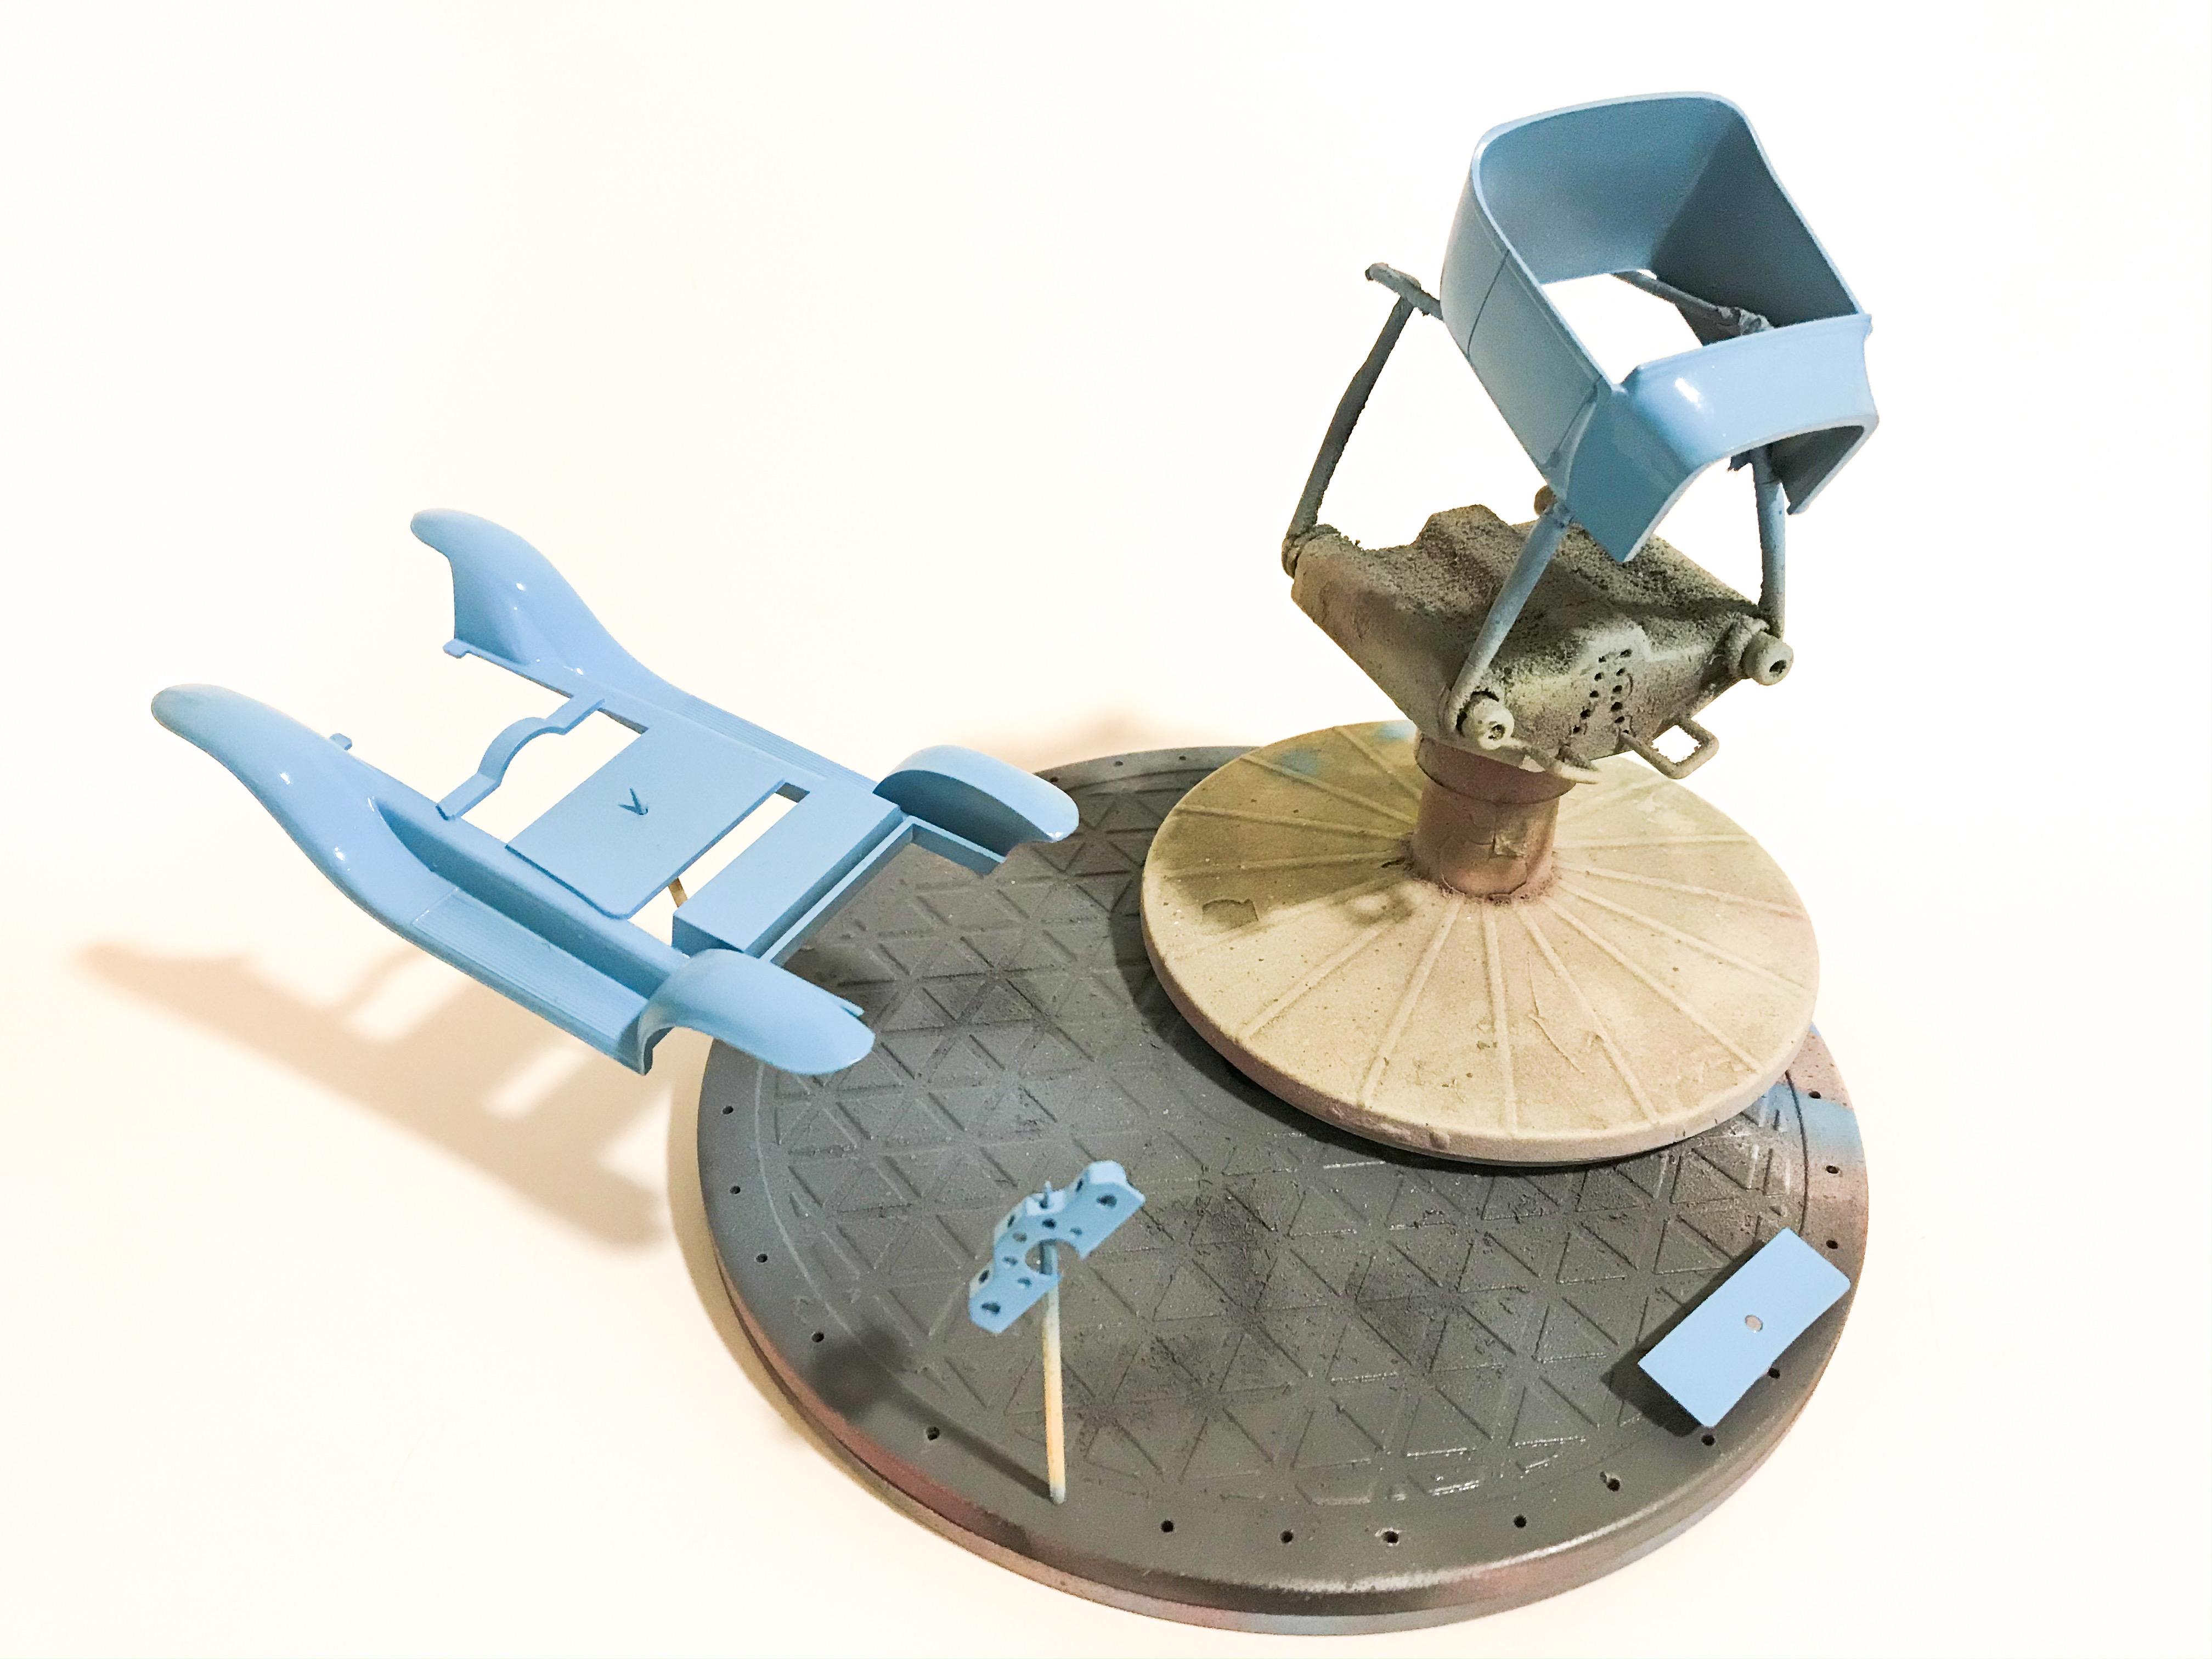
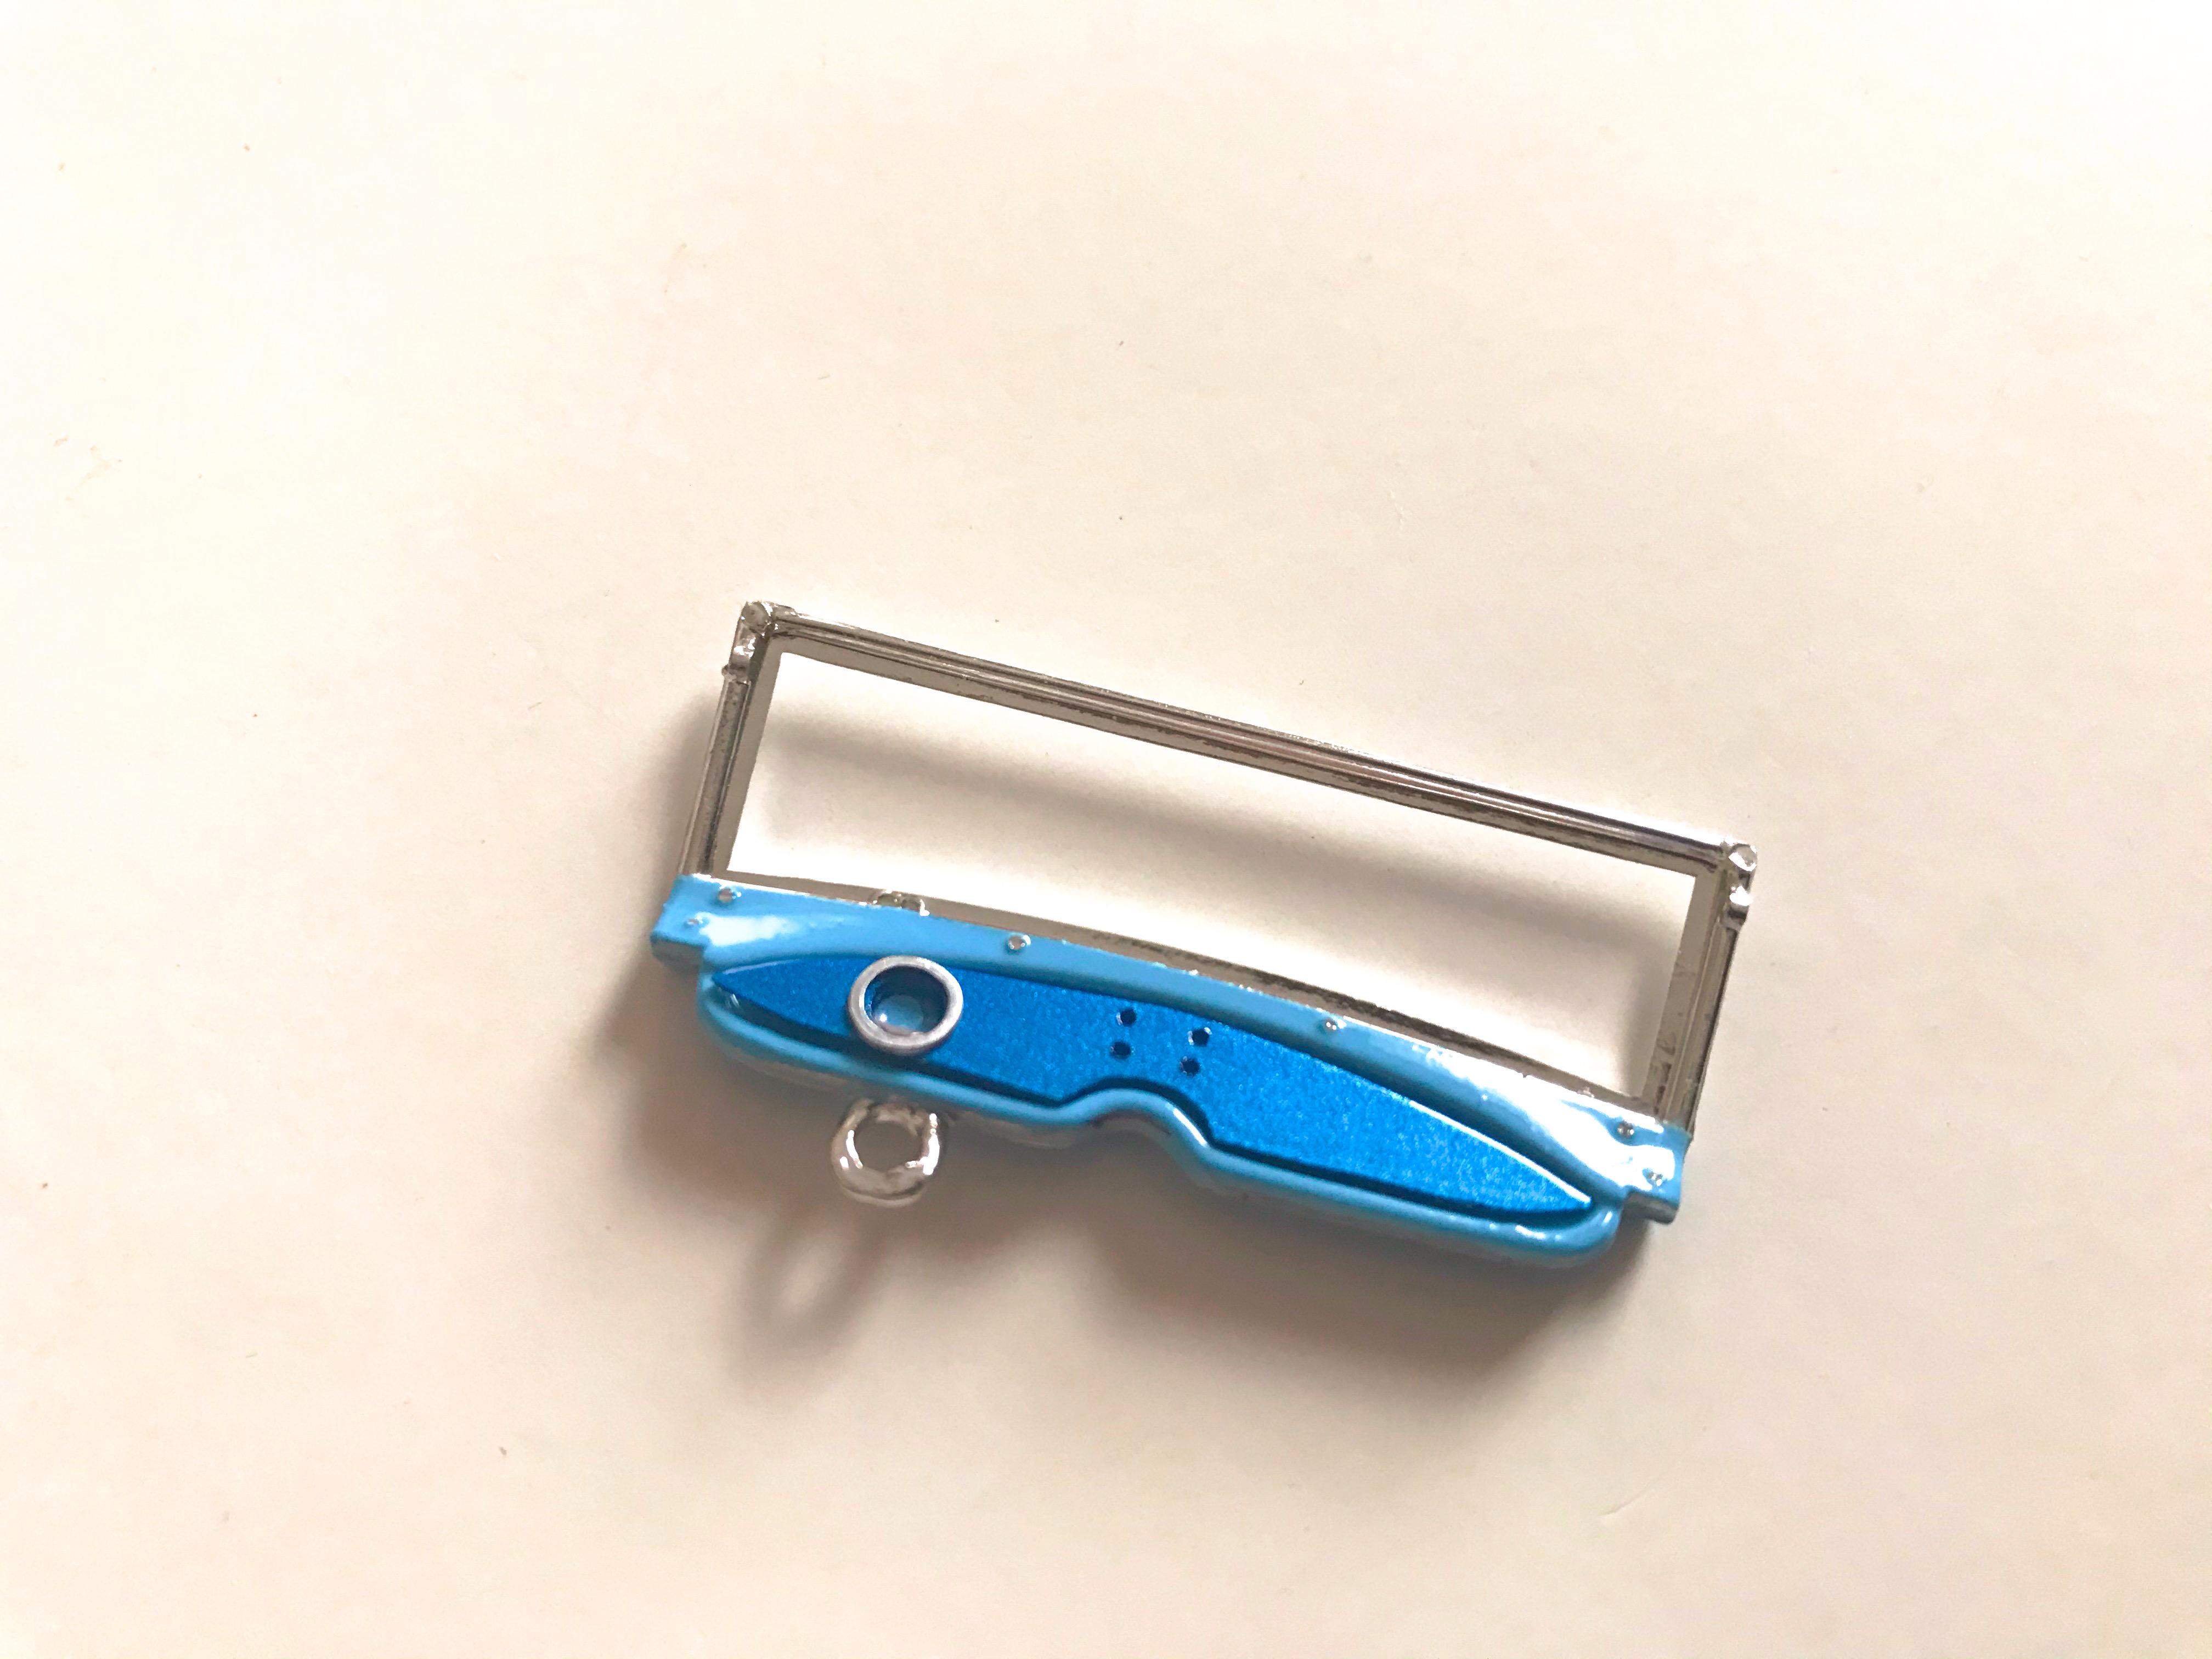
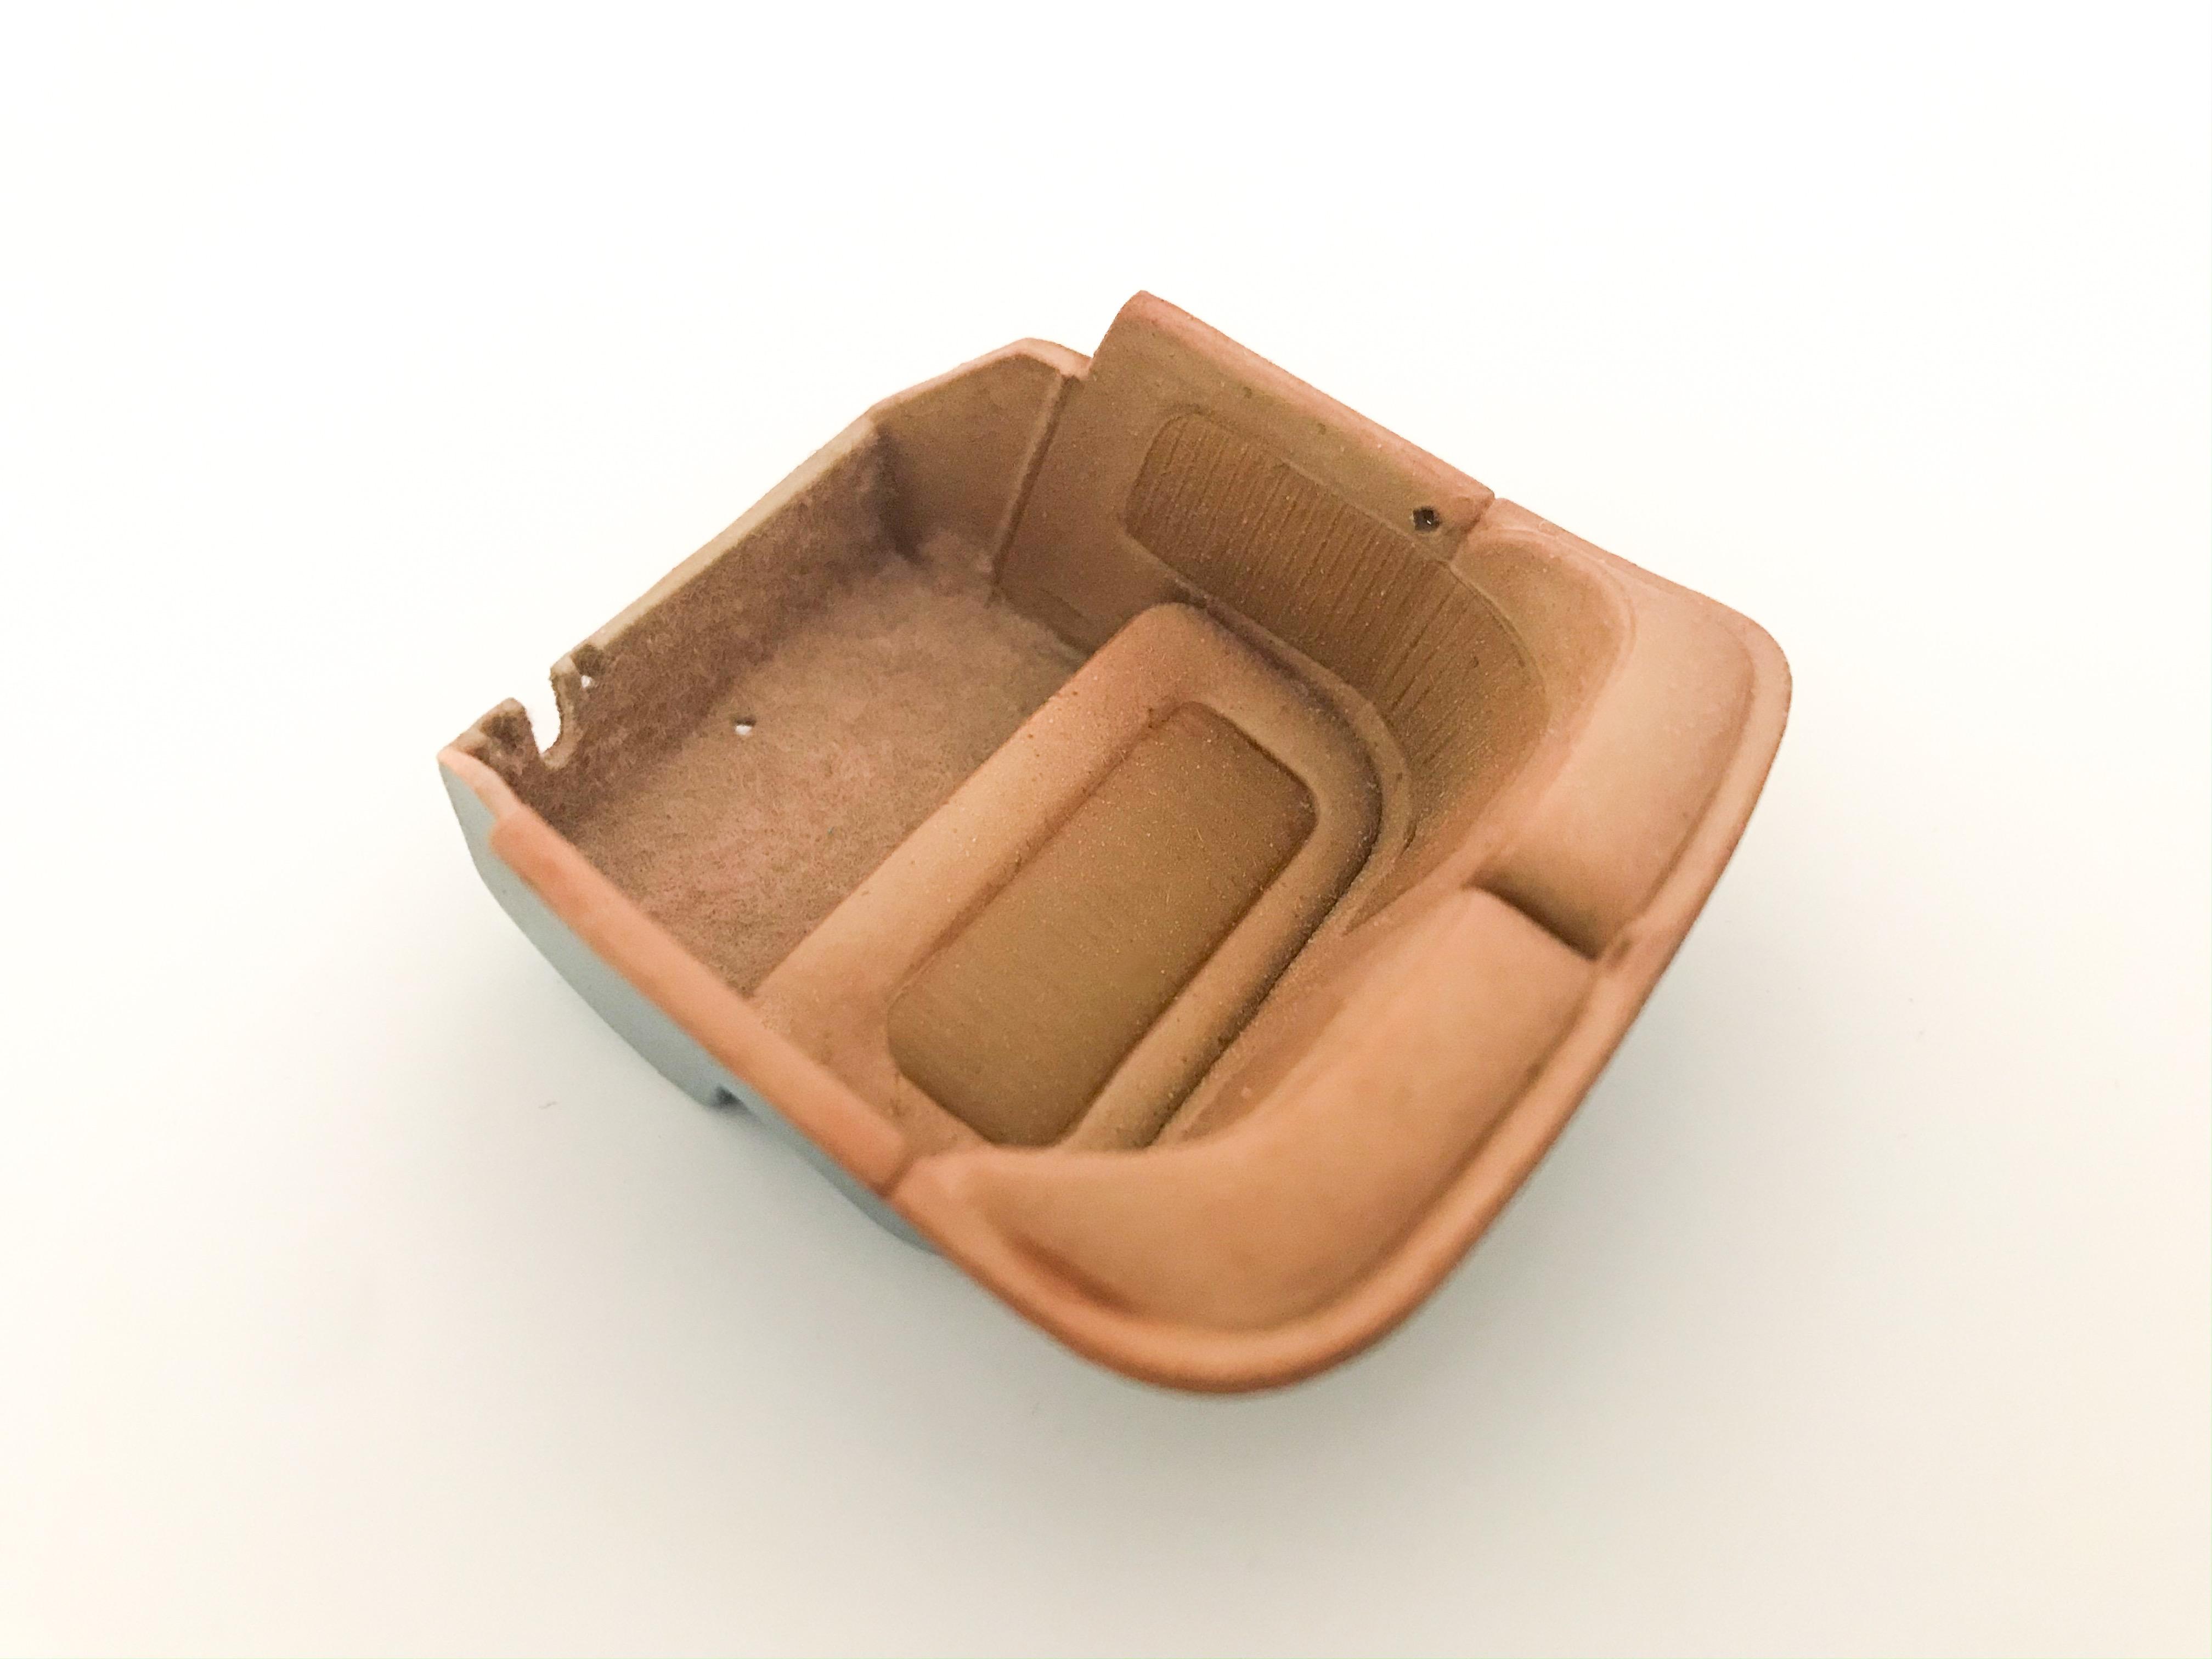
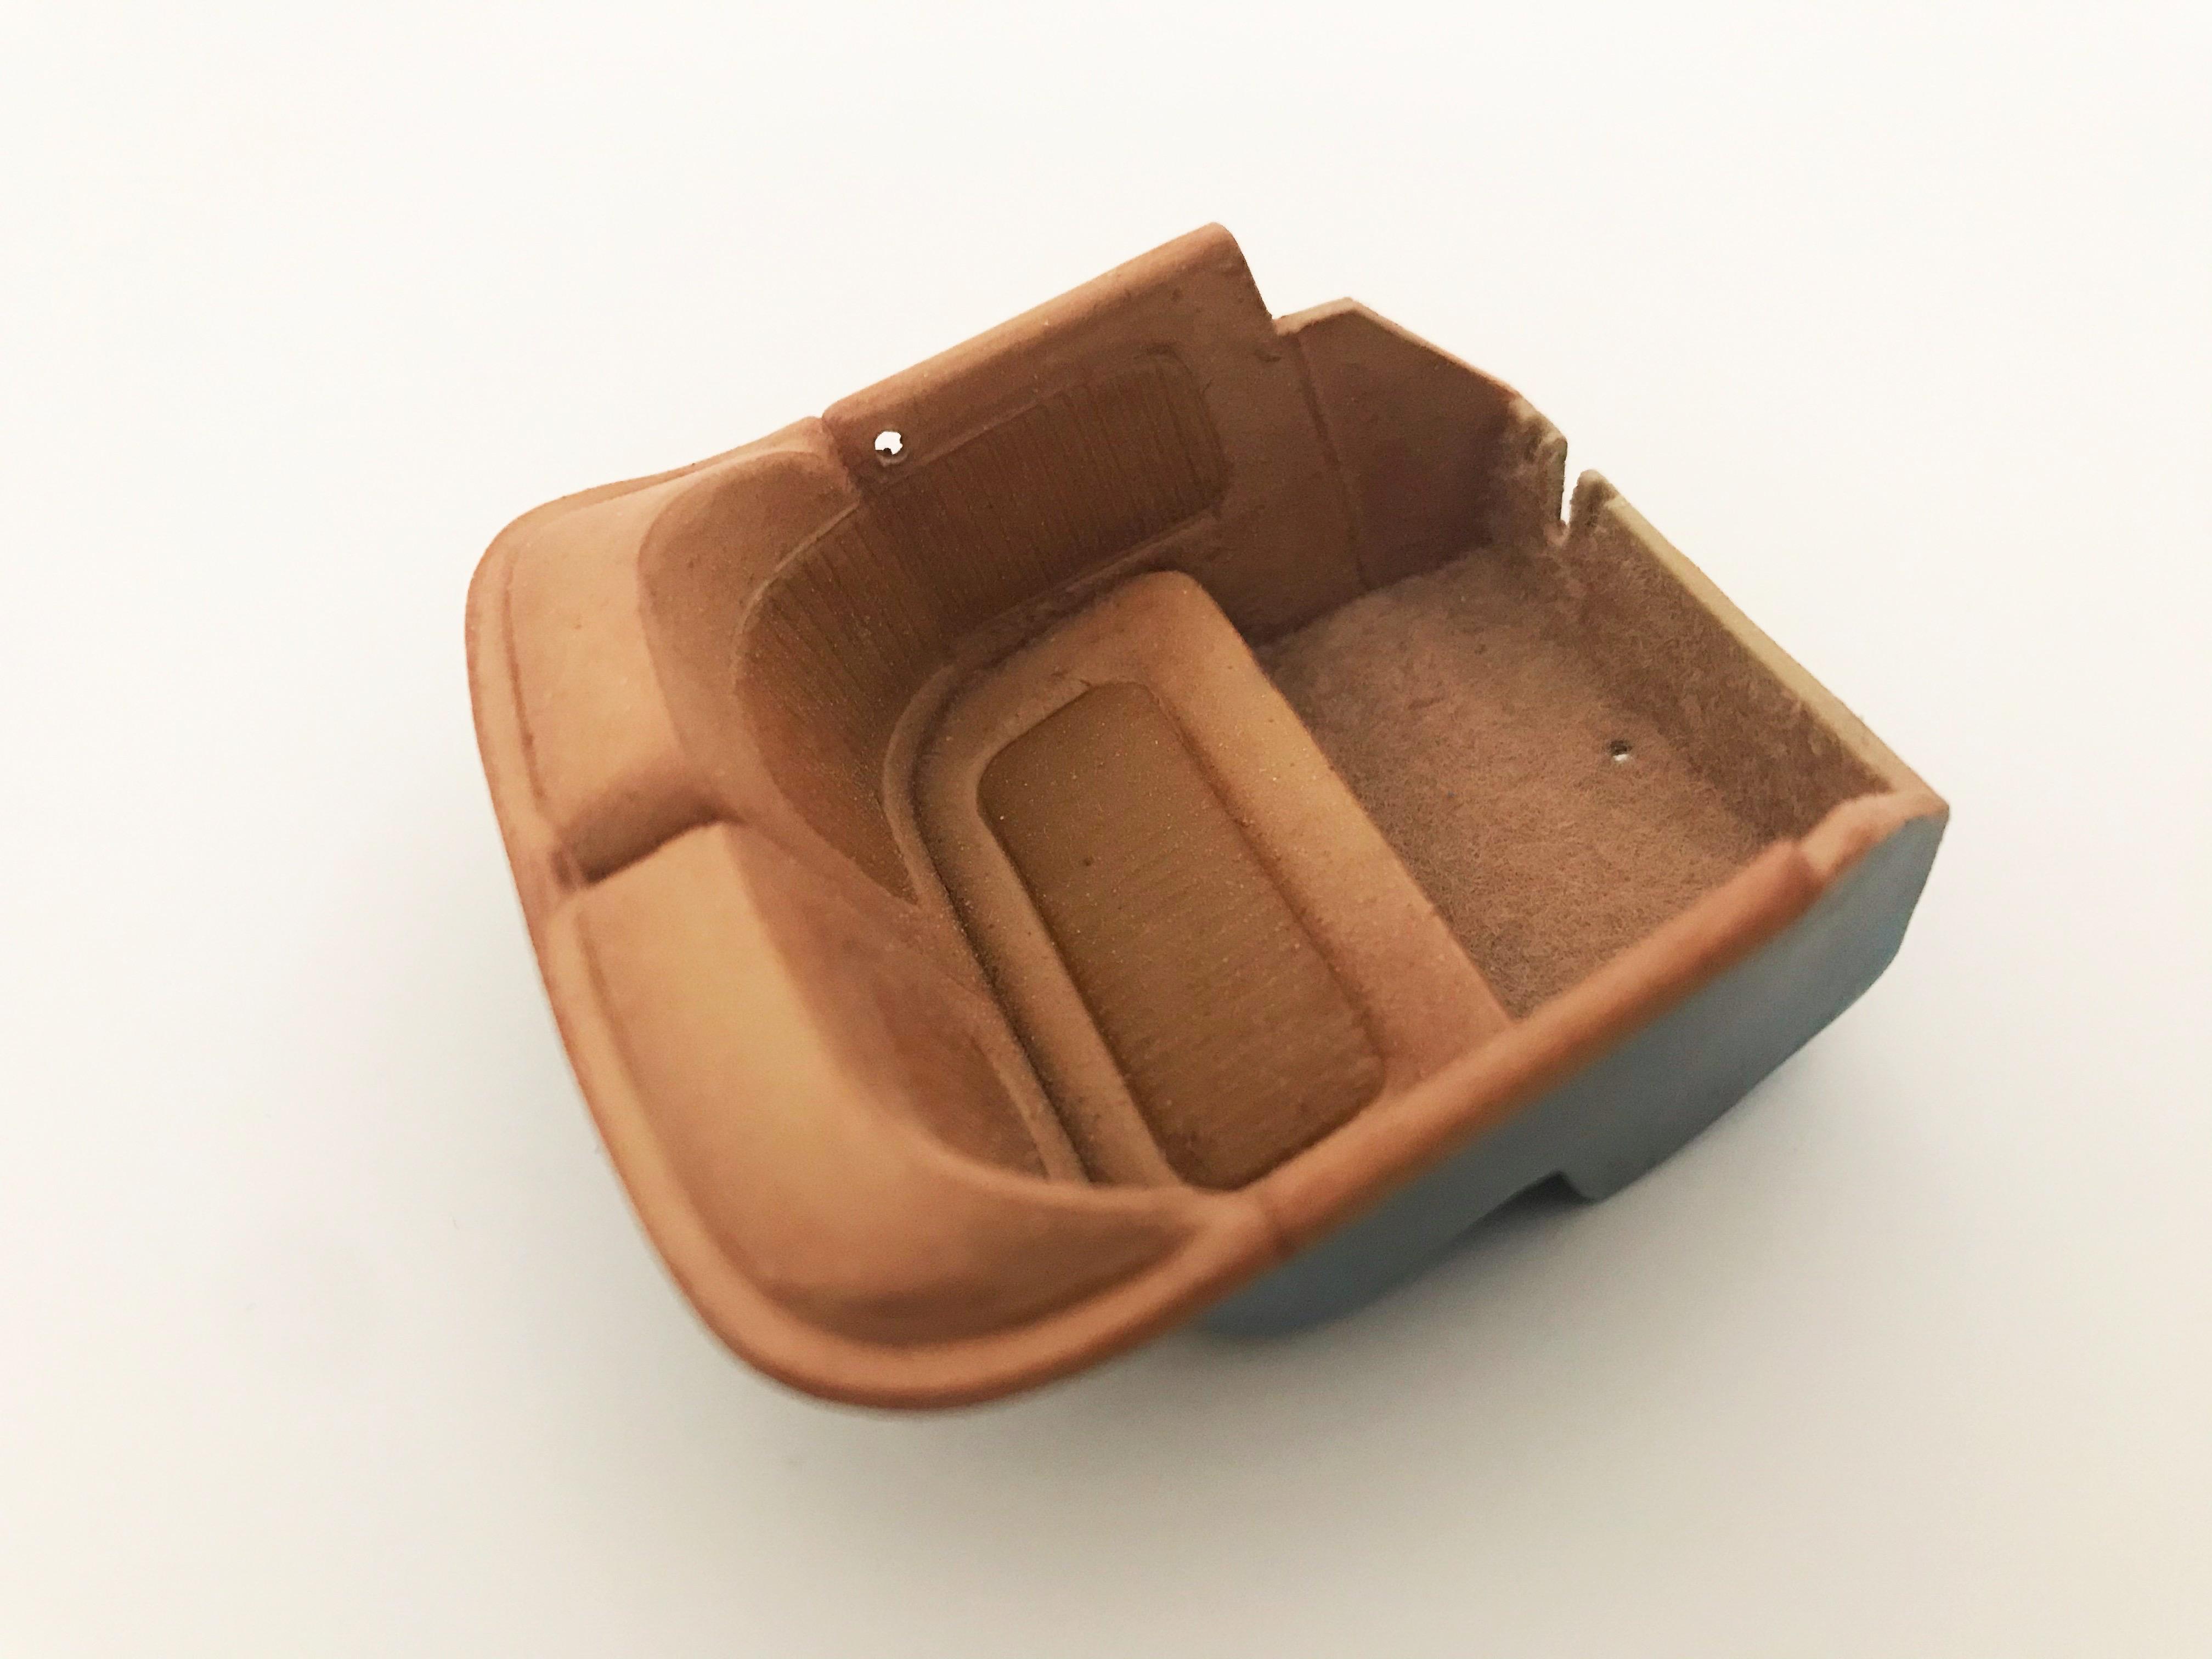
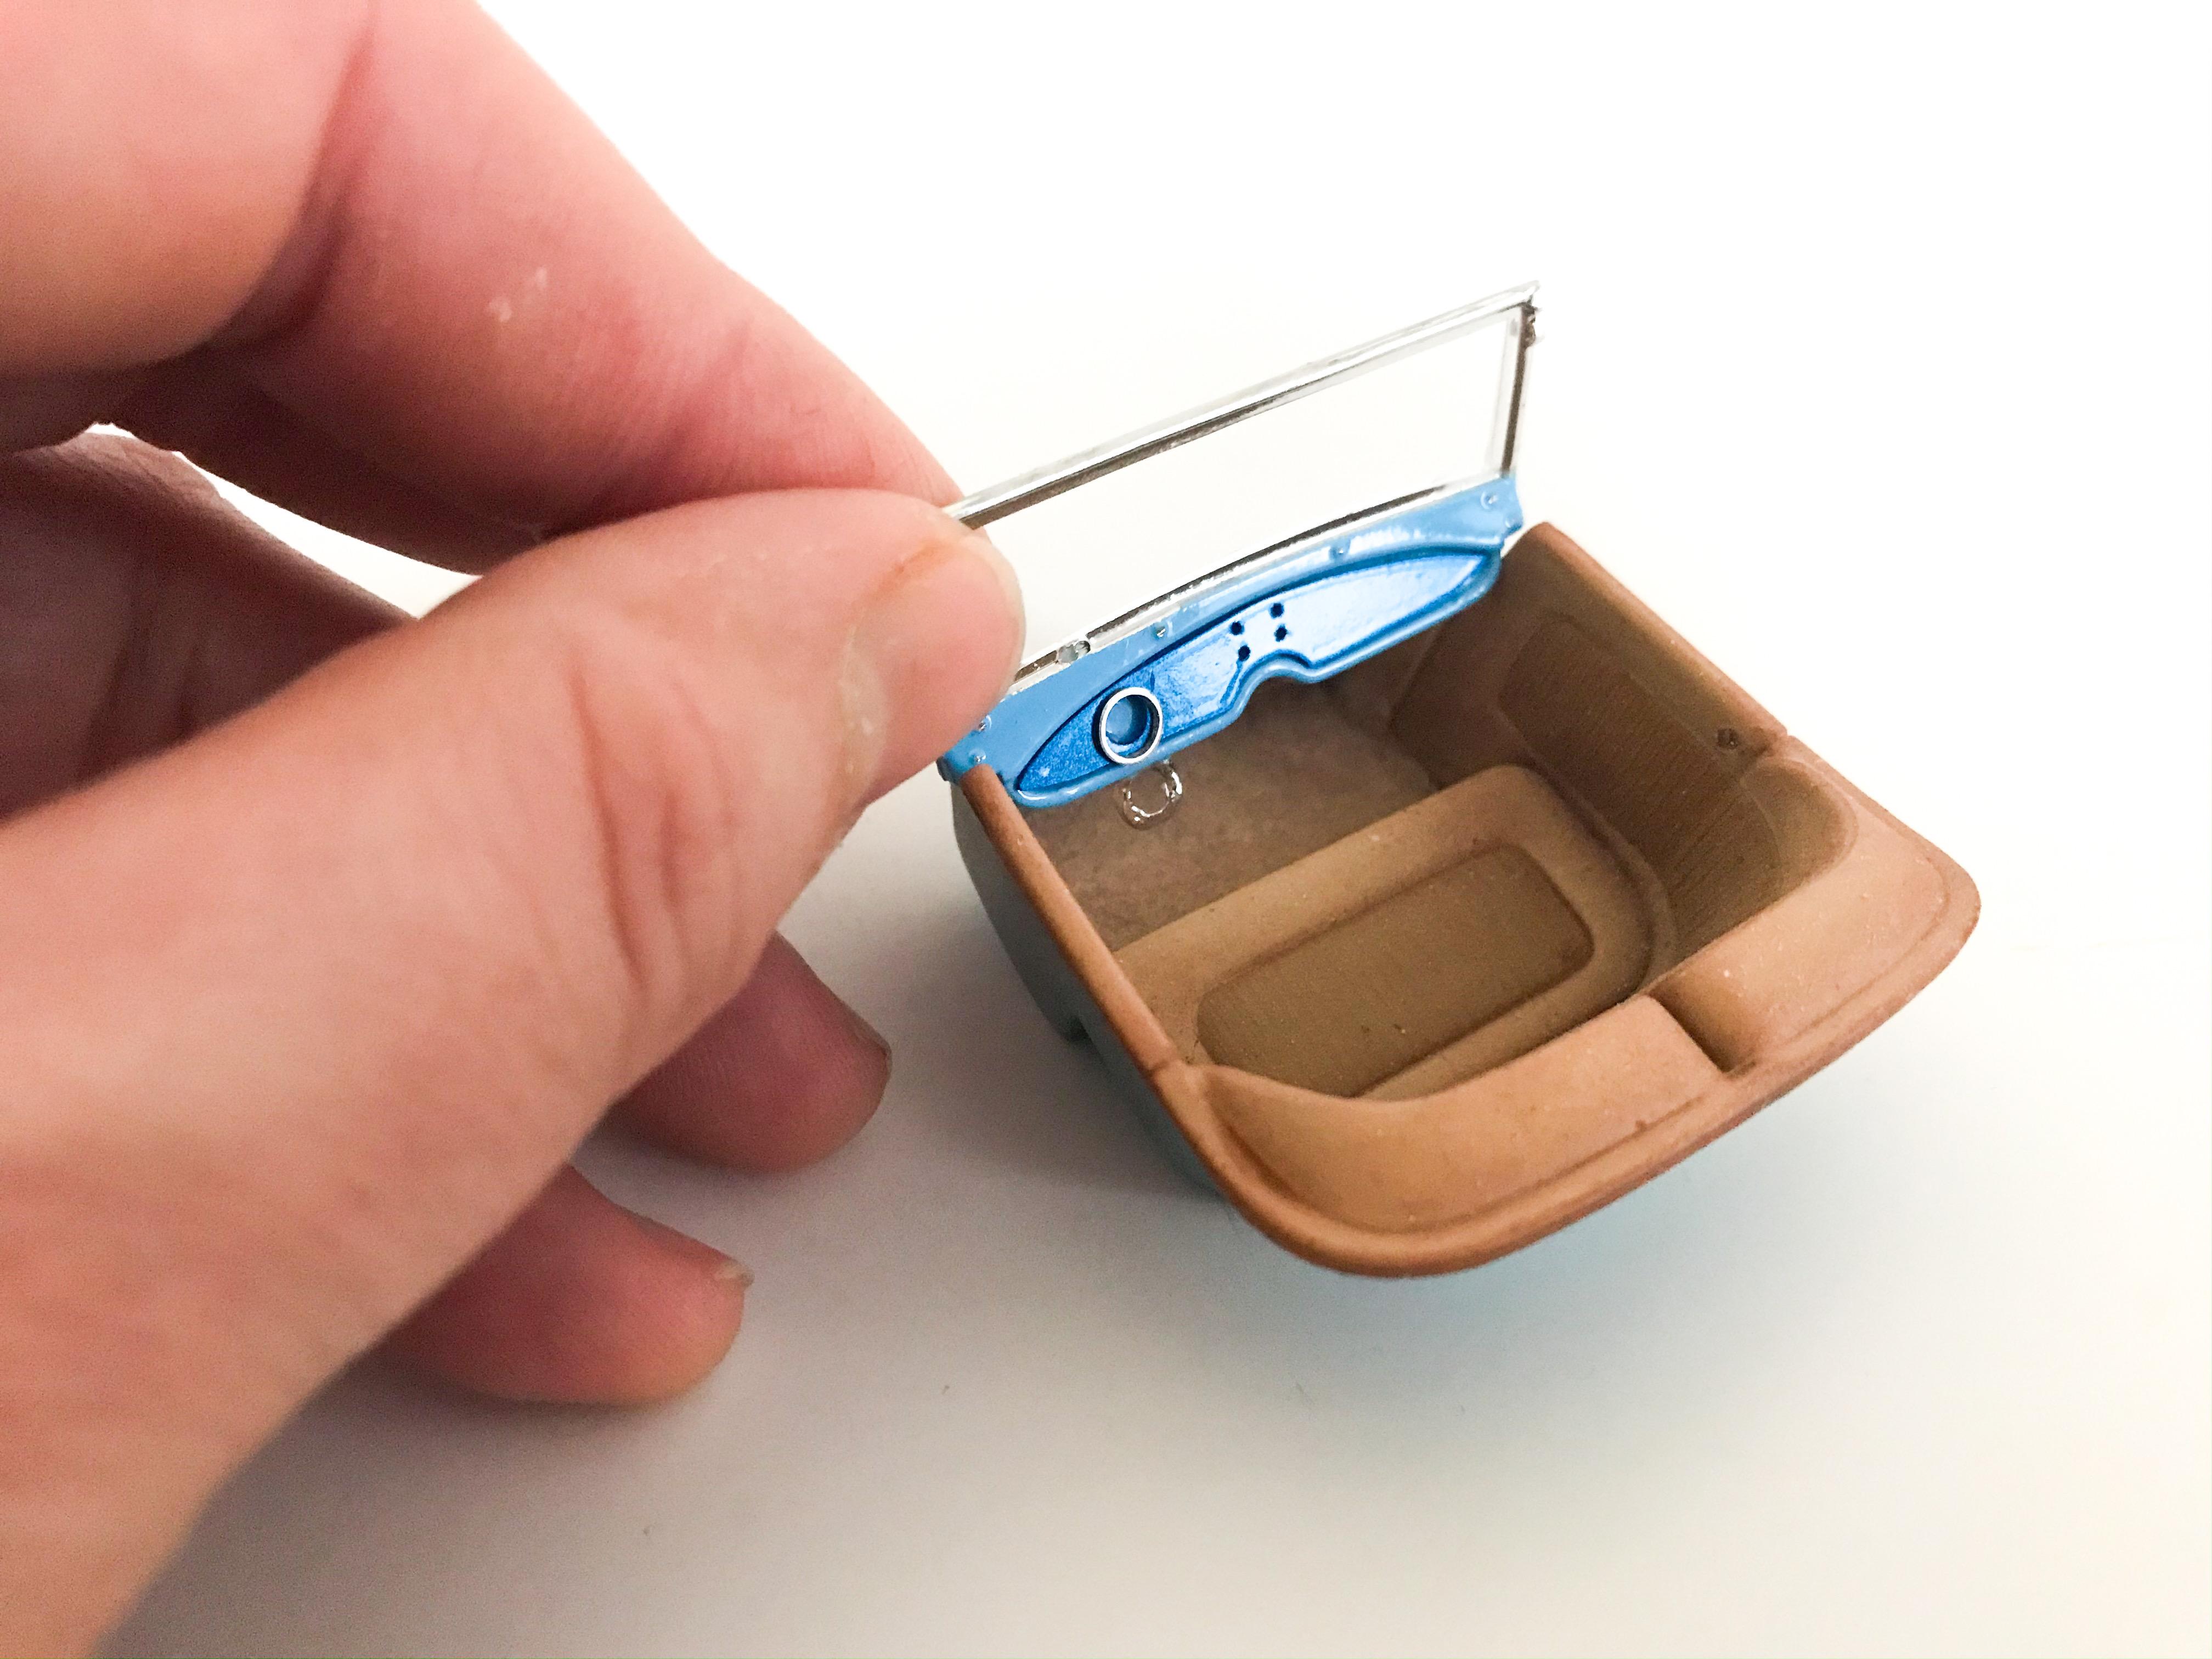
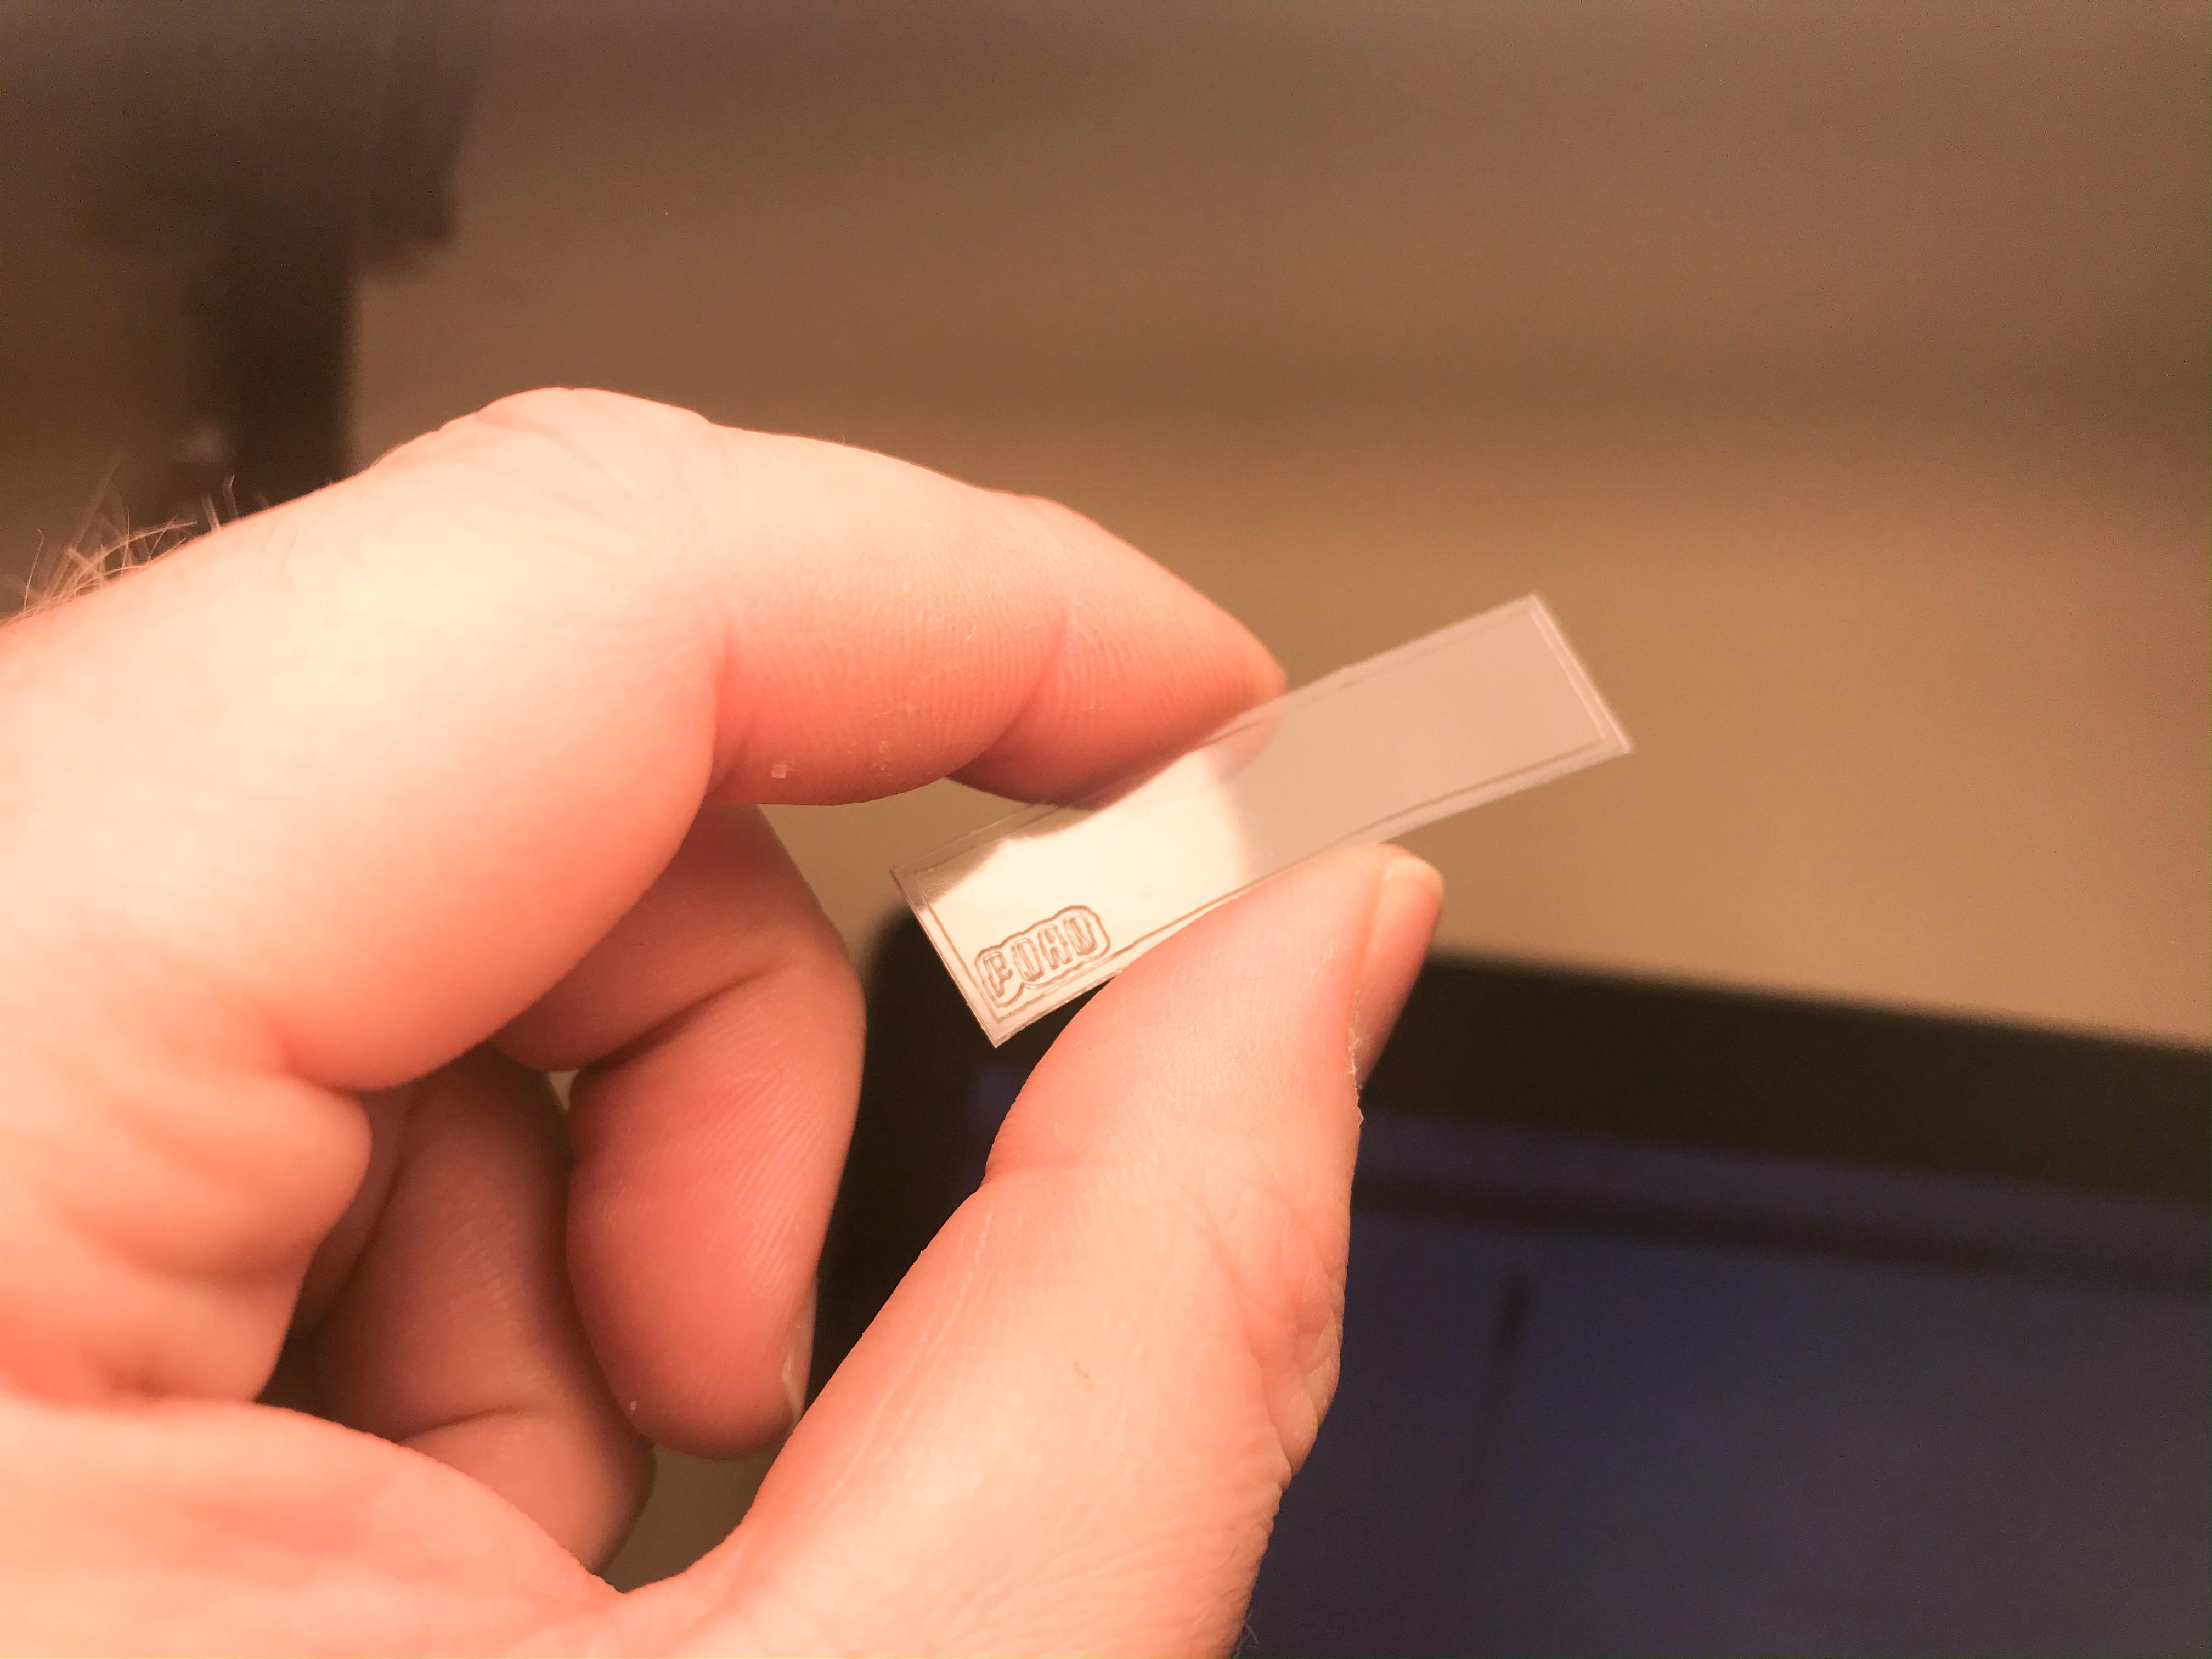
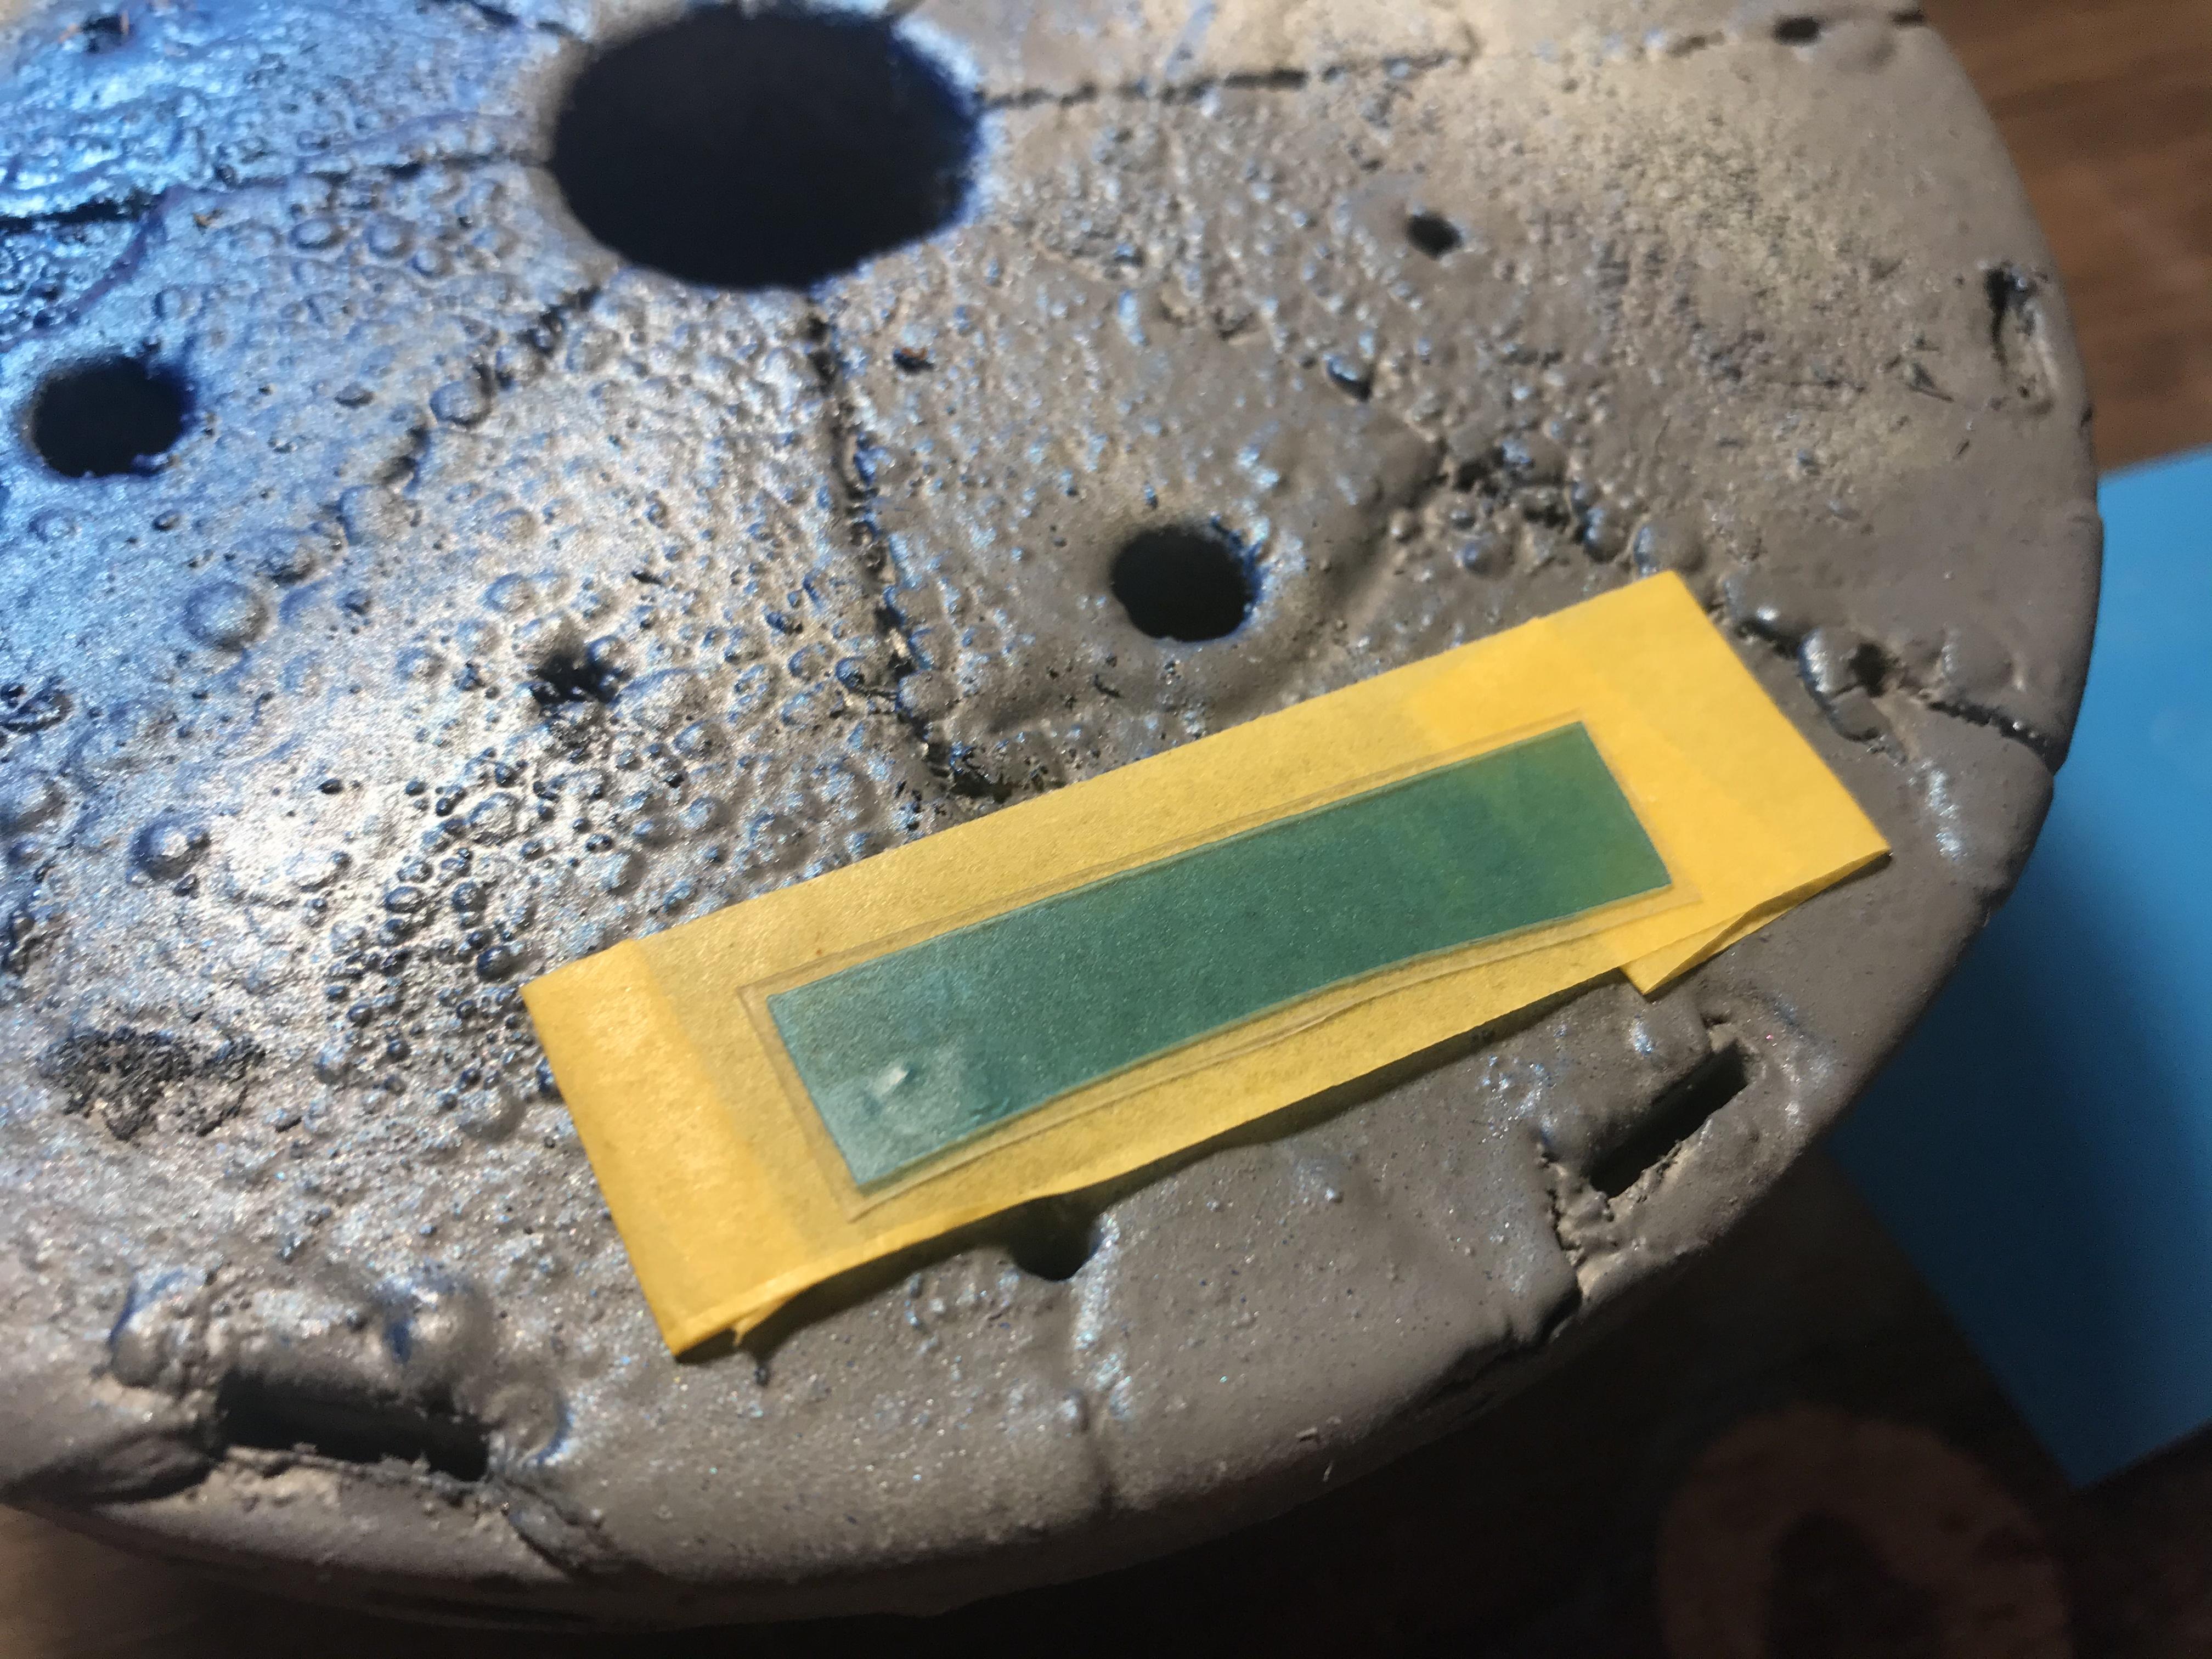
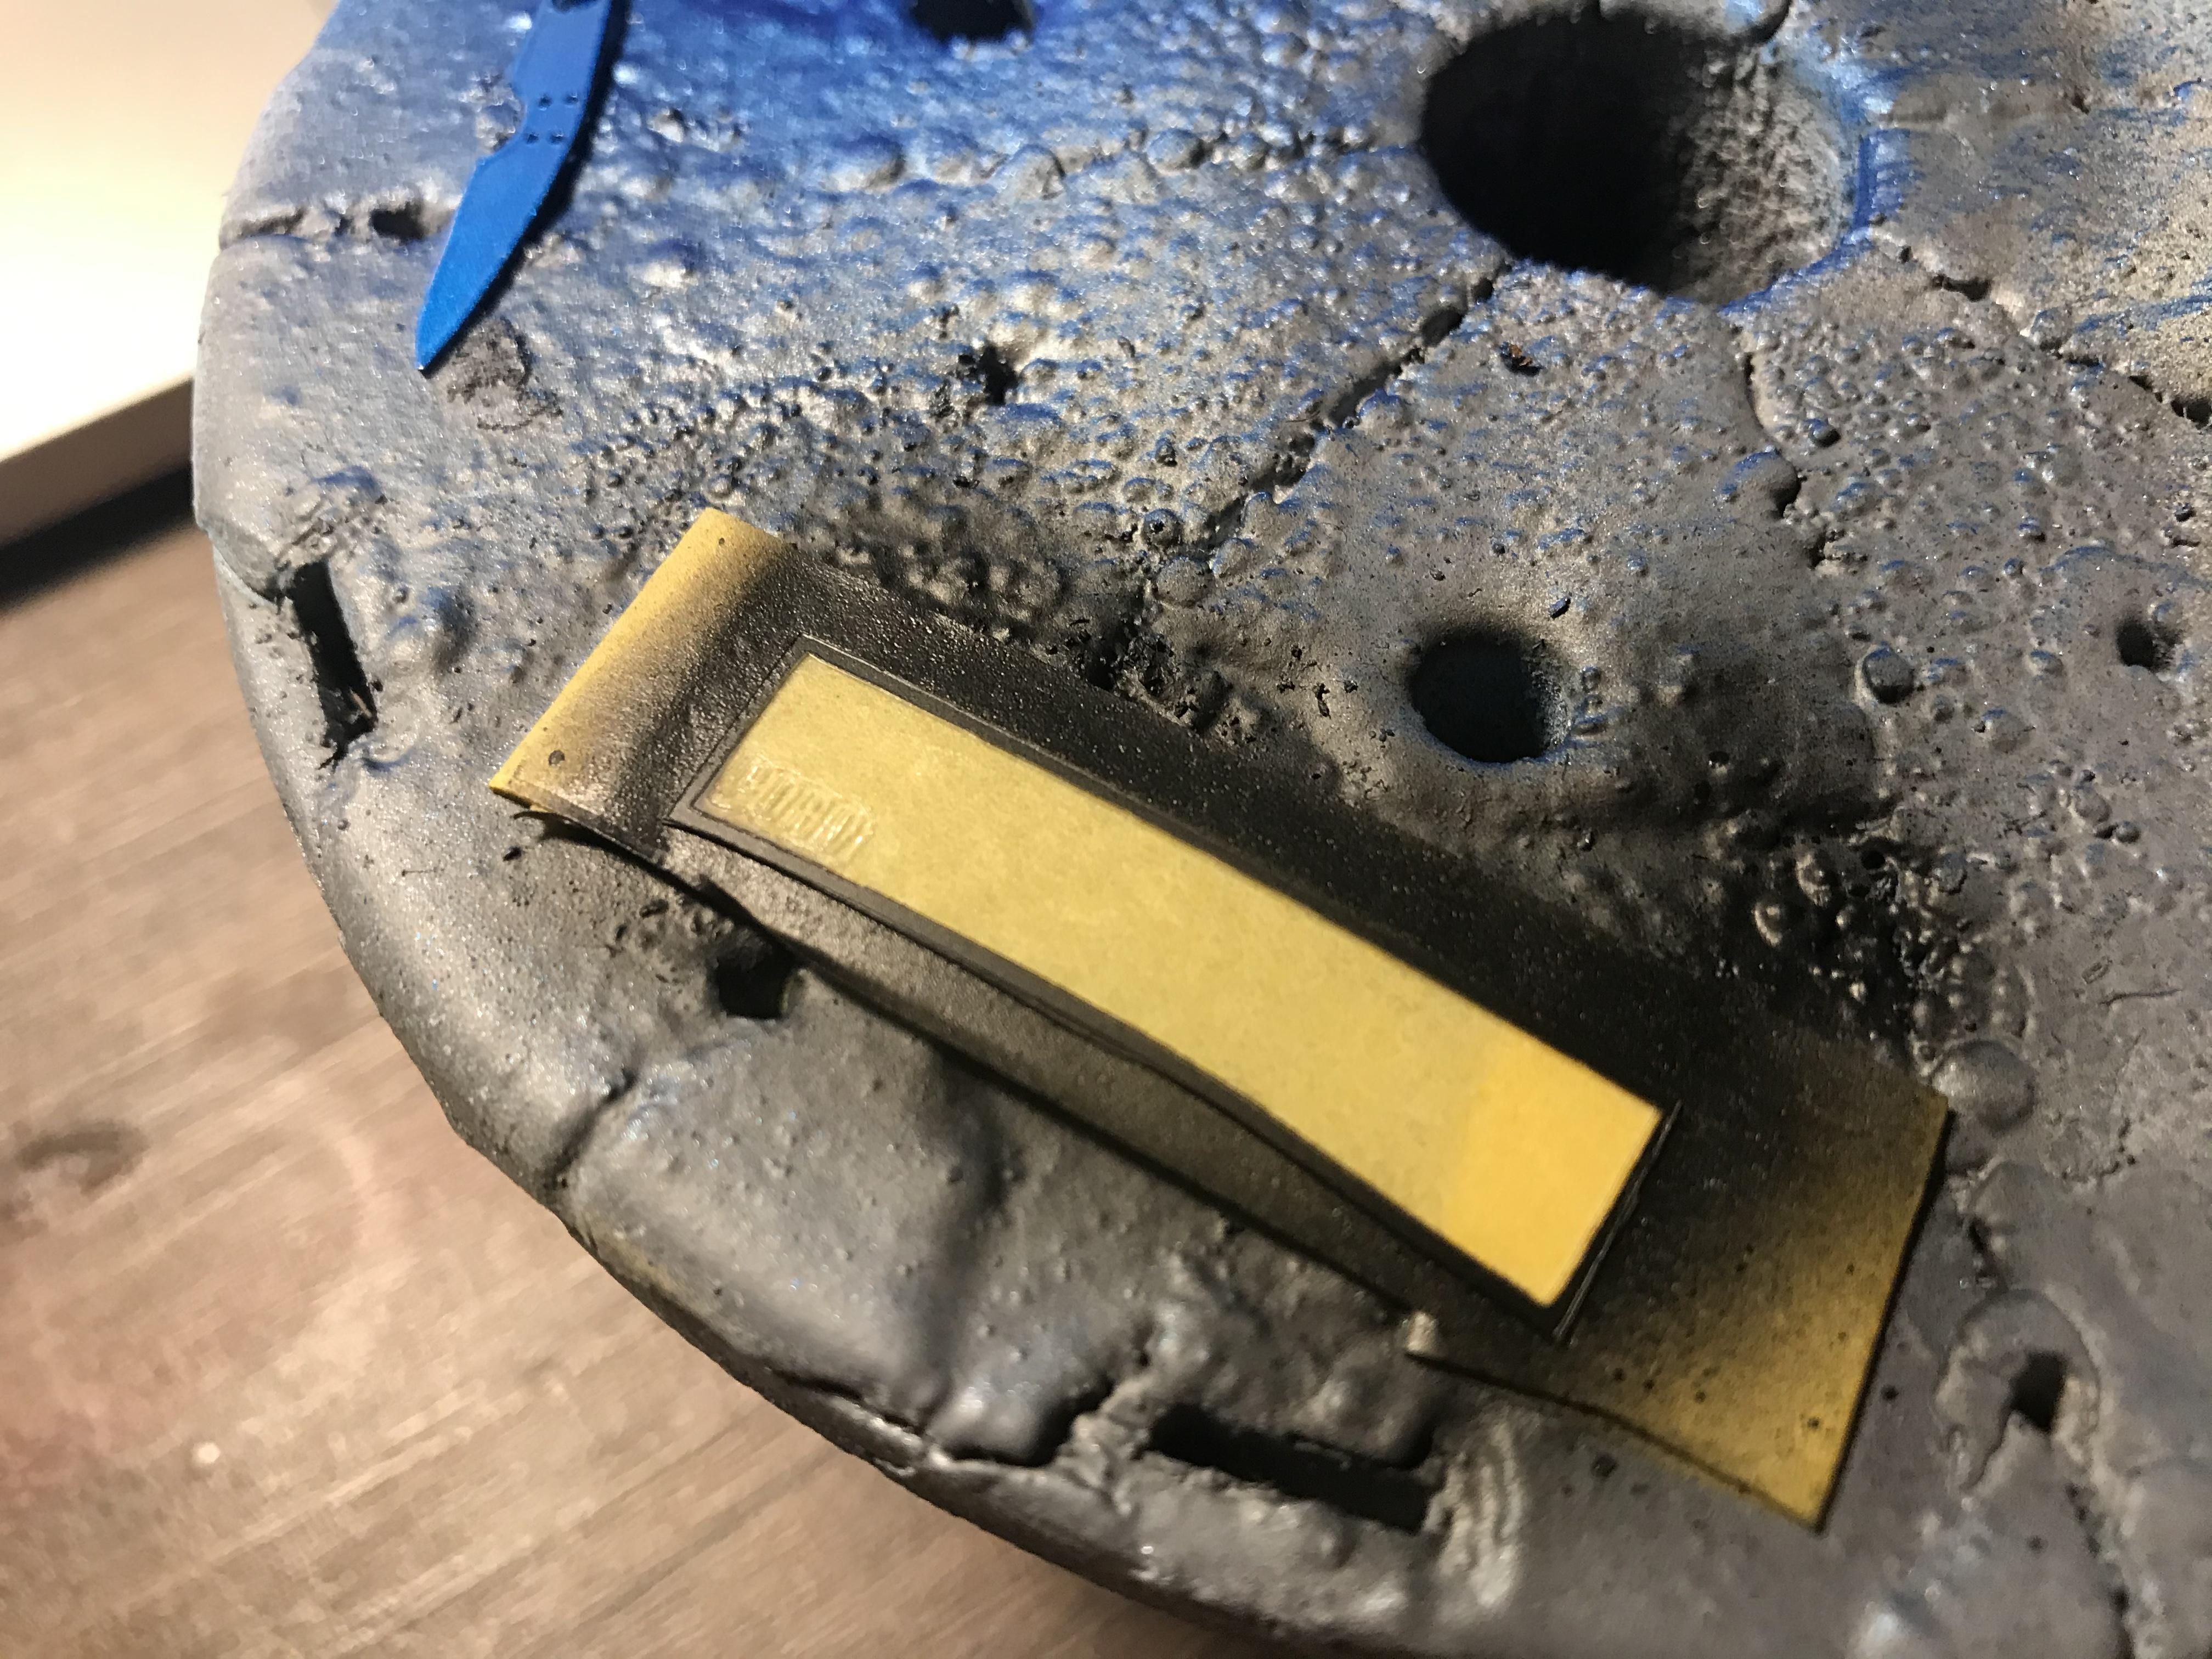
A little progress on this one - I didn’t like the fussy dash in the kit, so I made a little insert piece to cover all that up and make it a little cleaner: I shot that with a pearl metallic blue to compliment the baby-blue body color but without it looking too same-y...I think I like it! I decided on a tan two-tone interior with matching tan carpet and went to work on that yesterday - still needs a little clean-up here but this is roughly how it’ll look: And a look at that with the dash - I like how the colors work together! And I was going to use the kit windshield but came up with the idea of using my Silhouette cutter to see if I could etch a logo into the corner of the ‘glass’, so I designed something in my software here... ...and then cut it from some PVC sheet: The engraving is pretty subtle, which is fine by me - I just wanted an extra little detail that someone might spot if they looked closely enough. Whilst I had the cutter running I made a mask so I could put a black surround around the edge of the windshield and shot it with a little rubber-black: Once that dried I shot the whole thing with some Future to make it super-shiny...the black edge, like the etching, will be really subtle on the finished model but I wanted to try the technique out for future builds where you’ll see this stuff more prominently. More soon, soon as I’ve done more!
-
Does anyone happen to have a picture of one of these rubber belts? I’ve never seen one!
-
Biggest pet peeves on builds.
OldNYJim replied to LL3 Model Worx's topic in General Automotive Talk (Trucks and Cars)
Could we maybe relax the rule for hot-roddy pick-up type builds to just be posted in the category with the other hot rods without them being moved? No need for an extra category, less work for the mods who have to move them constantly because they’re in the ‘wrong’ place (because it’s the rule currently, which is fair enough - no complaints about that), the people building them are happy because they get to show them off with very similar builds, and the people who like ACTUAL commercial vehicles don’t have to see them ?. Just a small change in editorial policy that might work well, in my opinion... Either way, thanks for the work you and all the other staff do Dave - no complaints from me about how the place is run, just a thing that could make it even better easily, in my 2-cents worth of opinion -
If it's an SQL injection issue can't we just go back to carburetors? ?
-
1/25 MPC Don Prudhomme Wynn's Winder TFD
OldNYJim replied to Casey's topic in Car Kit News & Reviews
Ohhhhhh! Interesting! -
The difference with that interior is night and day - GREAT work!!! Keep at it ??
-
Biggest pet peeves on builds.
OldNYJim replied to LL3 Model Worx's topic in General Automotive Talk (Trucks and Cars)
I didn’t mean for you to get attacked, and I didn’t know who or what you were referencing - it just sounded oddly specific like I said! I don’t remember what I was doing when I was five ?♂️? -
Biggest pet peeves on builds.
OldNYJim replied to LL3 Model Worx's topic in General Automotive Talk (Trucks and Cars)
That one seems oddly specific ? -
Biggest pet peeves on builds.
OldNYJim replied to LL3 Model Worx's topic in General Automotive Talk (Trucks and Cars)
Wait - so is this acrylic you’re taking about or enamels, or both? Got me nervous about my big enamel paint collection now... -
Biggest pet peeves on builds.
OldNYJim replied to LL3 Model Worx's topic in General Automotive Talk (Trucks and Cars)
I’d really like it if hot rod pickups were allowed in the section with the other hot rods rather than in the forum with minivans and off road stuff and SUVs and whatever else -
Biggest pet peeves on builds.
OldNYJim replied to LL3 Model Worx's topic in General Automotive Talk (Trucks and Cars)
Not limited to models, but this whole thing with the extreme camber. I guess it’s up to other people what they do with their cars, but having the wheels sitting with 45 degrees doesn’t look cool to me. It’s the opposite of hot rodding or tuning a car to improve it. That said, it’s up to people what they do with their cars, and long as they’re having fun that’s the main thing ?♂️ Model wise, it DOES seem a shame to me when someone has a bunch of detail parts and aluminum stuff but the paint is awful or there’s seam lines and ejector pin marks and stuff...but as long as they’re having fun! Ditto painting parts on the sprue - how do you even know they’ll fit together right?! BUT, to each their own And finally, the fact that Testors only sells their excellent gloss enamel in a little tiny bottle. C’mon guys - sell a gallon jug of it so I don’t keep having to order 20 jars at a time now I’ve fallen in love with it and use it all the time ?? -
Thank God for stripper (singular)!
-
Looks great so far! This looks like a nice kit!
-
Looks great Tom! Nice savin’ ???
-
AMT Mod Rod 29 Ford RPU
OldNYJim replied to OldNYJim's topic in WIP: Model Trucks: Pickups, Vans, SUVs, Light Commercial
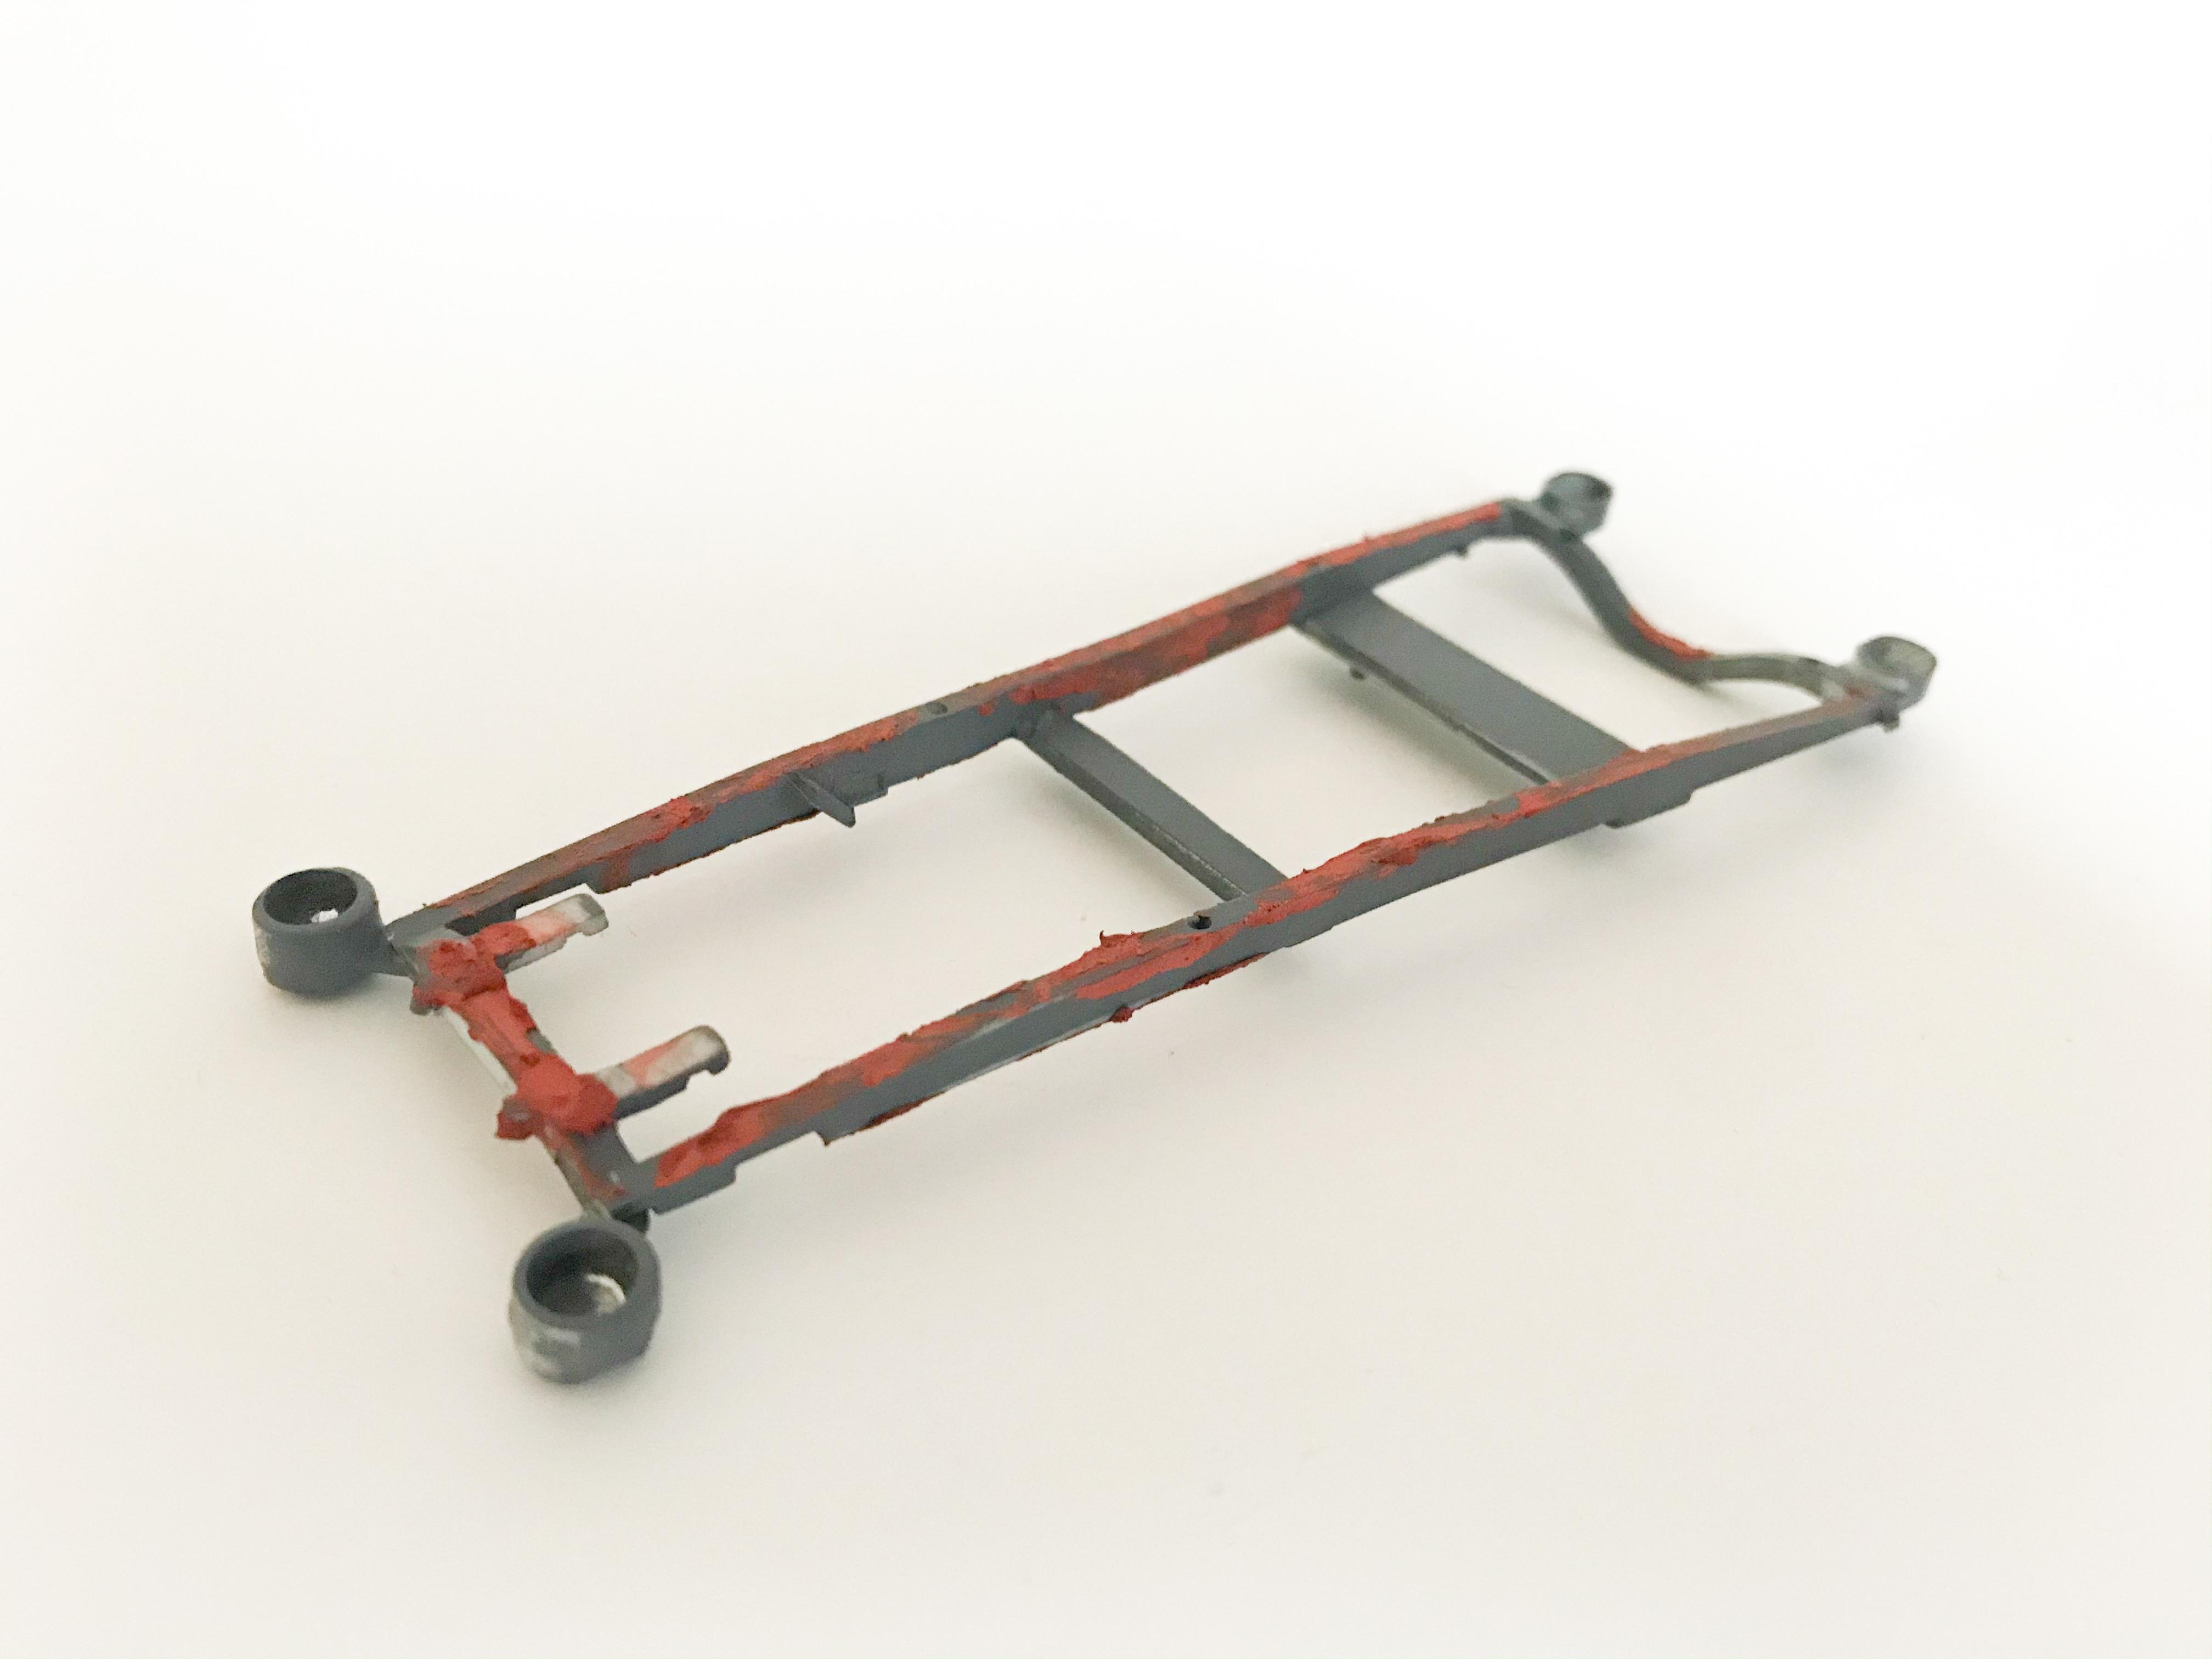
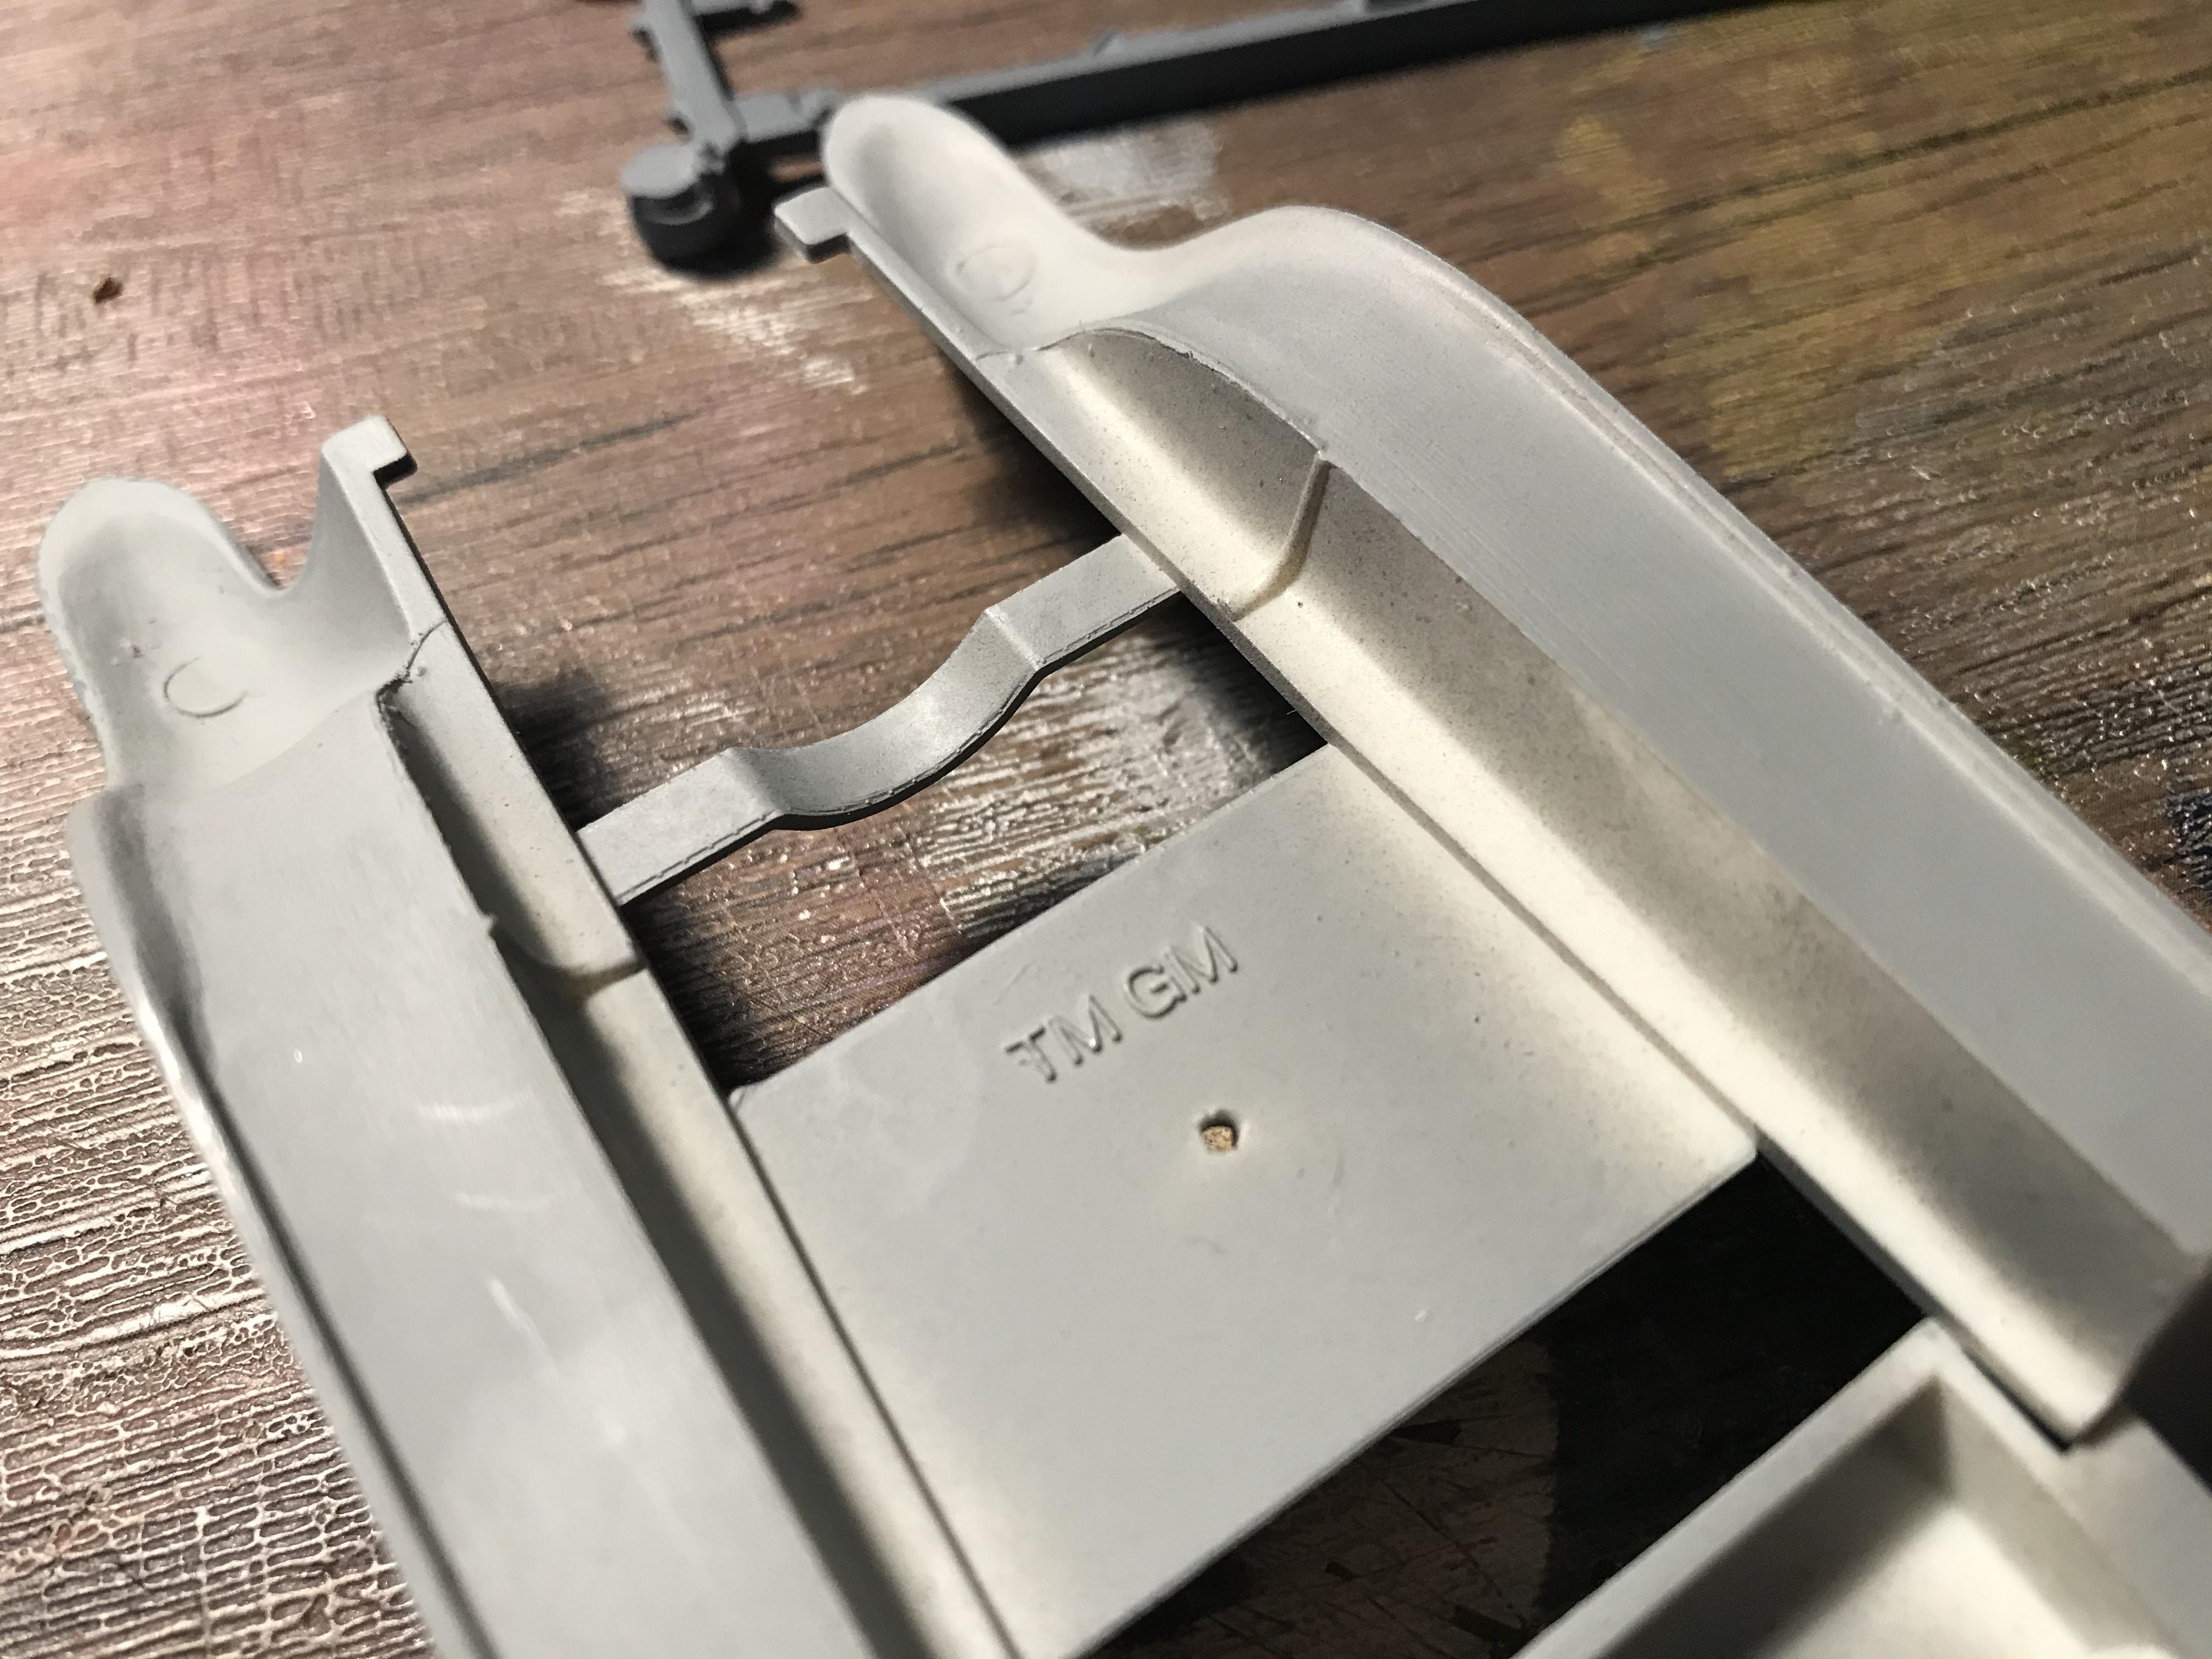
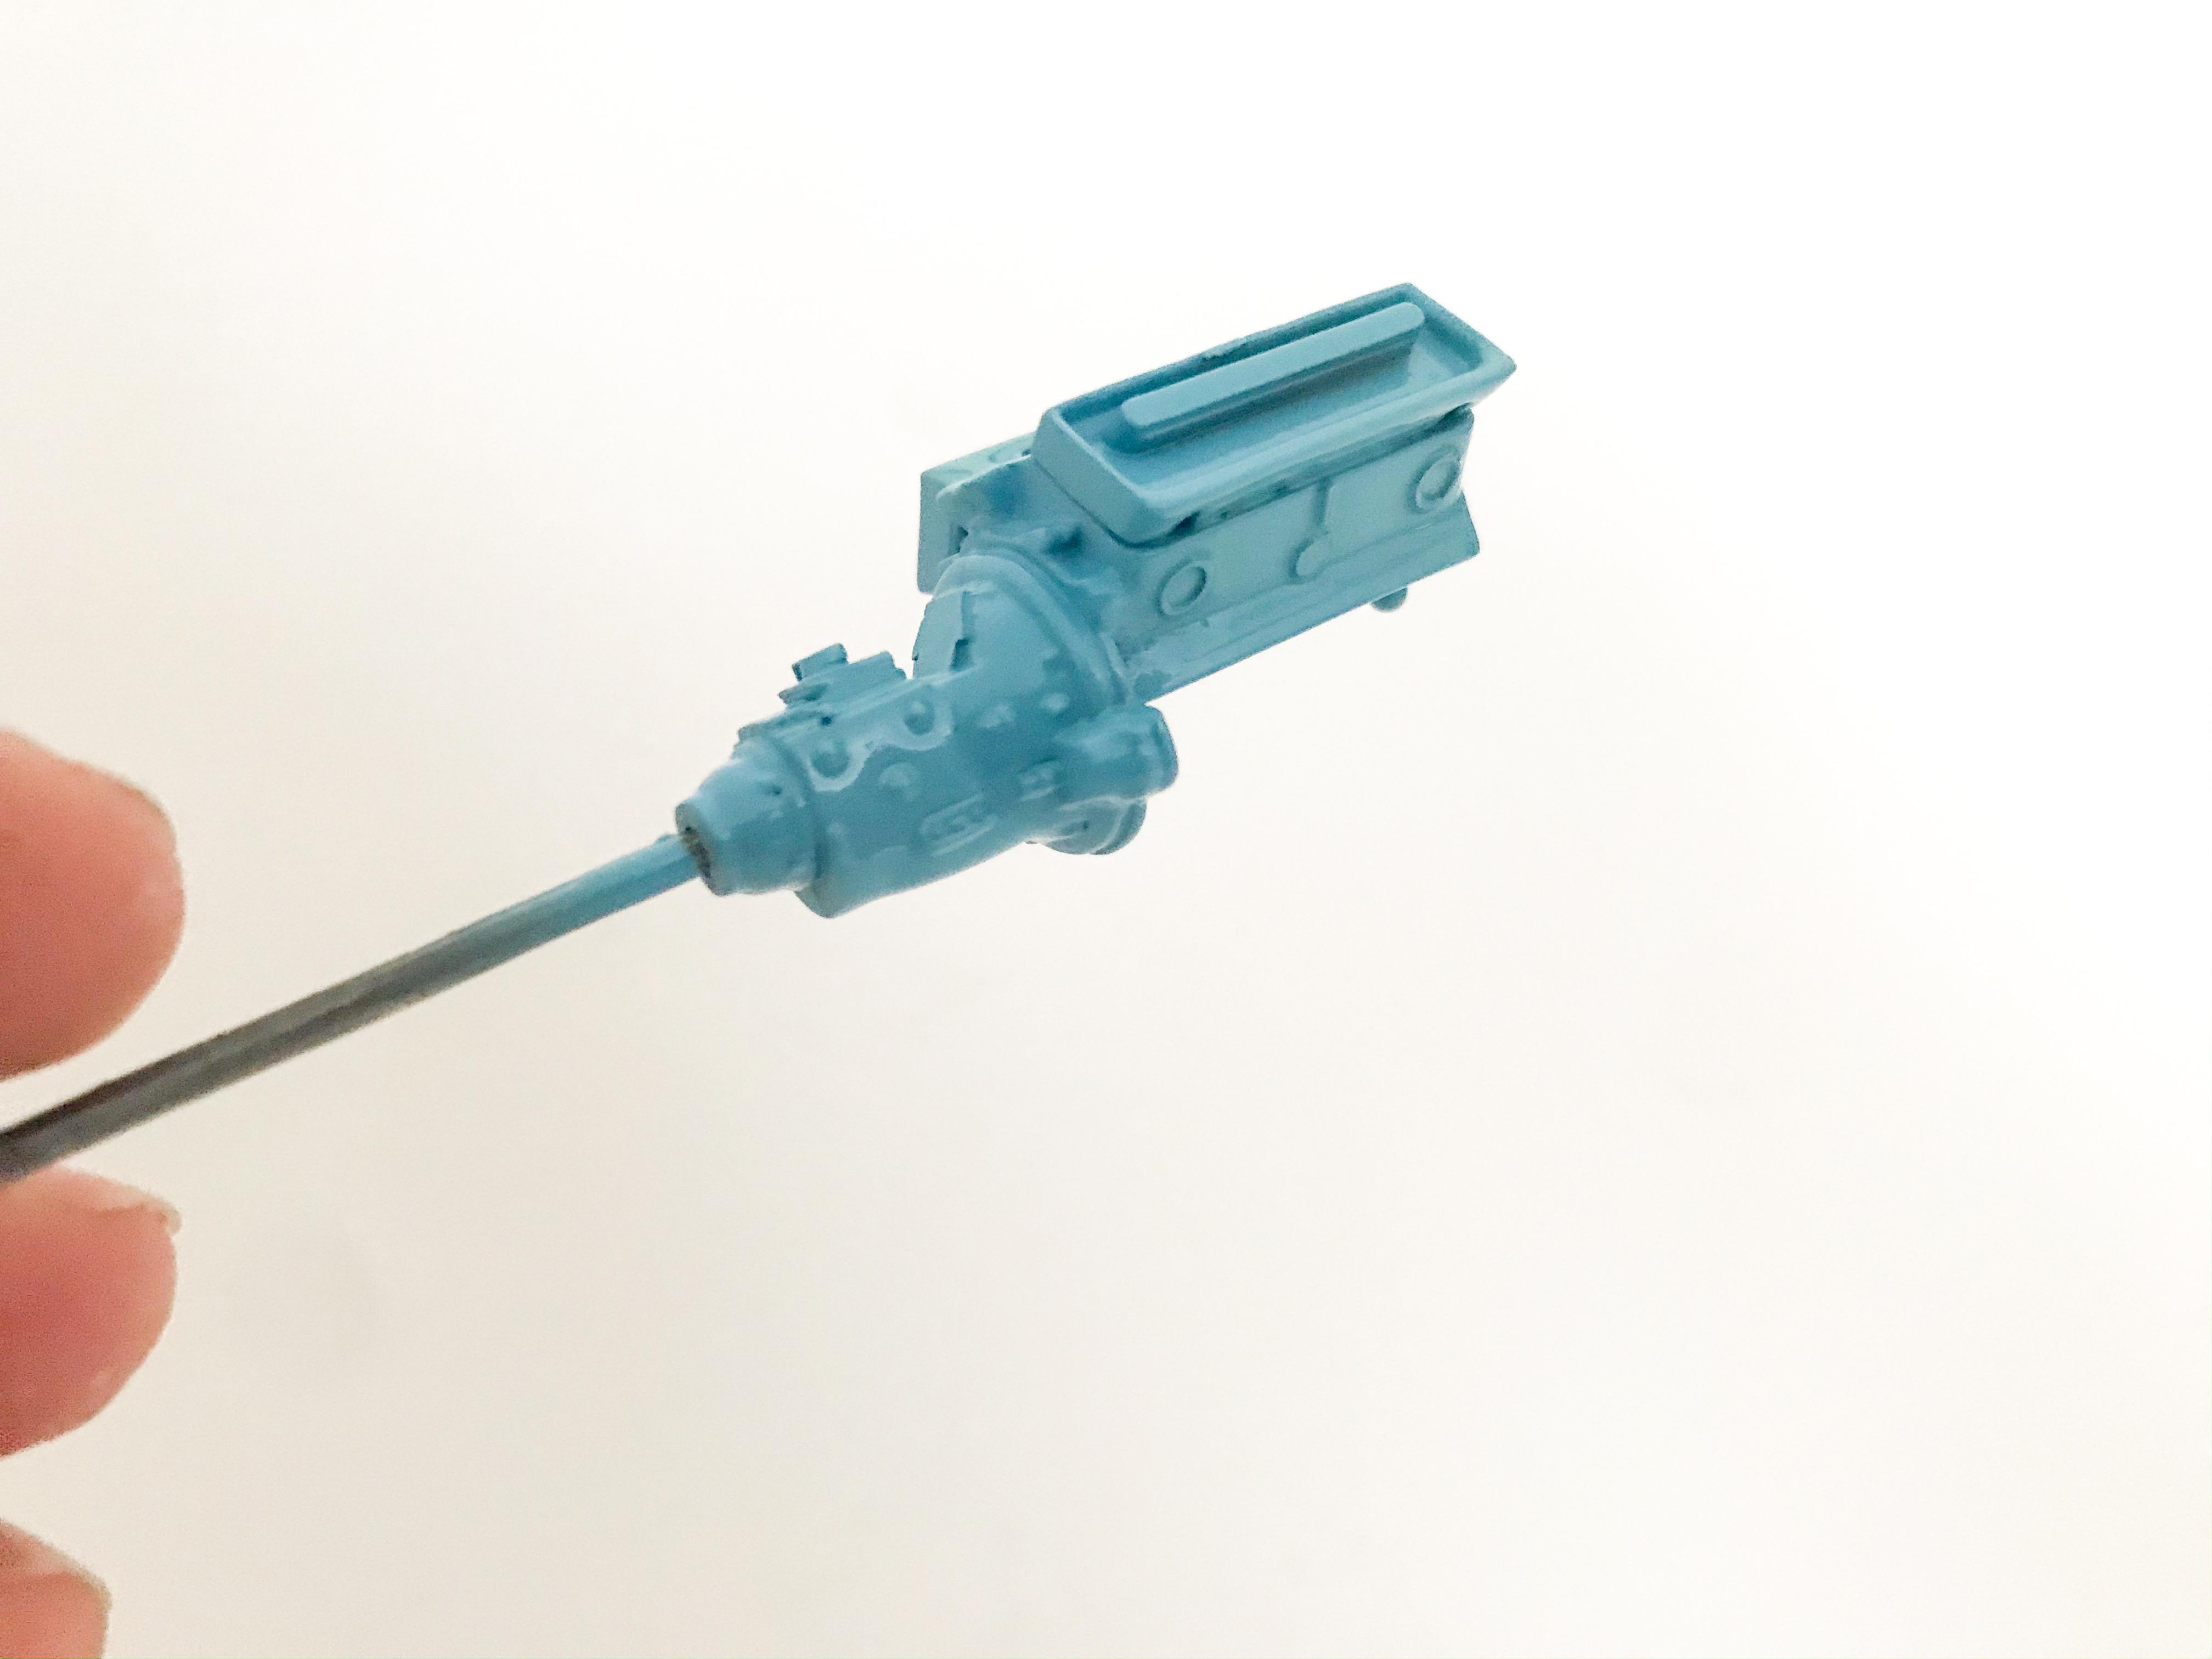
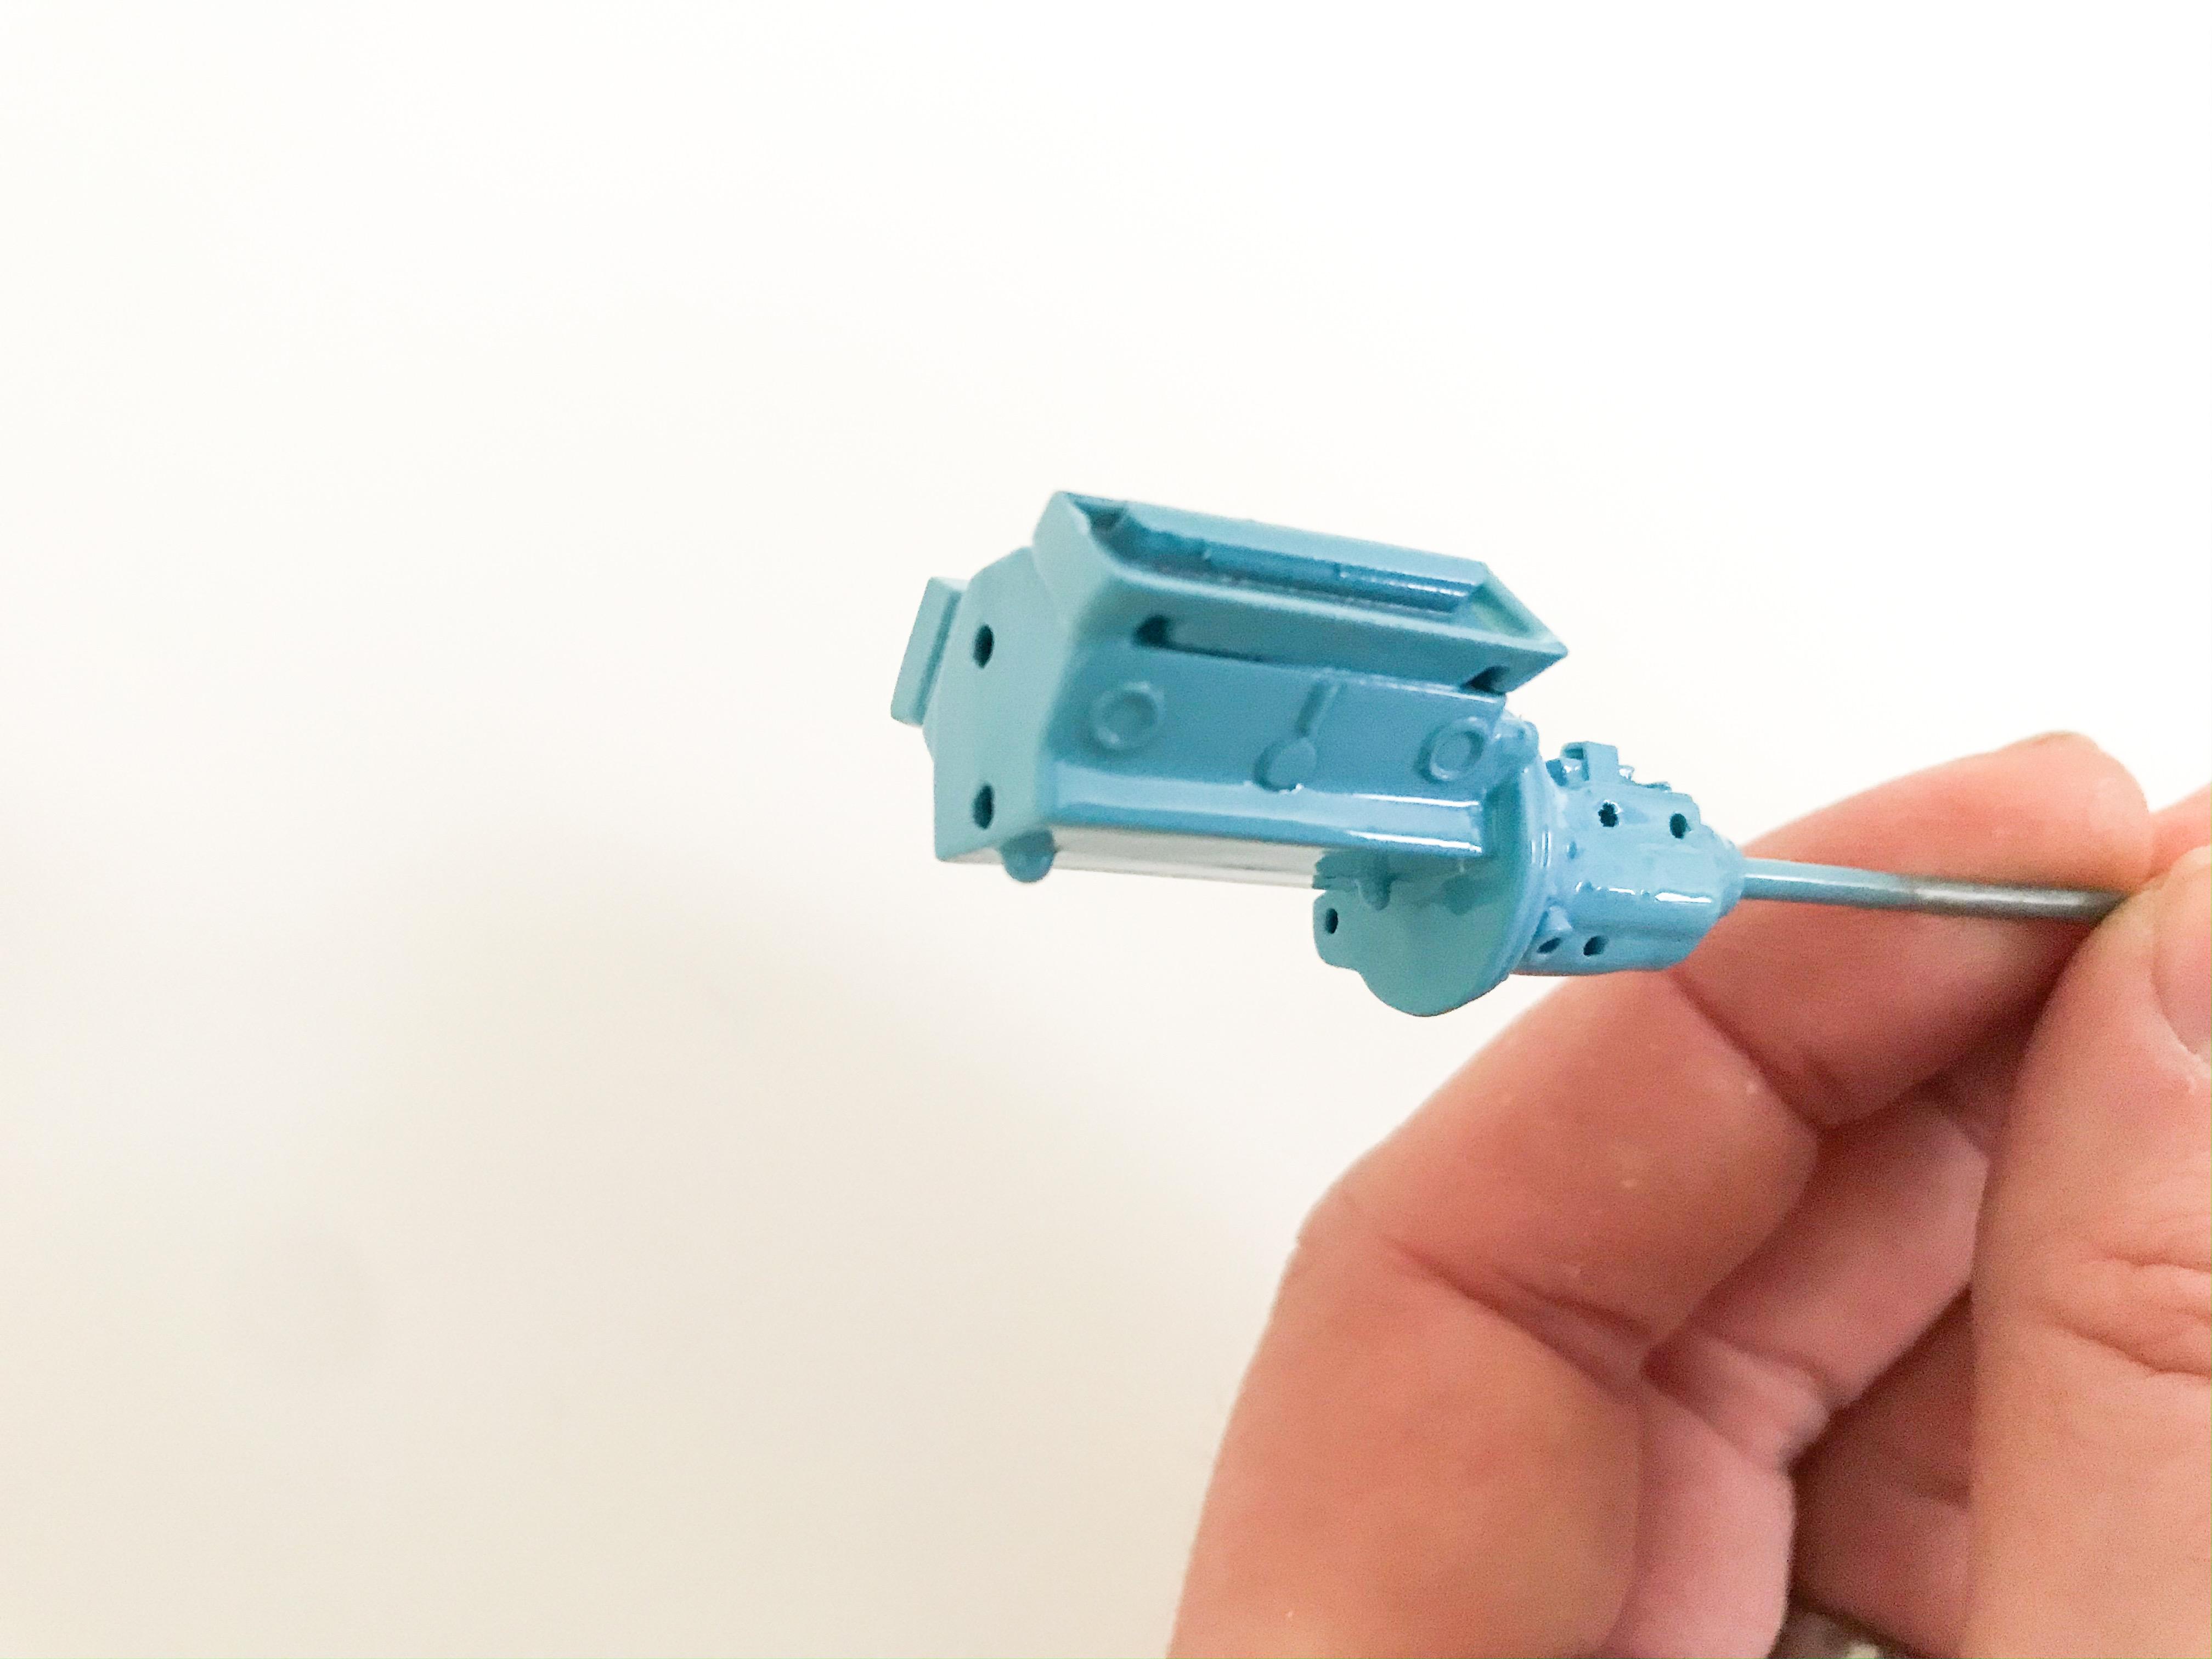
First job is to do some cleanup on the fenders and frame and get them nice and smooth: Those ejector pin marks inside the front fenders wouldn’t be visible when the wheels are on anyway and they were a pain to clean up...but I know they’re there so they had to go. Somewhat related, but I wonder why GM gets their name on the trademark info on the bottom of the floor? Meanwhile, I got the engine prepped and added a little detail to the 39 Ford trans (mainly the inspection cover that’s missing from the top) and scratchbuilt a couple of little pieces that I’ll add later. I also added a little detail to the sides of the block to stop it looking so slab-sided and to better replicate the 1:1 engine: That color is the one I’ll be using for the body too - it’s Createx Sky Blue with Testor’s gloss clear enamel over the top. I’ll shoot the trans with some sort of steel color I think when the paint makes dry enough to mask it and add some micro bolts and doodads to match the real thing. More soon!