OldNYJim
-
Posts
249 -
Joined
-
Last visited
Content Type
Profiles
Forums
Events
Gallery
Everything posted by OldNYJim
-

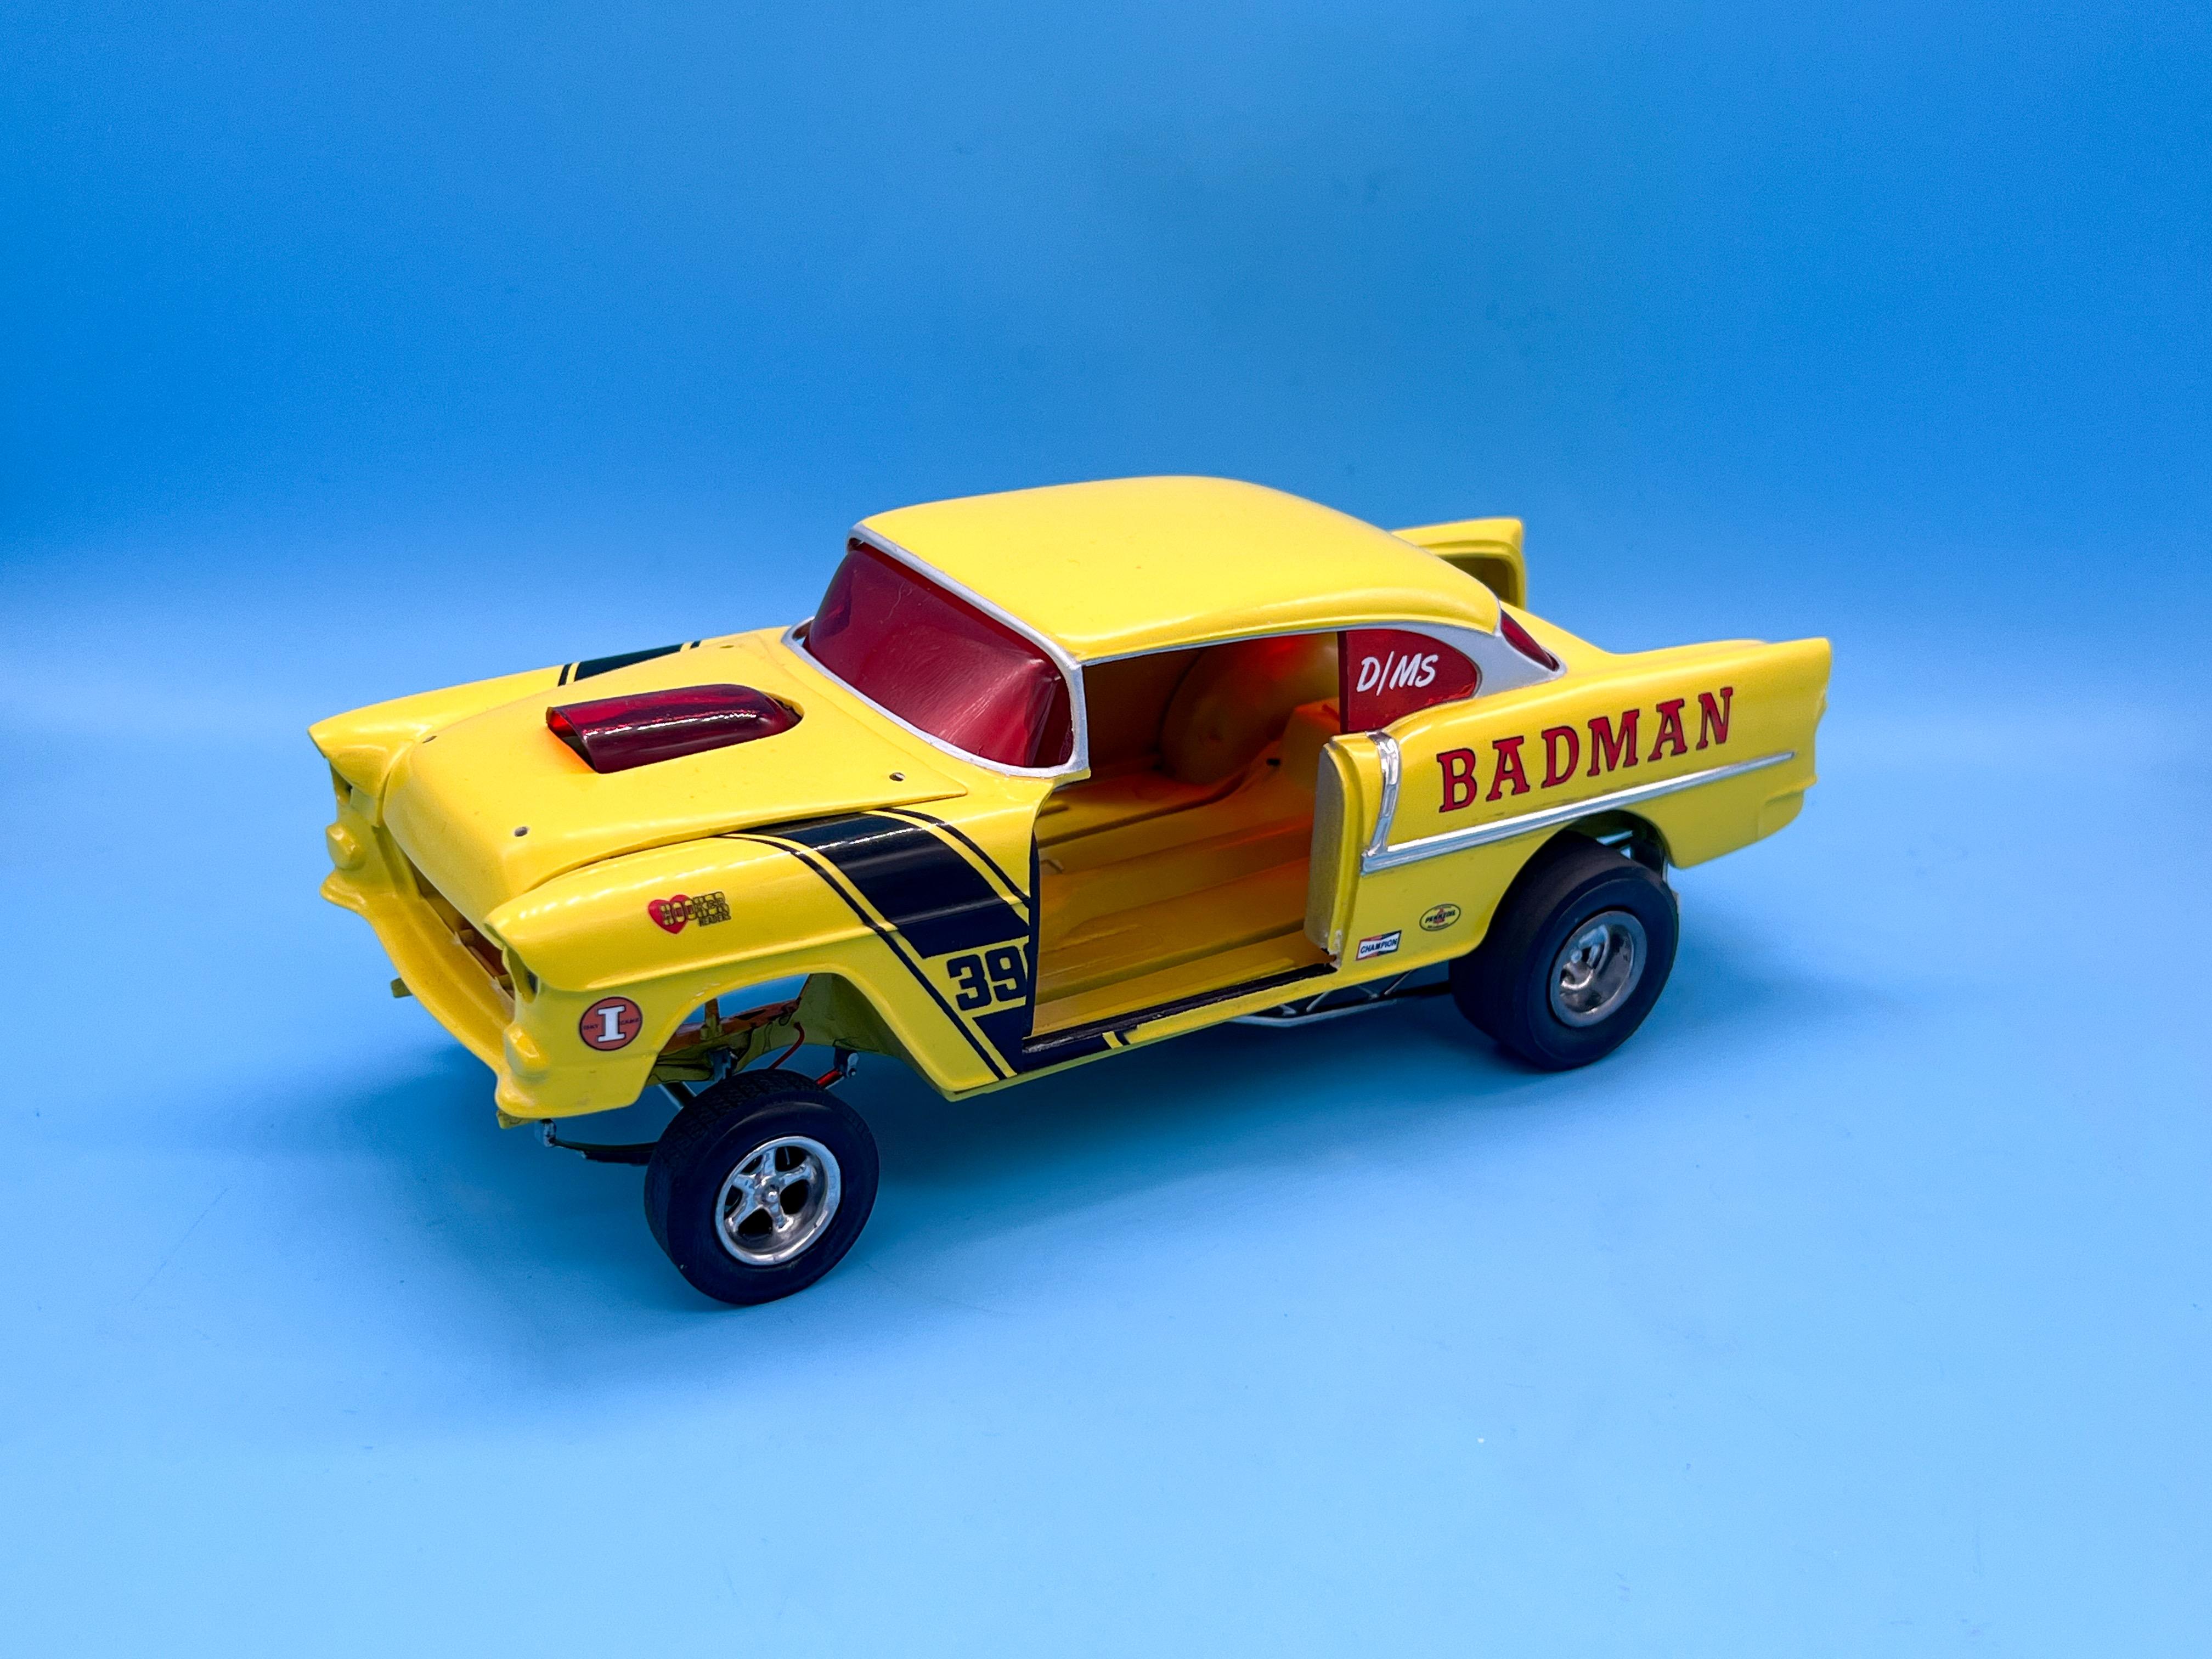
My take on the most famous ‘55 gasser street machine’…
OldNYJim replied to OldNYJim's topic in WIP: Model Cars
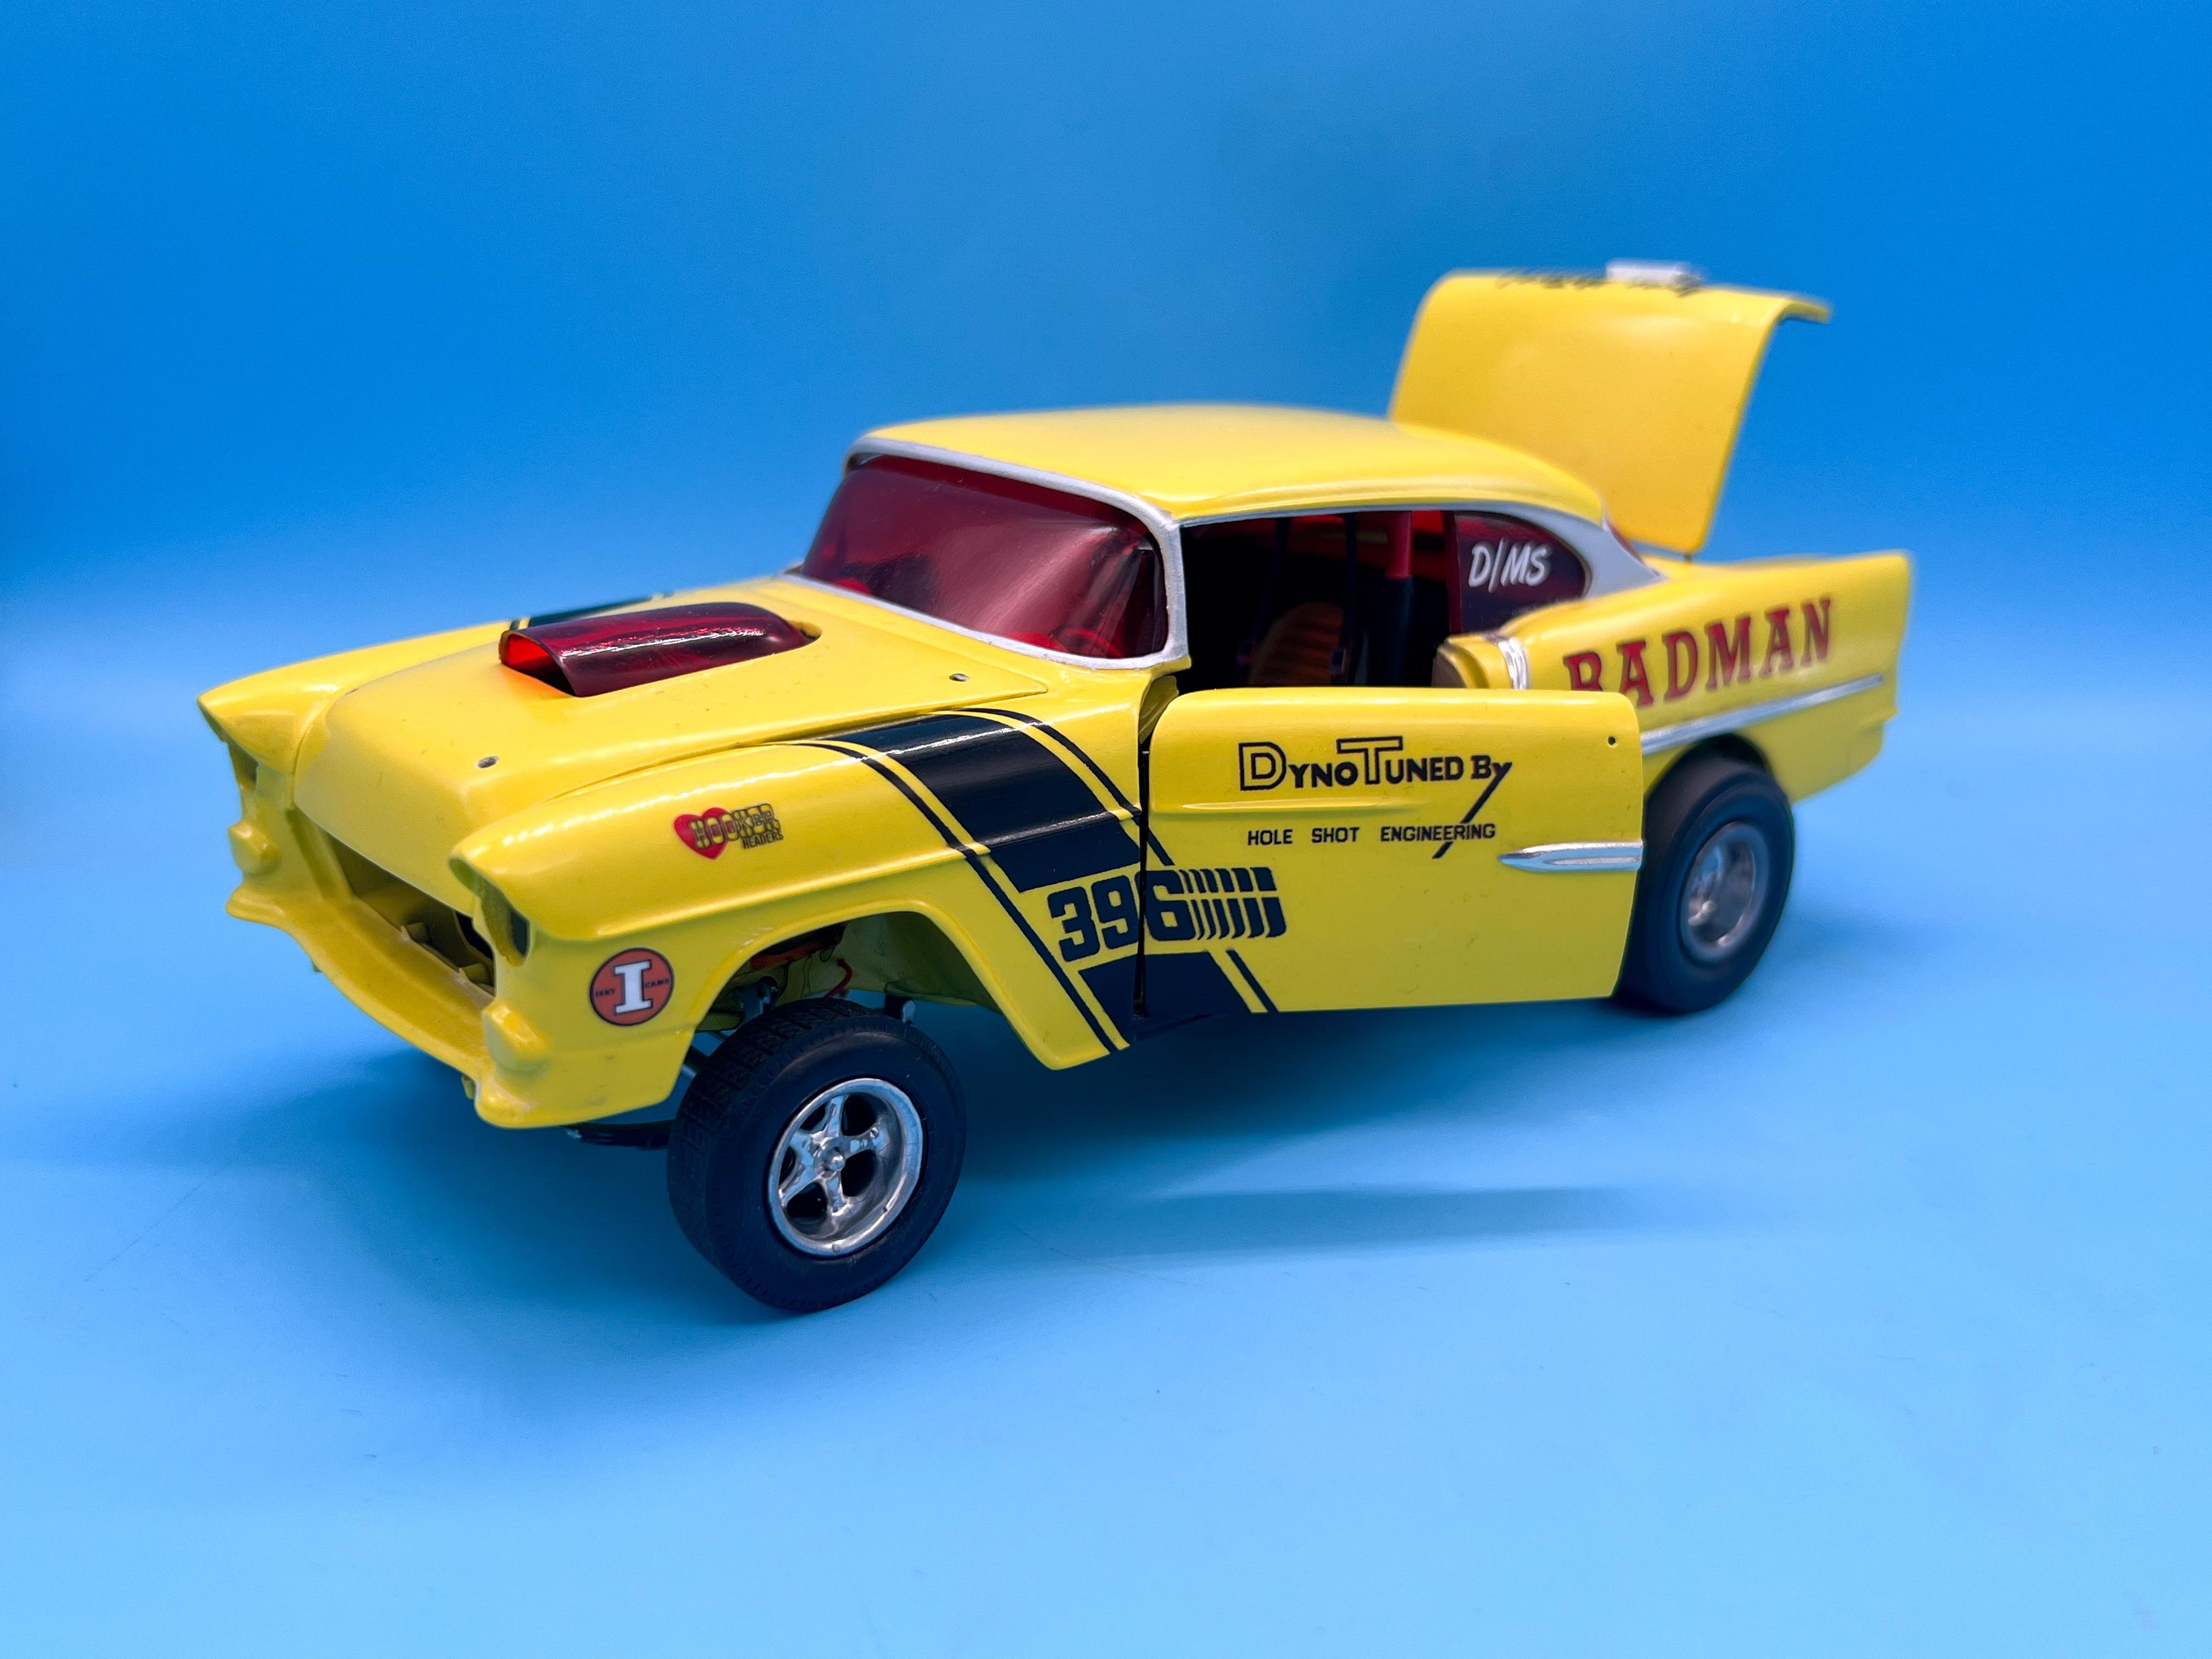
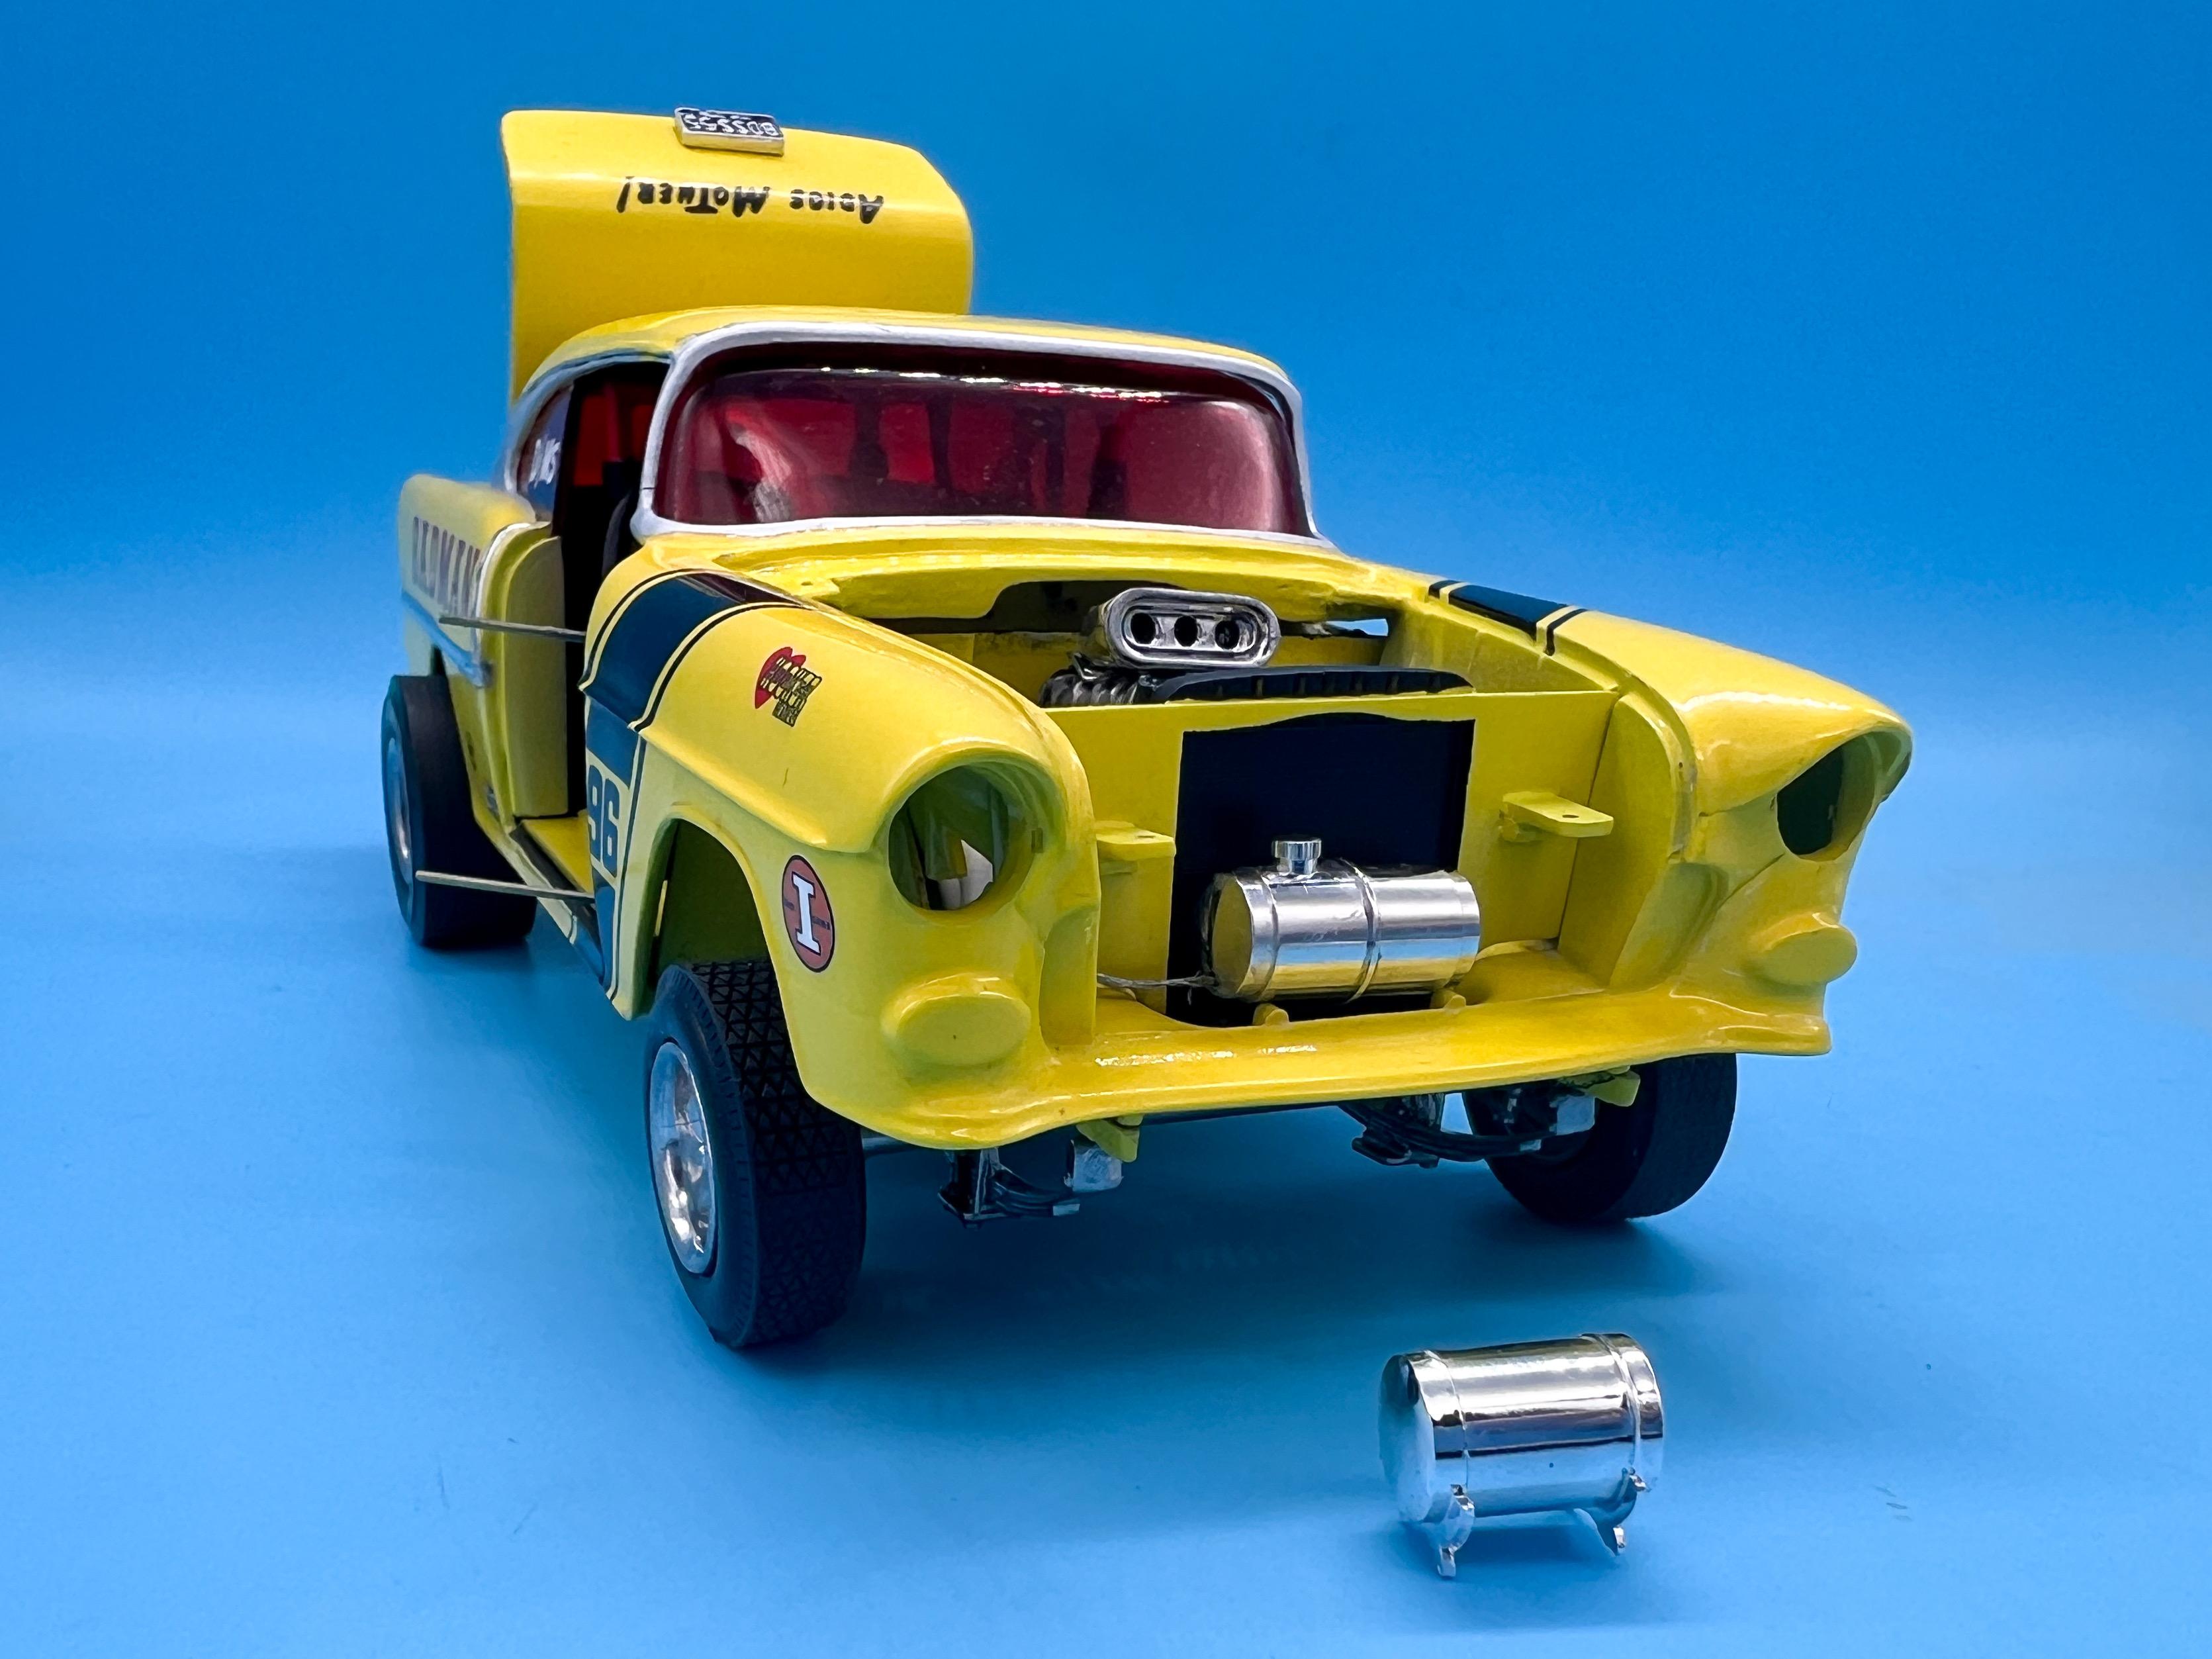
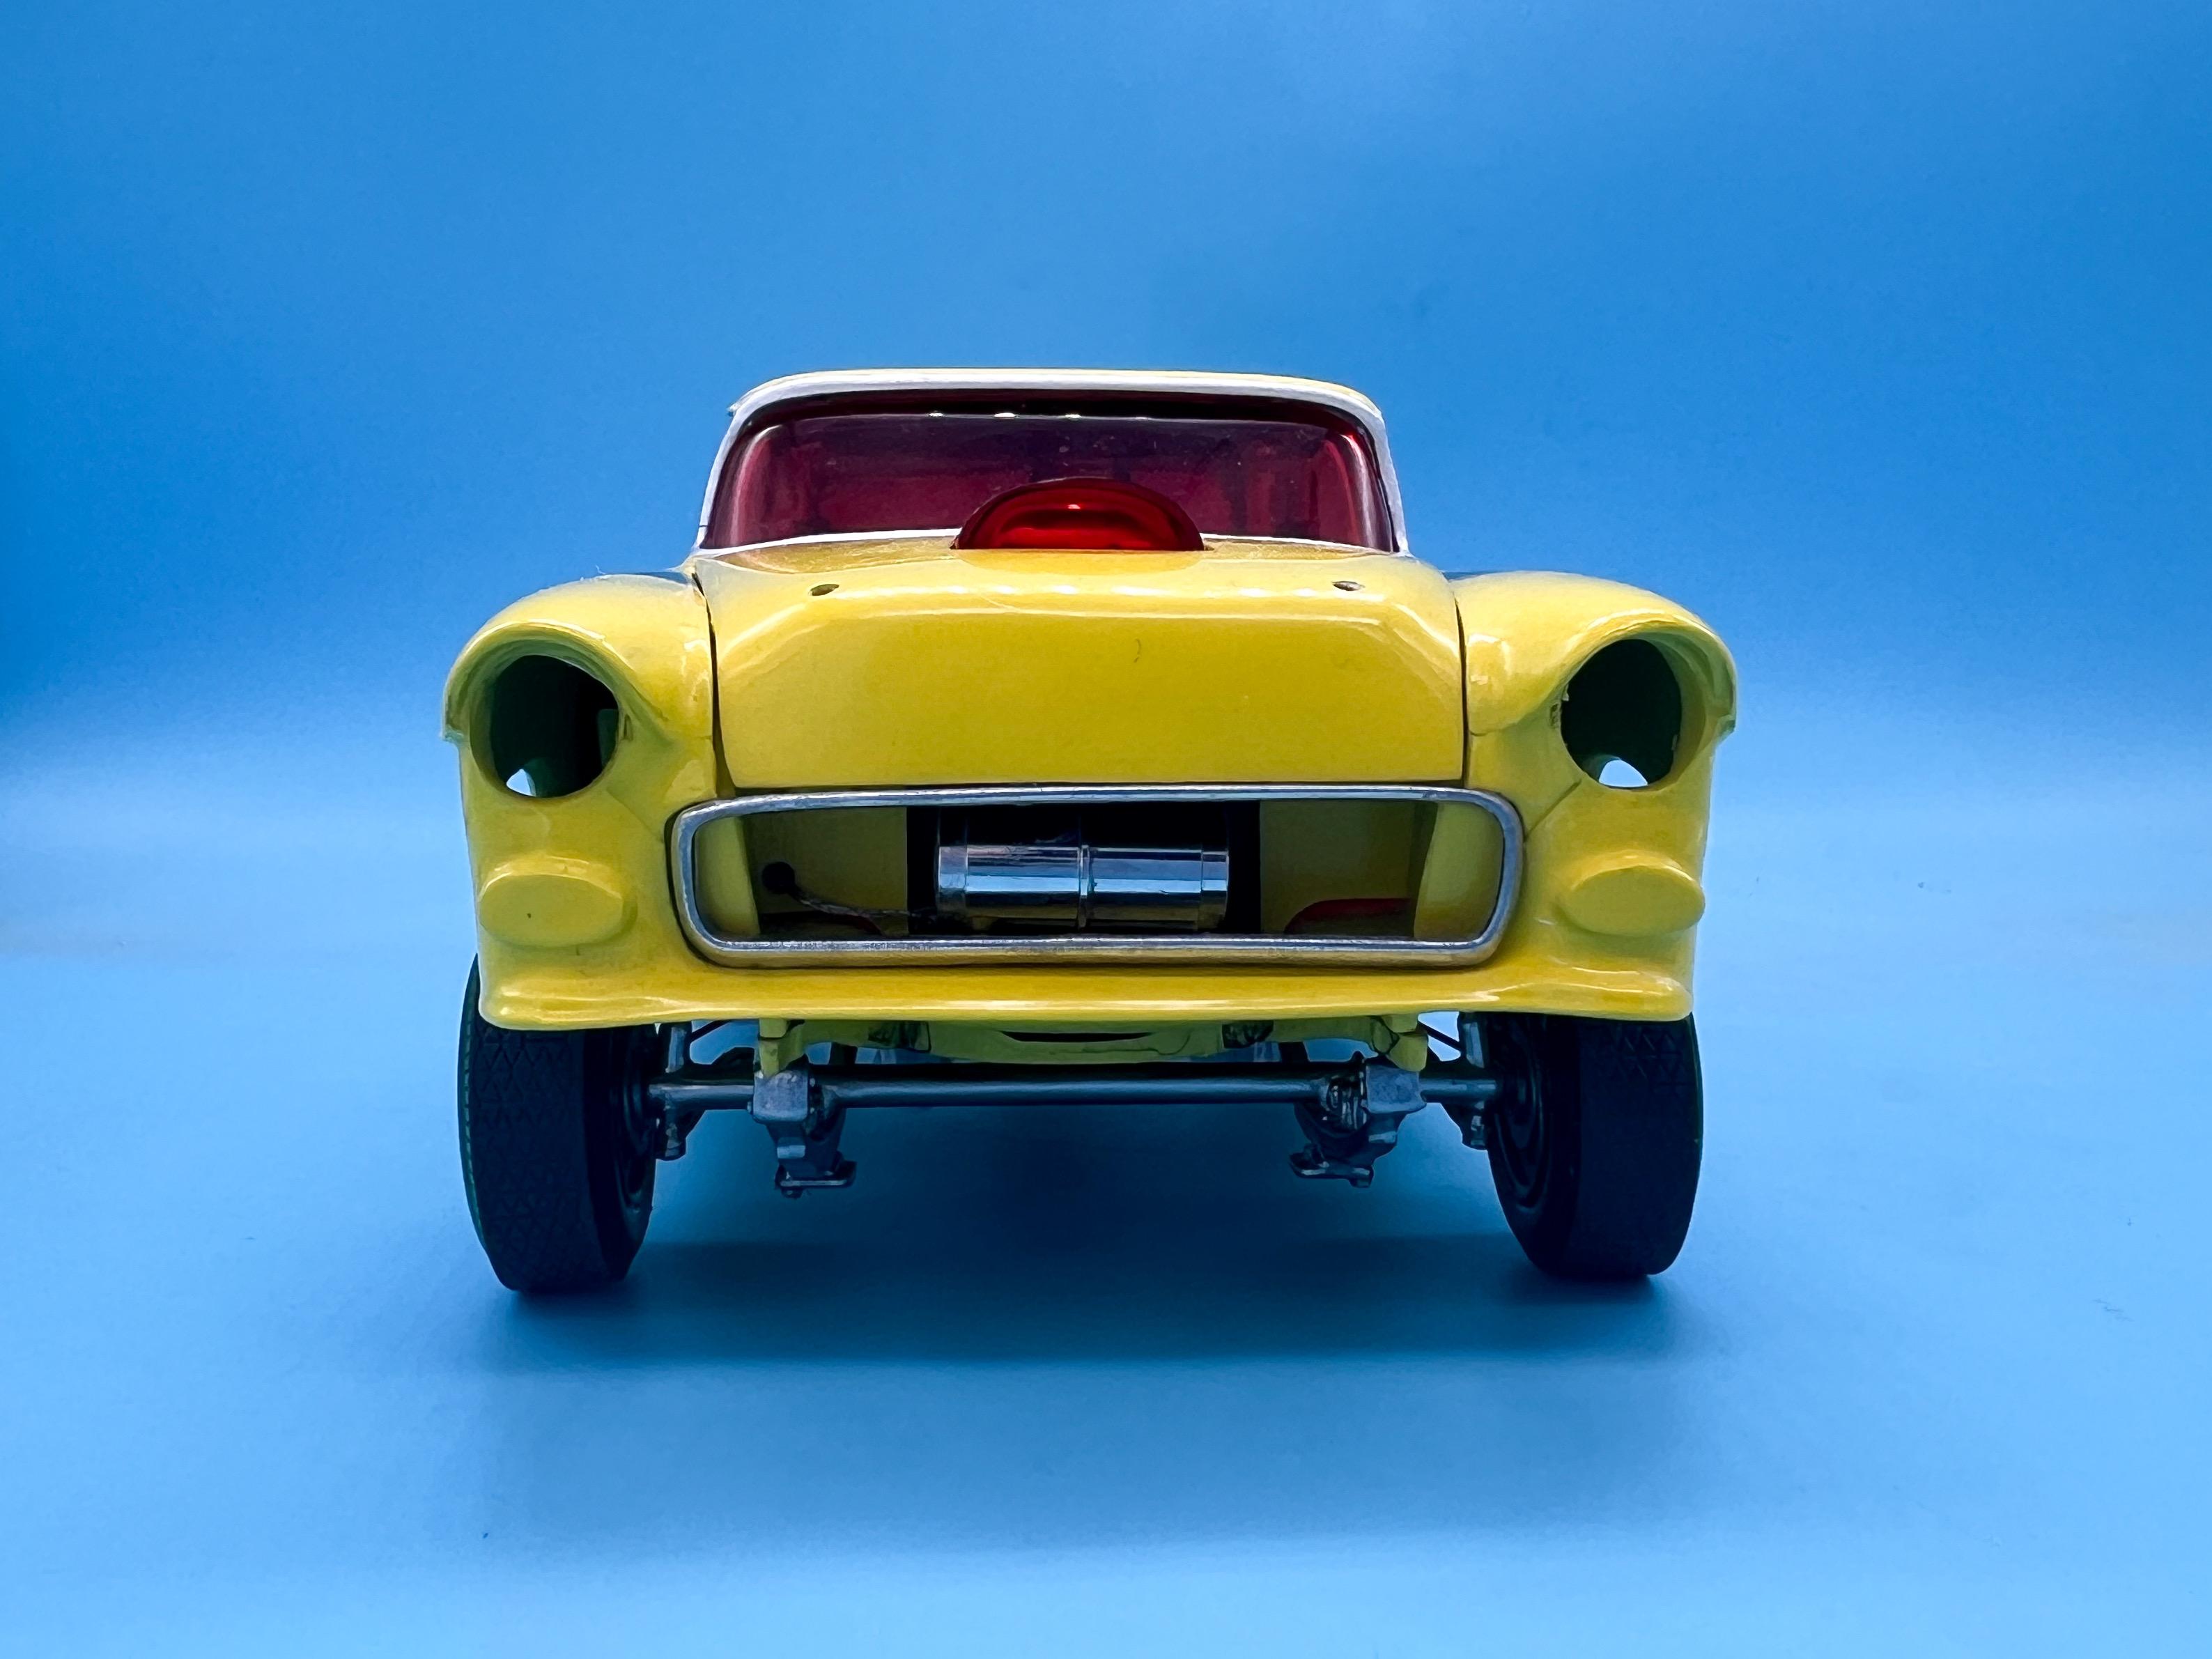
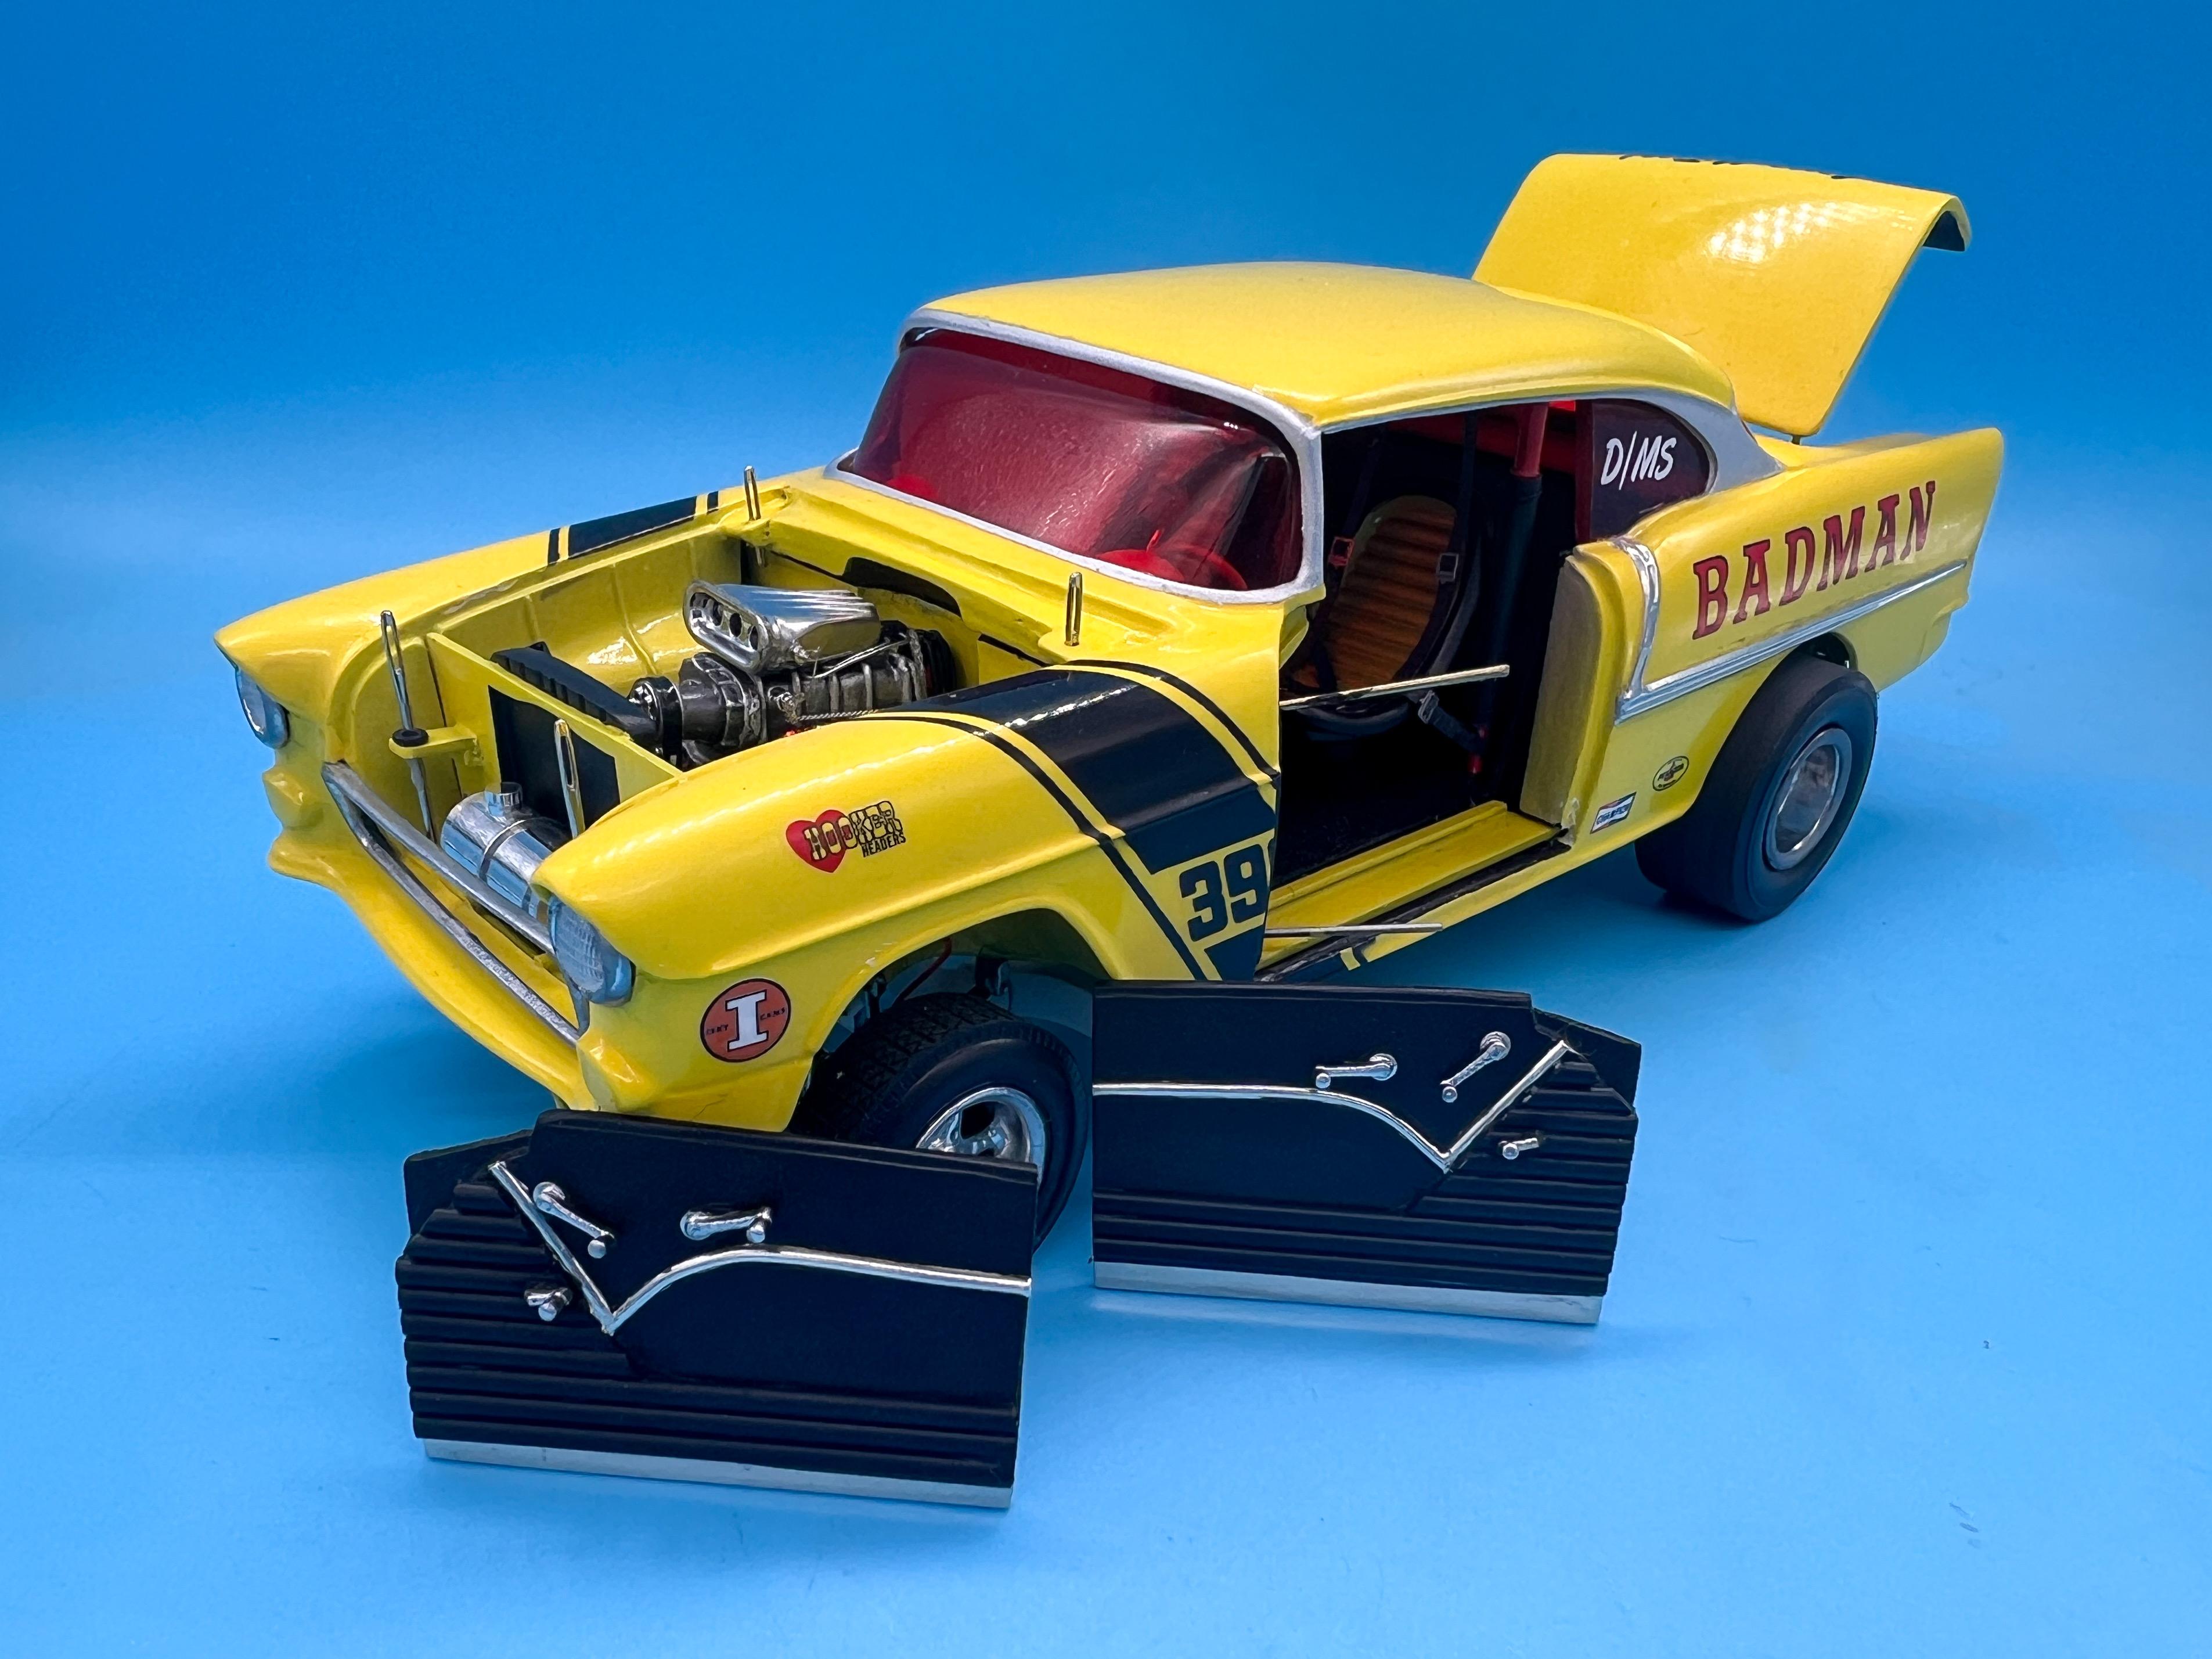
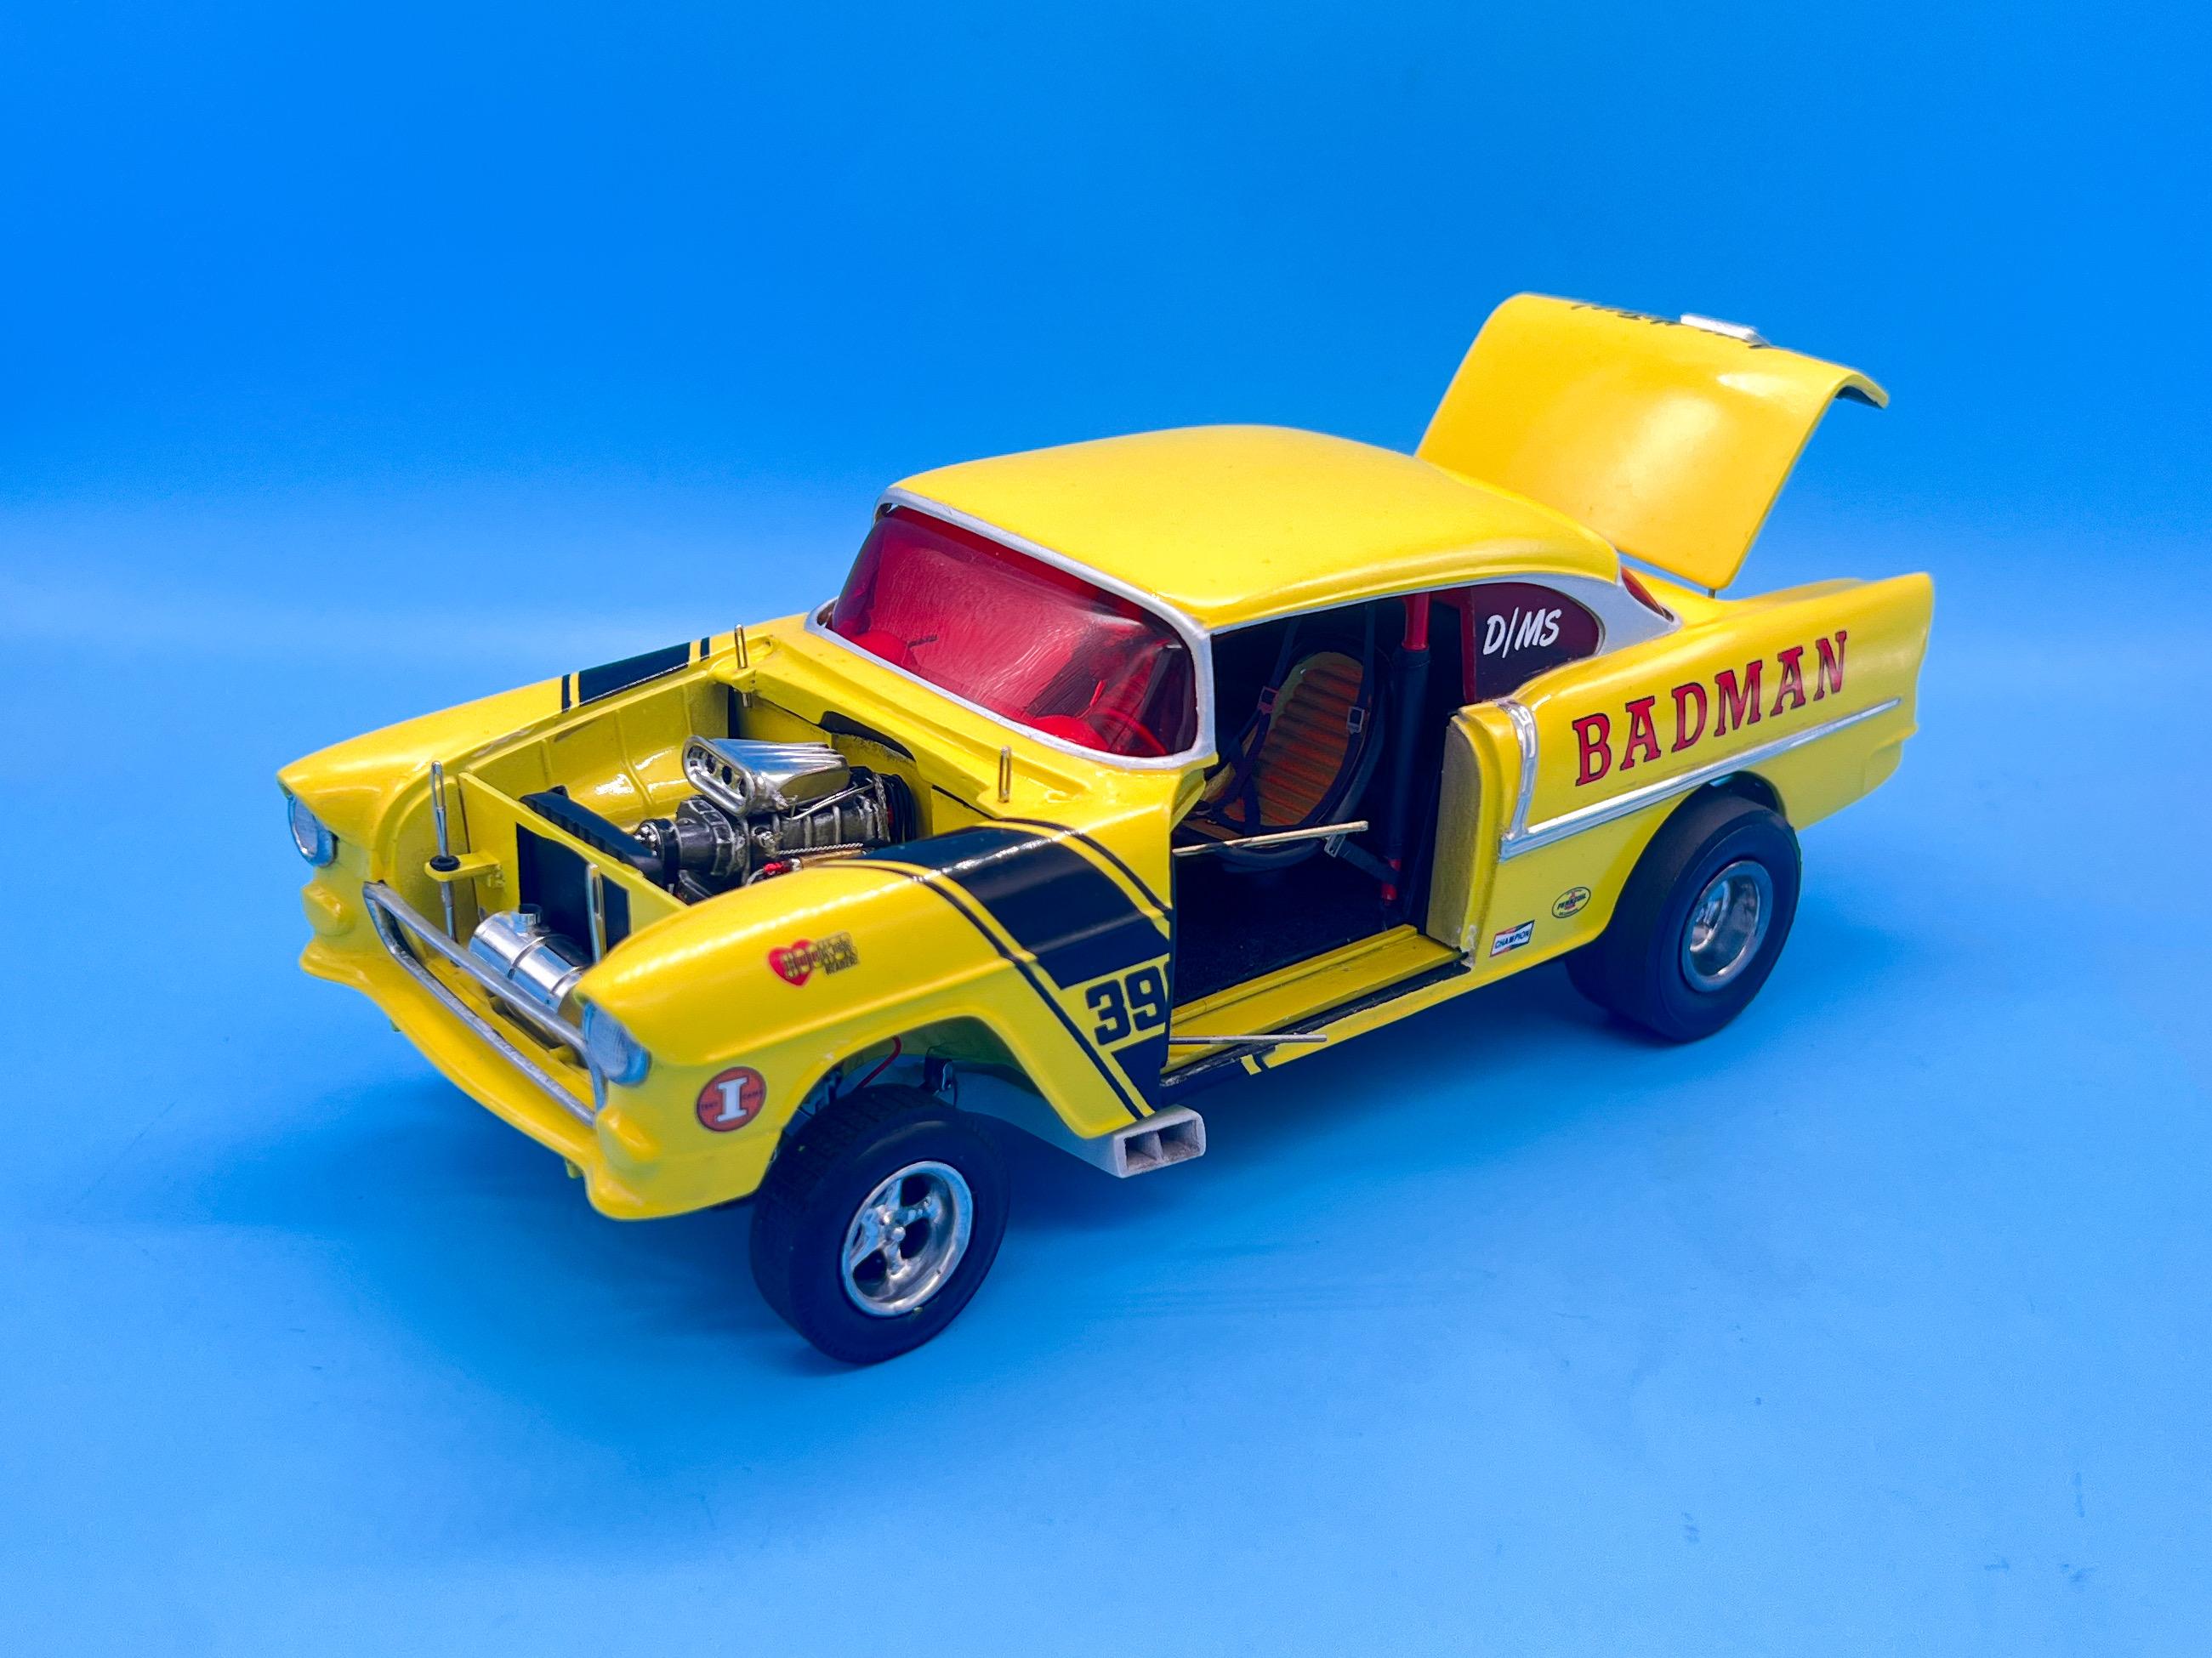
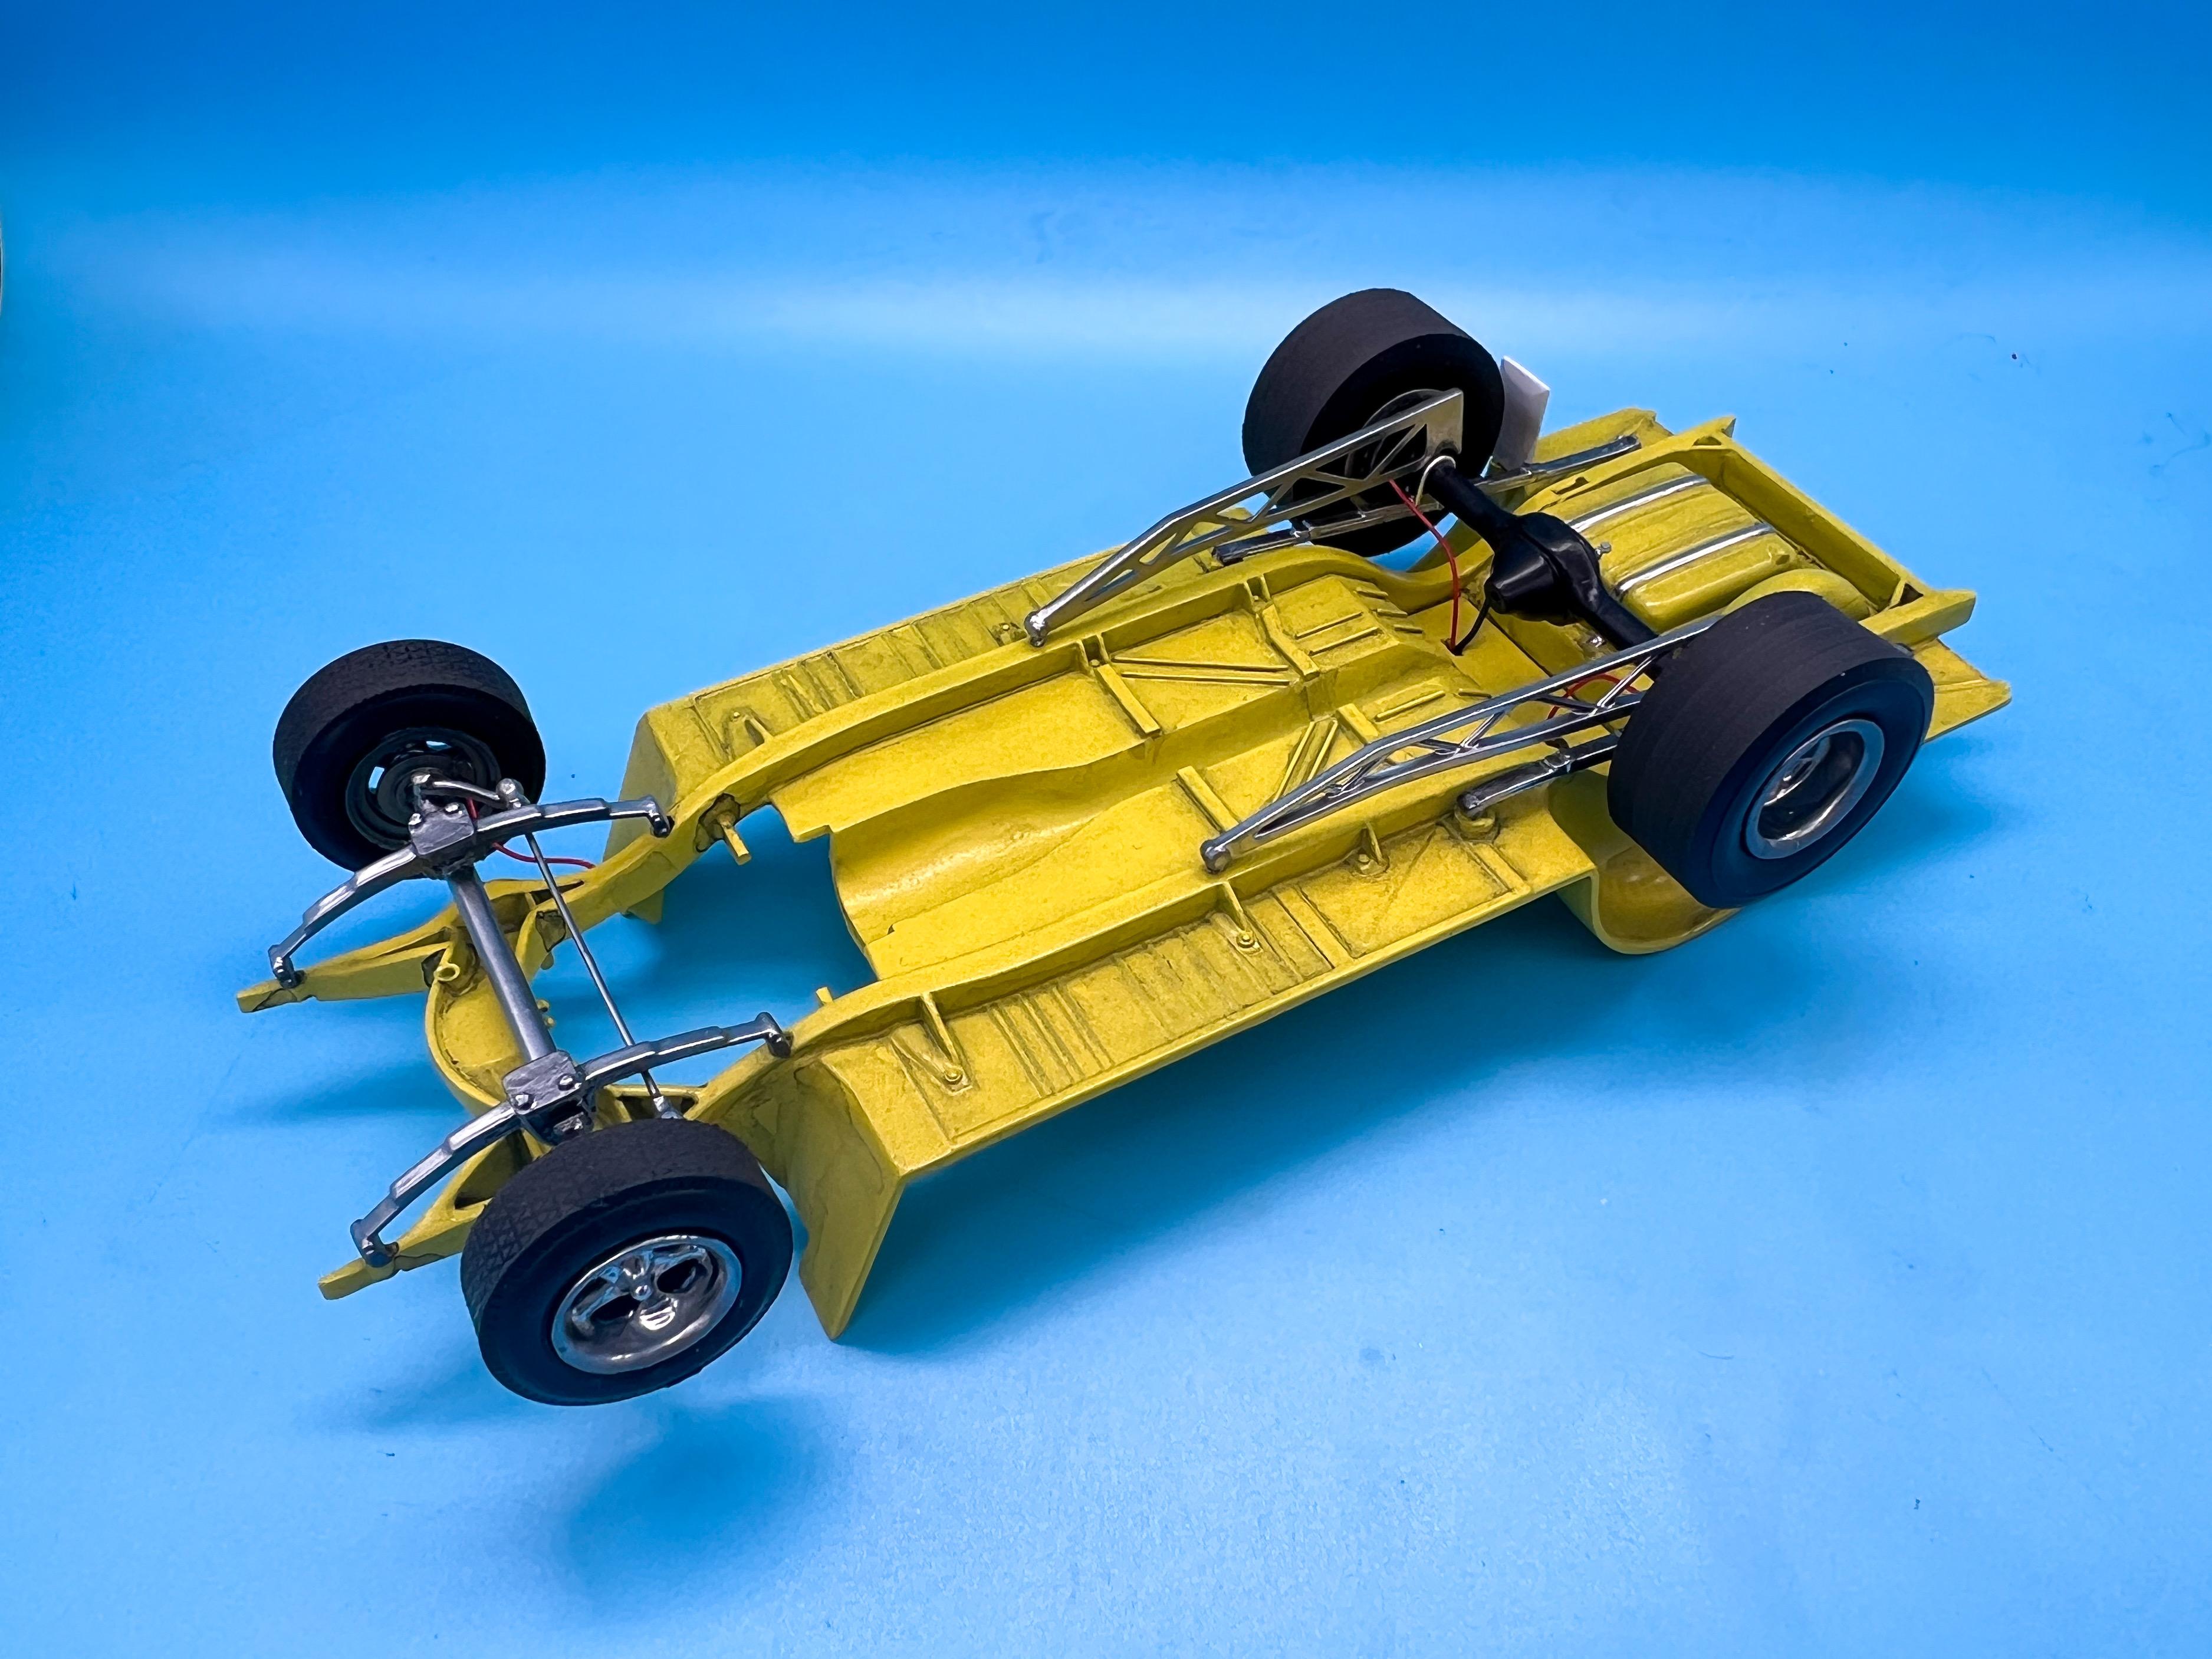
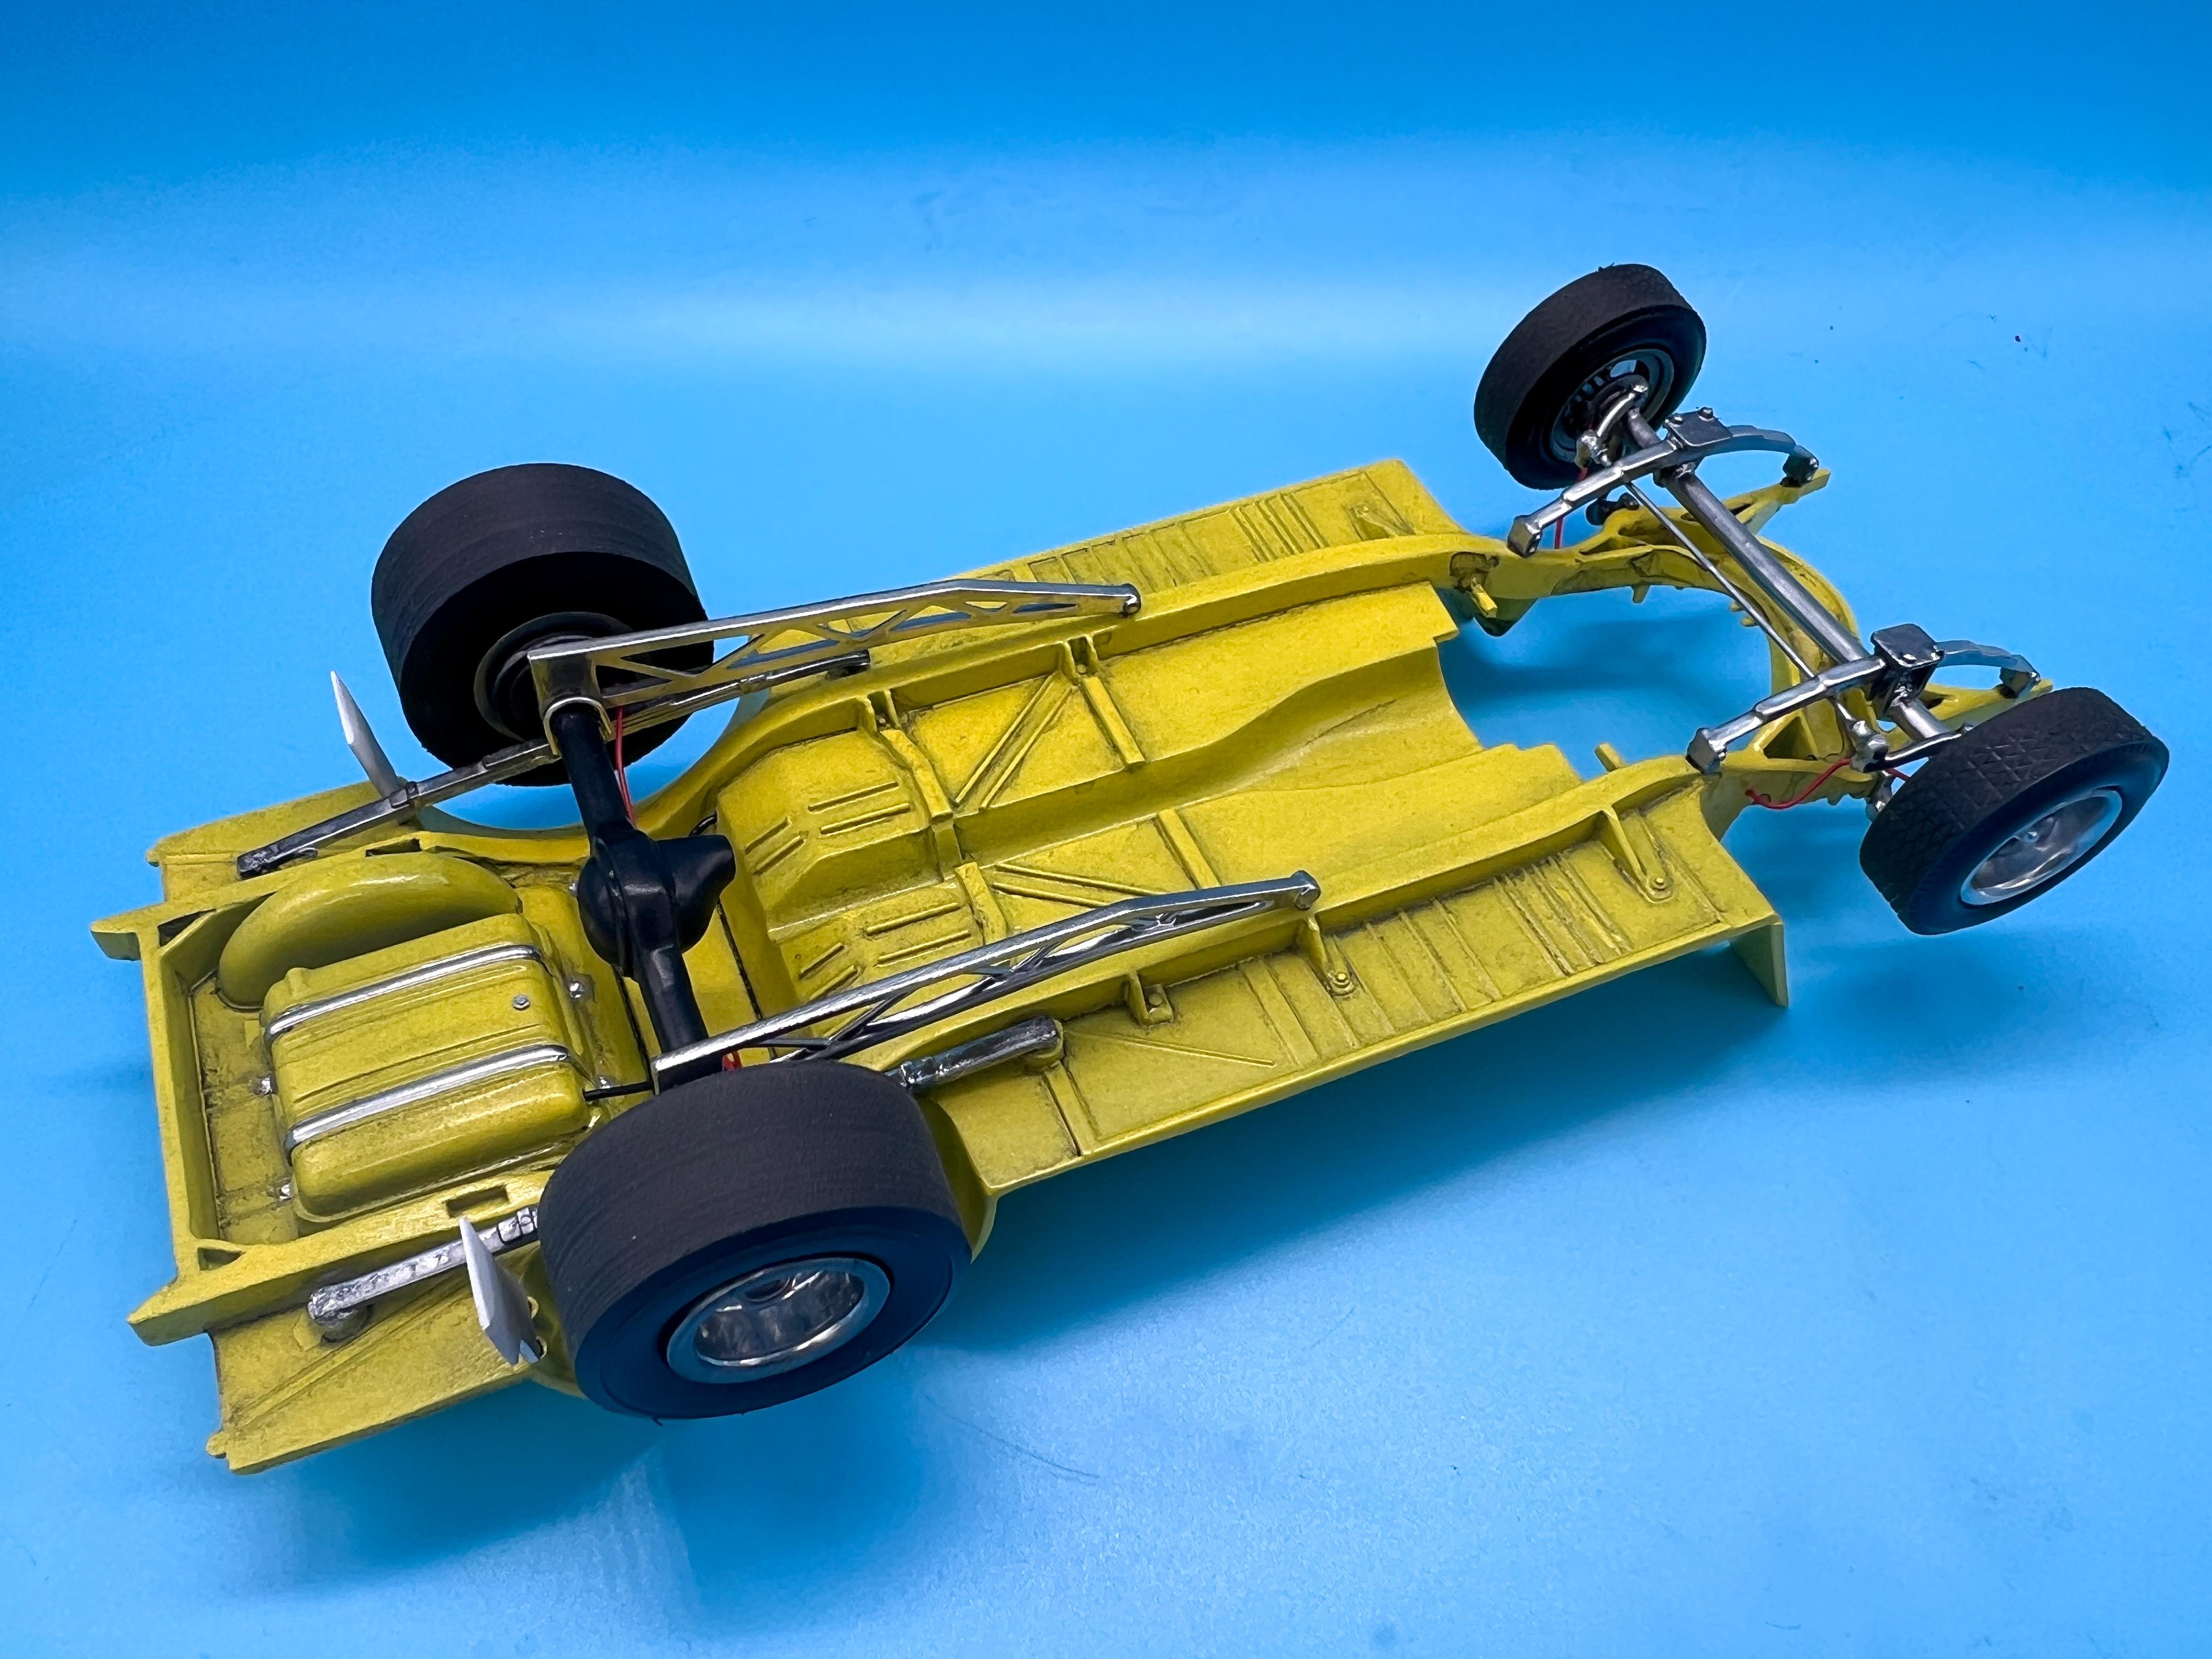
Thanks Andy! That’s sign vinyl - just cut a little strip. I brushed it with some matte clear after these pics to tone down the shine a little…but it’s super easy to work with and nice and thin… Thank you!! Some more progress, this weekend… Got the engine in the frame…found a parts box driveshaft that fit about perfect, so that saved me making one… Now, to add everything else! Got the interior assembled: And then I could get the body installed, for good: Next up, switched out the kit Moon tank for an aluminum one by Detail Master: Looks mean, peeking through the grill shell: Got the hood pins installed - kept the hood in place while the glue dried to make sure they were aligned correctly: And with the hood removed… Made a start on detailing the door cards - printed some handles and used some BMF for the trim…they still need a little more work and some clean-up: And that’s about where we are so far - still a few bits to do but ran out of weekend… Thanks for looking - more soon!
-
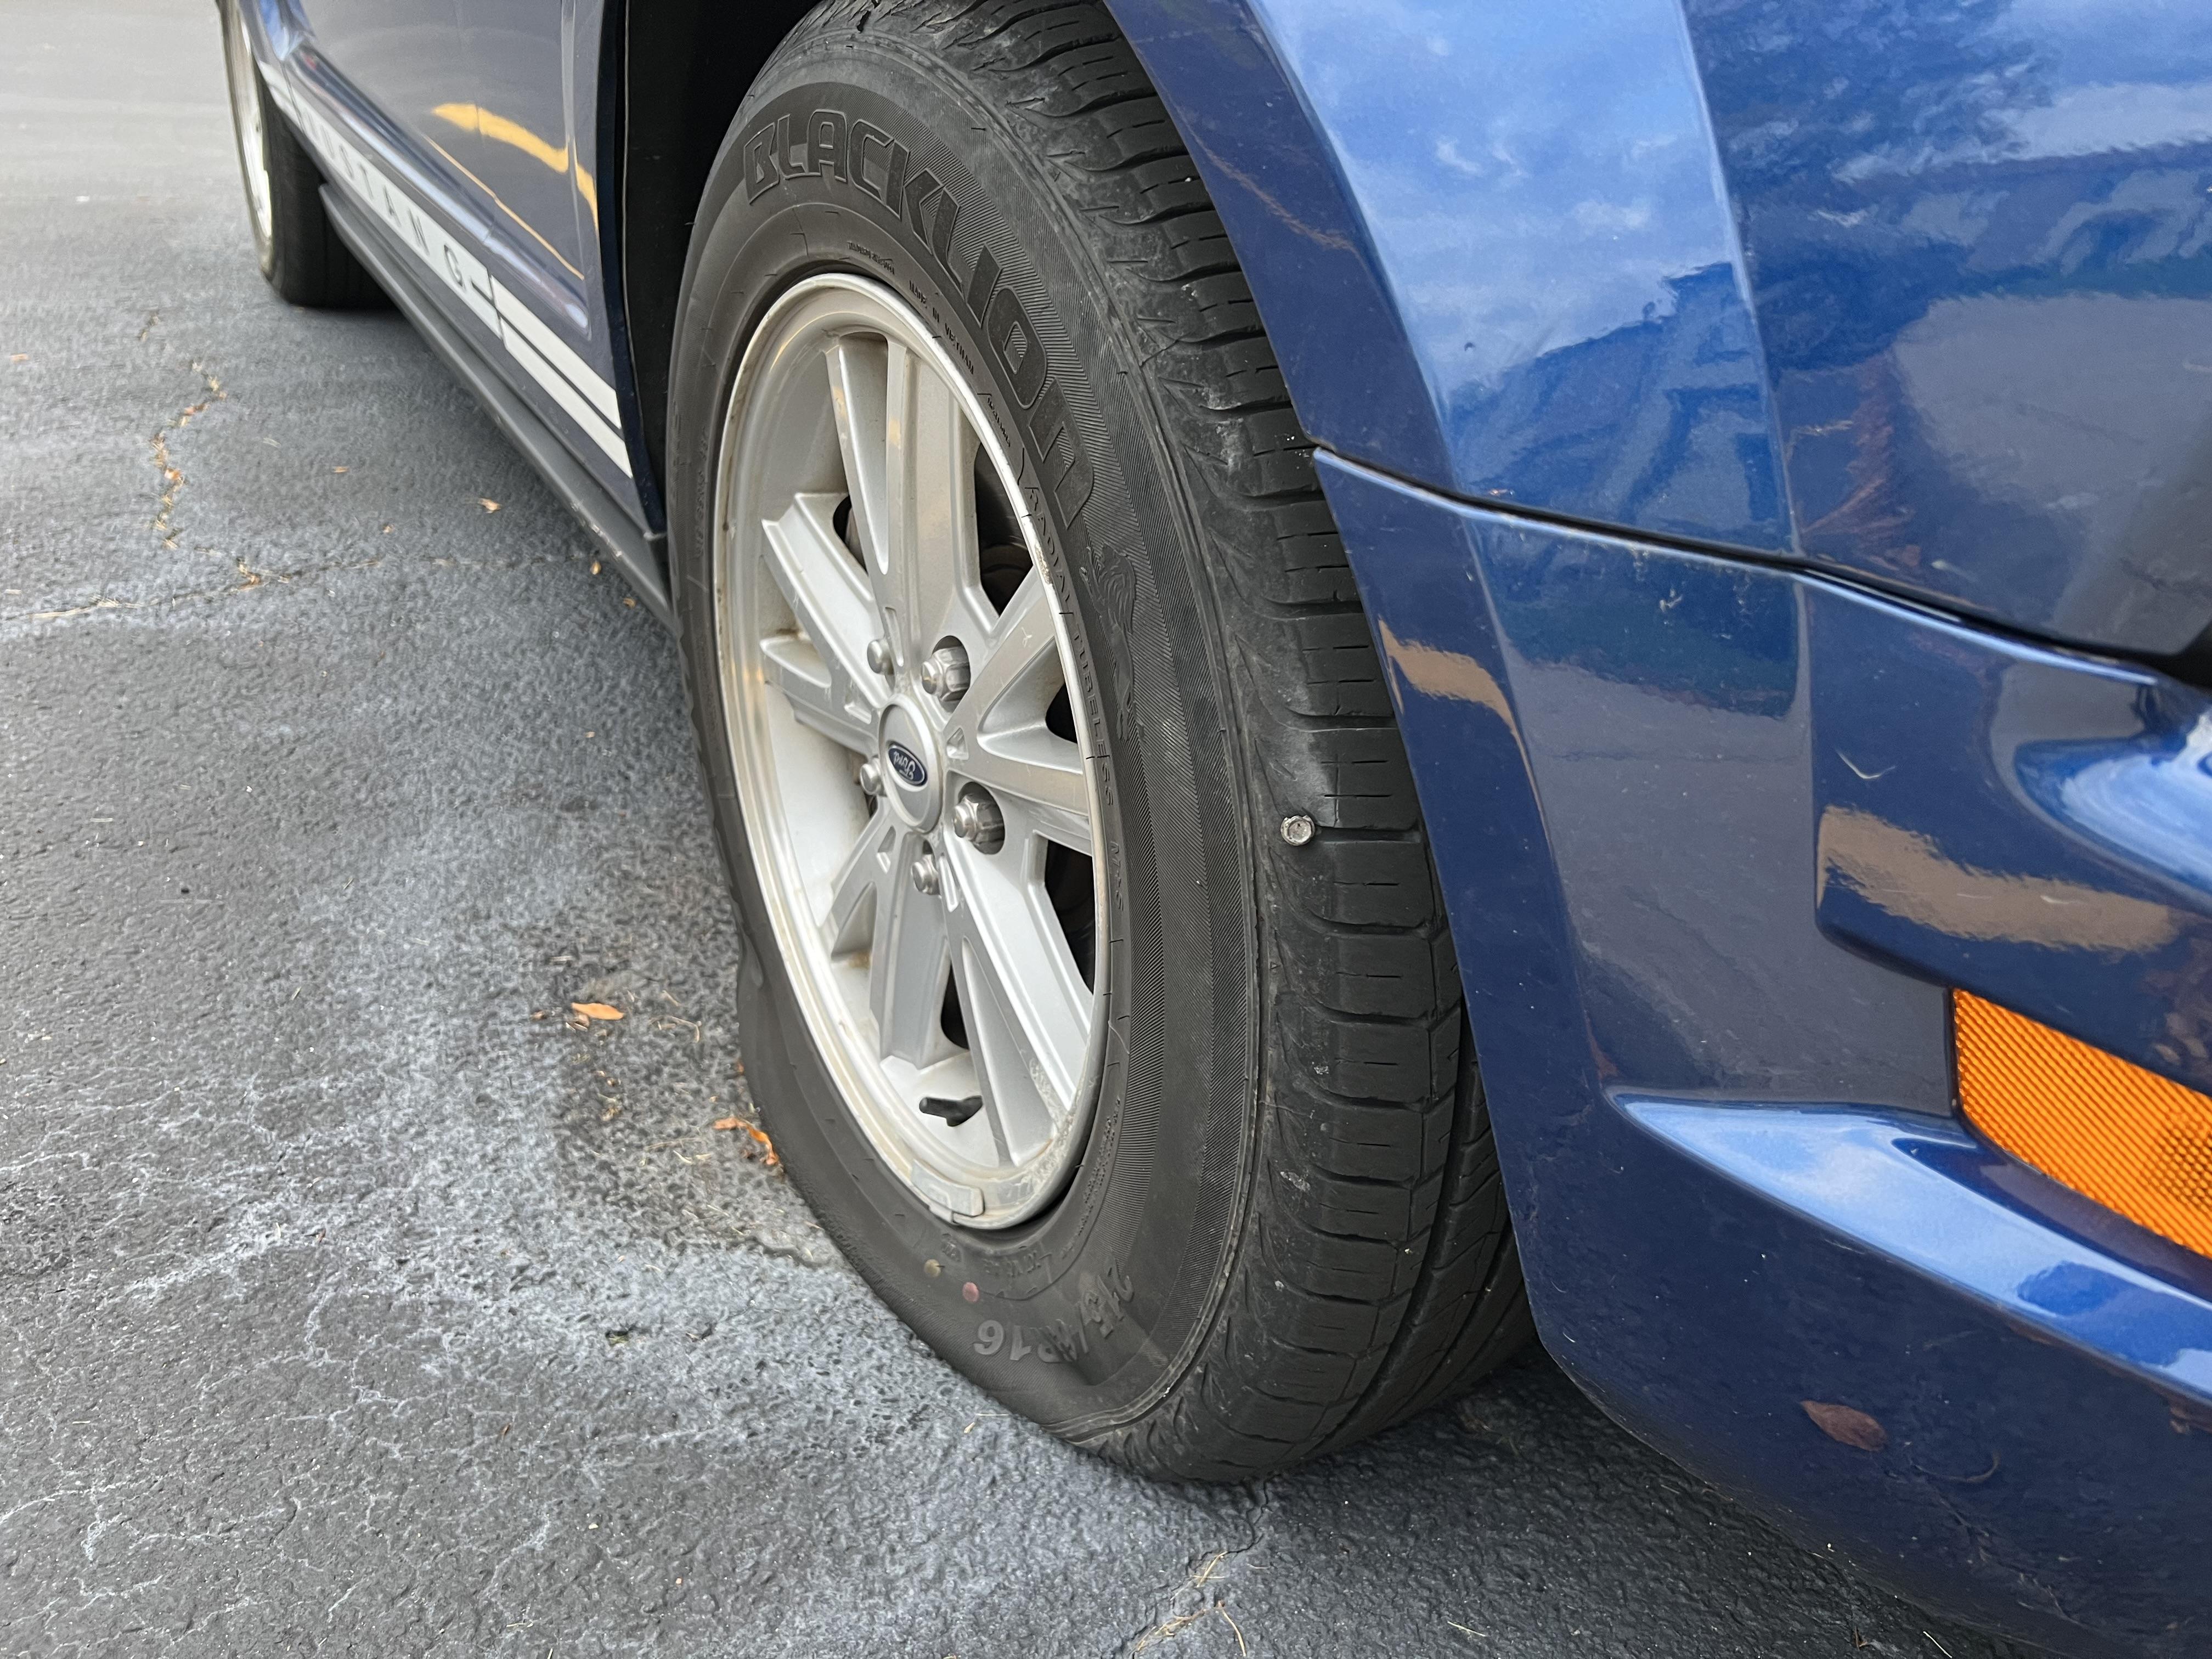
Yep, correct - had to get a cheapy placeholder put on there - it’ll be winter tire time shortly and I don’t intend to run these wheels next year once the snow tires come off, so… Still haven’t decided WHAT wheels to put on there though…I keep wondering if a set of Crown Vic black steelies might give an interesting look for a while until I get bored of them…
-
That looks great - you’re right, it’s a really nice in-scale flake. That candy pink is a nice shade too - didn’t realize they had a line of candies too!
-
Personally, I 100% find your articles valuable Tim…I revisit your Fotki often, and rarely look at your body of work without finding some inspiration. Thank you so much for the effort you go to, and please know it IS useful, enjoyable to view and DEFINITELY of value. MCM staff - more Boyd in the mag please!
-
My take on the most famous ‘55 gasser street machine’…
OldNYJim replied to OldNYJim's topic in WIP: Model Cars
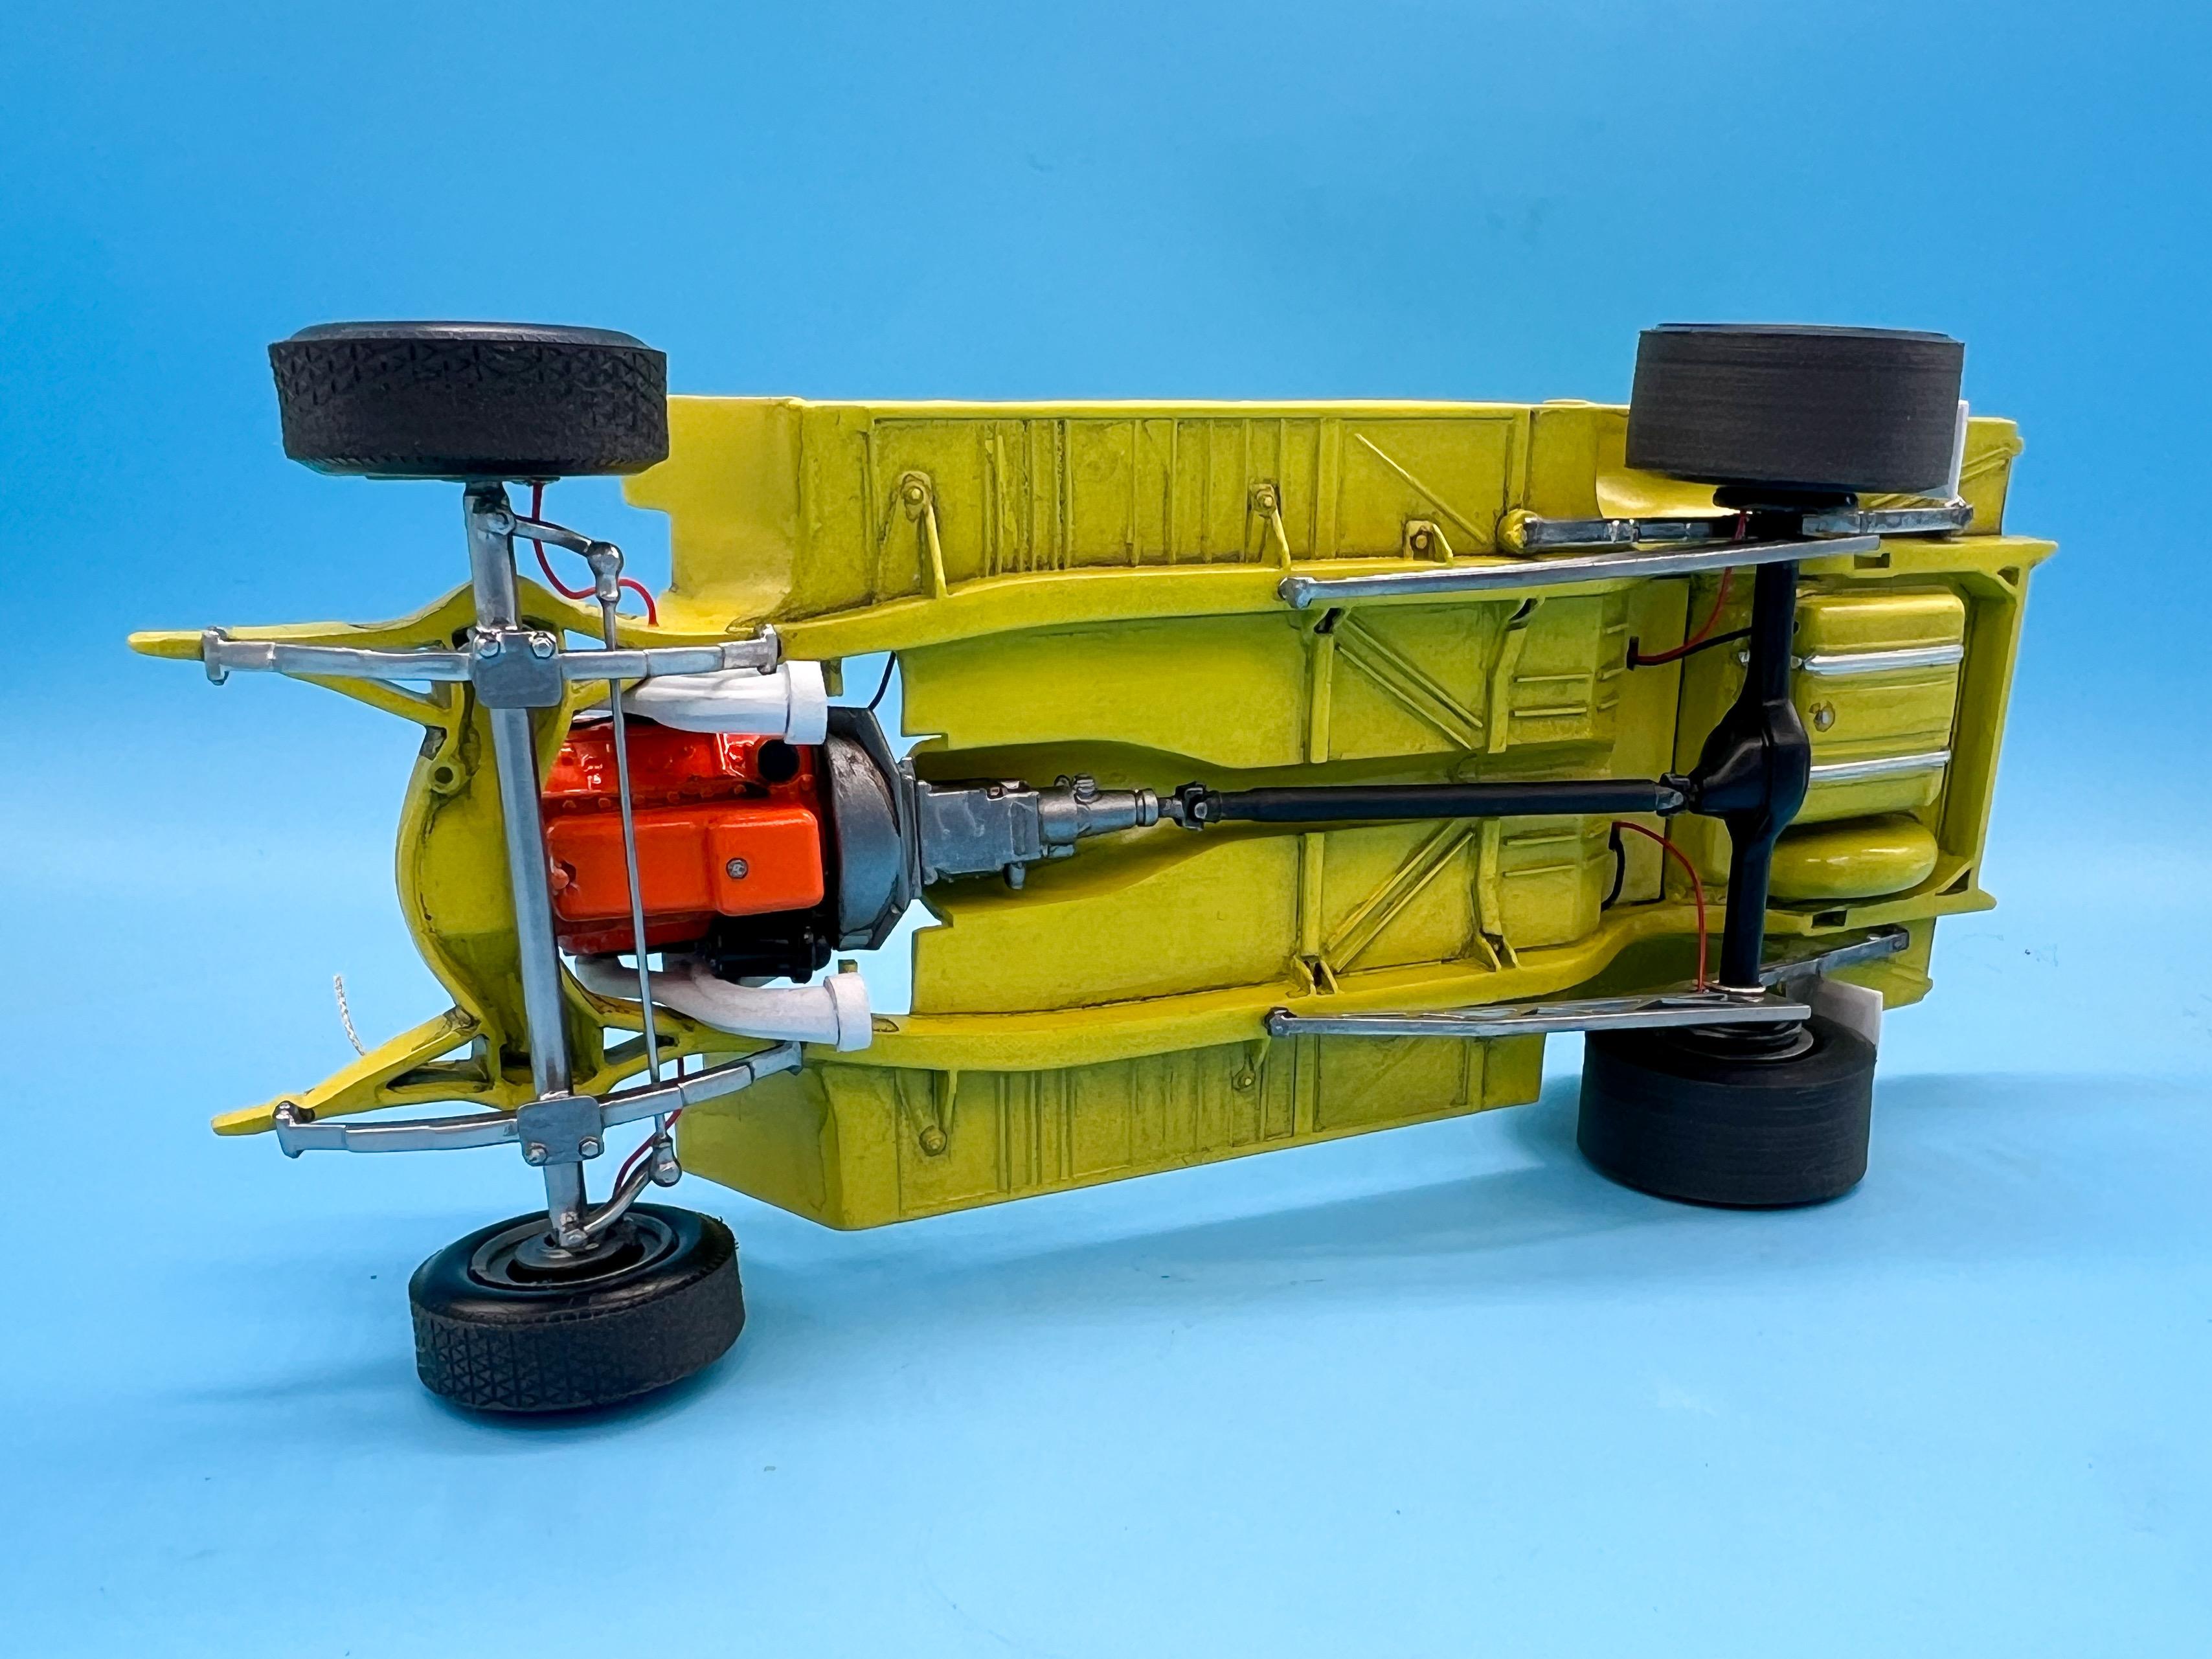
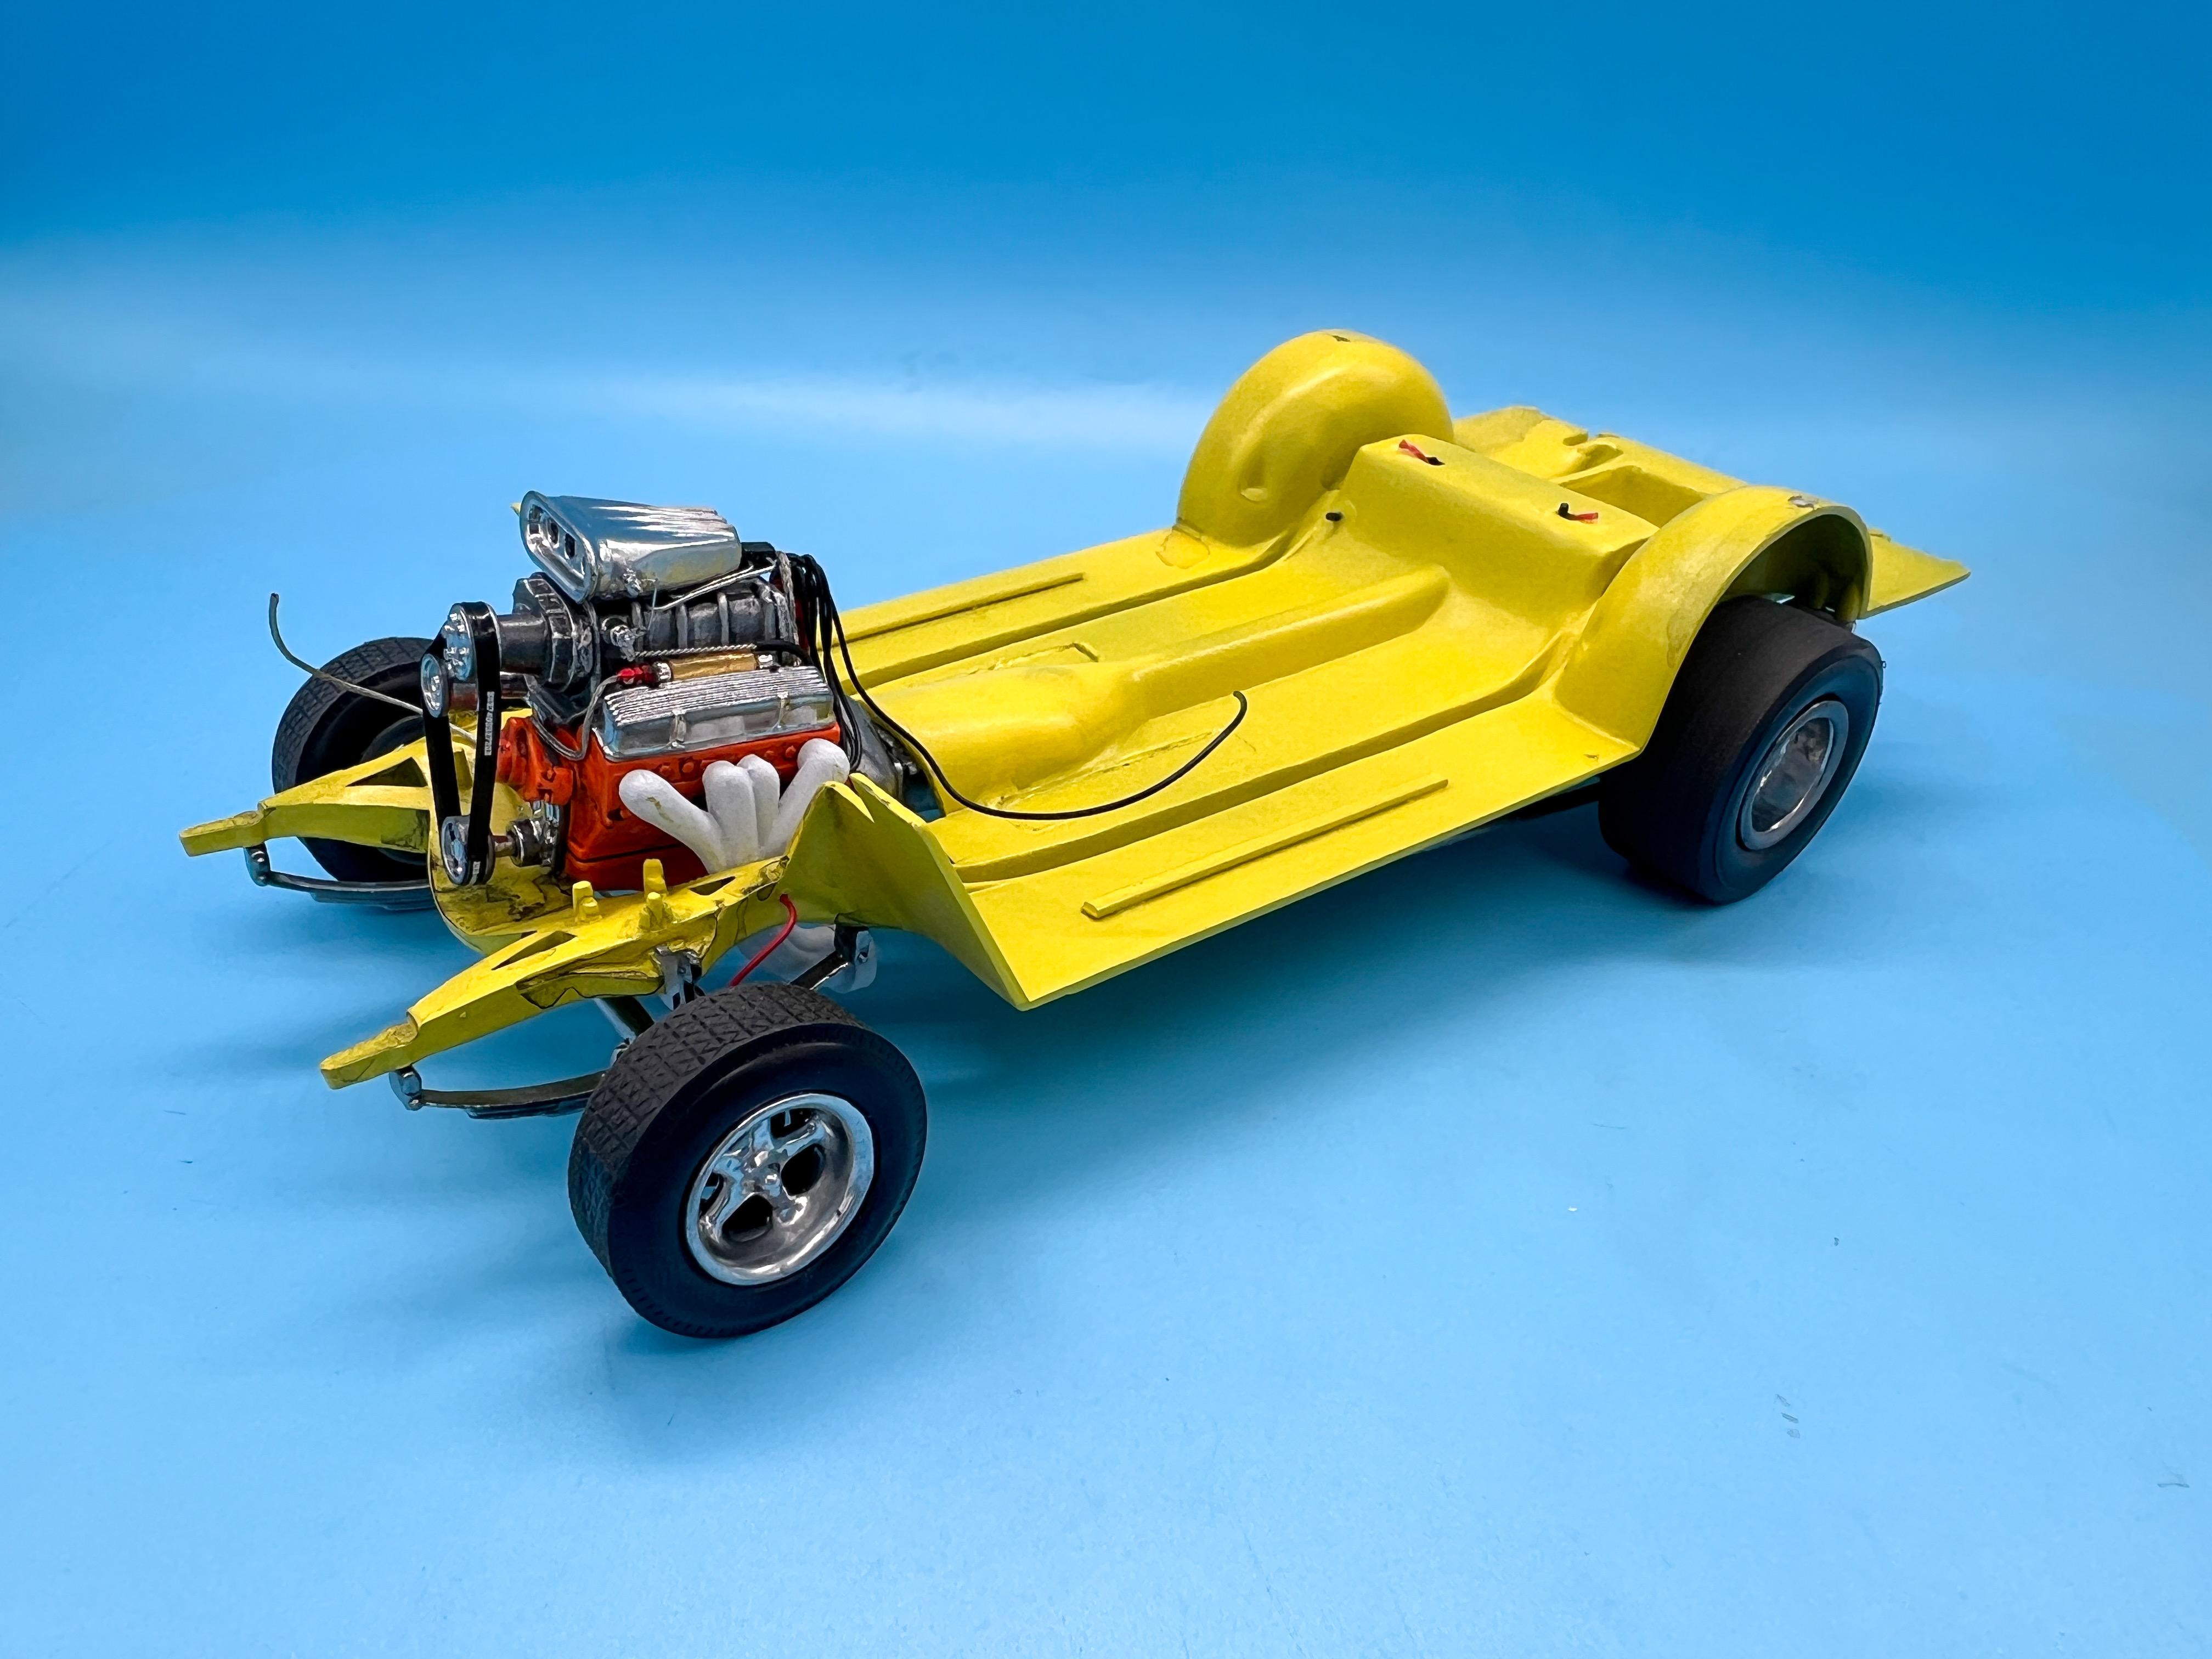
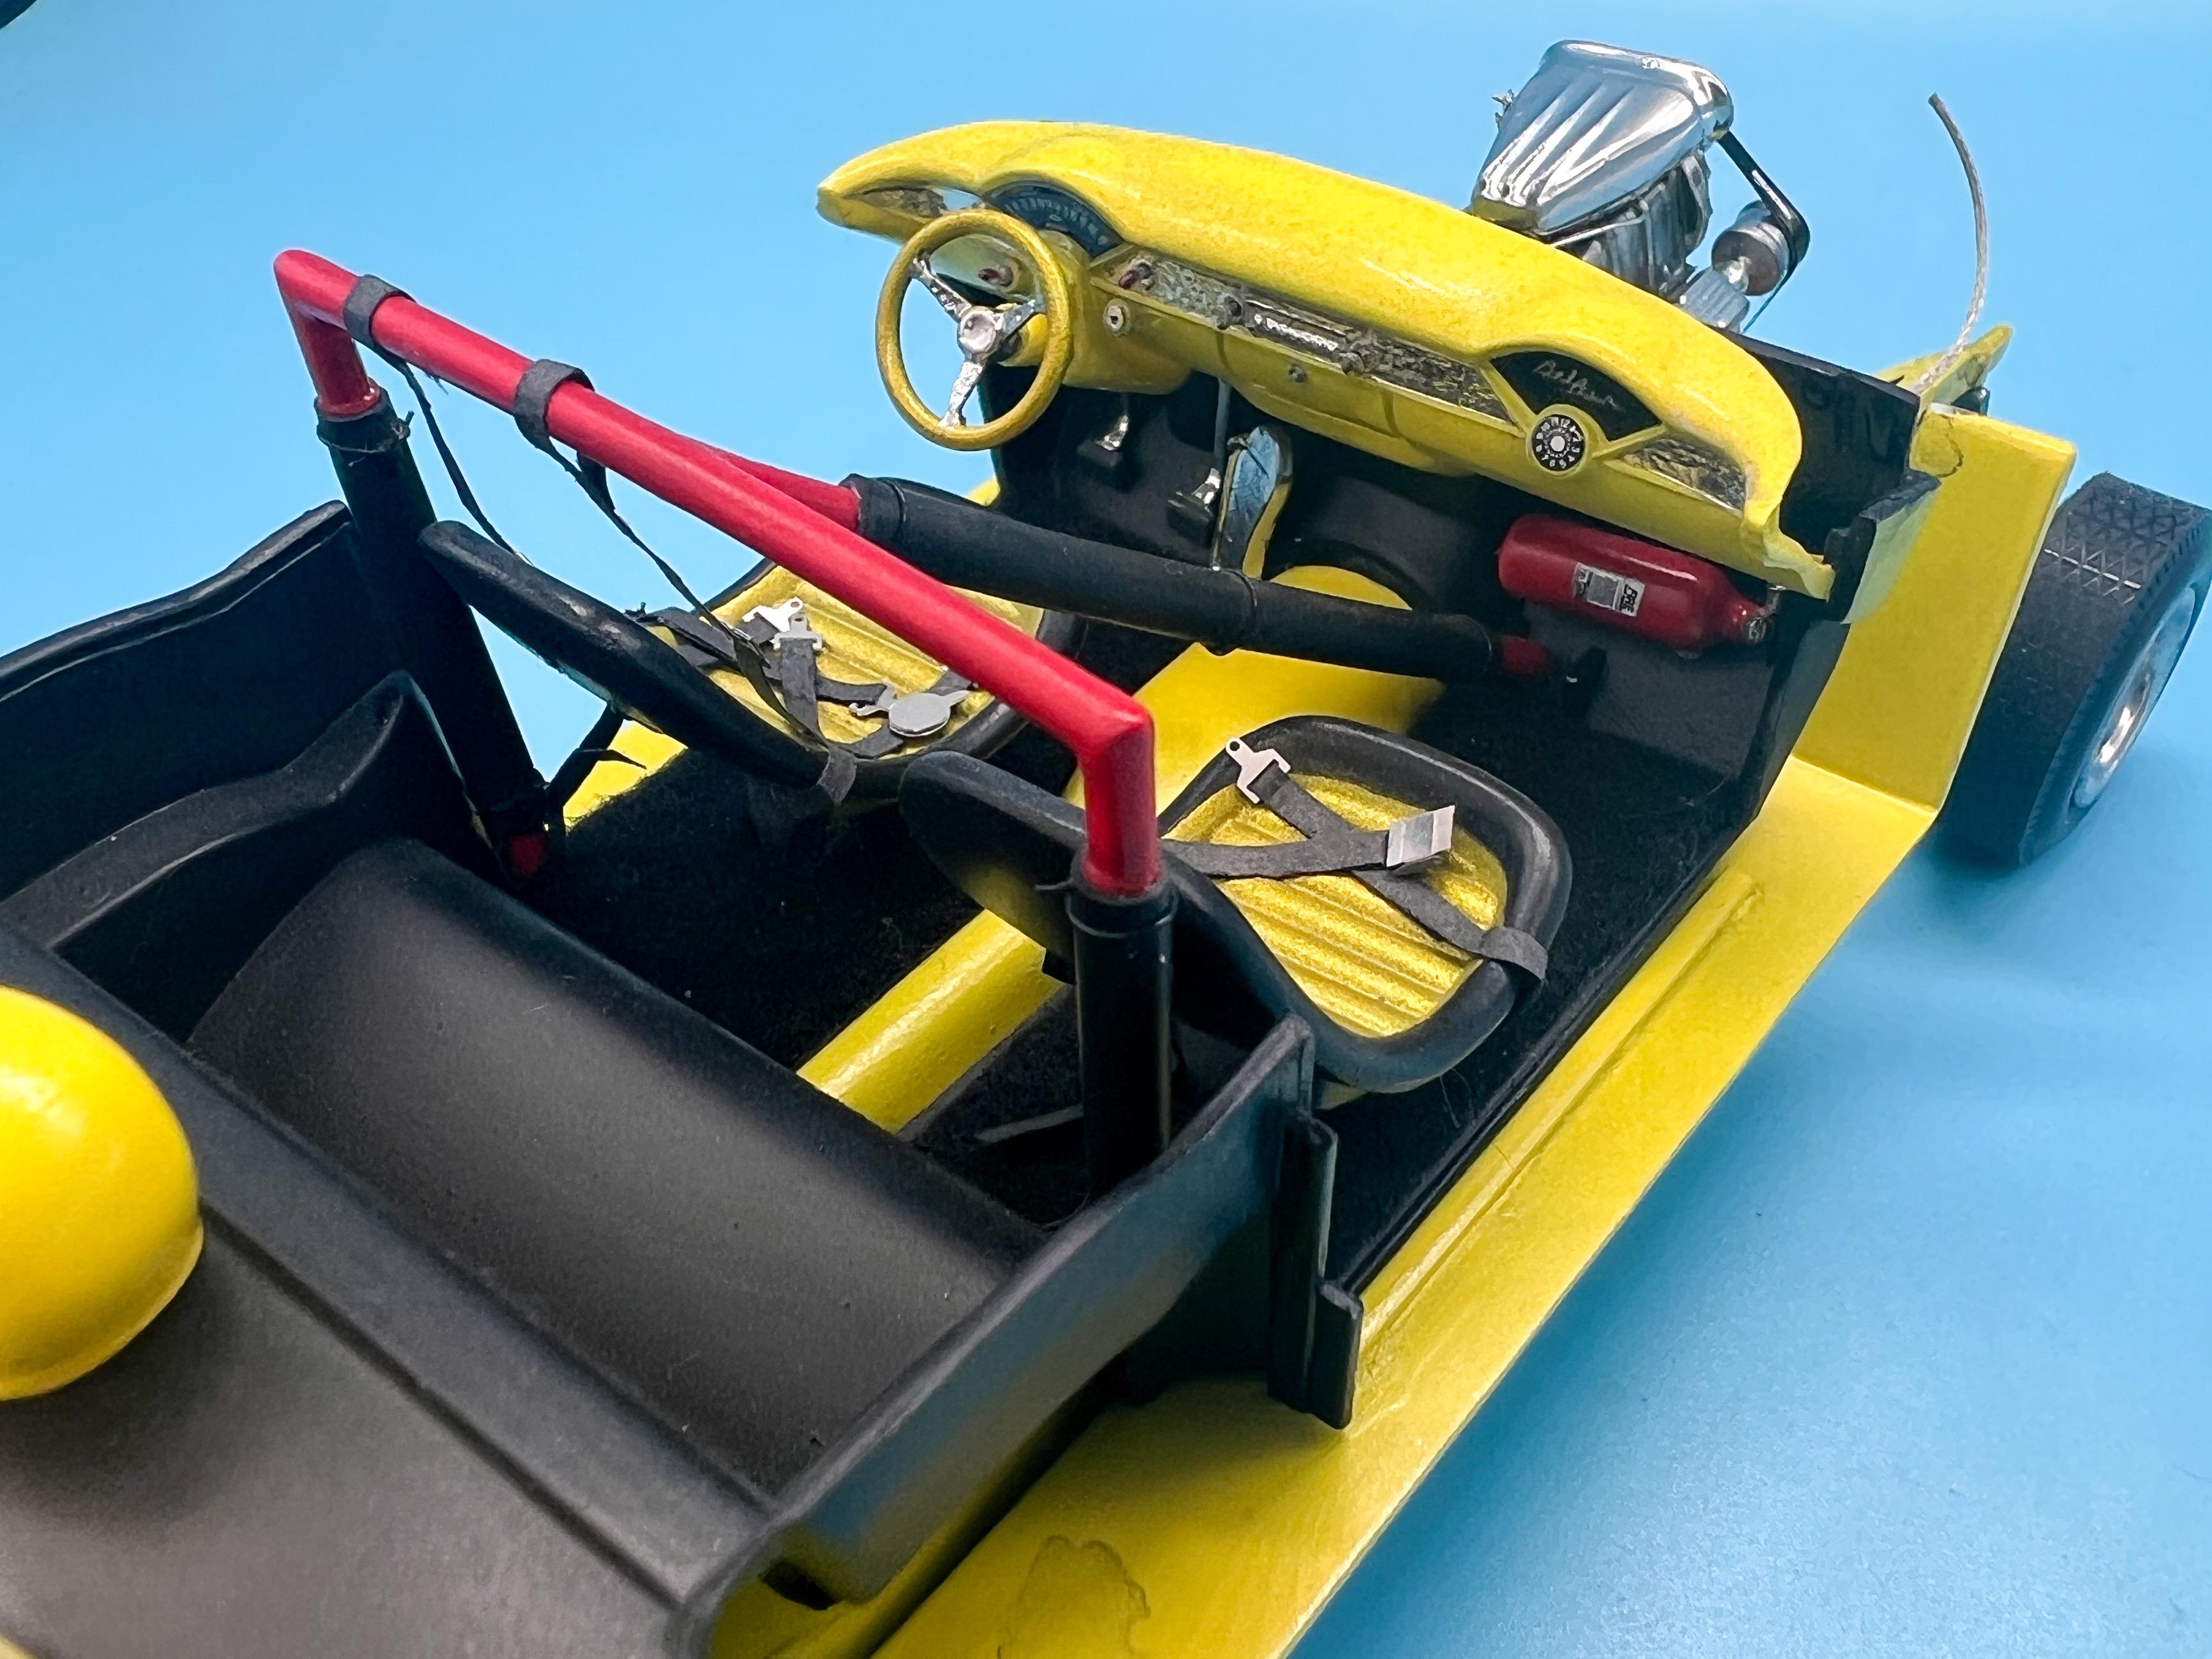
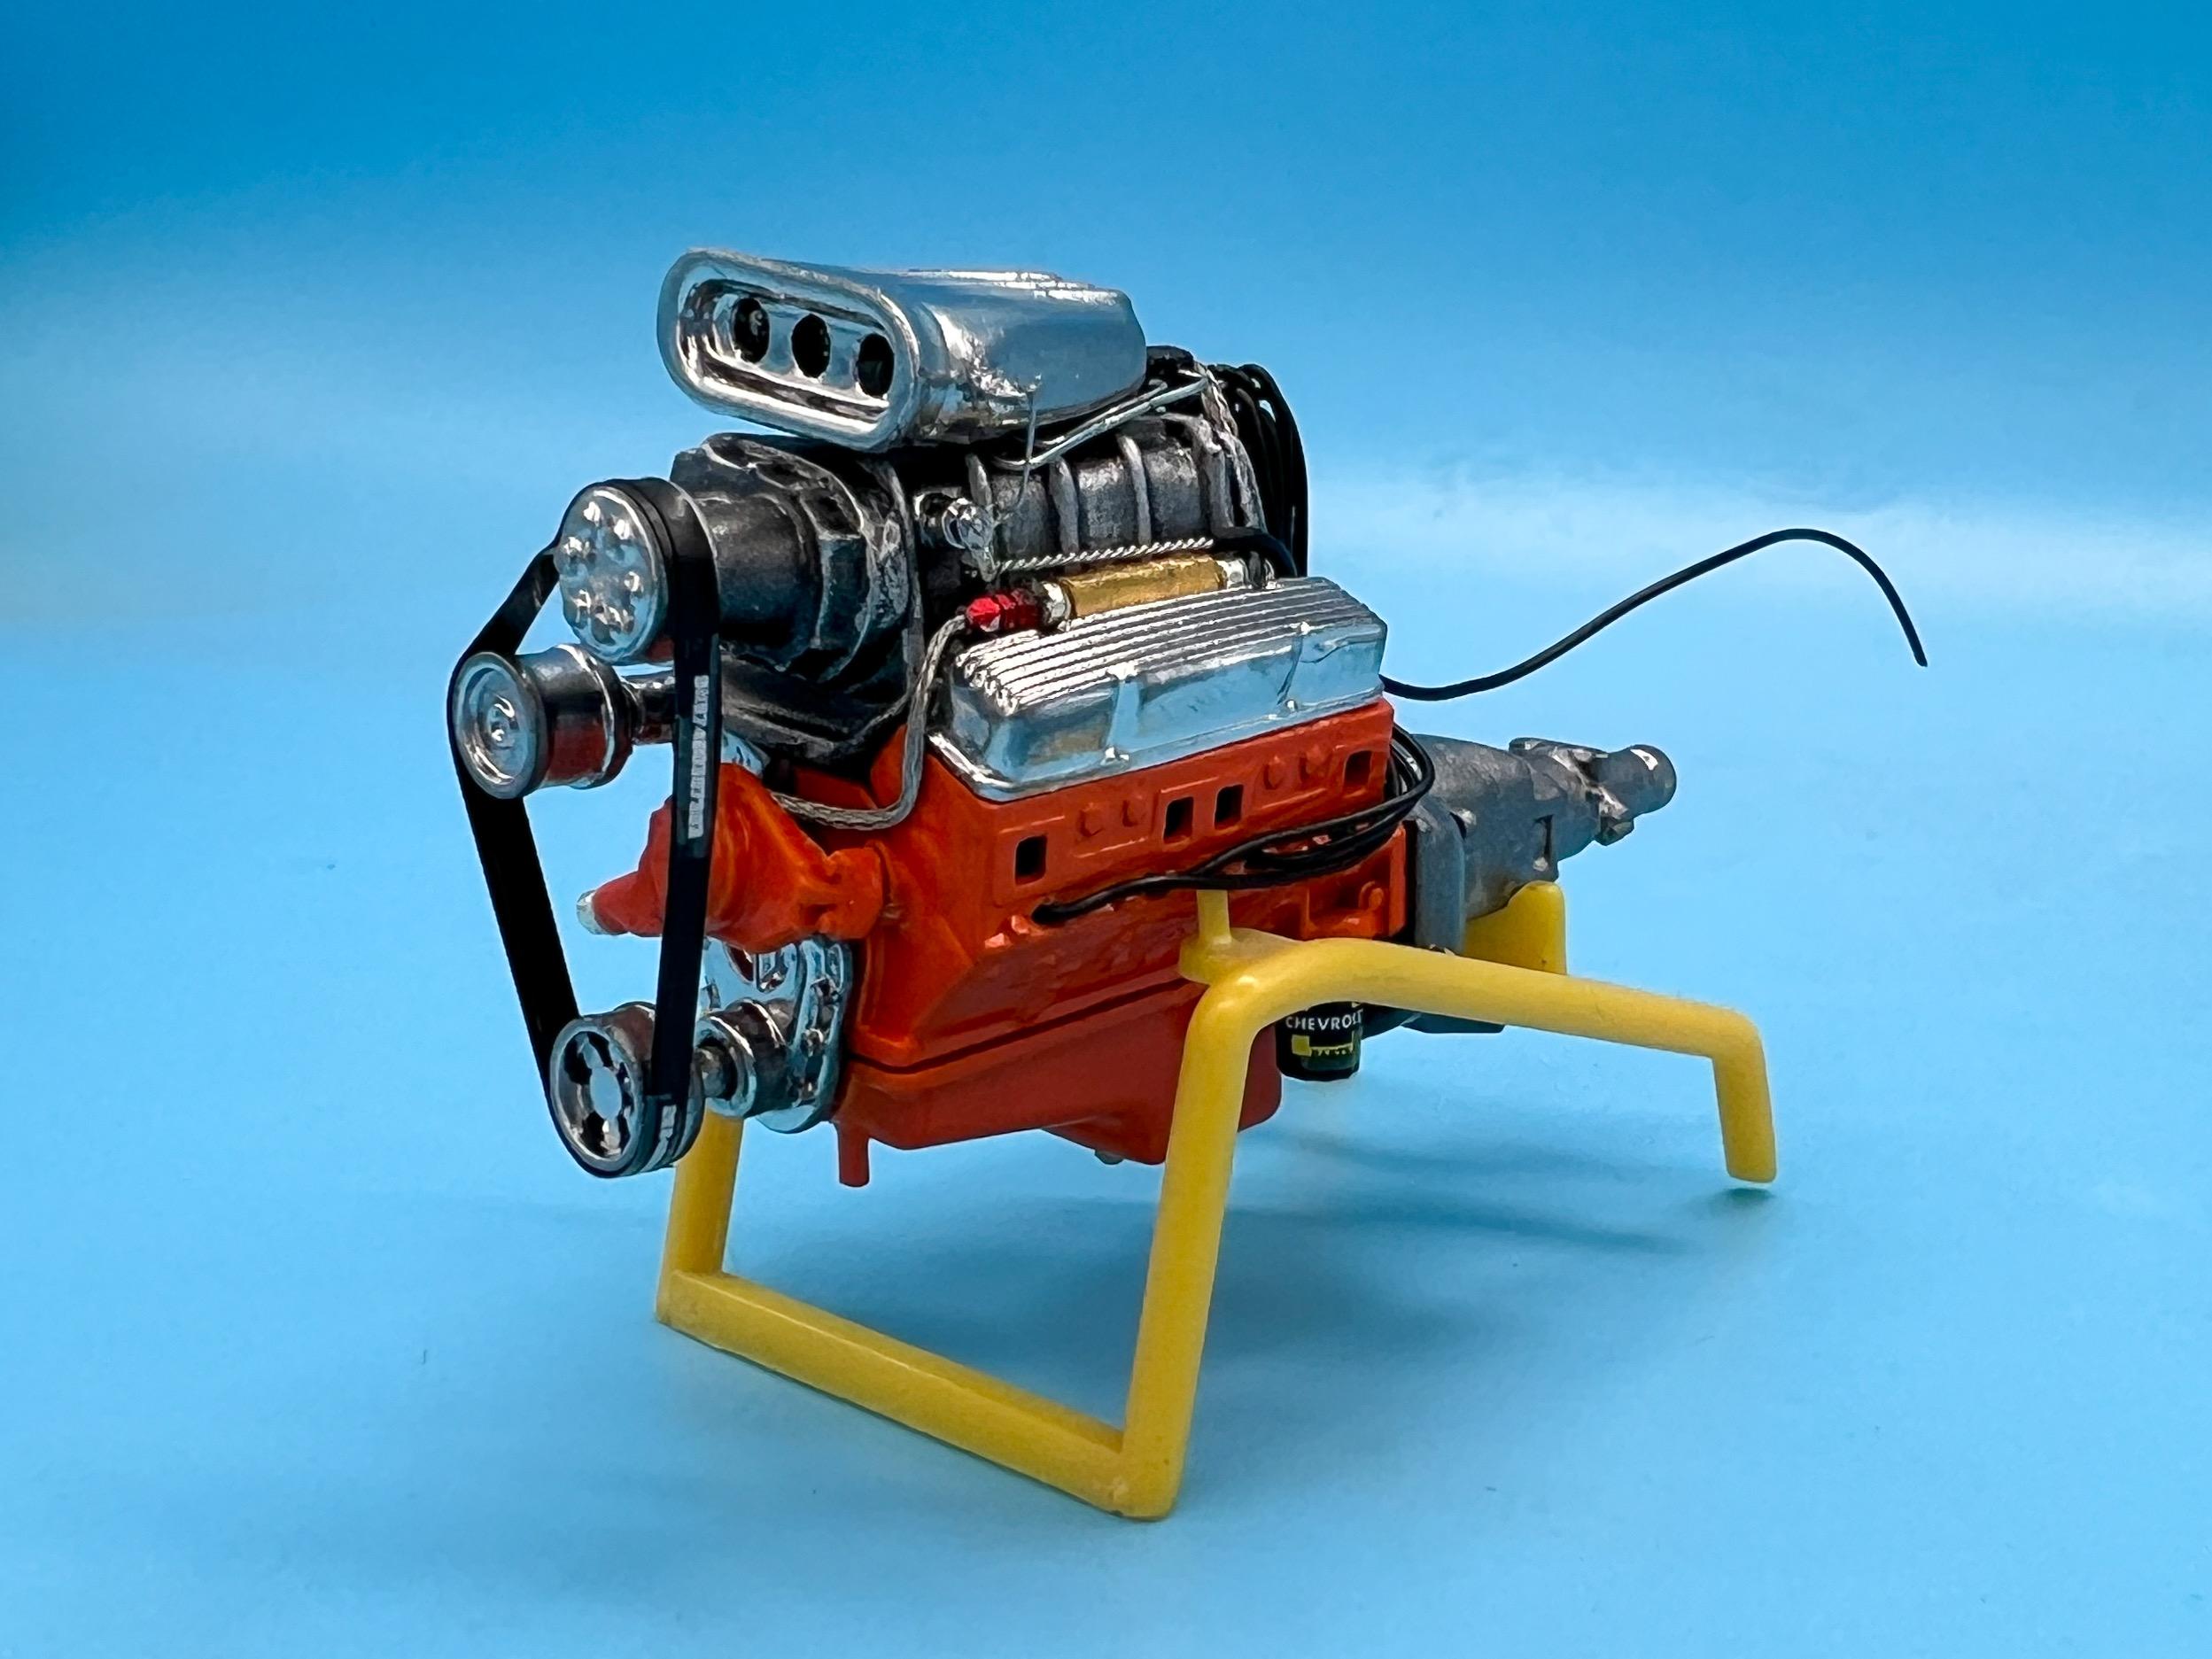
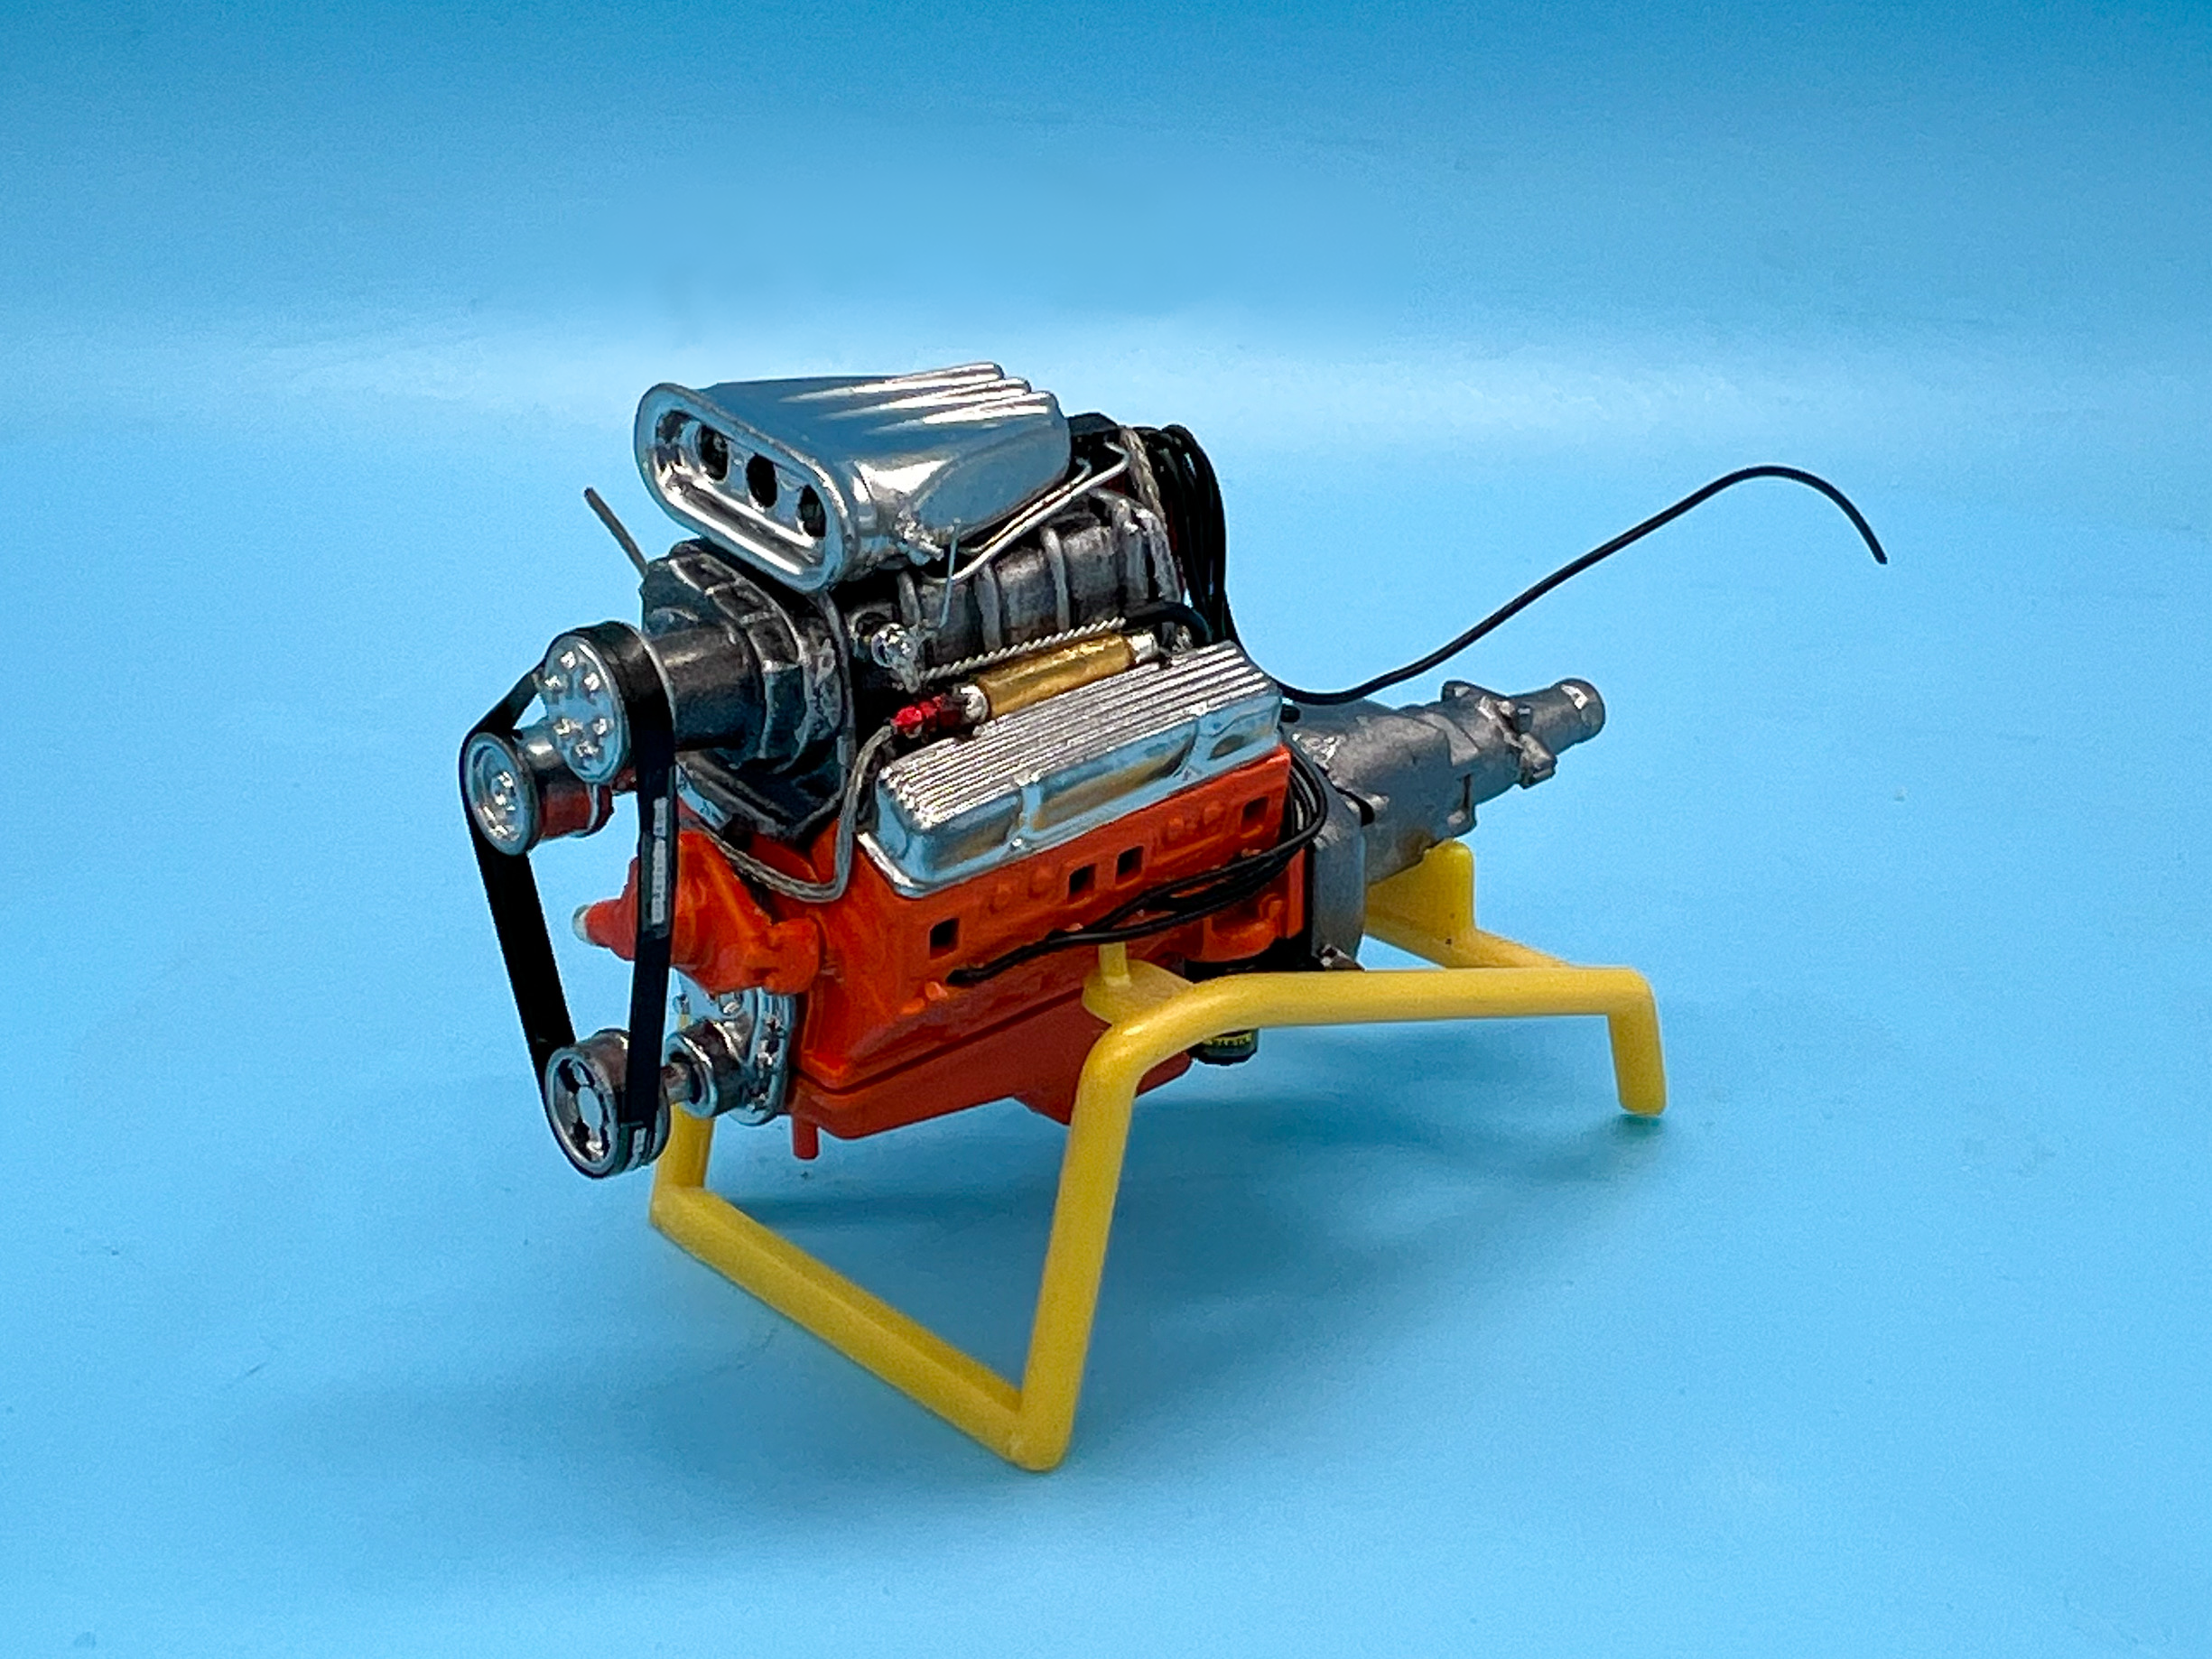
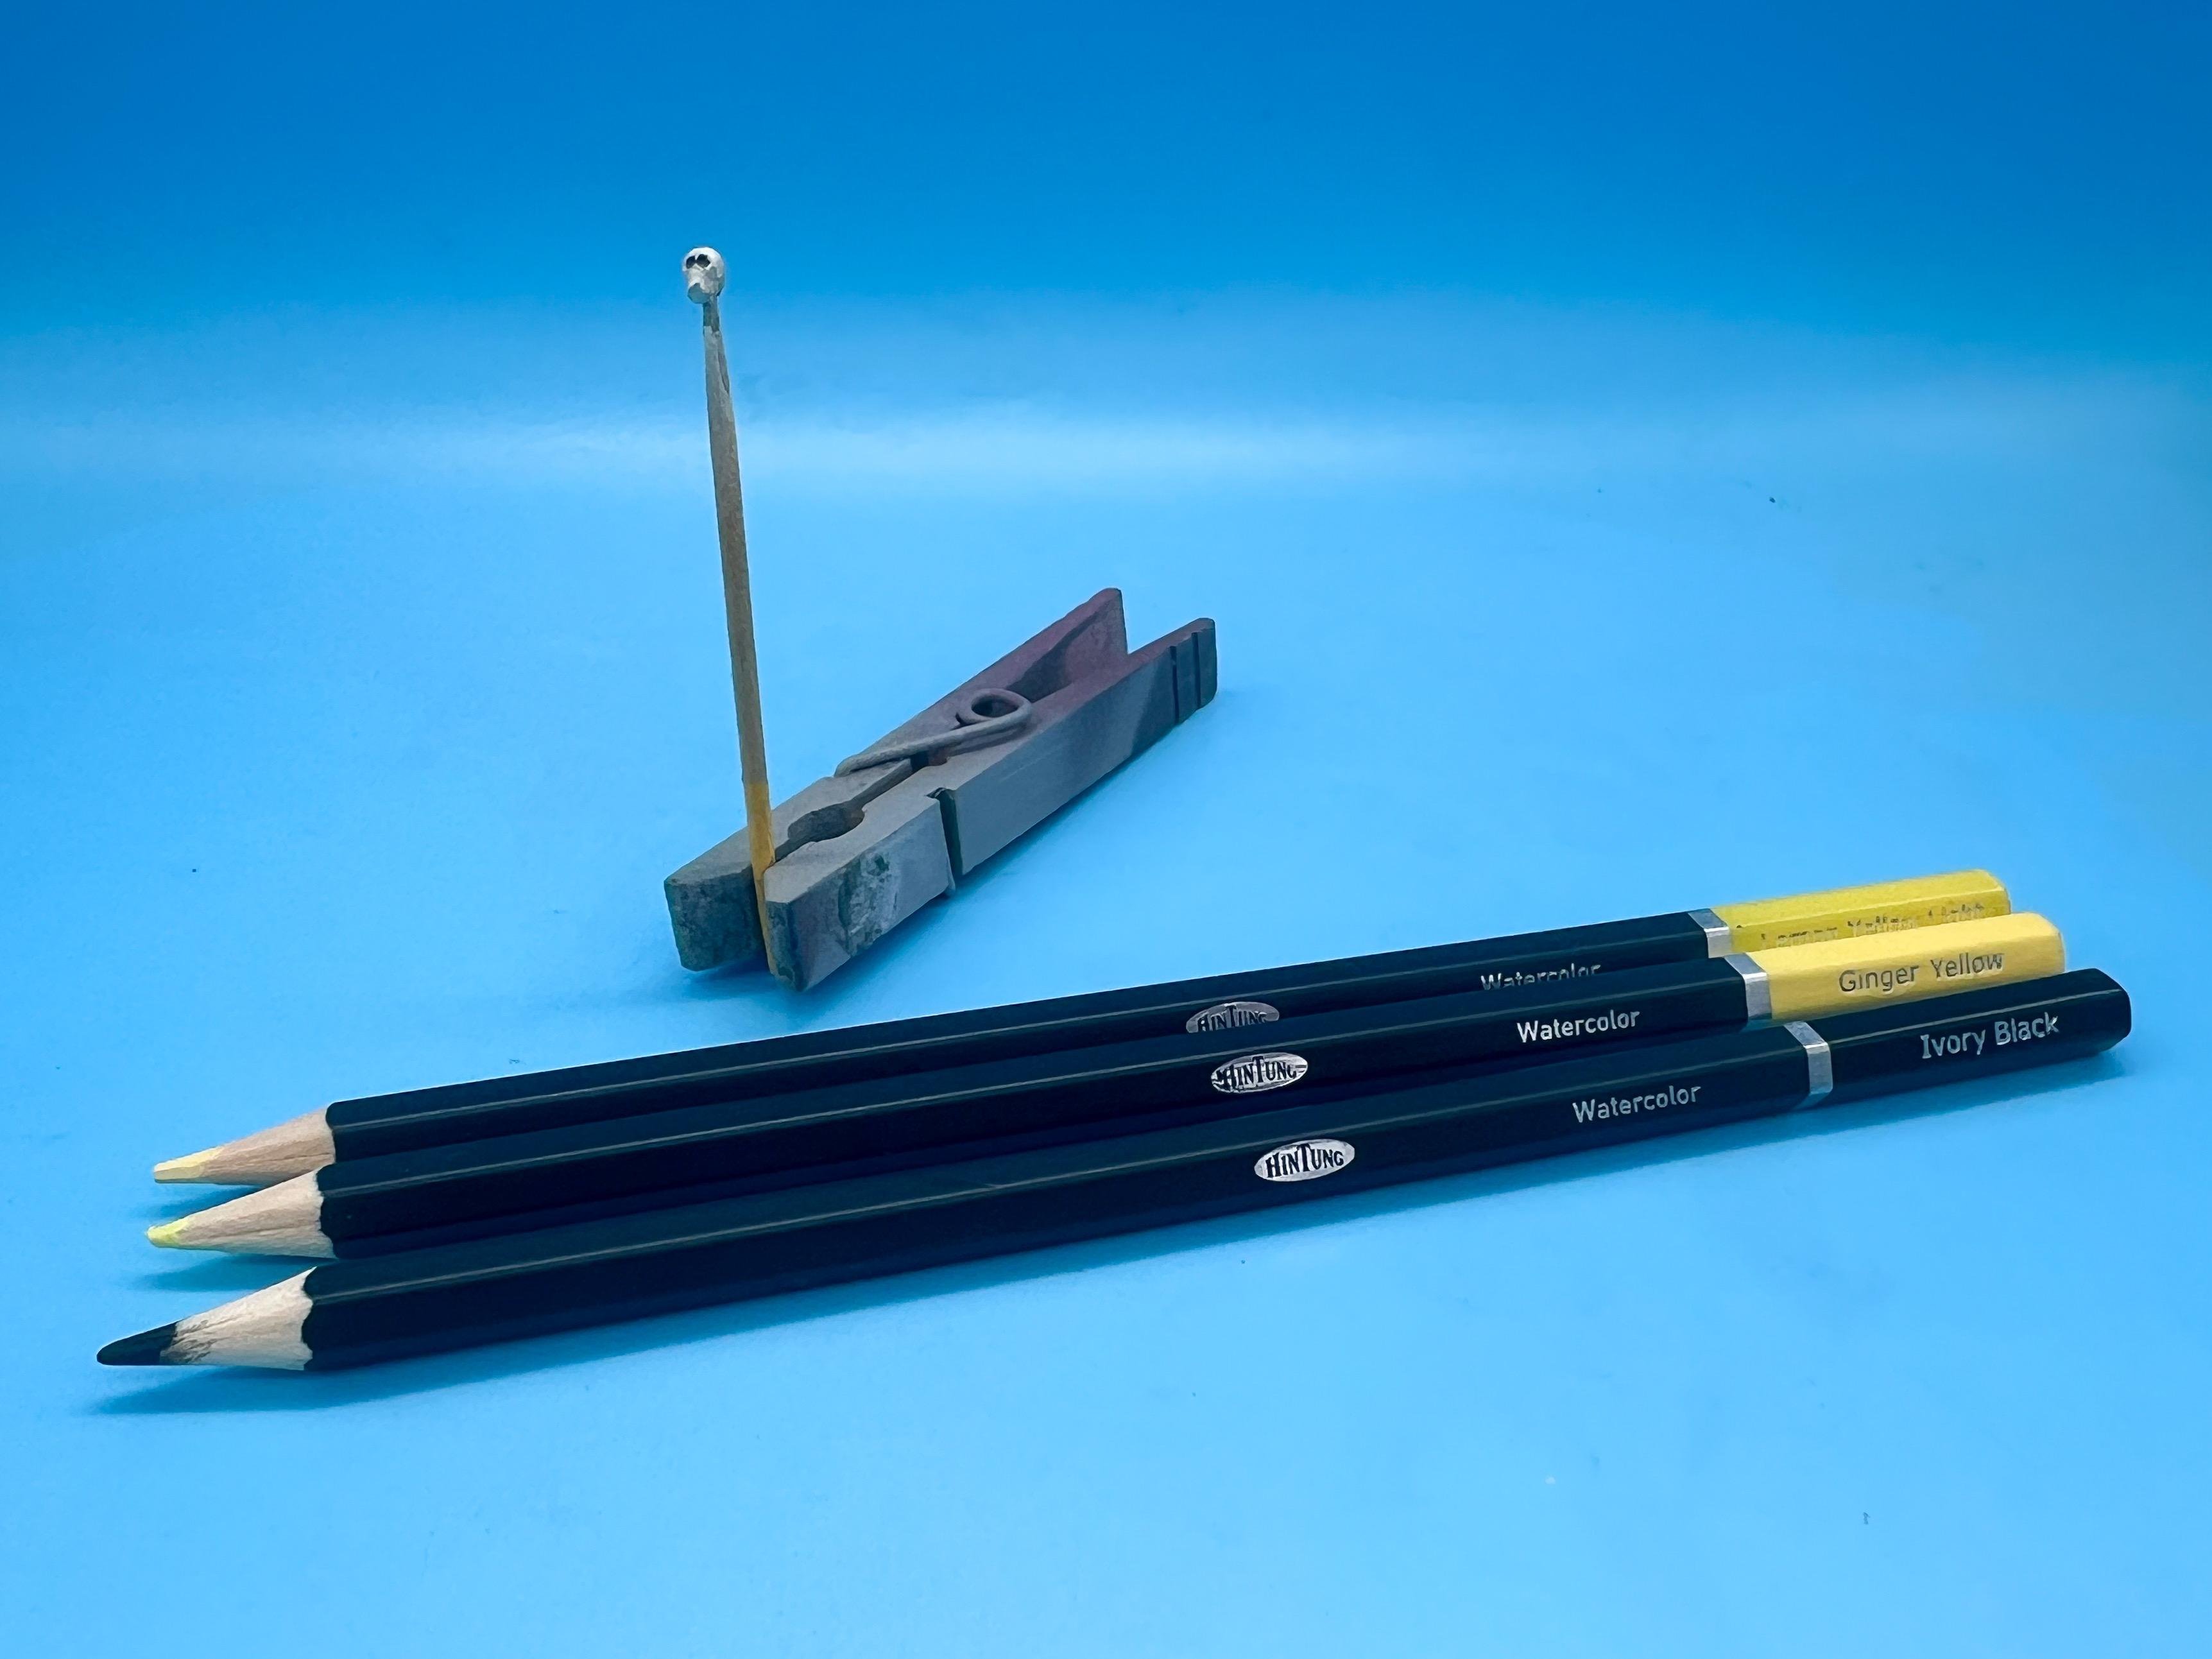
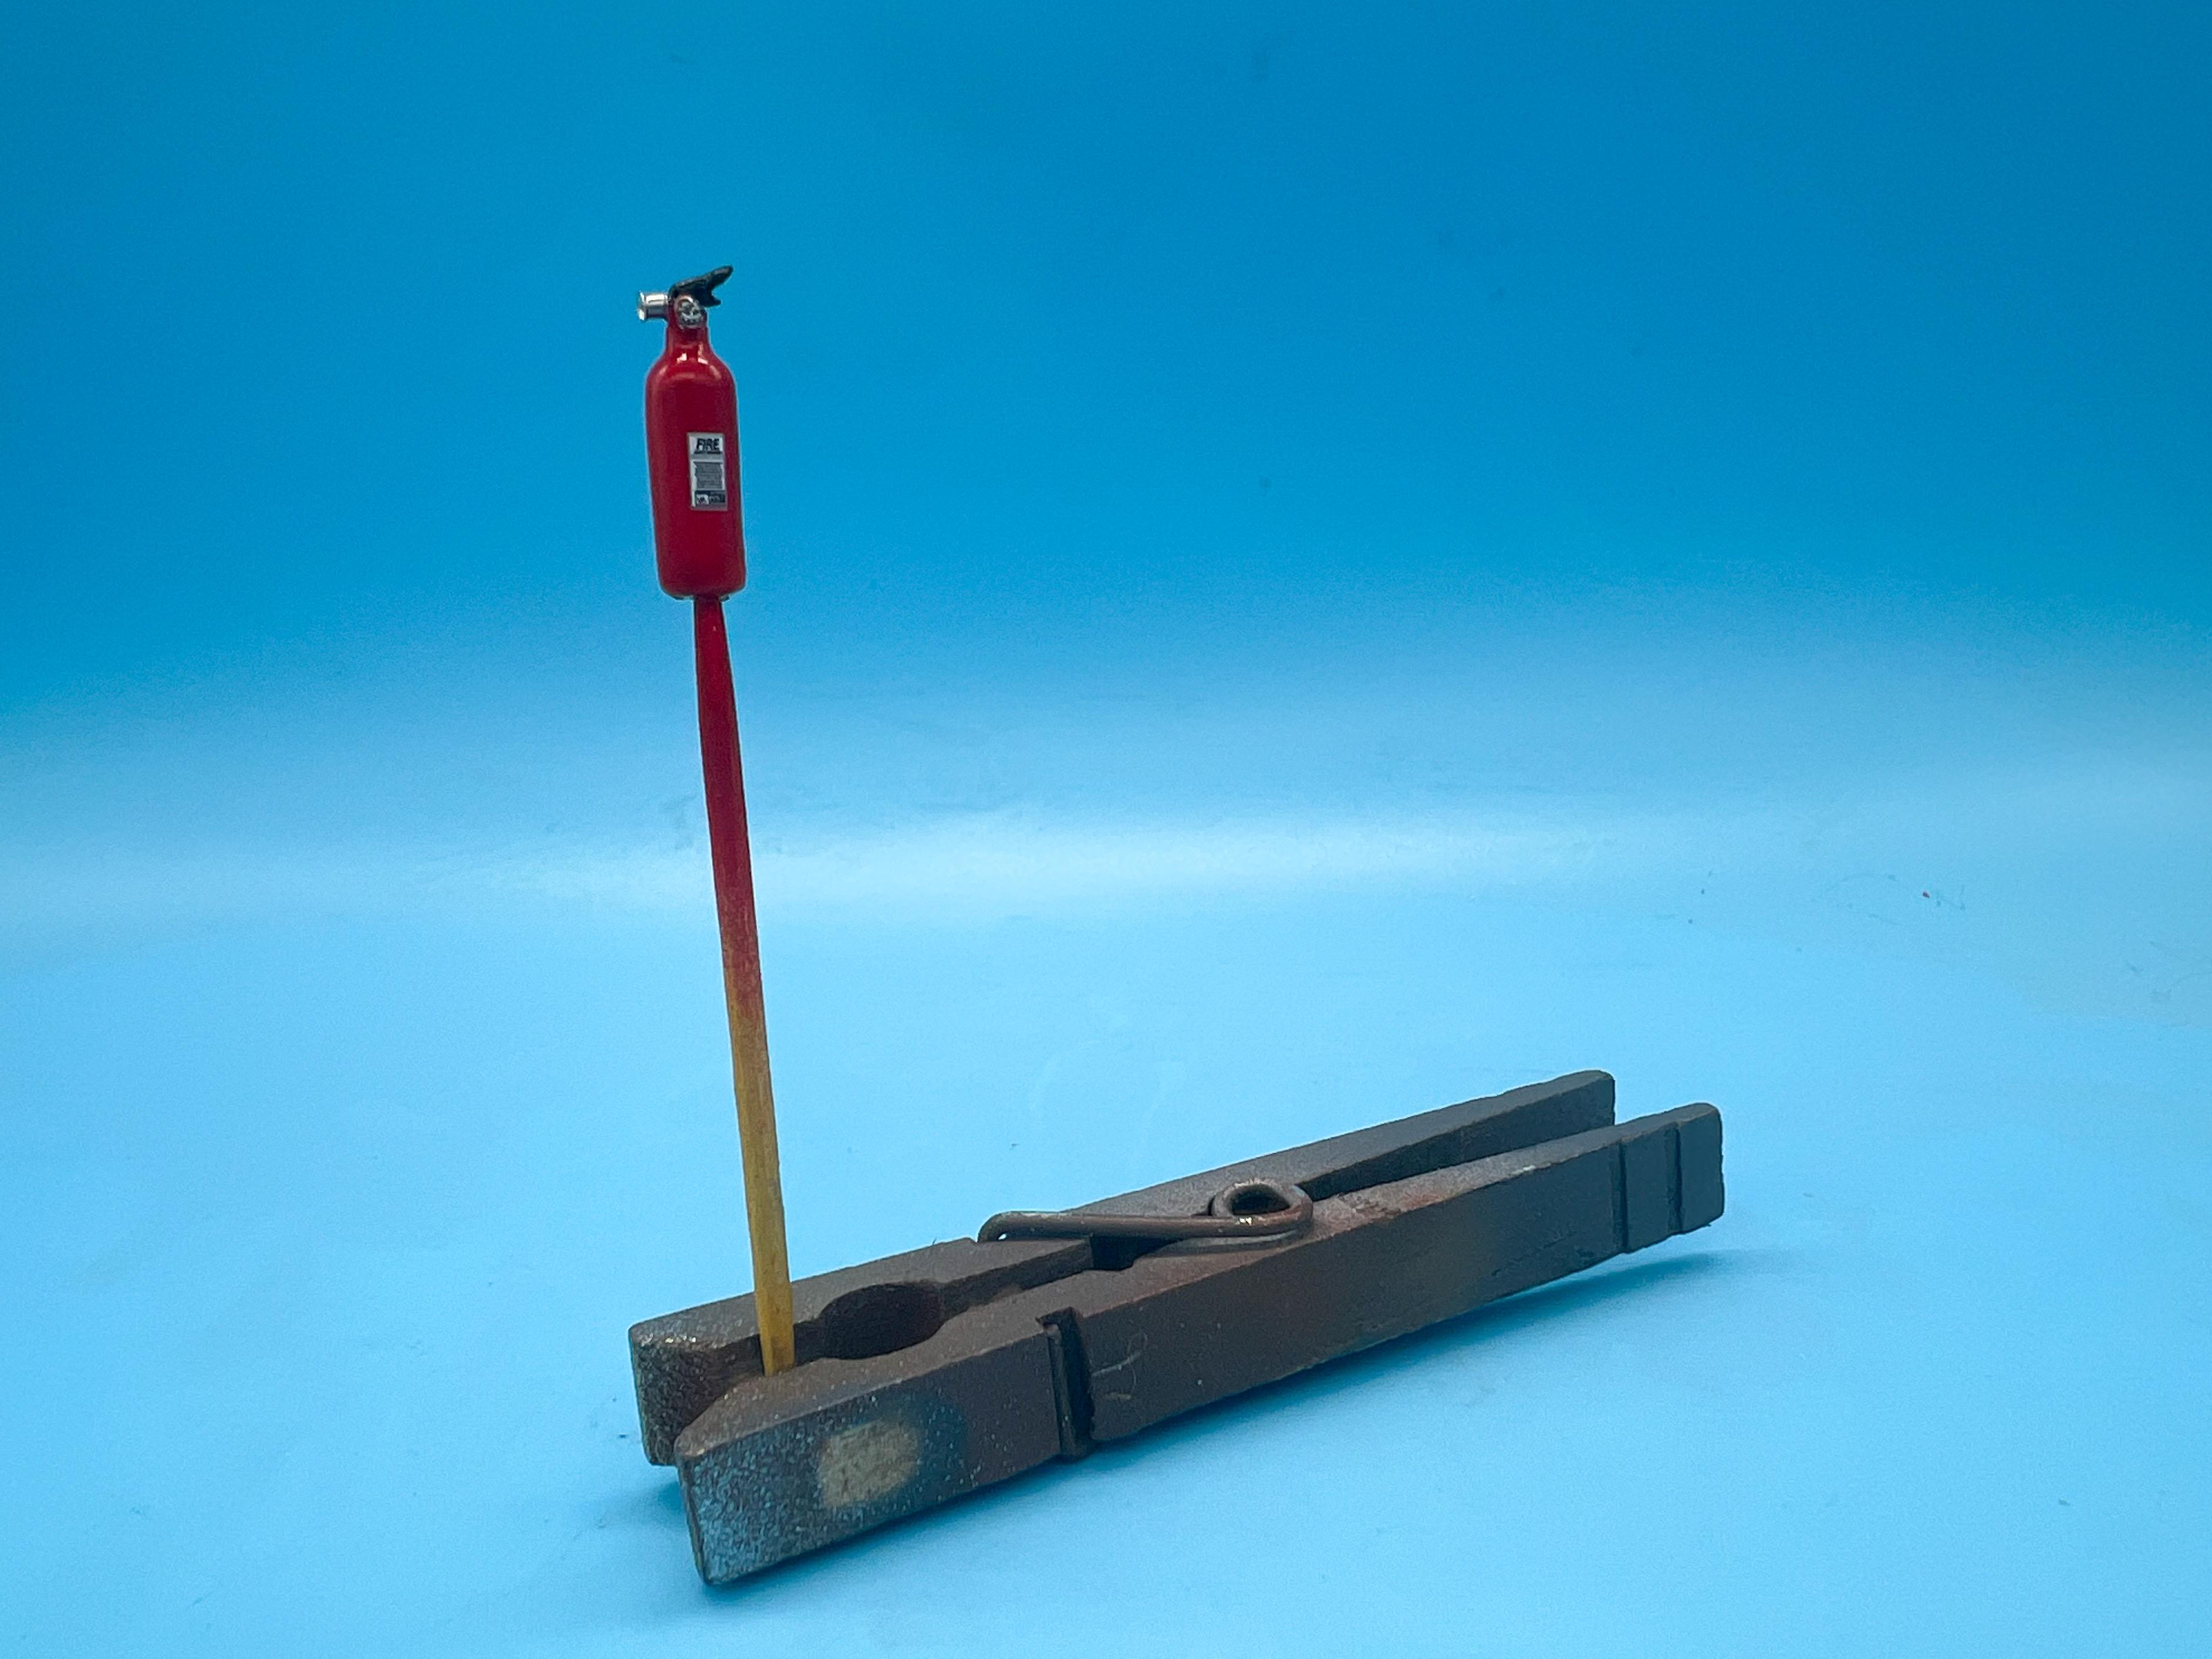
I little more work this week so far…got the engine assembled and mostly detailed: A few little touch-ups to do and some last minute stuff to add but it’s looking ok, I think… Started some assembly on the frame…I weathered the underside a LITTLE to add some visual interest but didn’t want to go nuts…not ‘wrecked’, just ‘used’… Resin case a skull shift knob, and I’ve been gradually layering it with some watercolors to make it look bone-like: Printed a fire extinguisher and added a little detail - the decal in this current Revell 55 kit was a big help for finishing this off… And now that the frame is to ‘roller’ status I couldn’t resist dropping the body on there to see how it’s all going to look: Plenty to do still - but it’s starting to look like a thing! Thanks for looking!
-
-
Those plug boots especially look GREAT!
-
That’s an outstanding looking build
-
I really enjoy these online how-tos Tim, and appreciate the considerable effort you go to, to put them together…and this one is no exception! That’s a great looking roadster - I like the color scheme particularly, and the tweaks made improve upon the out-of-box kit considerably! Great build!
-
Blaming @Ace-Garageguy for this one (although I guess I DID want one for a while before he posted his last week…) Interesting side-note - this kit had the strongest styrene smell when I opened the (sealed) box that I’ve ever smelled from a kit. Not sure what that means…
- 38,869 replies
-
- 2
-

-
- johan
- glue bombs
- (and 1 more)
-
My take on the most famous ‘55 gasser street machine’…
OldNYJim replied to OldNYJim's topic in WIP: Model Cars
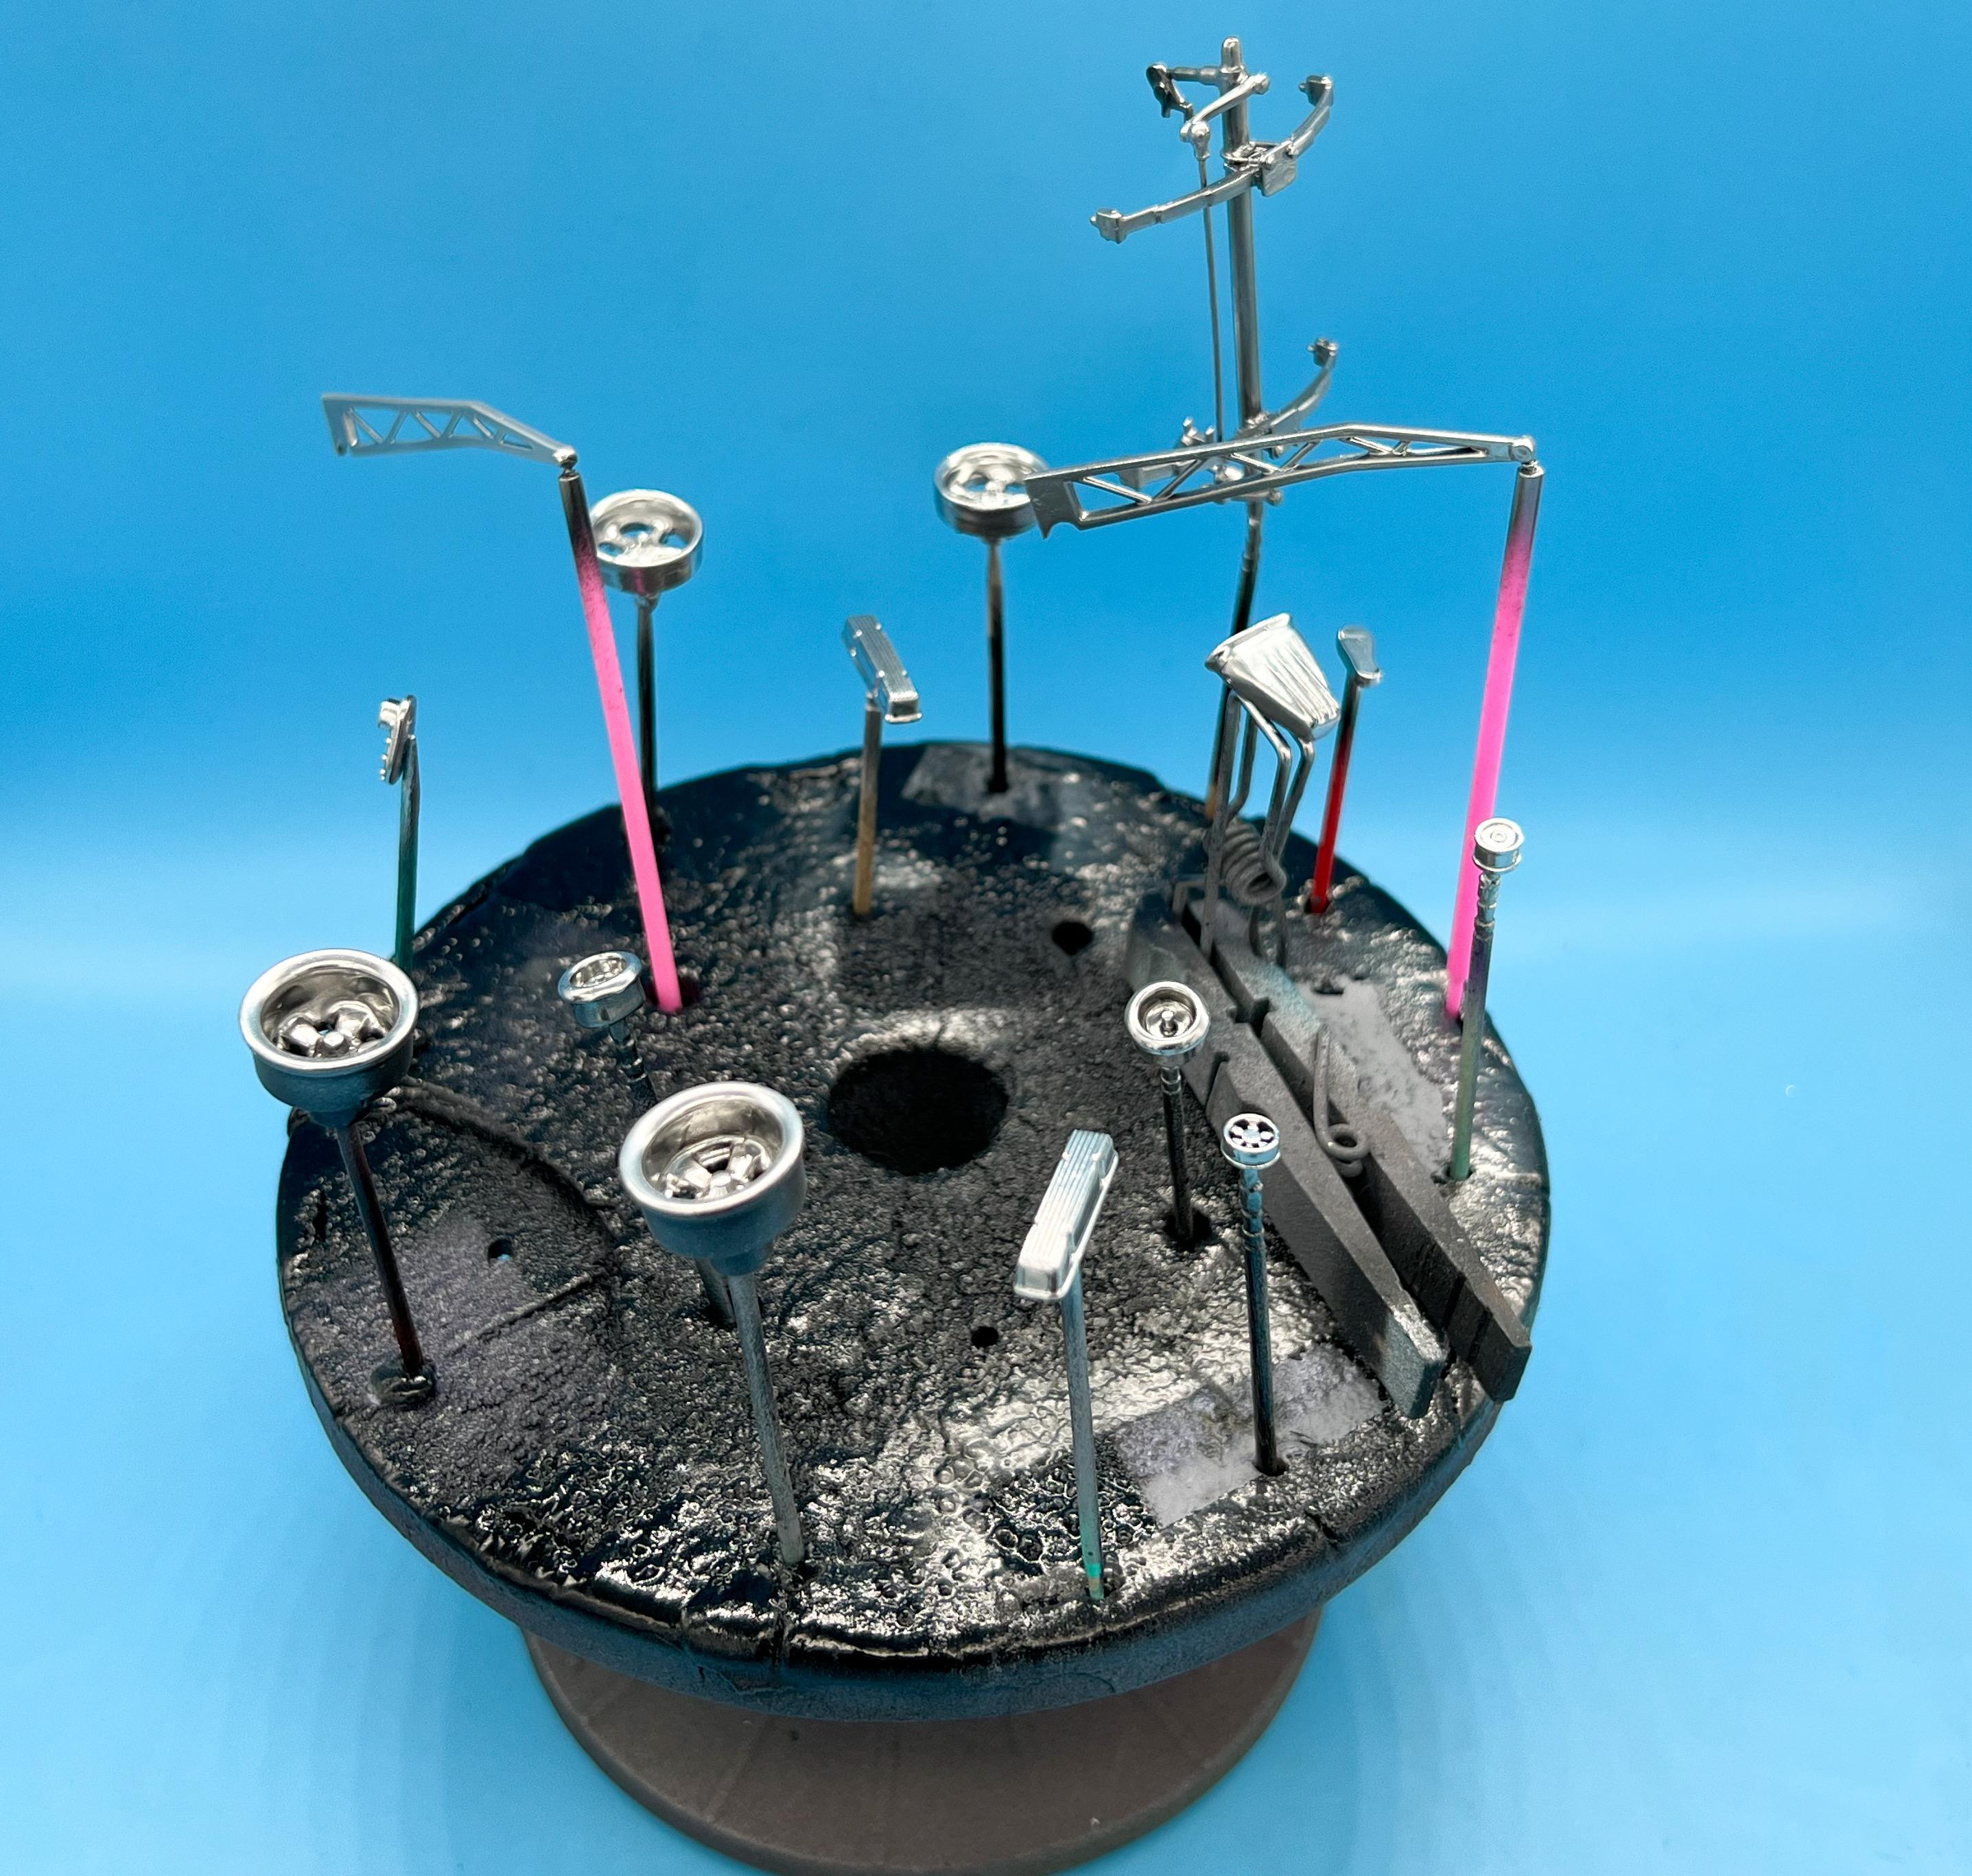
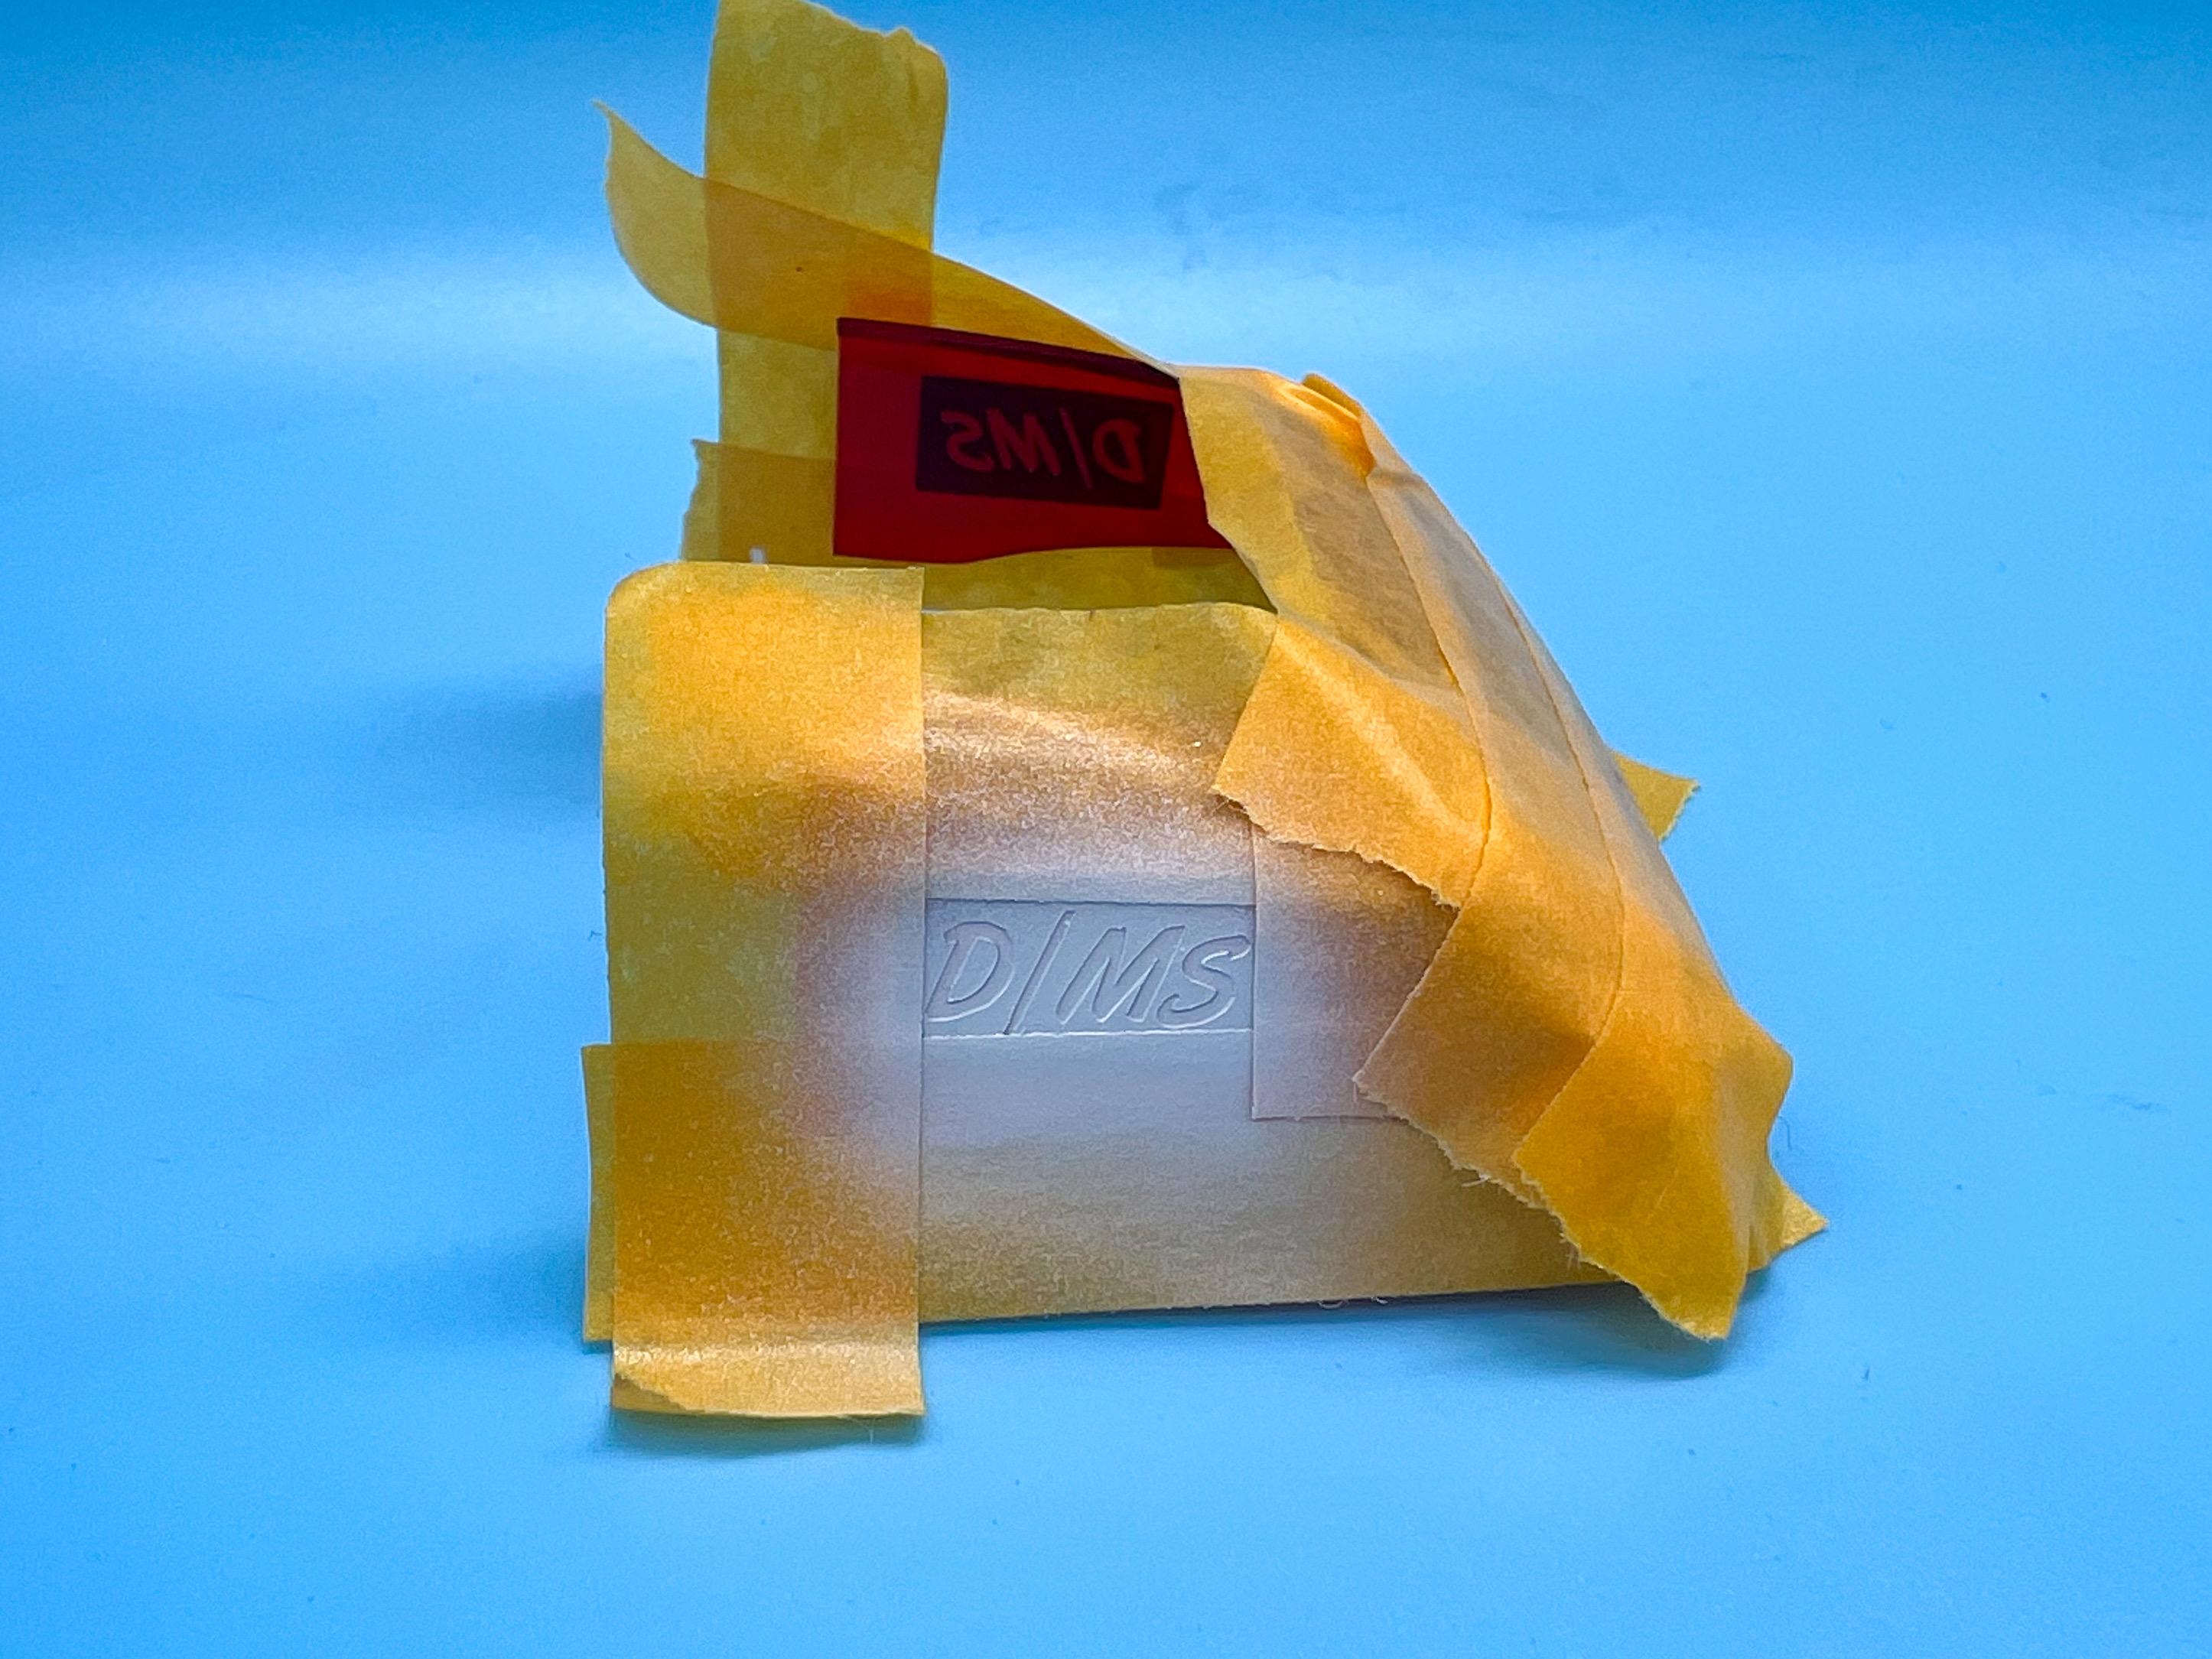
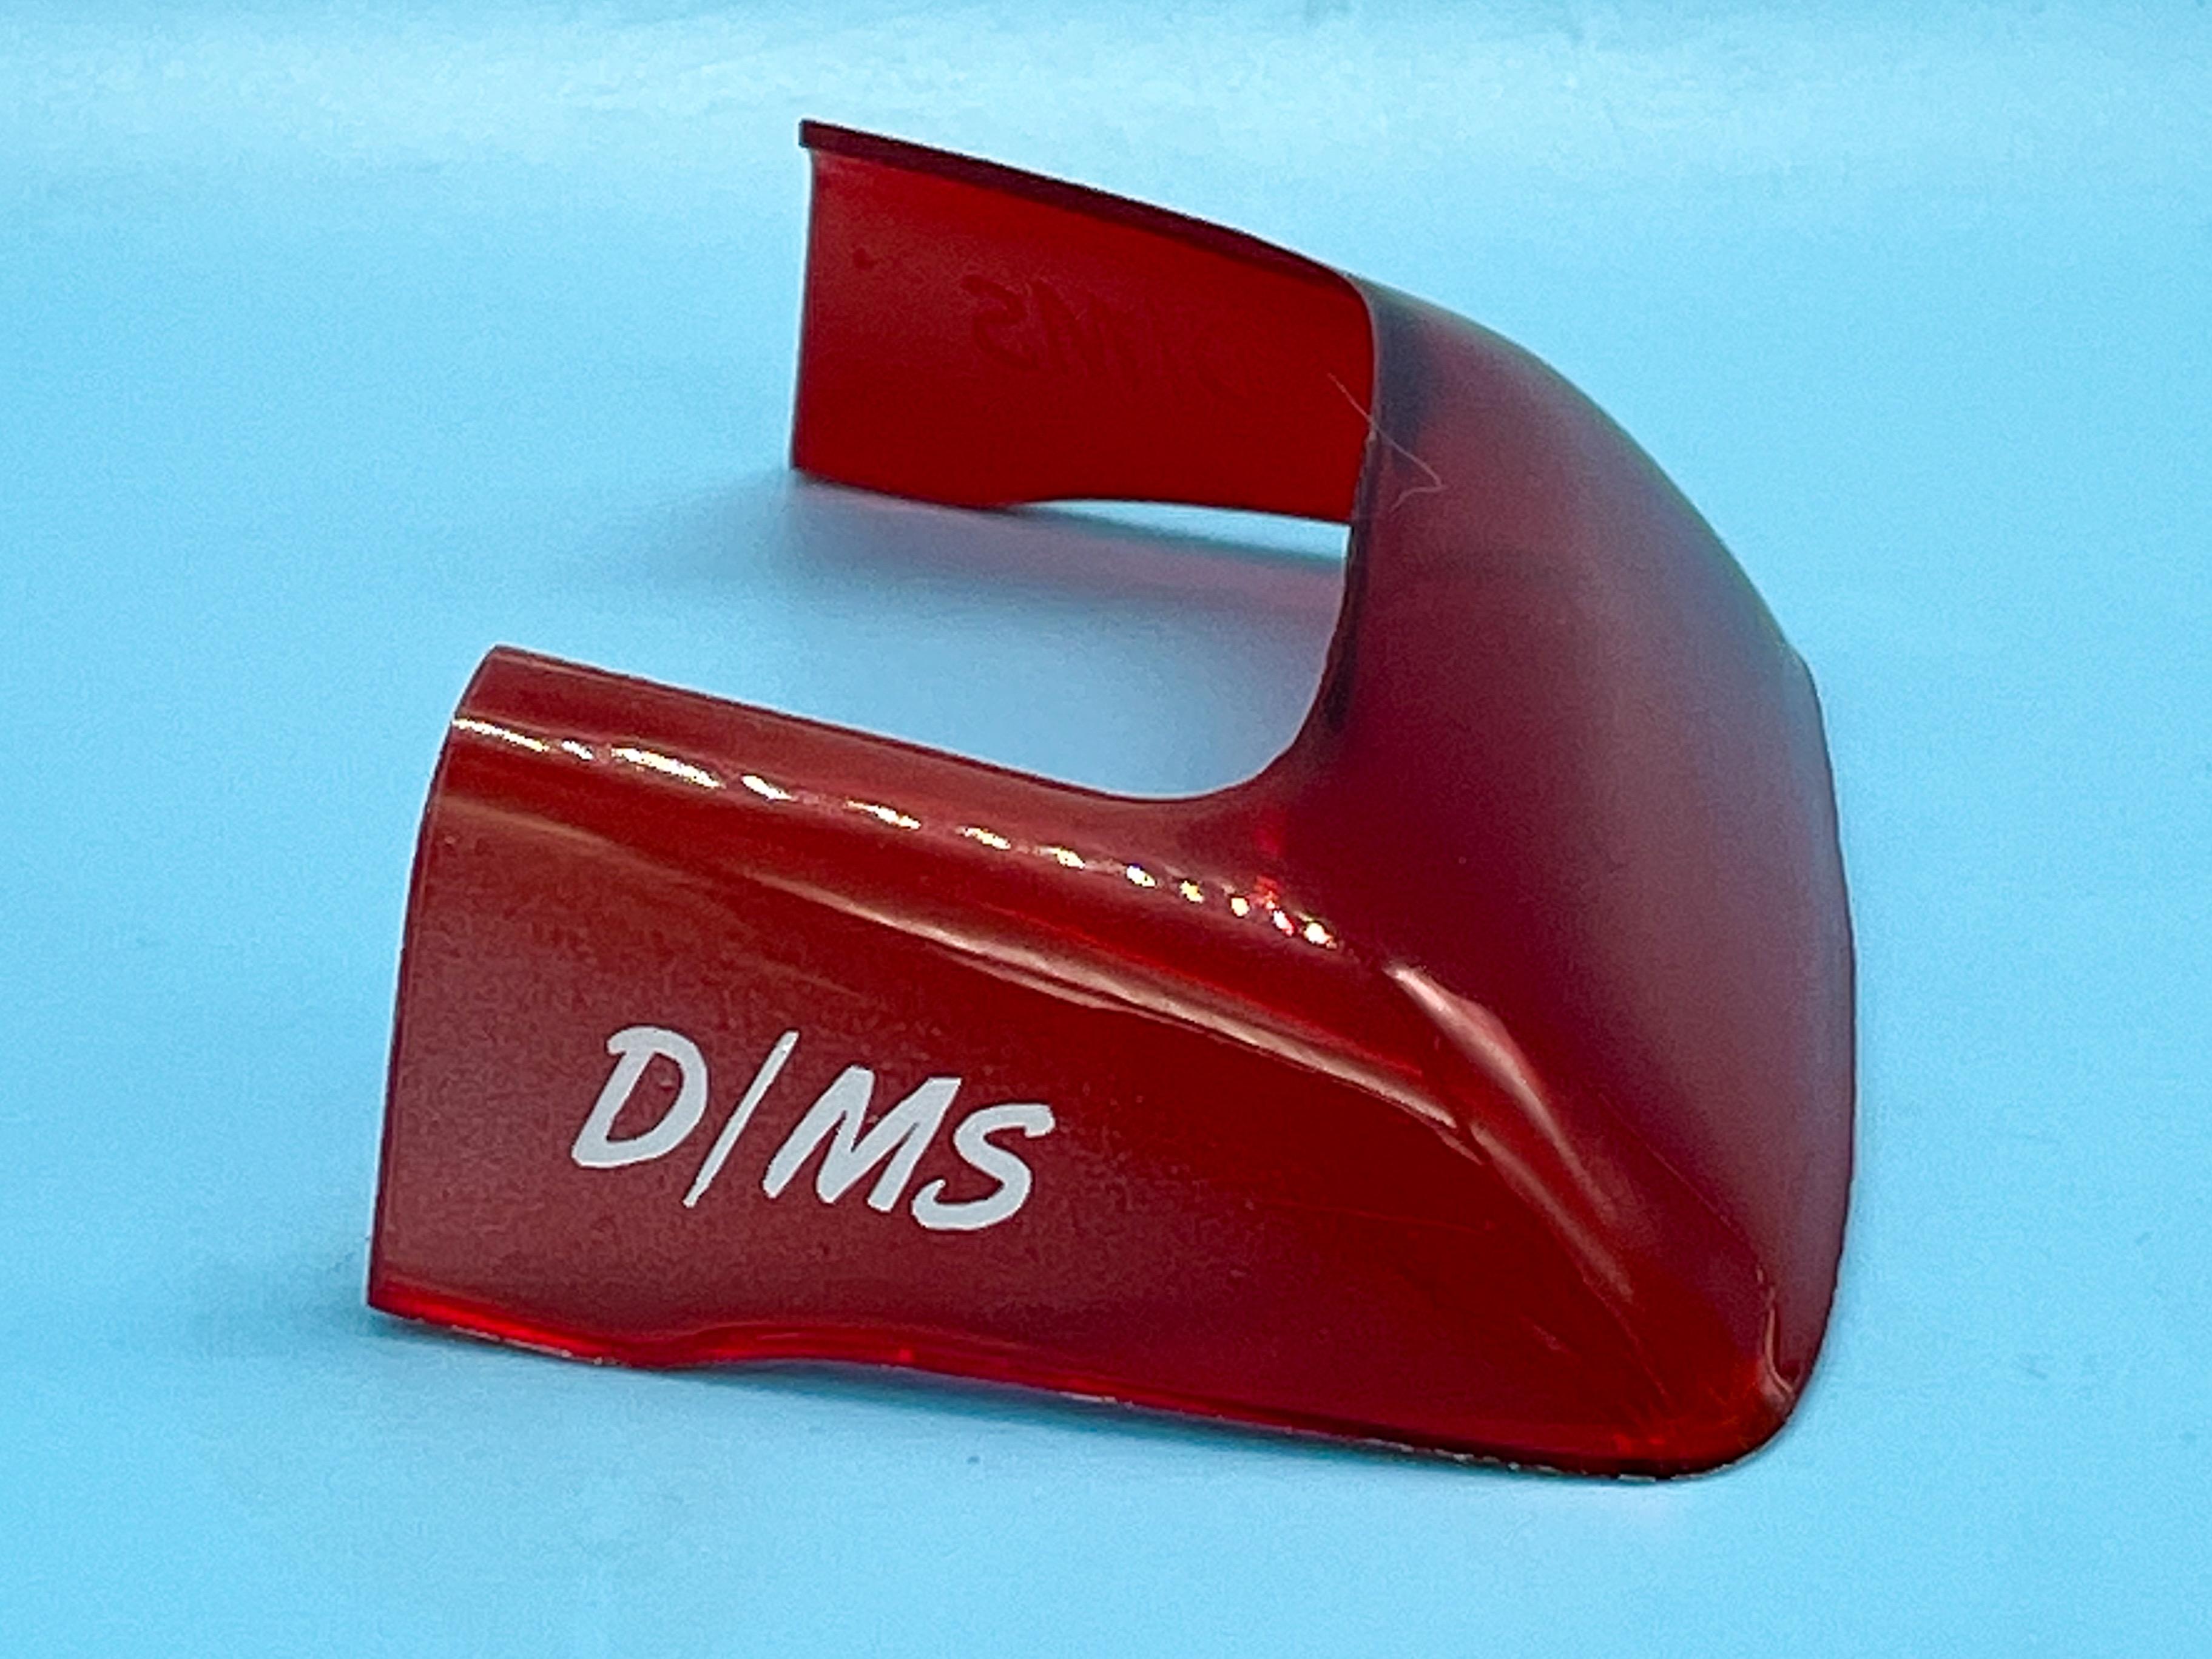
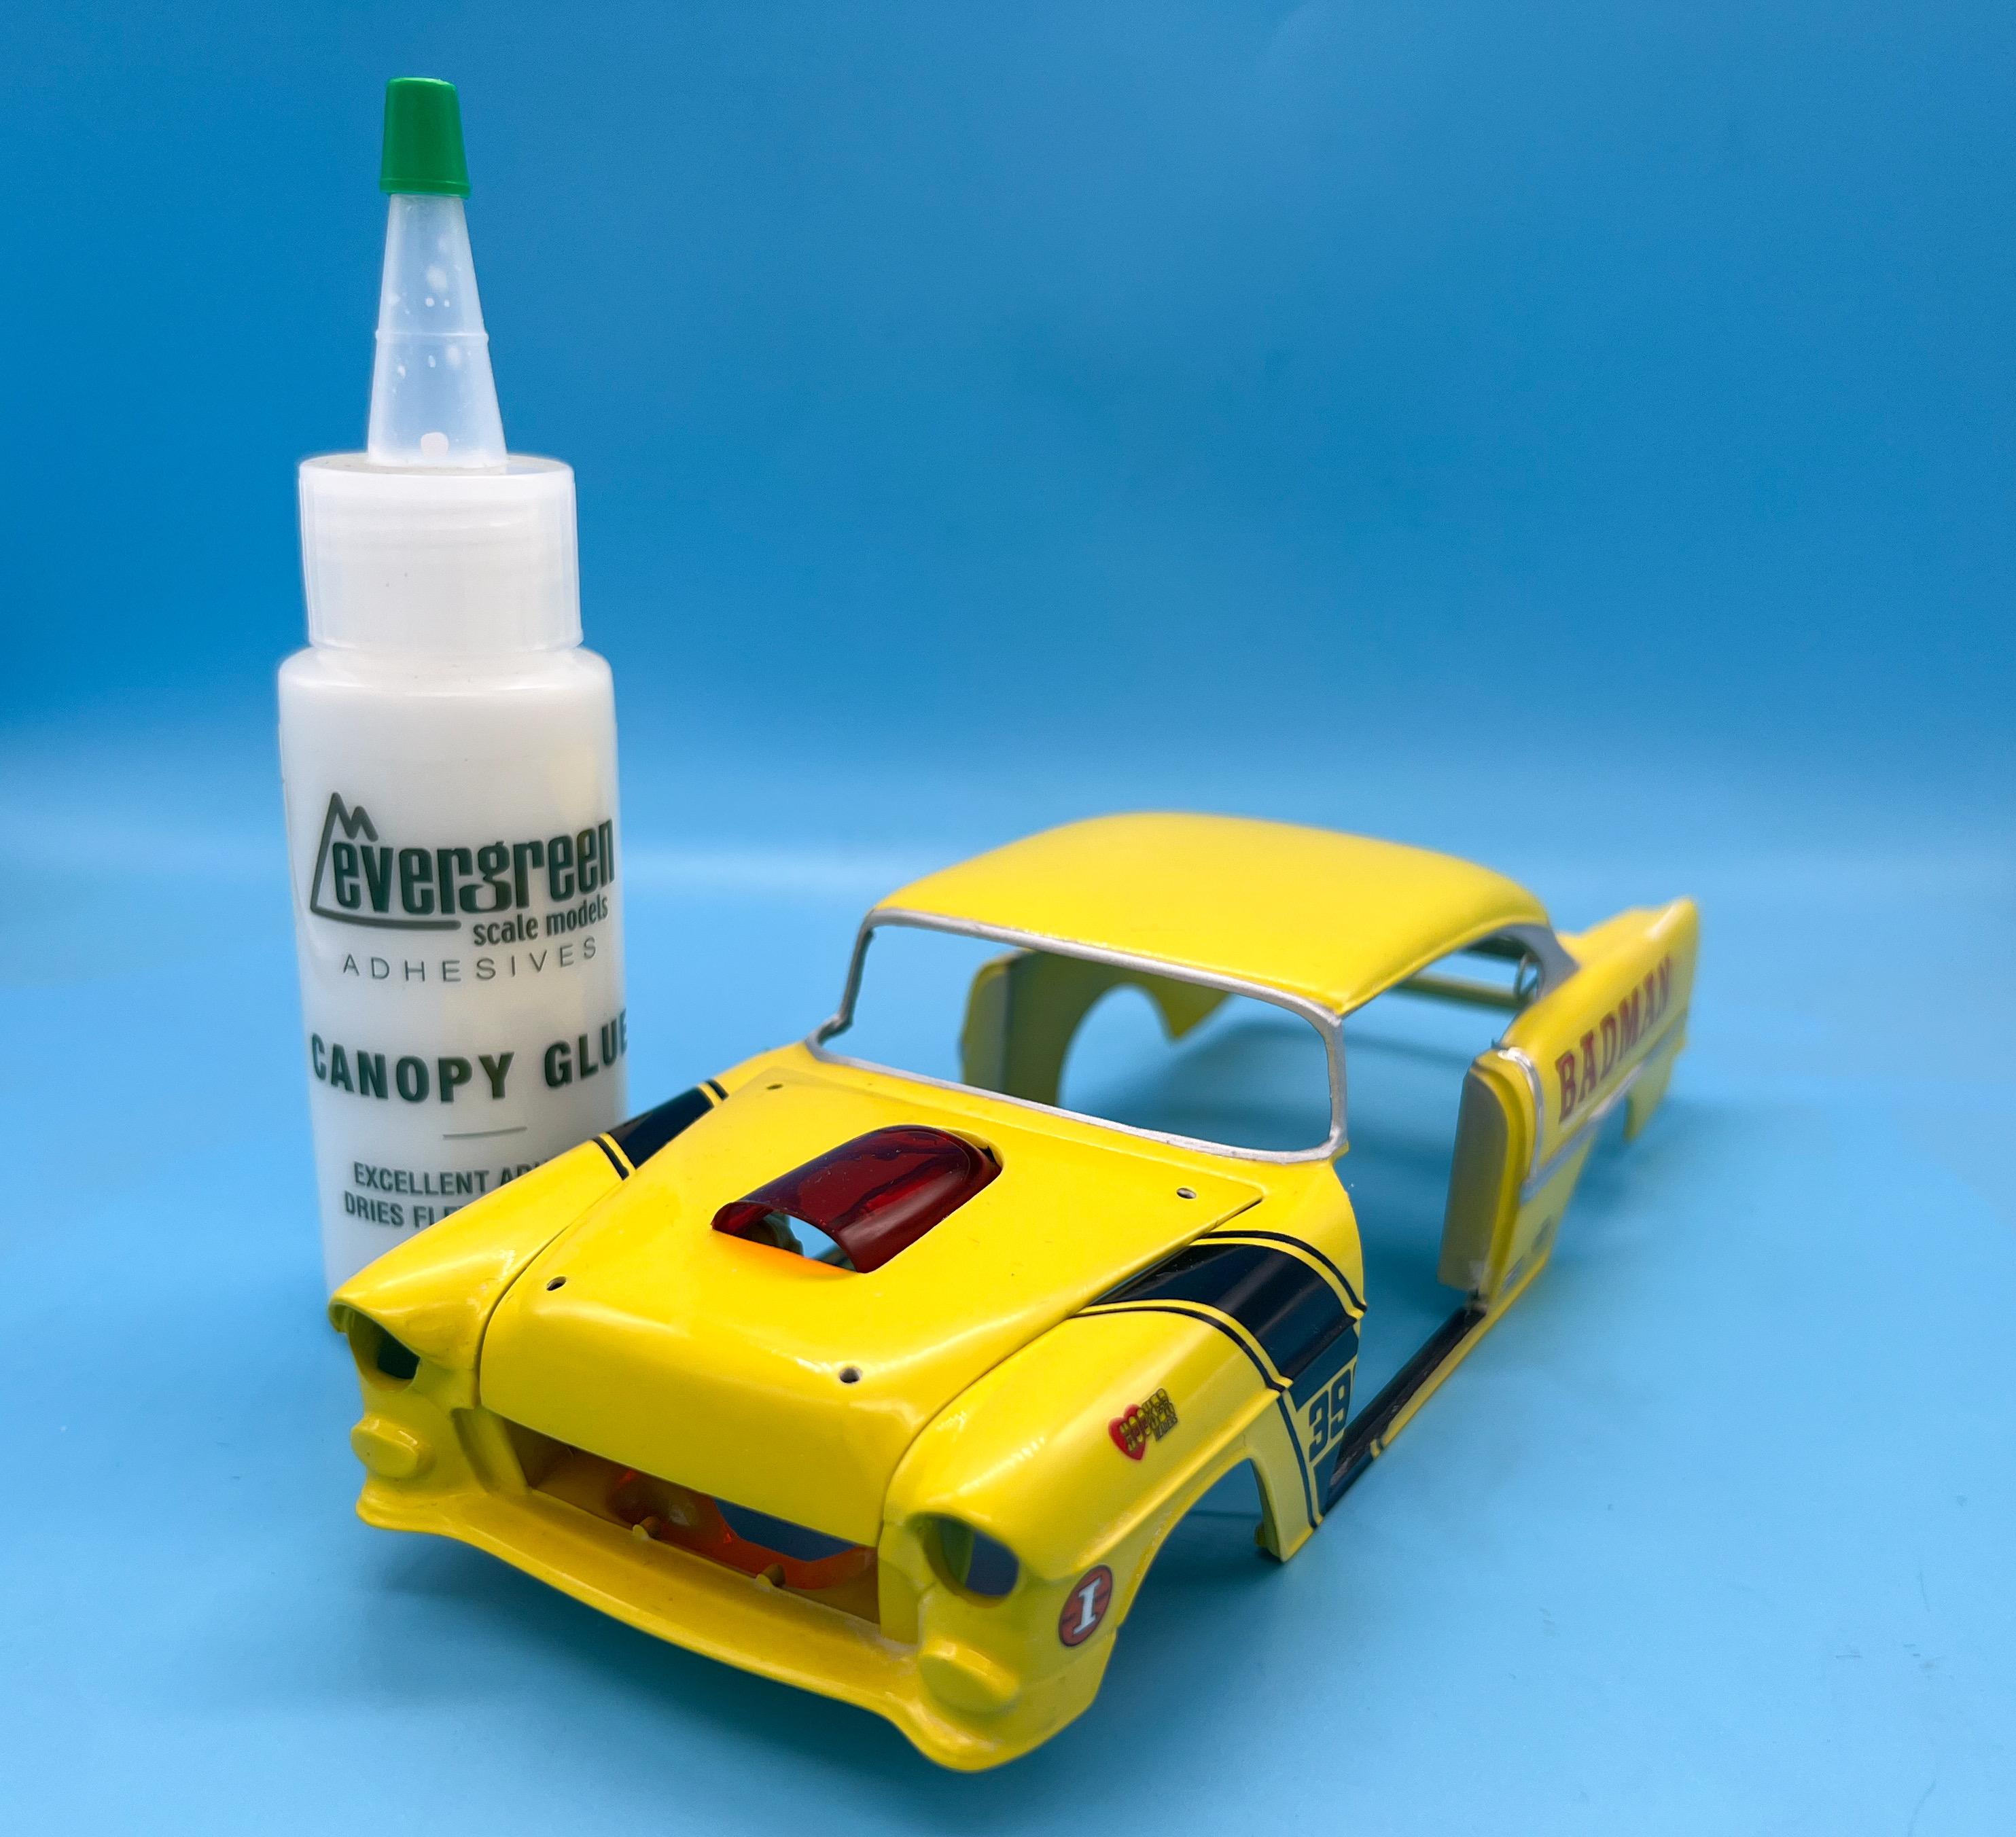
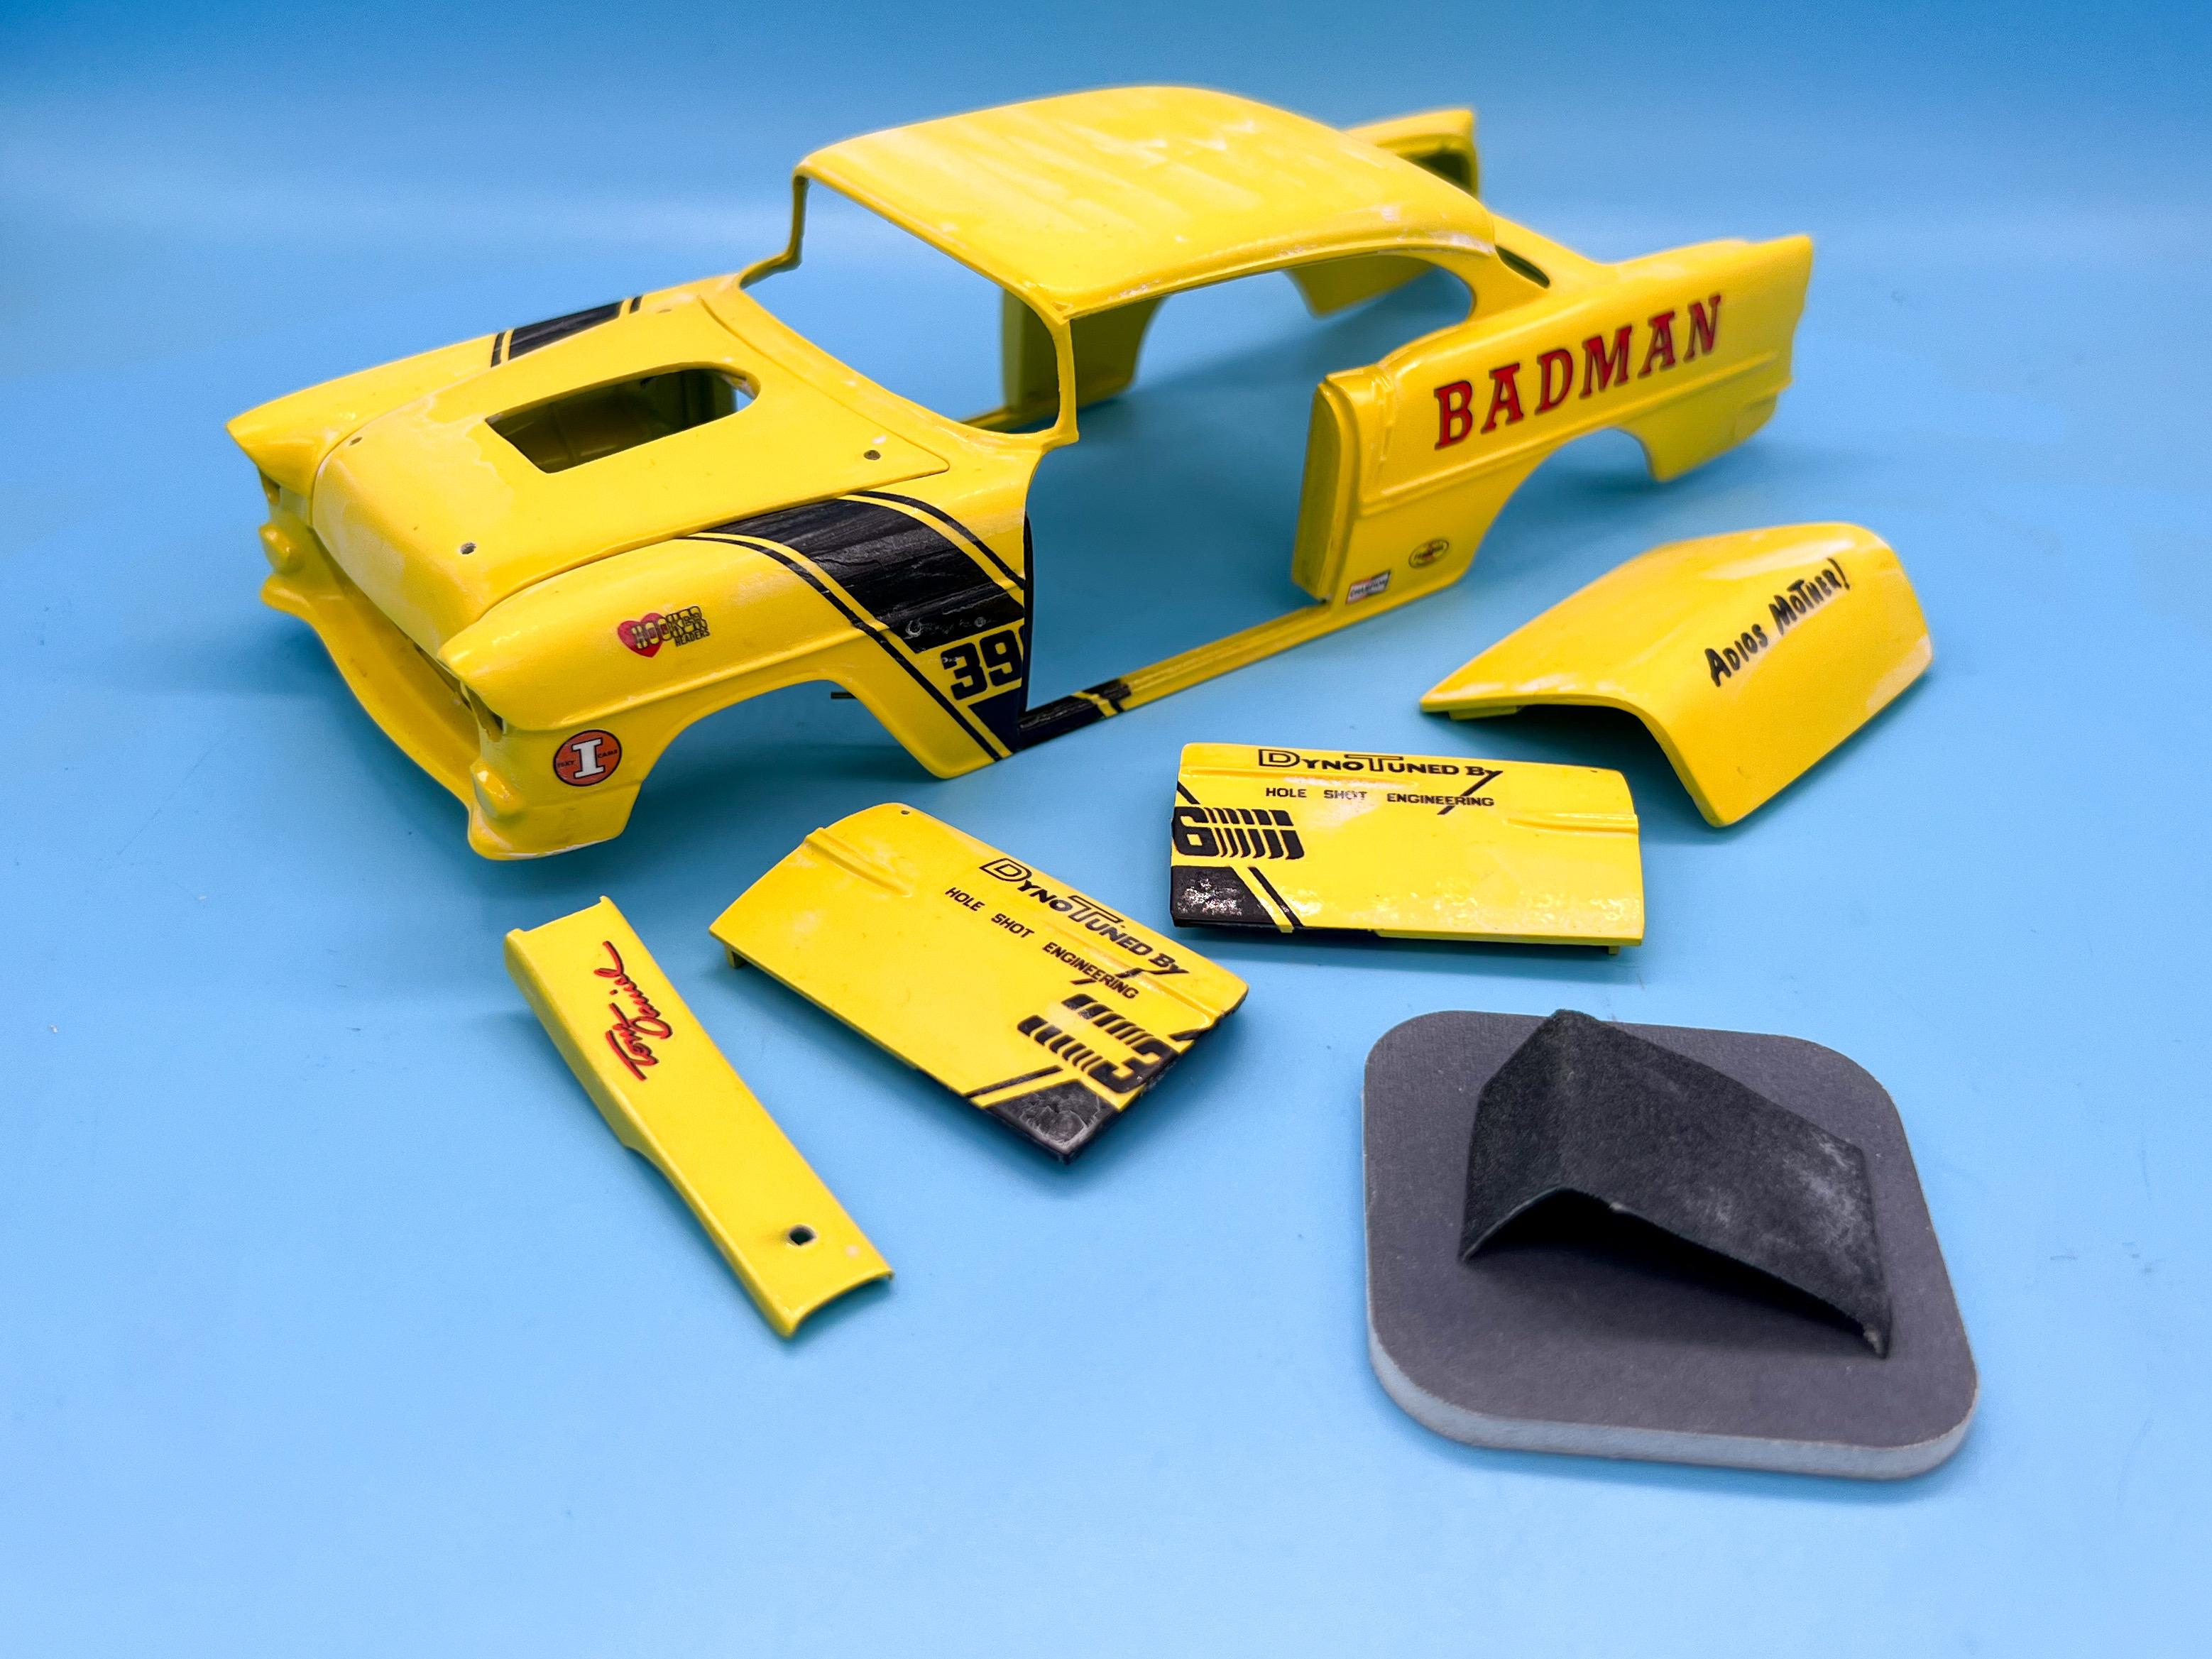
Thank you! I run my machine at .03 generally, but you’re right, I can crank up the resolution if I need something particularly crisp. Usually .03 gets me close enough for most flaws to be hidden by a couple of minutes of sanding and a cost of primer so I don’t sweat it too much… Couple of small updates, as I’m replying anyway…spent most of this week getting nice glossy finishes on what felt like a hundred little pieces ready for chrome…got the first batch shot today: If I was smart I would’ve done this first, because it’s really slowing me down not having parts to glue to other parts…lesson learned (or probably not - ha!) Back on the glass, I designed and cut some masks for the class lettering on the rear windows: Came out ok, I think: And I picked up some Evergreen canopy cement to start attaching some of these red bits to the shiny yellow bits: Seems to work pretty well, although I won’t be pulling on these pieces TOO hard…rest of the glass in place: And I’ve been working on the sister car a little - that one will be almost box stock, to demonstrate the work I’ve done on the ‘main’ car - gave the frame some light weathering (mainly for my own amusement), picked a second color for the engine and some other bits and started laying down some mist coats of clear on the body: Only got this weekend and next to wrap both of these up for the IPMS show in a couple of weeks, so I need to get hustling here…thanks for looking! More soon!
-
Atlantis Models has bought another lot of tooling/molds.....
OldNYJim replied to Dave Van's topic in Car Kit News & Reviews
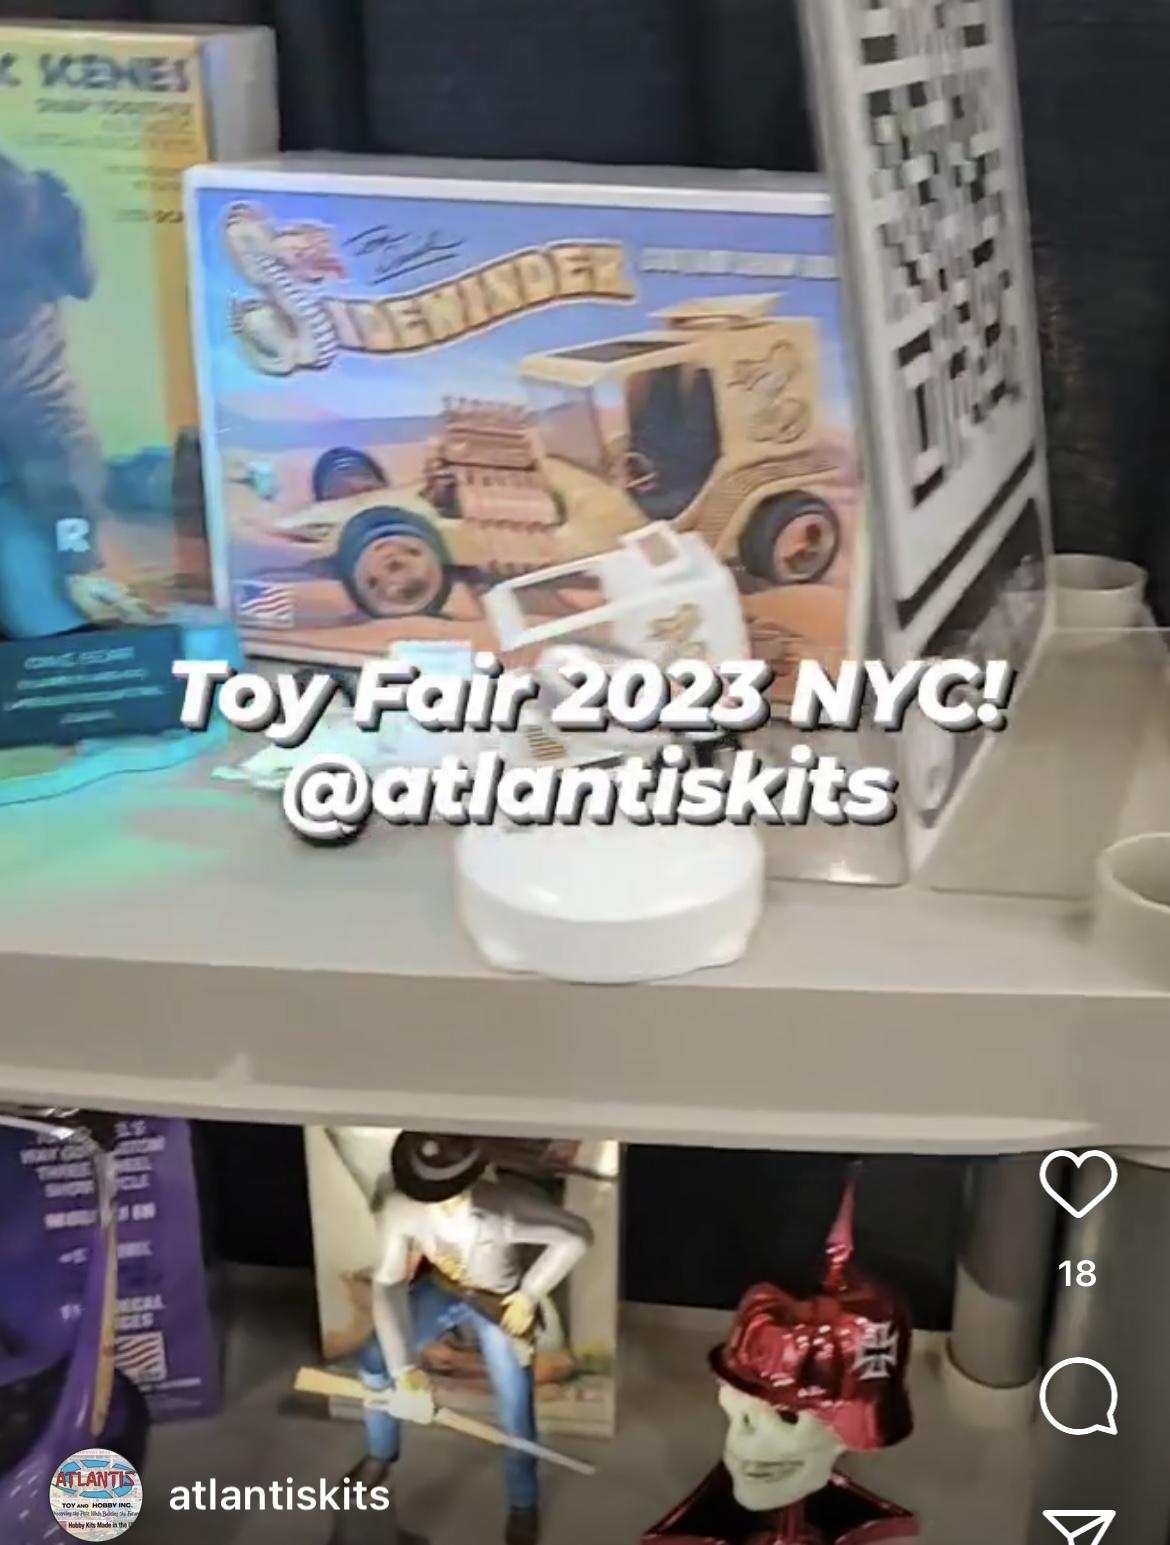
Well, for all us doubters (or, at least, concerned citizens), Atlantis posted a vid from the NY Toy Fair today, with a Sidewinder prototype proudly on display: Plus, this T-bucket that they’ve been teasing for a while: Excited for both of these!
-
Airfix 70s classics in 1/32 - Beach Buggy and Bond Bug
OldNYJim replied to Matt Bacon's topic in WIP: Model Cars
Both of these kits came up on my Amazon recommendations recently and I was contemplating picking them up, so I’ll be watching for some pointers! How is the engine and chassis detail on the beach buggy? Great start! -
He posted some paintings that he did to Instagram last weekend: https://www.instagram.com/p/CxlegcdOPLE/?utm_source=ig_web_copy_link&igshid=MzRlODBiNWFlZA== Seems like he's not really doing model stuff lately...
-
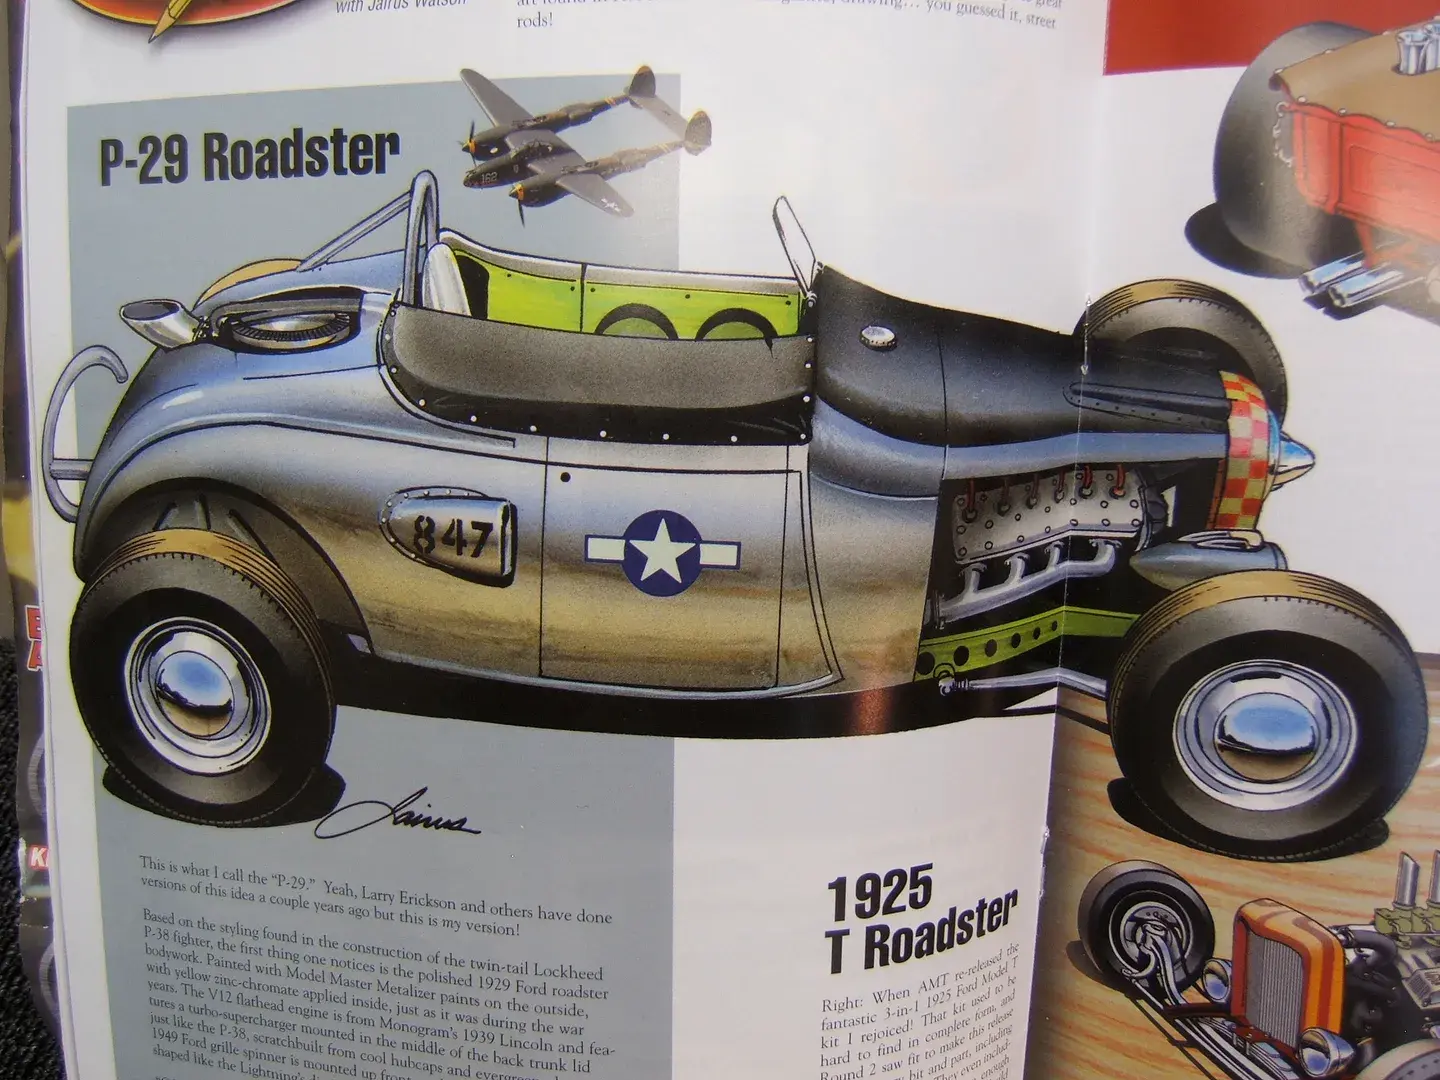
Aircraft rod
OldNYJim replied to Earl Marischal's topic in General Automotive Talk (Trucks and Cars)
Foose did it better... Him, and Jairus:
-
Aircraft rod
OldNYJim replied to Earl Marischal's topic in General Automotive Talk (Trucks and Cars)
Neat - he ruined a plane AND a car! -
And your time is no doubt valuable enough that trying to scrub overspray off that nice paintjob would be a waste… Great looking build so far! I remember seeing the Goldeneye Bond movie as a kid and falling in love with this car aged whatever I was then…it’s still on my to-build list now
-
You can buy perfectly serviceable furniture at IKEA…but there’s still master craftsman woodworkers. The human desire to create from nothing will never go away.
-
I looked up your build of one of these, and remembered once I saw it - GREAT build! Always enjoy your work!
- 38,869 replies
-
- 1
-
-
- johan
- glue bombs
- (and 1 more)
-
Atlantis Models has bought another lot of tooling/molds.....
OldNYJim replied to Dave Van's topic in Car Kit News & Reviews
I don't think you'll find any Atlantis Sidewinders out in the wild to 'stock up' on...not sure any made it out of the Atlantis warehouse door in the first place... I remember they were talking about using some kind of brass or copper plating instead of chrome for that one - maybe that's causing a slow-down and we'll see more in due course. Fingers crossed... -
Atlantis Models has bought another lot of tooling/molds.....
OldNYJim replied to Dave Van's topic in Car Kit News & Reviews
I seem to remember that the C-cab was going to use existing running gear (Tweedy Pie, as mentioned above), but with a newly tooled body. I hope that one makes it, because it's a cool looking kit! Ditto that blue T in the background, although the nose doesn't do that particular build pictured there any favors (in my opinion) -
Excellent! Thanks for the review Bill! I've got an original Monogram '34 kit that I haven't tackled yet...I'll DEFINITELY be pleased with my purchase once it arrives then! Thanks for the info!
- 38,869 replies
-
- 1
-
-
- johan
- glue bombs
- (and 1 more)
-
Atlantis Models has bought another lot of tooling/molds.....
OldNYJim replied to Dave Van's topic in Car Kit News & Reviews
There’s another dragster, along the lines of the Mooneyes kit that seems likely to be next (because they posted in-progress box-art of it a few weeks back) and there was a T-bucket kit they teased too…I’d bet that C-cab is pretty far down the list right now. Anyone notice that the Tom Daniel Sidewinder kit has been quietly taken off their website and can’t be preordered anymore? A few places still have it available to order, but I don’t see it on Atlantis’s site anymore, and between last week’s weekly email and this week’s it’s been taken off the ‘coming-soon’ list ? I’m sure there were pics of it on their social media too but I can’t see them on there anymore either… -
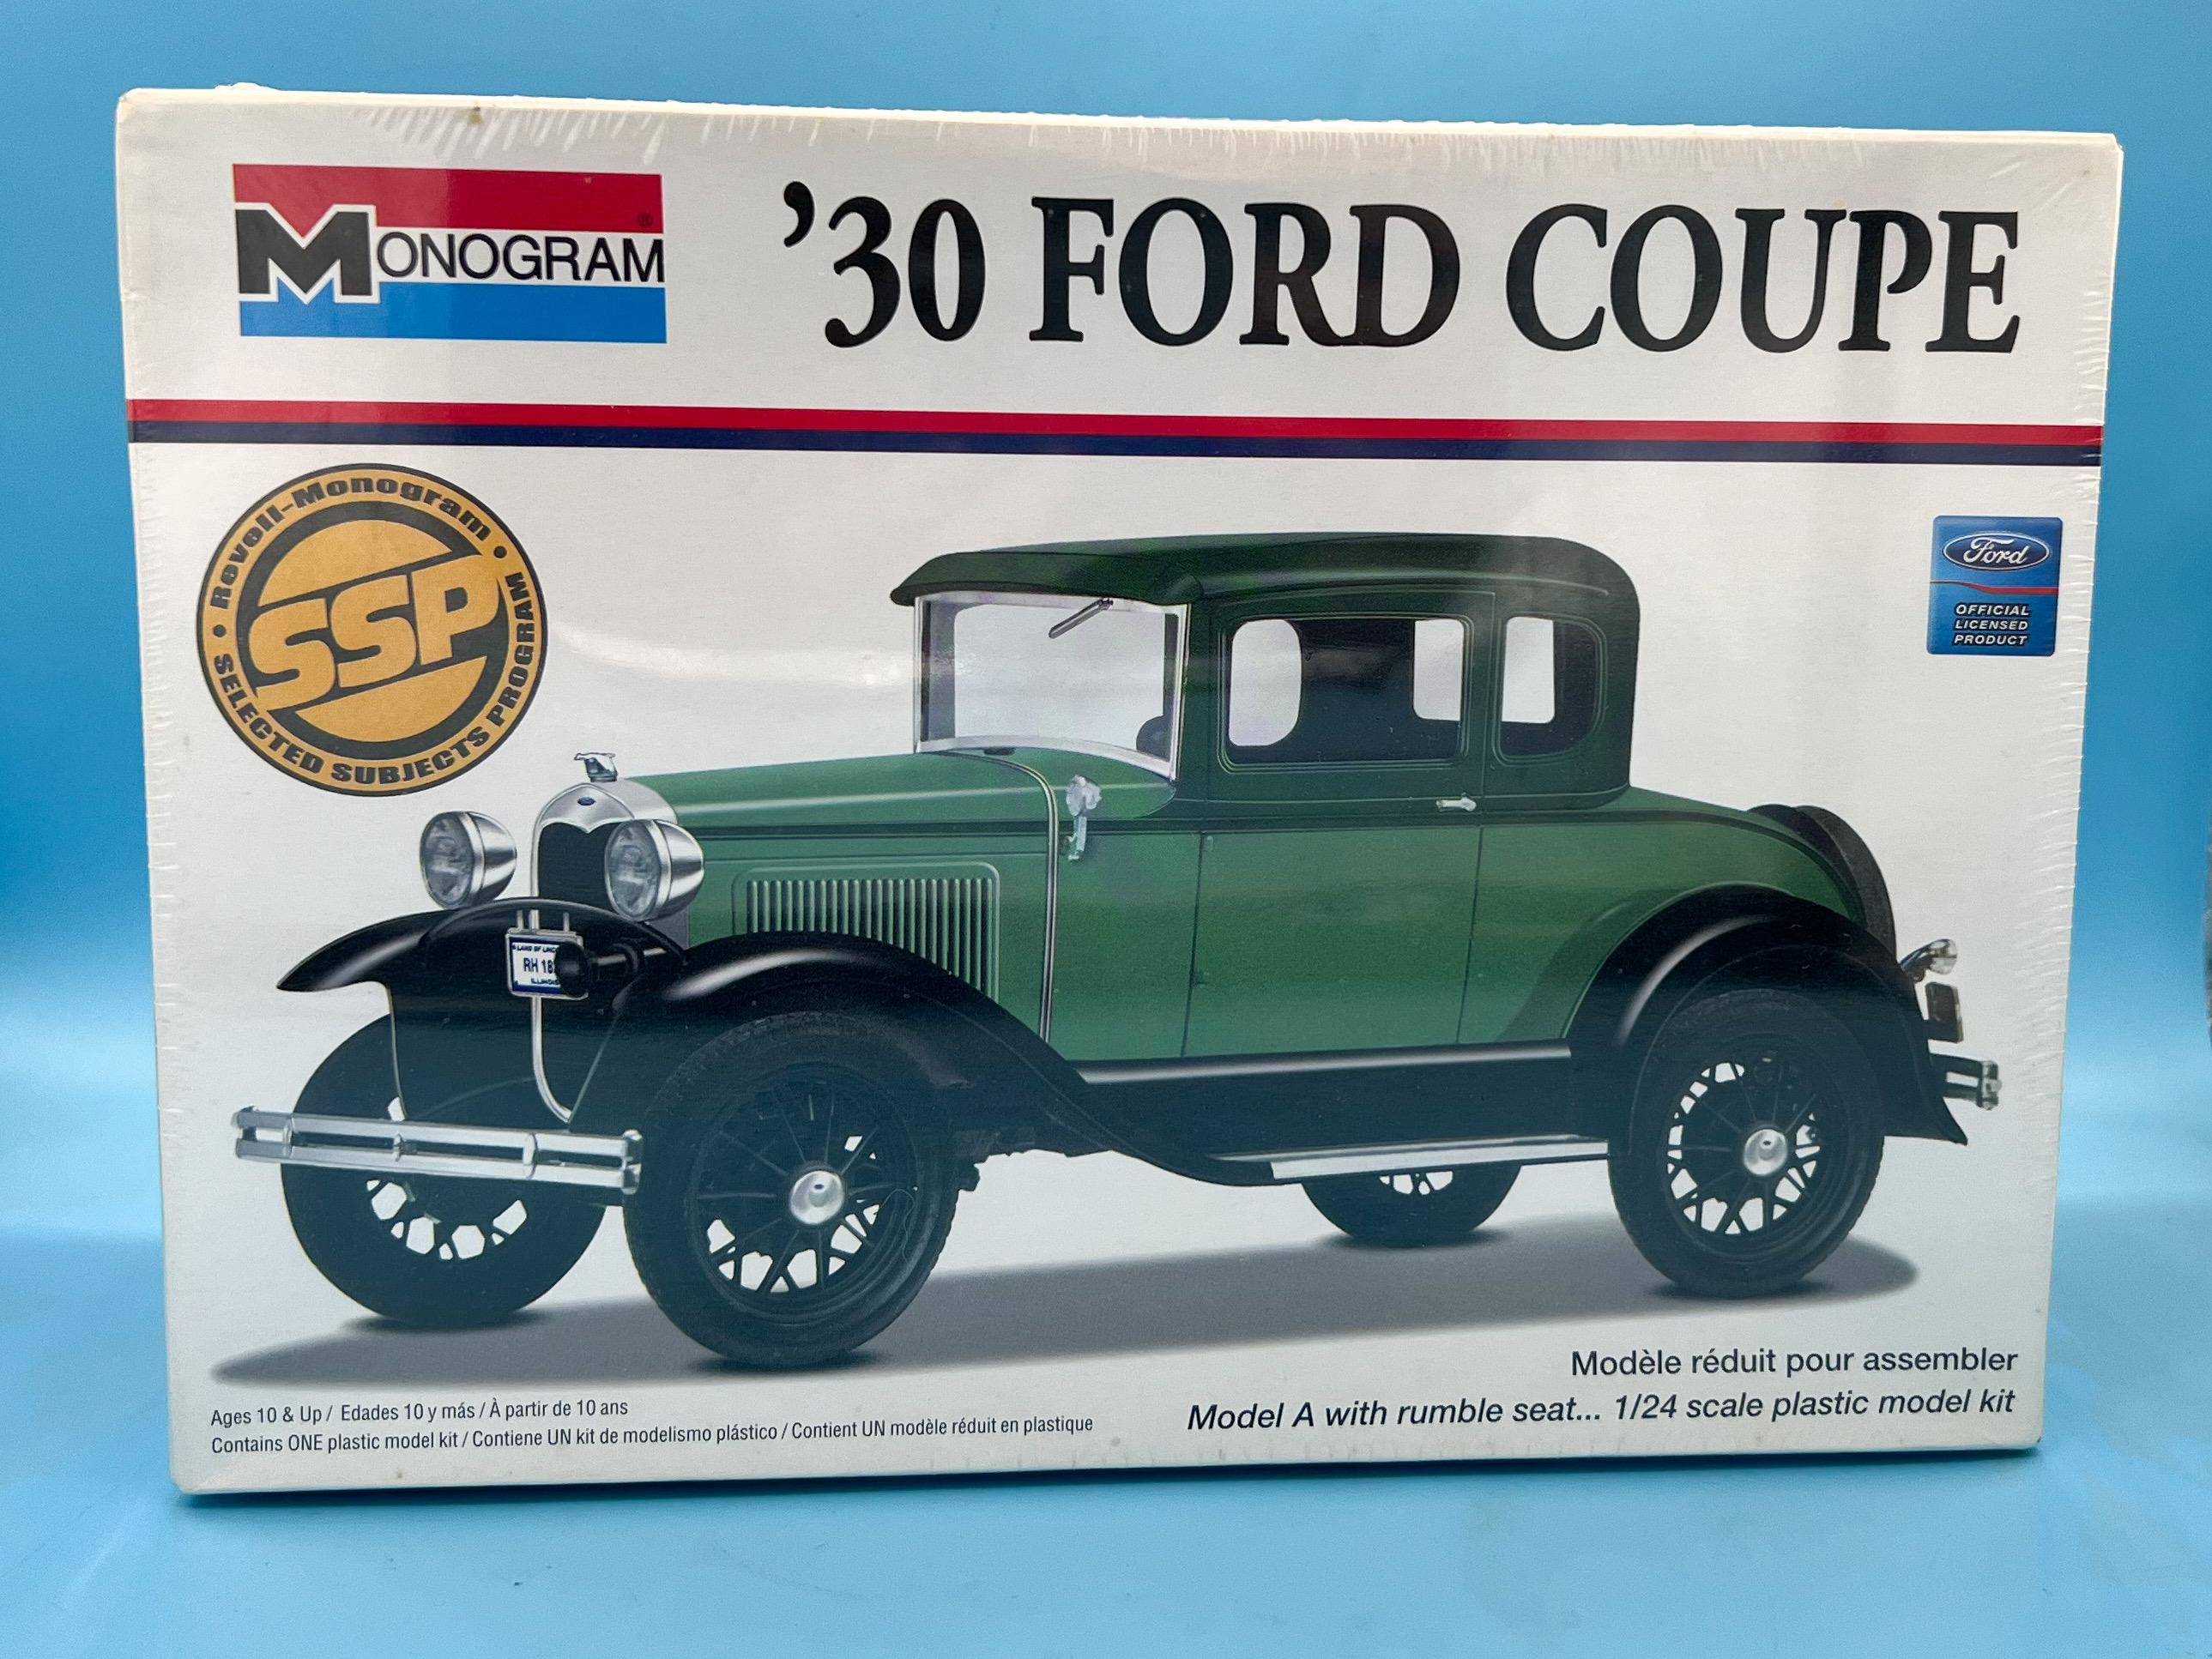
Just ordered one of these myself, having remembered that I wanted one thanks to seeing your post…paid 30-odd bucks shipped for this same issue, new and sealed…I don't even know what to expect in the box aside from the distinctive green plastic that all of these seem to have. Is the detail on these kits similar to, say, the Green Hornet / Black Widow kits, or maybe the old 1/24 Monogram Deuce roadsters? That’s what I imagined I’m getting…
-
My take on the most famous ‘55 gasser street machine’…
OldNYJim replied to OldNYJim's topic in WIP: Model Cars
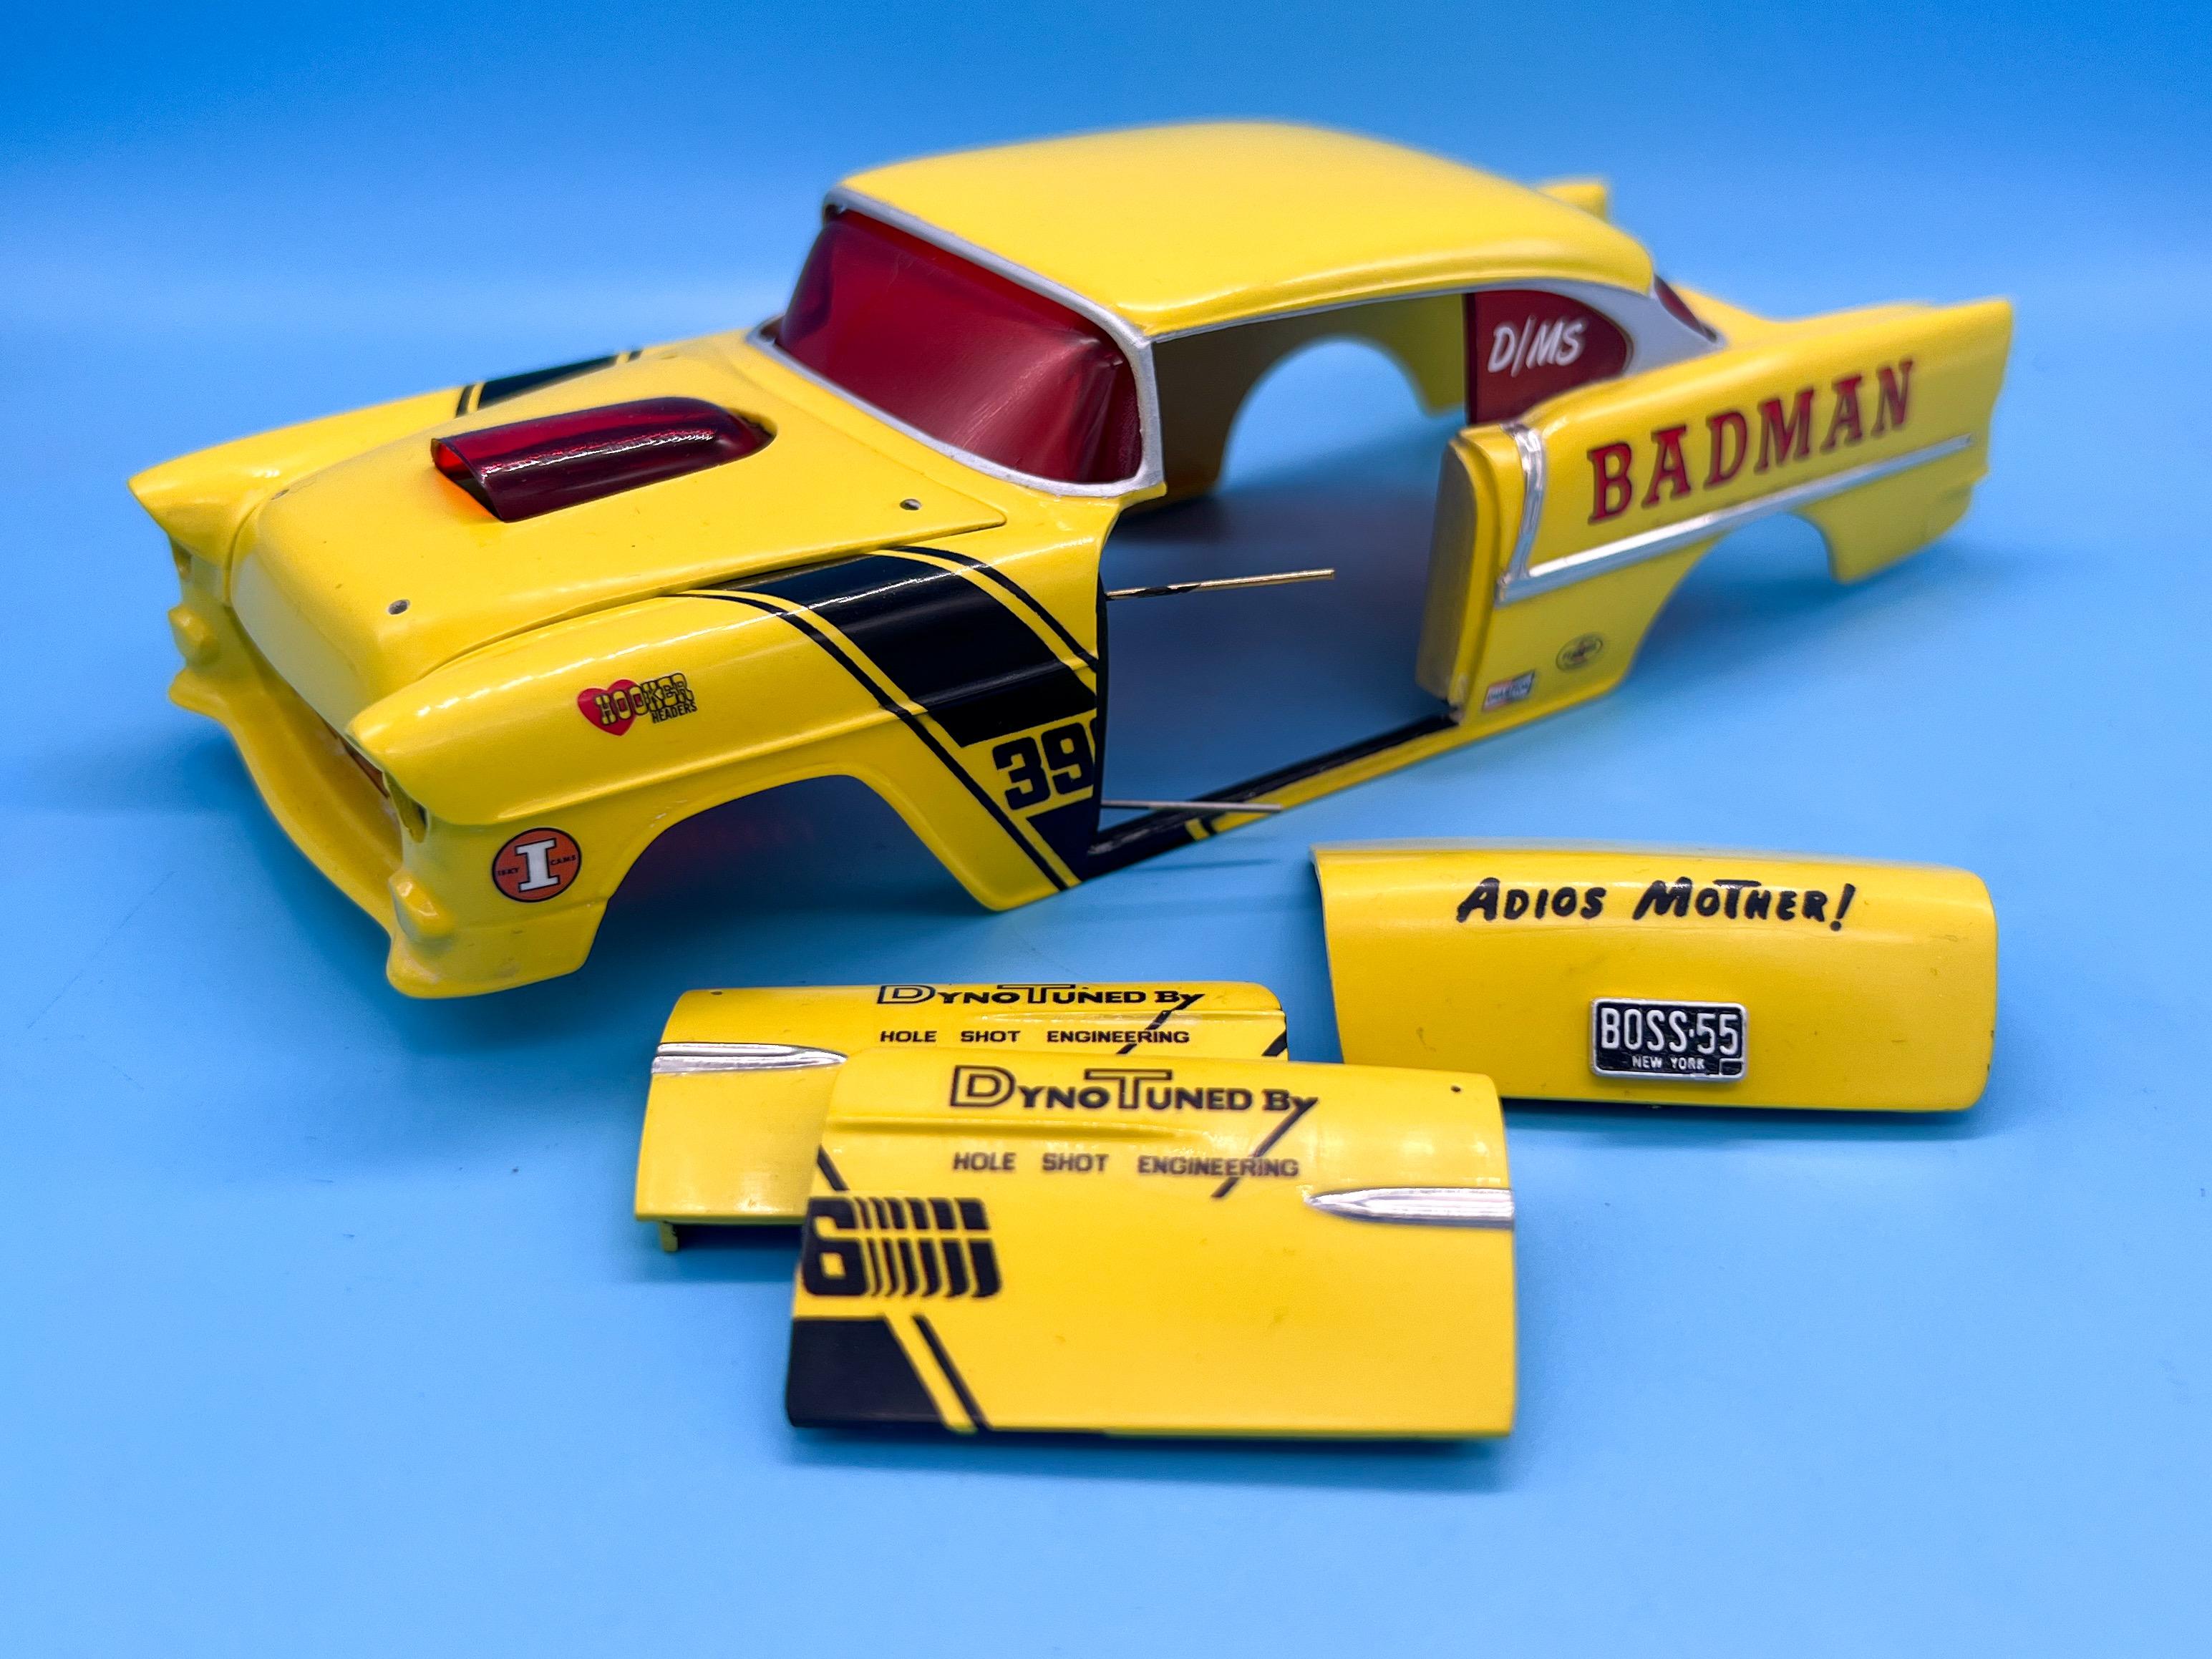
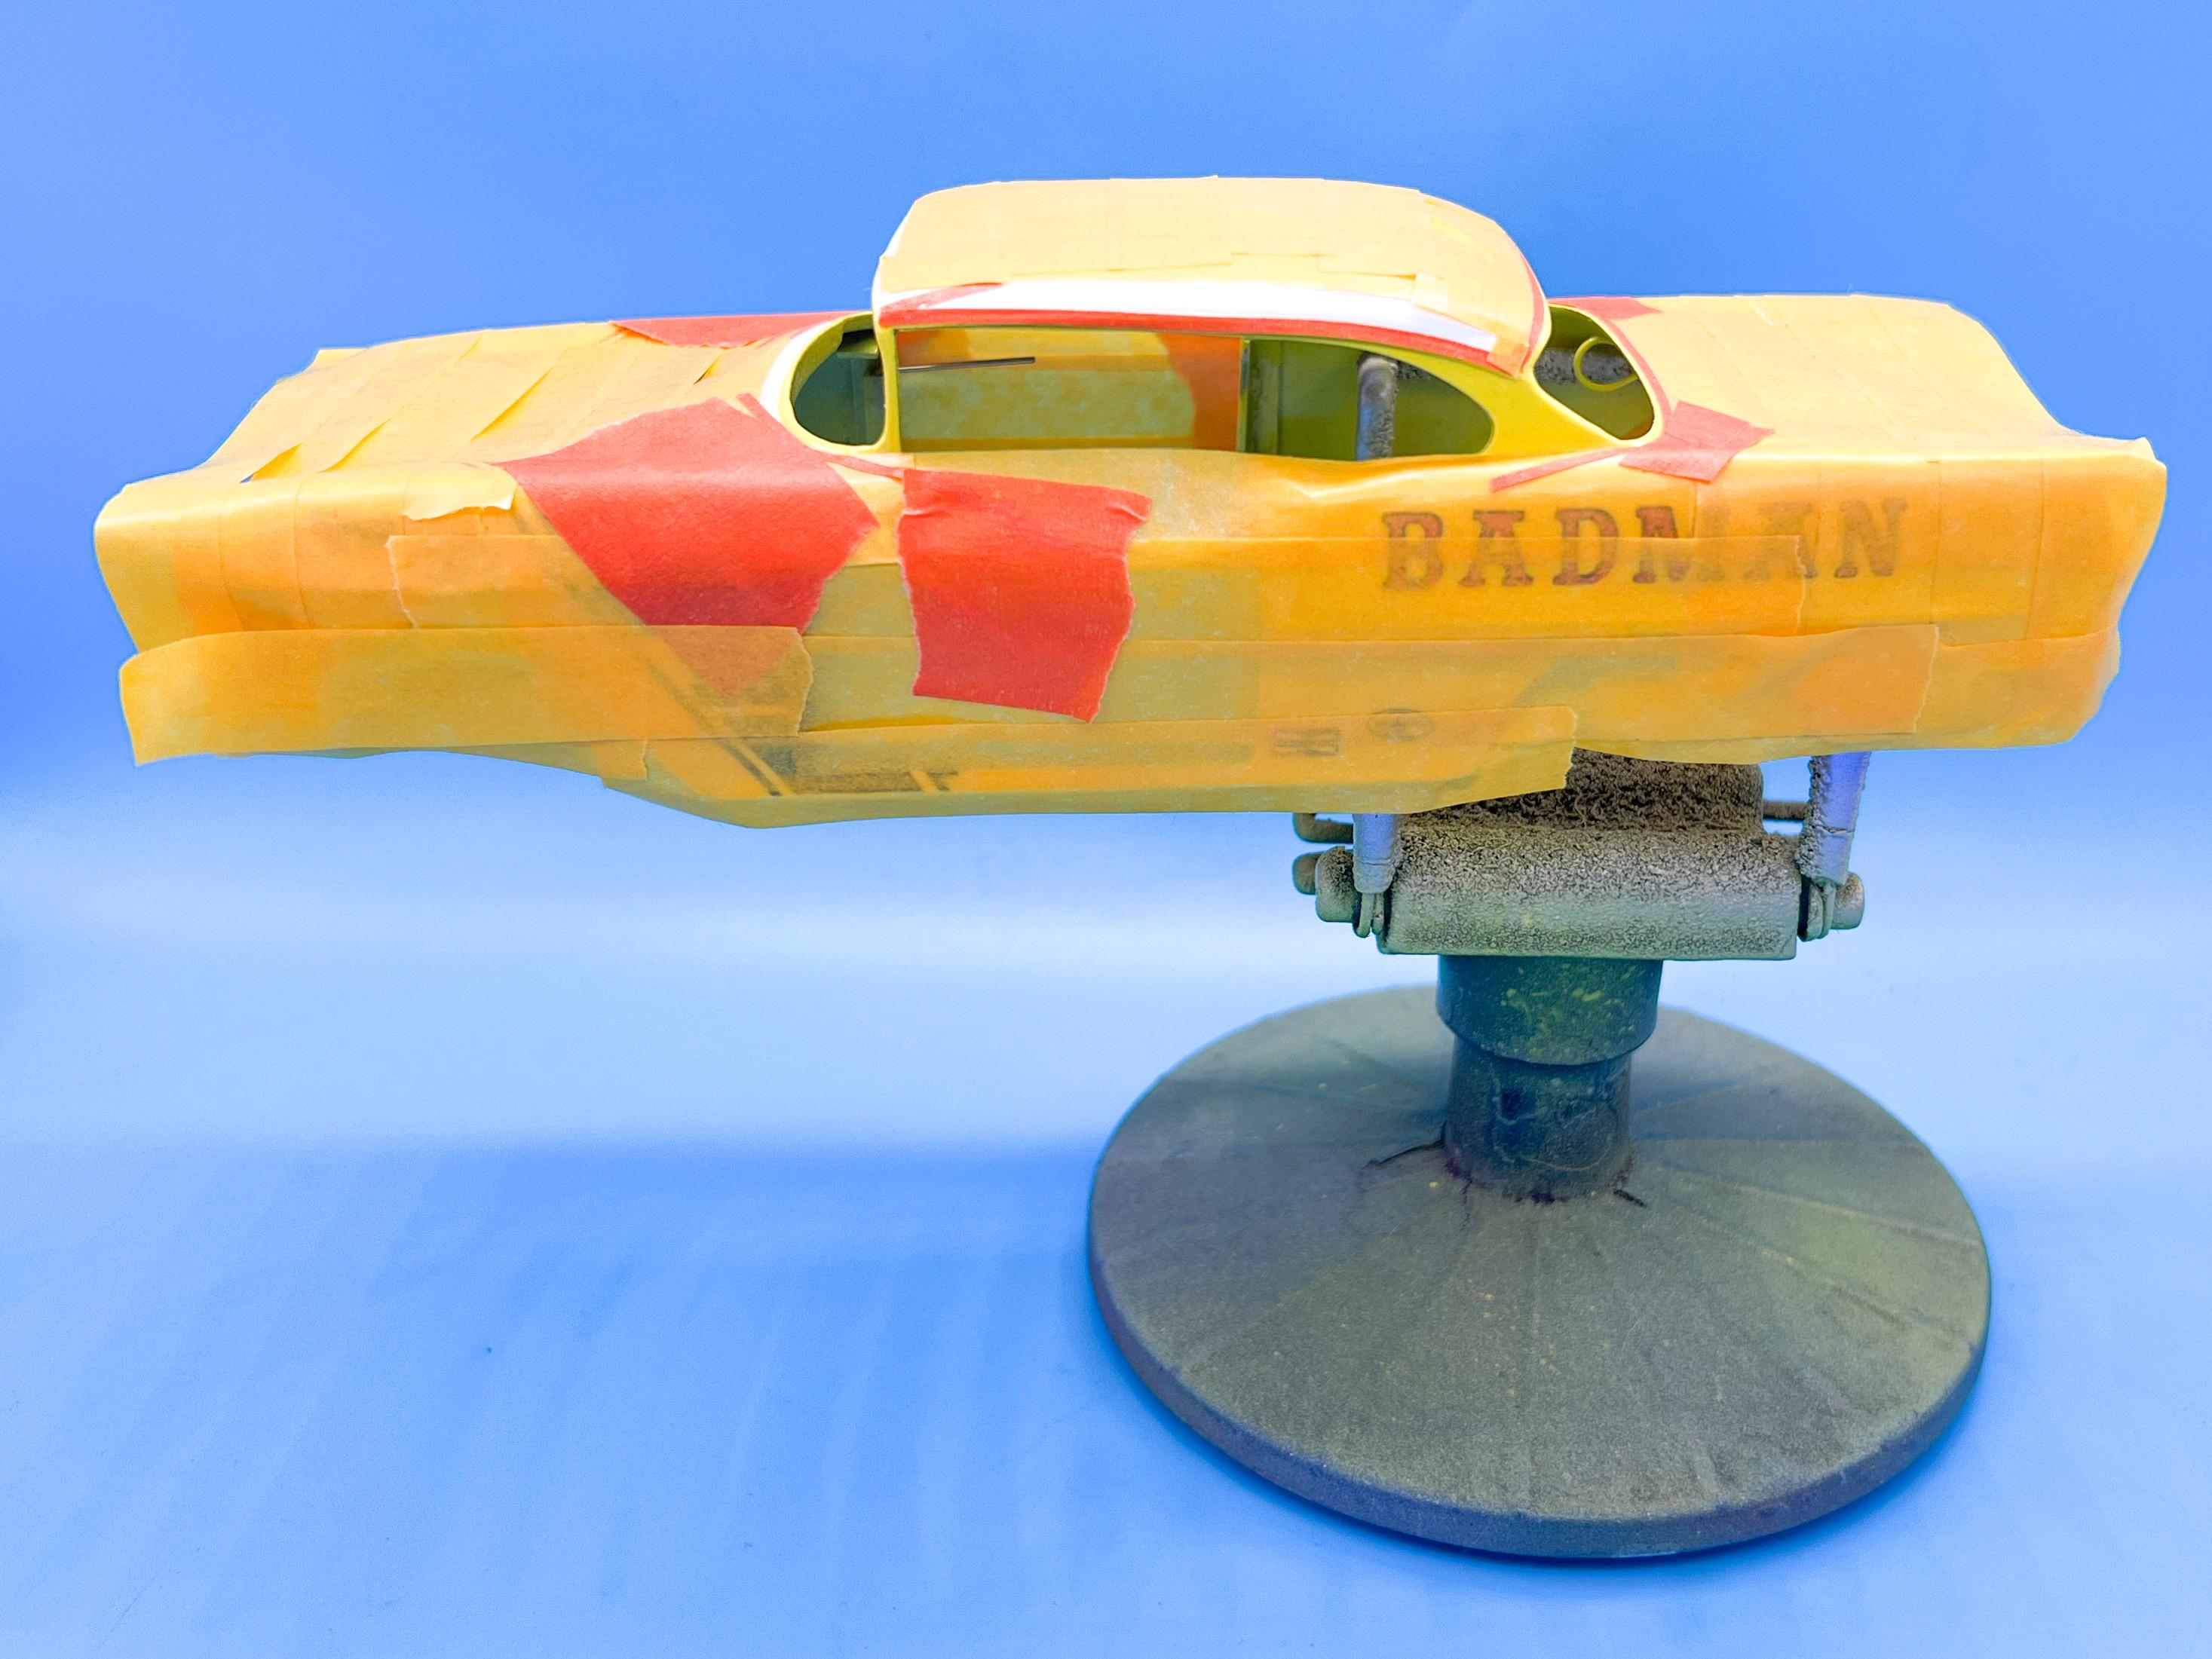
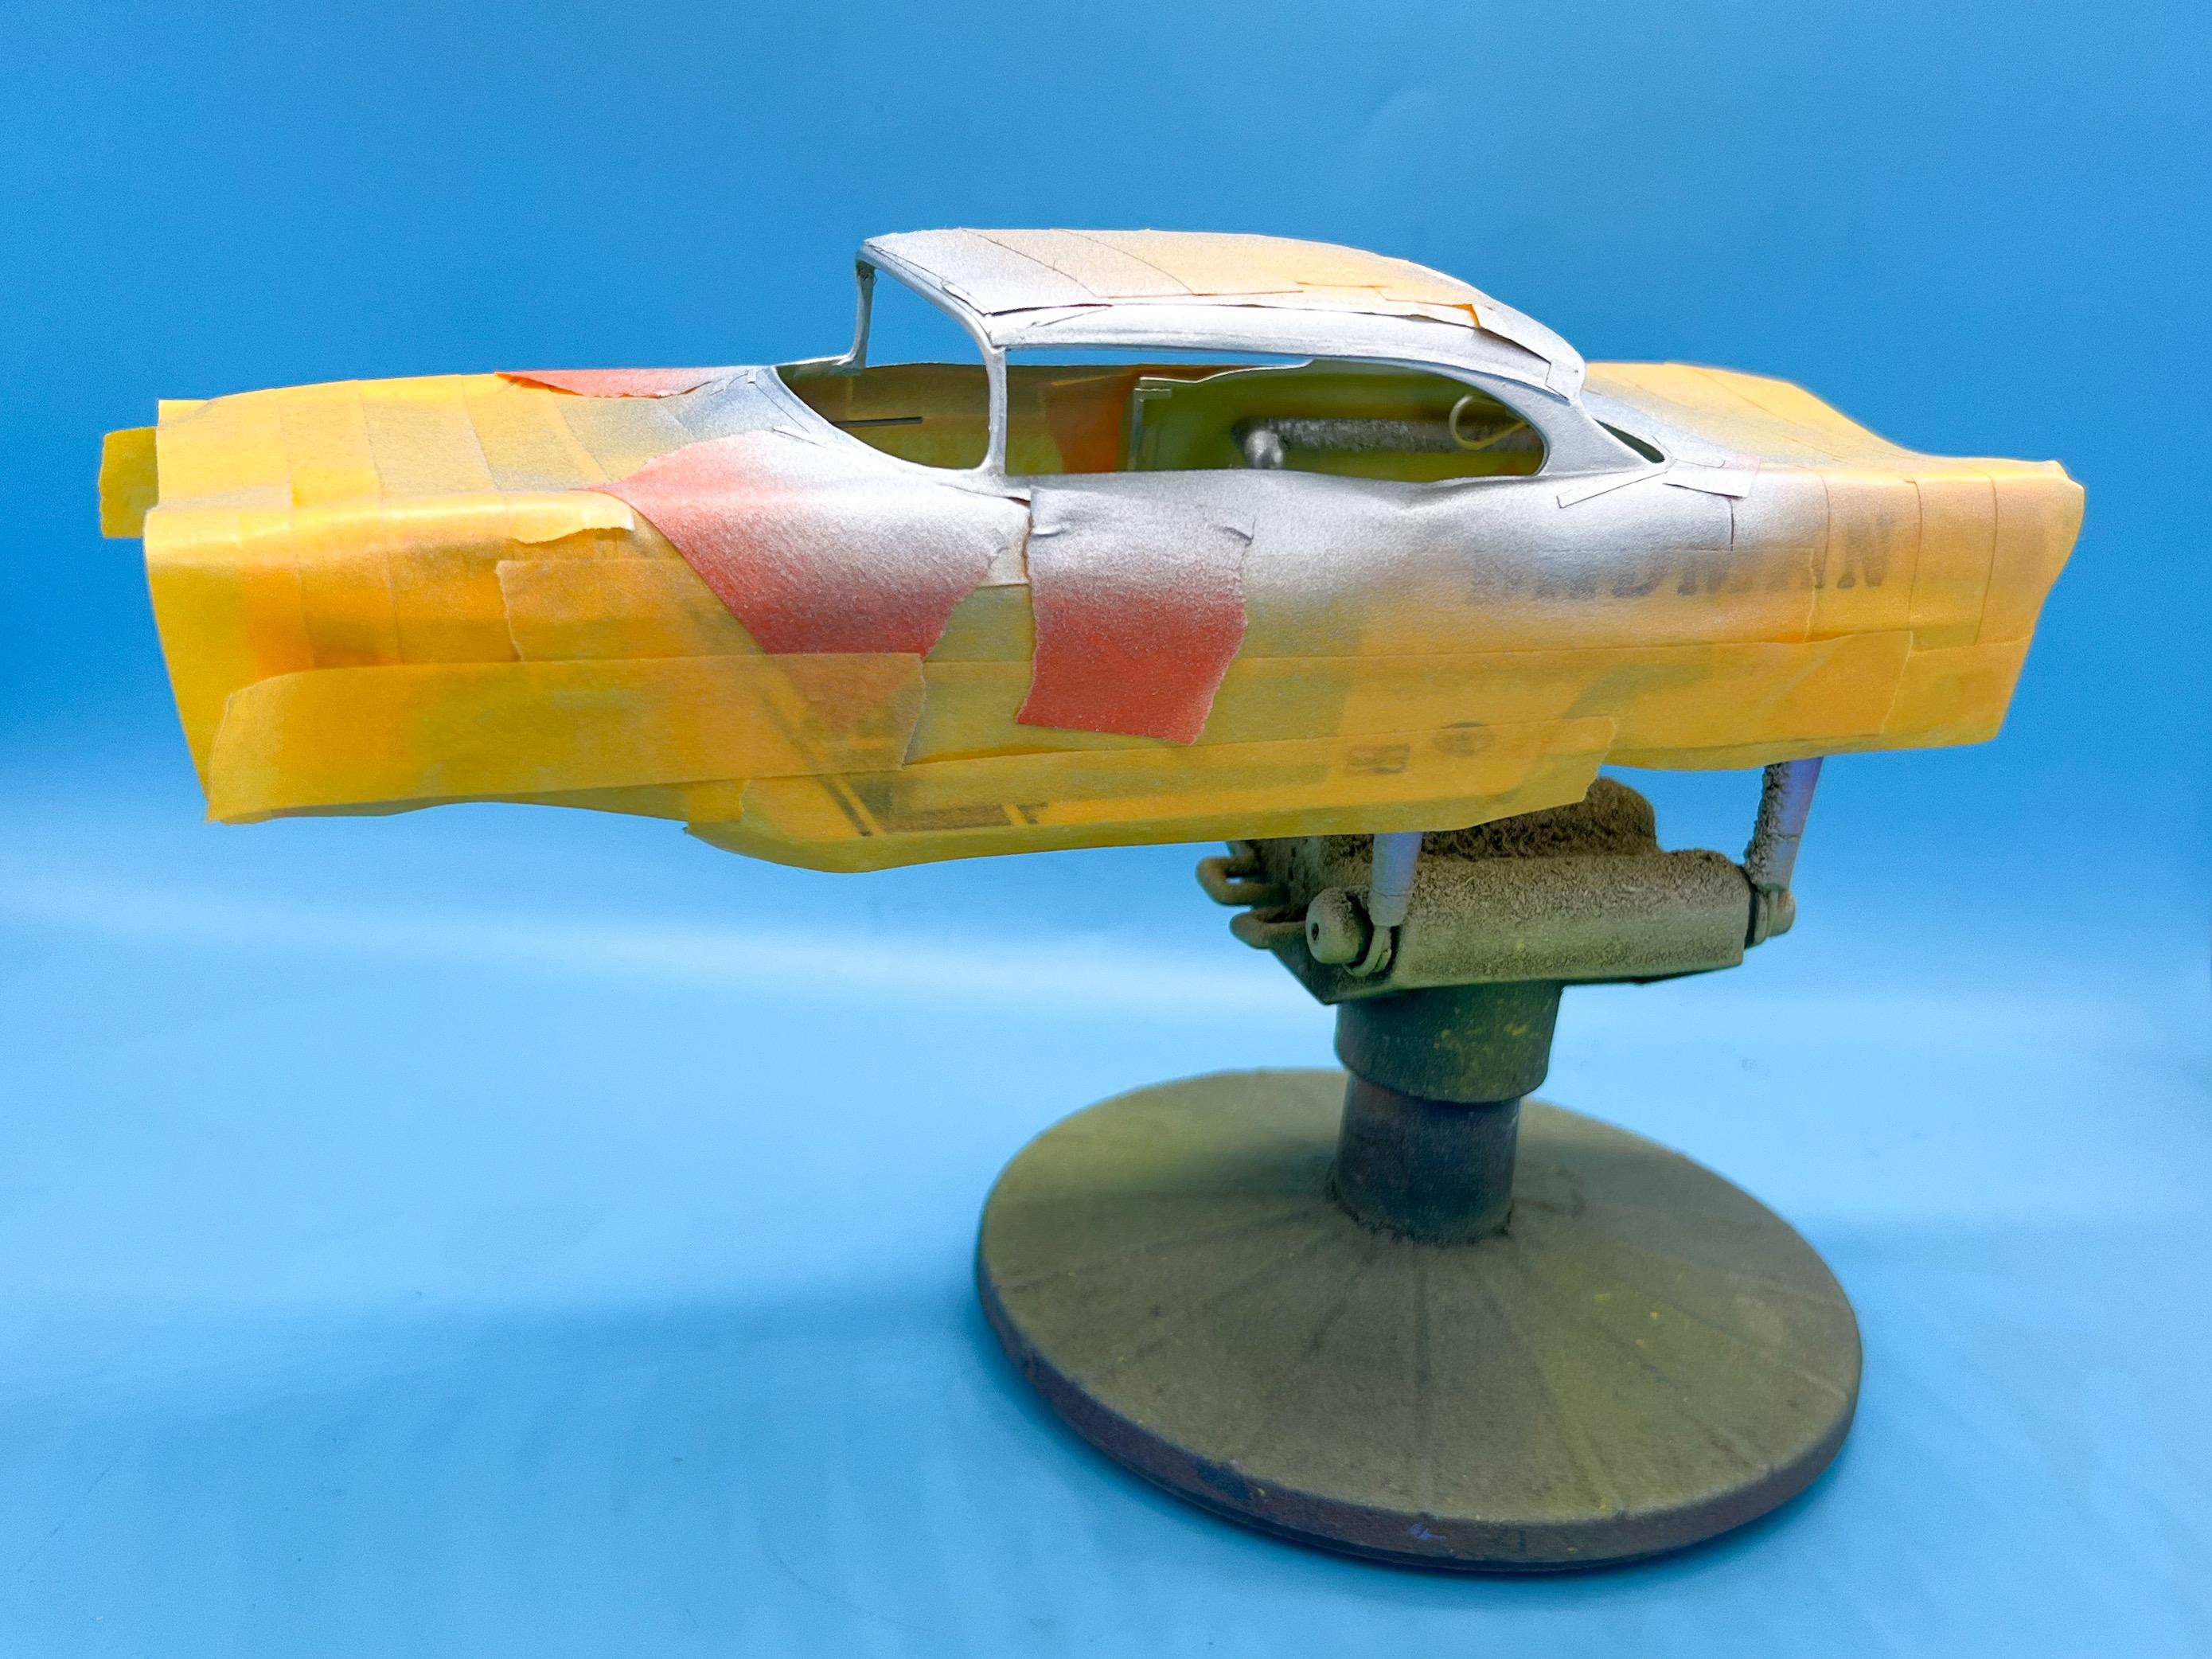
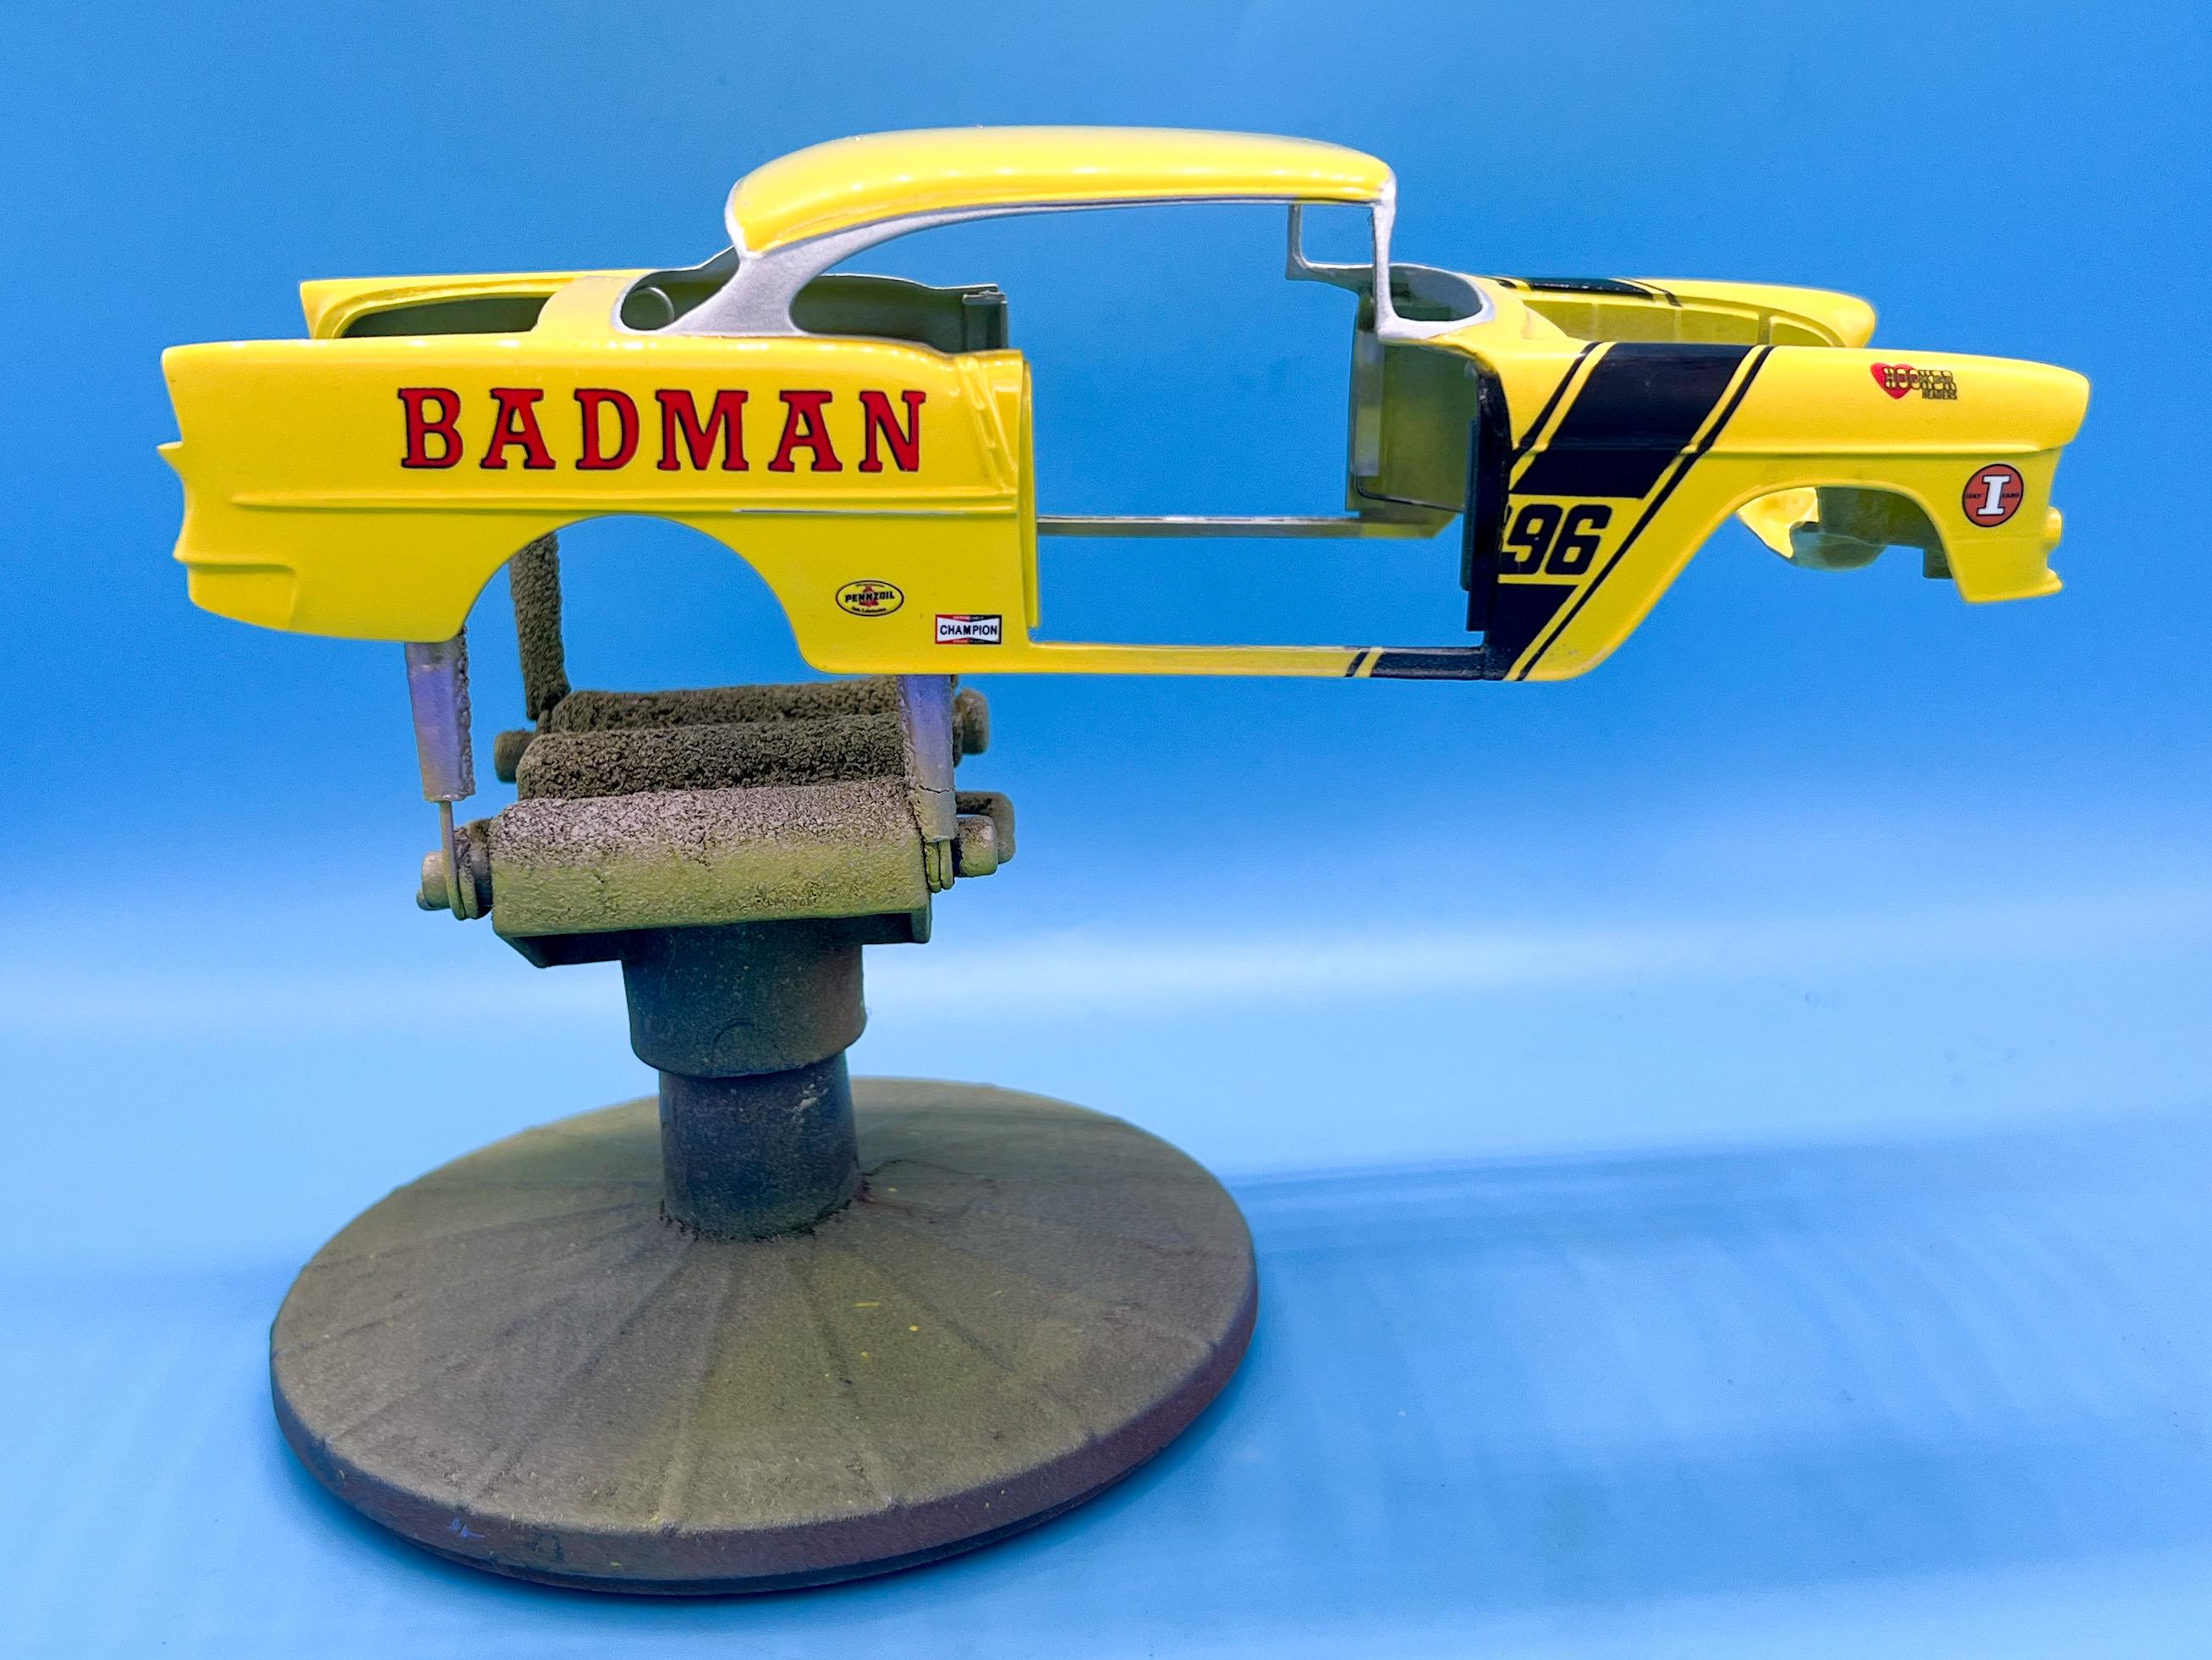
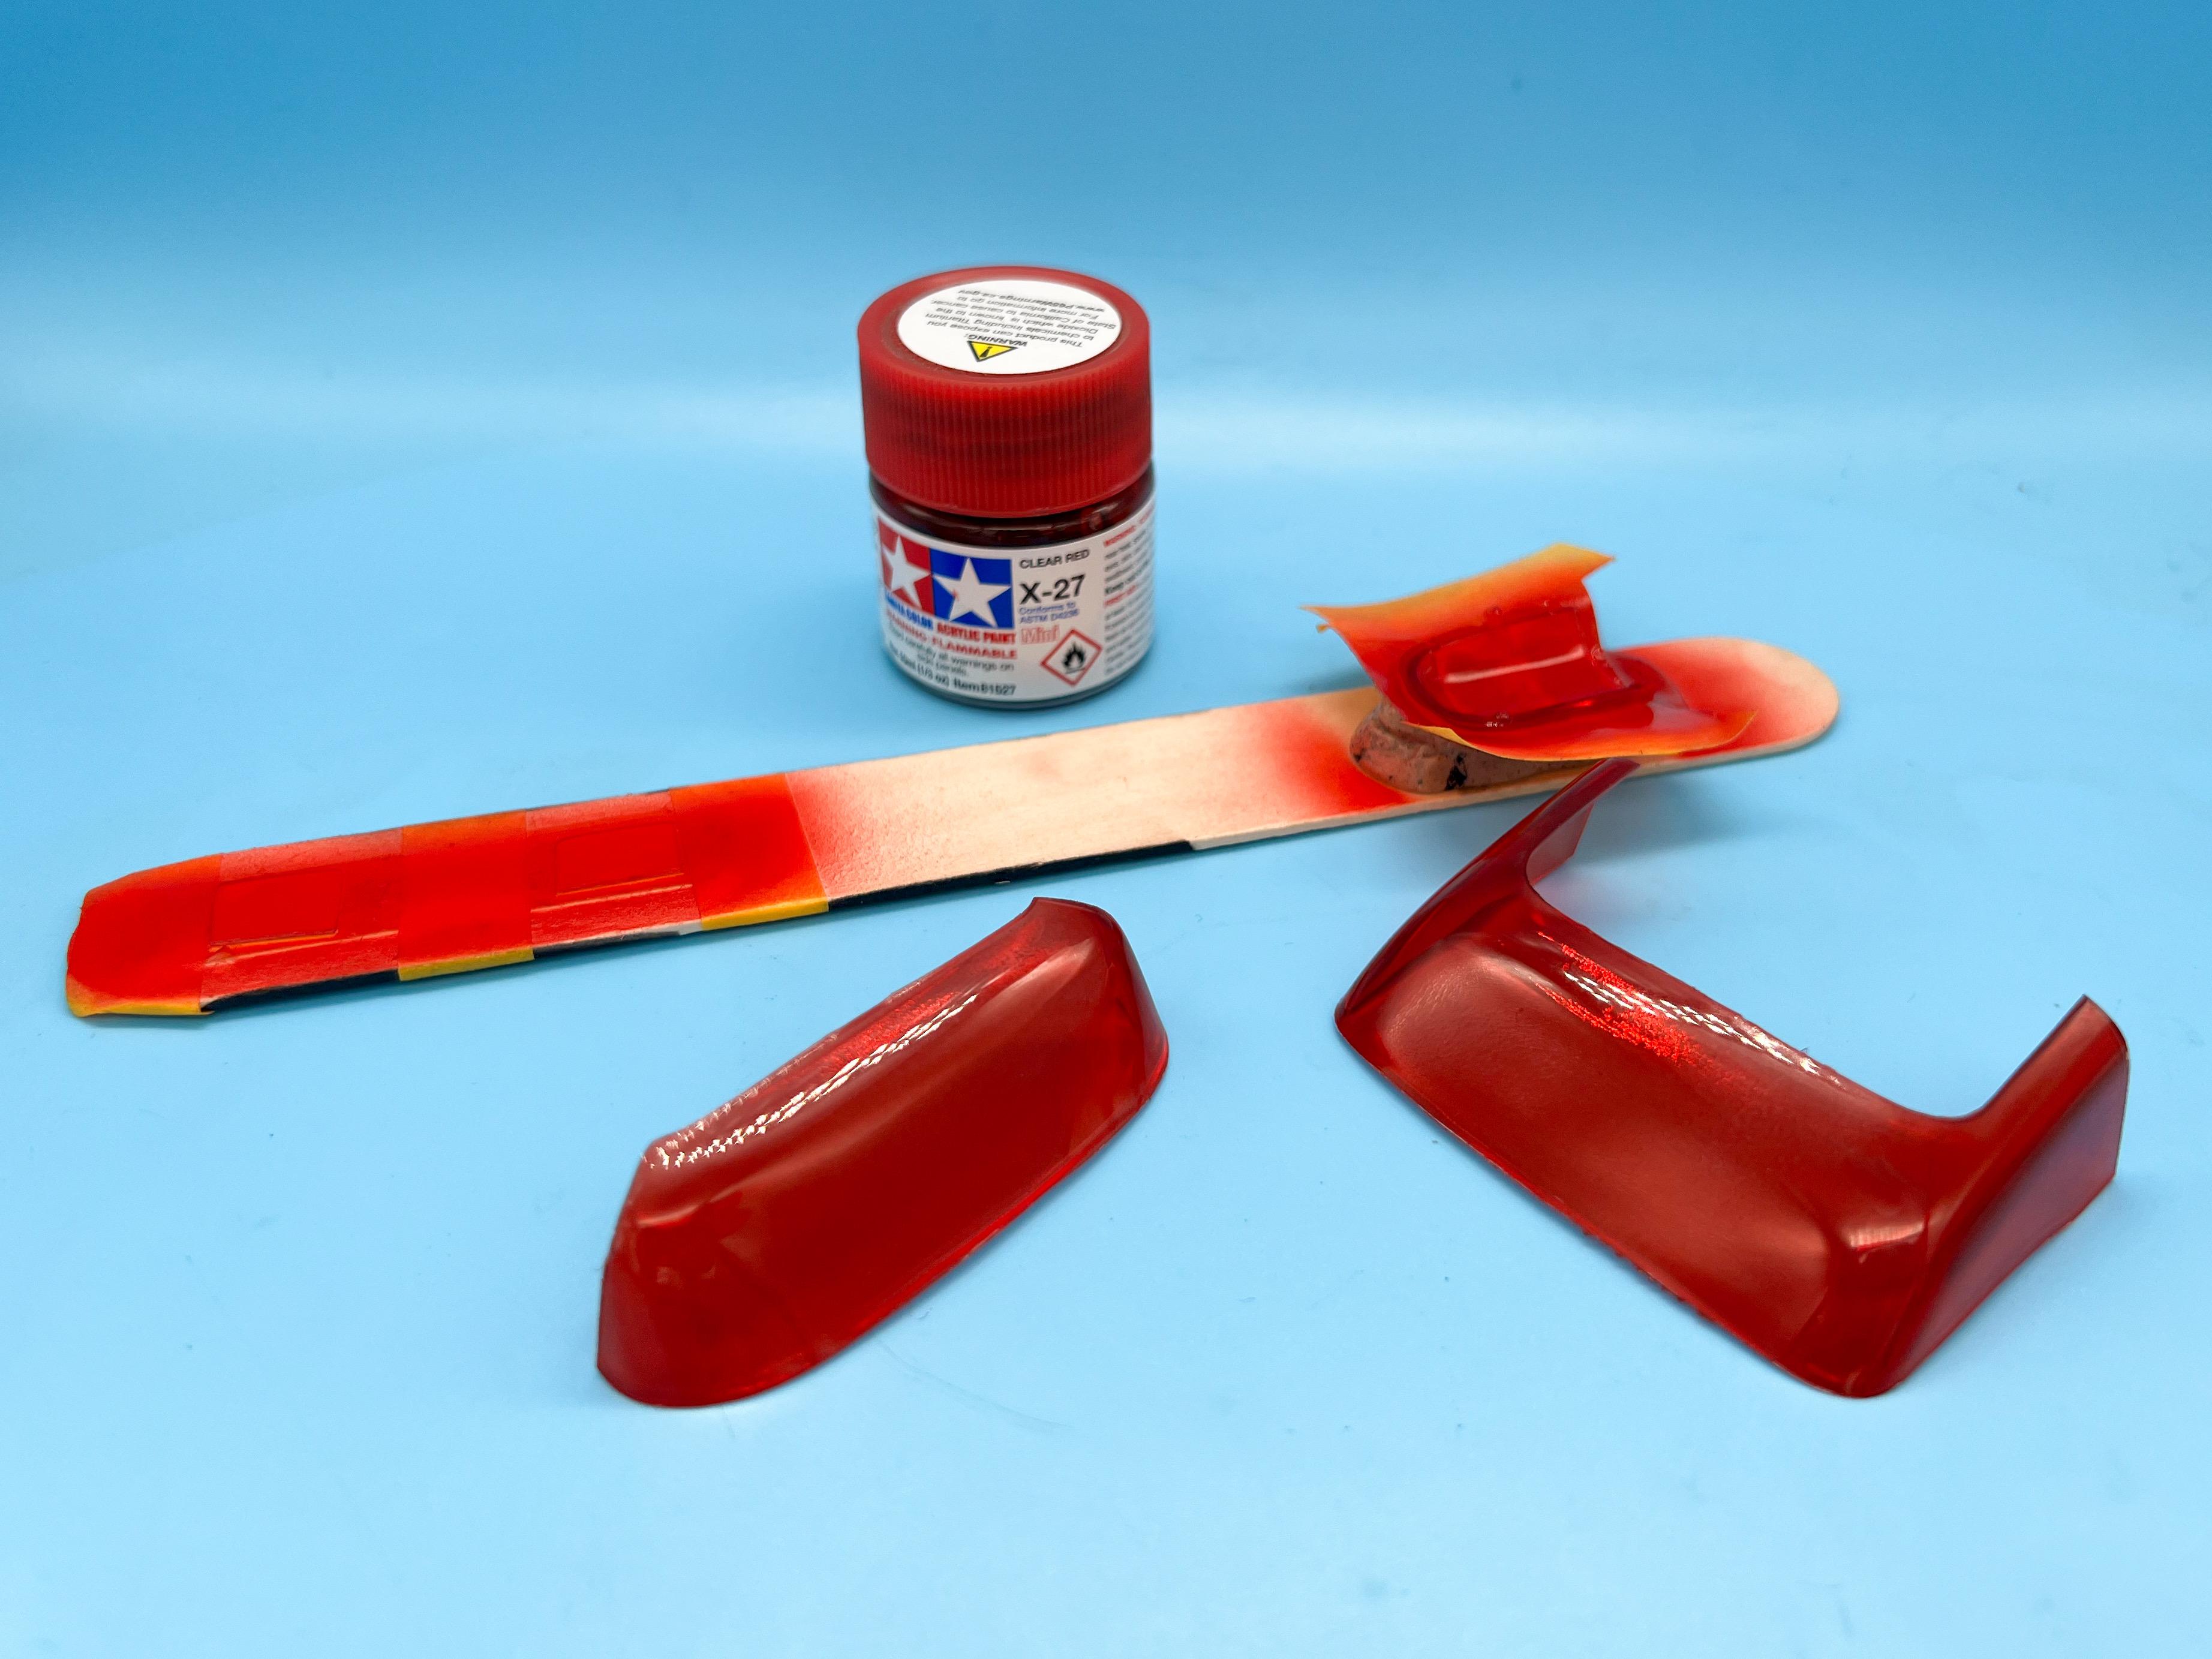
Thanks fellas! I picked up a stomach bug early last week and I’ve not been able to hit the bench like I’d like…which is unfortunate as there’s only a couple more weekends left before the IPMS show that I’d like to debut it at (assuming it’s done…). Plenty to do! Next challenge is something I’ve been thinking over for a few weeks now - how to tackle the chromework around the windows. I can’t use foil like I normally would because I made little brass vent windows, and some of the edges on the body itself are too skinny for me to be able to foil them, I think. Next option was Alclad, but I wasn’t overjoyed with the idea of masking the body and spraying black enamel base and risking trouble with the existing paintjob. Also, I don’t wanna have to try and assemble this thing and polish it out and accidentally ruin the Alclad - same problem with Molotow and the other chrome inks. Decided best course of action was Vallejo chrome, which is a bright silver acrylic that I felt safe laying down, can be cleared over to protect it, and easily fixed if I ding it during assembly later. First up, did a half-polish on the body and carefully washed it after: I normally use polishes for a lot of the finishing work, but couldn’t risk contaminating the surface with silicone or anything that would ruin the next paint steps… Next up, masked carefully with my favorite low-tack tape, plus some Tamiya plastic tape and some thin strips of Michael’s artist’s tape to get the curves I needed in a couple of spots: Laid down the Vallejo chrome (much more of a brushed aluminum, in reality…) And a coat of matte clear and some unmasking later and we’ve got some silver window trim: I really wanted to make these all chrome, but hopefully in the overall context of the finished build it’ll look ok…there WILL be plenty of actual chrome on here - plus I think the red tinted glass will be more of an eye-catcher than the silver stuff around it anyway. Speaking of which, polished out the glass with some Novus #2, washed the parts carefully in Dawn and got everything clear tinted like it needed to be: I’ll give these parts another polish before installation, and the side windows need some lettering to match the box art too… And that’s my pitiful process for this week…aside from prepping above 50 little pieces for chrome…that’s what’s slowing down any assembly for me right now. More soon, soon as I’ve done more!