OldNYJim
-
Posts
251 -
Joined
-
Last visited
Content Type
Profiles
Forums
Events
Gallery
Everything posted by OldNYJim
-
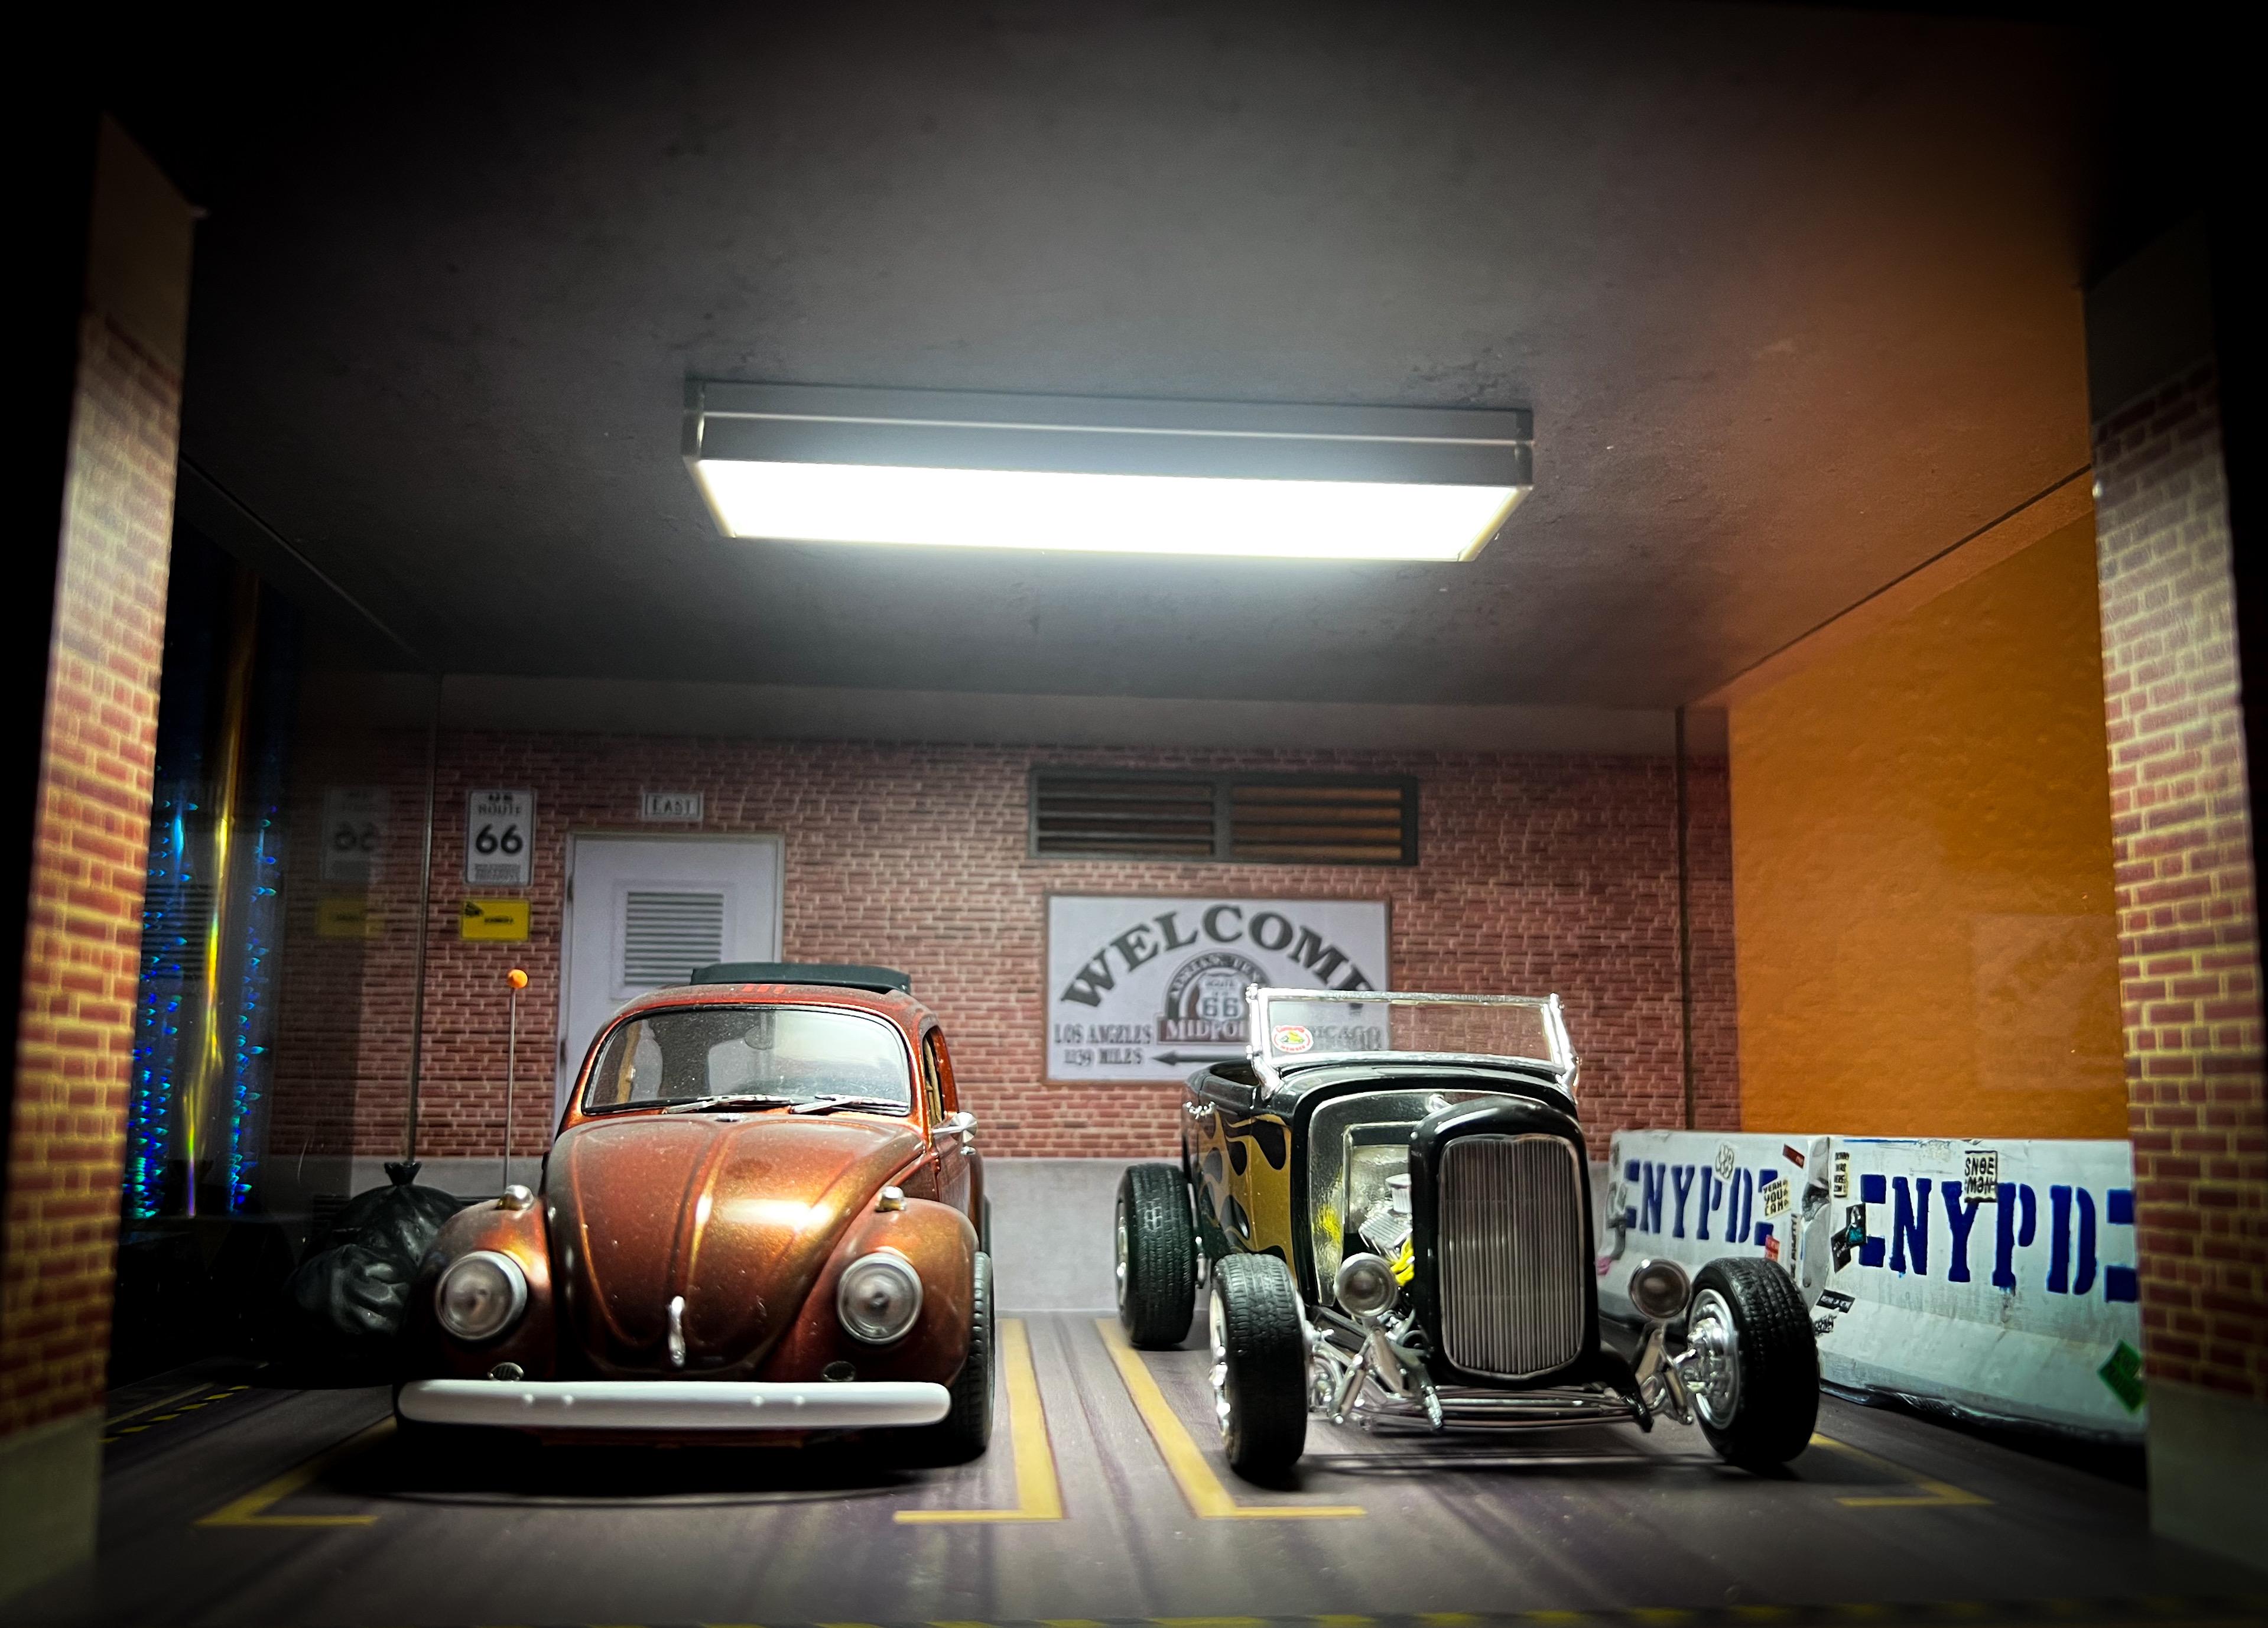
 I ordered one of those 1:25 parking garage display cases after seeing @TimKustom’s review of one in the magazine a couple of months back…was a fun evening project! Of course, I won’t be able to leave well enough alone so it’ll be getting some tweaks to improve the realism - but even out of the box it looks great and LED lighting is a nice touch!
- 38,884 replies
-
- 6
-

-
- johan
- glue bombs
- (and 1 more)
-
Revell 32 Ford Roadster REVISED (former Rat Roaster tool)
OldNYJim replied to Mr. Metallic's topic in Car Kit News & Reviews
Oh yeah, I've been enjoying that thread - that's probably what put the idea in my head ? -
Does anyone make custom PE parts?
OldNYJim replied to Oldmopars's topic in Model Building Questions and Answers
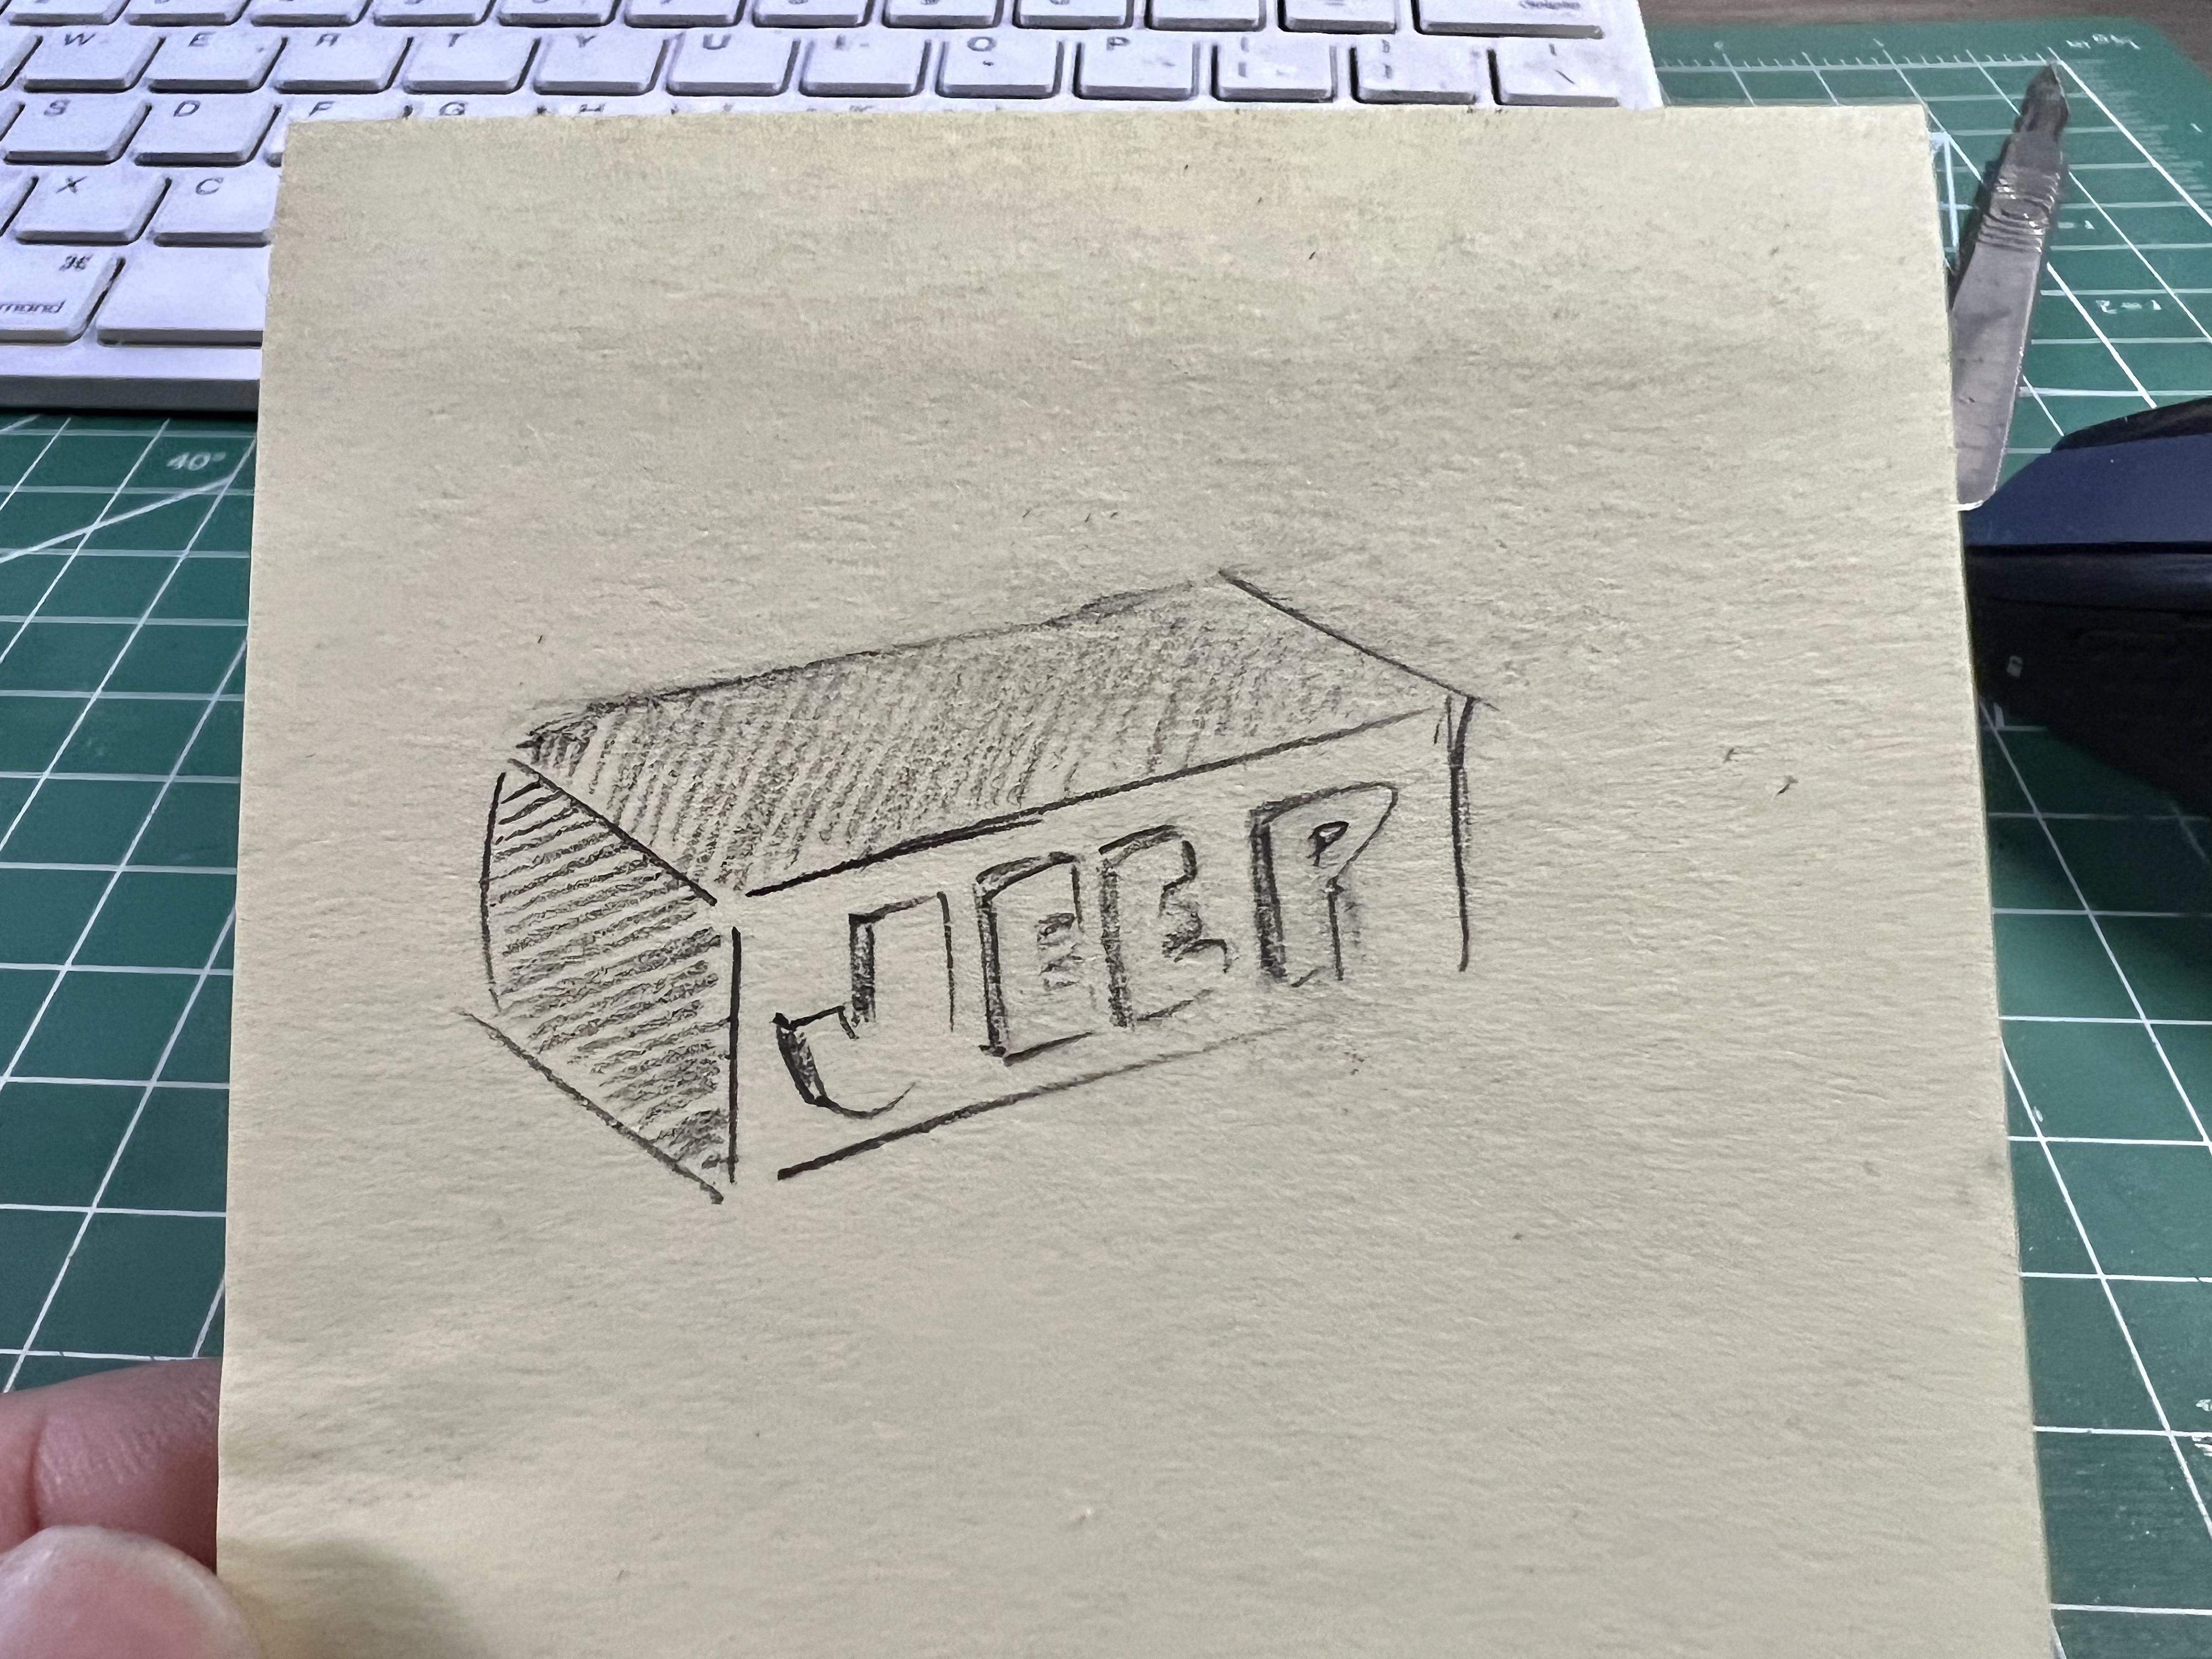
Hey Scott! I was thinking about your question today, and how we can maybe use 3D printers to create missing scripts and fine detail that would normally be something we’d have photoetched. I wondered about the possibility of making a larger piece that could just plug into a slot or groove cut into the body. Quick sketch to show what I imagined (with exaggerated depth, for clarity…): Printing tiny script in 3D is hard (near impossible, probably), but putting it on a ‘block’ like this, making a slot wherever it needs to be placed on the body and inserting this little panel into the body could be a way around that challenge…and achievable with a 3D printer. The edges of the block can be sanded and bodyworked to get the perfect fit, and then prime and paint as normal
-
Paint flames the clean ‘n’ easy way
OldNYJim replied to OldNYJim's topic in Tips, Tricks, and Tutorials
This one: https://a.co/d/fih8lZl I’ve been using this for four years - it’s on it’s second blade in all that time (but honestly the original one was still usable when I switched it after a couple of years). Then all you need is whatever material you want to cut…for making masks, I like this: https://a.co/d/4qDFpvA There are larger versions that can cut bigger pieces of material in one go - but for almost every model-related job, even the smallest version is plenty big enough… -
Agreed! At our local store they reduced the area for the car kits a little to make room for some robot kits, whatever they’re called…but they still had plenty of stock of those and a LOT of empty spots in their automotive line-up
-
I checked my local store in the week, and same thing; mostly empty spots and some of the standard ‘shelf warmers’ - only new thing I saw was the new race hauler set and the Celica, but neither followed me home…
-
Paint flames the clean ‘n’ easy way
OldNYJim replied to OldNYJim's topic in Tips, Tricks, and Tutorials
@NOBLNG‘s video covered it, but yes, it’s what you figured - a ‘printer’ with a blade that moves left/right up/down to cut vinyl, paper, card or even styrene sheet. Same machine as sign shops use to cut vinyl lettering for vehicles etcetera - but in a much smaller package ?? -
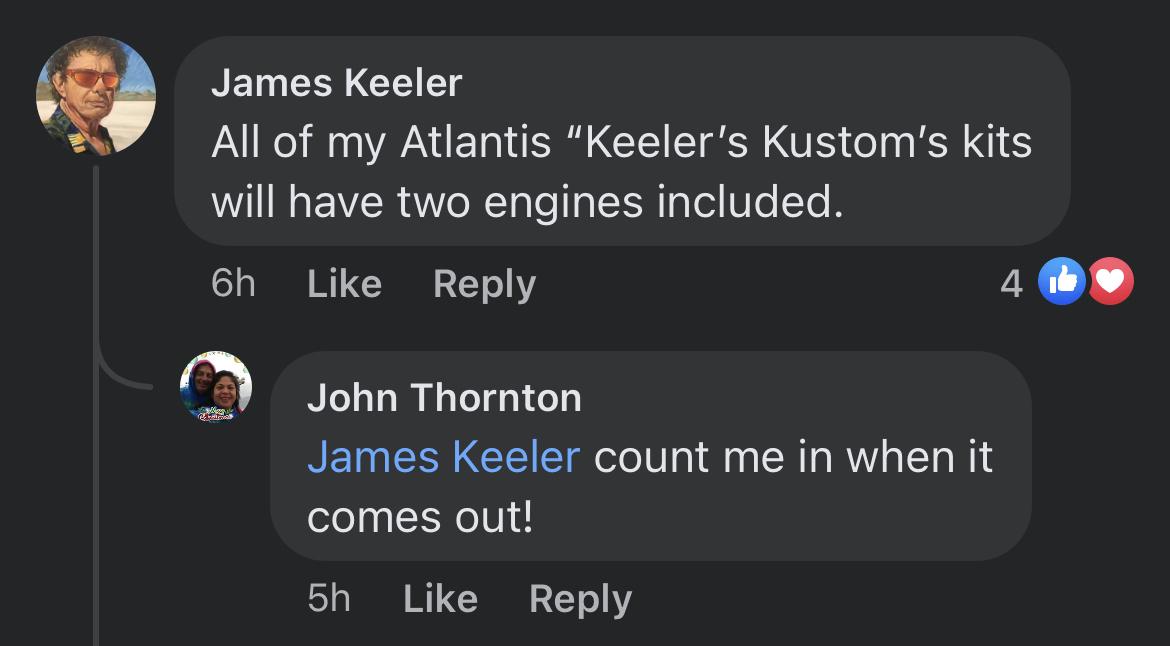
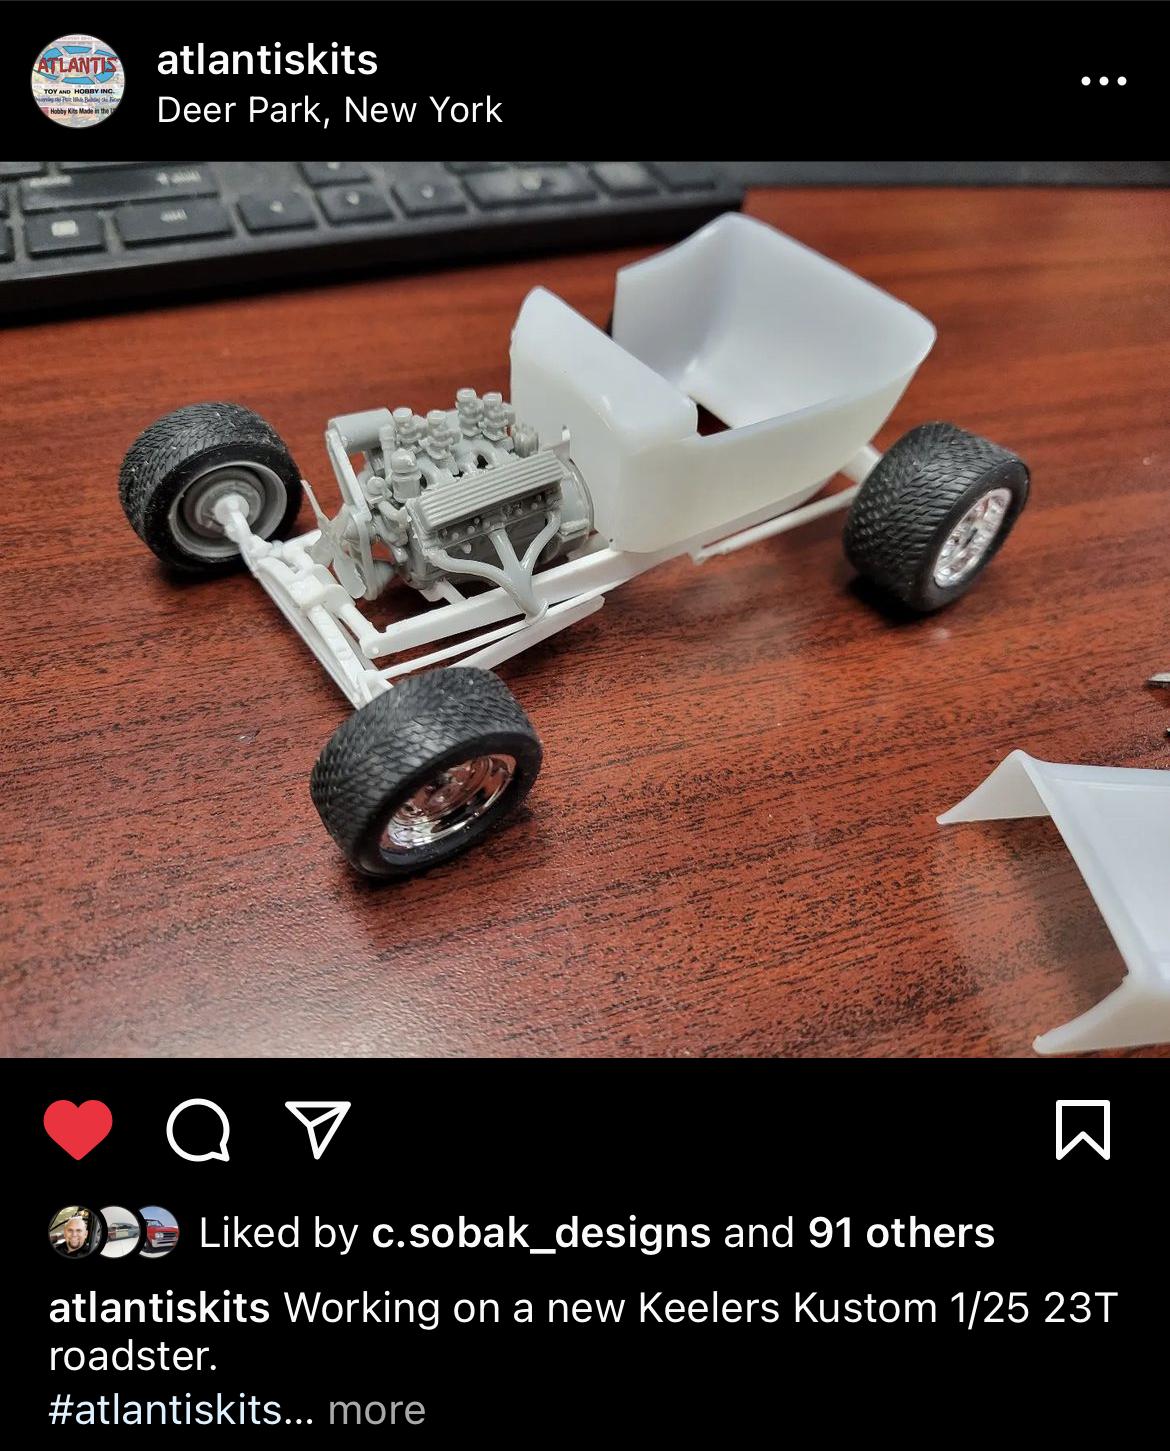
Atlantis Models has bought another lot of tooling/molds.....
OldNYJim replied to Dave Van's topic in Car Kit News & Reviews
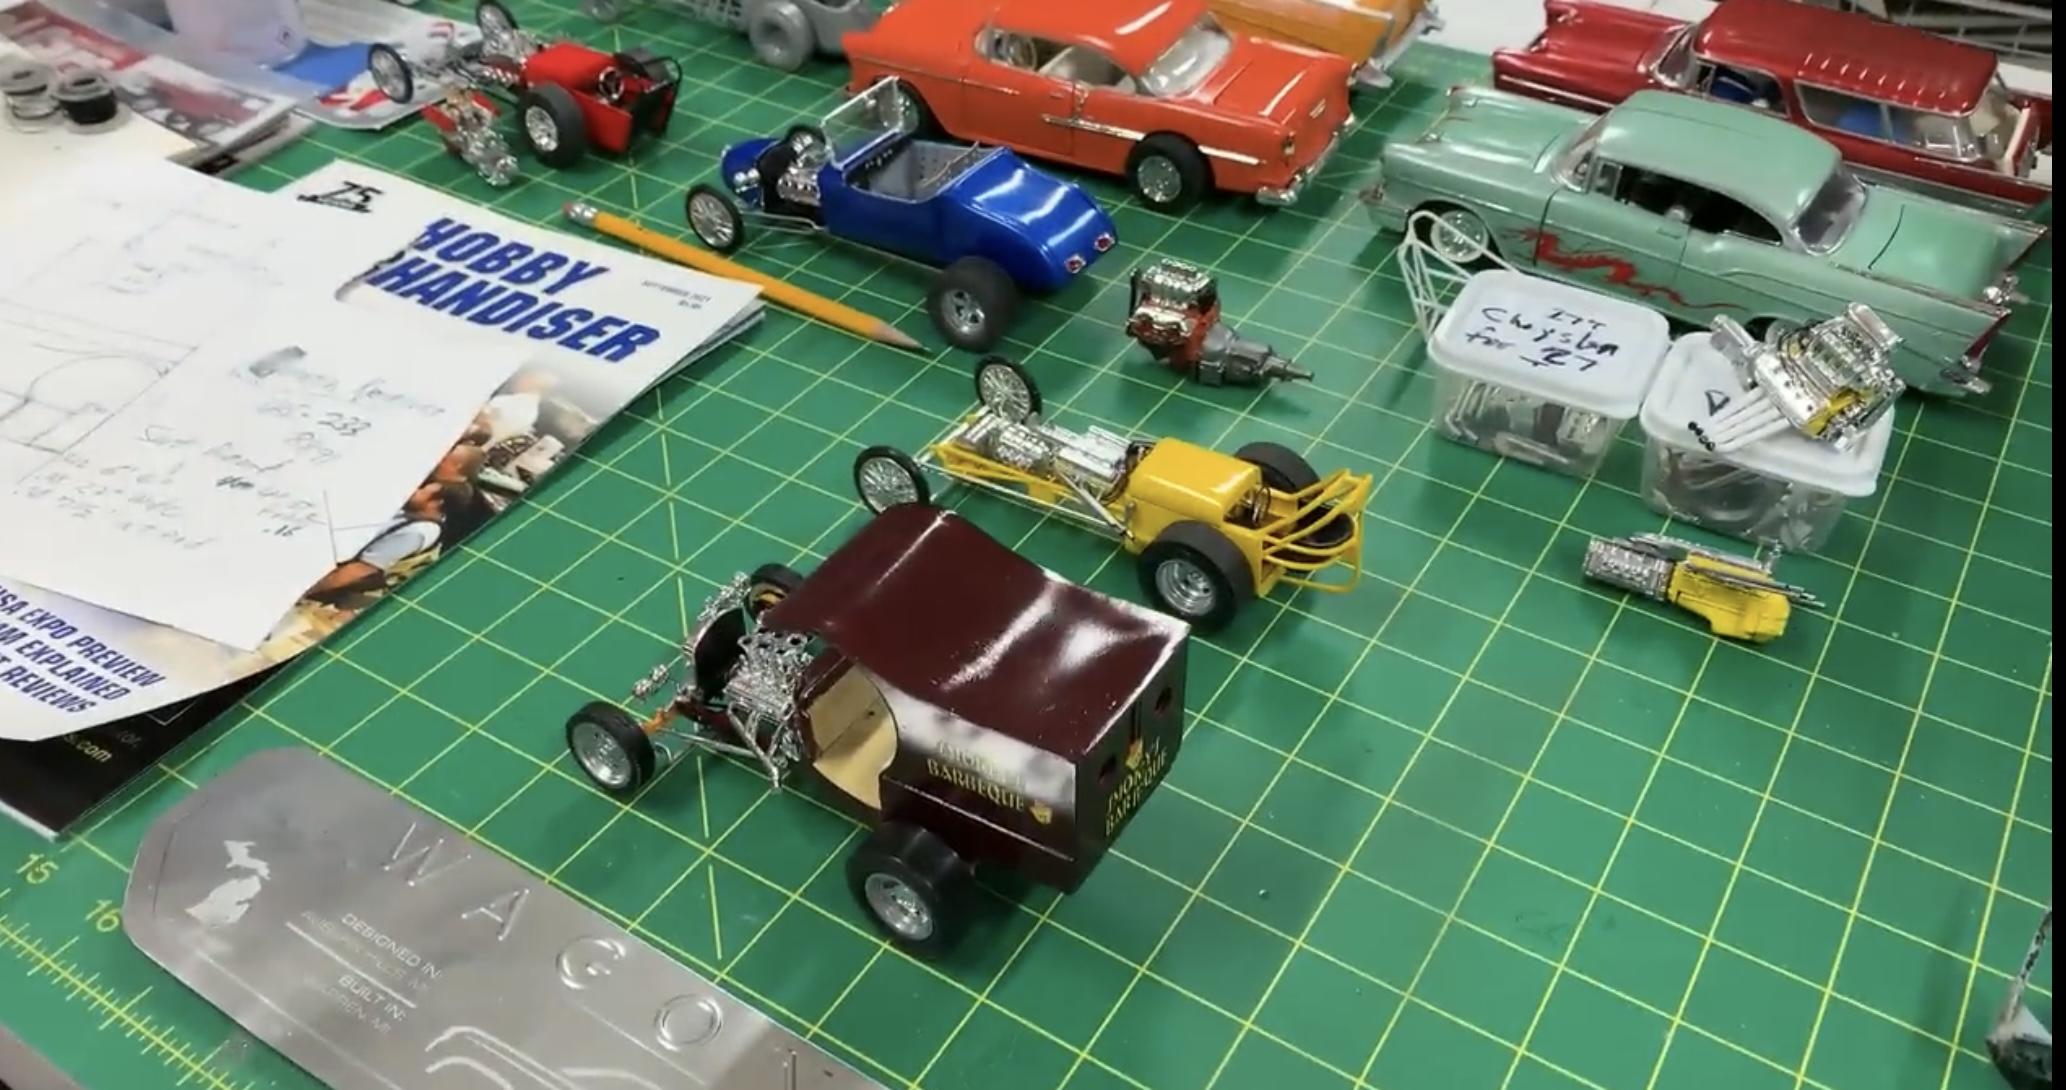
Not a clue…but here’s the T and the C Cab that I remember being displayed at wherever it was. These screenshots are from a video interview with Jim Keeler: Note the little white tub marked “Chrysler for 27” ?
-
Brushing prices, my stuff looks bad
OldNYJim replied to Milo's topic in Model Building Questions and Answers
What kind of paint are you using? Thinning it down some will help eliminate those brush strokes - but for painting a larger piece a rattle can or airbrush will almost always get nicer results than a brush -
Atlantis Models has bought another lot of tooling/molds.....
OldNYJim replied to Dave Van's topic in Car Kit News & Reviews
They had a cool in-progress C-cab that they displayed at a show earlier in the year that I liked! There's a discussion about it on here somewhere... -
Atlantis Models has bought another lot of tooling/molds.....
OldNYJim replied to Dave Van's topic in Car Kit News & Reviews
Apparently a couple of engines…and some different wheels (thankfully)
-
Atlantis Models has bought another lot of tooling/molds.....
OldNYJim replied to Dave Van's topic in Car Kit News & Reviews
The next Keeler’s Kustom project in progress: Needs different wheels and tires, methinks…
-
I did a quick search, and it looks mostly black in there in this pic of a 1:1 C7R: I can't quite tell for sure, there's a lot of stuff in thee, but I don't see much body color showing. I think a semi-gloss or matte black would be a safe choice...
-
Revell 32 Ford Roadster REVISED (former Rat Roaster tool)
OldNYJim replied to Mr. Metallic's topic in Car Kit News & Reviews
Oh yeah, I'd agree the blower is cooler in the RR. I was just surprised by the molded in pan, mostly, I guess...I haven't checked, but I wouldn't be too surprised if the 'cool' bits from the 29 fit the RR (and vice versa) fairly easily anyway. -
Revell 32 Ford Roadster REVISED (former Rat Roaster tool)
OldNYJim replied to Mr. Metallic's topic in Car Kit News & Reviews
Here you go... -
I am done buying Monogram 40 Fords
OldNYJim replied to junkyardjeff's topic in General Automotive Talk (Trucks and Cars)
The expansion from the freezing of the water gently helps gently pry everything apart - or at least gives it a good start. Free to try and worth a shot! -
Revell 32 Ford Roadster REVISED (former Rat Roaster tool)
OldNYJim replied to Mr. Metallic's topic in Car Kit News & Reviews
I started one - nothing much to report so far… I think the SBC in the 29 kits is a better piece, what with the nice alternator bracket and the fact the oil pan isn’t molded in (why did they decide to do that?!) but there was considerably less cleanup to do so far than on a lot of the more recent issues in their Deuce series. I might add any useful notes I think of to this topic for other people’s benefit - I’m doing a straight up box-stock build so I wasn’t planning on giving it it’s own build thread…
-
I am done buying Monogram 40 Fords
OldNYJim replied to junkyardjeff's topic in General Automotive Talk (Trucks and Cars)
Have you tried freezing it in gallon ziplock bag of water? That has worked well for me before -
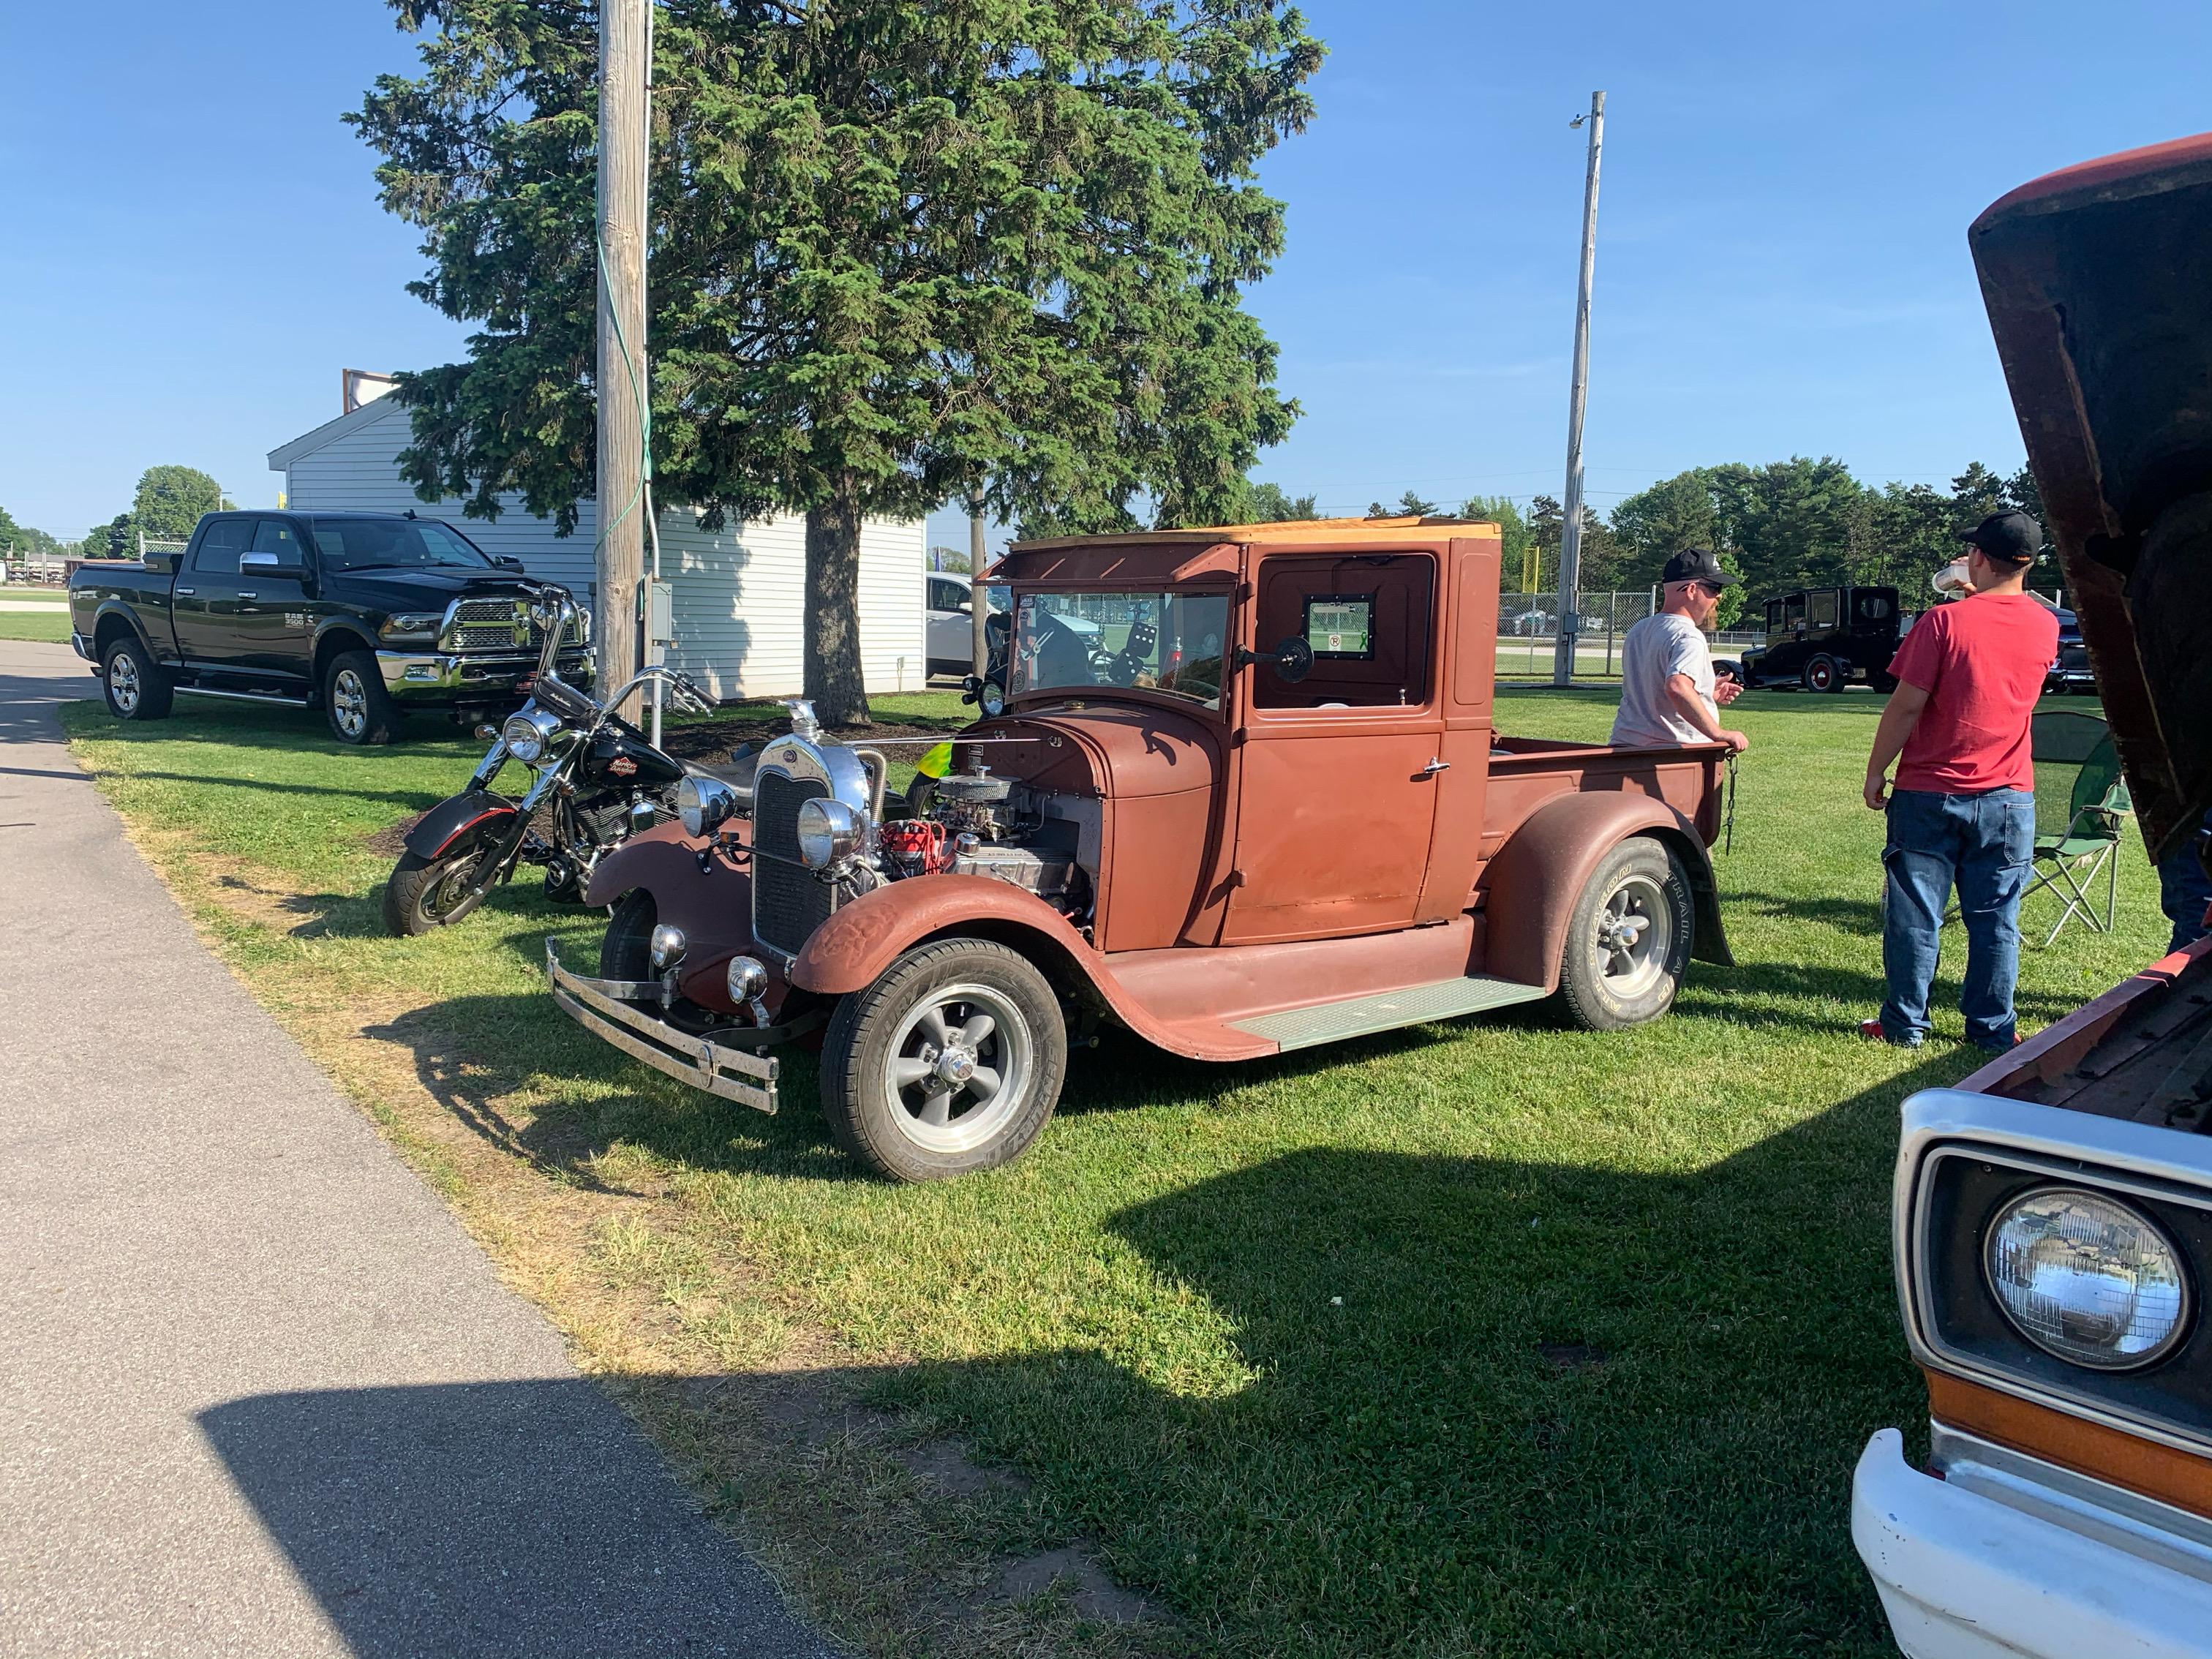
The last couple of years, particularly in the summer, I kept seeing this truck driving around near where I work: Every time I saw it, it caught my eye and I eventually got to see it parked up at a little show one evening. It’s probably not QUITE in the spirit of this thread, but it WAS, according to the owner, built in the 80s and hasn’t changed much since. Fluffy dice on the mirror, an old beer tap shifter, those awkward little spot lights…I’d drive the heck out of that thing! Whenever I see that truck around town I think of this thread ?
-
The Zen of Model Building
OldNYJim replied to afx's topic in General Automotive Talk (Trucks and Cars)
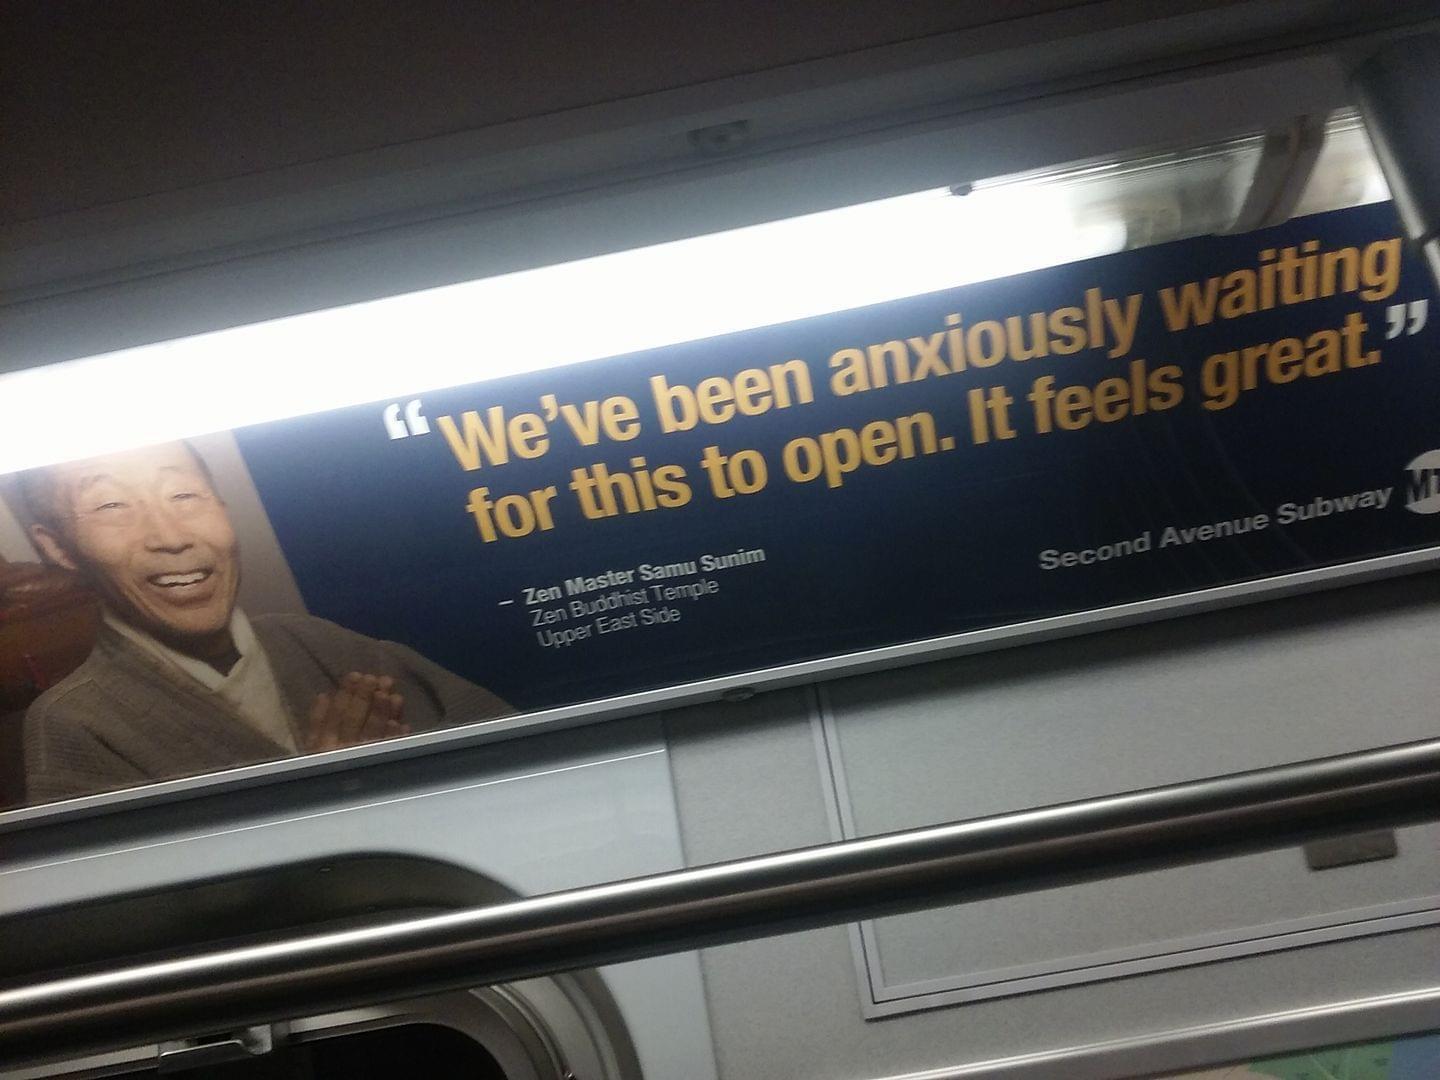
I feel like this too, but also I have a LOT of stuff I wanna build! I’ve been working on some tricks to help me build a little more efficiently and in a more organized way to help make good use of the time I have free. Of course - the urge to carefully consider every little detail and spend as much time on it as possible to make it as good as it can be means you can’t RUSH a project, but I’ve found some ways to get some of the repetitive work that I do a lot handled in a better way. For example, every build I will probably paint a distributor. So…I printed 25 distributors and painted them all at the weekend. I often need a battery, and have a design that I did recently that I’m pleased with - so I printed a bunch of those. Little things like that. Somewhat off topic - this thread about being ‘zen’ reminded me of this ad I used to see every day in the subway in NY, promoting an addition to one of the subway lines: I always thought it was ironic that the “Zen Master” was feeling so anxious about the new subway line opening. Maybe he needed to build a model to take his mind off it? ?
-
1964 Pontiac Bonneville Convertible.
OldNYJim replied to StevenGuthmiller's topic in WIP: Model Cars
That’s awesome - I love the detail of the little gold and red label on the cigar! Outstanding work as always -
Paint flames the clean ‘n’ easy way
OldNYJim replied to OldNYJim's topic in Tips, Tricks, and Tutorials
Thanks everyone! Hey Bob! Just the little Portrait - their cheapest model. It’ll cut an 8.5” wide piece of material, which is plenty big enough for most anything we do in scale, and it’s been a real workhorse! -
Of course, if you block the ads the site doesn’t get paid anything when you visit it - money which helps keep it running and presumably funds stuff like the free photohosting that we enjoy here…
-
Paint flames the clean ‘n’ easy way
OldNYJim replied to OldNYJim's topic in Tips, Tricks, and Tutorials
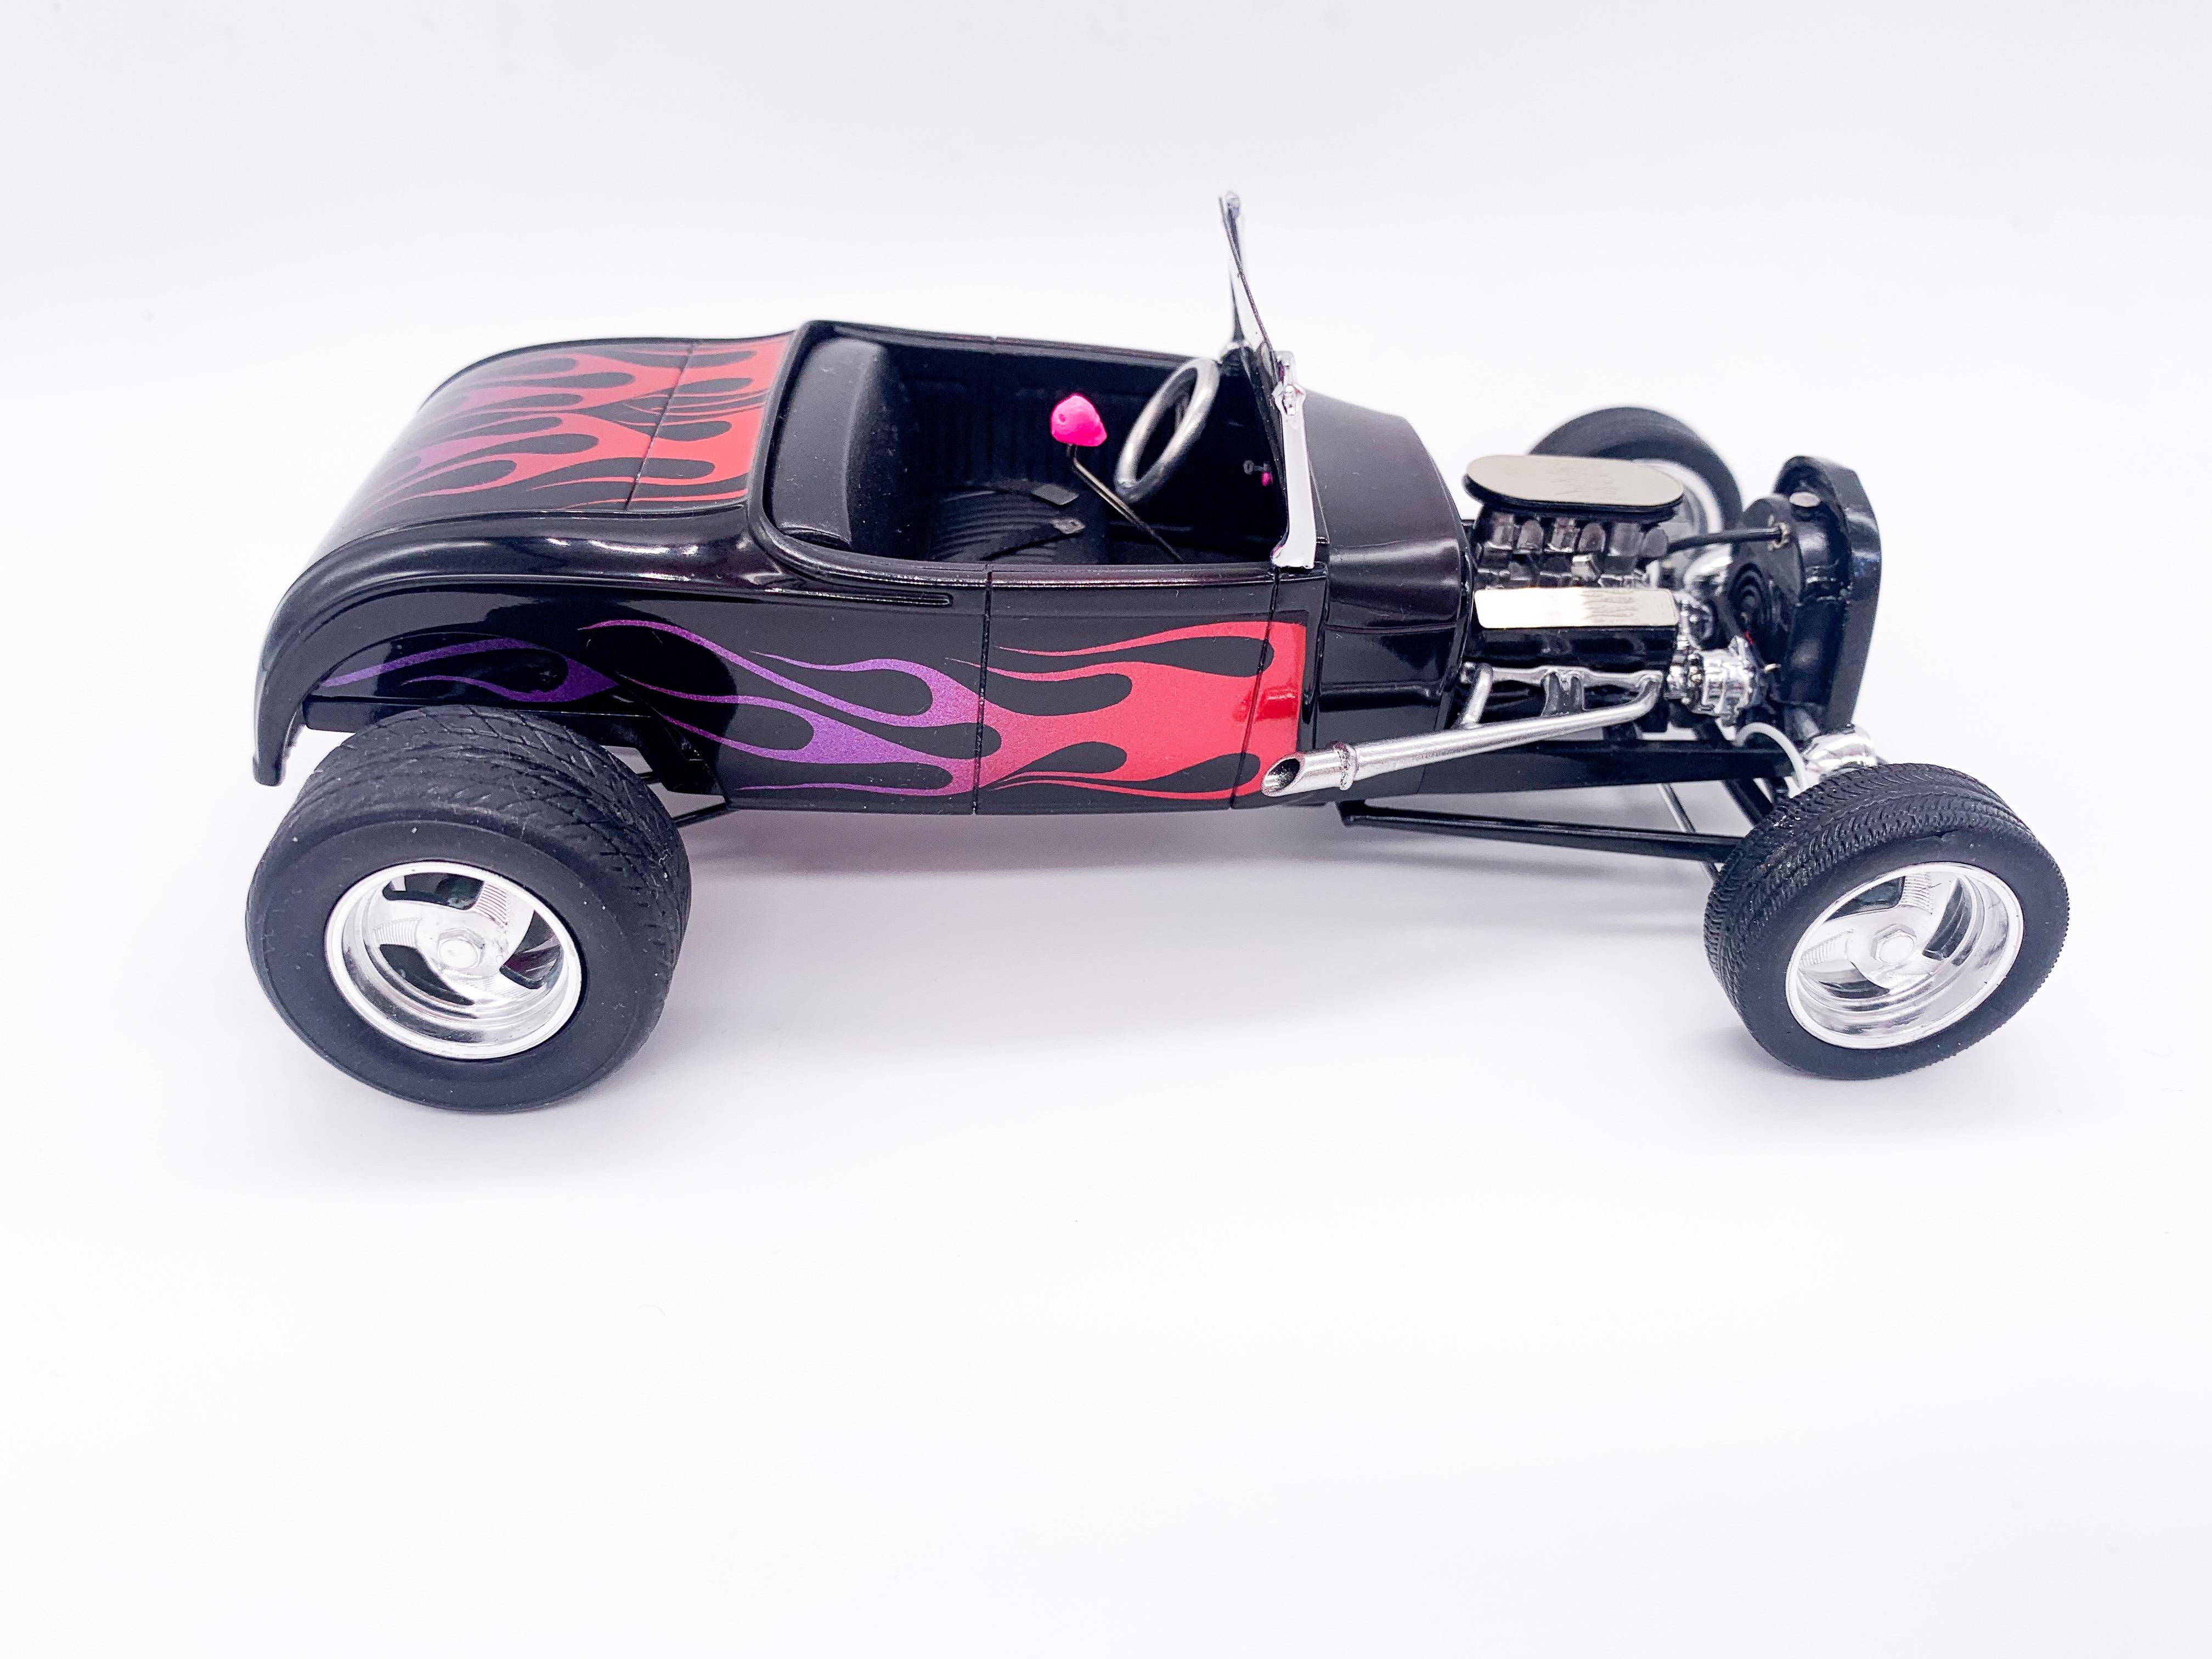
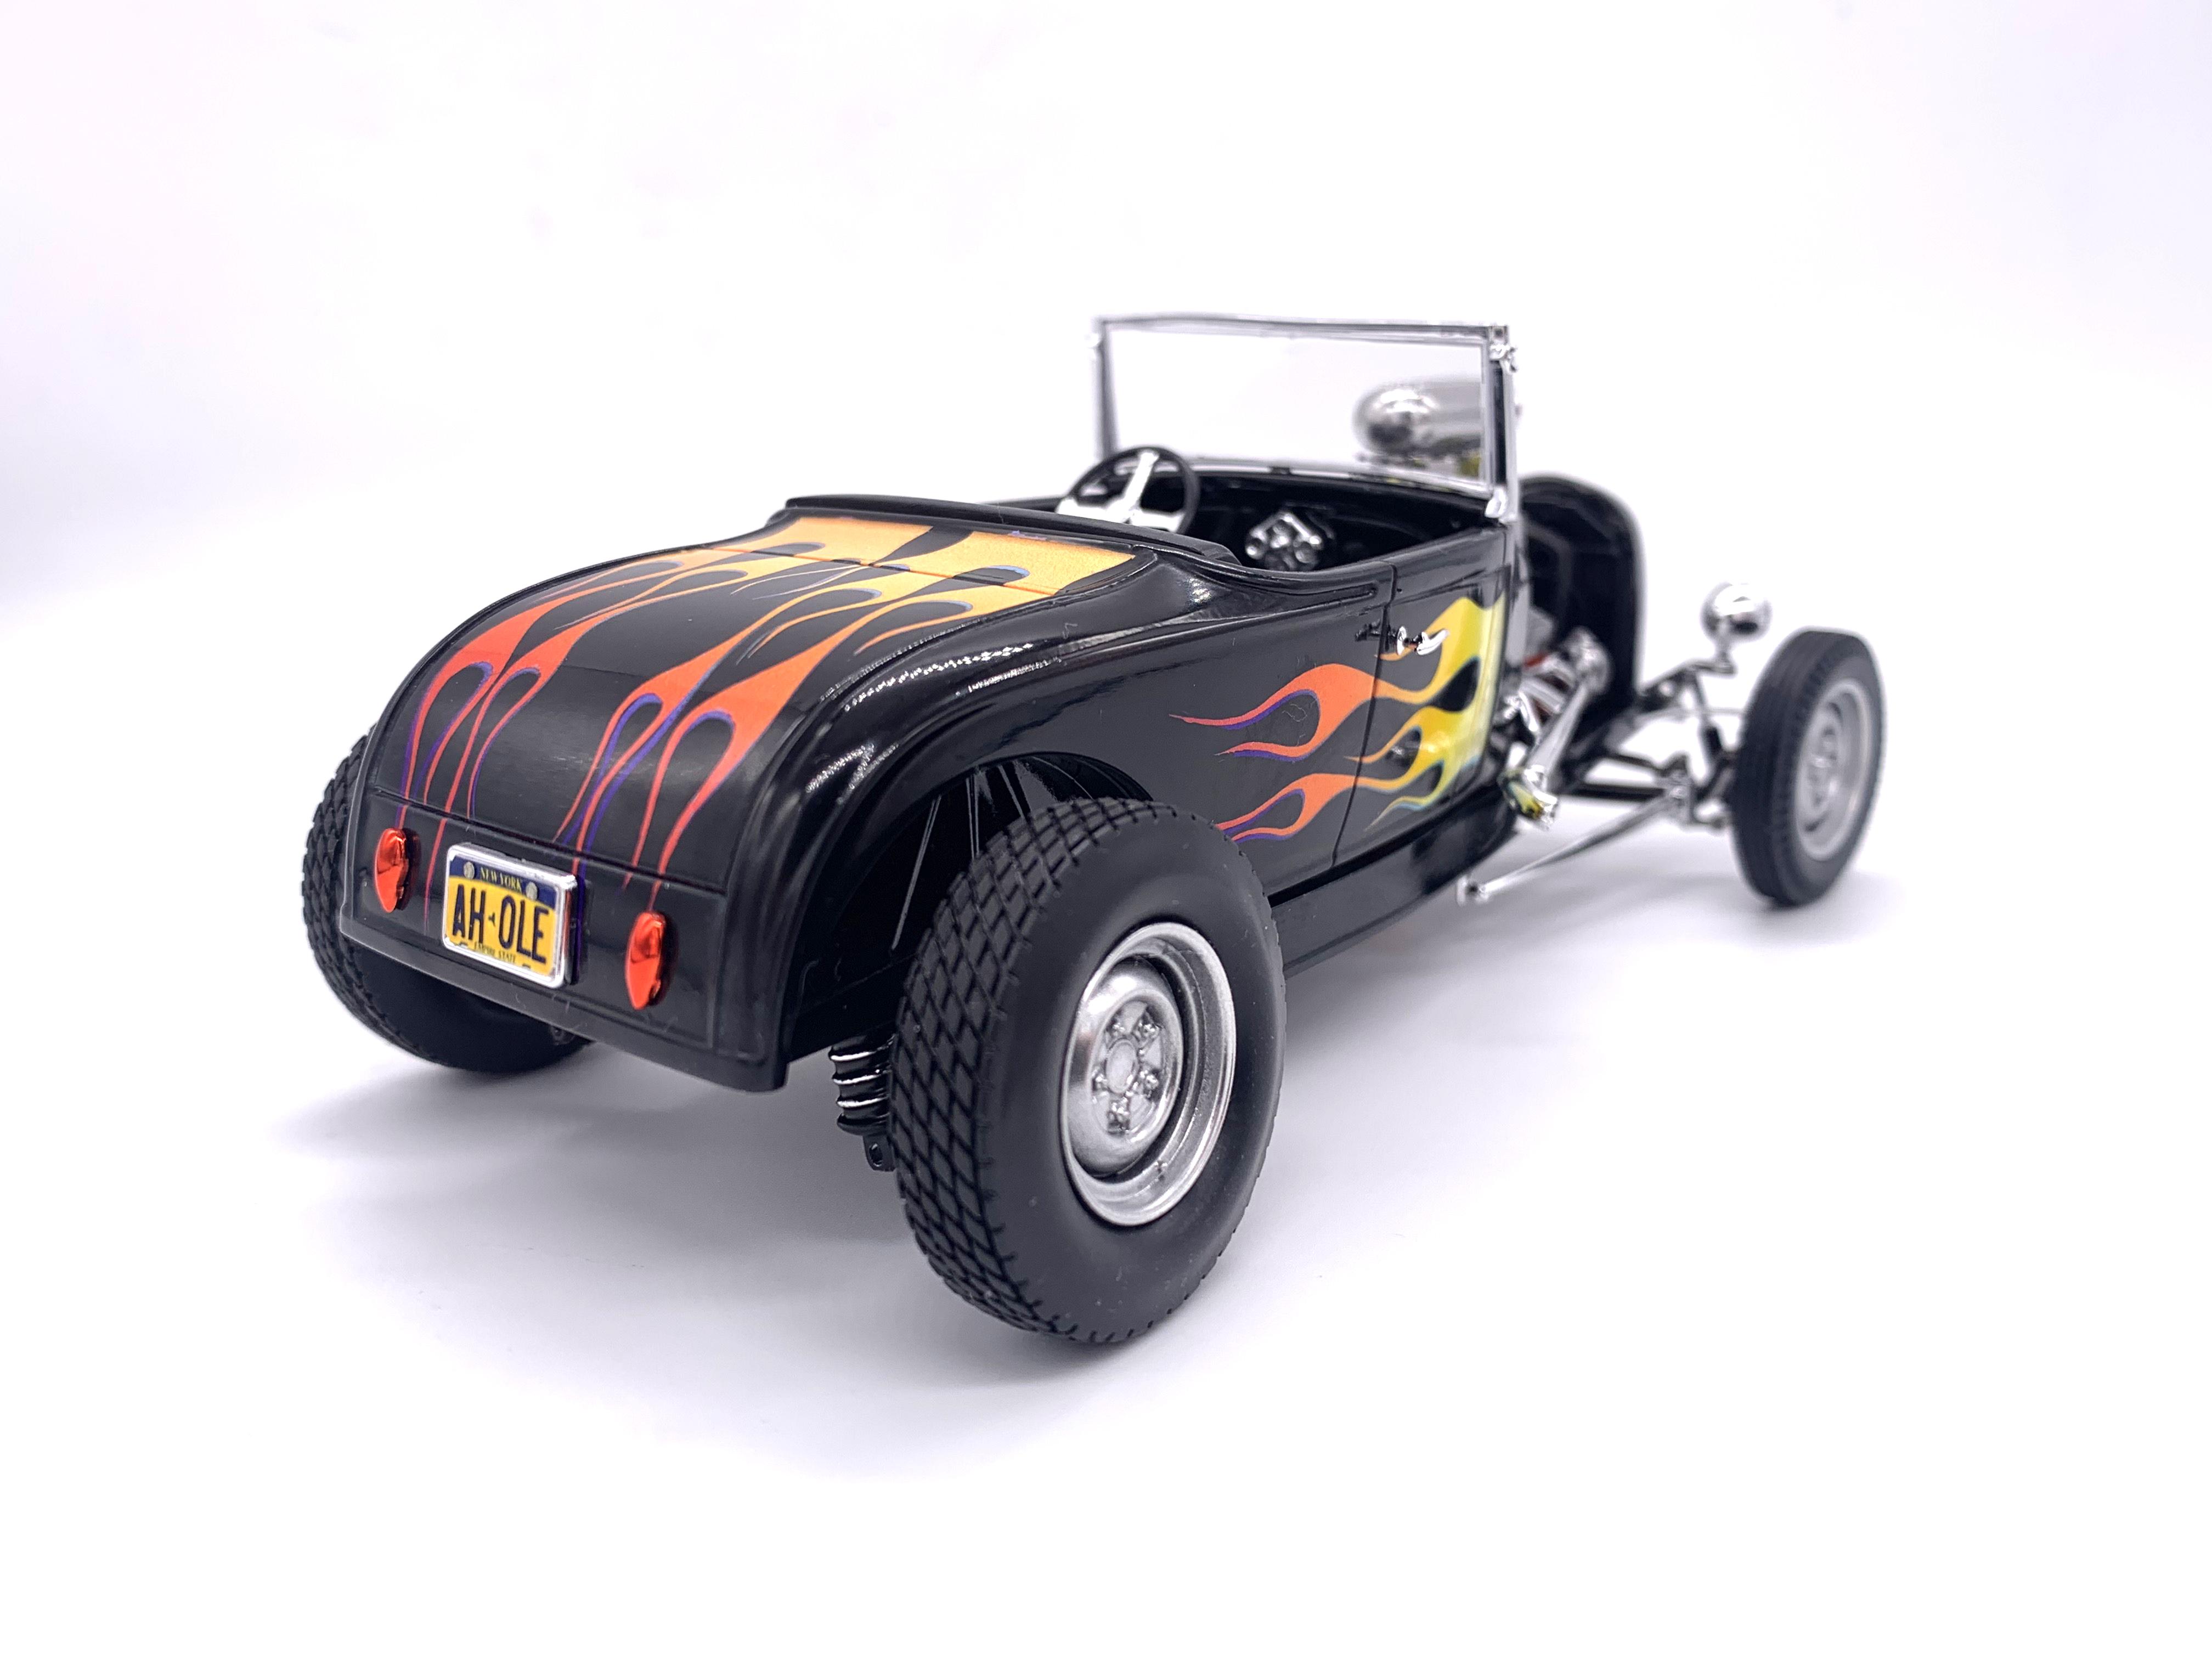
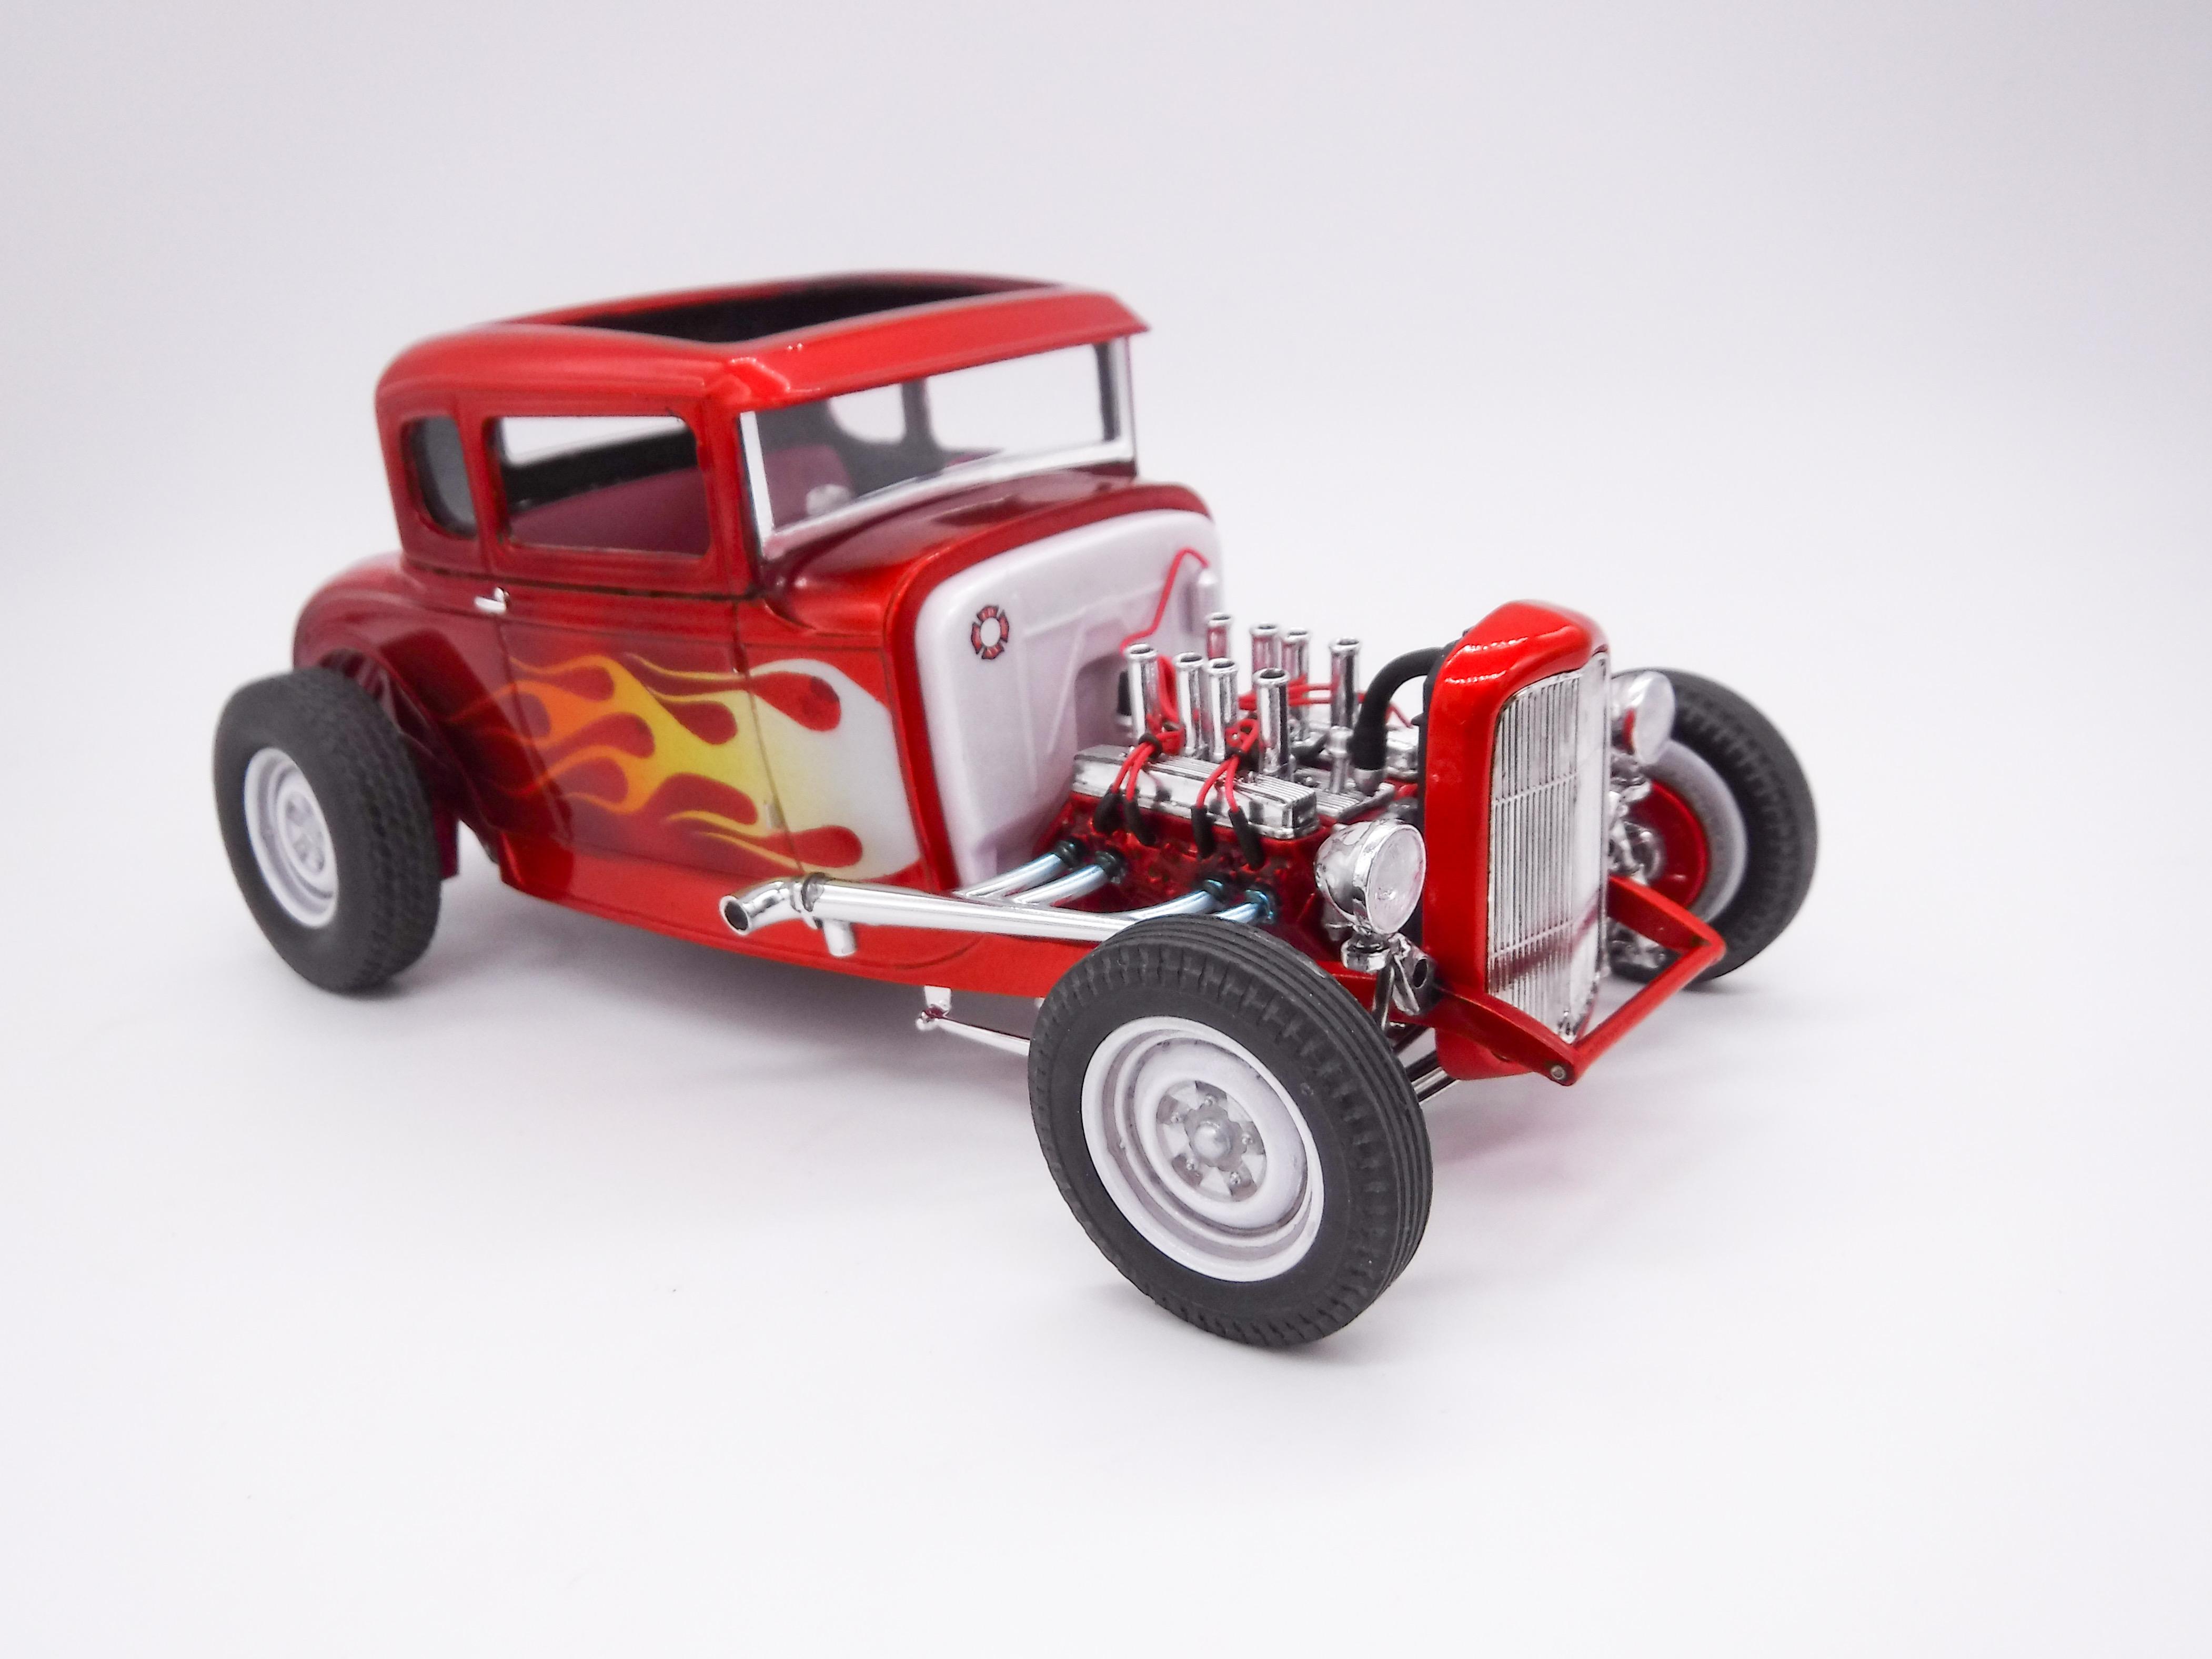
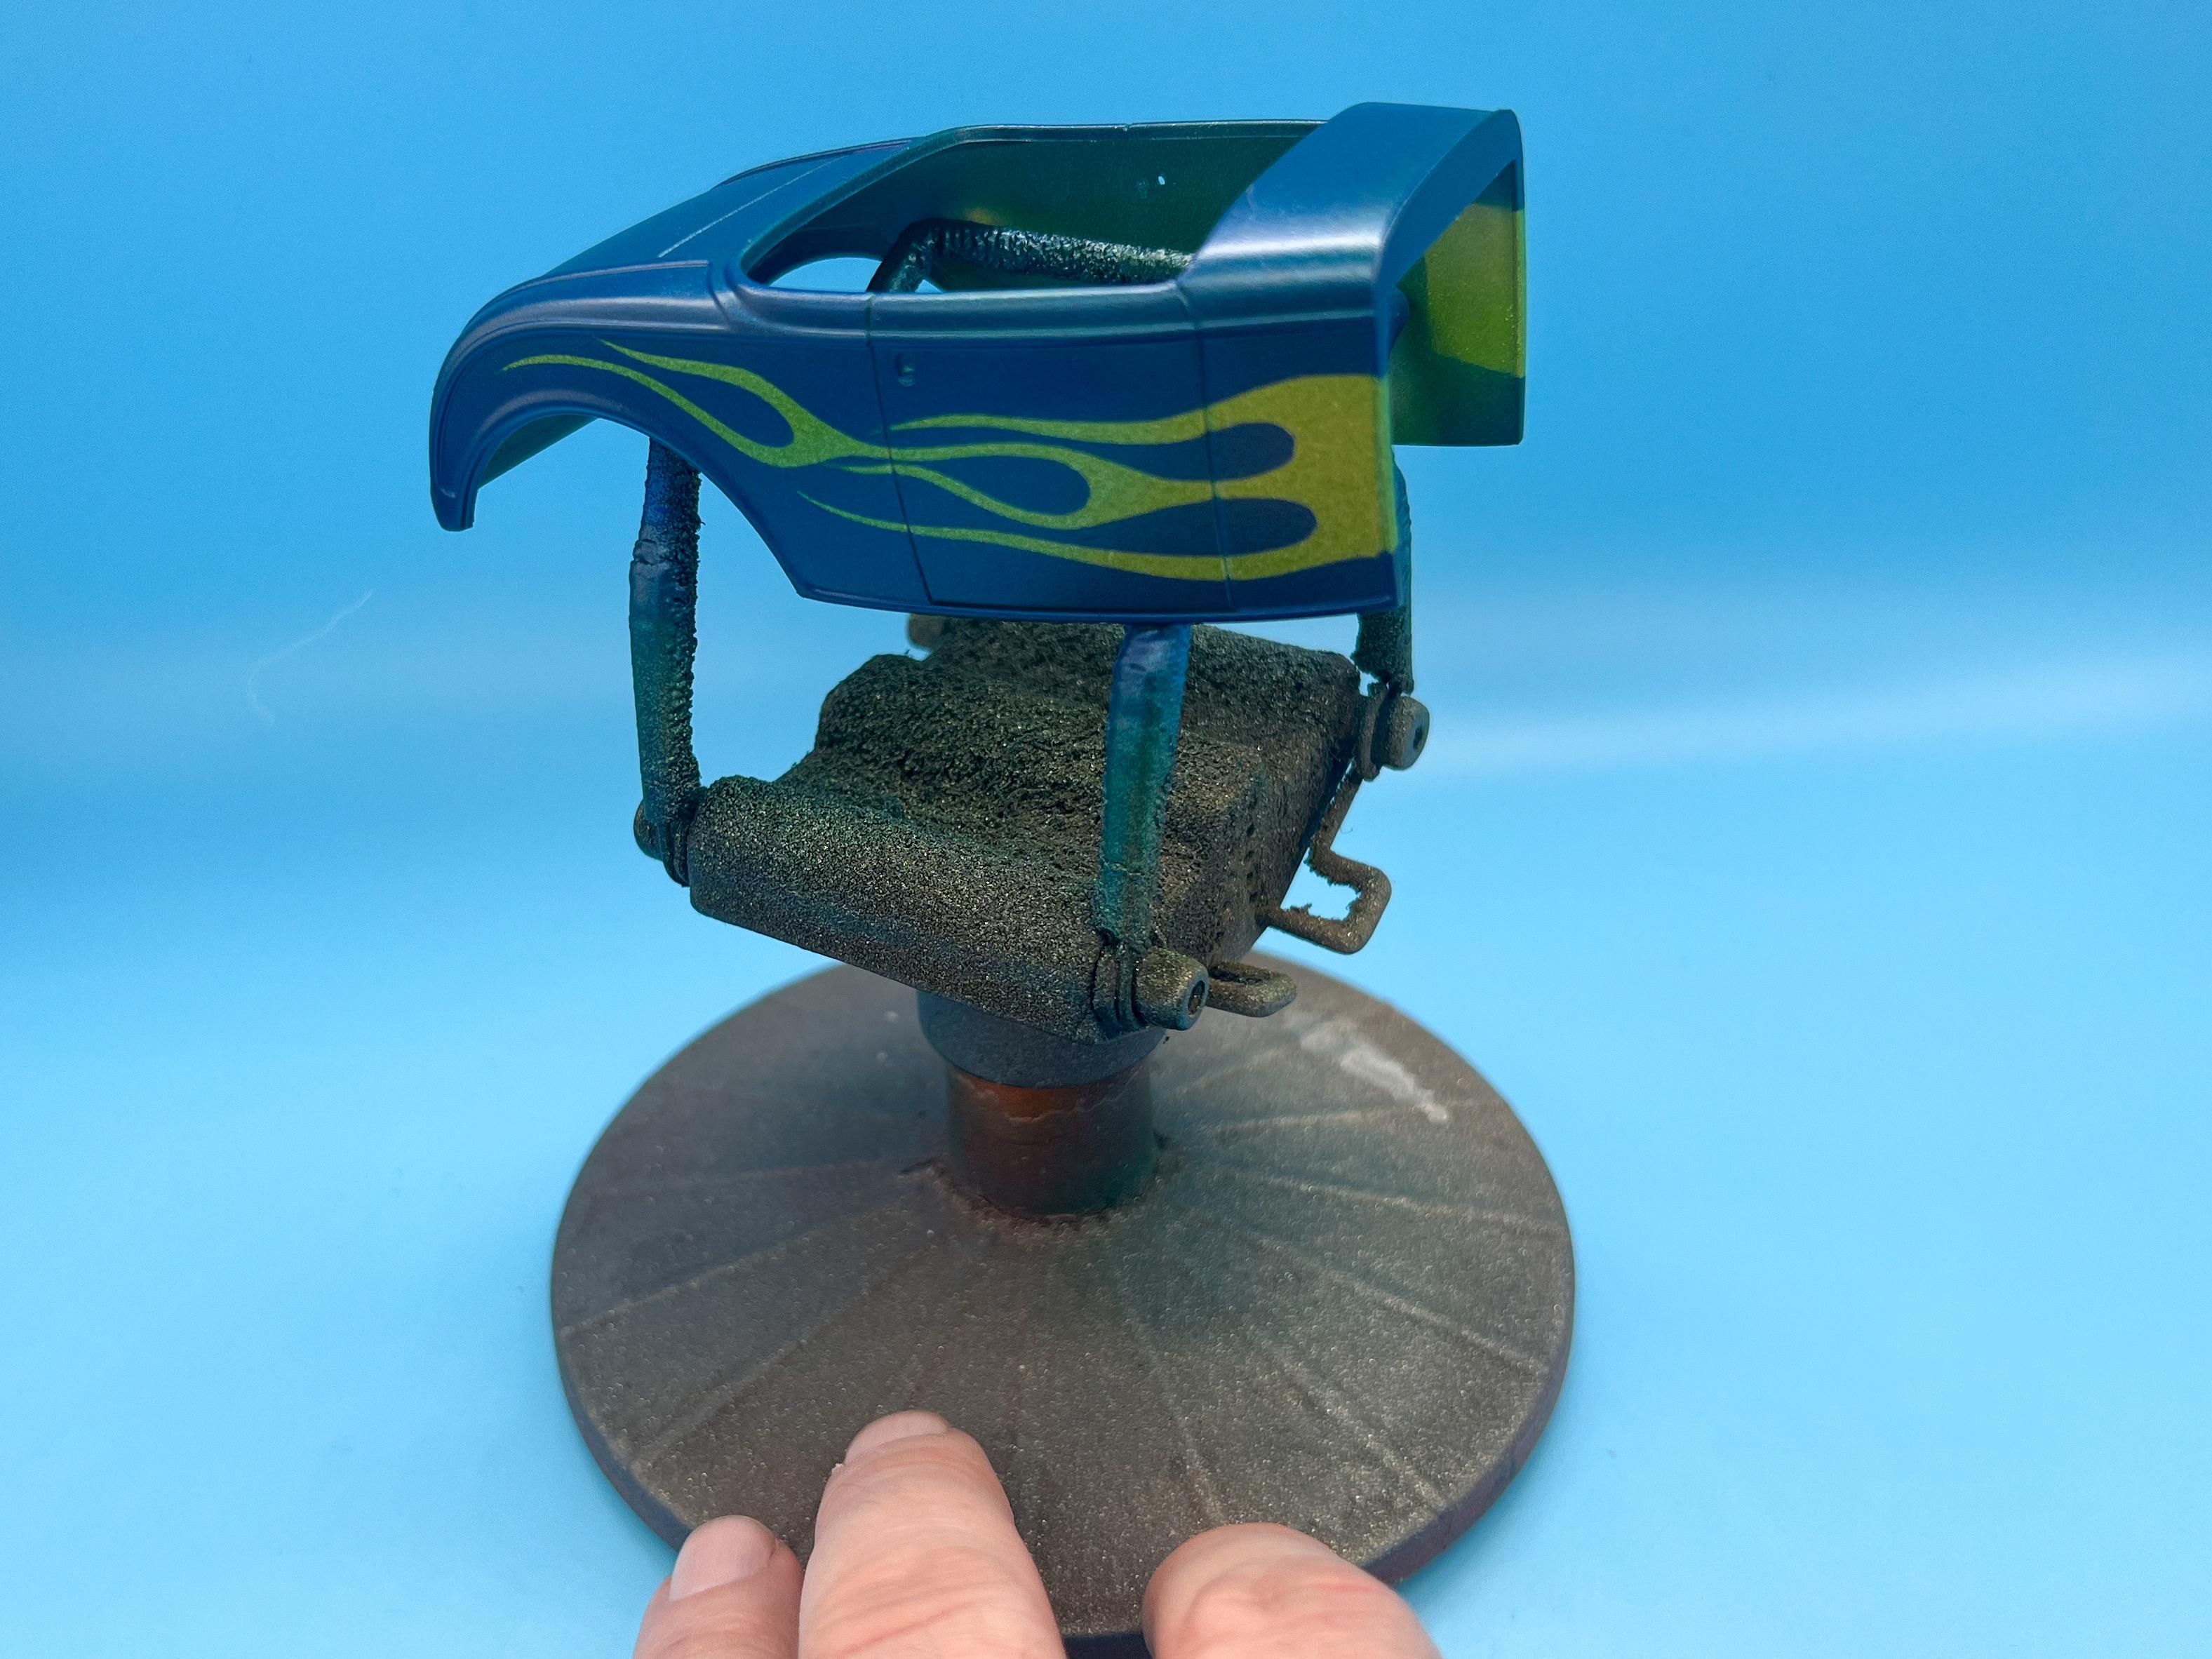
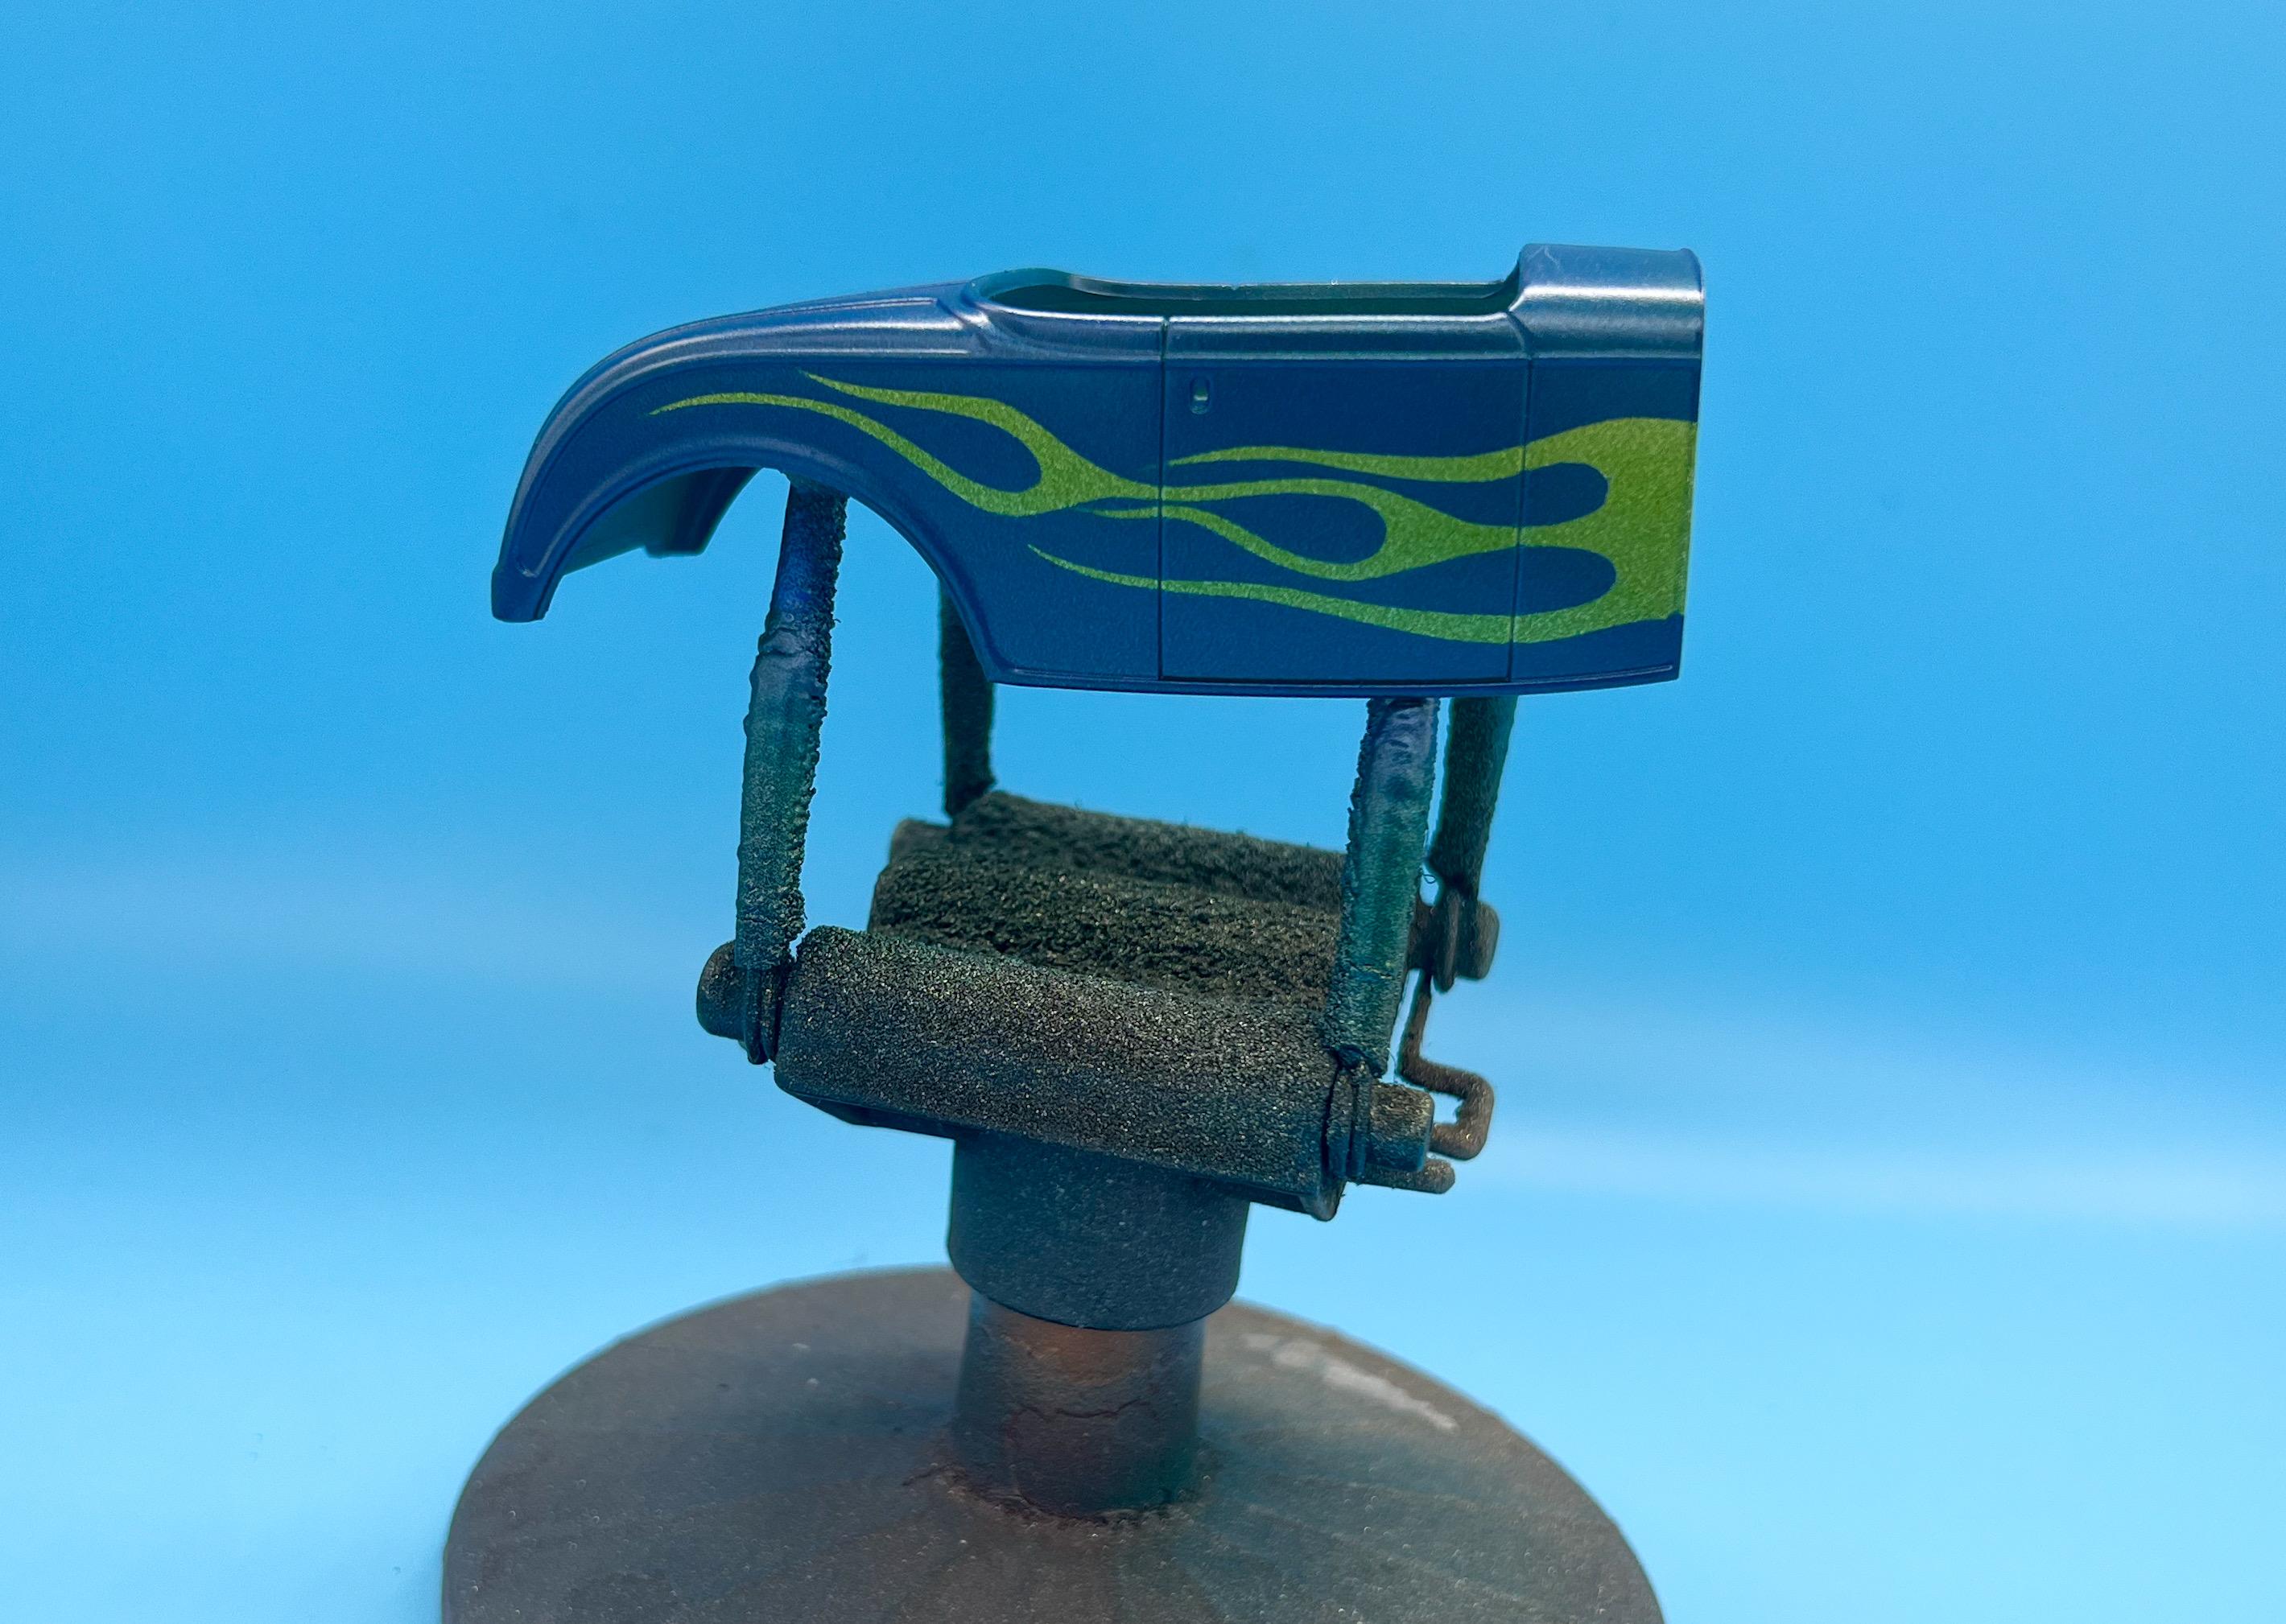
And a few other examples, achieved with the same technique…
-
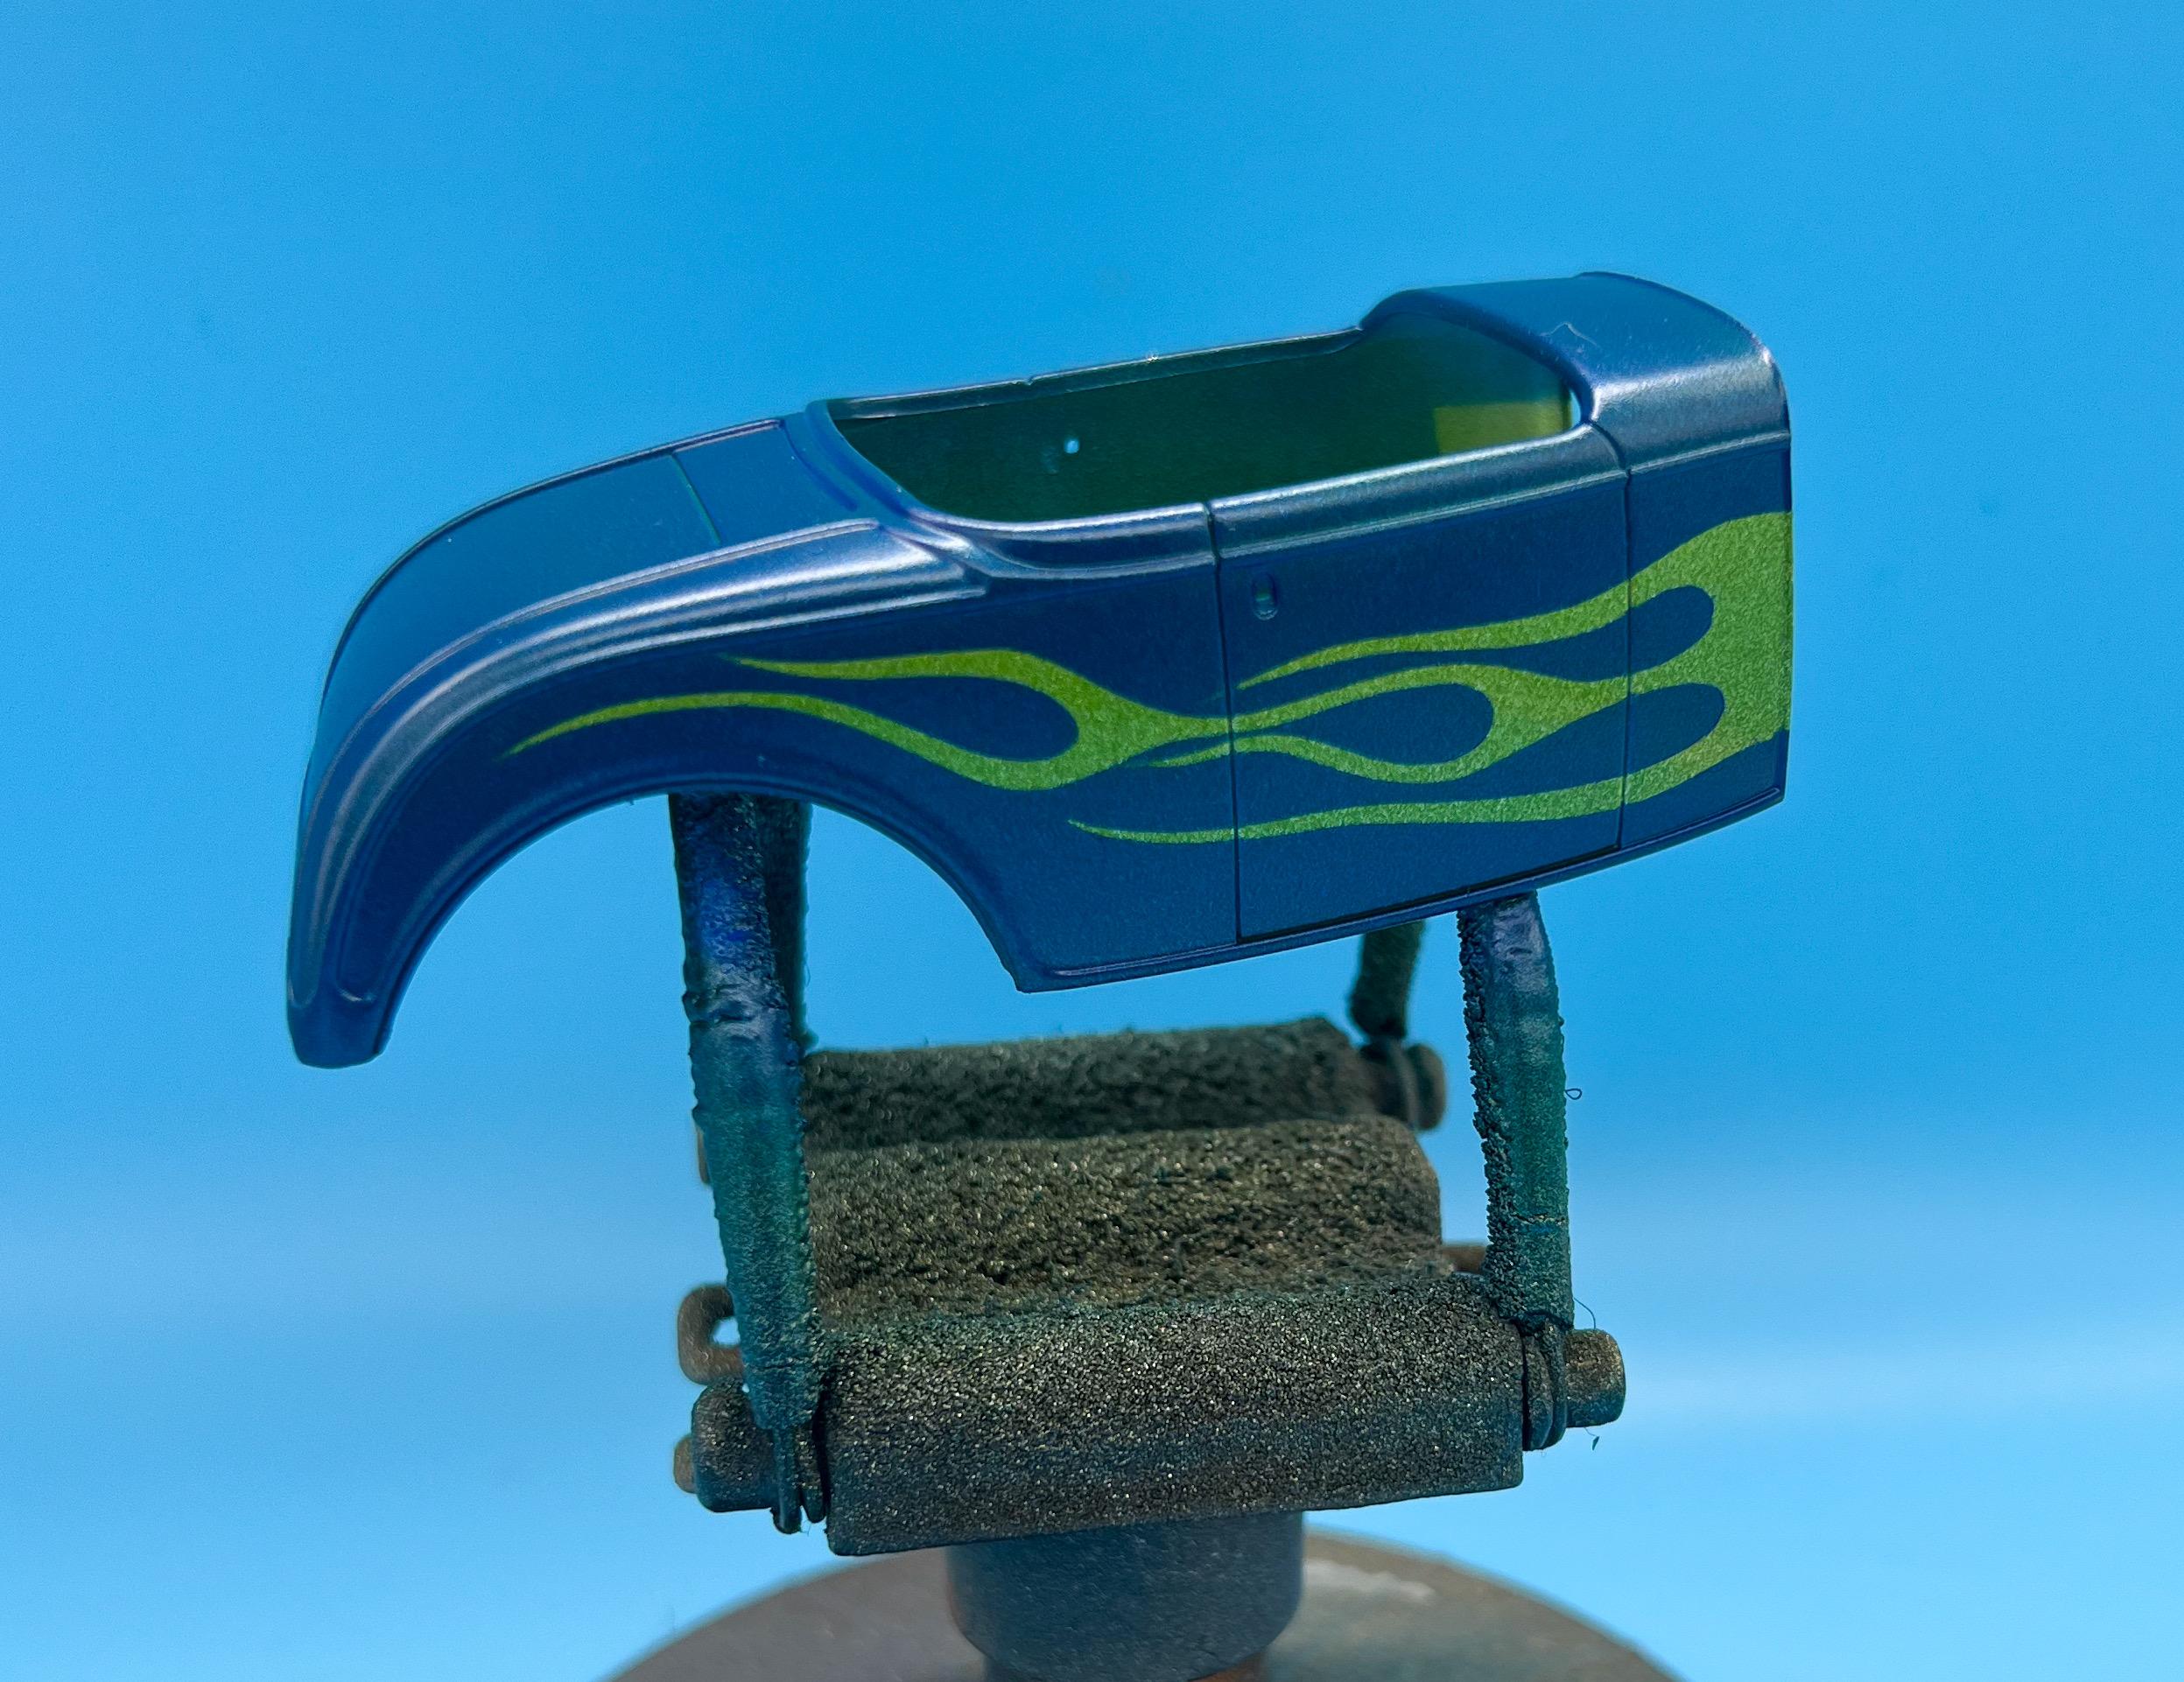
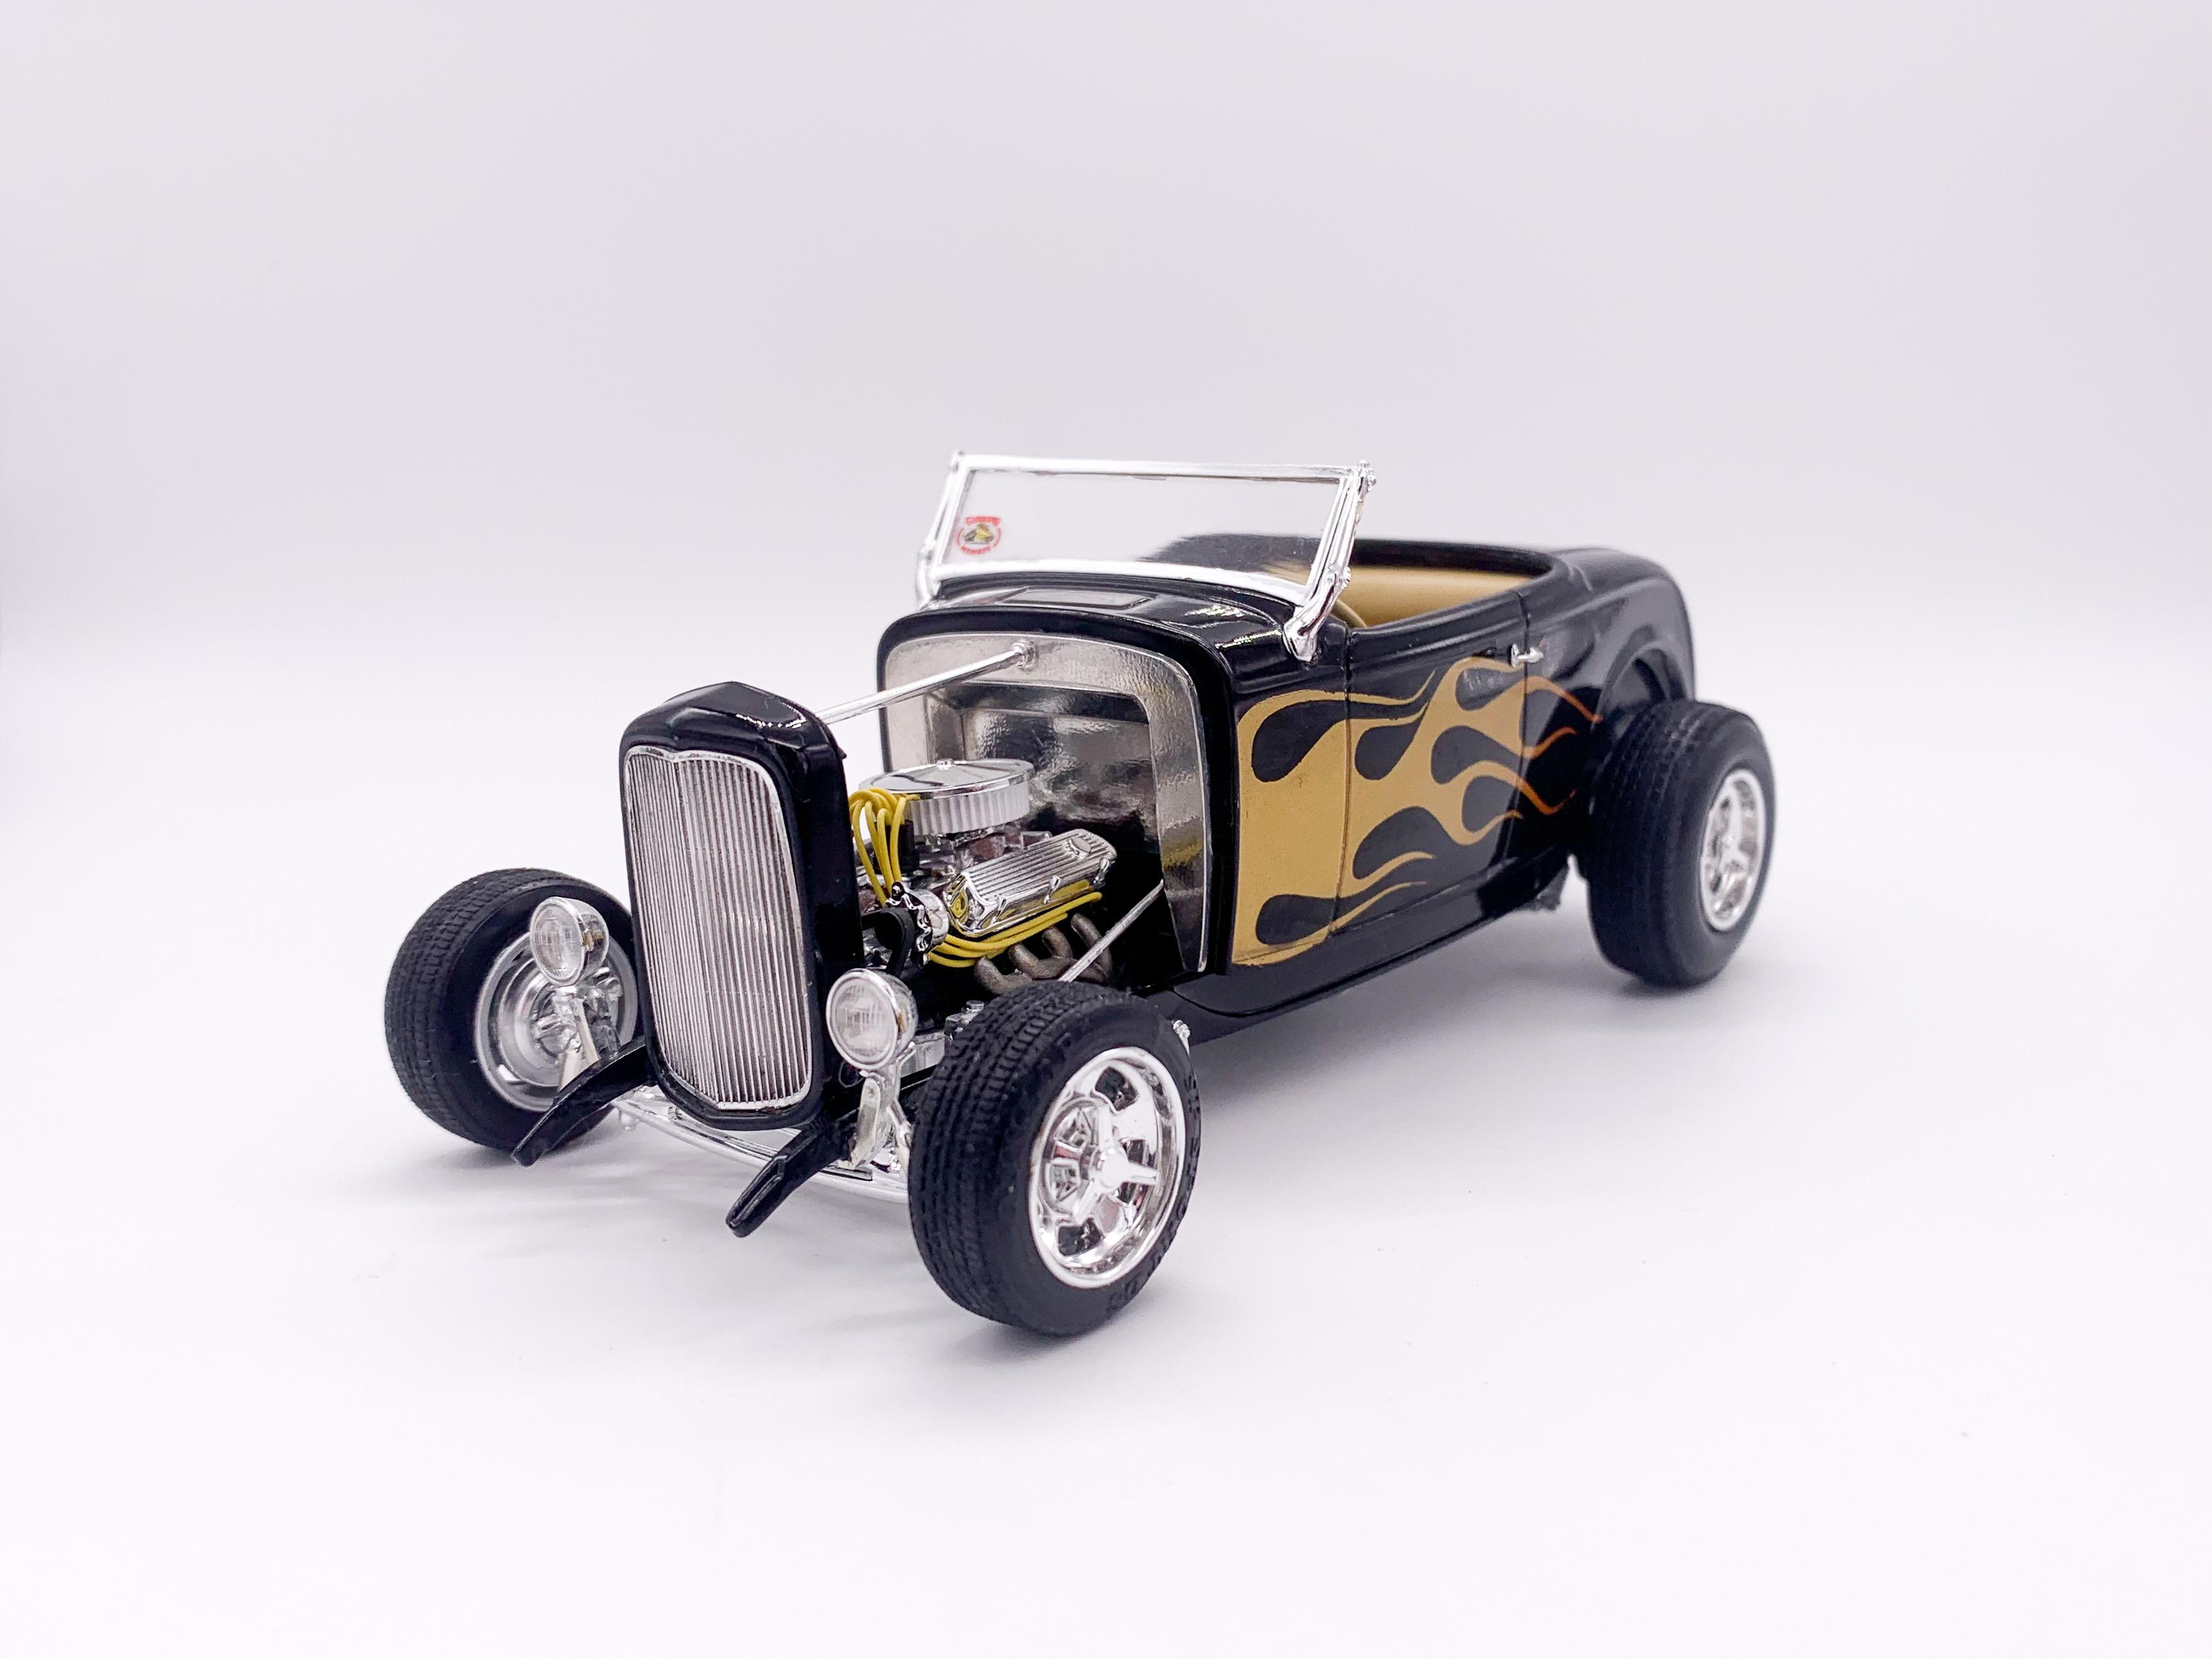
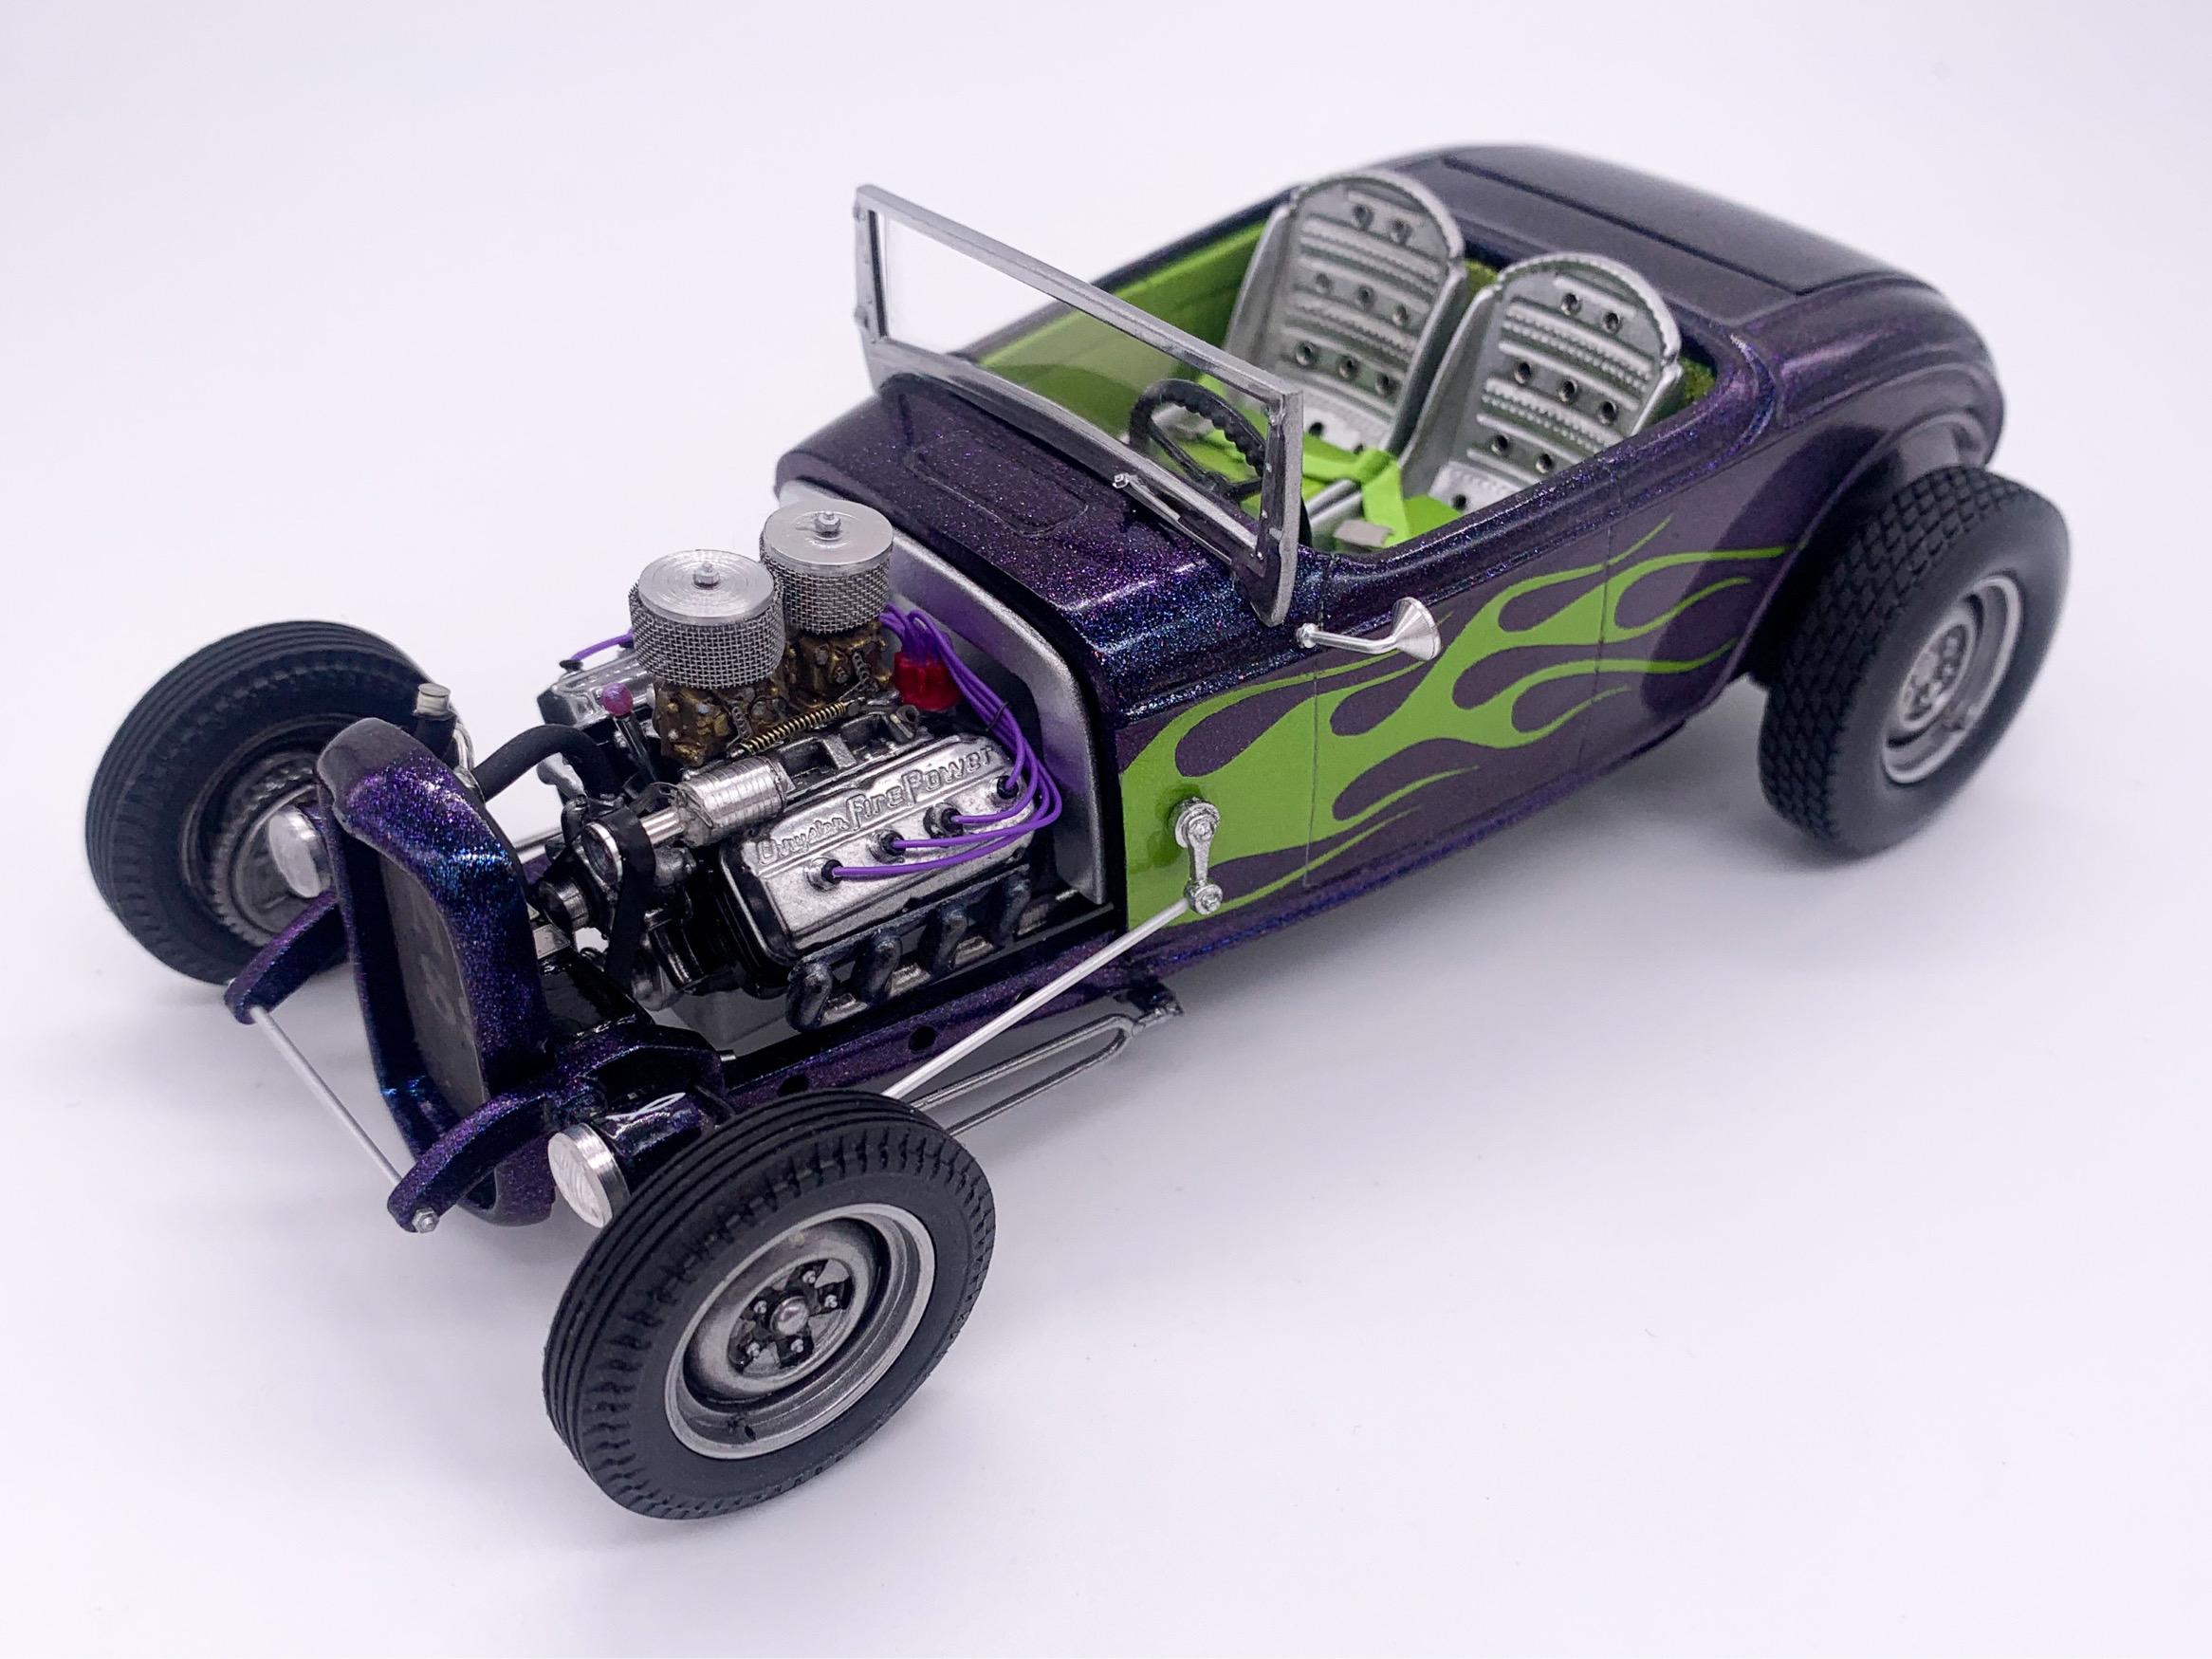
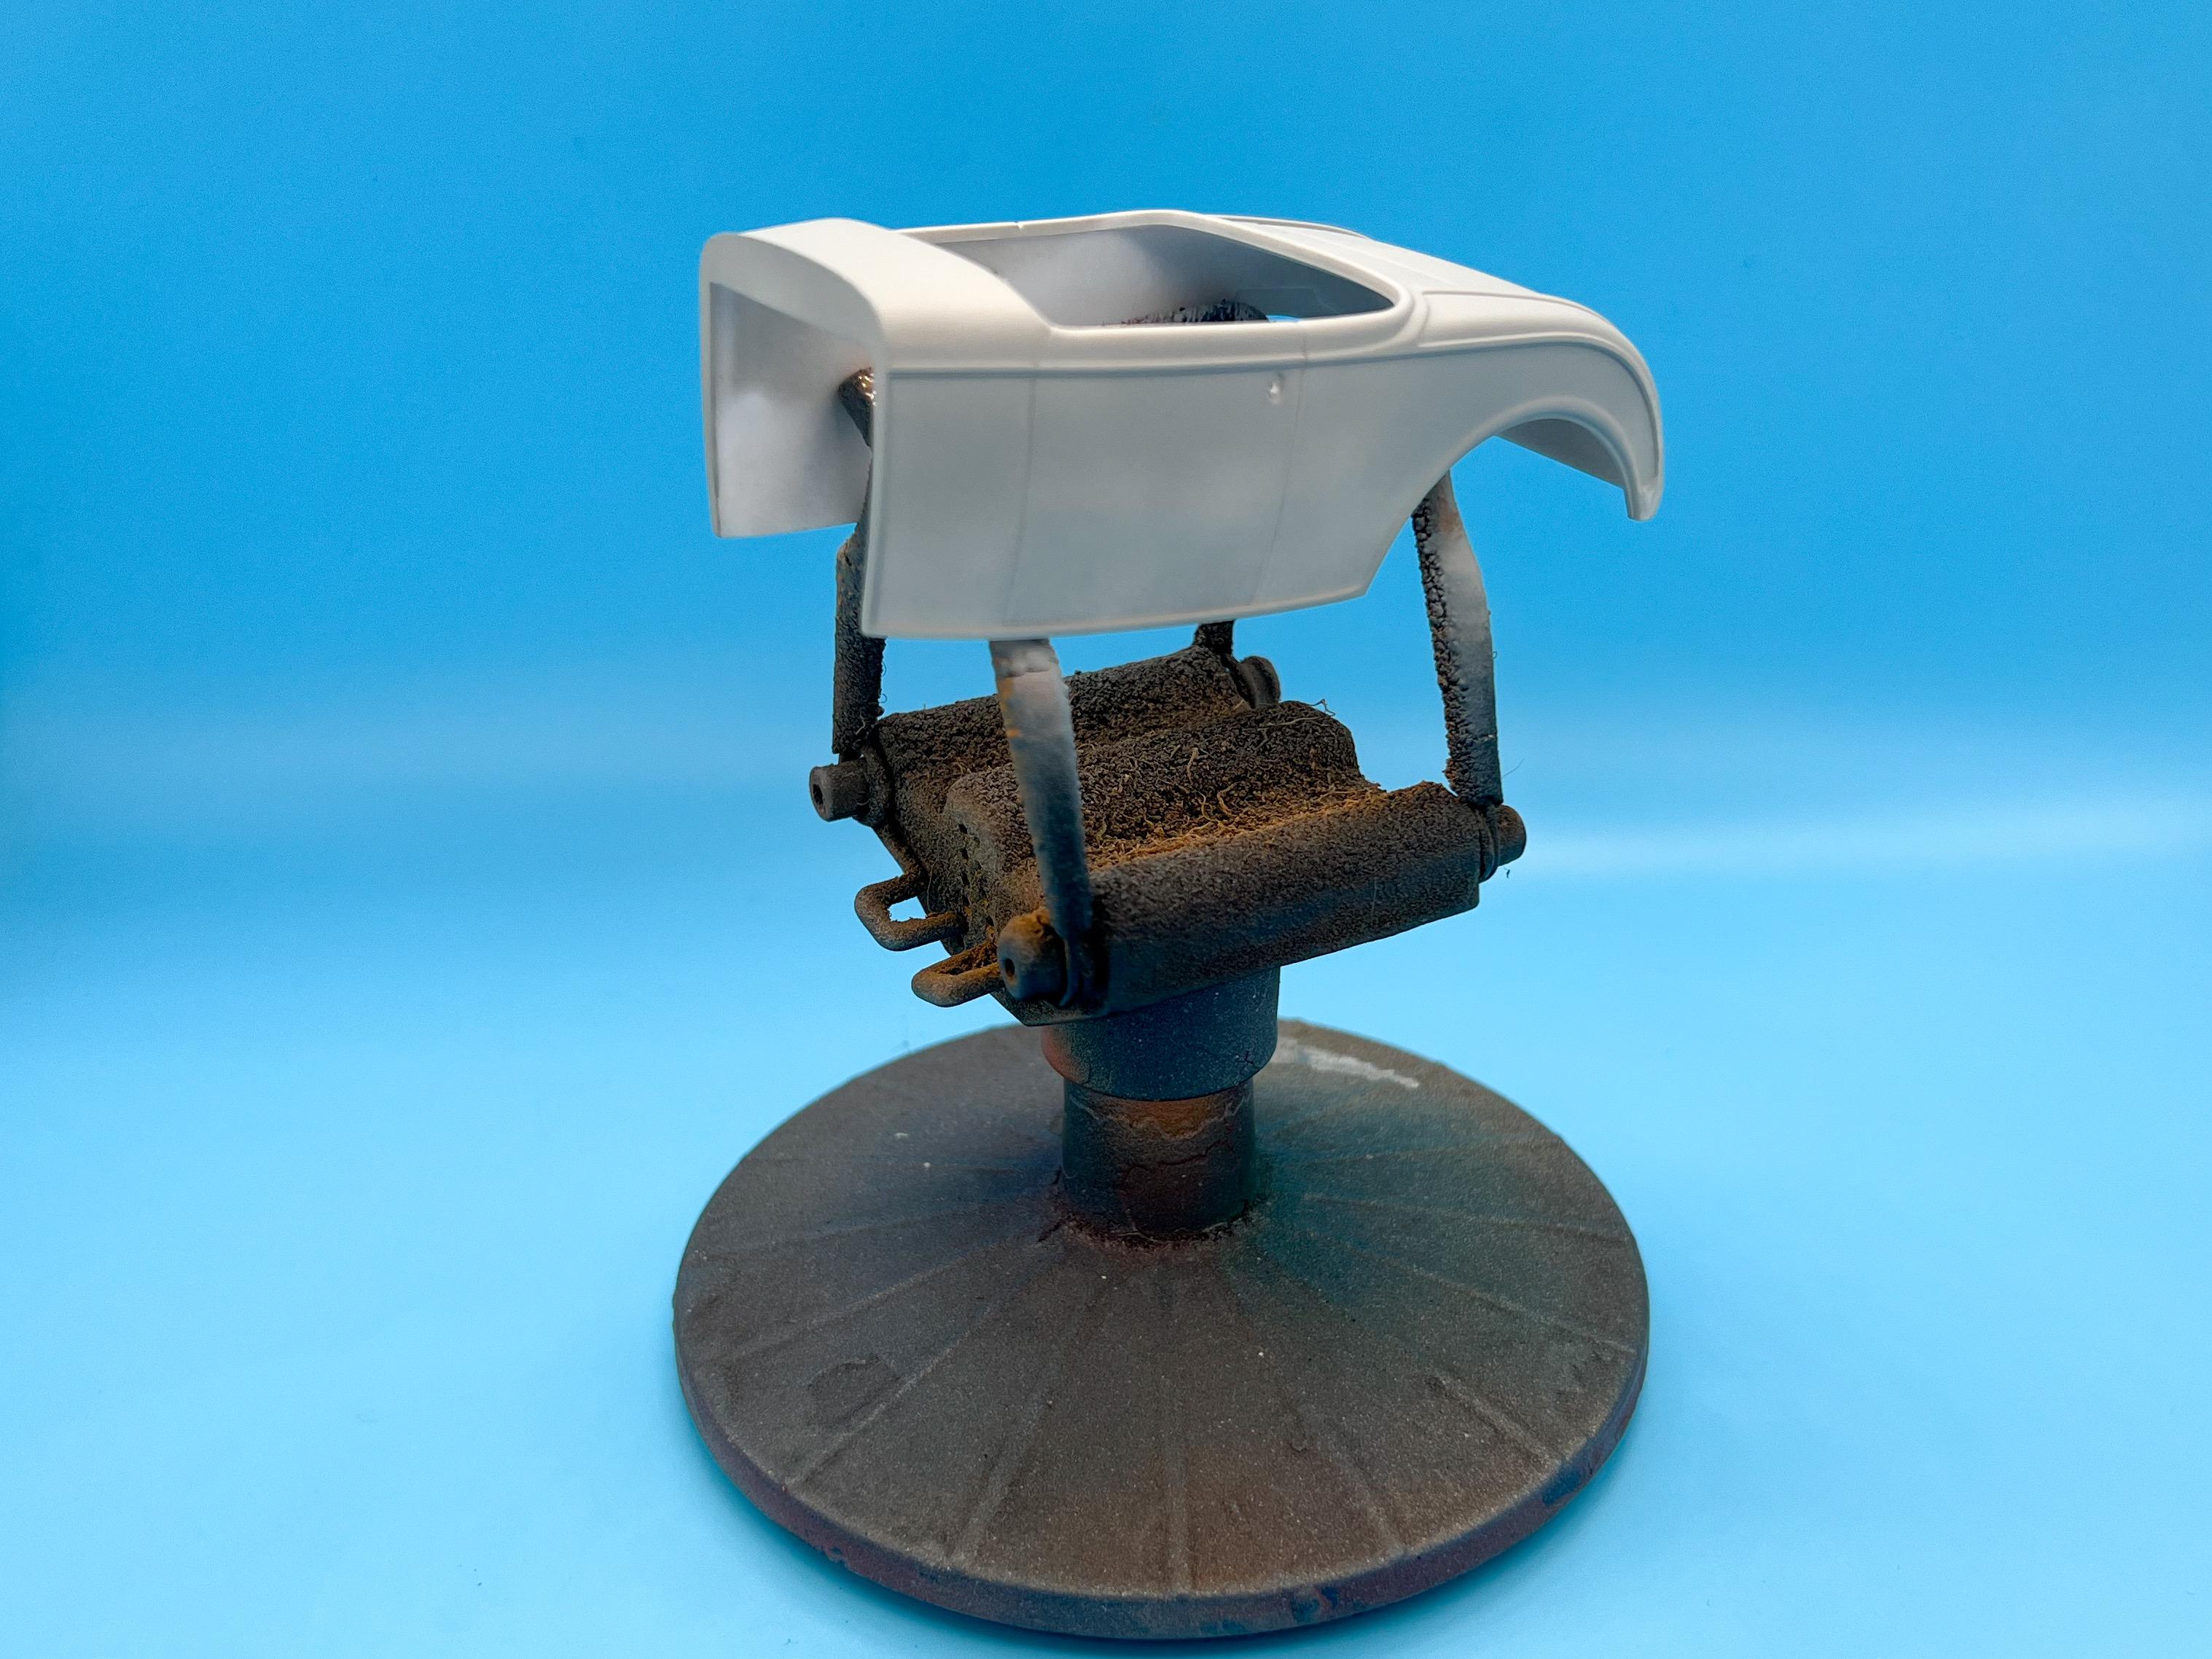
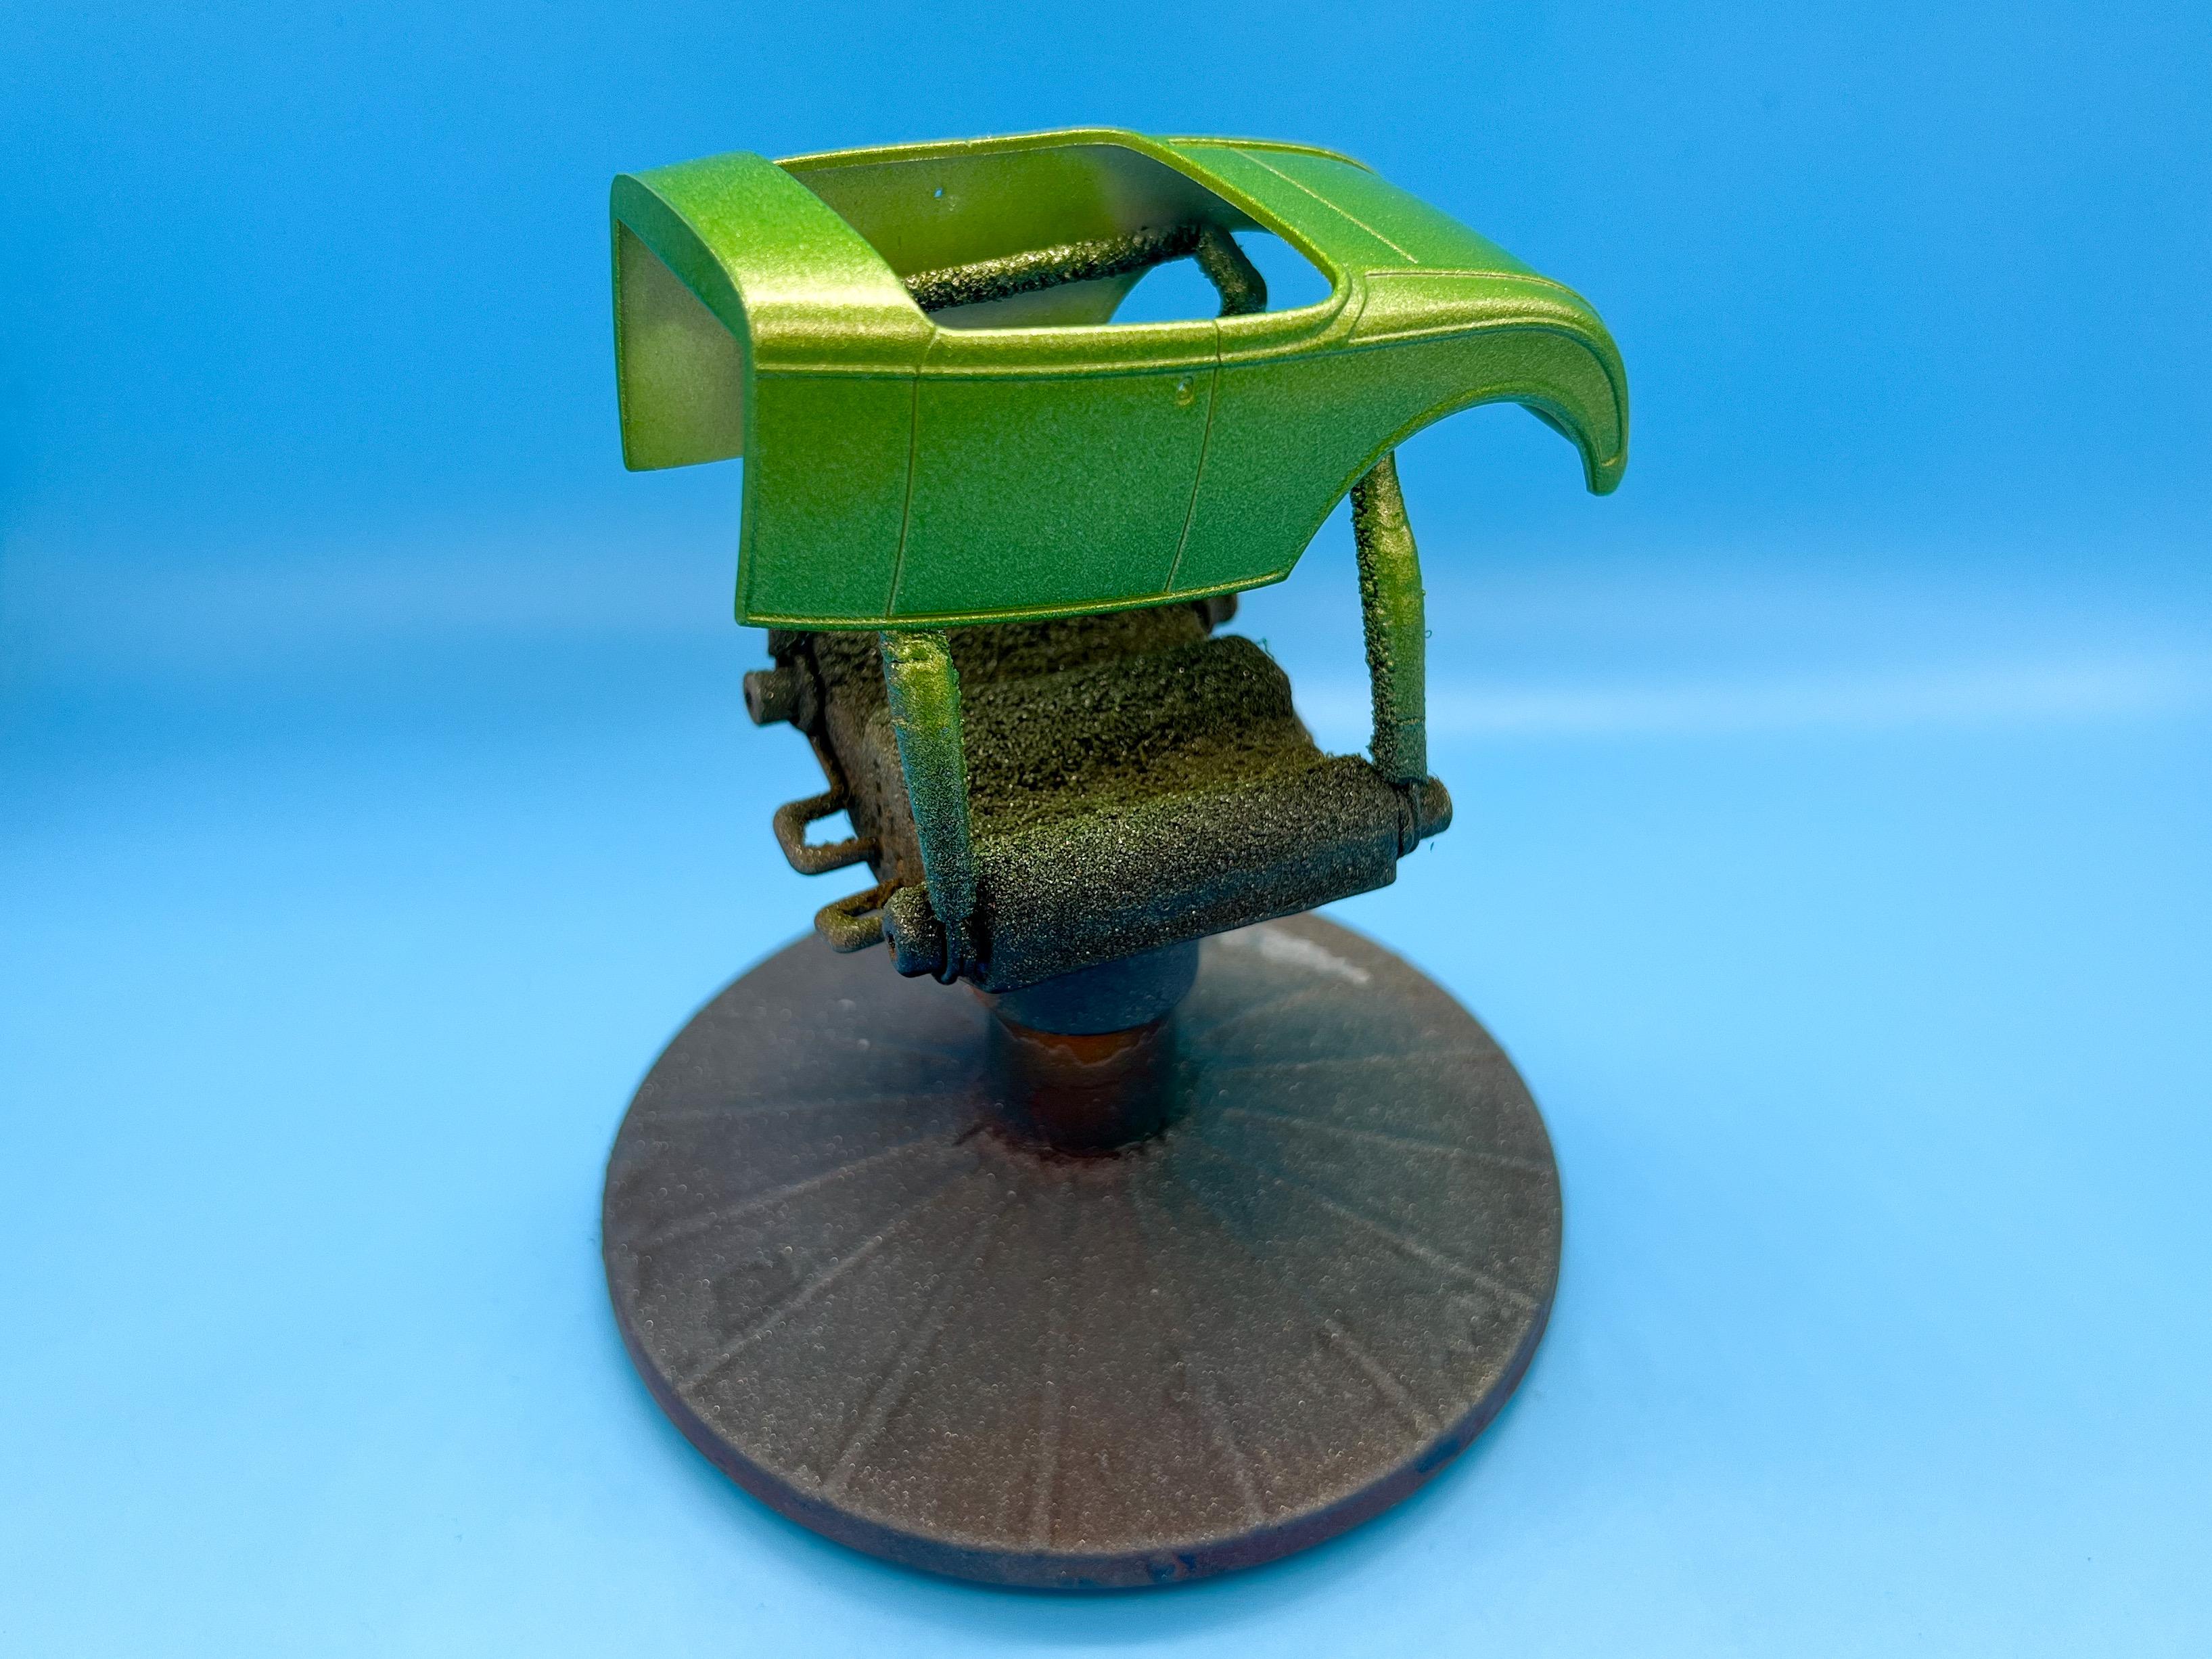
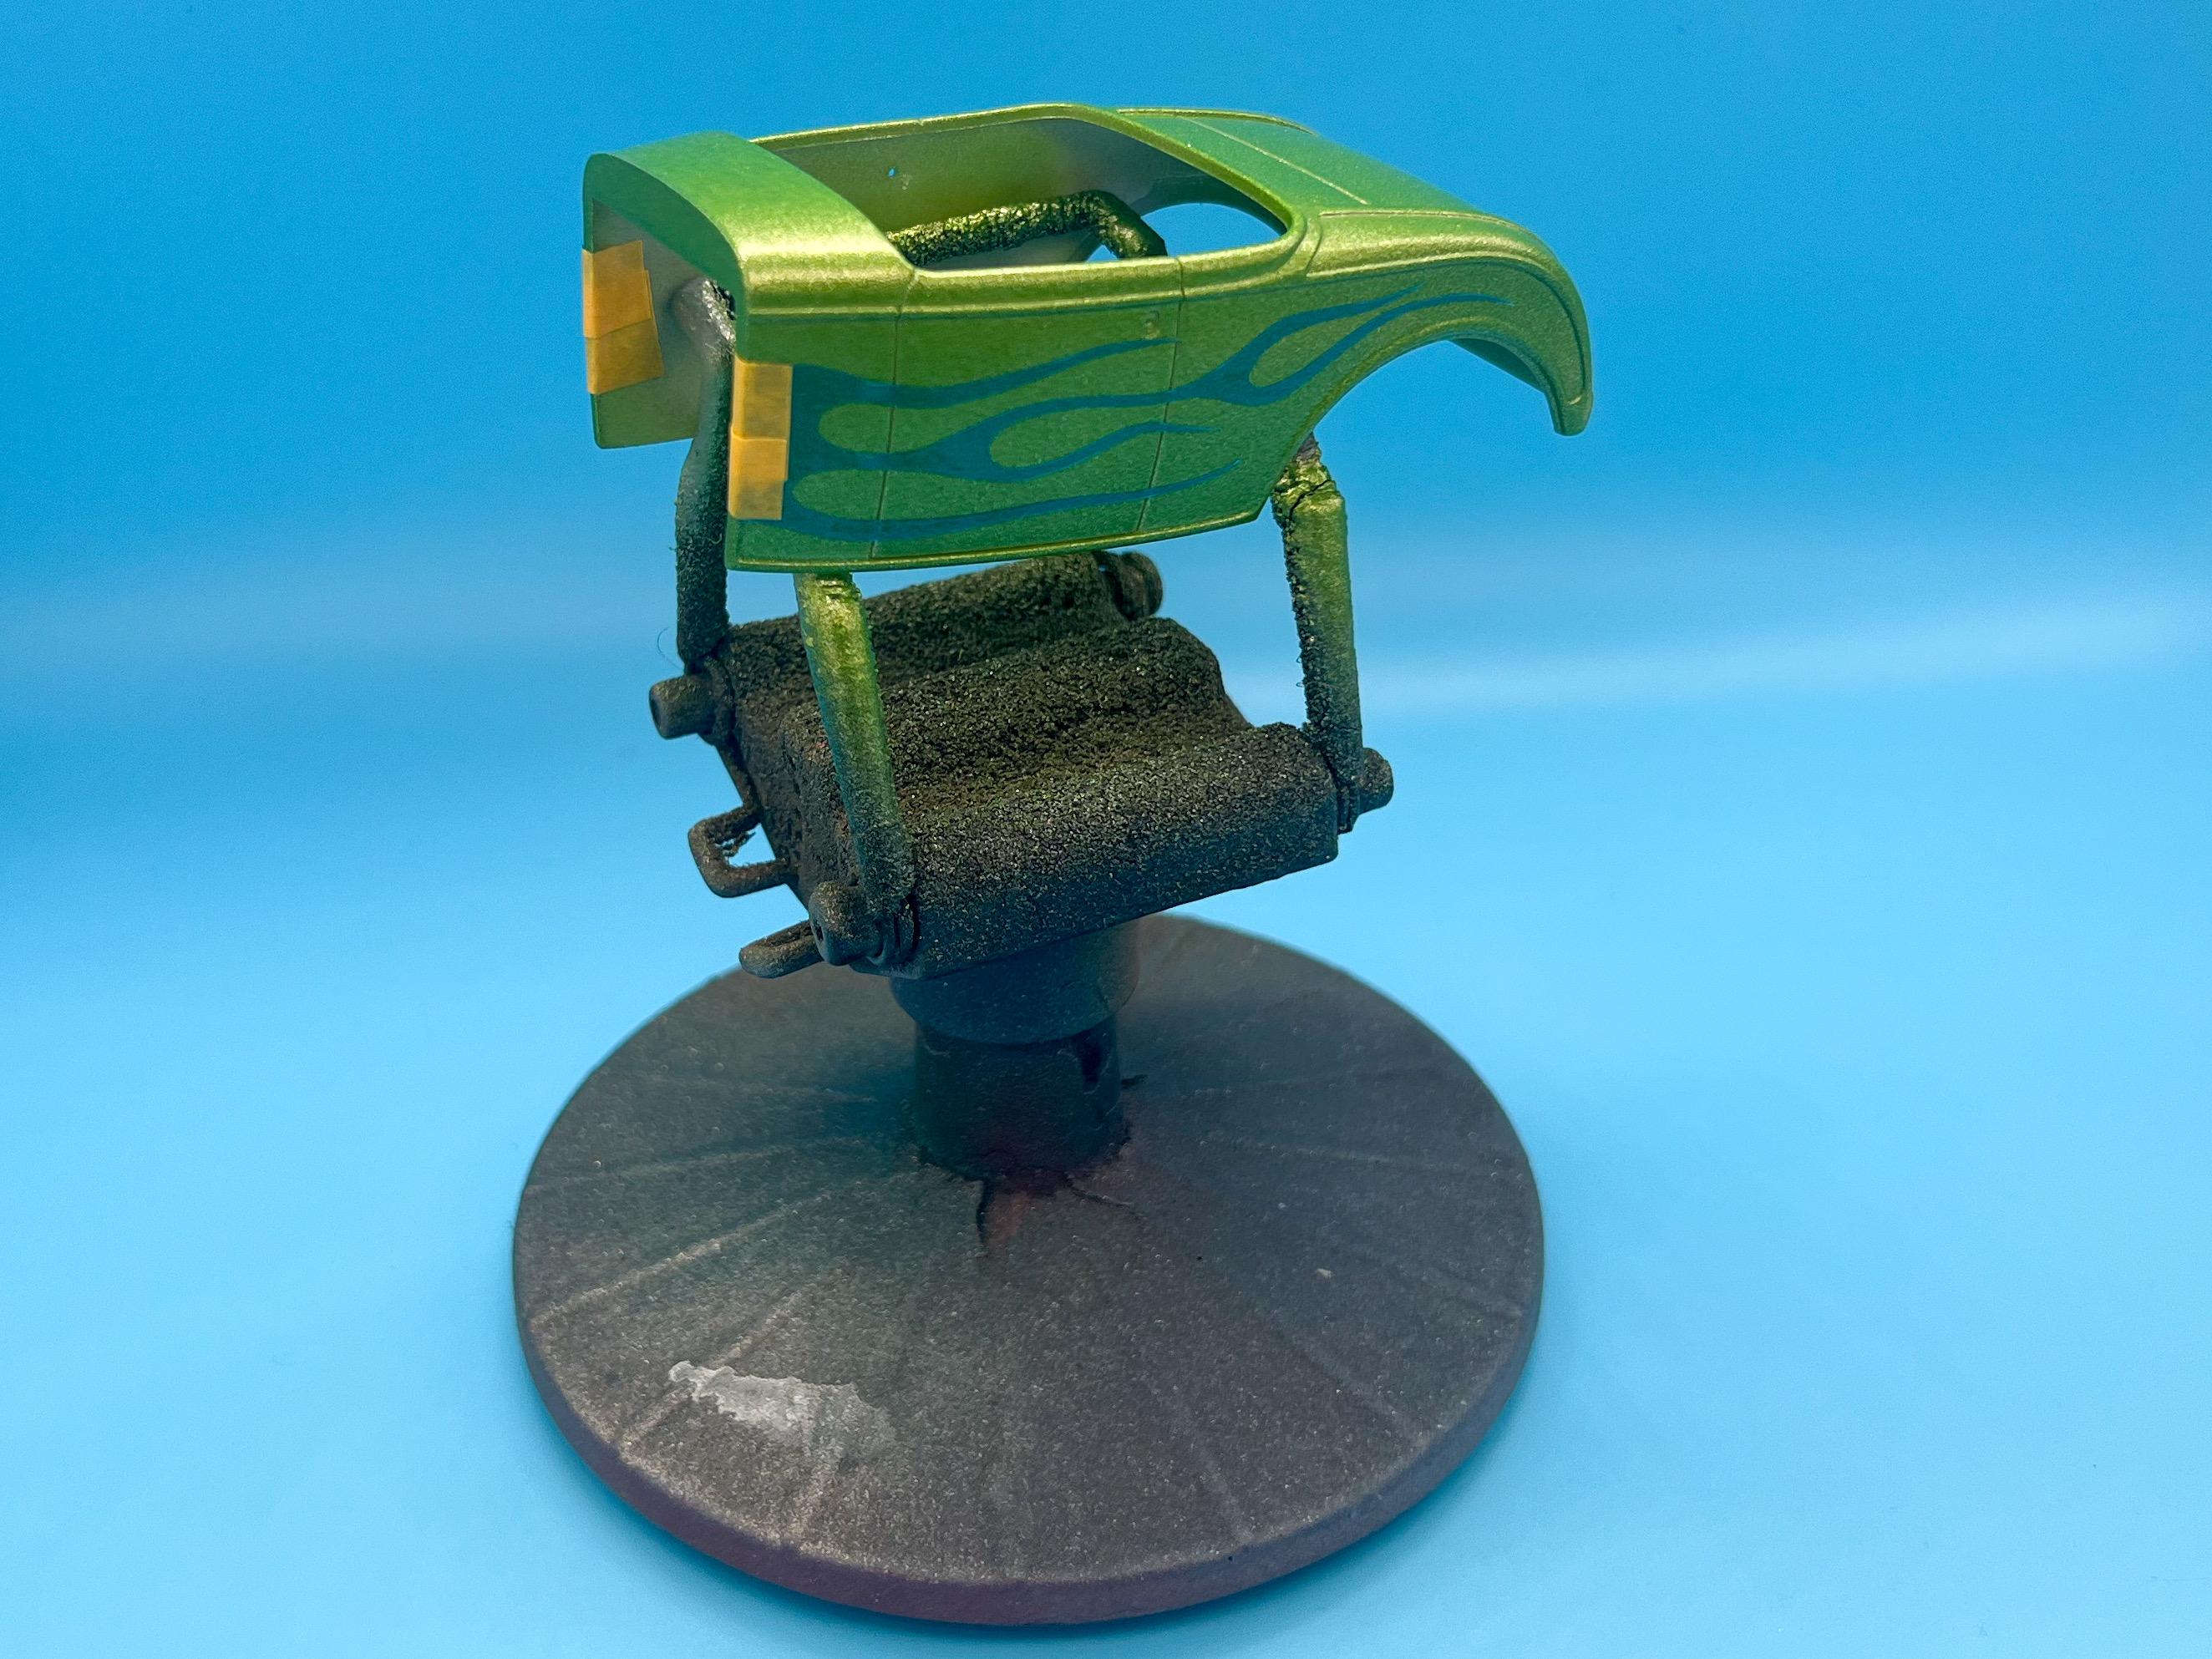
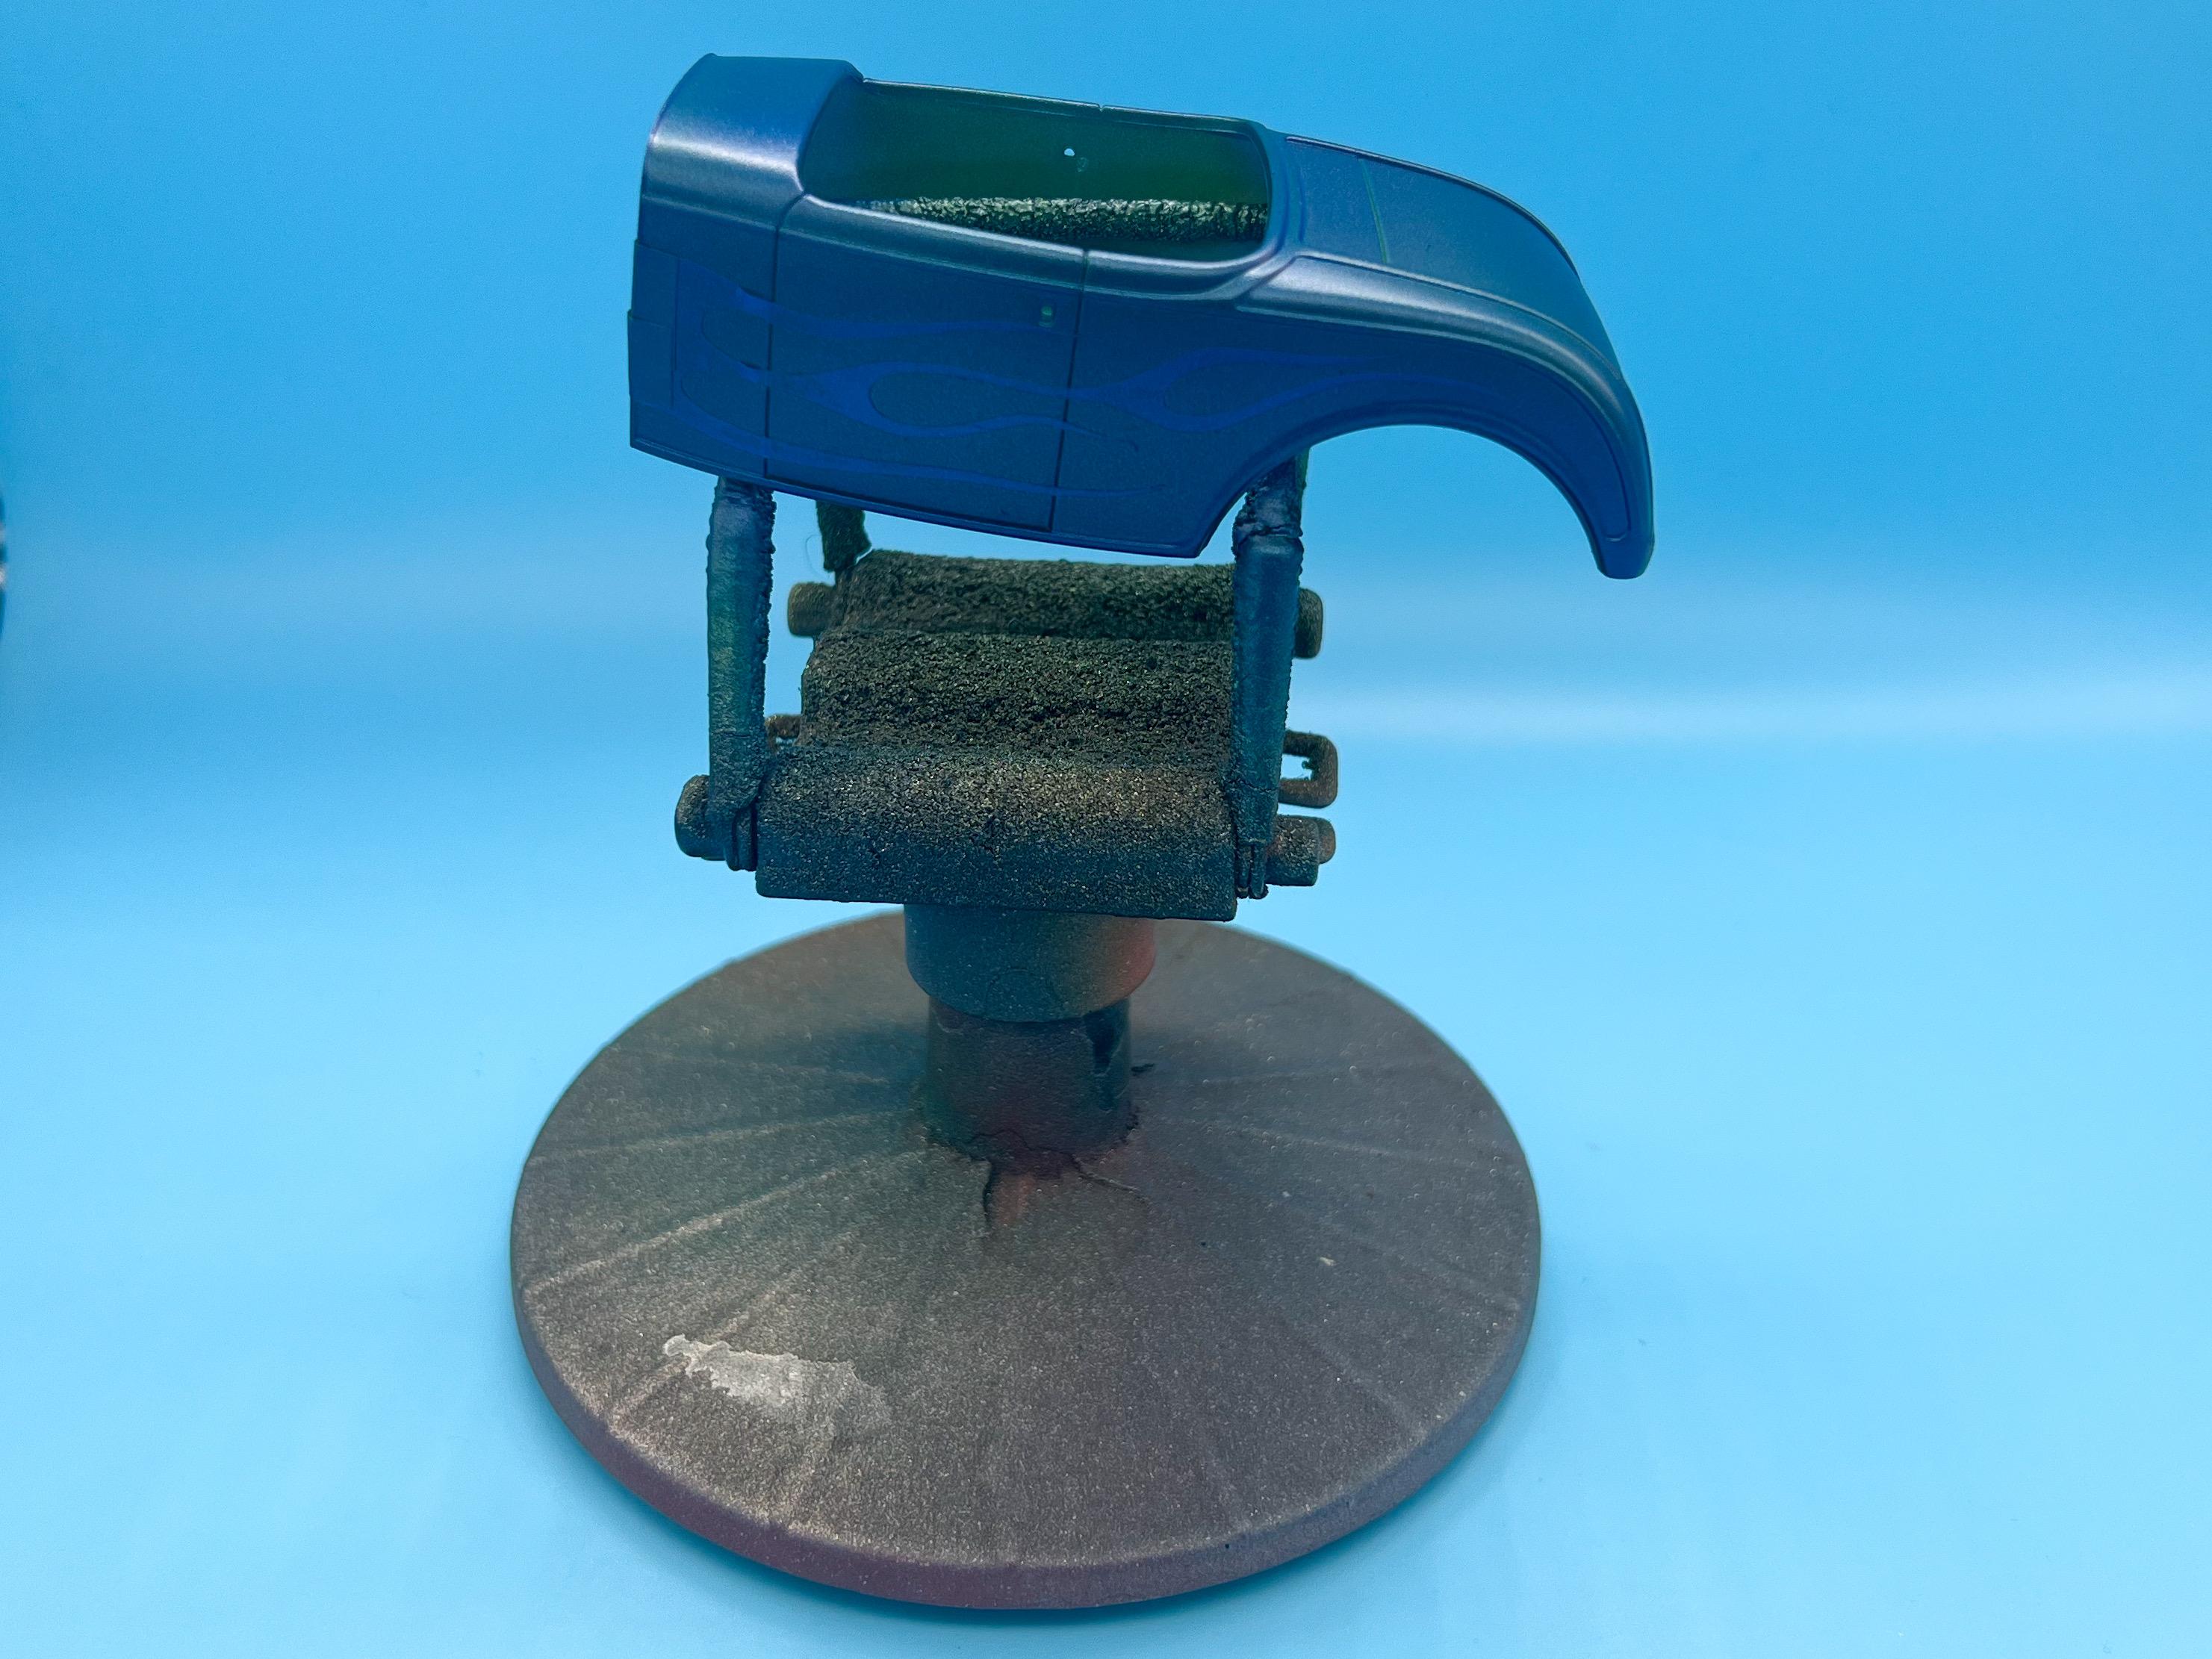
You ever see a scale flame-job that looks cool until you get up close and see bleeds, rough edges, high edges, fuzzy spots and other imperfections that come from trying to shoot light colored flames over a darker colored base color? Here’s a technique for super clean and easy flames I’ve been using for a couple of years now that I thought some of you all might find useful. You’ll need nothing special for this process, and I did this particular body with rattlecans. I DO use a Silhouette scrapbook cutter for making my masks…but you can use pre-cut ones from eBay or Lazy Modeler or cut your own from masking frisket or tape if you don’t have a plotter to use. First step, prep and prime body as normal: Second step is NOT, I repeat NOT the body color. Here, you’ll paint the color that the flames will be. I did a solid color, but you can do a gradient from white-yellow-orange or yellow-red or whatever you would like your flames to be at the end: Next, we mask. I like a traditional classic hot-rod flame, but for this one I recreated the decal art from the new issue of the Revell 32 Roadster kit, and then cut masks out of Oramask 813 masking vinyl (usually about $10 a roll from Amazon or eBay) The cool thing with this vinyl is that it’s translucent, so I could also have laid it over the decals, or a photograph or a drawing of some flames and traced the shape by hand instead…and actually, that IS how I did it before I had a cutter. Once you’ve got your flames, lay them down and make sure the edges are sealed nicely: Next up…body color! I used an old spray can of Testor’s blue, but any color darker than the first color will work just fine. And finally…carefully de-mask! Fold the vinyl over on itself as you pull it back, starting from the widest end - if you make the vinyl do a ‘u-turn’ on itself as you peel, you’ll get cleaner edges. If you do this when the paint is starting to dry but not wet you’ll usually avoid the paint chipping on the edges. And…you’re done! Tada! The secret to this technique is that by painting the lighter color first you won’t struggle to cover it with the darker color. And the less layers of paint, the smaller the ridge that you’ve got to try and cover with clear, the faster the drying time and the quicker you’ll be admiring your handy work. This entire paintjob was done in a day, including prepping the body (and most of the time was just waiting for the primer and green to dry). So, for, say, a black paintjob with yellow flames you’ll have no problems with building up multiple layers of paint trying to cover the black and it’s WAY easier to lay down those spindly little flame licks on a body than align a big sheet of mask that doesn’t want to lay flat over the curves of a more complex body (think 40 Ford, for example). If you’re painting something with a lighter main color, say a yellow body with red flames…do it how you normally would. But for light colored graphics on a dark body this is by far the easiest way I’ve found so far. And it doesn’t have to be FLAMES, of course - this trick works with scallops or race numbers or stripes…anything you can imagine! Hope some of you found this helpful!