OldNYJim
-
Posts
251 -
Joined
-
Last visited
Content Type
Profiles
Forums
Events
Gallery
Everything posted by OldNYJim
-
 That game's hard - I played it a bunch in Times Square and never won a single time! ?
 -
YES! I've been meaning to do that exact build... so they'd sell at least one
-
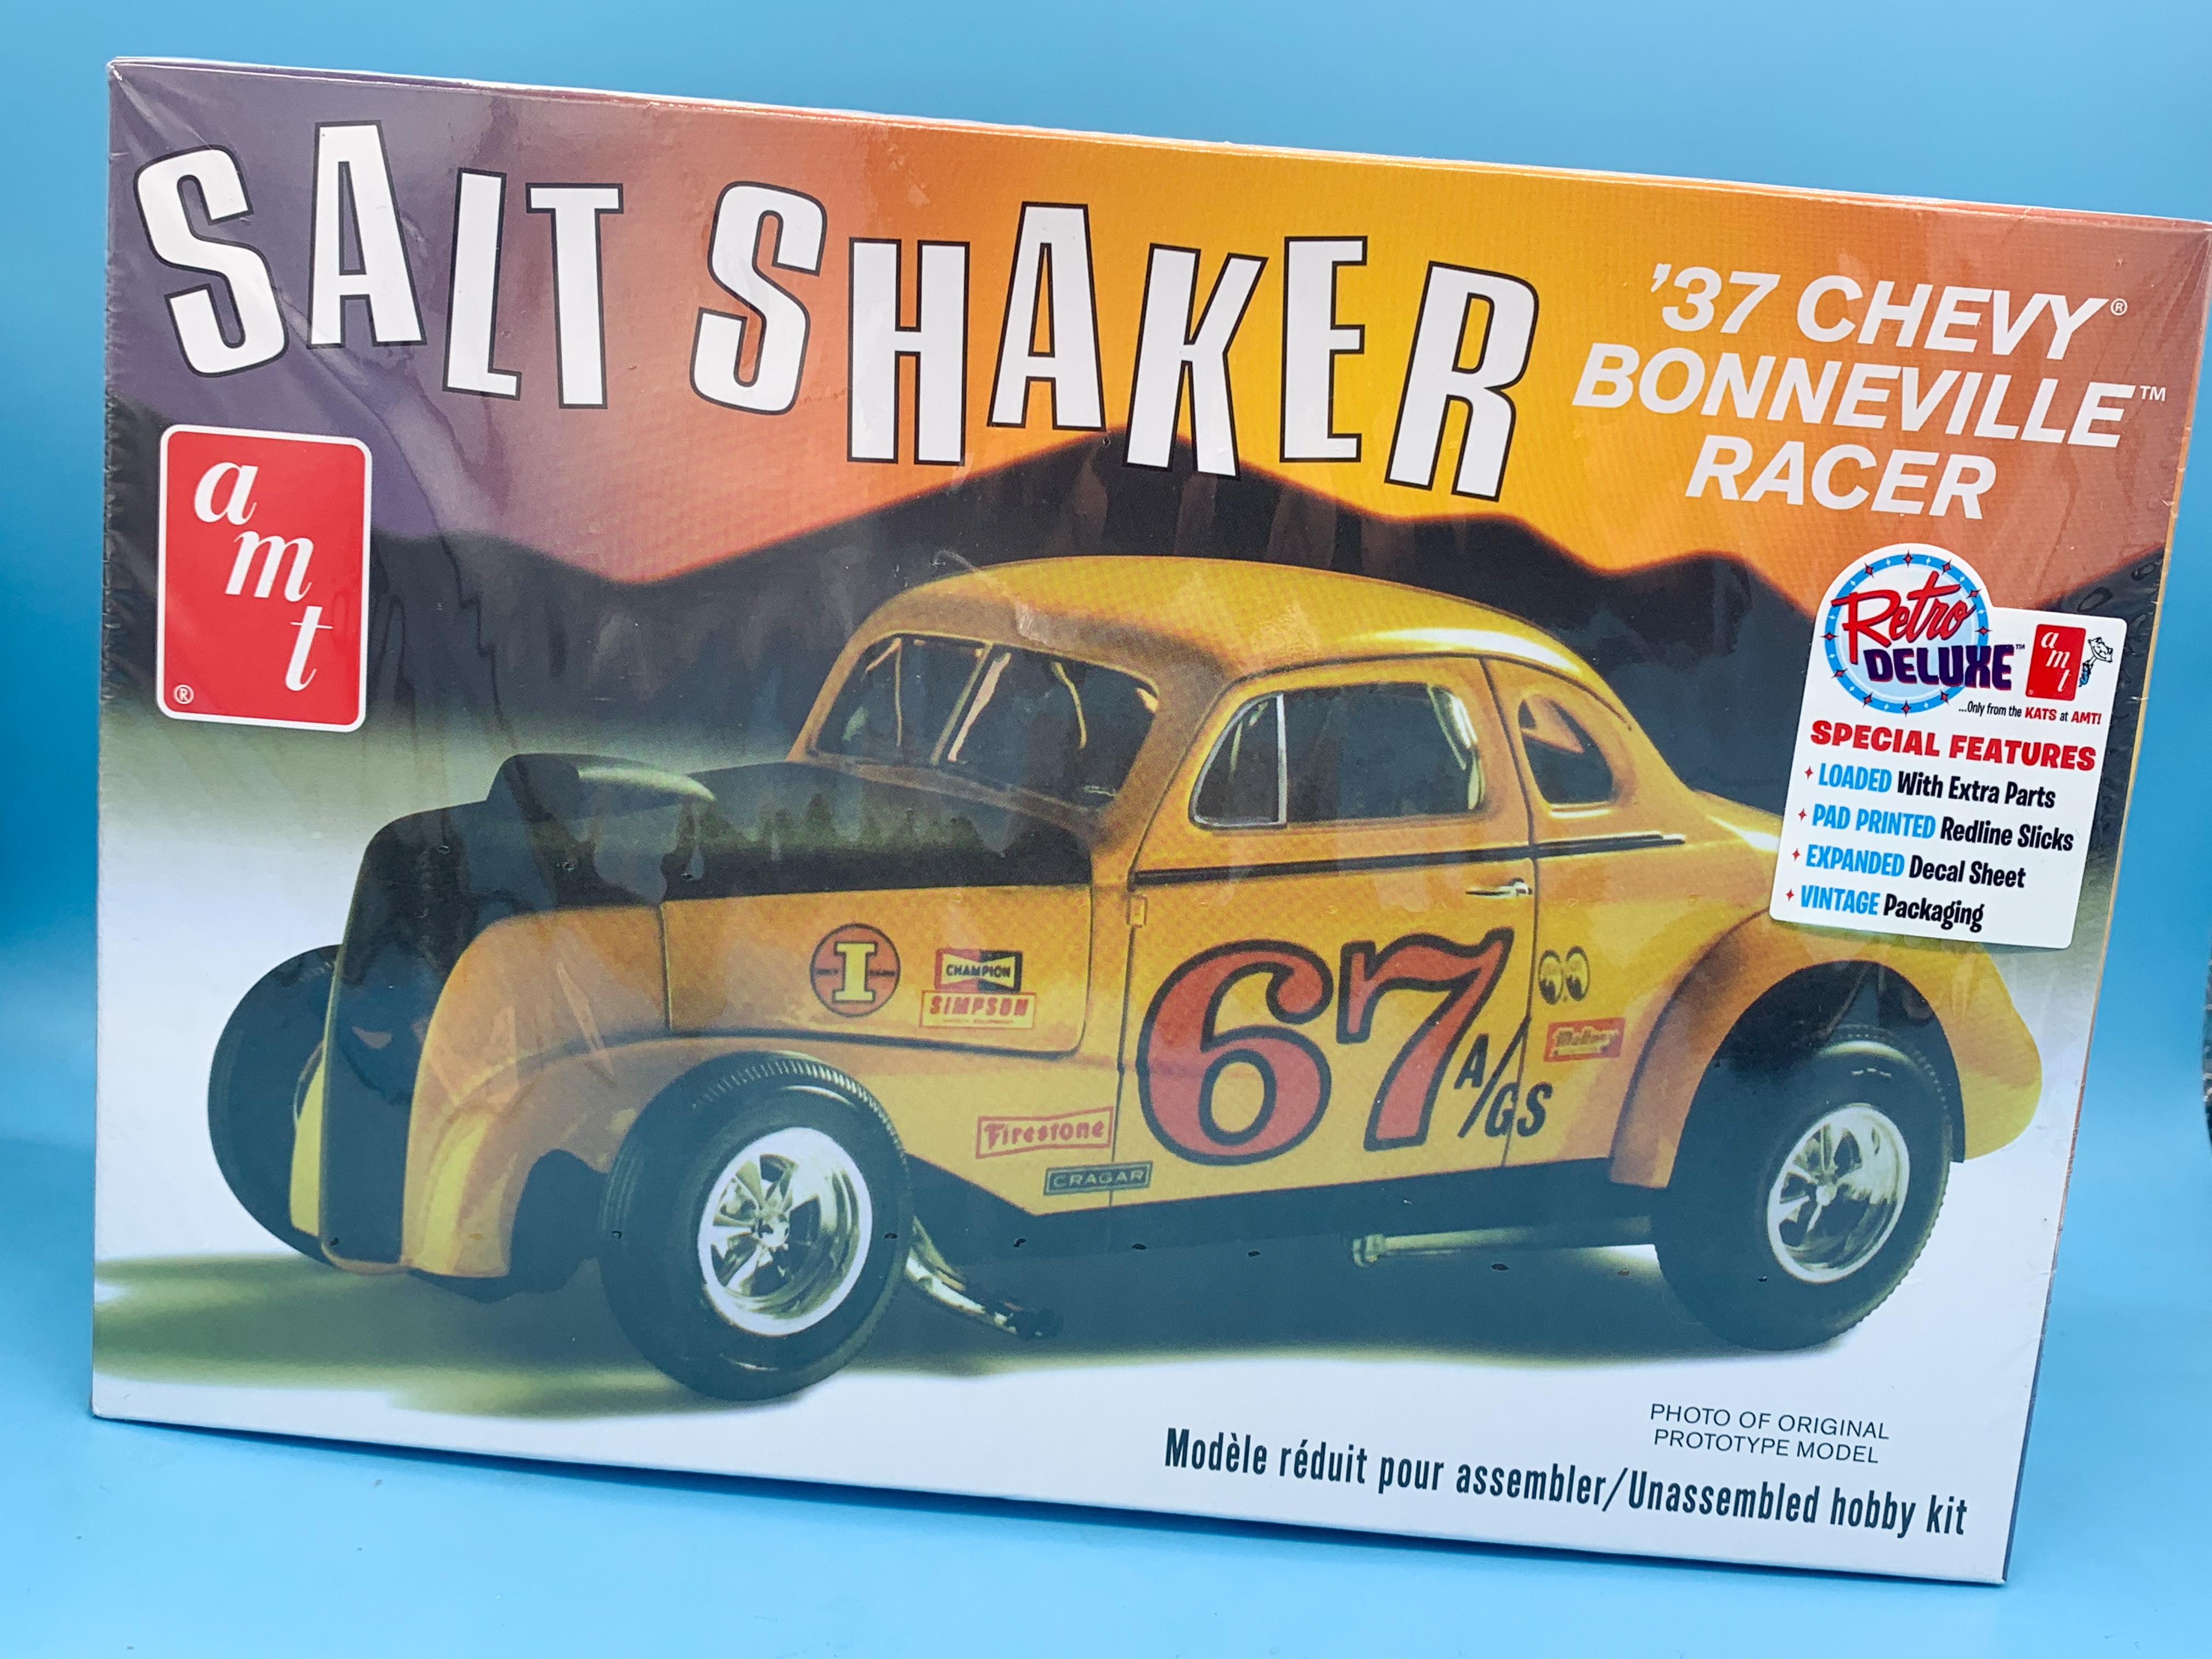
This one has been on my to-buy list since the latest release…I originally figured it was just the Bonneville parts in there, but they weren’t lying on the box to say it’s “loaded with extra parts”…you can just as easily build this as a proper full-fendered rod or possibly even stock (or closer to stock, anyway). Ive got some decidin’ to do before I dig into this one…

- 38,885 replies
-
- 1
-

-
- johan
- glue bombs
- (and 1 more)
-
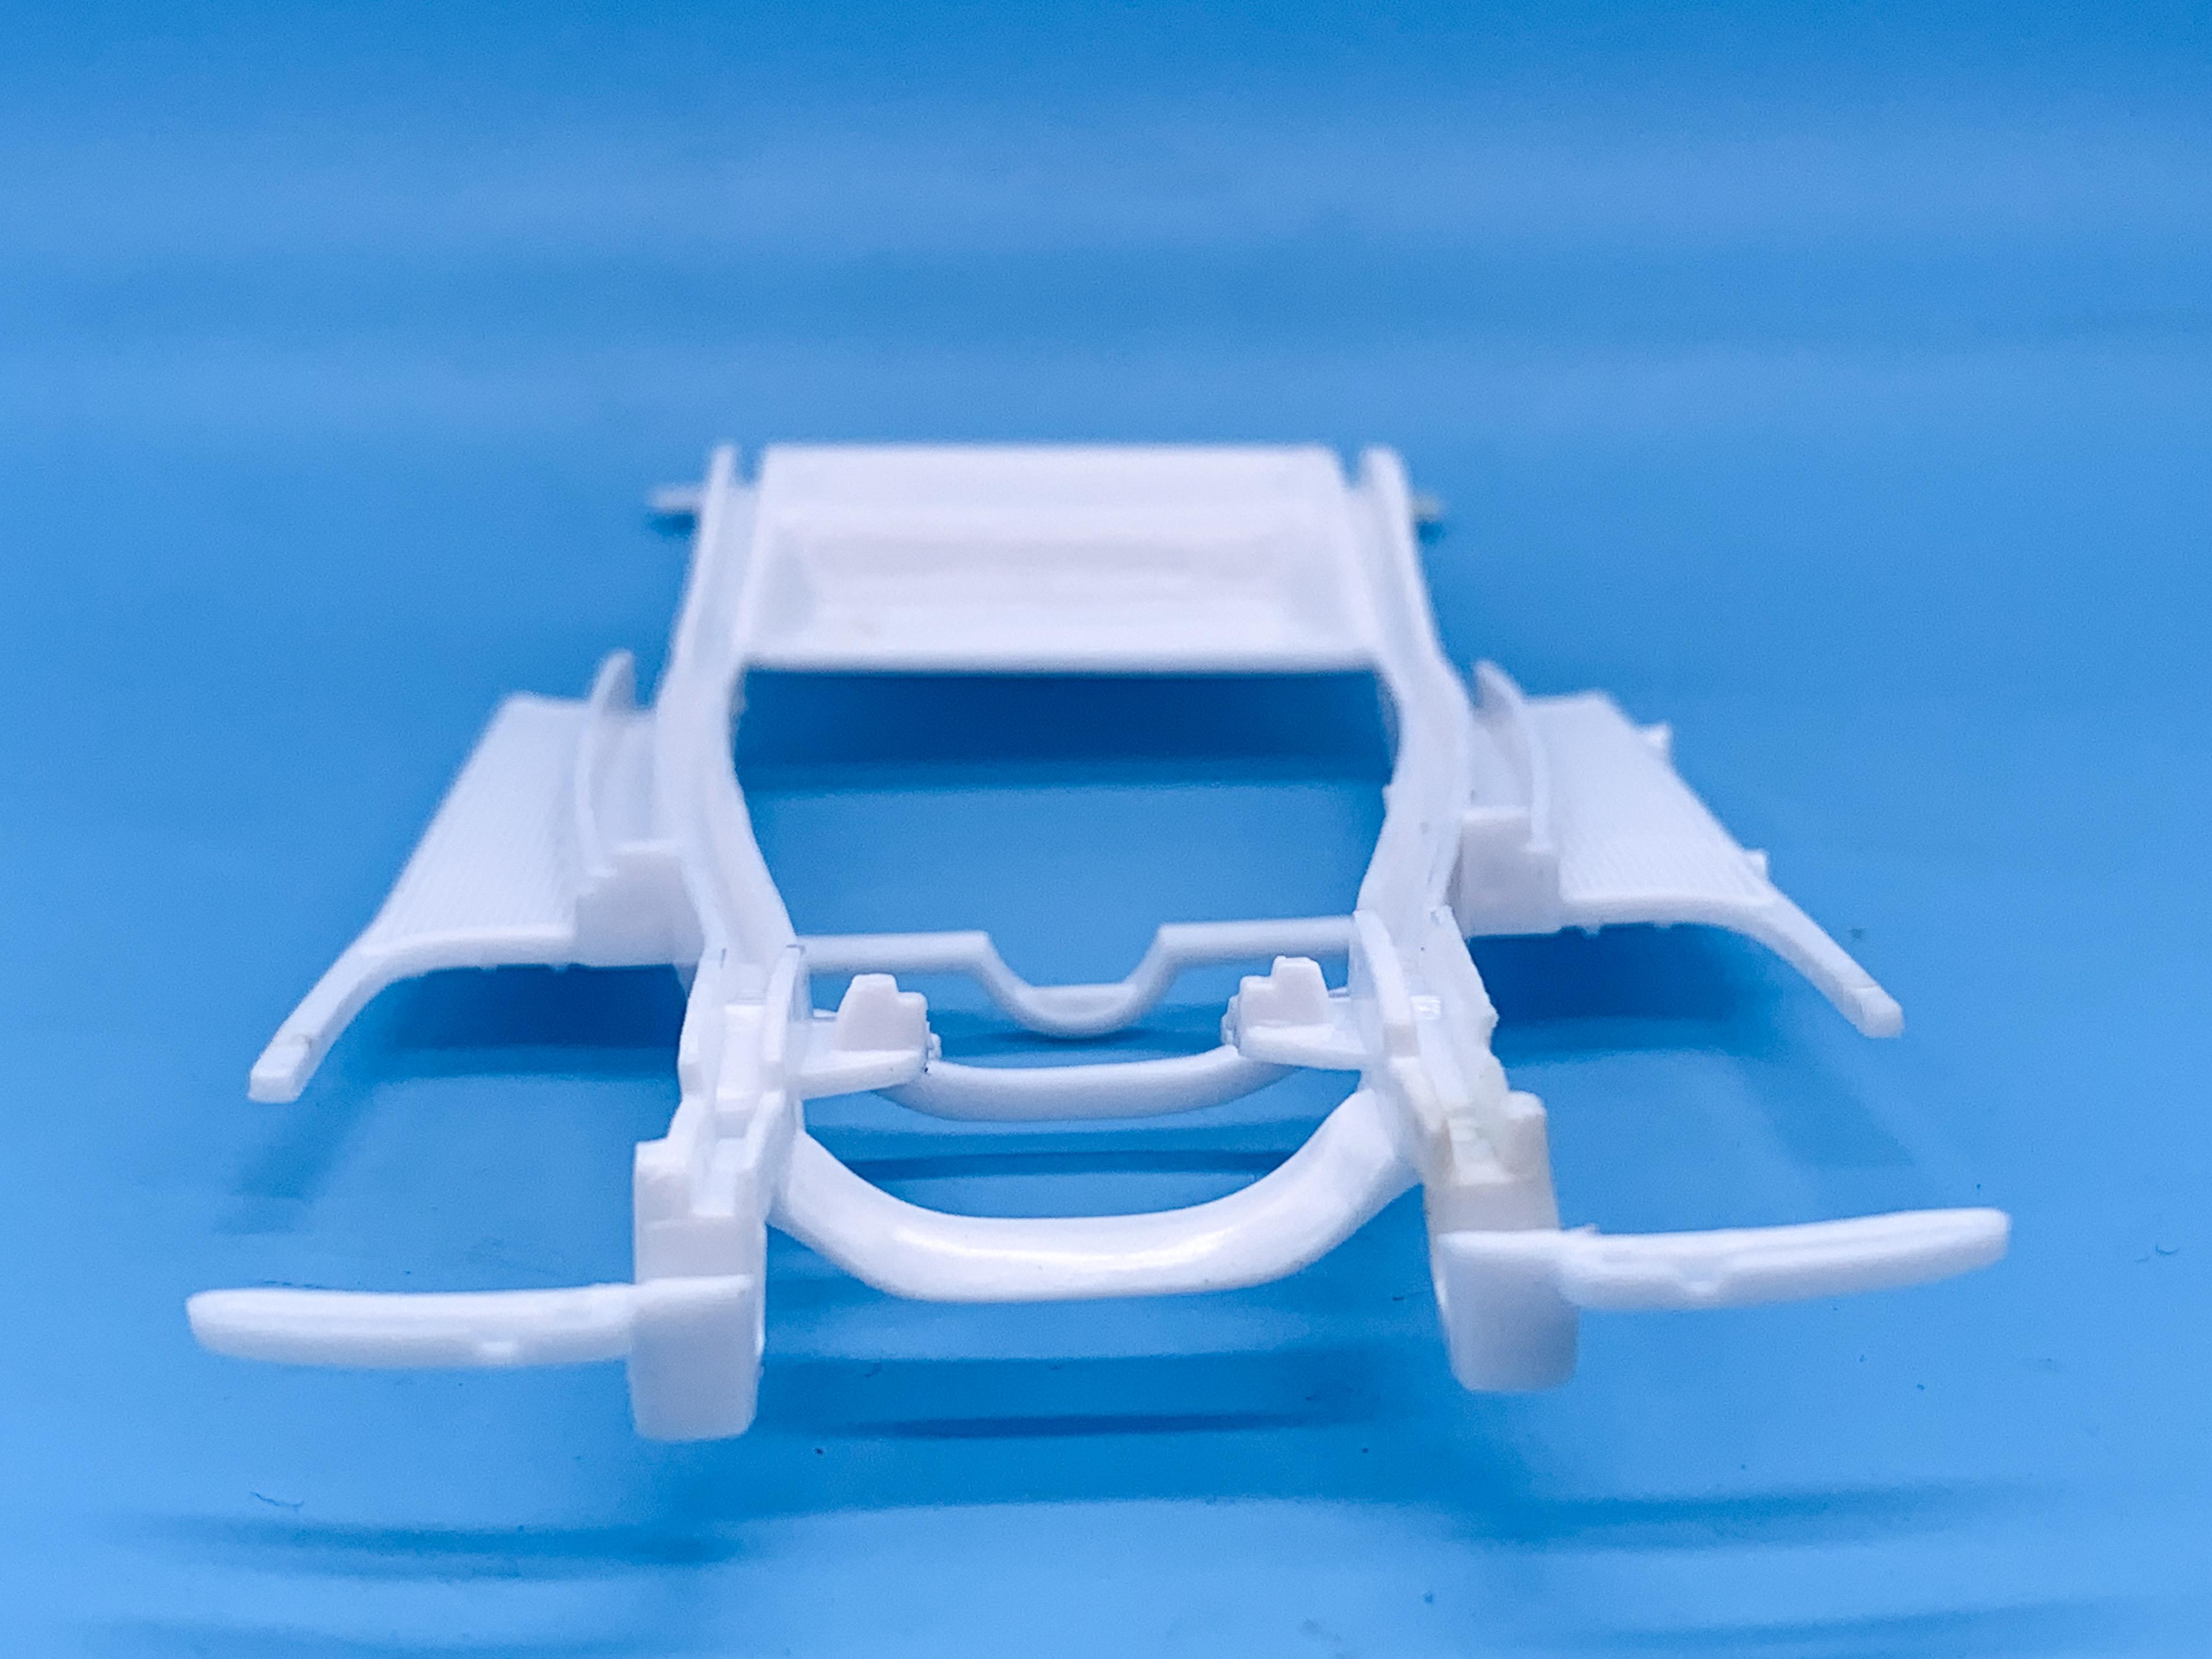
Mine’s not as bad as that, but definitely a little tweak: The back of the frame is fine, but the drivers side front (right in the photo above) sits a little high. No biggie, nothing some hot water and some brass rod in those frame rail recesses won’t fix…
-
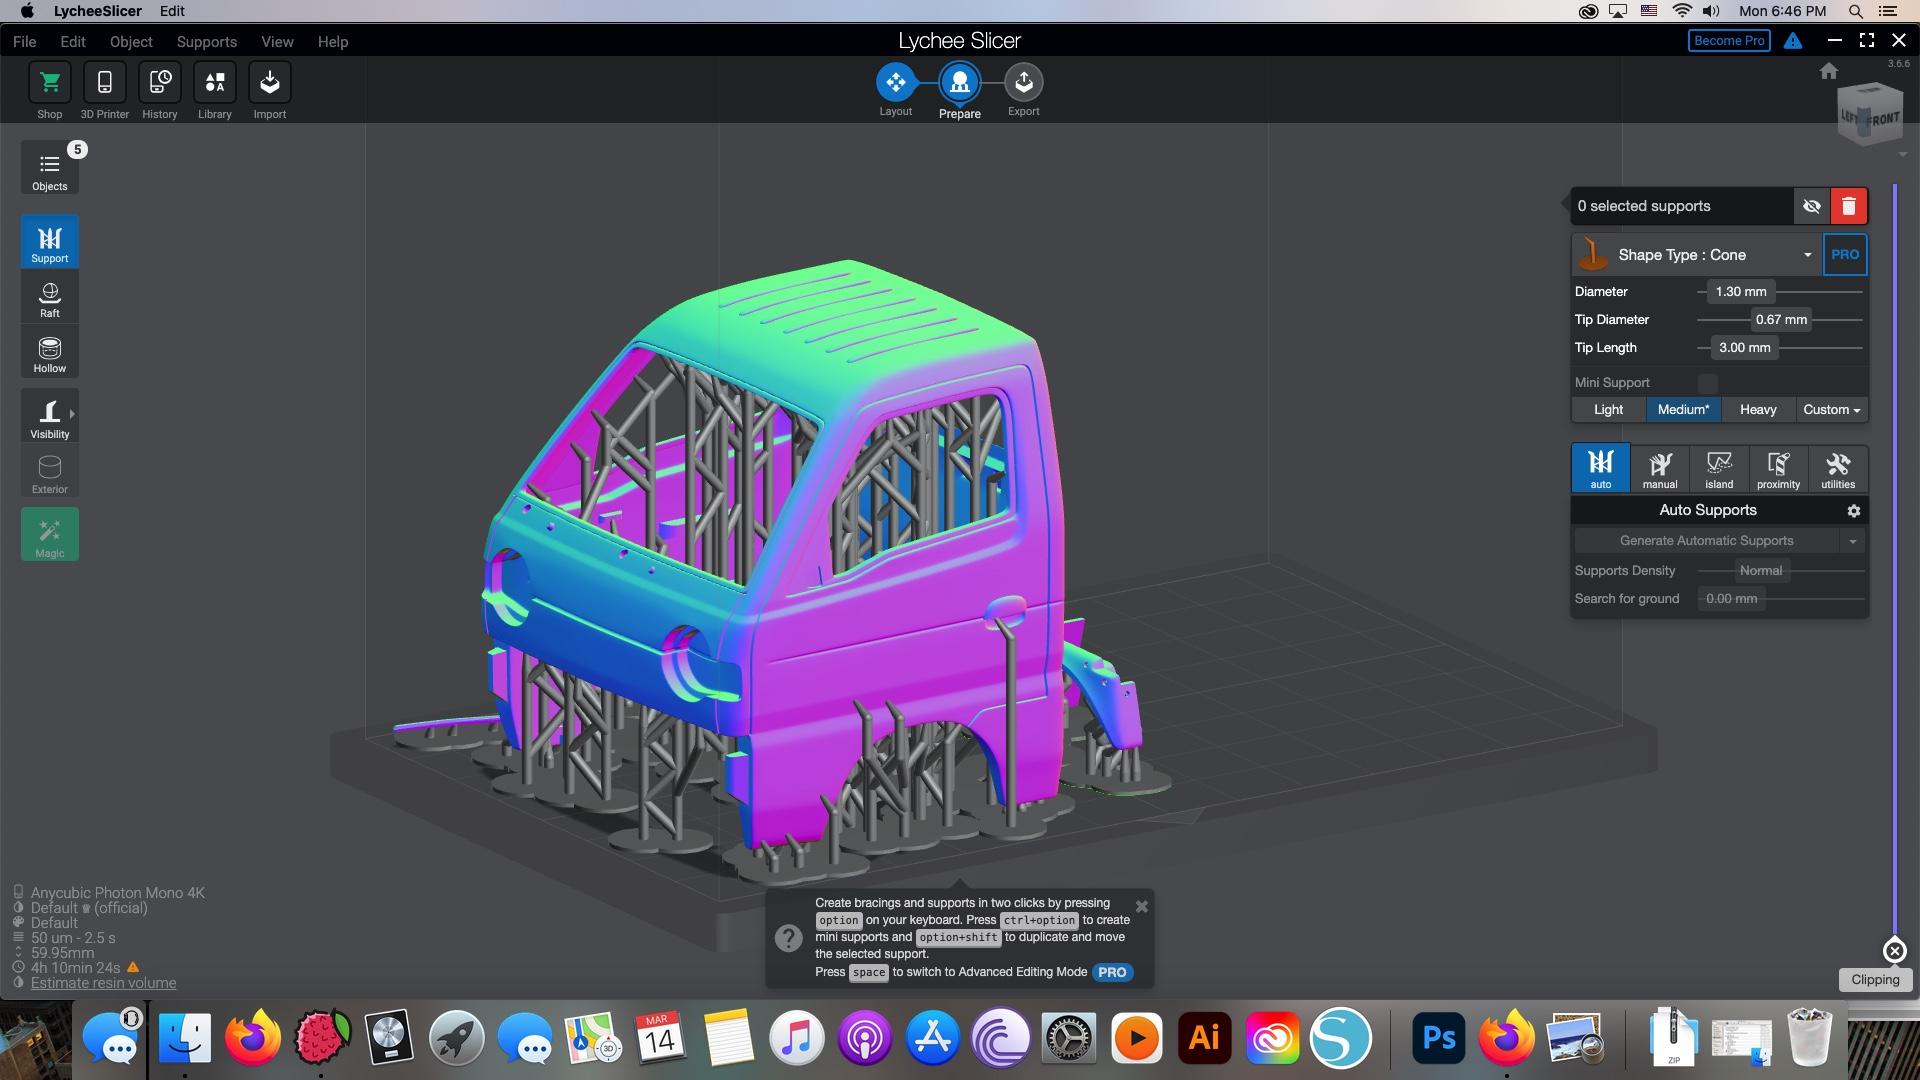
I did watch that vid, yeah! It was really helpful, thanks buddy! The automatic supports feature is great in a LOT of cases, but not always. For example, if you’re printing a tire, the software doesn’t know that it’d be easier to clear up a support nub from the sidewall or the middle, compared to putting them on the tread or right on the “FIRESTONE” lettering on the side or whatever. It’s not smart enough to know which detail is really important and which part is going to be hidden, or easier to clean up. So, sometimes you’ve got to outsmart the software and just line them up yourself That said, I thought of you this evening when I was playing with the files for a Kei truck print I’m going to be working on. I let the software figure out the best spots for the supports and this is what it came up with: In this case, it worked pretty well! Didn’t put any of them anywhere TOO awful, supported that front end (which would likely sag during printing) and a bunch of interconnected ones running up the A-pillars and to the roof. It actually put a BUNCH more in there than I did for my Jeep (although this has a roof, obviously) so it spotted the fact that this roof is relatively high with not enough ‘meat’ in the roof pillars to let it print perfectly on it’s own. It’s clever stuff, even if it does need some human brainpower to produce actual useful parts sometimes
-
Plymouth Salt Flat Slammer
OldNYJim replied to OldNYJim's topic in WIP: Other Racing: Road Racing, Land Speed Racers
Thanks Bill - and everyone else for the nice words…and thanks to MCM for the feature! That was such a cool surprise! Still wish I’d done a more detailed build if I’d known it was gonna be in a magazine ?. Guess I’ll have to build another something-or-other!
-
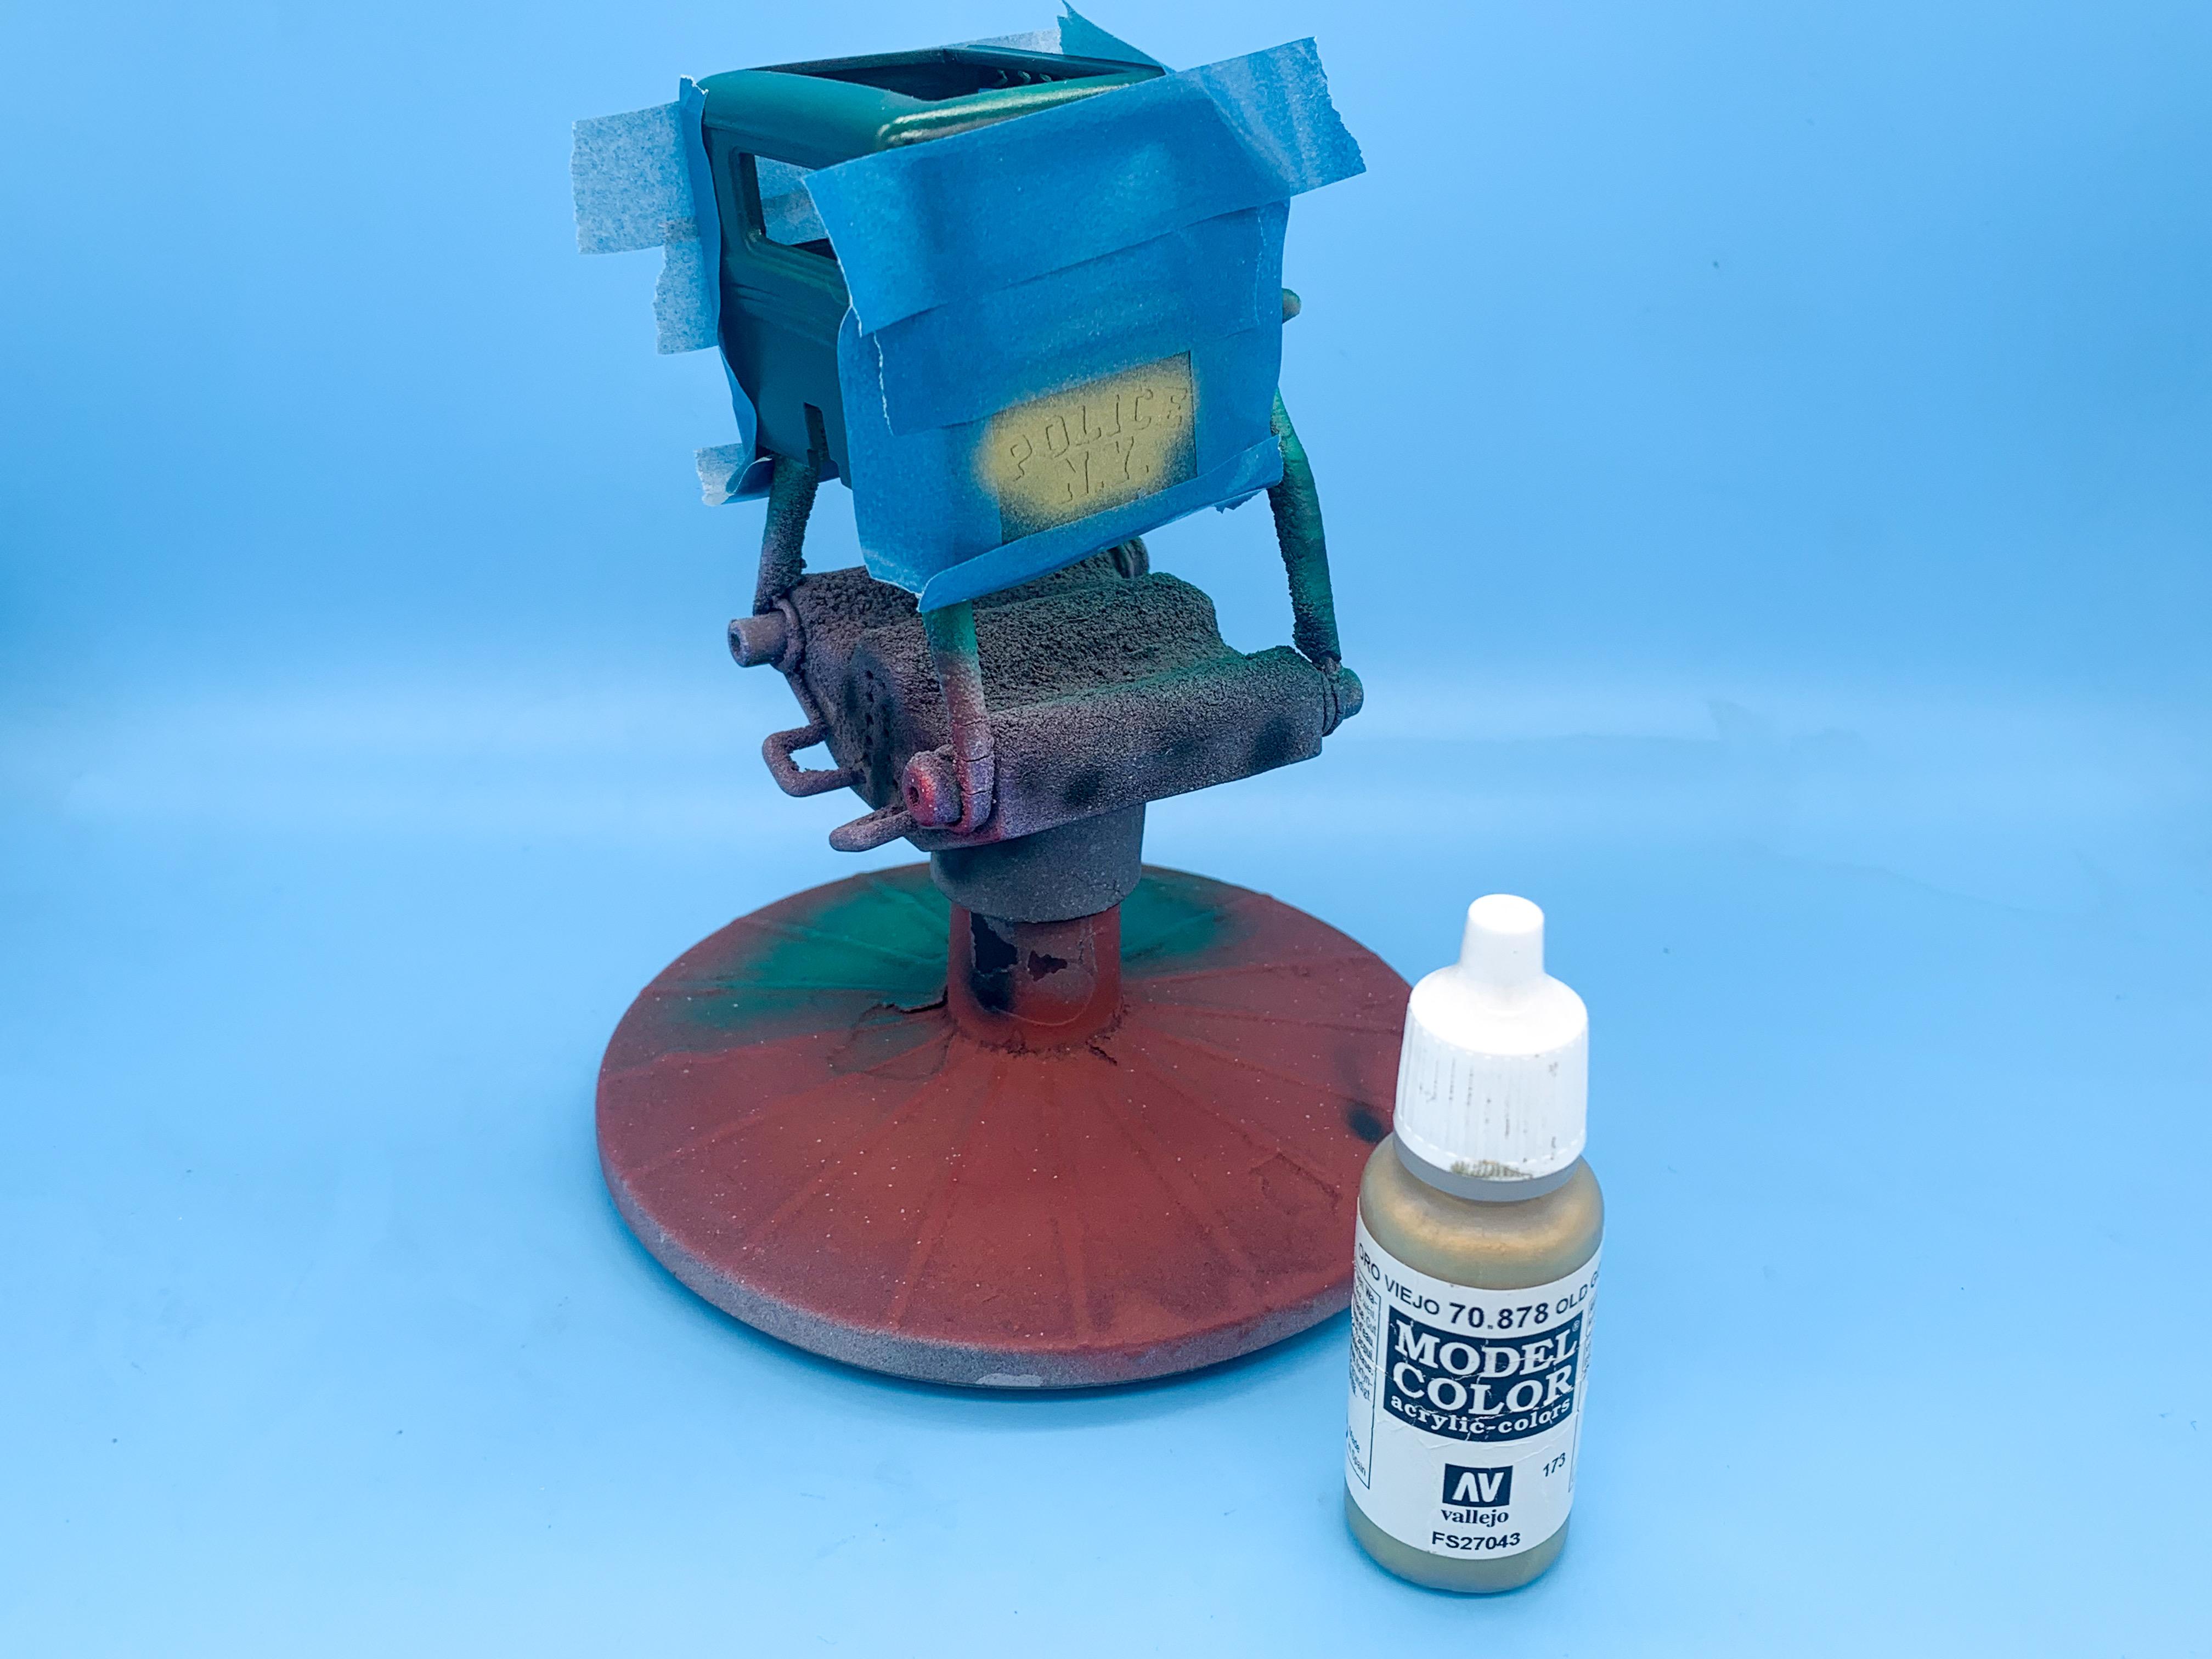
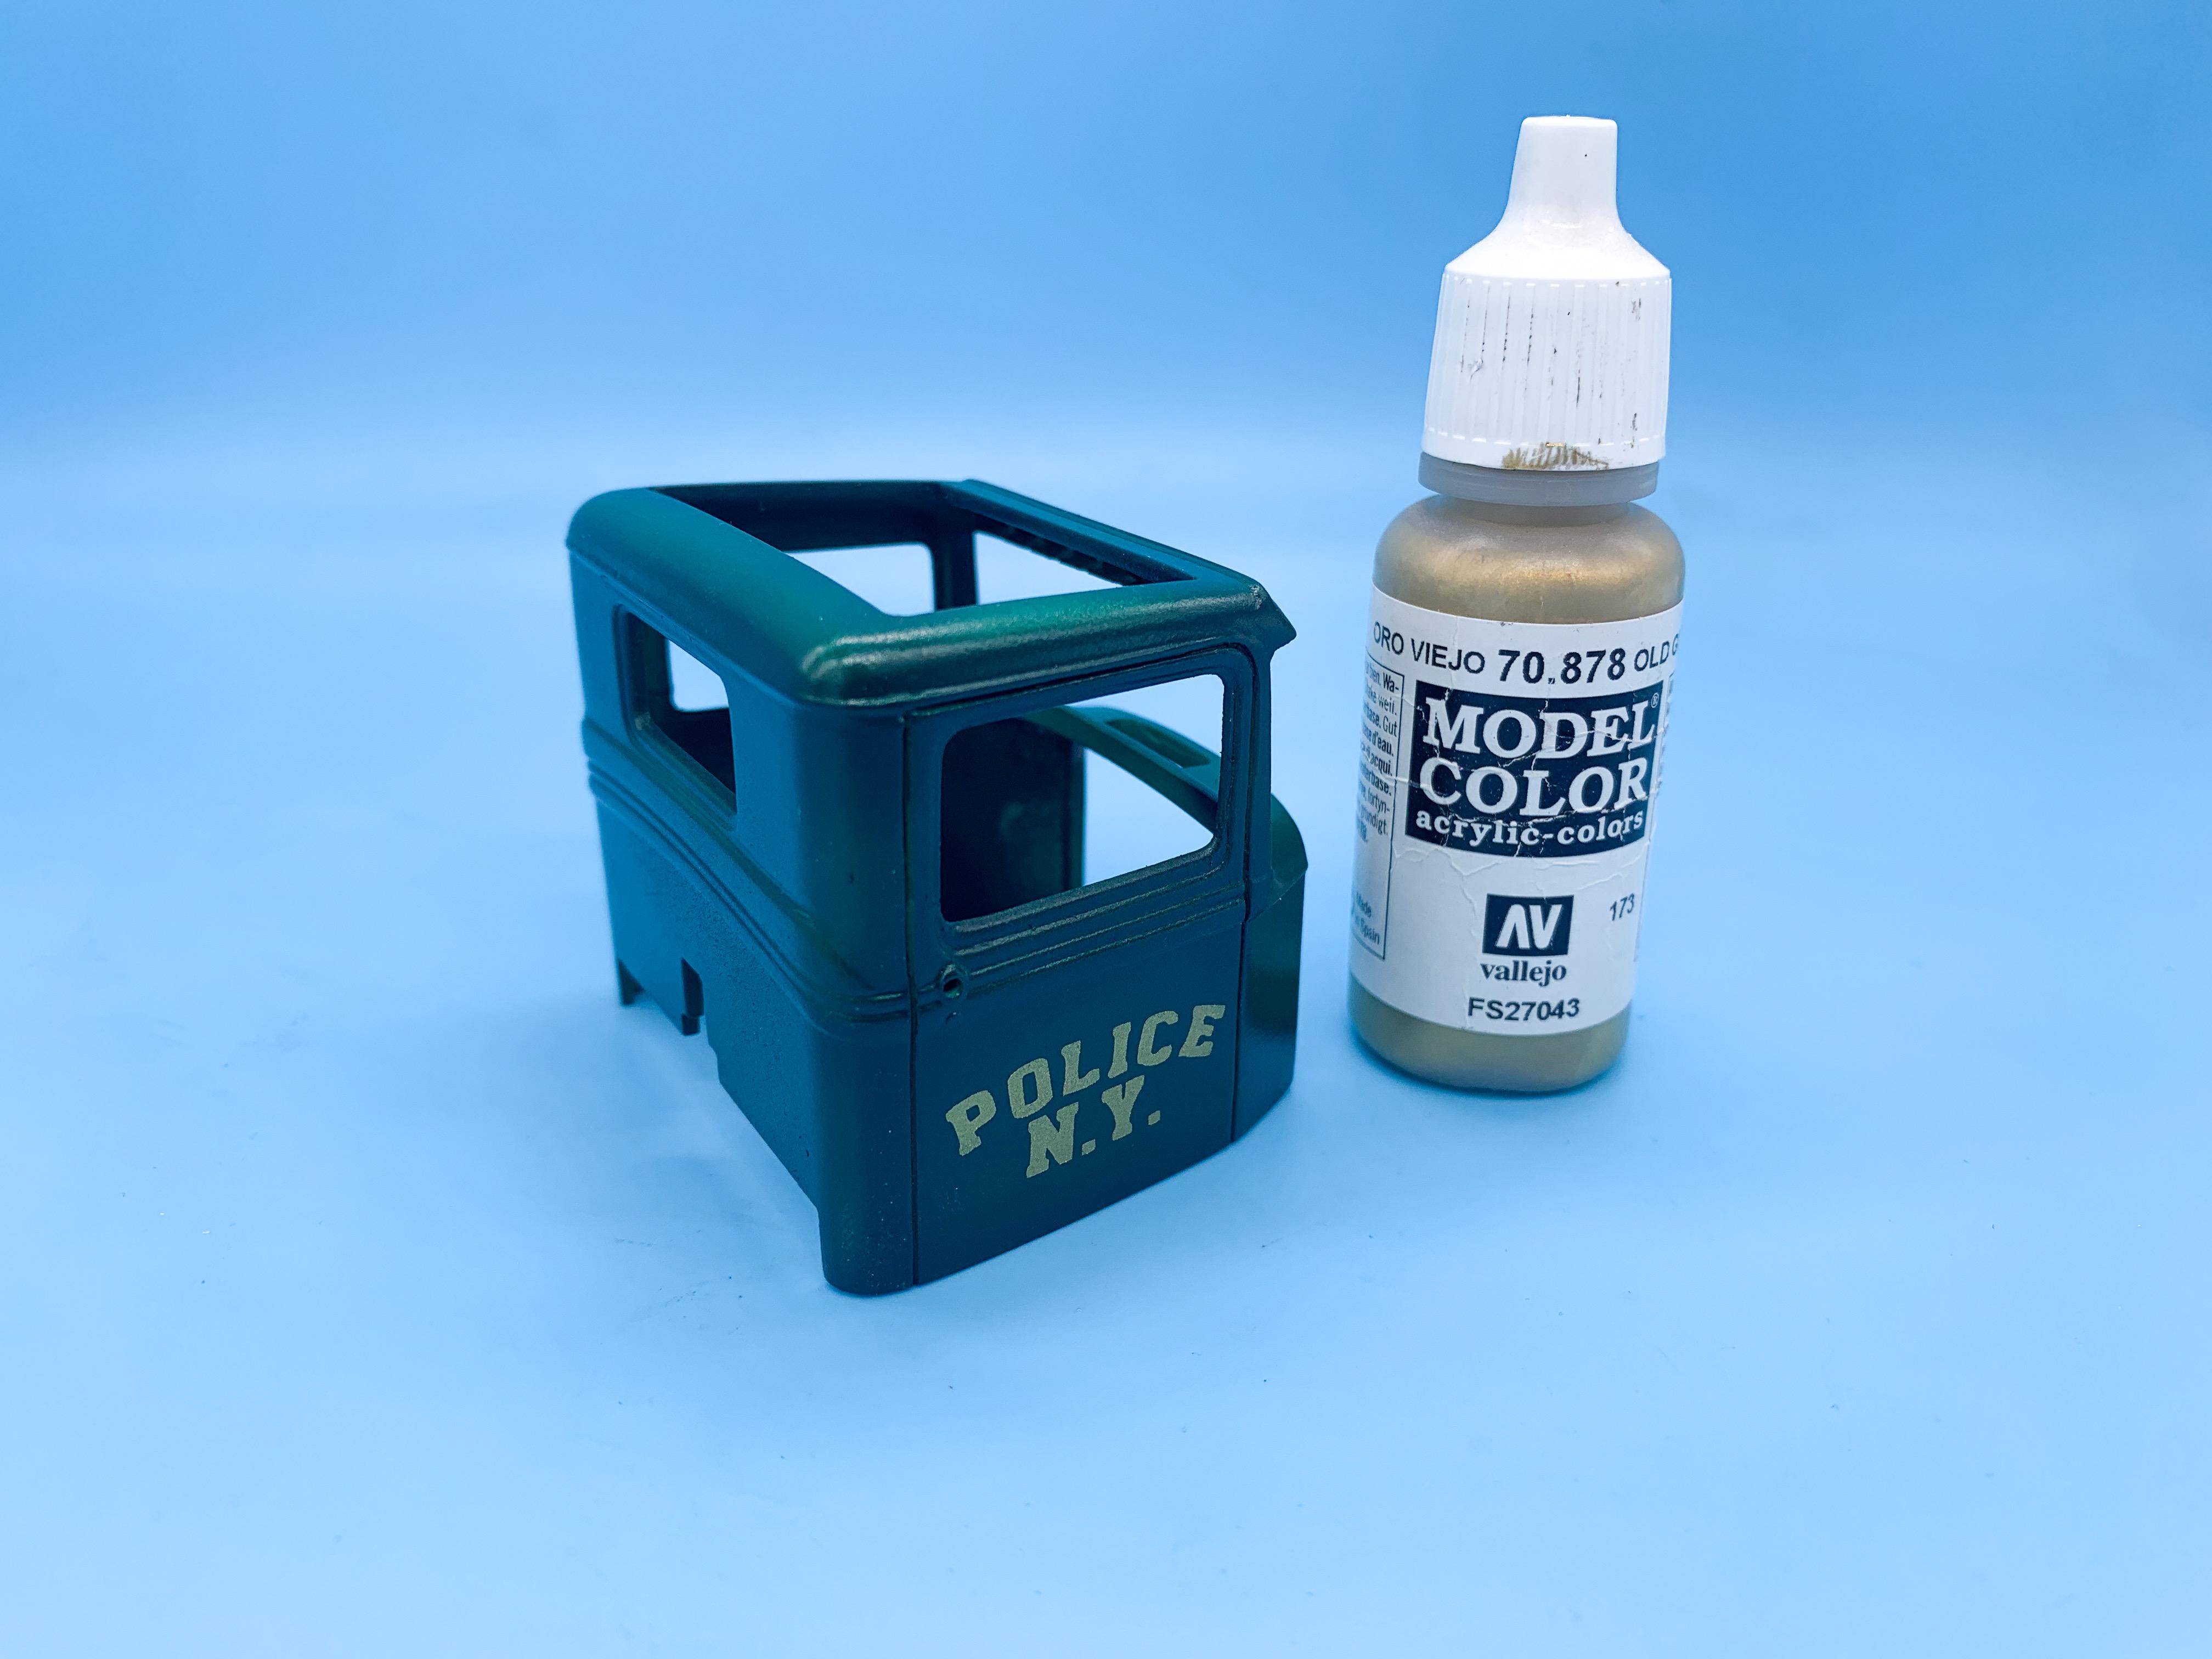
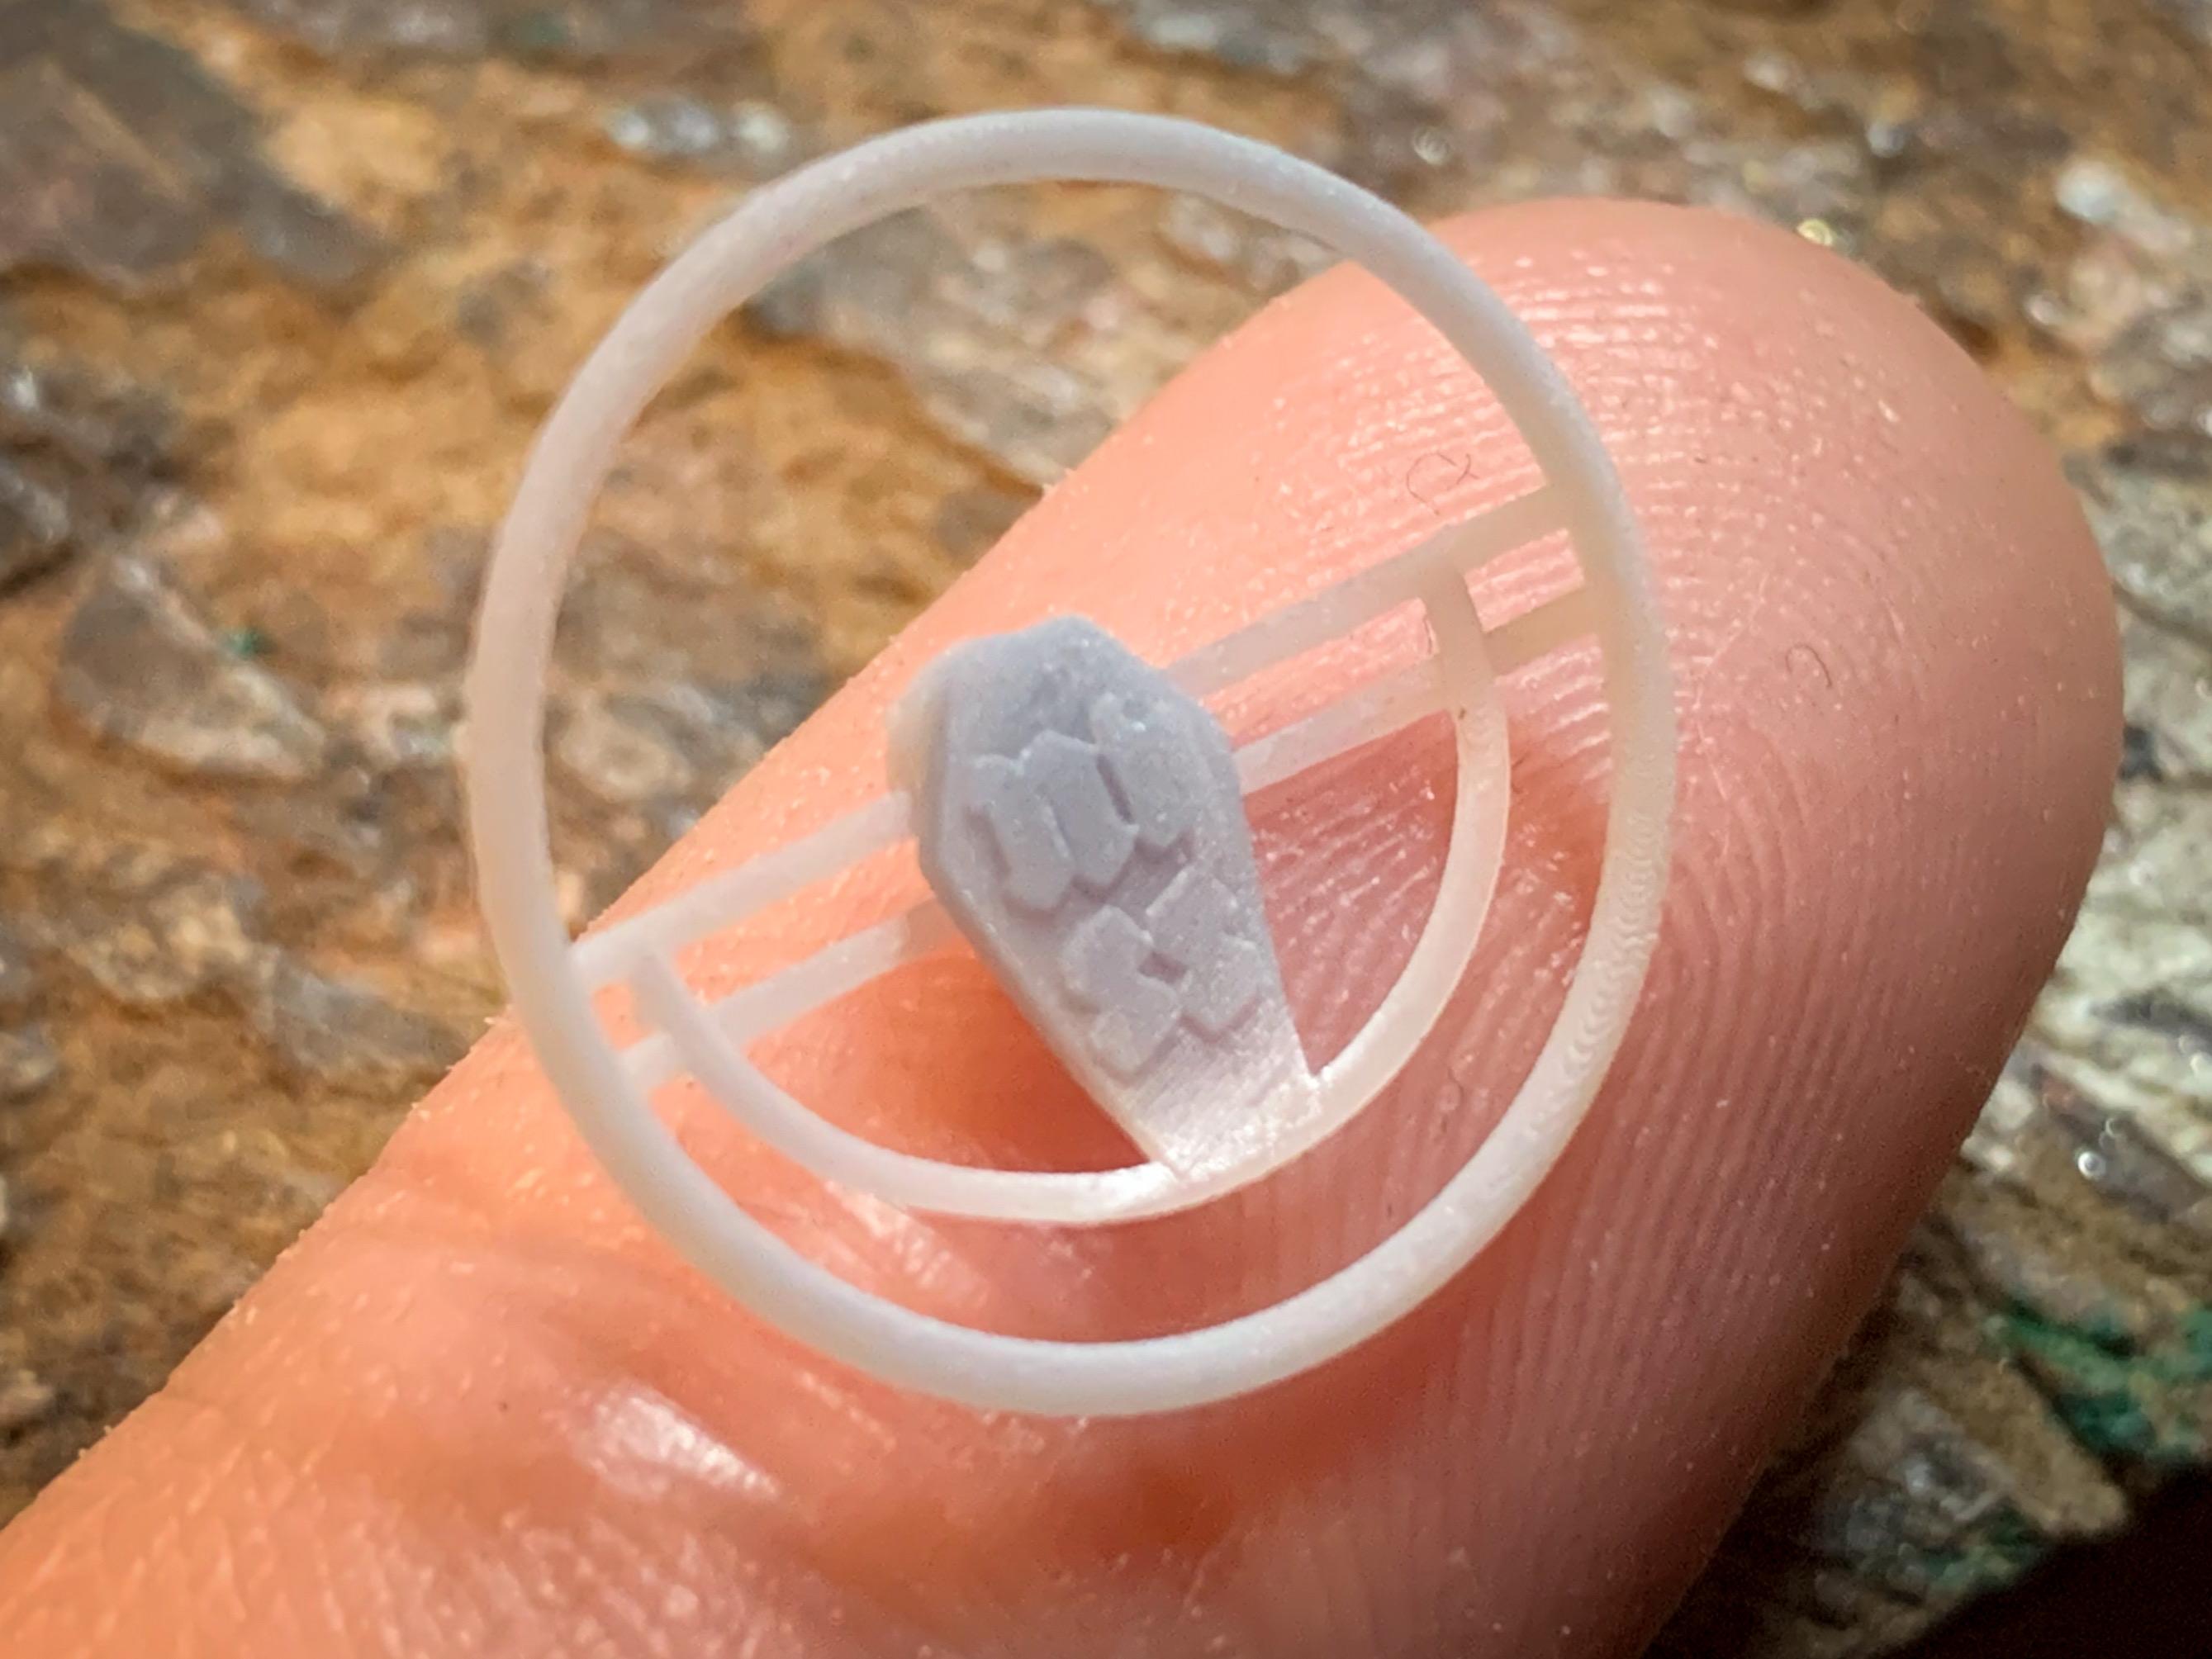
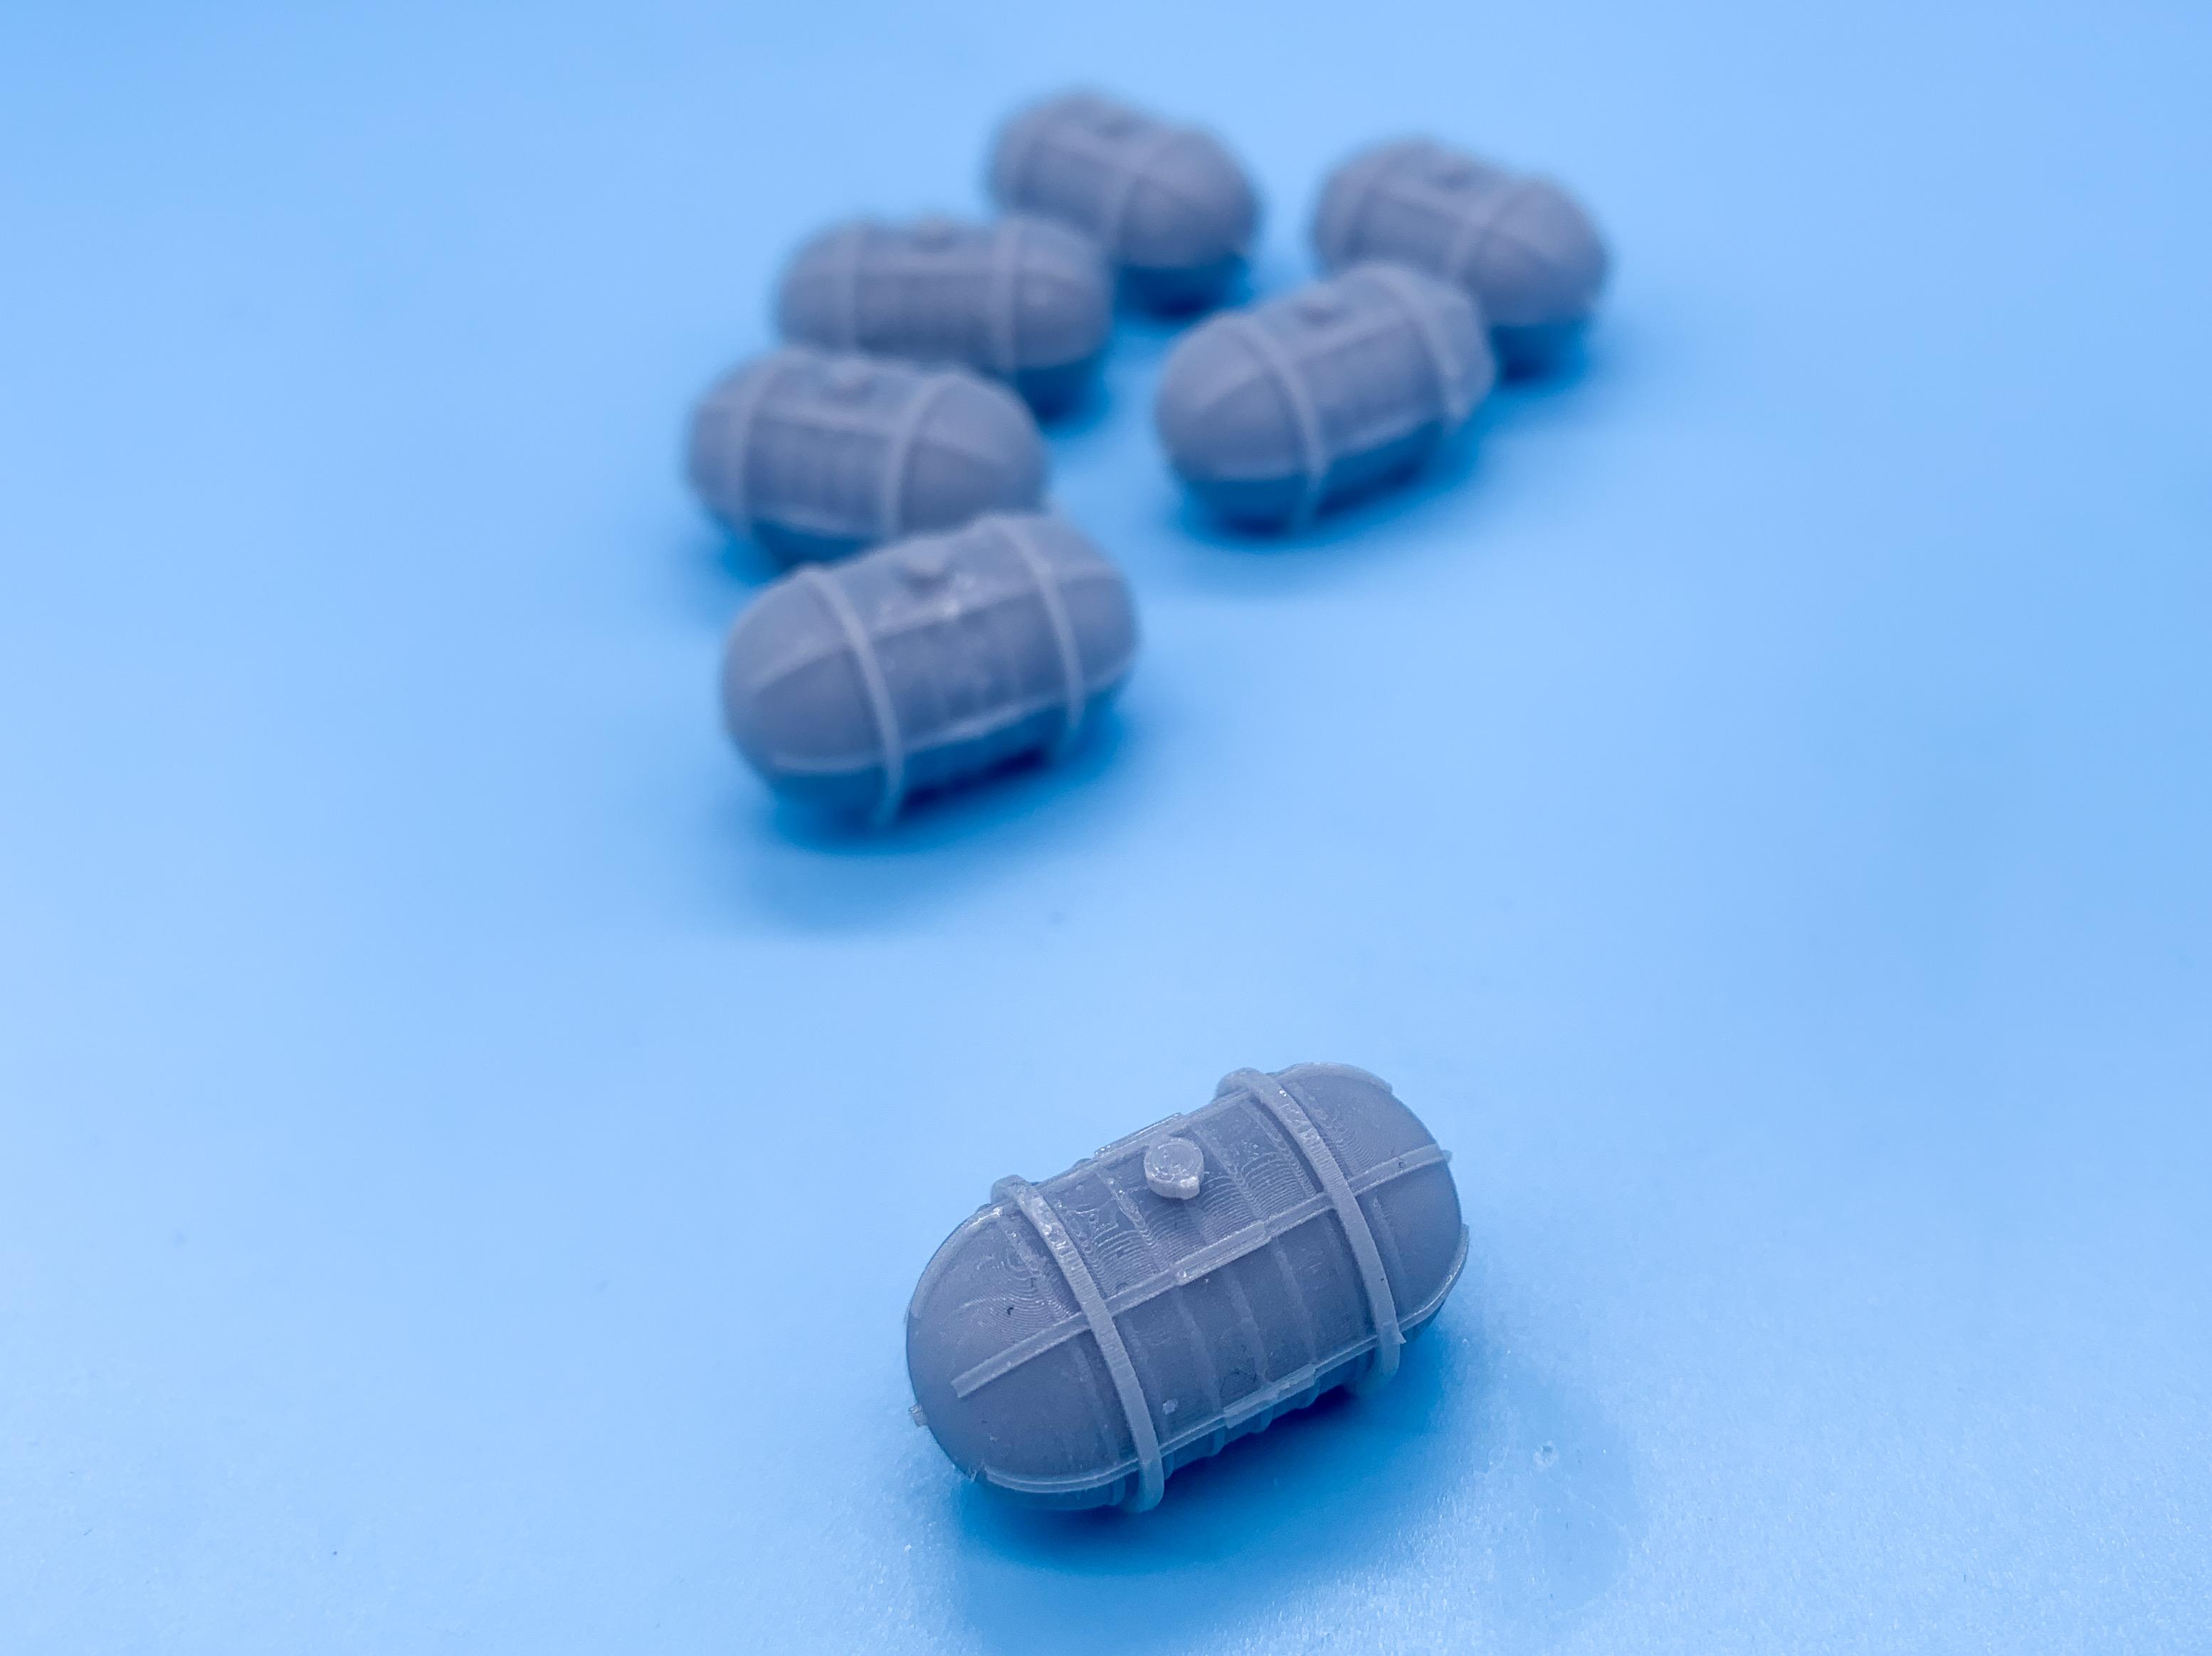
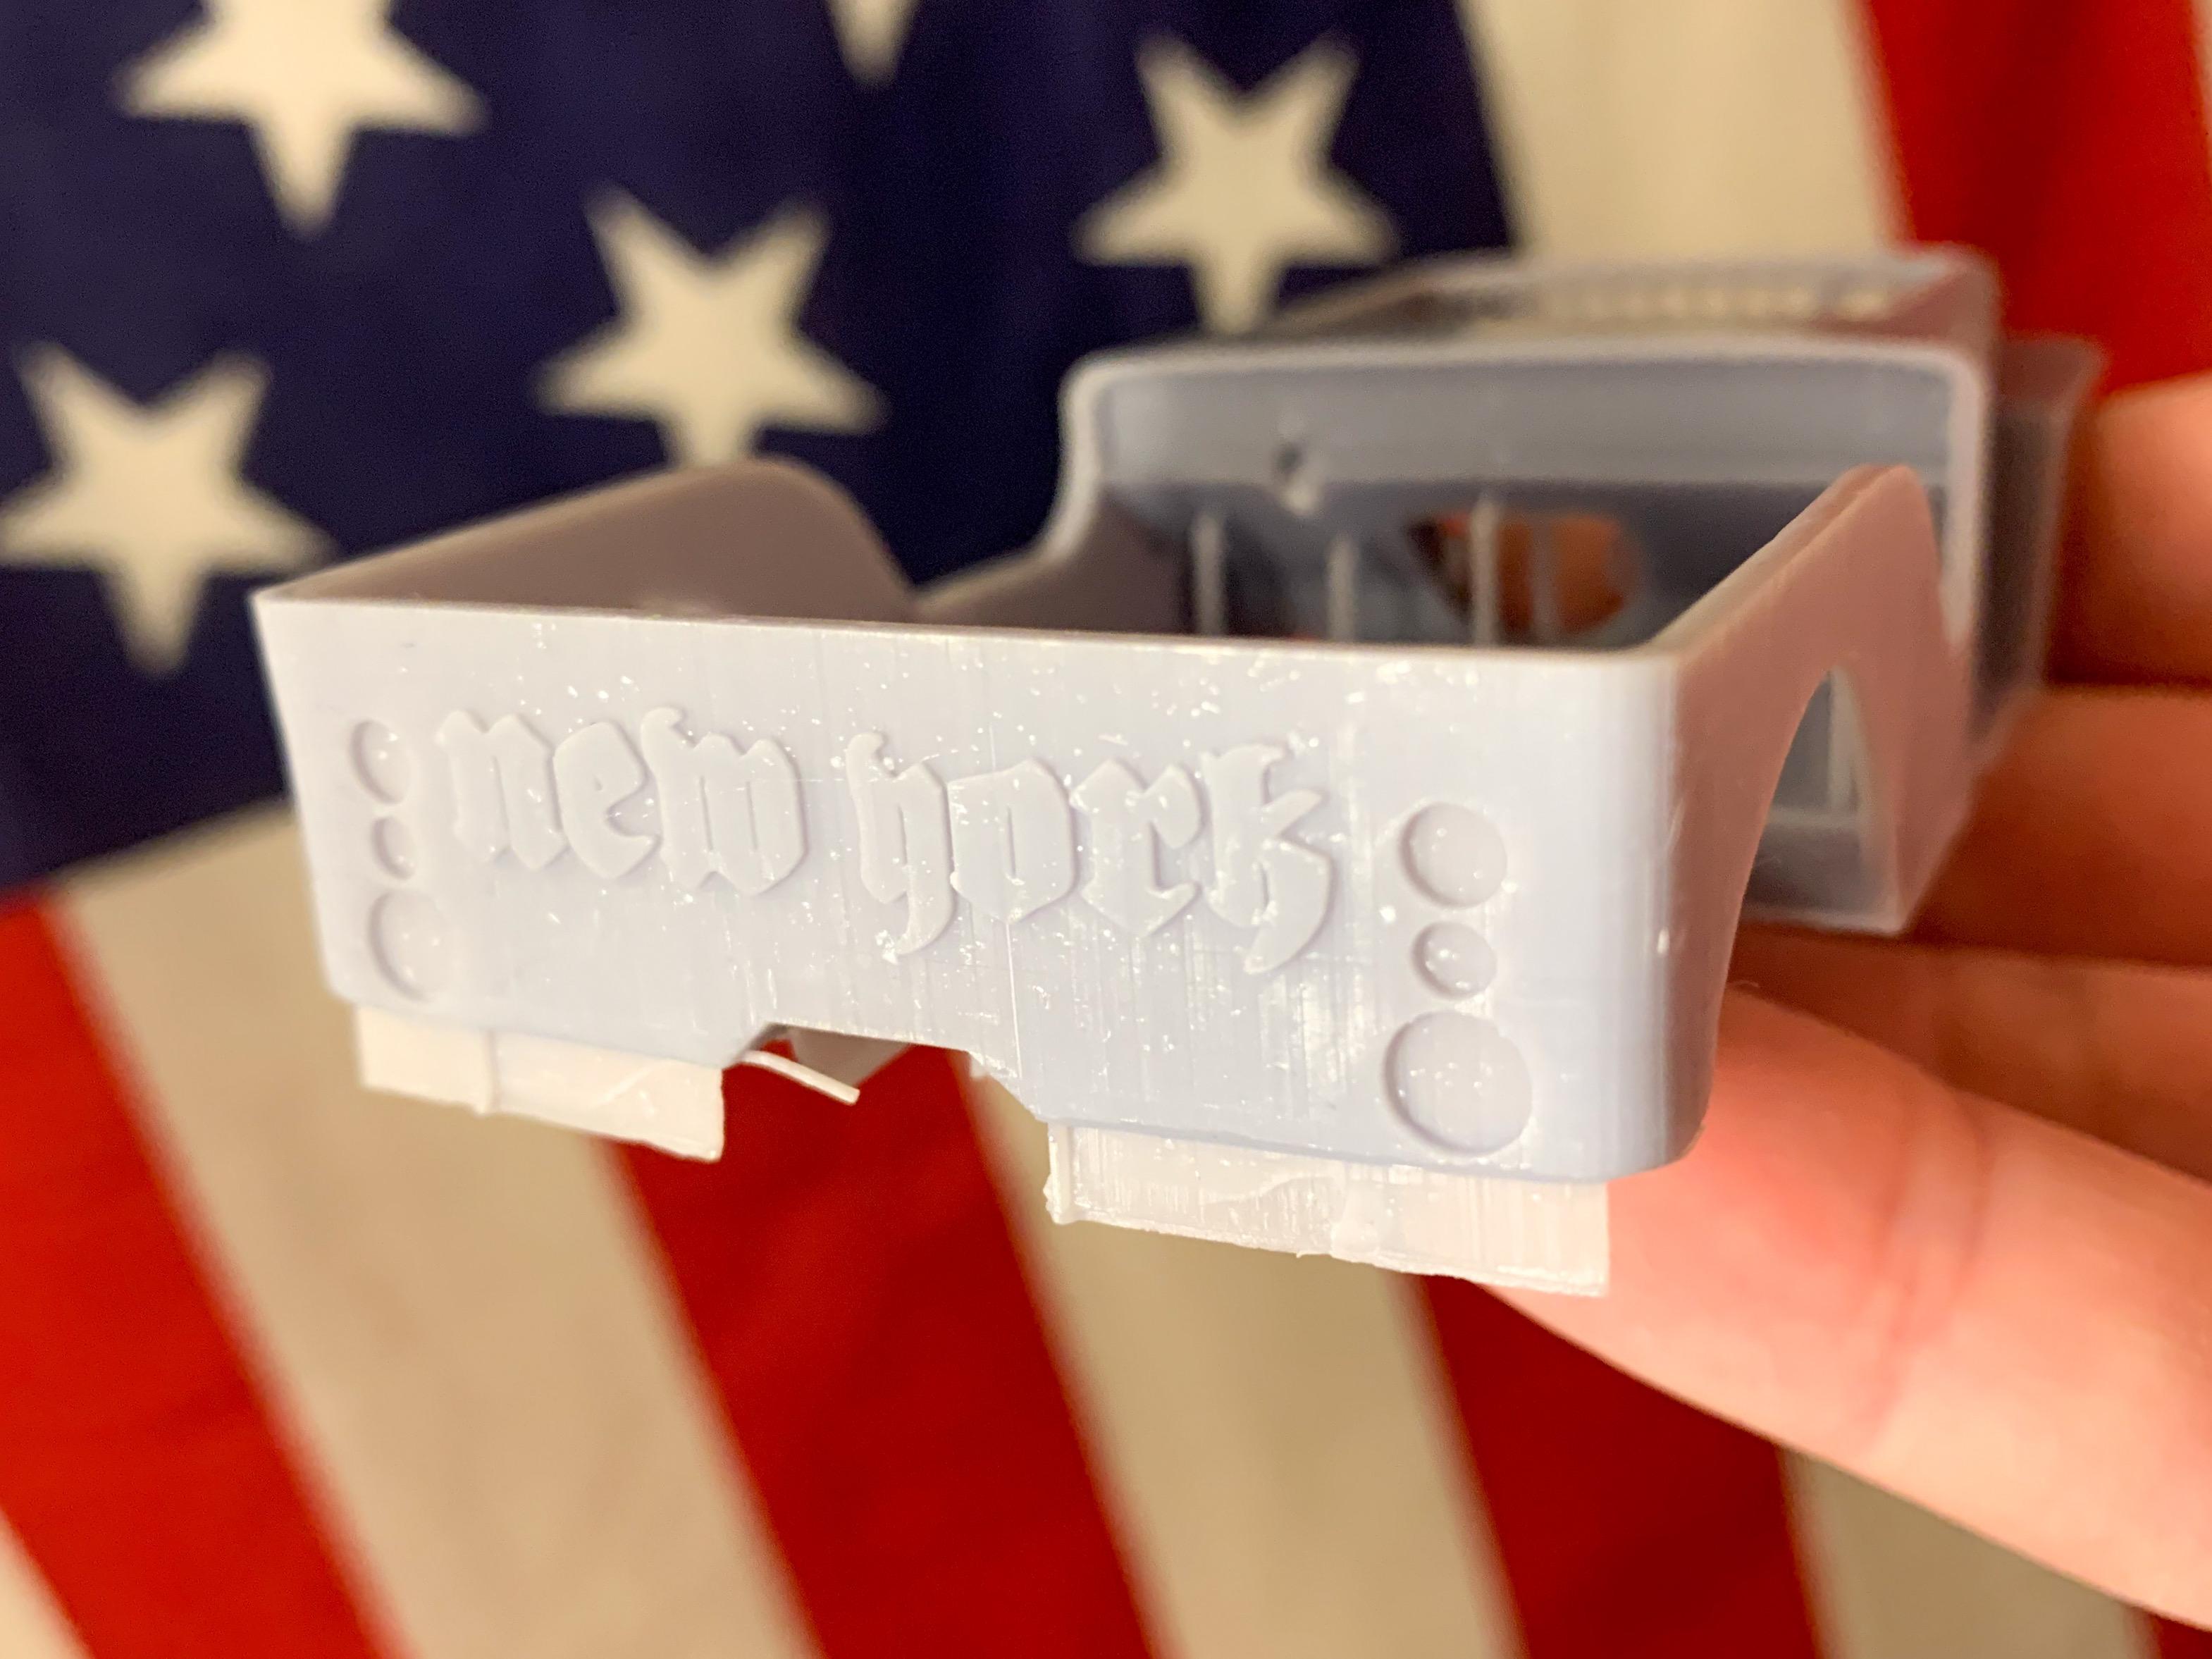
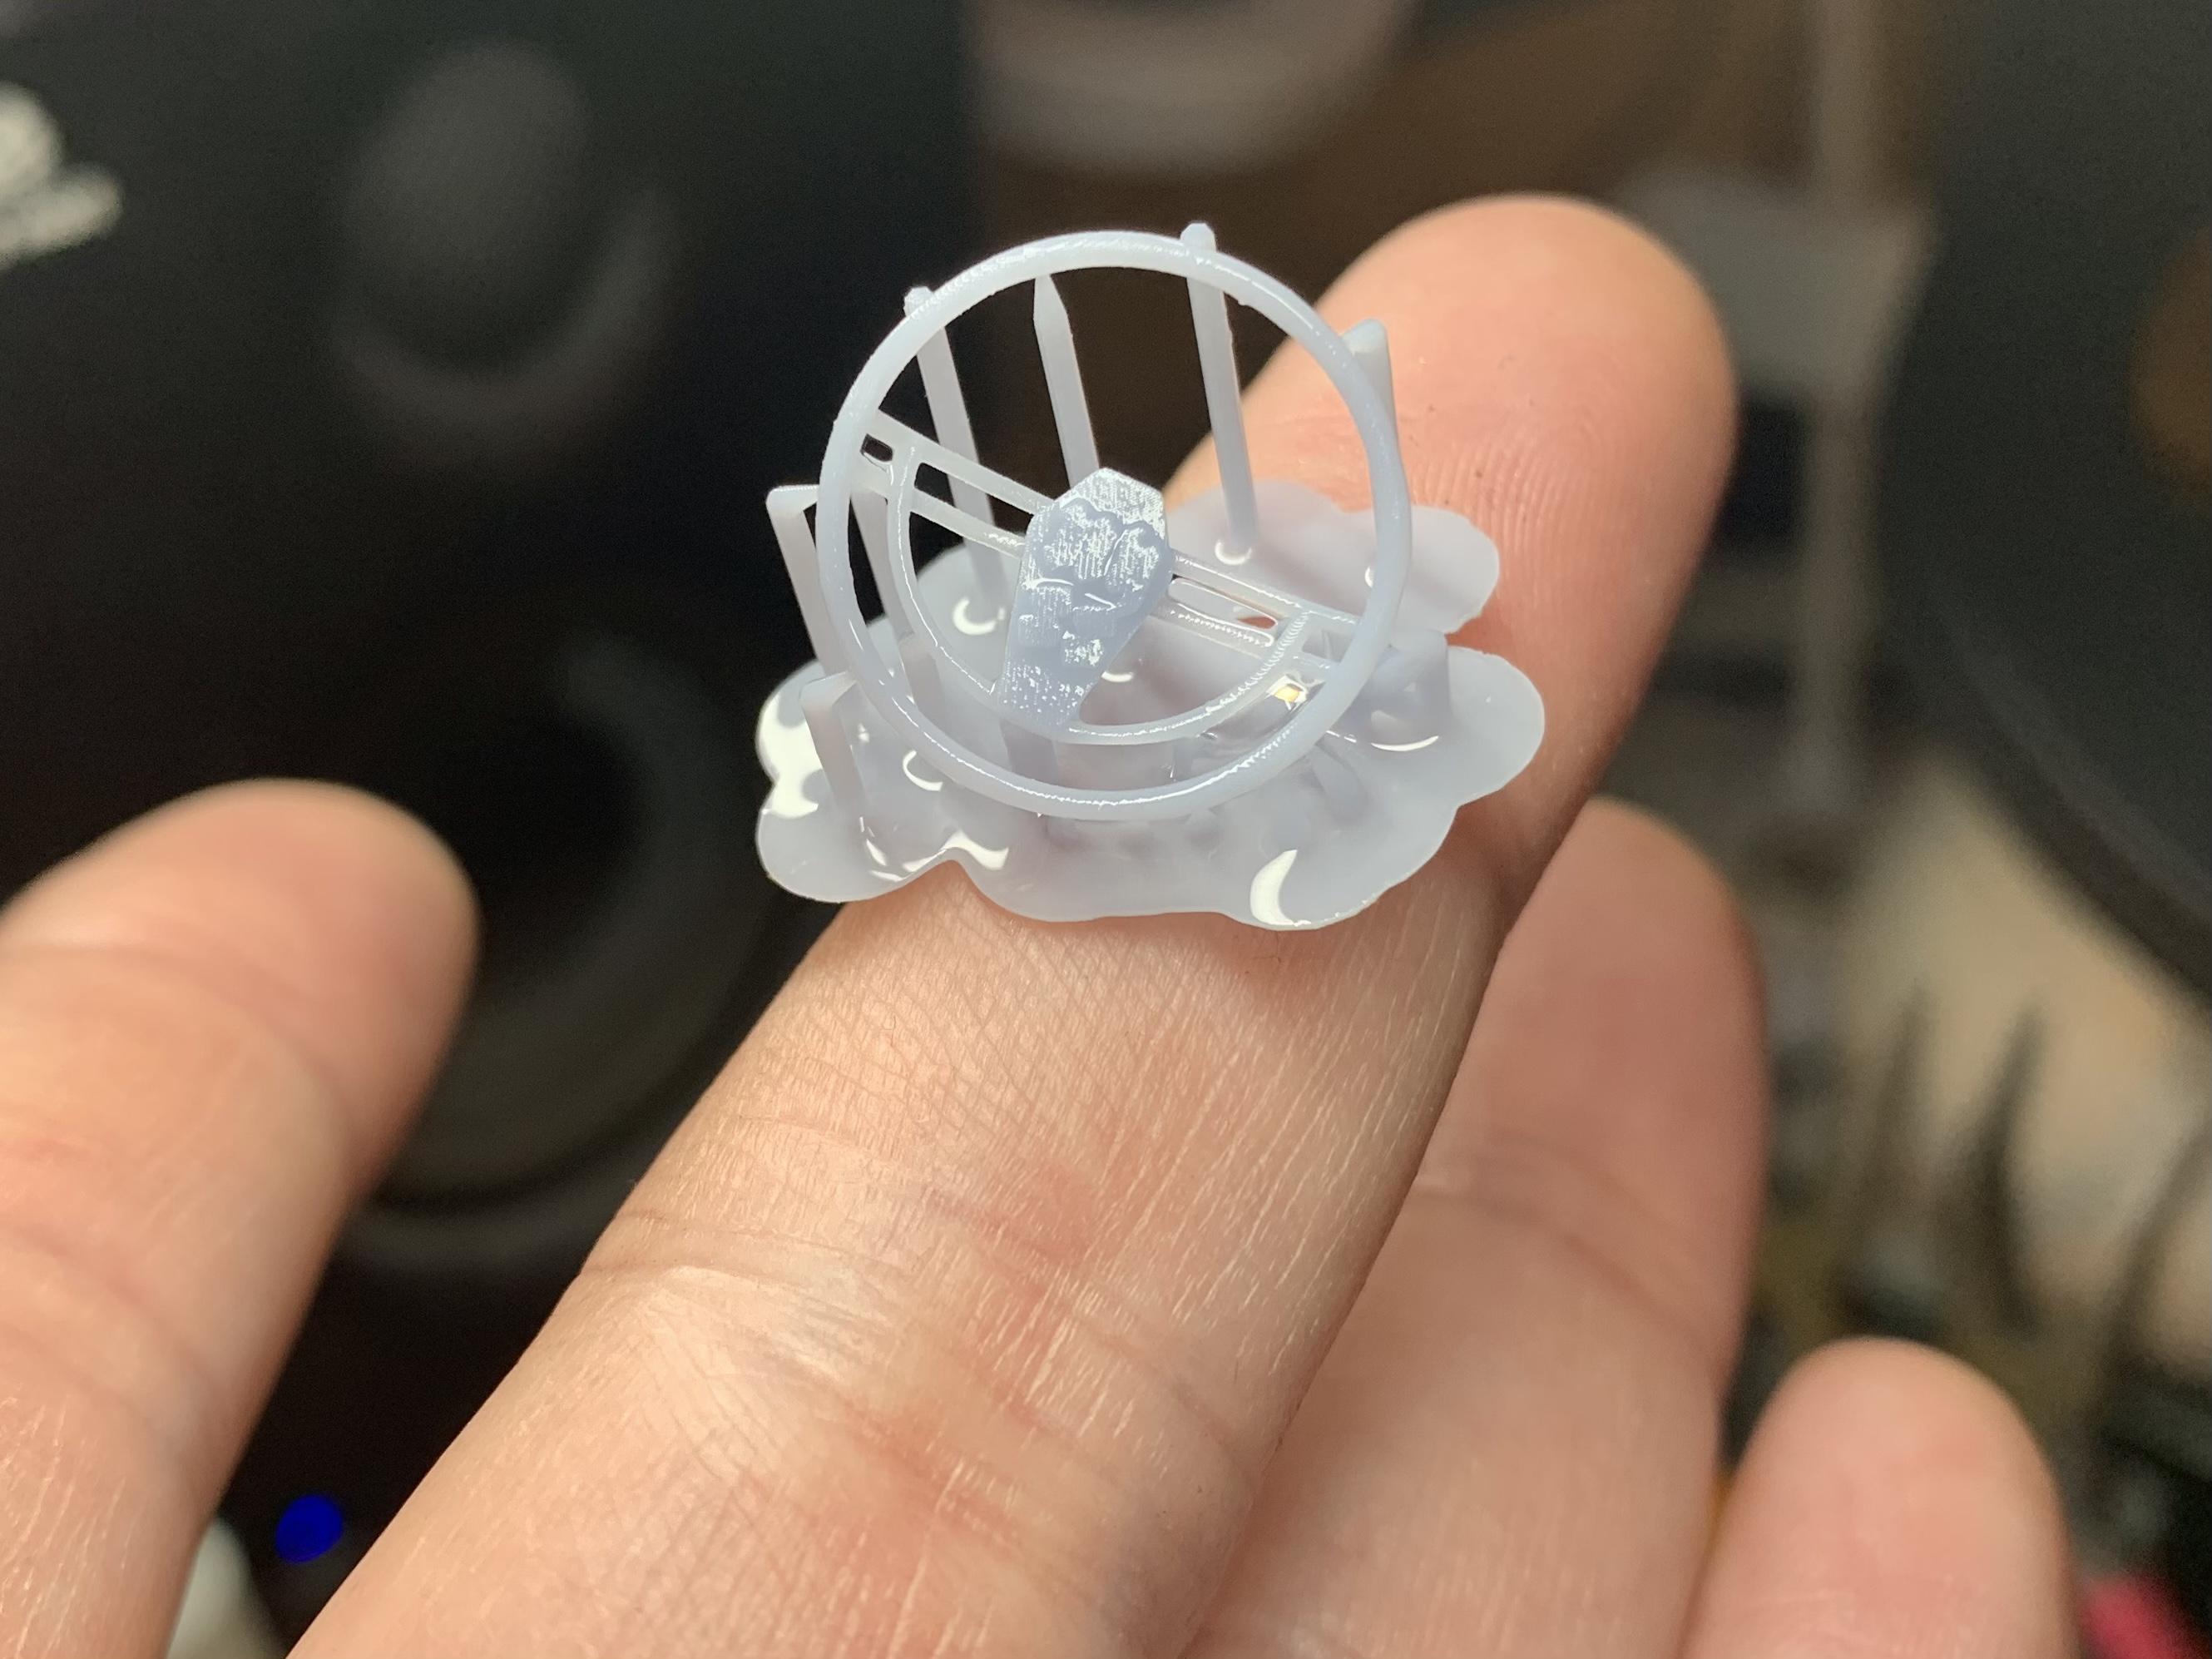
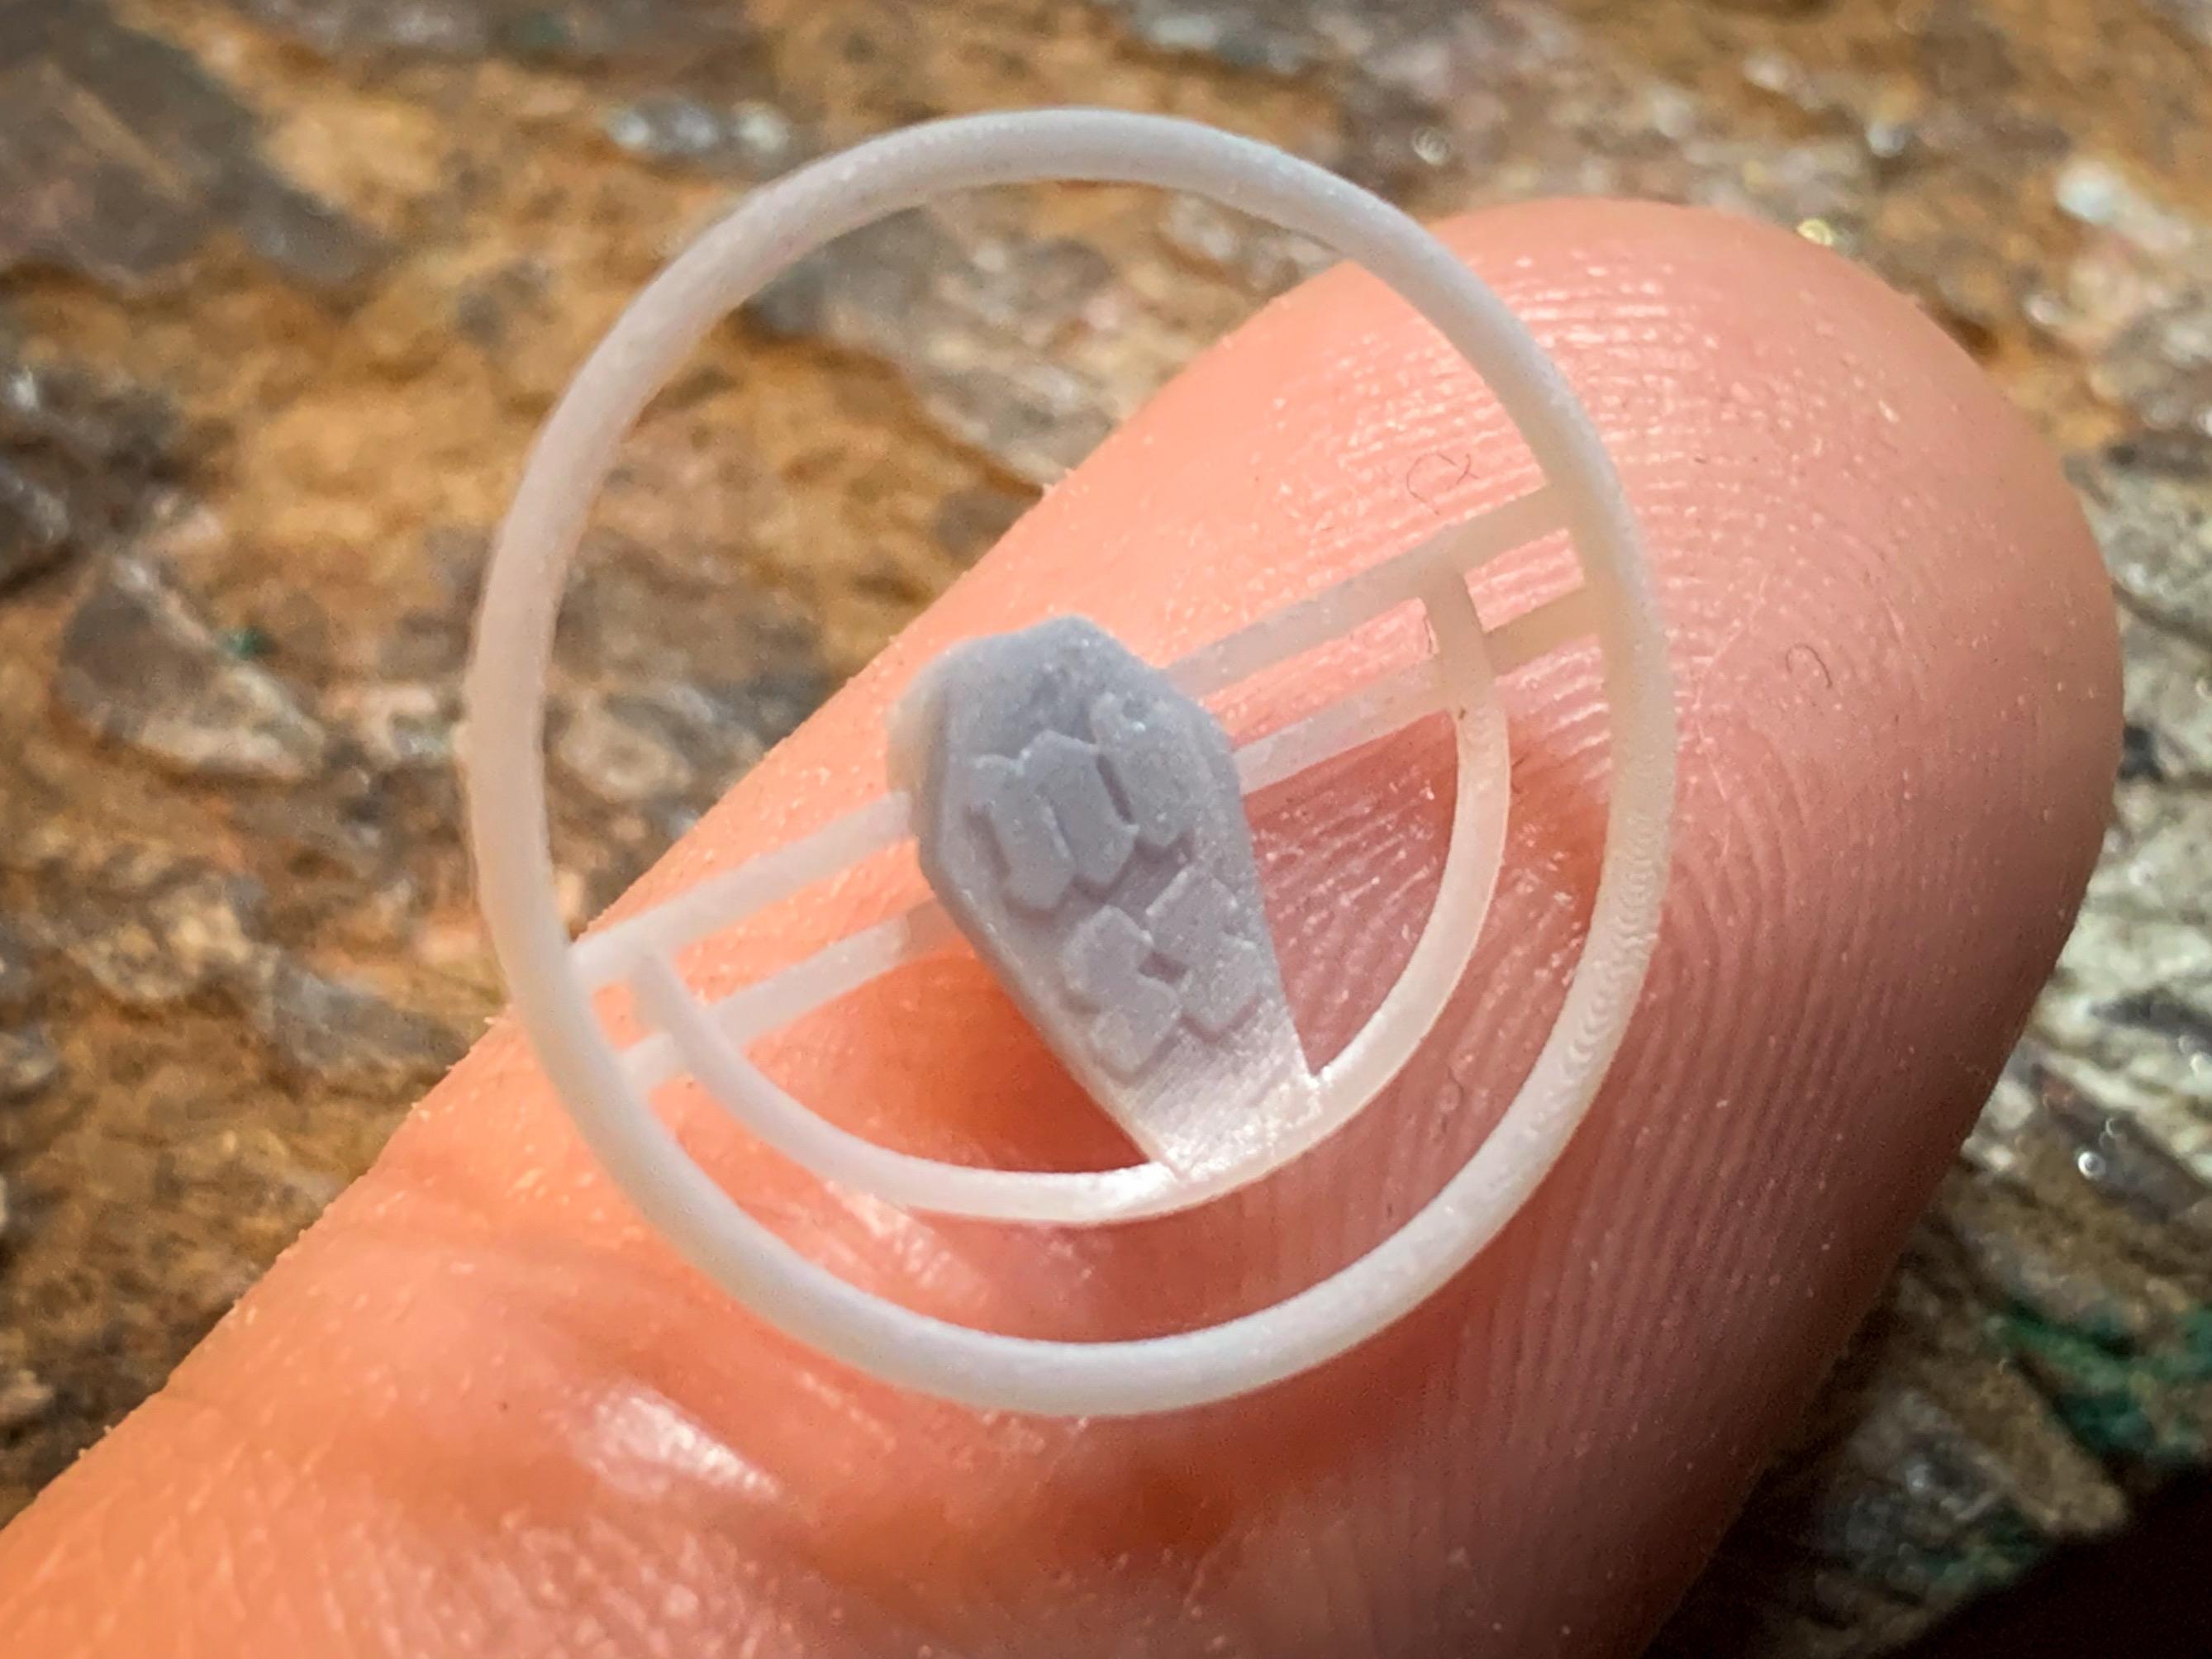
So, I didn’t update this build for a while because I’ve just been cleaning up parts and designing little doodads and whatever and learning some stuff…but I figured it was time for an update anyway… Got the body all cleaned up and into primer - I’m doing a paintjob inspired by the old trucks that the NYPD used back in the 30s. I have no evidence that they ever used ‘34 Fords (they were much bigger, more like fire trucks generally) but they were green with gold lettering and I liked the idea that someone in the 60s found an old cab somewhere and built something Roth-inspired around it. Military modelers use a trick where they pre-shade underneath their paint with different tones to give a simple paintjob a little more depth and realism, and because the Wicked Colors paint I’m using is a little translucent I can use that same trick to make this almost-90 year old paint look like it’s aged a little: I’m not going for a patina’d look here, just really old but clean lacquer (or I guess enamel maybe? Whatever they were using back in the day…) Next up, twelve coats of Wicked green: Followed by some lettering in Vallejo Old Gold: Aside from the body, laid out a steering wheel design that I’d had in my head for EVER… …and printed one of those (along with a dash, that I’ll get to in a later post… Printed some B17 oxygen tanks to use as a gas tank: Conveniently, these things came in dark green for certain applications, so they work with the color scheme and are unusual enough that I thought it would fit with the theme I’m going with here… Oh, and I stumbled upon a new grill that caught my attention so I printed one of those too: Finally getting to the point where there’s not much left to design on this thing (thank God - this was basically like designing a whole kit!) so it’s about time to start spraying some colors and doing some assembly. More soon!
-
Good questions dude! Honestly? I’m kinda feeling my way through this stuff myself… So, the upper side of the front fenders printed just great, but there was some waviness on the undersides where the material was sagging under it’s own weight. That’s what I was hoping to avoid with those supports under there, and the tips where they connect to the body are so tiny that cleaning them up is really quick and easy so I added plenty. On the rear of the body. I was concerned about the same thing happening, or the thing getting wobbly or wavy not printing right…but there’s only so much space INSIDE the body because there’s a floor there. I COULD have connected some braces to the floor and to the inside of the body, but I figured I’d rather just level out the outside in this case because it’ll be easier to get to. Those little nubs where the braces attach are REALLY small, and a shape X-acto blade removes them really quickly. All that said, yeah, it might not need that many, but I’d rather do a minute of clean-up on an extra brace than spend three hours waiting for the thing to print and it’s not usable. Was just trying to give the machine the best shot at getting it right first time!
-
Thread for aeroplanes and stuff ⬇️⬇️⬇️
-
Plymouth Salt Flat Slammer
OldNYJim replied to OldNYJim's topic in WIP: Other Racing: Road Racing, Land Speed Racers
I’ve got the Portrait 2 - but I also had the Cameo 1…seems like they’re all about the same in capability apart from different potential cut sizes…my wife has a Cricut and that works about the same too ?? Thank you!!! Thanks buddy! Was a nice surprise to open the mag and it was in there! Yessir! My lowest-effort least-detailed least-proud-of build of all of last year, and it made the mag ?? -
Not sure if this is true or not - but if you’re a Future fan might be worth grabbing an extra bottle or two now…
-
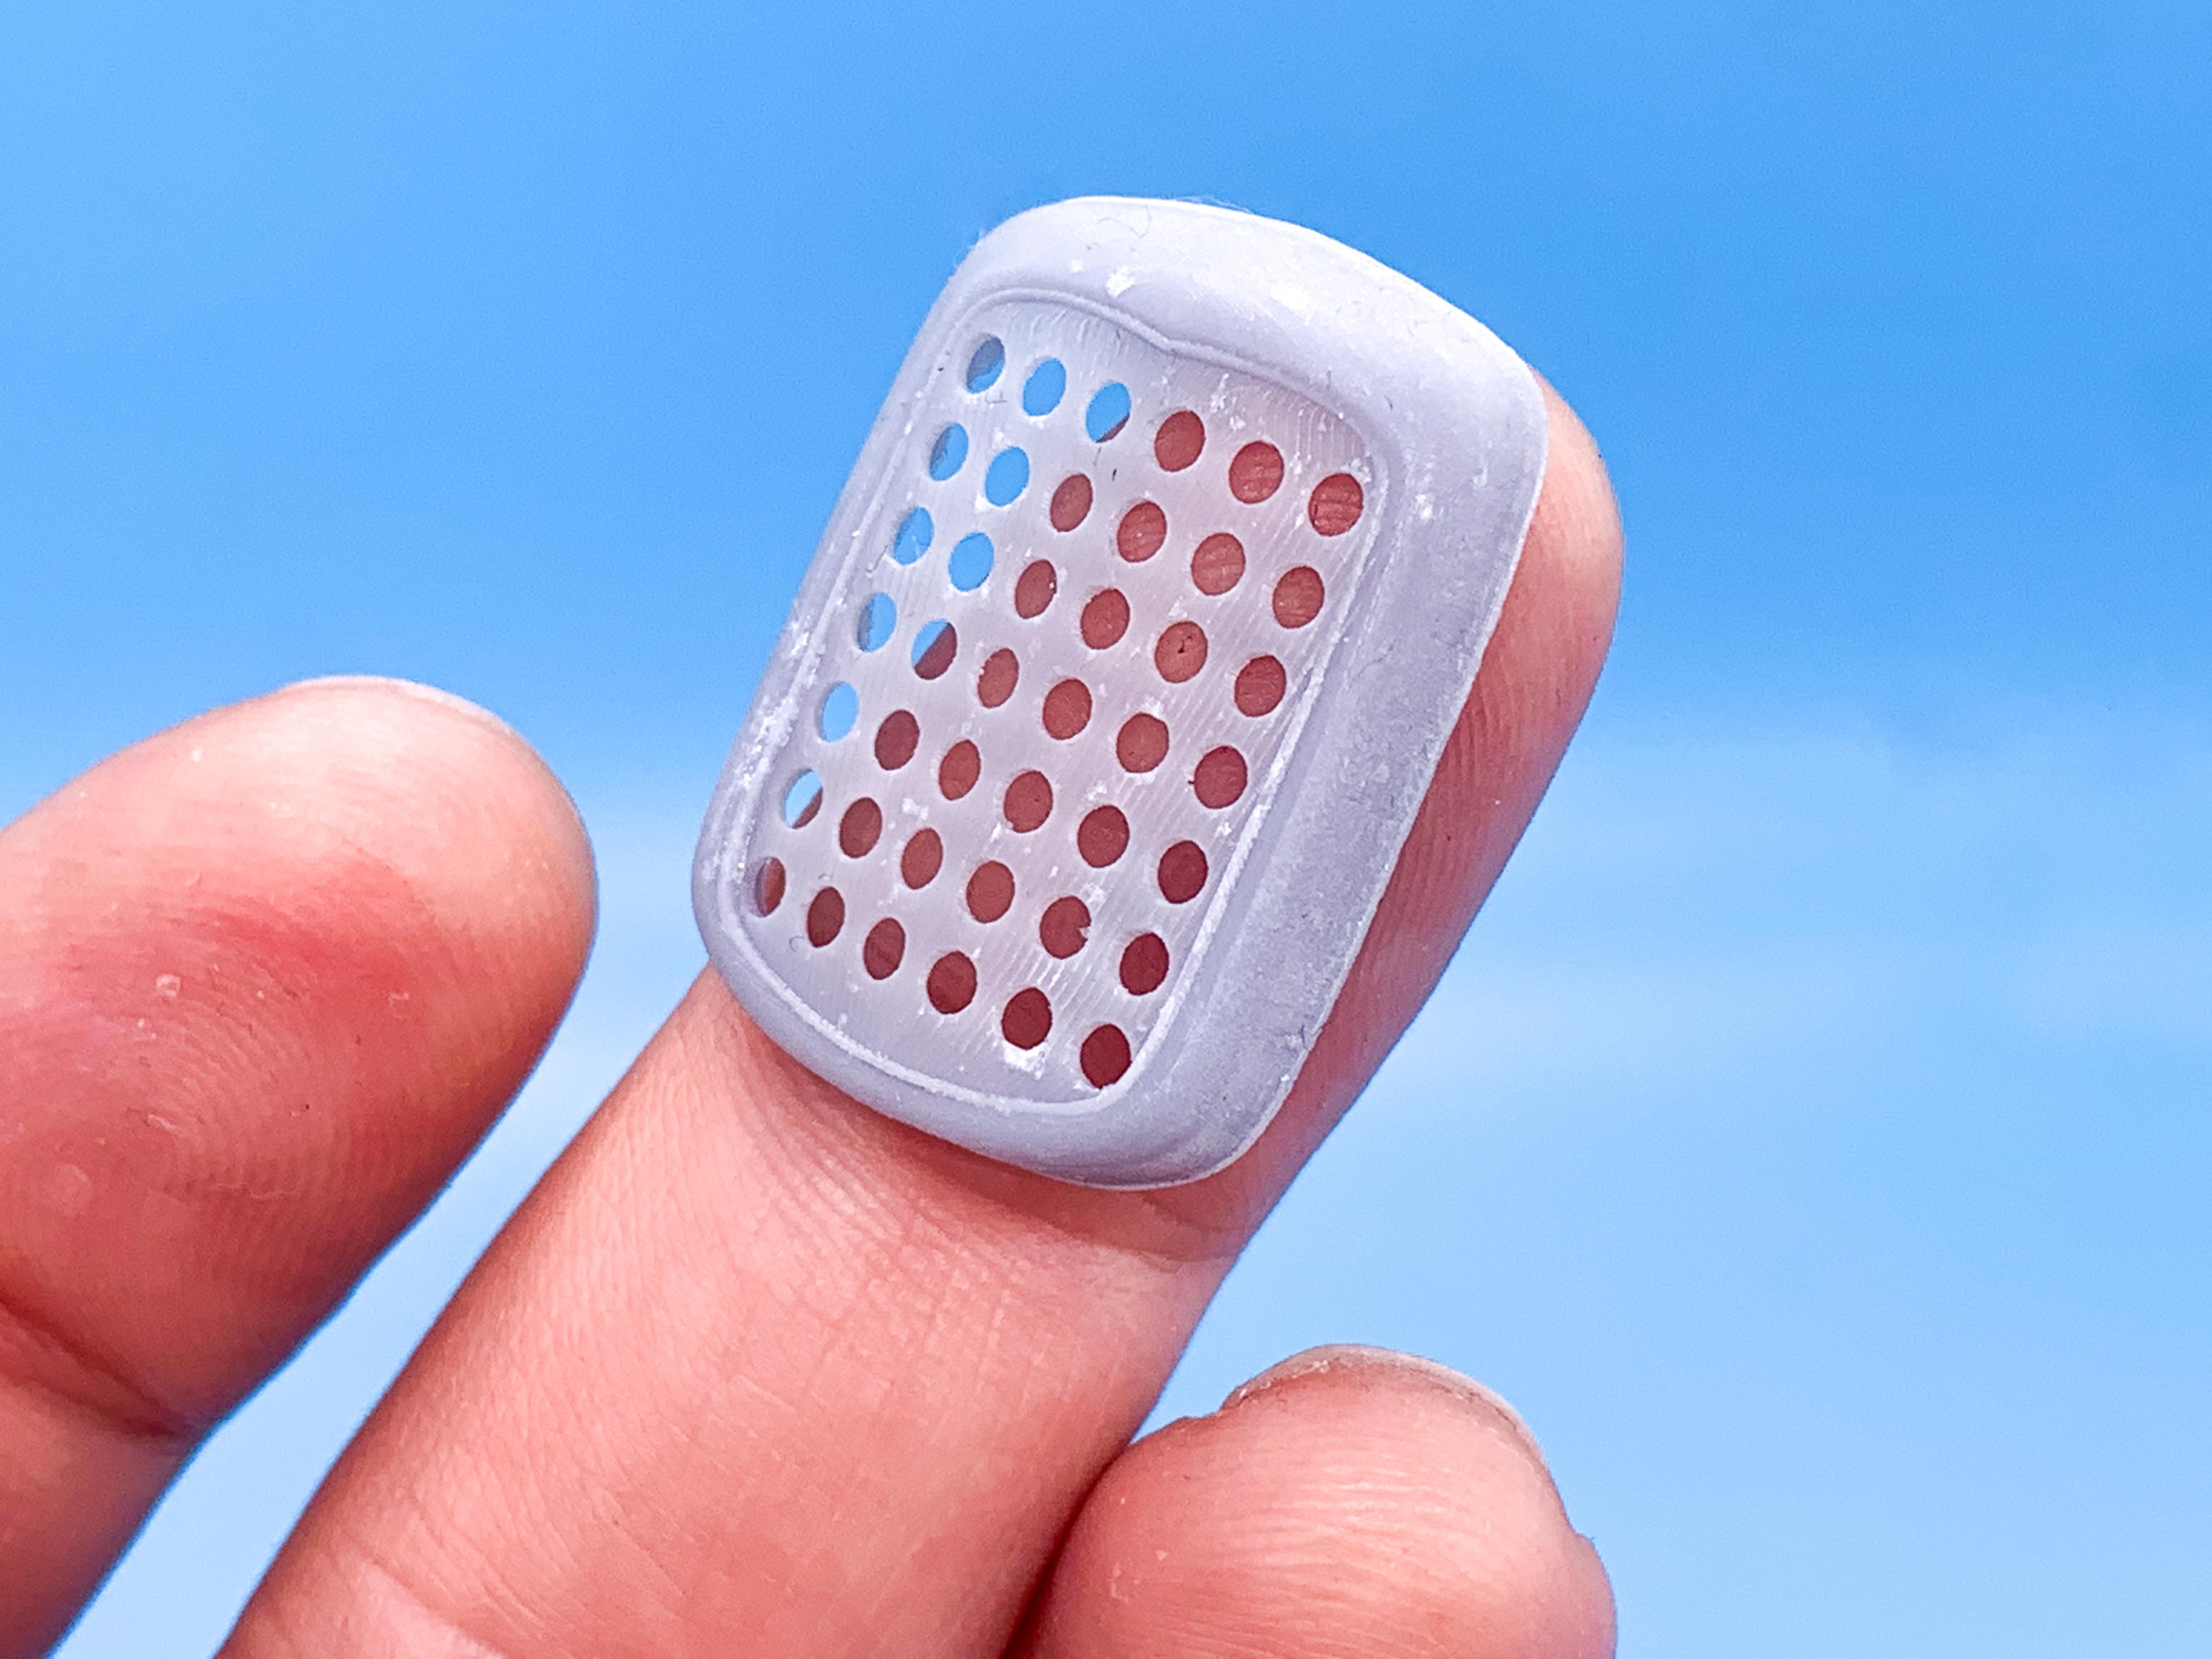
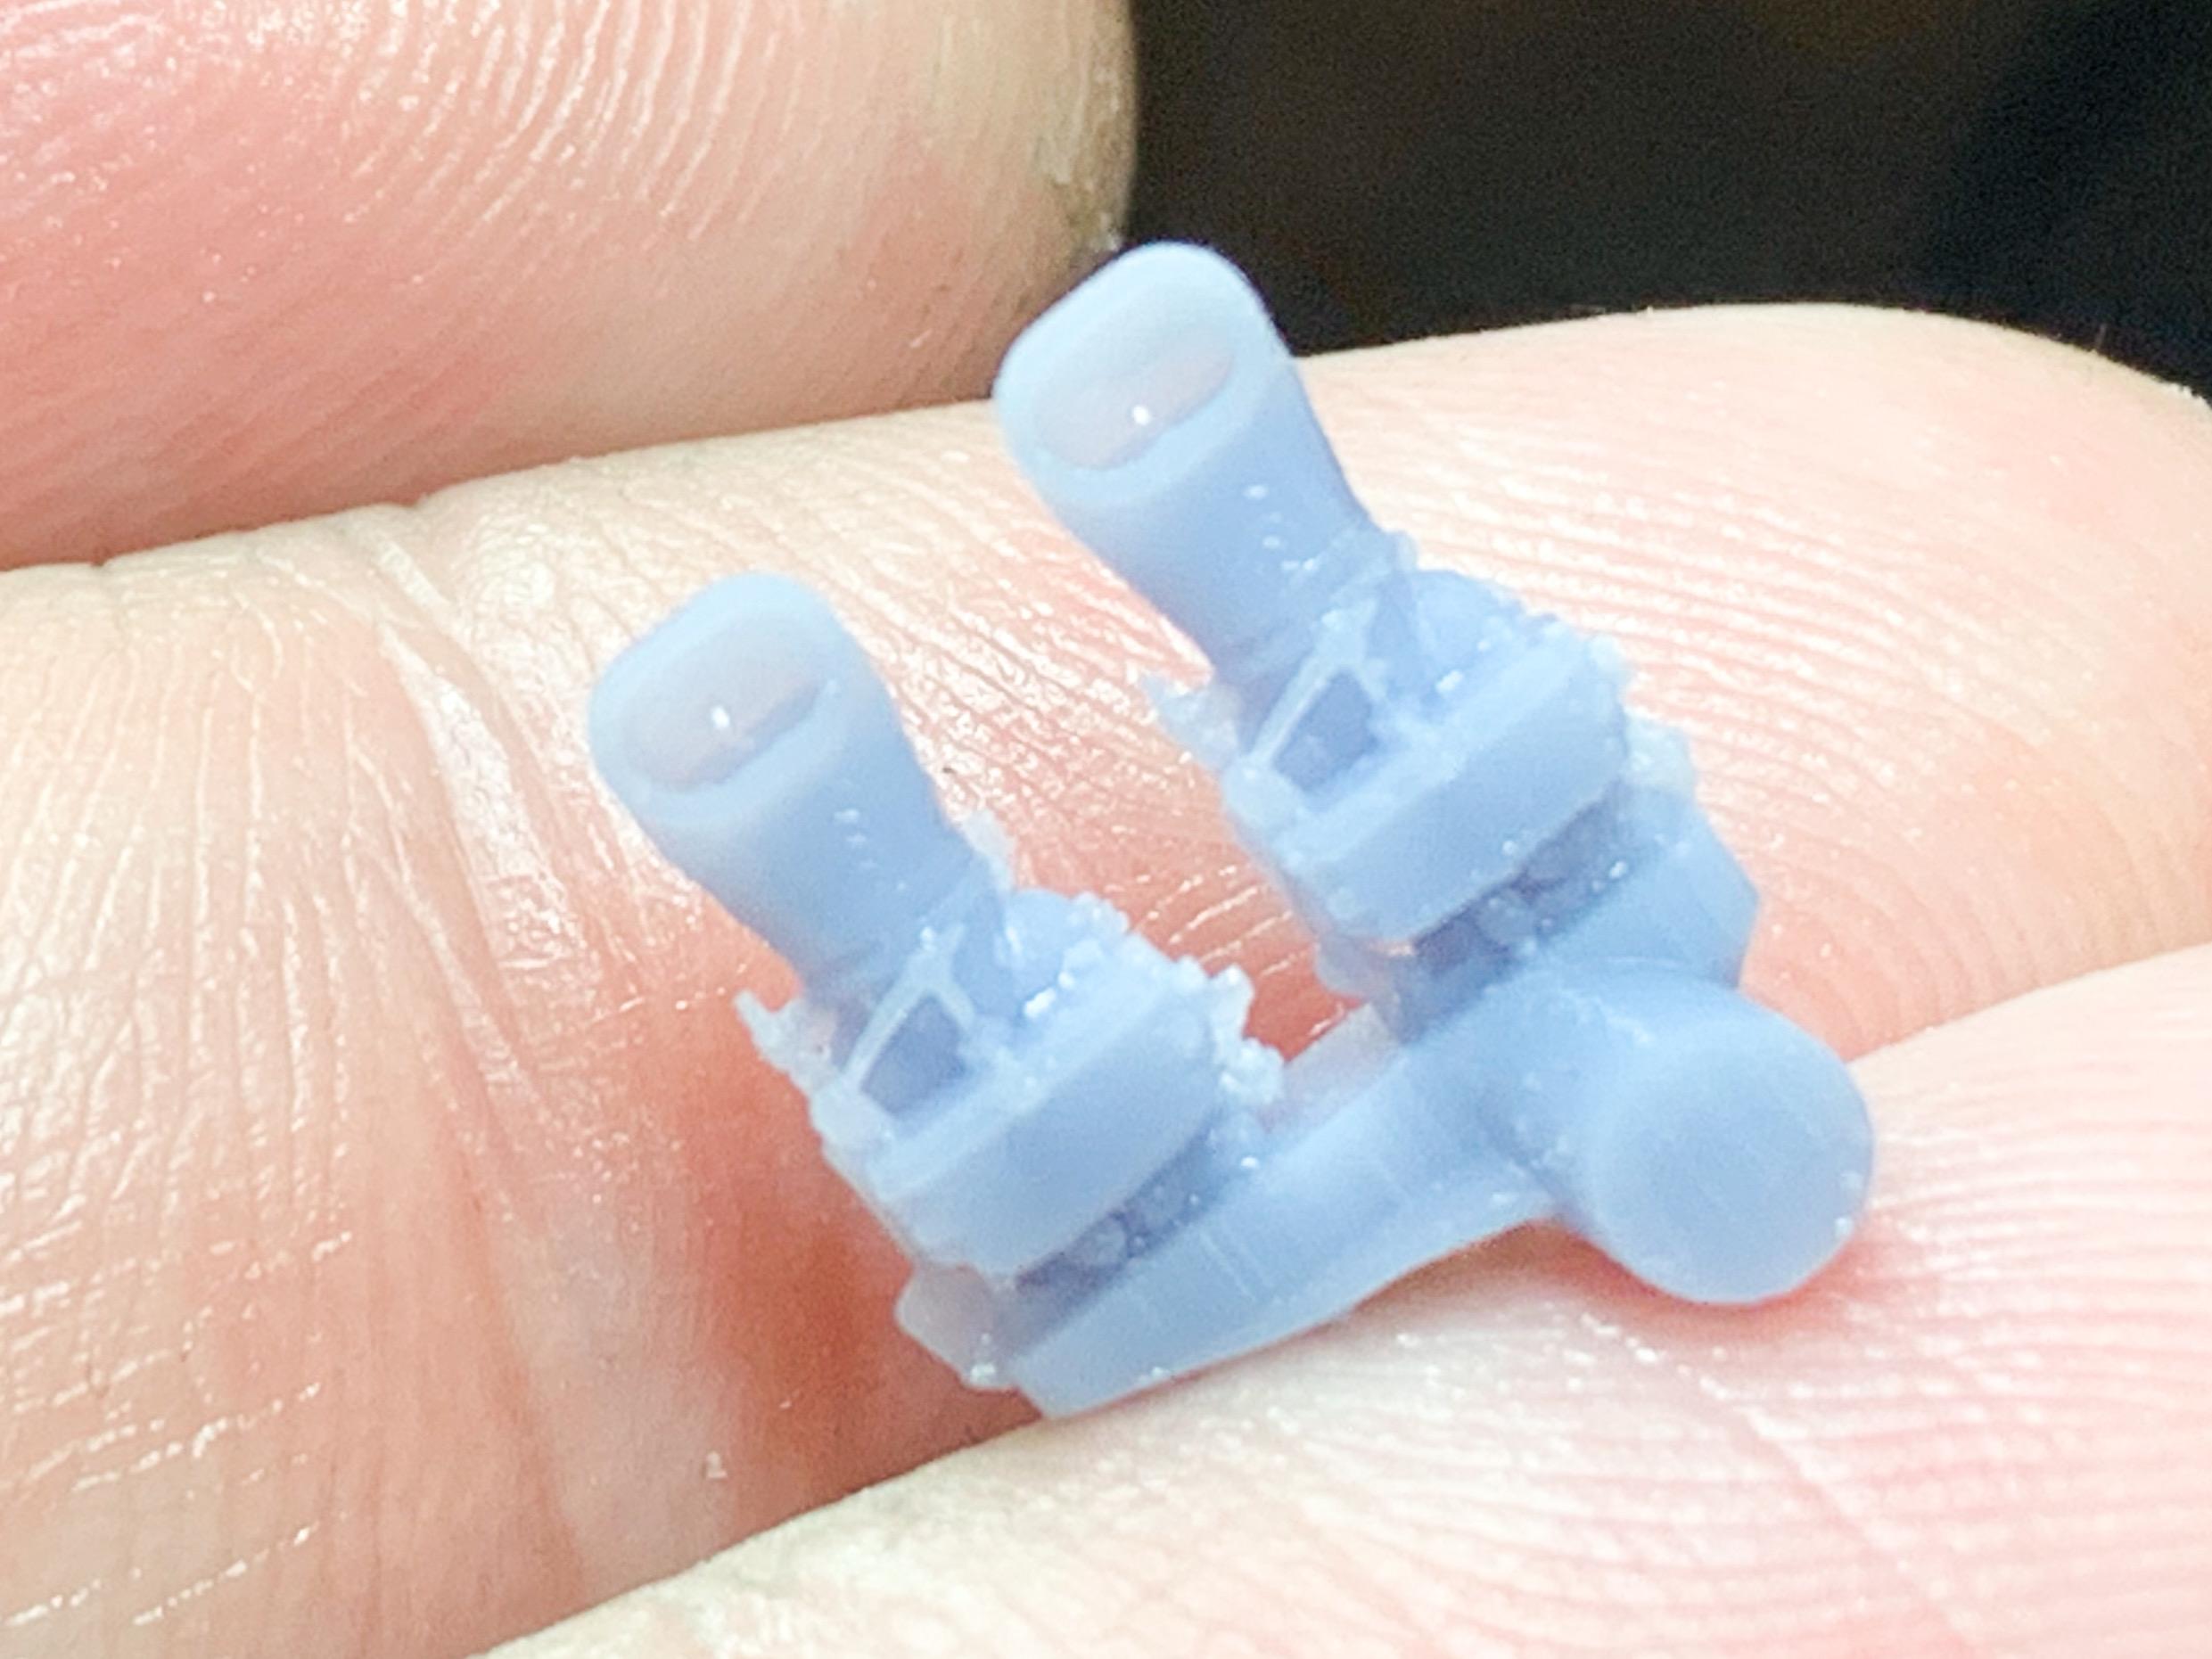
I think, in some aspects, 3D printing is way ahead of regular resin casting…for example, I just printed these today: Check those tiny linkages! I bet you COULD do that in resin somehow…but I probably couldn’t…and it certainly wouldn’t be as quick and easy. I think 3D printing is already AT the point of being as good or better than the majority of cast resin parts in the market today…but like resin casting, the people designing the masters and the people doing the casting (or printing, in this case) makes the difference.
-
temporary glue that holds
OldNYJim replied to Paul Payne's topic in Model Building Questions and Answers
I agree on the Tacky Glue - works just like Elmer’s, but much stickier. I’ve used a regular glue gun for larger parts before, and that works well if you need a stronger (but still temporary) bond. -
Model Car Muse with Doug Whyte
OldNYJim replied to OldNYJim's topic in General Automotive Talk (Trucks and Cars)
Doug is such a good presenter - so likable and good at communicating. This week’s video ? : -
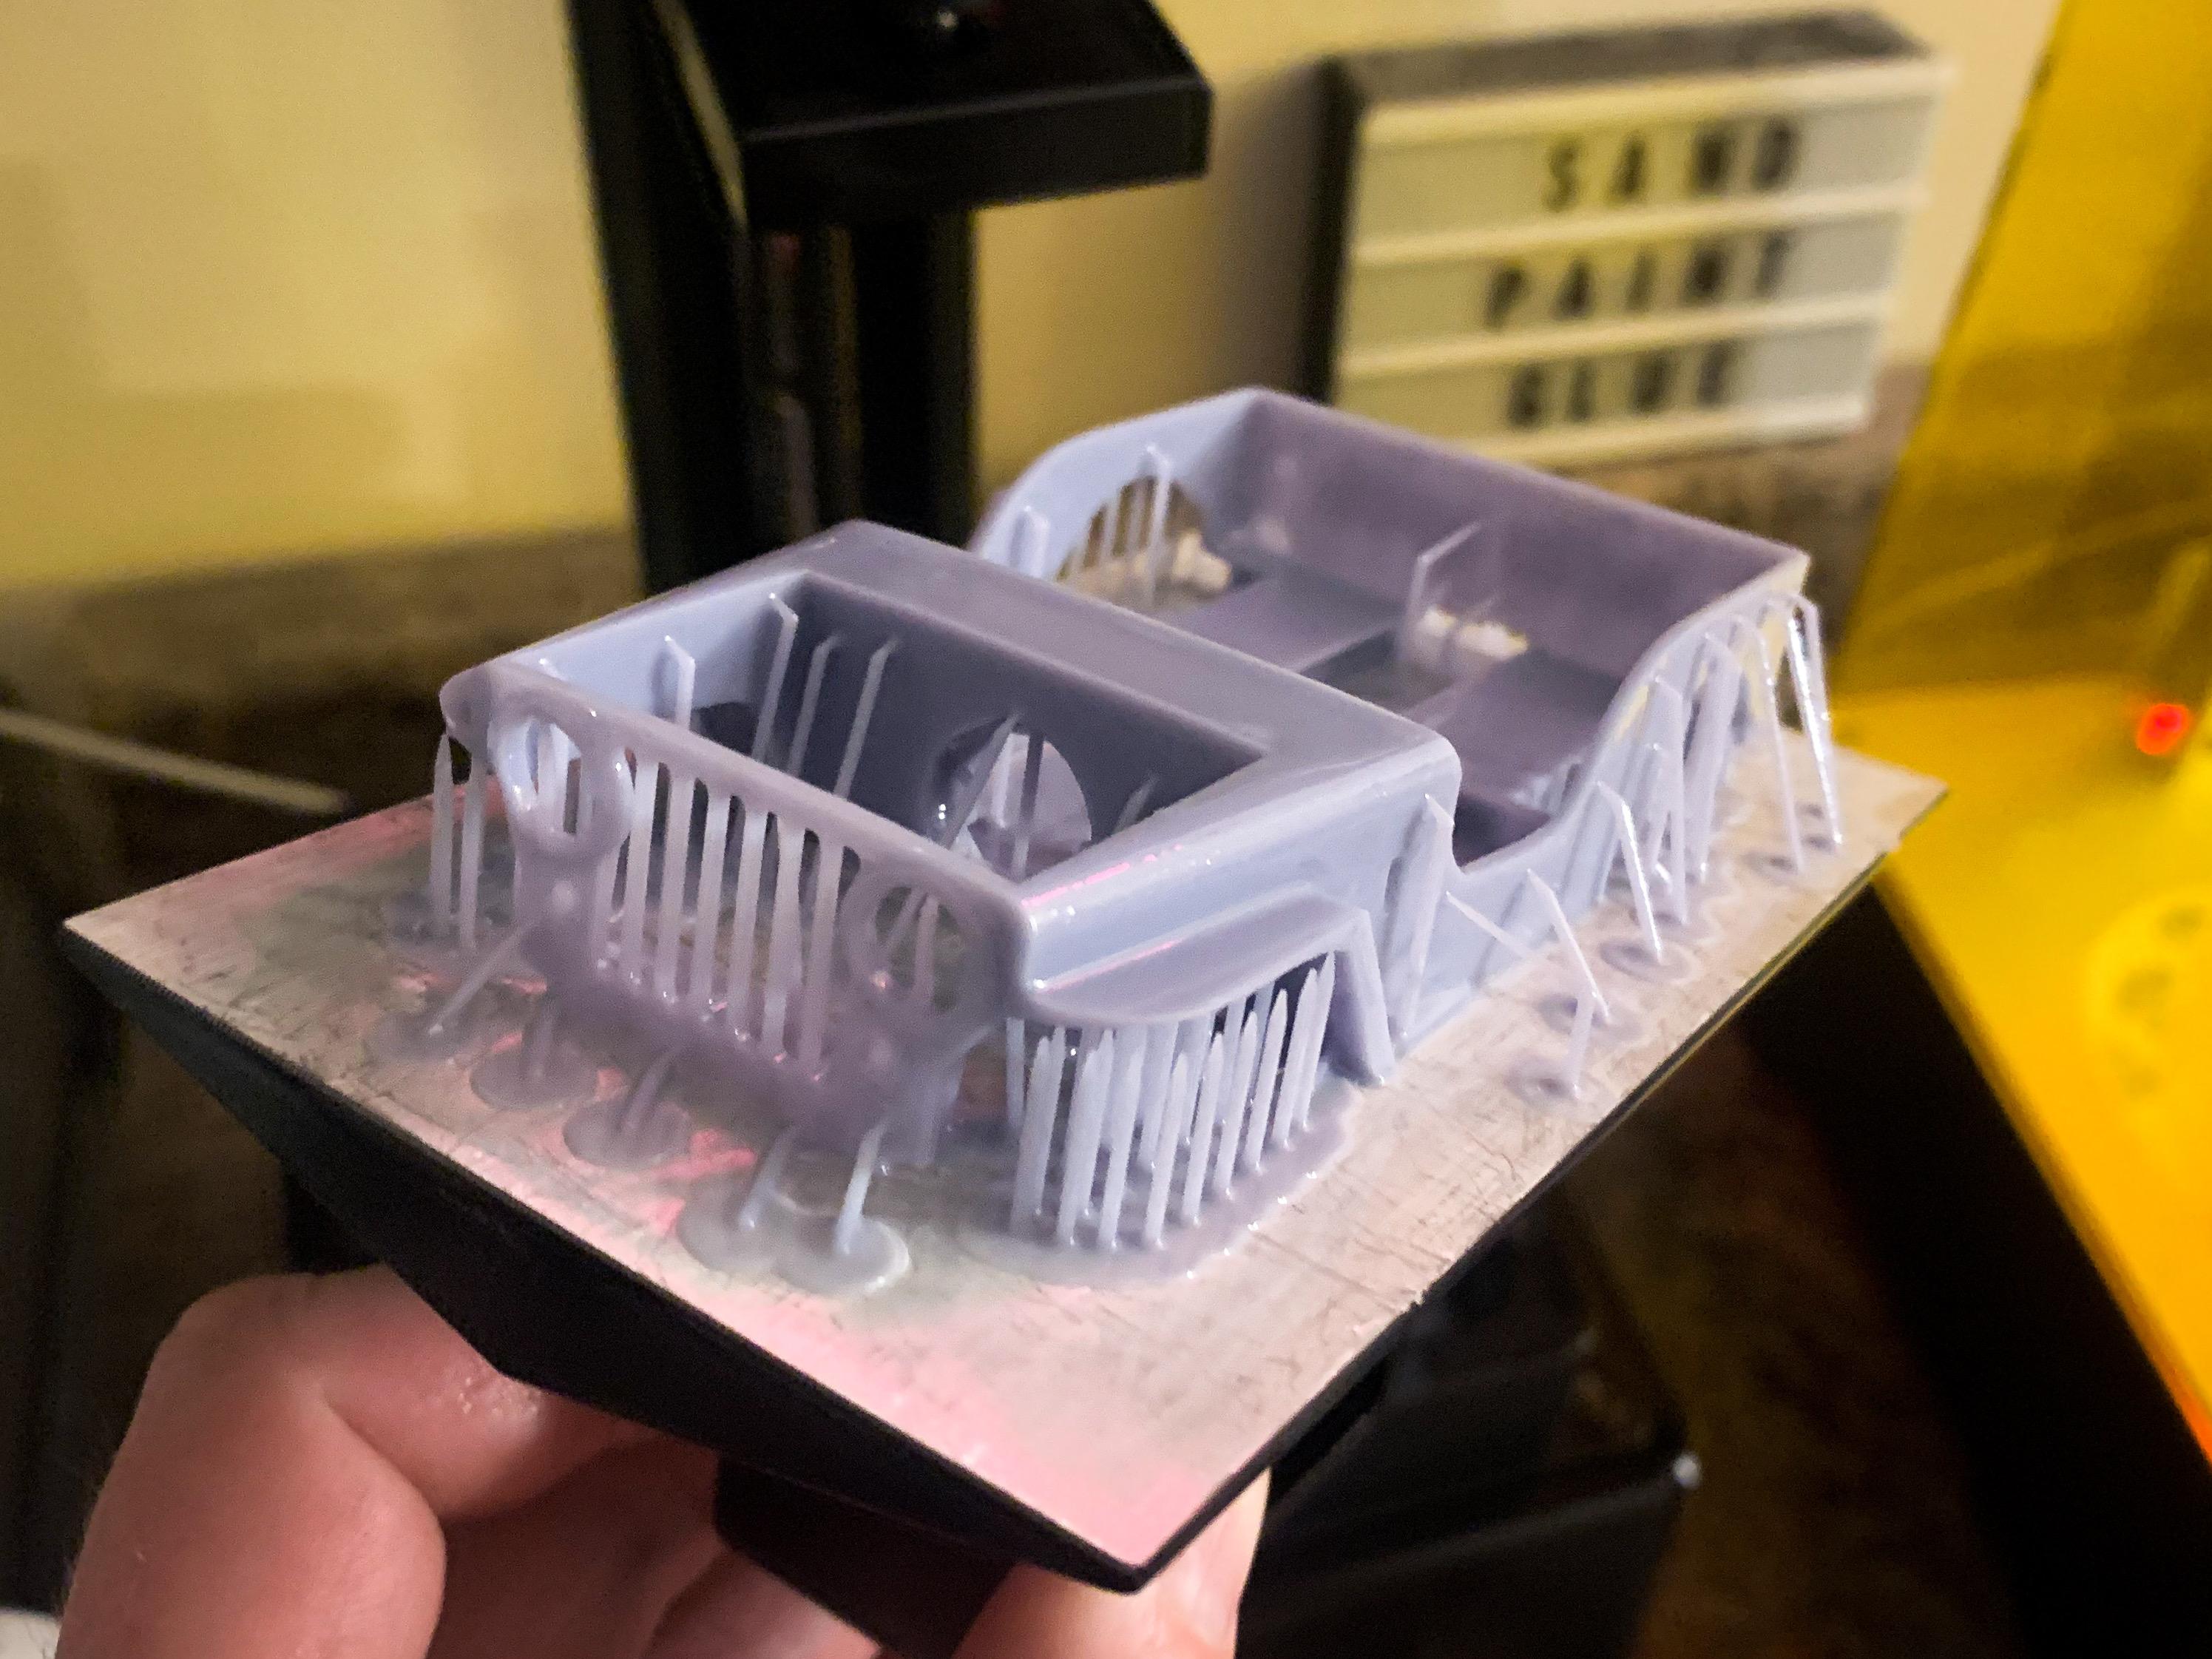
I’ve been playing with Adobe Dimension lately for 3D design - I have it as part the suite of software I (have to) subscribe to and it does a nice job of doing some simple 3D modelling and modifying of existing parts. Messed with this Jeep design on my lunch break yesterday… …and then printed one this evening: Need to tweak the some of the supports under the front fenders there to stop them disconnecting, but it’s definitely a usable first attempt. I added a few thin sacrificial planes under the back of the body to help support it when printing - just some little 0.5mm thick strips to stop the back sagging that can be easily removed when I take it off the bed…worked out great! You can see a little of what I’m talking about under the rear of the body here: Excited to try some more complex bodies (anyone seen a good 30 Ford anywhere?) but I figured I’d start with something simple. This stuff is a blast!
-
I’ll be REALLY interested to see how you get on with this project - you’re basically doing the same experiments as I am right now! I picked up various different colors and thicknesses of leaf from Amazon…I‘m trying to do basically what you described - use a stencil to lay down the adhesive (or Elmers, or clear paint, or whatever) and then lay the leaf over that. I think I’ve got a good technique down for larger lettering (say, 1/2” or above in this case) but I’m really trying to figure out if I can make the same technique work for MUCH smaller lettering (more like 1/8”). My backup plan, and one I use for painting too, is to do the process backwards…lay down a larger piece of leaf before paint, then clear coat to protect it, mask over THAT and spray the body color and remove the masks. Haven’t specifically tried that yet, but I do that pretty often with paint instead of leaf so I’m pretty confident it would work ok. I bet it would, yes!! I should pick some up to experiment with! Will report back as/if/when I get around to it ?
-
Yes sir - have tried…haven’t succeeded. The BMF tears too easily to be easily transferred from the sheet to the car. Cutting it isn’t super easy with the cutter either, for the same reasons For mirror-y stuff I would either cut a mask and shoot Molotow (or Alclad, but then you need to add a black layer first) or get some CHEAP signwriter’s chrome vinyl. Cheap stuff is best because the worse the quality, the thinner (and this more in-scale) it is… I’ve been messing with a technique to use one of these machines to lay down gold and silver leaf, but I haven’t figured it out yet…I had an entire day of failures last weekend trying to figure it out but I have some new ideas for this coming weekend that I’m excited to try…
-
Well, in the truck’s defense, we have no evidence that the driver’s behind isn’t still toasty warm in this pic…he may wanna blow some warm air on his feet though to stop frostbite setting in ?
-
This whole 3D printing thing still blows my mind. I’ve had an idea for a steering wheel design for AGES and never got around to making one…so in a quiet hour at work today I drew it up in CAD: Then had one printed within an hour of getting home: …and ready for paint by dinner time: This stuff is like living in the future to me! Amazing that we have these tools at our disposal now, and so easily available!
-
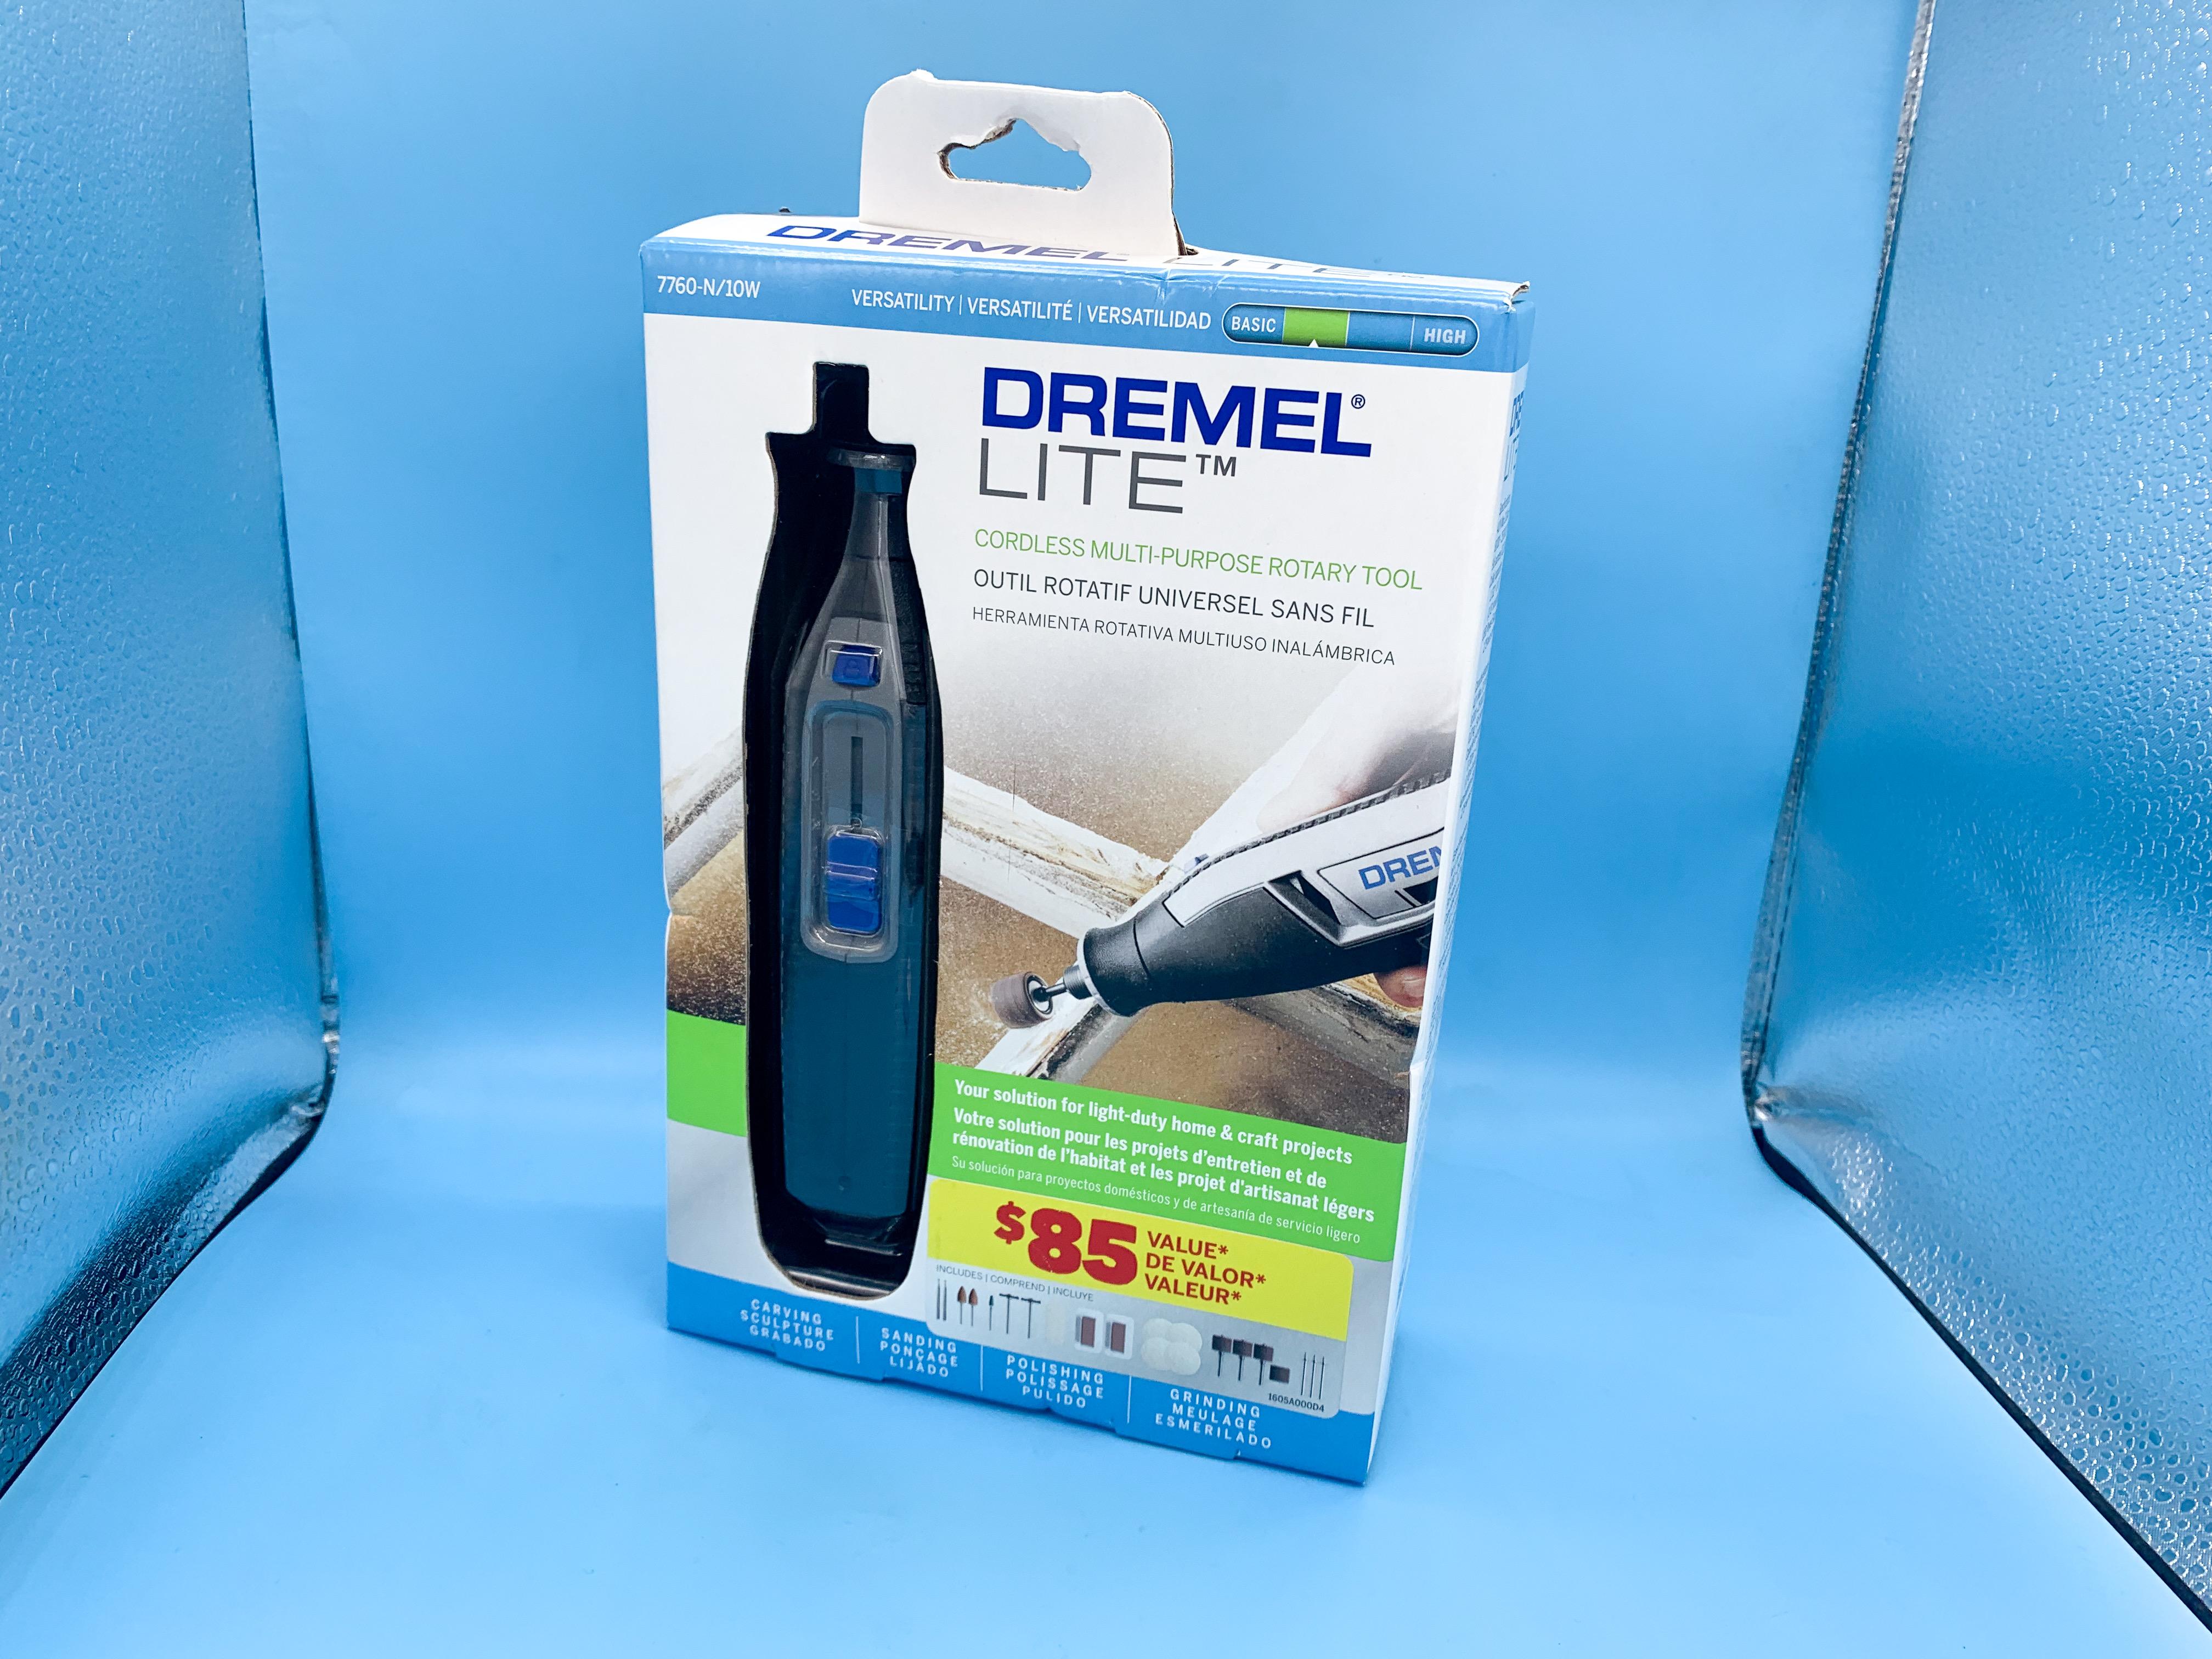
My wife surprised me with a cordless Dremel this evening…she did good!
- 38,885 replies
-
- 3
-
-
- johan
- glue bombs
- (and 1 more)
-
Plymouth Salt Flat Slammer
OldNYJim replied to OldNYJim's topic in WIP: Other Racing: Road Racing, Land Speed Racers
Thanks buddy! Yeah, the machine will cut whatever material you put thru it (within reason - no stainless steel ?). I use Oramask 815 masking film but it’ll cut frisket just fine, or even regular masking tape. On plastic, yes - it’ll score styrene sheet really easily and also cut right through thinner gauge…I have done that myself on a few projects, but check out some of @Impalow’s builds on his profile to see some really masterful work with one of these machines. Or, even better, check out this video and the amazing grille and frame he built: -
Reading thread titles is hard… Meanwhile, this came today - hobby chisel with interchangeable tips to allow you to scribe different width lines. I was struggling to clean up the window frames on something I’m working on after chopping a top - sanding was tricky because it’s a pretty thin little pillar and I can’t get a file into the spot because there’s a drip rail in the way that I didn’t want to lose. This worked great though! Good for levelling out wobbly door lines too…
- 38,885 replies
-
- 1
-
-
- johan
- glue bombs
- (and 1 more)
-
Great pics, thanks for sharing Tim! There was a bunch of cool stuff there! Looks like the 'fabrication style' hot rod trend (with rivets and stamped-looking panels and whatnot) is still going strong...and I noticed a few with super skinny motorcycle-style front wheel and tire combinations up front, which I don't recall seeing too much of recently. I'm not sold on the styling of the '31 Chevy that won, personally - looks amazing from the back but a whole mess of different things at the front...but can't fault the imagination and creativity that went into it!
-
Good info, thanks Mark! They did a bunch of these things, apparently...I wouldn't mind seeing that Mustang come back too!
-
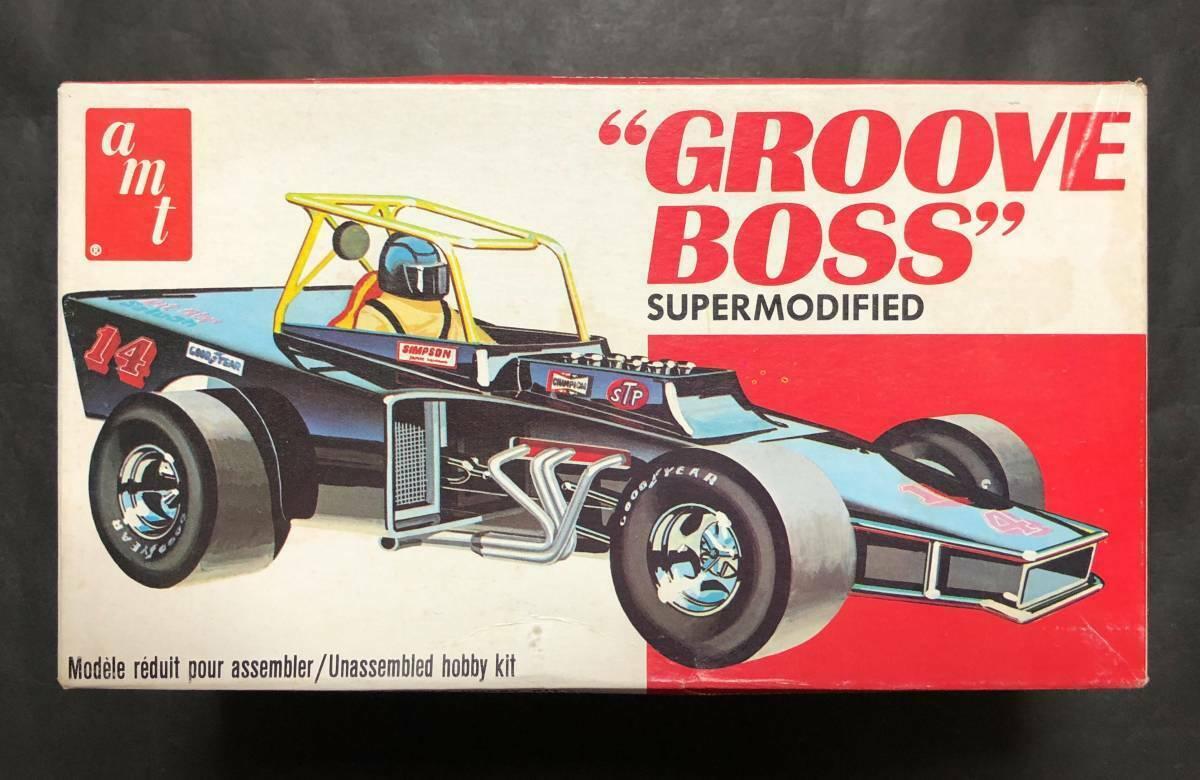
I'm excited for the Mod Rod A Kart, whichever version it is, but this REALLY got my interest: I never even saw this kit before, but I want one!