OldNYJim
-
Posts
251 -
Joined
-
Last visited
Content Type
Profiles
Forums
Events
Gallery
Everything posted by OldNYJim
-
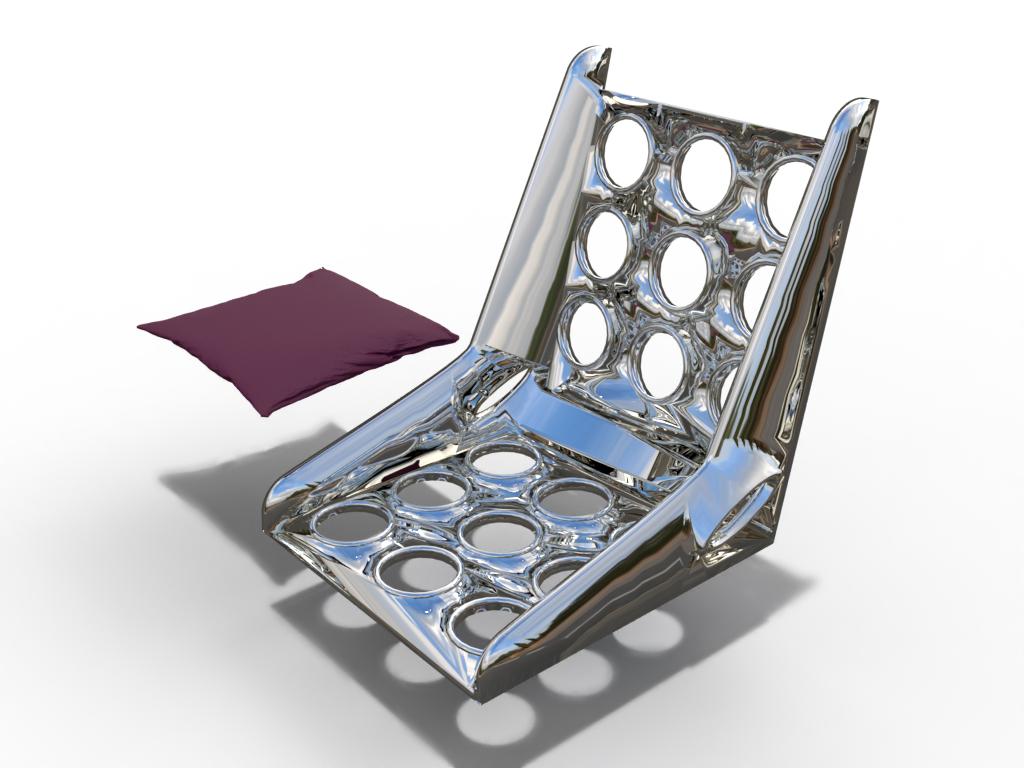
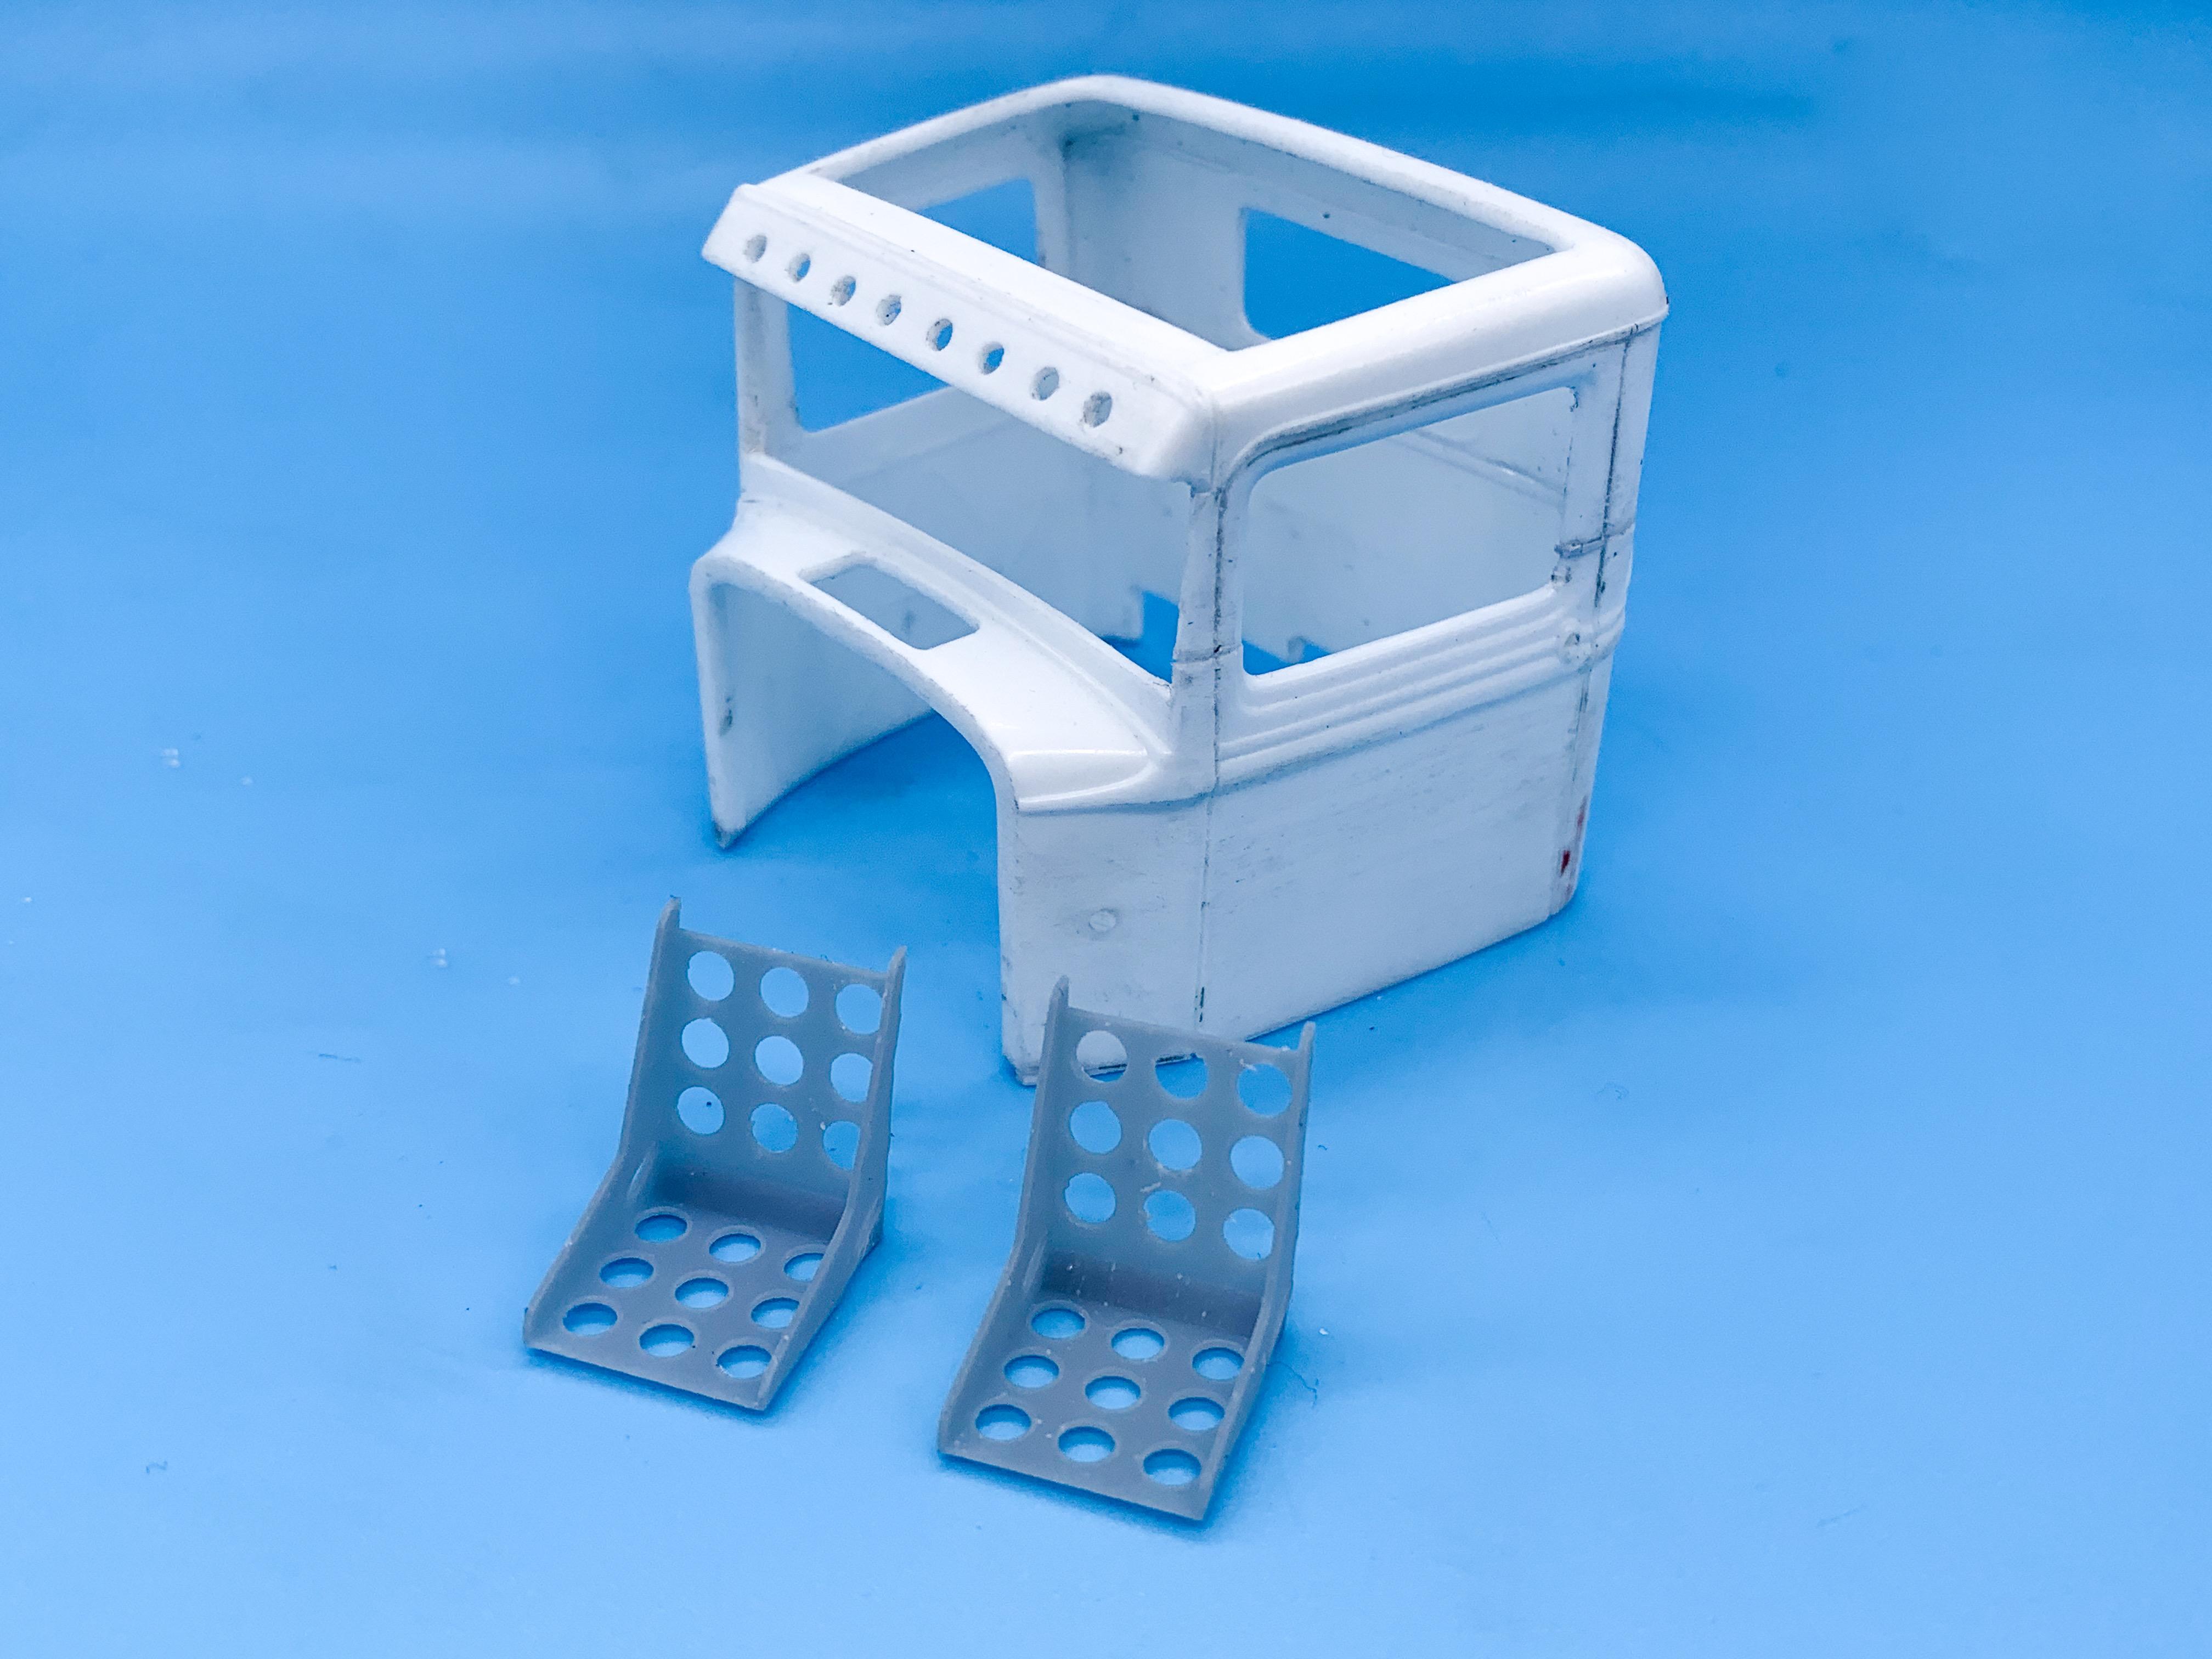
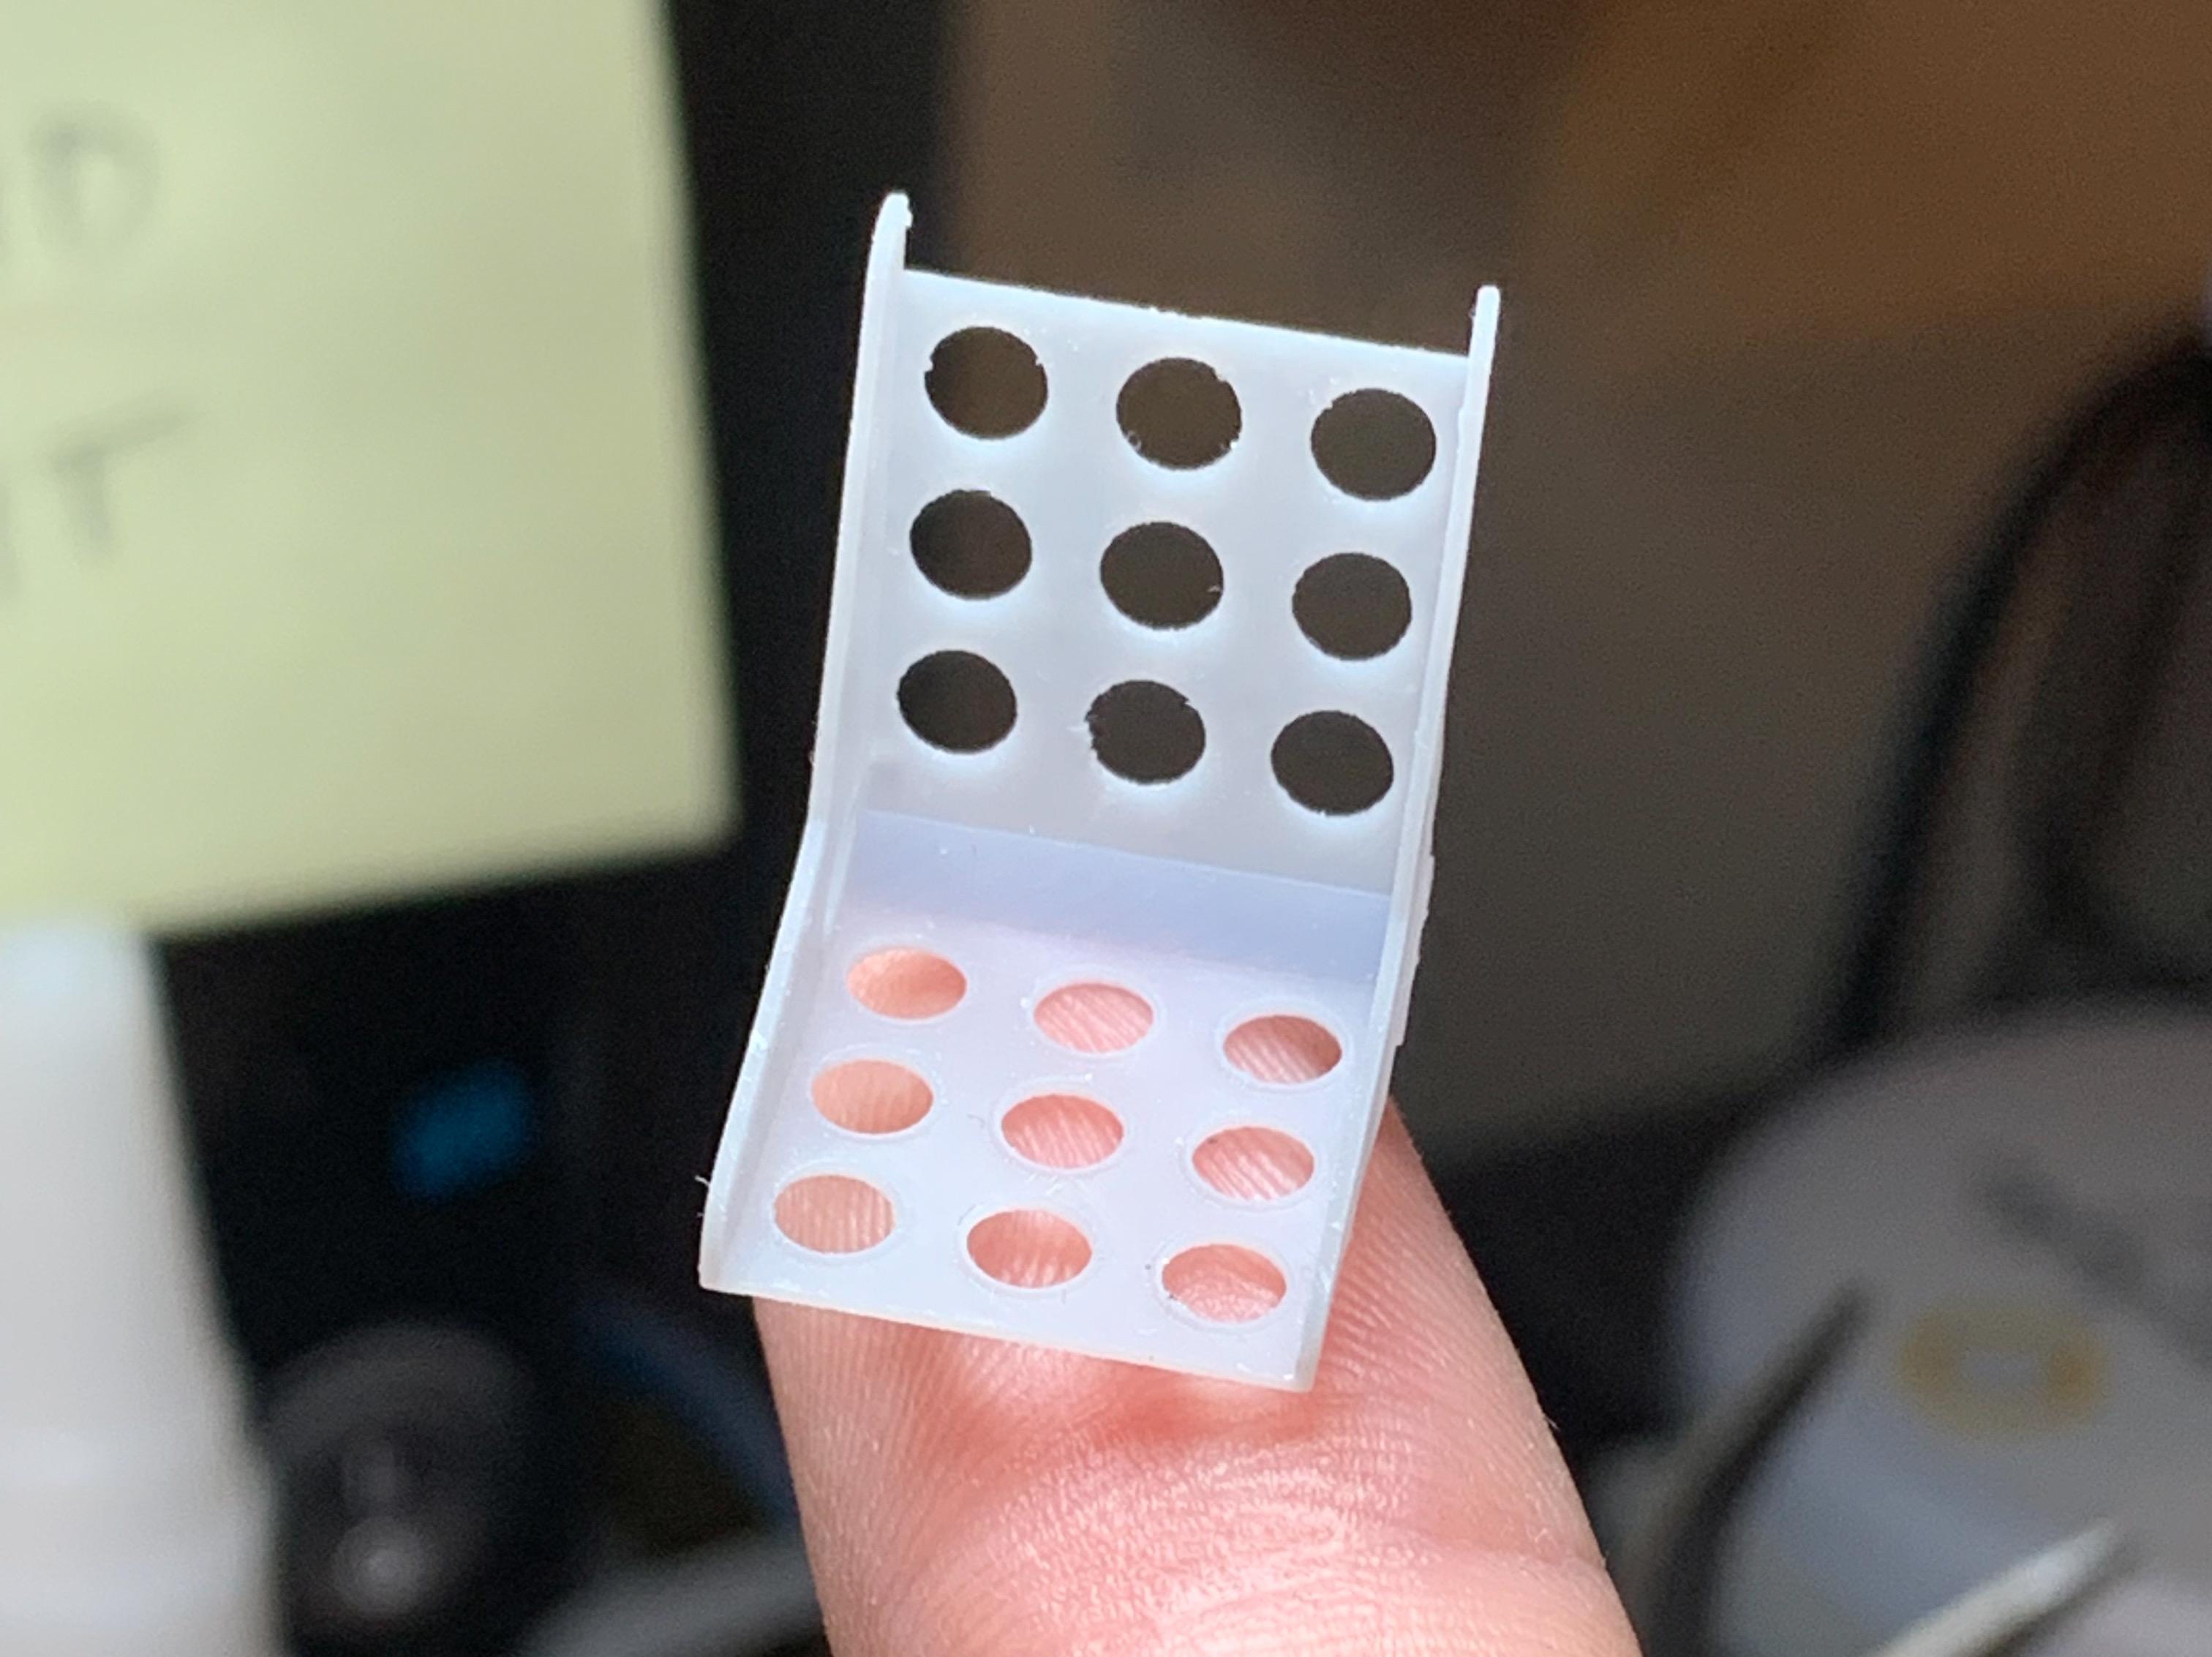
 Tiny bit of midweek-progress…I wanted to go with bomber seats for this one, so designed some earlier in the week (with matching cushion, because these things look uncomfortable ?): And tried printing a set tonight: Came out ok - I was mostly concerned that the printer would struggle printing something with such a thin wall to it but it did great! Ready for cleanup and paint! Didn’t try a cushion yet - I added some leather texture to those which I’m almost certain won’t show up when they’re painted, but I can probably re-introduce a little roughness with the airbrush… Just a tiny update, but those two seats took me two evenings to get done…more soon!
-
Are you talking about the kit with the blue truck on the box in the upper left corner of your pic? If so, I think that's just the '34 Ford truck kit coming round again...
-
Foose Ford FD-100
OldNYJim replied to bluestringer's topic in WIP: Model Trucks: Pickups, Vans, SUVs, Light Commercial
Apparently you need to grind some material off the dash to ensure the body fits right come assembly stage, although I haven’t built one of these yet…worth doing some careful test fitting! -
I've been thinking the same thing! I've done them before with a printed generic backer and then cut sign vinyl for the letters and numbers to give them some depth, but I think 3D printing would be a better way to try making those. Only issue would be for plates with a particularly 'graphic-y' background to them - a decal is a better way to go for ones like that I'd think...or a decal OVER a 3D printed plate to give the best of both worlds...
-
I love starting the day on a nice round number! Then, a mile down the road, the engine management light came on ????
-
Hasegawa Toyota 1600GT.
OldNYJim replied to PatW's topic in Other Racing: Road Racing, Salt Flat Racers
I think to imply that the moderators on this site discriminate against people because they're not based in America is grossly unfair and untrue. -
Beautiful pics! I don't want to jinx it, but it seems like we've had a LOT less snow than last year, with less predicted thru until spring too. Suits me, even as pretty as it is...
-
Congratulations to Steve Guthmiller
OldNYJim replied to Khils's topic in General Automotive Talk (Trucks and Cars)
Steve does GREAT work - congrats buddy! Well deserved! -
That would be really cool! Thanks Dan! Good idea - I just looked at replacement/spare tanks for my little AnyCubic and they're not super expensive...that would be a good solution. Probably doesn't hurt to have a spare here anyway for when the plastic film on the tank starts to get to the point of needing replacing too - I already nicked mine in one little spot trying to get some baked-on resin off of it...
-
Thanks buddy! I saw someone using that rubber-resin online...I'll be really interested to see how you like it! I'd bet you'd need to do some careful clean-up of your tray after using it so it doesn't contaminate future parts...but I'd love to try it on some smaller parts too and see how it performs. Imagine being able to print toothed blower belts, and rubber gaiters for shifters and floor mats! Way cool!
-
Seaplane Trolly.
OldNYJim replied to PatW's topic in WIP: All The Rest: Motorcycles, Aviation, Military, Sci-Fi, Figures
That Cobra is gorgeous! What an amazing build - that would be cool in 1:25 - but to get all that detail and that paint finish in 1:43 ? -
I have my helmet from karting sitting here still…it’s full-face with a visor - I wonder if I can wear that places instead of a mask? It’s pretty comfy…
-
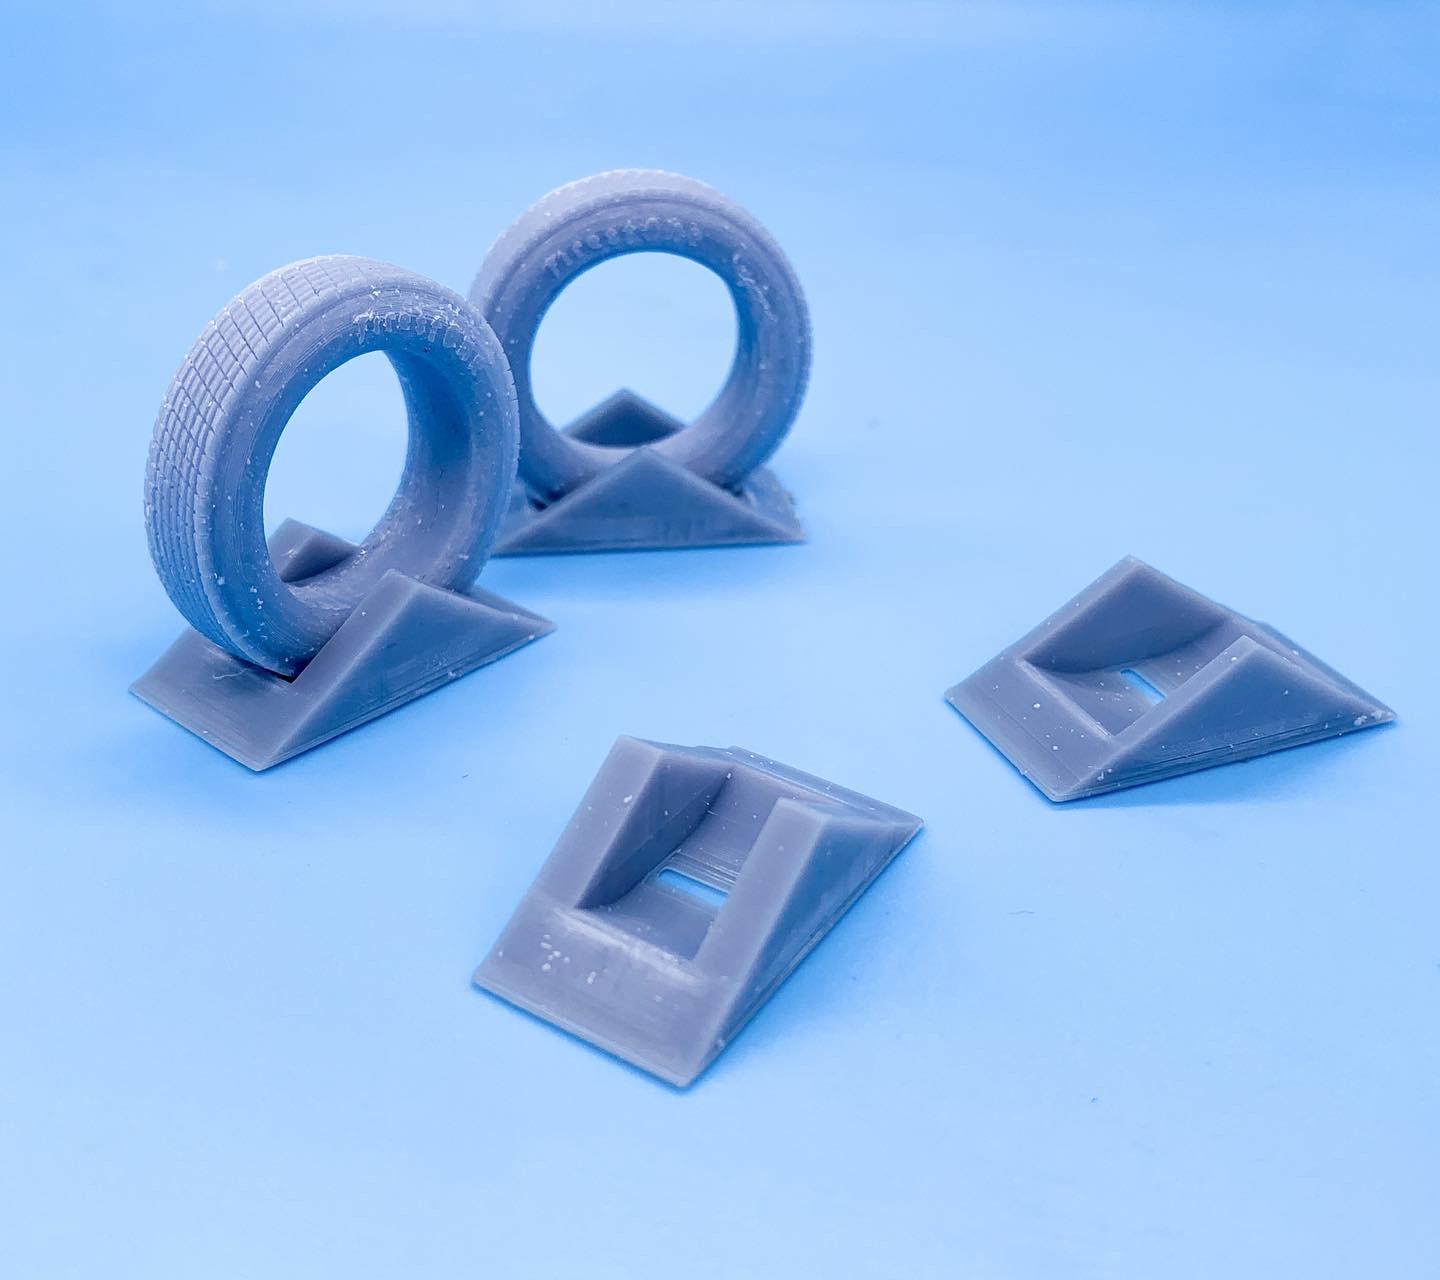
That video was great - thank you! Getting something to print well is one thing…getting it so the supports don’t ruin the detail is QUITE another @iamsuperdan - does the forum support the upload of .stl files? Would be cool to be able to share designs somehow; we have some super-talented designers on the site here! At the other end of the spectrum of 3D design skills, here’s a little something I came up with today - wheel holders so your wheels and tires don’t keep rolling away when you’re doing mock-ups: Super easy to design in CAD and took maybe 20 minutes to print - these things are gonna be a game changer at my bench!
-
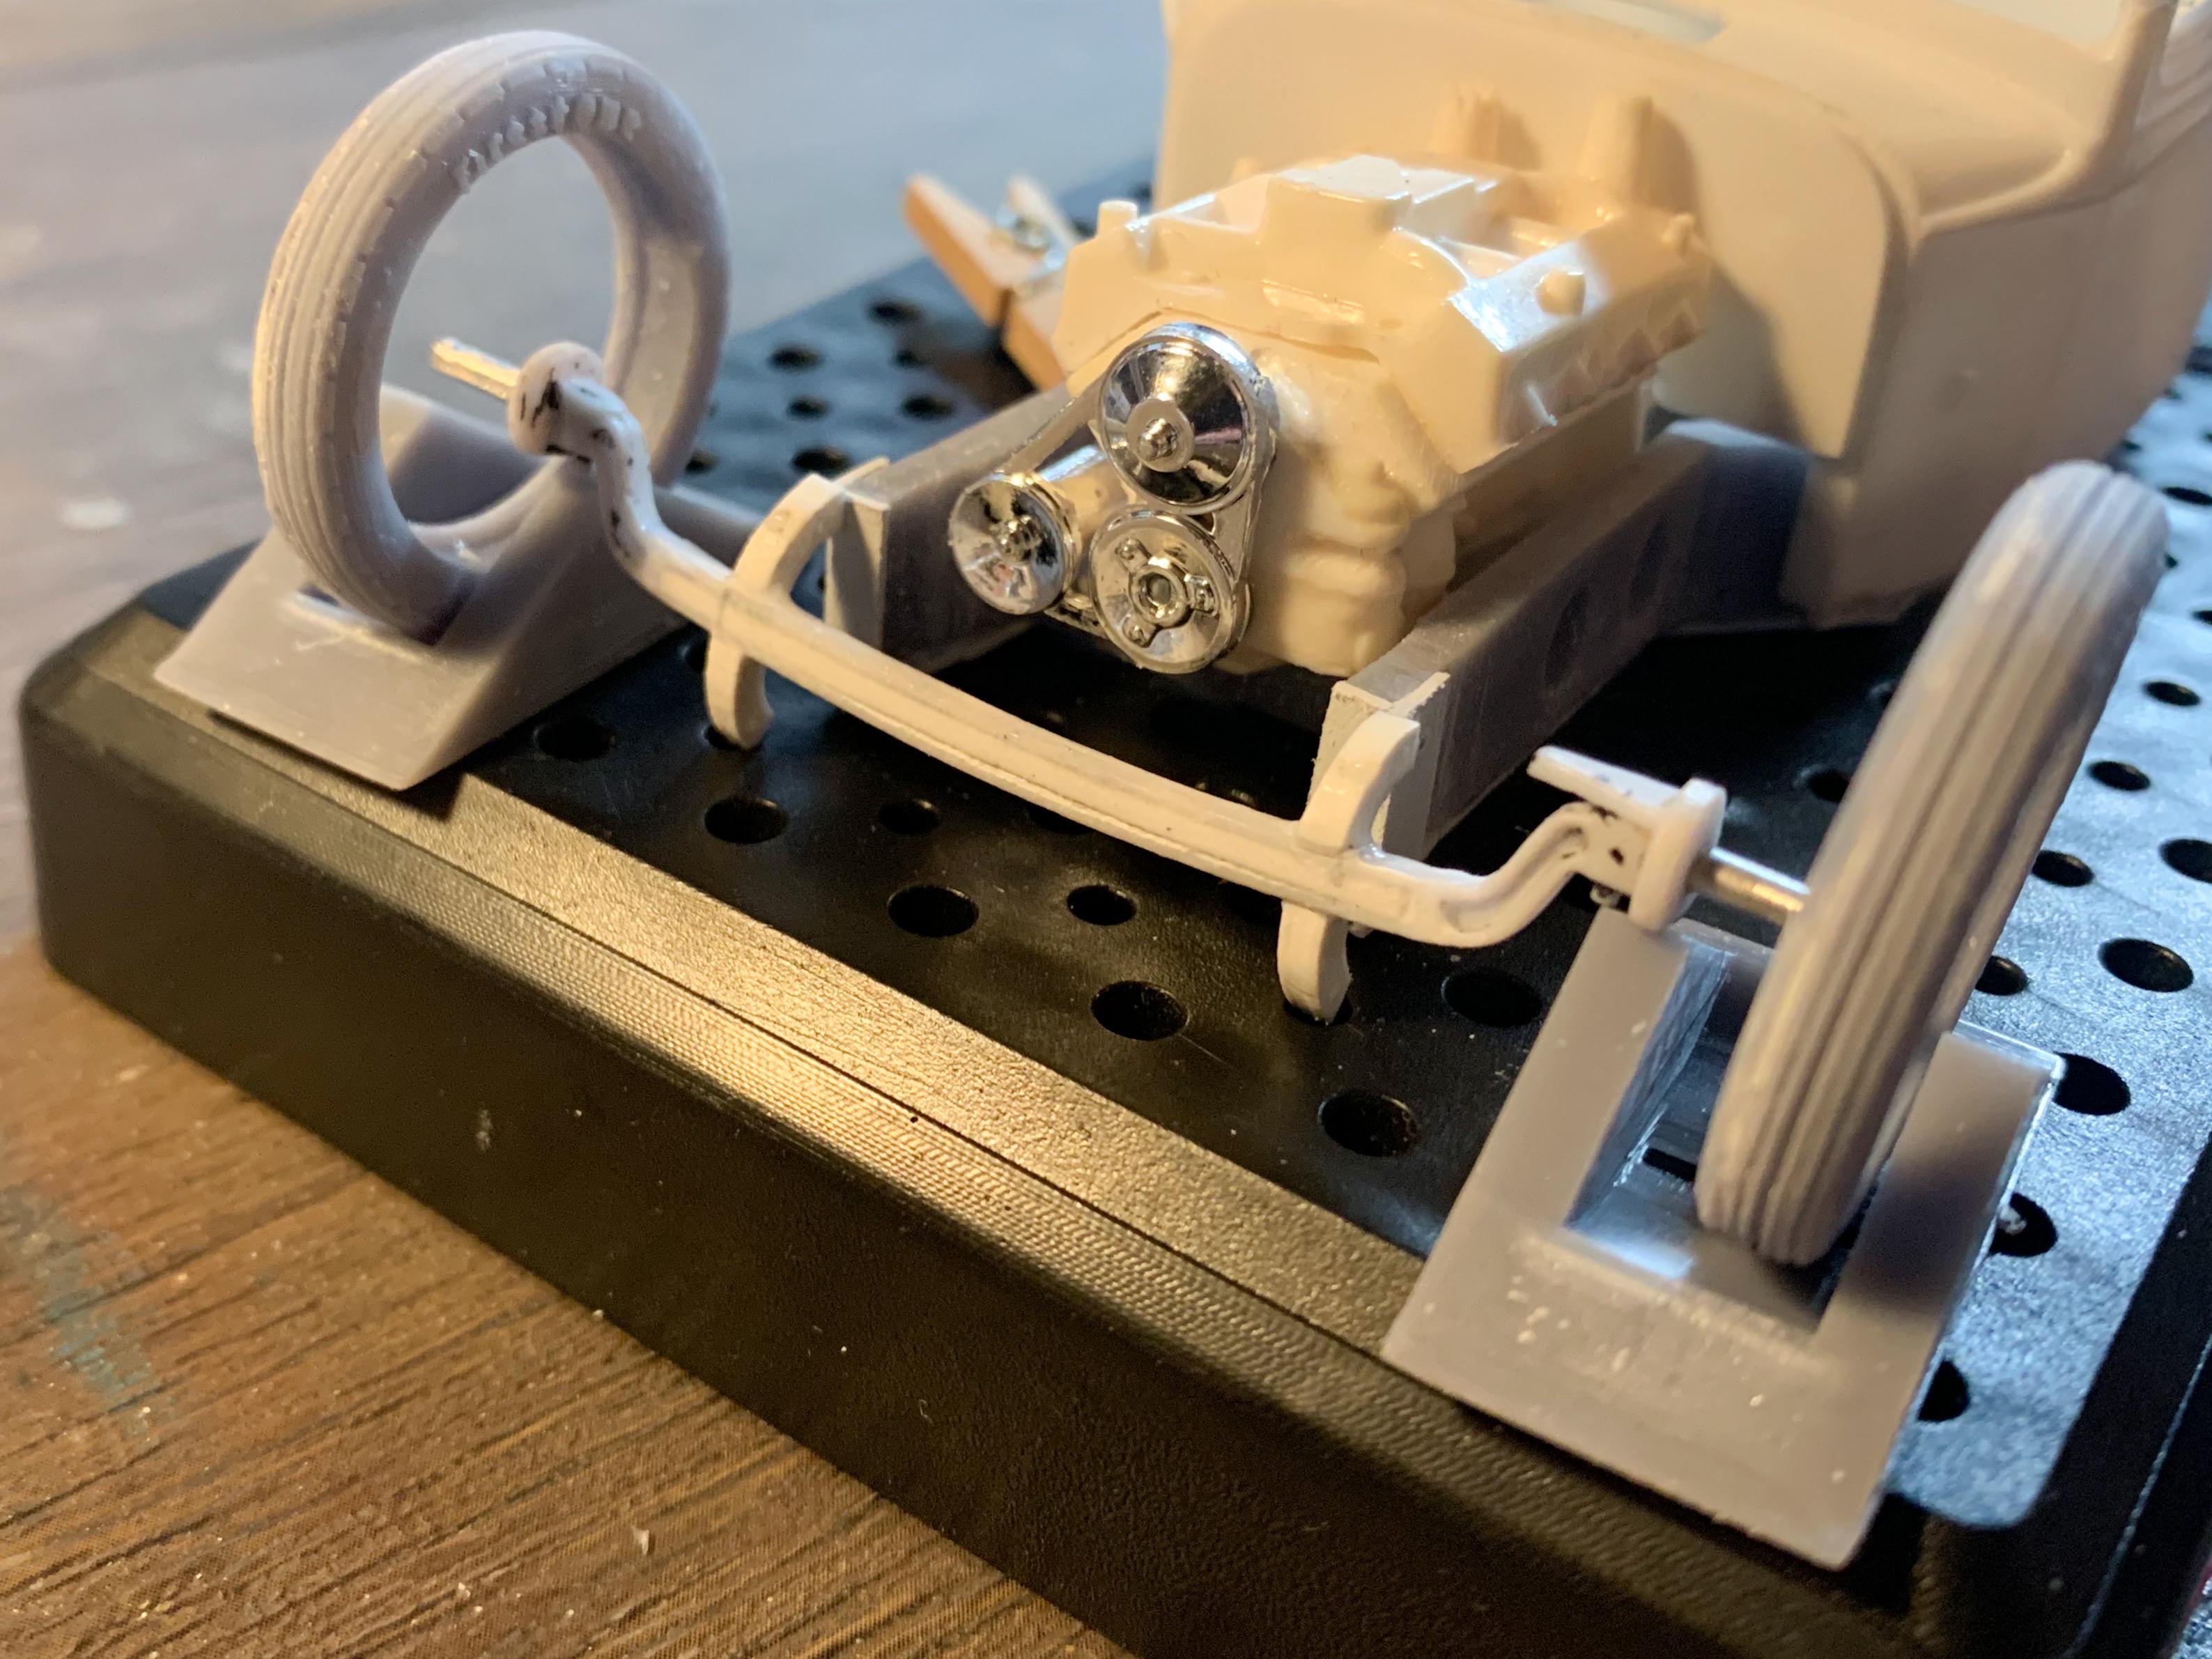
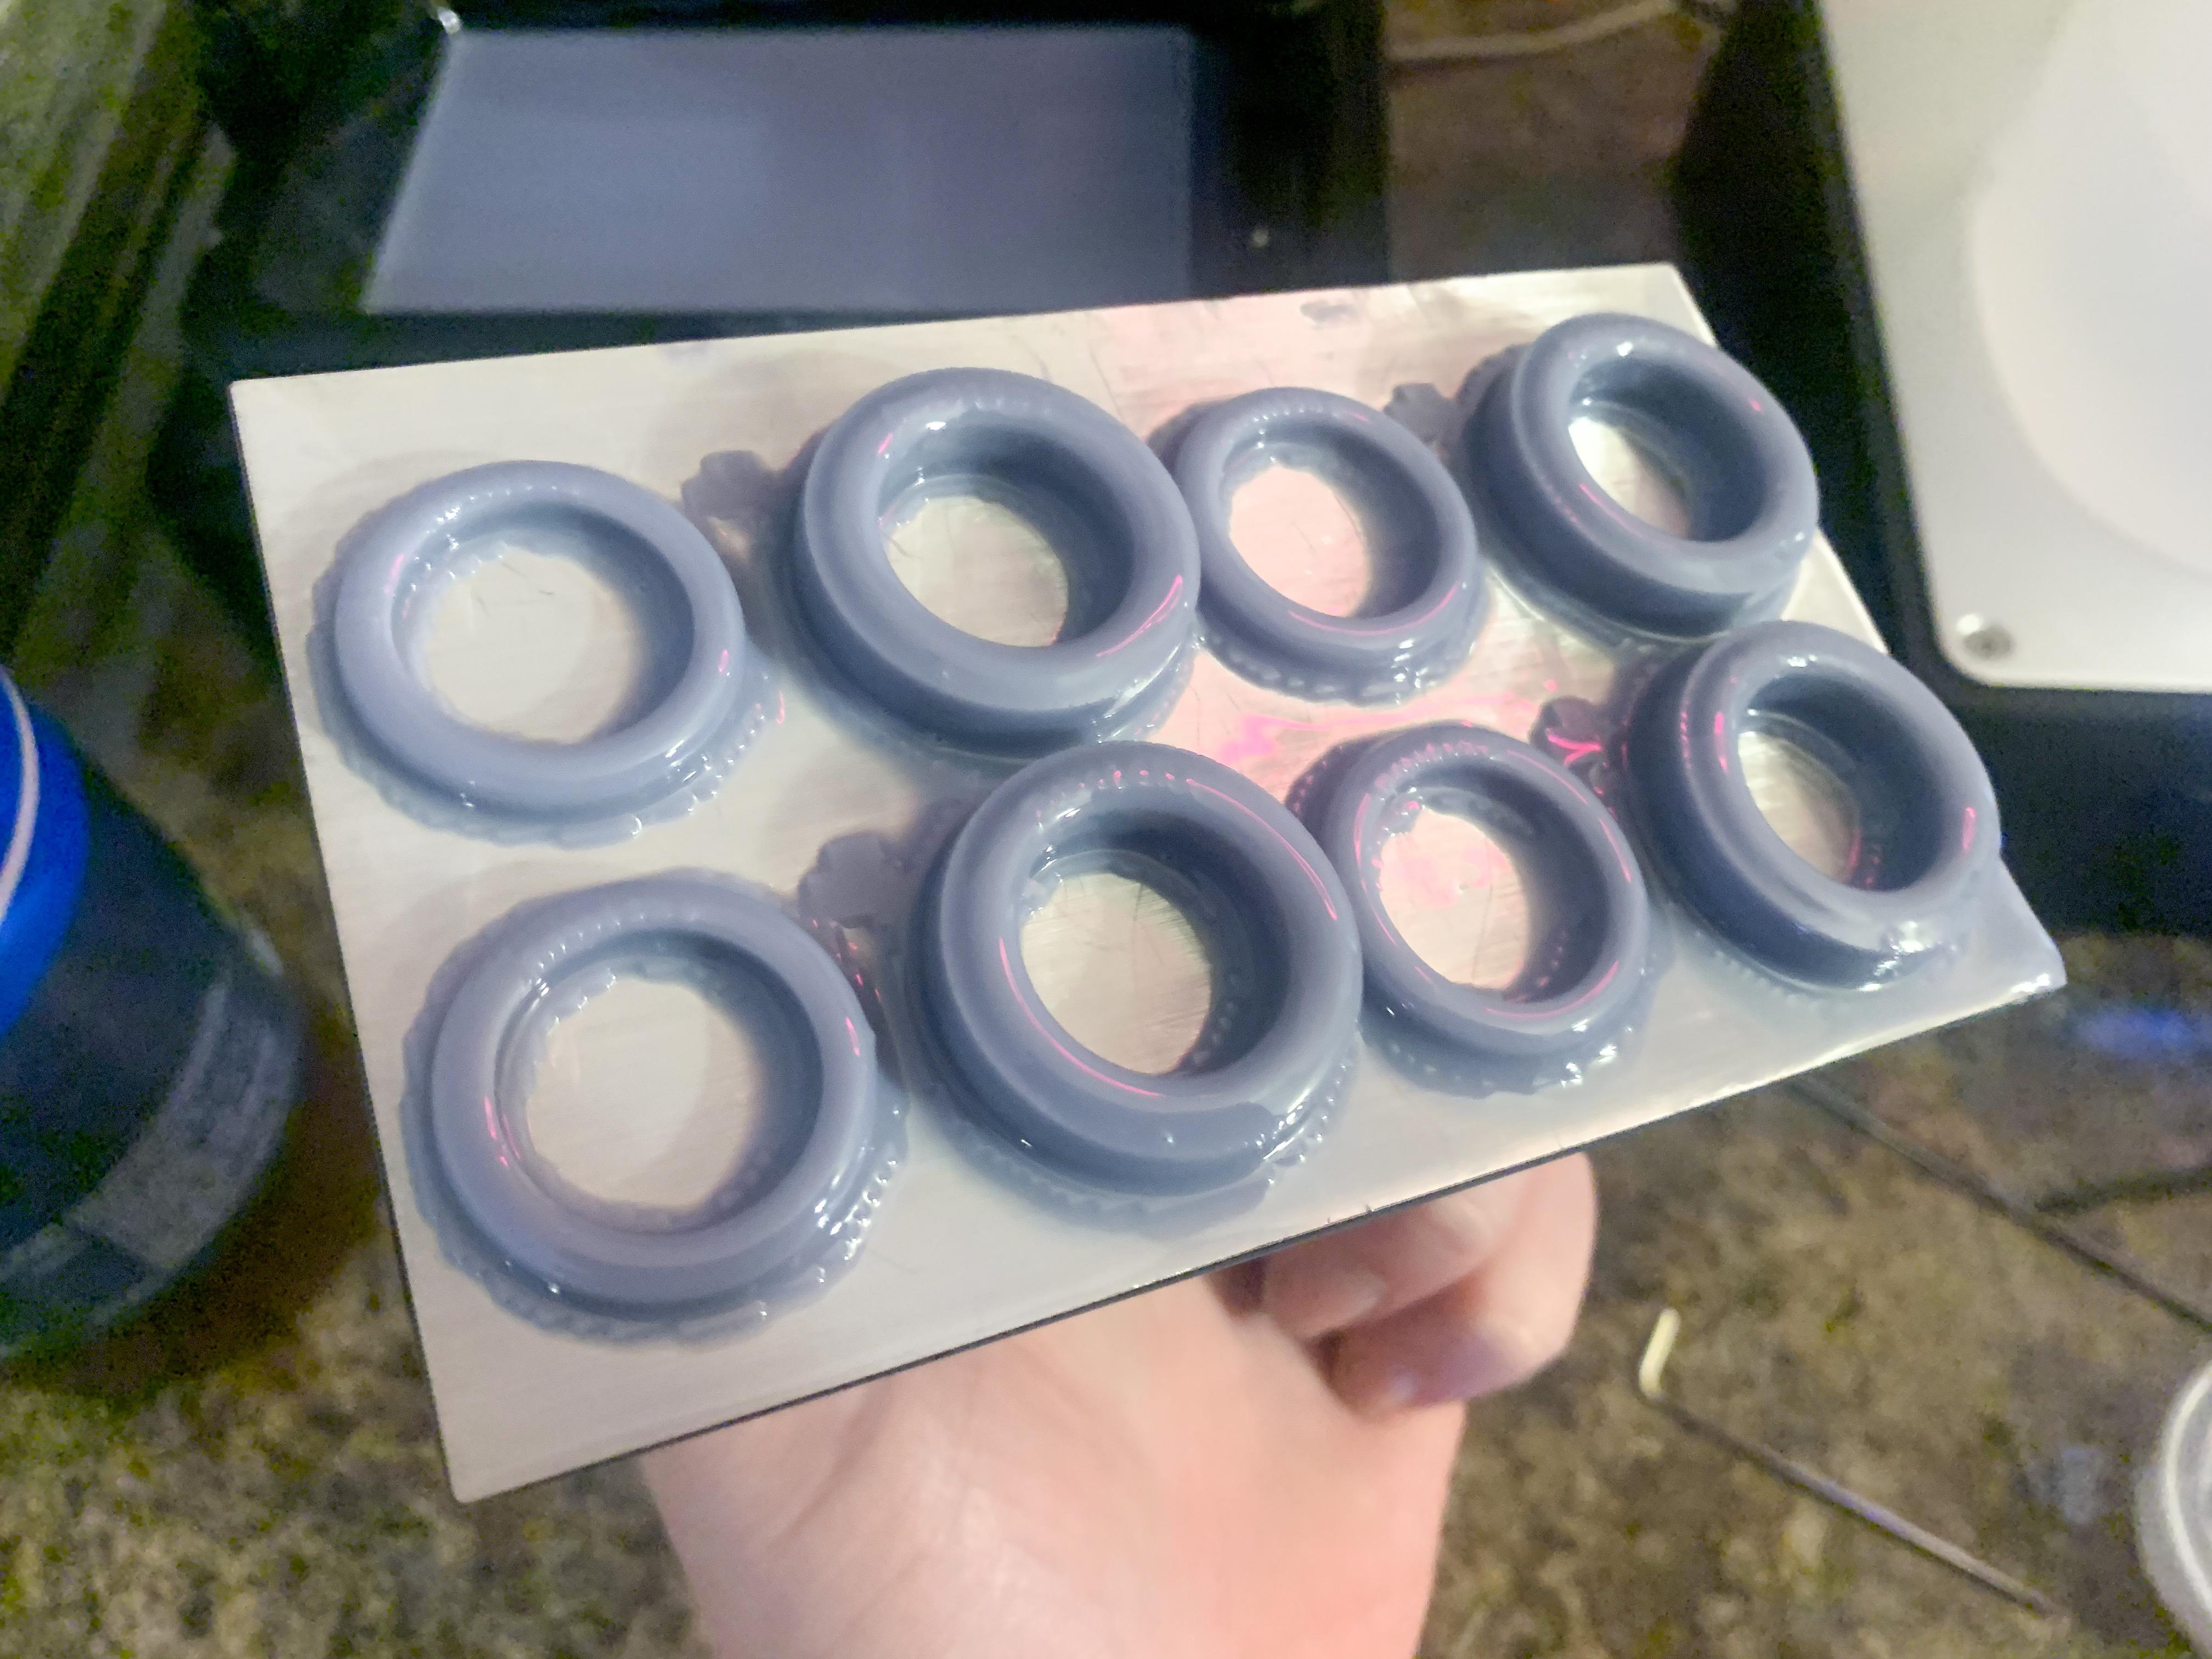
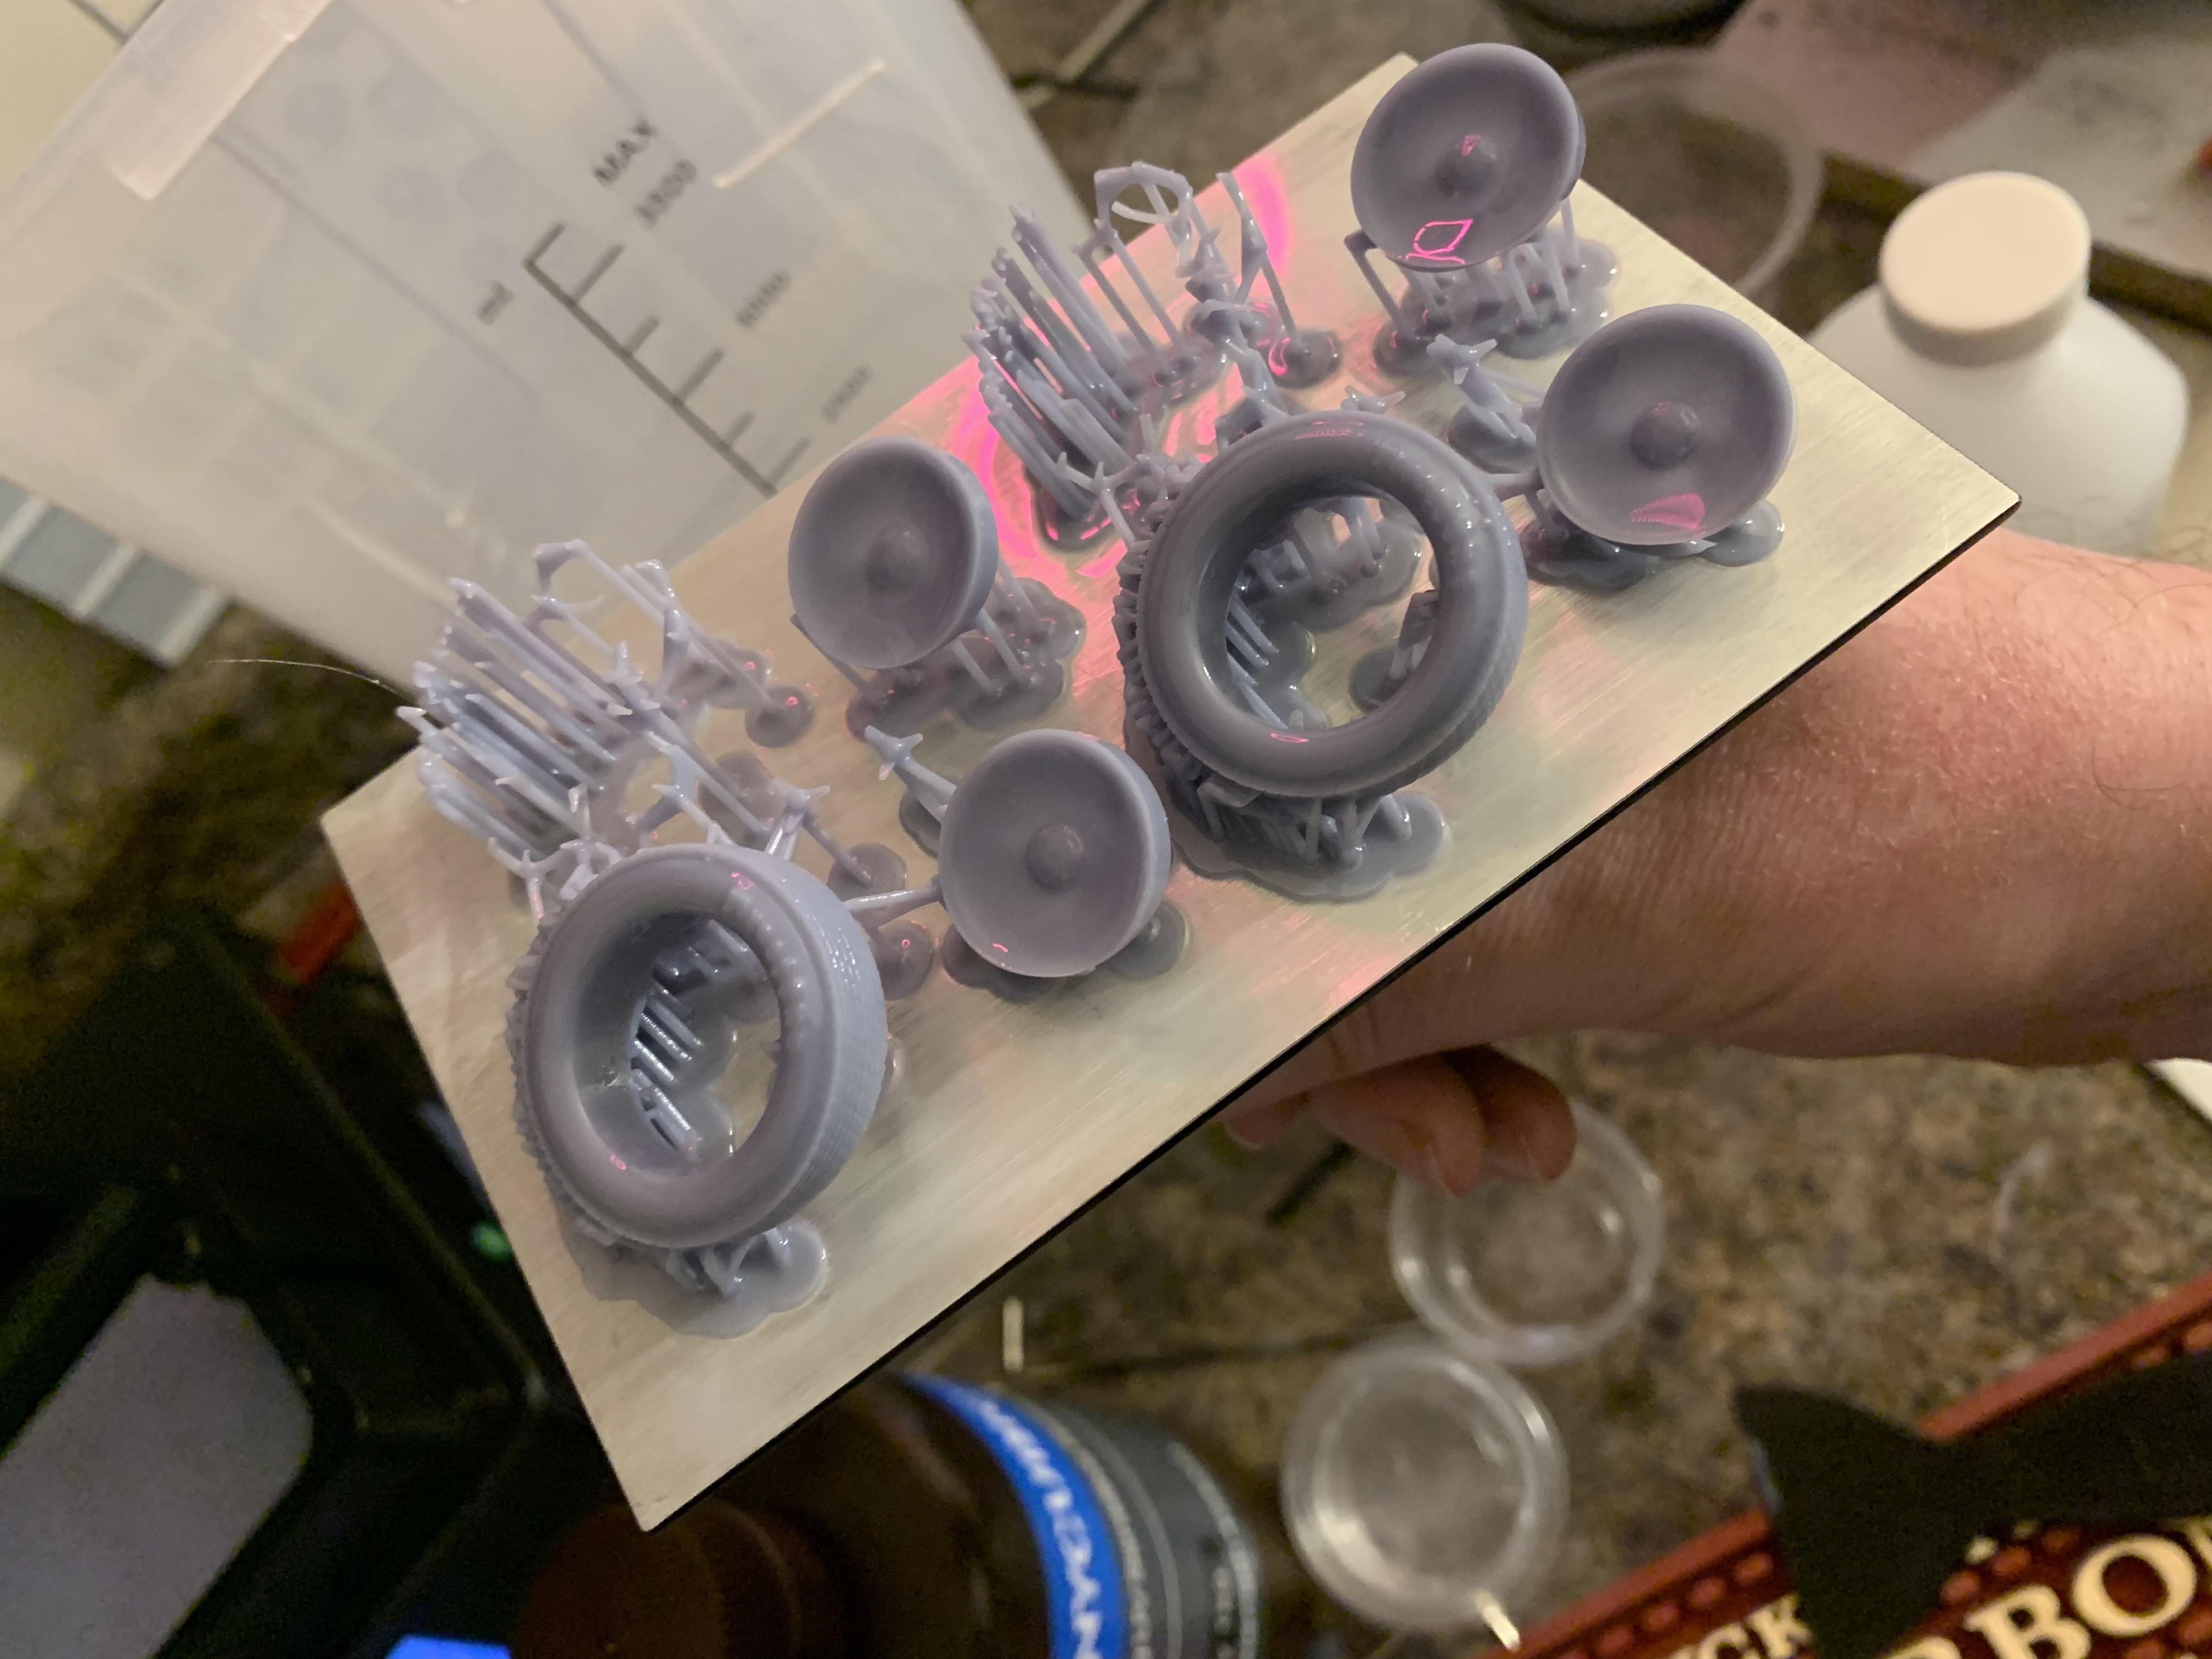
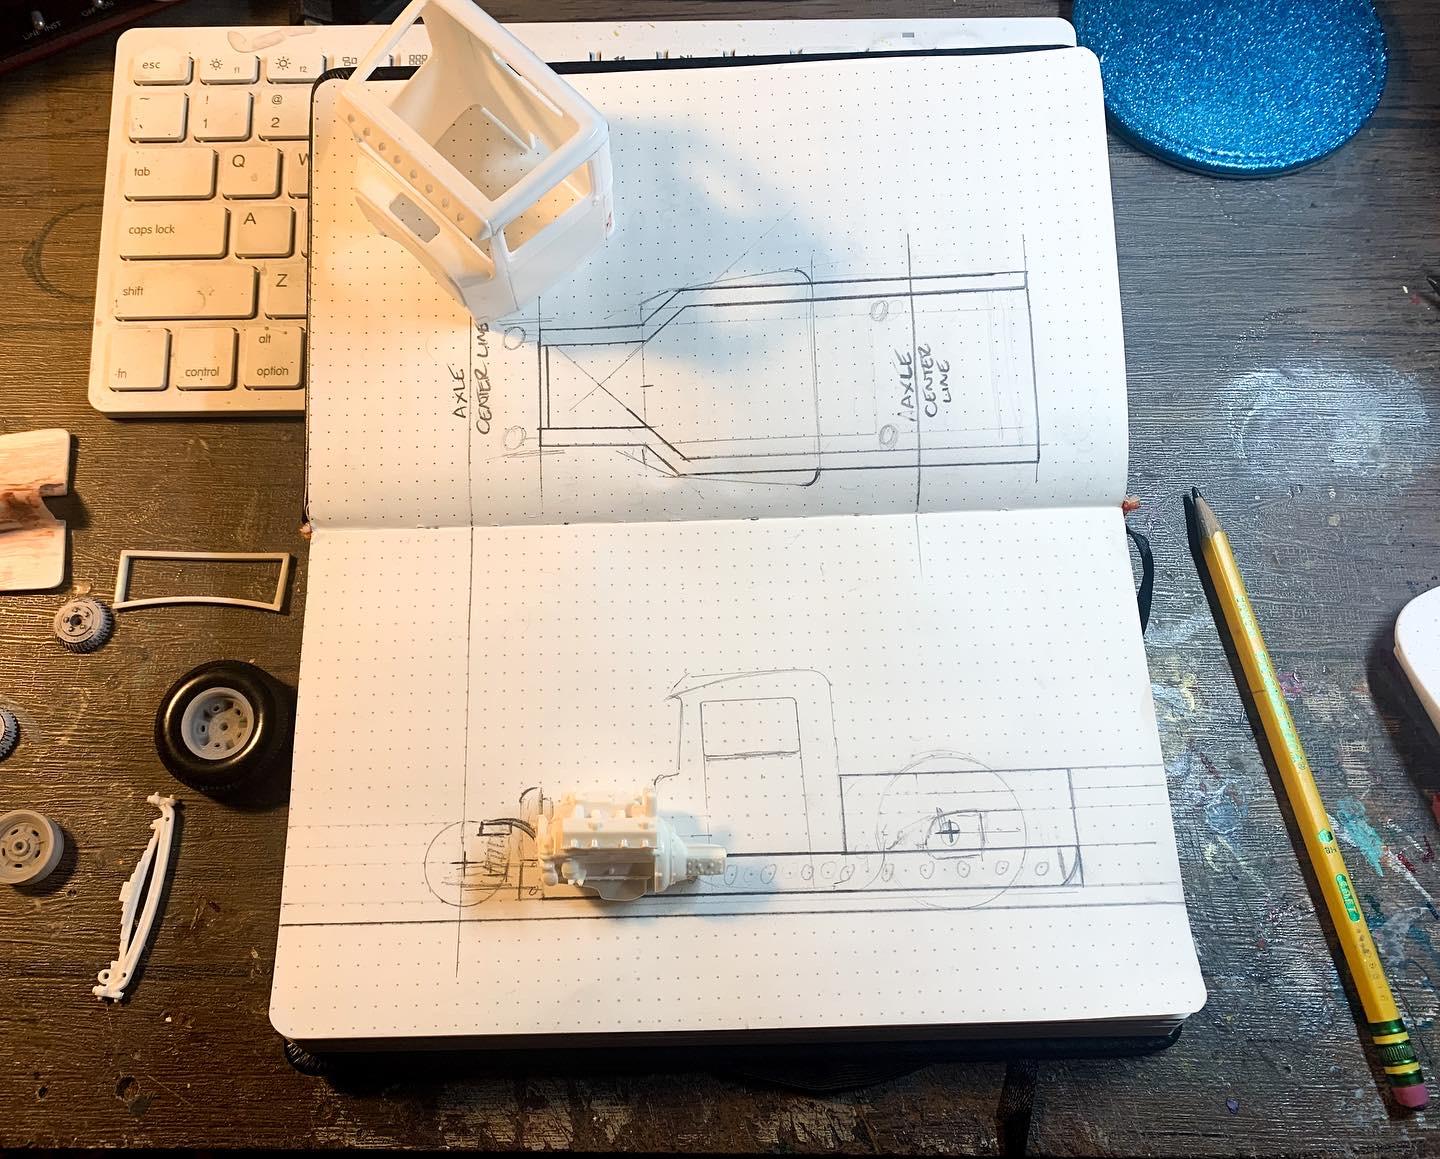
I dunno…a lot of people seem to muddle through just fine with WAY less skills than you think one would need to survive the game of life ? Yessir! Rarely have a bad day’s model-building! A little more progress today - got a good set of those nice tires printed and cleaned up…printed some extras whilst I (mostly) had them printing how I wanted: Started work on the front end - modified a Revell 29 kit axle for the suspension setup I have planned: Made some linkages and some pieces to scratchbuild some shocks this coming week: And, after battling wheels rolling off the bench all weekend, I finally got smart and make some chocks to hold them in place for mock-ups (not totally relevant to this project but I’m pleased with the idea ?) Not a bunch of progress for an entire afternoon in the shop, but small steps…more soon!
-
Those F Toys kits look cool - there’s a whole series of them! They were pretty easy to find on eBay for $10 or so for a while there but I haven’t looked recently. Thanks for the reminder - cool find!
-
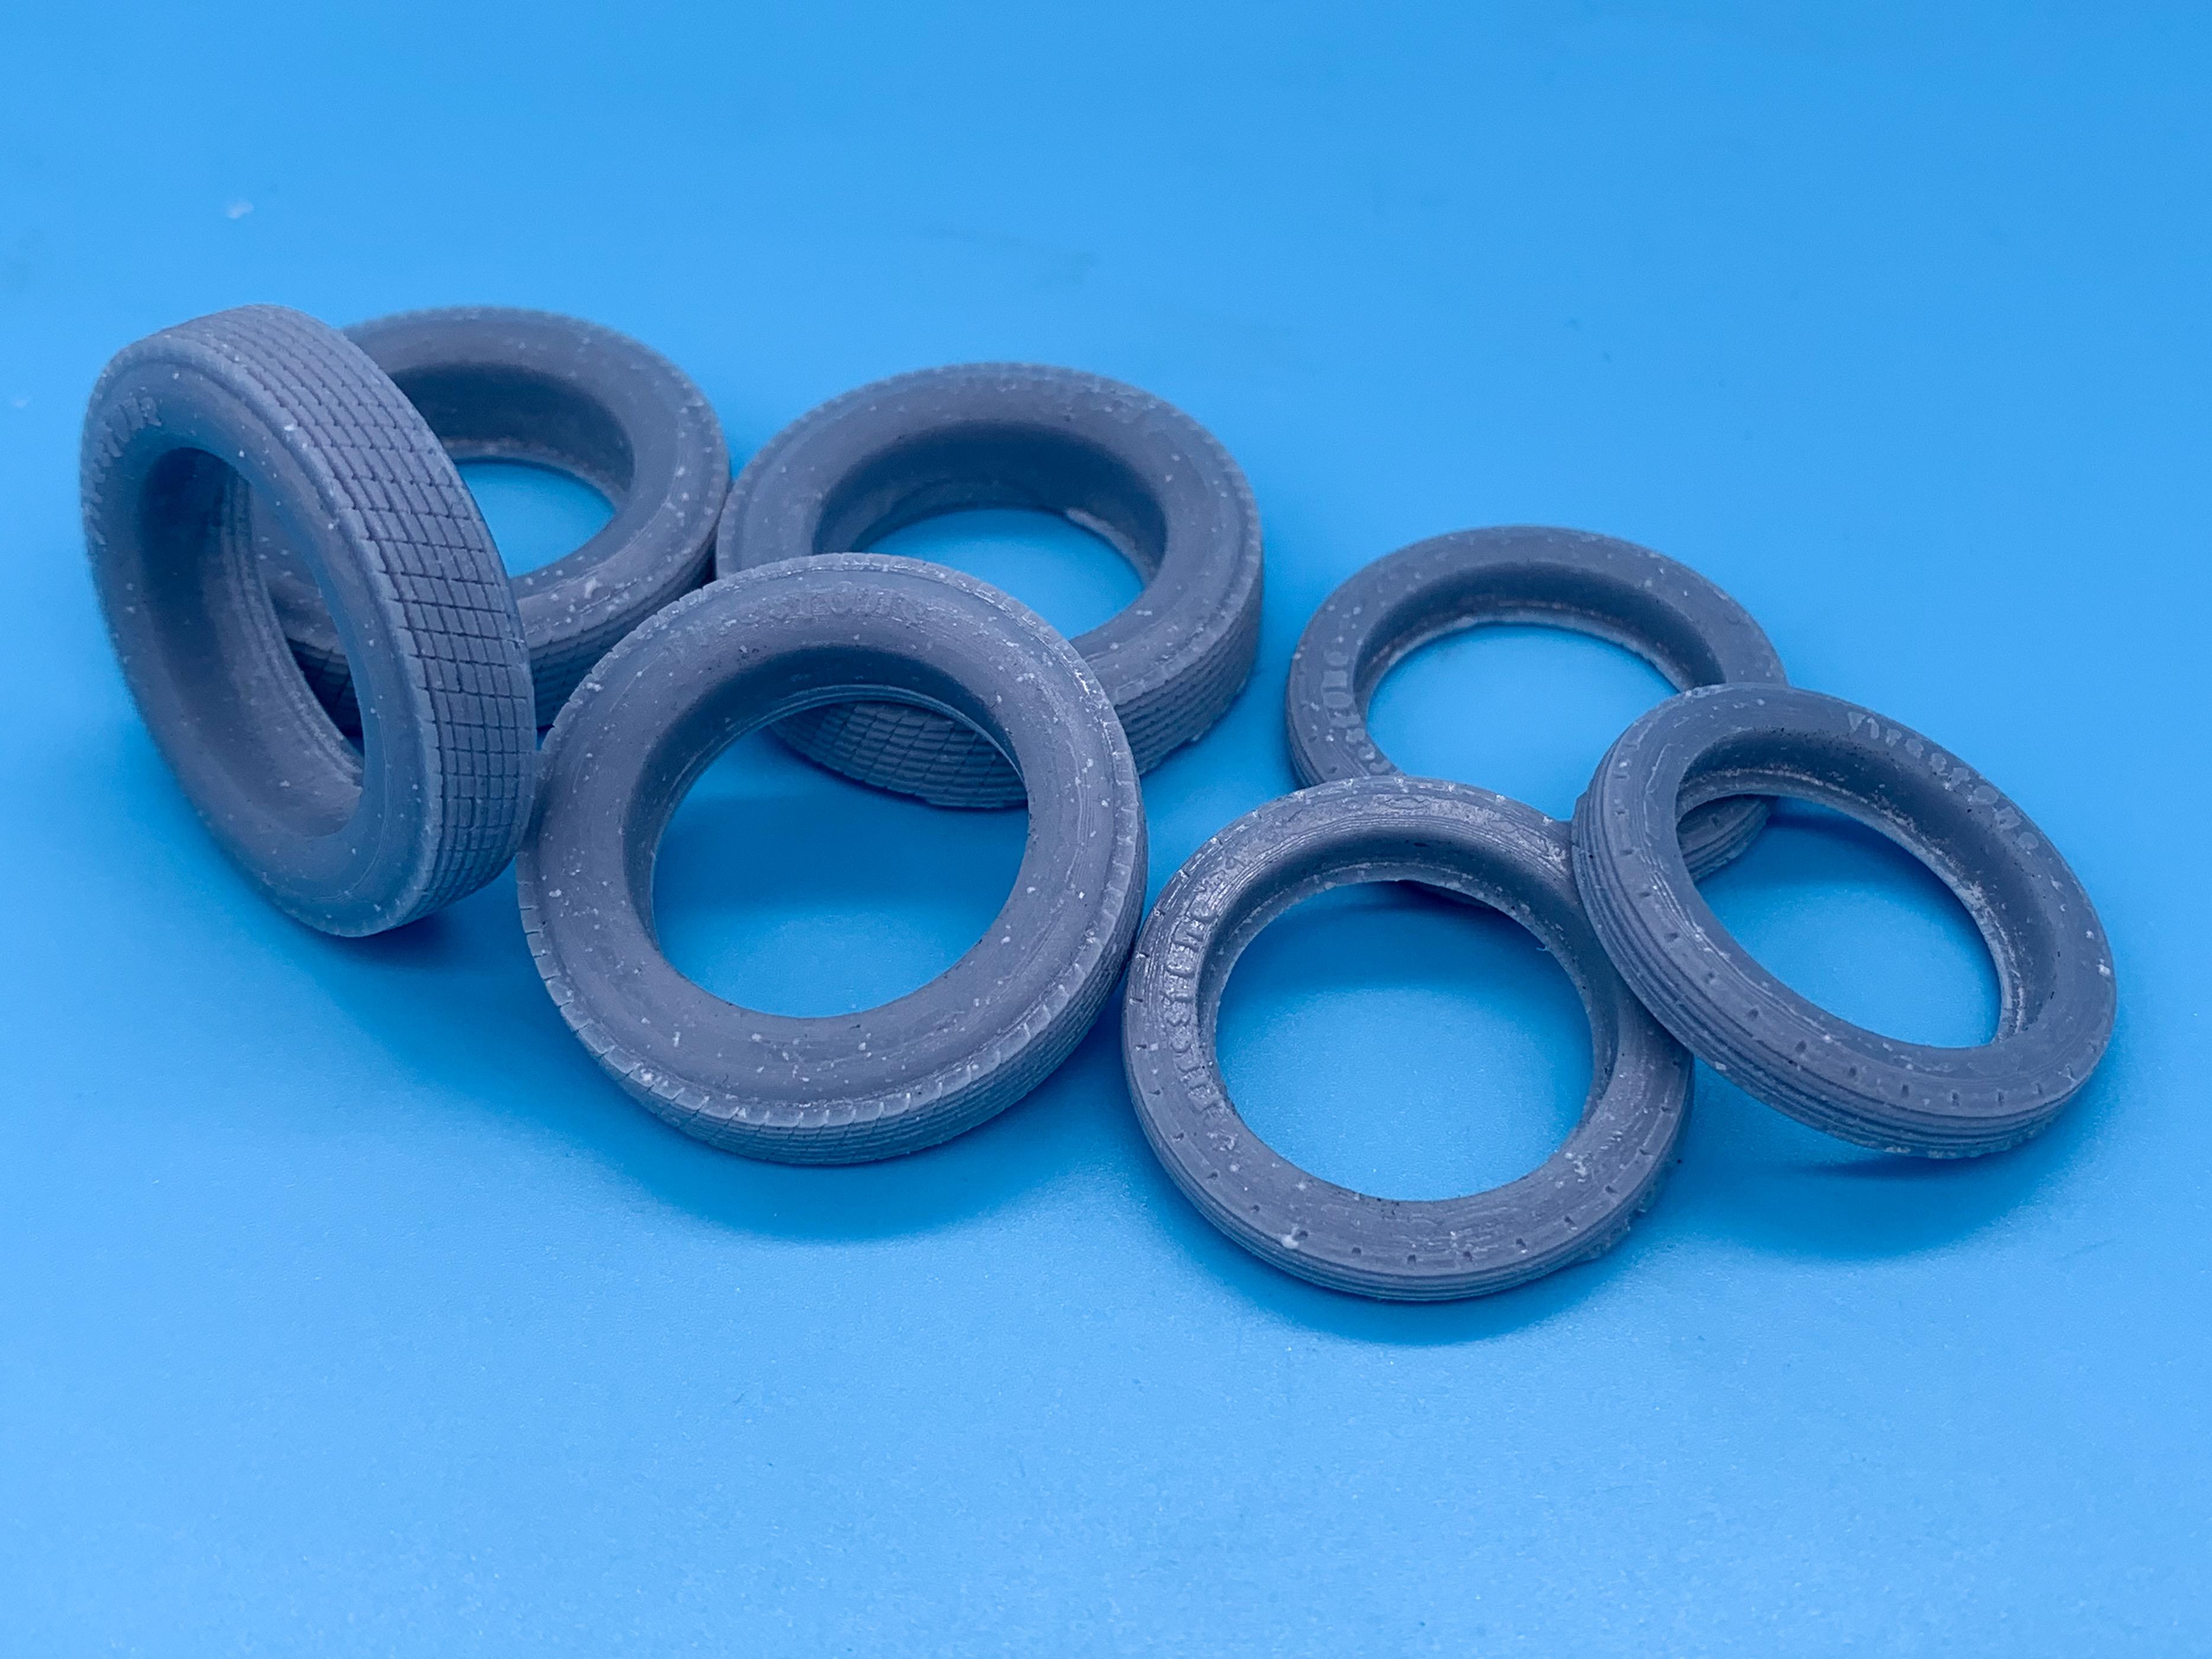
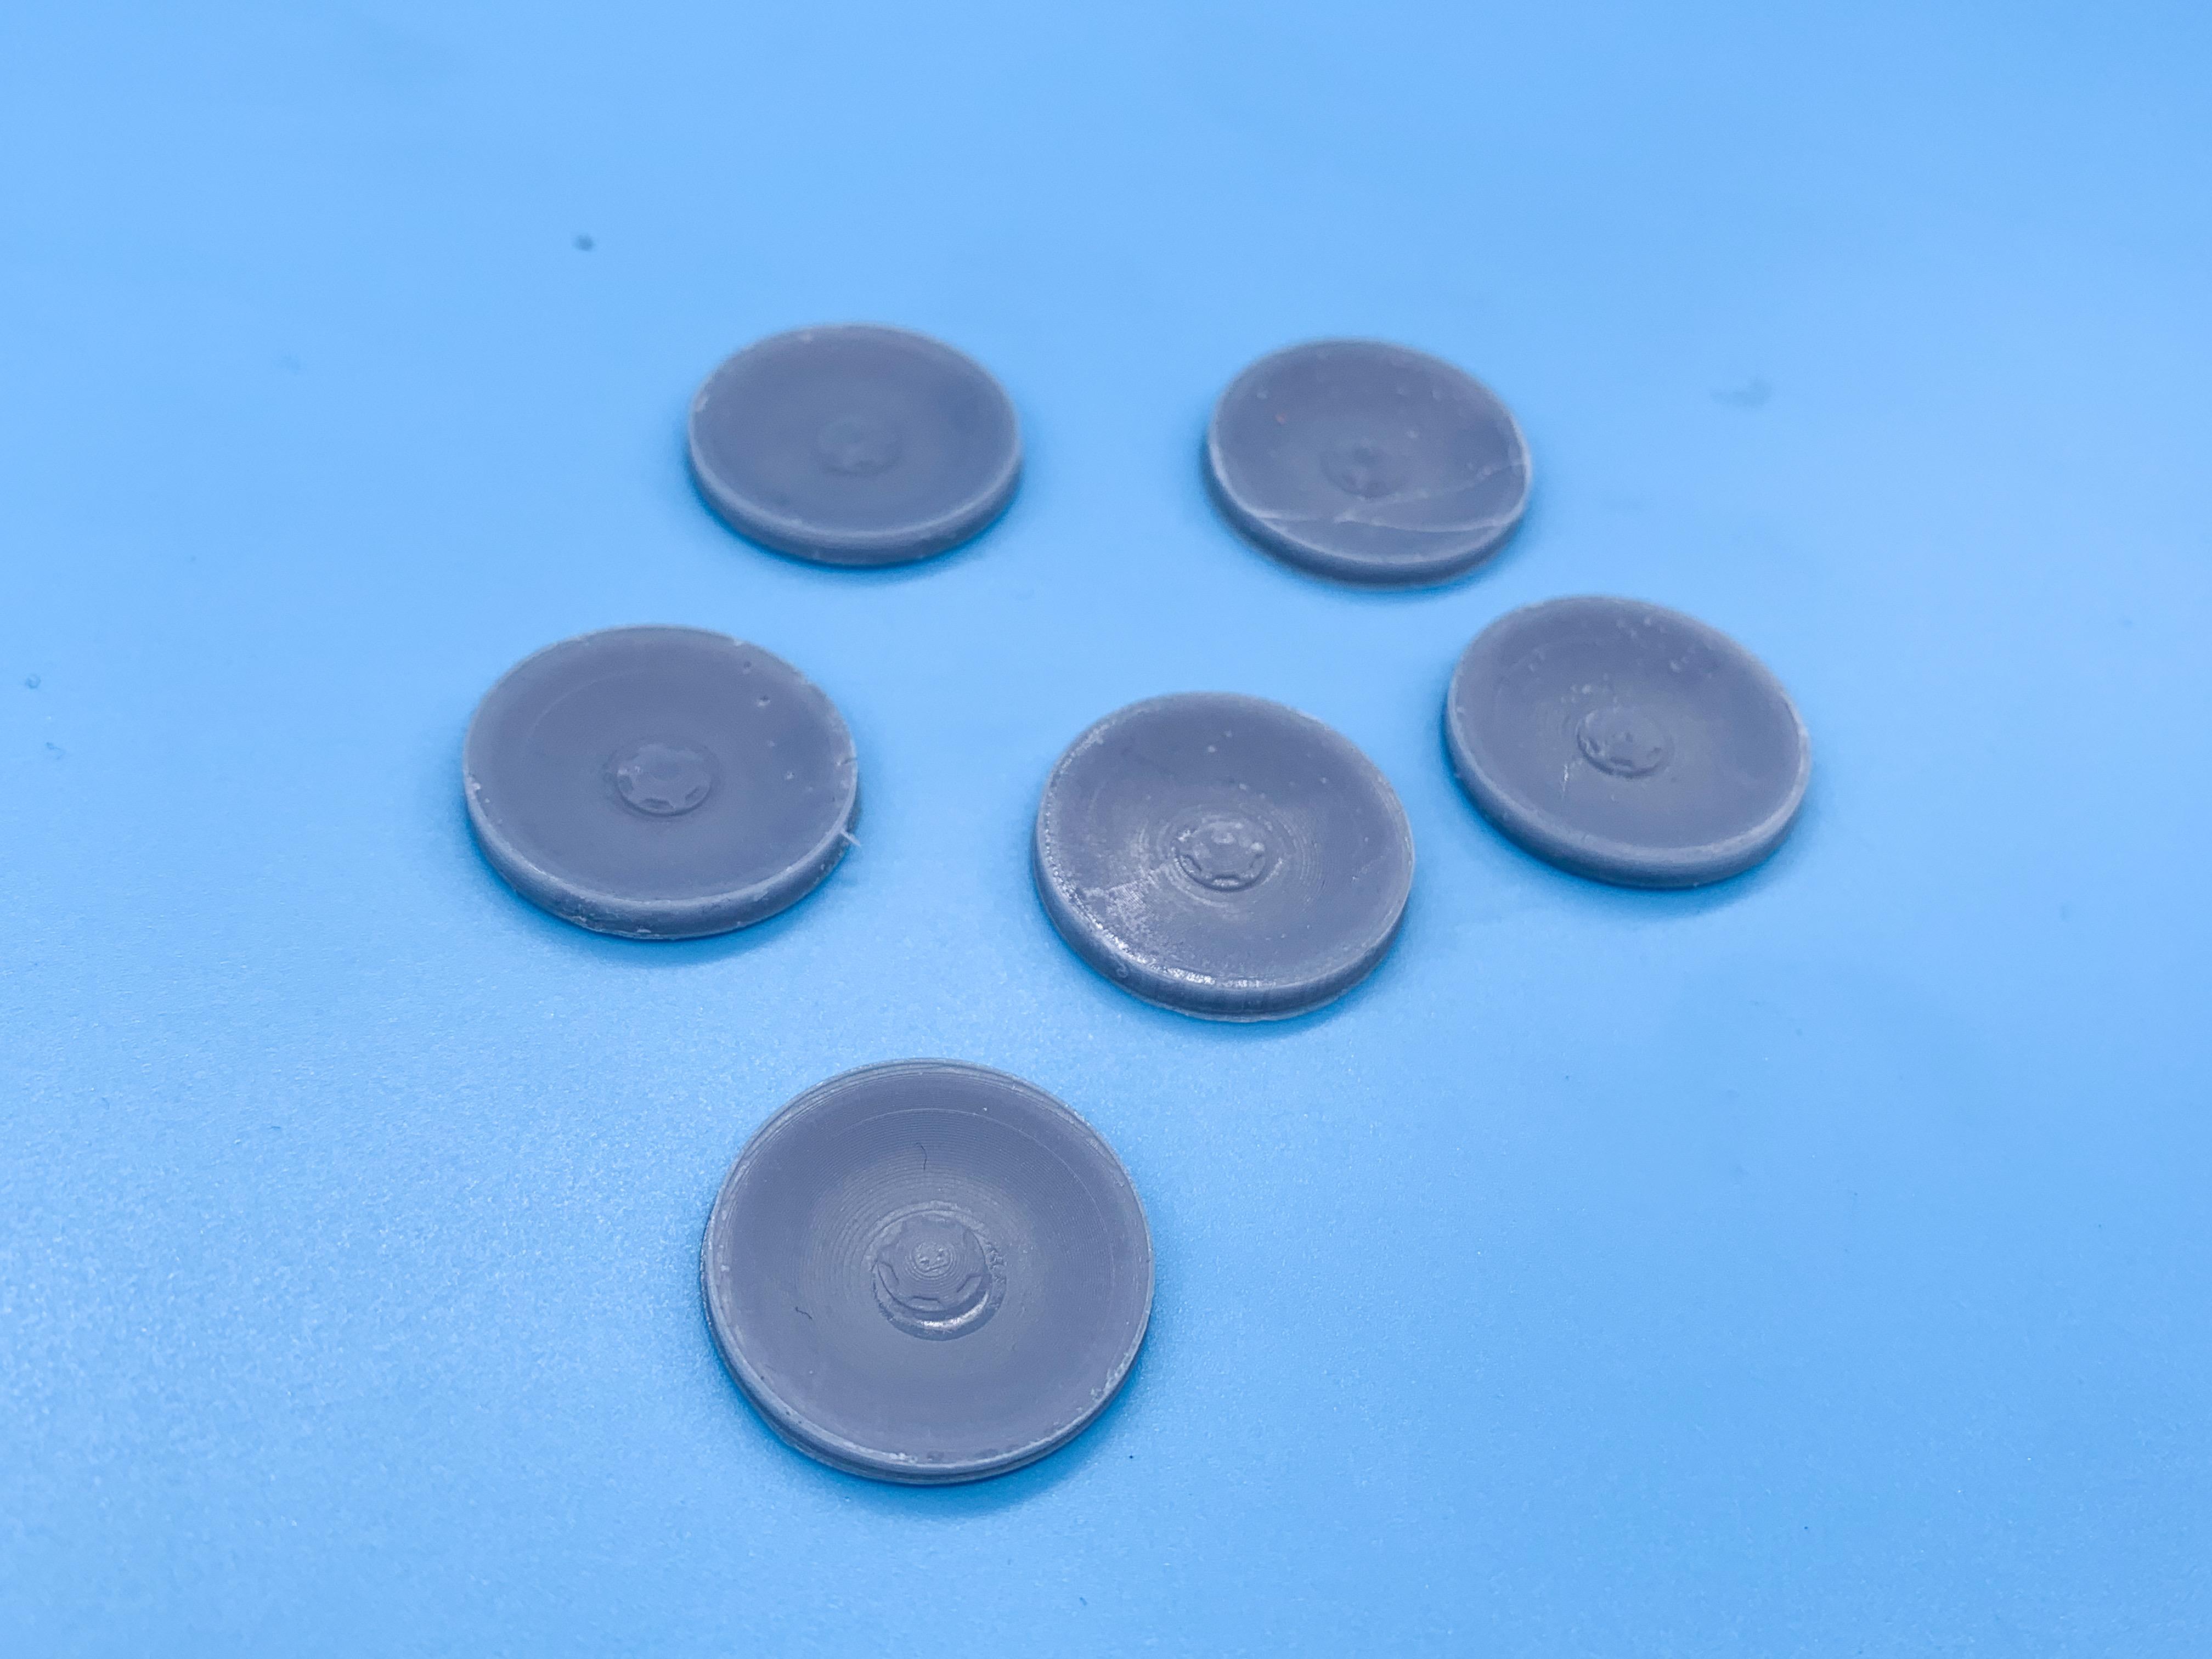
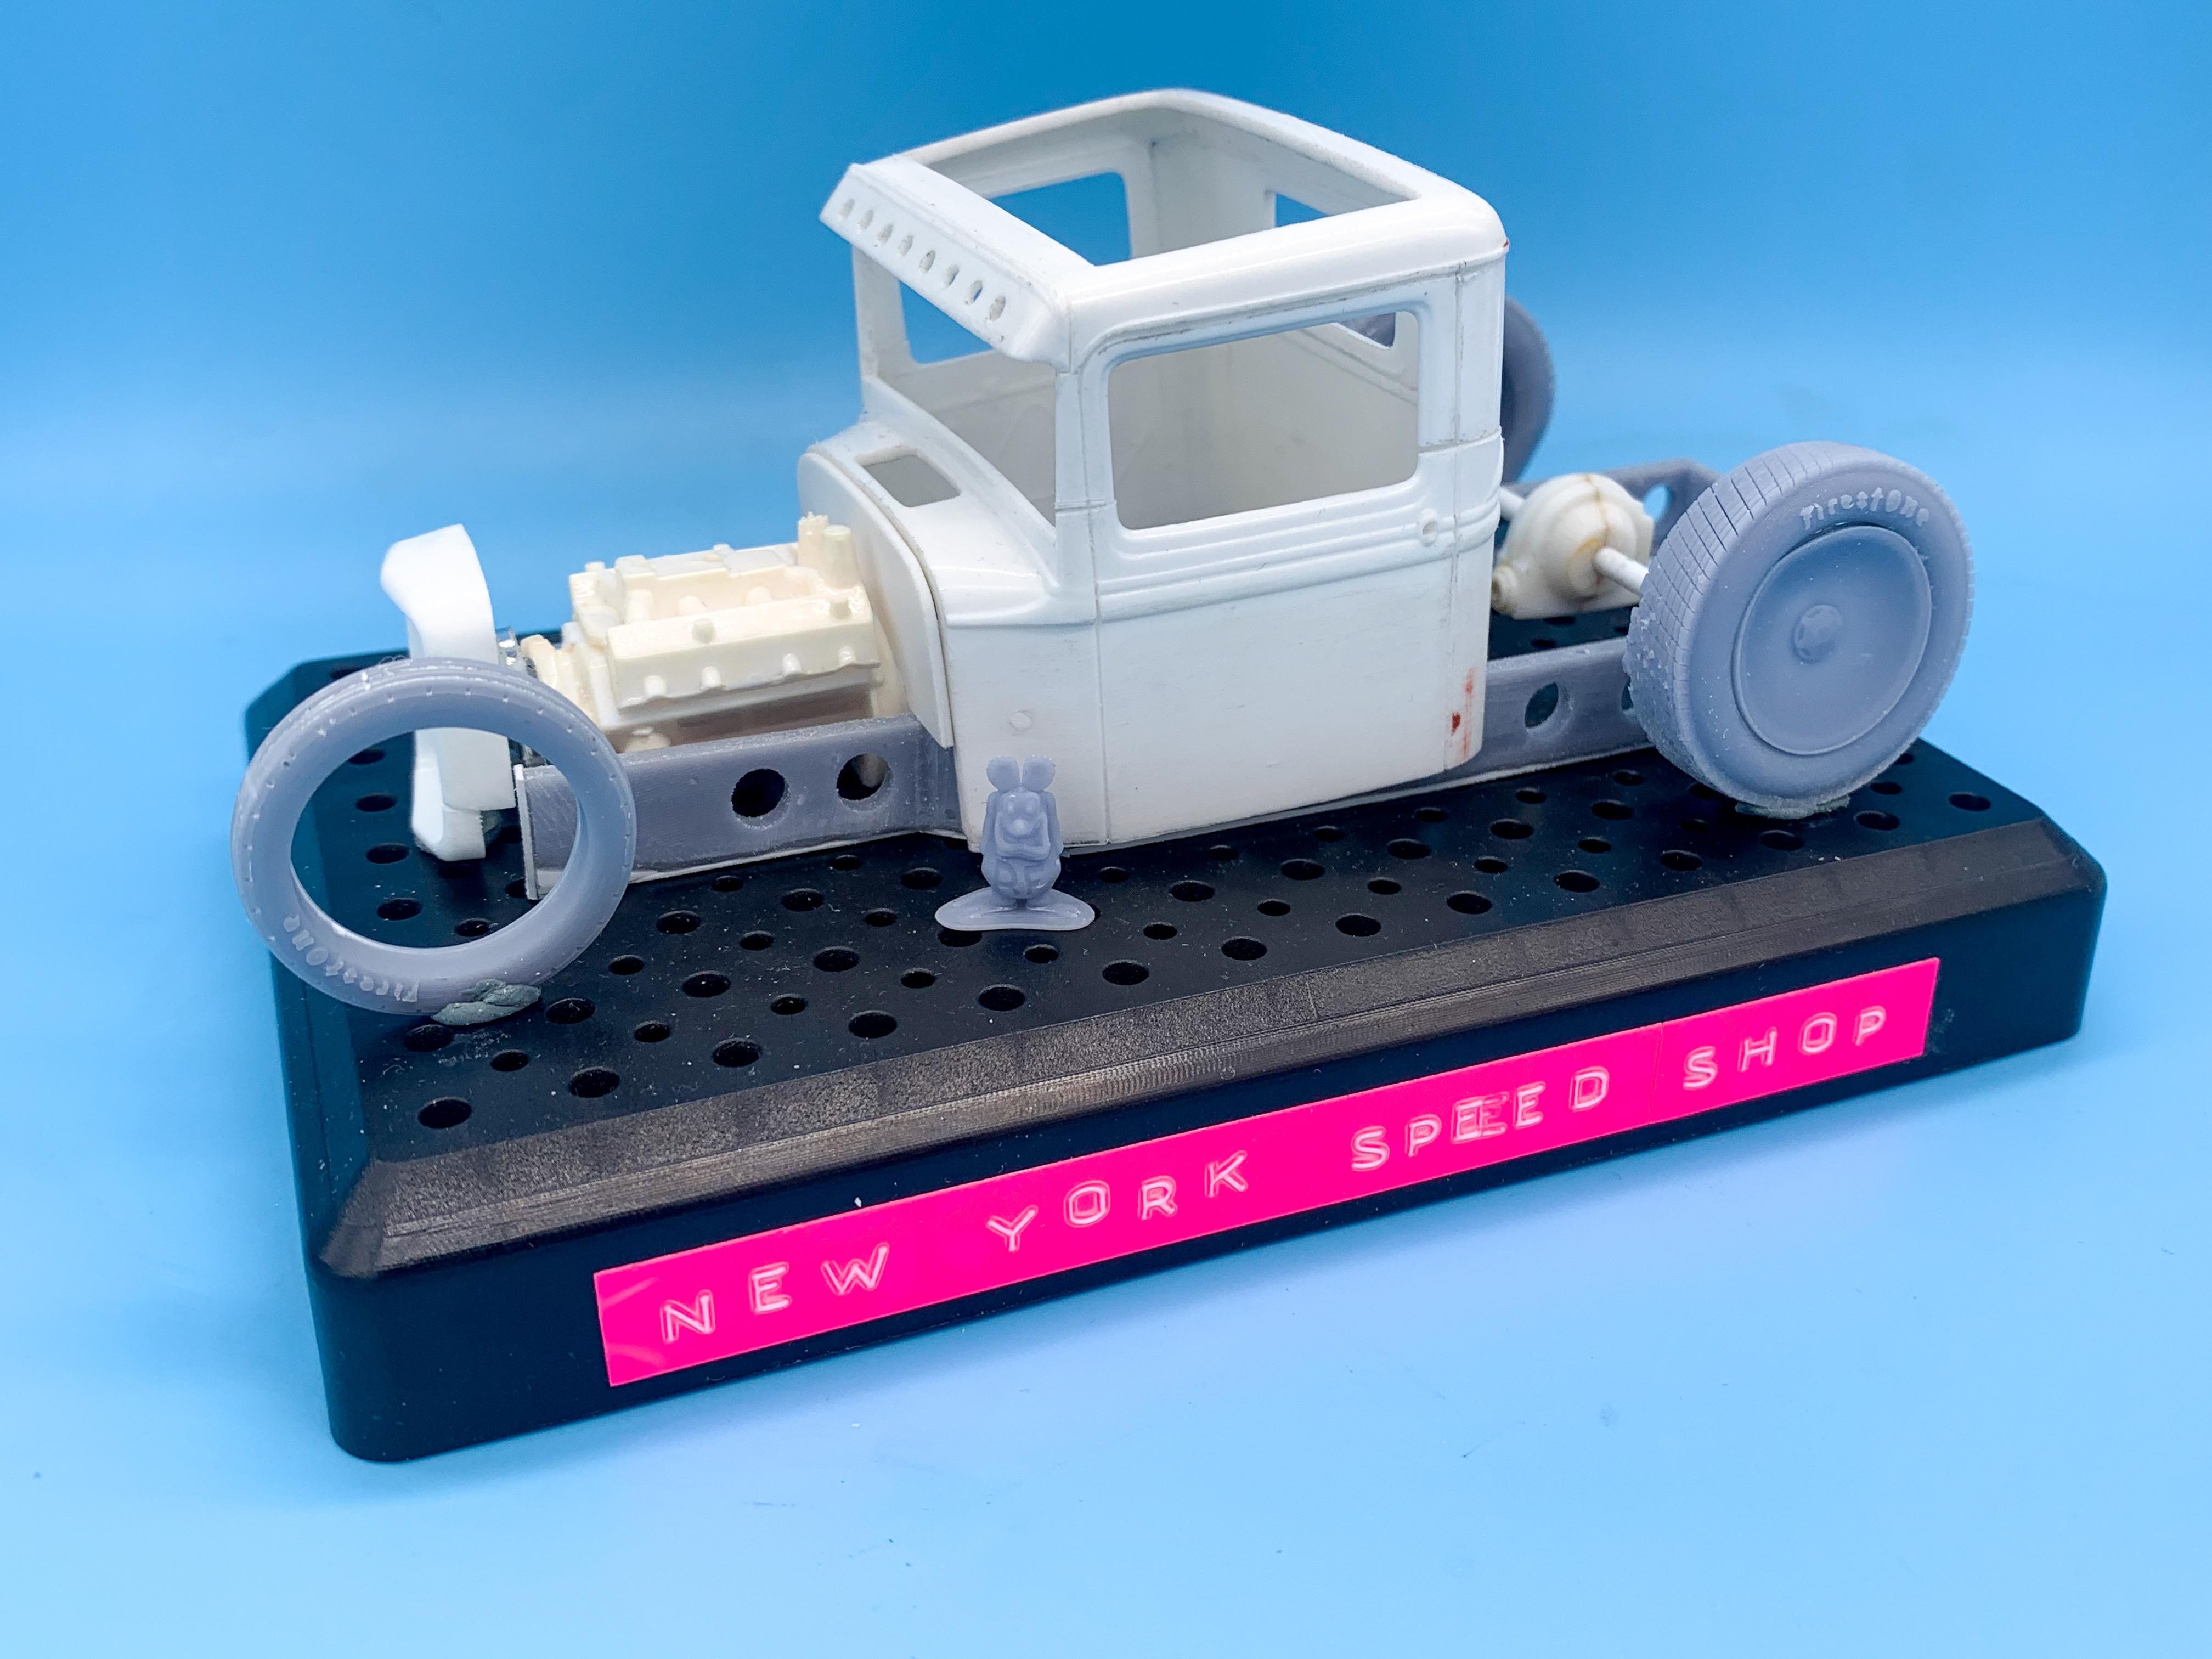
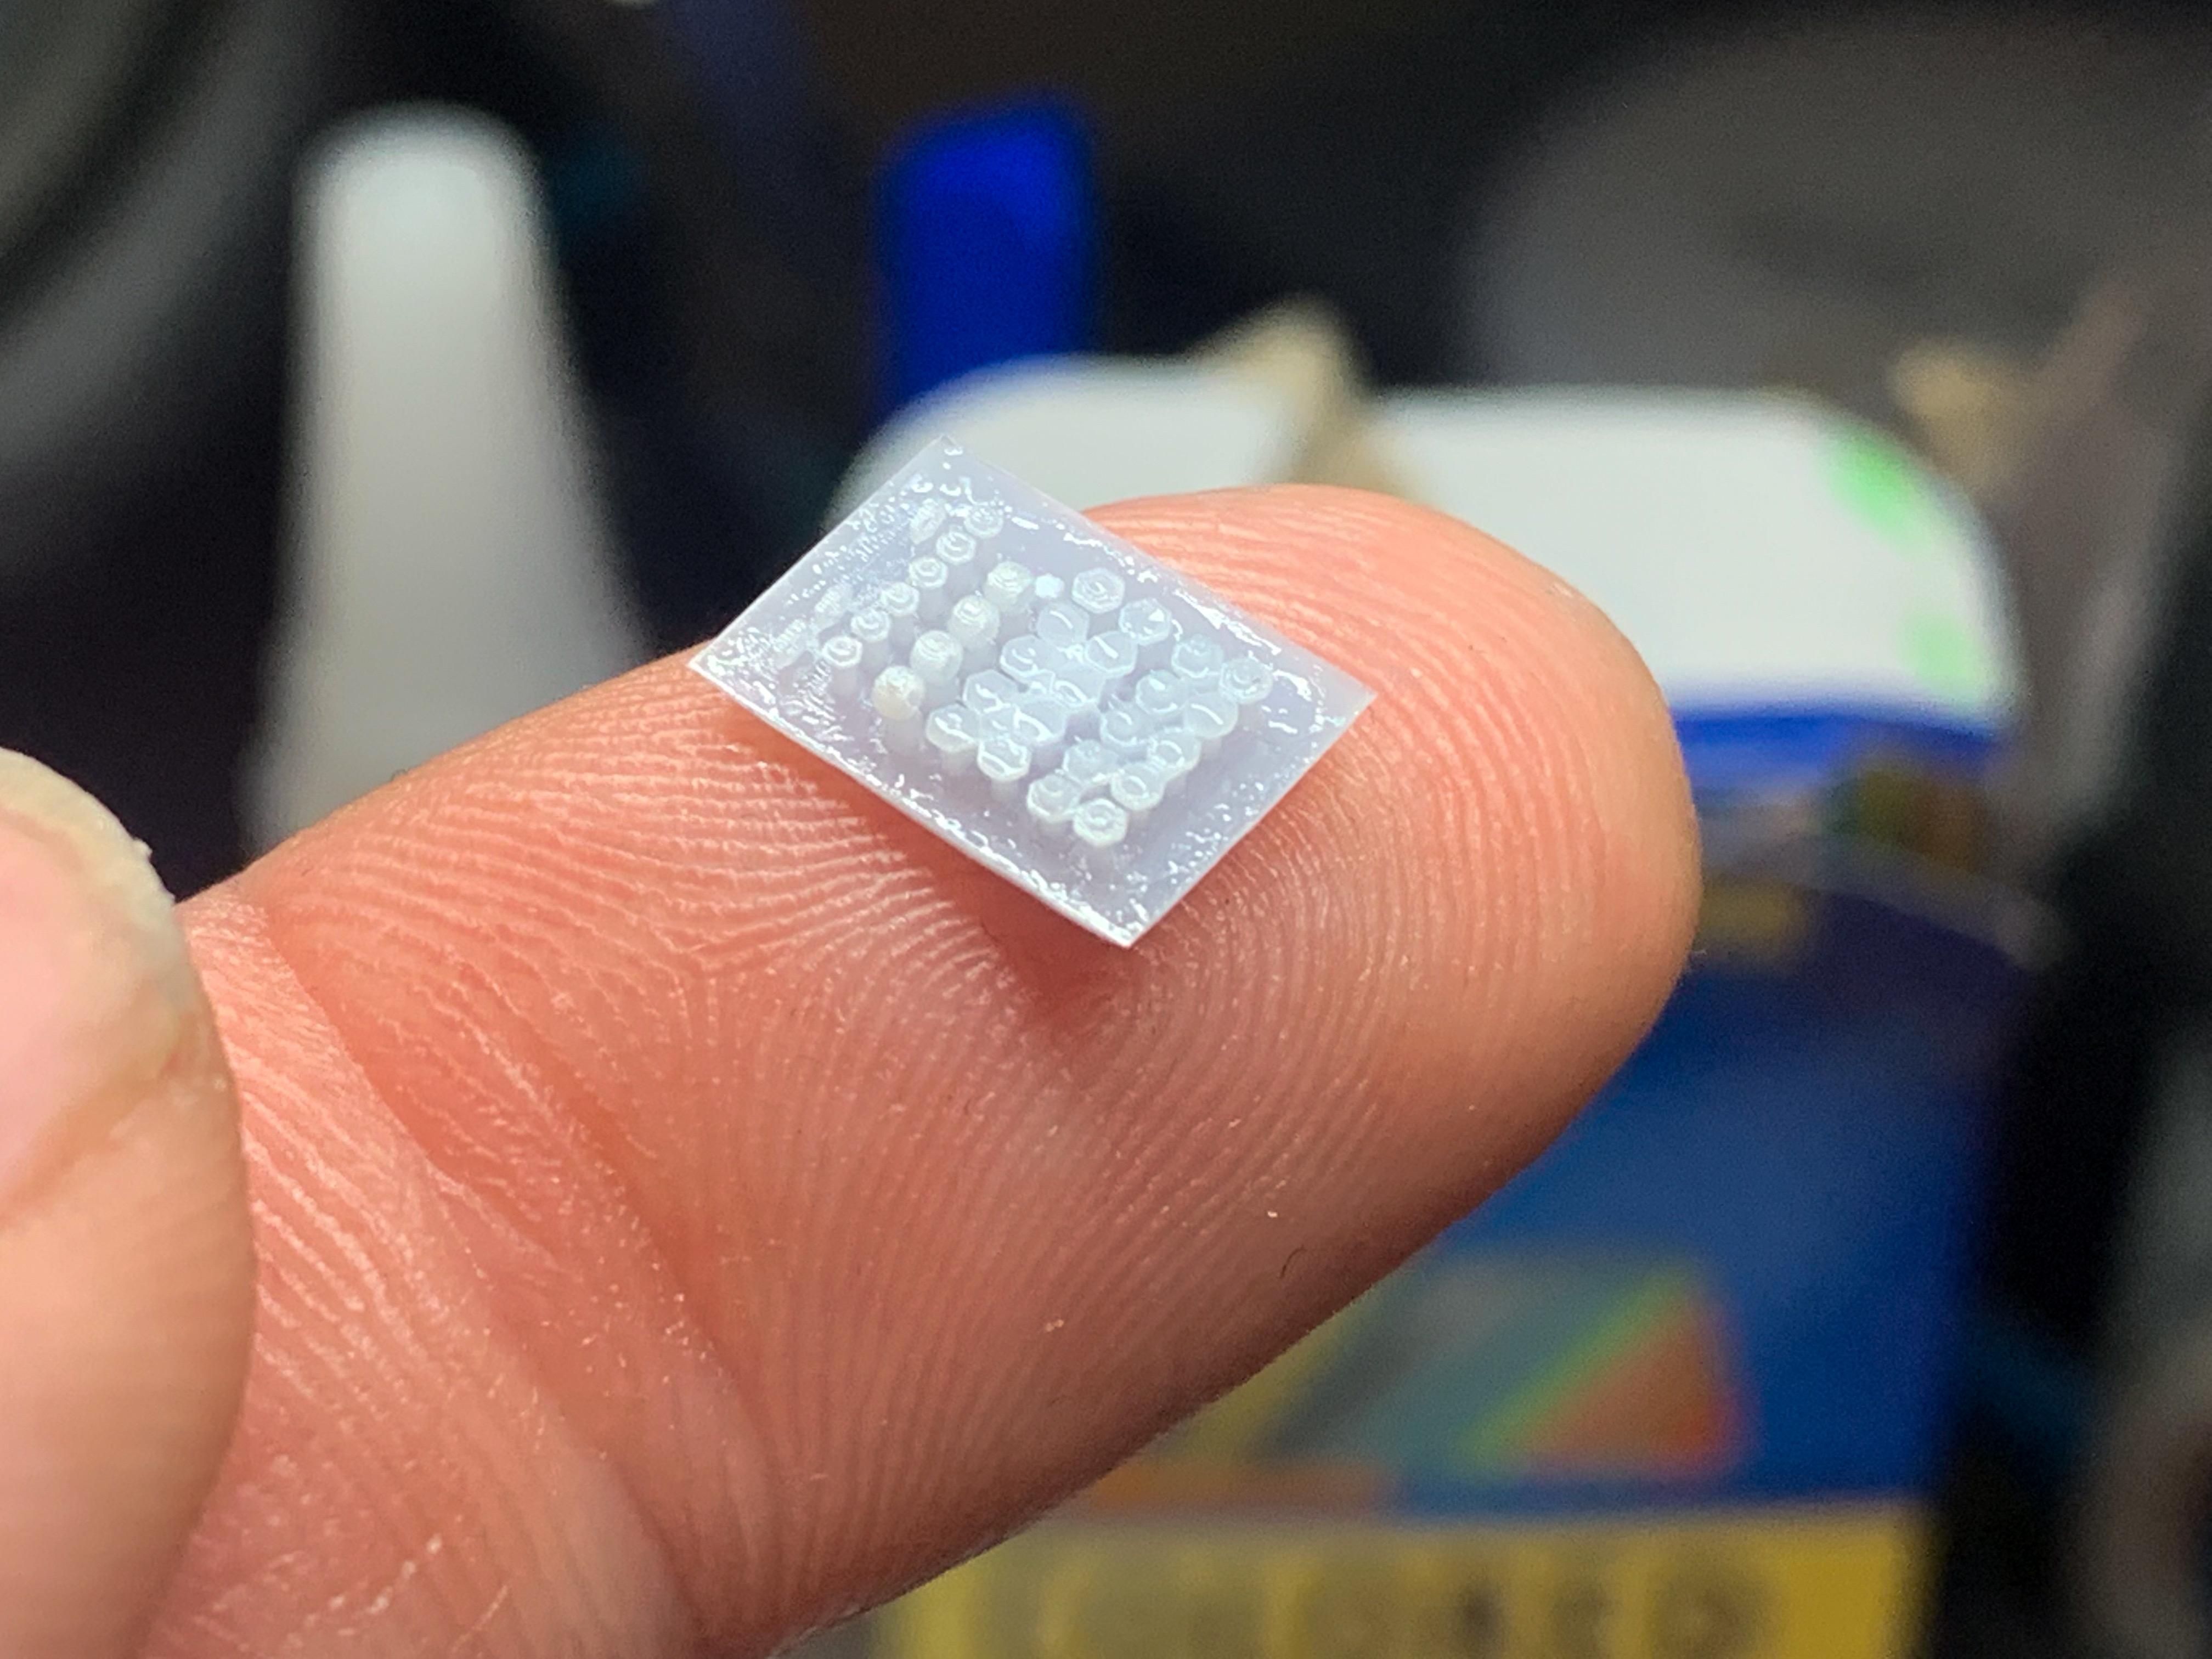
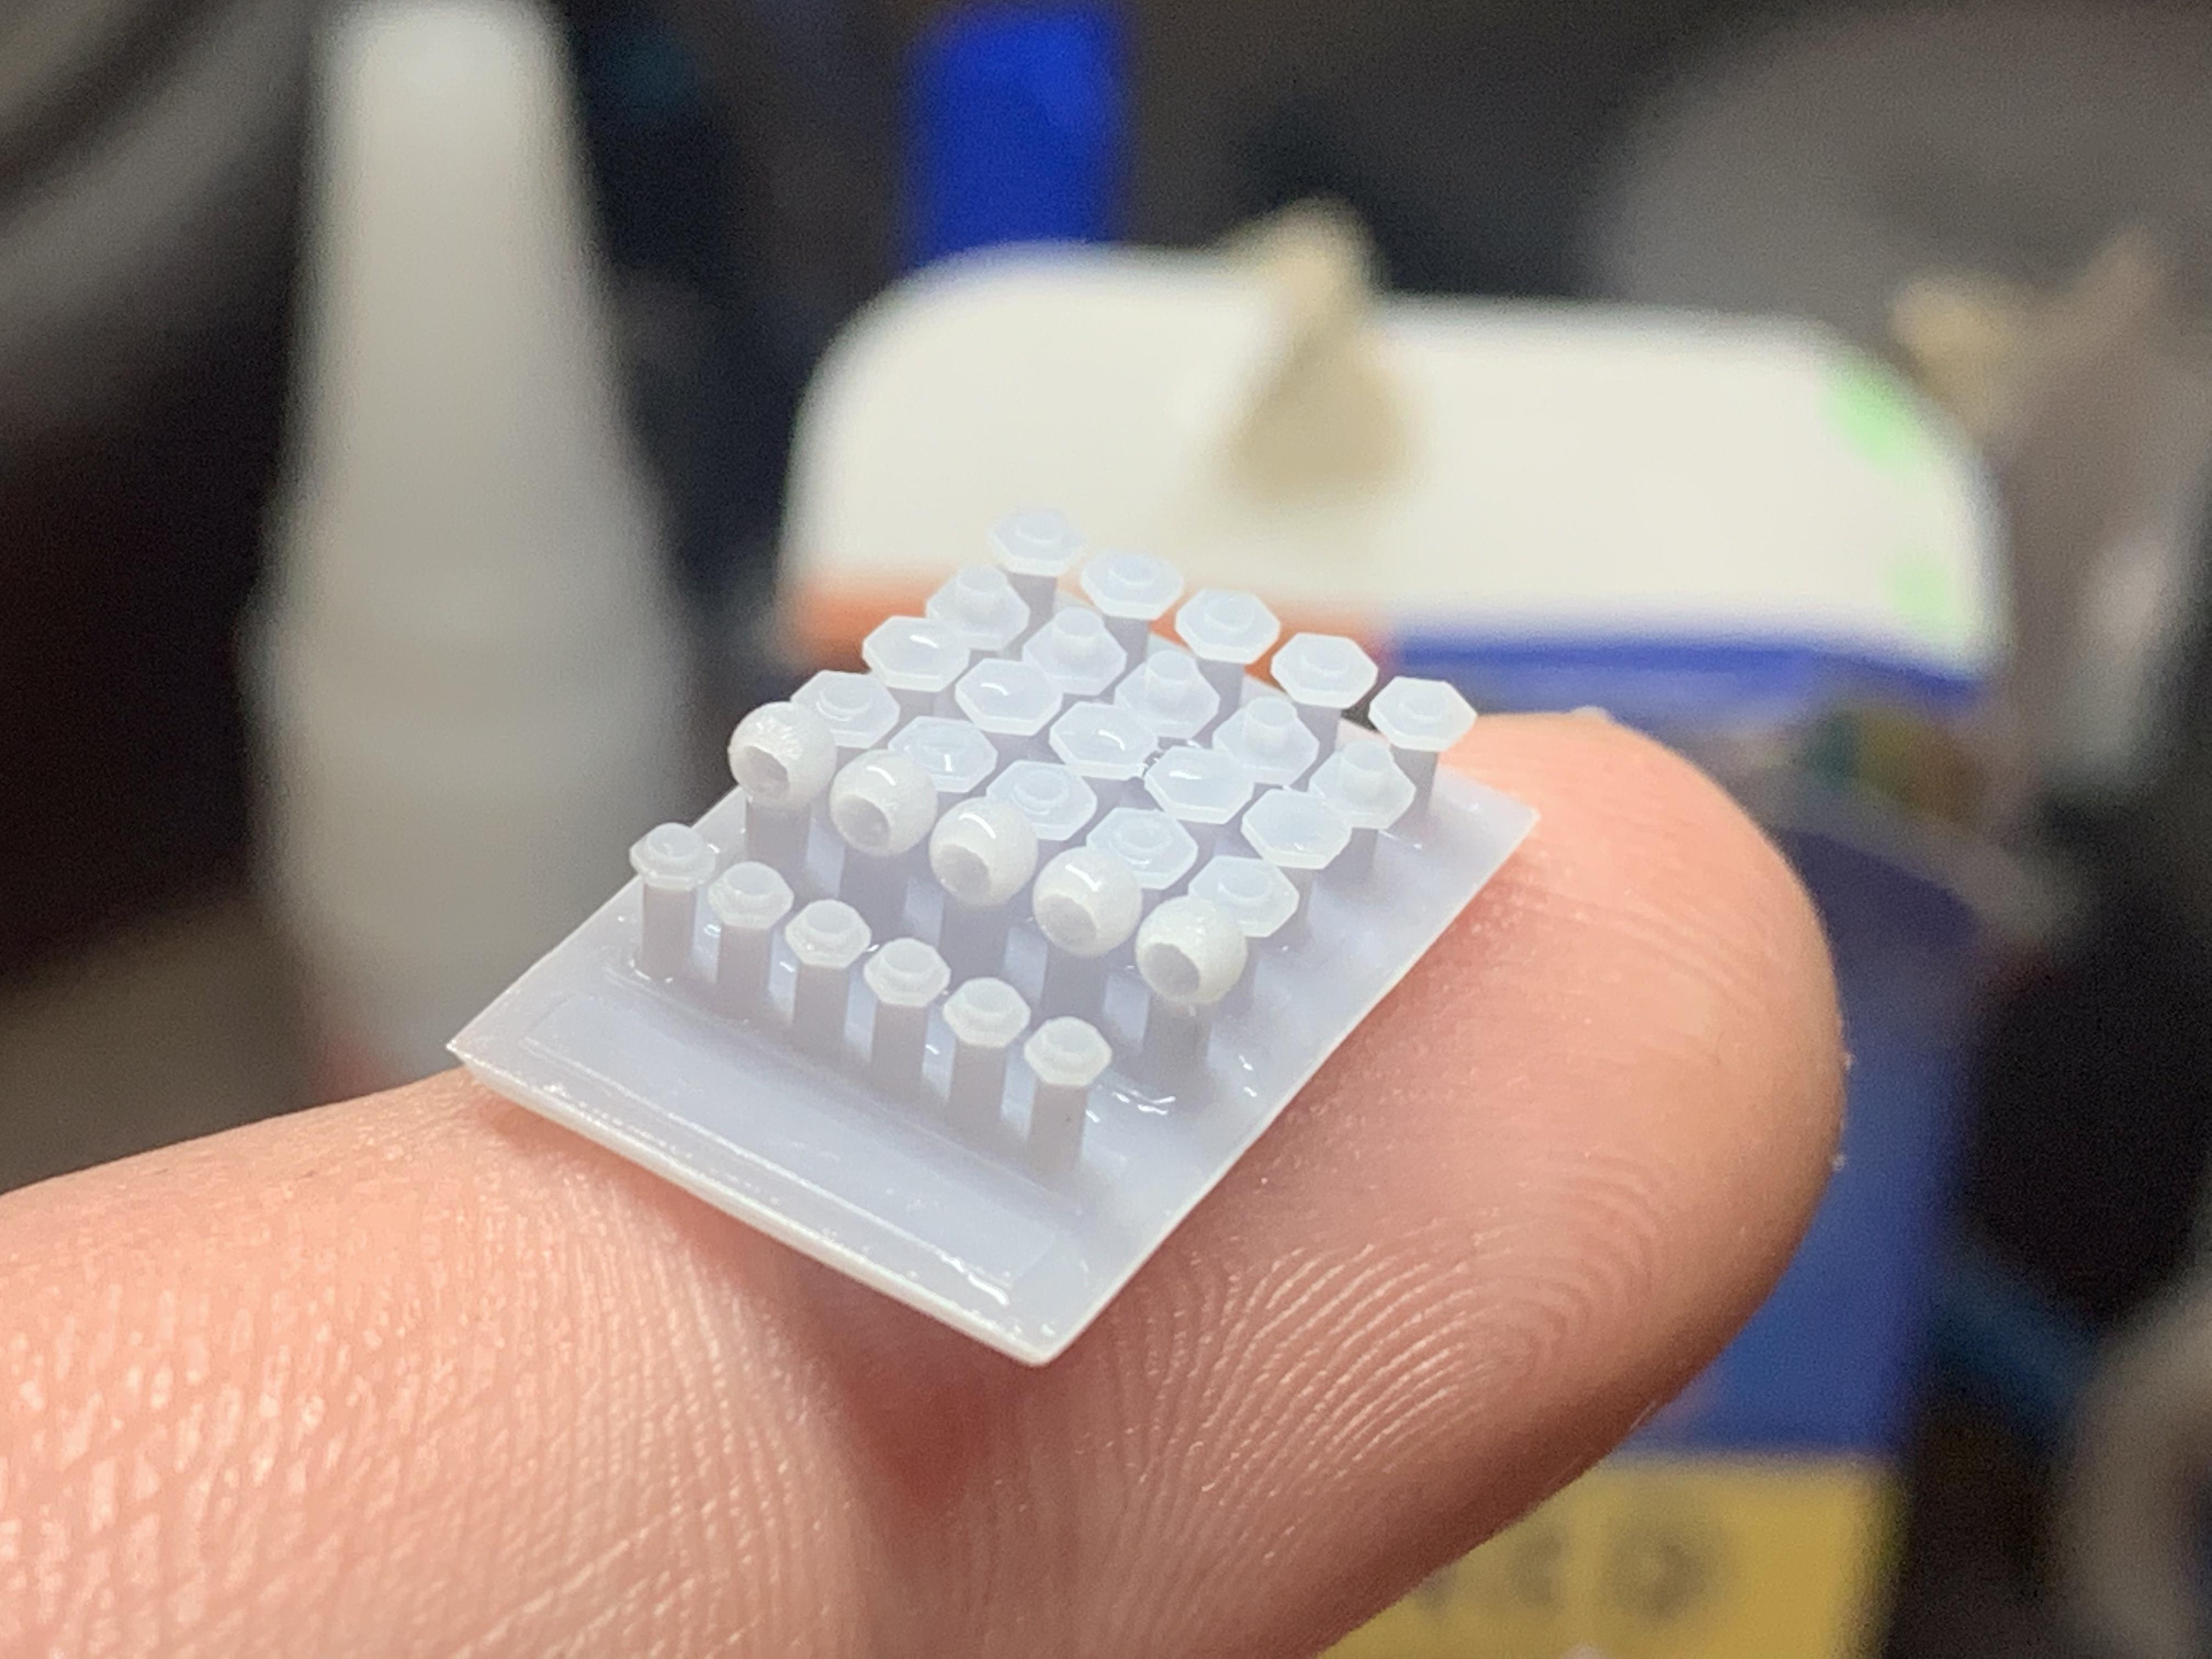
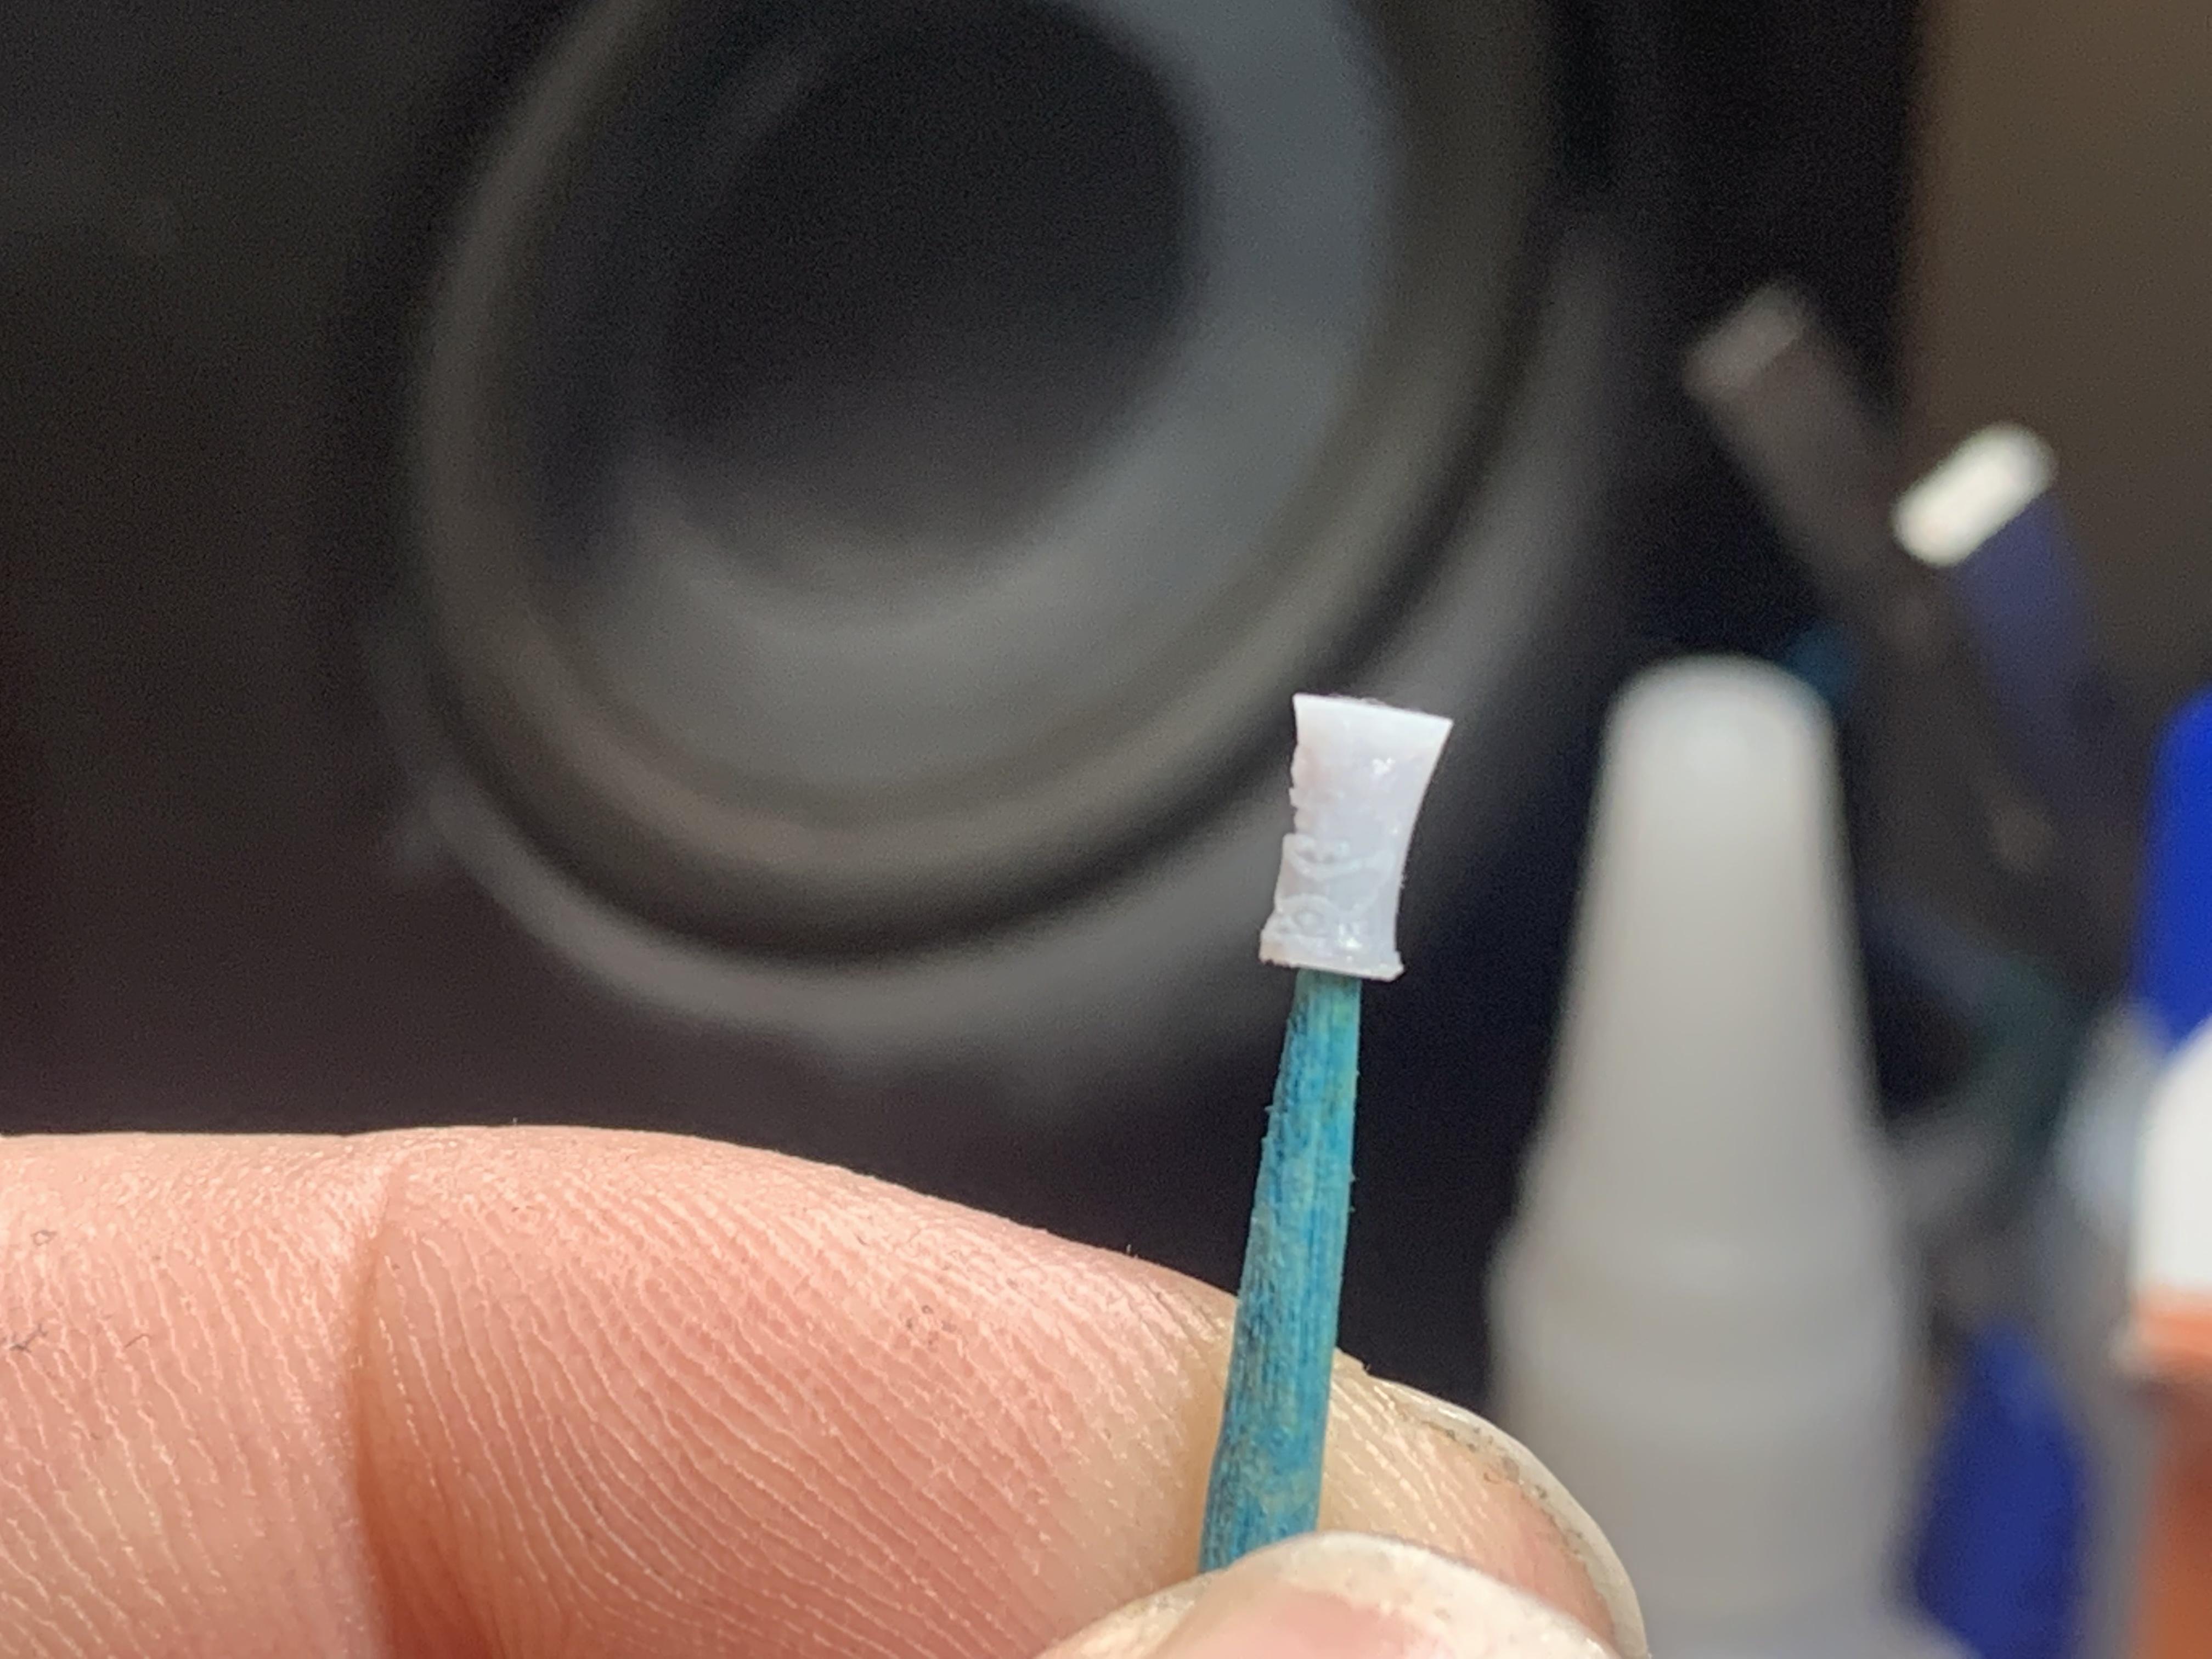
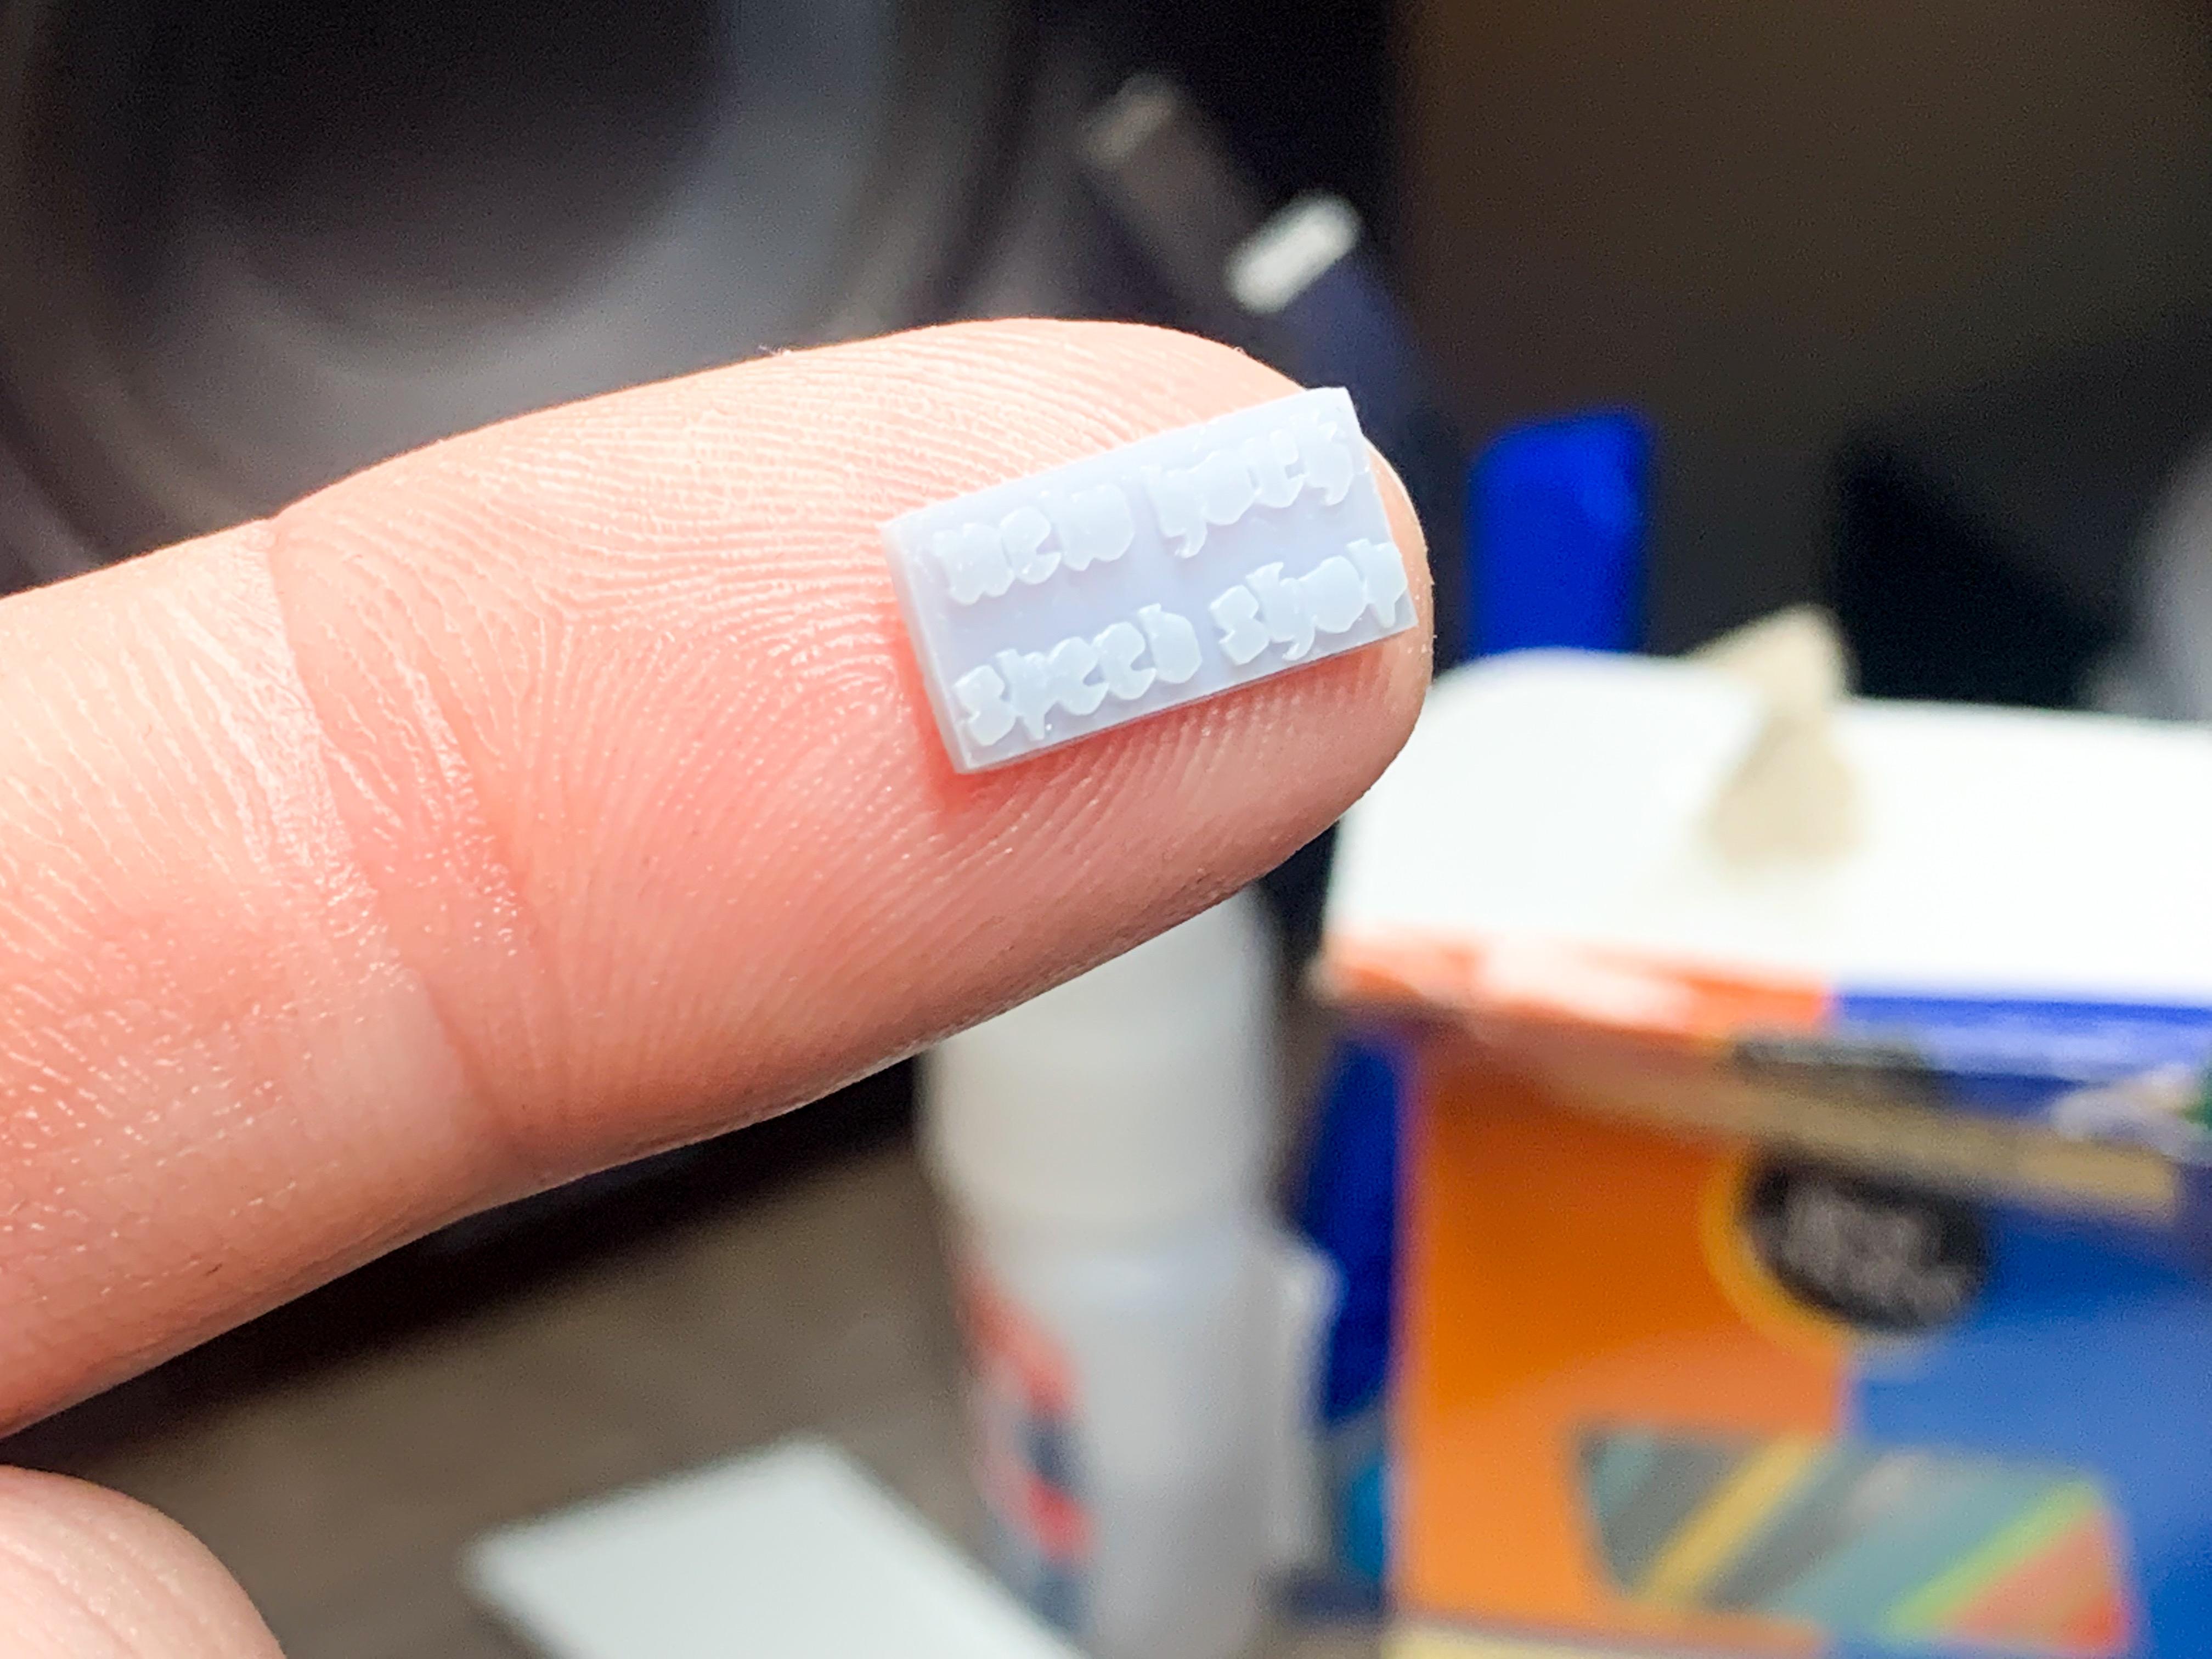
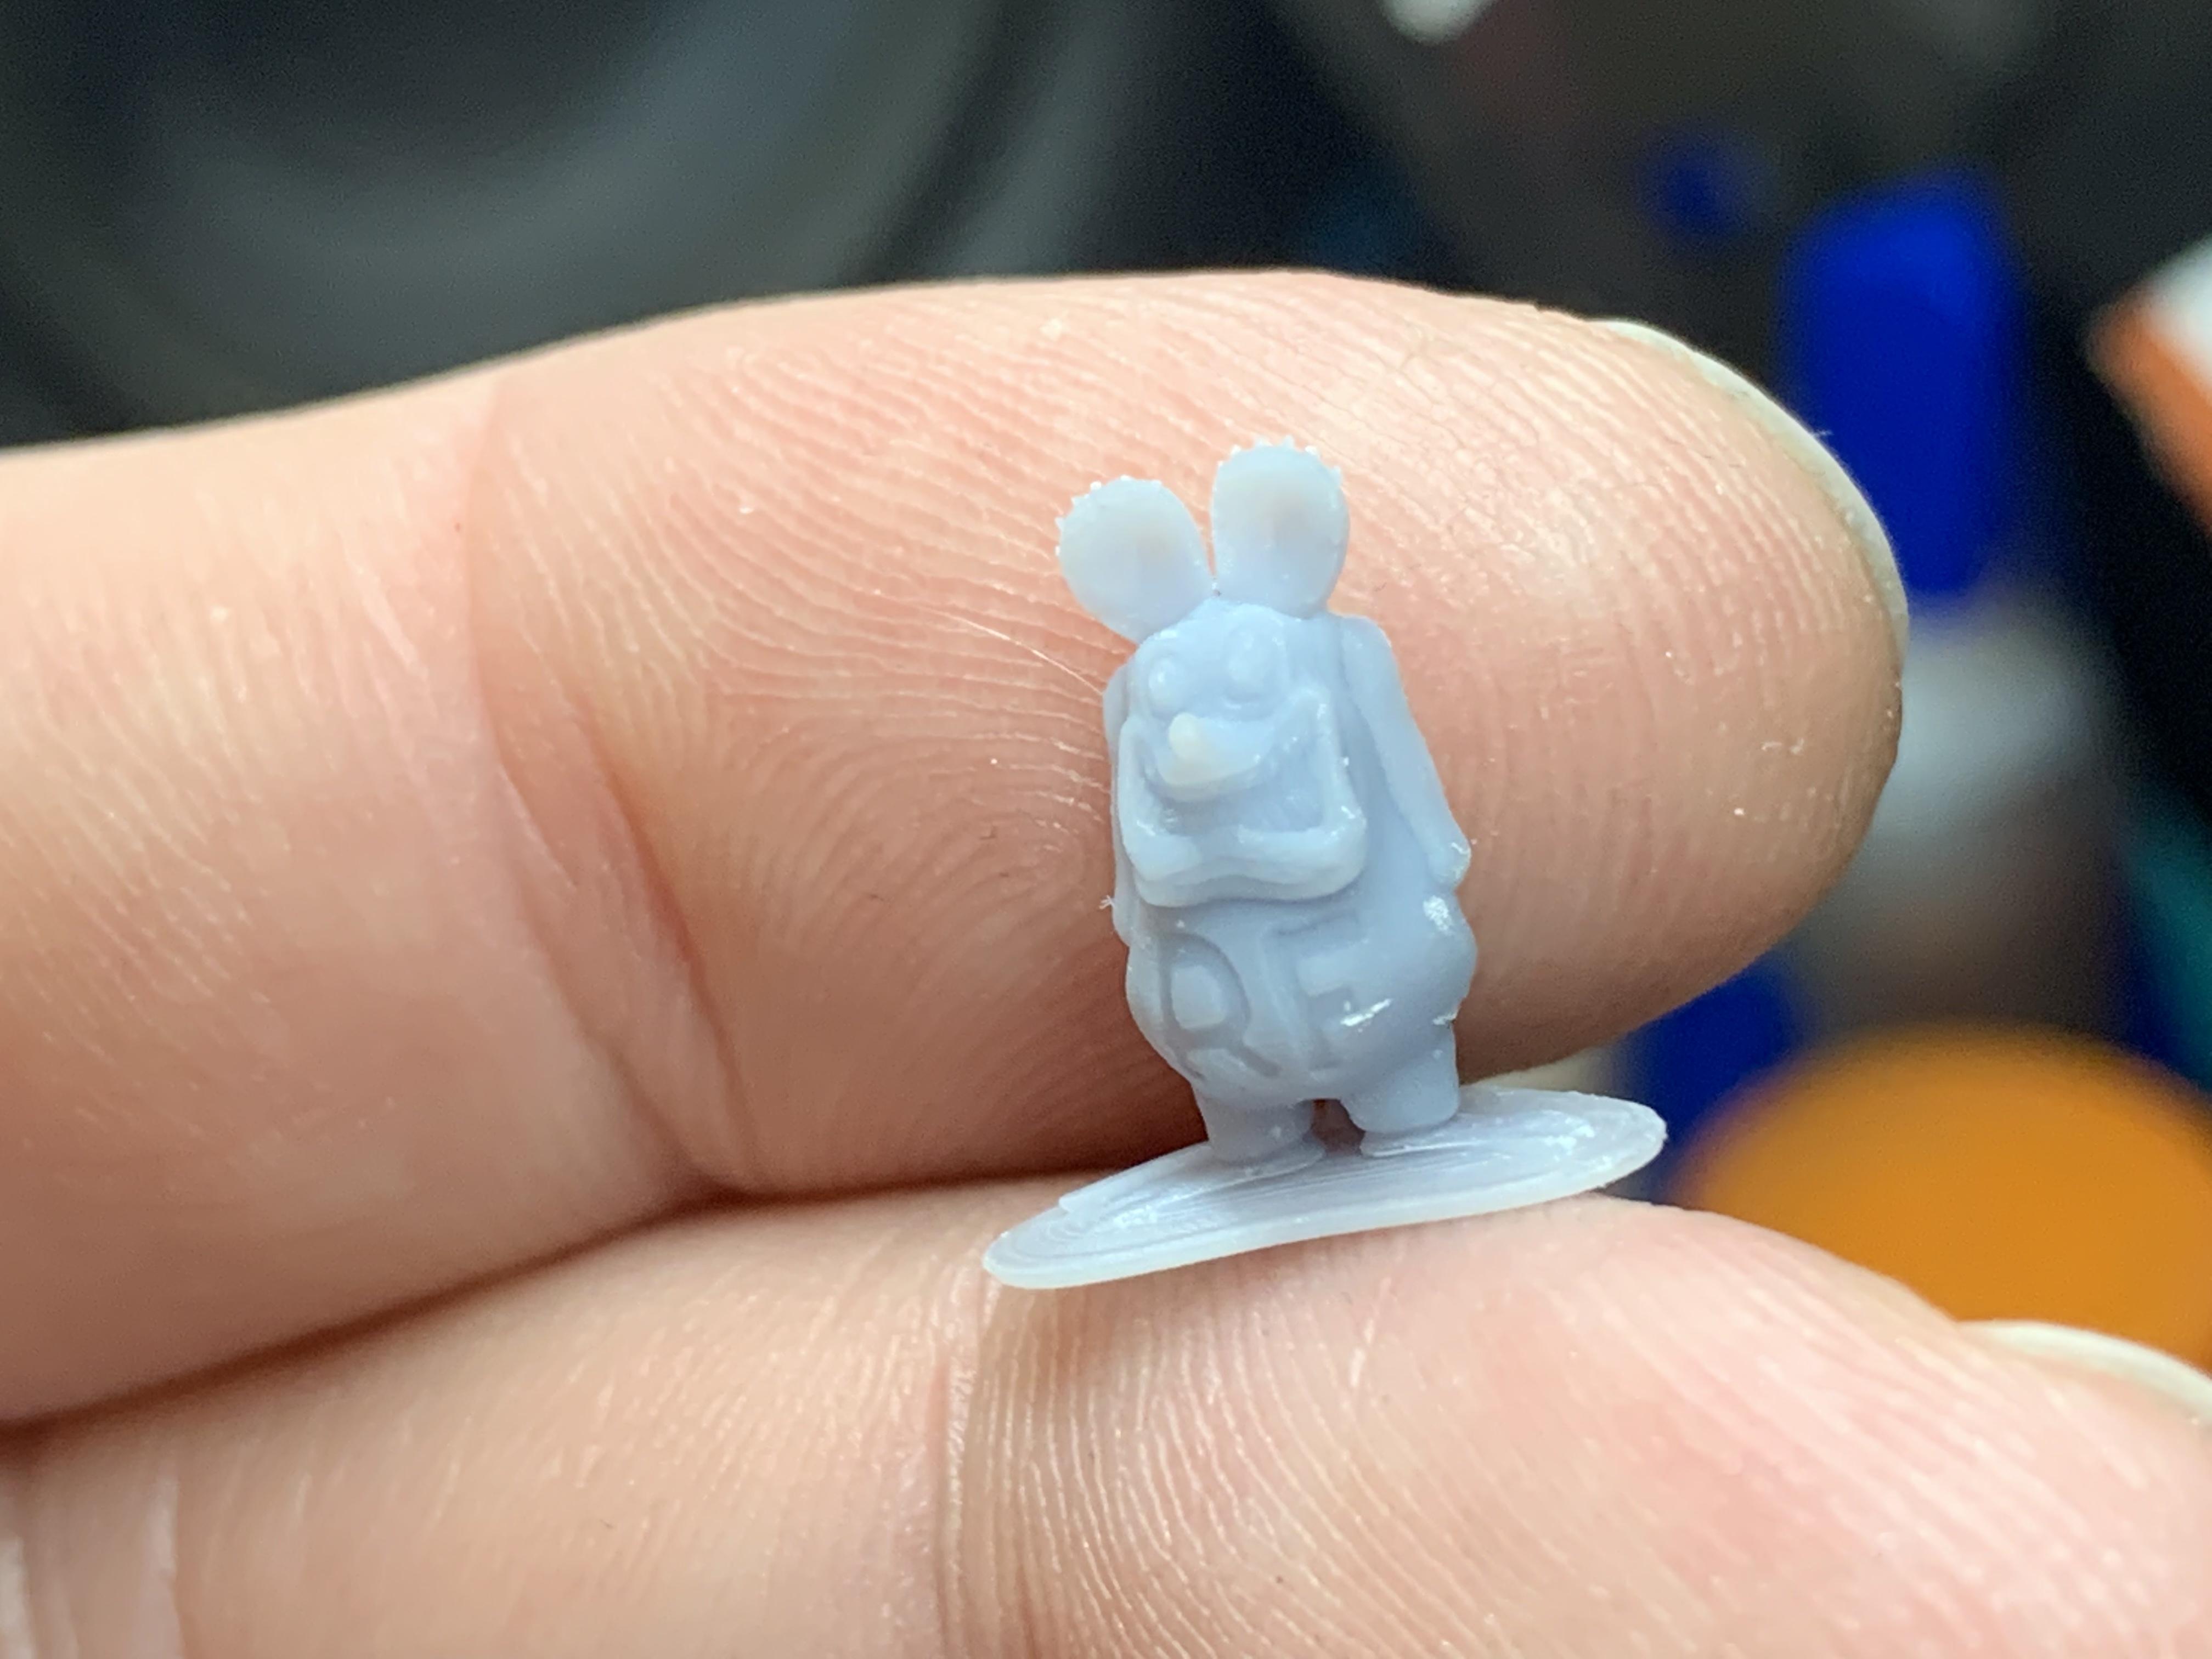
Jack of all trades - master of none! I kinda feel like if you picked any one aspect of our hobby (painting, scratchbuilding, machining, 3D printing, designing decals, etc etc) and really tried to master that ONE aspect to the ultimate level…then THAT would be your hobby. Like, I can KINDA airbrush but I’m not an airbrush artist. And I can machine some simple parts but being a master machinist is a whole other lifelong pursuit. So I’m ok with being kinda average at a bunch of skills as long as I’m improving slowly I guess…we need a lot of different skills to be good at this hobby! Using TinkerCad for the simple stuff (free online app), and Sketchup and Adobe Dimension (both paid subscriptions) for the more complex projects, and Lychee slicer (free version, although there’s a better paid version I want to try) to convert all that stuff into printable files. Learned a lot of software the last couple of months! I’m engaged in a hobby popular in the 60s, building a car from the 30s using this week’s latest 2022 techniques and technologies! ?. Thanks Steve! I’m interested to see what I can do with this thing too! You’re absolutely right, Mr Britches! I knew that was the recommended way to do that, and have been snipping before curing generally, but I was nervous about tweaking the frame or knocking it out of alignment somehow or something…in this case I cleaned, cured, snipped and re-cured - seemed to work ok (although I know that curing too long makes parts brittle too so I’m going to be cautious with the frame. Speaking of the frame, one of the tweaks I made before printing the final version was to take some depth out of the bottom edge - I noticed some rippling in the print so I removed just enough from the design so I could build it back up with strips of styrene sheet and have something I was more comfortable working with to get it all straight and level before paint. I also spent the best part of today messing with printing wheels and tires…got the wheels done after a couple of attempts: They need a little cleanup still but between all my various tries I’ve definitely got 4 usable ones now…tires I’m still messing with but getting better, gradually…here’s another batch fresh out of the oven: I used a couple of the failed prints to do a quick mock-up…I have some larger resin tires that I might like better but these are nicely detailed anyway: And after a whole day of trying to get some tires that I was happy with, I just wanted to print some easy stuff so I did some tiny bolts I’d designed that I wanted to try for detailing purposes further down the line… Some bigger bolts and track rod ends: A tiki shifter which is really hard to see but looks like it came out nice in real life… And another experiment with making 3D club plaques (which I’m going to mess with some more so I can figure out making actual embossed custom license plates rather than just using flat decals): All in all, not much progress on the truck itself but some of these parts will make their way onto it at least… Less playing and more actual building tomorrow hopefully - more soon!
-
They went for the hobby supplies but stayed for the instrumental Christian songs Hobby Lobby always plays in the background…
-
I’m saving the hood to make a boat-tail hot rod of some sort ?
-
Thanks Dan! I’d be interested to see that! Did three runs at getting some tires and wheels printed today and definitely got CLOSER anyway… First completely successful print WAS with them laying down, like you mentioned - ditto the wheels. Print quality was best with them angled up slightly though, virtually no lines or imperfections aside from the issue with figuring out where to put the supports. I had enough of printing wheels for one day so I’m trying a random mix of various other parts I’ve been wanting to try this evening…I’m hoping I can get some good nut and bolt heads printed…I’m getting low on Tichy Train ones that I normally like and it would be cool to be able to just print a bunch of sizes instead. Plus, had some seats and a grill and some other little geegaws I wanted to see printed:
-
Honestly, it’s pretty easy - just scribe the hood off carefully (especially if you want to use it, which I didn’t) and then put some strips of styrene in behind the fenders when you reattach them to the body so you have some good gluing surfaces! Nothin’ much to it! ????
-
Good tips - thanks Bill! Trying again this morning with more angle and just a single set (two tires, two wheels) Also trying adding my own supports so that they don’t ruin the tread pattern as much as the automatically generated supports did. Guess we’ll see in a couple of hours if it worked or not! I’ve been enjoying Cults3D for hunting down cool stuff to print (and there’s no shortage of stuff on there) - like this! https://cults3d.com/en/3d-model/various/hotrod-ford-flathead-3-versions-frenzel-supercharged-4x2-carb-1x2-carb Or this: https://cults3d.com/en/3d-model/game/peel-p50-printable-car Or even a lawn tractor ? https://cults3d.com/en/3d-model/various/gt5-1-25-garden-tractor-model
-
Oh, that’s weird, I evidentially forgot to update the thread - my bad! Thanks for the interest… I finished it! Pics here: https://public.fotki.com/NewYorkSpeedShop/scale-models/drag-cars/willys-gasser/ Not my most incredibly detailed build - just wanted to get a handle on how this kit goes together for future builds! I’ve got two more here ready for some attention…
-
They really are! There’s guys online selling entire kits already that you print at home and assemble like any regular kit- there’s a few cool car kits in 1:25 that I want to build. Like any technology, it has it’s limitations and doesn’t do some things as well (or any better) as a simpler method…for example, it’s not going to be quicker or easier to 3D print a coil spring compared to just wrapping some wire around something of the right diameter. It’ll be easier and quicker to scratchbuild a little bracket out of styrene than it will to draw it in CAD and print it… But then on the flipside, instead of hunting for a particular kit with a particular type of wheel to use, then ordering the kit and waiting to it to arrive I can likely find a wheel design online, download it, print it and have parts ready to use before most eBay sellers have even packaged the order. It’s really cool!
-
Funny thing - although the machines are, like, $300, I’m looking at the price of printing a part (which the software will tell you, based on what you paid for resin and how much a part uses) and I’m like “I can print this whole body for 50 cents?! DEAL! I can see my machine paying for itself pretty fast… I ordered a set of 3D printed artillery wheels a couple of months back on eBay and they were like $10 delivered. I have the file they were printed from here and the resin cost is 15 cents. Of course, there’s other consumables to factor in, but I’m really impressed so far… I’ve just recently got the AnyCubic Photon 4k, and I’ve been having some OK results with it considering I never used one before. Right now, about half of what I print works out right and is usable, and I’m starting to learn what does and doesn’t work. First thing I printed worked GREAT and tricked me into thinking this was easy: I’ve since printed this (which took two tries, but I got it on the second go around) And next thing I want to try is wheels and tires - I tried a set tonight and they HALF worked but two of the tires didn’t print: I think the software is adding WAY too many supports to those tires too (even though it lost two in the tank)…the ones nearest the camera had so many supports they entirely covered the tread on the bottom of the tire ?) Has anyone had any success printing tires and wheels? Could I see how yours look with the supports and whatnot? I’m guessing the angle they sit at is really important too… This stuff is so exciting - you need some computer skills and decent analytical skills to solve problems, but I’m having a blast! Thanks for starting this thread @iamsuperdan!
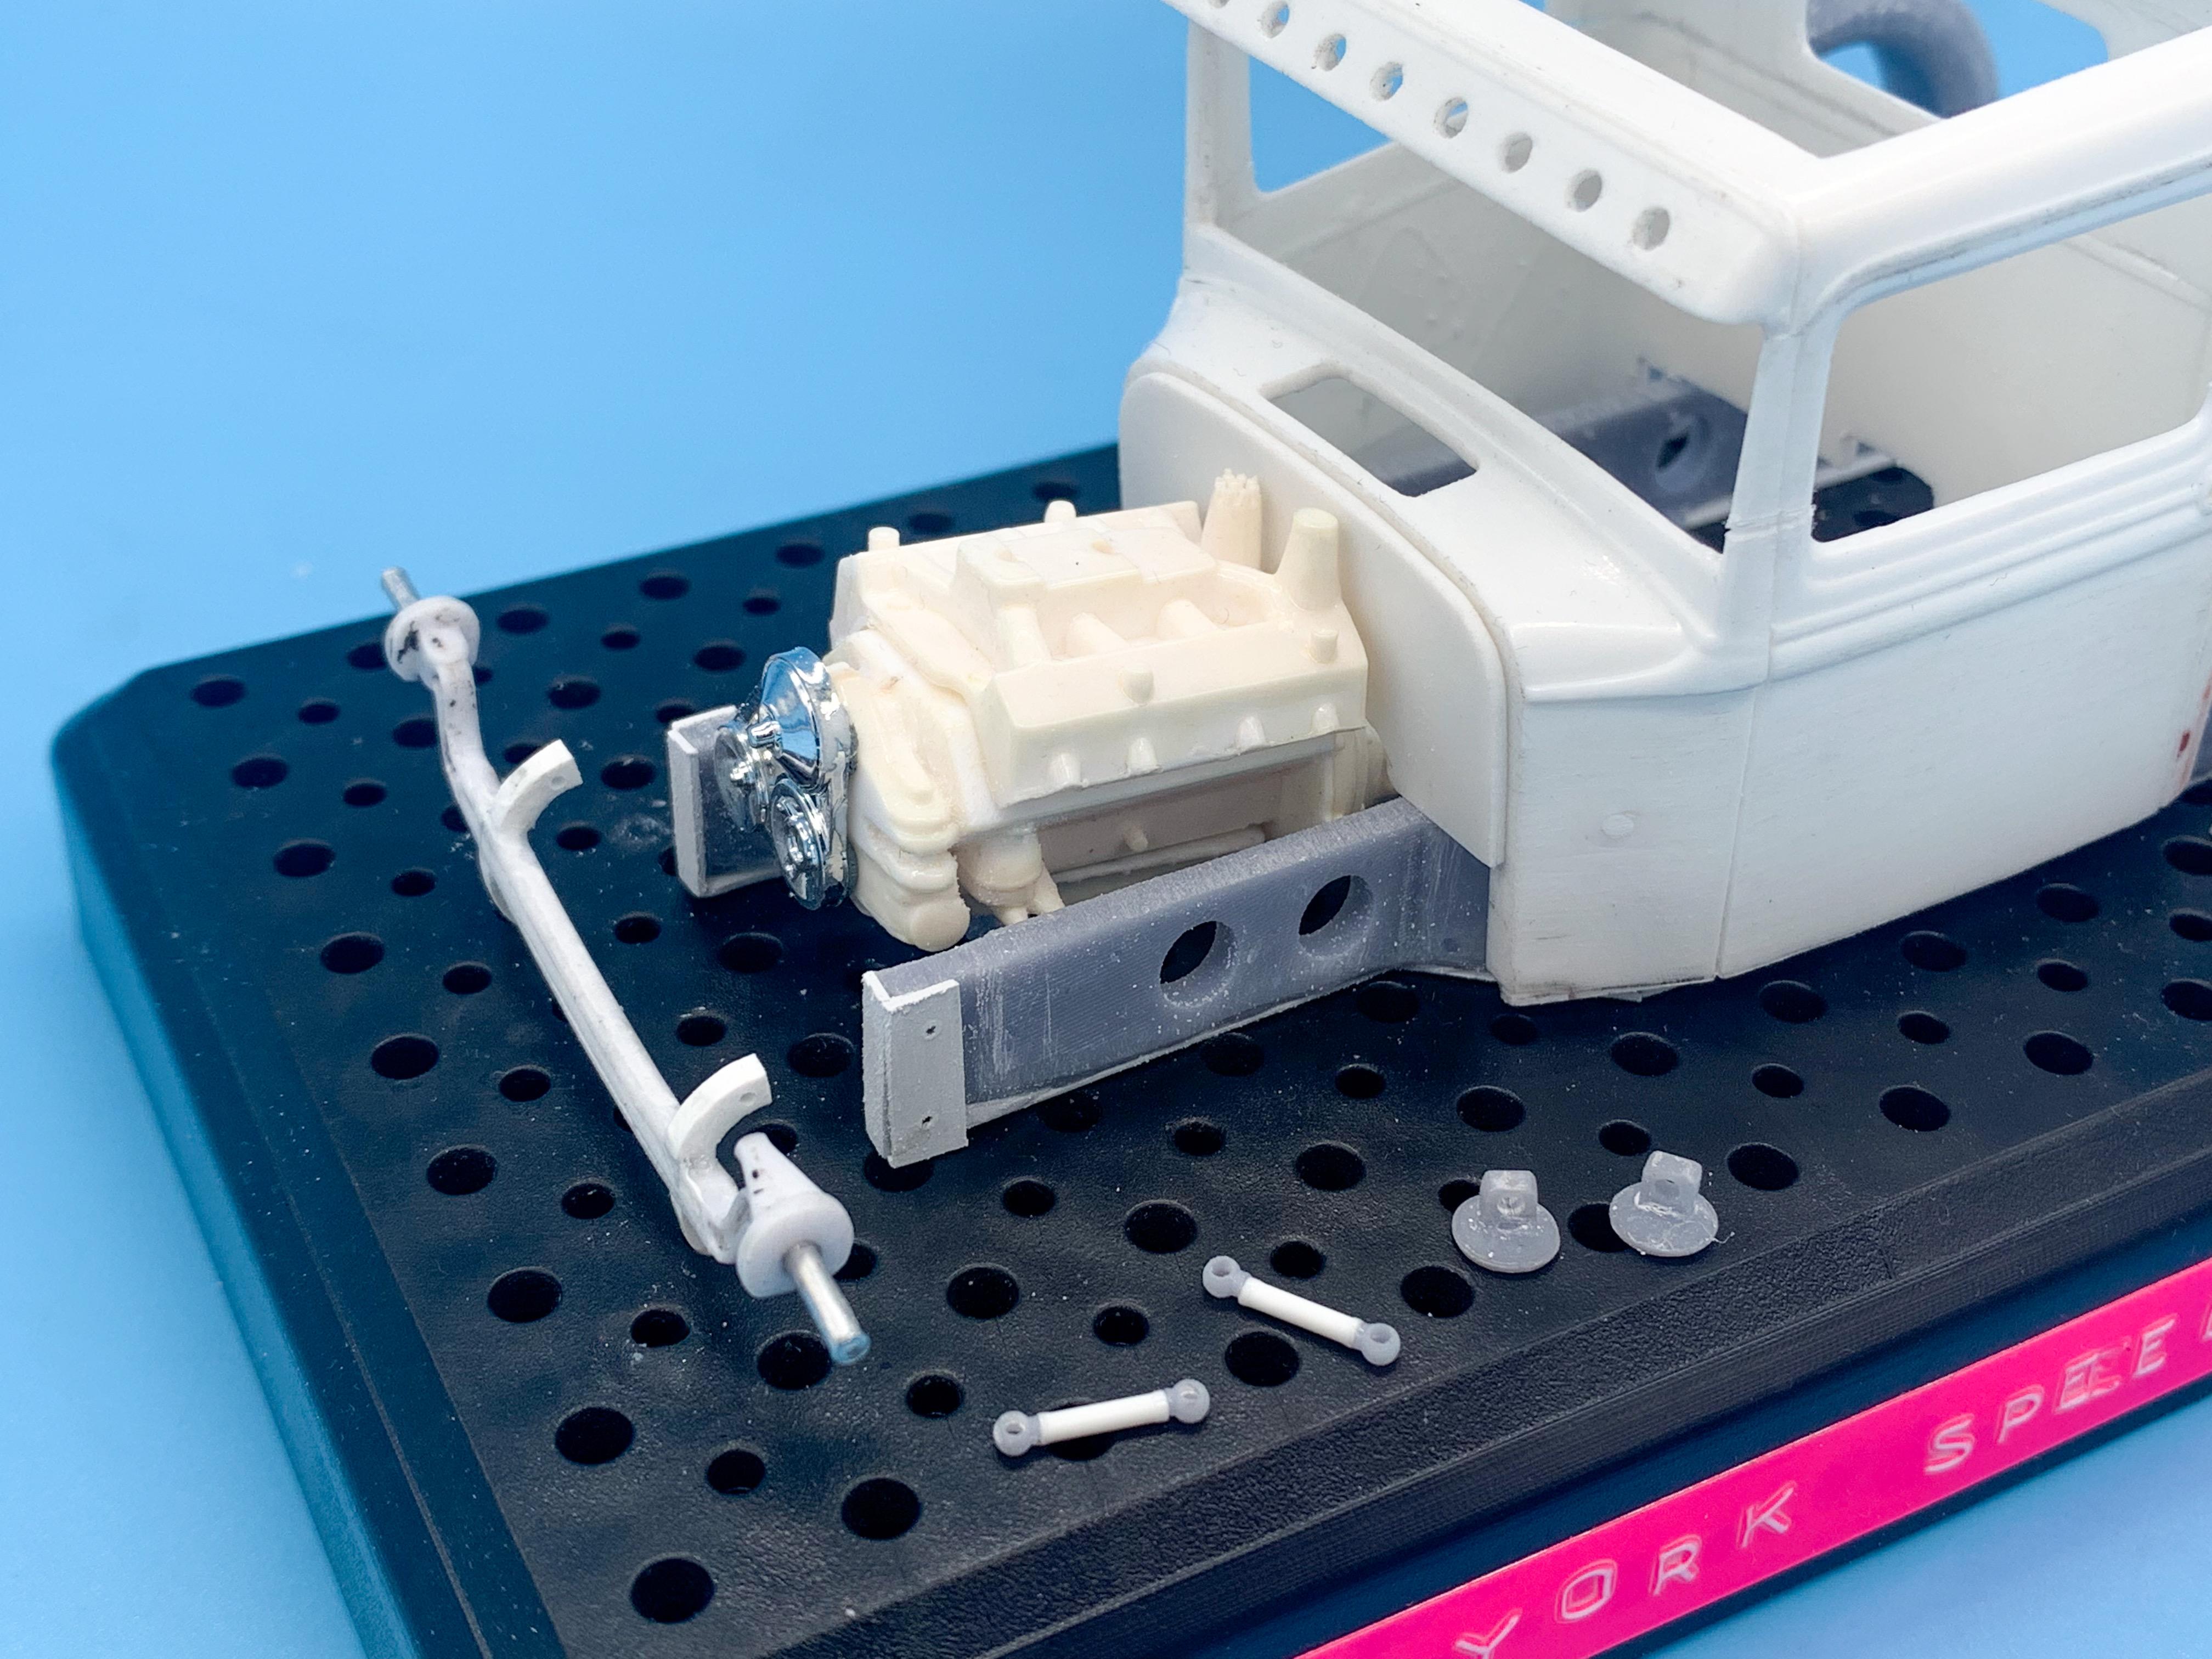
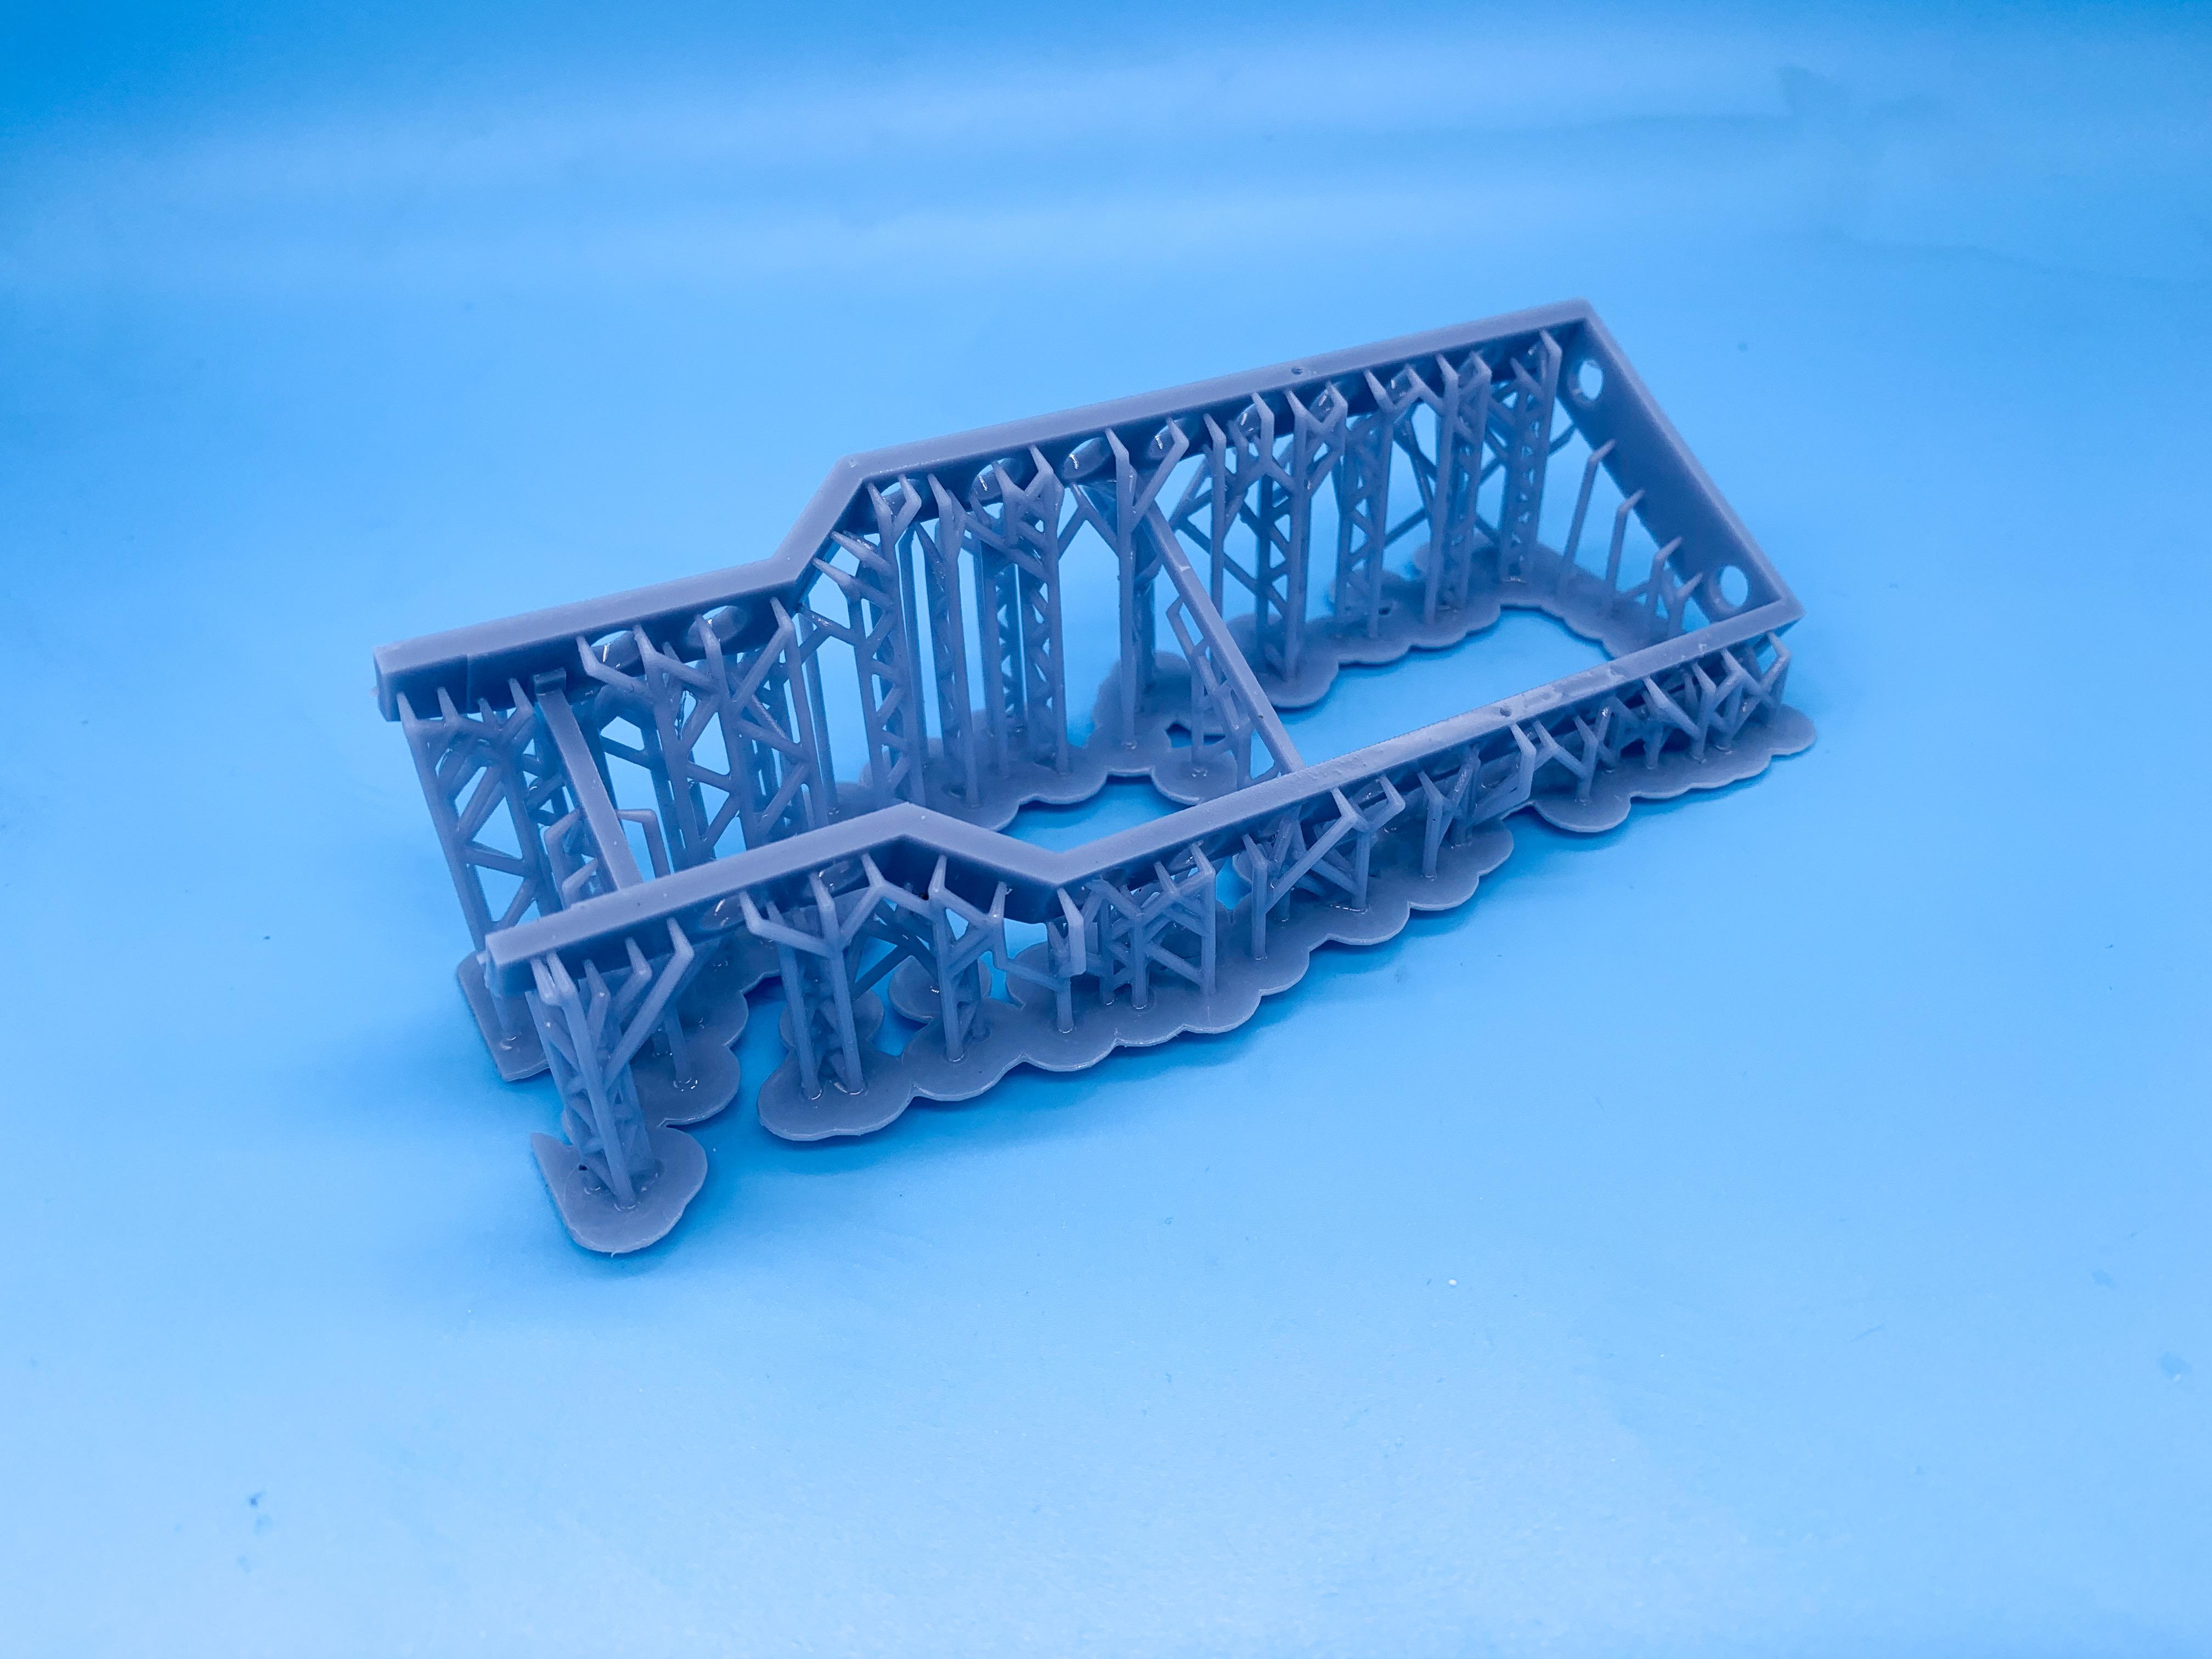
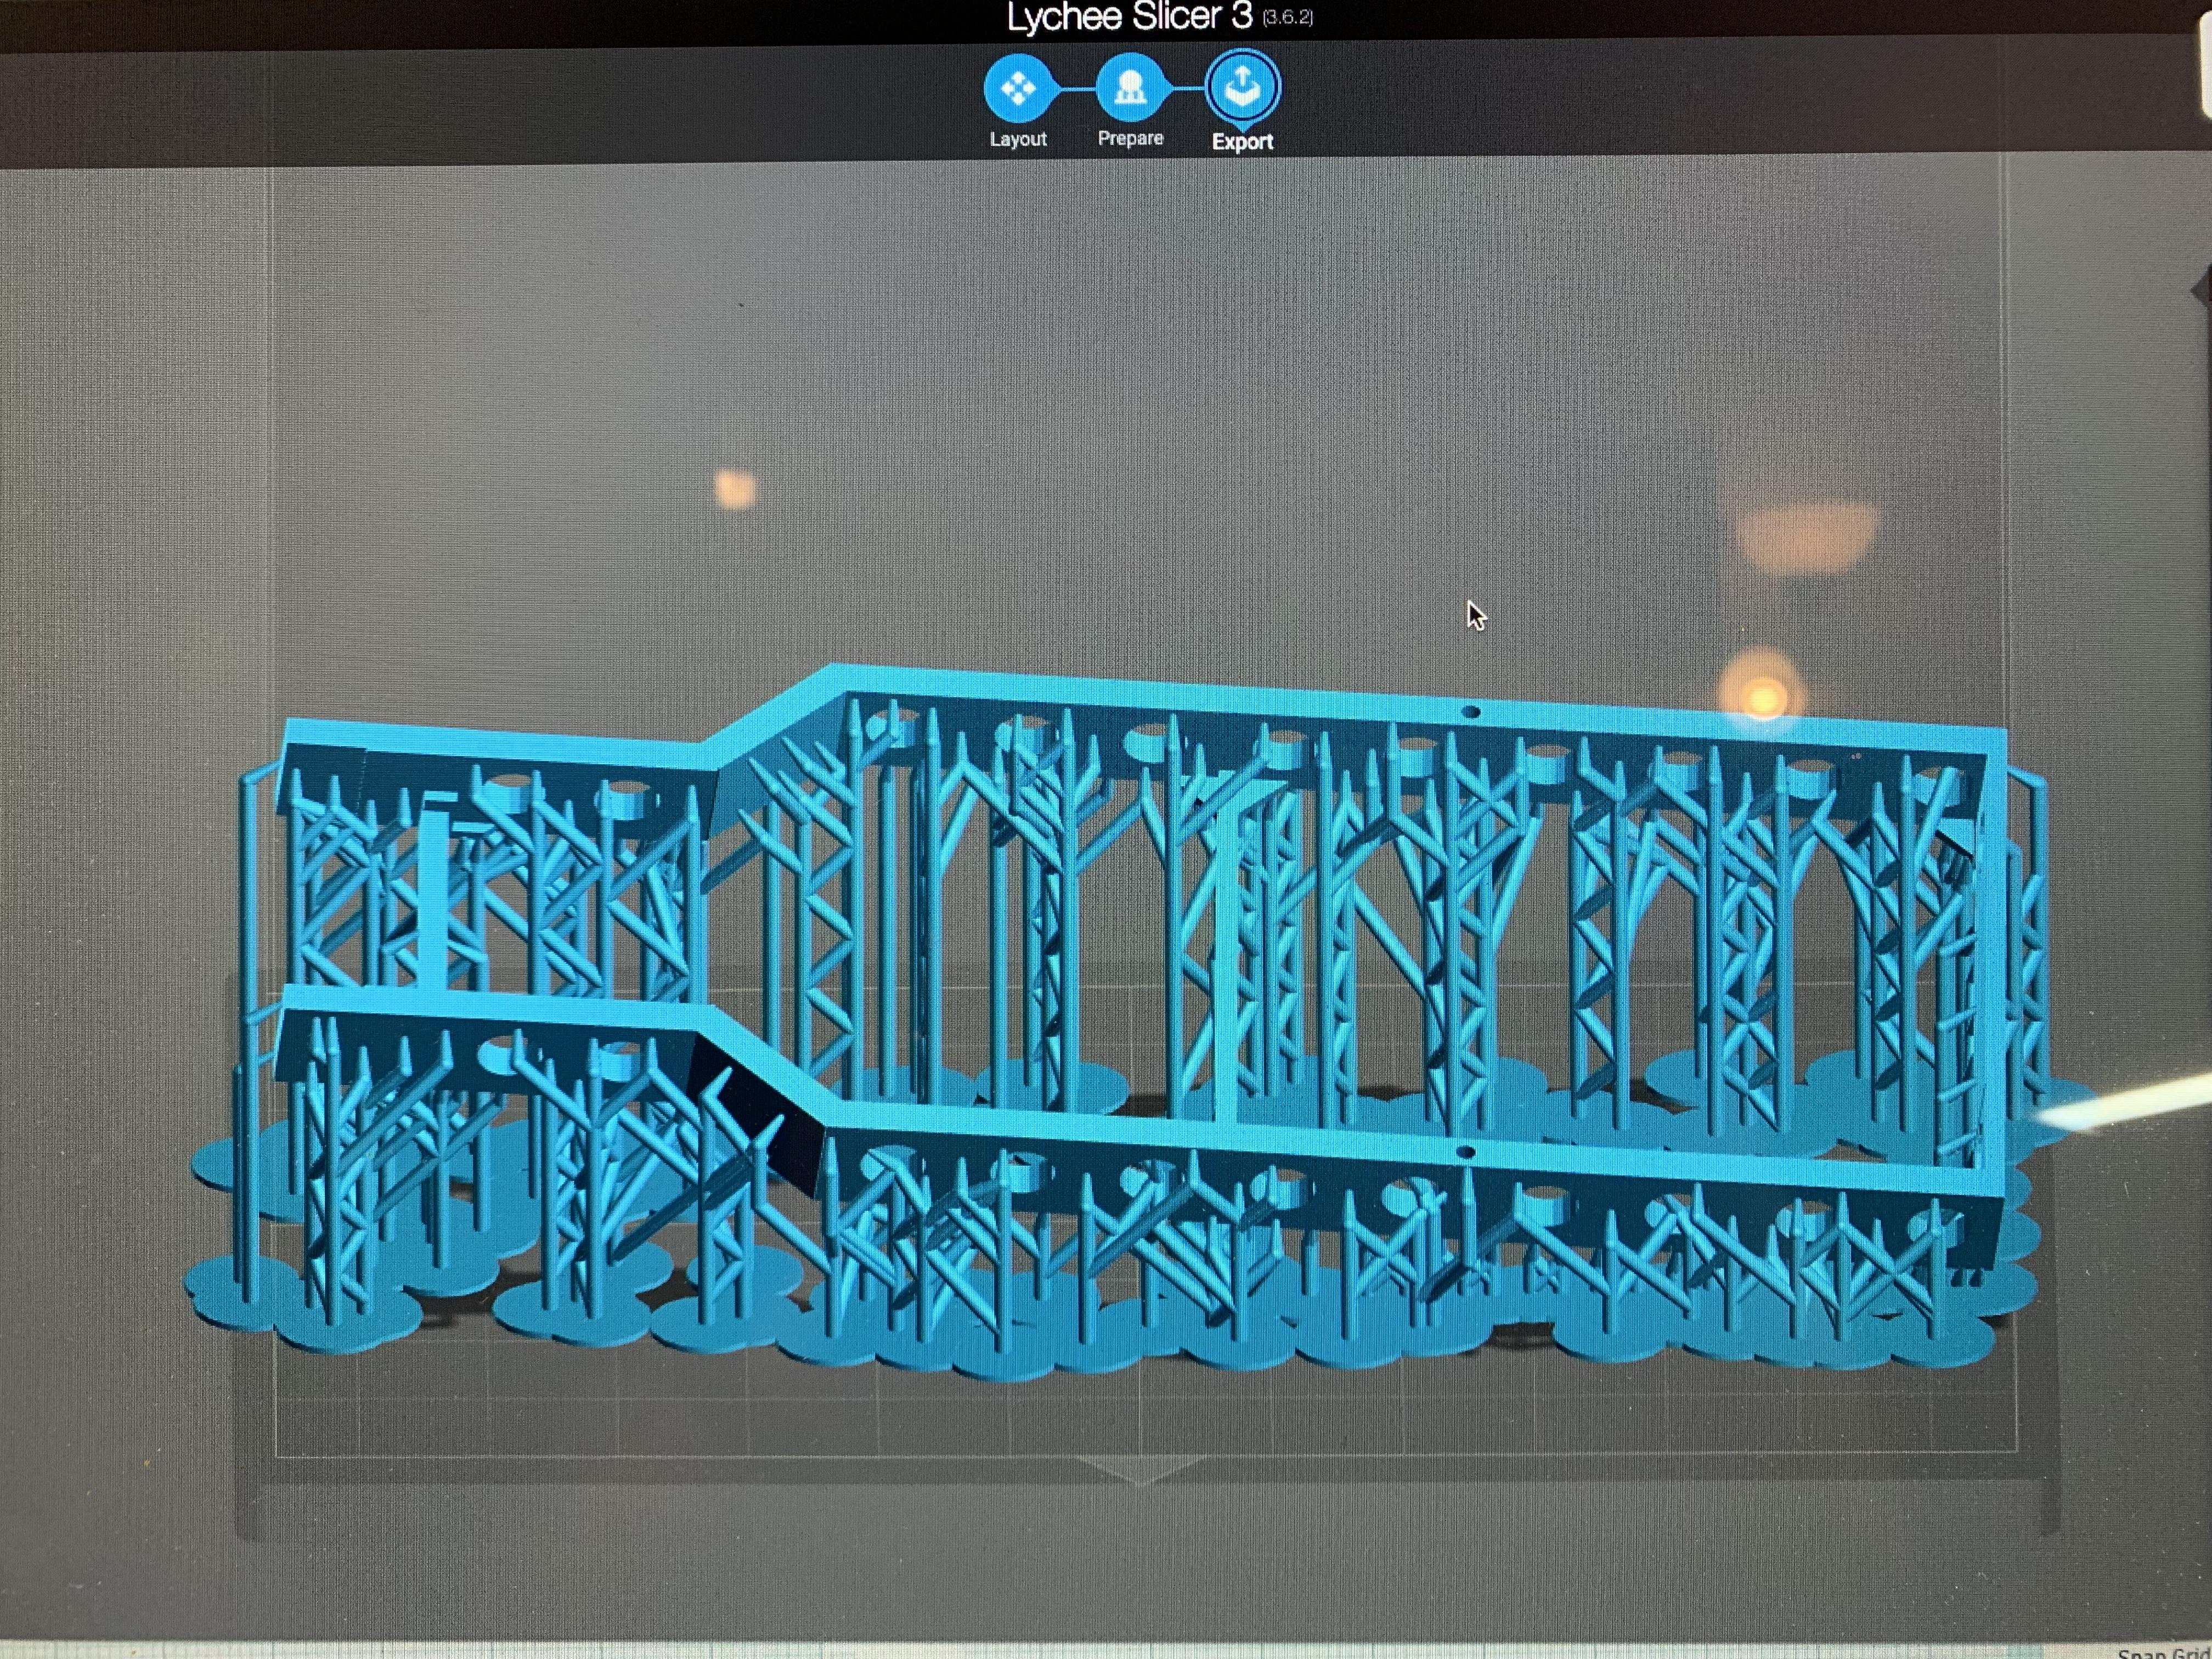
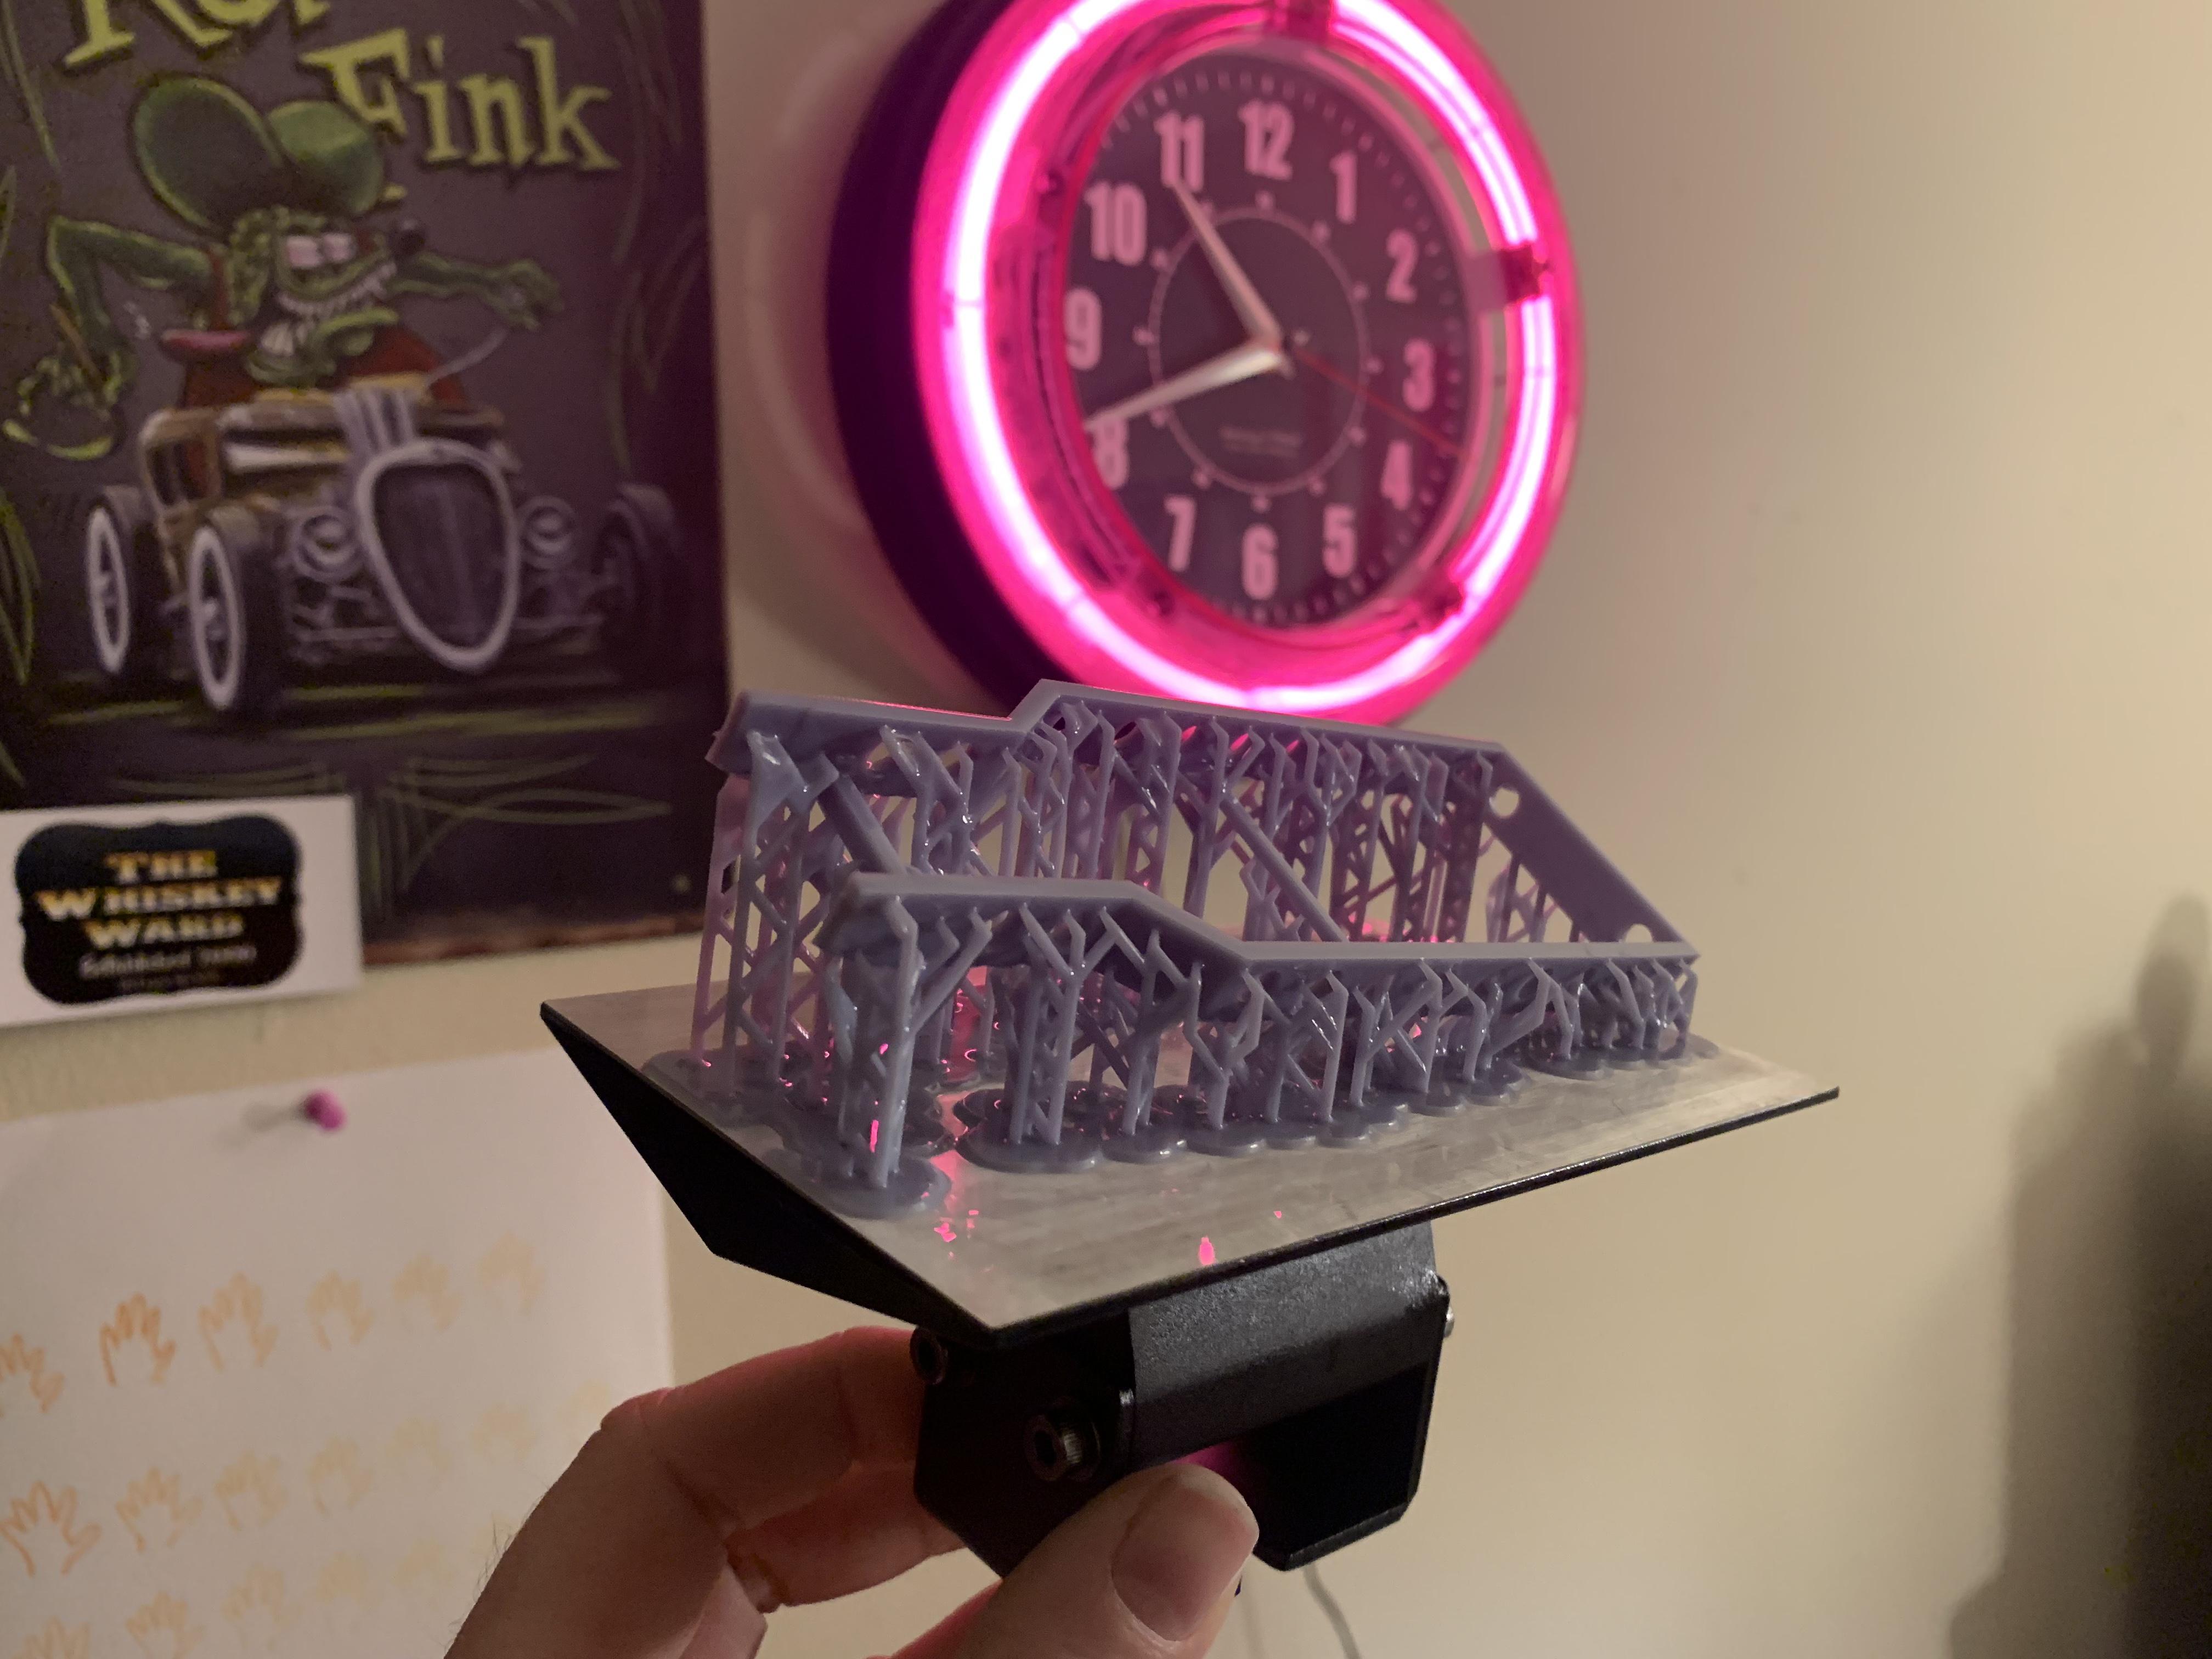
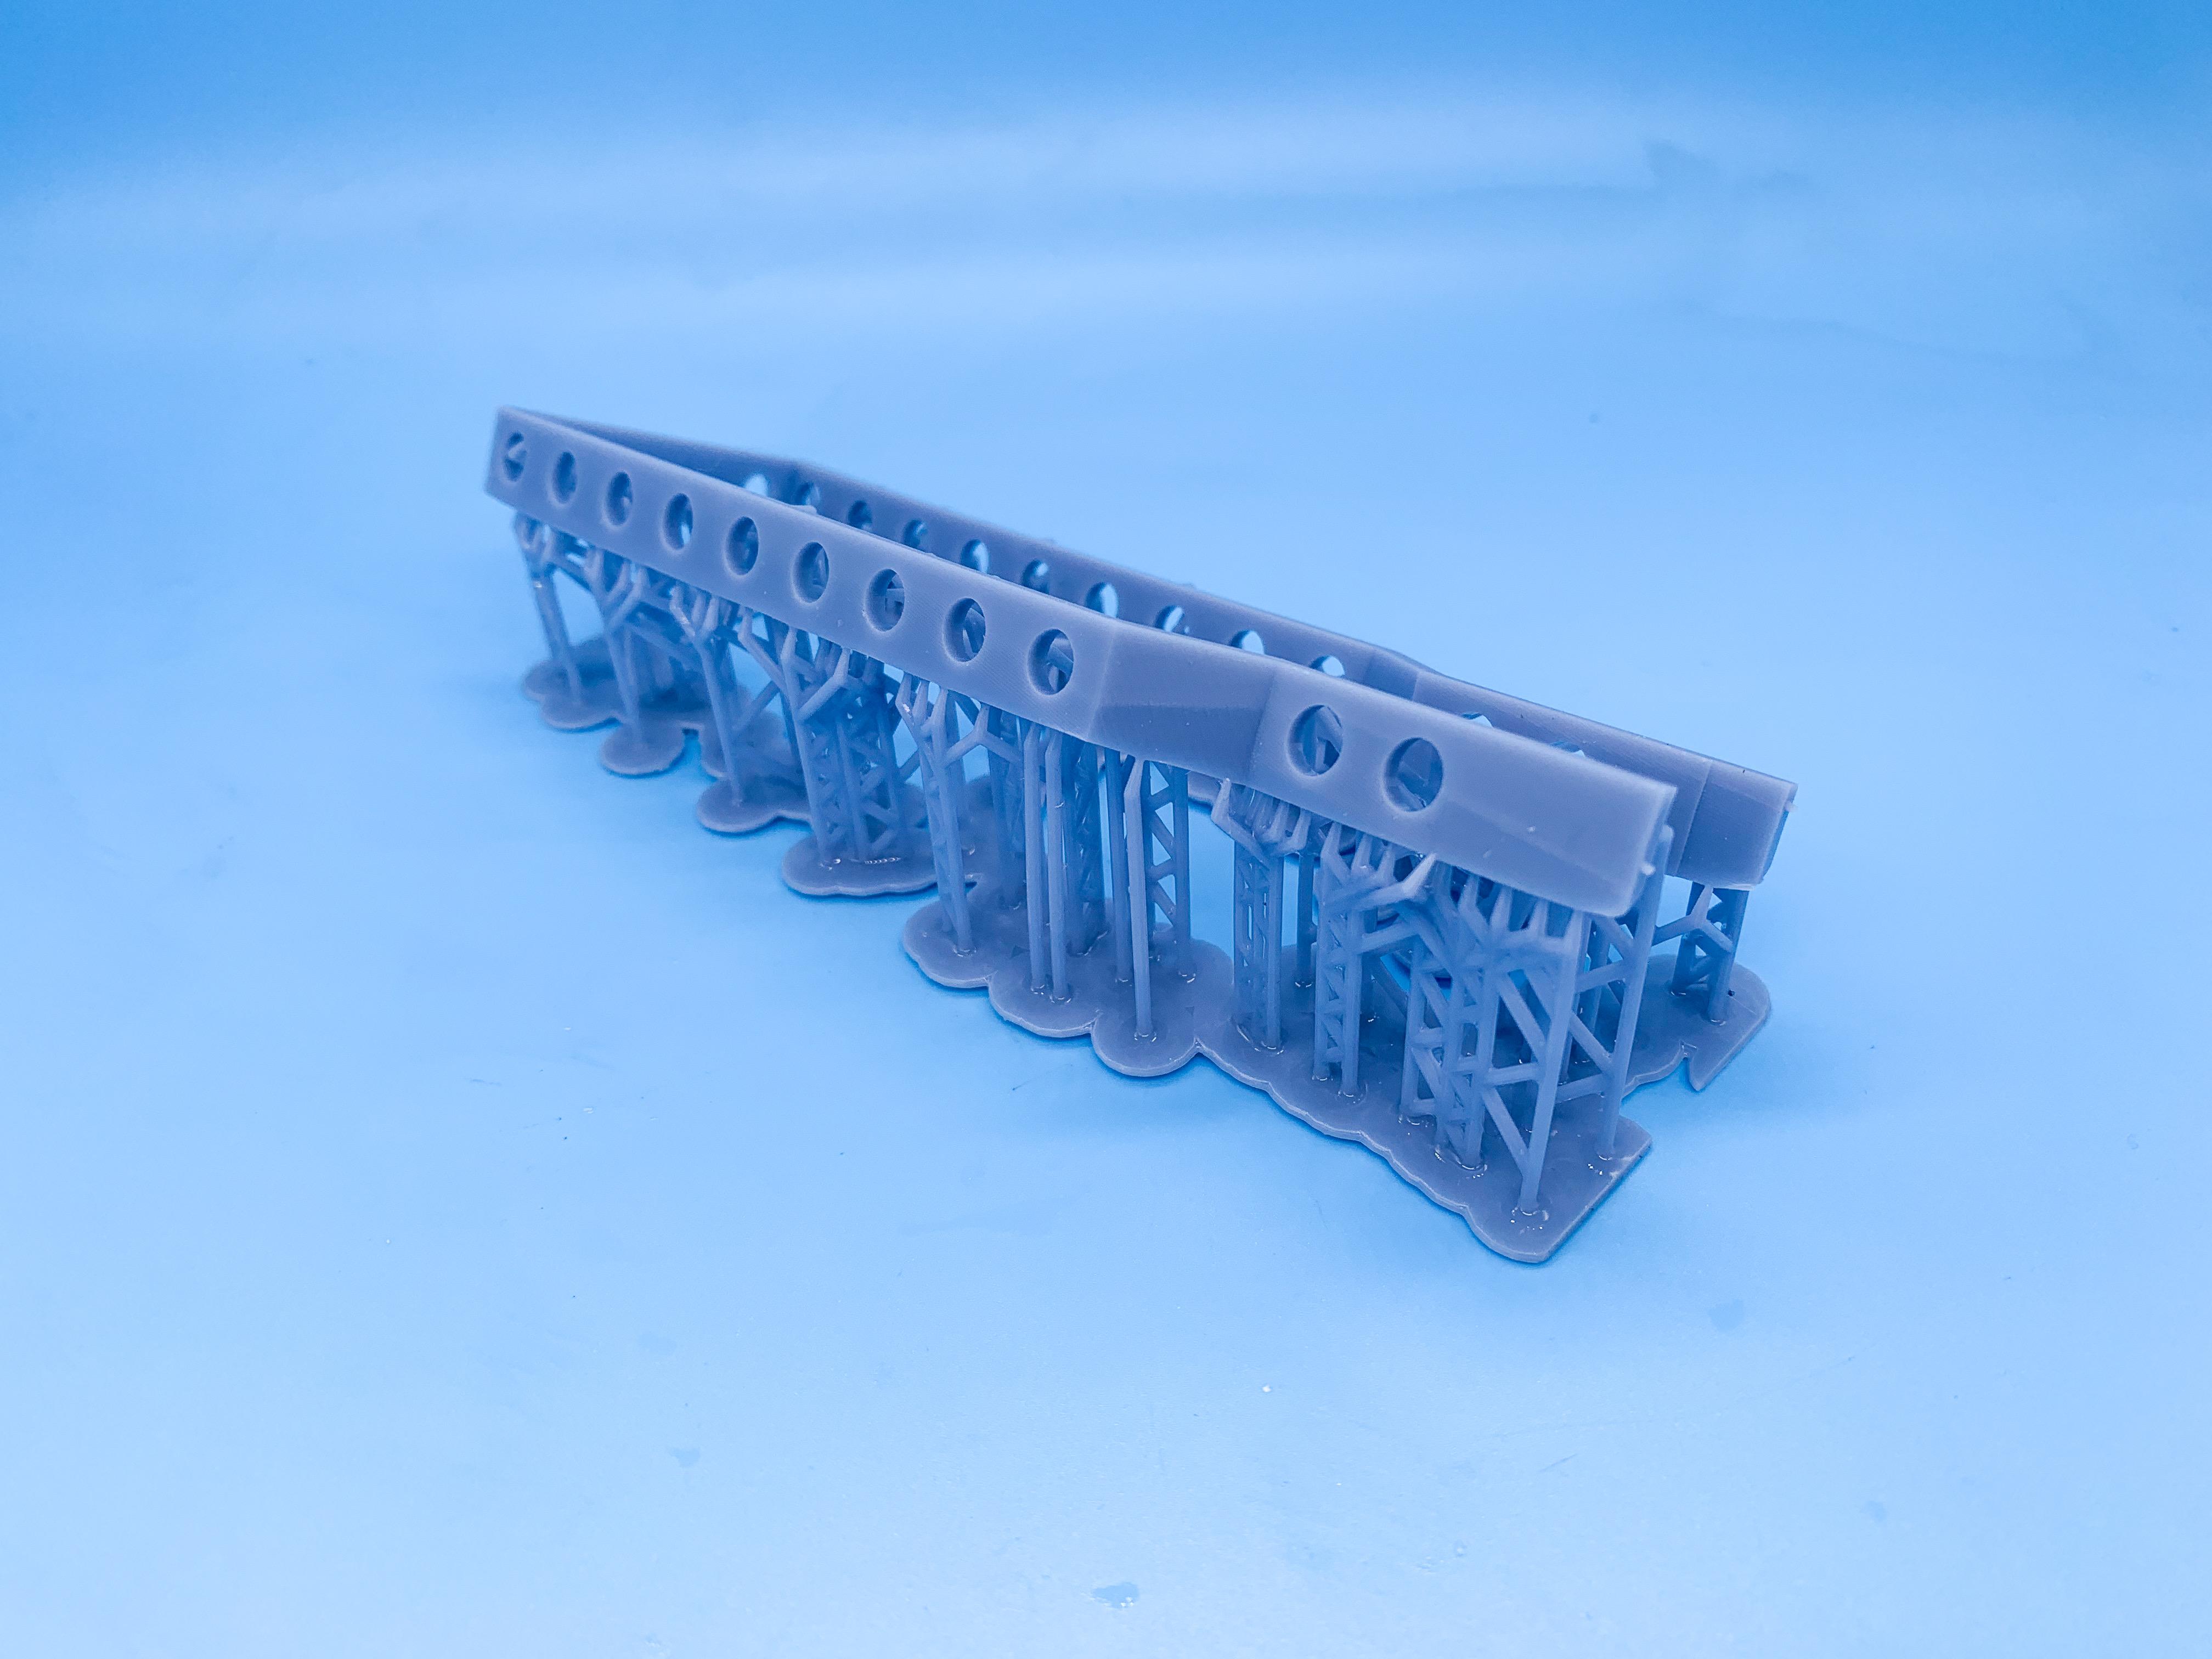
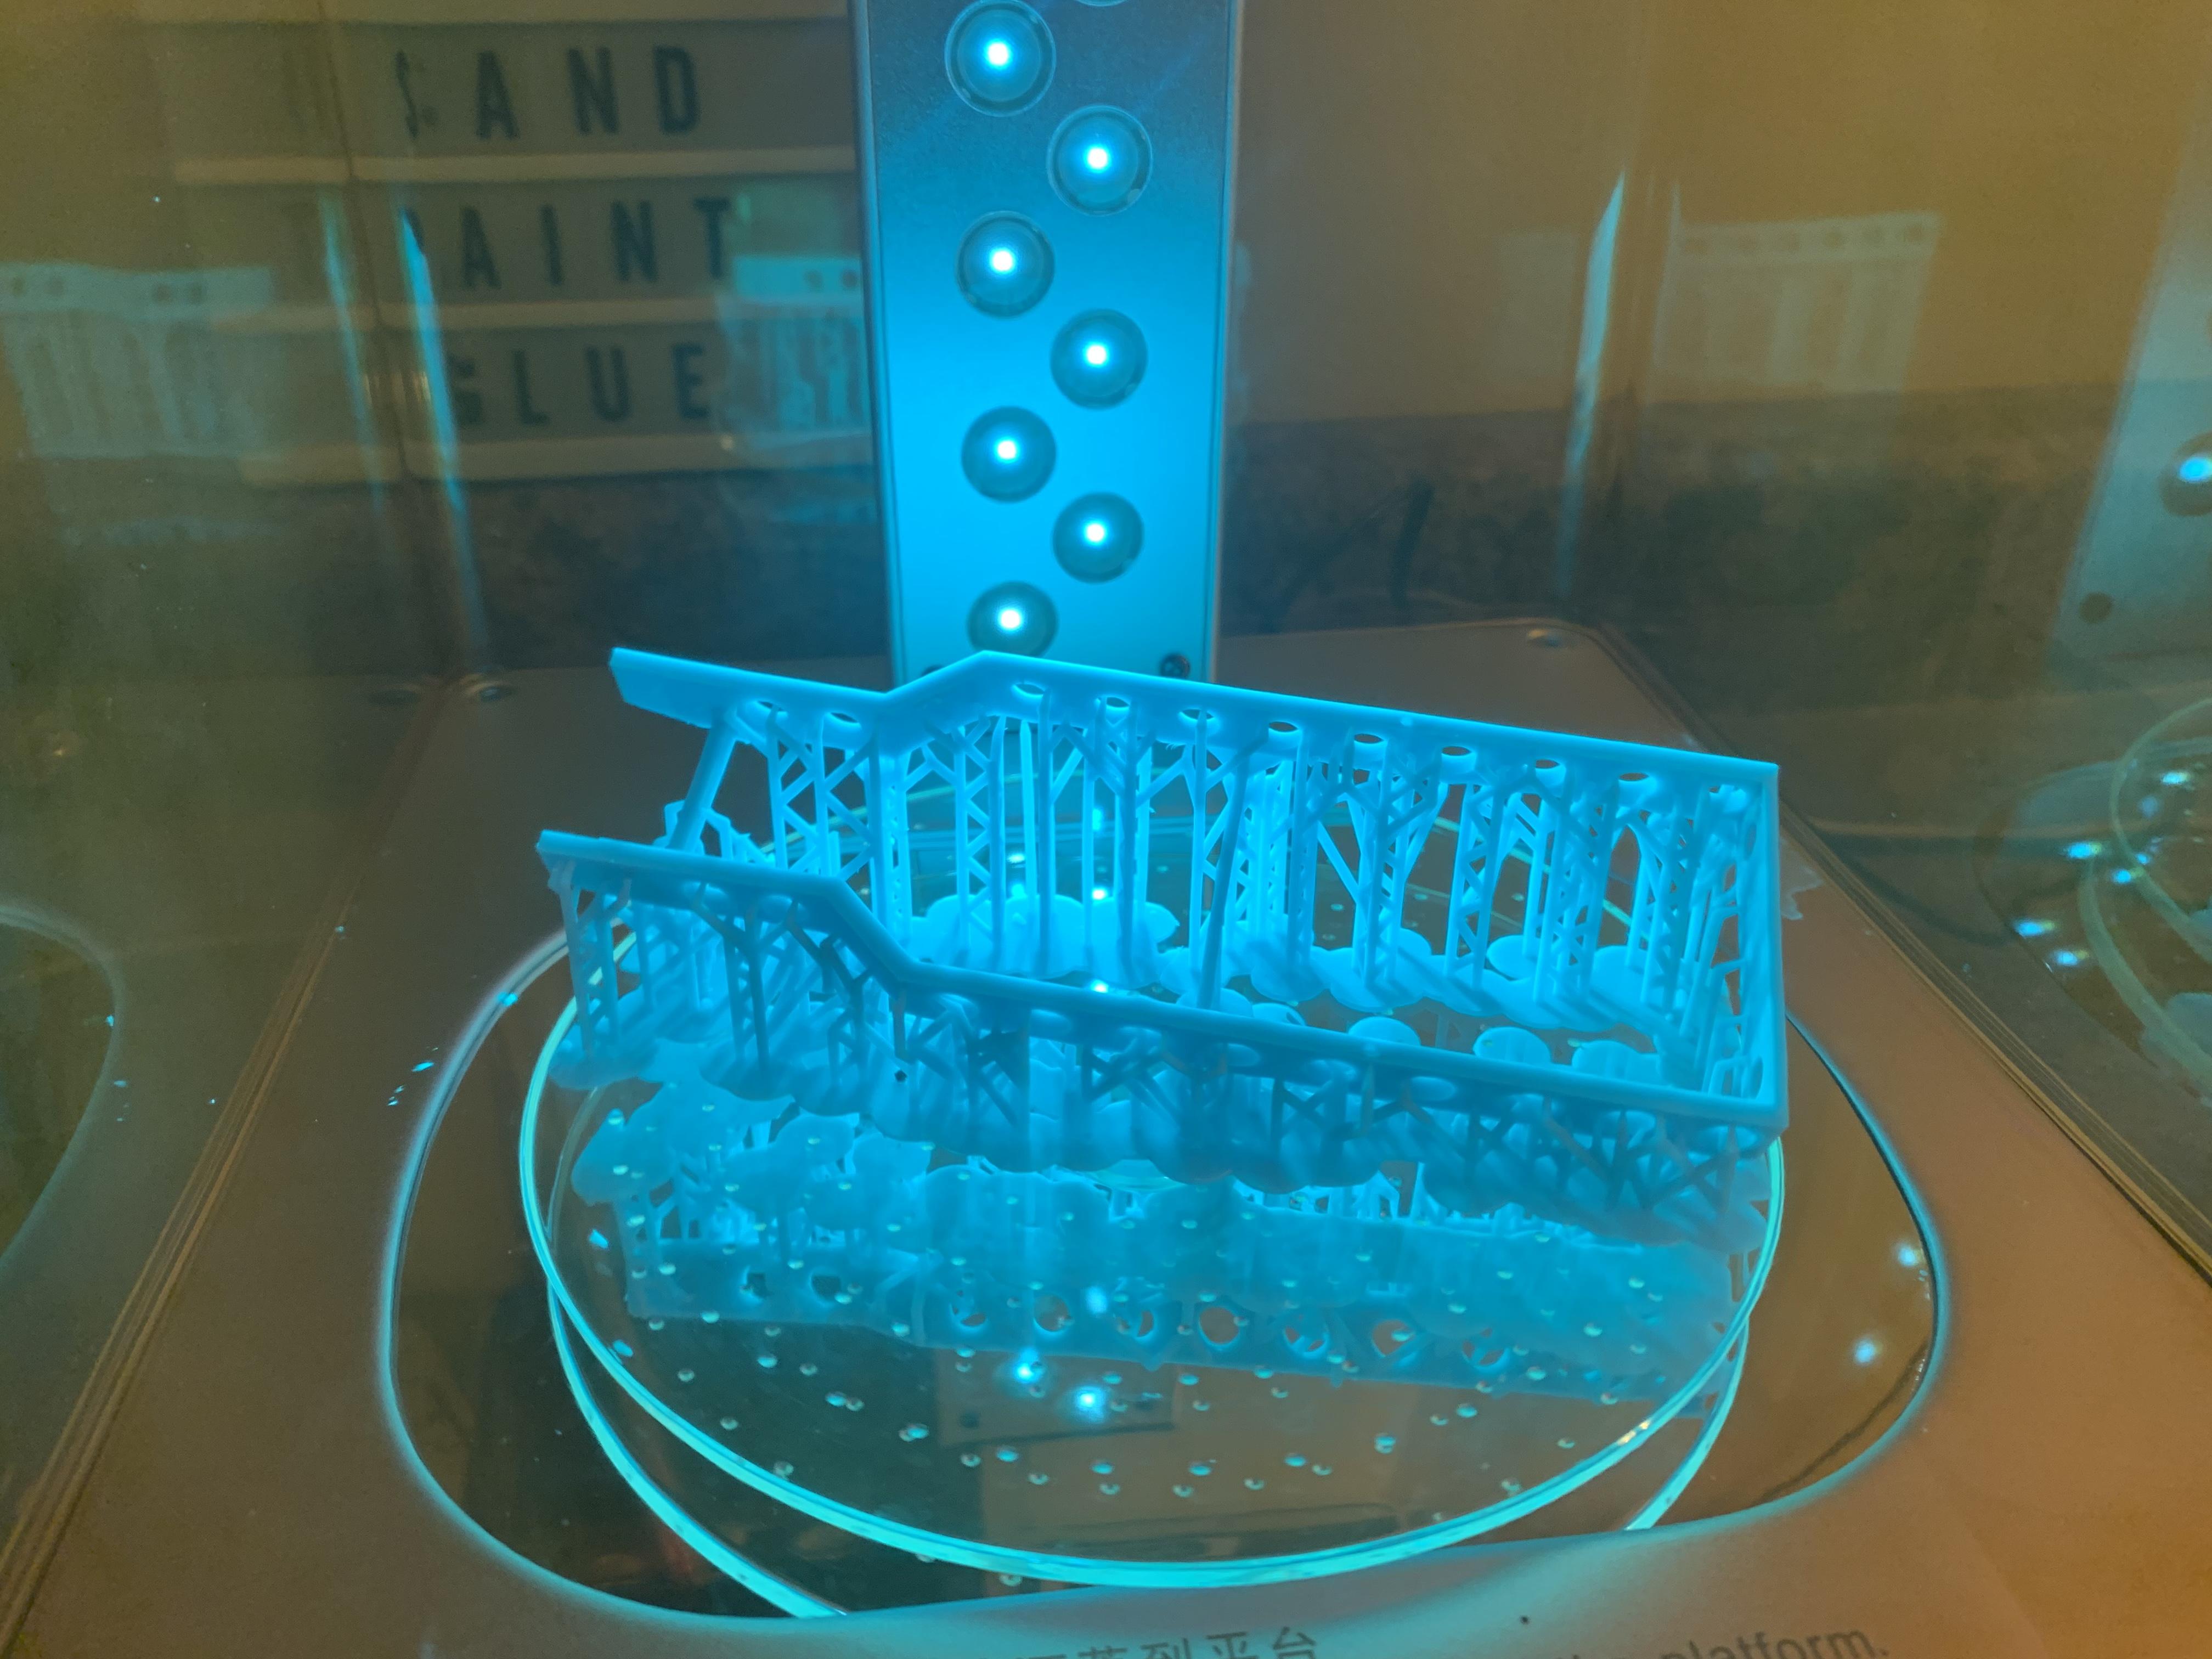
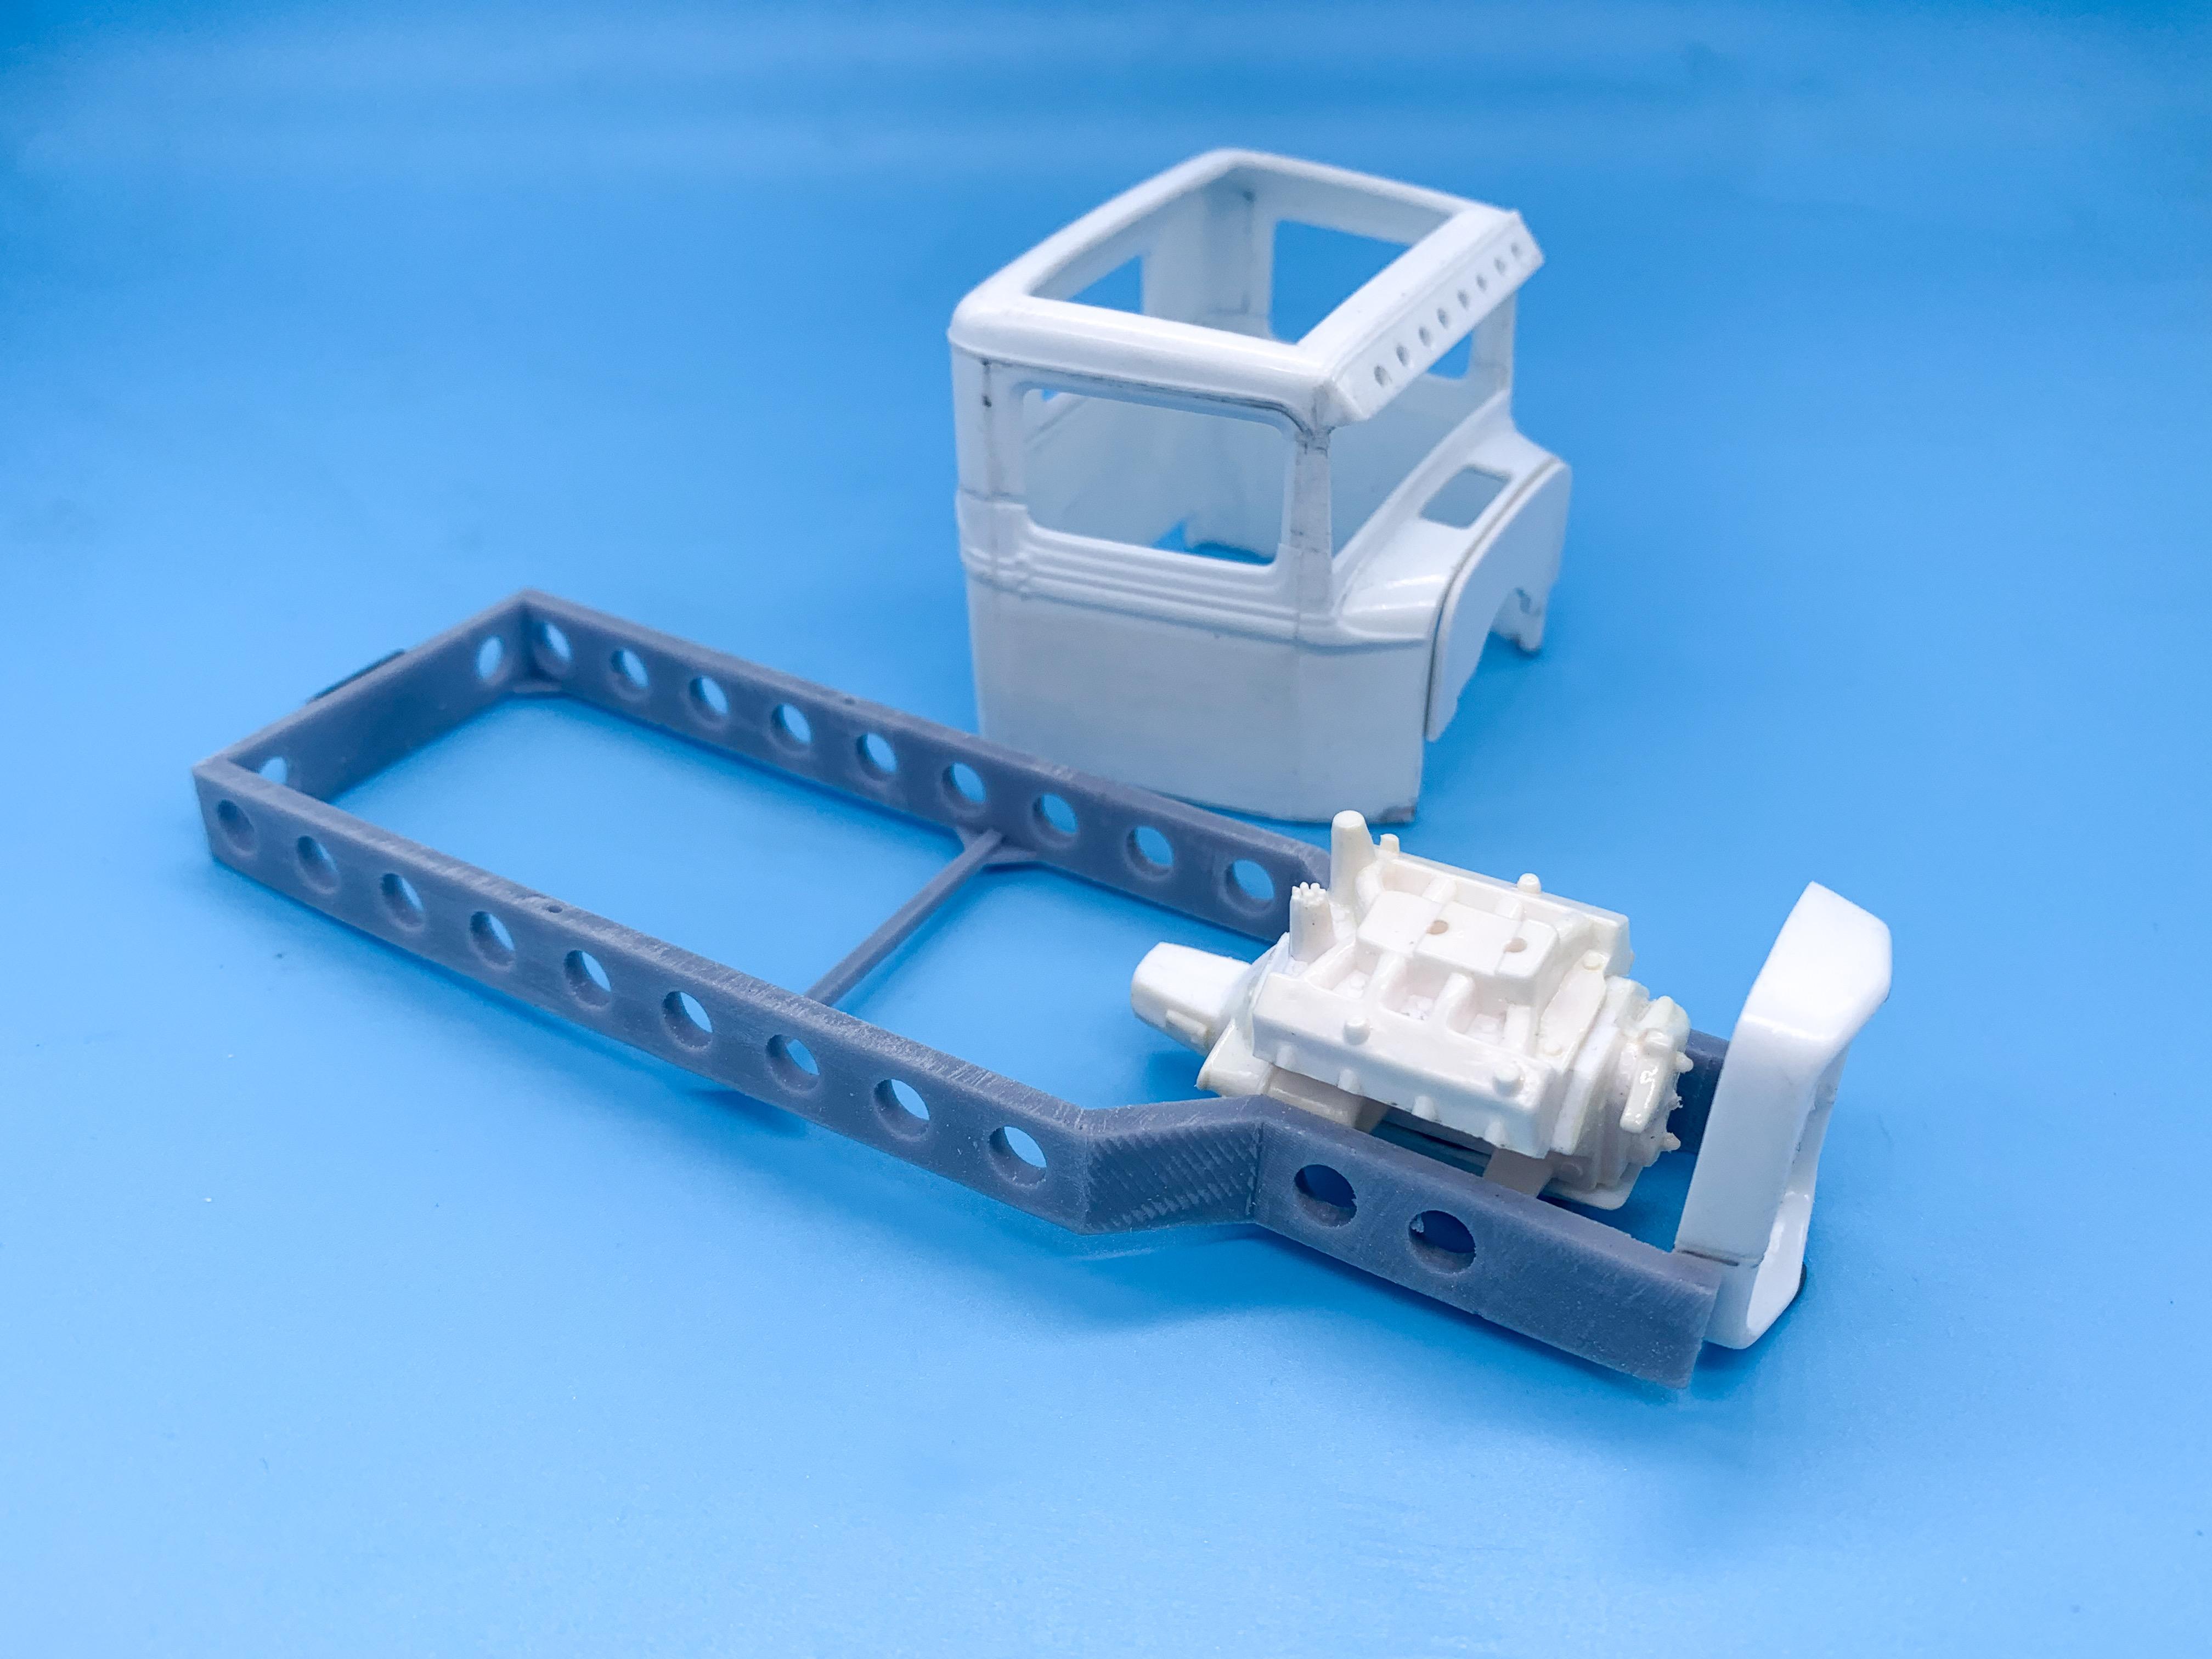
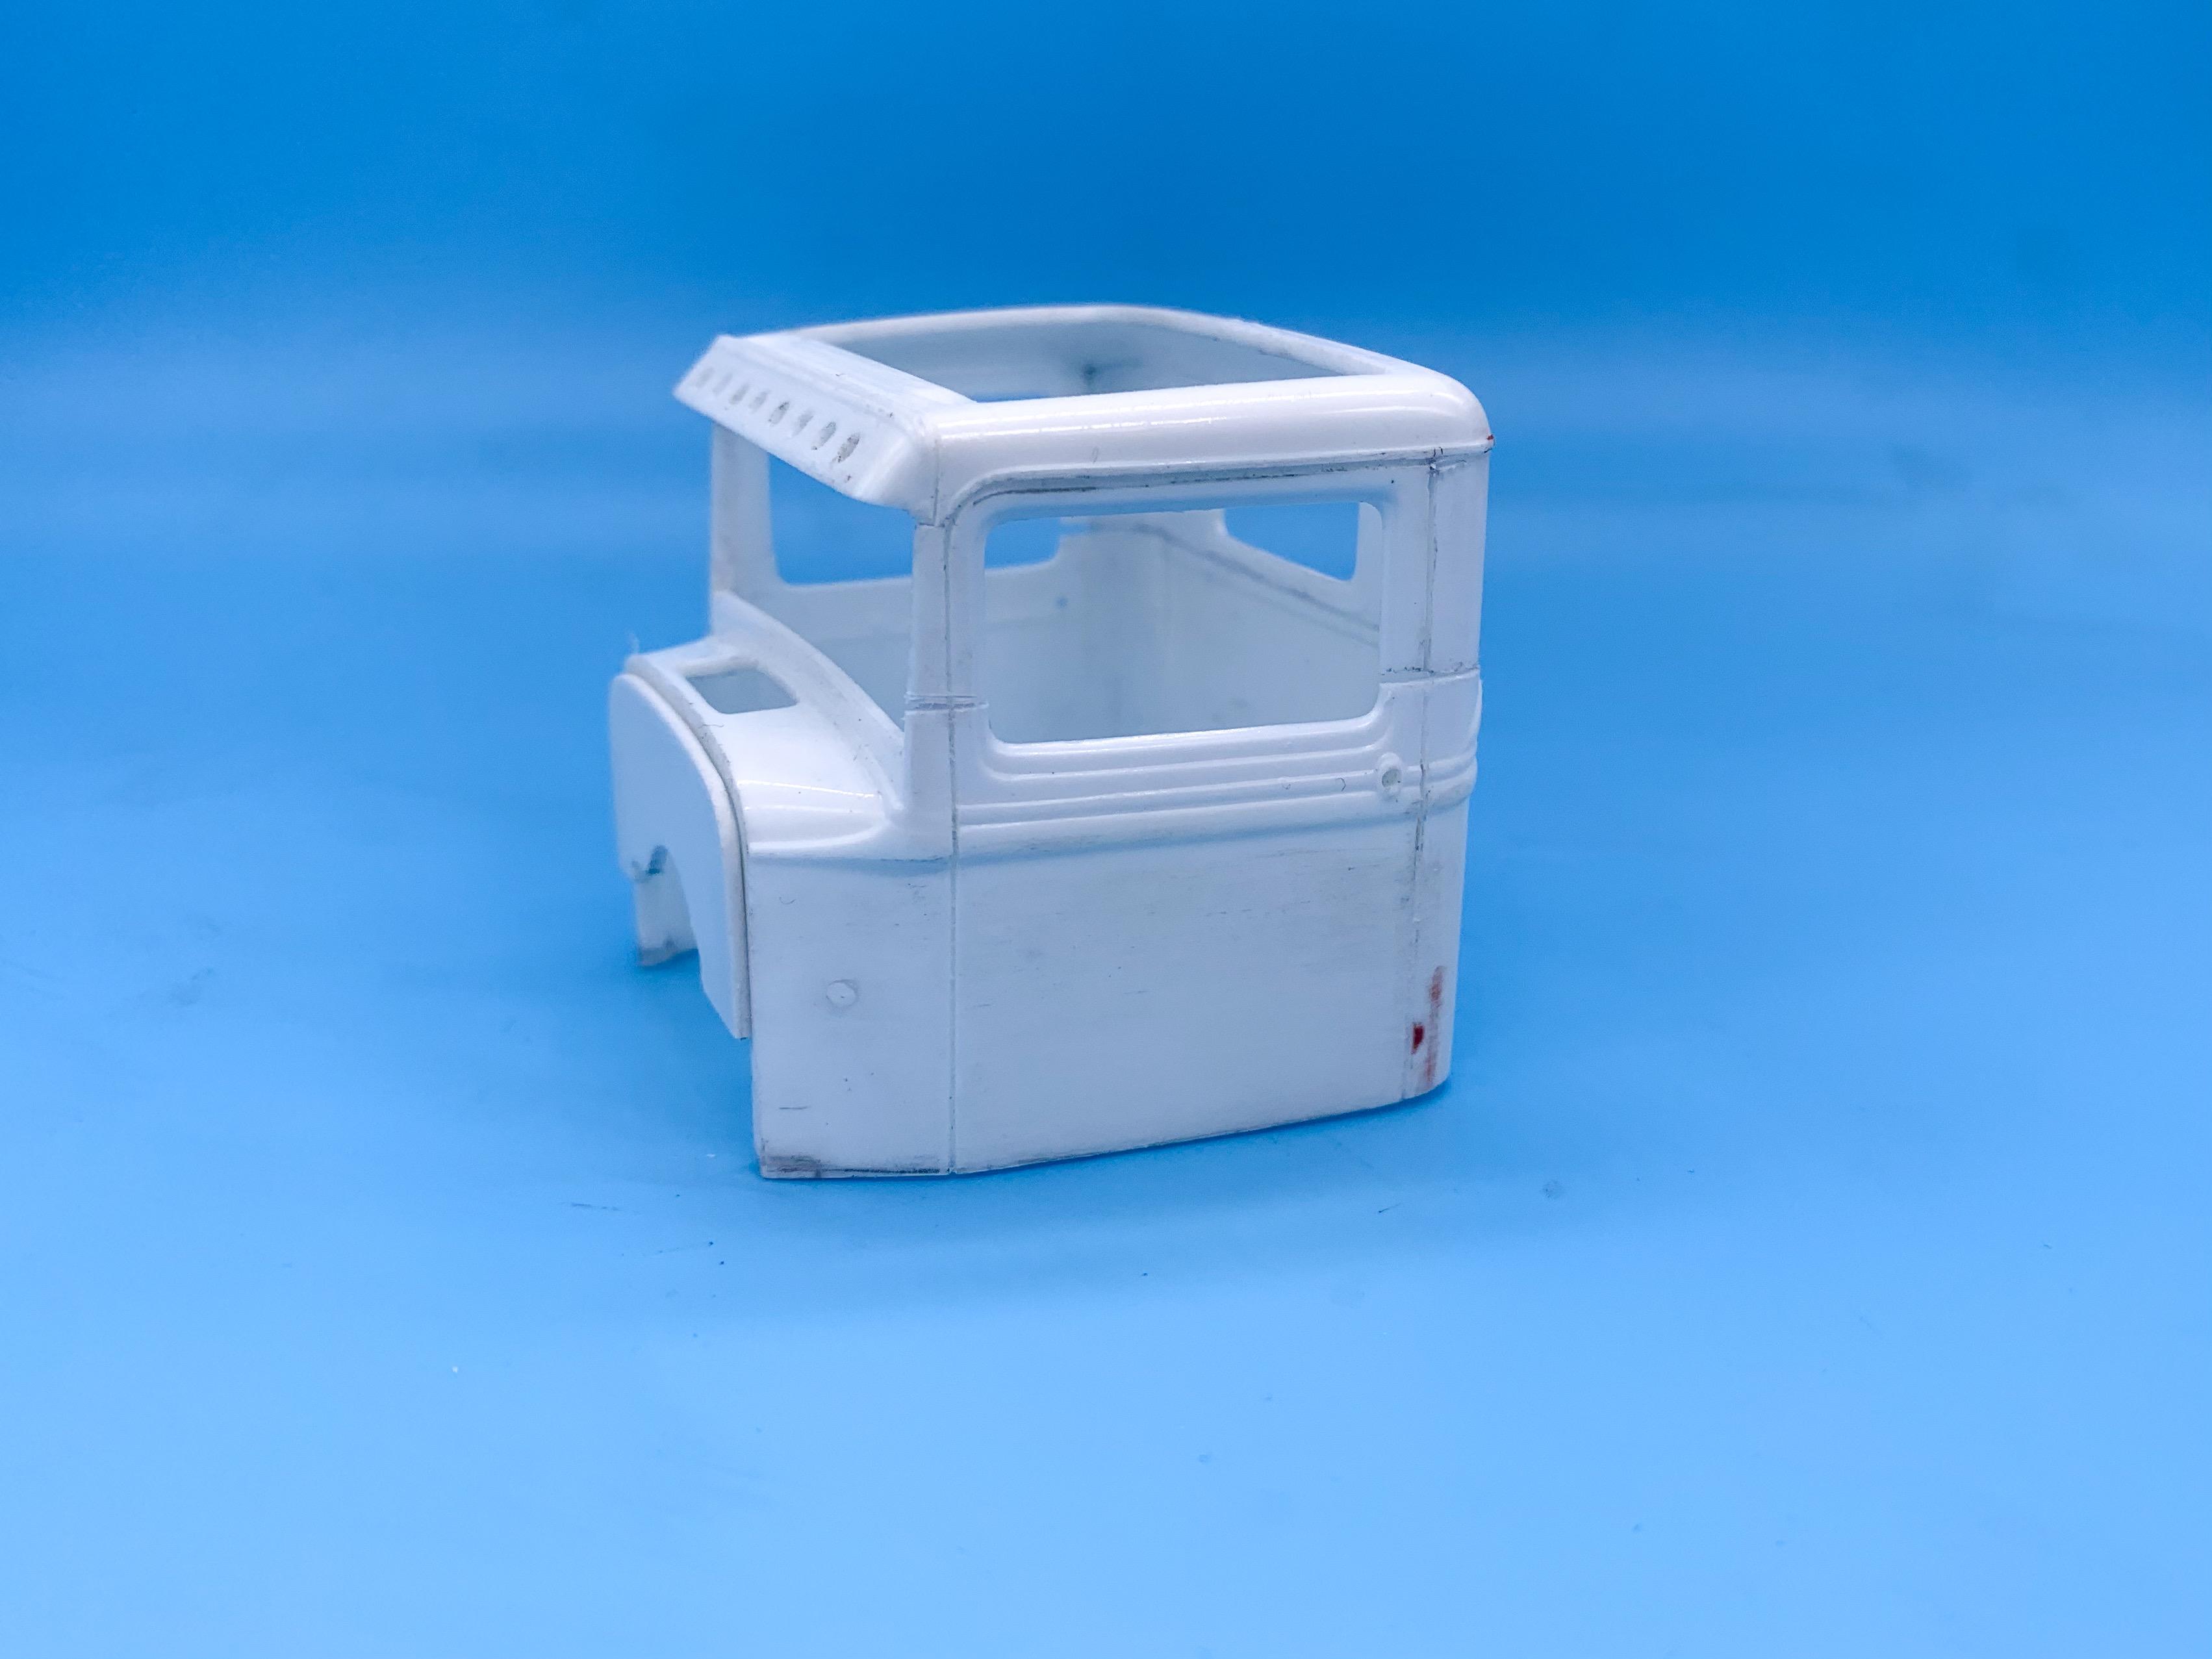
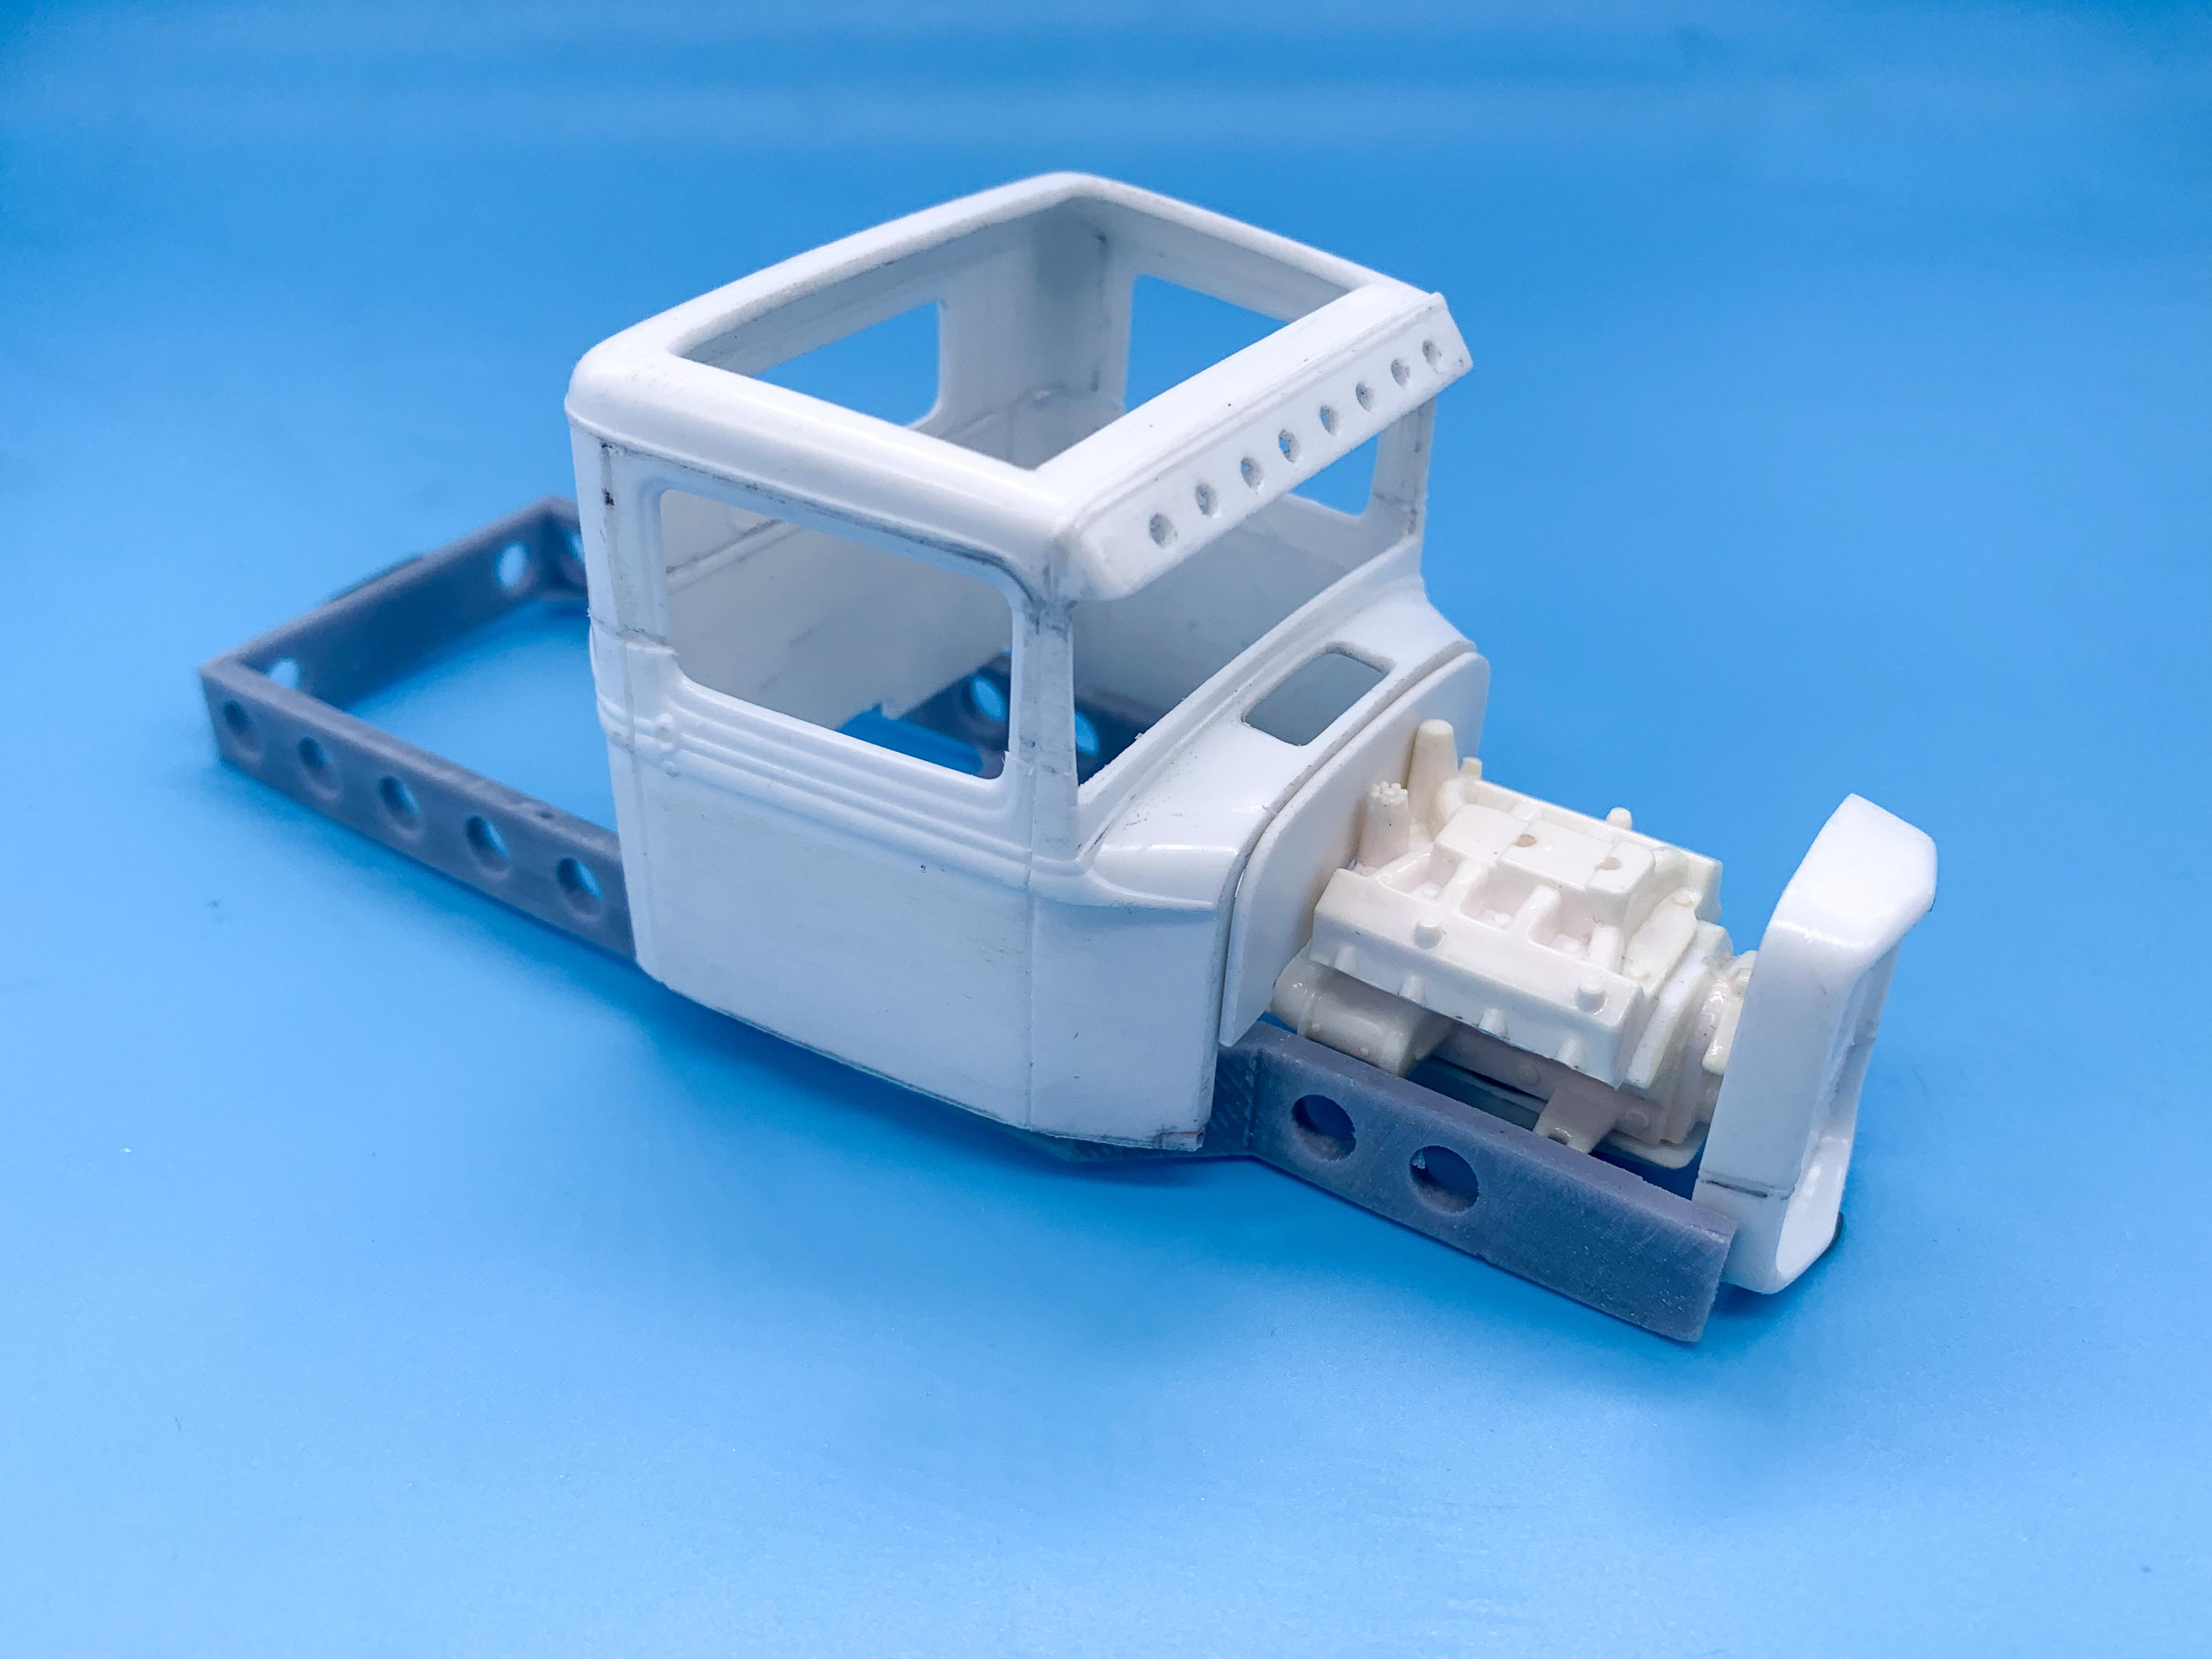
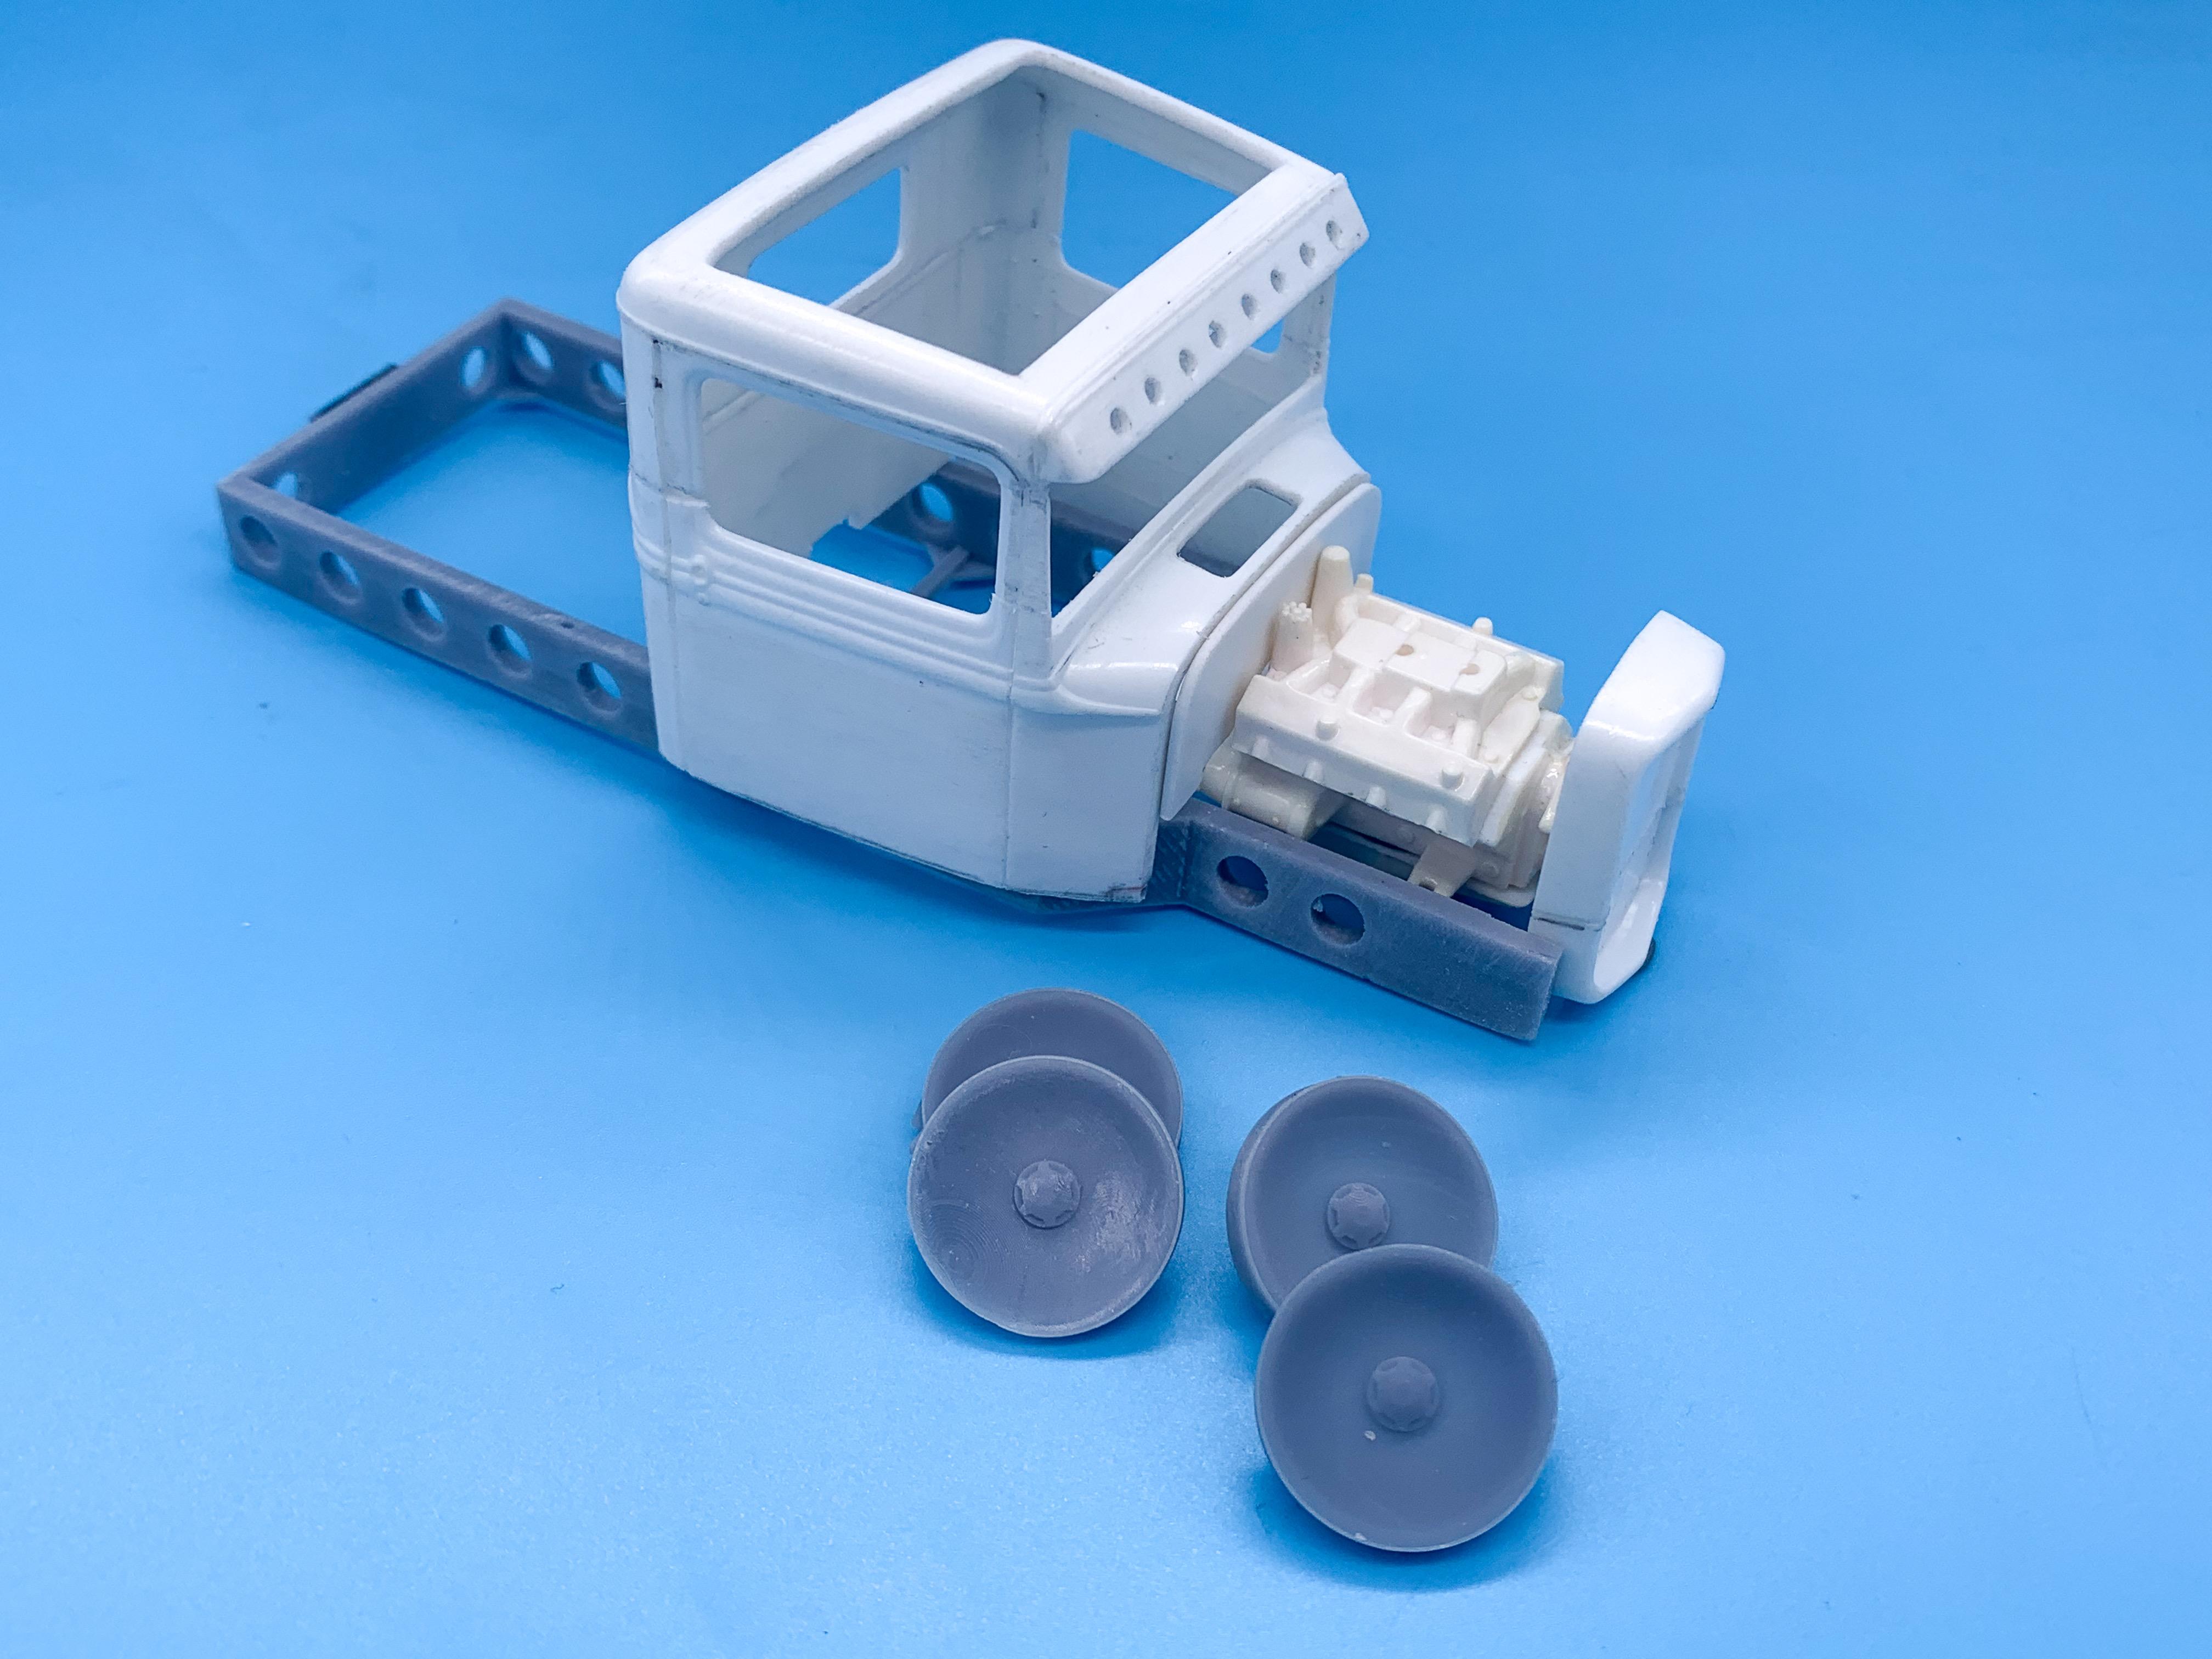
-
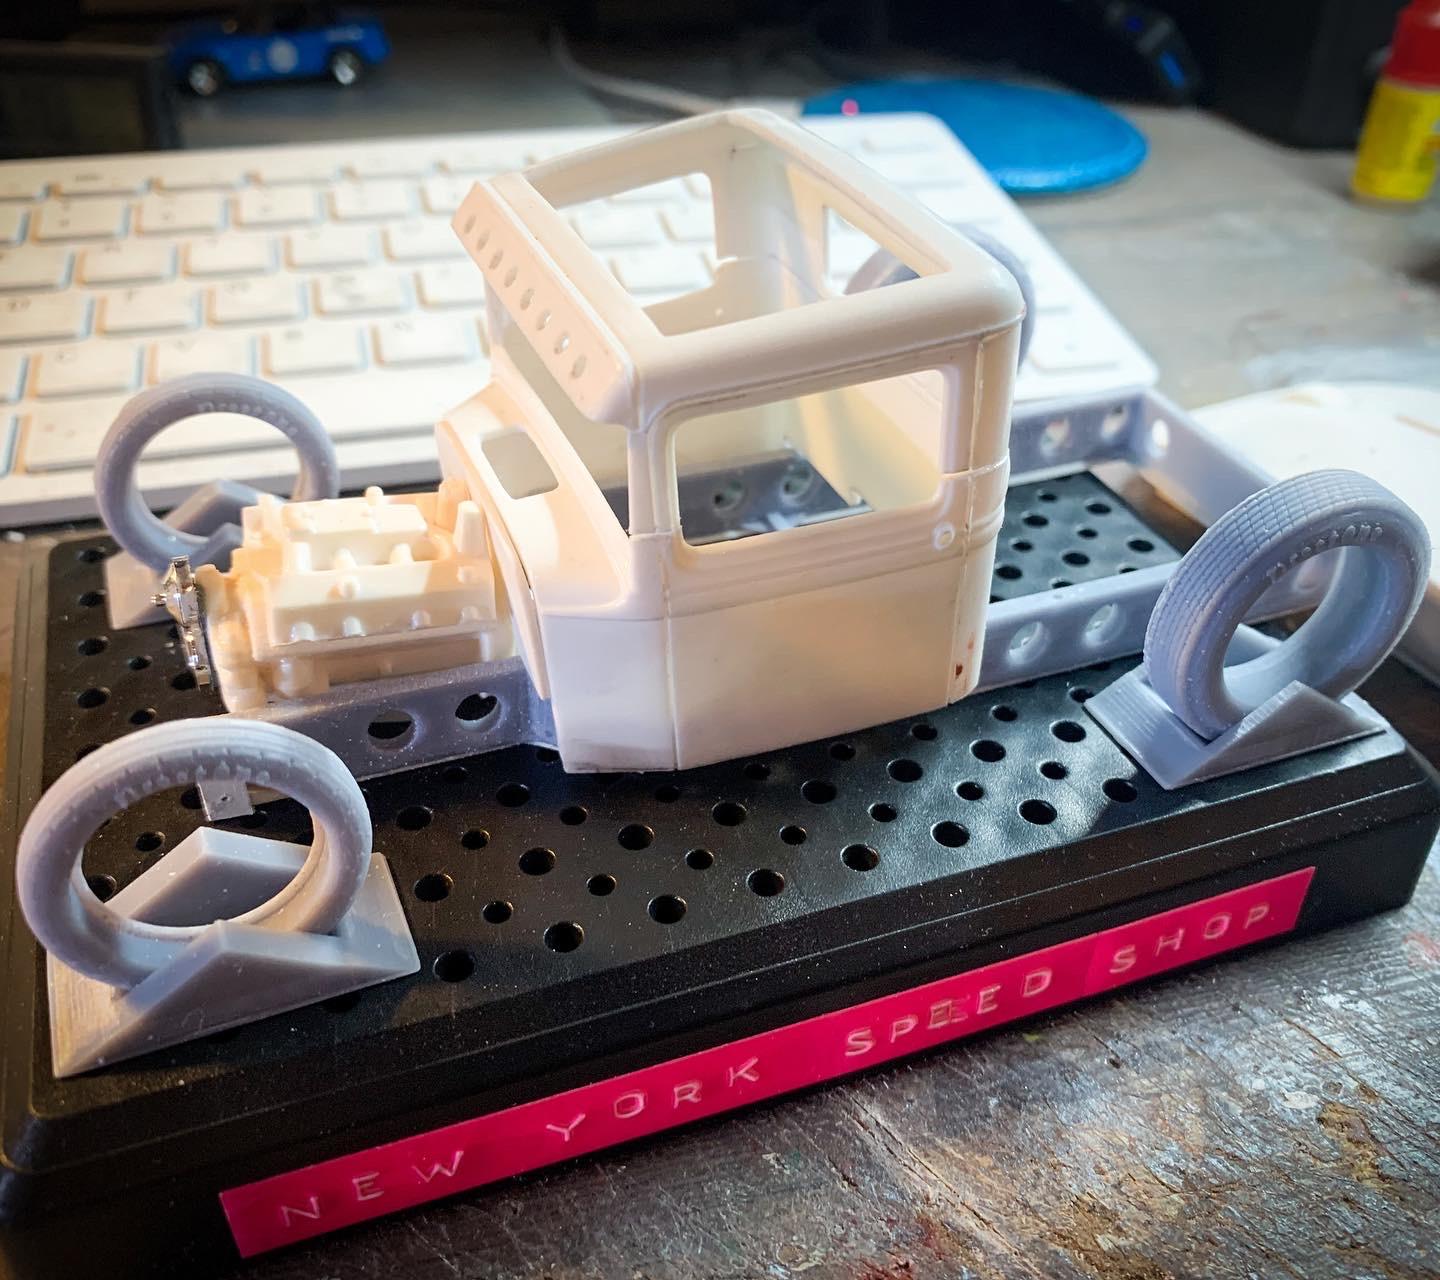
I’ve had this idea in my head for AGES now, and actually kinda started it last year, got distracted, had a better idea and just now got to working on it again. I really love the unusual (if impractical, because it broke) frame on Ed Roth’s Mysterion: And, I don’t know why, but I kept wondering what that would look like if applied to a more traditional hot-rod body style. In fact, probably the most different body to the sleek futuristic design of the Mysterion - a 34 truck. I recently got a 3D printer and took a course to get a start on learning to actually design stuff for it…I’m REALLY green at this stuff still, but enough to do some basic work anyway. So, first things first, designed a frame: Actually, first step before that was pencil and paper, but my printer won’t print from those ? I did a quick test-print of the frame to see how it was going to work out, made a couple of little tweaks and then printed the ‘real’ one. All the supports that the software adds look crazy - and I’m not sure if it’s even necessary to use quite so many, but they stop the resin from sagging or the part not printing correctly so I let it add all that it thought it needed: Four hours printing later: Cleaned the parts in 99% alcohol and then cured with UV light: Now I gotta snip all this extra stuff off: Then, after some cleanup…a frame! As you can see from that body, whilst the printer was running I started hacking that apart and getting the proportions a little closer to what I’d imagined - took a couple of scale inches out of the bottom of the doors and a little out of the roof too. Before: And after! The body is just tacked together right now so I can check all the measurements and make the joints nice before gluing it back together, but it looks like I imagined in my head now… Going with a 390 FE motor as a hat-tip to the Mysterion (but only ONE of them in this case): And a shot with the body on the frame: I’m excited already! Tomorrow’s project is wheels and tires…I started playing with some vintage dirt-track style smoothies this evening but didn’t get a good run at making the tires yet: Still learning all this stuff, but I’m having a blast playing with some techniques that I haven’t tried before…more soon!