OldNYJim
-
Posts
251 -
Joined
-
Last visited
Content Type
Profiles
Forums
Events
Gallery
Everything posted by OldNYJim
-
I like doing that too - definitely helps to figure one out fully before committing to a more detailed or modified (pardon the pun) project Nice start! I’ll be watching!
-
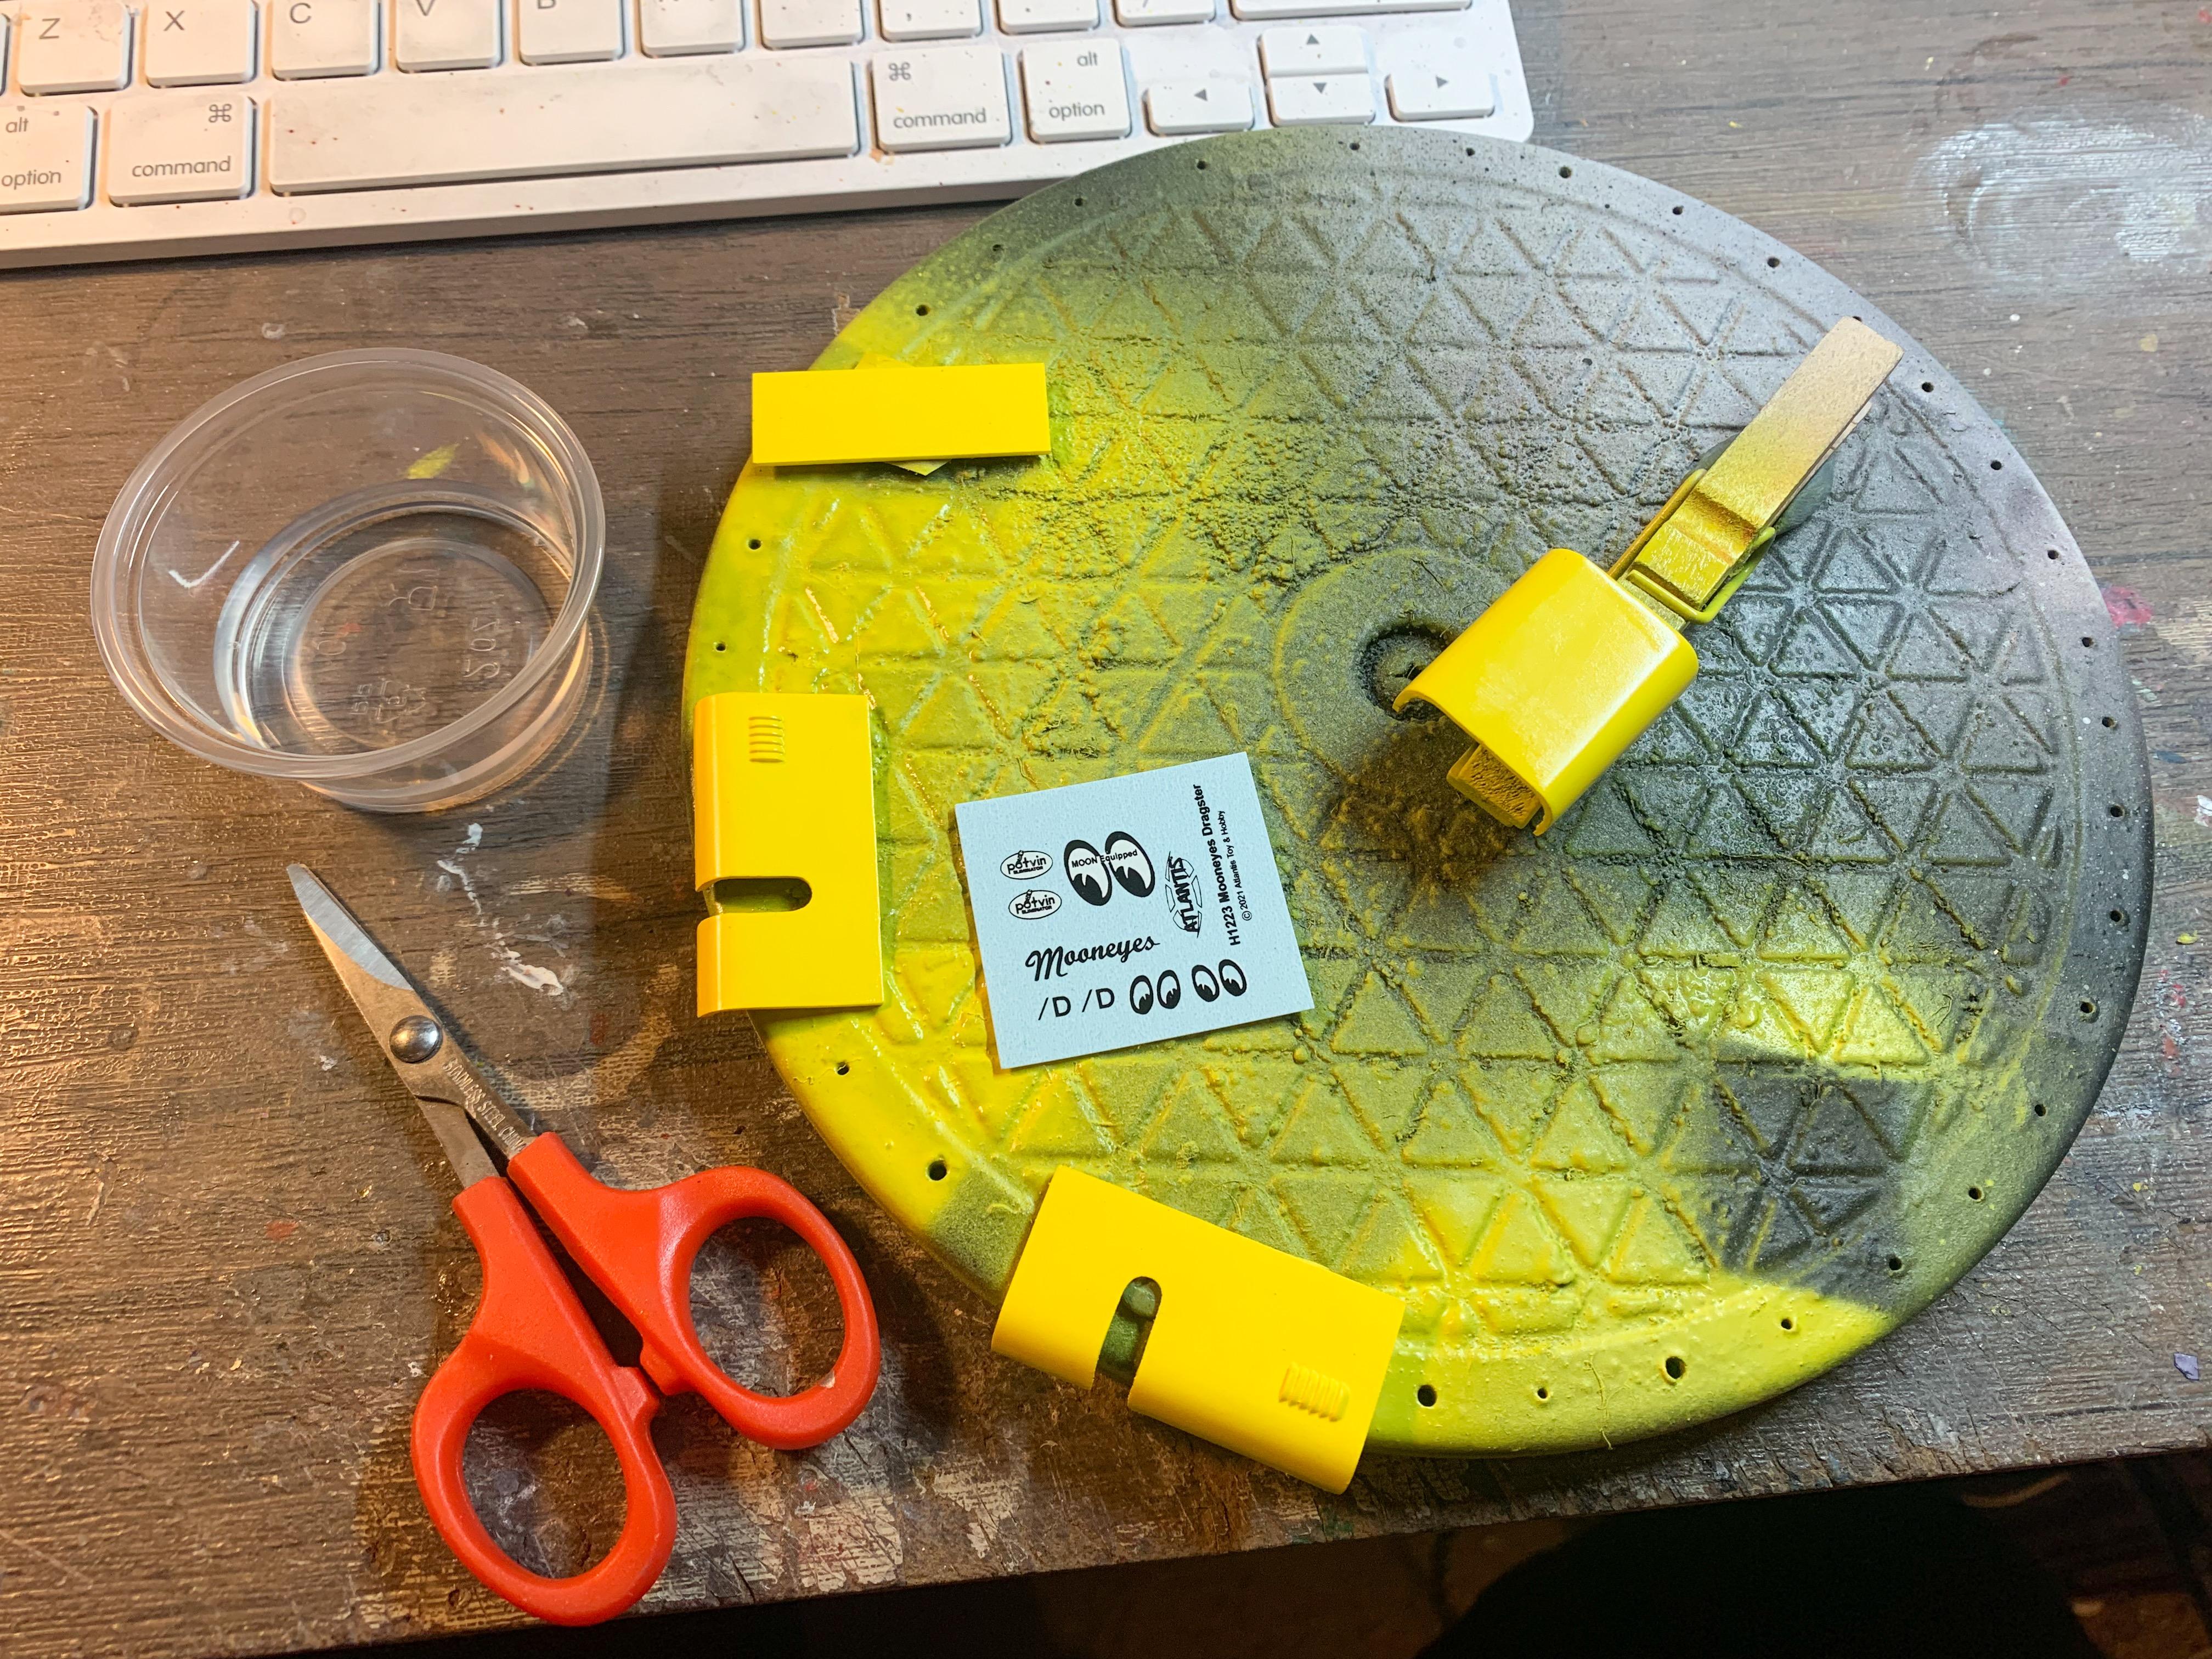
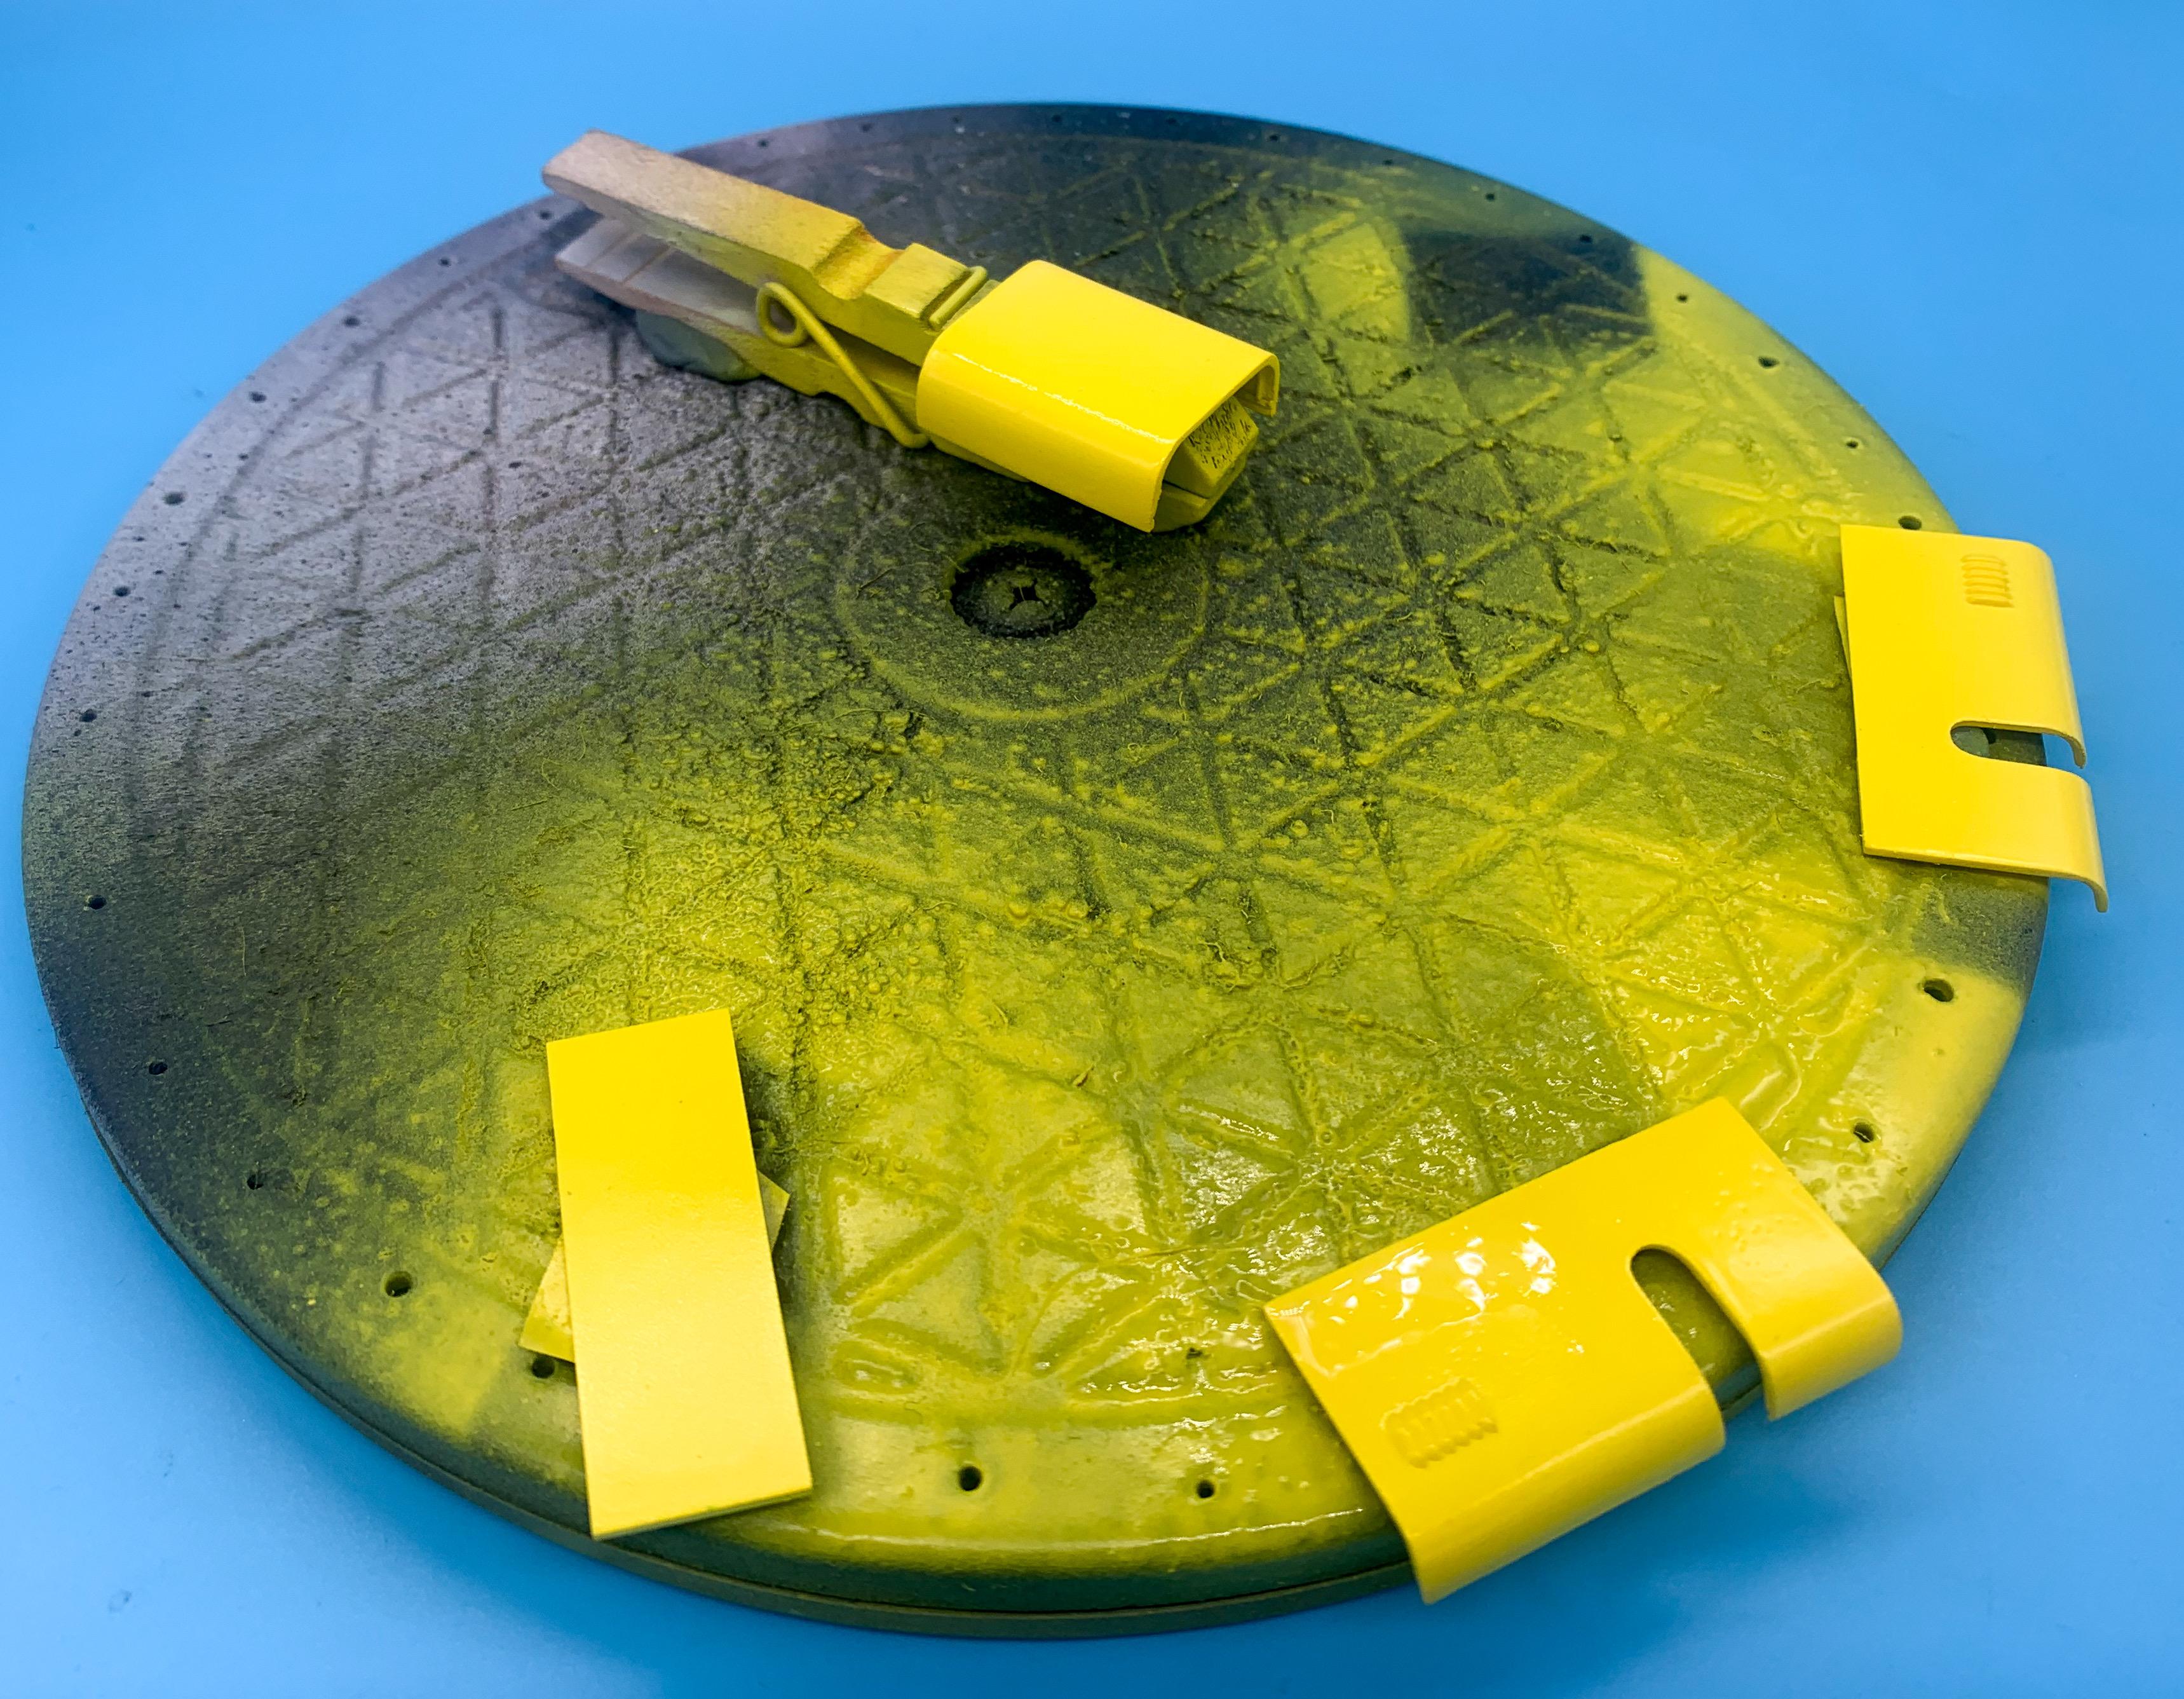
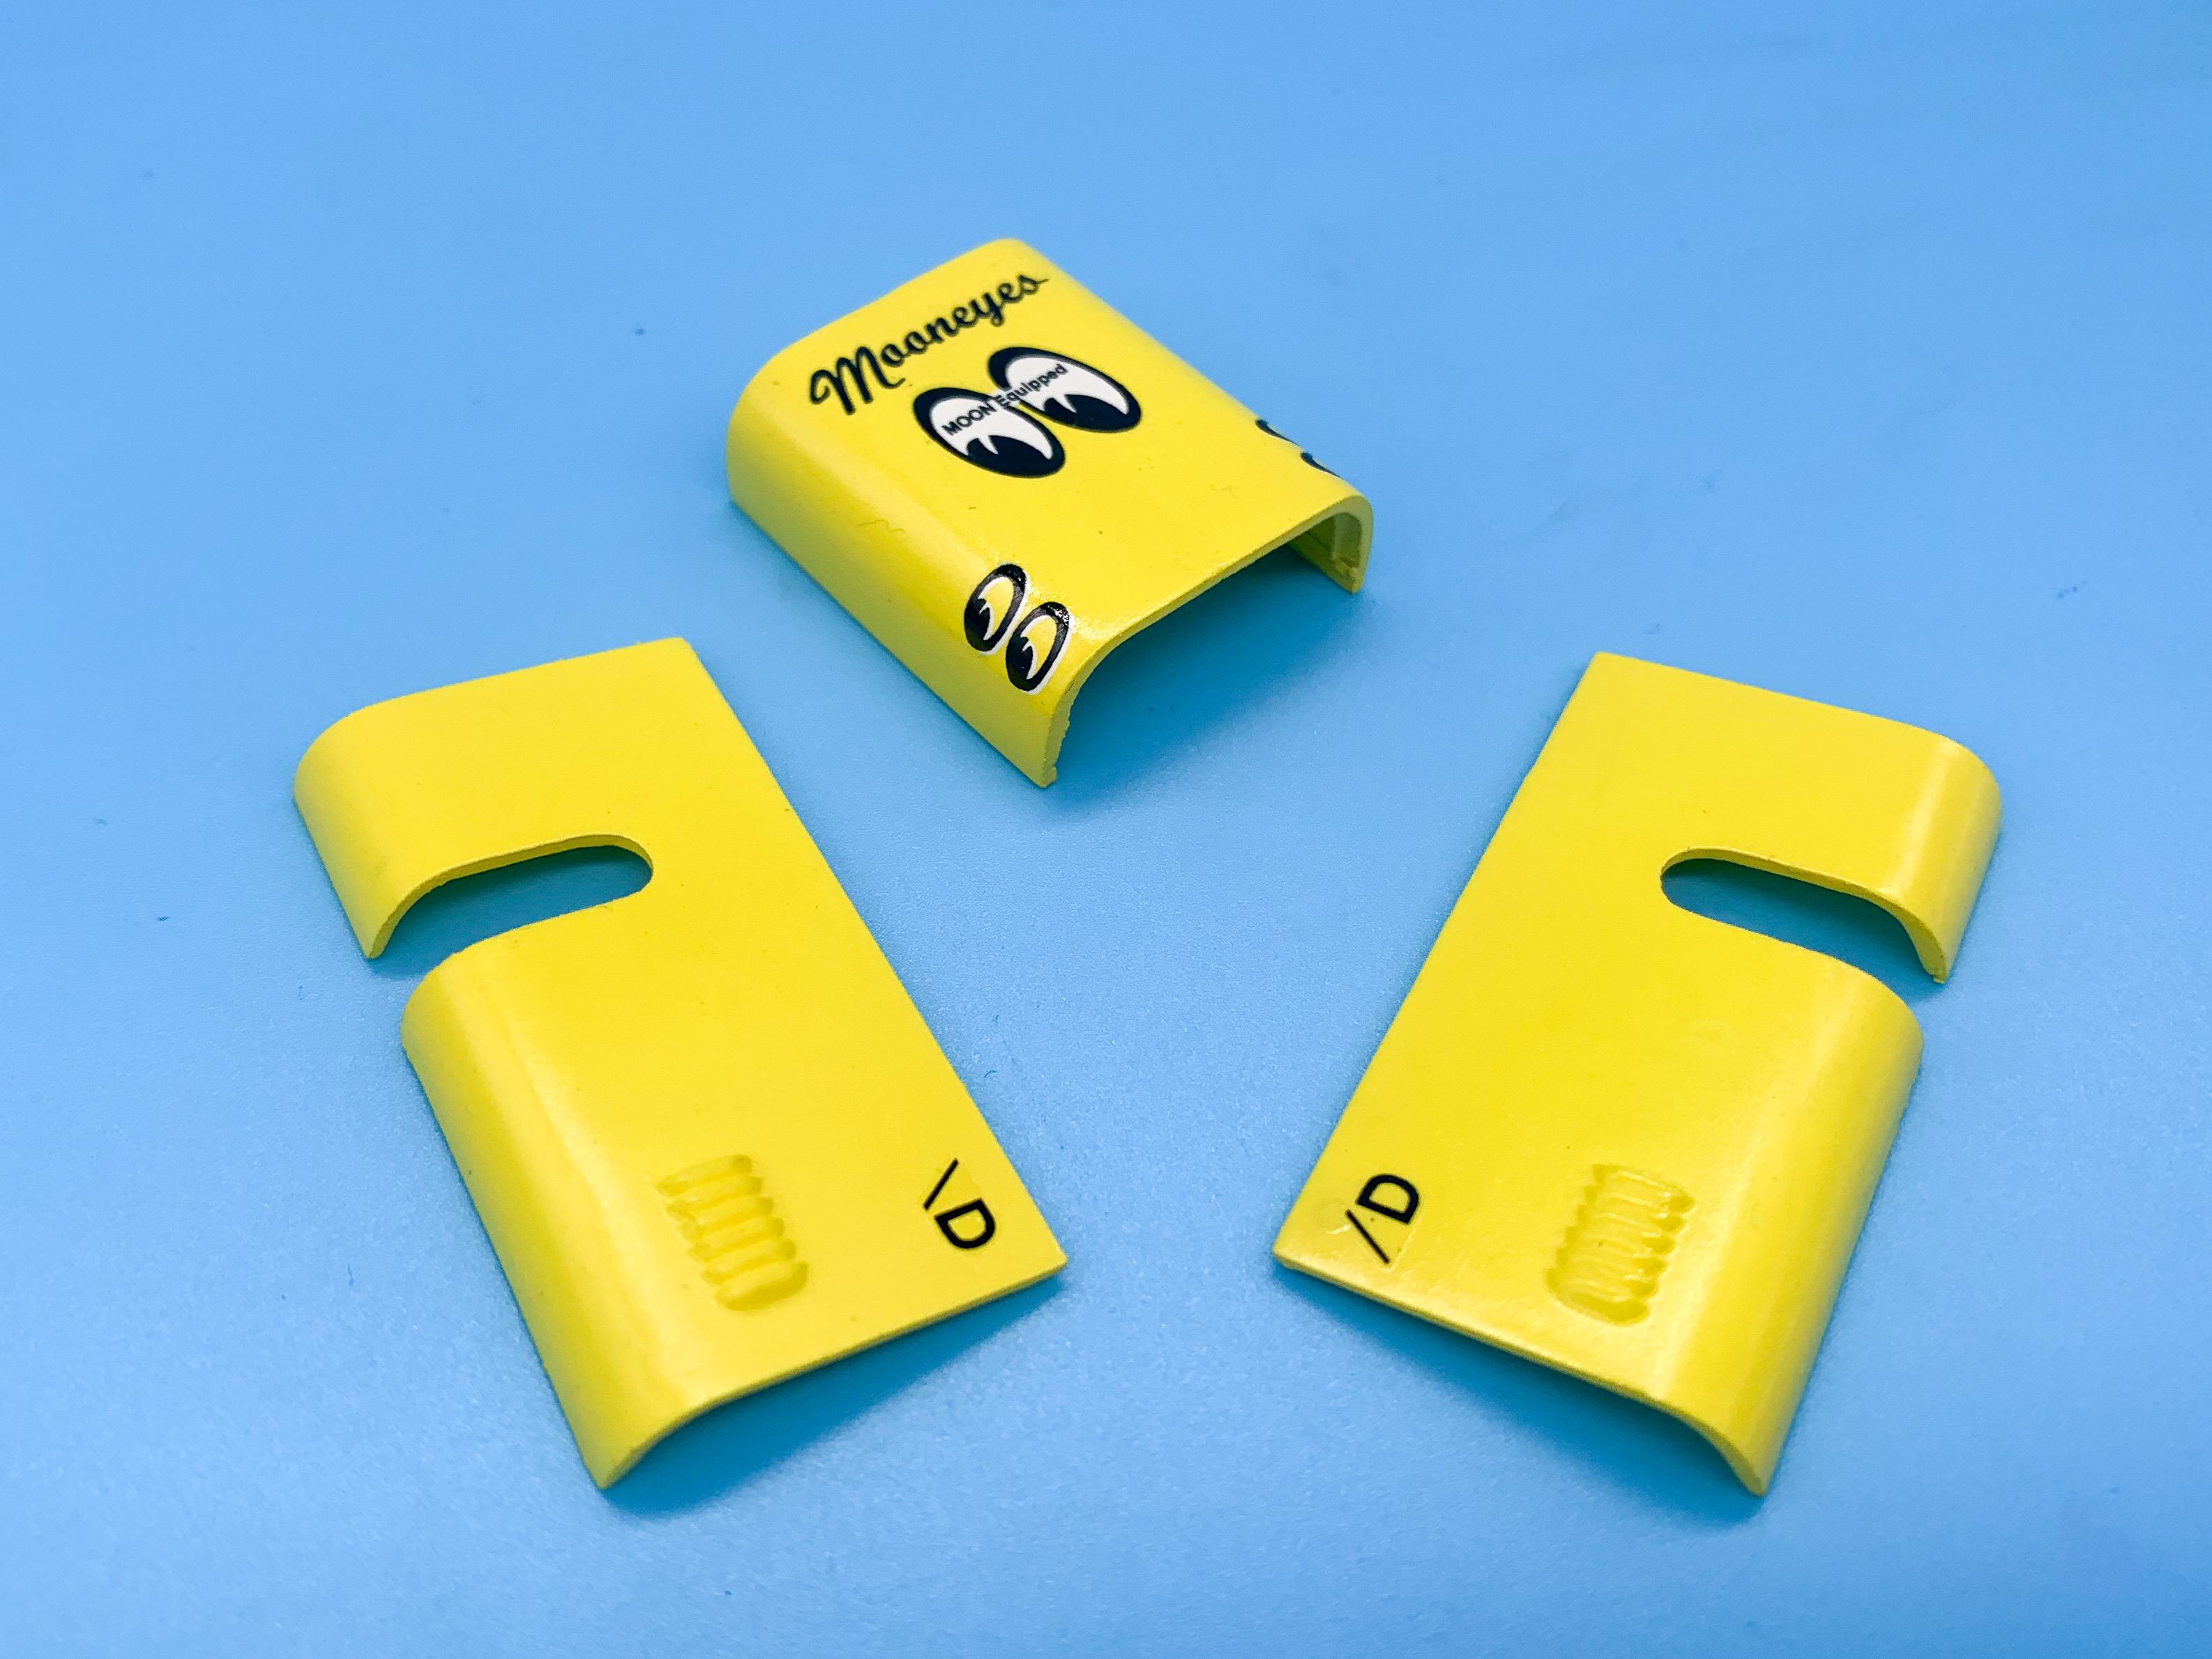
I appreciate that, thanks Raoul! You’re right, there’s some great reference pics in there! I’d be interested to do some more research and see if there were a lot of differences between the ‘current’ clone and the first clone (which was crashed and rebuilt into second one). Add to that the very early version of the car with the top mounted blower plus another version which ran Revell logos and I could be building these things all year ? Thanks buddy! Tiny update, but one of my favorite parts of this build so far…the decals! Finished painting the ‘tins’ and shot them with a coat of Createx clear gloss. That isn’t my favorite clearcoat to polish, but it self levels nicely, protects the coats underneath and provides a good surface for decal application… It’s a pretty tiny decal sheet, as you’d expect… But they laid down BEAUTIFULLY and the white elements covered the yellow just fine - great job Atlantis! I’ll let them set overnight before starting to apply some clearcoat to gloss the panels up a little, but I’m pleased with how it’s starting to look like the car in the pics, finally! I also ordered a photoetch set from Highlight Model studio that has the correct rectangular Mooneyes pedal for the original car, plus a Detail Master aluminum Moontank…I can spin up a tank myself on my lathe but their kit has nice photoetched brackets too so I’m going to check that out and see if it’ll work. More soon!

-

Polishing base coat before clear?
OldNYJim replied to rightrudder's topic in Model Building Questions and Answers
A differing view on sanding metallics: -
Cutting Sheet Stock Accurately & Easy
OldNYJim replied to redneckrigger's topic in Tips, Tricks, and Tutorials
Those are awesome! Nice score! -
Awesome! Thanks Mark!! Those are both really cool!
-
Drive By Wire In 1958
OldNYJim replied to OldTrucker's topic in General Automotive Talk (Trucks and Cars)
I saw that story reported in some of the junkier tabloids, but the NTSB report disputes most of those claims: https://www.mercurynews.com/2021/10/22/drivers-seat-wasnt-empty-in-fatal-tesla-crash-ntsb-says Tesla says that the ‘self-driving’ add-on wasn’t optioned on the car involved, and investigators couldn’t make the self-steering function turn on in an identical car on the same road because of a lack of painted white lines that the system requires to function. Sad as it is, I’d suspect this particular case was driver error rather than technology error… -
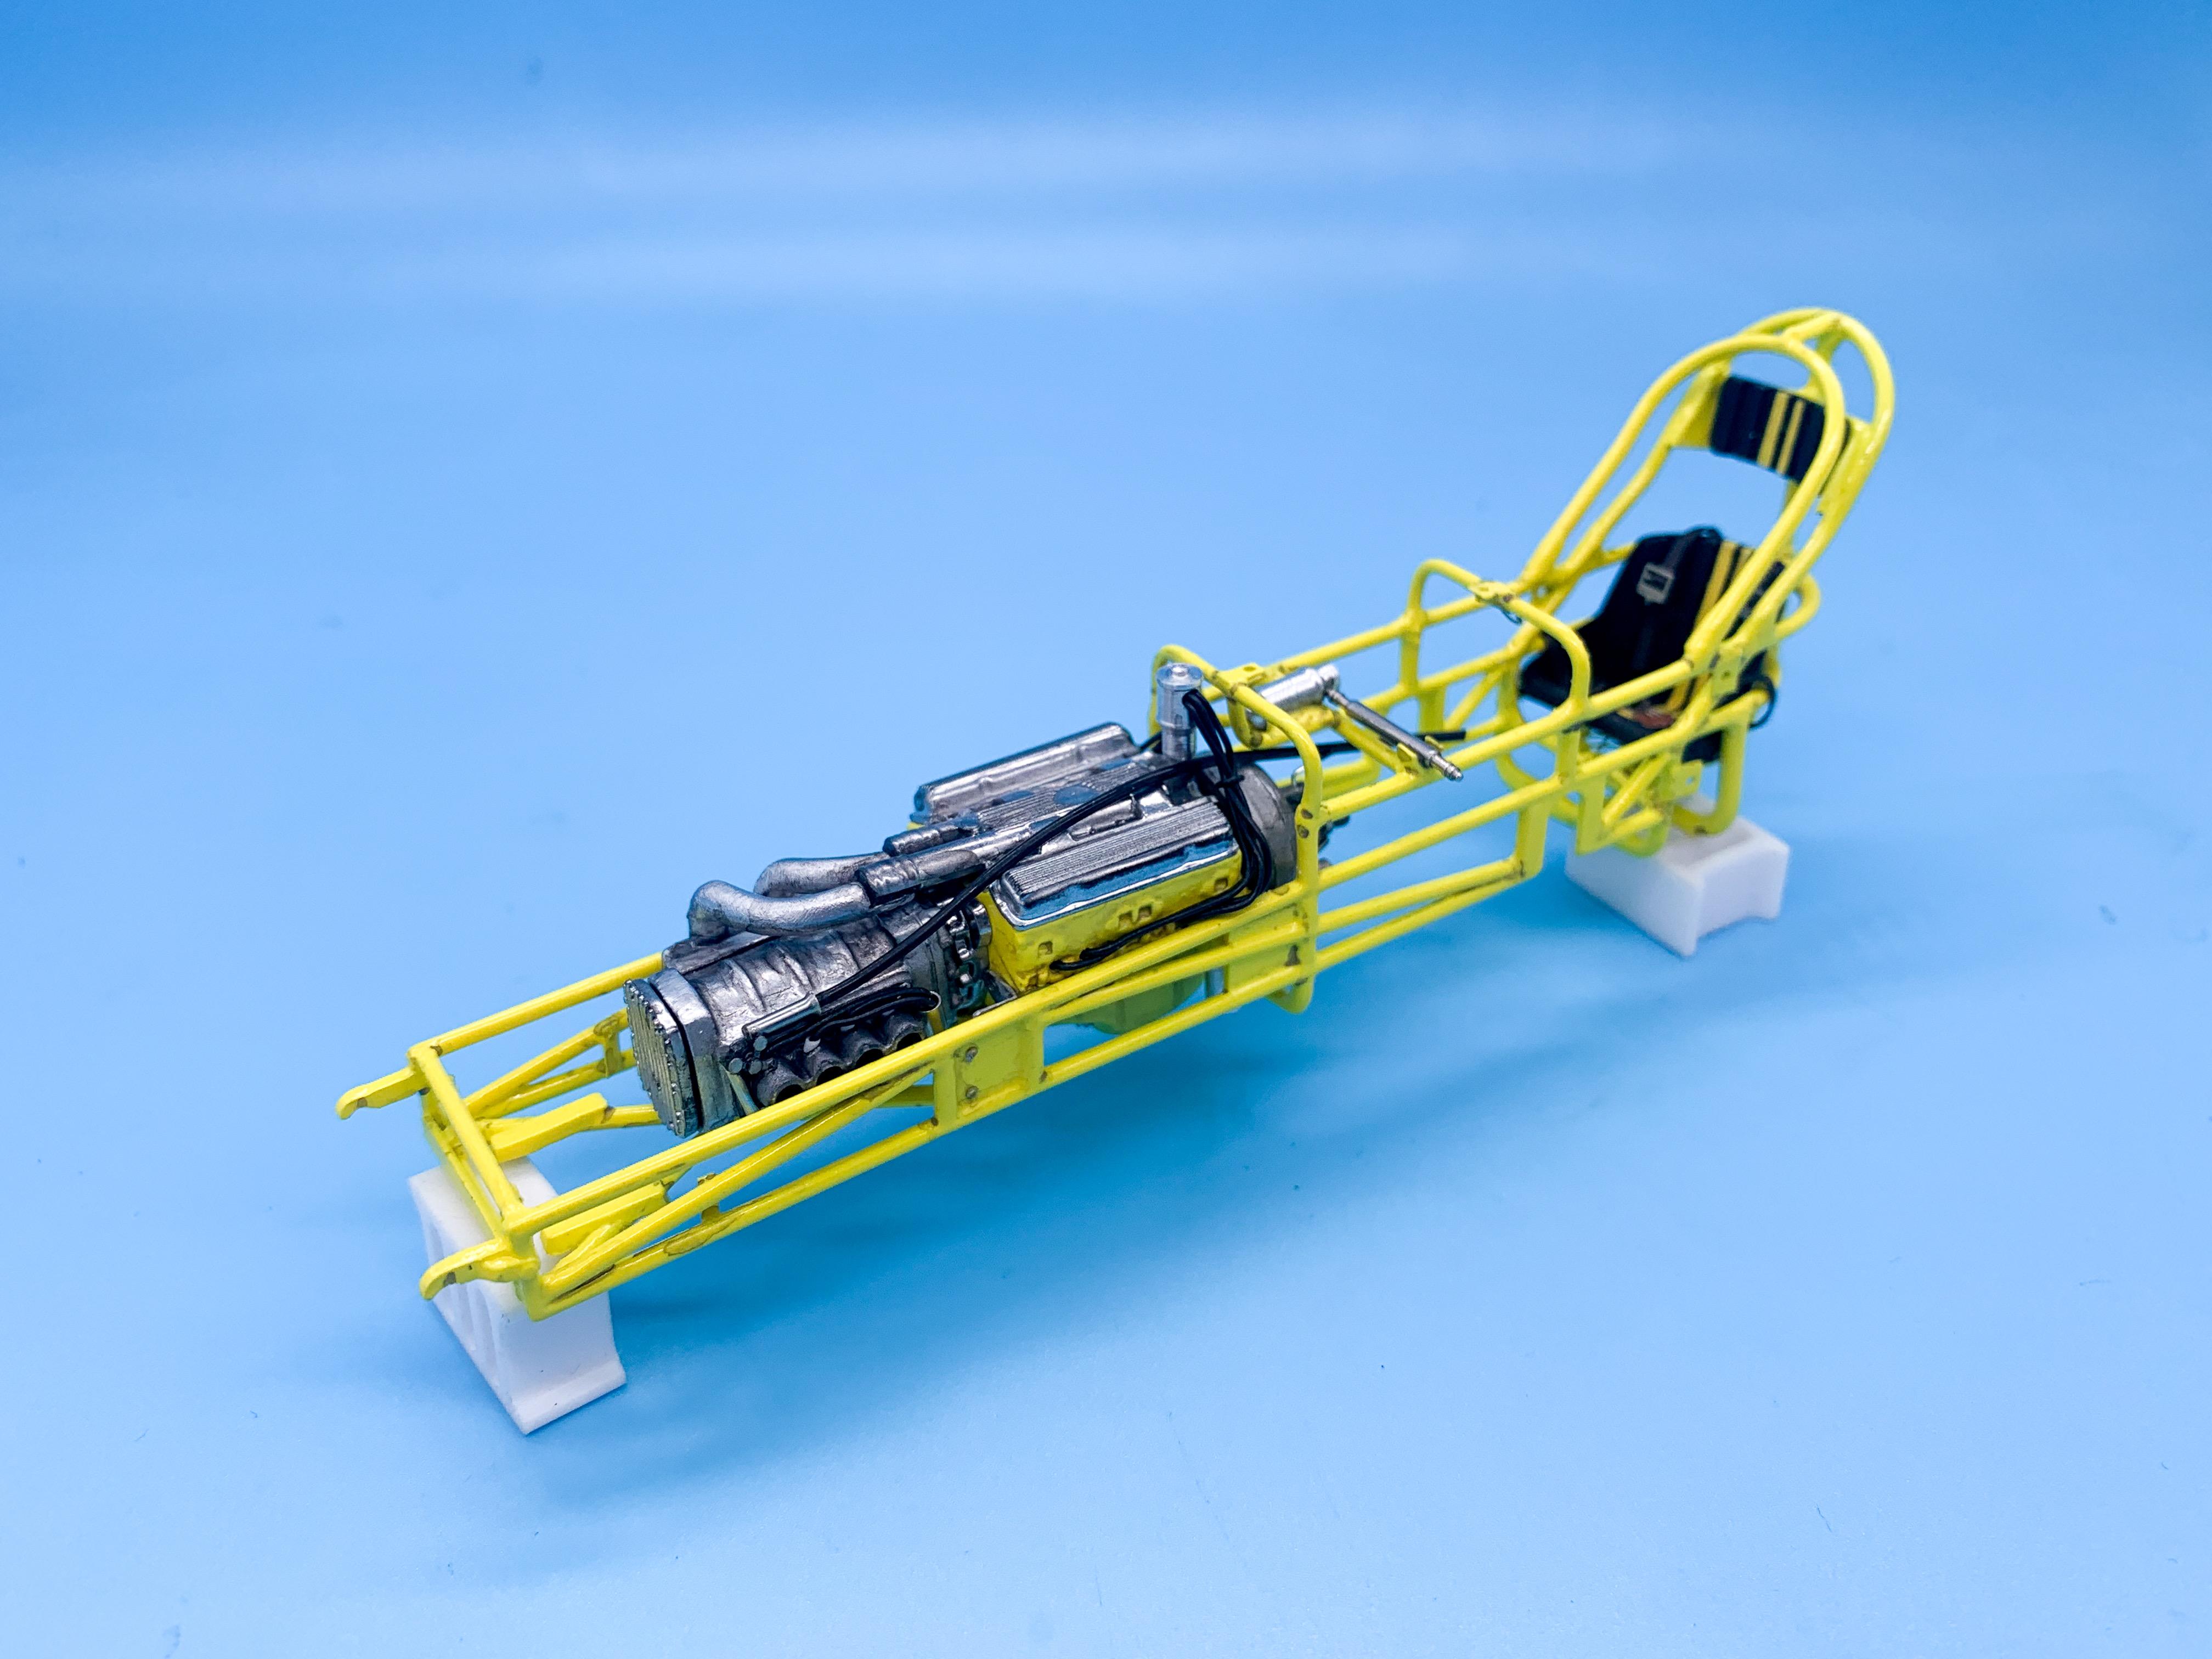
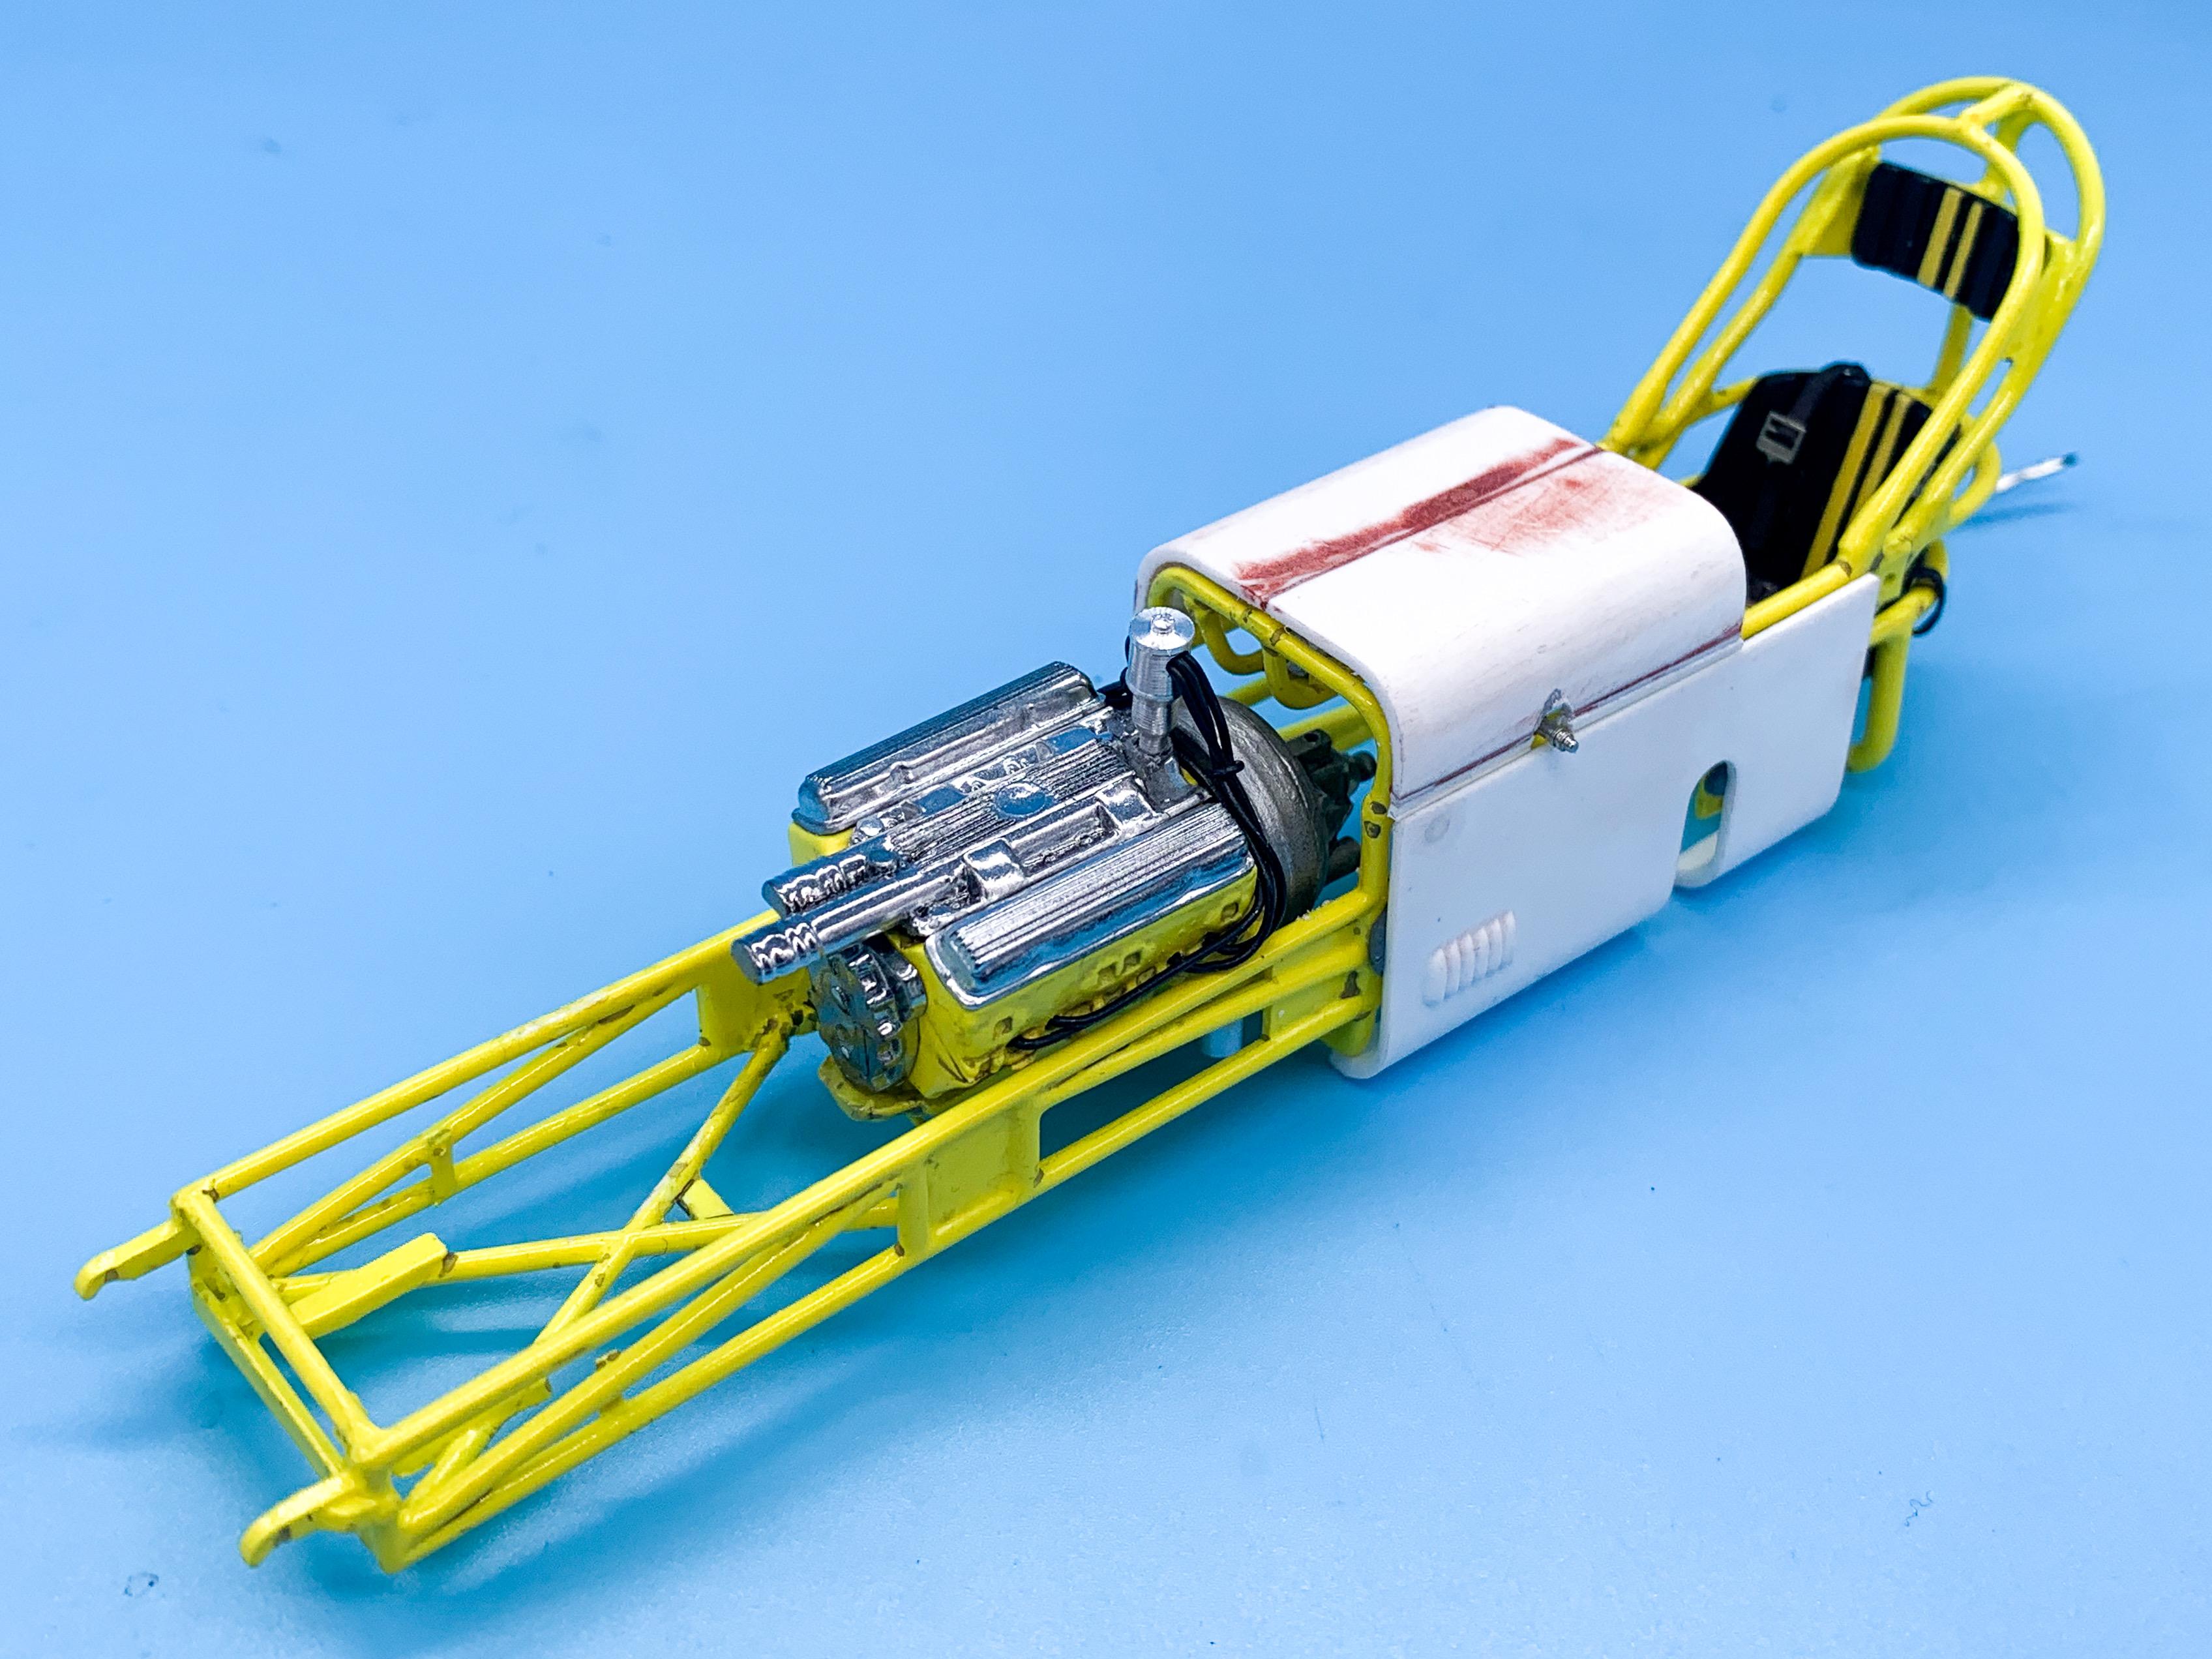
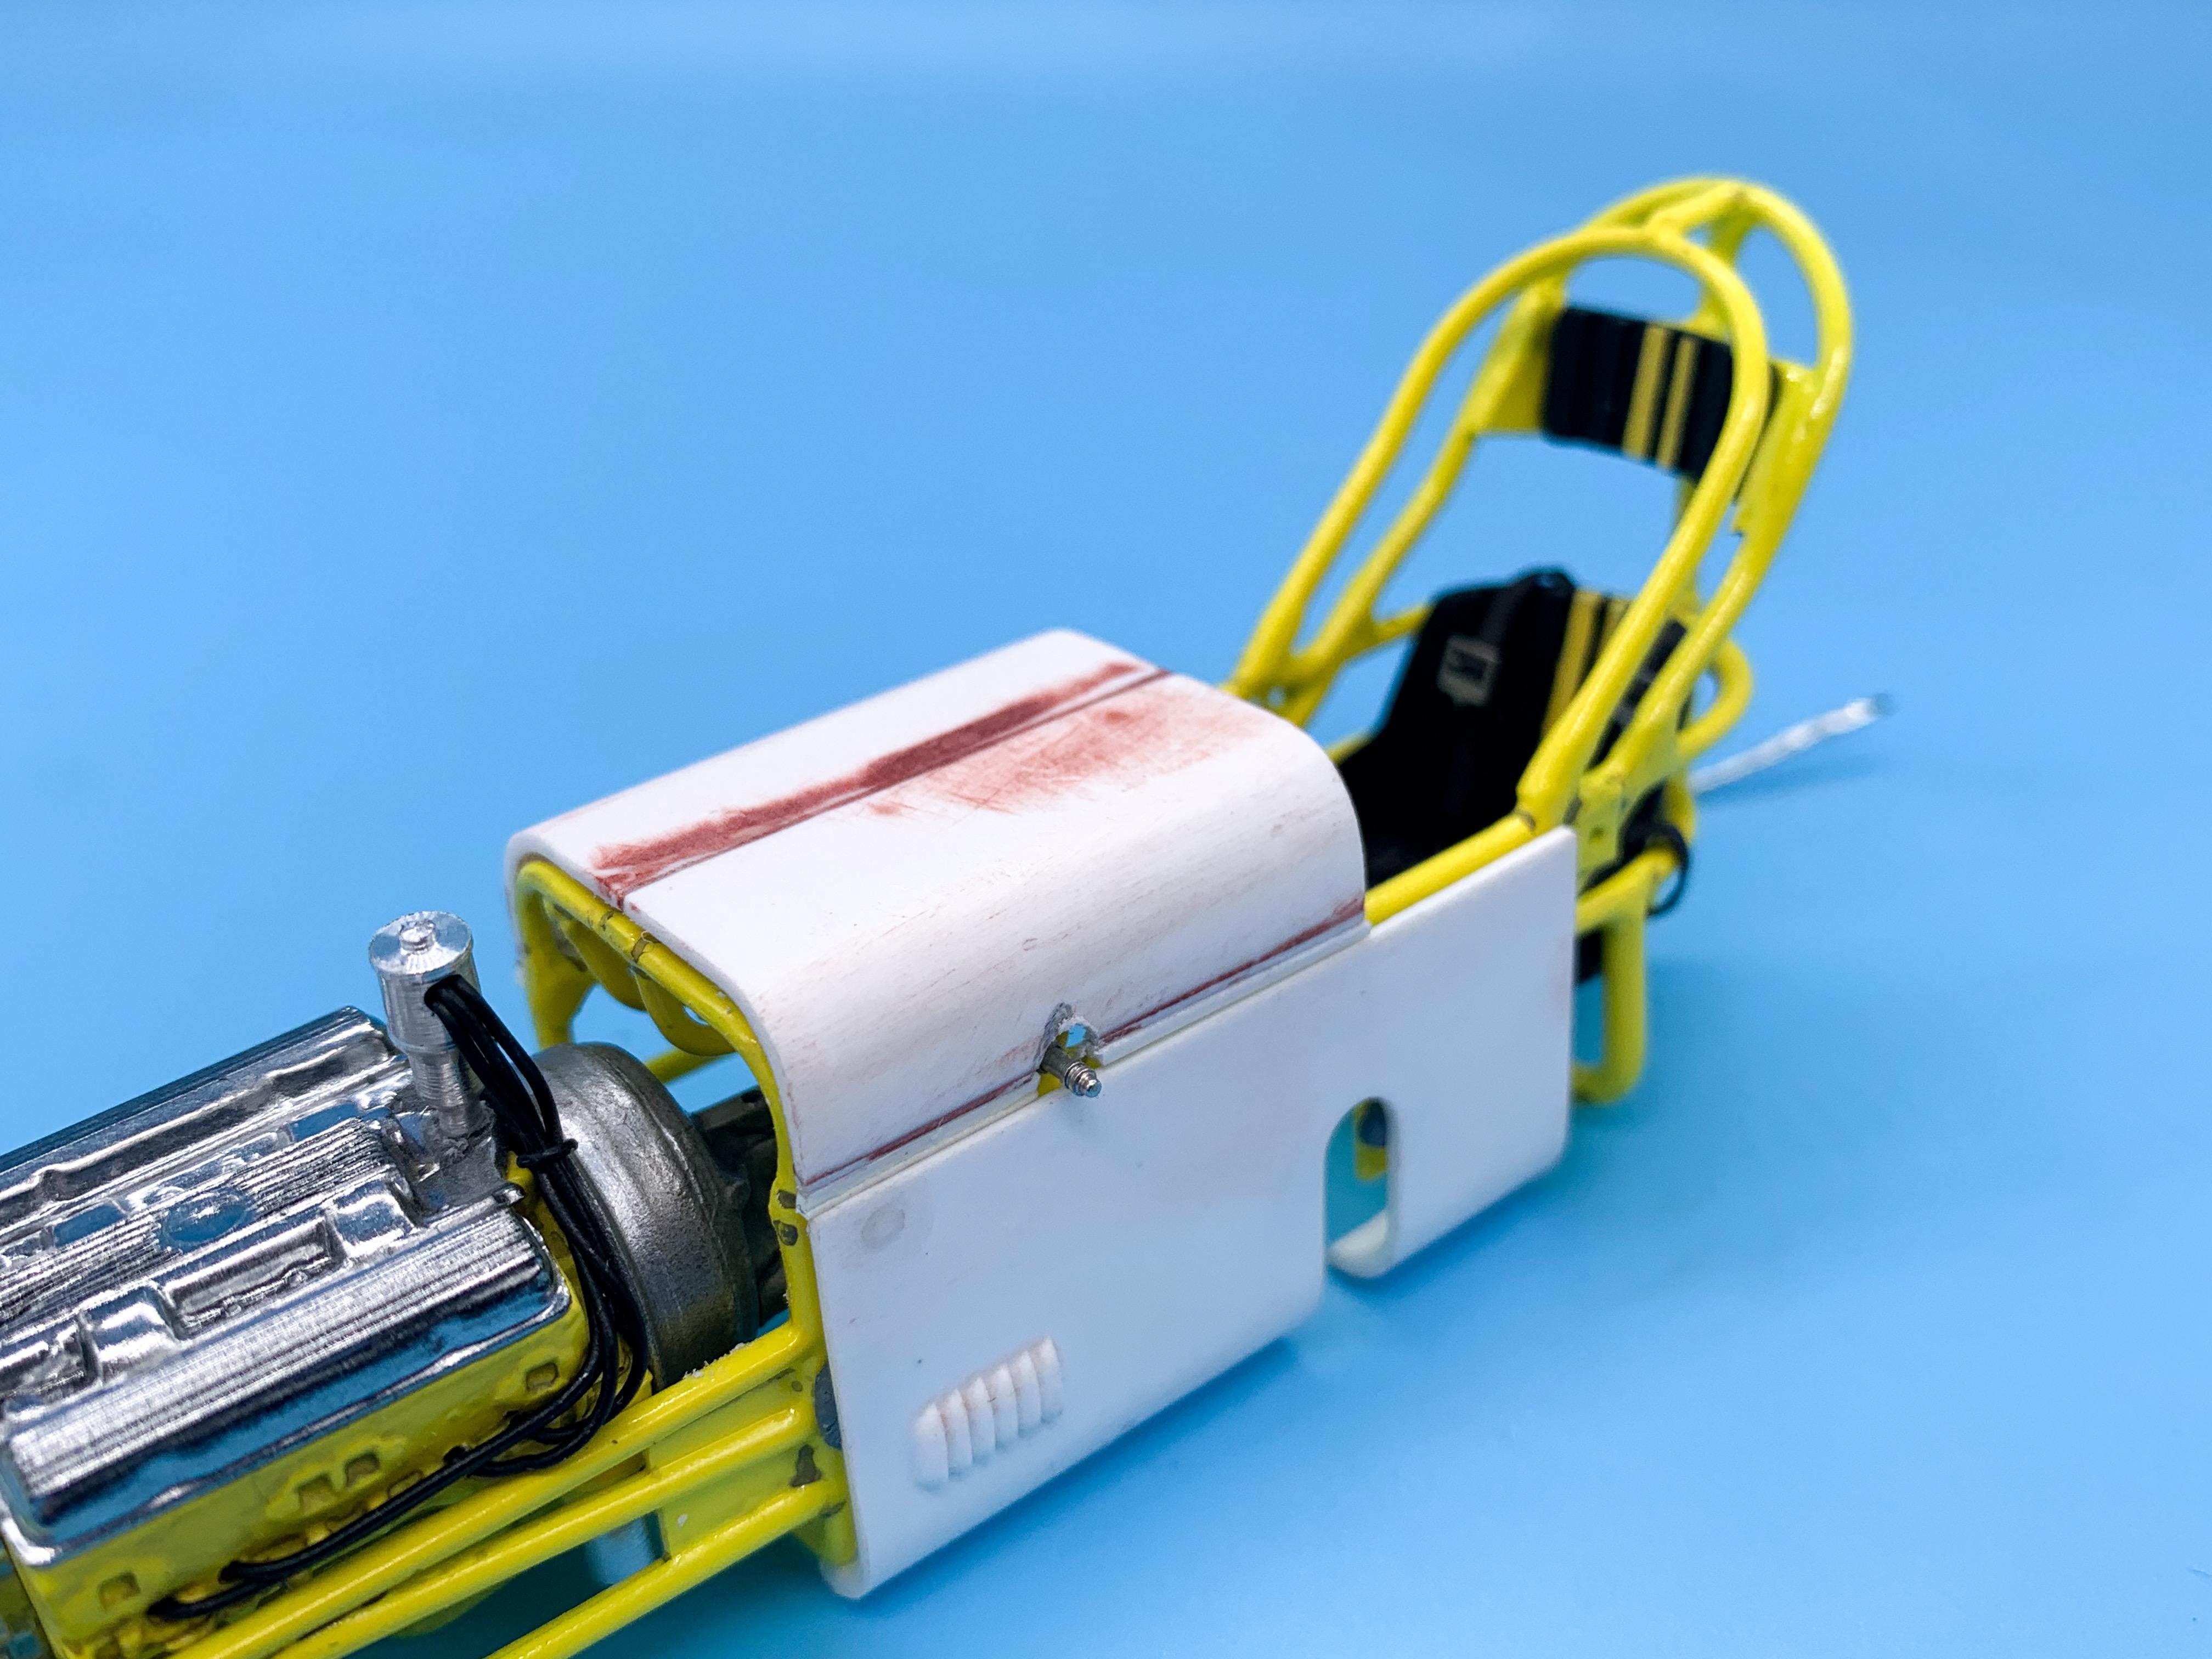
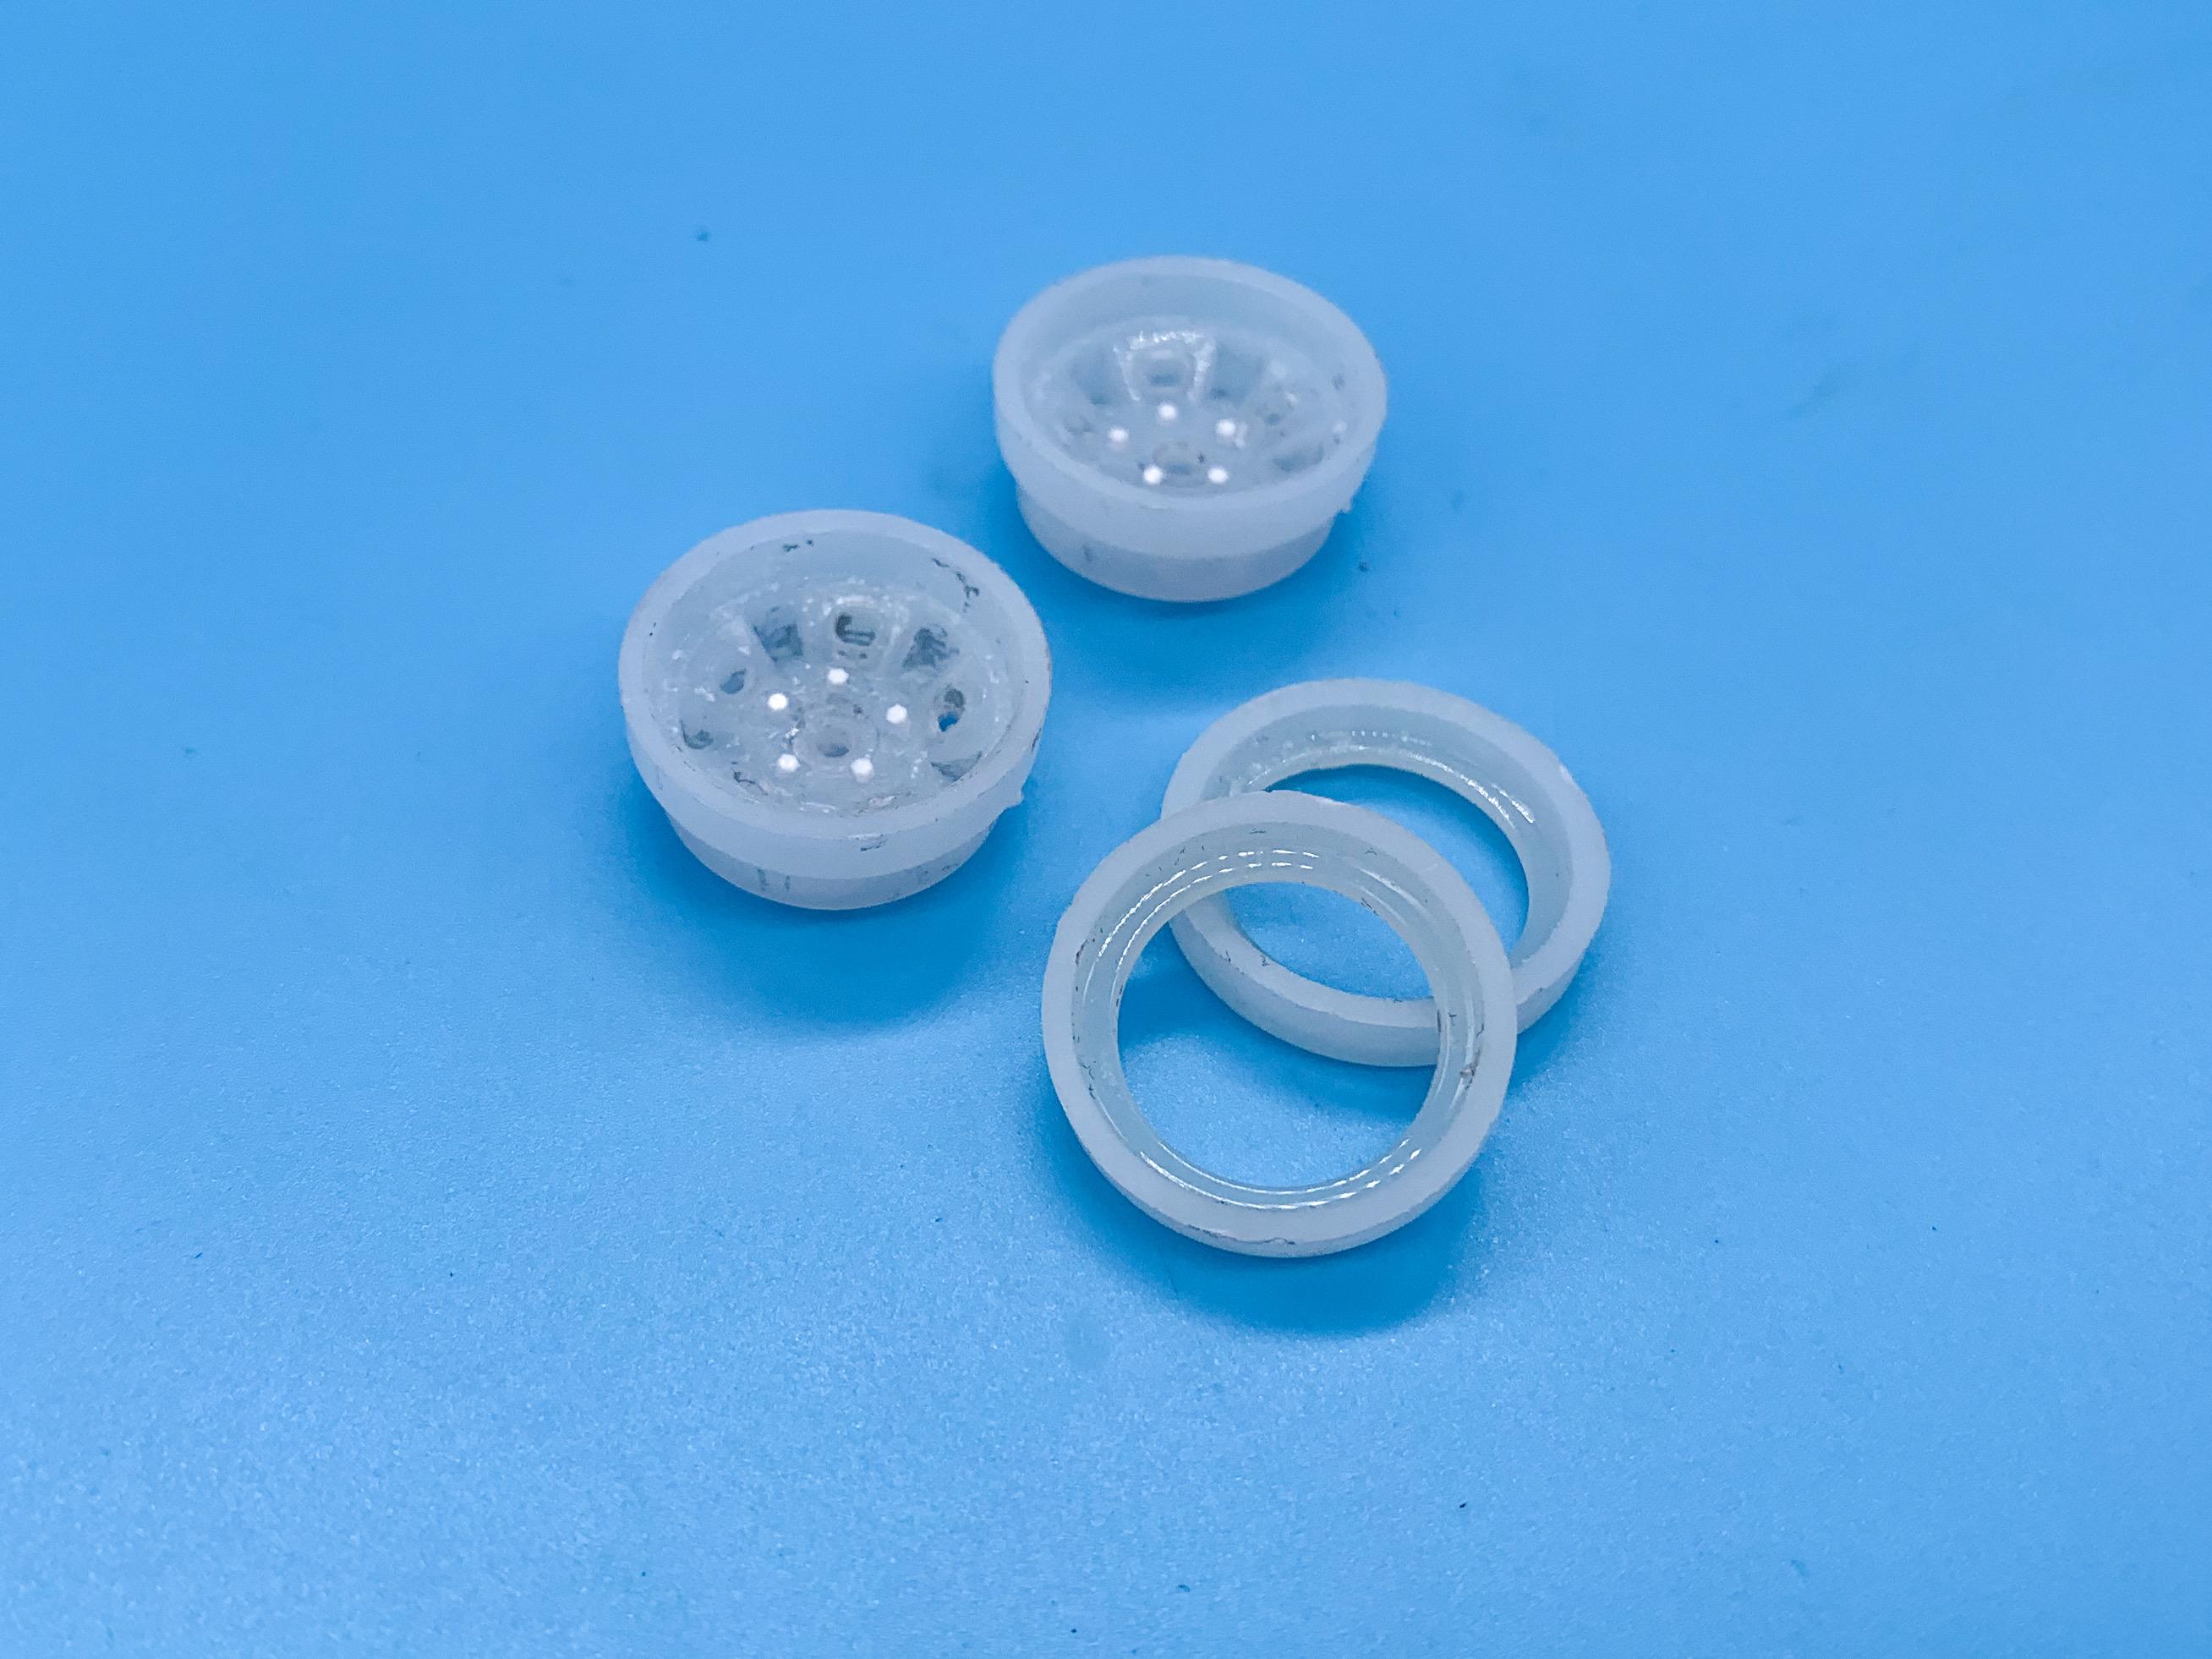
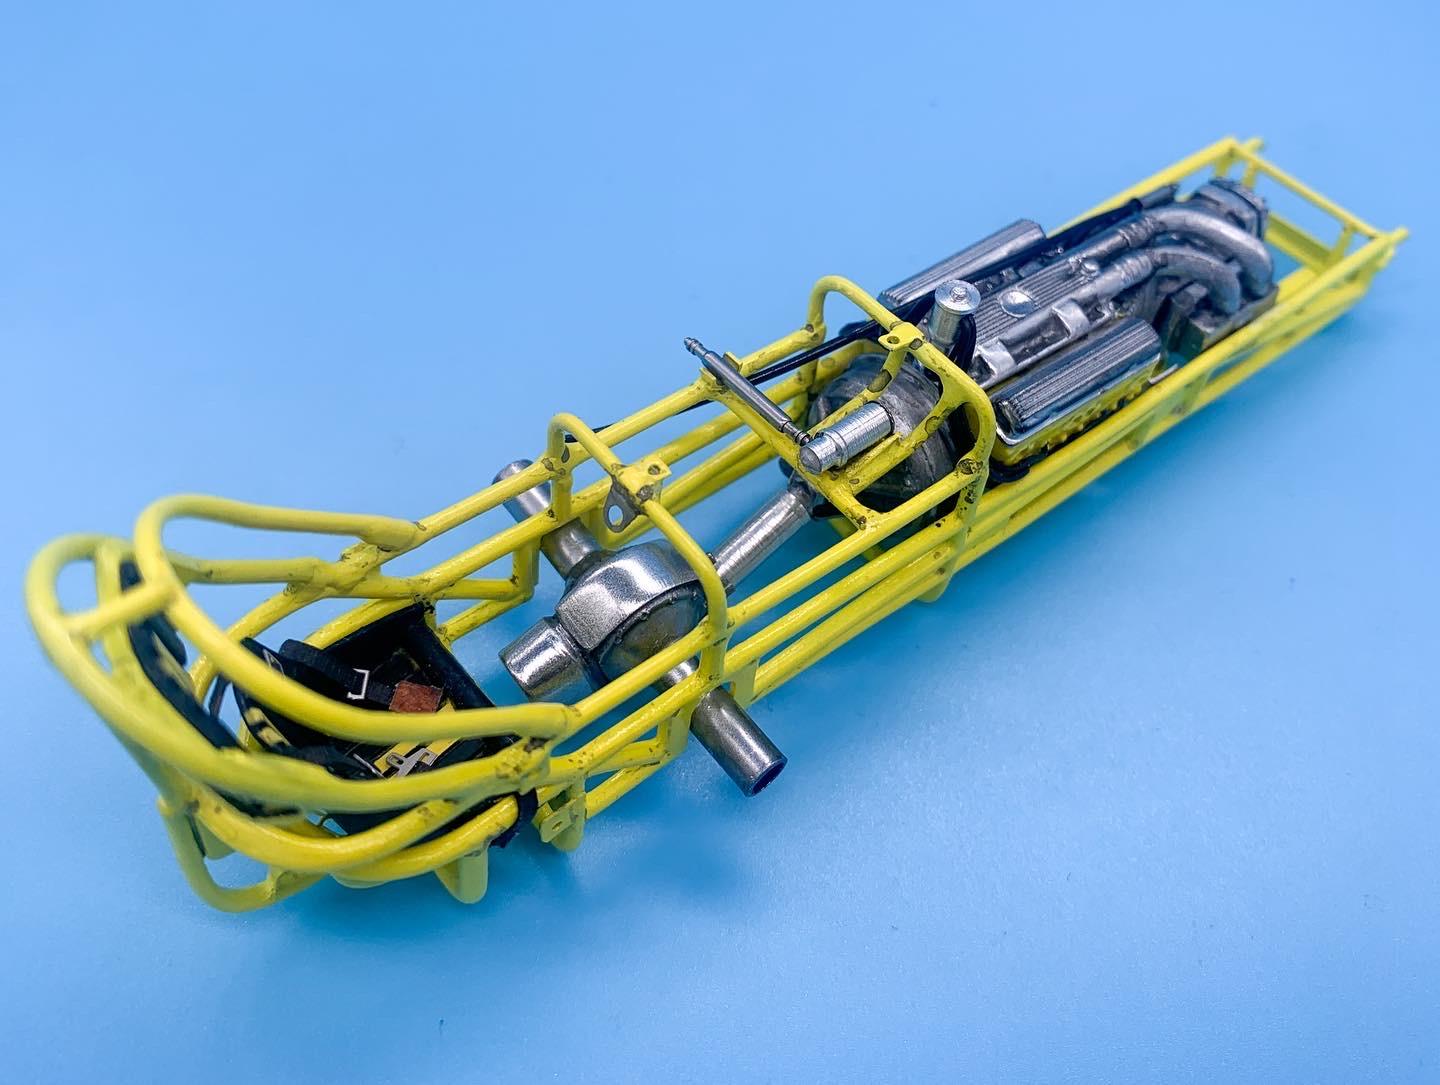
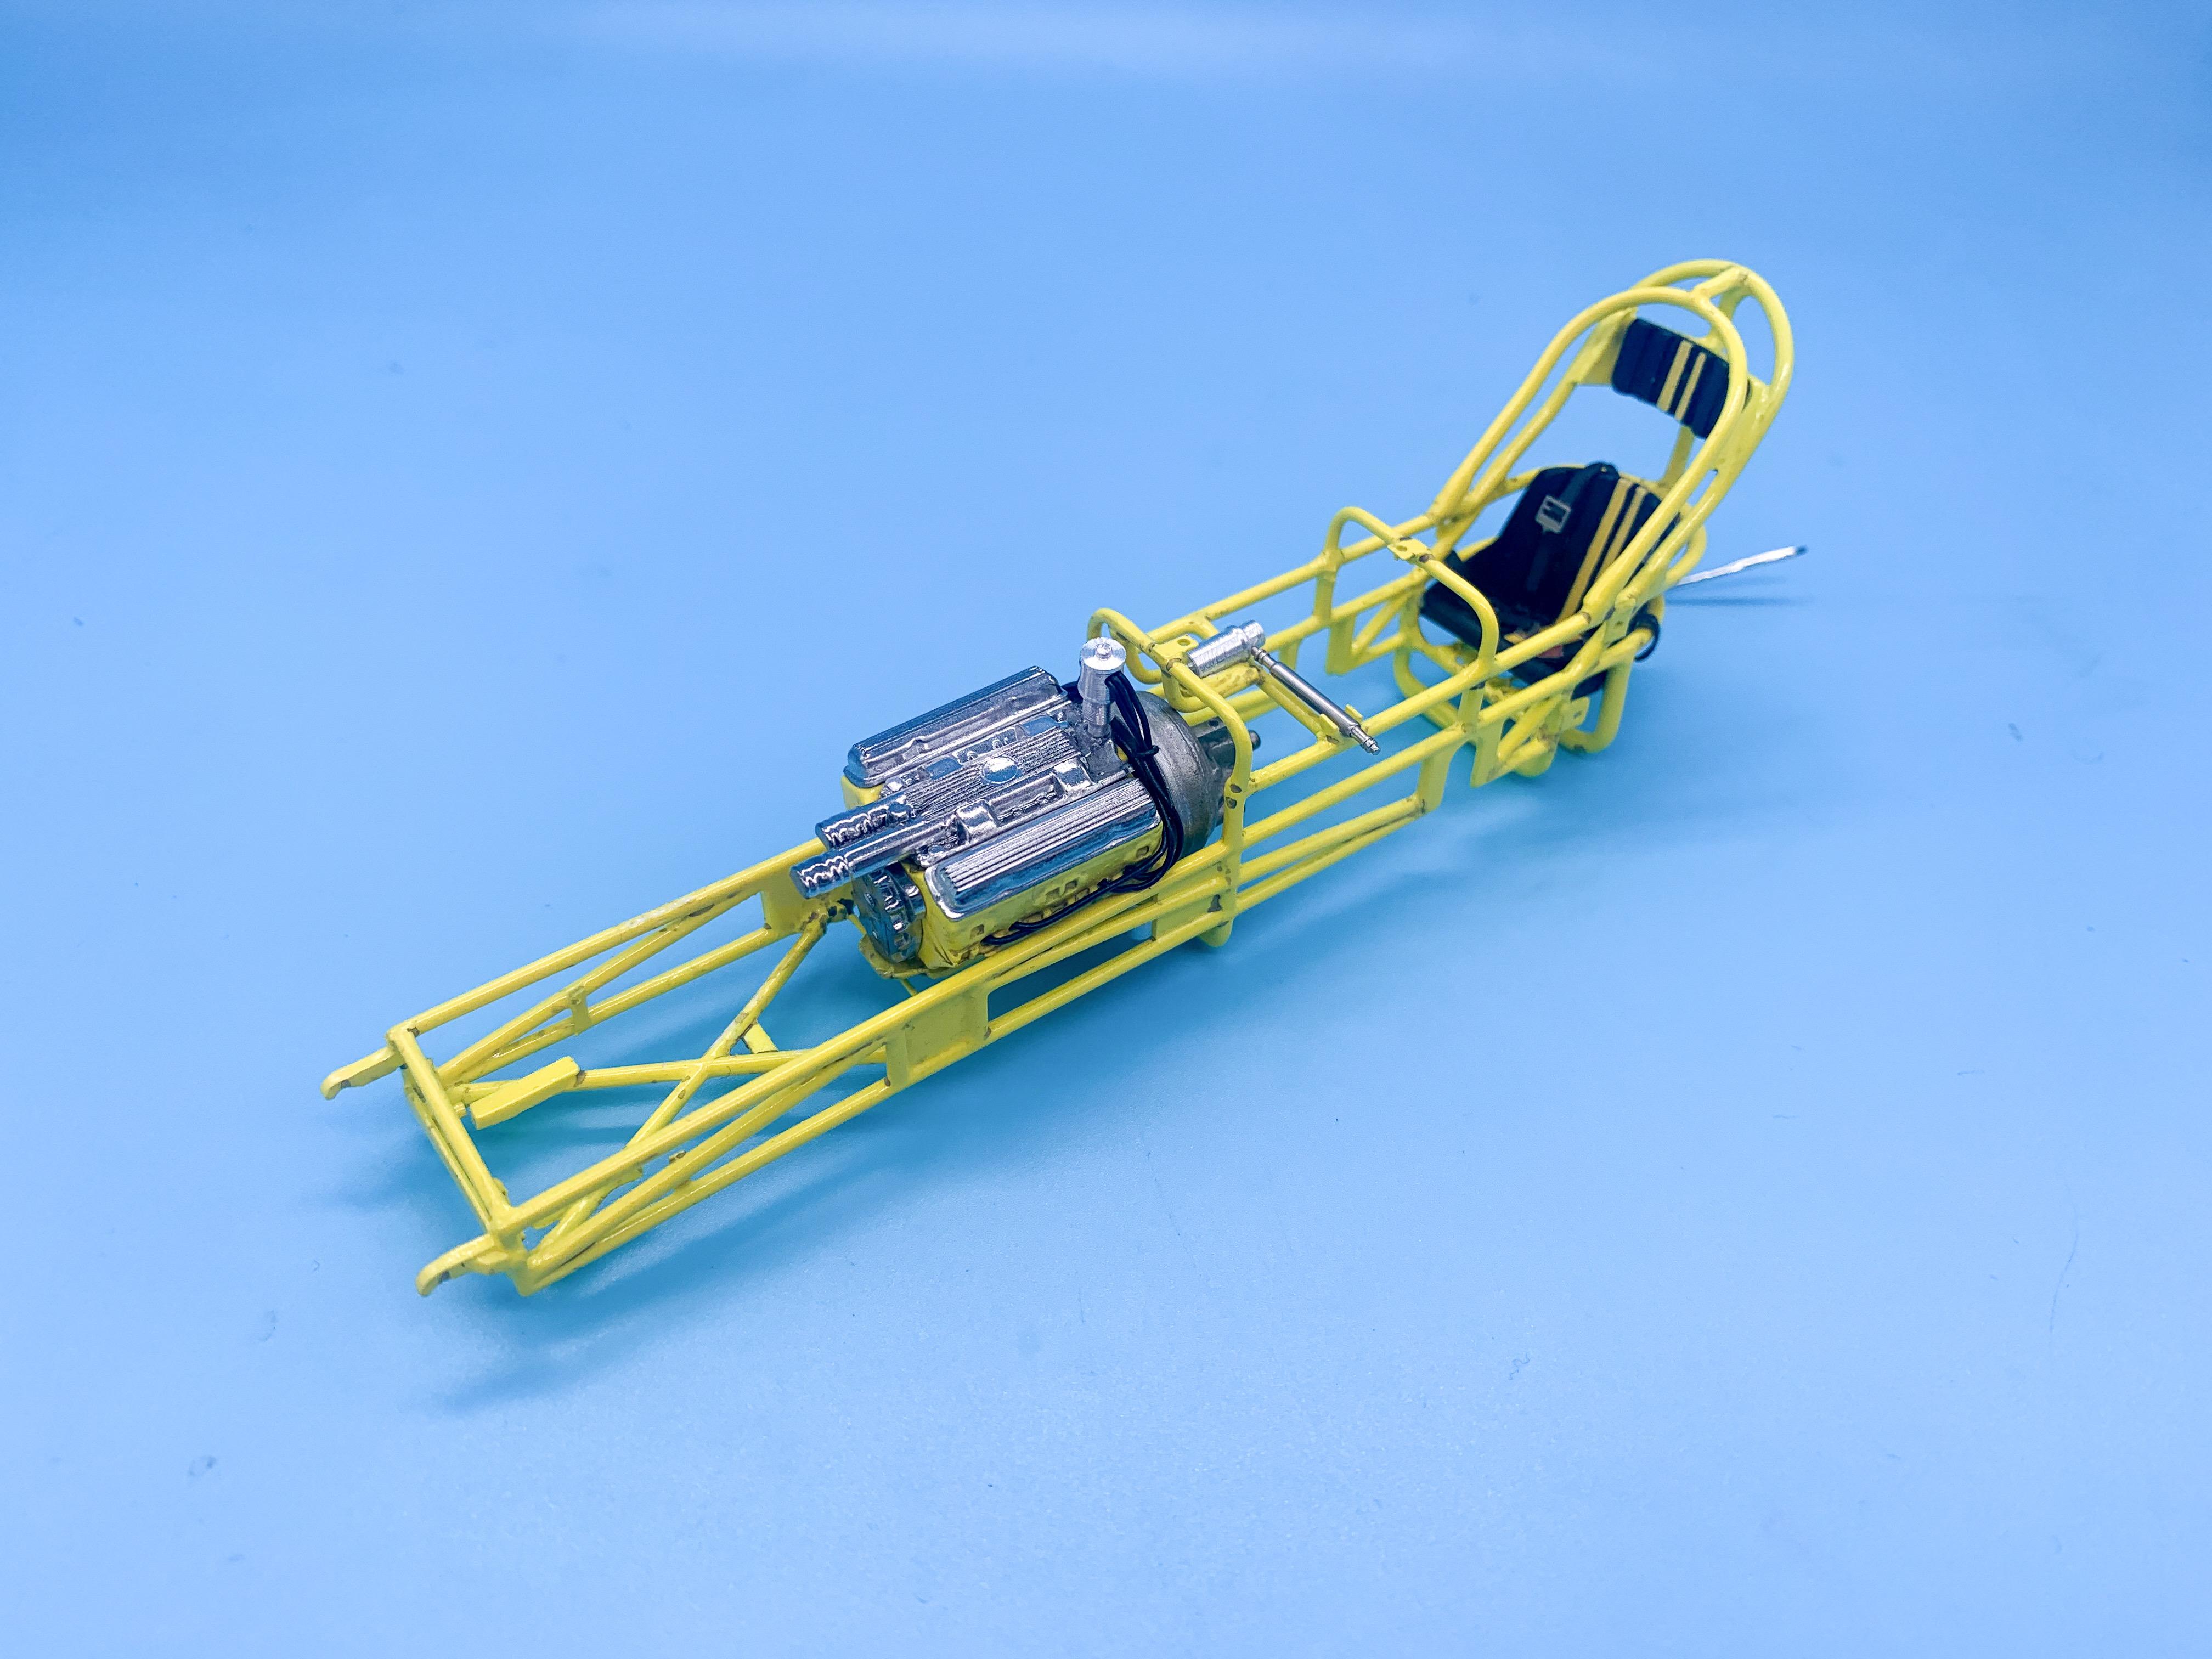
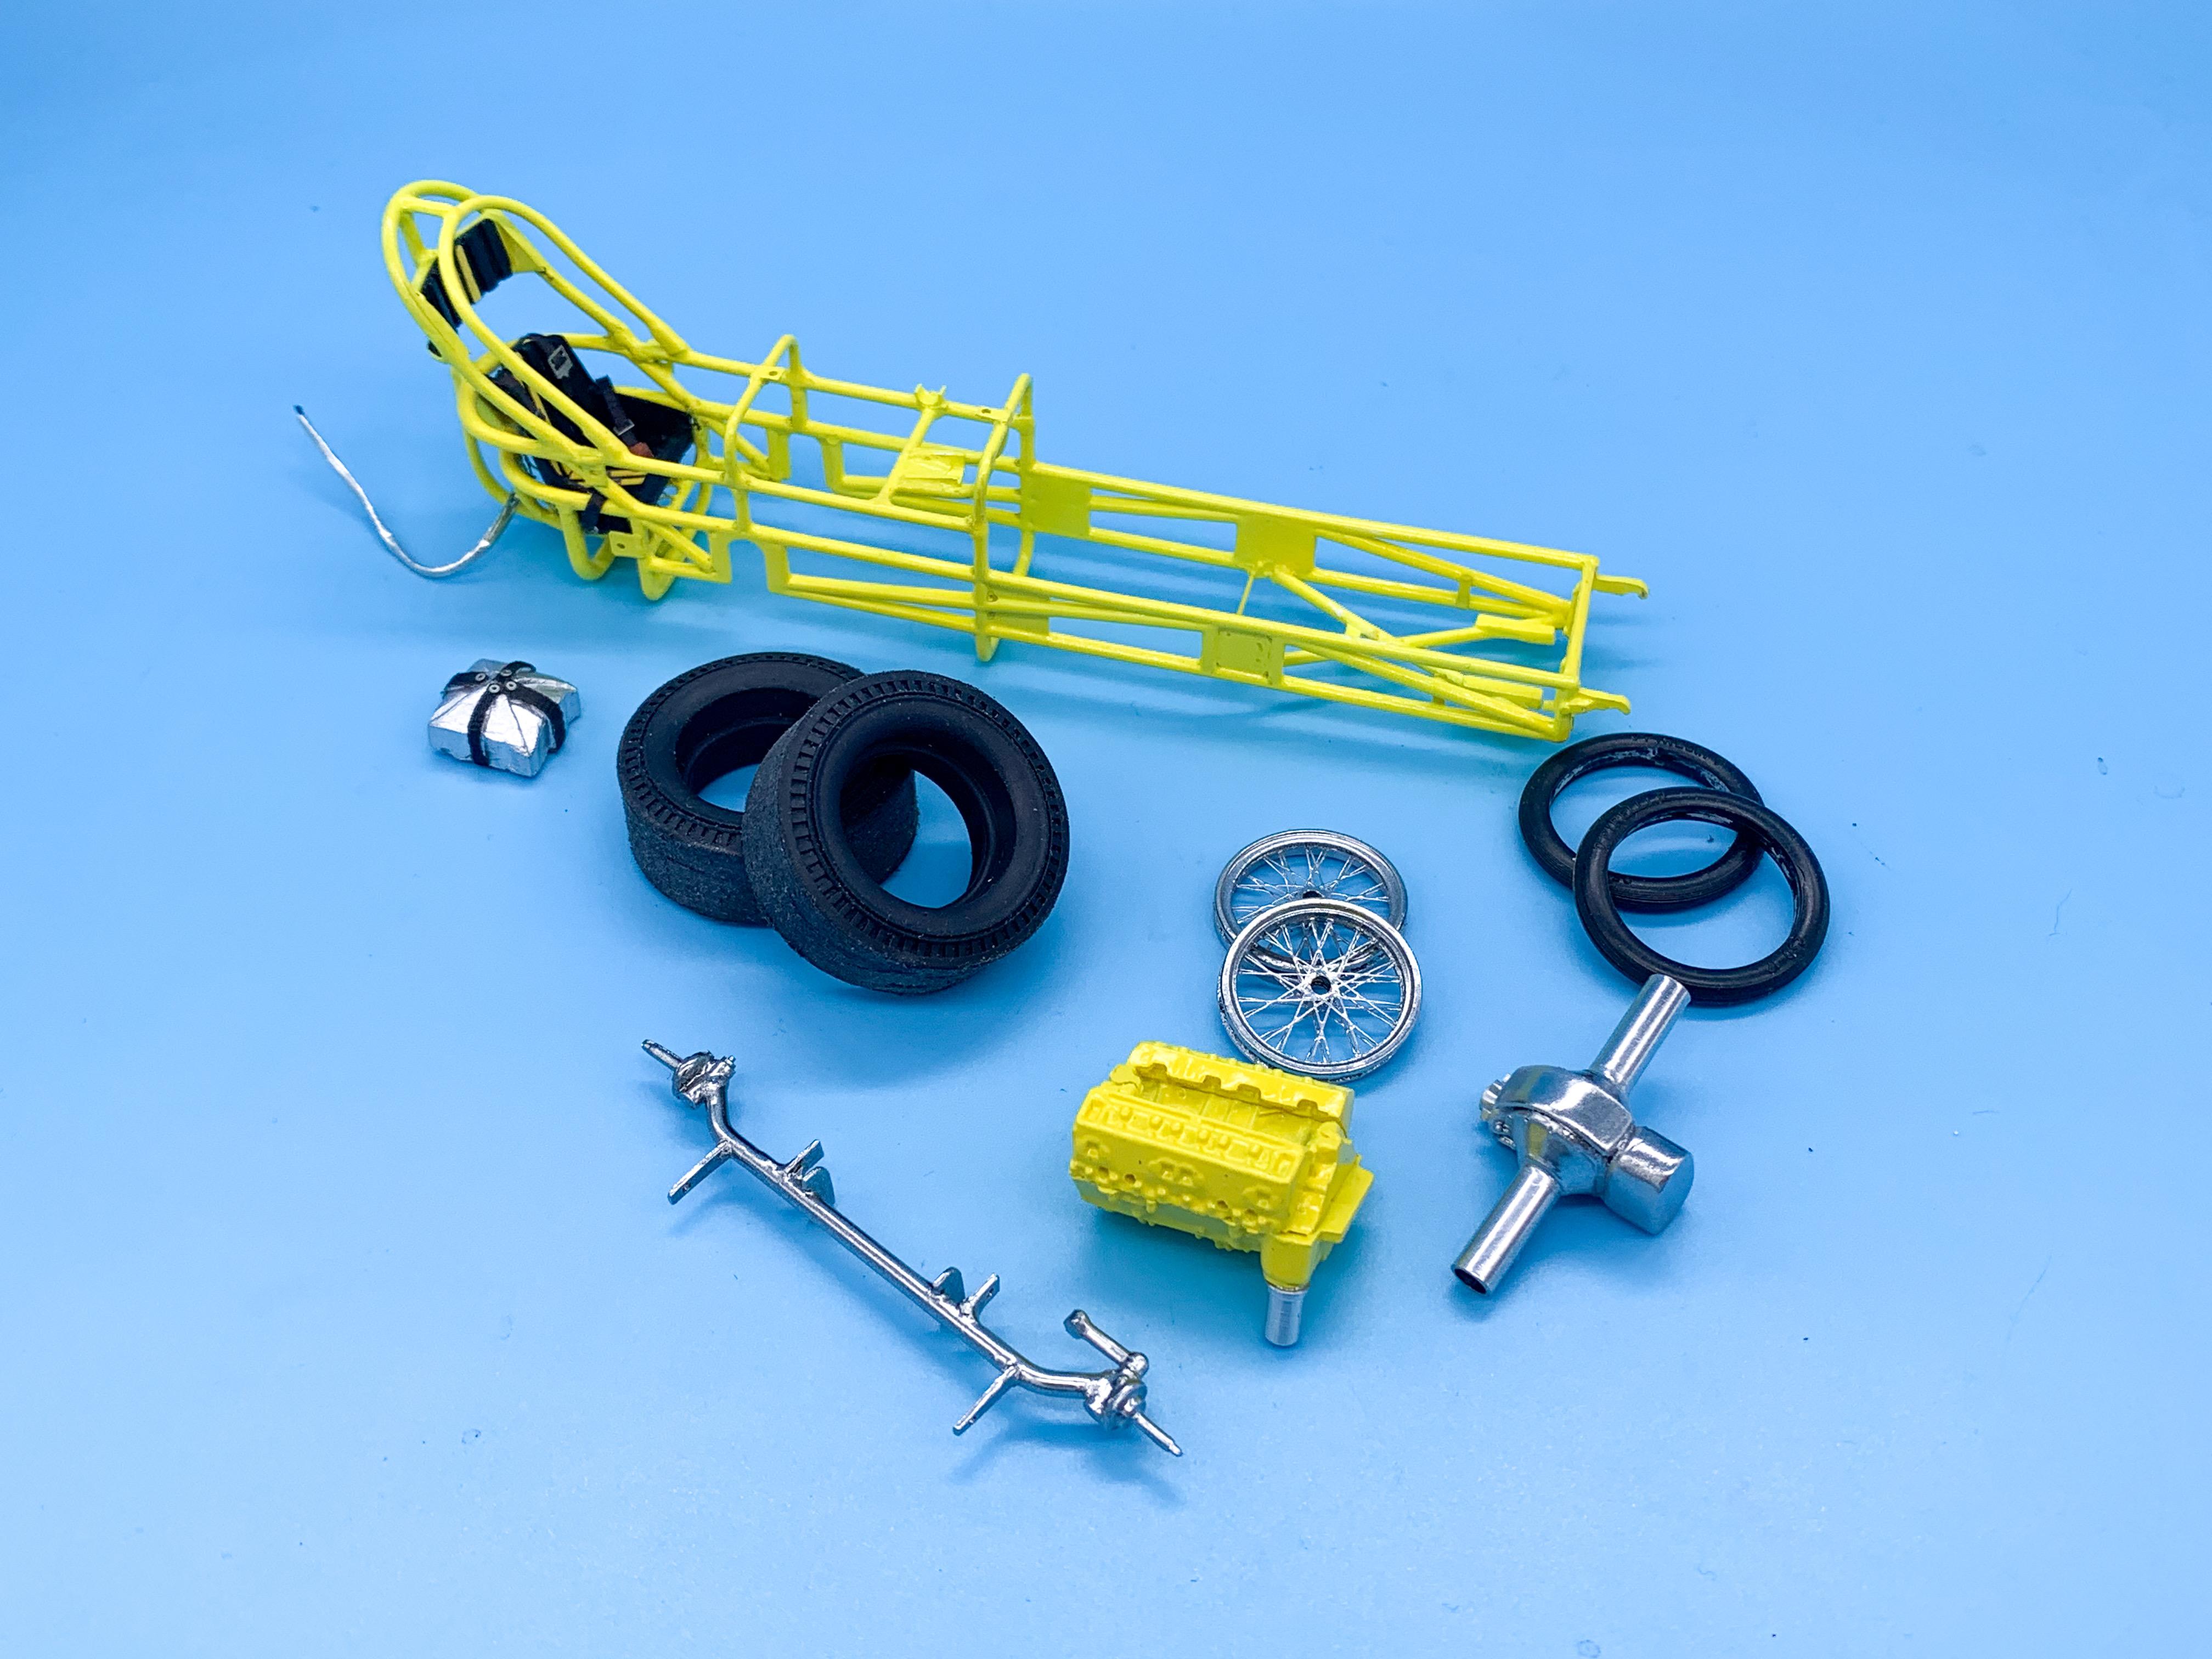
Thanks fellas! @Daddyfink - I didn’t know that kit came with a ‘chute, thanks for the info!! I should pick one of those up… Slowed myself down this week when I repainted a couple of bits that I wasn’t happy with, but made some bits of progress anyway… Got the engine mostly assembled (but with some detail still to come) and into the frame: I made some little aluminum mounting brackets to match the ones on the 1:1, but you can’t really see them now the engine’s in there…. Incidentally, I’ve been messing with using a satin black enamel base under some of my metal parts - it’s a nice way to get some variation in metal and chrome tones… Did some work on the body panels; added some material to the ‘hood’ to get that to fit a little nicer: Got all the parts cleaned up and smoothed out and started getting them into color today…I mixed up a small batch of paint to match the 1:1 because I’d like to build a hauler for this thing too and I want the yellow to match… Added the missing lug nuts to the wheels and got them ready for chrome: And now the engine’s in place I made a driveshaft shield like the 1:1 has to protect the driver - just a simple piece, although I still need to make a wrap around spring for it (not that I can figure out what that spring DOES)… Test fit to make sure everything lines up still: And that’s about where we’re at so far! Before I can install the rear axle I need to get the floor panel painted, and then figure out the pedals and THEN the axle can go in, followed by the rest of the steering assembly that I’ve started but not finished, and then once the body panels are in place I can figure out making the rear disk brakes that the 1:1 runs…got a very particular order that I need to assemble this thing in so it can actually go together…thanks for looking, more soon!
-
I know this is an old thread, but that's REALLY nicely done. Great subtle weathering and the tire rubs look SUPER realistic! Nice job @Jay!
-
Coke Fink, to hit both collector audiences ?
-
One way to find out - engage Snake-fu! ??
-
Yeah, the woody that isn't a woody (unless the wood is under the metal, I guess). And the headlights on TOP of the fenders?! That red plastic they used for those sucked too - it was the most rubbery hard-to-sand stuff I ever worked with. It was like trying to sand a pencil eraser. Glad that one came back in a more 'conventional' form later on
-
Wow, this stuff must be pretty magical - I should get this drum of the stuff: https://www.walmart.com/ip/Methyl-Ethyl-Ketone-MEK-55-gallon-drum/831293952 ?
-
That's interesting - I didn't know that. I assume Boyd didn't want any non-Boyd wheels included in the kits. Figures, I think the largest chunk of his business was from wheel sales...
-
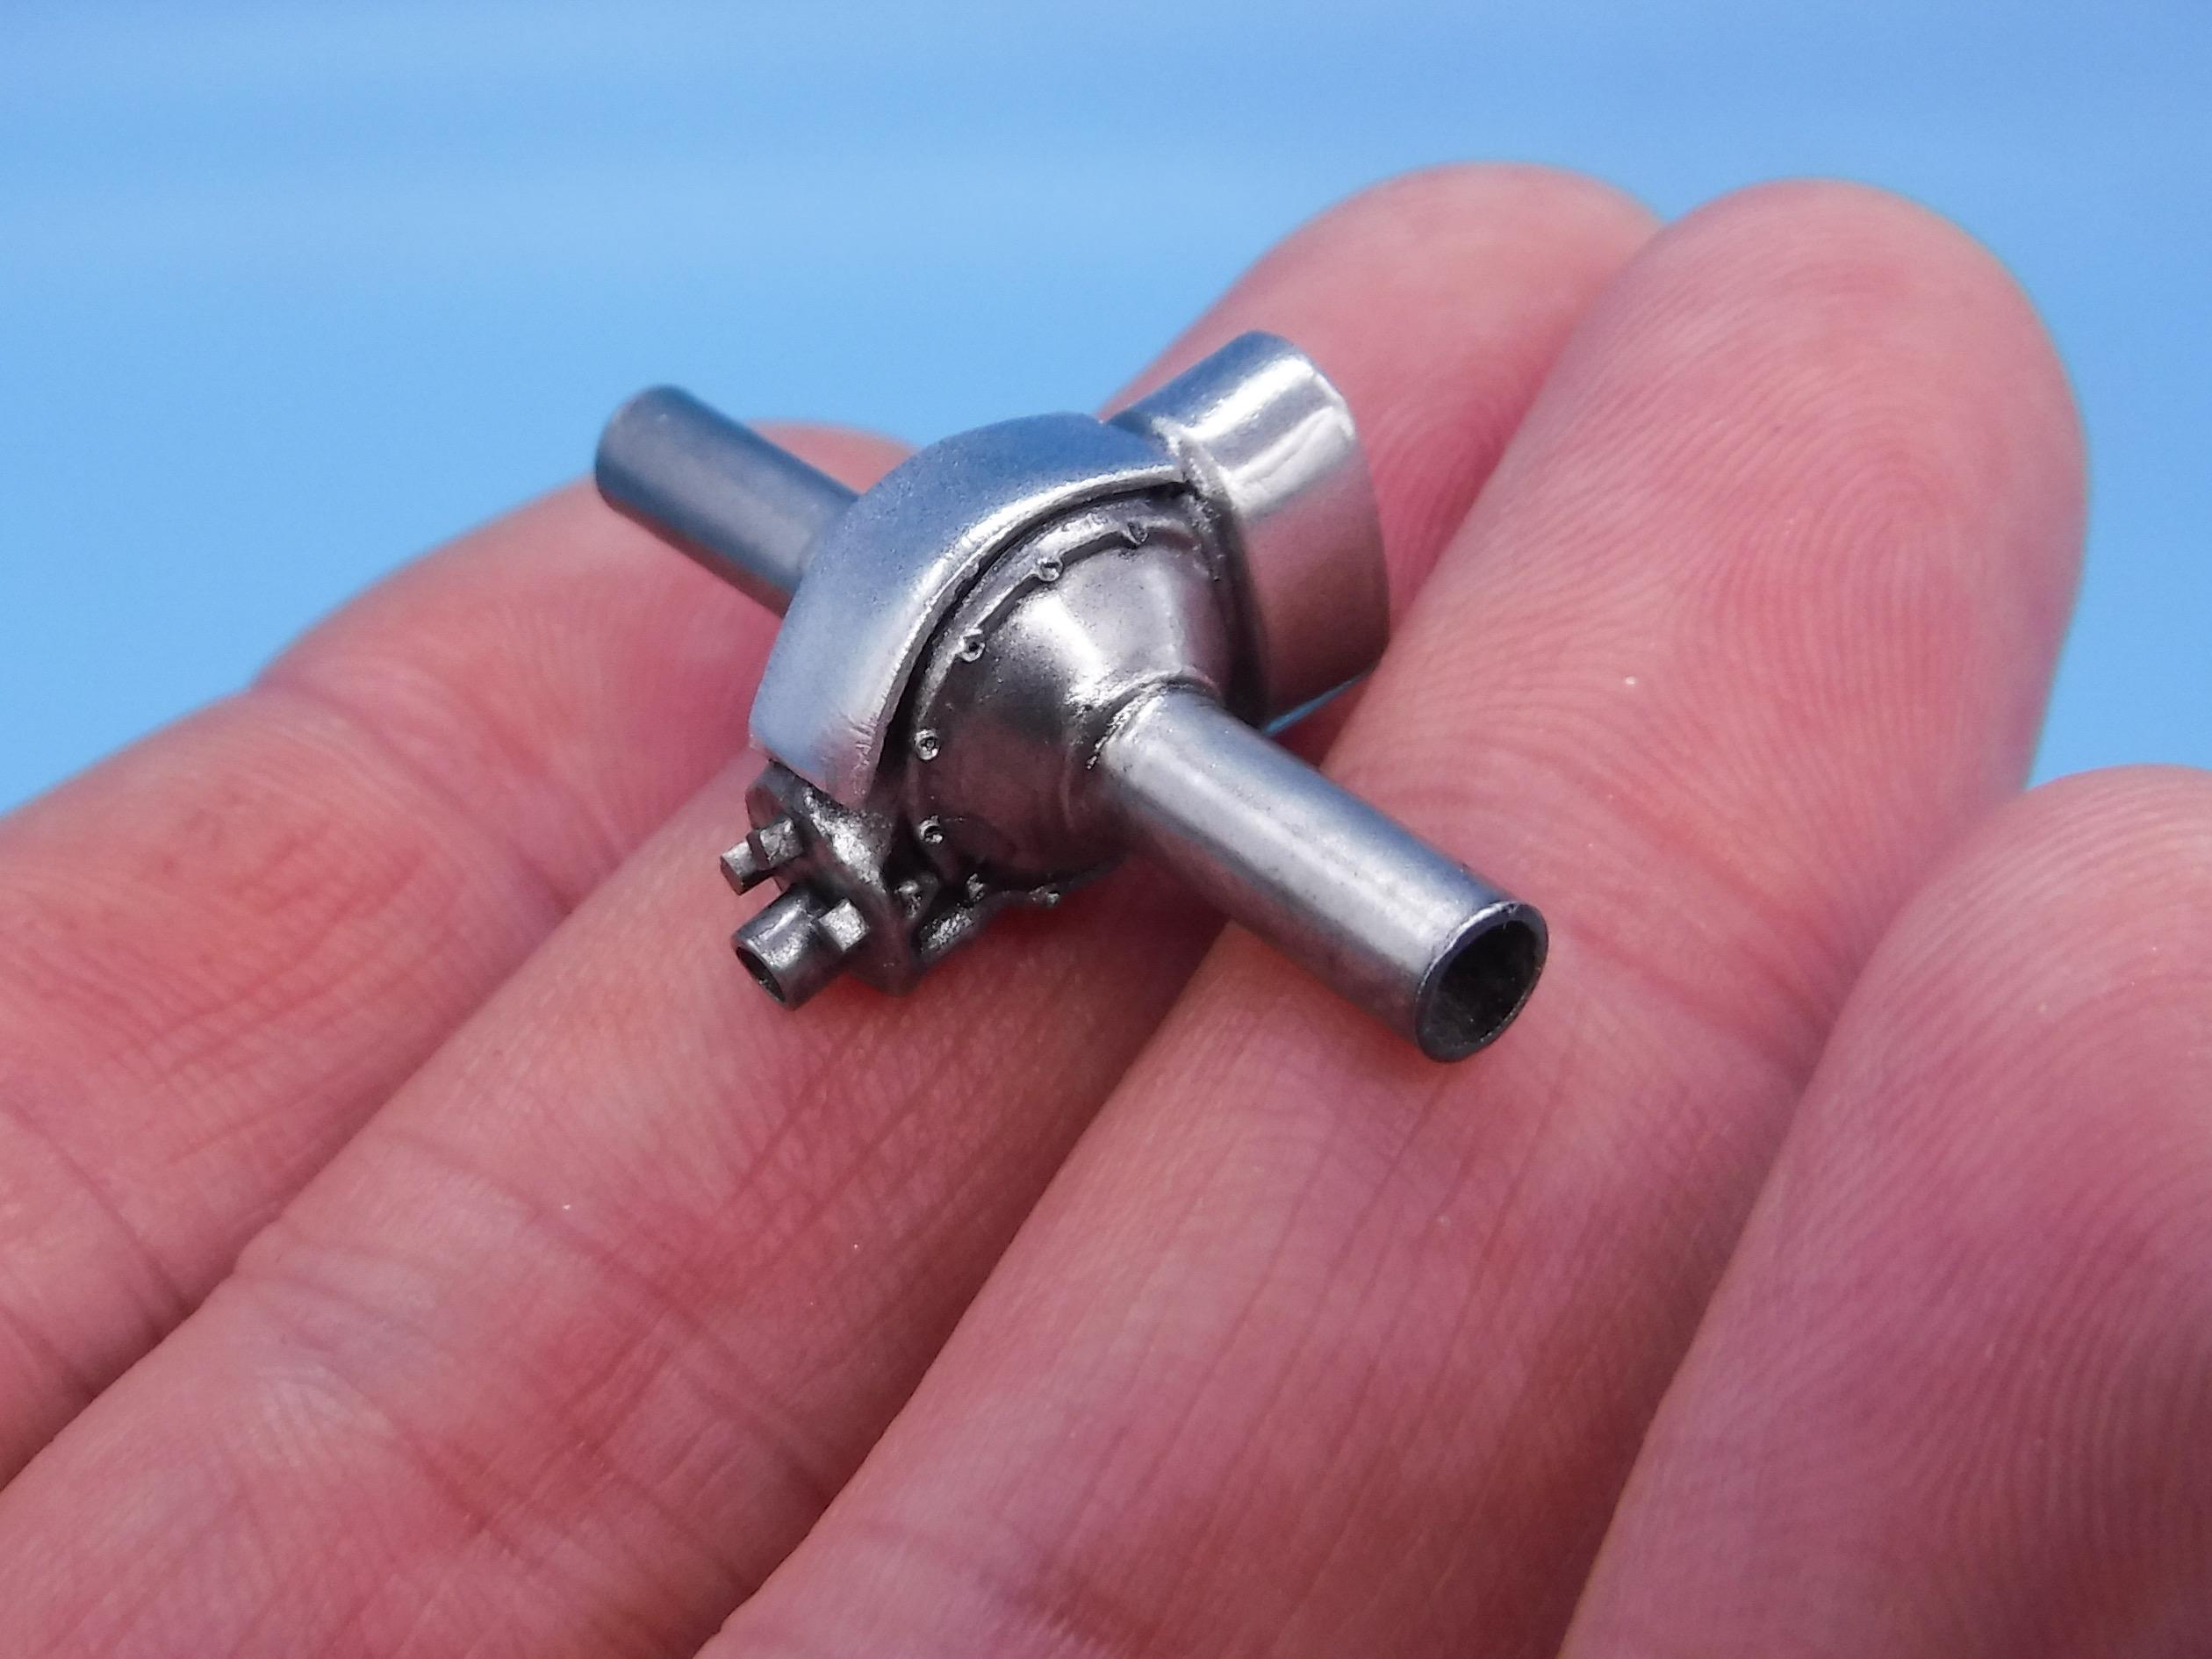
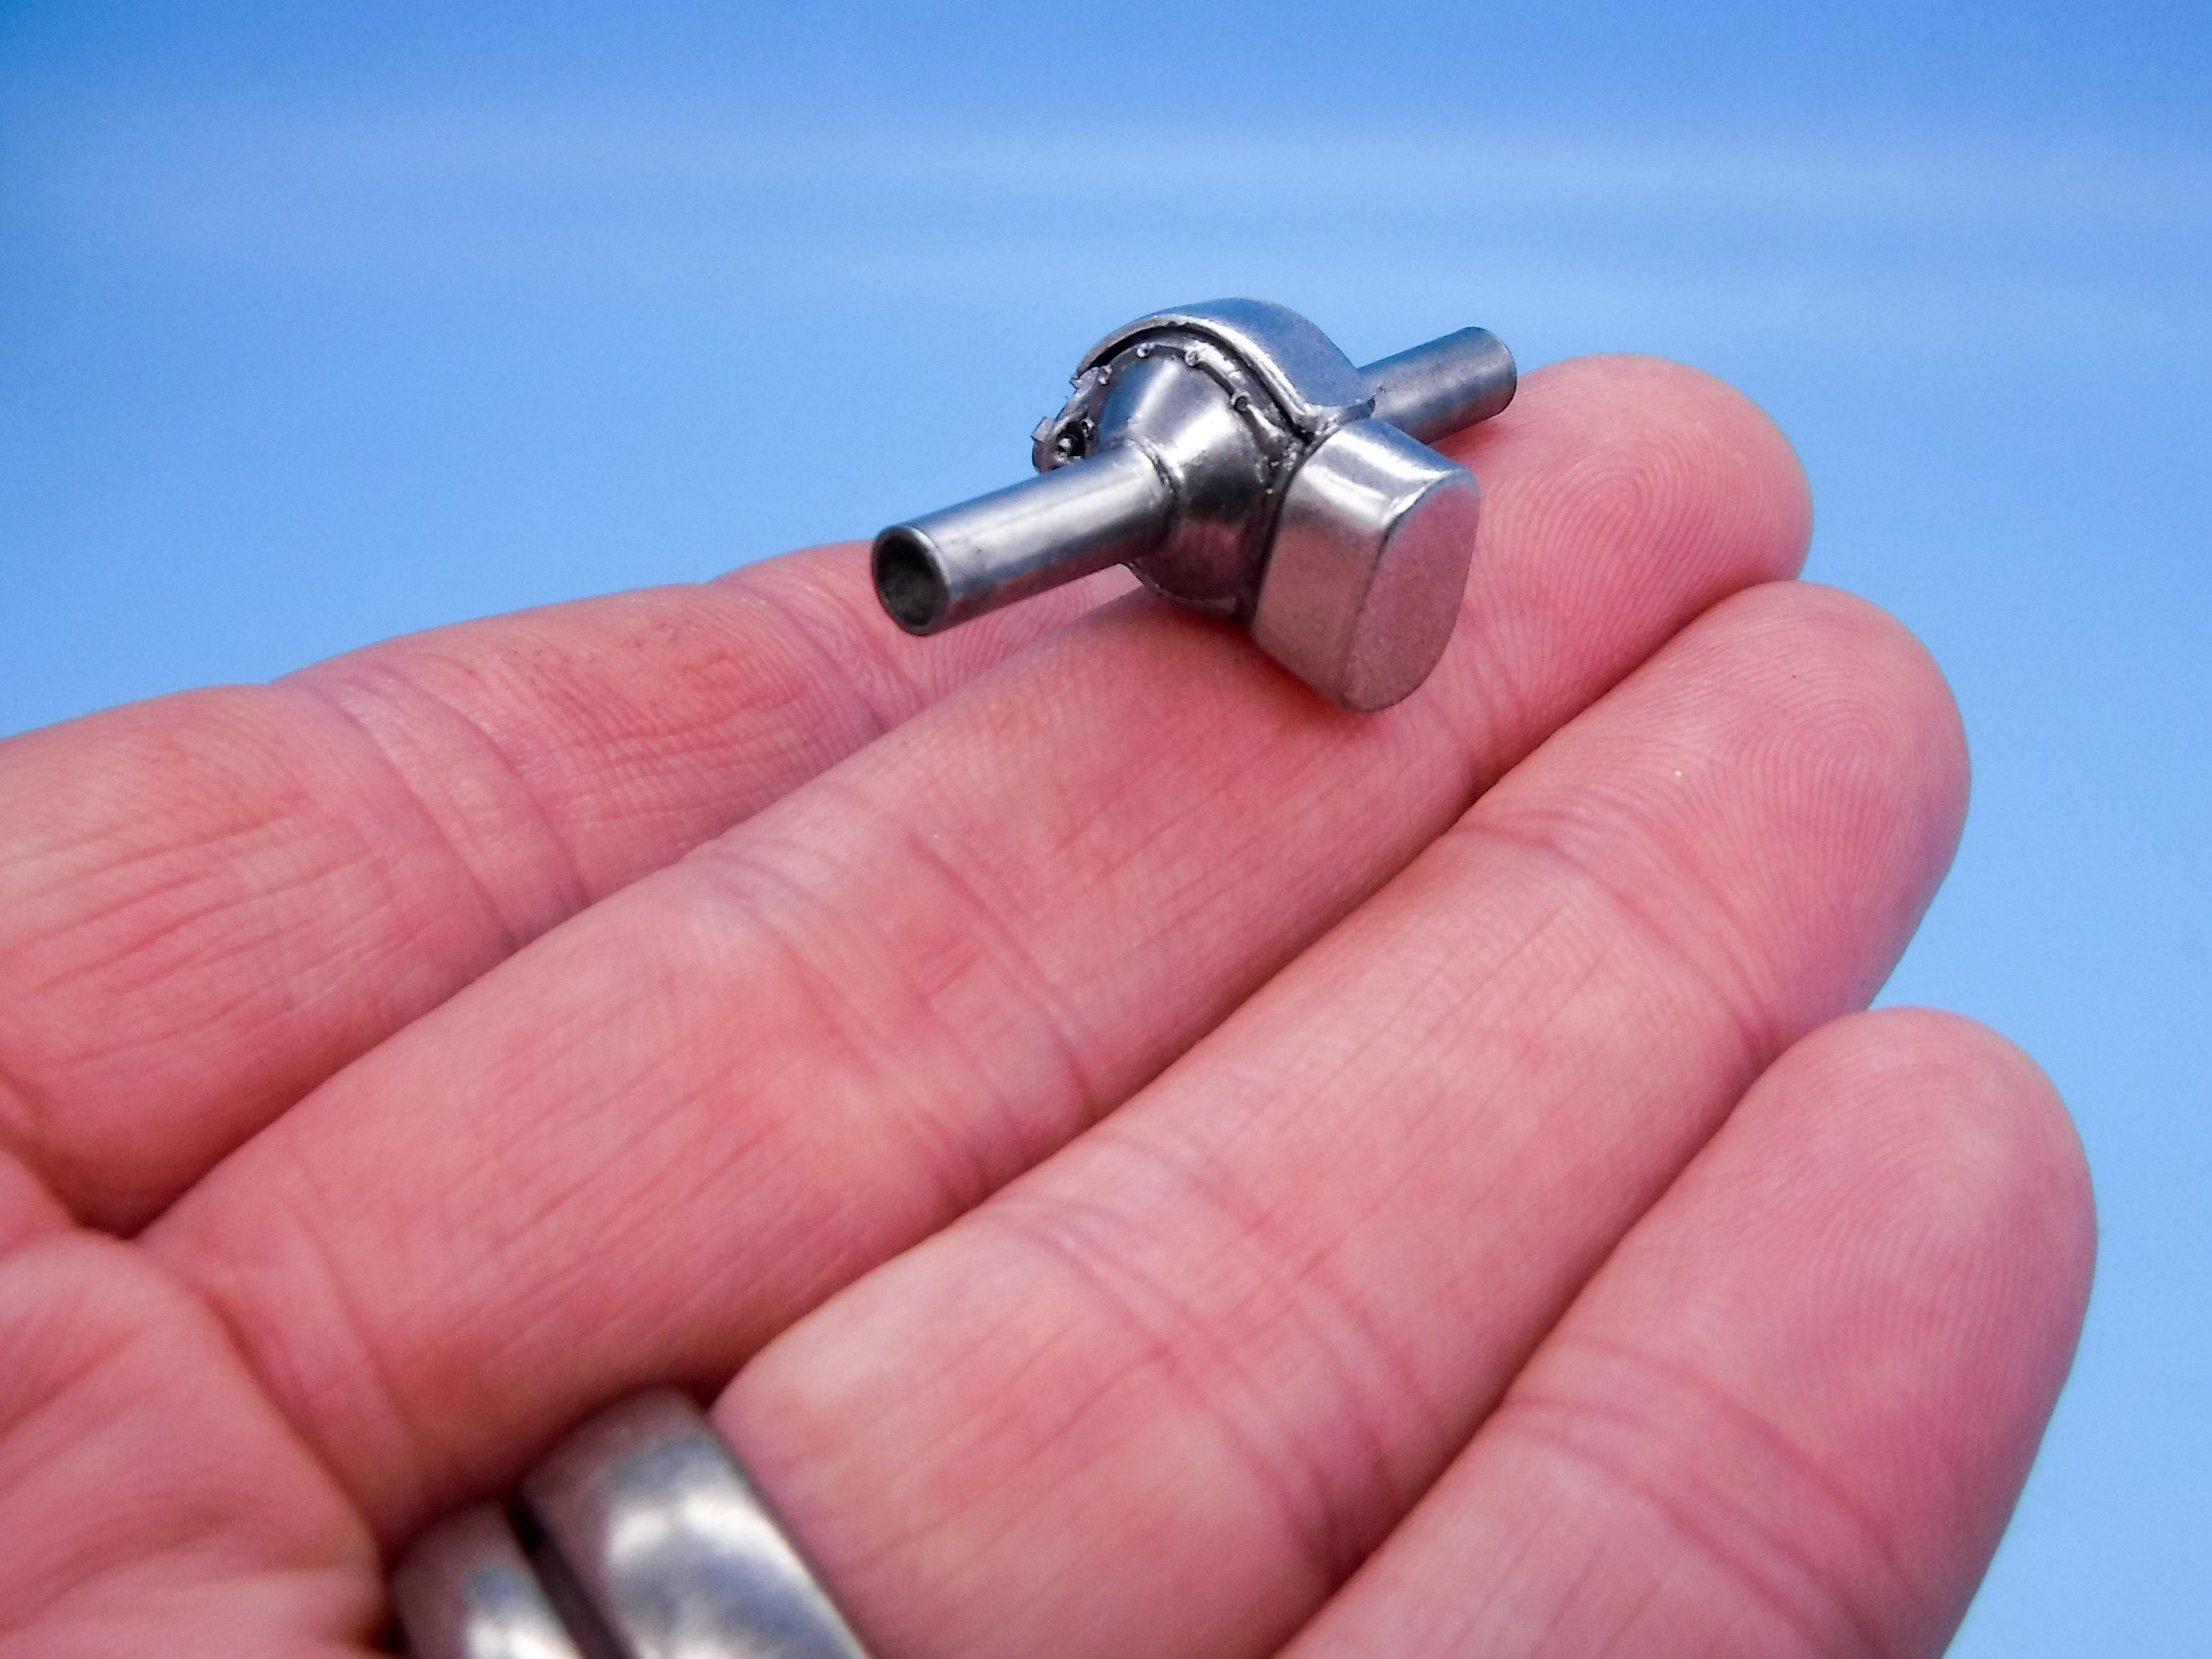
Yep - and in the case of the Boyd '57 Chevy kit (not sure about the '55) it had a rear axle where shafts on the housing angled upwards and had molded-in CV boots to get the ride height lower - it was like a cross between a conventional axle and independent suspension. They did some weird things to get those huge wheels under these kits... ? EDIT: Haha, Mark and I both posted about those weird axles at the same time. Great minds...
-
I'm gonna go ahead and predict we don't see those Boyd parts back again, although I don't think it looked as bad as some of the other Boyd kits that AMT put out Better than this thing, anyway...
-
Is that Nomad the same kit that became the Boyd kit at one point? It had big ol' 24" wheels and rubber band tires and whatnot
-
I HATE that - have they got CCTV?
-
Those Woodlites look AMAZING! Nice job!
-
Back 10 years ago or so I was designing plastic components for a company making aftermarket parts for 1:1 cars. My job, loosely put, was to take existing plastic components, reverse engineer them, see what improvements could be made (and identify if there was a viable market for an upgrade part if we weren't making a straight bolt-on replacement) and then design the part. I must've seen 50 different times a case where a part would be run out of nice high-quality material (new virgin plastic pellets, no color added or recycled material) and the piece would be fine - and then they'd run the production pieces on a lower quality material or start mixing color into it and it would cause issues. And I'm pretty sure that's what happened with those E-type bodies too, with the warps and sink marks...they get the part figured out in CAD, cut tooling, make test pieces, adjust...and then somewhere down the line someone comes up with the idea of using colored material or something cheaper and you start seeing weird issues like this. Sink marks where there weren't any before, parts warping when they come out of the machine, brittle or fragile material etc. etc. If I was Revell first thing I'd try on these (and the E-types) is ditch the colored plastic and try regular old white. I'm sure they don't care what I think tho, and I don't claim to be an expert in their processes...just recounting some of my experiences with this stuff... ?
-
I like the stuff those Hoonigan guys make, but I can never make it through a whole video of theirs. It’s like they all drank too many energy drinks and they’re excited that someone’s filming them…and then when they edit the video it’s so jittery and weirdly-edited that I can’t sit through an entire one. Maybe that’s how you keep people’s attention on YouTube or something - and I guess it works for them ?♂️
-
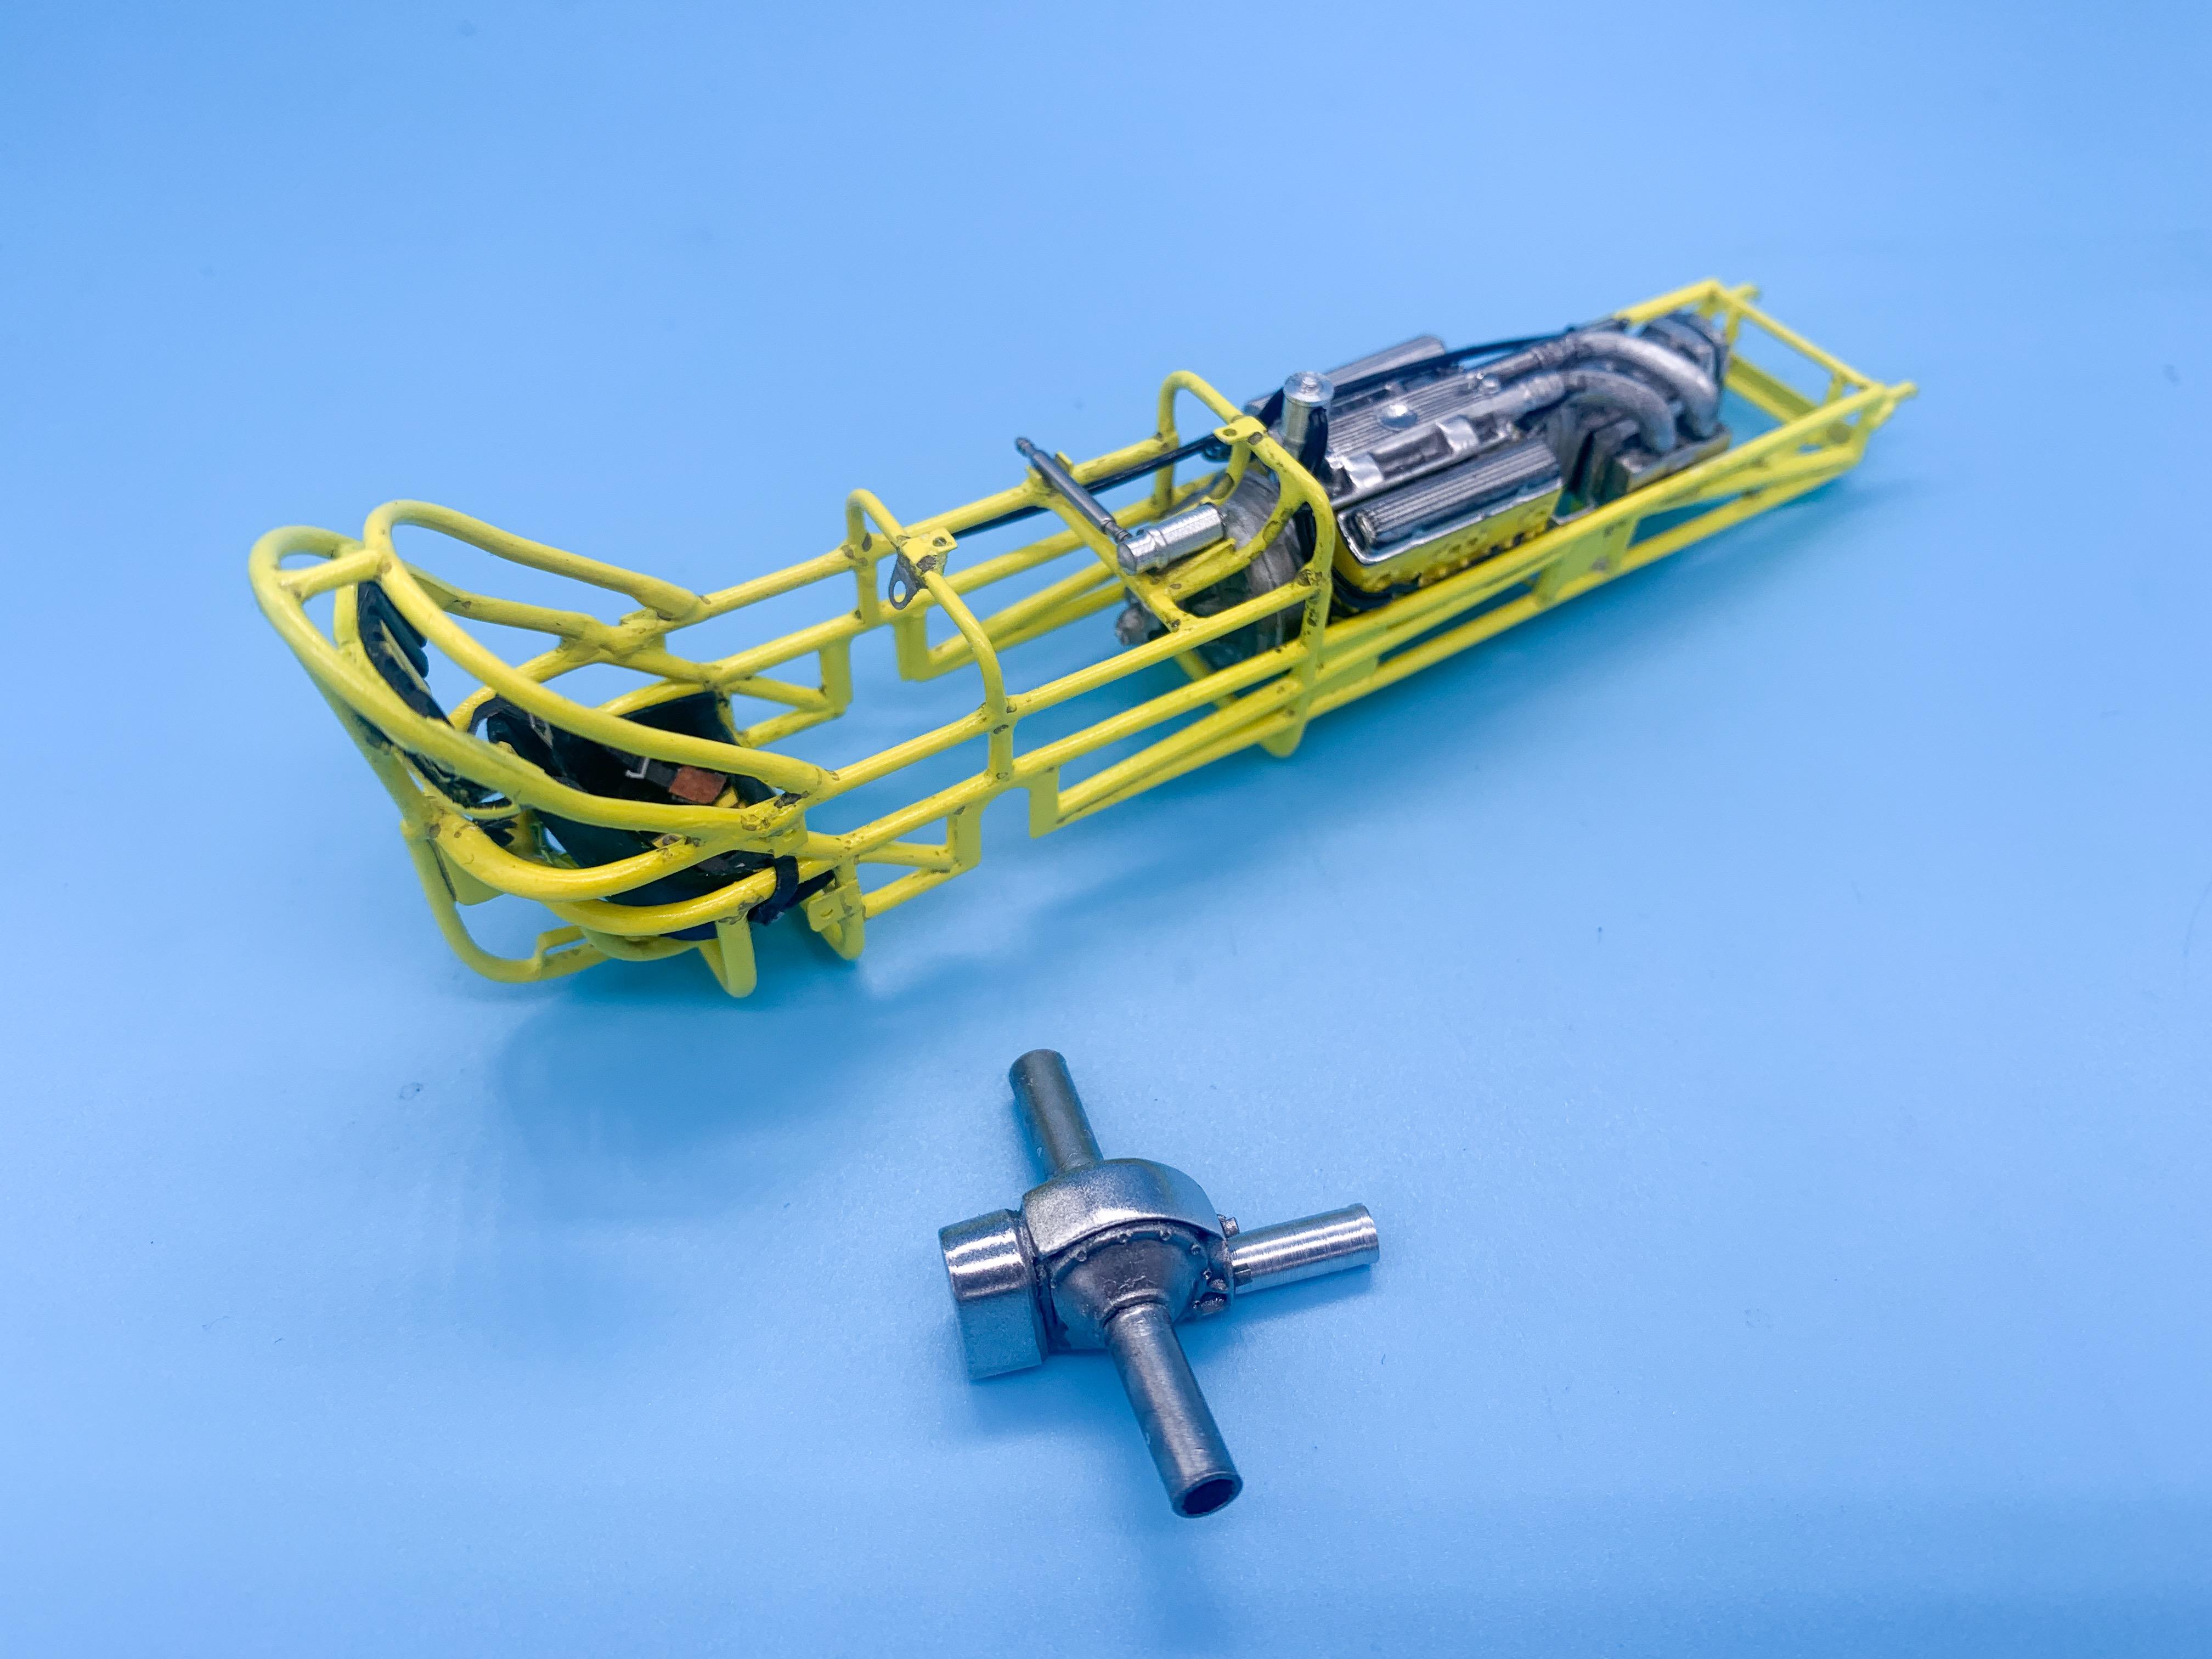
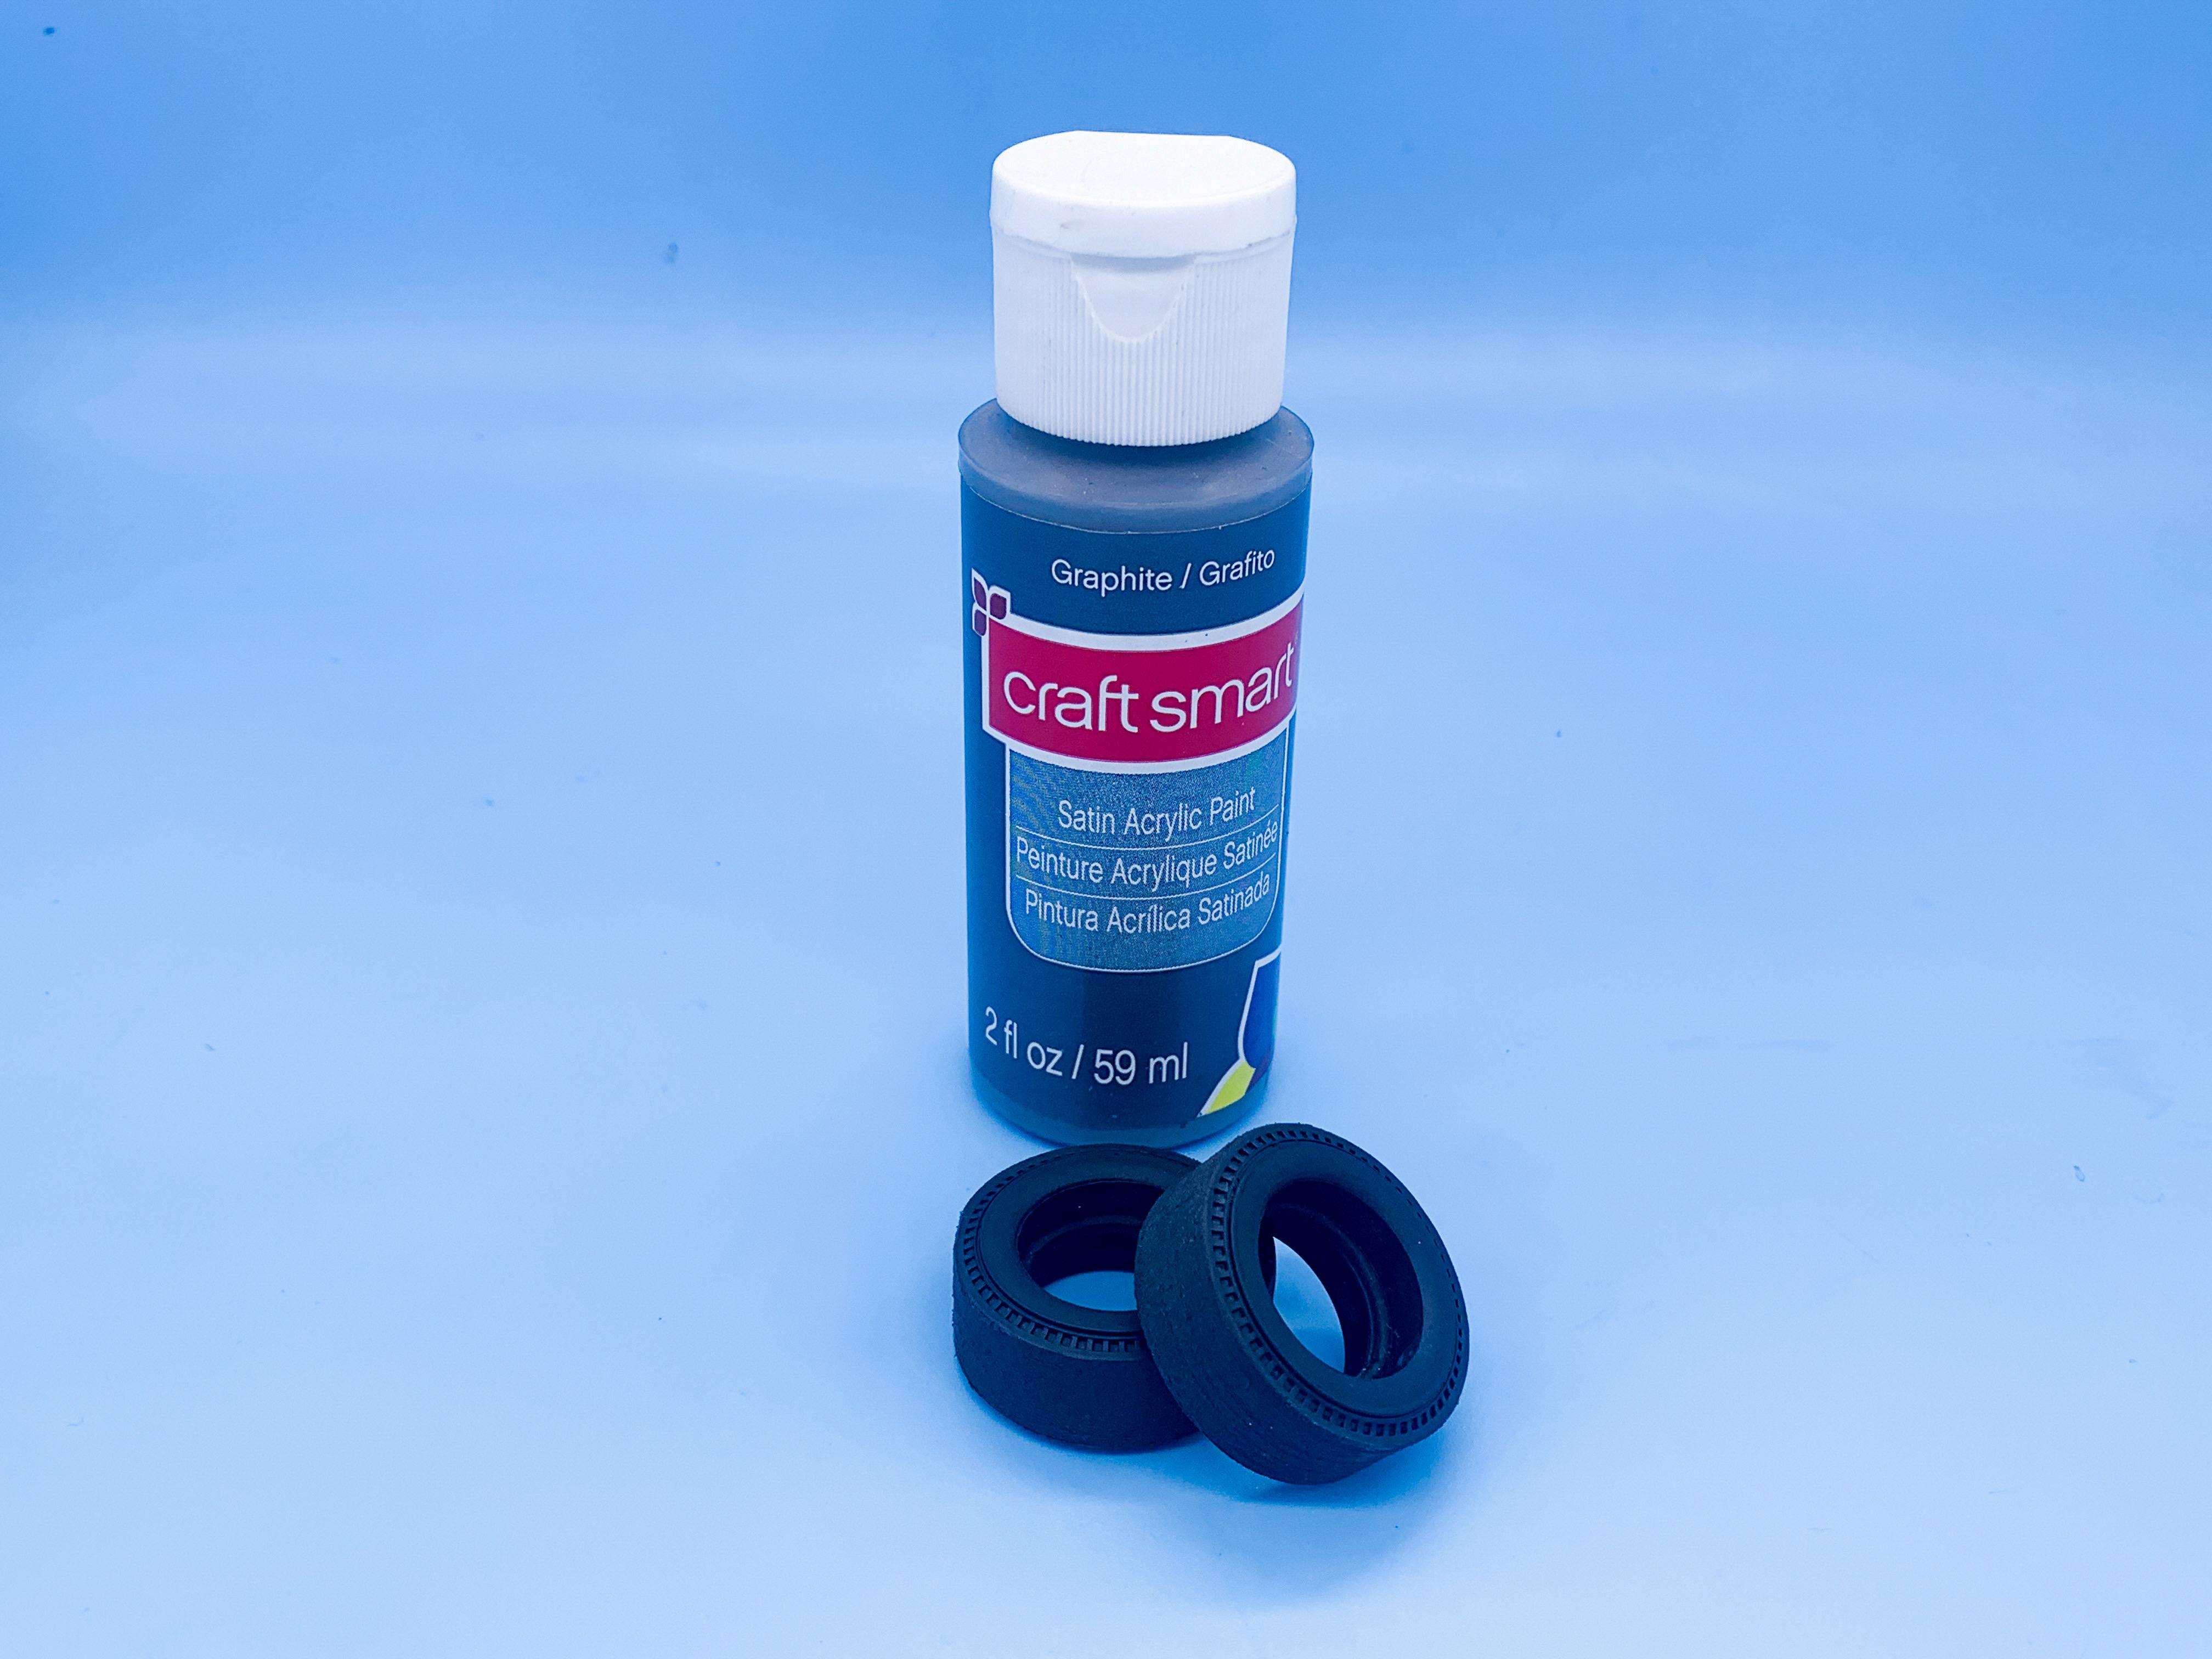
I would like to see someone build that version! Cool! A little bit of progress today… Started layering washes onto the tires to dull down that shine and make them look more gray-rubber than black-vinyl: Added some detail to the intake - used some photoetch added fuel lines and that larger line at the top replicates the hydraulic throttle setup that the real car has: Started some assembly on the engine and made a magneto on the lathe: …and then got the plug wires installed: Gave a very light wash to the frame - not going for ‘dirty’ on any of these parts, just trying to add a little depth and realism: And a quick mock-up for my own amusement: I REALLY want to get the front and rear axles installed, but I know that’s asking for trouble without having the engine locked down first…patience grasshopper! More soon!
-
That’s a healthy list! I’m looking forward to seeing those short track oval cars especially - love stuff like that!
-
This is gonna be a great looking build - way cool!
-
Love these threads! Thanks for posting one of these again Snake! I started to make my 2022 list yesterday…I got these as an early Christmas present from a buddy, so they’ll be fairly high up the list: Im working on my Mooneyes dragster build - would like to wrap that up this month: I’ve been working on a 34 truck that got put aside so I could finish up some of my ‘21 builds, so that’s on the list for this year too, and on top of those I’d like to build the following: - A replica of the 1:1 Mooneyes ramp truck - A kustom Impala - A gasser of some sort - maybe a Henry J or the new Mobius Nova - A funny car - probably the recently re-issued Atlantis Tom McEwan car - A dirt modified - A couple more hot rods - Whatever the NNL East web theme project is (even if I don’t end up making the show…but I HOPE I do) - Maybe a Beetle? I’ve had a couple of VW ideas bouncing around my brain lately. I have a dune buggy T idea in my head too… - A dirt oval car - I did one last year and I’d like to build something for it to race against Lower on my priority list, if I get to them are… - A 70s rail dragster - An AMC Gremlin with an aircraft engine - A Bonneville streamliner Catch you guys in 364 days and we’ll see if I managed any of these! ?
-
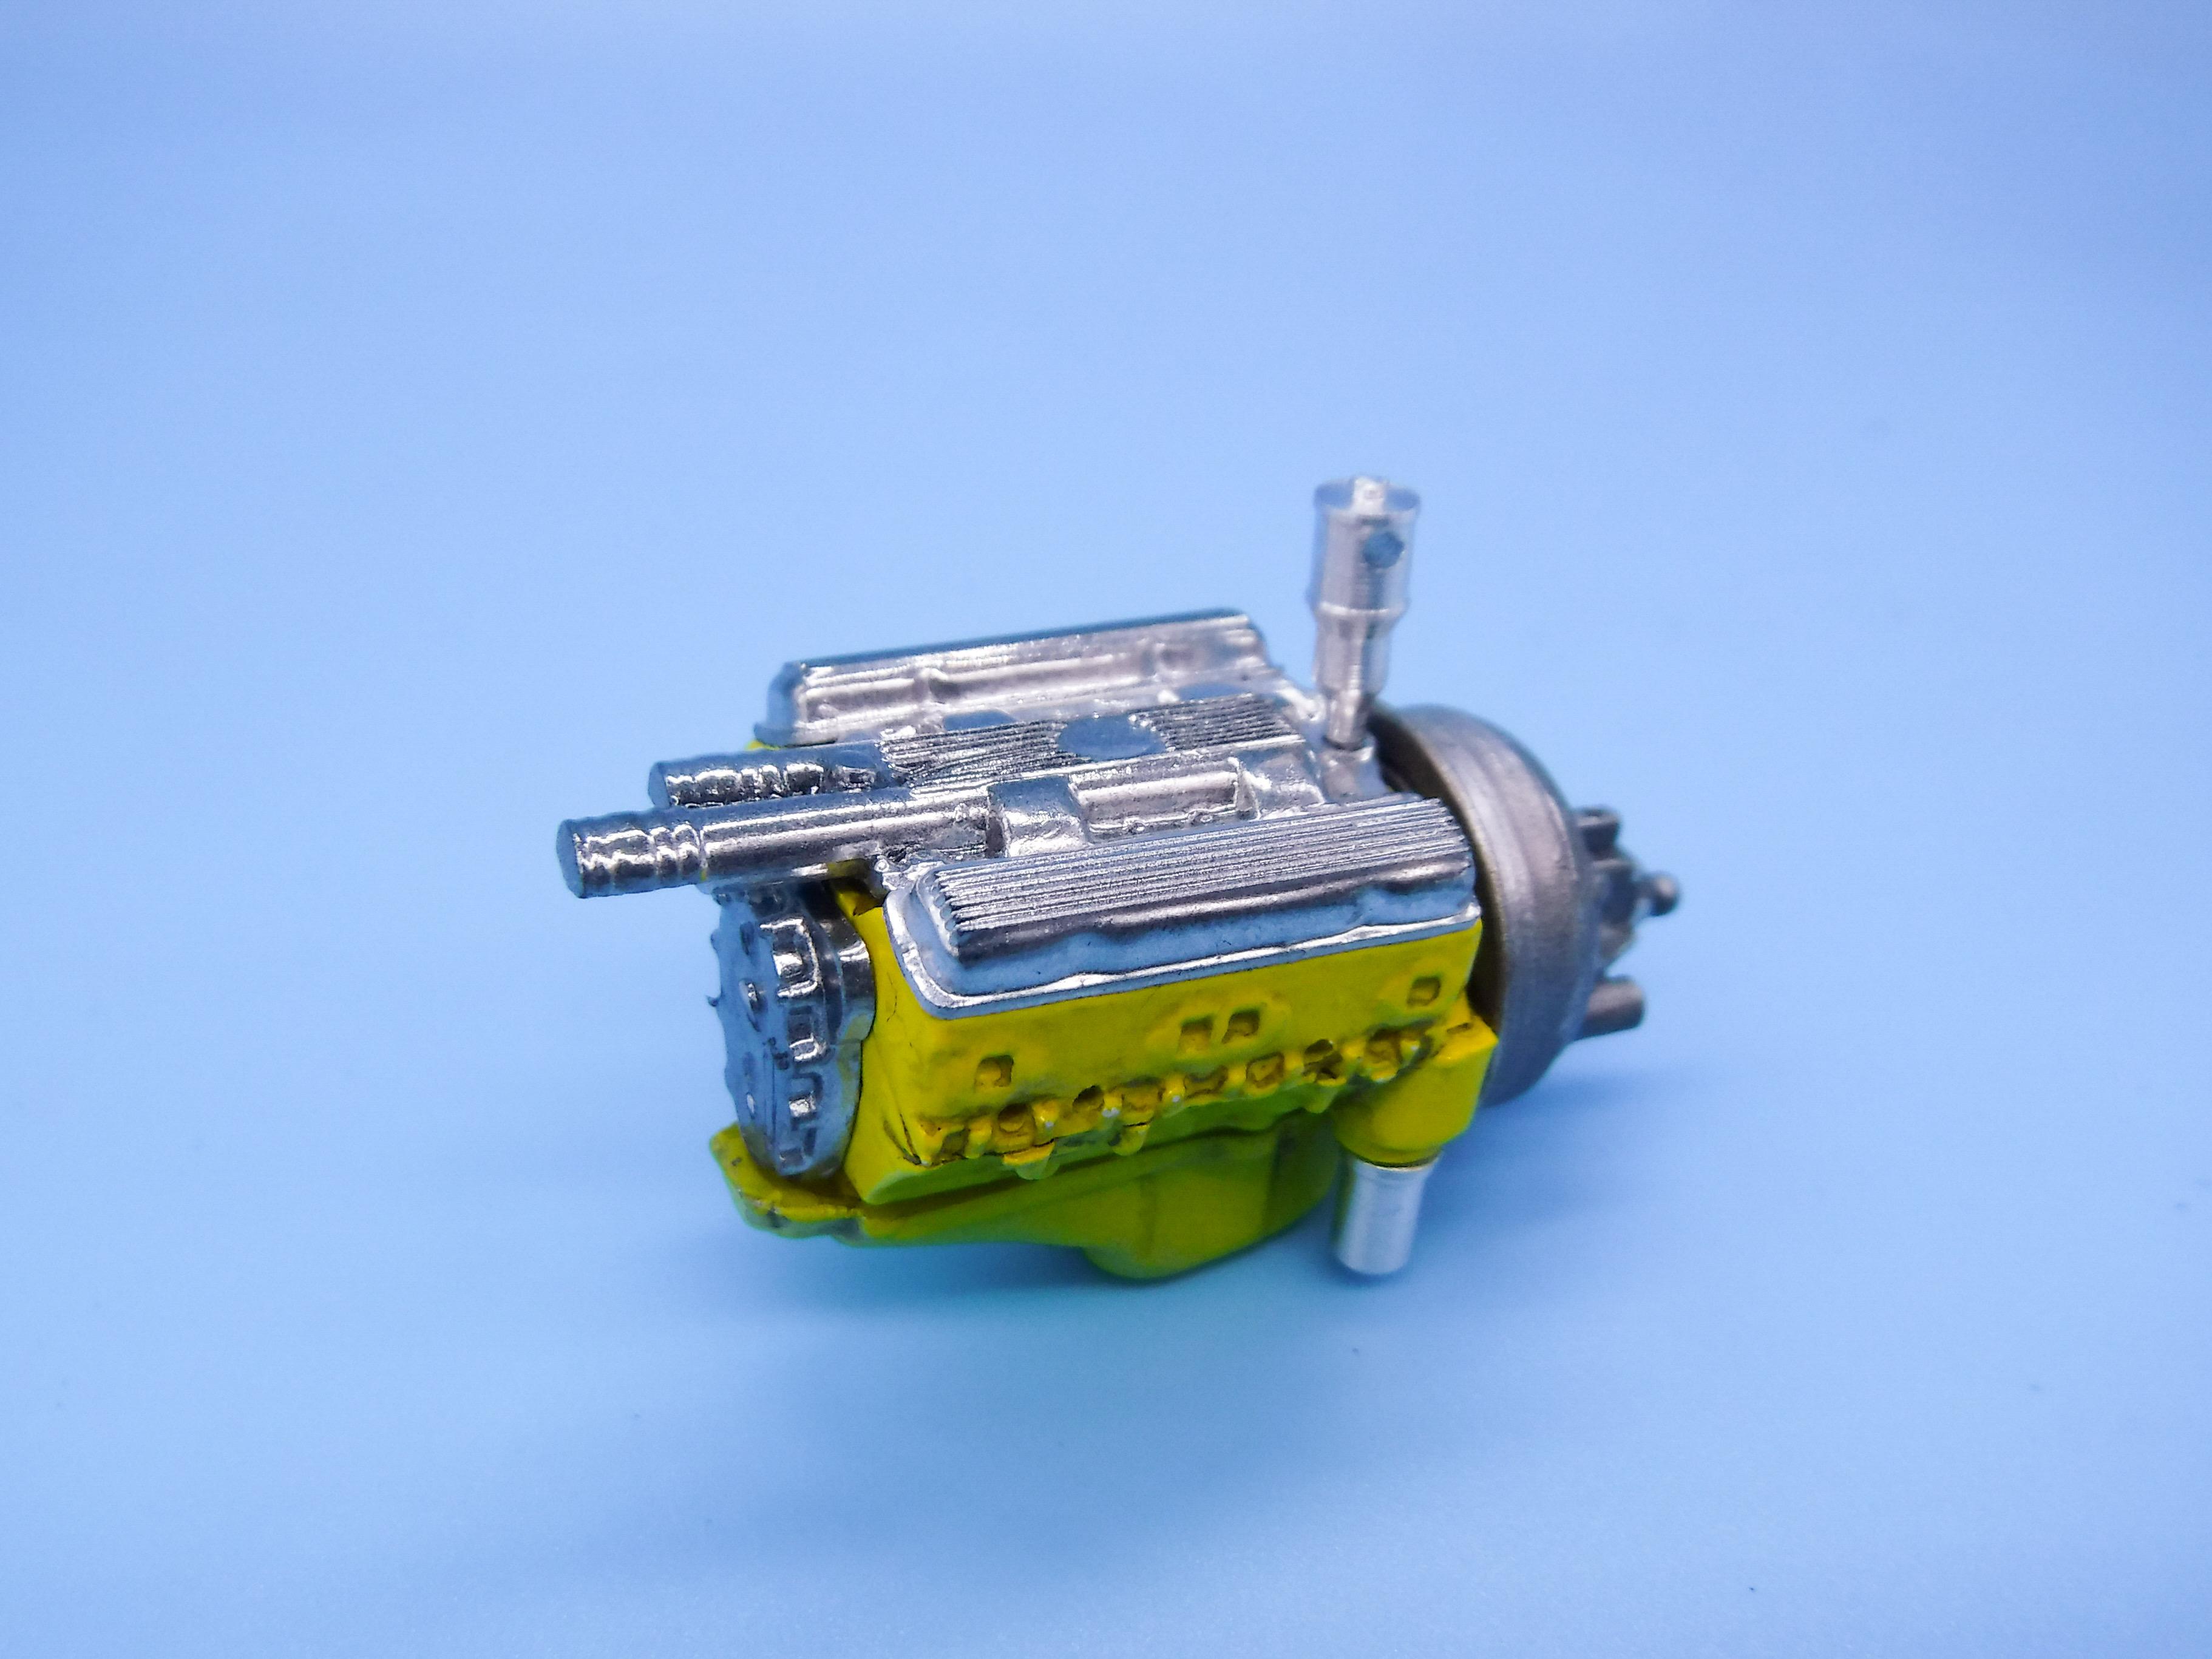
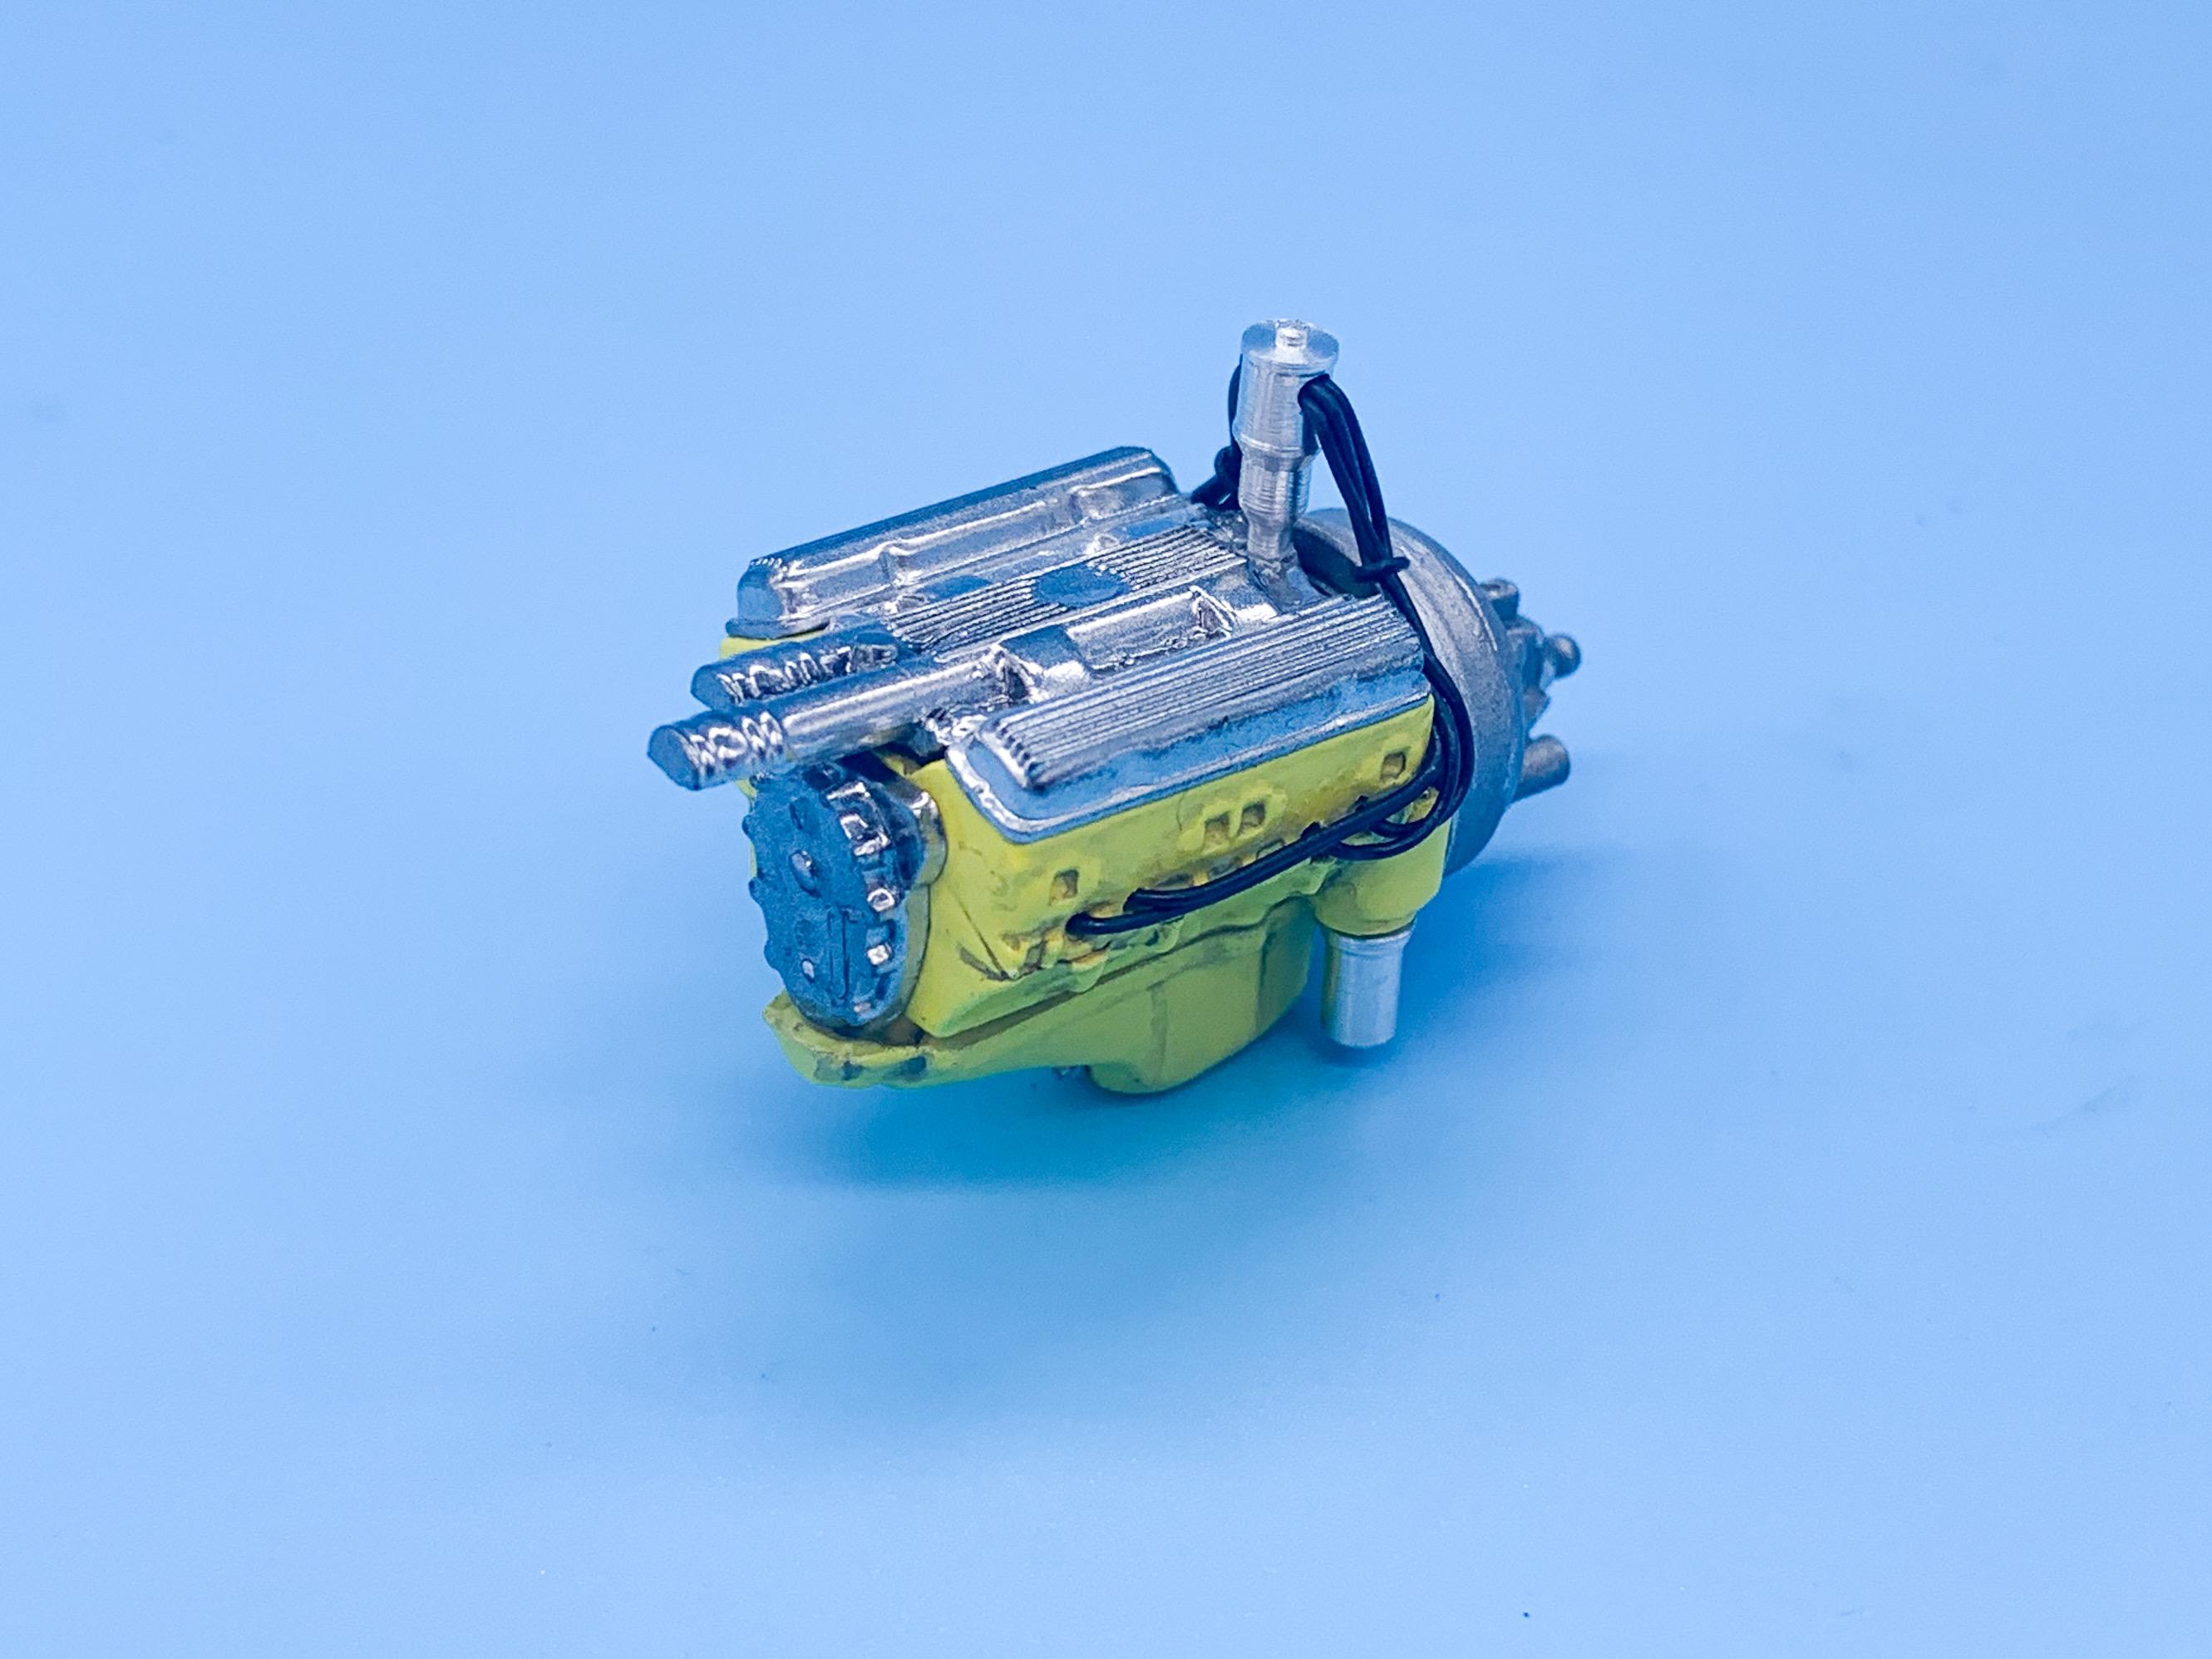
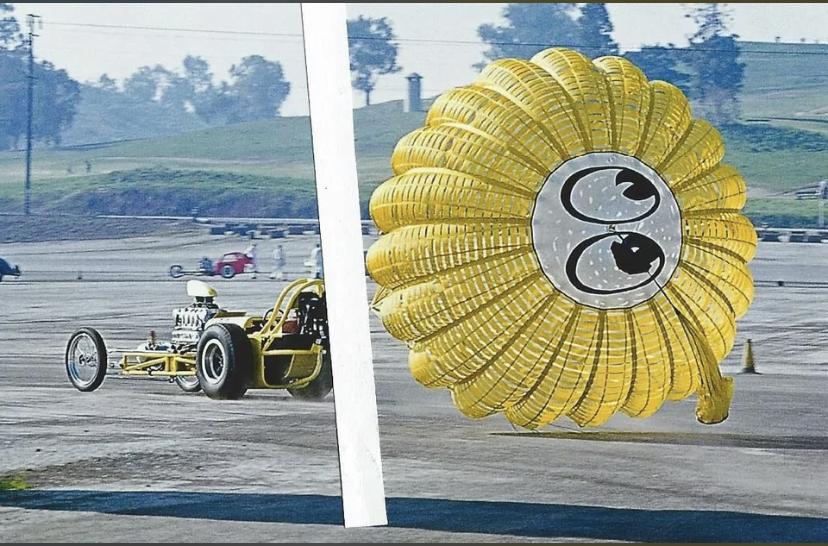
Thanks fellas! Here’s a cool thing - an early version of the 1:1 with a more conventional blower setup and a cool Mooneyes parachute! I can see myself falling down a rabbit hole and doing like five versions of this thing just to have all the variations… Did a little light weathering to some of the mechanical parts today getting ready to assemble the engine - I drilled a drain plug hole in that oil pan and added a little Titchy Trains bolt, and then added some light washes just to give some depth and interest: Shot some of my favorite black enamel on a bunch of pieces and got them in Spaz Stix chrome ready for a light buff and some washes tomorrow before starting to assemble the engine - plus I shot the trans and some other little parts in some metal shades too, whilst I was at it… The Quickchange in the 1:1 is a regular old steel Quickchange with a chrome cover over top, so I shot that in chrome first and then thinned down Vallejo steel acrylic with Createx thinner and gave it multiple brushed-on coats to give a subtly different tone to the metal of the axle compared to the chrome accents - came out ok I think! As some others have noted about this kit, the new real tires are nice but they have some pretty decent sink marks in the center of the tires - I spun those down on my lathe today and managed to fix that and tomorrow I’m going to start laying down some washes of gray and black to make them look a little more realistic…more soon!