OldNYJim
-
Posts
251 -
Joined
-
Last visited
Content Type
Profiles
Forums
Events
Gallery
Everything posted by OldNYJim
-

Scratch made gauge bezels ?
OldNYJim replied to Jasper018's topic in Model Building Questions and Answers
Michael's and Hobby Lobby both keep small silver rings in a variety of sizes - cheapest easiest option is probably to buy a bag of these rings for 2 or 3 bucks and get 100 or more to use. I think Photoetch ones look better though, personally - and a set like this gives you 50+ for a few cents a piece: https://www.ebay.com/itm/224471128348?hash=item344385991c:g:3DcAAOSwAlVgqc5r -
paint brush preserving....
OldNYJim replied to Jesse in Laramie's topic in Tips, Tricks, and Tutorials
My wife's a professional artist and she swears by this stuff - it will also somewhat salvage brushes that have been ruined by having paint left on them. I need to have a brush cleaning session and try it on mine! -
I want this 'Advent Calendar' VW Bus! https://www.revell.de/en/products/advent-calendar/advent-calendar-vw-t2-bus.html "With this Advent calendar, you can now build the classic yourself. Everything you need is included in the 24 doors and at Christmas your VW T2 bus will be under the Christmas tree." Sounds like a fun way to spend a December!
-
I suspect, but don't know for sure, that those front tires would typically have some sort of grooves in - I think they were just using skinny motorcycle tires in this period, right? It's a small nitpick, and tires are available that have a tread pattern - I was more curious about it than anything. Those rear piecrust slicks are GORGEOUS though, and I love whatever material Atlantis has used to mold these - it has a gorgeous satin-y look to it
-
I really enjoyed reading about this project Kit - I saw this build in that Model Car Muse video about Ted and it caught my eye, and it immediately had me wanting to build one just like it! What a cool project - but an even cooler story!
-
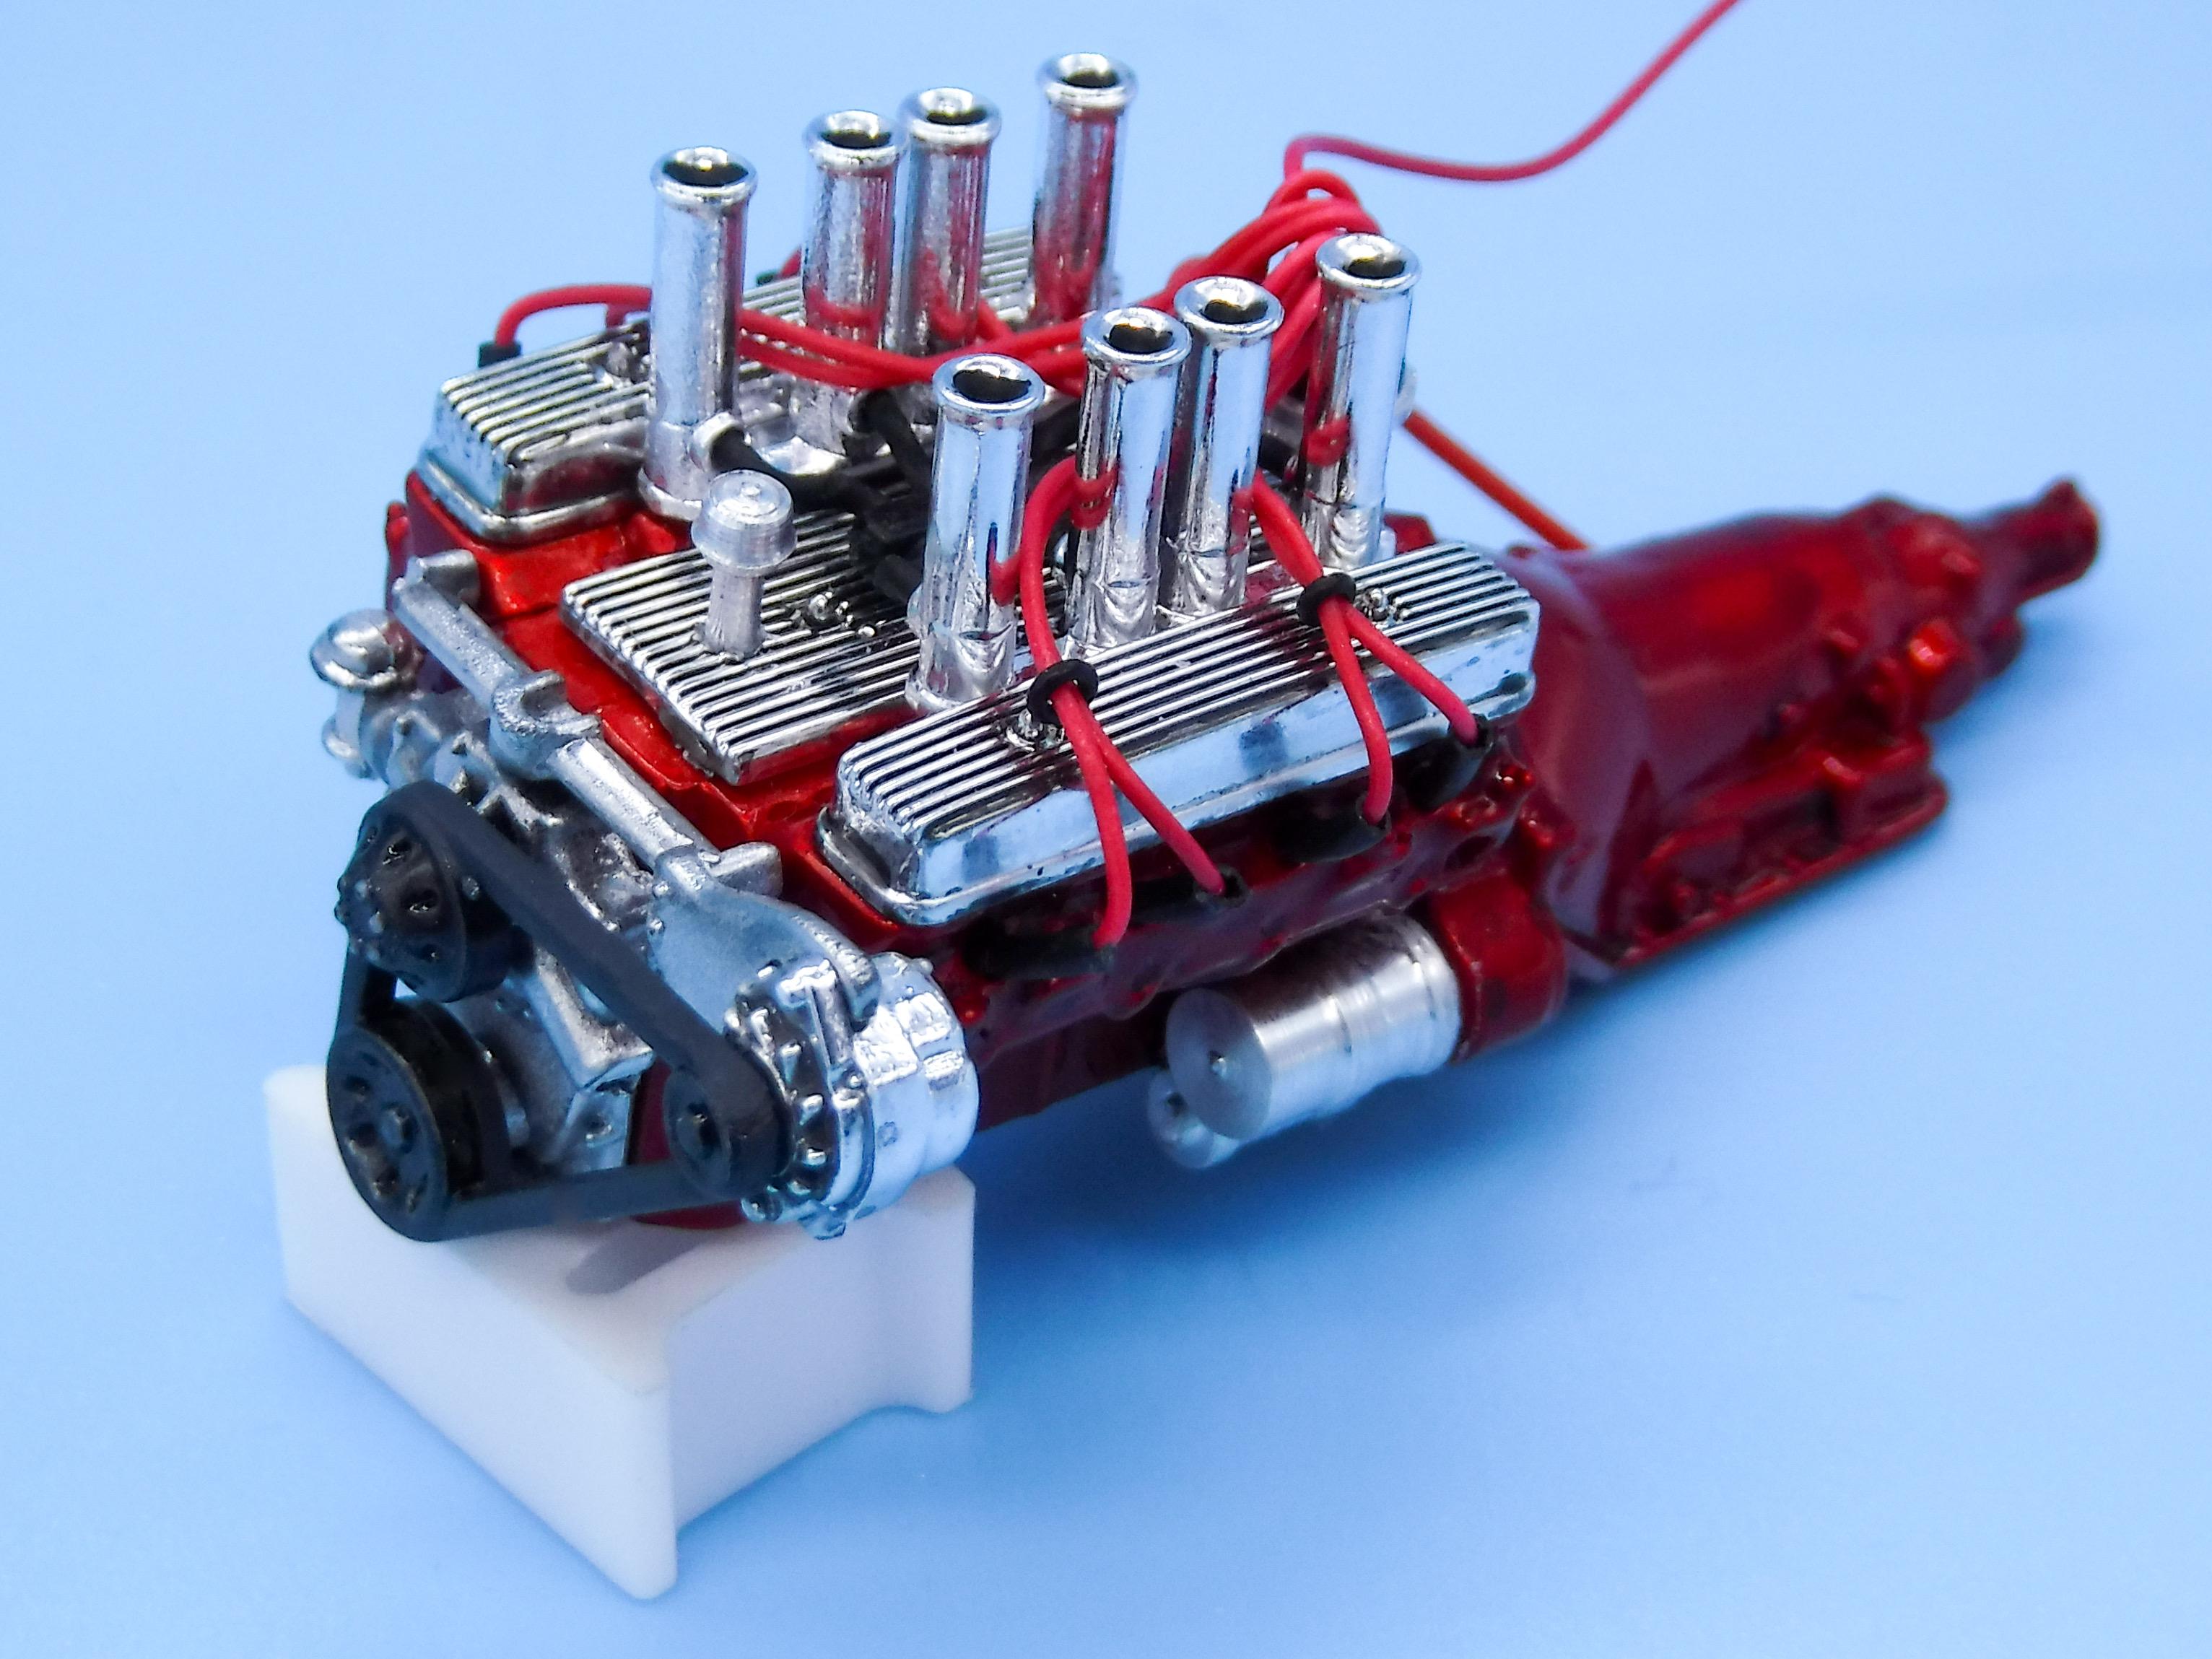
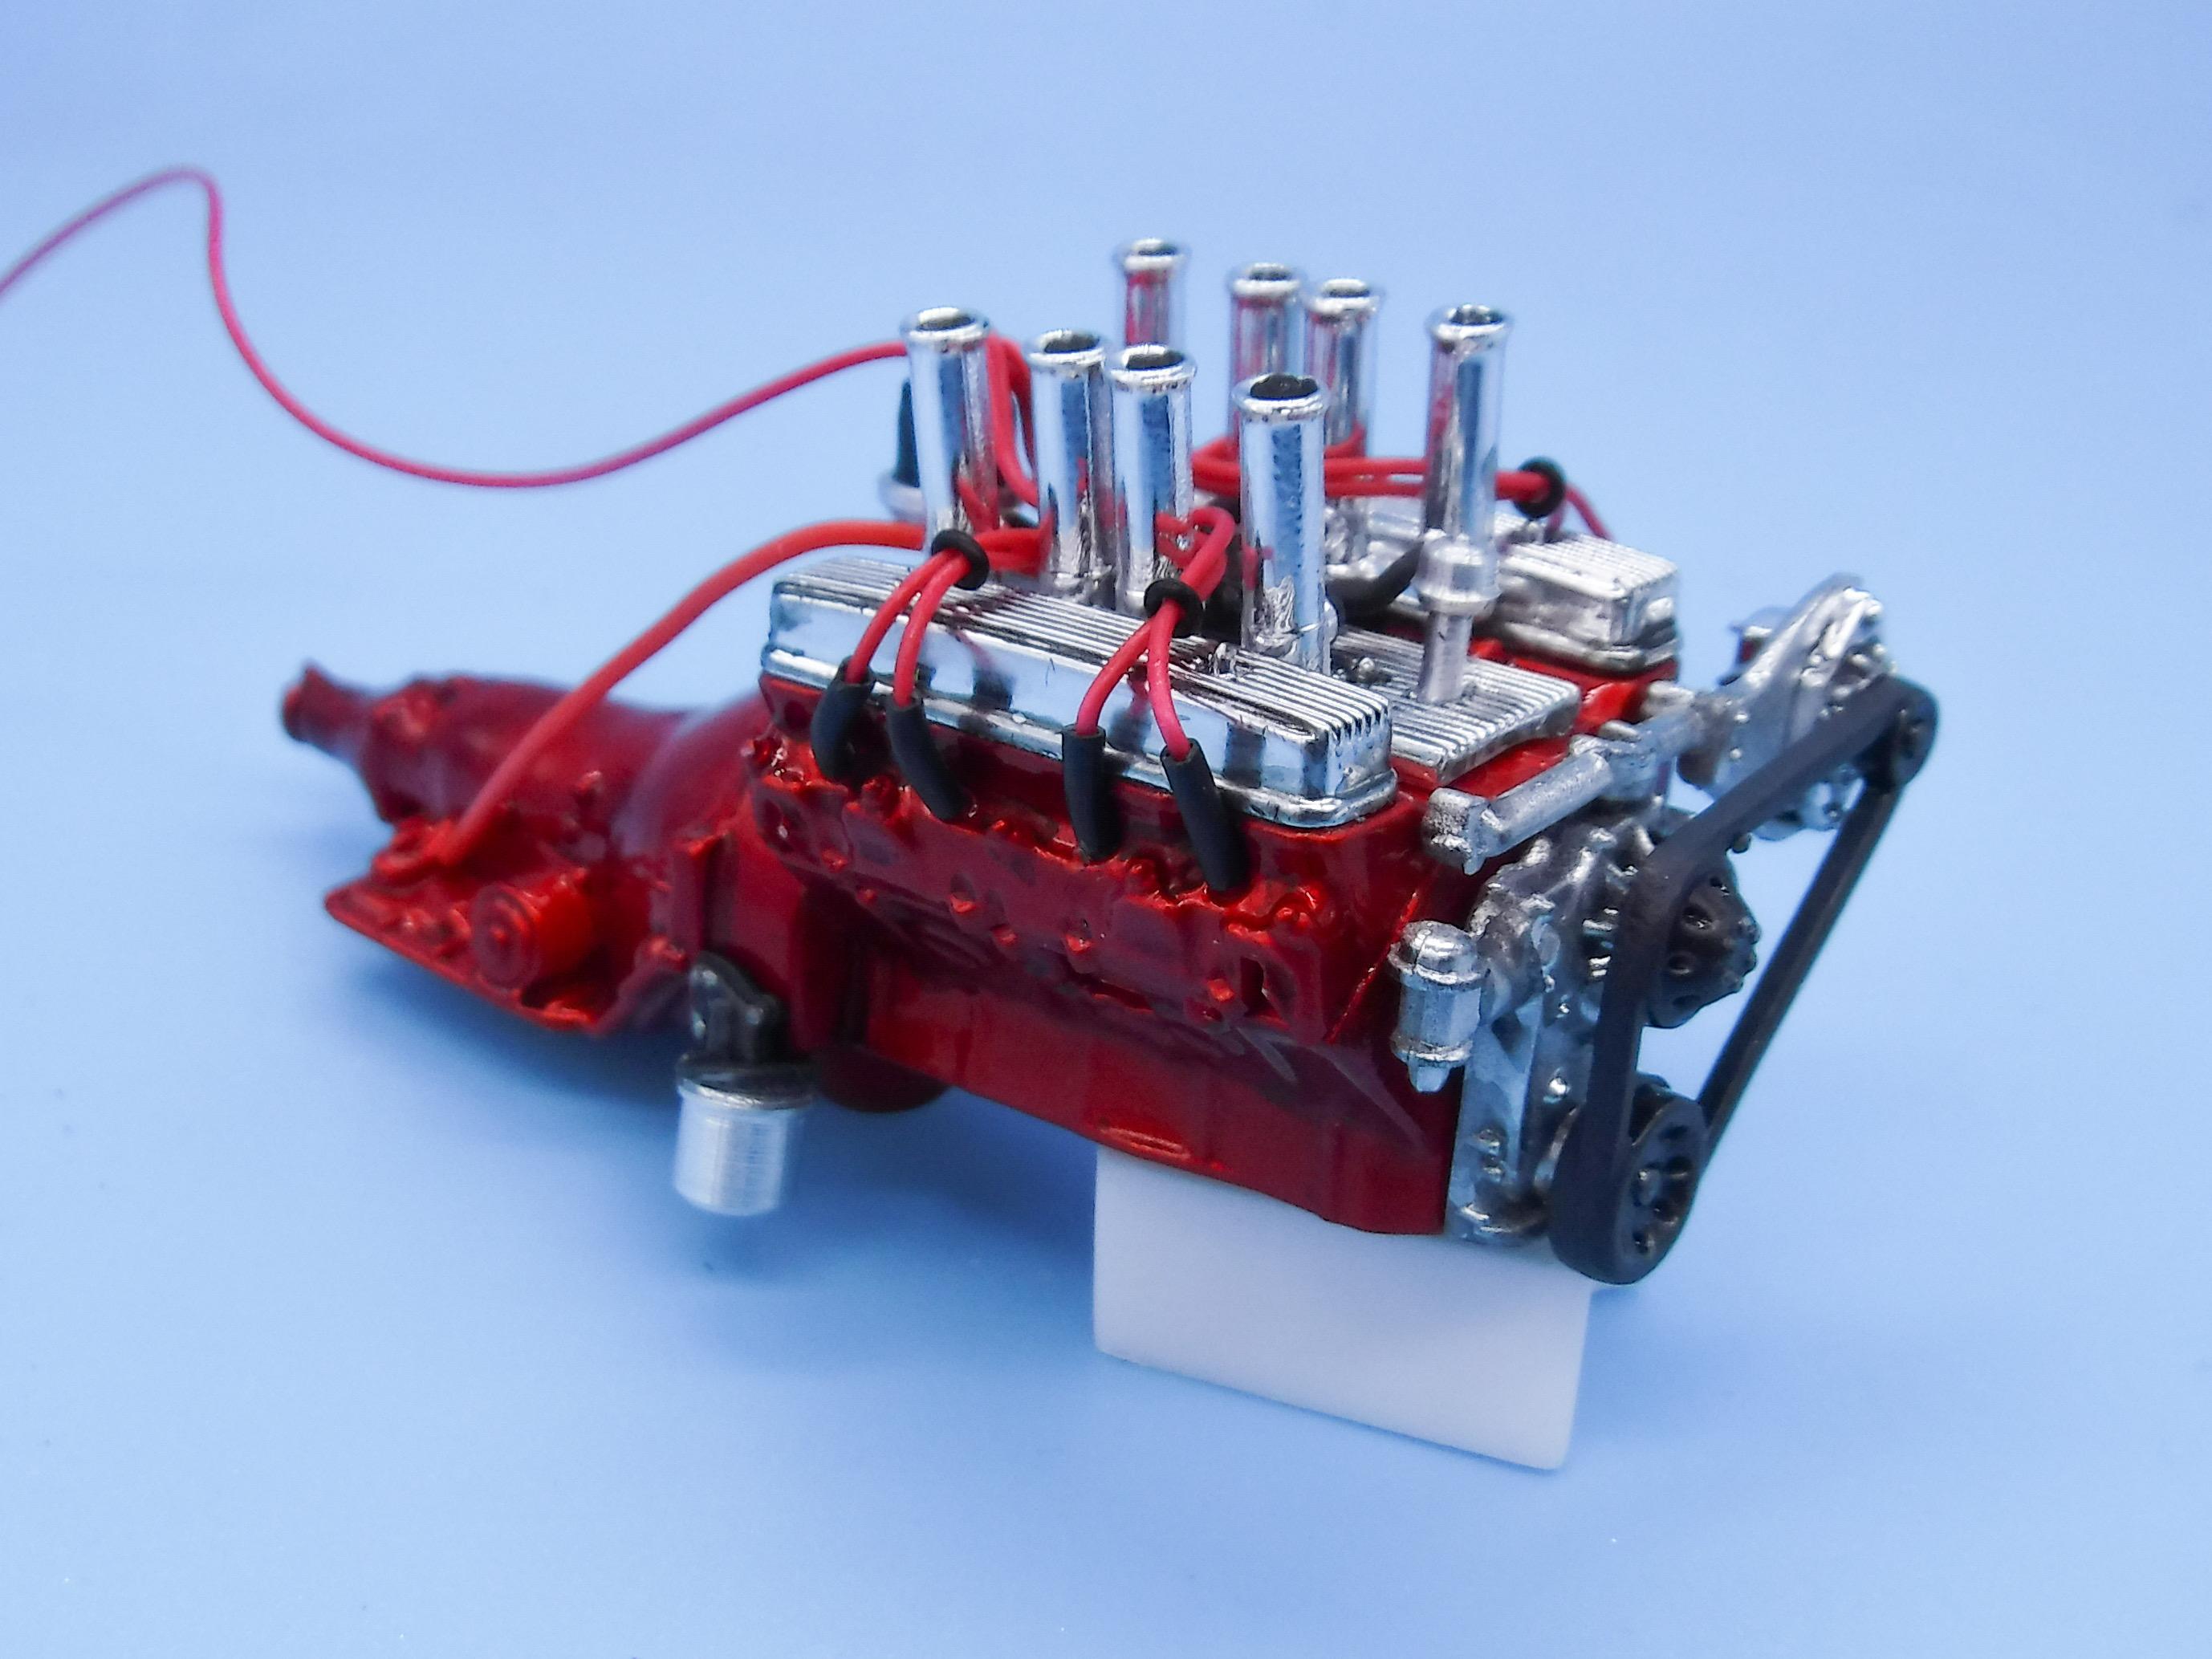
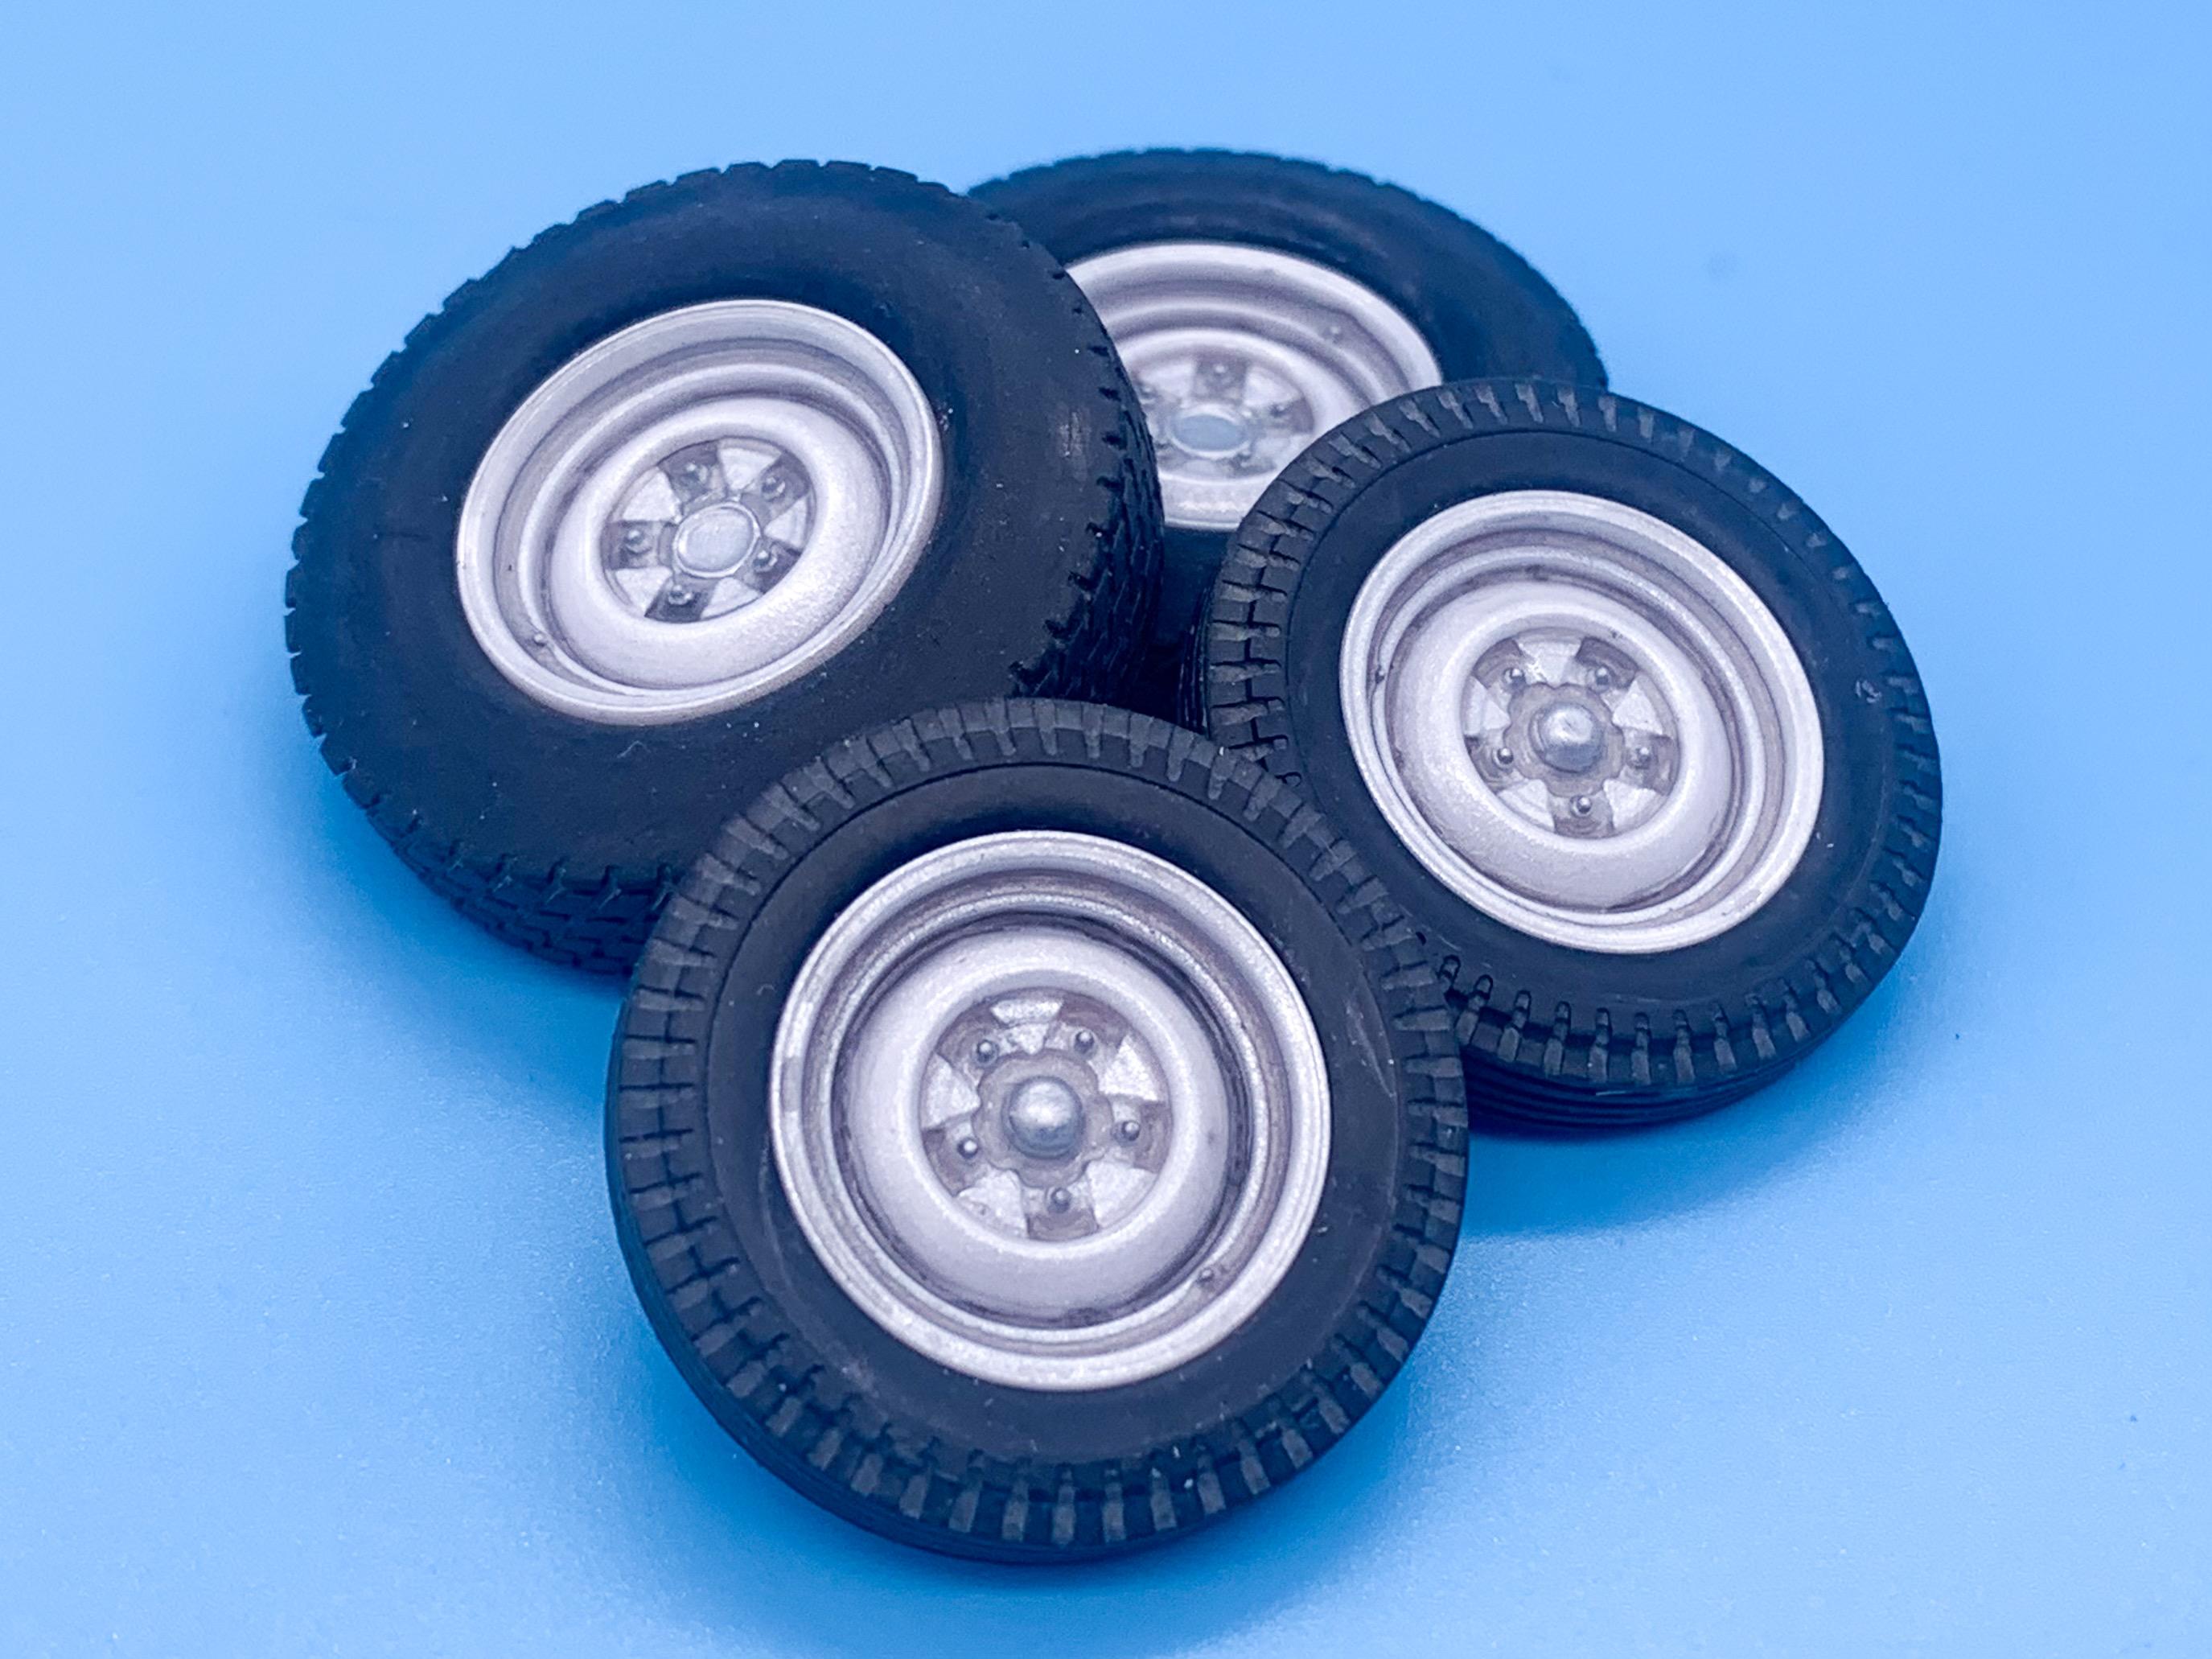
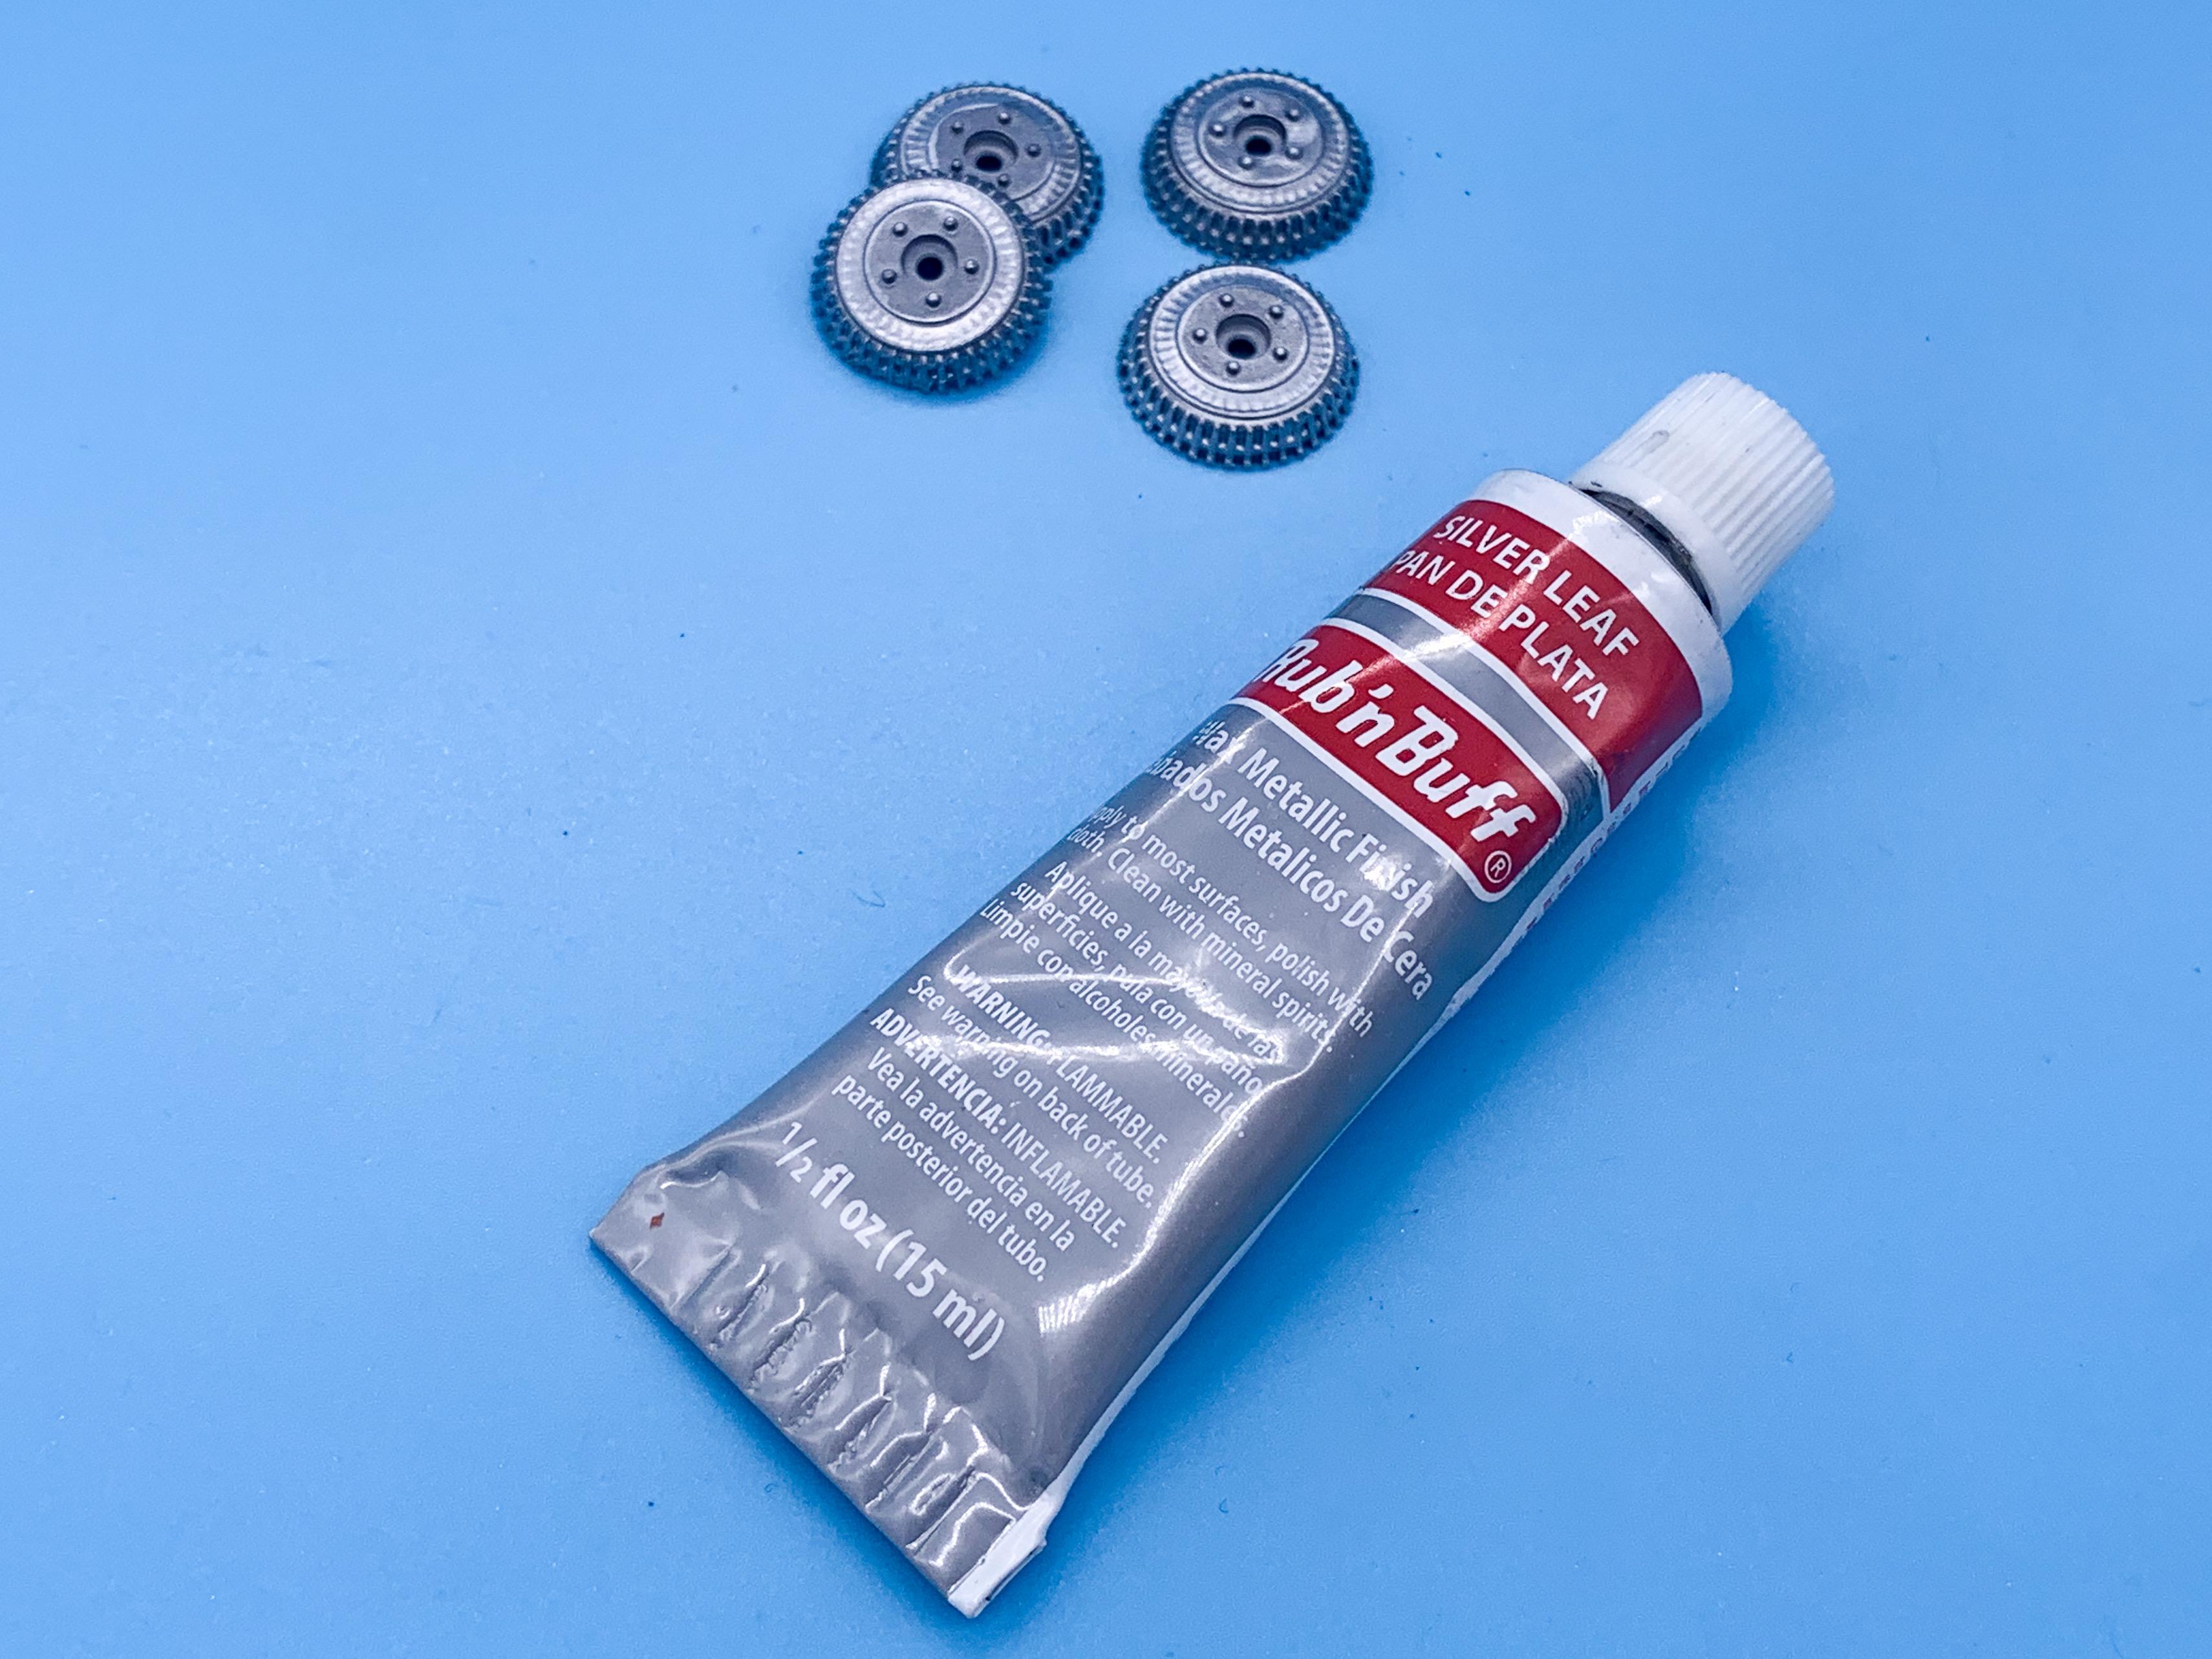
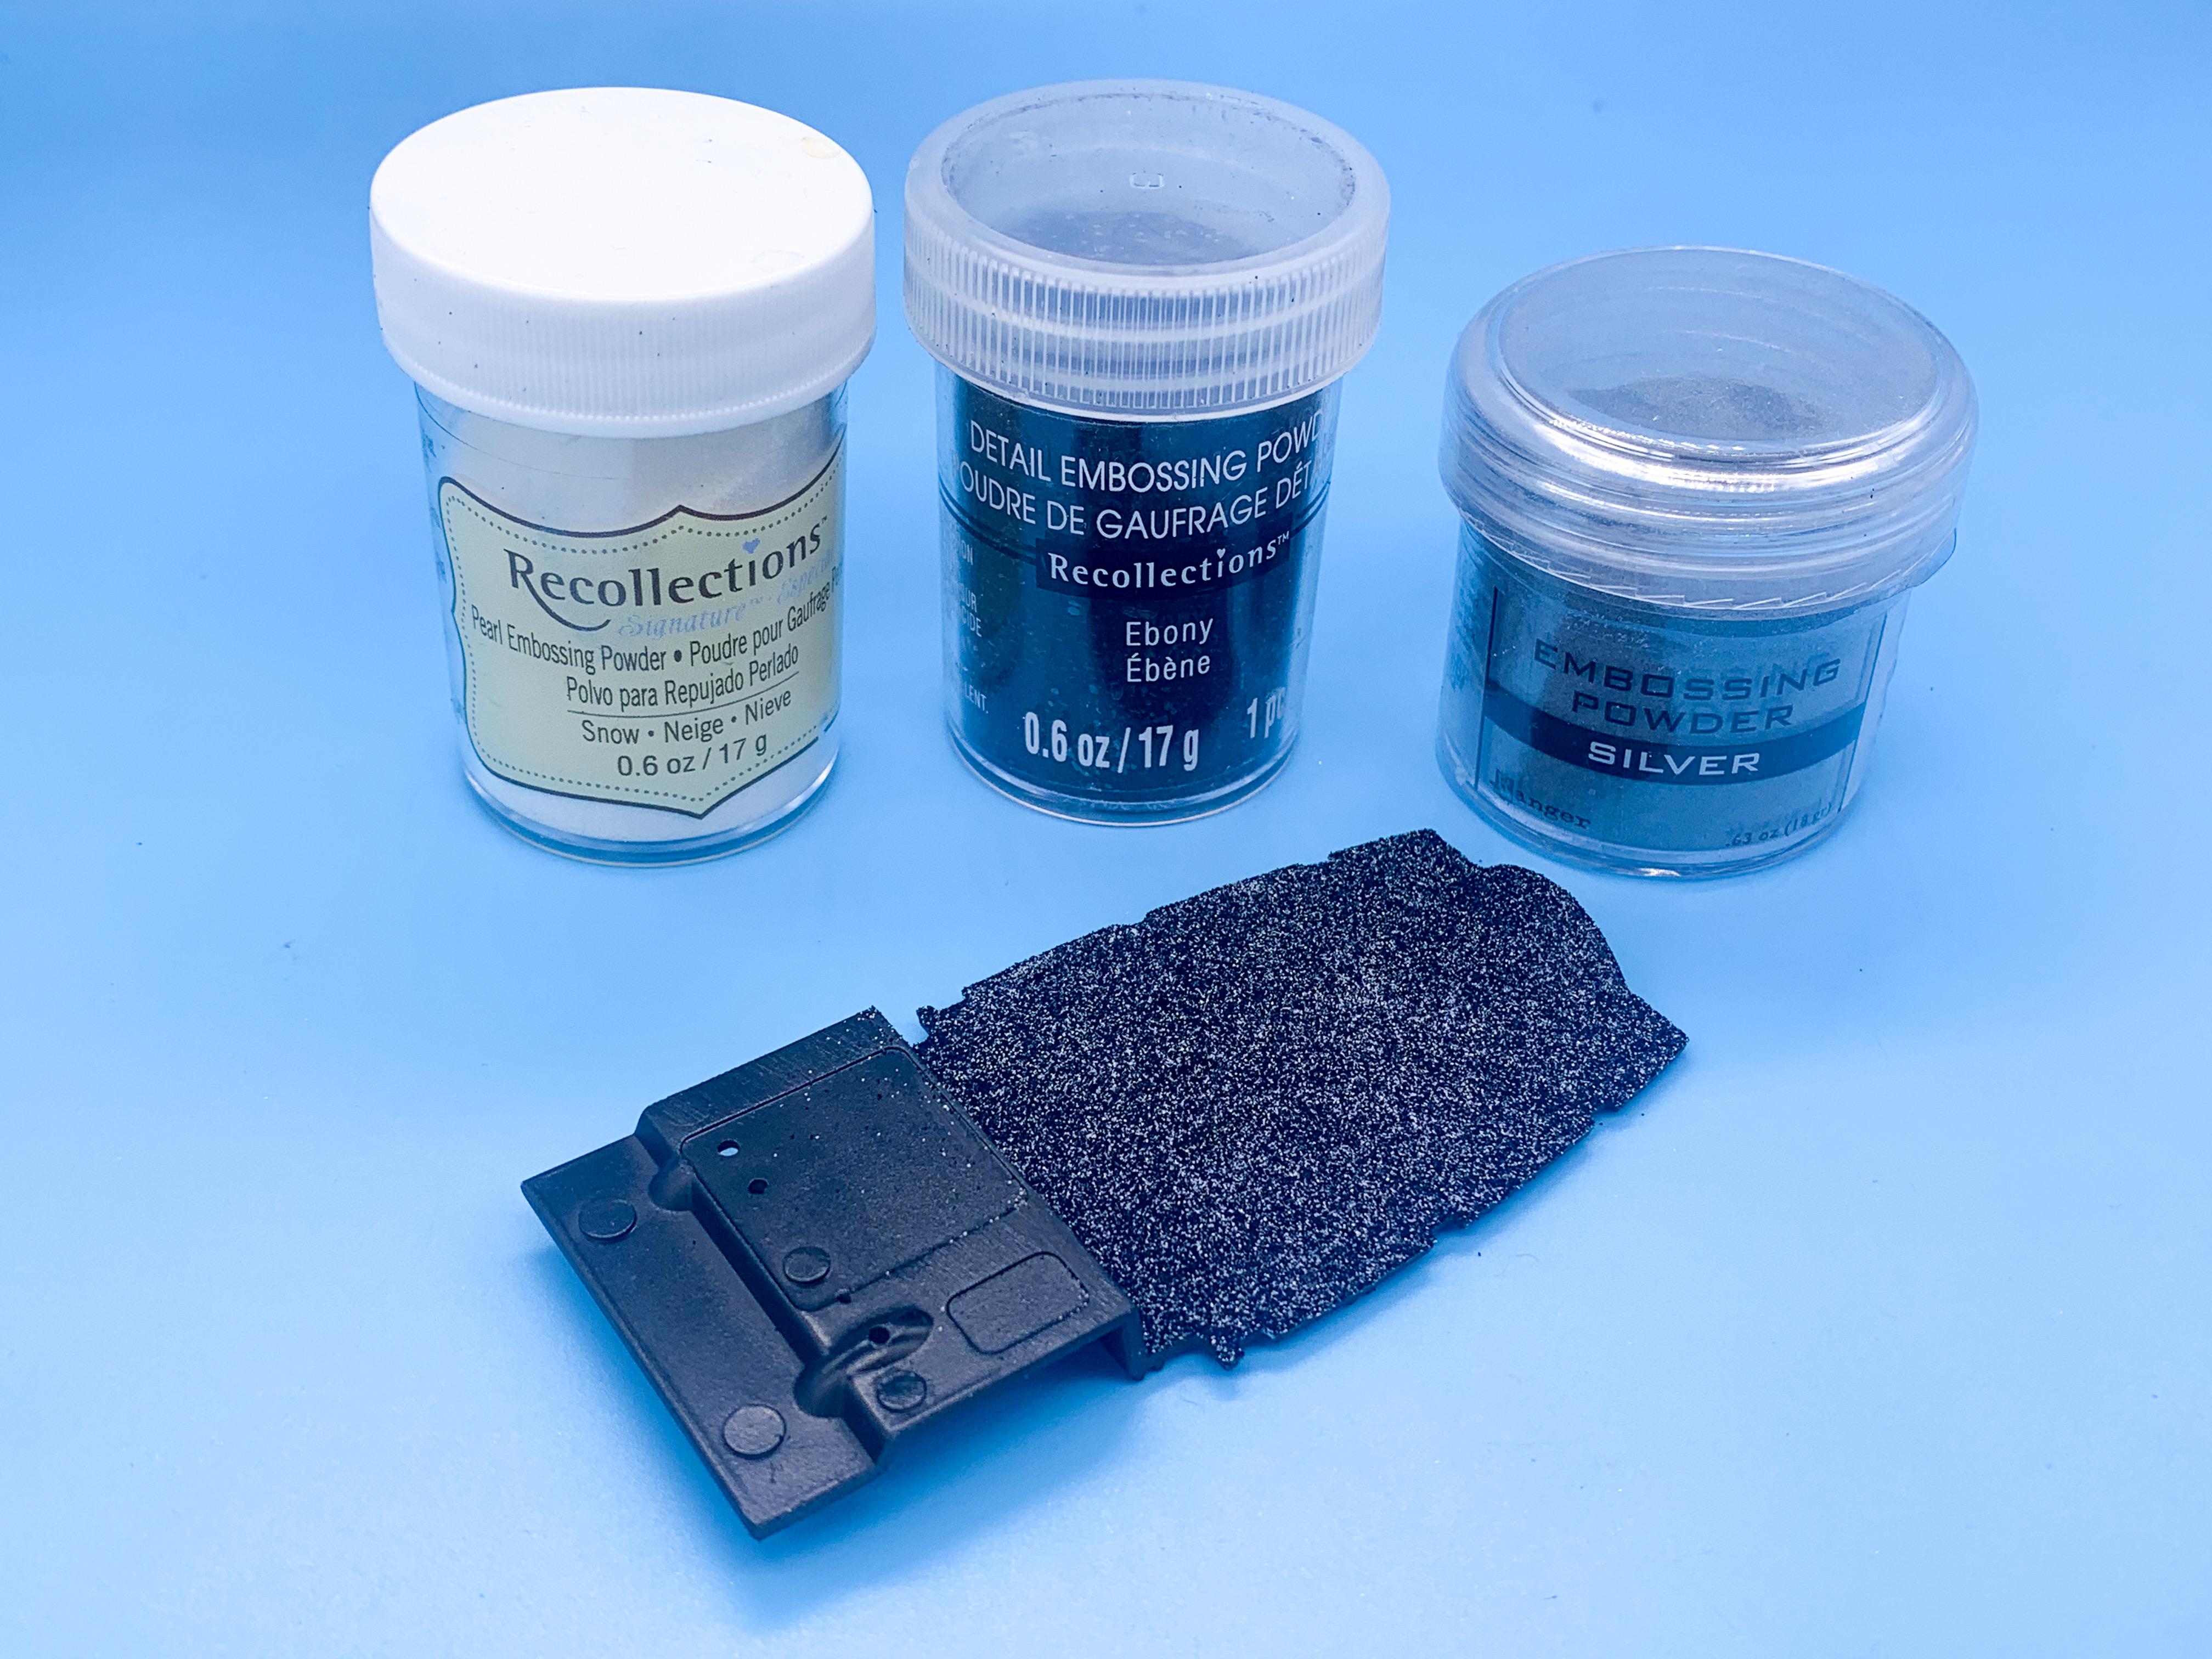
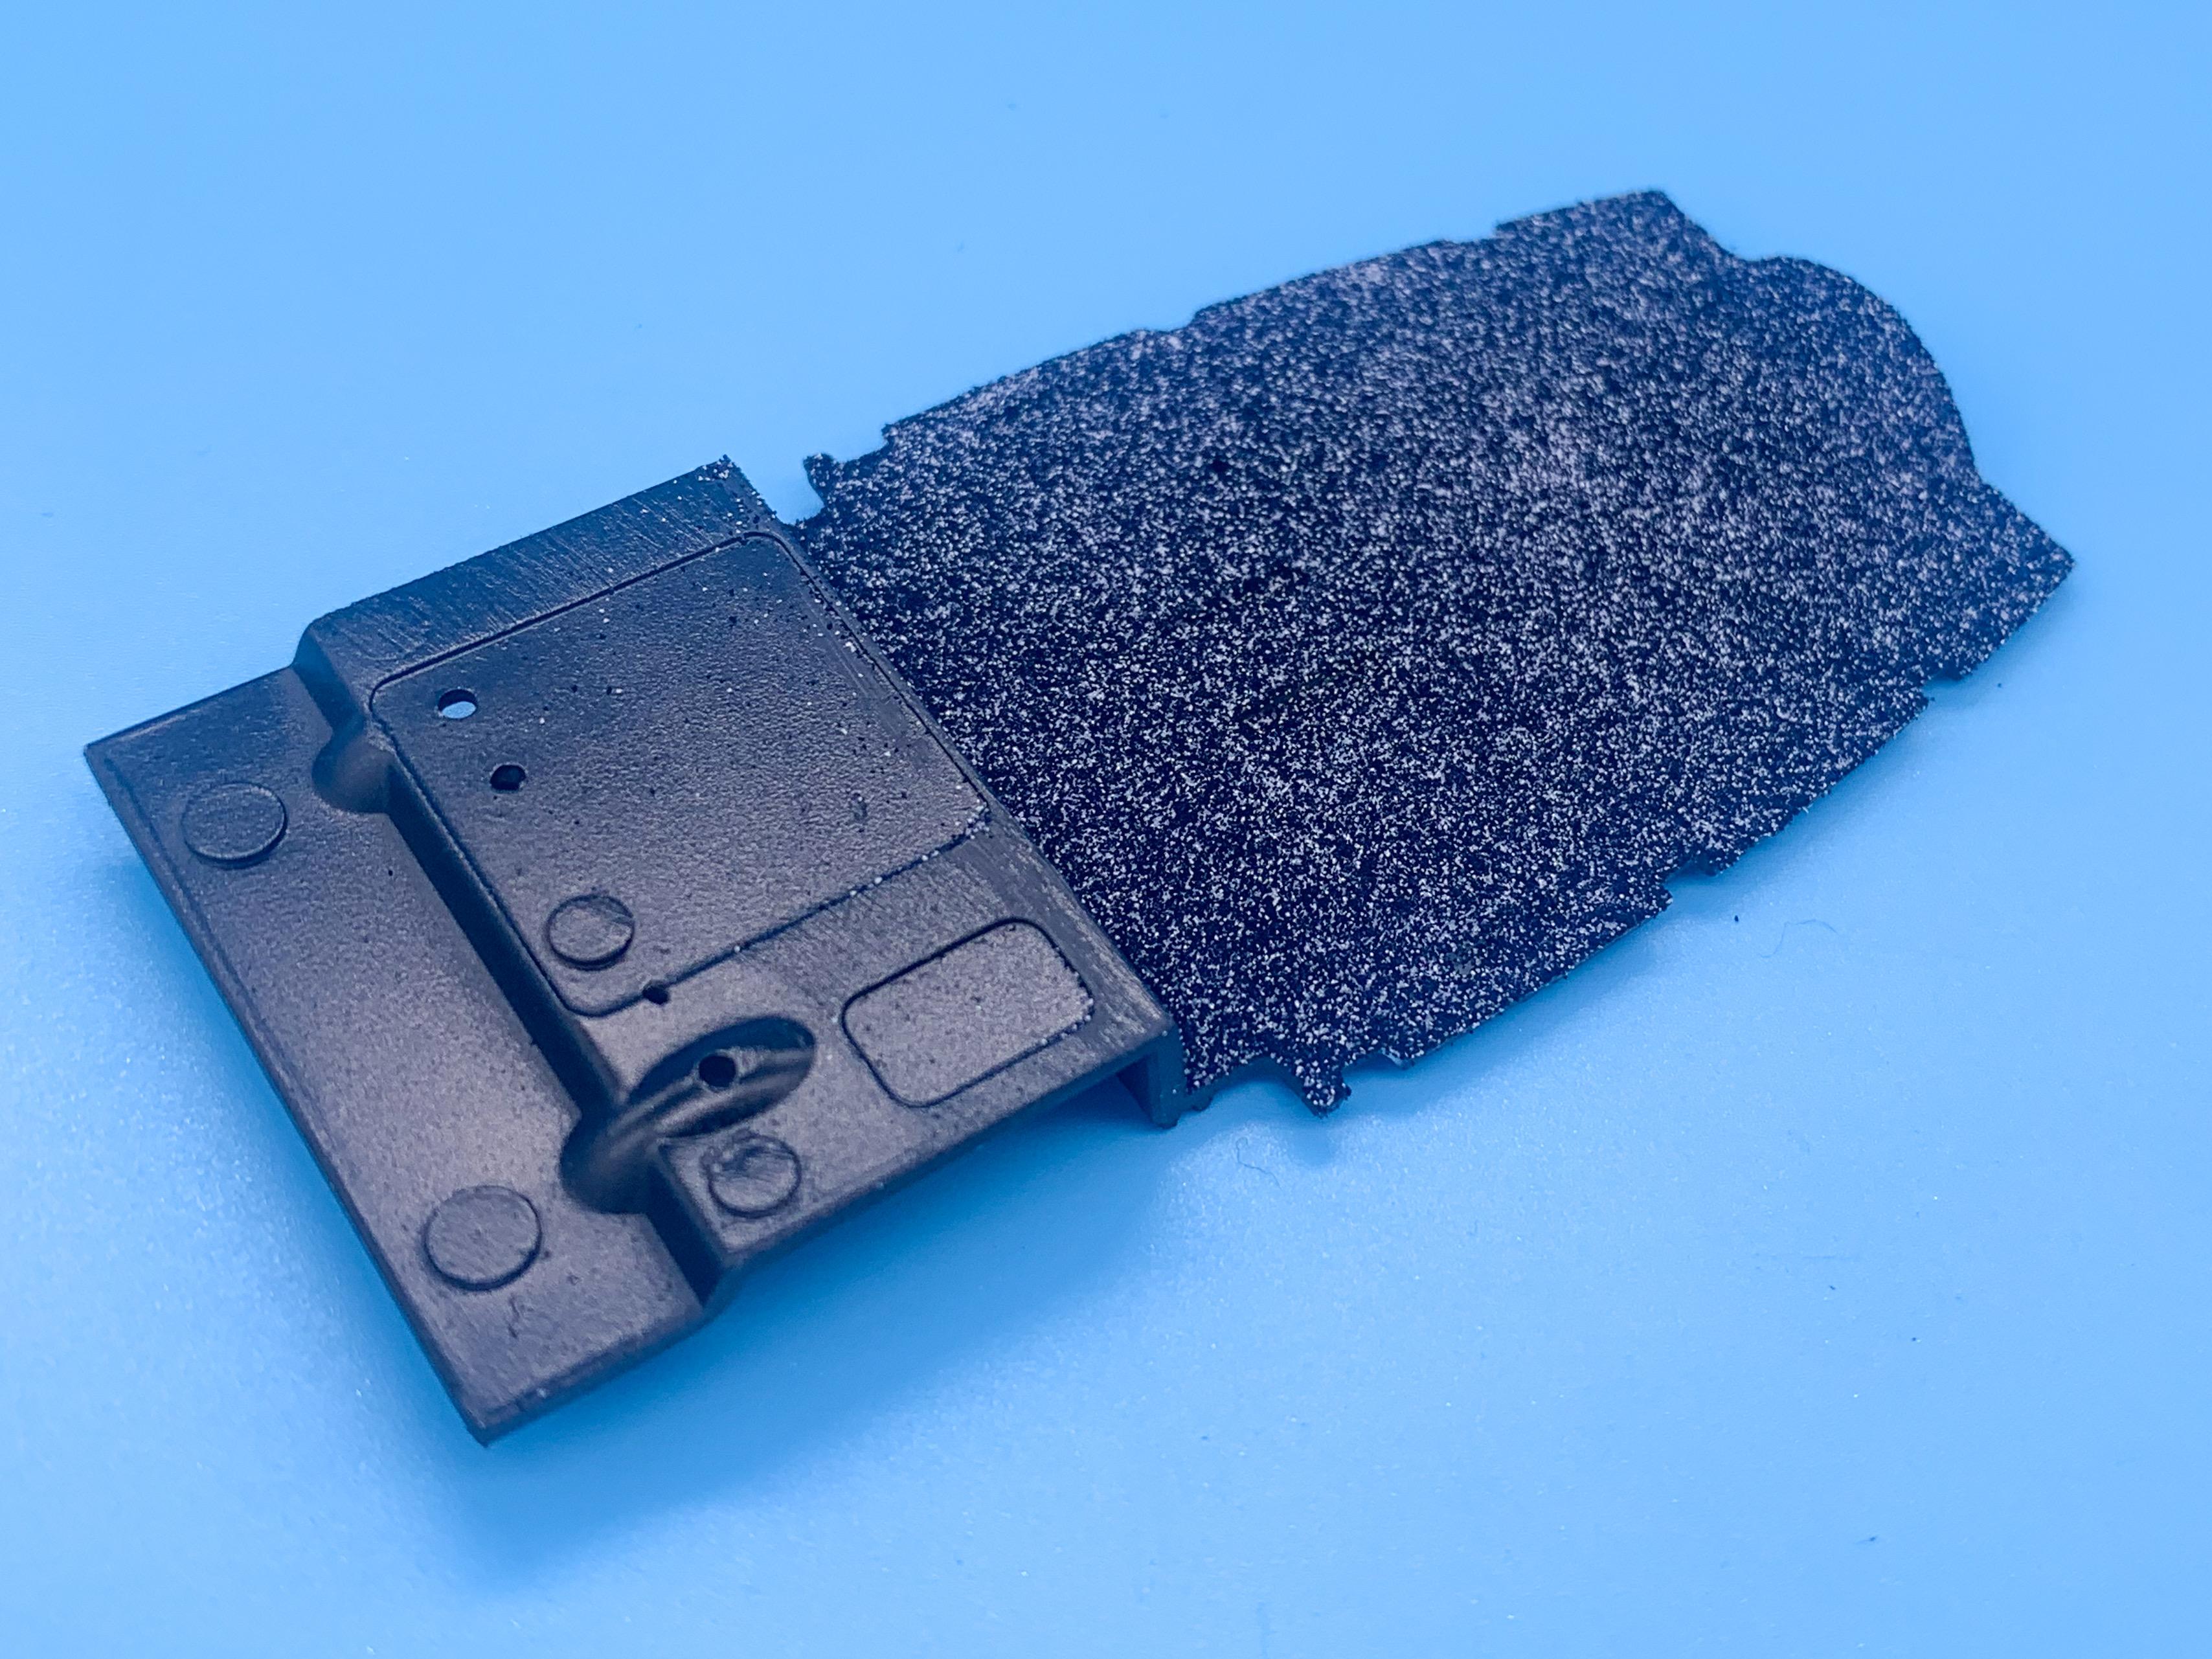
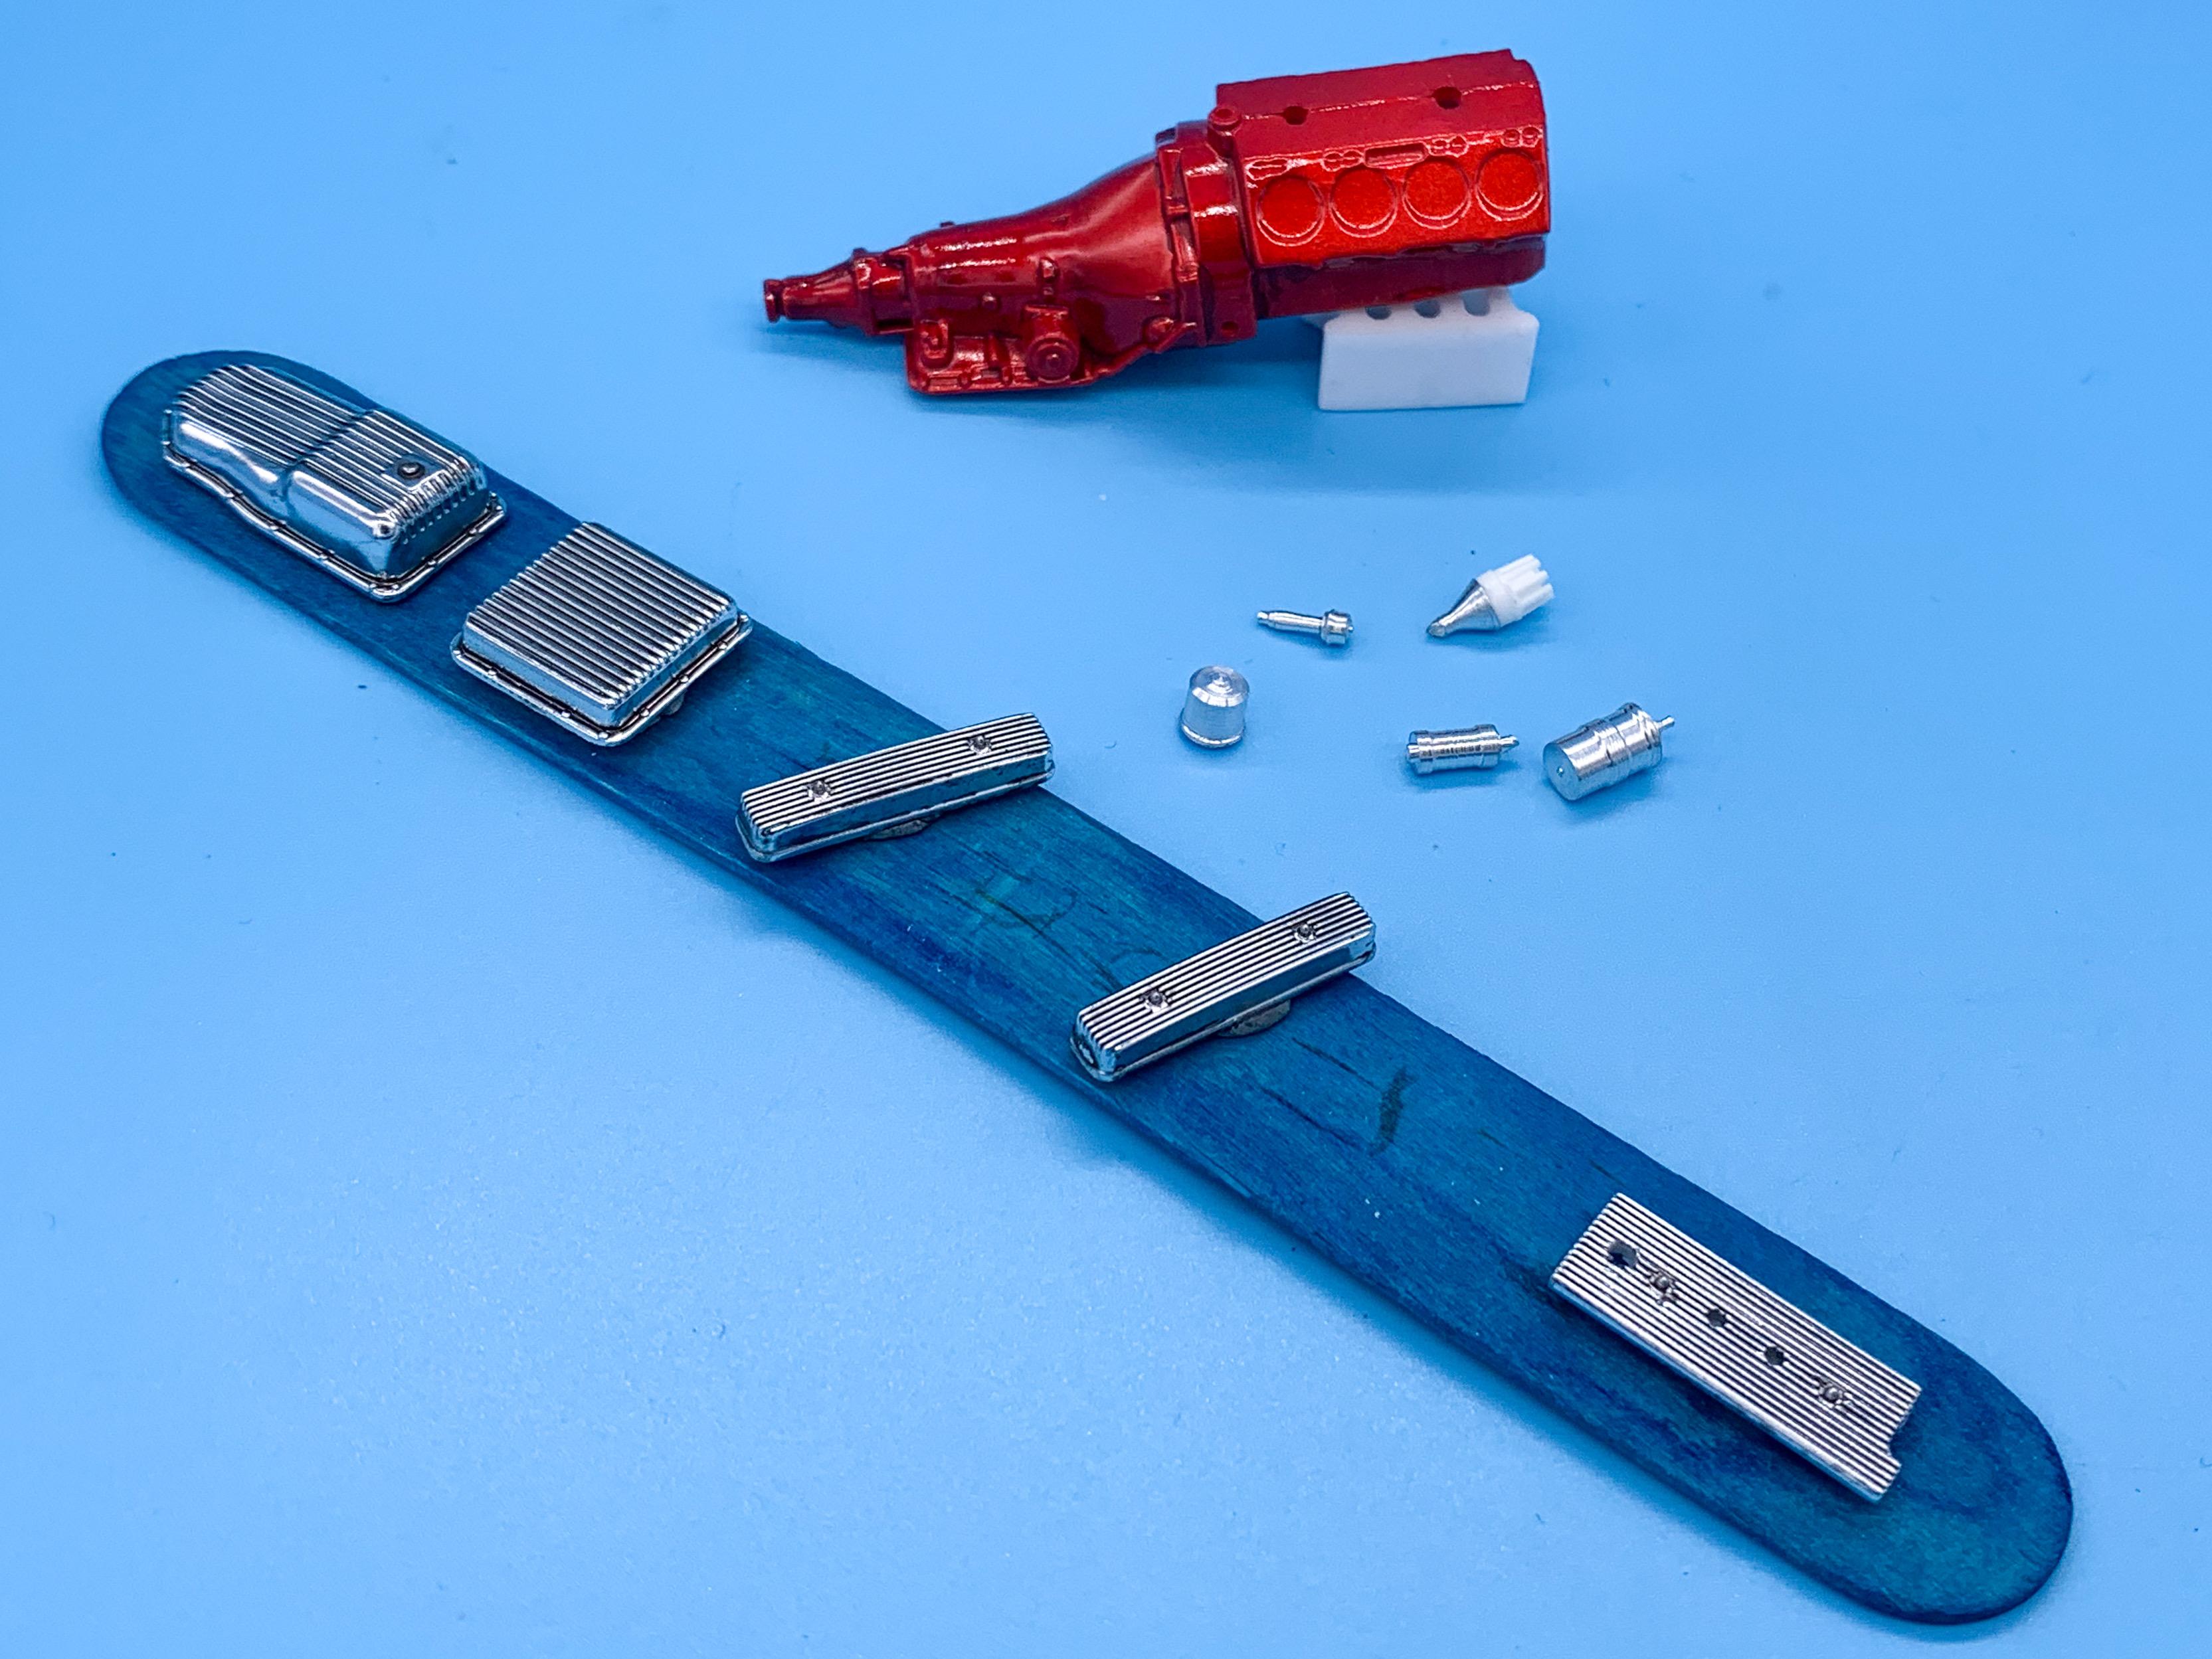
Thanks fellas! @bill-e-boy - I don’t have a tailstock or drilling attachment for my little Taig lathe as yet, but that tip about using a higher speed is really helpful, thank you! I should probably get a few more add-ons so I don’t keep having to figure out how to do things the ‘wrong’ way ? Made some more progress today - got a good run at assembling the engine and adding plug wires: Still some more detail to make and add, but I love how these Nailheads look! Revell did a good job on this one (although I understand the port spacing isn’t quite right)… Next up, now I’ve learned about using a tumbler I gave the tires a few minutes in there to buff the sheen off… …and then gave the wheels a wash with gray craft paint to add a little depth, picked out the lug nuts and introduced tires to wheels: Used a little Rub n Buff on those nice finned brake drums, as an experiment - I like how they came out: And finally for today, I wanted a dark color carpet for the interior but I didn’t want plain old black, so I mixed up black, silver and white embossing powder to make a kinda flecked finish…came out ok I think! Thanks for looking - more soon!

-
64 Dodge D100 Pickup Pro Street
OldNYJim replied to AmericanMuscleFan's topic in WIP: Drag Racing Models
Still watching, still enjoying this build! -
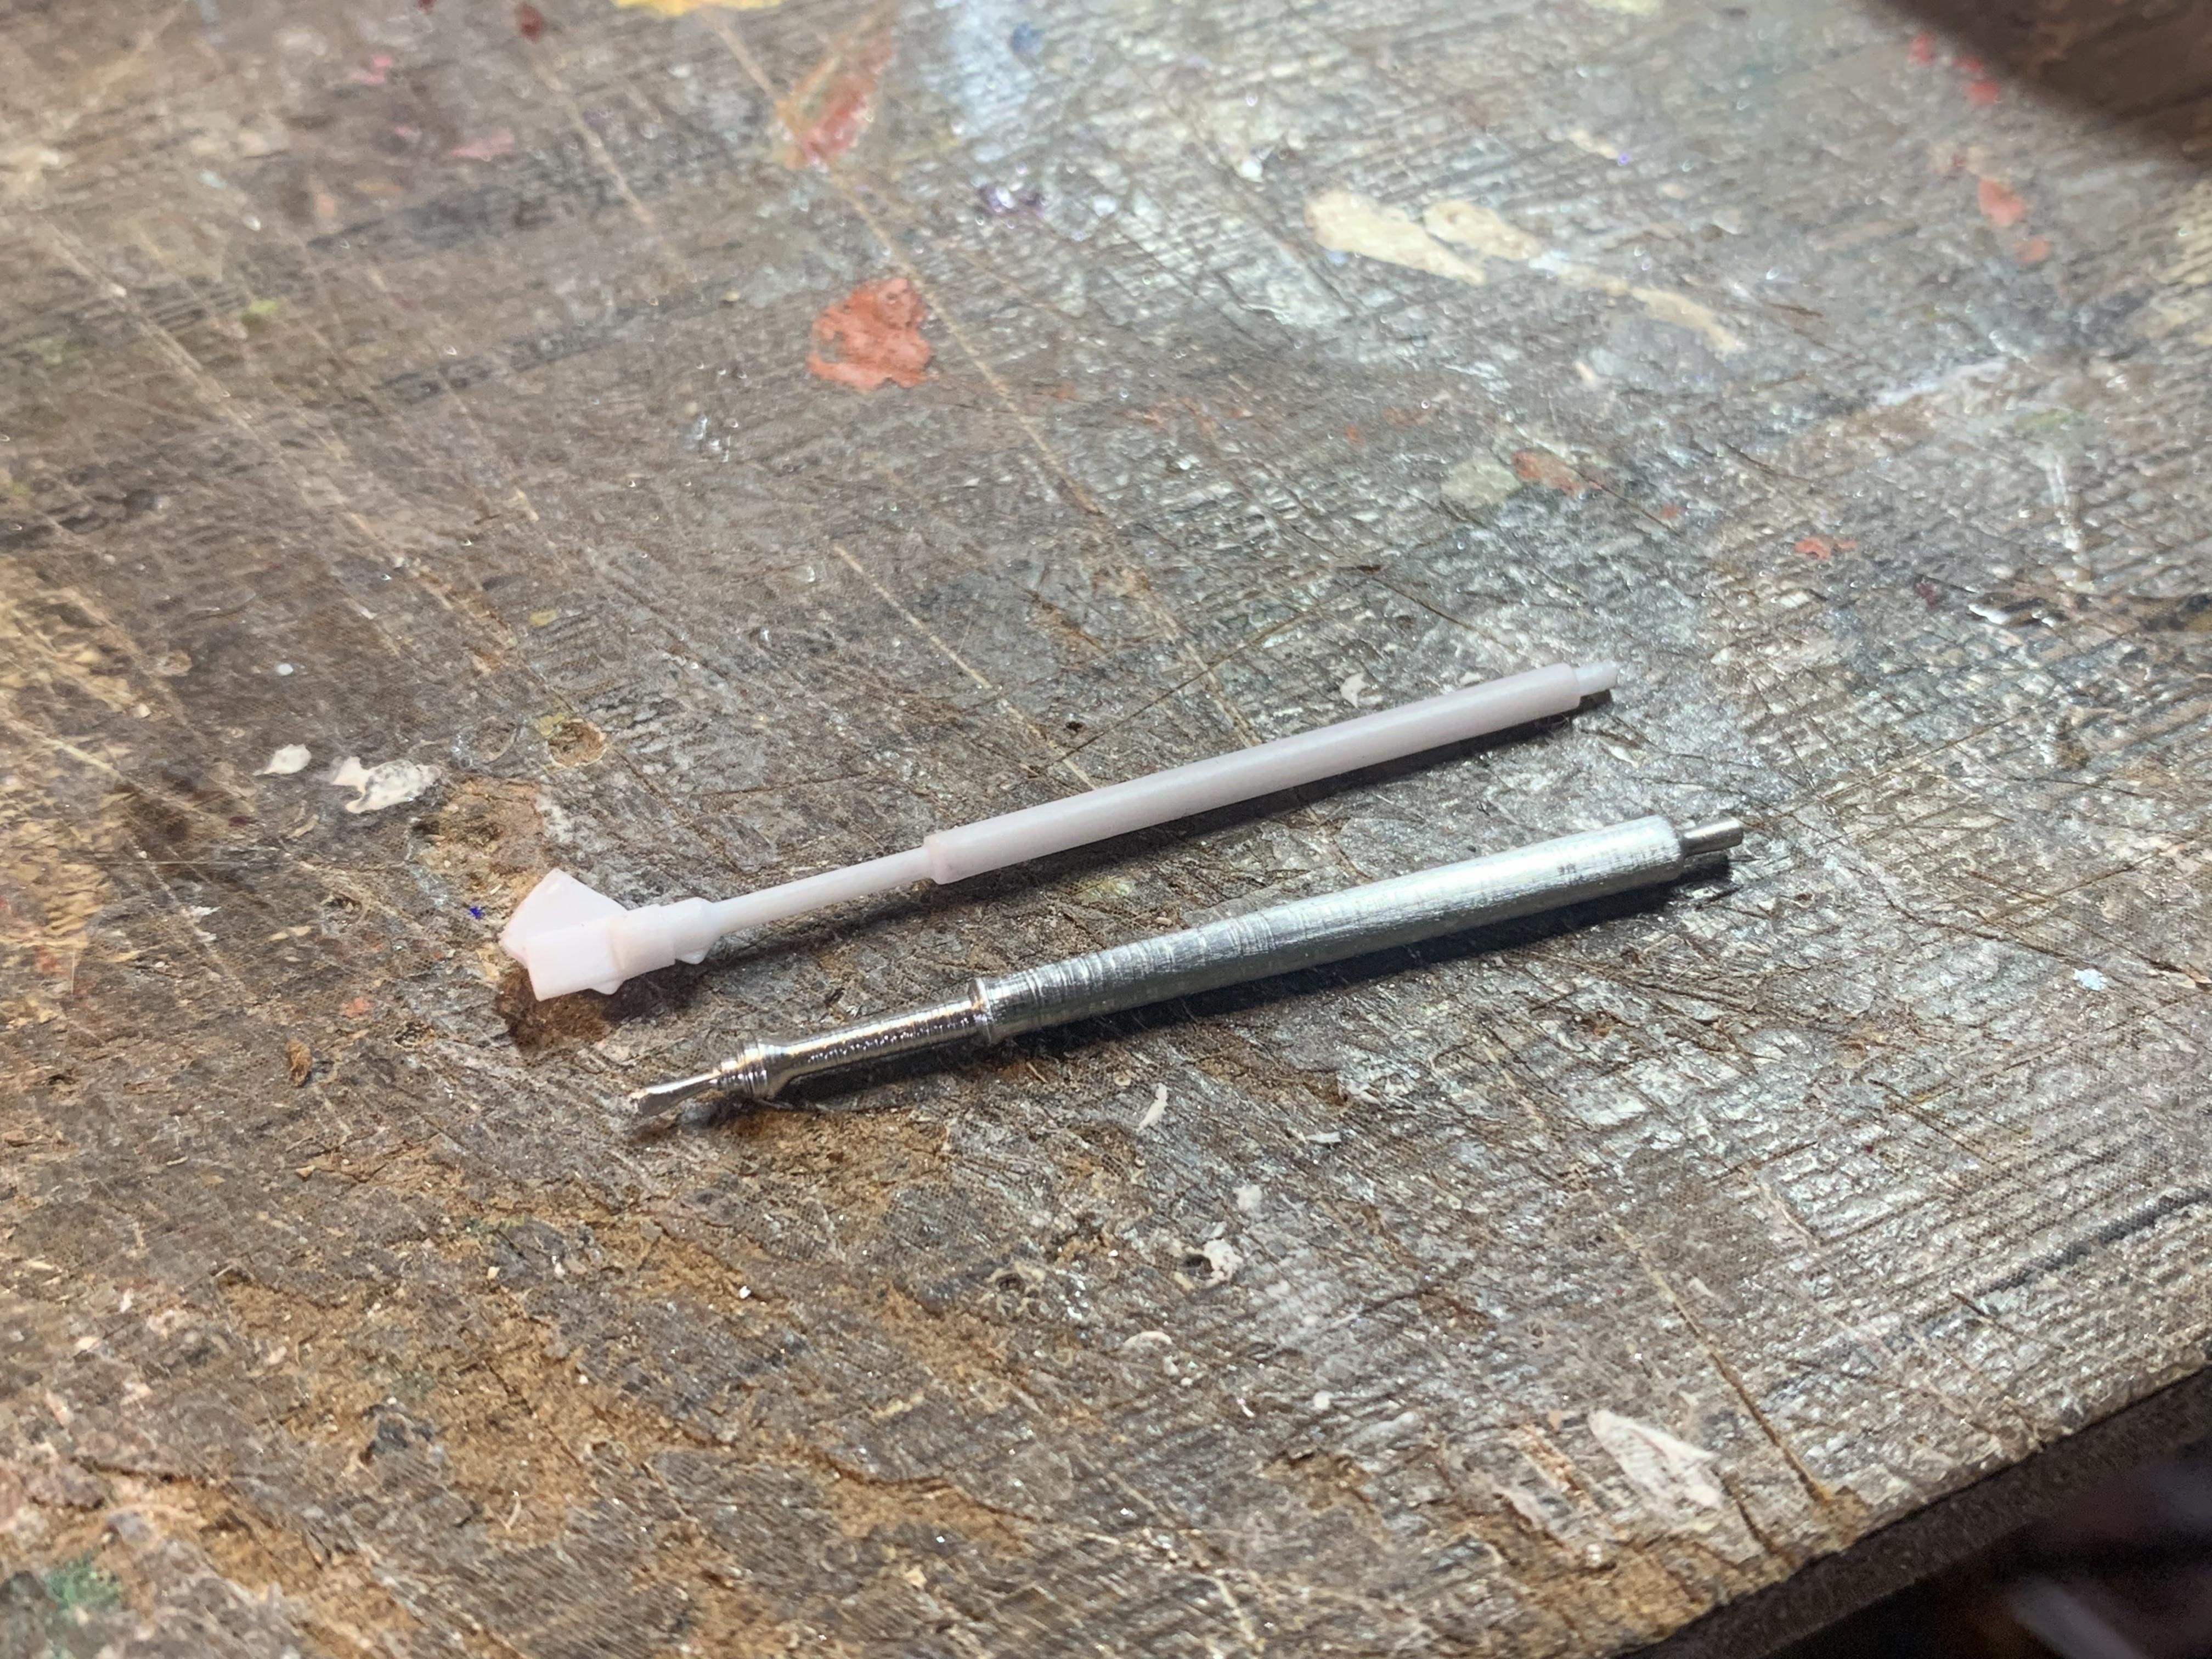
Thanks fellas! Appreciate all the nice words! Spent a BUNCH of time on this thing today, and barely made any progress ?? I wanted to work on that cool Nailhead today, and although I’m building this thing roughly out of the box I still wanted to add some little upgrades and have a chance to practice my machining skills. So, I spent the morning making aluminum replacements for the kit’s oil filter, oil filler, starter and starter solenoid: As you can see, I also added a black wash to the chrome parts too to bring out that nice detail. I like using either thinned down black craft paint or India ink for my washes, but I sometimes find that they don’t flow out very nicely over chromed parts and they can turn out a little blotchy. Did some experimenting today and mixed up a little Createx balancing clear with the India ink to see if it would help it lay down better, and it seems like it worked pretty well! I’ll store that trick away for future use… Whilst I was at the lathe anyway, I figured I’d turn a new steering shaft to replace the kit piece, just because I thought it would be quick and easy and I haven’t made one before. Took me the rest of the afternoon ??. Tricky thing was that the shaft is pretty narrow at points, but relatively long, which meant I kept bending and ruining them. I think a better grade aluminum would’ve worked better than the stuff I had here which is pretty soft, but I got something semi-acceptable after five or six tries: Problem was, I wasn’t really happy with the machining marks you can see on the part and didn’t dare mess with it much more on the lathe for fear of ruining it…but I’d been meaning to try out my $2 Goodwill kid’s rock tumbler for a while and decided to tumble the part and see how it worked out. Dropped the part in the barrel and added some grit: And let it spin for a few minutes then gently cleaned it up…success! Got a nice semi-satin finish and removed most of the marks - it’ll definitely be acceptable for a part that’s pretty well hidden under the header anyway. Say all that to say, didn’t get very far on the engine, but I had a fun day in the shop! More progress tomorrow, hopefully!
-
Looks great Ron!
-
What Did You Get Today? (Not Model Related)
OldNYJim replied to LOBBS's topic in The Off-Topic Lounge
This little fellas arrived today - a delicious can of Rat Fink! He popped up in my eBay suggestions and I had to get myself one…of course now I’ve discovered there’s a bunch of different colors to collect and I kinda want the others too…
-
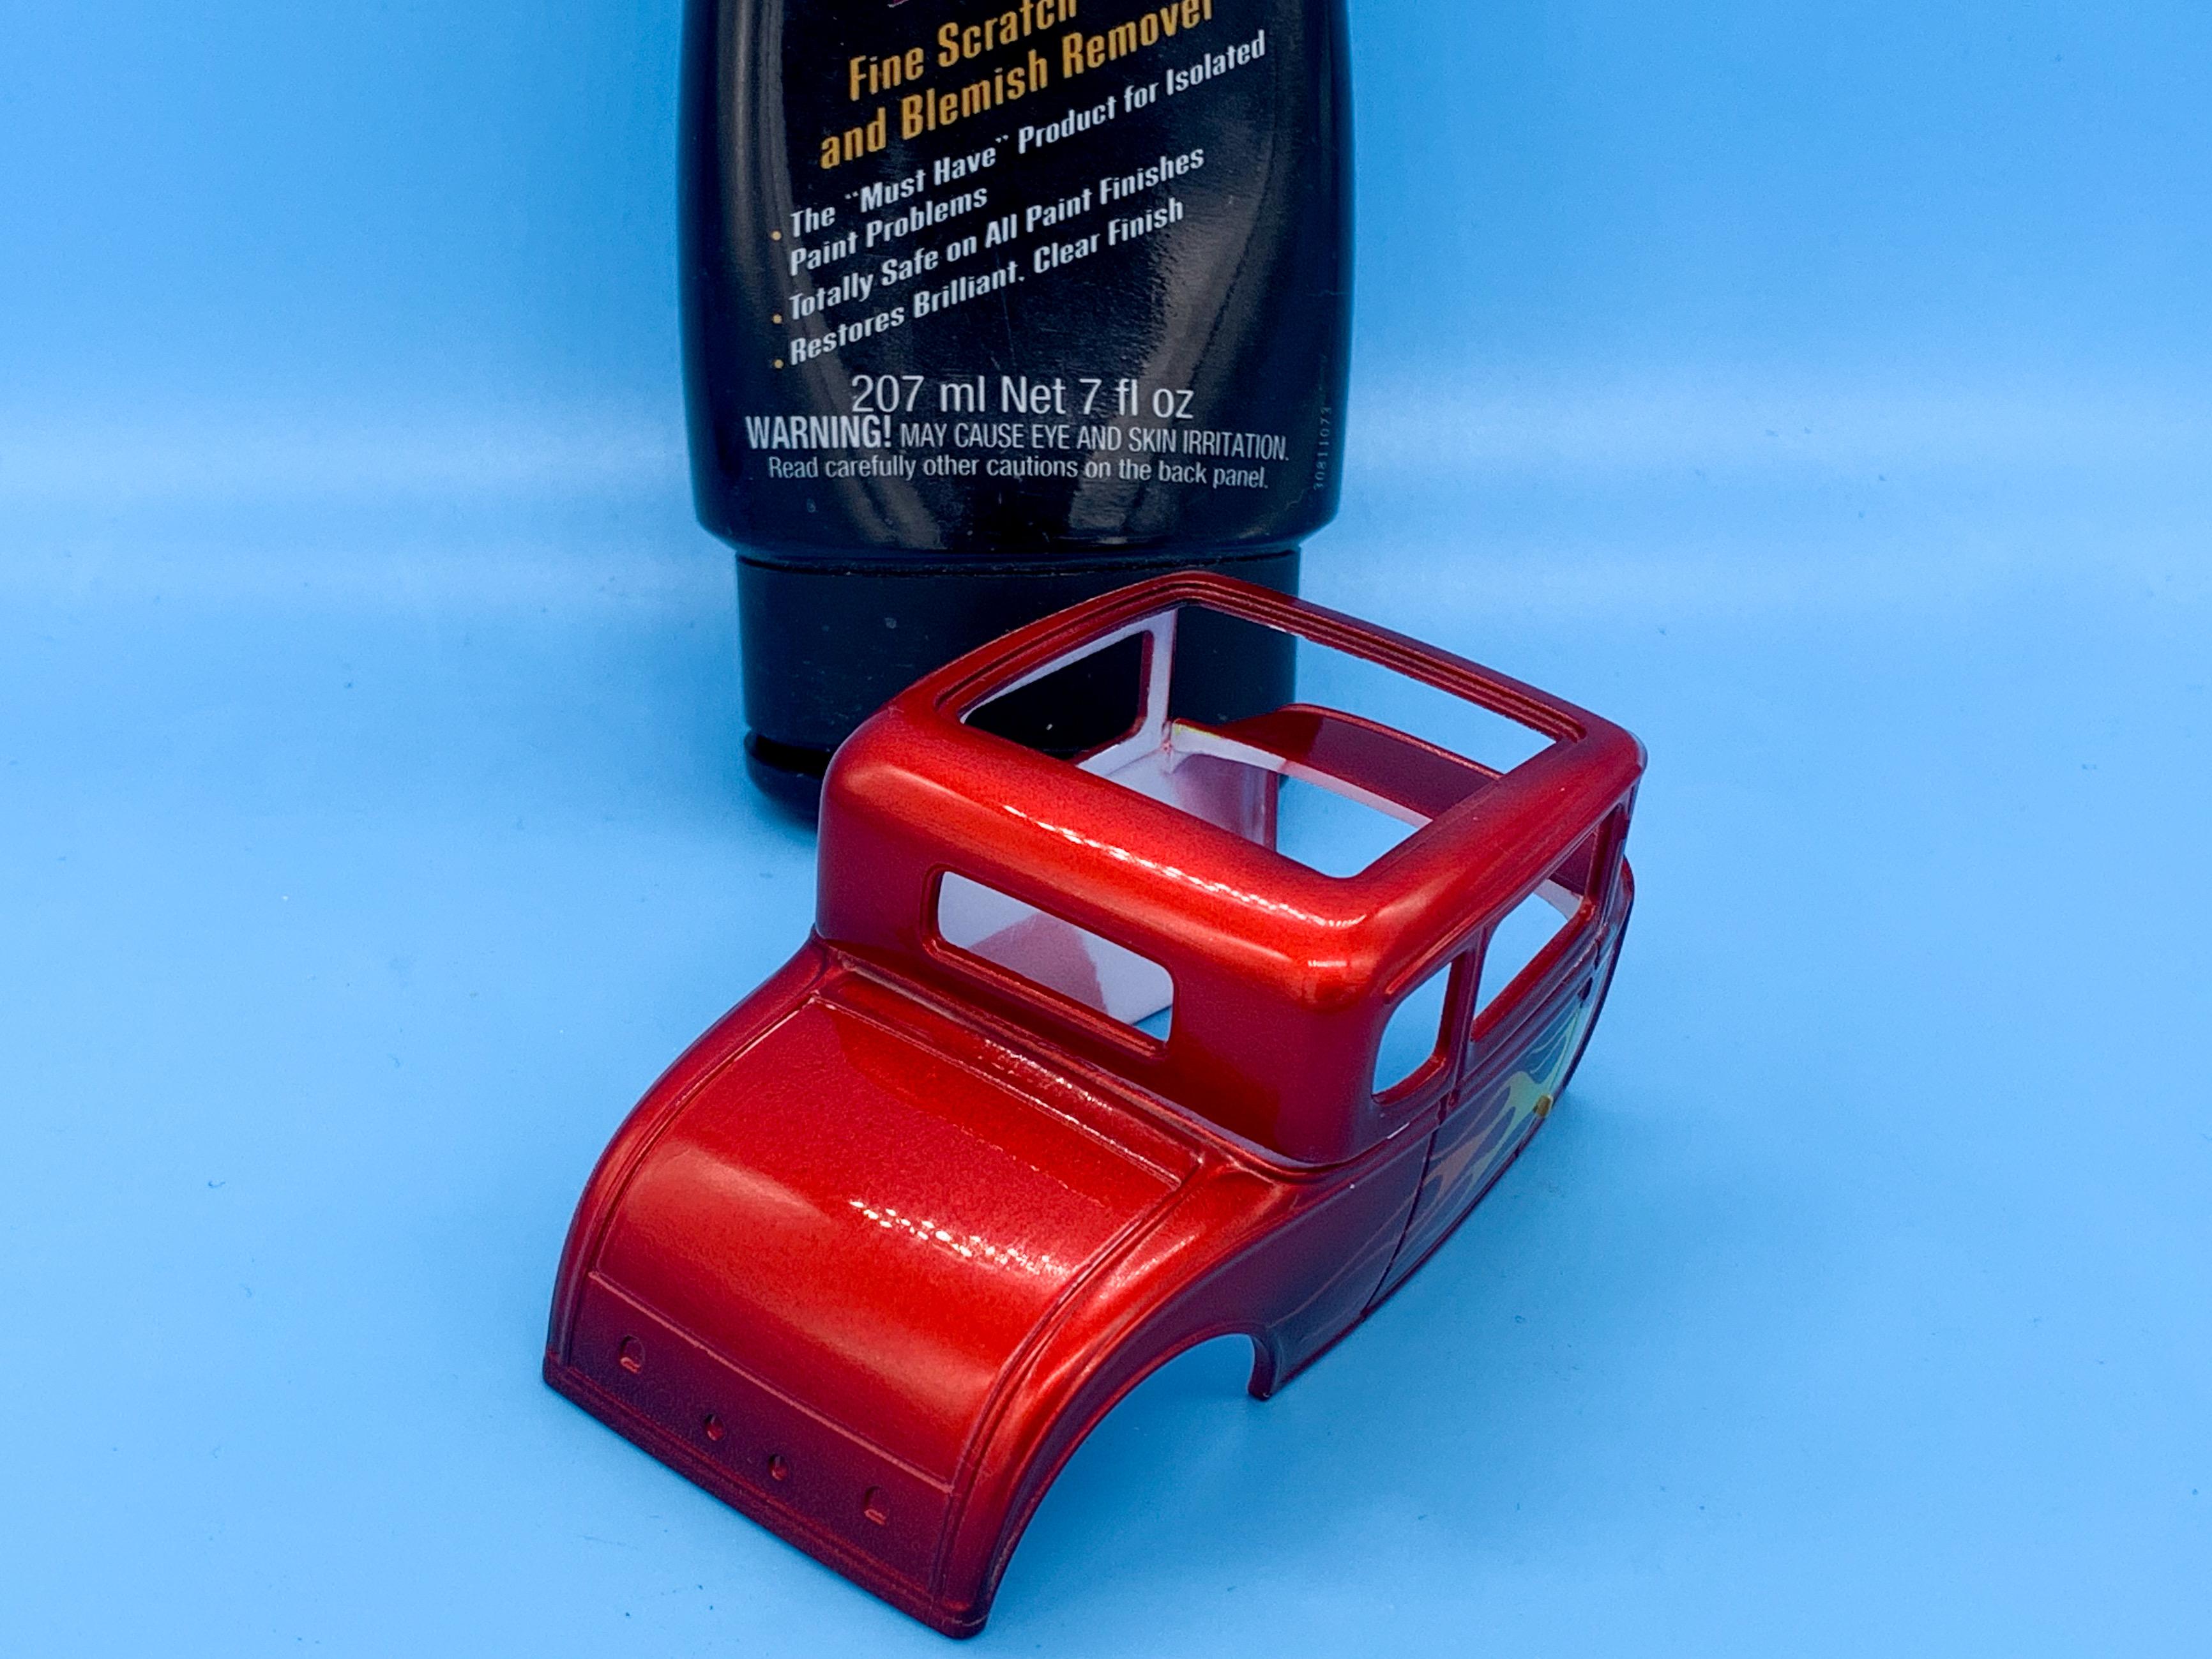
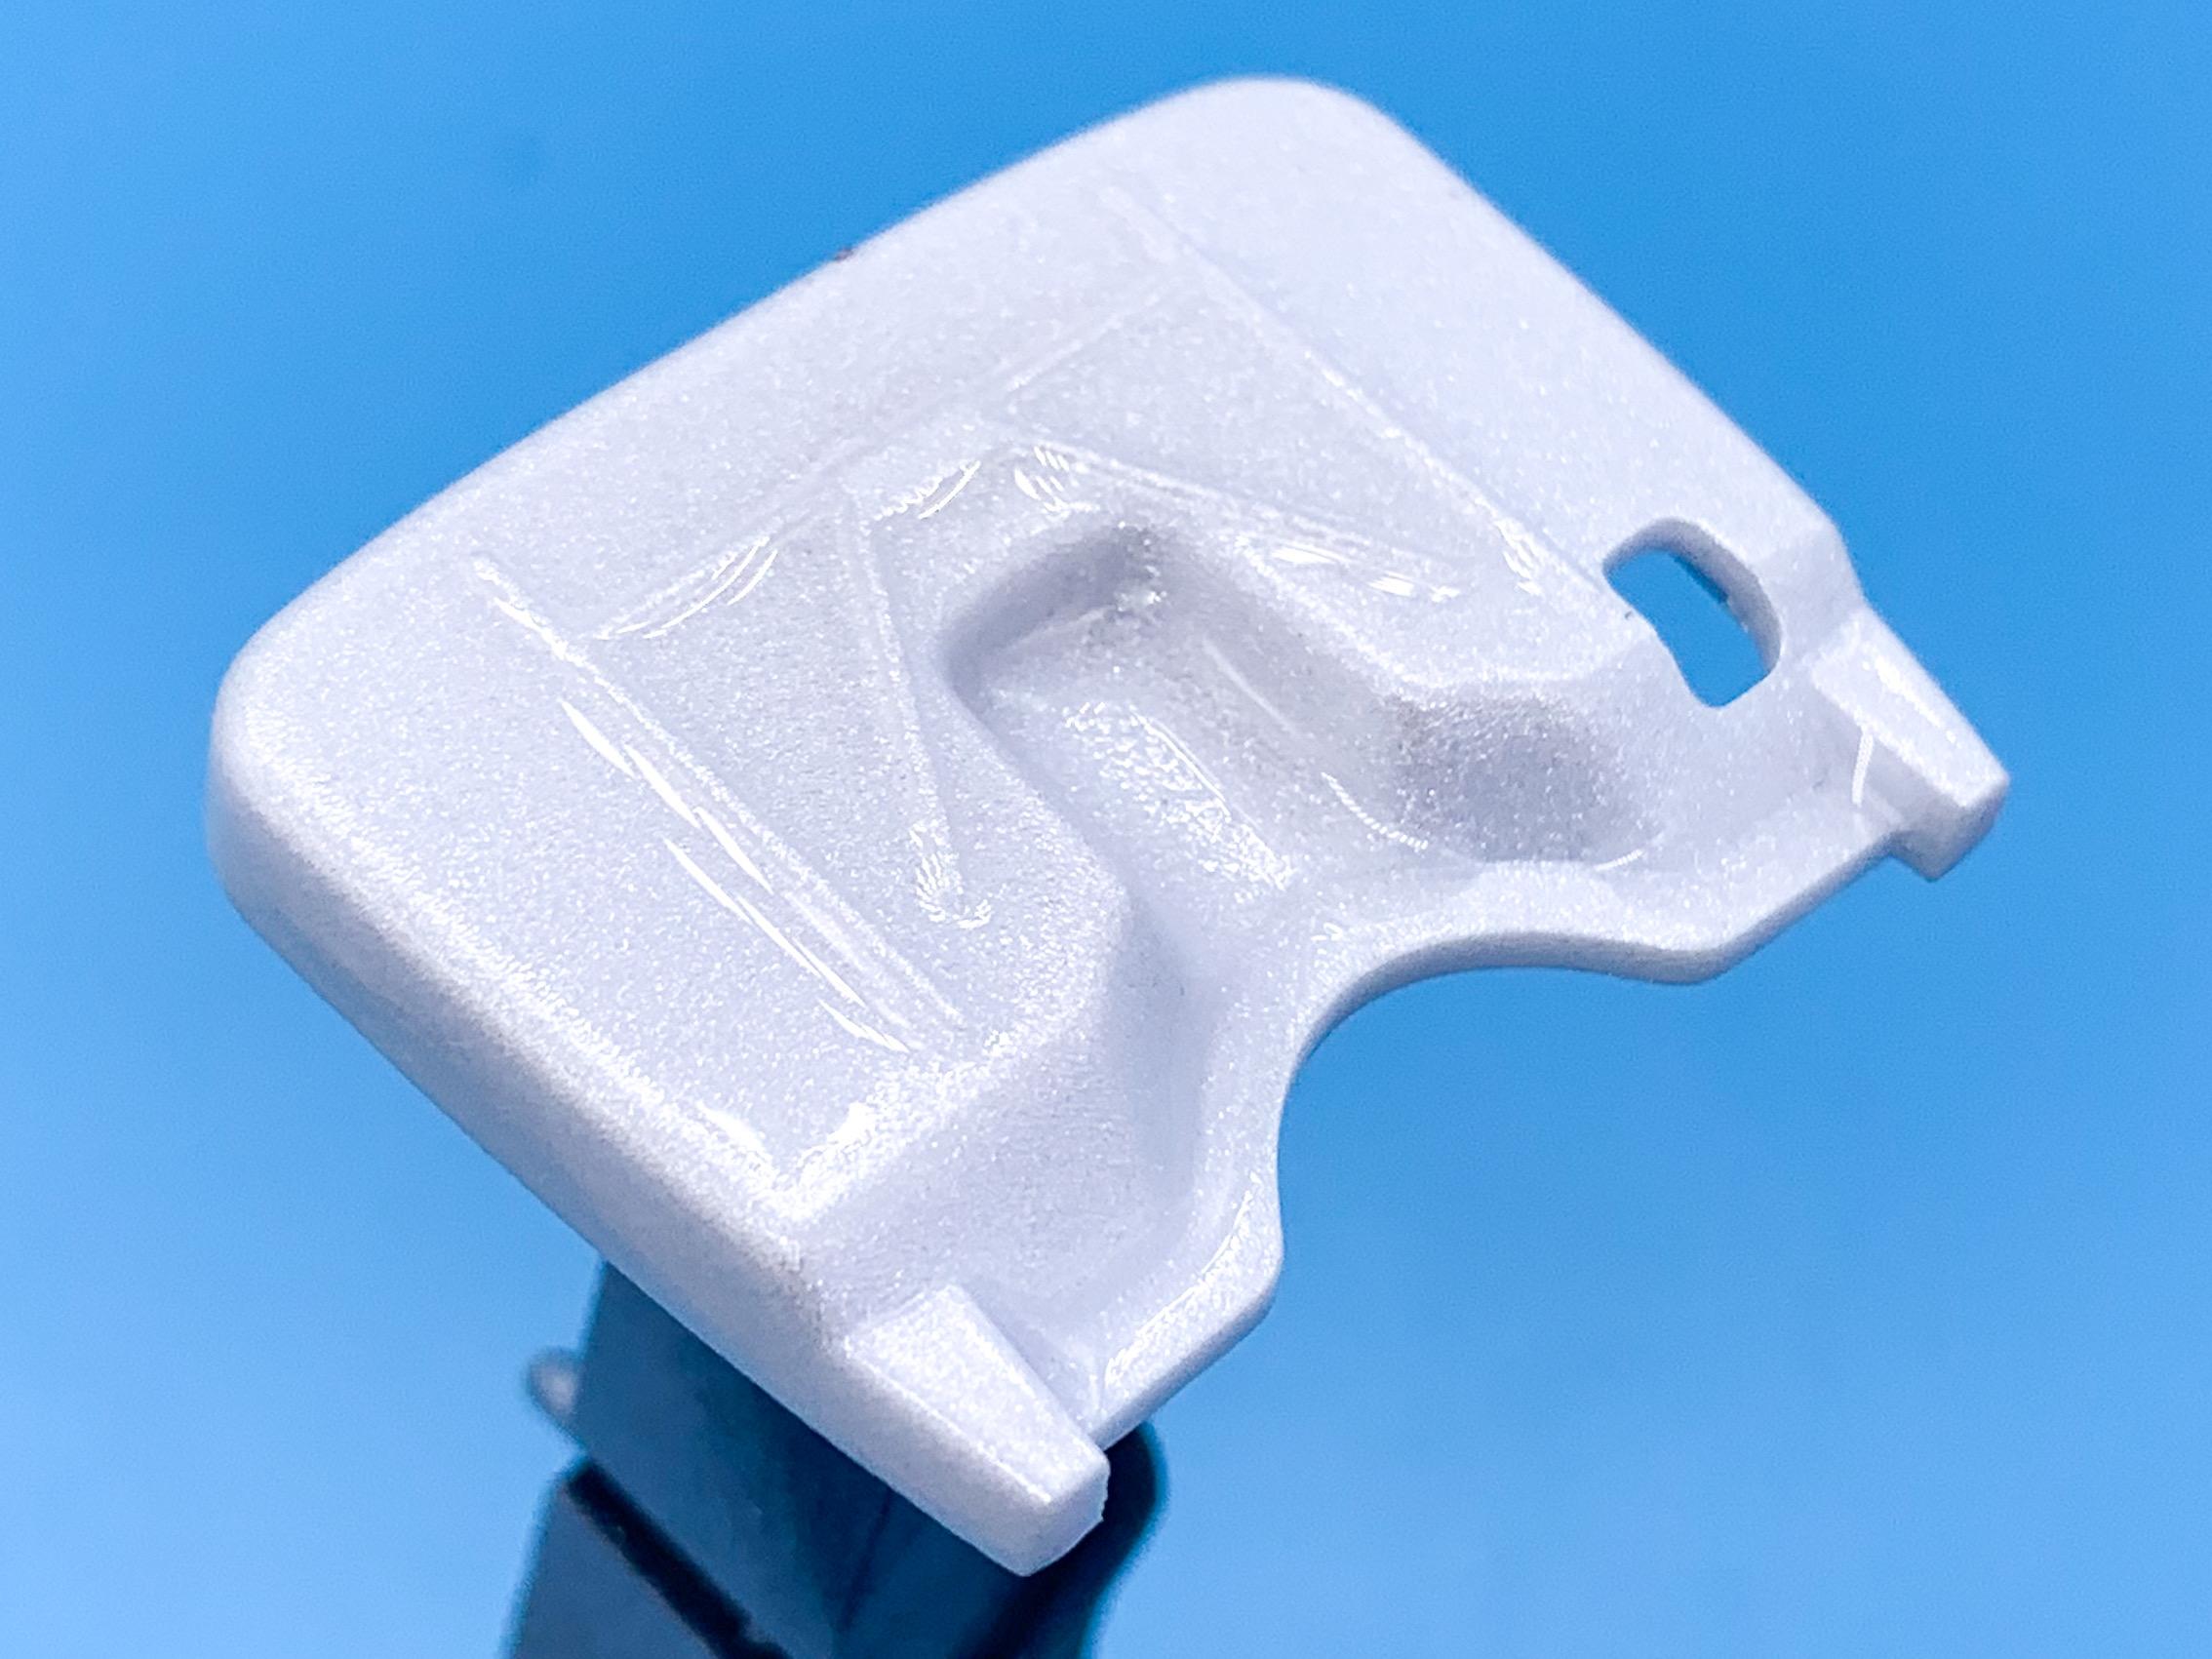
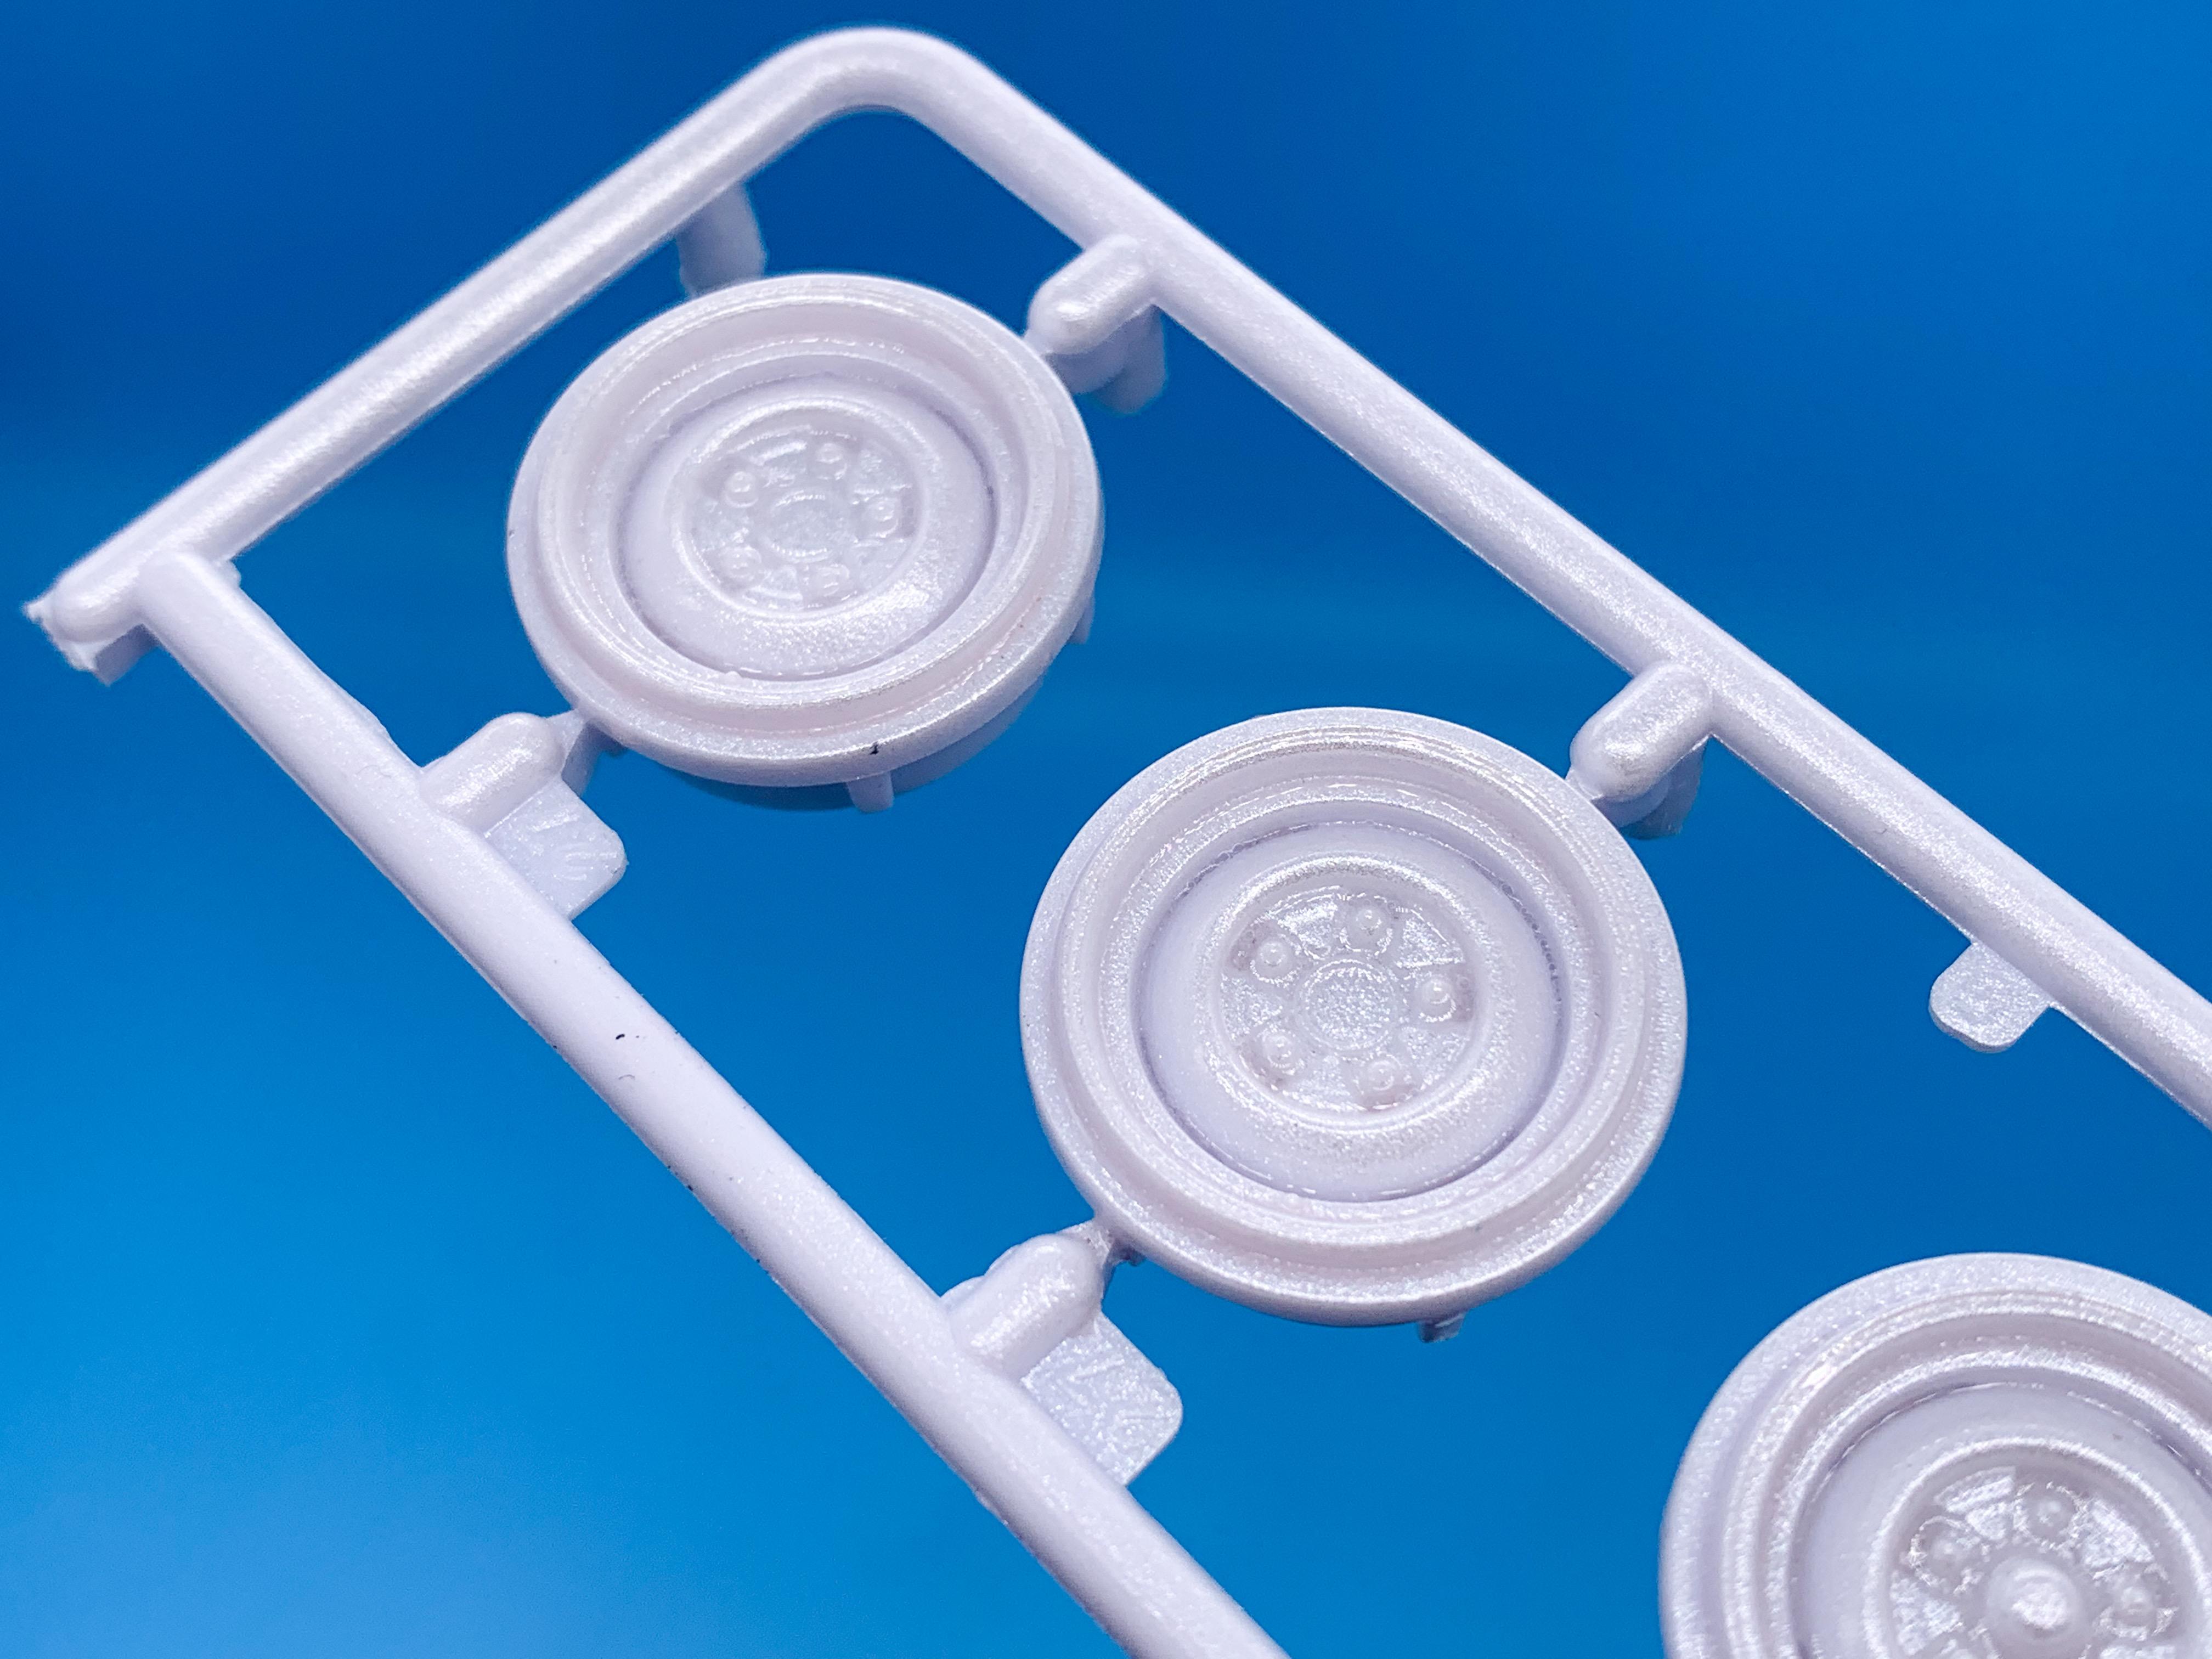
A little tiny bit more progress - had to get all the major components in clear so I could start actually assembling anything - so spent the last couple of nights laying some Rustoleum lacquer down. Don’t shoot lacquer as often as a lot of people do, but I DO love how quick it dries. Bunch of parts cleared, and ready to be polished then detailed… Shot 8 coats of clear on the body - shooting flames like this always adds some steps and lumps on the edges that I want to polish out as best I can, so I gave myself plenty of material to work with: Polished out the body tonight, after it had 48 hours in the dehydrator to set up nice and hard - used the usual polishing grits from 2400 up to 12000, then Scratch X followed by Novus 2. Not finished yet, but it’s looking shiny, I didn’t burn through the clear and the edges of the flames levelled out nicely: I’ll give that some more attention over the weekend - I prefer polishing in daylight if I can so I can see what needs more attention… In the meantime, I picked out a Wicked Colors pearl white for the wheels and firewall - I wanted to do something a little more interesting than plain old white - but honestly the flake is pretty subtle anyway…had to really zoom in and increase the contrast on these pics to be able to see it ? By the way - I NEVER like painting parts on the sprues…but the clever way Revell designed these wheels means you totally can, if you like. Sure makes it easy! Ive been trying to master using Future for some smaller parts - I never really got a great finish with it when I’d tried it before, so I used the firewall as a test. I kept it perfectly flat and brushed on three really wet coats over the course of a few hours and it’s the best results I’ve had with the stuff ever. Not that there aren’t a thousand perfectly good clear-coats out there, but I never actually managed to get results I was happy with with Future and I wanted to see if I could master it…I think that firewall actually looks TOO glossy now, it’s got that ‘dipped in syrup’ look, a little, but it looks good in real life and not on a screen. Can’t wait to start assembling some stuff next - I’m looking forward to messing with that Nailhead especially! More soon!
-
1/25 Revell F&F Brian's Ford F-150 SVT Lightning
OldNYJim replied to Casey's topic in Truck Kit News & Reviews
This kit needed boxes, a strap and a Miata bumper
-
Made it into Contest cars!
-
Mooneyes Dragster reference pictures
OldNYJim replied to sflam123's topic in WIP: Drag Racing Models
Huh, interesting - I wonder if they went with a heatproof paint or something along those lines for the block then? Would make sense I guess… -
I got a new sheet of BMF on Amazon recently, and it worked just fine. Not sure if I got lucky or it was old stock, or I’m just really good at BMFing (nah, that’s not it ?)
-
If you have the rocket, you're in trouble - if you don't, you're all good! EDIT: On no, now I got a rocket ? EDIT EDIT: Actual helpful answer - you get different things depending on how many posts you've got. I guess a rocket is the best
-
Mooneyes Dragster reference pictures
OldNYJim replied to sflam123's topic in WIP: Drag Racing Models
Great pics, thanks Stephen! I started collecting a few myself for the same reason... https://public.fotki.com/NewYorkSpeedShop/11-cars/reference-material/mooneyes-dragster/ I believe this car that you photographed is the 'real' one and they use the newer replica for events and whatnot - although, good spot, that engine doesn't look the right color compared to ANY of the pics I collected of the real car...guess it got switched out at some point. I remember from when the 'new' car was unveiled reading somewhere that the easy way to spot the difference between the two is the little British emblem badge, whatever that is, attached to the front of the frame on the old car which the new one doesn't have. -
This was interesting - thanks for the heads up on this technique! I don't think I'd use it as intended, but it would be cool to be able to do gold / silver leaf lettering, say for a vintage dragster of some kind! Cool!
-
Good news is - Createx comes off real easy, so it won’t be a bunch of work to dunk it in the Purple Power and then give it a fresh coat!
-
Oh cool! I’ll be picking up one of those lil’ dune buggies - thanks for the heads up!
-
Someone posted a sneak-peek of this one on Instagram today, for anyone curious: https://www.instagram.com/p/CWRiLryAsfz/?utm_medium=share_sheet “In stores next month”, apparently…
-
Looks GREAT Steve! And I agree on how good those panels lines look - super realistic!
-
Don’t quote me, but I think I saw an English seller selling these on eBay before we got them here - the shipping here was ridiculous, predictably enough, but I’m pretty certain SOMEONE had them for sale there
-
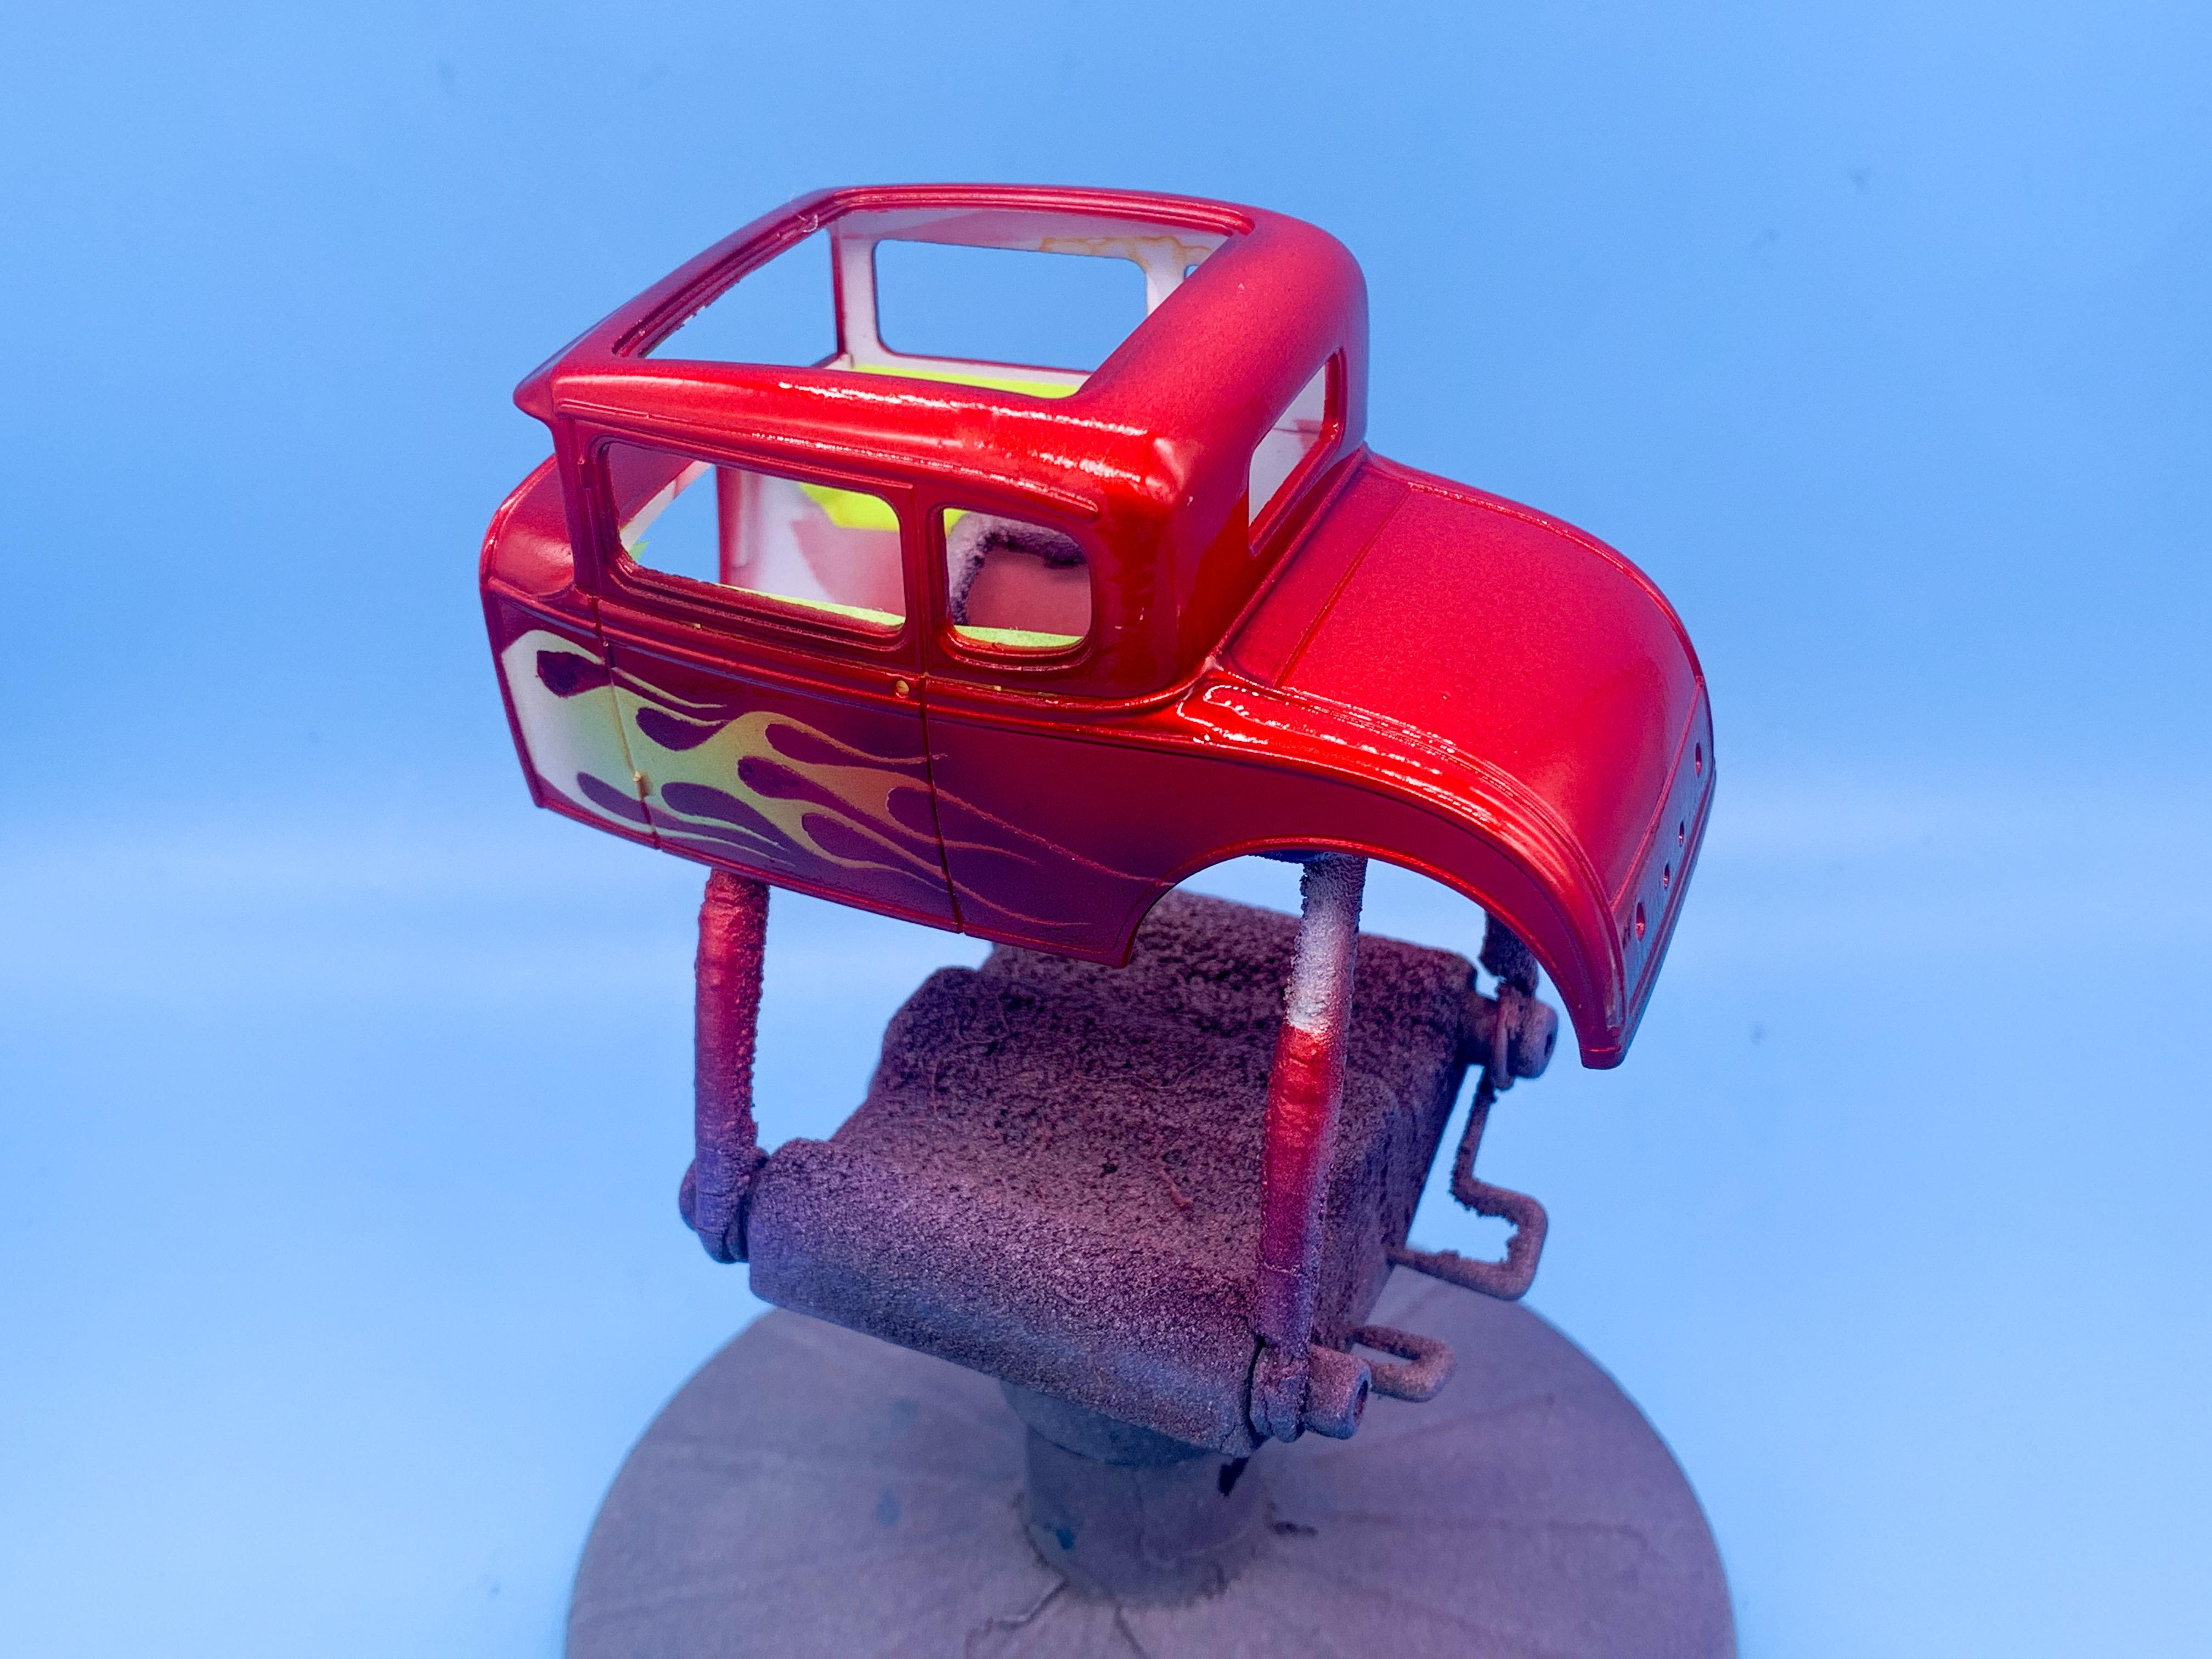
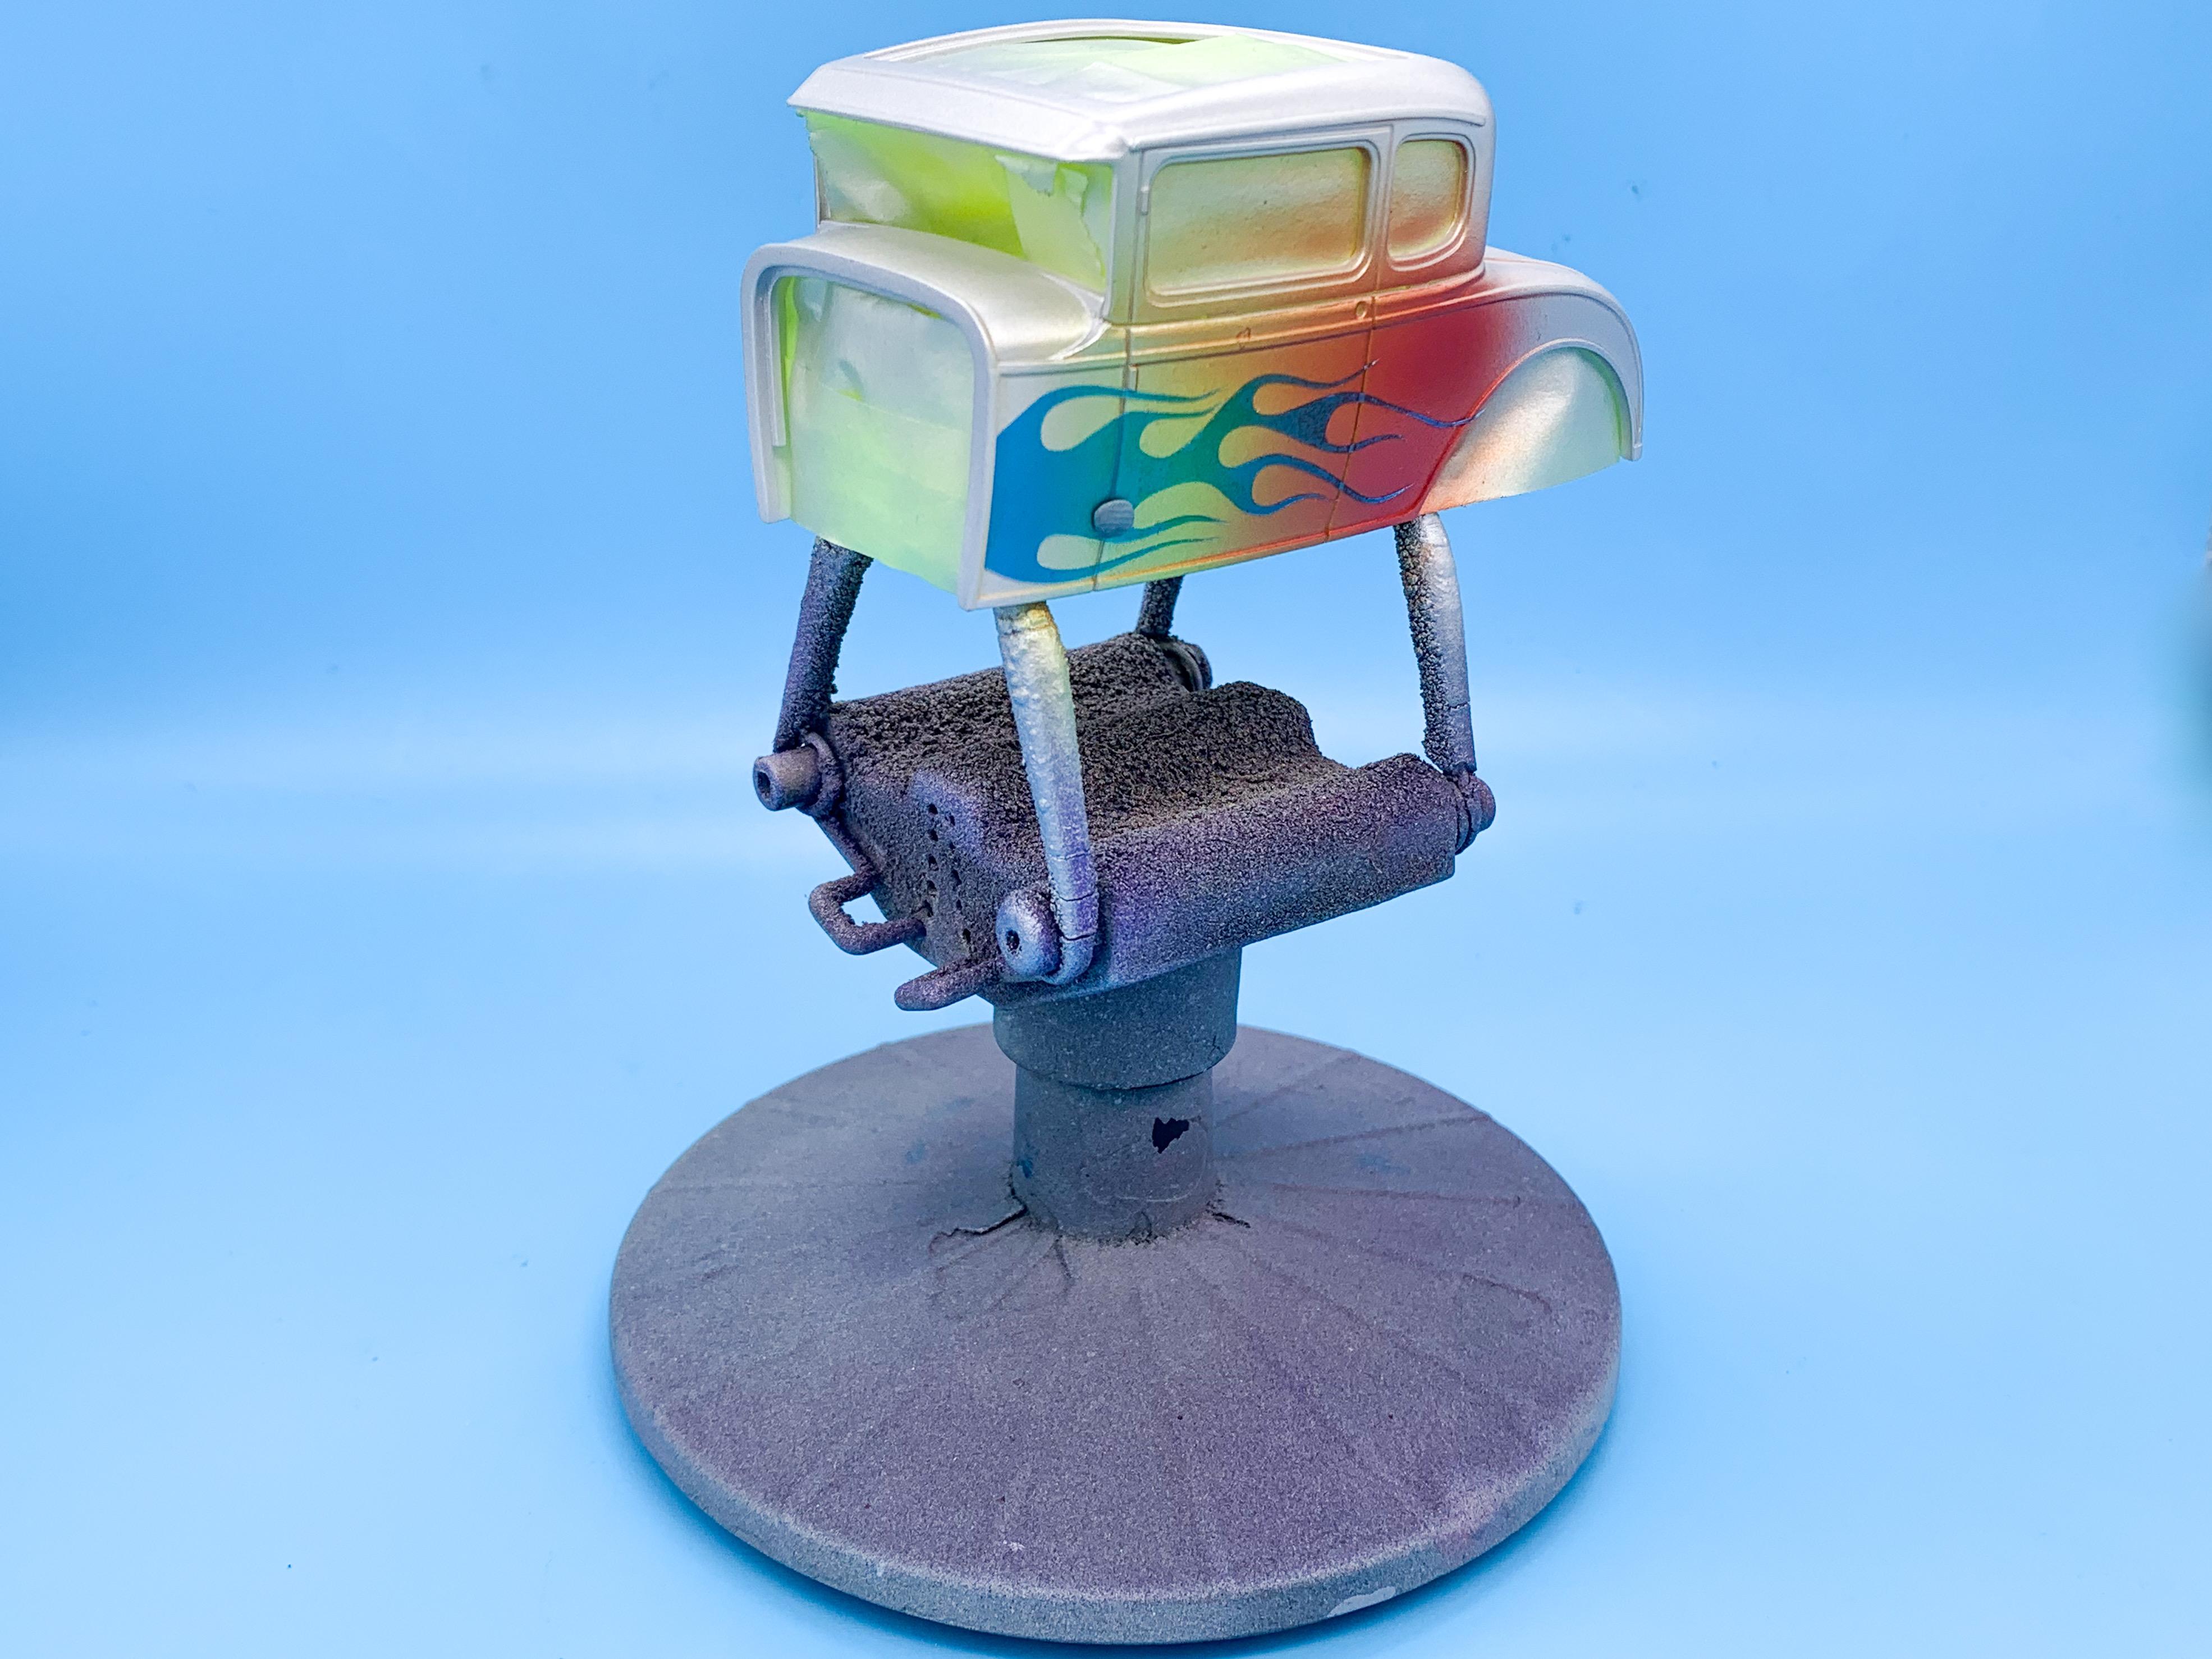
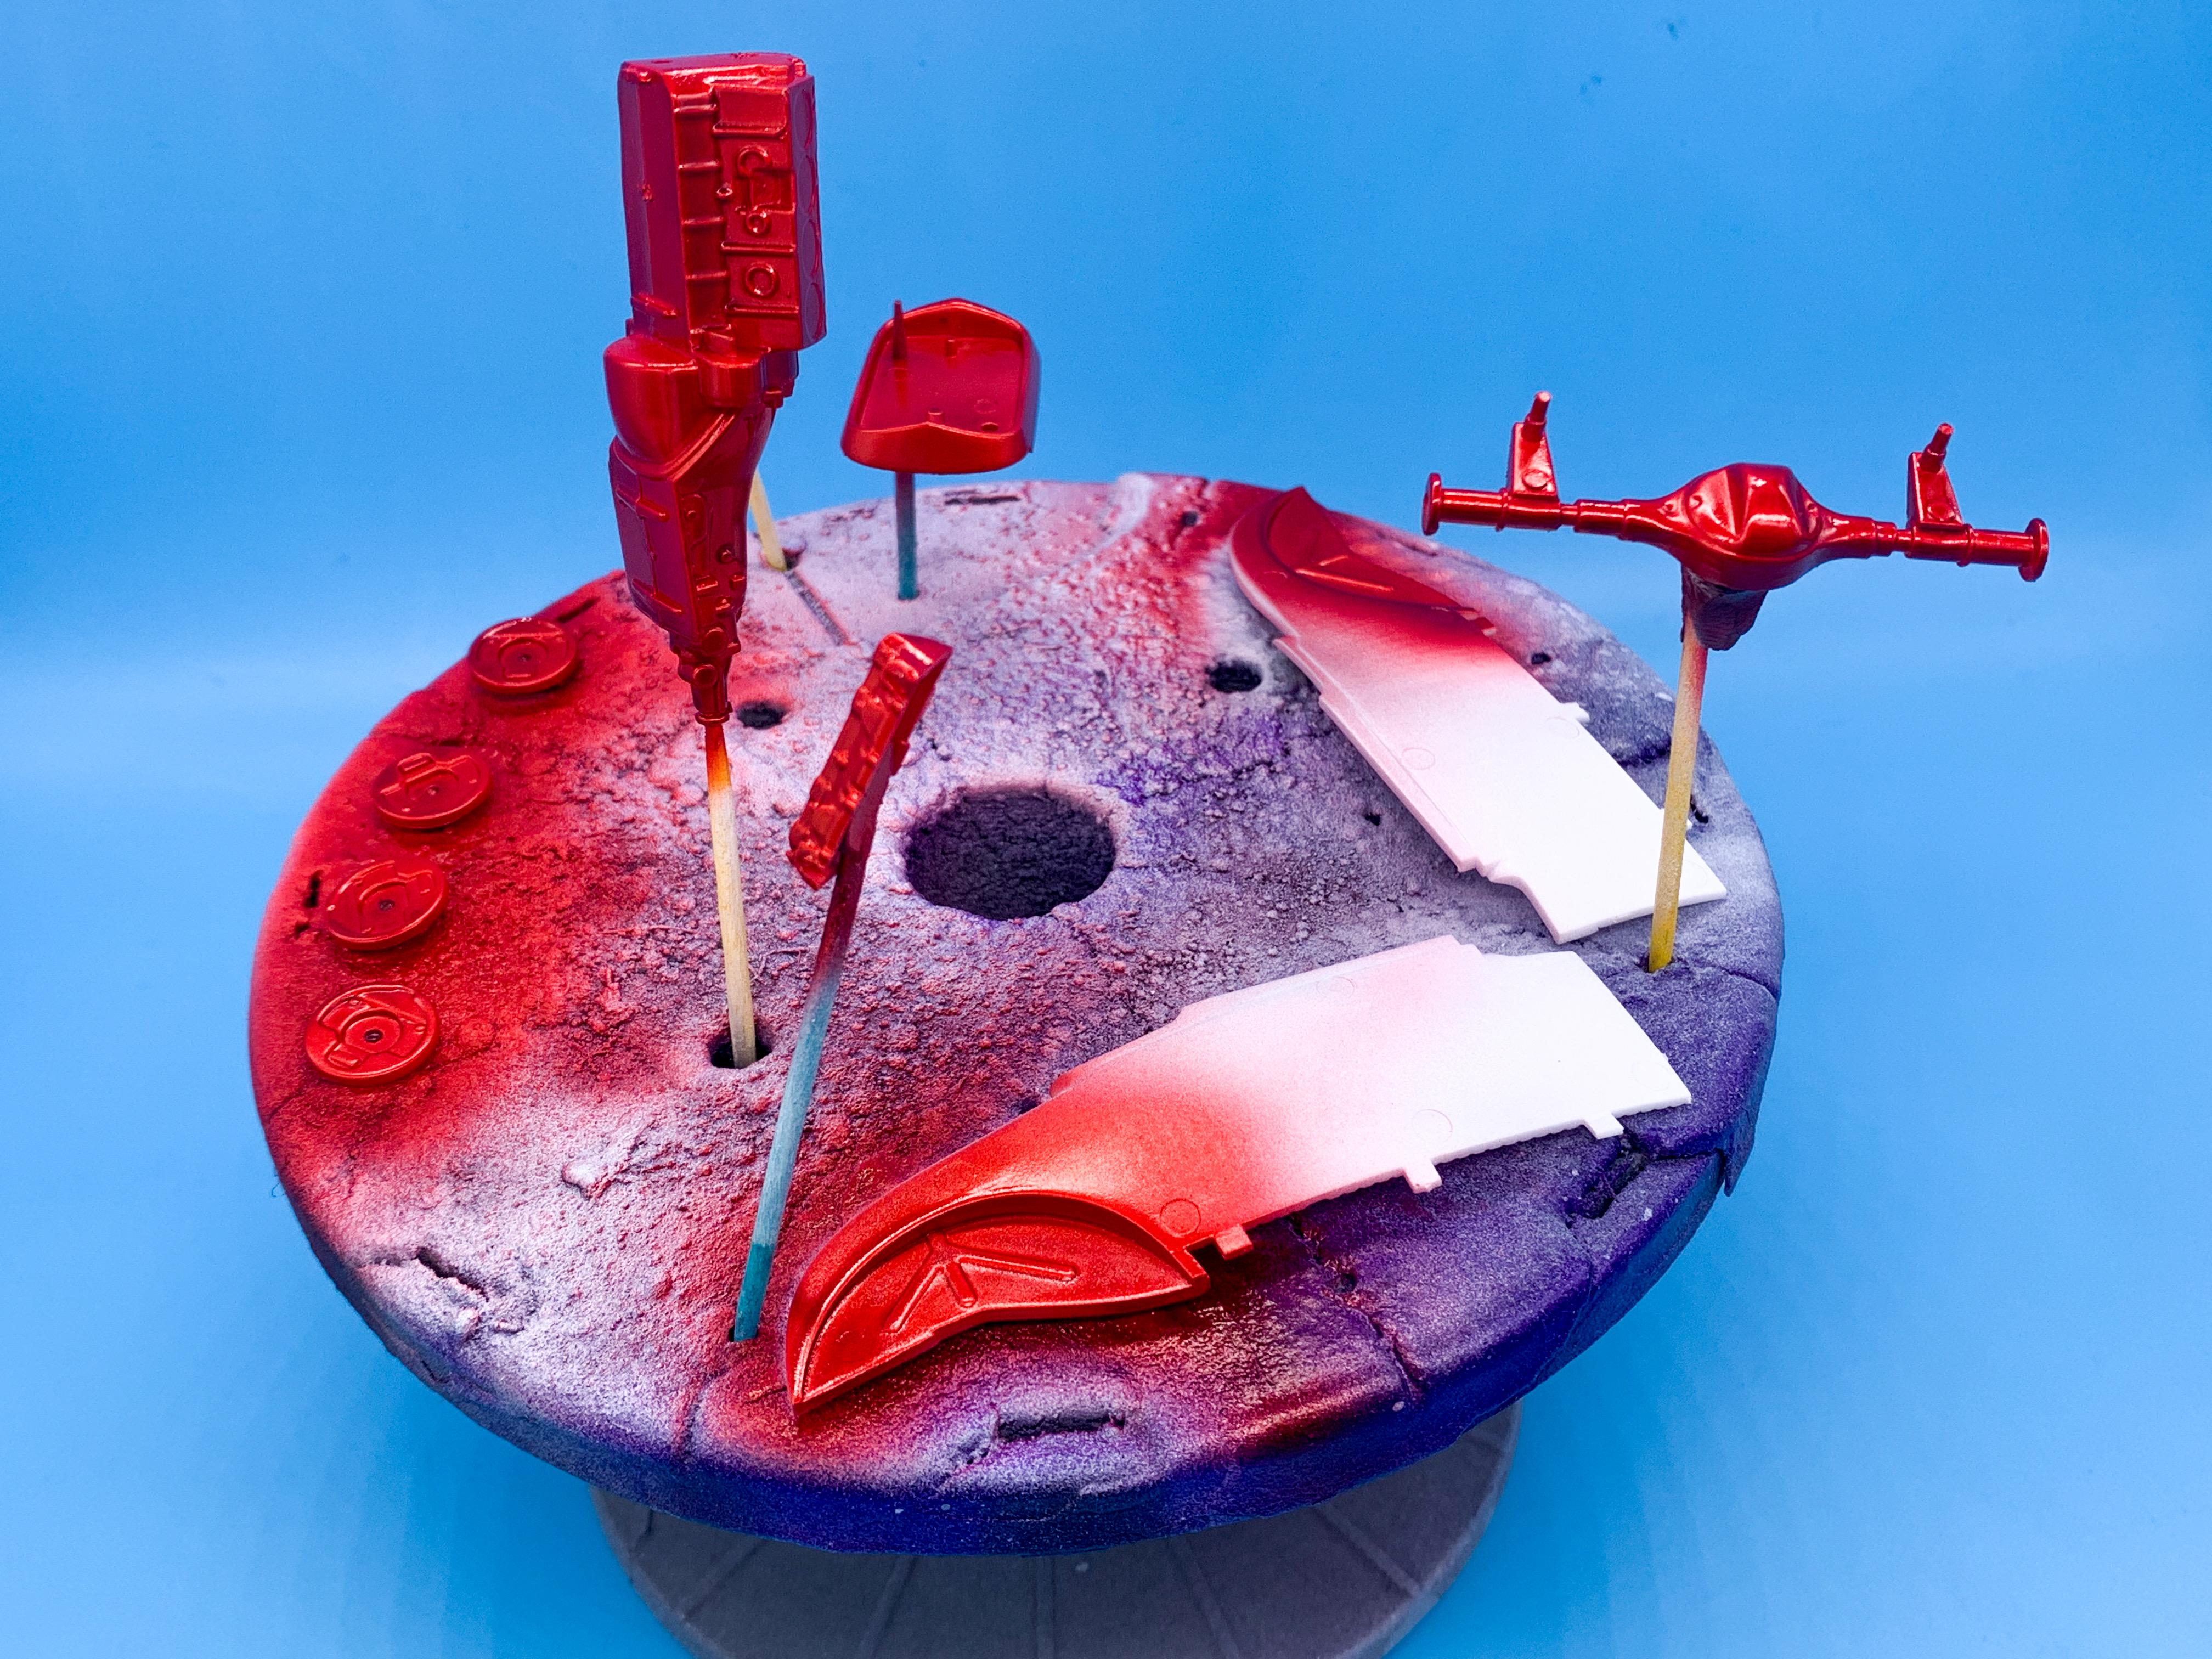
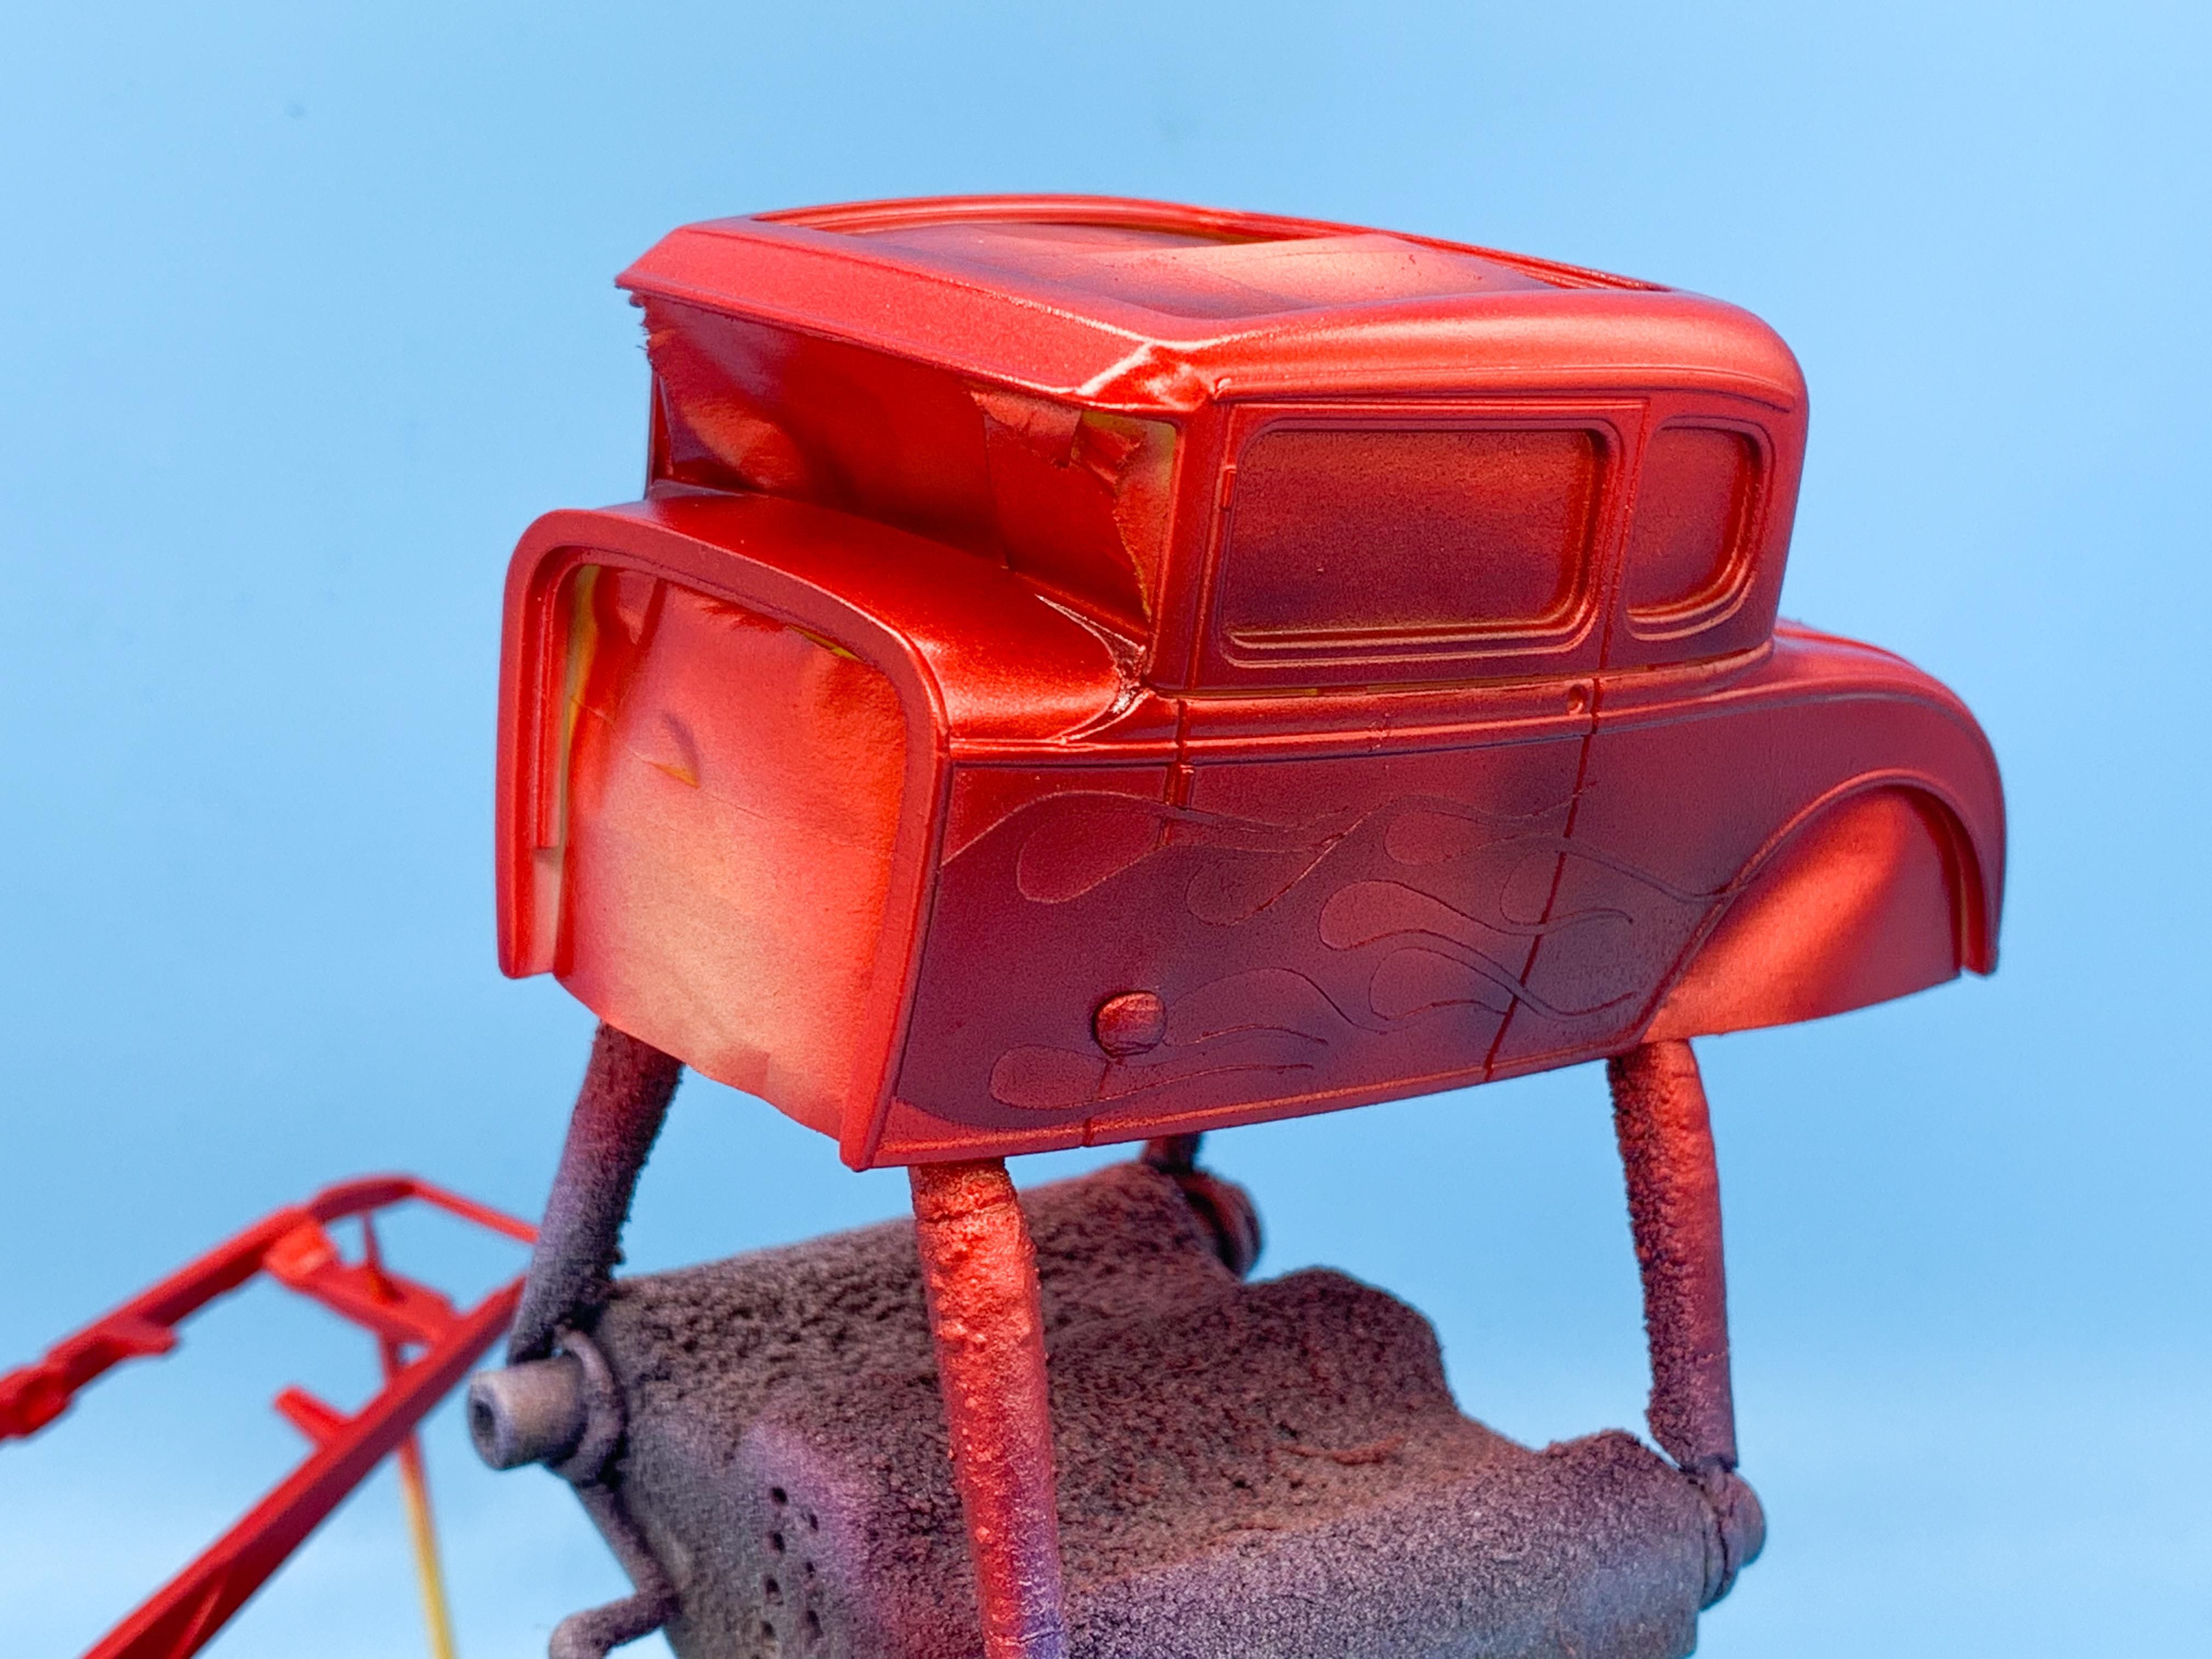
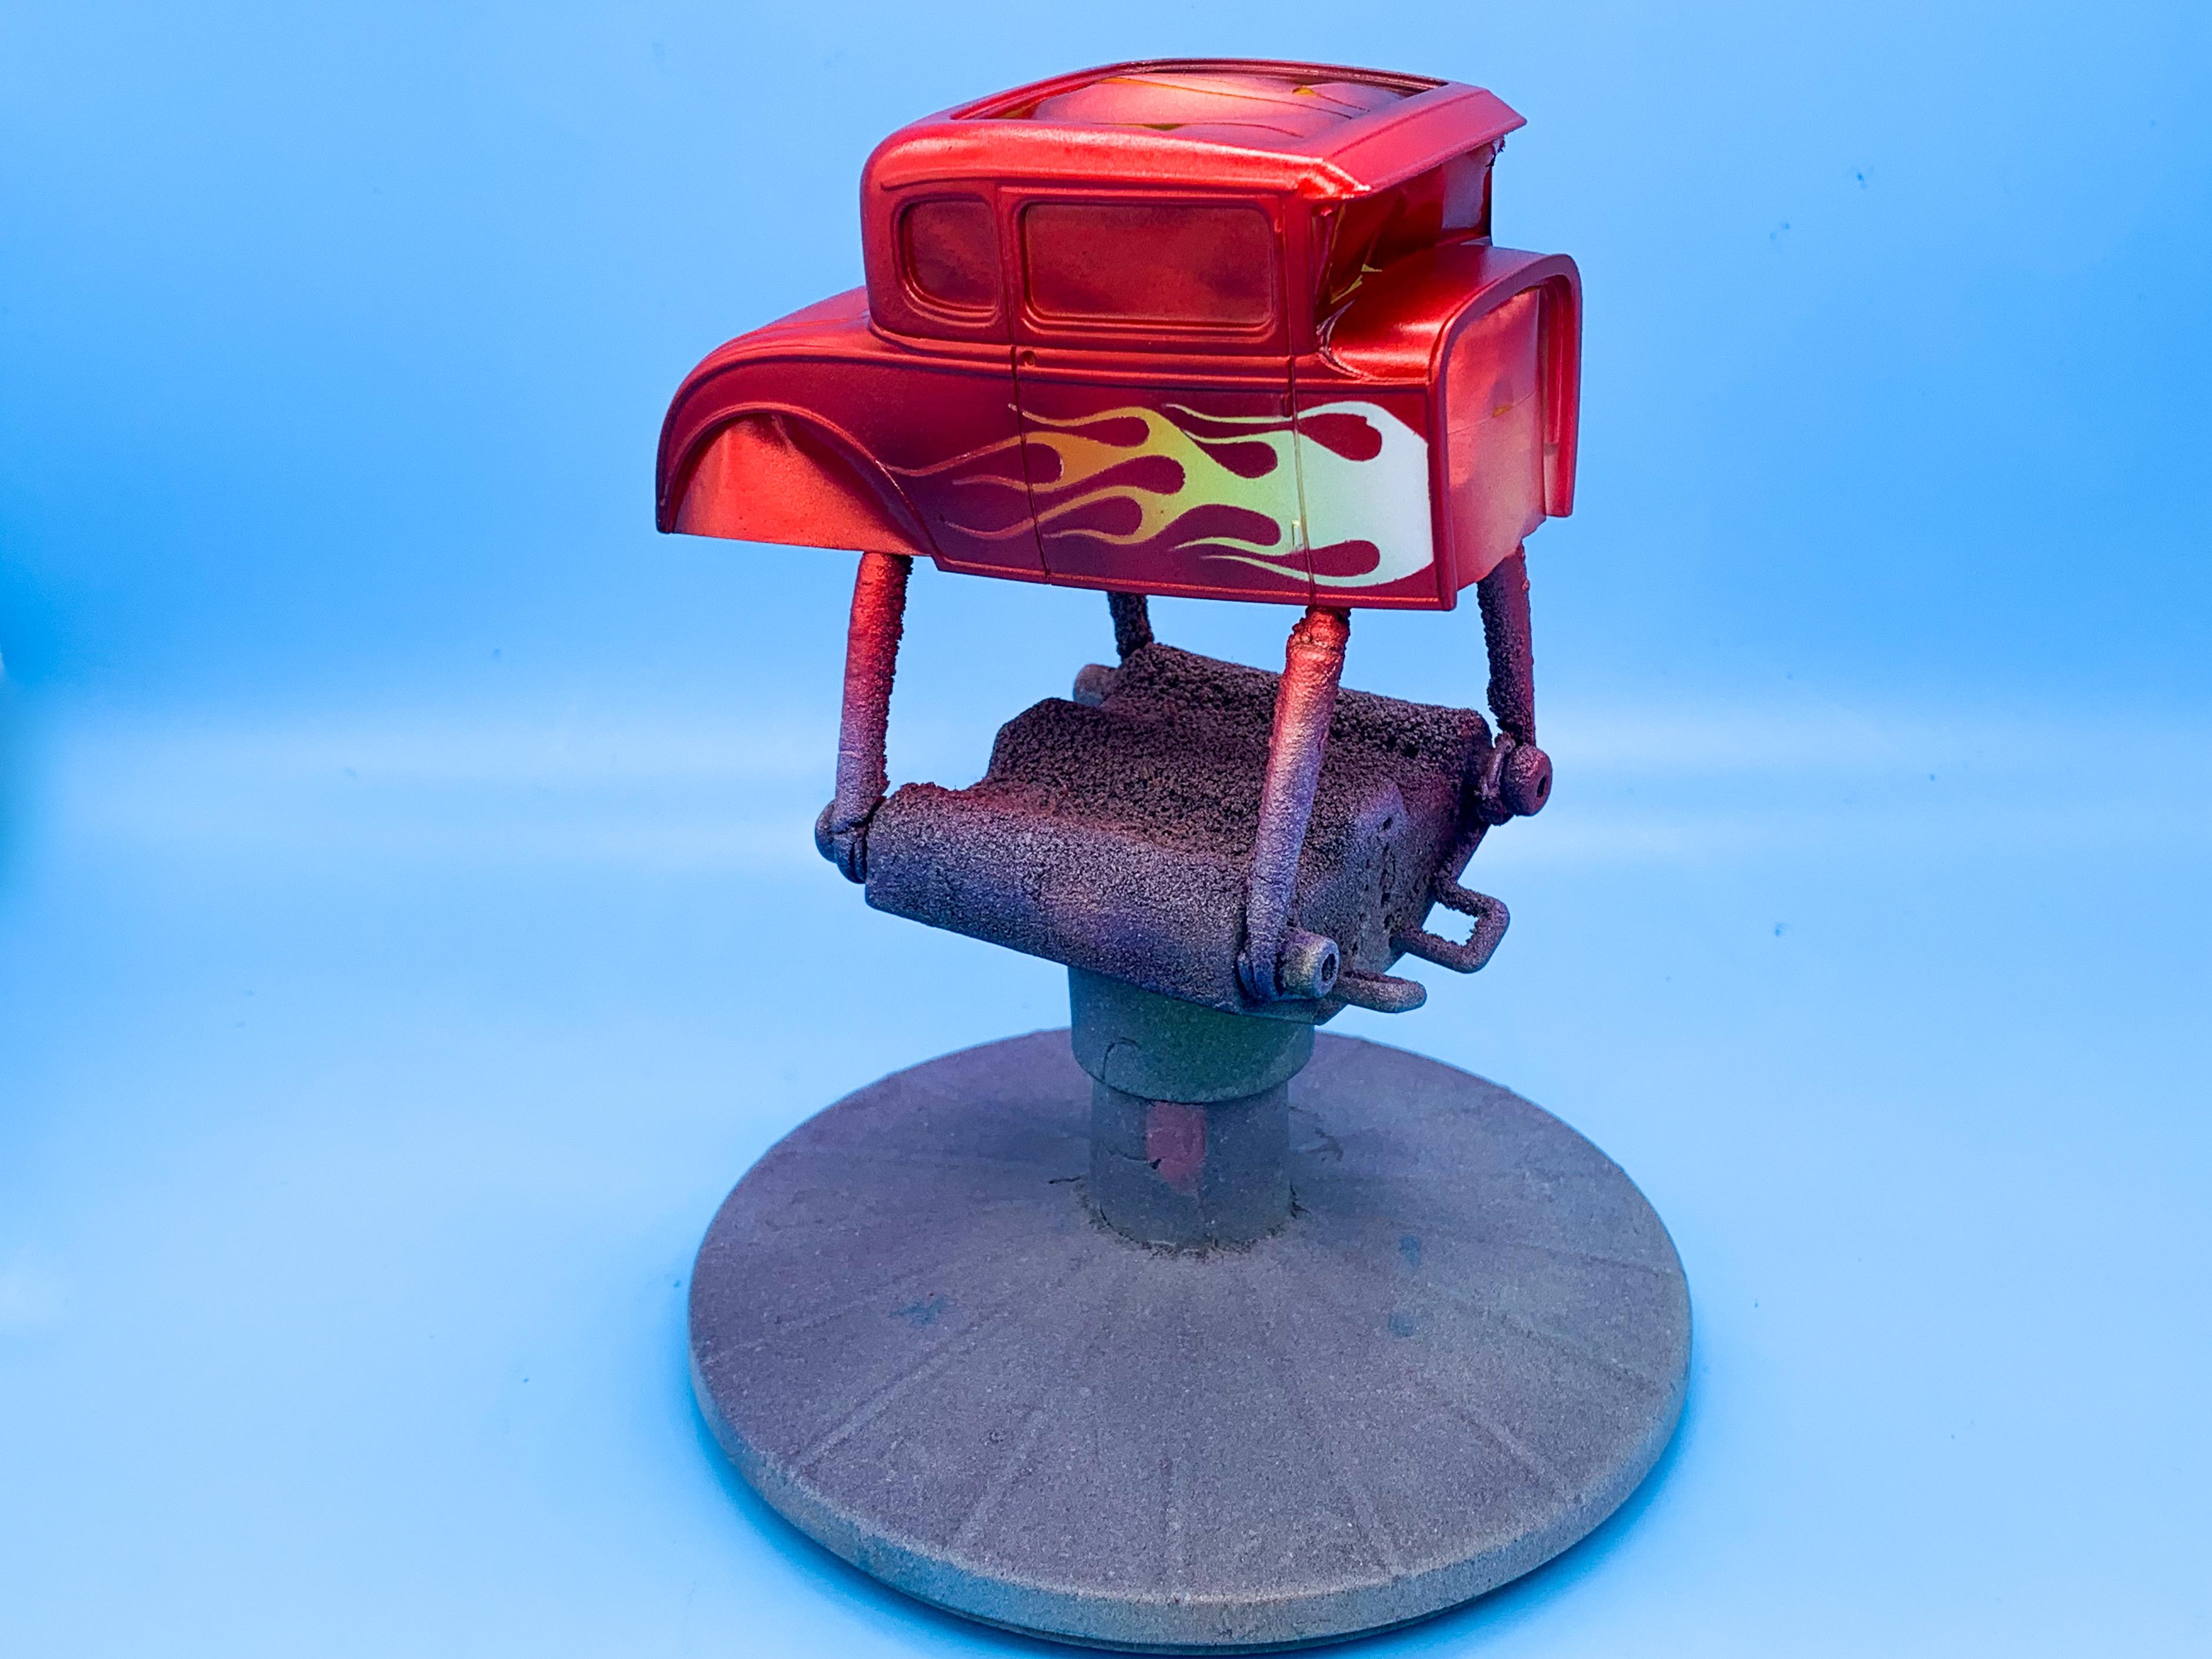
It’s paint day! Shot the body (plus the frame, engine dash and suspension pieces) in a base coat of Testor’s silver, first up: Then shot a gradient of white, candy yellow, candy orange and candy red over top of the silver base down the side of the body: Then, cut a couple of flame masks: Then, another coat of silver, with a little gunmetal silver shading to add a little depth: Then, finally, the fun part - candy red topcoat! You can see some of those gunmetal lowlights peeking through the candy color here: Then, carefully, remove the masks: Needs a couple of little touch ups (this Createx candy lays down REALLY nicely, but if you remove it at the wrong time in a five-minute window it’ll either chip or pull like chewing gum) and then it’ll be time to clear it! More soon, thanks for looking!
-
Almost related story - last Christmas Day my wife and I were driving early morning to visit her family, and we thought we’d try the local McDonald’s to see if we could grab coffee for the road. I pulled into the parking lot and spotted pretty quickly that they were indeed closed (no great surprise), but some guy who was in the parking lot flagged us down. Rolled down the window, guy comes over - “they’re not open?!” he says. “Nope - closed for Christmas I guess” I reply. “How am I meant to collect my order?” he asks, frustrated… Turned out he’d ordered like $80 worth of breakfasts and drinks and snacks for some big family gathering via their app…and there was no one there to make it. The app didn’t care if they were open or not, it still took his order and told him to drive to the store to collect it ?