GerN
-
Posts
494 -
Joined
-
Last visited
Content Type
Profiles
Forums
Events
Gallery
Everything posted by GerN
-
One of the best customs I've seen in a long time. The design, the workmanship - everything is excellent. Almost a shame to "disguise" the wonderful body under the decals. Just a great build.
-
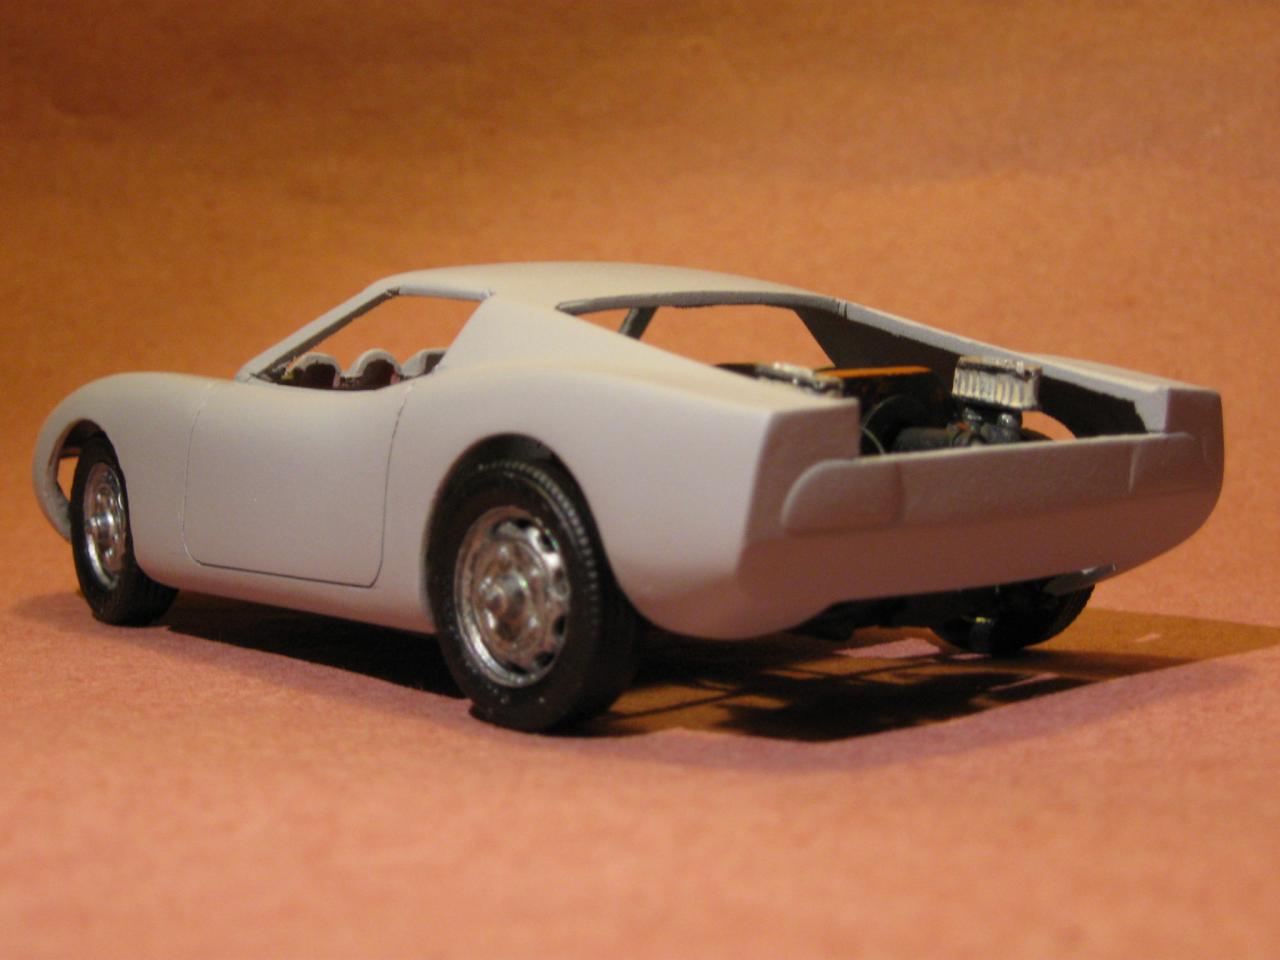
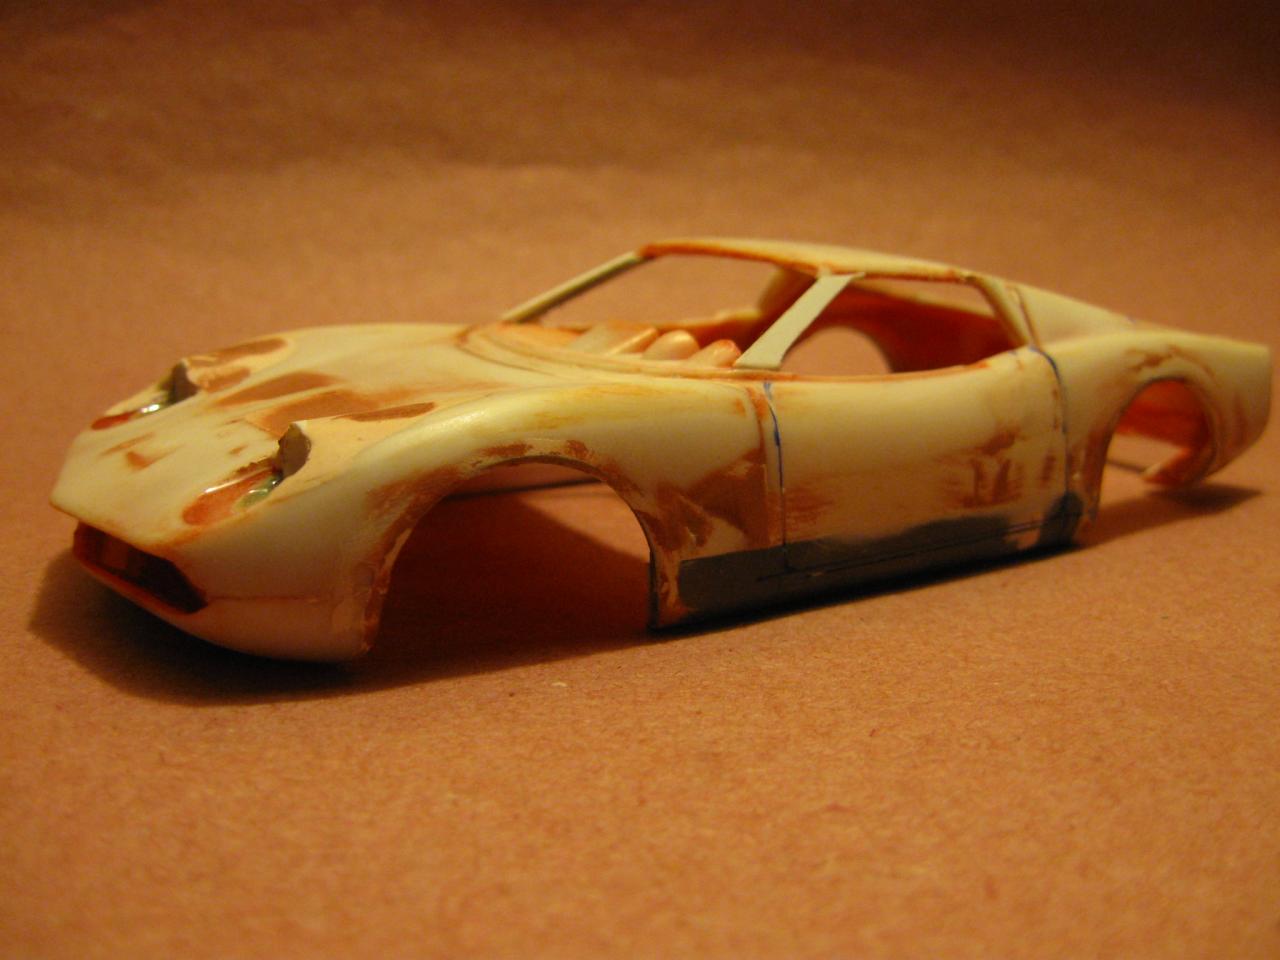
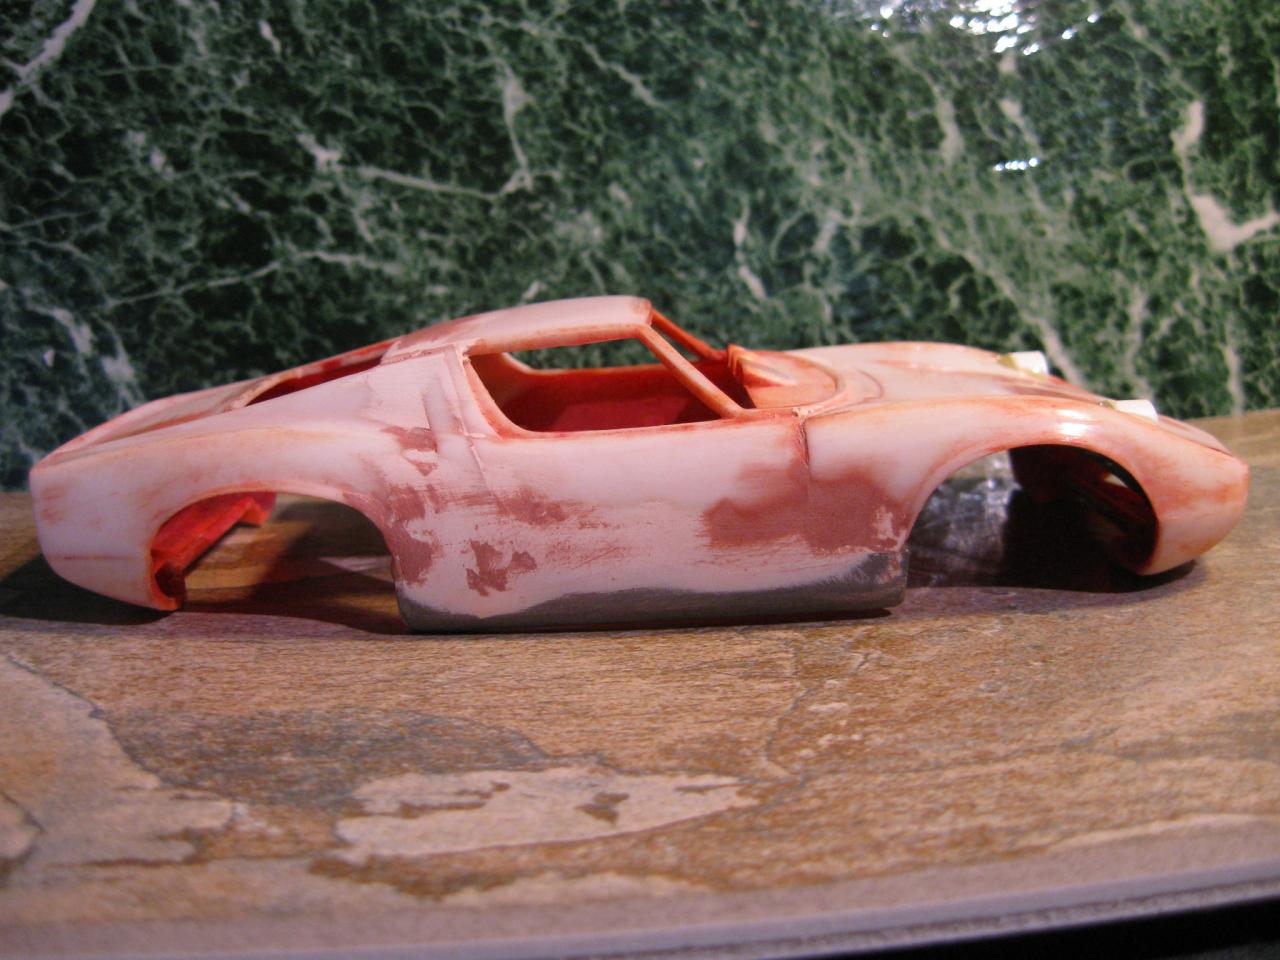
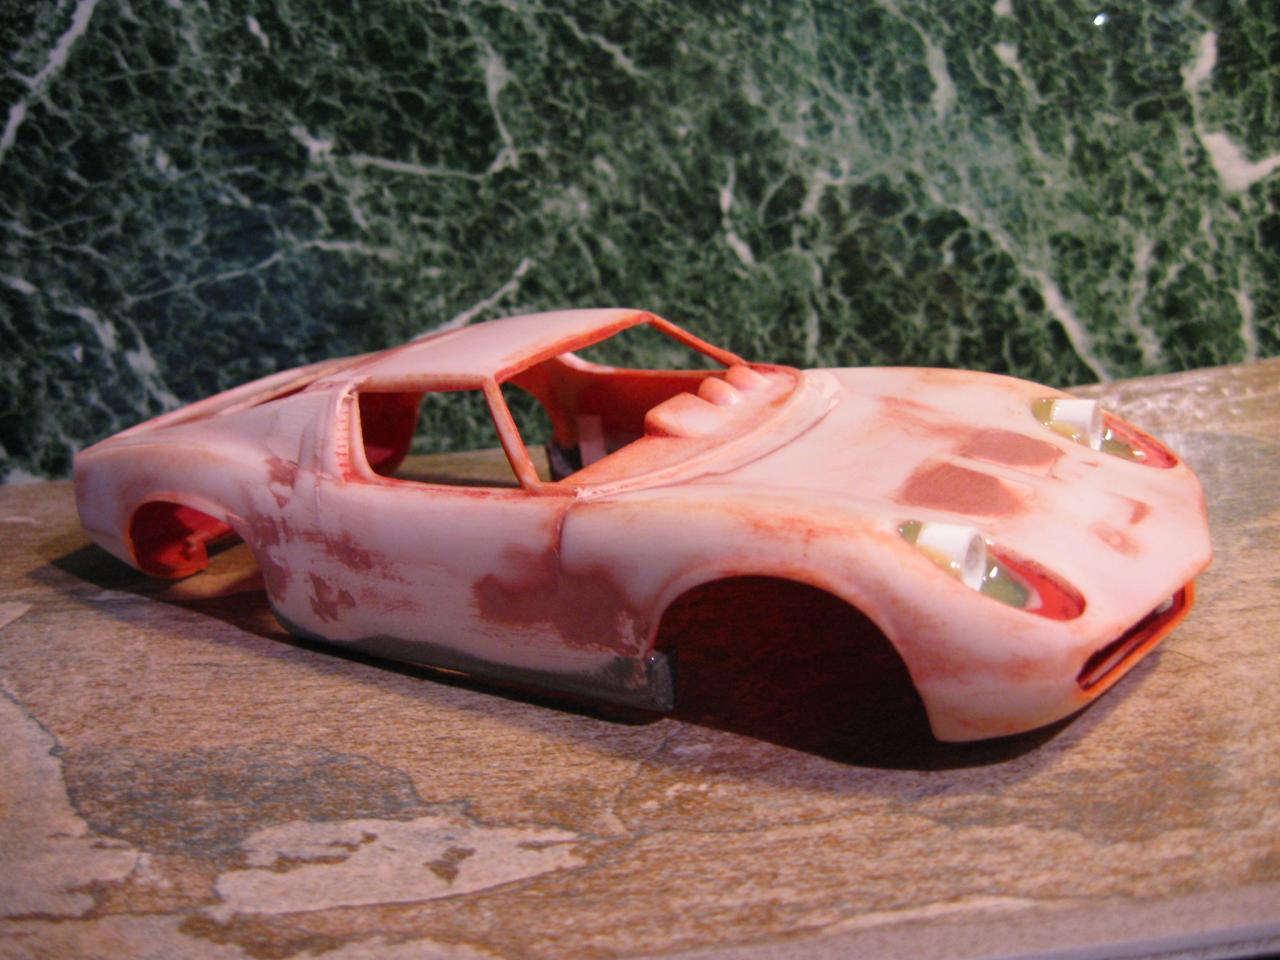
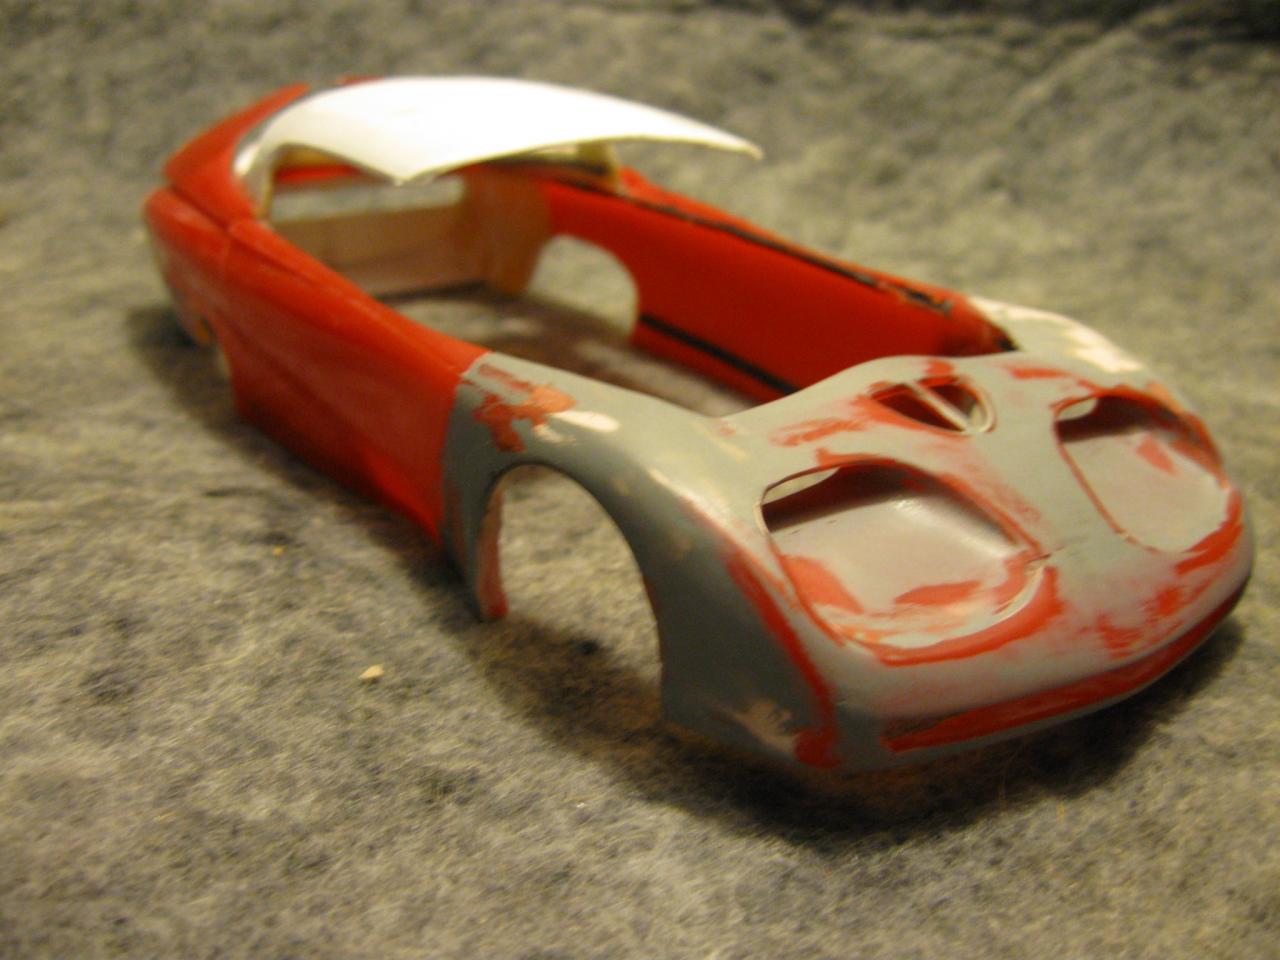
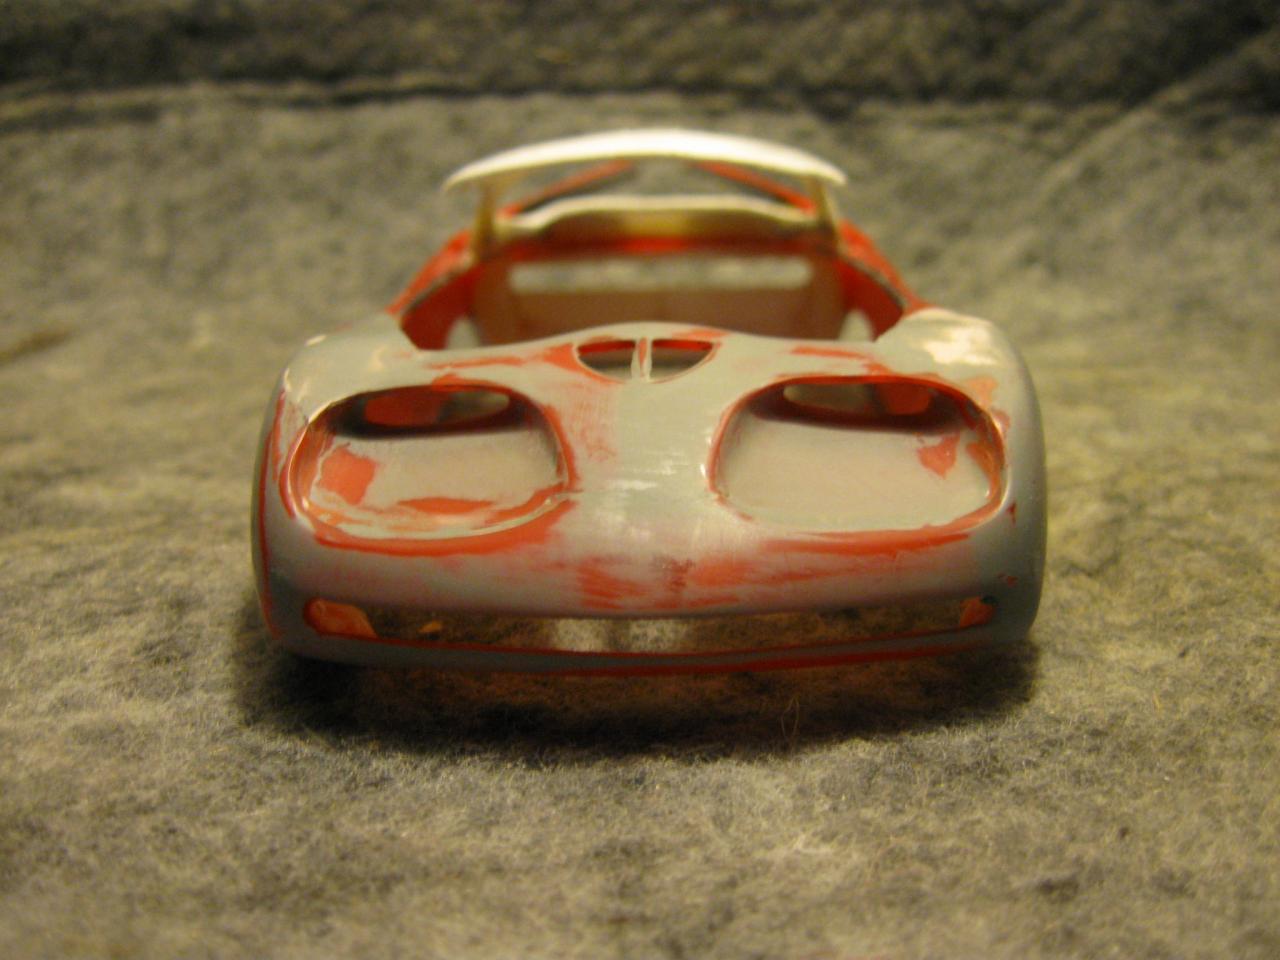
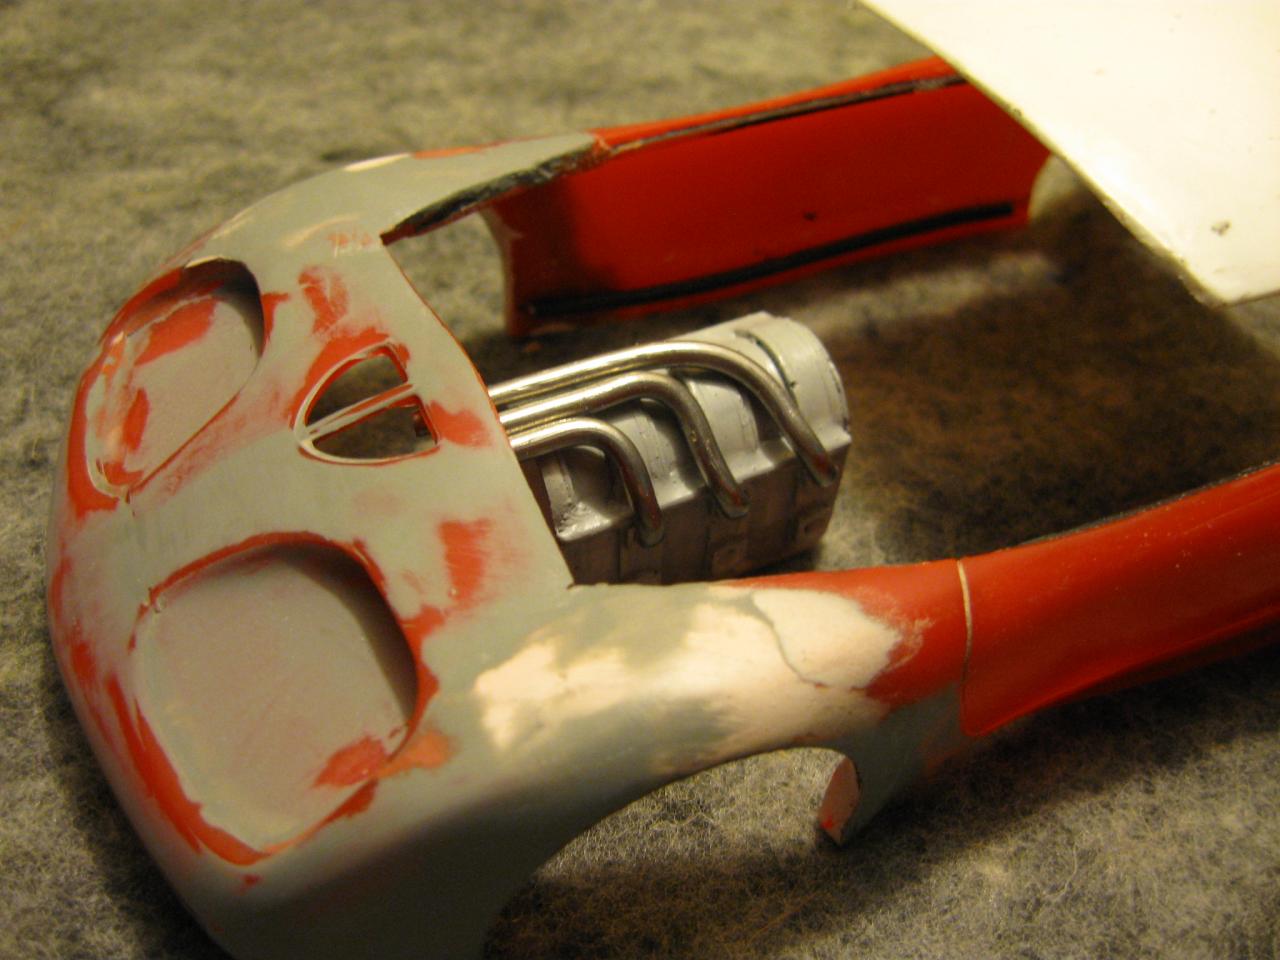
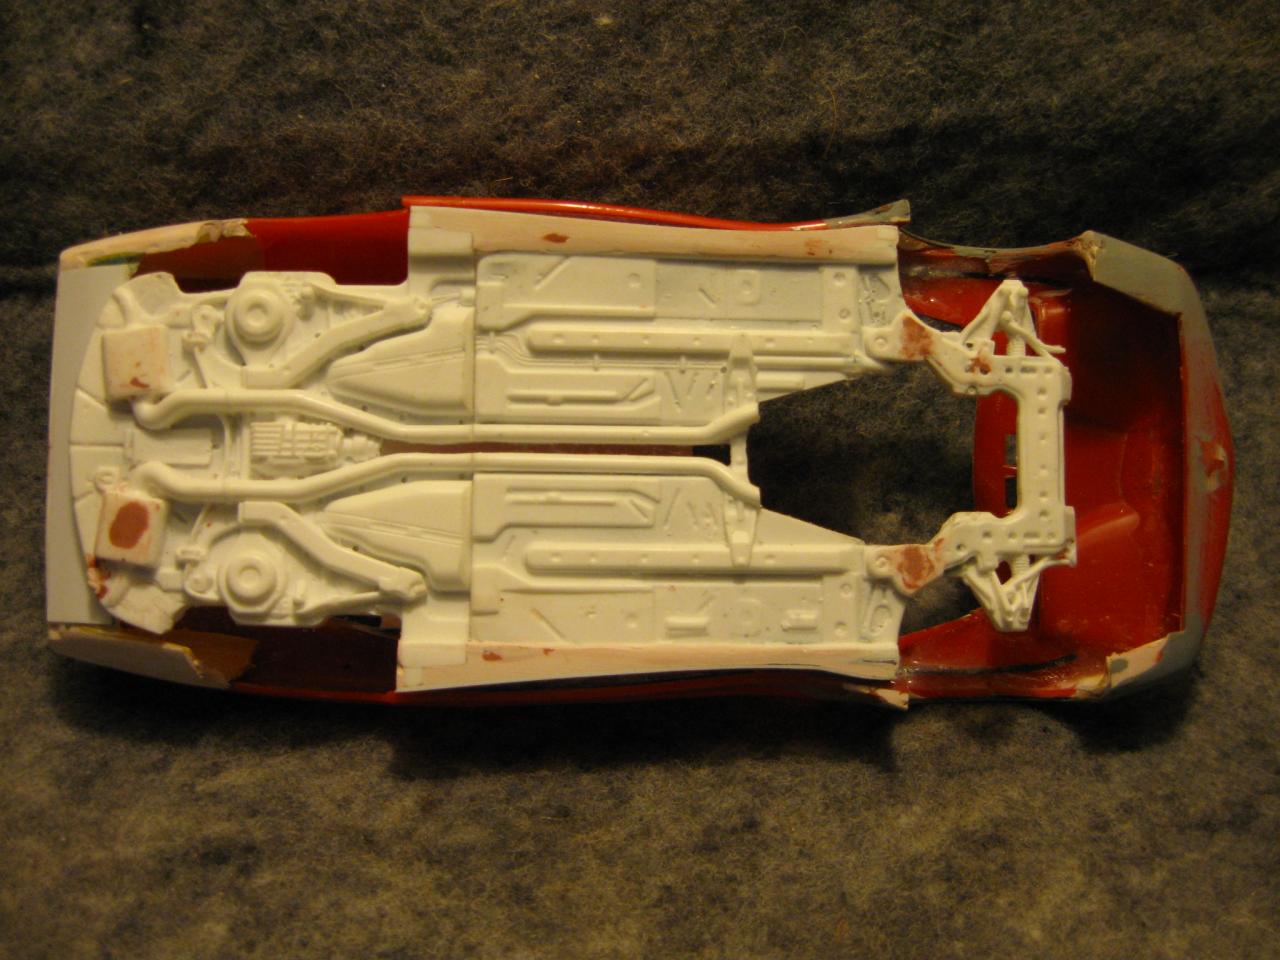
A decent coat of primer. Still need to inscribe the front trunk lid, add the rear engine vent, fit the engine lid and add some tail lights. But progress is being made! I need to decide on a wheel coating; these two are quite similar. Also considering chrome (Spaz Stix), gloss black or a color to contrast with the body color (which I haven't picked yet, either).

-
Thanks for the interest and comments. I hope to have the body in primer sometime tomorrow - always so much body work with any custom. I should do a box stock build for a change. But I love customizing, and the Miura is one of my favorite designs (why I bought the Eidai glue bomb in the first place). I admit, the idea to use this as a VW kit body took about a year to come to me. I'll try to get more photos on tomorrow PM.
-
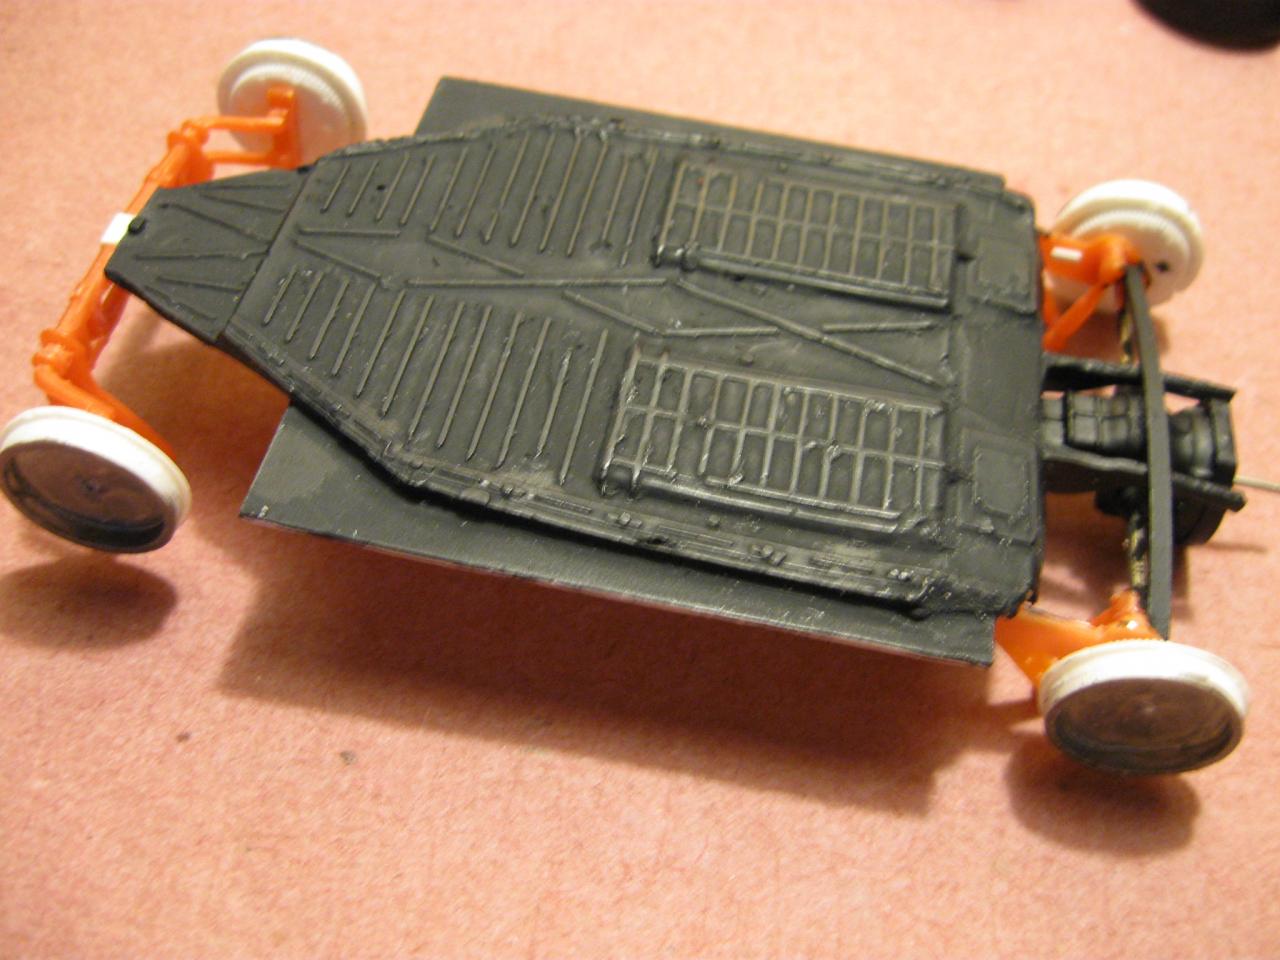
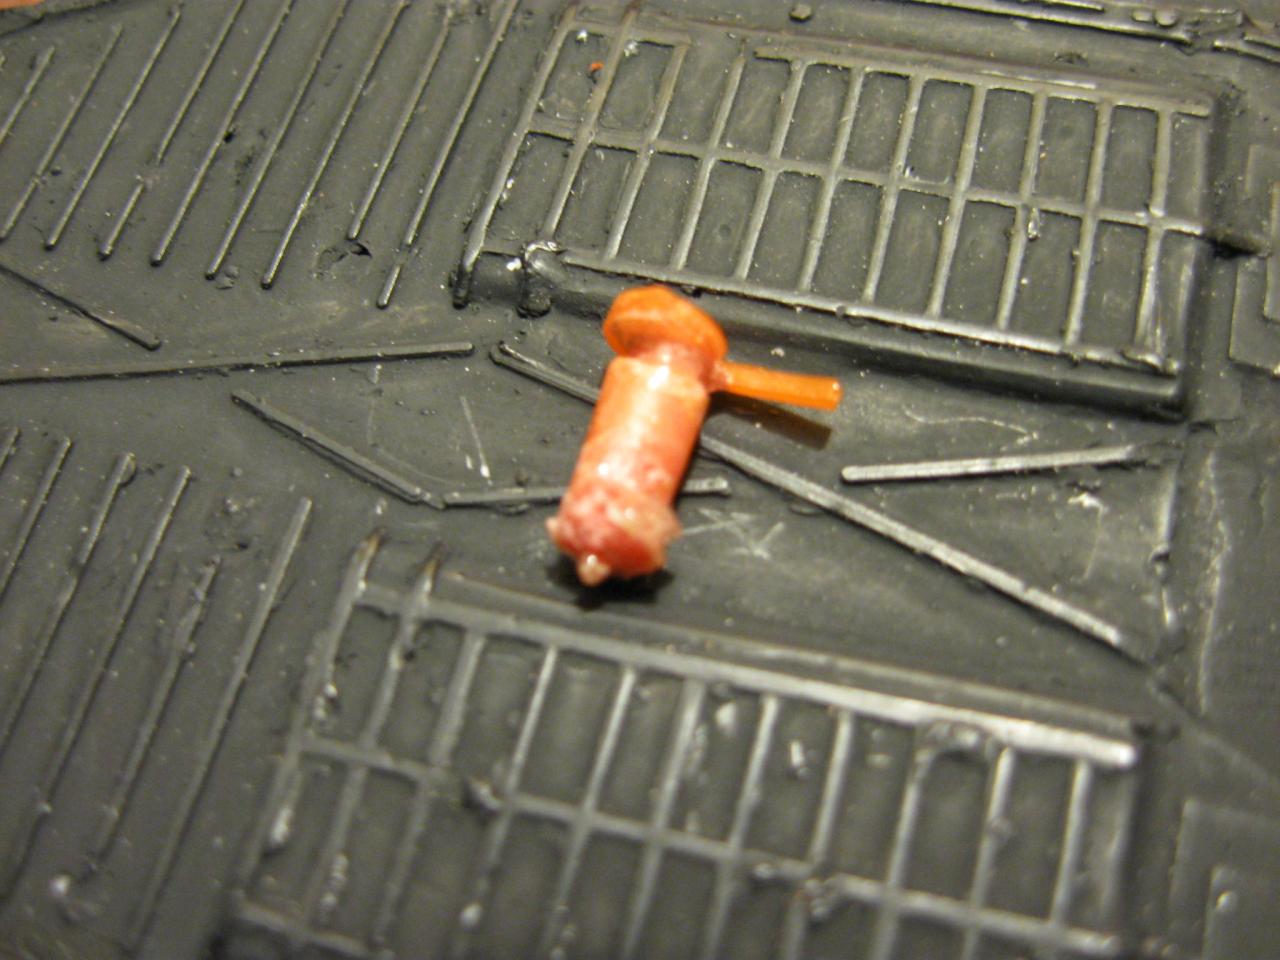
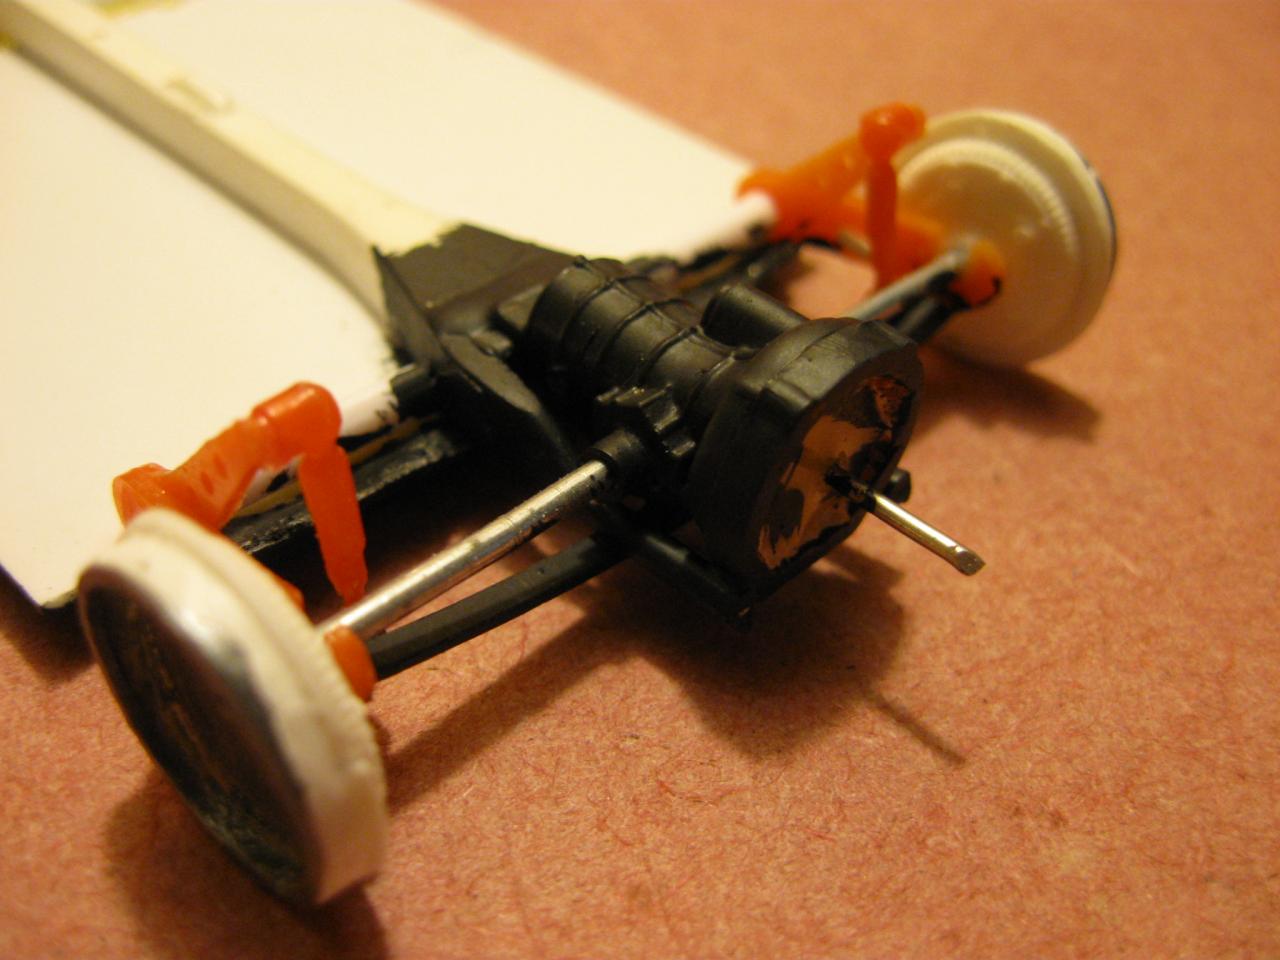
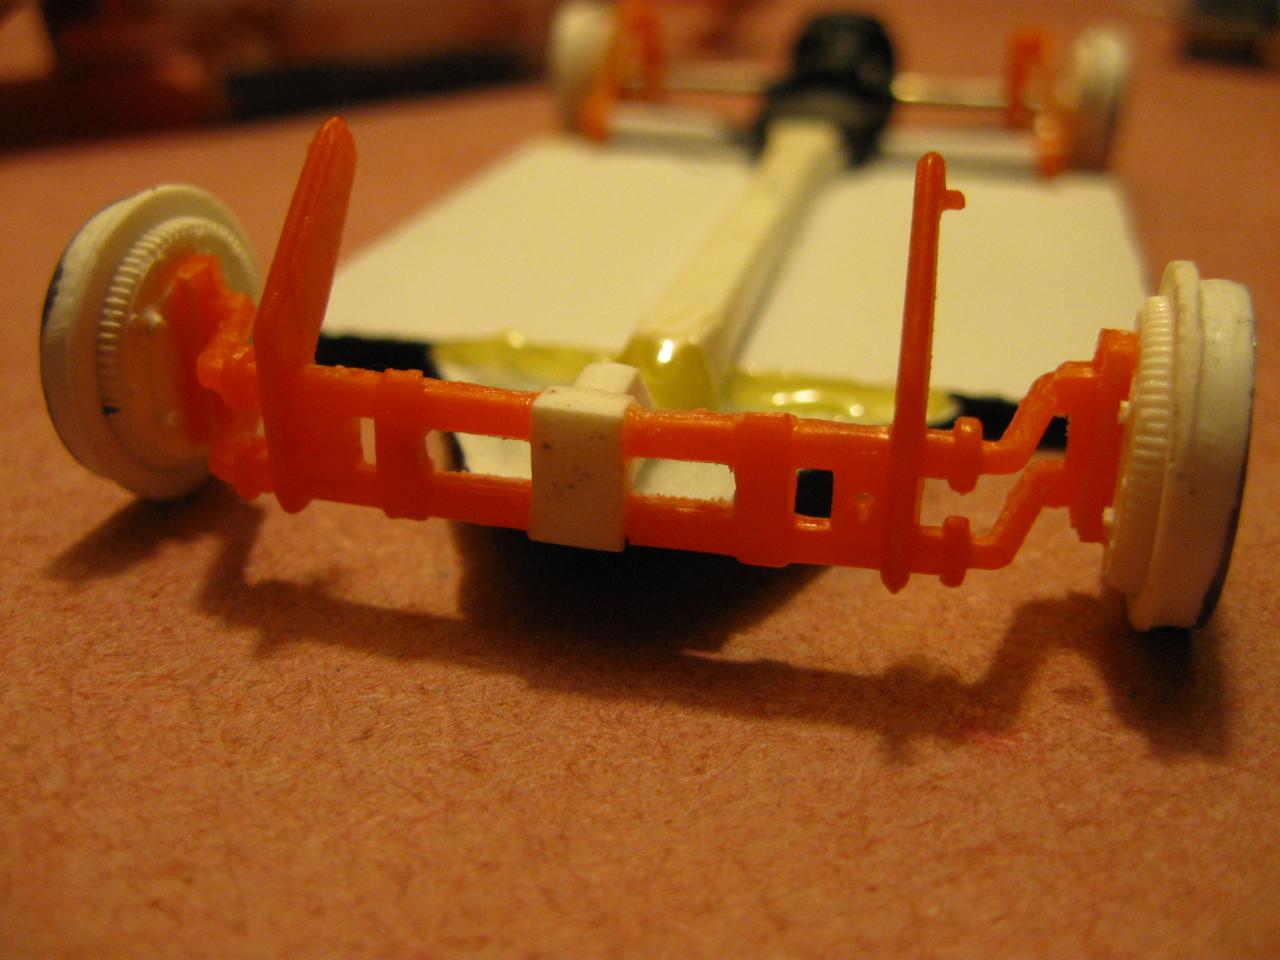
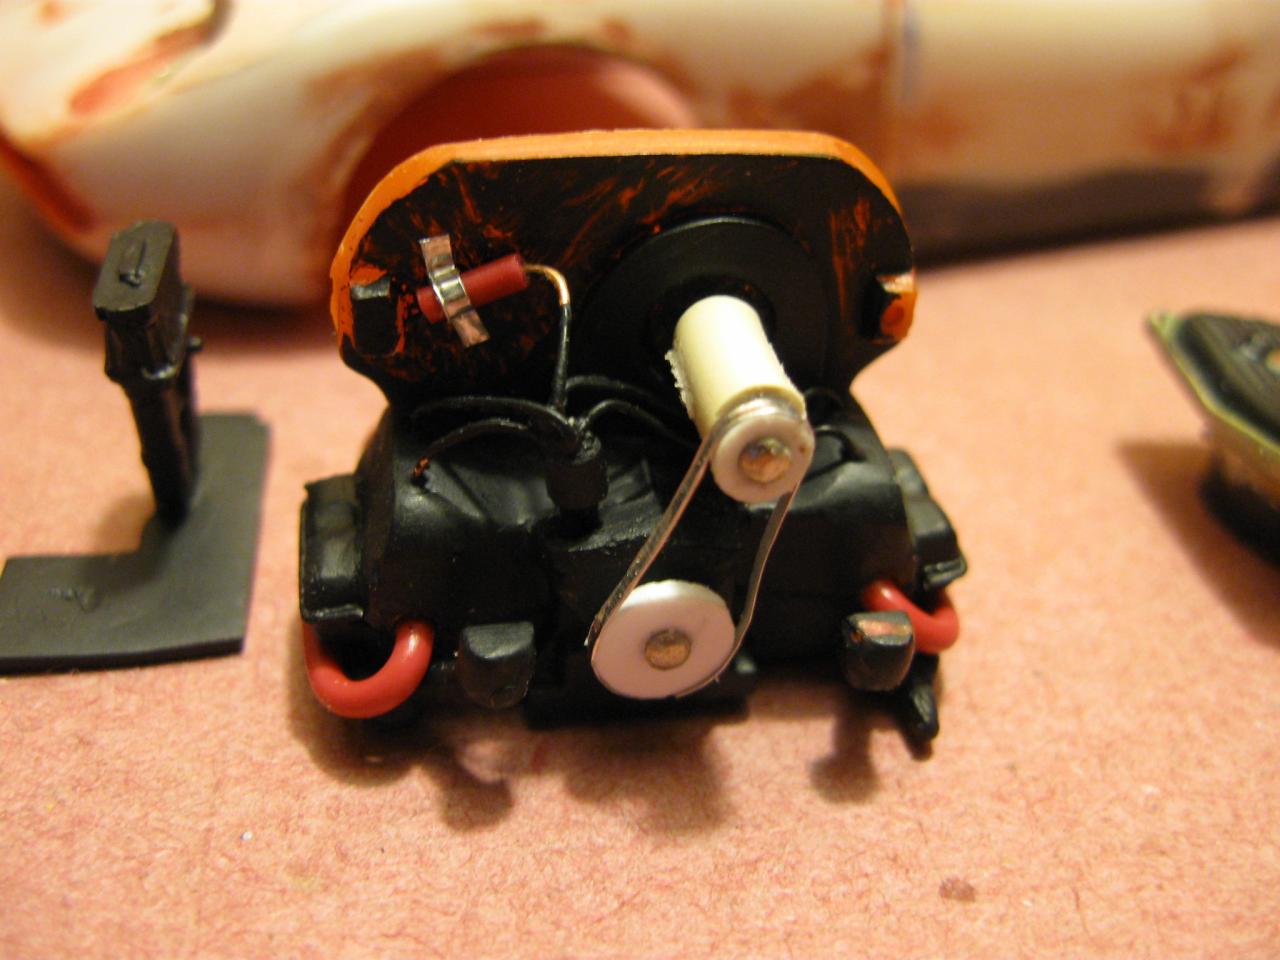
The second photo shows the generator from the glue bomb - typical. Had to modify the suspension to fit the Miurette's width.
-
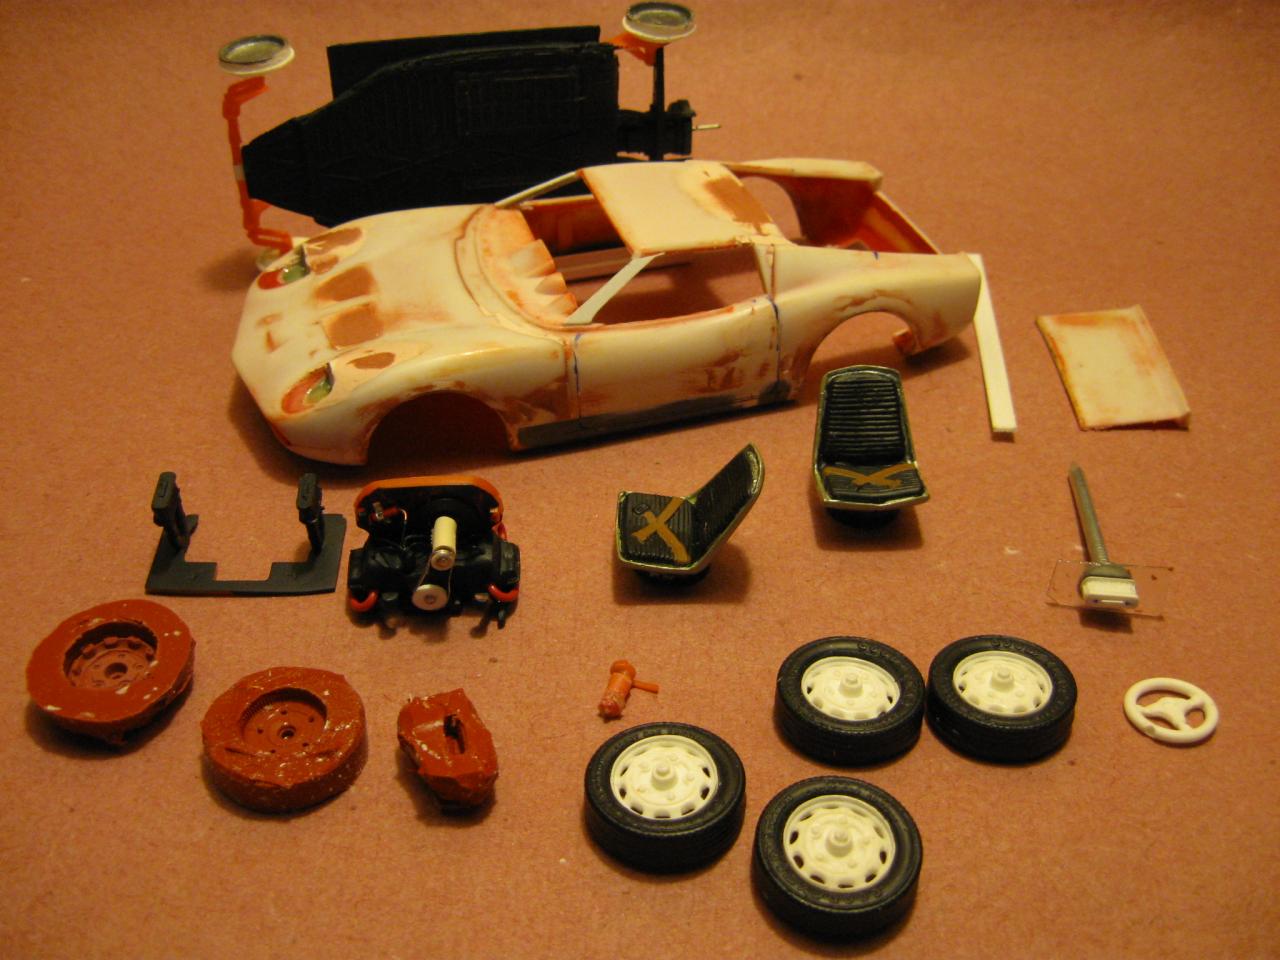
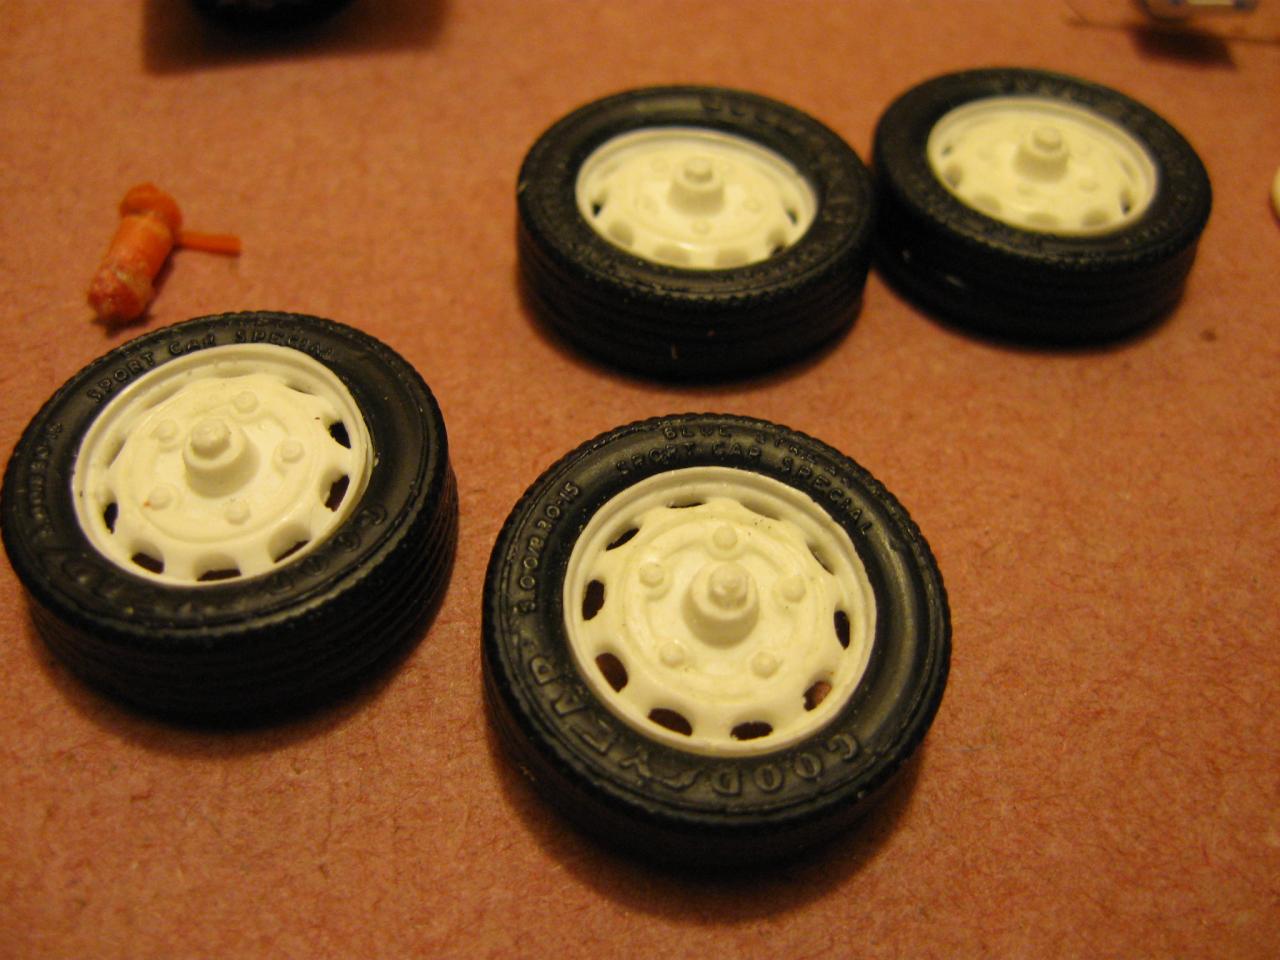
A build inspired by a really bad kit: the Eidai Miura, labeled as 1/24 scale, but really about 1/29. Also, I started with a glue bomb. I decided this was really a model of the incredibly rare Miurette kit car, a fiberglass shell for a VW chassis. (Don't search for Miurette; I'm making this up.) Since the Miurette company didn't want to chance being sued by Lamborghini, they changed the design a little: one piece (plus doors), no B pillar intakes, no pop-up headlights (all making it cheaper as well). The windshield was from the Avanti (no 0.85 Miura windshields available), requiring a change to the A pillars. To cool the VW engine, ventilation was added behind the rear glass (a flat piece). That's my back story; now some photos. The wheels and tires are my cast resin from modifying the two part wheels with the old Revell Porsche 356, the chassis pan my copy of the Revell Beetle, the engine, suspension pieces and seats from a built-up Revell dune buggy. A few of my molds are shown in the last photo. The fan belt is made from aluminum tape (actual aluminum).
-
I really like your design. With the windshield in place, it should look even better balanced. You might try increasing the ride height to see how that would look. Its great to see a full custom being built.
-
Another great build! A Corvair flat six might fit, and would be extremely different.
-
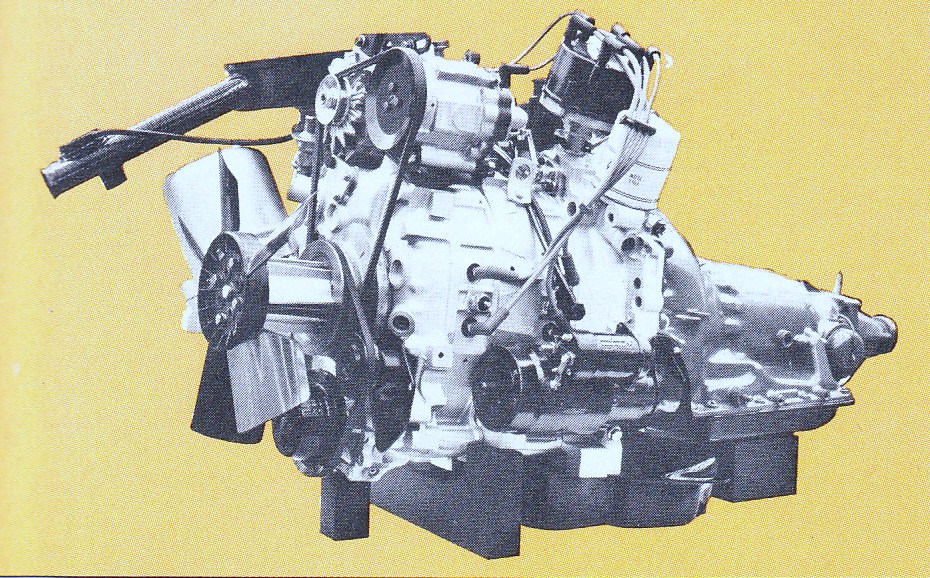
Ignore my request for more rotary info. I finally remembered GM was considering a rotary for the Aerovette, did a search and discovered they put together two Vega rotary engines as a possible four rotor Vette mill. I even found photos, but I'm sticking with my big cube tri-rotary. I've done a little more body work:
-
Sorry about spreading this out, but I was unable to add anything yesterday and I wanted to get whatever I could on the forum while It worked for me. Today I'm using Google Chrome instead of Explorer; maybe that's the difference. Style decisions: I usually prefer front and rear wheel openings to match, but here I wanted to keep the bulge along the top of the body side from front to rear. The roof is from a '57 T-bird kit, also picked up at the MAMA show. The tail is my resin copy of the current Challenger front. The Banshee kit chassis is poor, and the one with the junker was pretty messy, hence my resin adaptation from the Camaro concept car. I'm not very happy with my scratch-built rotary. I could only find one grainy picture of a GM rotary, and I don't think it has much to do with the rumored Vette engine. I assumed GM would go with cubes for their performance rotary. If anybody has any good info, I'd appreciate it.
-
-
-
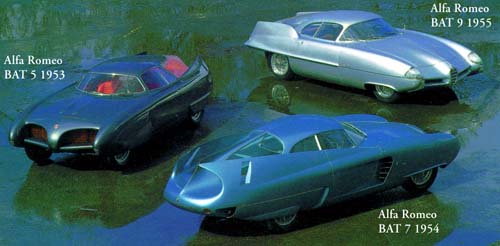
At the Maryland Automotive Modelers Association (great) show 11 May, I picked up a junker Pontiac Banshee. After staring at it (who knows how long), I decided to throw caution and taste aside. Maybe I could blame Ira Dahm; his stuff always looks so good no matter how wild. So, even though this is red plastic, I started hacking. Hopefully you can see the Alfa Bat influence. Of course, a scratched rotary engine and one of my resin chassis are going into the mix.
-
 You did such a good job on the section that I missed it. I should have seen it; all the new pony cars are so fat (thick bodies). You've made this one look trim again. Kudos on trying to make everything work properly for a 1:1 version. A custom is more interesting when it could be real.
 -
Love this! The whitewalls and painted steelies suit this car very well. Blackwalls and mags would push it back toward racer - these keep it more in the weird arena.
-
This is really good. The basic form looks very right. You might consider making it a sedan with a B post and a fixed window from there to the C post, which would be much narrower. This would lighten the back third of the car and provide much better visibility. Too bad almost nobody offers wagons in the US any more. This would be a very attractive and distinctive alternative.
-
As George53 said, it depends on what your goals are. I've slush-cast bodies which I've used for customs, and the entire effort is lo-buck. Mostly I cast solid parts: engines, wheels, tires, etc. These are pretty easy to do without spending much. Very important - keep water vapor from contaminating your resin. I can provide info and photos if anyone is interested.
-
Resin Casting for your own good?
GerN replied to DailyGrindCustoms's topic in Car Aftermarket / Resin / 3D Printed
Here are some inexpensive ways to get into casting parts. If there is interest, I'll post photos. I've used these methods for slush molding an entire body as well as small parts. Permatex Red High Temp RTV Silicone Gasket Maker Permatex results in a fairly strong, flexible mold and will take fine detail. If used by itself, this must be applied to the master in thin coats. Can be mixed with flour (my preference), sawdust or Durham's Water Putty to speed curing and allow thicker coats. Flour or Durham's (a relatively strong plaster) shouldn't excede about 1/20th in volume or the mixture may not harden properly. I mix on a hard surface, repeatedly spreading the flour/RTV mix as thin as possible. This seems to speed curing (it may absorb water when spread thin). I don't go over about 1/4 inch thickness with each coat. Sawdust should be screened down to near-dust size particles for best detail. Coarser sawdust can be used for outer coats for strength. The Permatex will cure regardless of the added amount of sawdust, but too much may weaken the final mold. I've used a 1-to-1 mix without problem. With either additive, the Permatex still likes ambient moisture to harden. I use a plastic box on a plastic surface with damp paper towels under the mold. I've read that RTV in general will harden faster with heat, which makes sense. If using urethane casting resin, mold release agent may not be required, but may help extend the life of the mold if it has fine projections. It stretches well, but doesn't seem to compress. Urethane Casting Resin I've only tried three types: Alumilite, and MicroMark CR-300 and CR-600. I strongly prefer CR-300. It has a short (a few minutes, more resin means faster hardening) but workable pot life, doesn't smell as much, takes fine detail and is very easy to carve and work when fully cured. It is similar to styrene, i.e., not very brittle. I use thin fabric as a way to make thin castings stronger, like using fiberglass cloth to lay up a surf board. The CR-300 soaks in and through, so a trimmed sheet can be positioned in the mold before pouring the resin. Work out any air under the sheet as much as possible. Casting Durham's Durham's Rock Hard Water Putty can be using for casting larger simple objects, too. I have mixed in waterbase acrylic paint slightly diluted with water to add strength and workability. Once in the mold, tap or vibrate the mold. This will liquefy the Durham's to help fill the details of the mold, but doesn't seem to cause any problems with hardening. Hardening will take overnight. This is a very cheap material. -
Please, AMT reissue these kits! Variety is good. Choice is good.
-
Nice work on one of the sweetest American car designs ever produced. GM could bring it back as a hybrid and use the battery pack to balance weight distribution. Maybe I should do a model - a transverse four instead of the flat six, electric motors for the front wheels, thinner seats for interior room - yeah! Could have 300 HP total and still get decent MPG if driven gently.
-
You might consider casting one of the Aoshima tires, removing the lettering from the casting and making four copies of your modified version. I have a couple (I think) of these kits myself, so your build is quite interesting - especially how you are making it more accurate.
-
Very original, yet it looks so right, and so real!
-
Very organic - looks like it belongs together. From the side, the front fenders and hood dominate; the rear fender line seems low in comparison. Maybe its just the high rears of almost all current cars. Very good start.
-
Chopped '30 Ford Woody "Lorena": Poncho blue, March 18
GerN replied to Ace-Garageguy's topic in WIP: Model Cars
I really appreciate that you're considering how your modifications would work in the 1:1 world. I try to do this for my own scale customs, but I lack the 1:1 knowledge and experience which you have. Thanks for sharing your thoughts as well as your build. -
This is from the April 2013 issue of Popular Science.
-
For removing kit chrome and some types of paint, I've had good results with LA's Totally Awsome, available at Dollar Stores. Its labelled an eye irritant, but otherwise seems pretty innocuous. Welcome to the forum.