GerN
-
Posts
494 -
Joined
-
Last visited
Content Type
Profiles
Forums
Events
Gallery
Everything posted by GerN
-
Great work!
-
Excellent work and perseverance.
-
Your build looks so real. Too bad the engine is hidden. I wonder if Revell will release this in a U.S. version as well as the RG kit.
-
1929 Model A Roadster ArtDeco/Coachbuilt/Streamliner -DONE!
GerN replied to Impalow's topic in WIP: Model Cars
Superlative project - inspirational. -
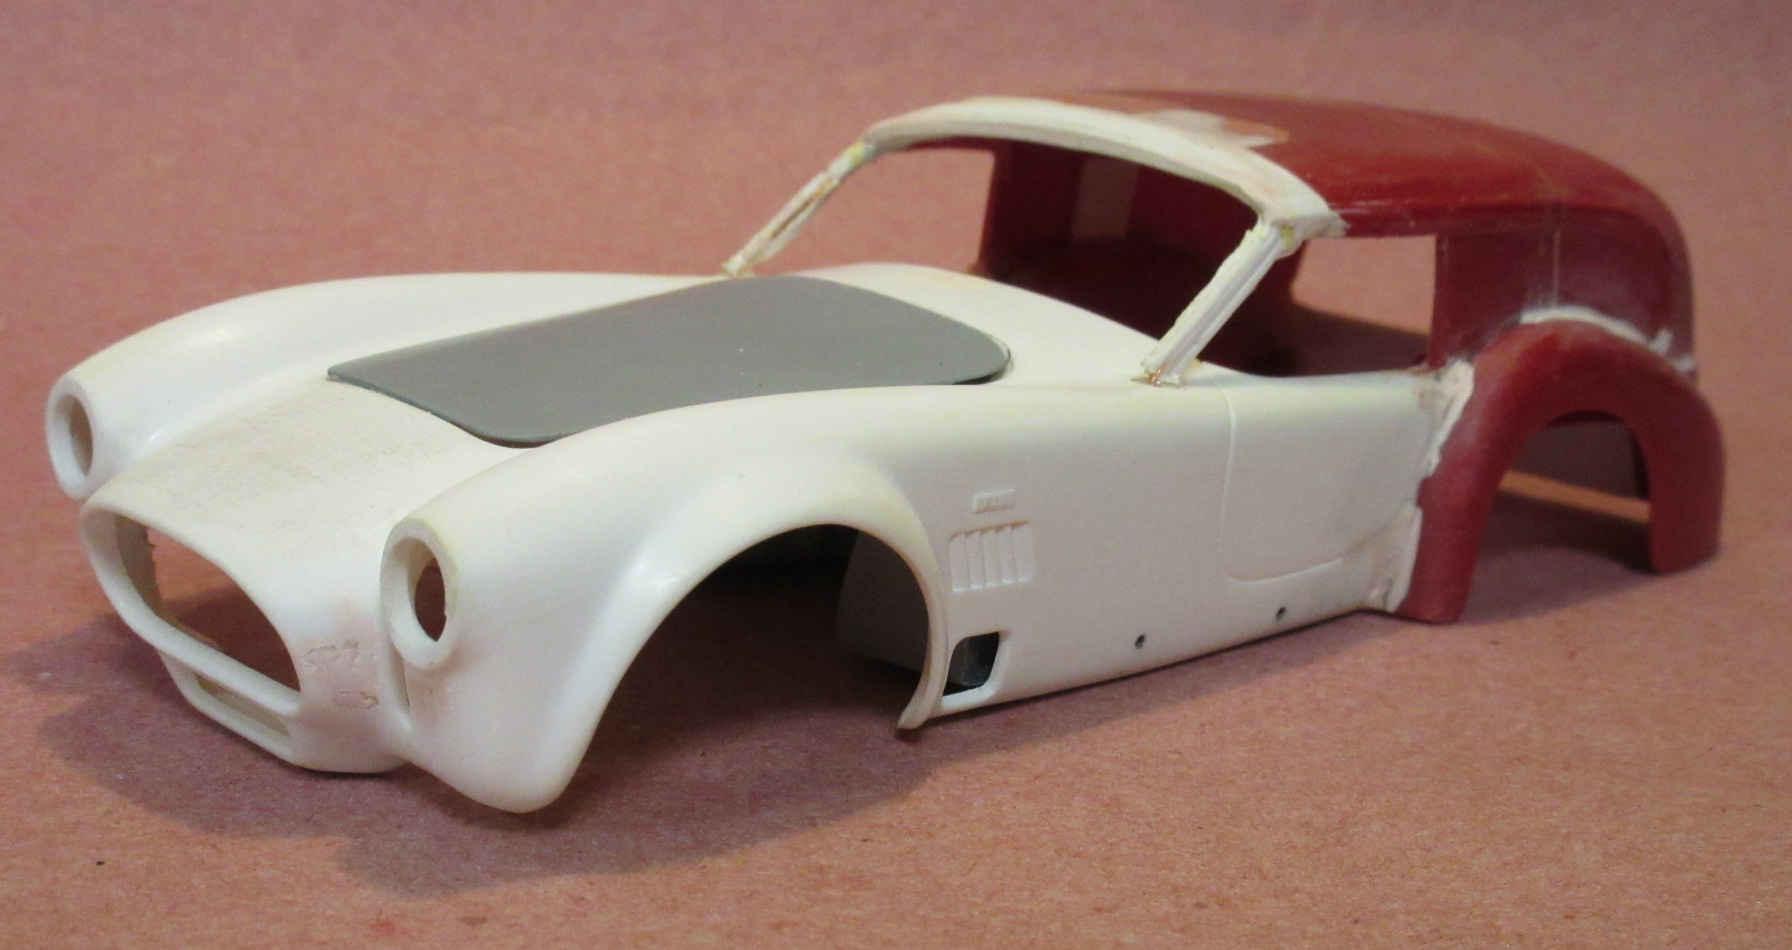
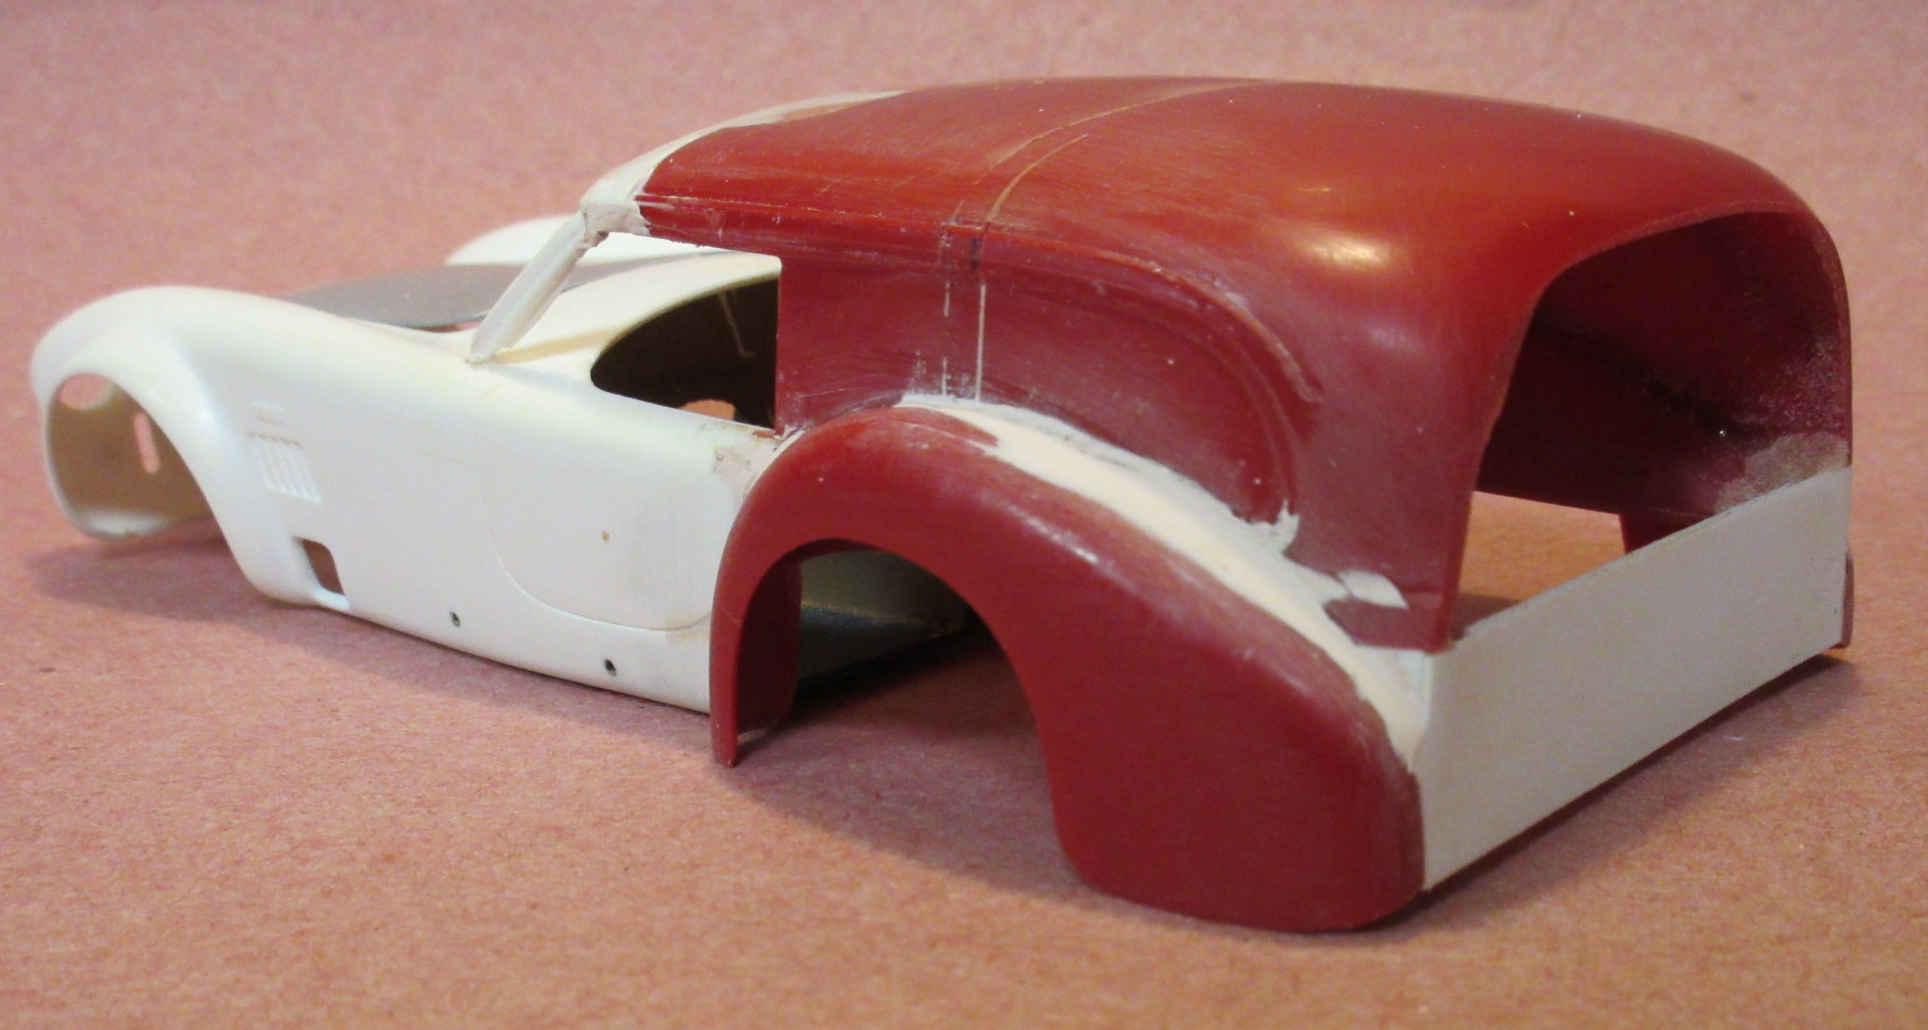
I hope no one minds, but I couldn't resist posting photos of a model I started some years ago. A cheap built-up in semi-decent shape but missing quite a few parts. I too was inspired by the Ferrari bread van, and had a whole backstory for my Cobra BV: backwoods mechanics made it to try to get in good with Henry F, but no luck. BTW, these pix were nearly 1 MB each until I shrunk them in GIMP, a free alternative to Photoshop.

-
http://www.corvaircorsa.com/astro1_02.html The Astro-I was equipped with this experimental Corvair engine, with a bore and stroke of 3.56 and 2.94 inches, displacing 176 cubic inches. It was air-cooled, but unlike the production engine, used three tandem centrifugal blowers on a common shaft above the engine to blow cooling air over the cylinder blocks. Designed as a high output unit, the engine produced 240 horsepower at 7200 RPM. Specific power was 1.4 horsepower per cubic inch! Each side of the engine was fed air and fuel by using a Weber style 3-throat carburetor on a special light alloy head with a single overhead camshaft. The cylinder heads had nearly hemispherical combustion chambers and inclined valves. Camshafts were driven by Gilmer-style belts from the crankshaft. According to SCCA racer, Seth Emerson, the engine's carburetors were not standard Weber. He quotes good sources who claim they were GM castings, completed with Weber parts. The modification of the carbs was necessary because of bore-to-bore differences. The throats on the Astro I carbs were much wider apart than the Weber 40IDA 3-barrels. The Corvair cylinders (hence the intake valves) were further apart. Seth has run the 40IDA 3-barrel Webers on many engines, and indicates if you center the middle cylinder, both outer cylinders have to have the manifold turn out to meet the head. He says that's why GM cast their own bodies. An experienced Weber man can tell by the distance between the fuel inlets on the sides.But, keep in mind that this car was never driven under its own power. The Astro I is still owned by GM and was completely restored several years ago. As of this writing, it is a part of the GM Heritage Center Collection.
-
This may help: Astro info 1.rtf
-
Stunning!
-
If I were attempting this, I would probably use a squared-off piece of 2X4 to hold the sides parallel while gluing the top to them. And I would use CA glue and sprinkle baking soda on it for a very strong join because there will likely be some force applied later. I would probably cut off the firewall and either reshape it or replace it. Good luck however you try to do it.
-
I can send you a resin copy of the rear window area of a Monogram 1941 Willys street rod I got recently. This kind of custom building/restyling must be supported!
-
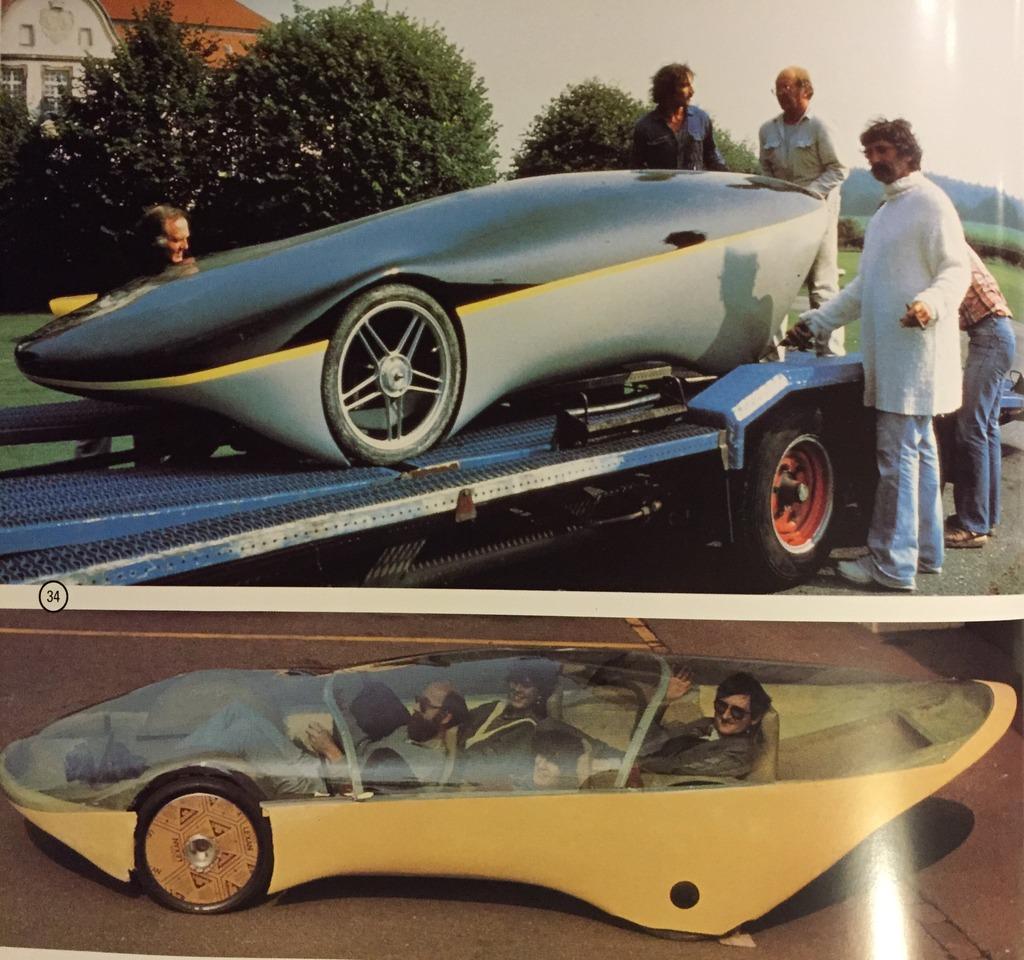
Here's what I meant. Years ago, Matchbox did a series of Colani cars that got me interested.
-
I am VERY impressed. Look up the designer Colani, BTW. http://www.colani.org/luigi_colani_Product_design_museum/Cars.html#76
-
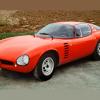
Here are a couple of photos of my recent castings, based on the Revell Ferrari California. The first shows the mold and a casting straight from the mold. The second shows a chassis (using two of these castings) I'm doing for my Talbot 150 Record custom. This CR-300 is very similar in workability to slightly softer styrene. The Permatex red RTV for the mold cost about $3 and the CR-300 about $1.50.
-
I've been casting resin for years - mostly parts like wheels, tires, engines, etc., but some bodies too. I use Permatex red hi-temp RTV to make the molds. It takes fine detail and even tiny projections like holes in disk brakes can last for quite a few casts. I mix the RTV on a smooth plastic cutting board adding about 1/20 by volume baking flour, repeatedly (about a minute) spreading the mixture out, giving it a chance to absorb some atmospheric water. Mold thickness of up to 3/8 is no problem. Sawdust can also be mixed in after the first layer of flour plus RTV for a thick, more rigid mold. I use petroleum jelly dissolved in mineral spirits as a mold release agent on the piece to be copied (let it dry), and on the mold if it has vulnerable projections. I like MicroMark CR-300 resin or the SmoothOn equivalent; Alumilite puts off vapor I can't stand. I usually wash castings with soap and water before applying water-based paint. Good luck and I hope you enjoy casting as much as I do.
-
Superlative!
-
I've been using SpazStix for years and like it a lot.
-
TRIM Nail Sticks Back at Walmart! Update 8/13/18
GerN replied to Snake45's topic in Tips, Tricks, and Tutorials
Sally's (beauty supplies) has inexpensive (about $1.25) nail sticks. I have used the Kiss and BeautySecrets brands and have been very pleased. I clean them with a cheap brass wire brush - wears the brush down but not the nail sticks. Cloth-backed wet and dry sanding sheets make excellent sanding tools when cut down to appropriate sizes. They can be wrapped around objects to get the shape you need. Sanding plastic, they also last a long time (I clean them the same way). Also I glue drywall sanding screen to paint-mixing sticks or just use on a flat surface for rapid bondo removal. -
First paint the tire with a water-based acrylic. Then dry coat the tread surface with a different acrylic, perhaps flat black with a bit of yellow or white. I usually do the second step by putting a little paint on a strip of thin adhesive-backed foam and then rolling the tire on that. This creates a contrast which I find realistic. BTW, I resin-cast most of the tires I use - no problems with paint adhesion or interaction, no softening of the tire over time and I can customize (a little). I wish kit manufactures would use styrene for tires. I realize this would make swapping wheels and tires more difficult. Maybe if a high-quality manufacturer like Moebius included styrene tires as well as vinyl the others would follow.
-
Really good build and explanations - thanks!
-
Der Beetle Bus
GerN replied to Psychographic's topic in WIP: Model Trucks: Pickups, Vans, SUVs, Light Commercial
Wonderful, inspiring build! -
Great models and what a departure from the usual.
-
Really good work - people who have never done a full custom may not appreciate the challenge. You have met that challenge. I agree with misterNML: all that paint design would hide the pure lines and beauty of your work.
-
This one has been a lot of work! The headlight lamps in the Revell Ferrari California kit look a lot like your Triumph front turn signals, just a little larger. These kits can be found for not many $, and styrene might be easier to work. The 3d pieces might look better with a small coating of something like MicroMark CR300 resin or DecoArt triple thick glaze to give a smooth finish.
-
WOW!!!
-
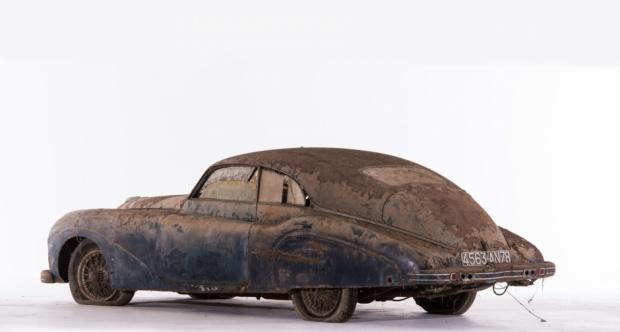
Good Work! I've been thinking about a similar model and have collected some relevant photos. I could not find any record of a four-seat T26 fastback. Except for this recent barn find designed by Pierre Saoutchik. It was done on the longer Record chassis and the other fastbacks were apparently done on the shorter GS chassis.