Kit Karson
-
Posts
1,542 -
Joined
-
Last visited
Content Type
Profiles
Forums
Events
Gallery
Everything posted by Kit Karson
-

GSL Common Kit: [revision] just another Model A Roadster
Kit Karson replied to 89AKurt's topic in WIP: Model Cars
Really inspired by your build so far! -KK -
Famous last words! May they live forever, Brother! Designing on the fly is winning by/through failure! The "BEST" is yet to come!! Sometimes what looks good on paper may not prove to be doable in real life. Even if you plan your work and work your plan... the outcome sometimes doesn't meet with one's own expectation. And, if perfection isn't realized, the art of the intent is still understood. Your vision will lead you to your best and doing your best is learning through trial and error! And sharing is helping and teaching others... every step of the way, Brother. Enjoy watching over your shoulder!! -KK
-
Tony, what is the name of your LHS?
-
'36 Ford 5ive window coupe, old build being resurrected.
Kit Karson replied to Rocking Rodney Rat's topic in WIP: Model Cars
There's enough going on here and as always, the Master Fabricator is sharing a wealth of information and inspiration. Been watching over your shoulder for three decades and I am still learning something with your every build, Brother! -KK
-
Amt 34 Ford 5 window coupe, the two day tribute build.
Kit Karson replied to Bullybeef's topic in WIP: Model Cars
One & Done! Never have I ever built one... One that I have never done... Done one that I have left undone... Building one that will never be done... But have never done one & done!
-
This Forum's Purpose
Kit Karson replied to Dave Ambrose's topic in Model Cars Magazine News and Discussions
https://www.modelcarsmag.com/where-to-buy/ -
Well done! A great kustom kar name from the fifties would be: "ZONE OUT" MOPAR KUSTOM KOUPE! @NOBLNGKool Tool, Brother! btw the only bad chop on a Model A koupe... Not quite low enough! -KK
-
@Speedprothank you for sharing your progress and the kind words. As expected, the changes and work you have put in surpass all of my expectations! I'm with you! And kan't wait to see it in some other color than maker's white!! -KK
-
You raise an interesting question, @Tom Geiger... I wonder how many MCM forum members are not yet on board with a subscription? Thank you for your renewal! I mentioned to the staff earlier this week, that everyone I have shared/shown my copy of MCM with has really been excited about what they saw! Having access to the publication really adds to my involvement here on the MCM forum! And being surprised issue over issue with actual MCM forum members being highlighted in print! How exciting is that? Way better than having your model showing up in one of the model car show coverages from around the world! Right? To everyone reading this, you too could be featured in the magazine in a future issue! Can you imagine being in a magazine that you haven't subscribe to as a member of the MCM forum? Would it be helpful to have a listing of outlets that carry MCM over the counter? That way those that haven't yet signed up, to have the one and only model car magazine delivered right to their own mailbox, would know where to find the closes MCM retail dealer. Quick question: What's the difference between the newsstand price and the cost of a subscription? -KK
-
Rat removed from the Roaster: '32 roadster
Kit Karson replied to Rocking Rodney Rat's topic in Model Cars
SIMPLY
-
Once everyone is caught up to date on their subscriptions and have been able to assess the specific missing issues; and thanks to the staff, back issues are rapidly disappearing! As for the staff behind the scenes, kudos on all of your individual efforts in rebooting MCM!! -KK
-
Enjoying the progress, fellows! I have it on my continual watch list! -KK
-
'36 Ford 5ive window coupe, old build being resurrected.
Kit Karson replied to Rocking Rodney Rat's topic in WIP: Model Cars
You never cease to amaze... simply You're having way too much fun detailing the one part of your build that very few will ever see, Brother! -KK
-
'36 Ford 5ive window coupe, old build being resurrected.
Kit Karson replied to Rocking Rodney Rat's topic in WIP: Model Cars
We go way back with our Mate from down under... in fact we're trying to get him over here! -KK -
Awesome, Mate! -KK
-
1990 Mustang LX - SVT Cobra DOHC Powered! UPDATE! 1/22/23
Kit Karson replied to Dennis Lacy's topic in WIP: Model Cars
Fabulous coverage, ADL! Awesome mechanical conversion!! -KK -
Kwick update from @Speedpro... Paul said he's klose to adding a primer coat to the pristine pickup & trailer. Yup! He's kleaned every piece of plastik and reworked & improved the rear suspension. We share the same koncern regarding the attitudes of the pu & tagalong boxes. Ride height, fender klearence & tire placement are krucial! Some fun diskussion has included the final kolor & assembly... oh, & the possibility of the latter okkurring together! -KK
-
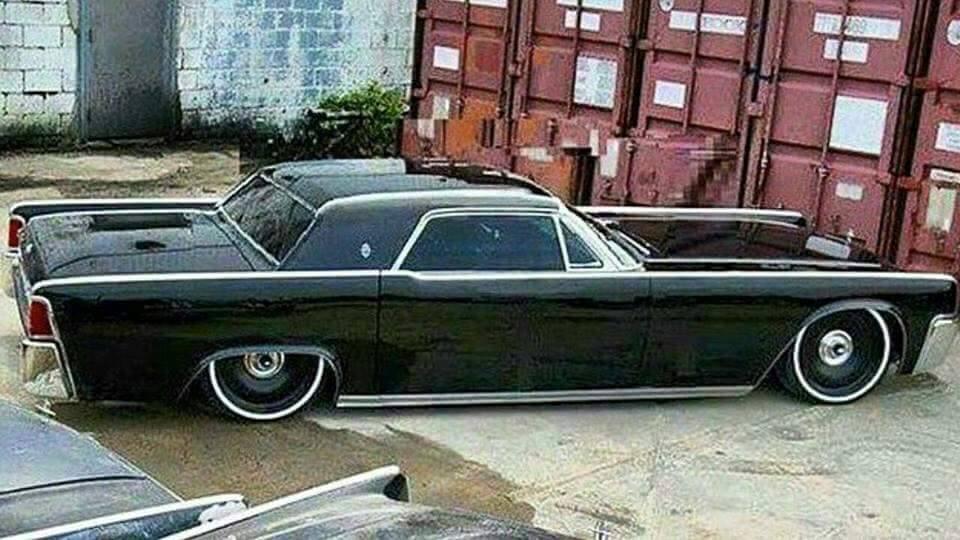
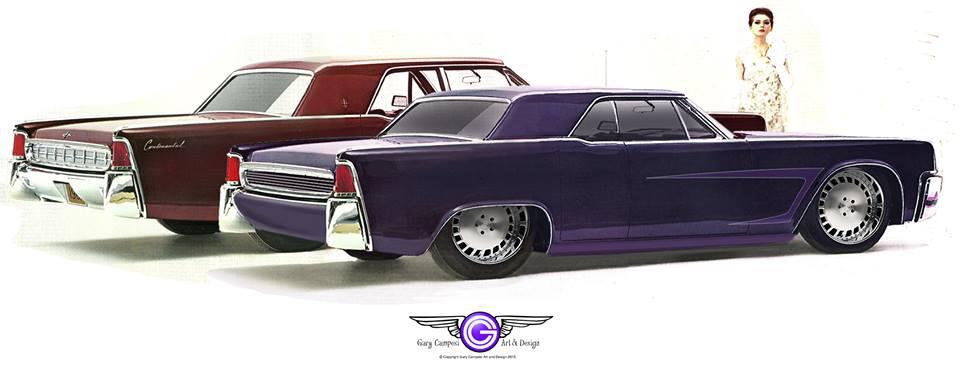
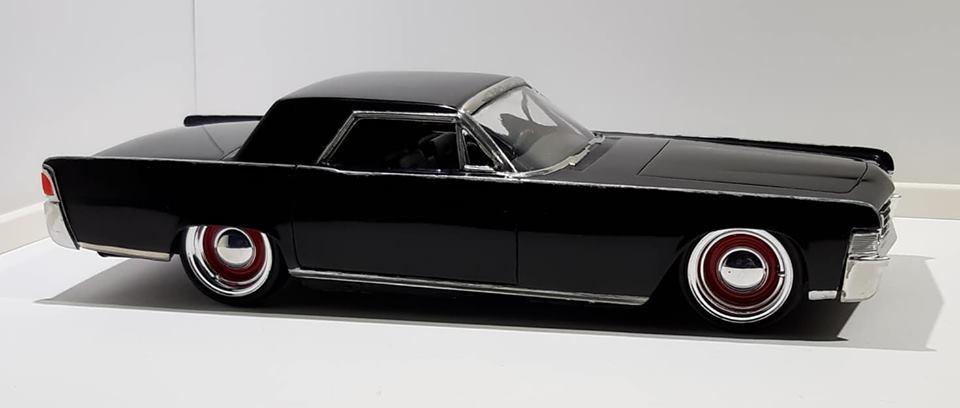
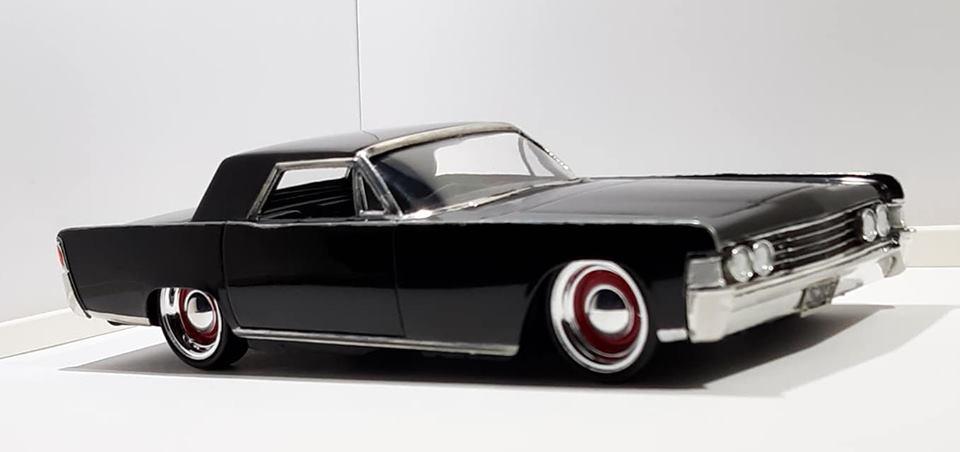
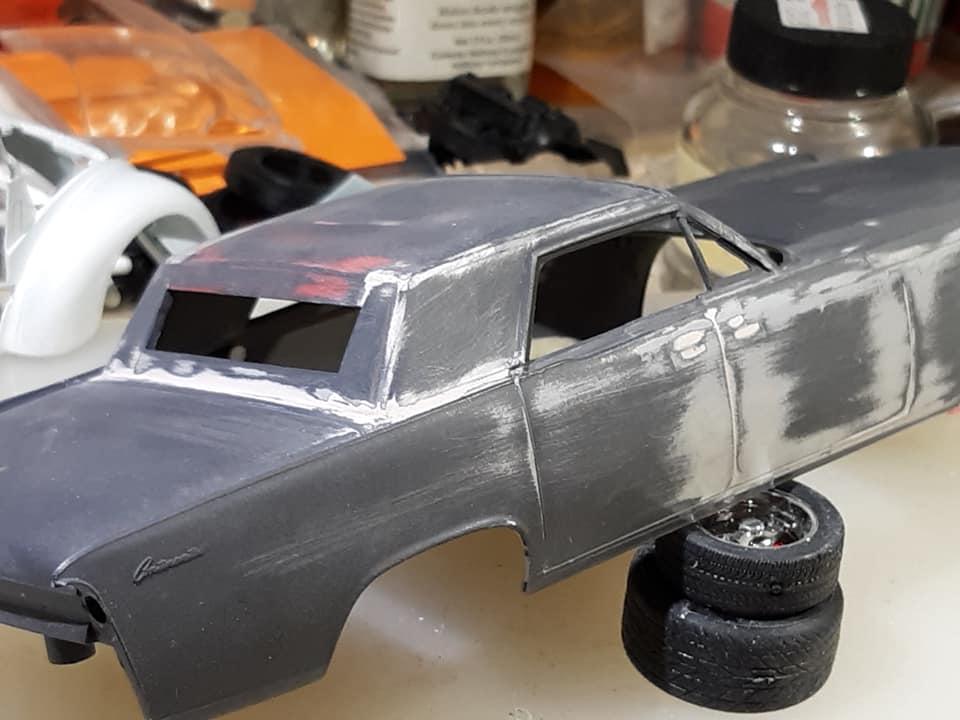
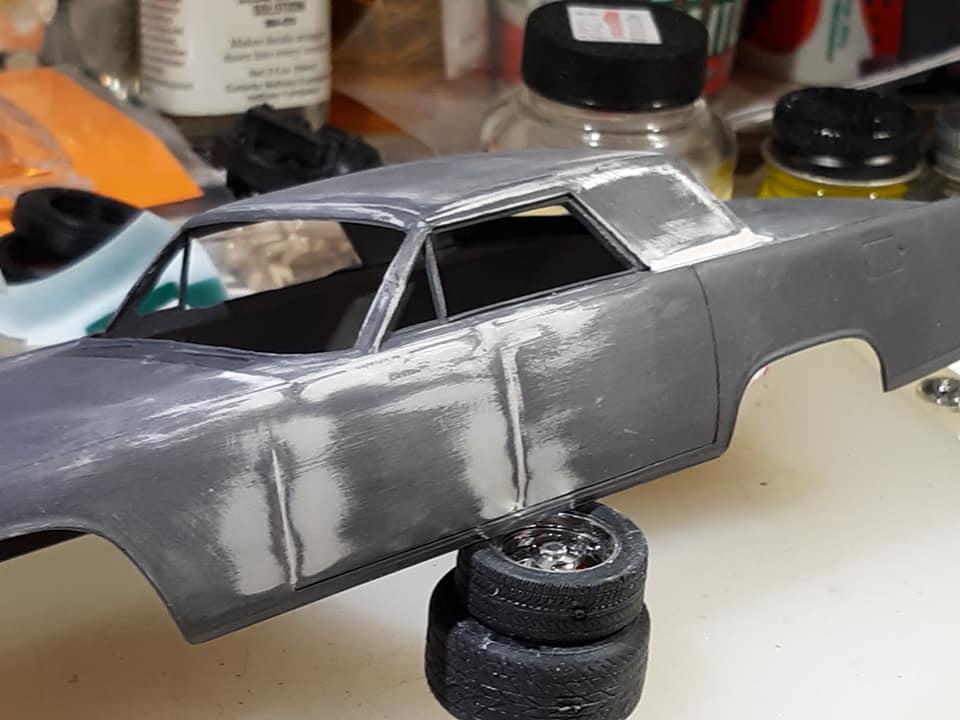
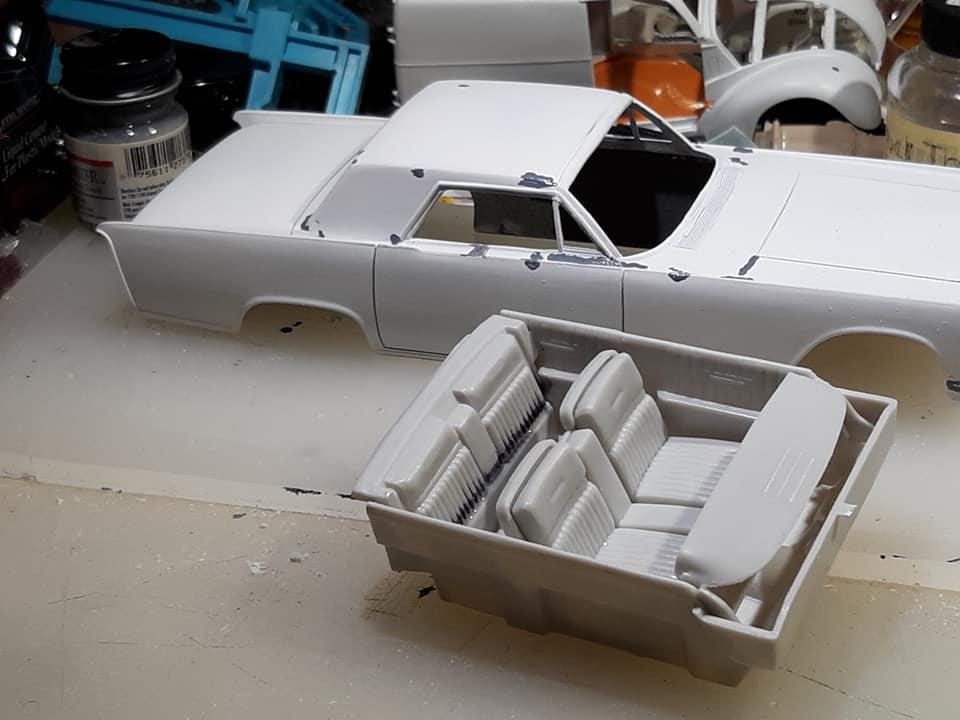
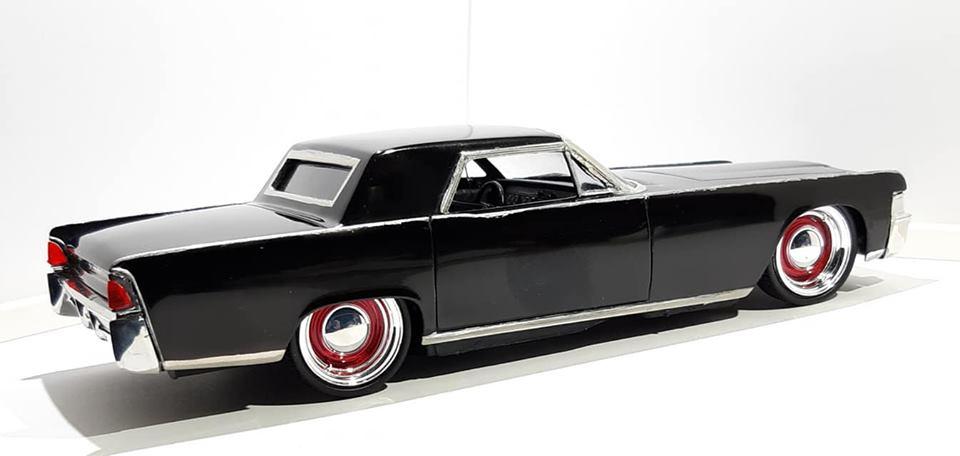
K&R Kustoms+Rods S'Lincoln Coupe finished by Bruce Rathbun
Kit Karson replied to Kit Karson's topic in Model Cars
Here are the two pieces that truly inspired the S'Lincoln Continental Coupe Here's the build link:
-
Bruce Rathbun finished the K&R Kustoms+Rods S'Lincoln Coupe, built originally by @Rocking Rodney Rat& @Kit Karson How 'bout a big atta boy, for Bruce! -KK&-RRR
-
K&R Kustoms+Rods S'Lincoln Coupe finished by Bruce Rathbun K&R Kustoms+Rods S'Lincoln Coupe was sent to Bruce Rathbun Let's give Bruce a well-deserved round of applause! -KK&-RRR
-
Removing the Rat from the Roaster
Kit Karson replied to Rocking Rodney Rat's topic in WIP: Model Cars
Did I hear someone say, "Paint"? -KK -
Time to kick up some scale road dust....and some water mist, too!
Kit Karson replied to tim boyd's topic in Model Cars
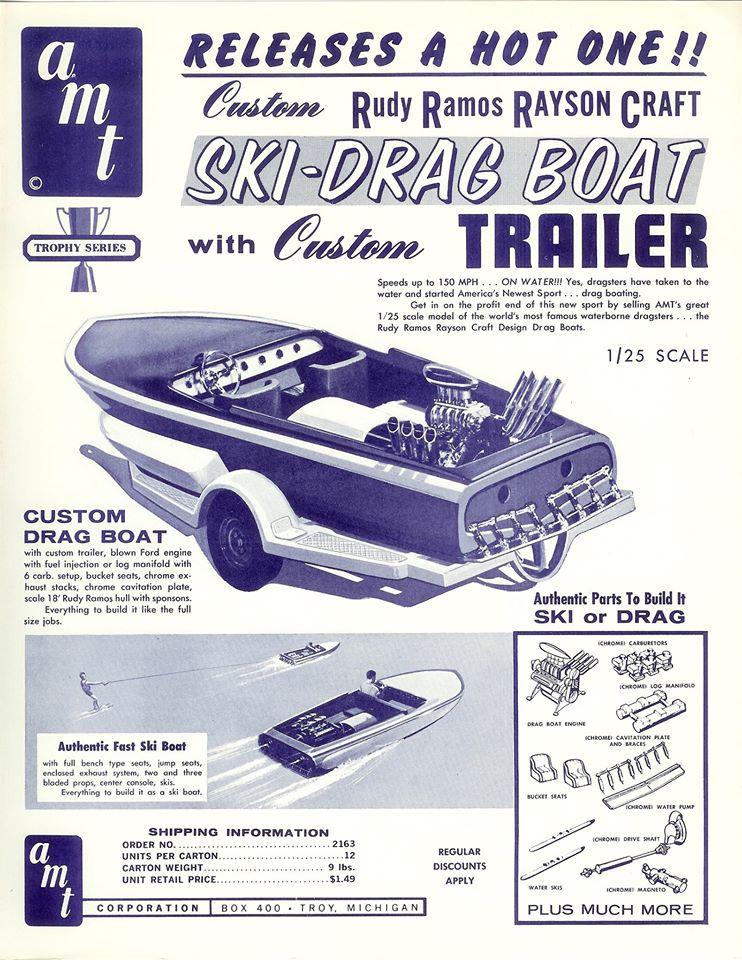
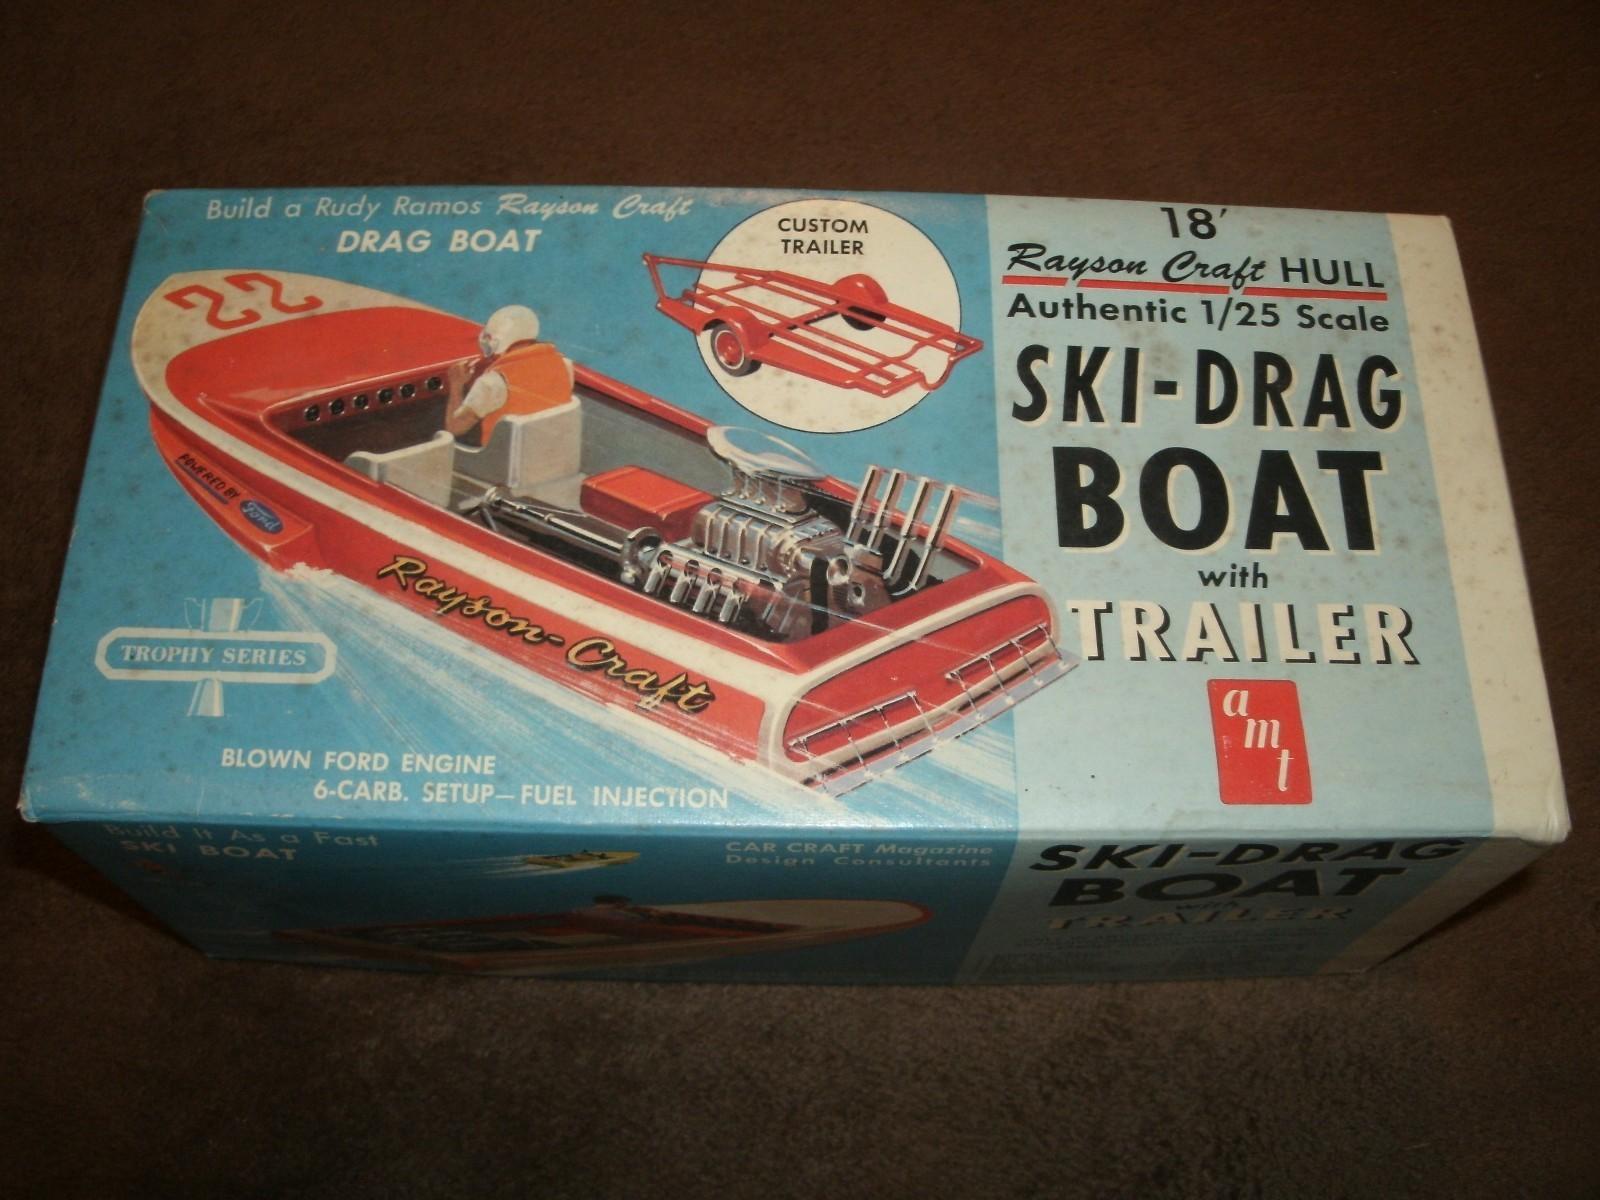
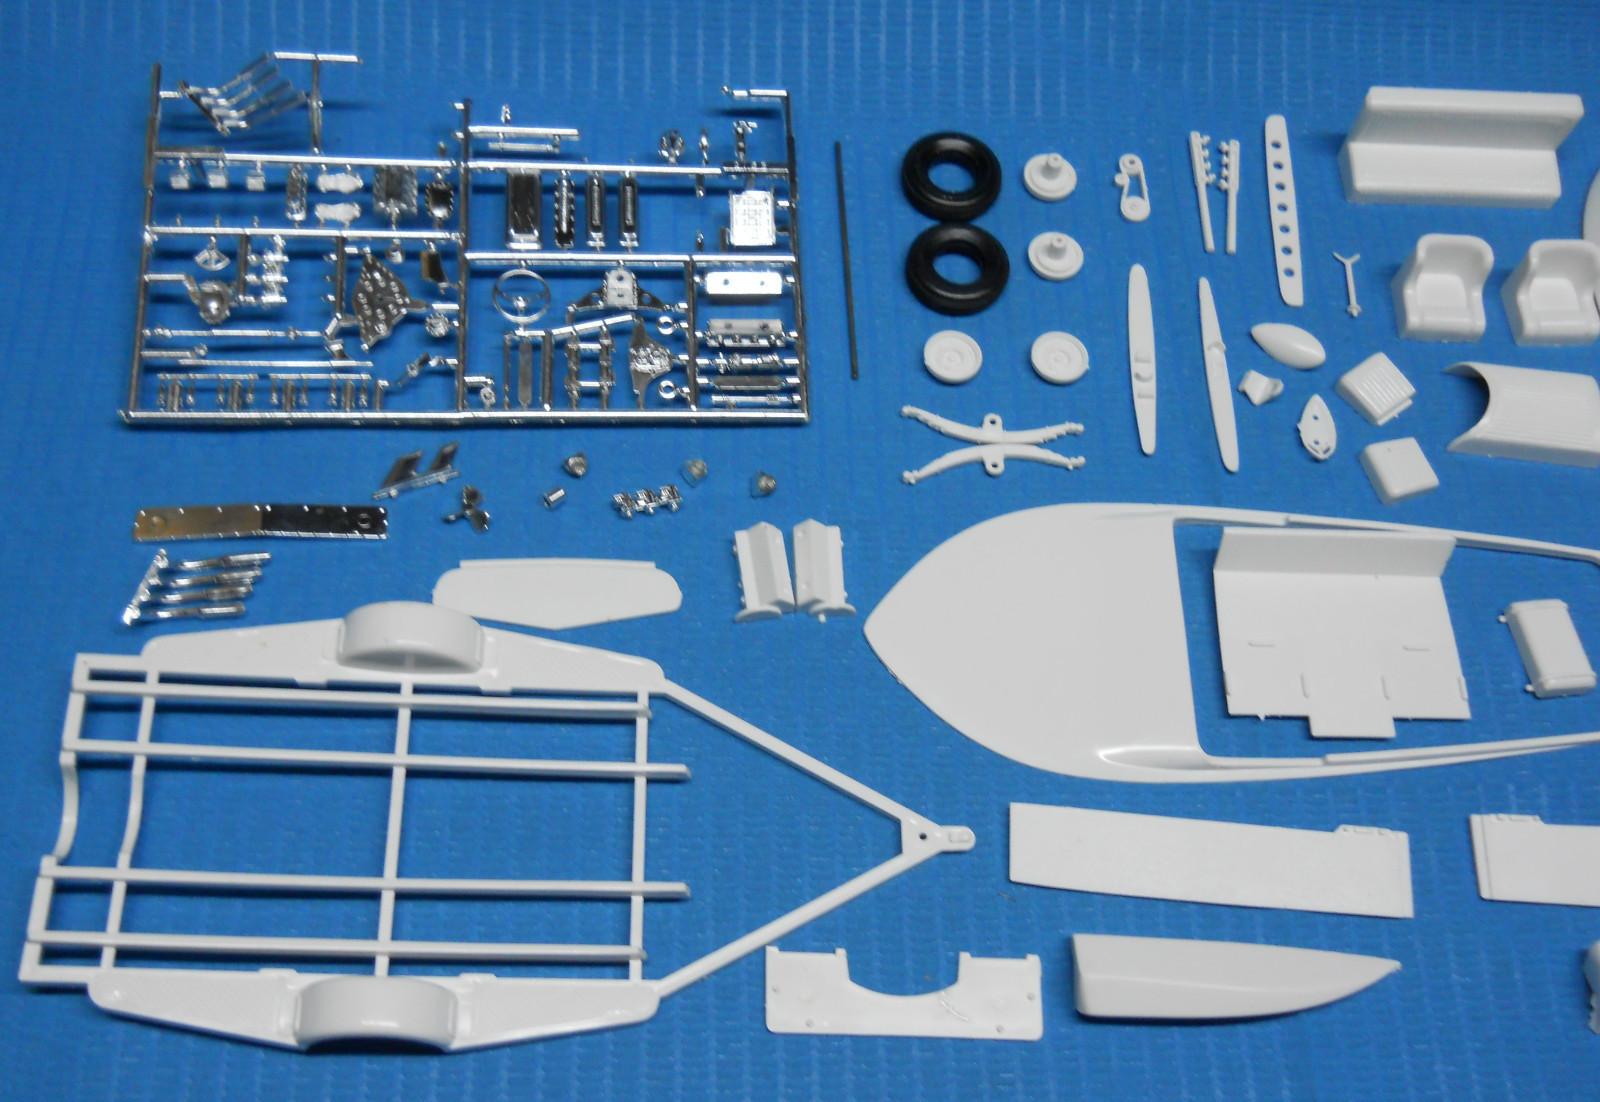
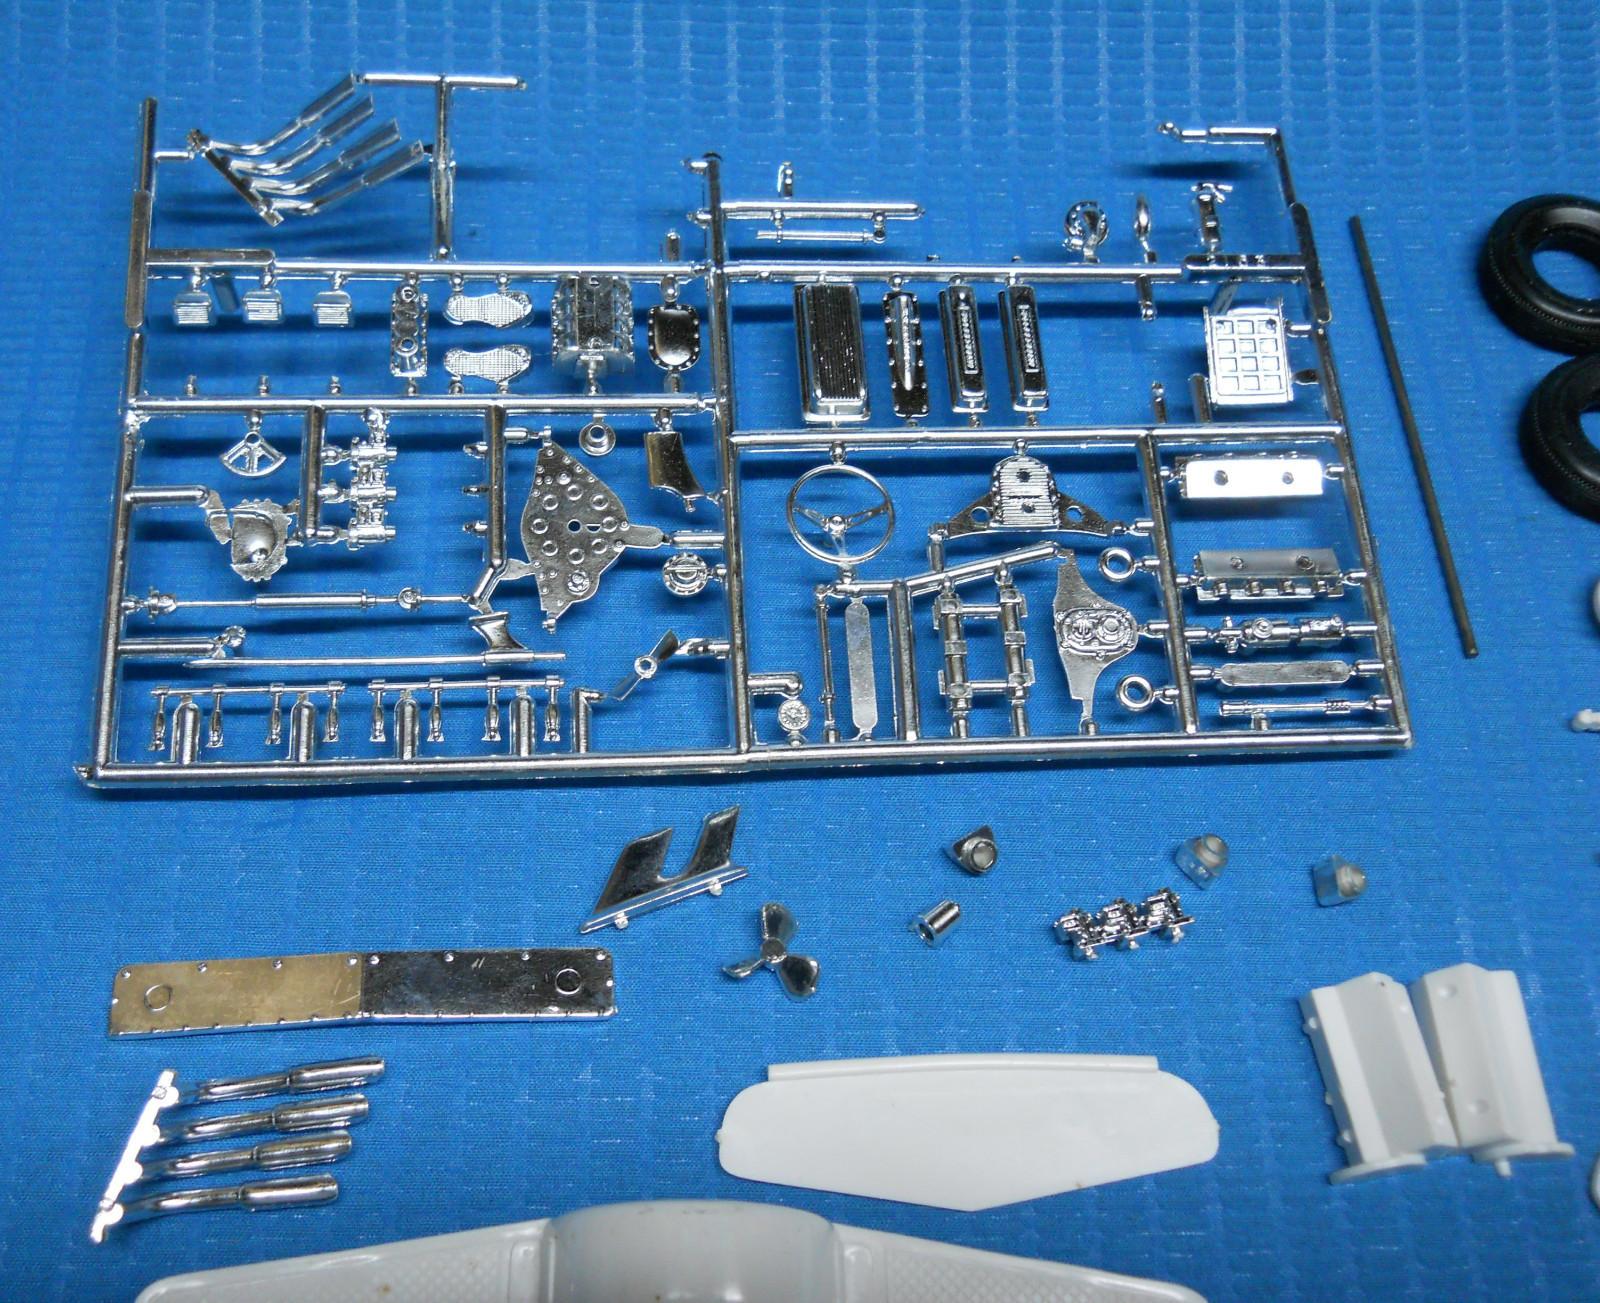
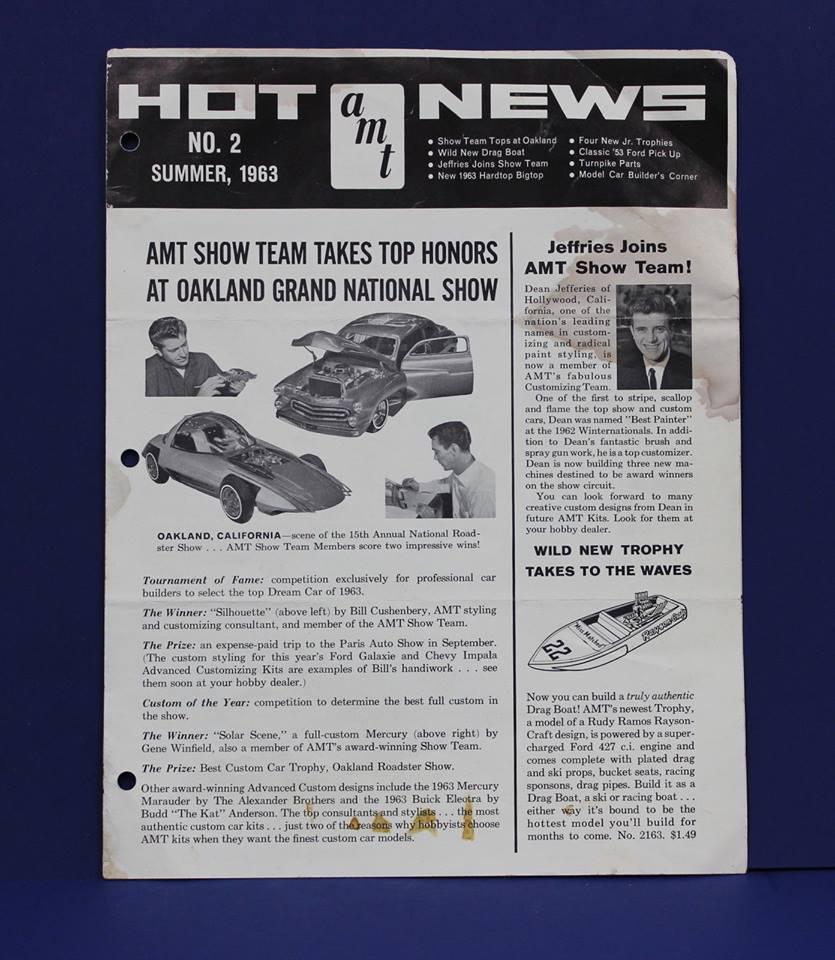
AMT Rayson Craft Ski-Drag Boat Kit Wish we could have a re-do on this kit! Dean Jeffries & the Drag Boat
-
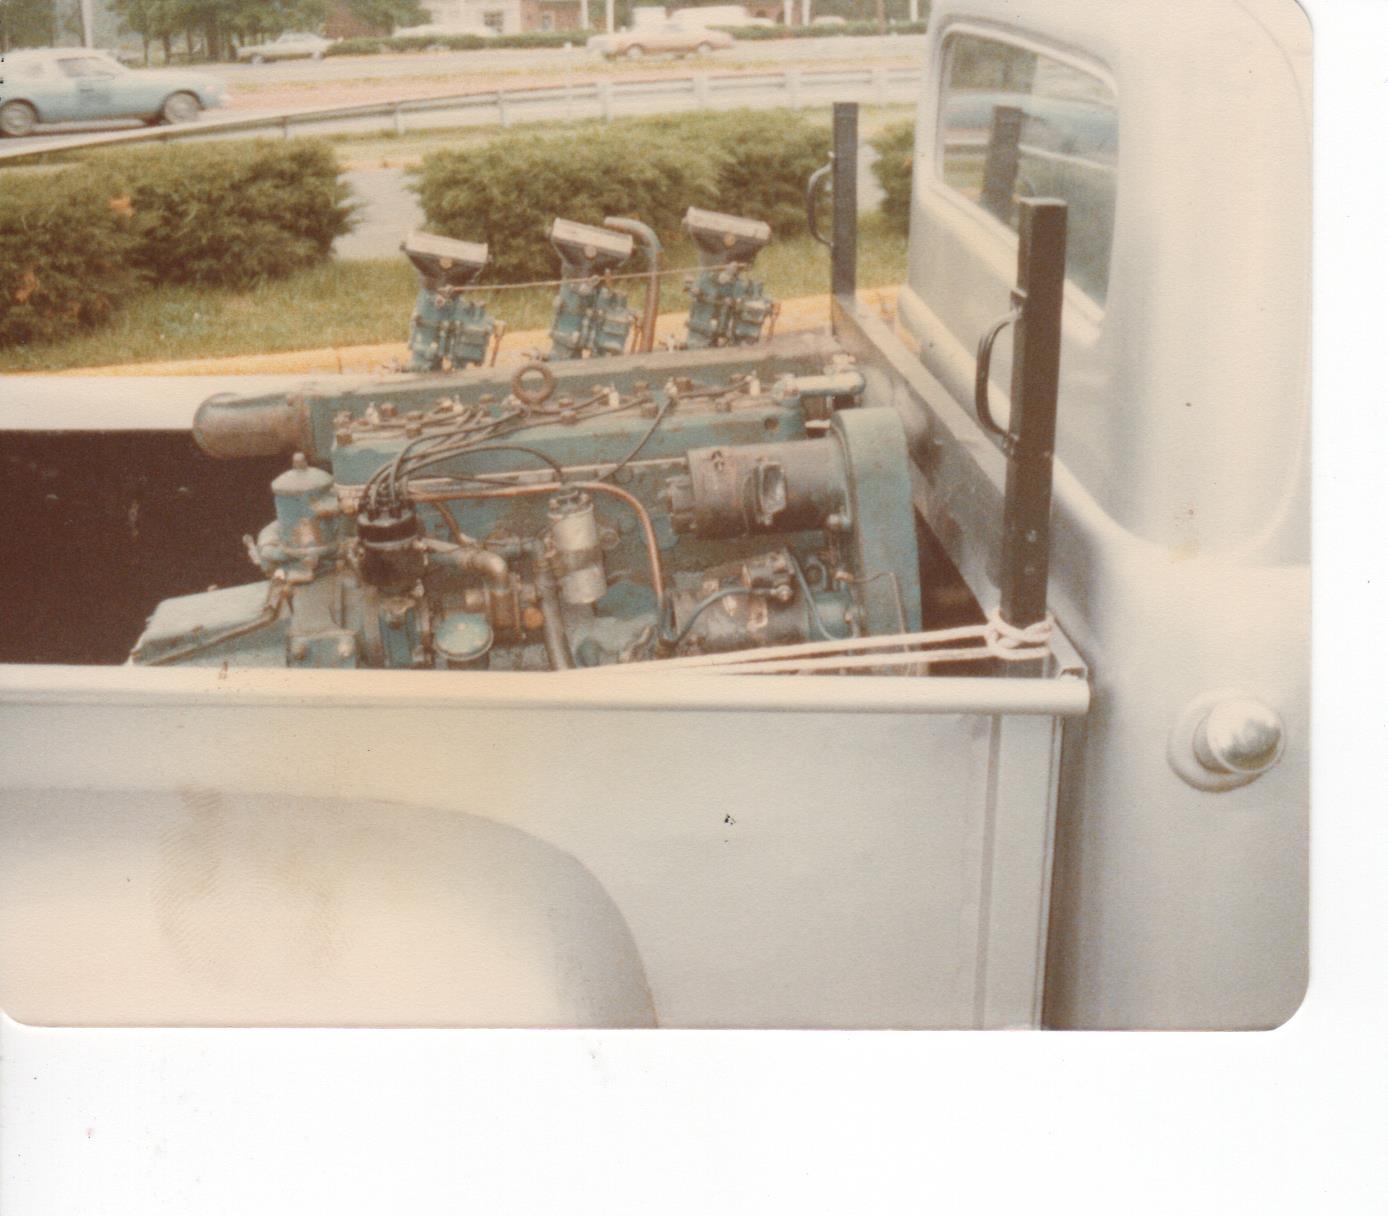
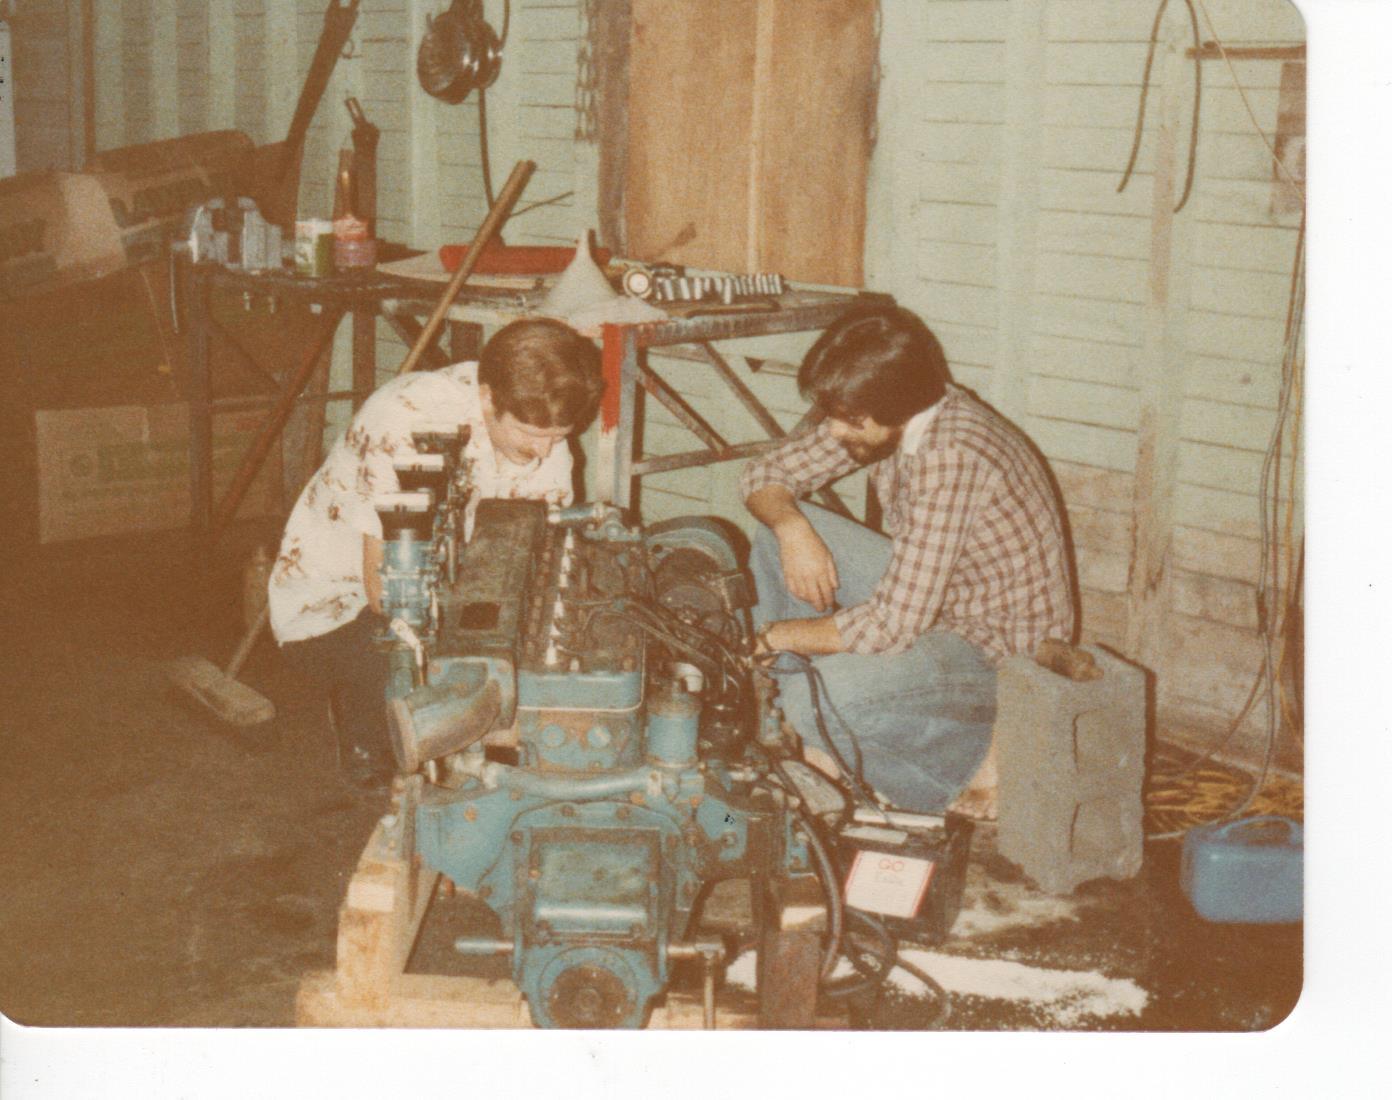
Time to kick up some scale road dust....and some water mist, too!
Kit Karson replied to tim boyd's topic in Model Cars
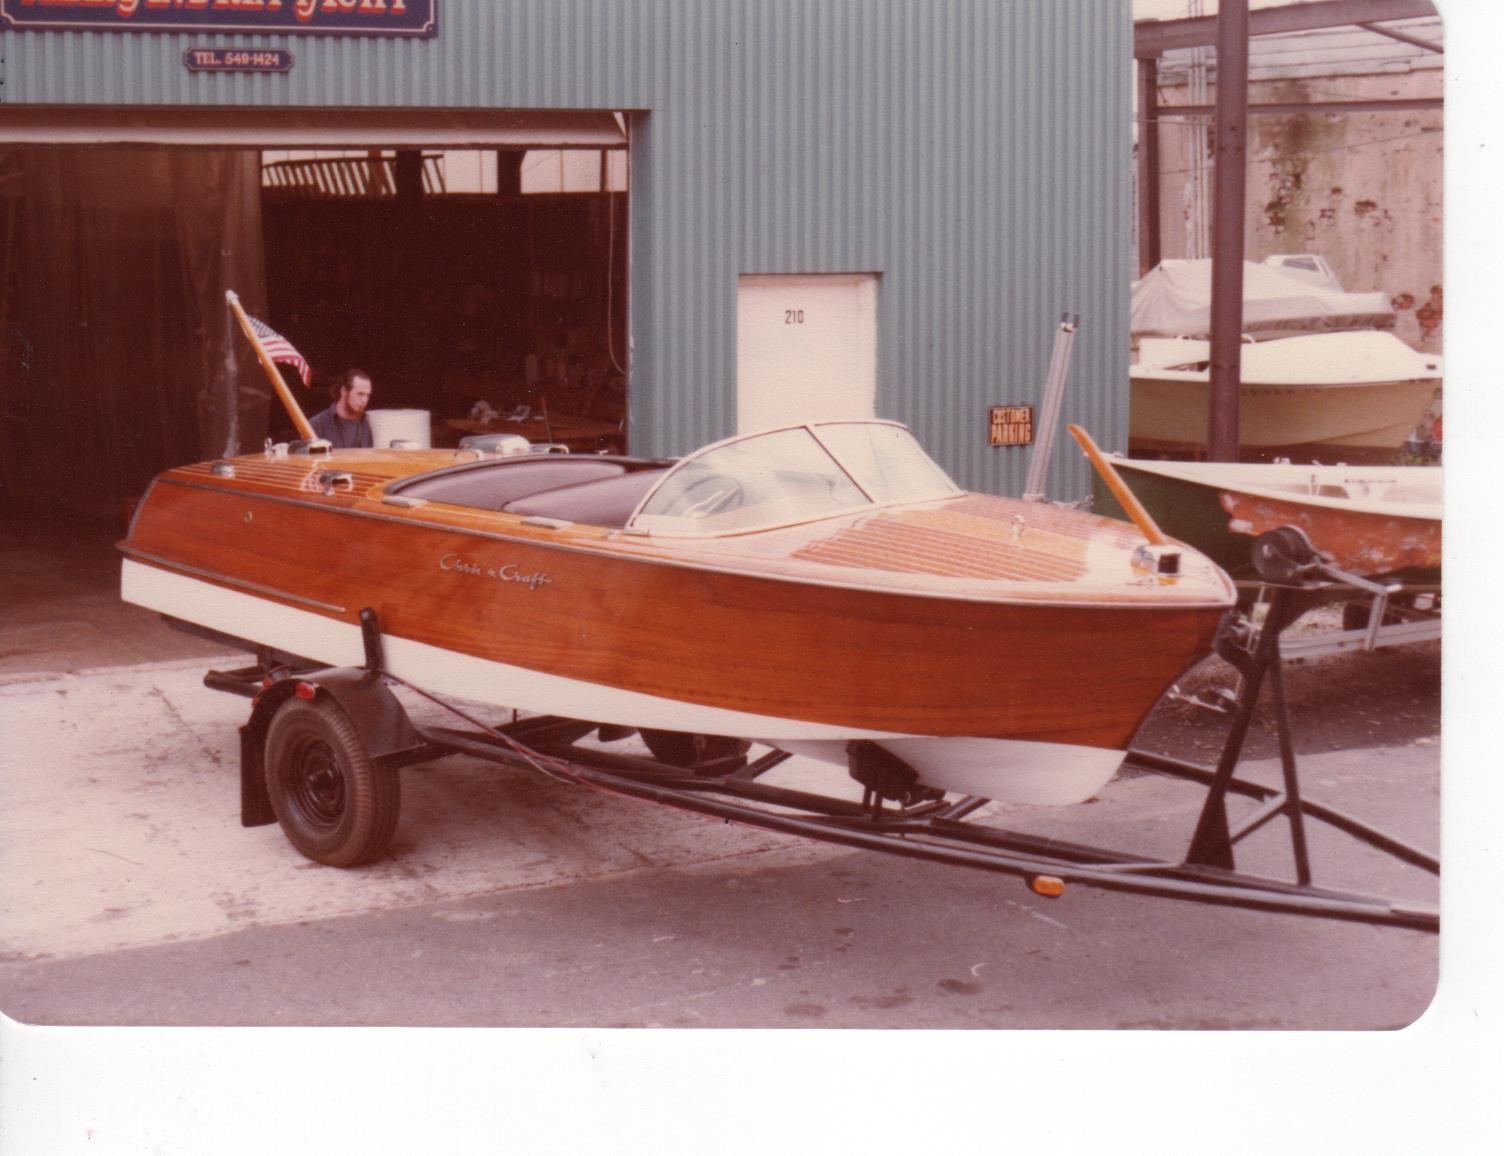
Had to chime in here with a 1:1 surf&turf combo: '51 Ford F100 tow truck '55 Chris Craft 19' Capri Restored 1976 '55 Chris Craft 19' Capri, Flat Head 6 Cyl with 3hree Zenith 1 Brl Carbs Found the "LAST" crank on the right coast... Transom was a real mess!
-
1990 Mustang LX - SVT Cobra DOHC Powered! UPDATE! 1/22/23
Kit Karson replied to Dennis Lacy's topic in WIP: Model Cars
Now I'm wondering just how many other Ford bodied kars could benefit from this transplant from the ol' deuce phantom?!. -KK
-
1963 Chevy Nova Wagon Street Rod FINISHED 3/20/22
Kit Karson replied to Dennis Lacy's topic in WIP: Model Cars
Well...


.jpg.fba29d68b62bfb953a28764da8841be7.jpg)
.jpg.05e7c2be784eb496410d612c4b77af79.jpg)