Kit Karson
-
Posts
1,540 -
Joined
-
Last visited
Content Type
Profiles
Forums
Events
Gallery
Everything posted by Kit Karson
-

*1950 3100 Chevy Pickup*
Kit Karson replied to Zippi's topic in WIP: Model Trucks: Pickups, Vans, SUVs, Light Commercial
Fine Art Pen You can also float a flat black solution into each recess... -KK -
@alan barton We may need to call them out by @Name to get their individual attention! I want to call @Gregg's attention to this thread, @Dennis Lacy asked me last night if we could get some of the builds in this thread into the magazine... Maybe we could get a couple of @tim boyd early builds included!?. I think there are at least one other "Tribute" thread here on MCM Forum... maybe we can get a link over here, to it, too! What do you think?
-
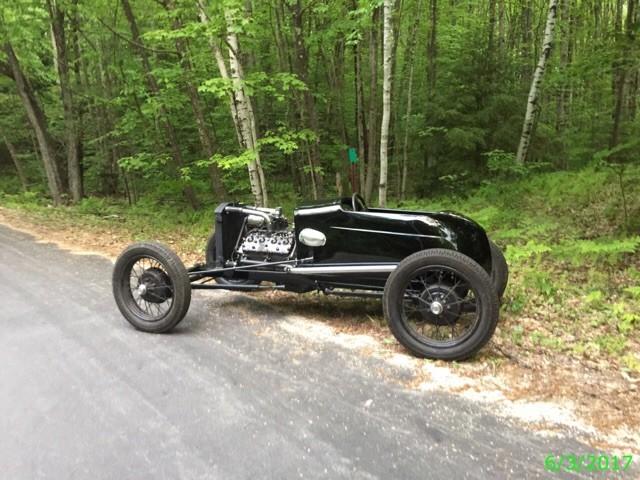
What ADL is referring to is the inspiration for RRR's One-Man Speedster:

-
Way Kool! What a great addition to the @Dennis Lacy "Tribute" thread!! Your thought process is making this thread more interesting with every stroke of the pen! Young model builders are being exposed to a the art of creation and combining of parts from way different kits that contributed so much to our long-time love of model building. Forgotten engines, fenders, running gear options and 1:1 contributions from awesome mentors in the hot rod and custom car building mecca. Over the decades, building styles have evolved from the back-yard mechanic to the high-scale Hot Rod Shops across our great nation; and now car builders around the world! @Rocking Rodney Rat is an avid follower of The Hokey Ass Message Board - spreading the gospel of traditional hot rods and customs to hoodlums worldwide: The H.A.M.B., thus giving us the MCM Forum. This is our modeler's version of The H.A.M.B., IMHO. To that end, these are the "good old days" of modeling and we are able to bring years of experience and dedication to the hobby and share it with our fellow modelers, both young and old! My personal thanks to @tim boyd and his many years of bringing "Modeler's Corner" to us from the pages of "Street Rodder" and rekindling the fires for a modeling era of long ago! @alan barton thank you for picking up the baton in this marathon "Tribute" thread, started by a real-life hot rodder and traditional model car and truck builder, @Dennis Lacy! And, I really have to thank @Rocking Rodney Rat for encouraging me to get back to my bench and join this "Tribute" build! Let's make this the most watched thread in the history of the MCM Forum! With over 11,000 views, so far! -KK
-
@tim boyd @alan barton @Dennis Lacy @Rocking Rodney Rat Name Droppers! Back in the day these guys were trail blazers in the hobby and a great inspiration to the young and restless modelers of yesteryear! GoodGuys had sponsored a Model Cars event along with their 1:1 Hot Rod & Custom Car Shows and while RRR & I were just starting our partnership, Pryor Passarino was the traveling host when GoodGuys came to Puyallup, Washington. Pryor pulled me aside and presented me with an opportunity that I couldn't refuse! That was the last time I saw him and from that point forward Gary Meadors, R.I.P., invited me to be the NW traveling host for the GoodGuys Model Car Show. What an honor! And, to have RRR as my wingman was absolutely the most fun we had early on in our life long friendship! As it turned out, @Rocking Rodney Rat became my "Best Man" and still remains my BEST friend, ever! -KK
-
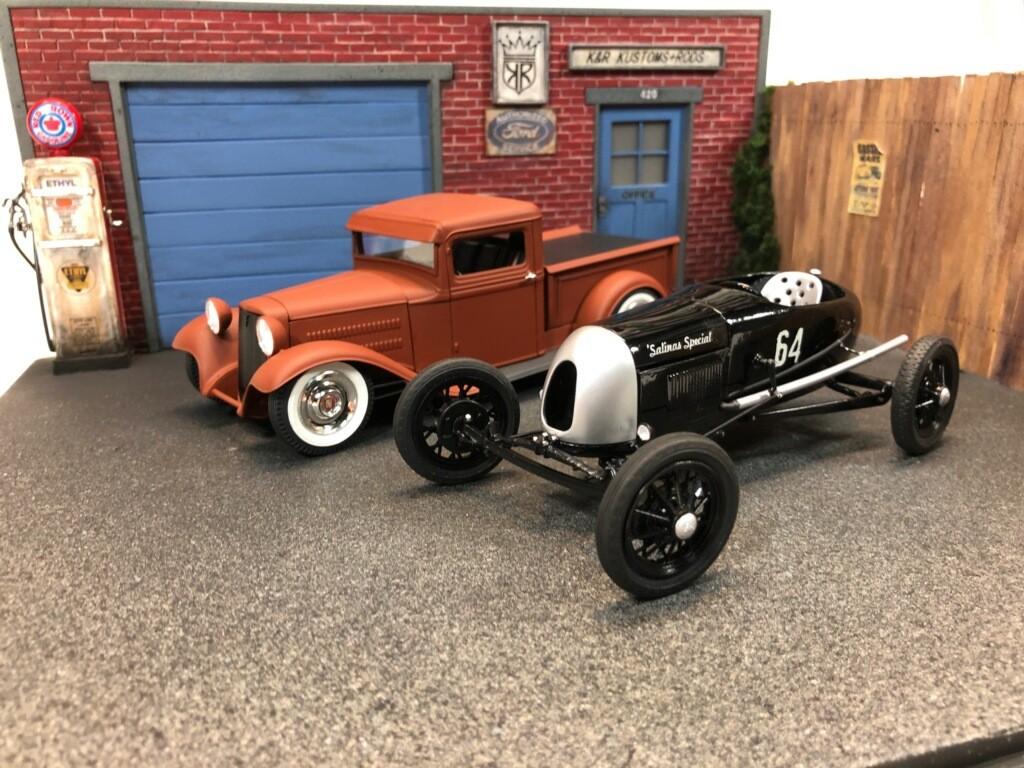
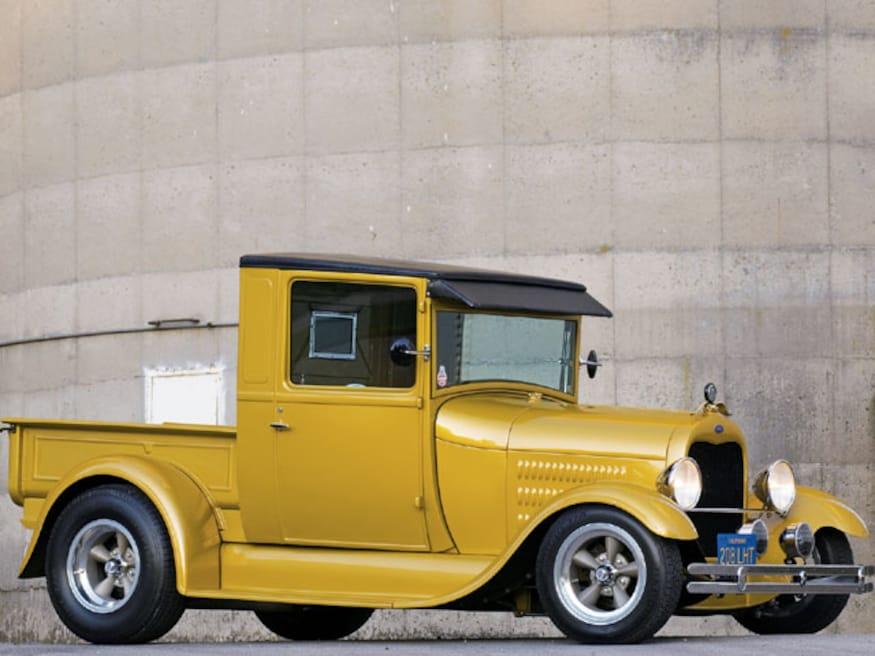
RRR, You are most prolific; creative plastic surgeon; and, enthusiastic scale hot rod builder! Here are a couple of perspective views of your One-Man Speedster: A little T & A in front of the K&R Kustoms+Rods Hollywood Shop! '34 Hot Rod Primer Pickup & A V-8 One-Man Speedster in front of the K&R Kustoms+Rods Hollywood Shop! Absolutely, on of the most spot-on roadsters in your collection, Brother! -KK
-
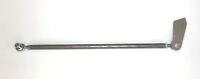
Panhard Bar, Yes! (If that is what you are calling "a rear stabilizer bar"?)
-
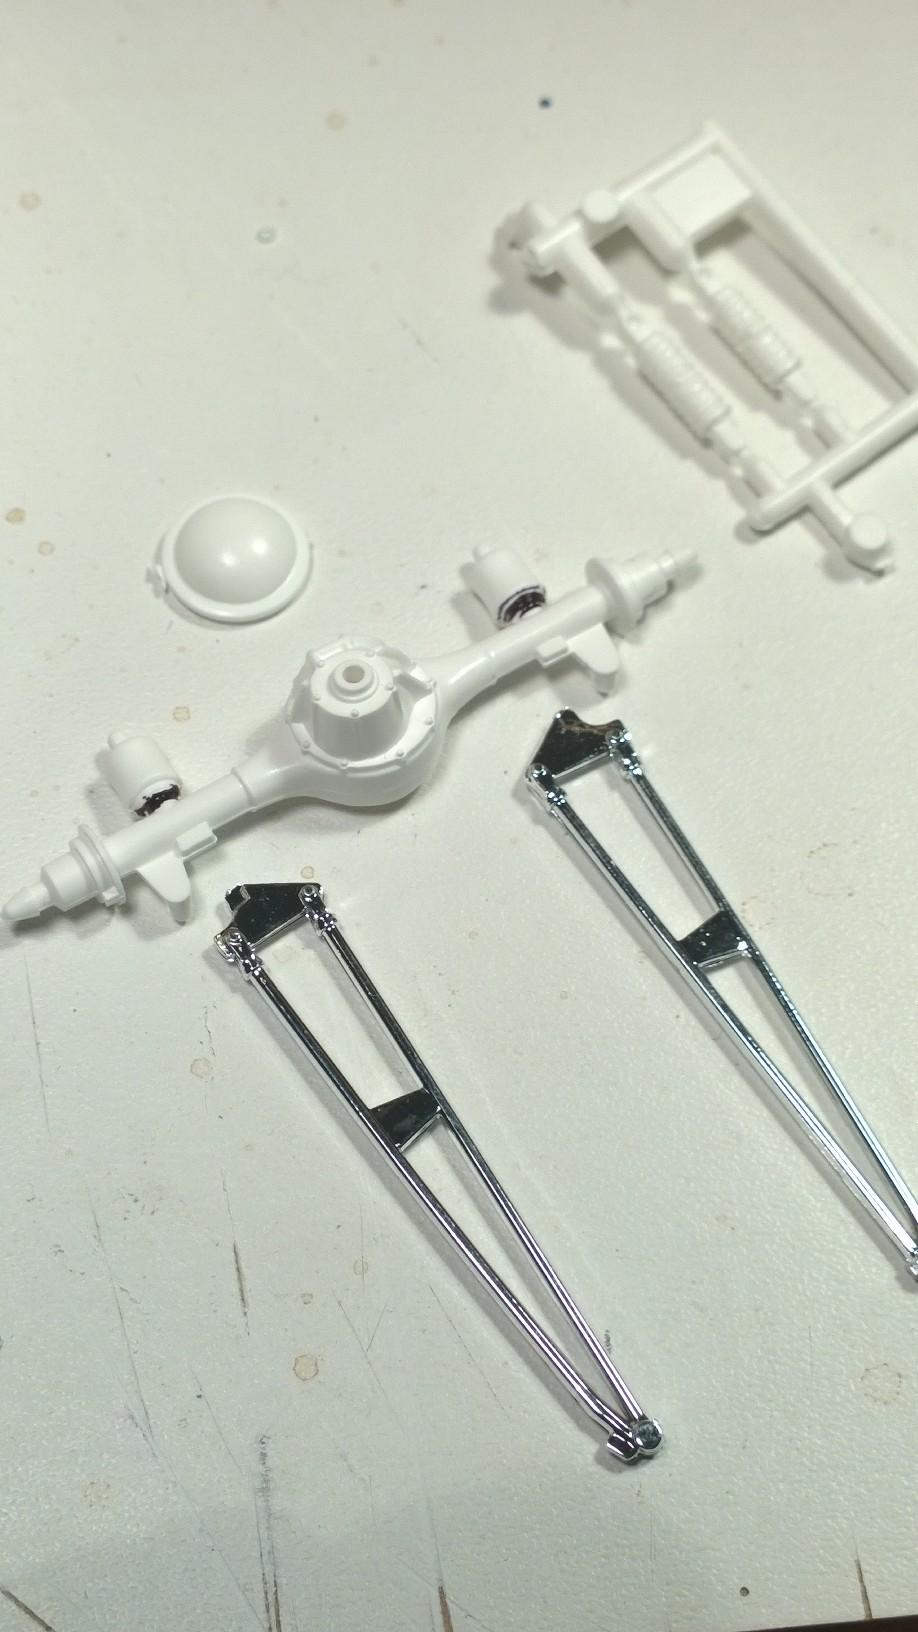
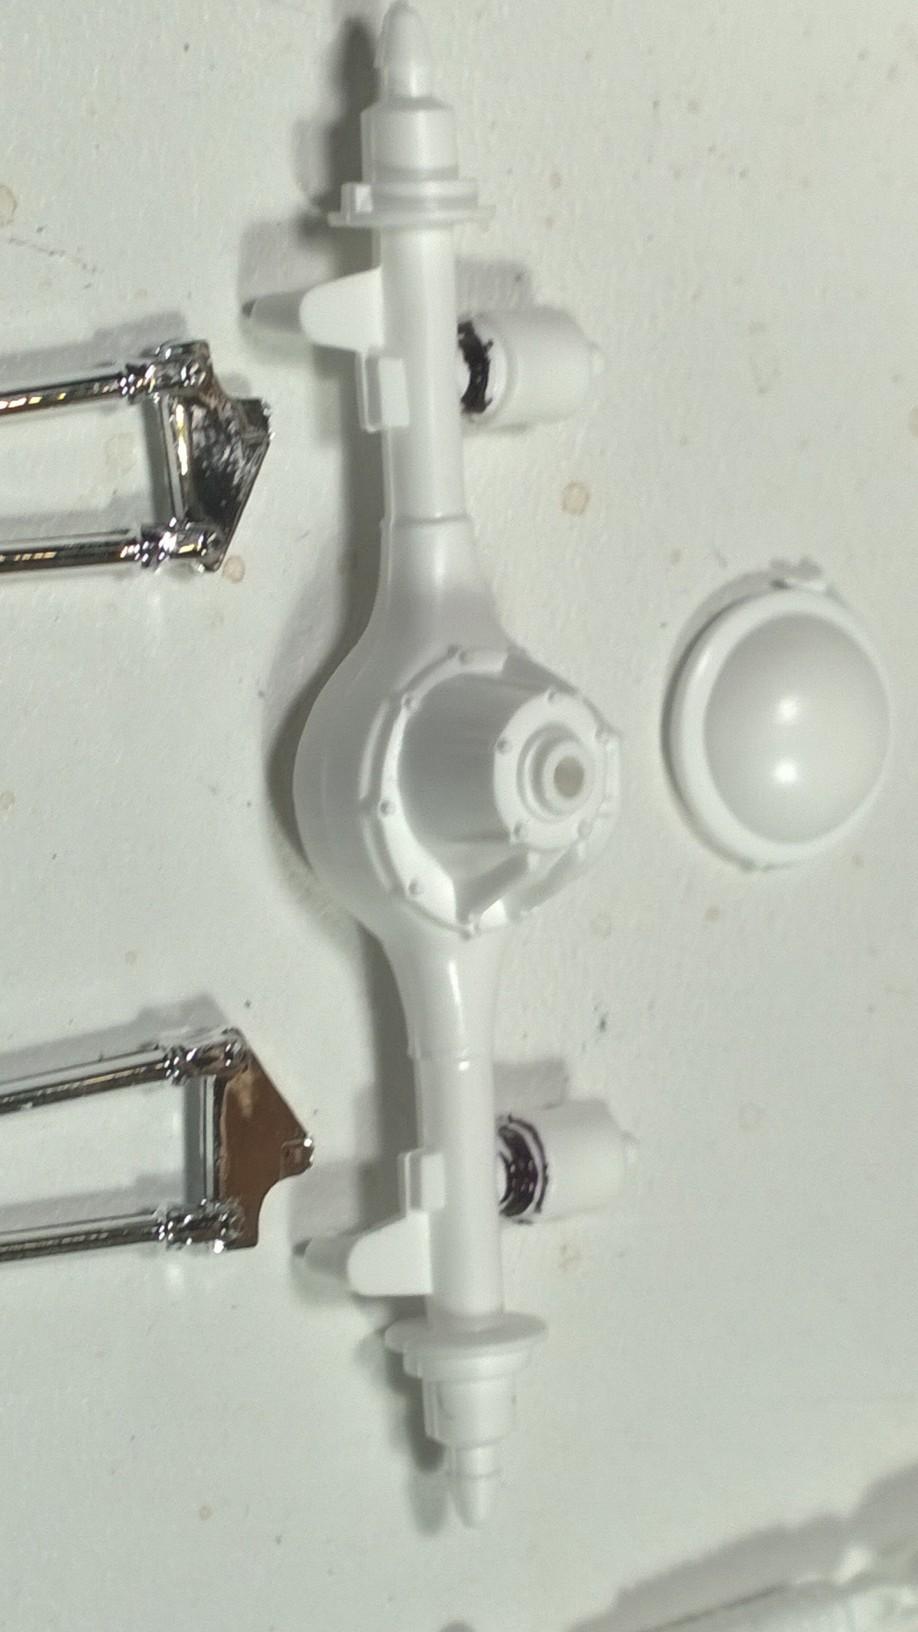
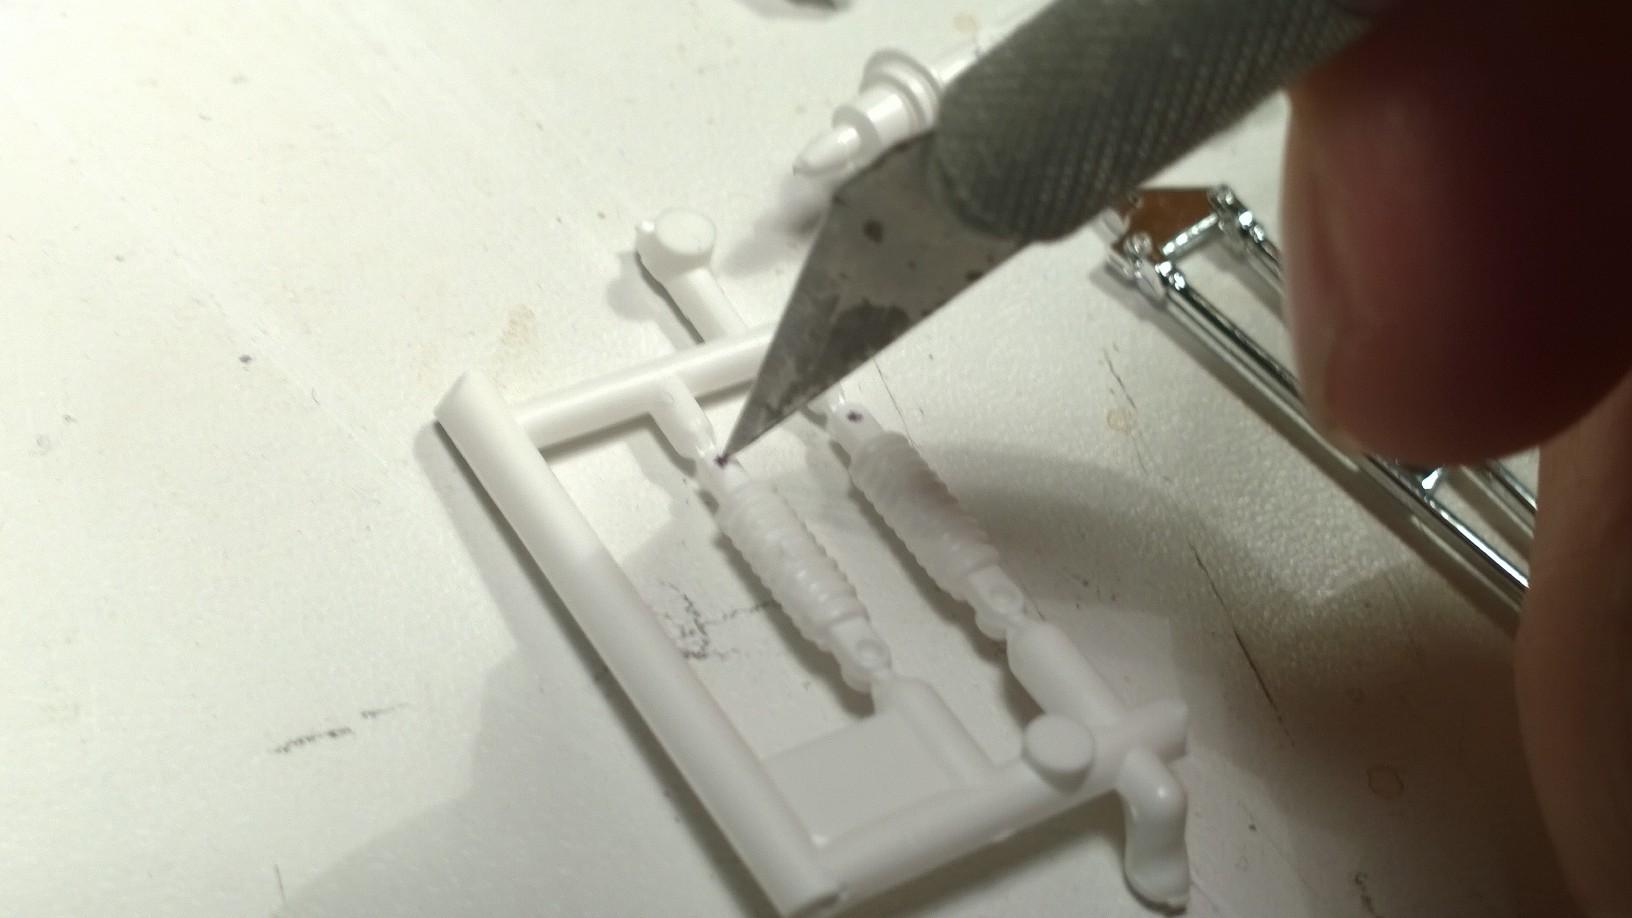
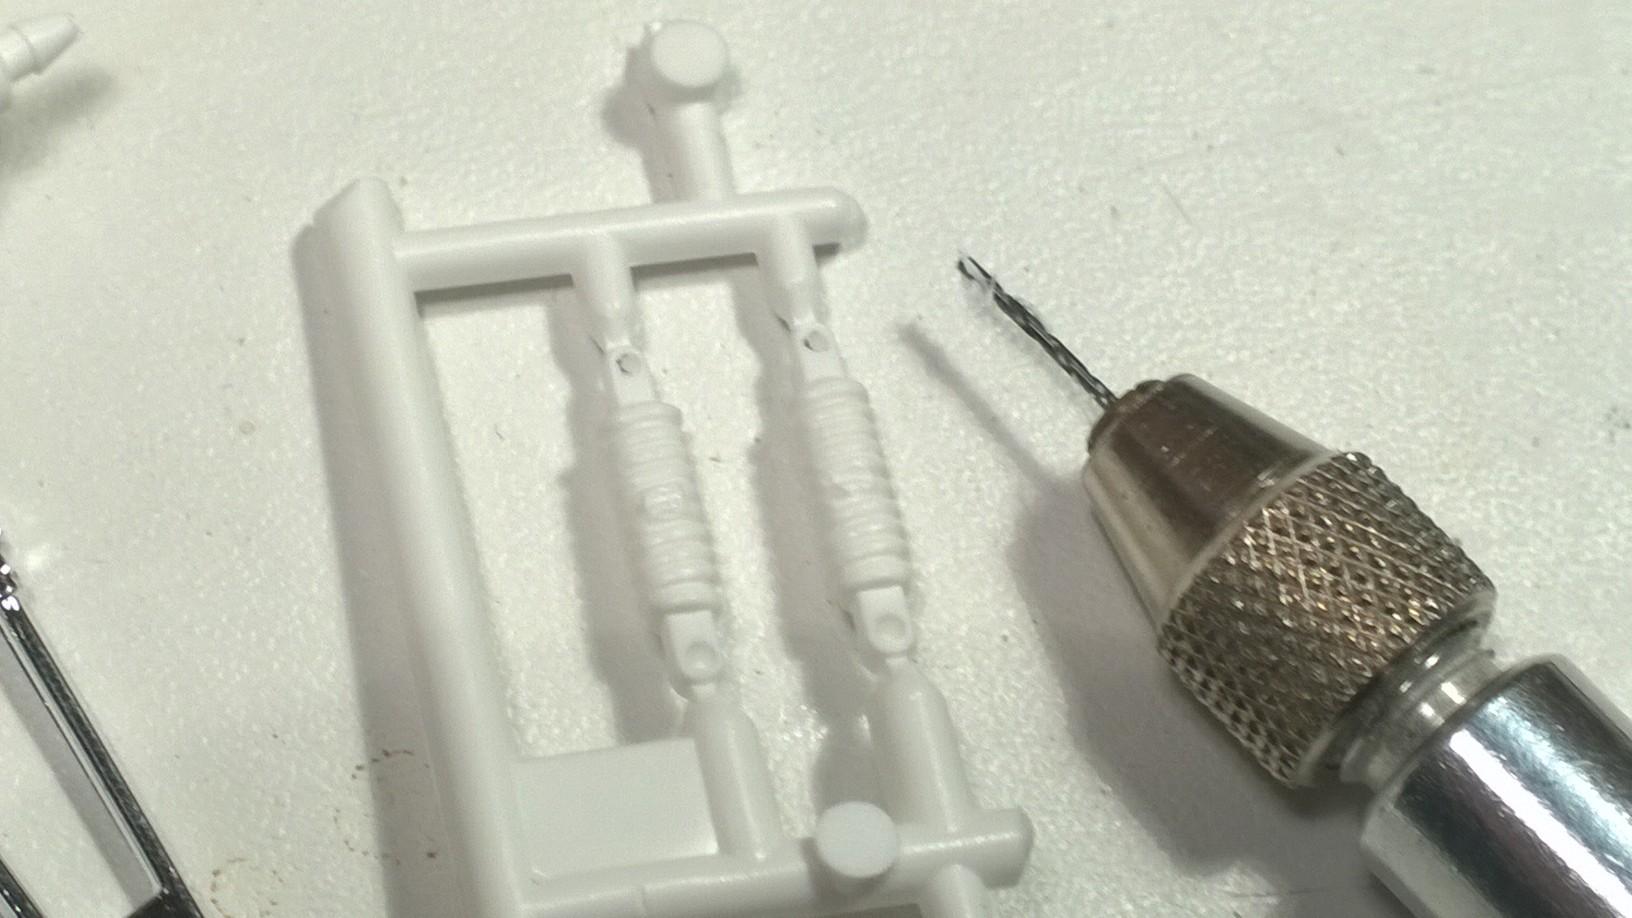
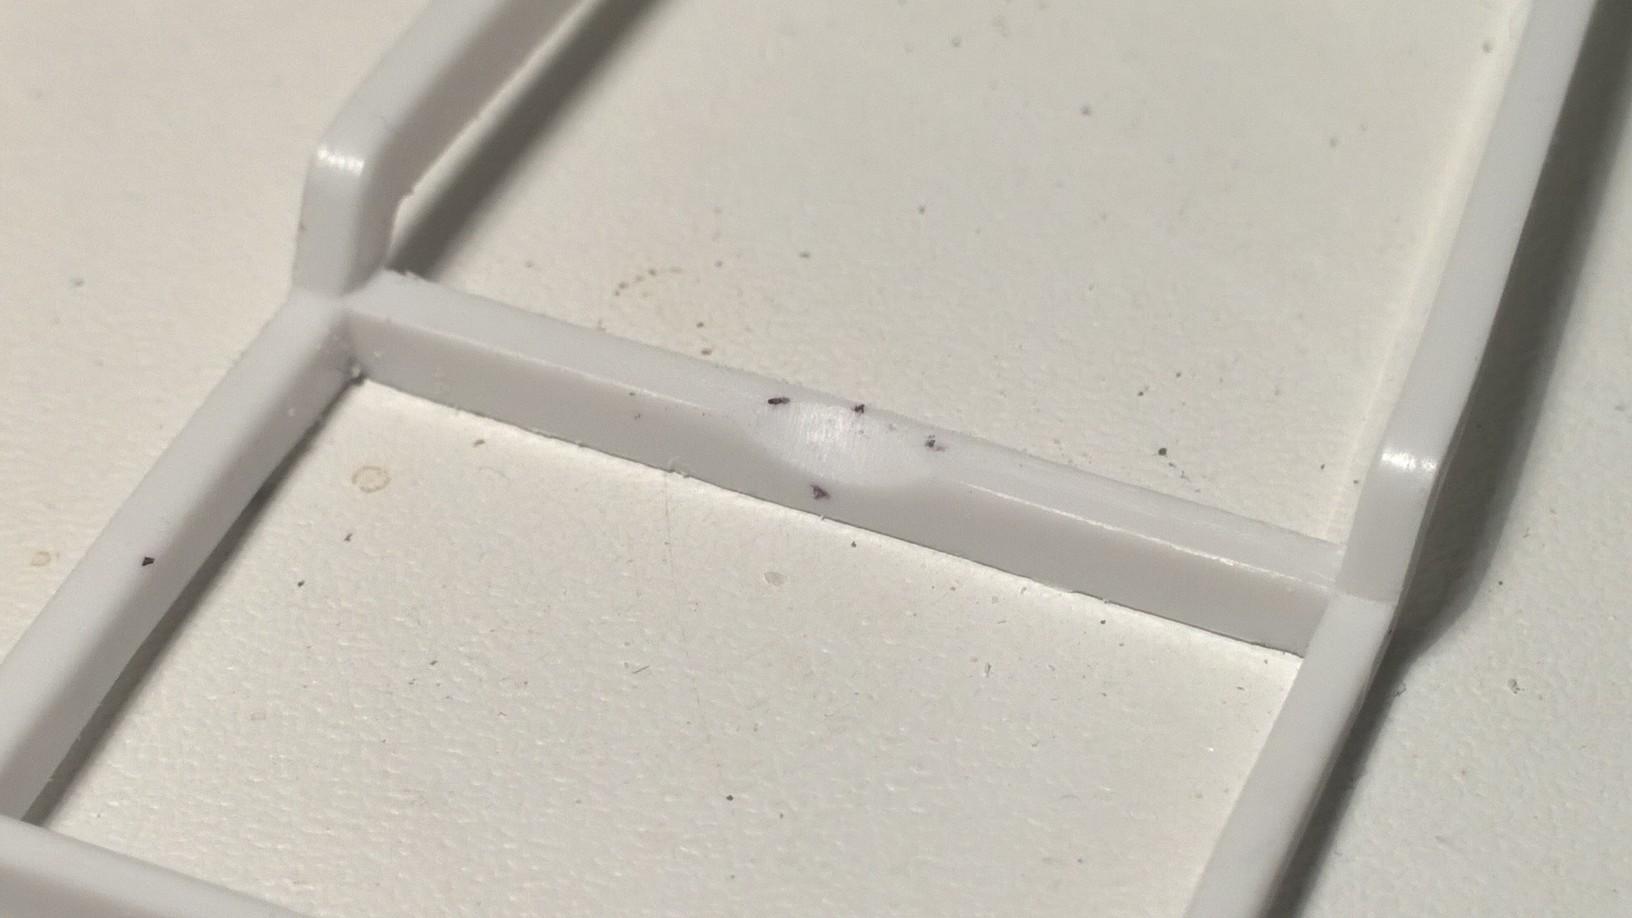
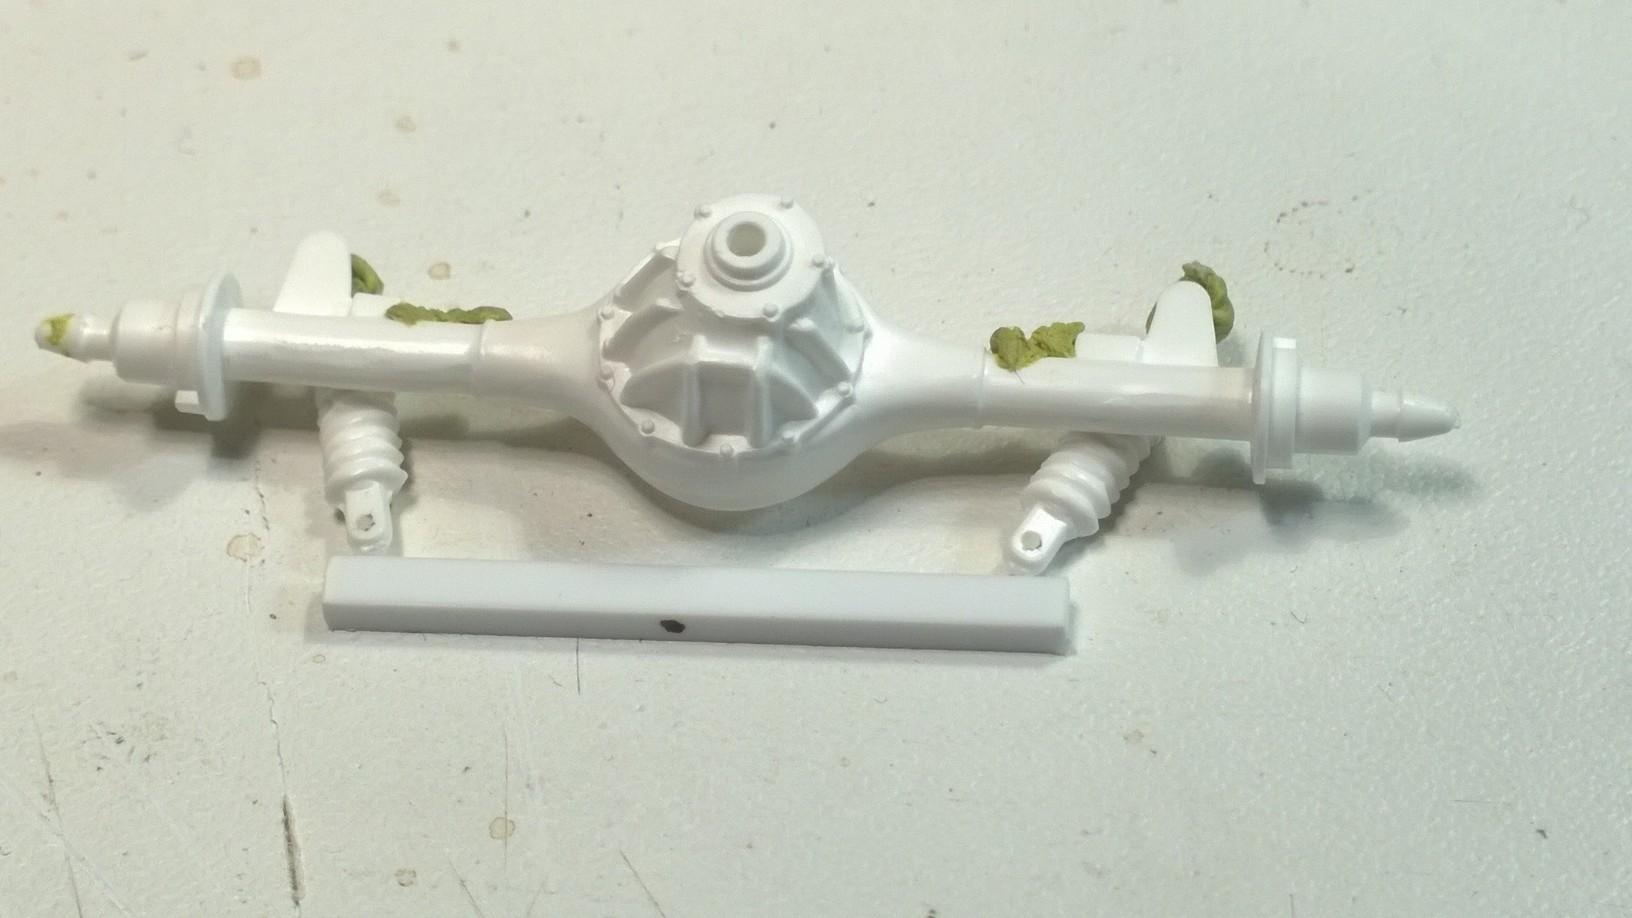
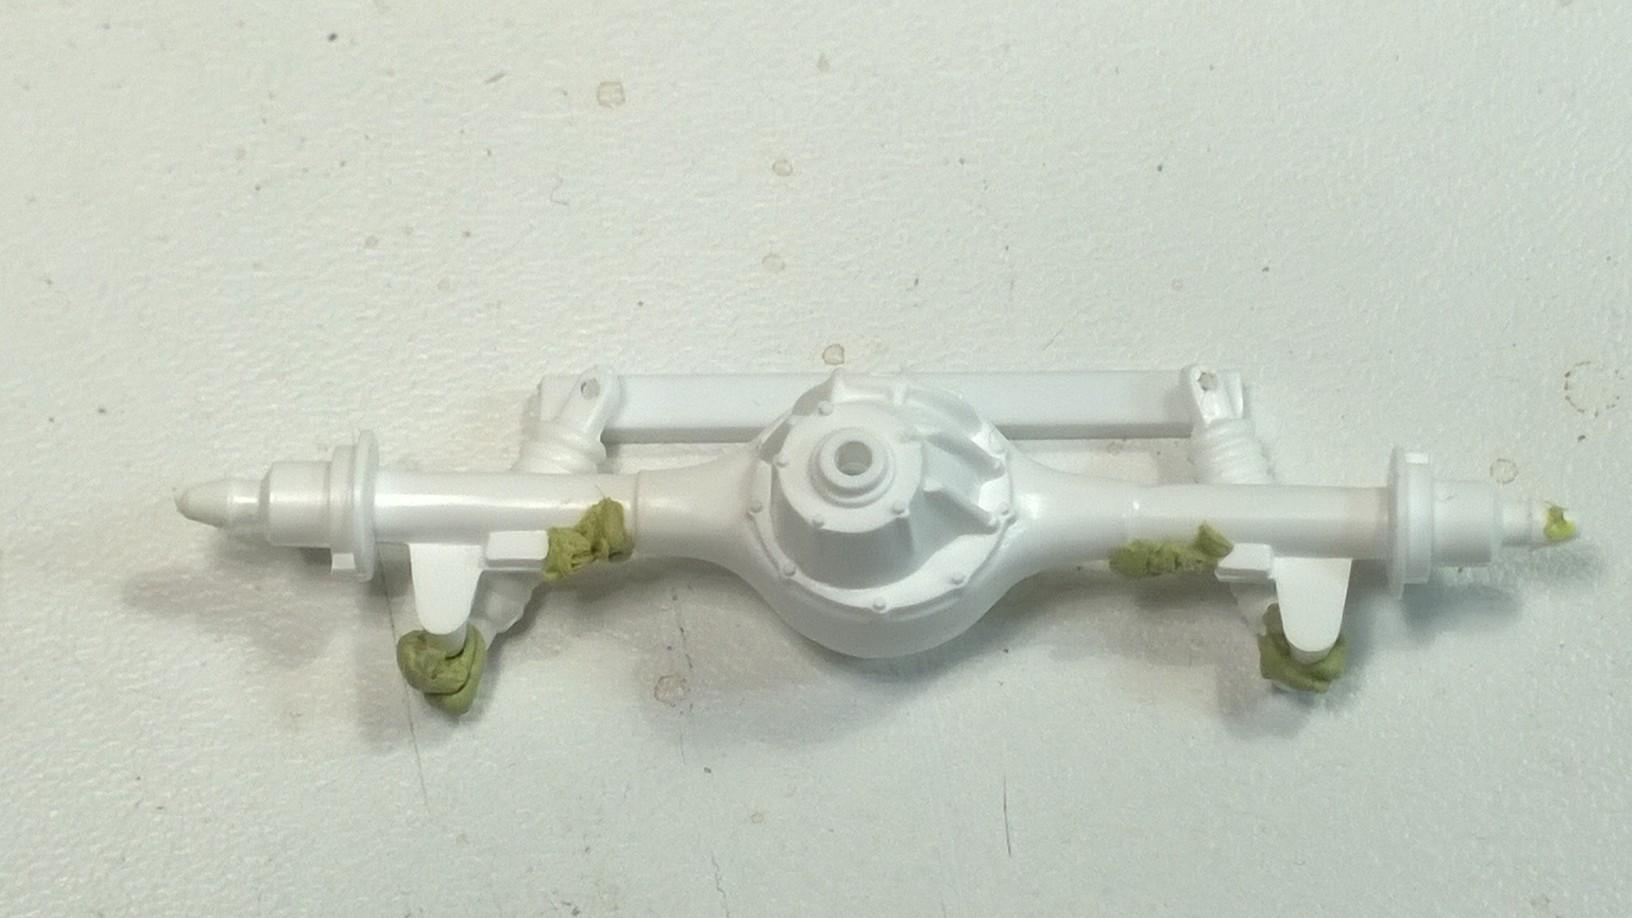
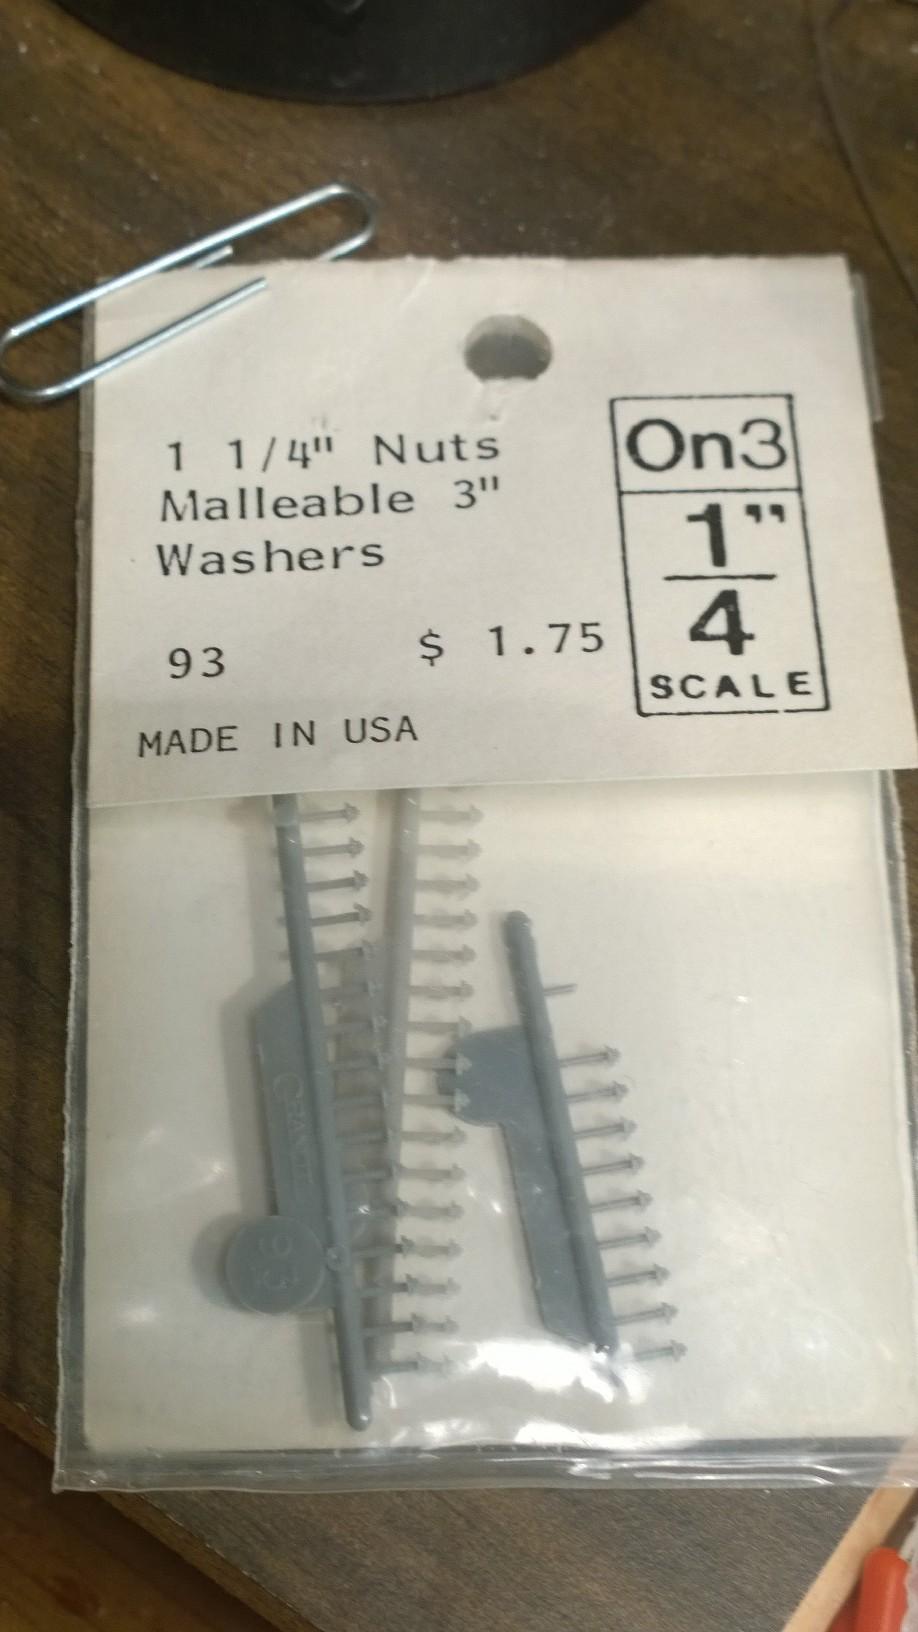
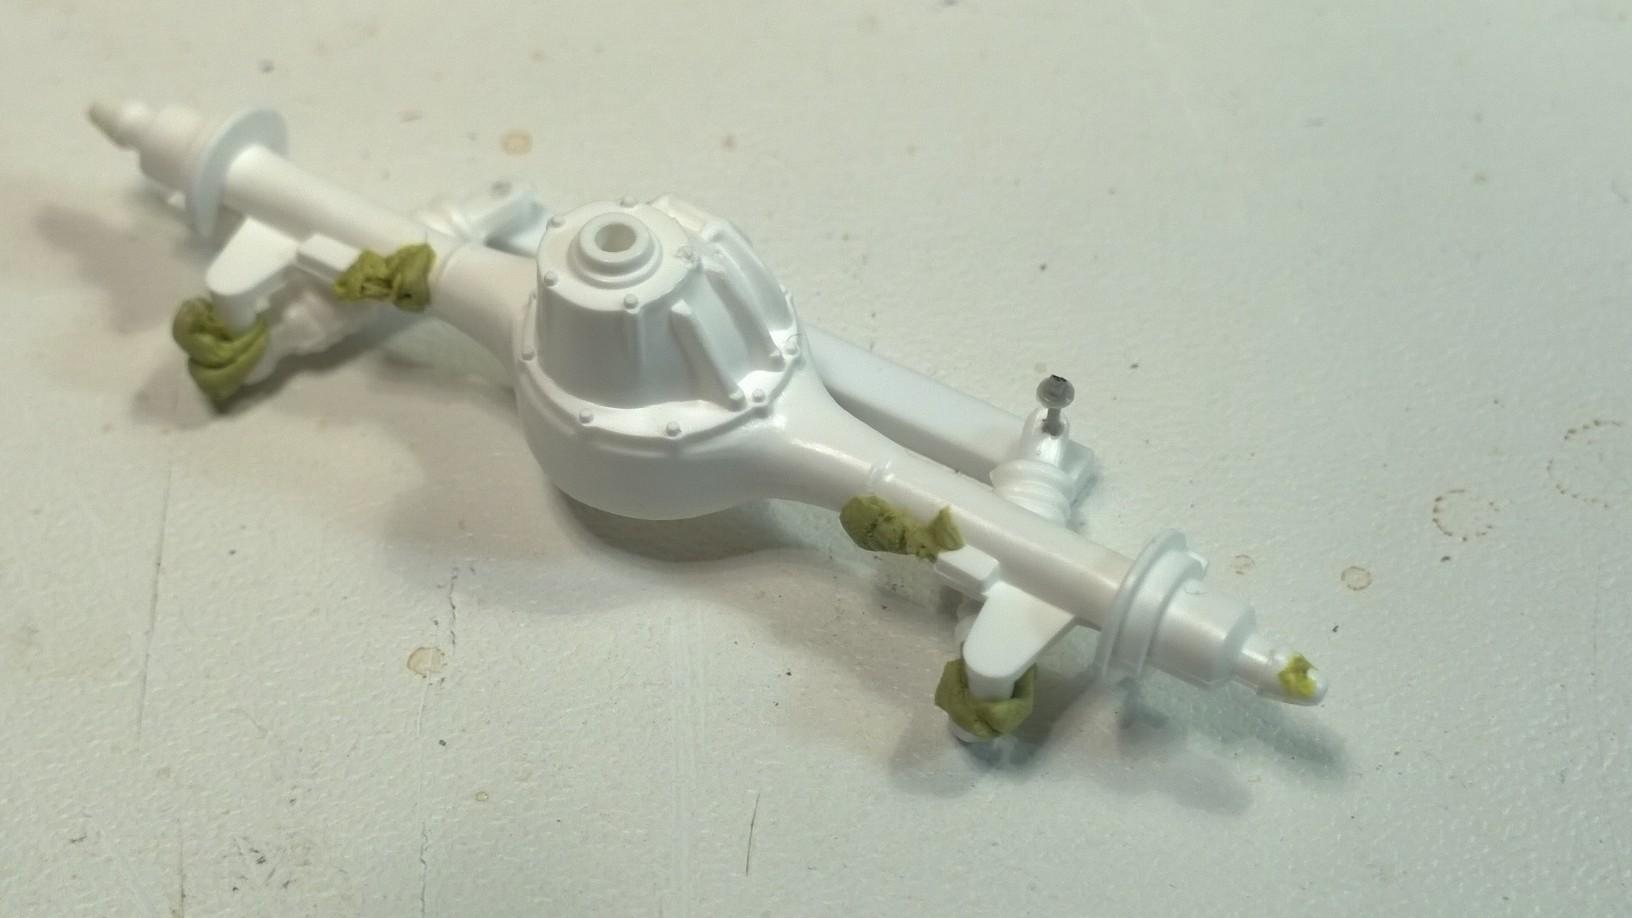
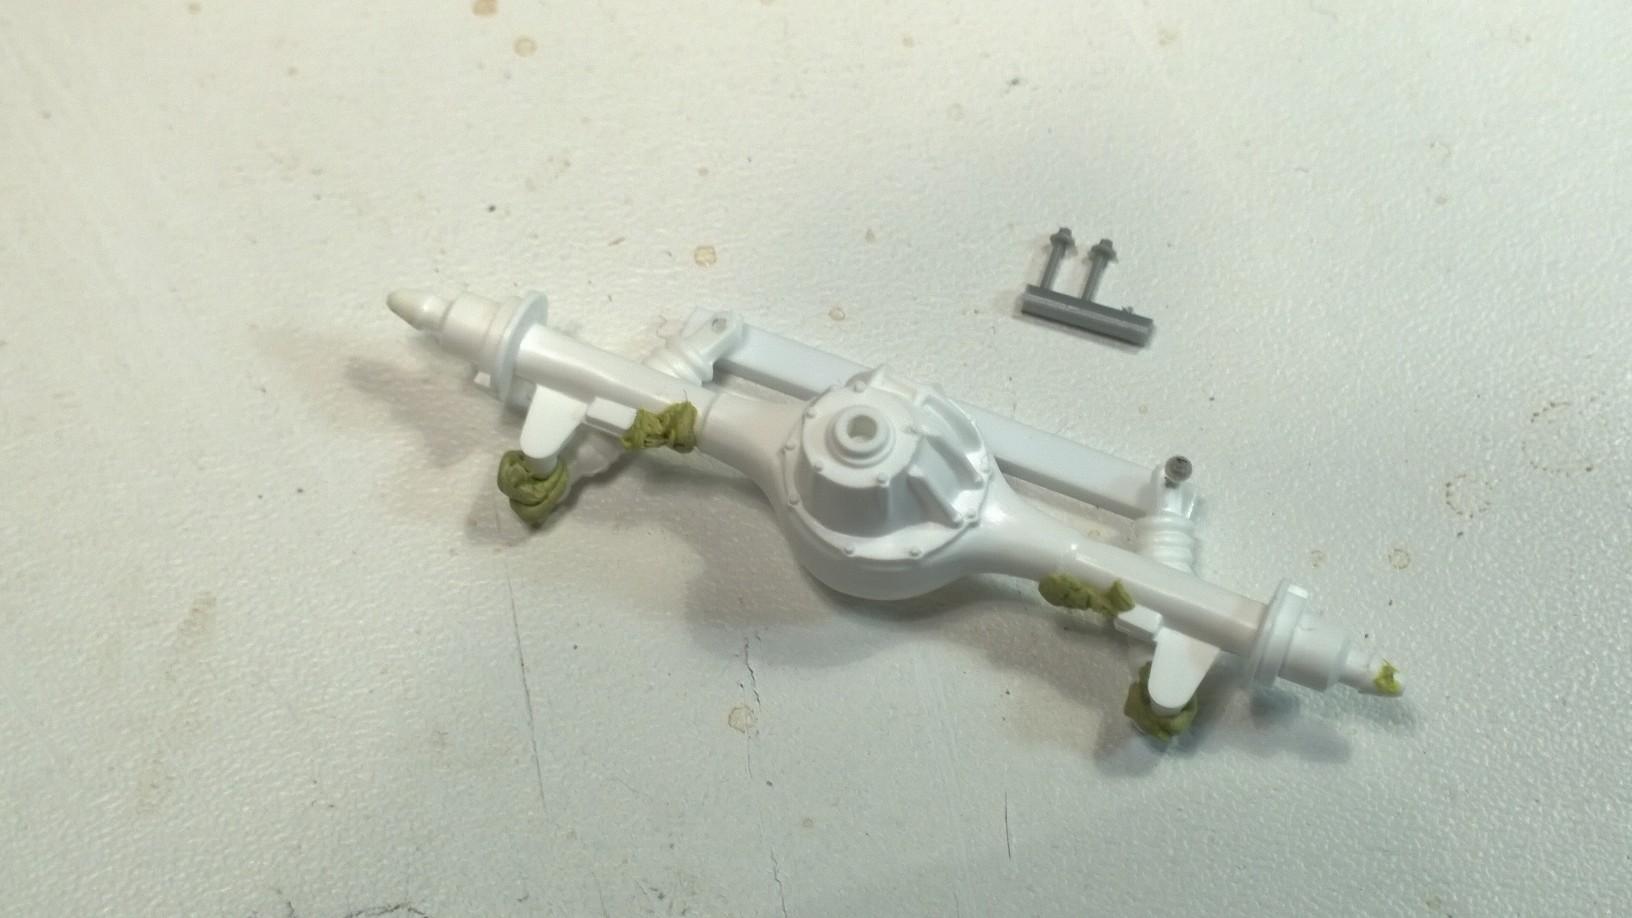
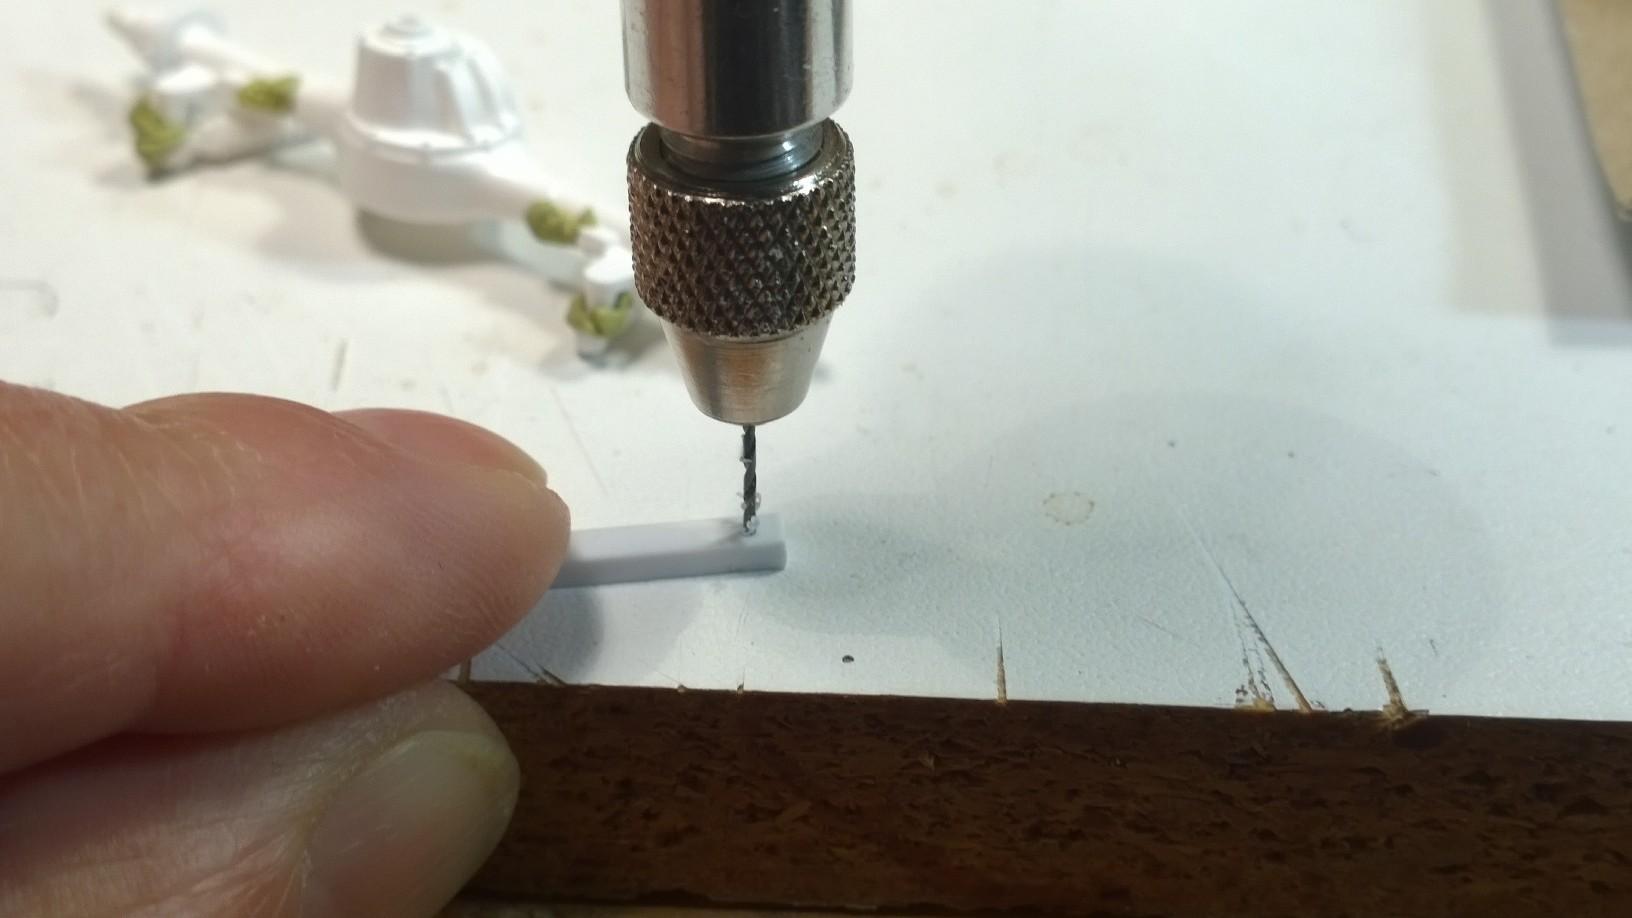
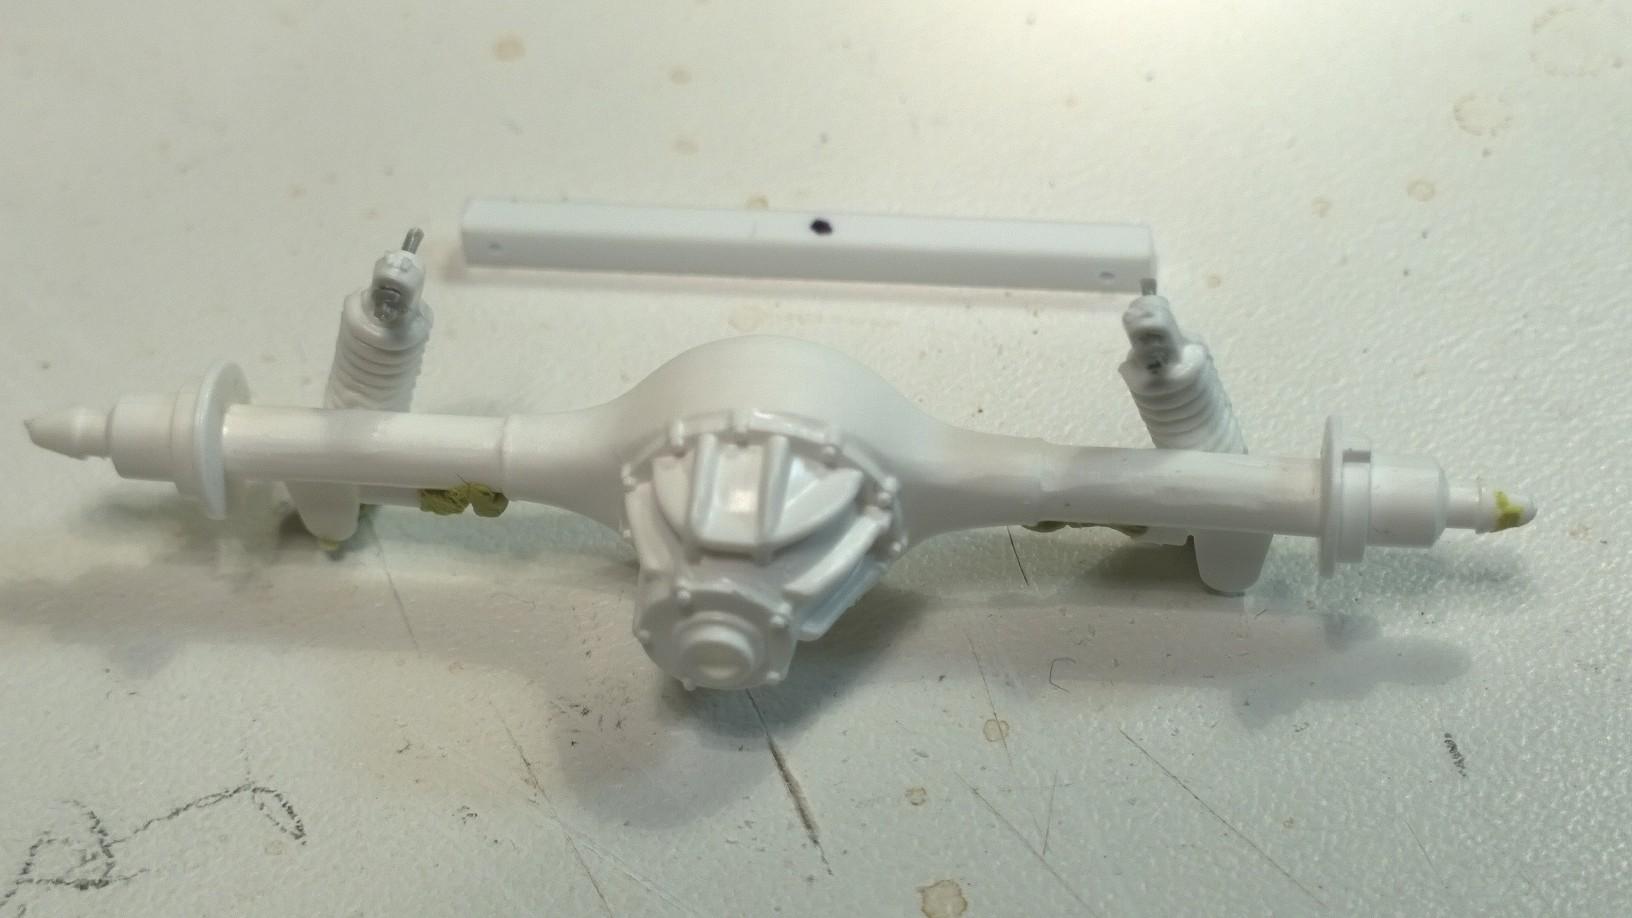
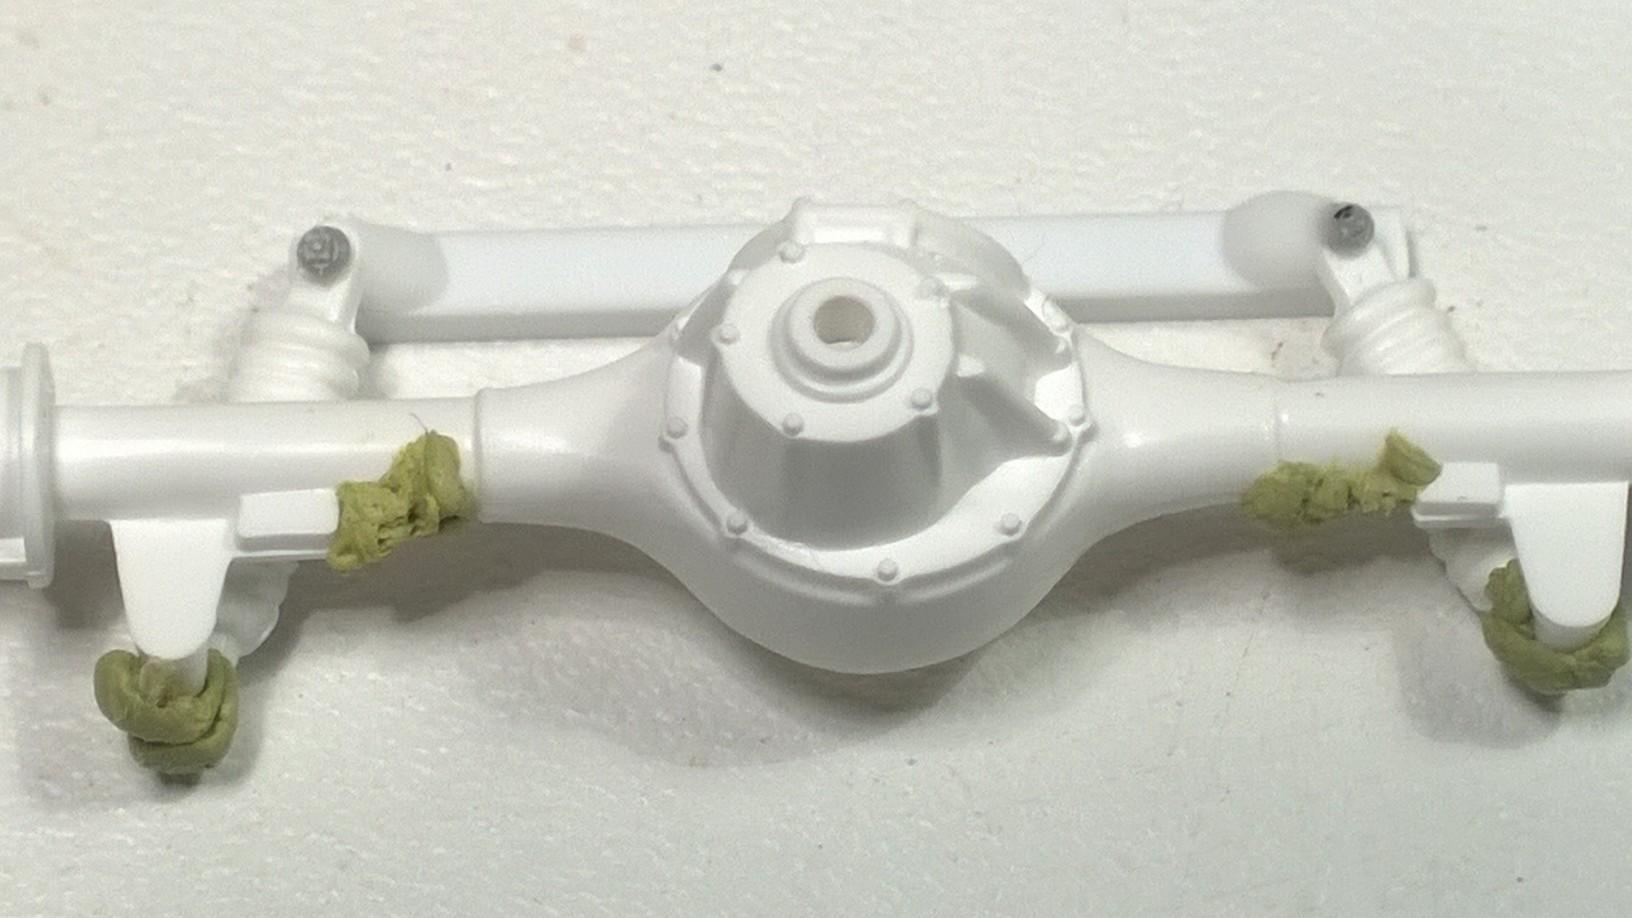
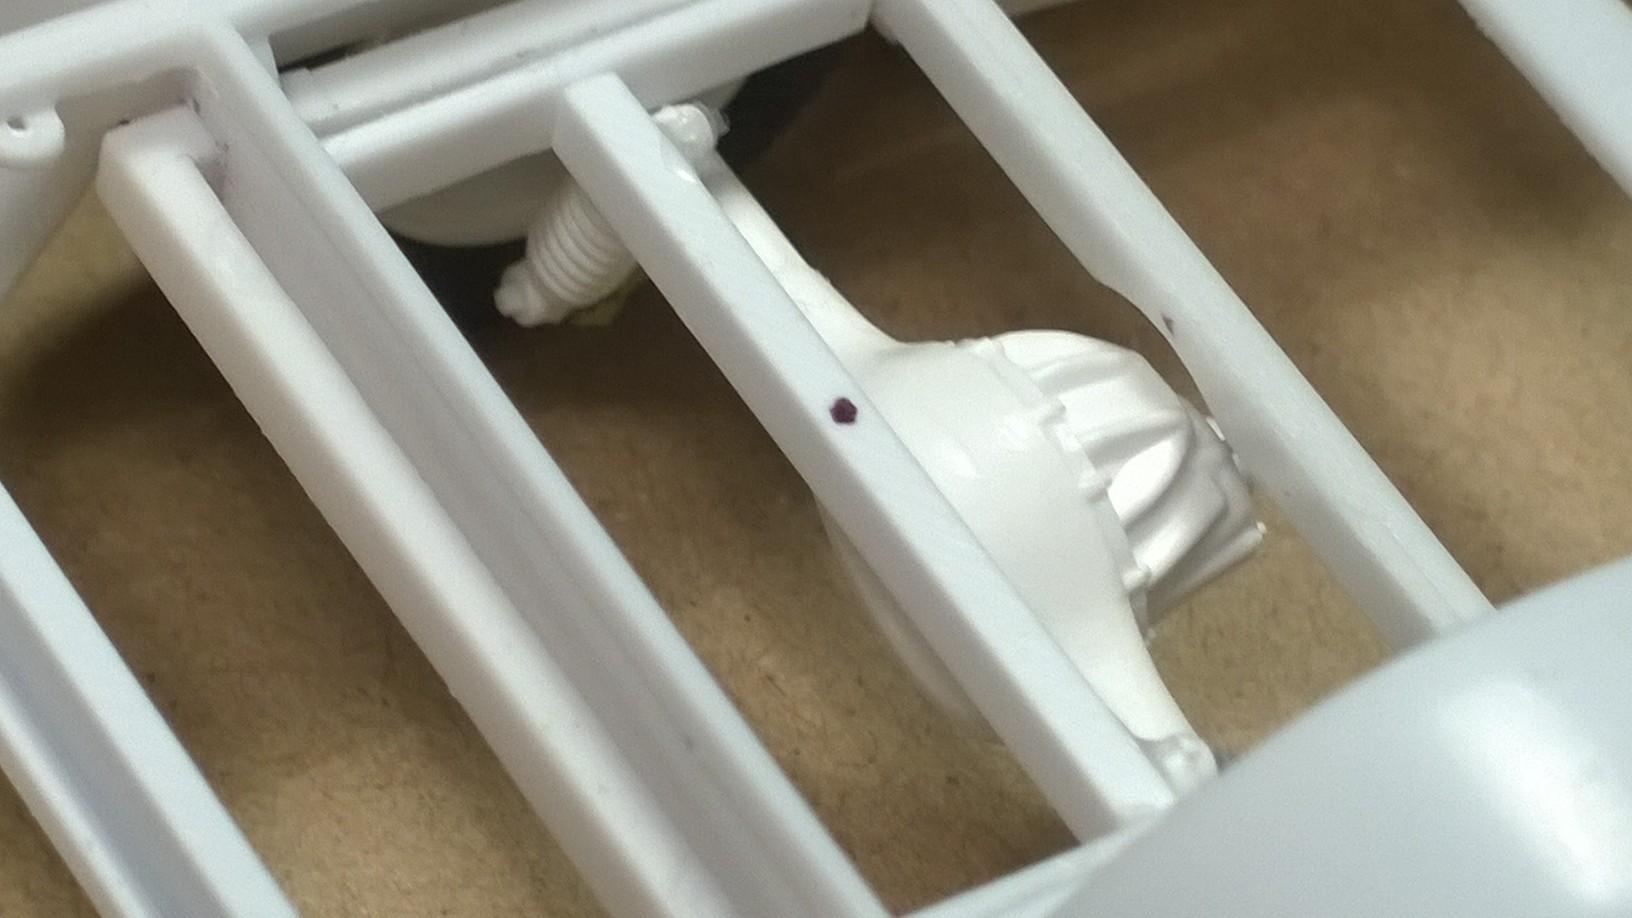
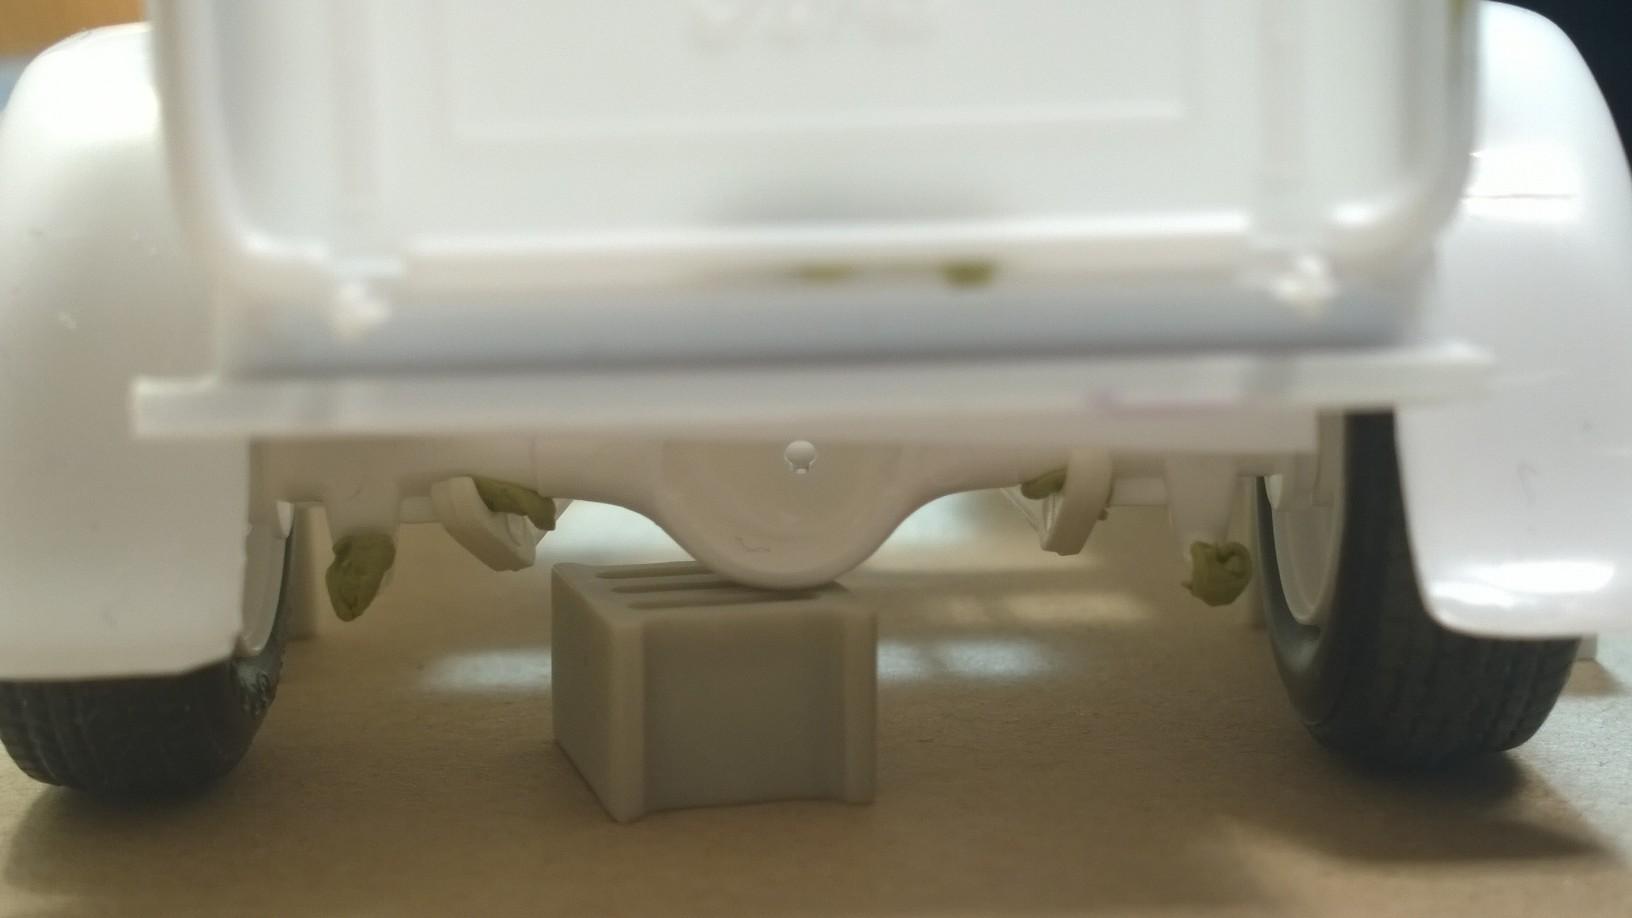
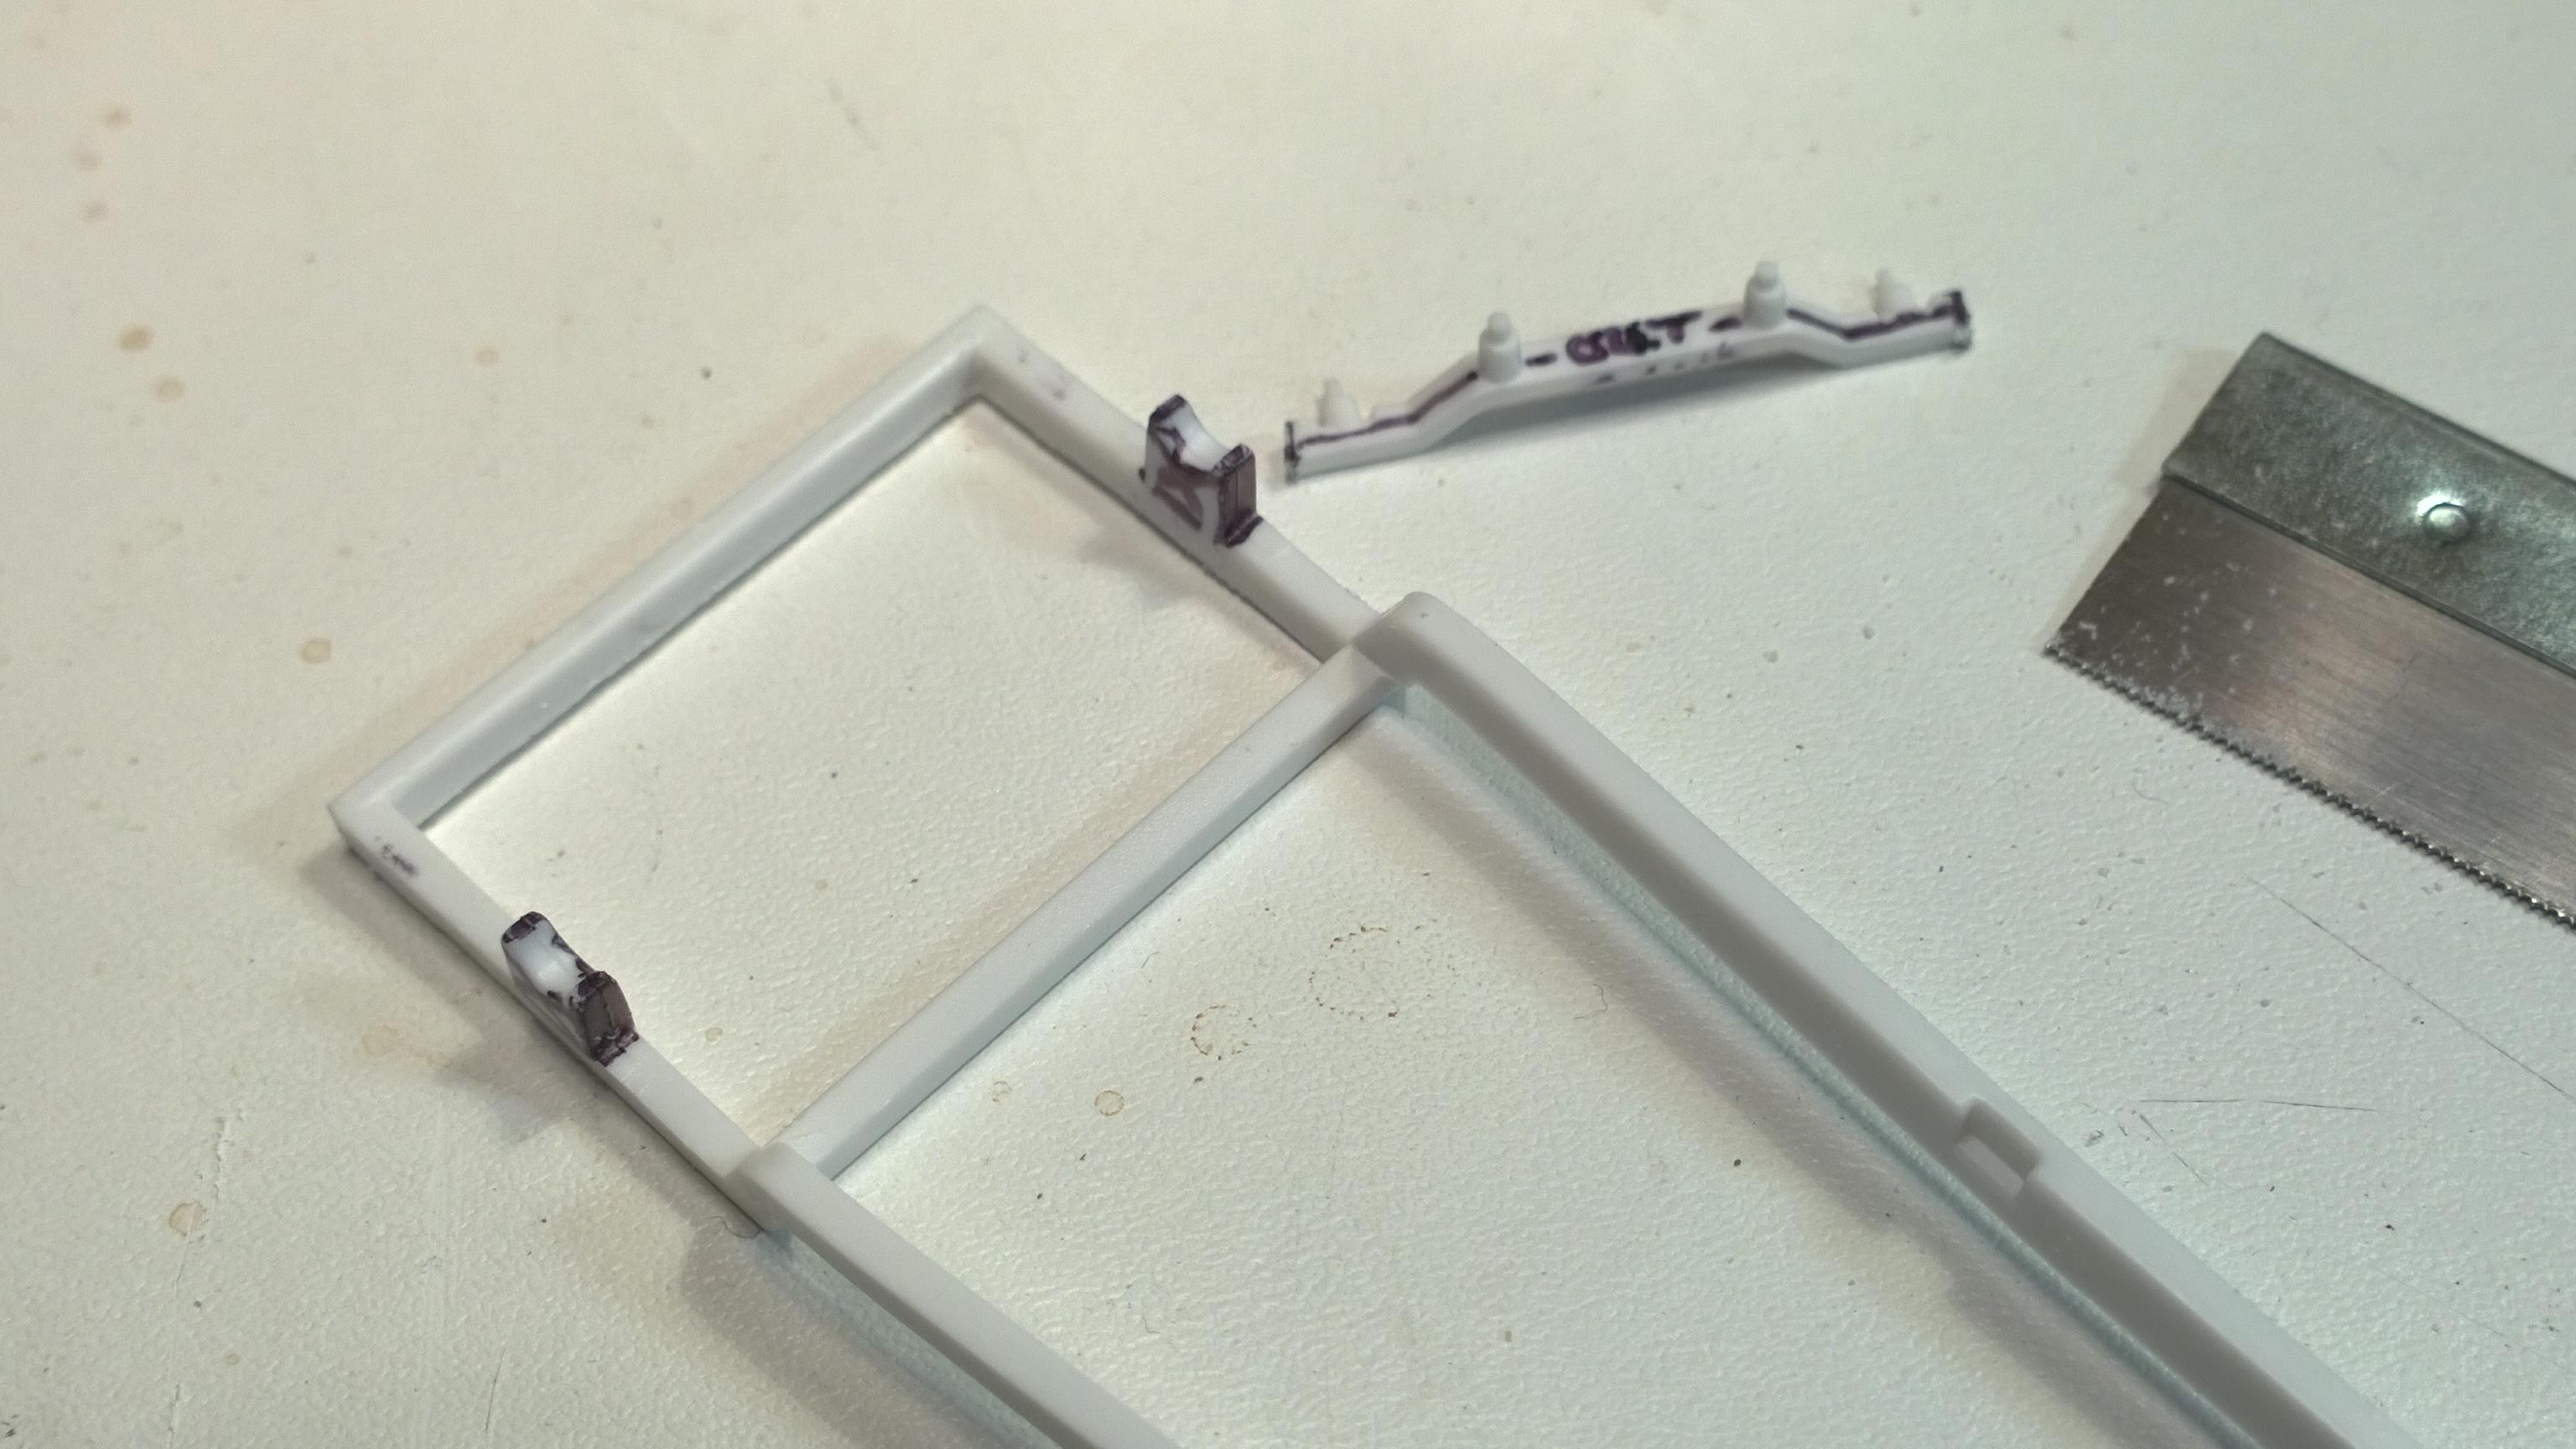
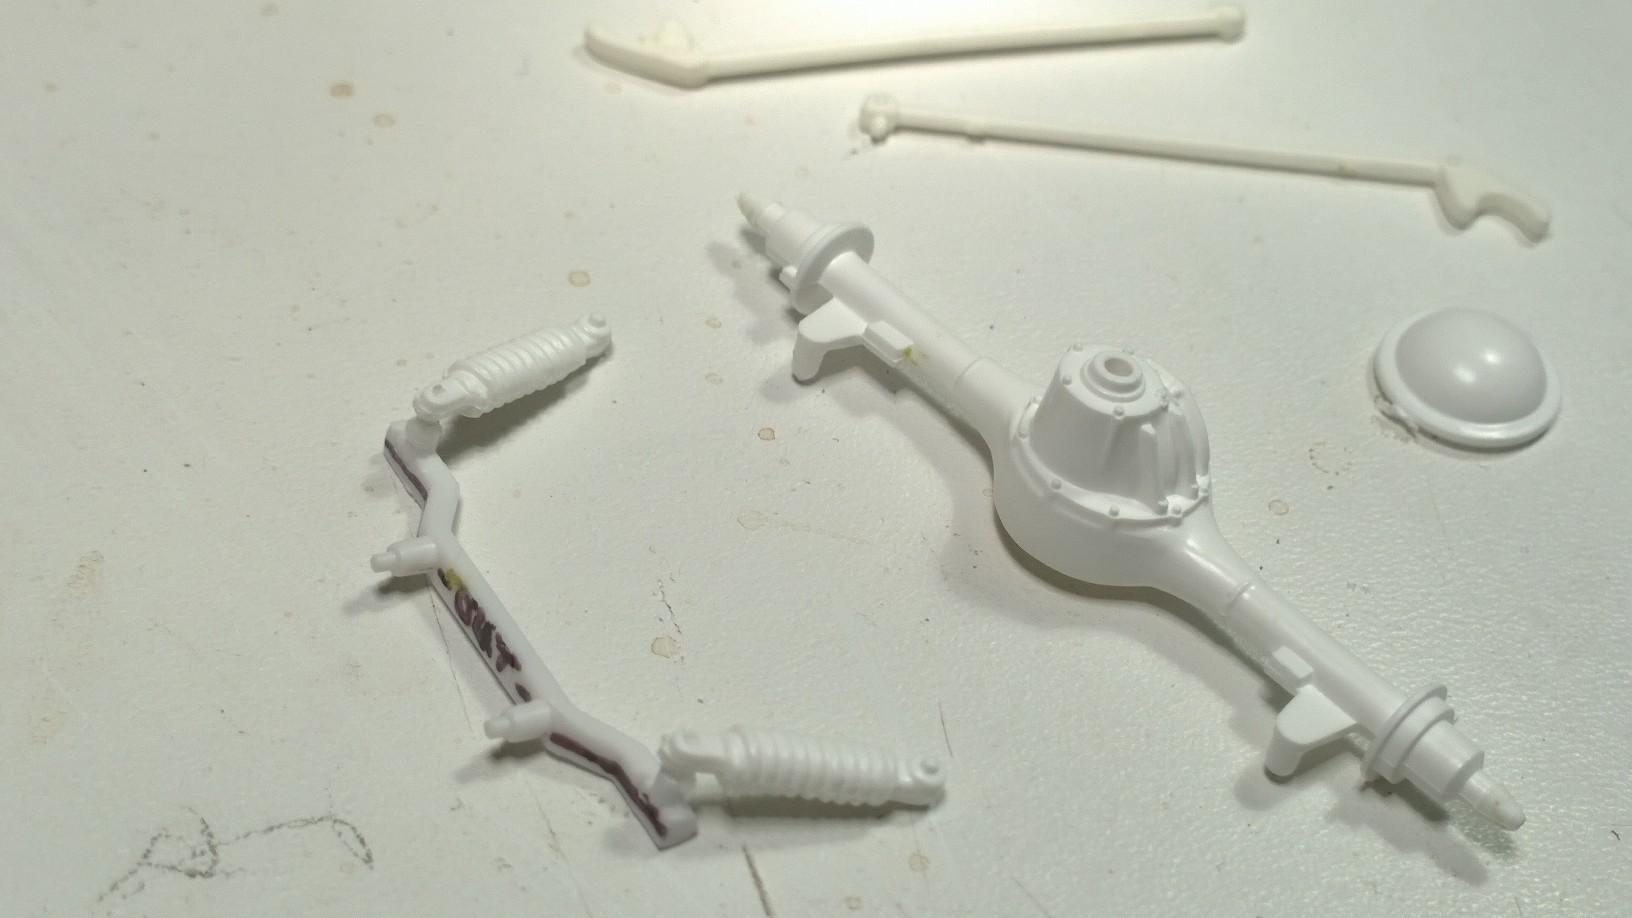
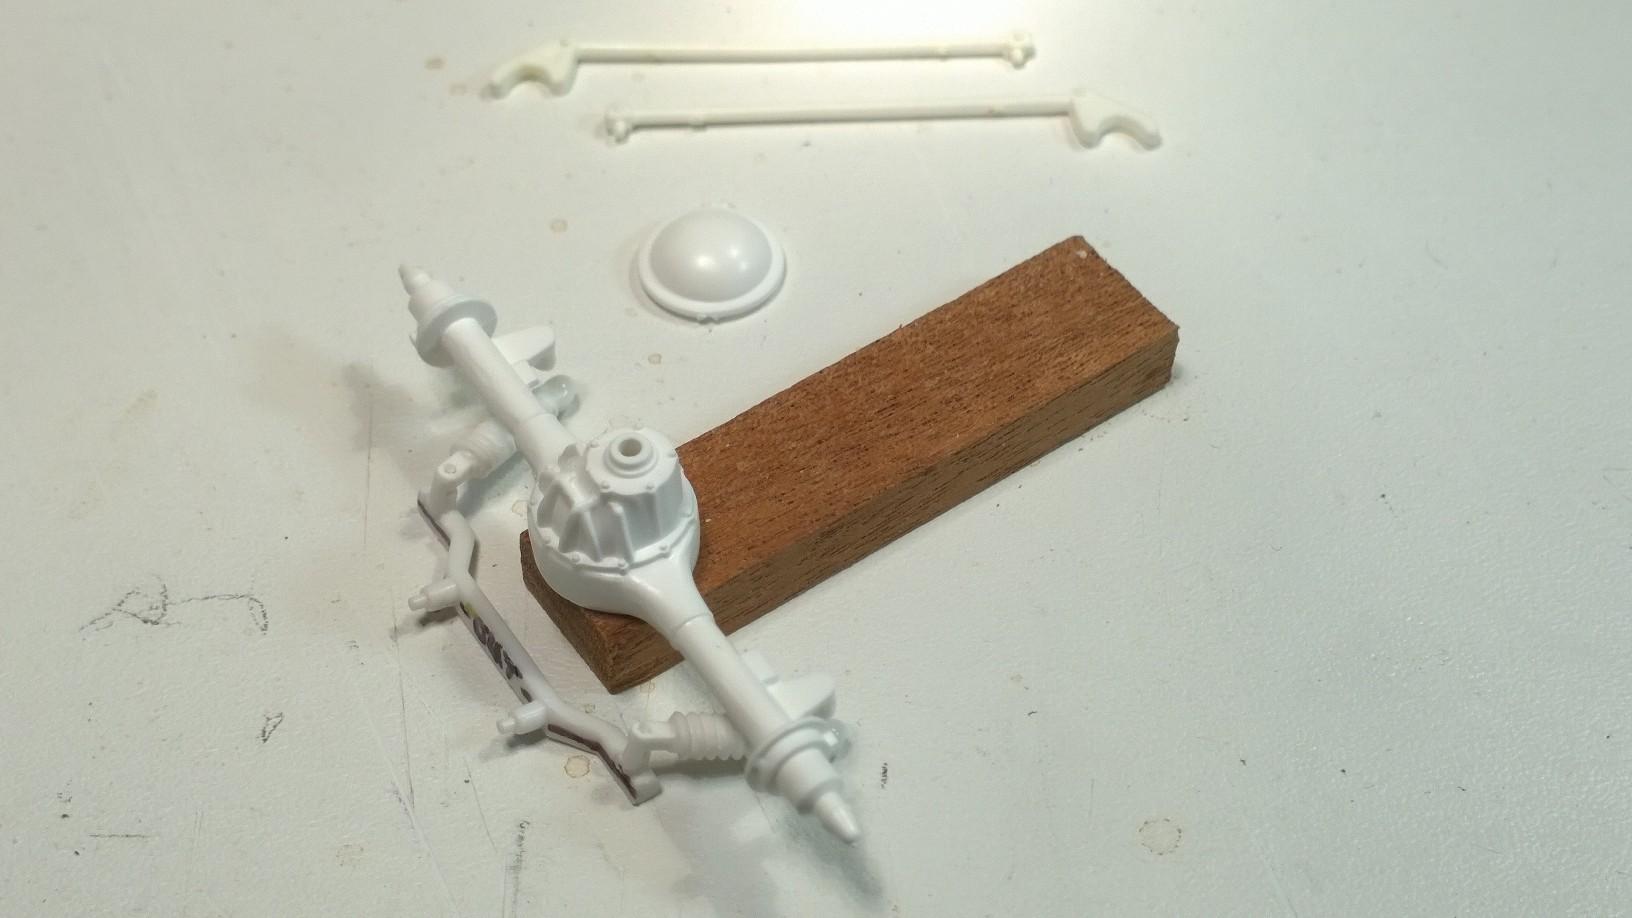
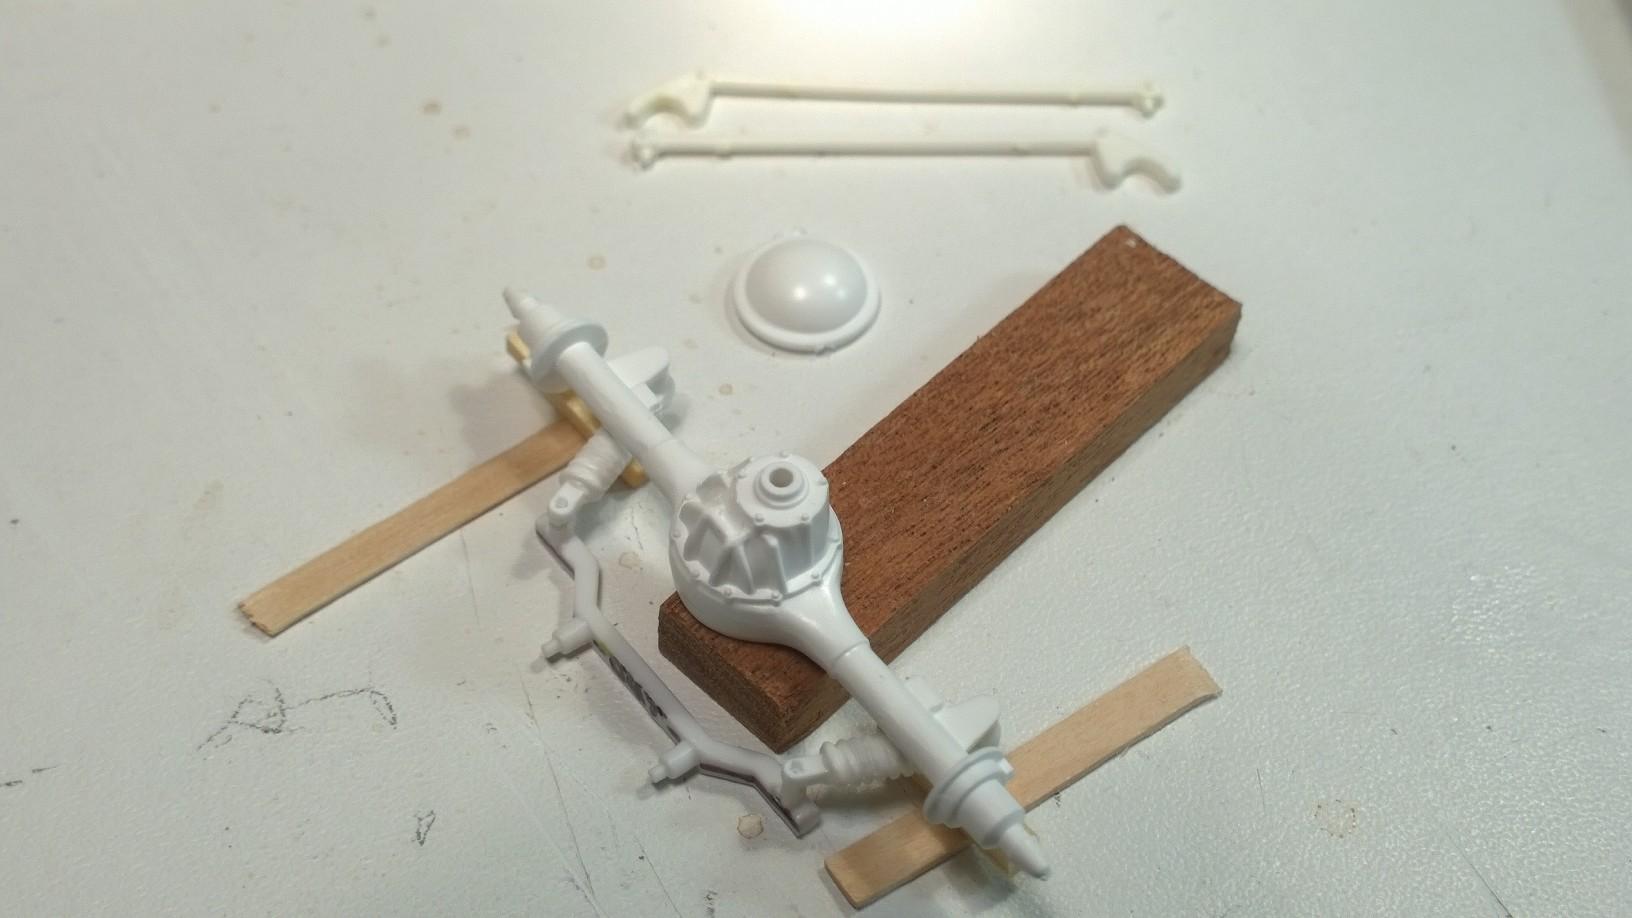
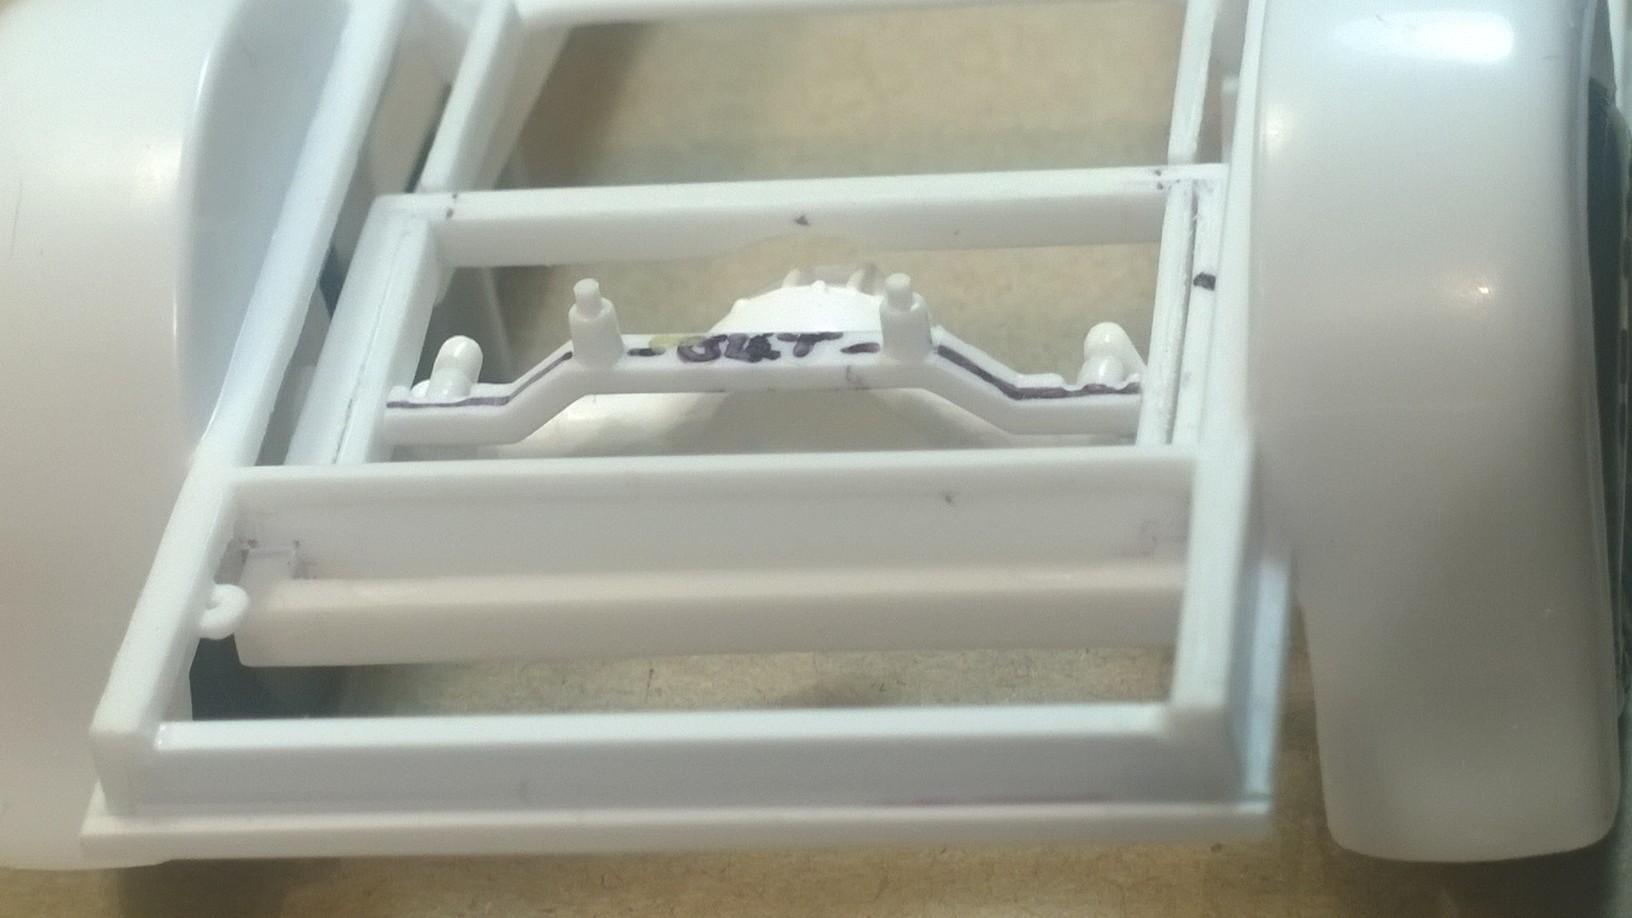
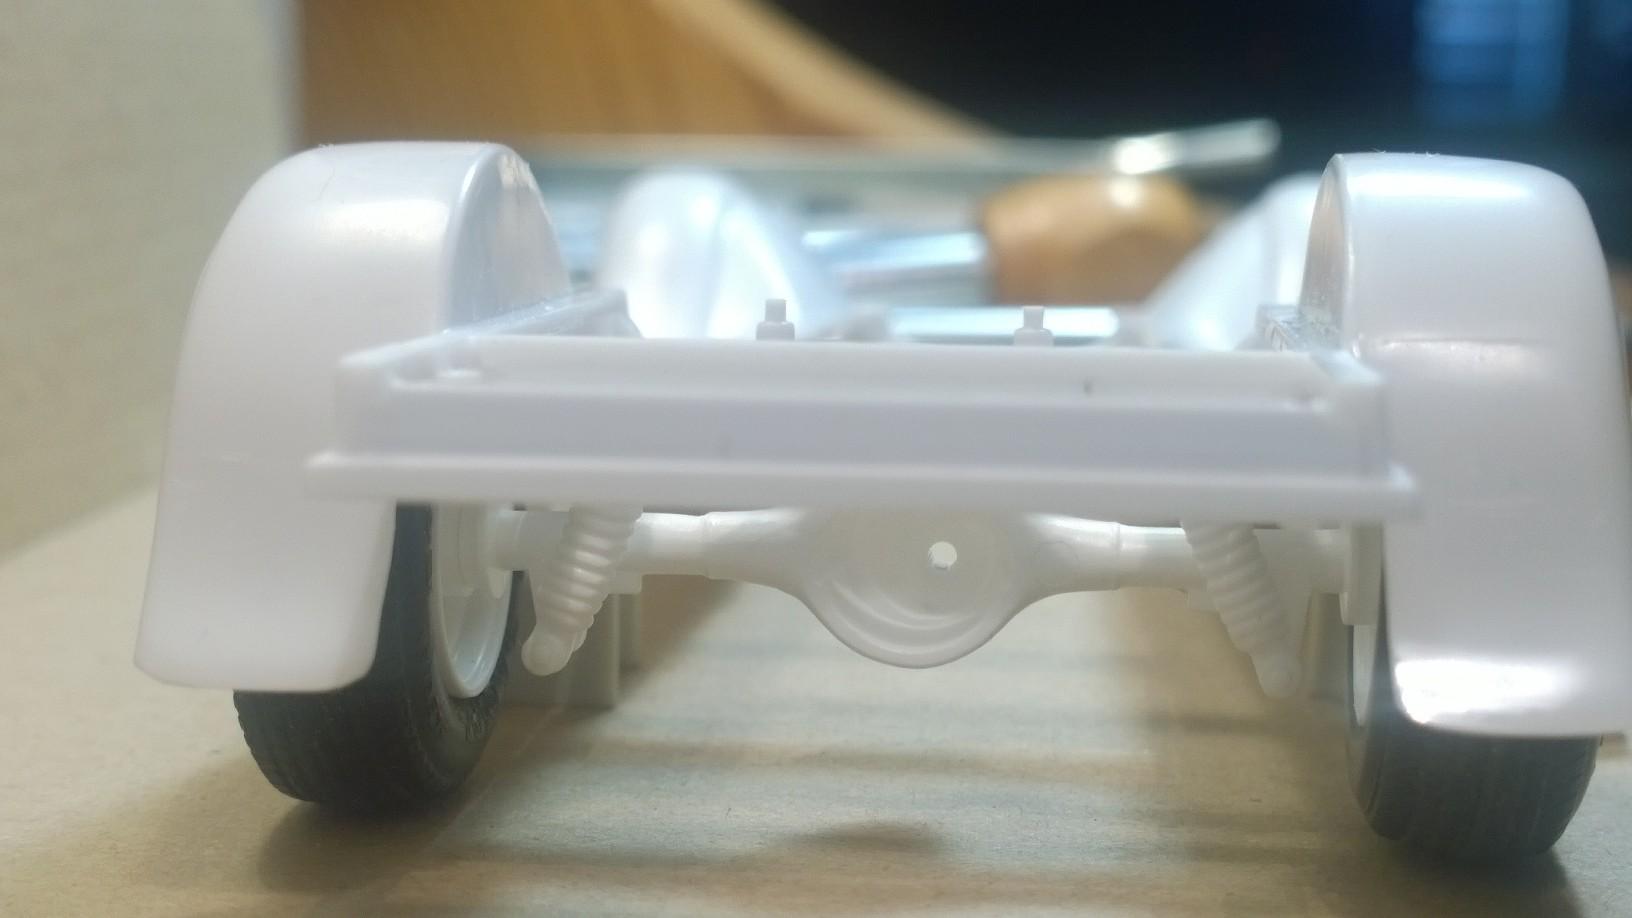
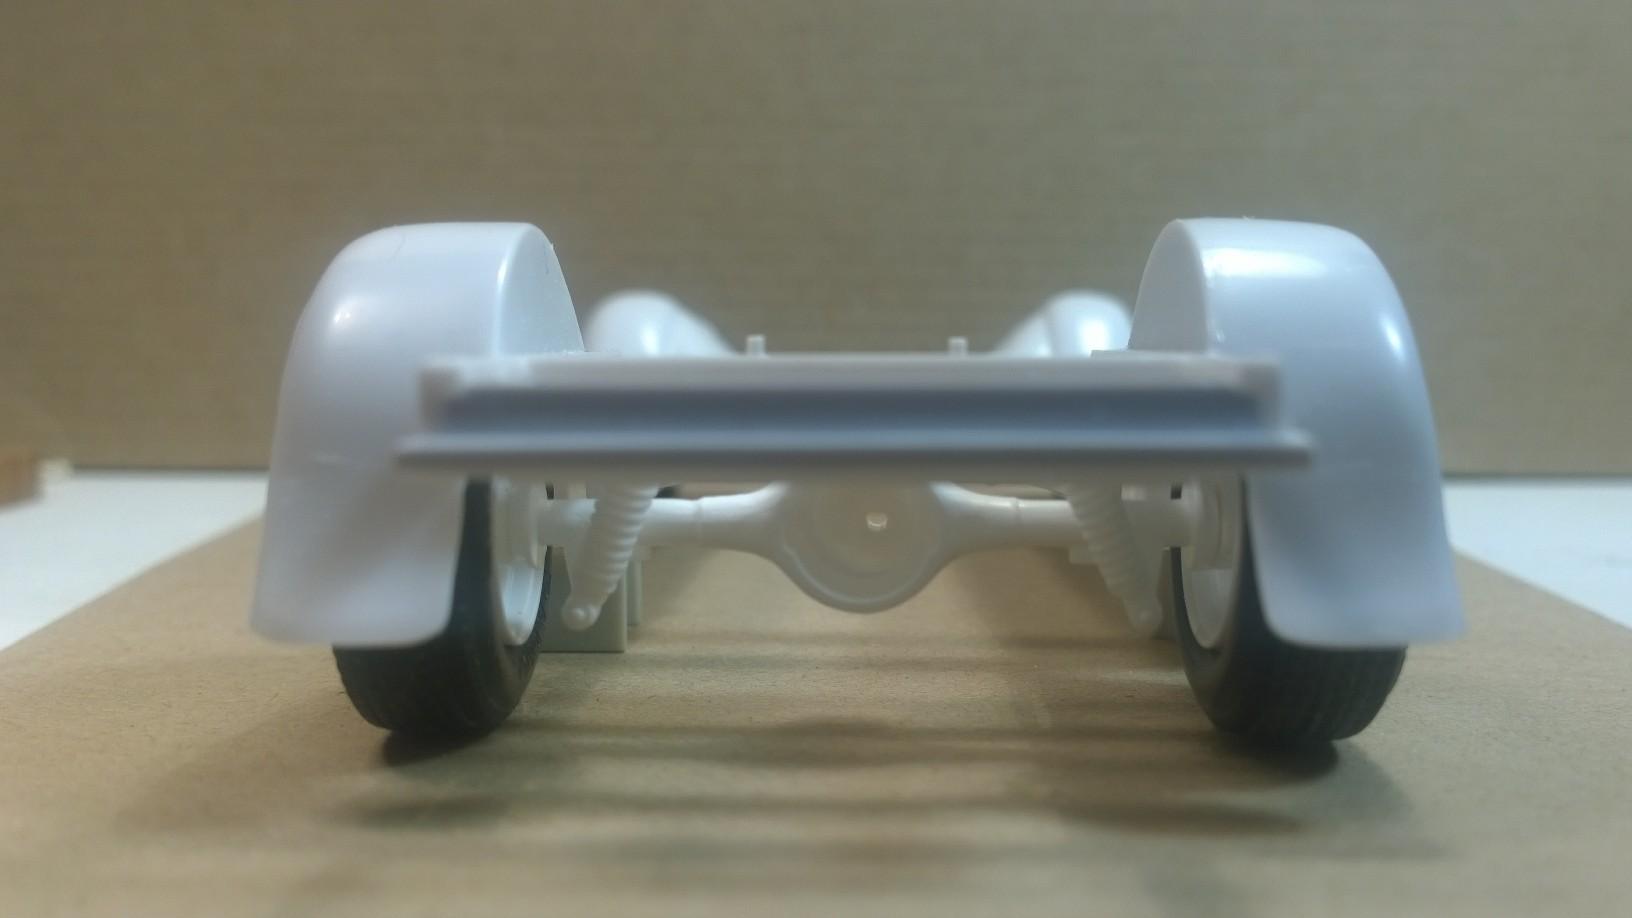
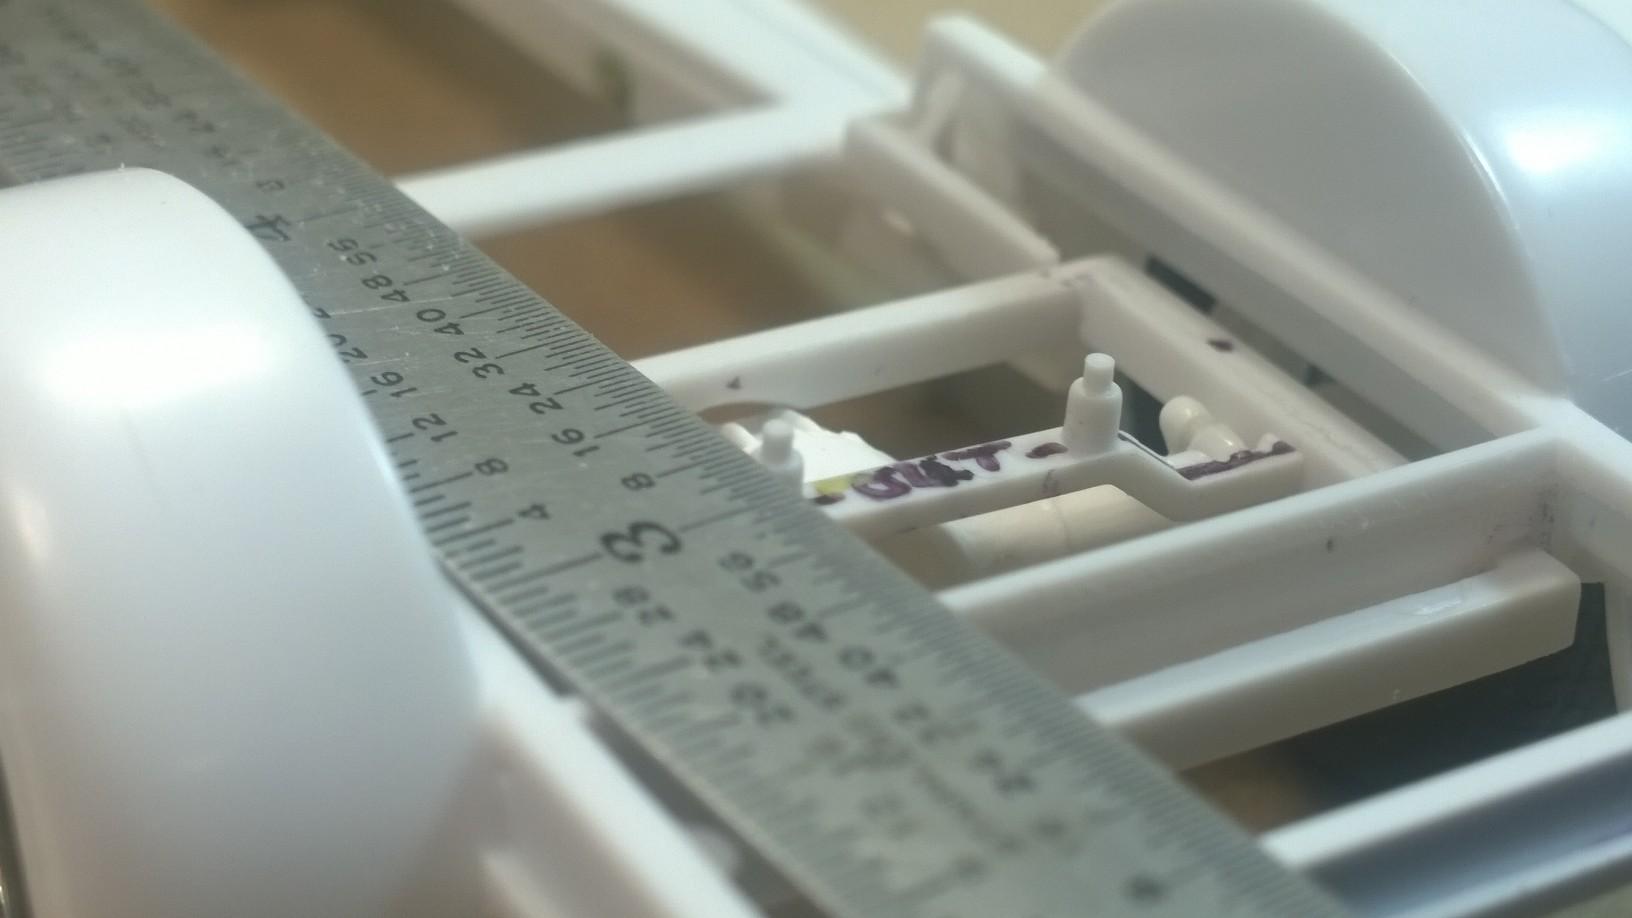
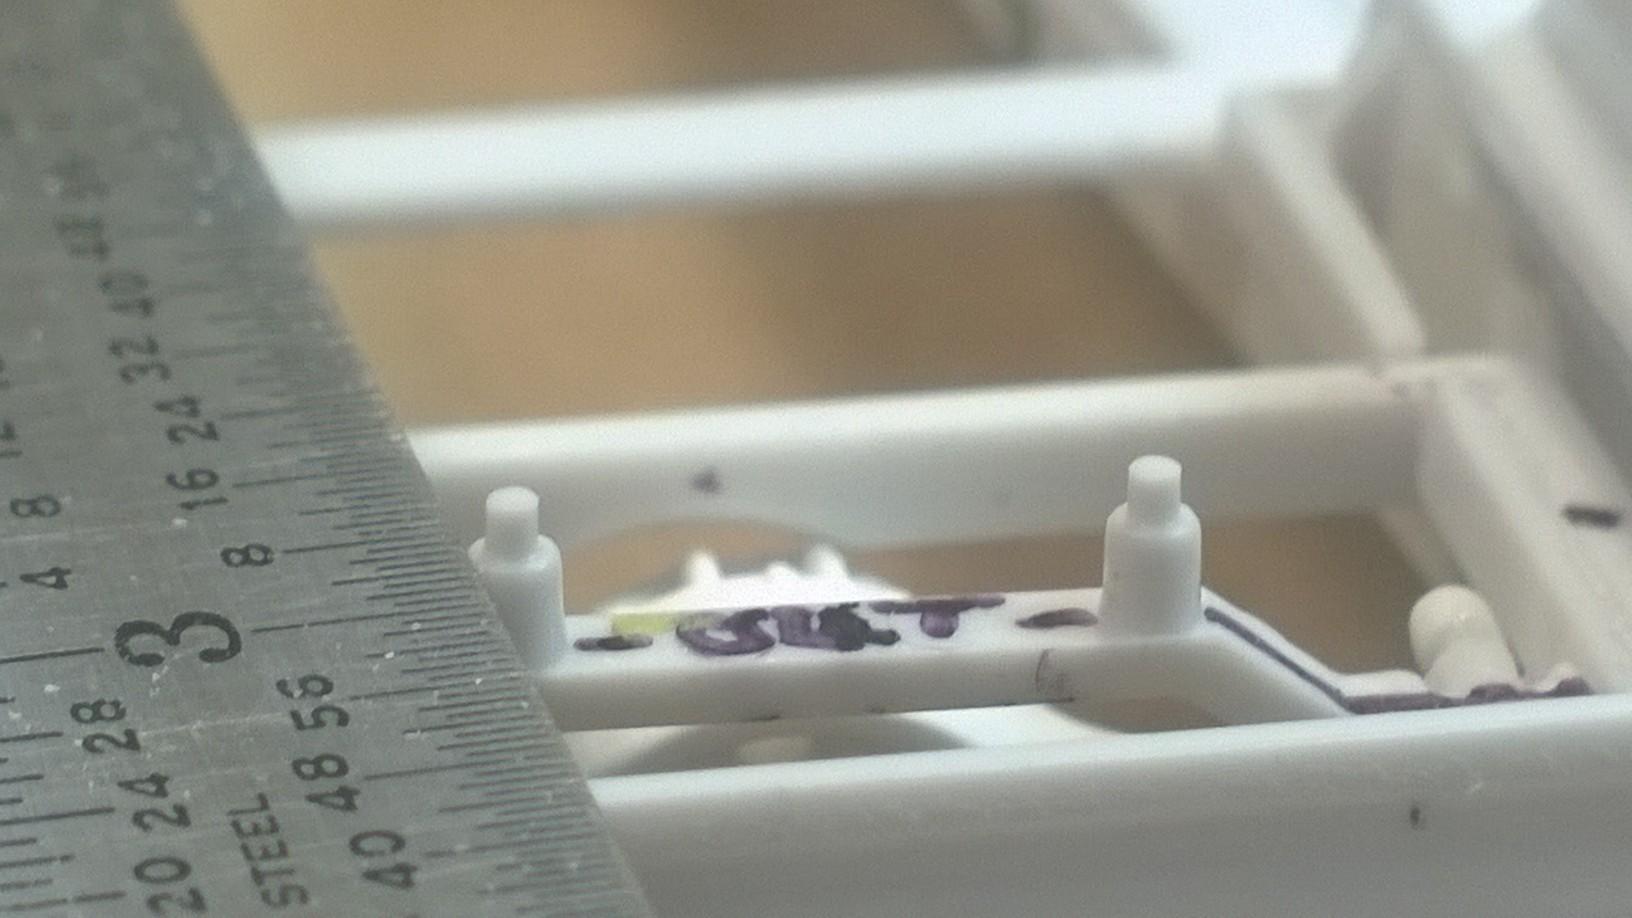
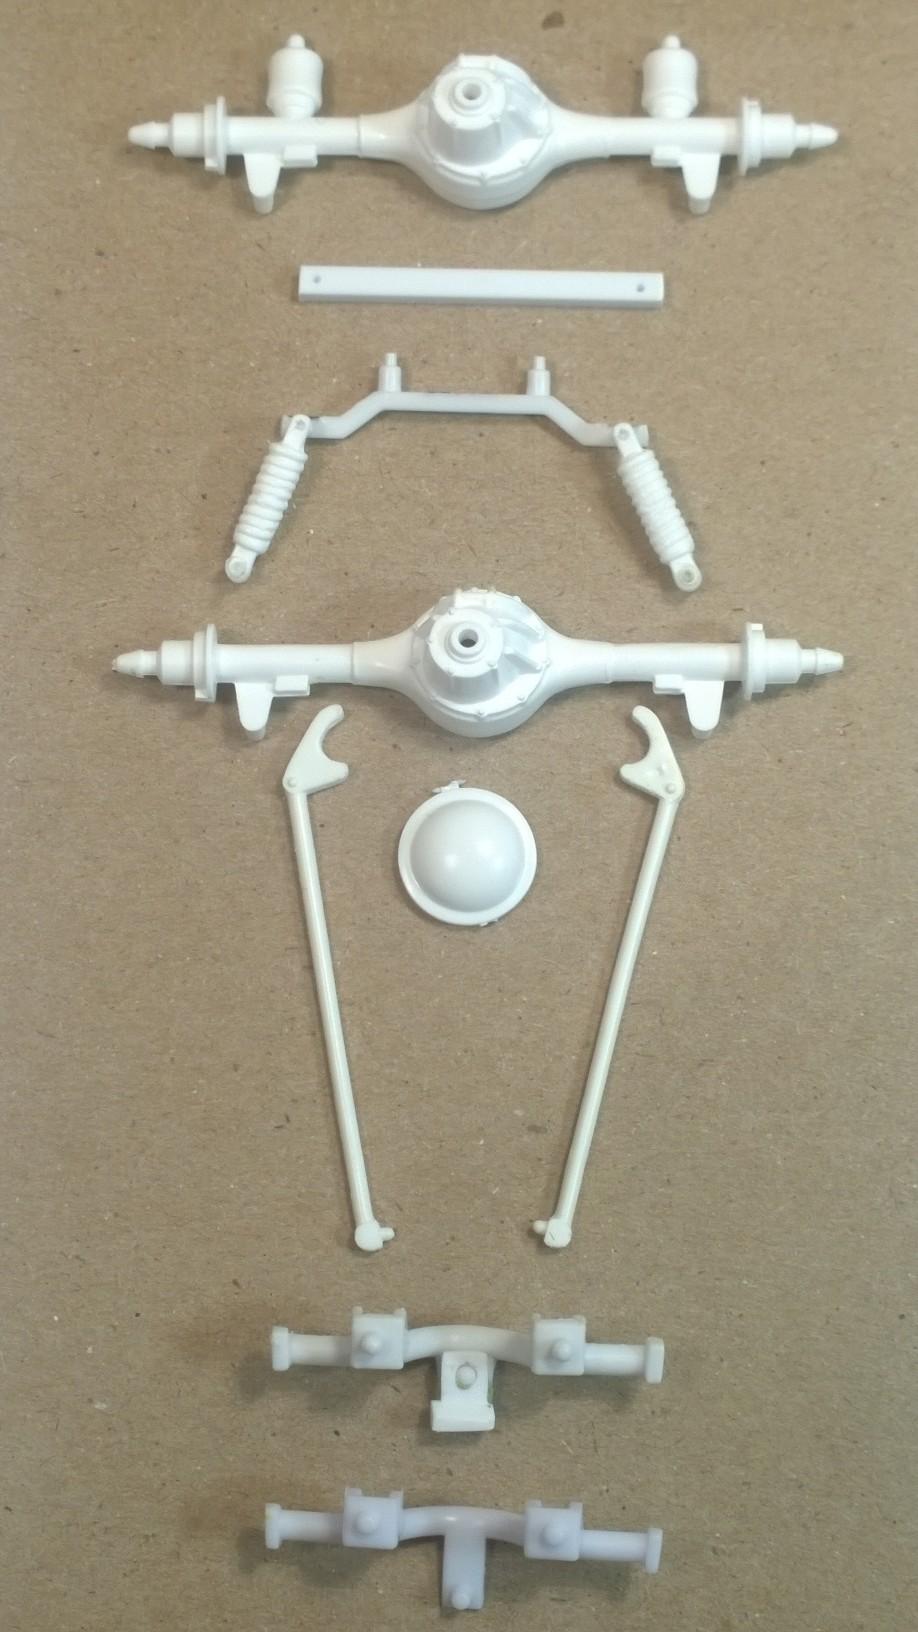
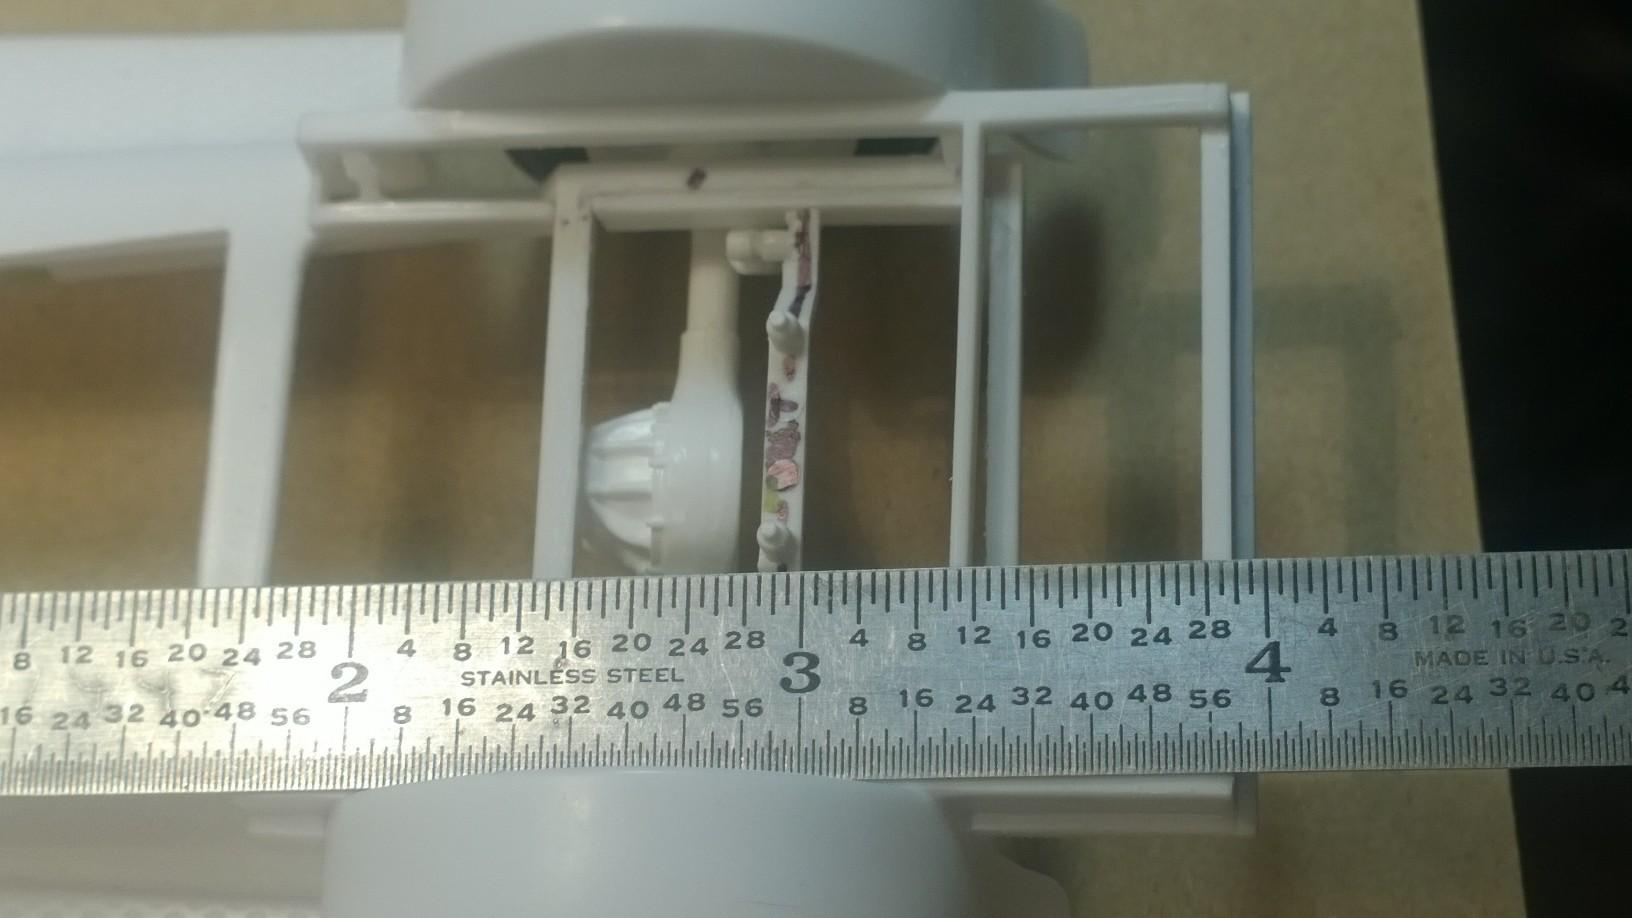
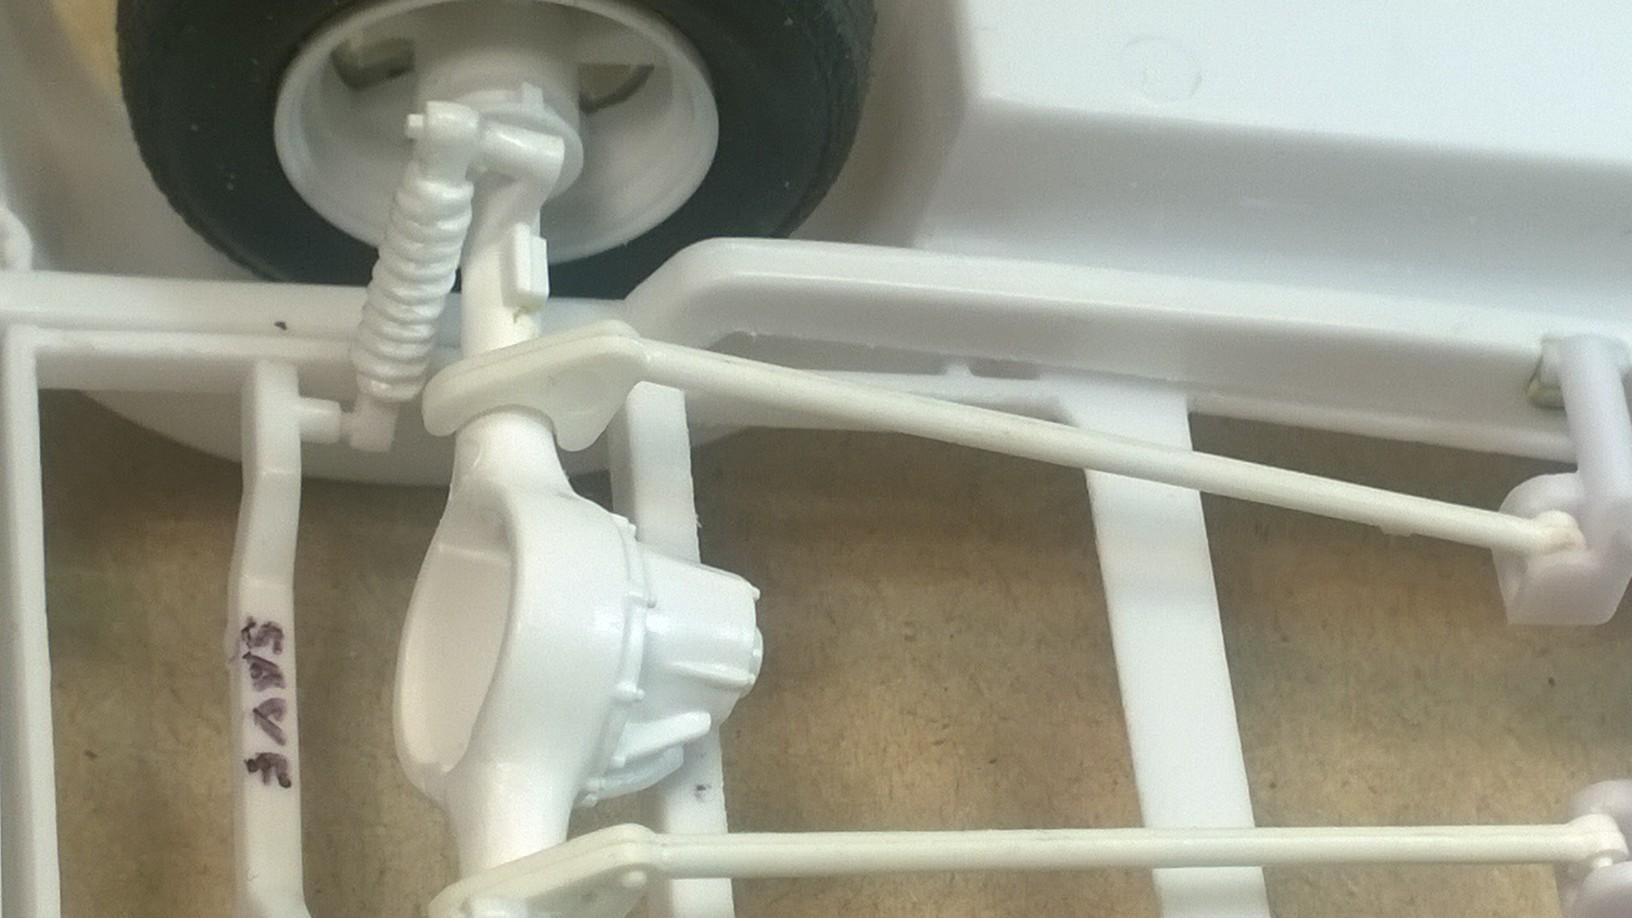
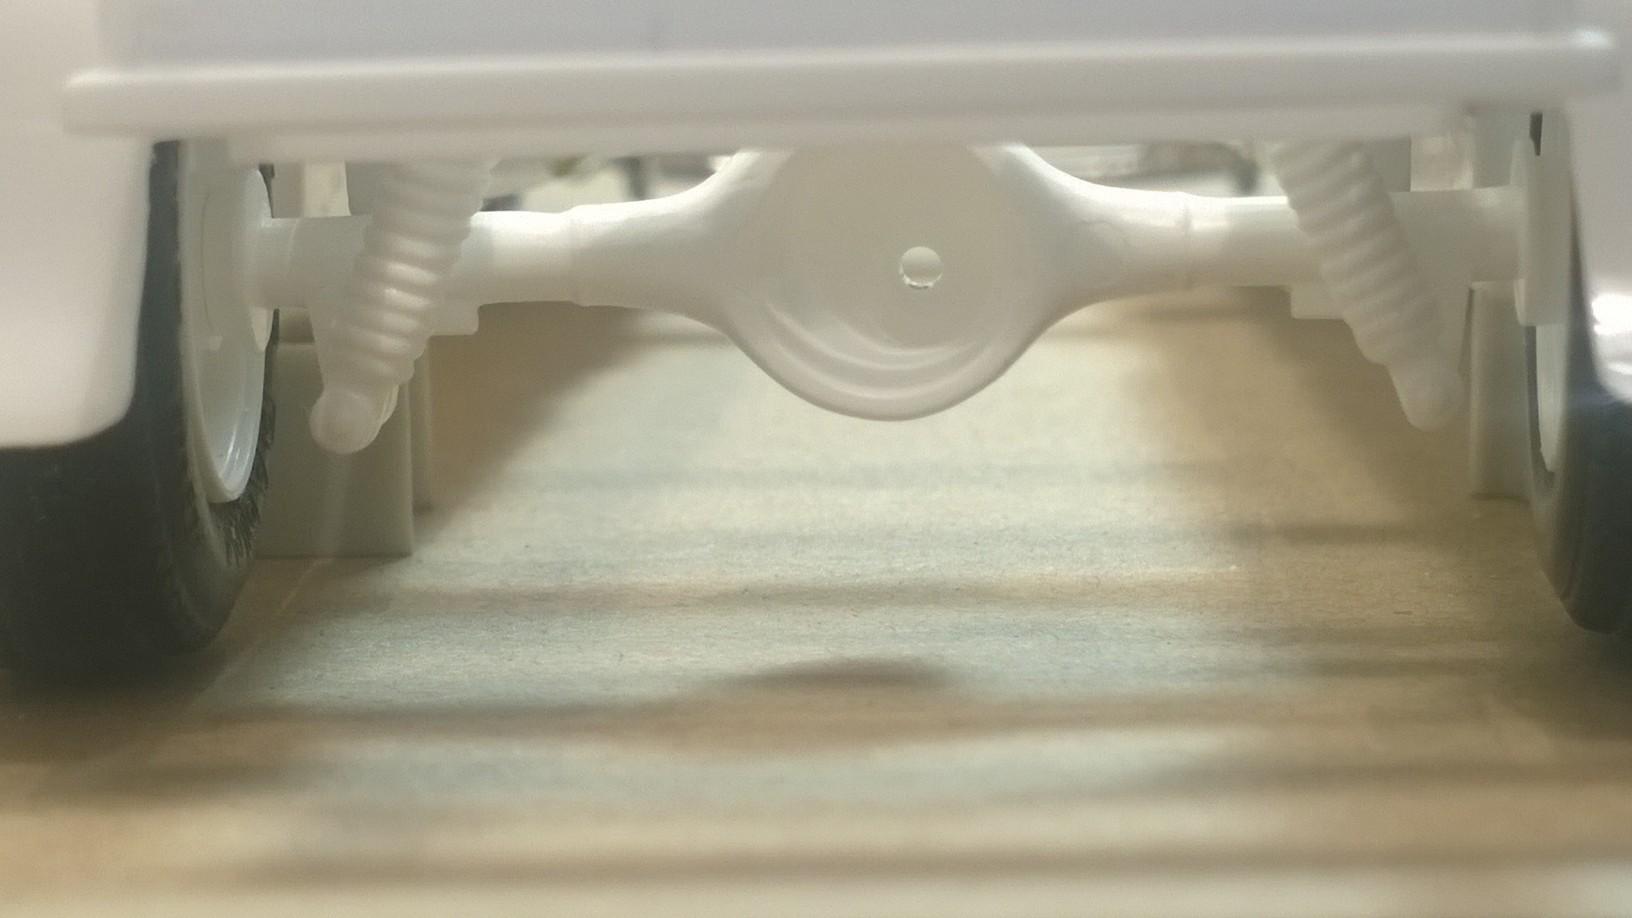
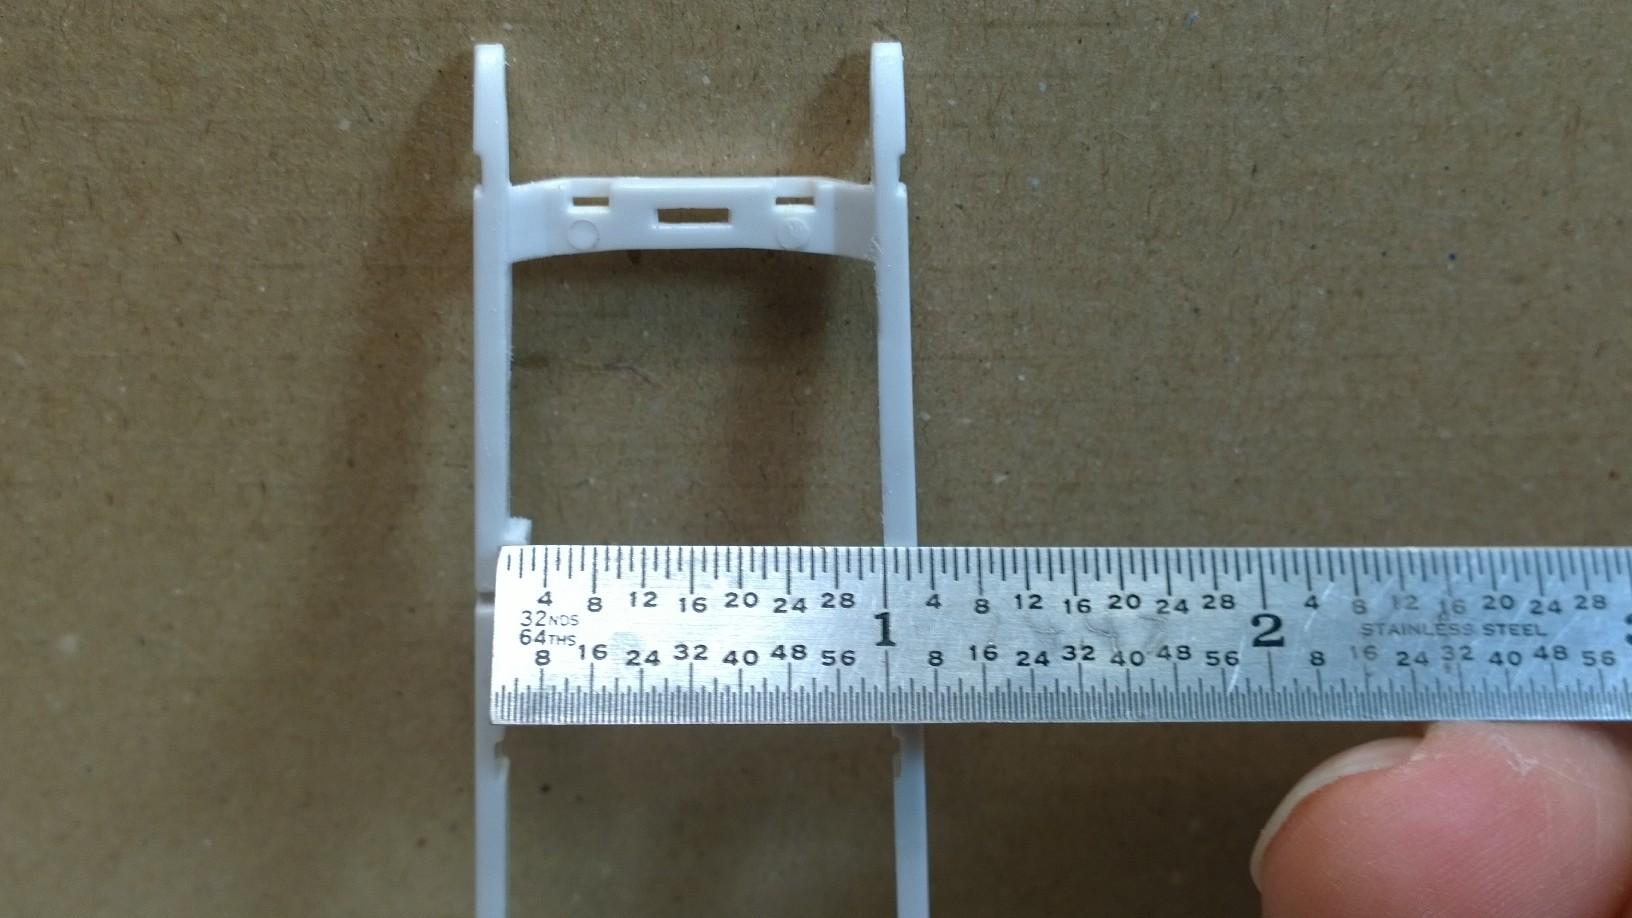
While sourcing parts for the '29A Closed Cab Pickup Tribute Build, it was mentioned by @Dennis Lacy in one of our off-line conversations, that the Revell Deuce 10 bolt rear end with the disc brakes might be a good go-to rear axle for this PU! Starting with the parts from the Revell Dan Fink's '32 Ford Speedwagon, Kit 85-7606, Parts #: 33 Rear Axle 34 Rear Cover 35-36 Stabilizer Bars 89 Rear Shocks First to go... the air bags Marked the upper shock mounting holes Before drilling any hole, use a #11 blade to center punch the point of the hole to be drilled (btw the Stabilizer Bars, parts#: 35-36, turned out to be too long) Pumpkin clearance concern surfaced during the first rear end mockup using the Radius Rods (2) from the Monogram '33 Ford Street Rod, Kit 2480 - 2702 ZZ Top Eliminator - AKA Kit 7647 Thom Taylor '34 Ford Cabriolet Street Rod (part #51) Using a curved file, the Roadster frame crossmember was hogged out to allow the third-member to fit Looks good to go! Houston we have pumpkin clearance! Measured a piece of stock to be used as a WIP crossmember for the Deuce 10 Bolt Rear End Drilled the shock mounting holes in the WIP crossmember Years ago, I picked up some Scale Railroad parts: And, used a couple of the nuts & washers to bolt the upper shock mount to the WIP crossmember Ready to set between the frame rails Fits! Even from underneath, ride height looks good! Previously, in one of the first posts in this thread, the shock mount crossmember was removed from the Roadster frame Picking up the cut-out crossmember and shortening it to match the WIP crossmember, the Roadster crossmember can be turned around to be mount the shocks Using a little white glue to assemble the parts Mocking up the rear end... we now have a second option for hanging the rear shocks Noticing the two body/floor pan mounting pins on the top of the Roadster crossmember, a couple of things occurred to me: If the Roadster crossmember is going to be used, the pins can either be used to mount the PU bed; or cut off. When scoping the posts out, the pin base turns out to be level with the bed rails To make sure, I laid my 50+ year old scale across the rail plane to see where the bottom of the bed would hit the top of the pins And, sure enough one could drill a couple of holes on the PU bed to solidly mount the bed to the frame While discussing the facts of the Roadster shock crossmember with @Rocking Rodney Rat, he felt the WIP crossmember might fit this build better! Any thoughts? Measuring for the final location of the shock mount crossmember Places the crossmember 5/16ths forward of the inner edge of the back of the frame. To that end, here are the parts for the rear end for the '29A Closed Cab Pickup Tribute Build: Including: the two Tranny crossmembers (140 & 141) and the Radius Rods (2) from the Monogram '33 Ford Street Rod, Kit 2480 (parts #51) Taking a look at how the parts fit together Sets the ride height right about where it needs to be! Note to self: Just have to decide on which shock mount crossmember to use? -KK Rear End Donor Parts List (& Parts included in the above pictures) Revell '29 Ford Pickup Kit 2085 Custom Rod 3'n1 Parts #: 51 Fenders 53 Pickup Bed 54 Tailgate Revell '29 Ford Roadster Kit 4463 Model A Roadster 2'n1 Parts #: 141 Crossmember Revell '29 Ford Roadster Kit 4322 Model A Roadster 2'n1 Parts #: 77 Fame/Chassis 140 Crossmember Revell Dan Fink's '32 Ford Speedwagon Kit 85-7606 Parts #: 33 Rear Axle 34 Rear Cover 35-36 Stabilizer Bars 89 Rear Shocks Monogram '33 Ford Street Rod Kit 2480 - 2702 ZZ Top Eliminator - AKA Kit 7647 Thom Taylor '34 Ford Cabriolet Street Rod Part #: 51 Radius Rod (2)
-
55 Chevy
Kit Karson replied to avidinha's topic in WIP: Model Trucks: Pickups, Vans, SUVs, Light Commercial
@avidinha Andrew, Your work on this project is coming along swimmingly! Several years ago, I had a similar build: '55 NoMeo And, added a '55 NASTRUCK Then packaged it up and sent it all to Dirk Joseph to finish... with a tandem trailer with matching fenders. @Jairus Watson followed the concept and created his version in a drawing, later published in MCM! Keep up the good work, Brother! -KK
-
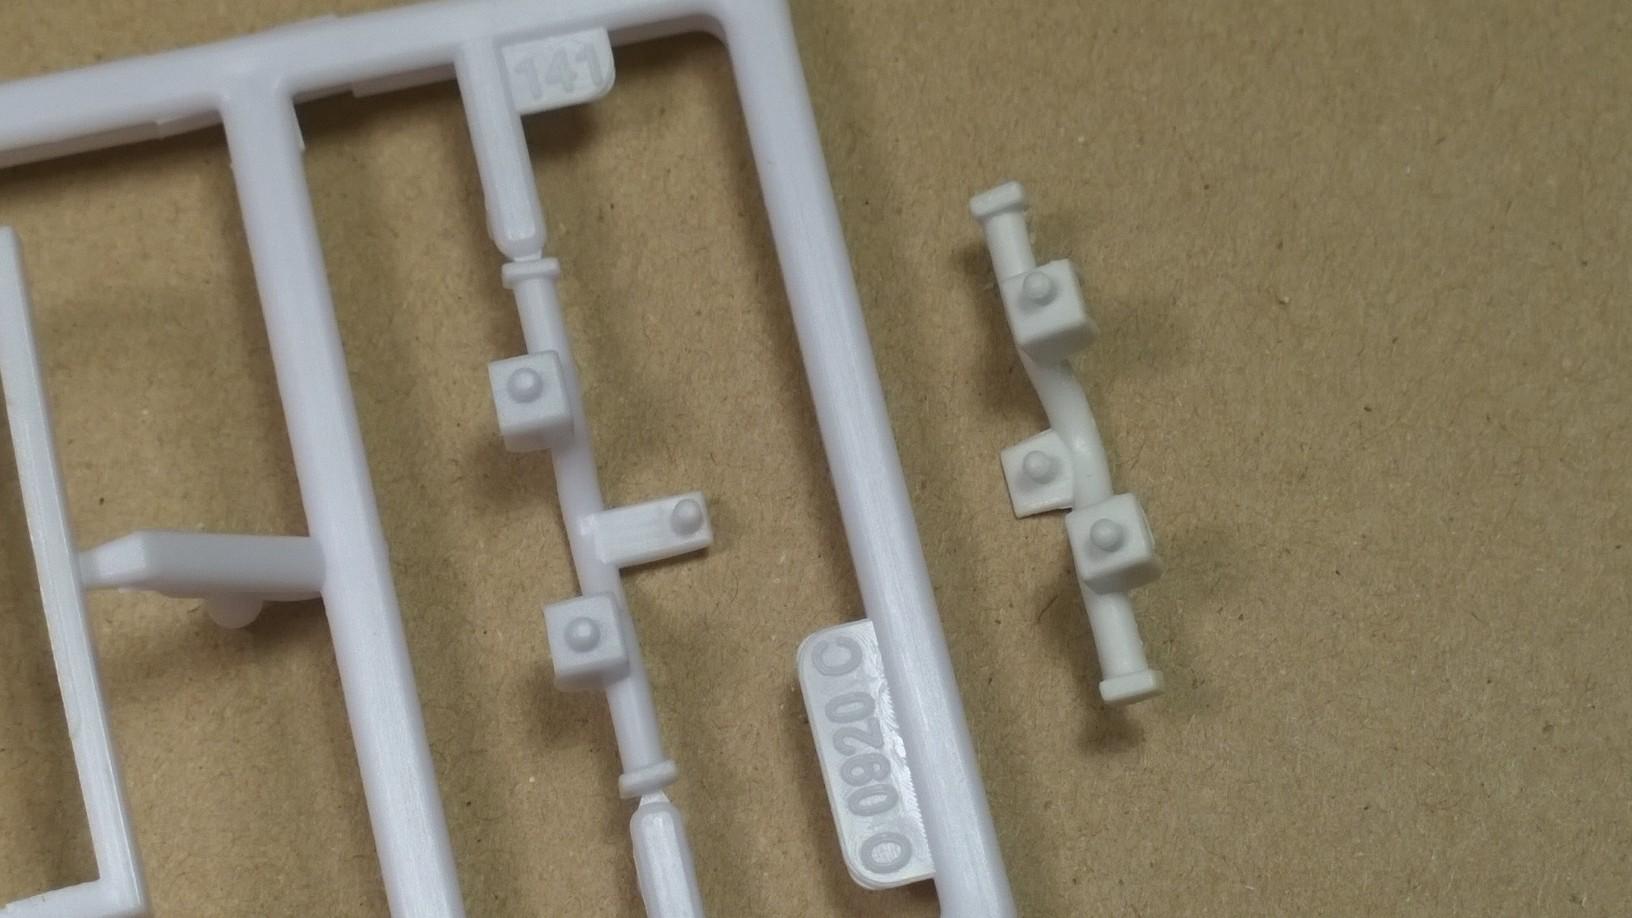
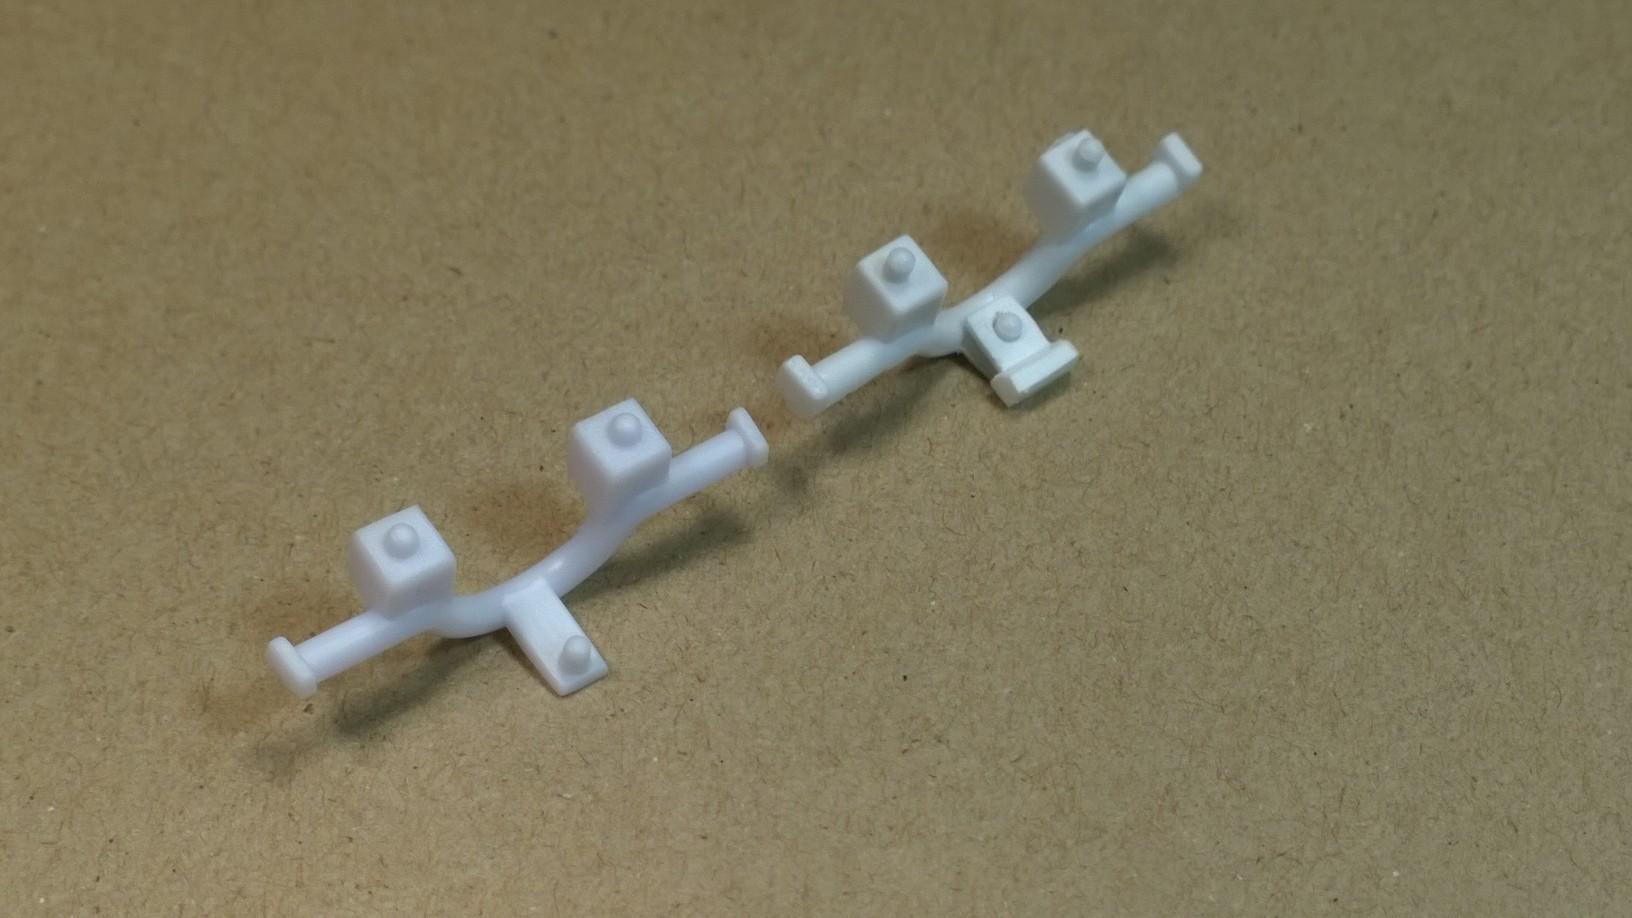
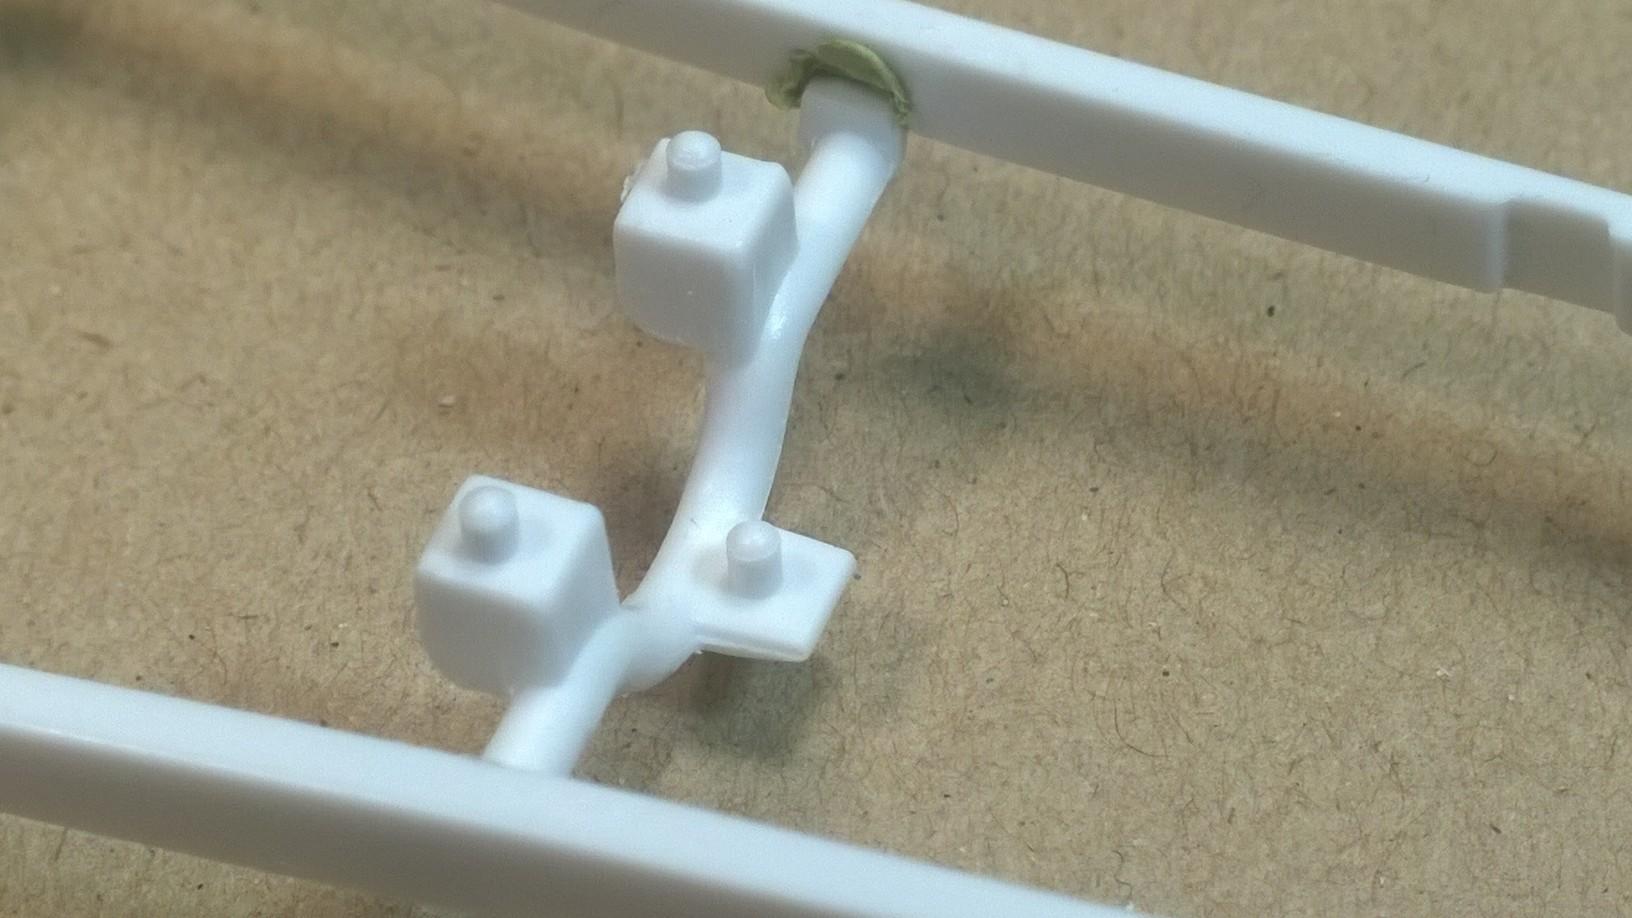
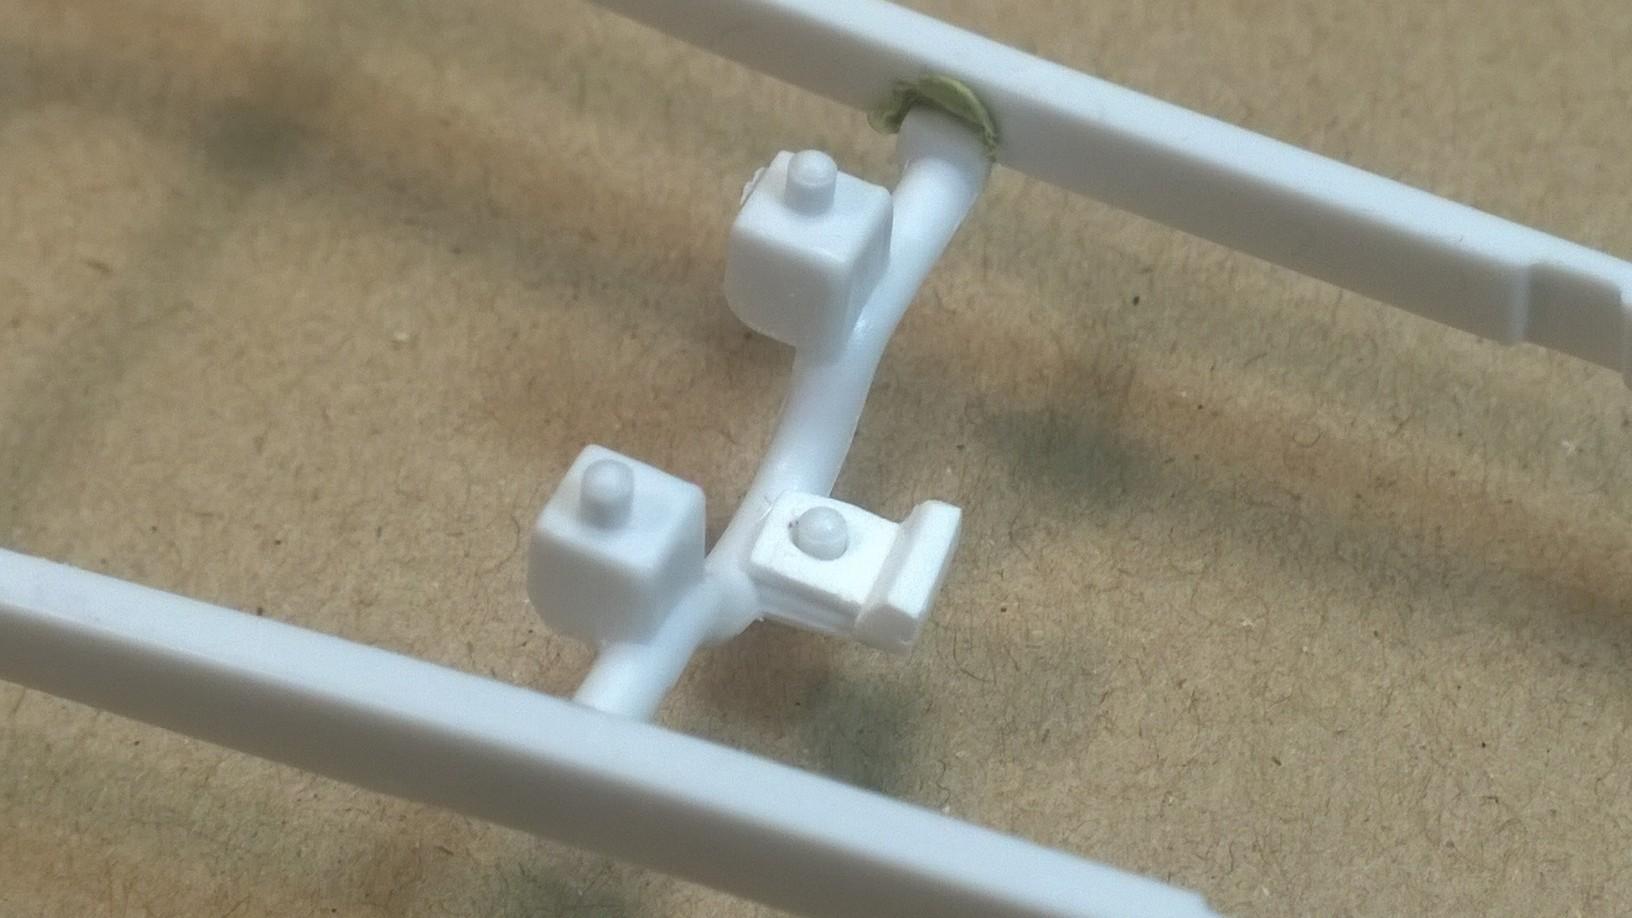
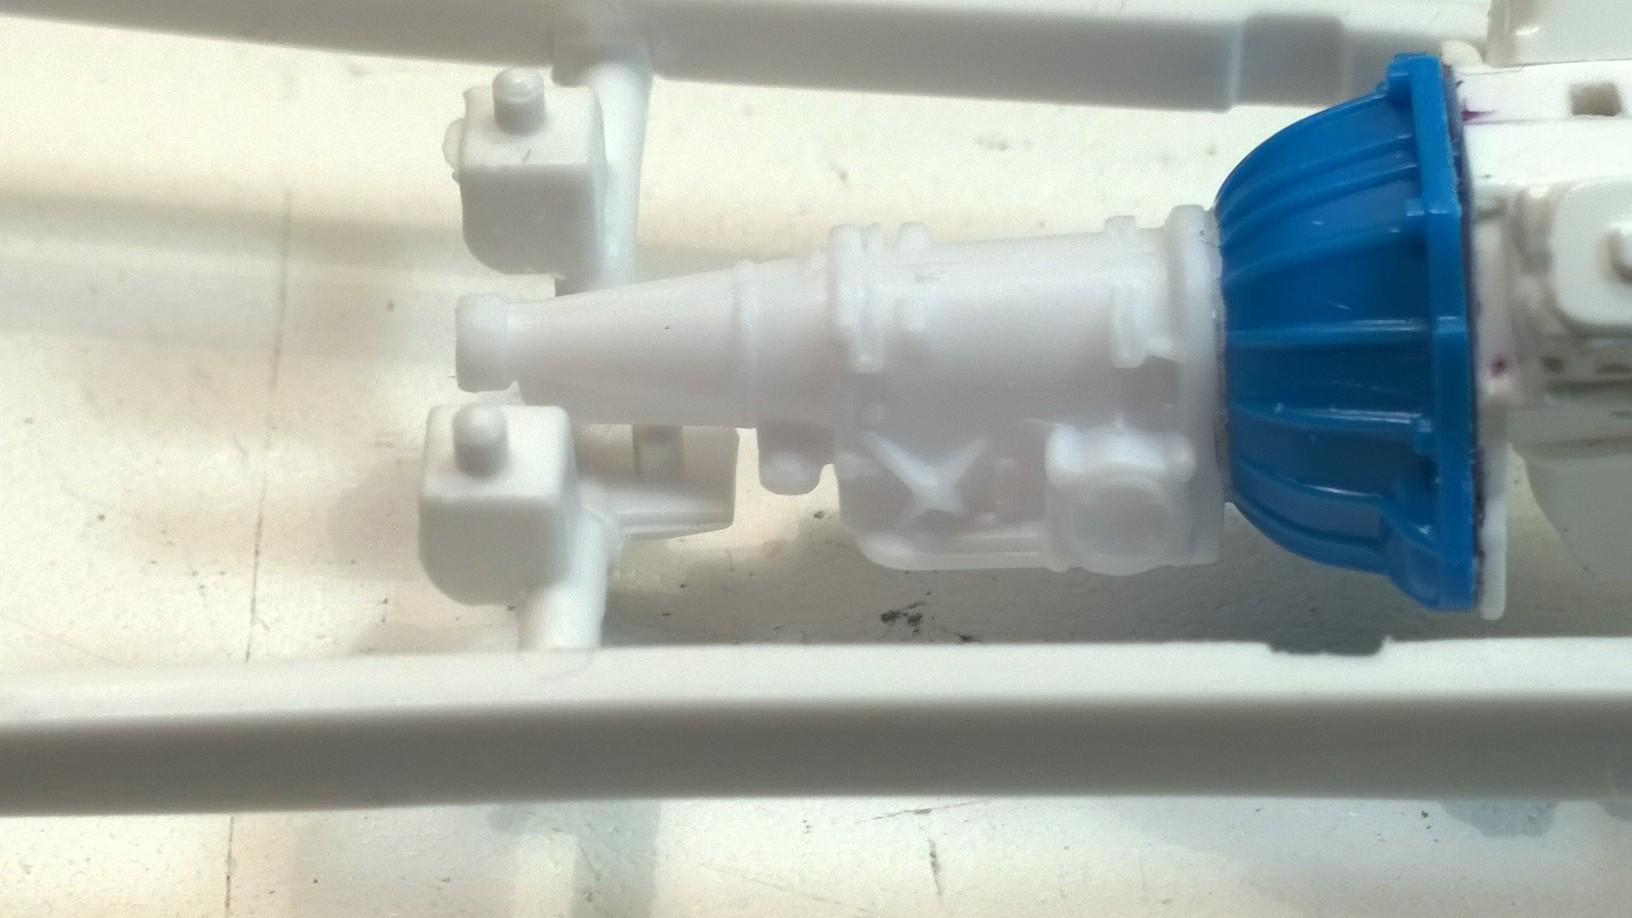
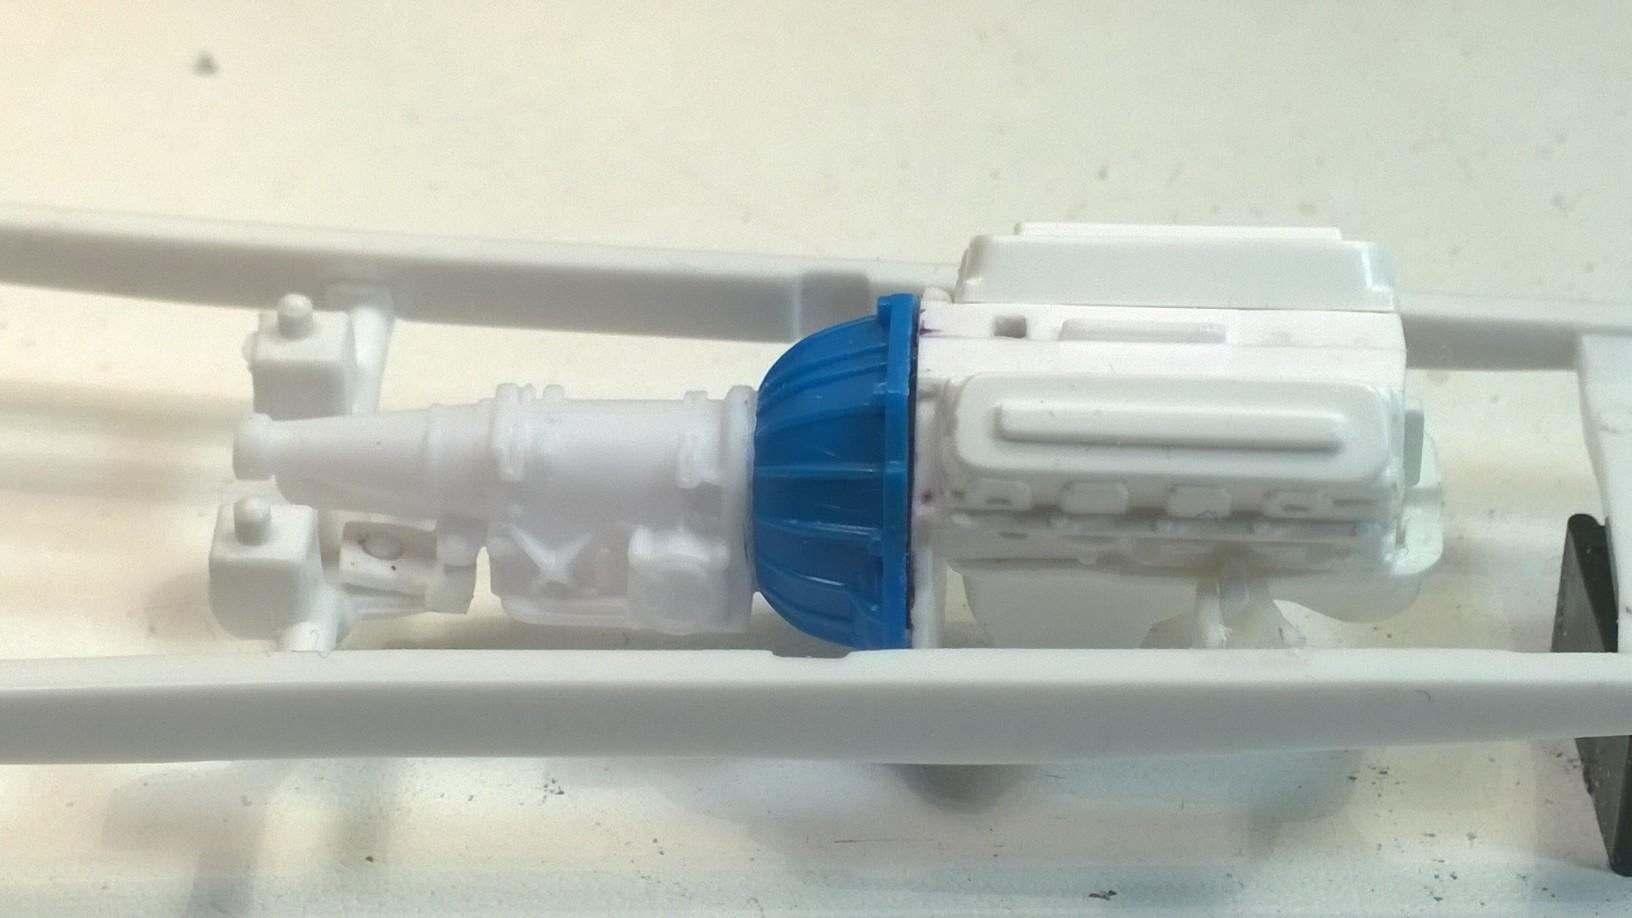
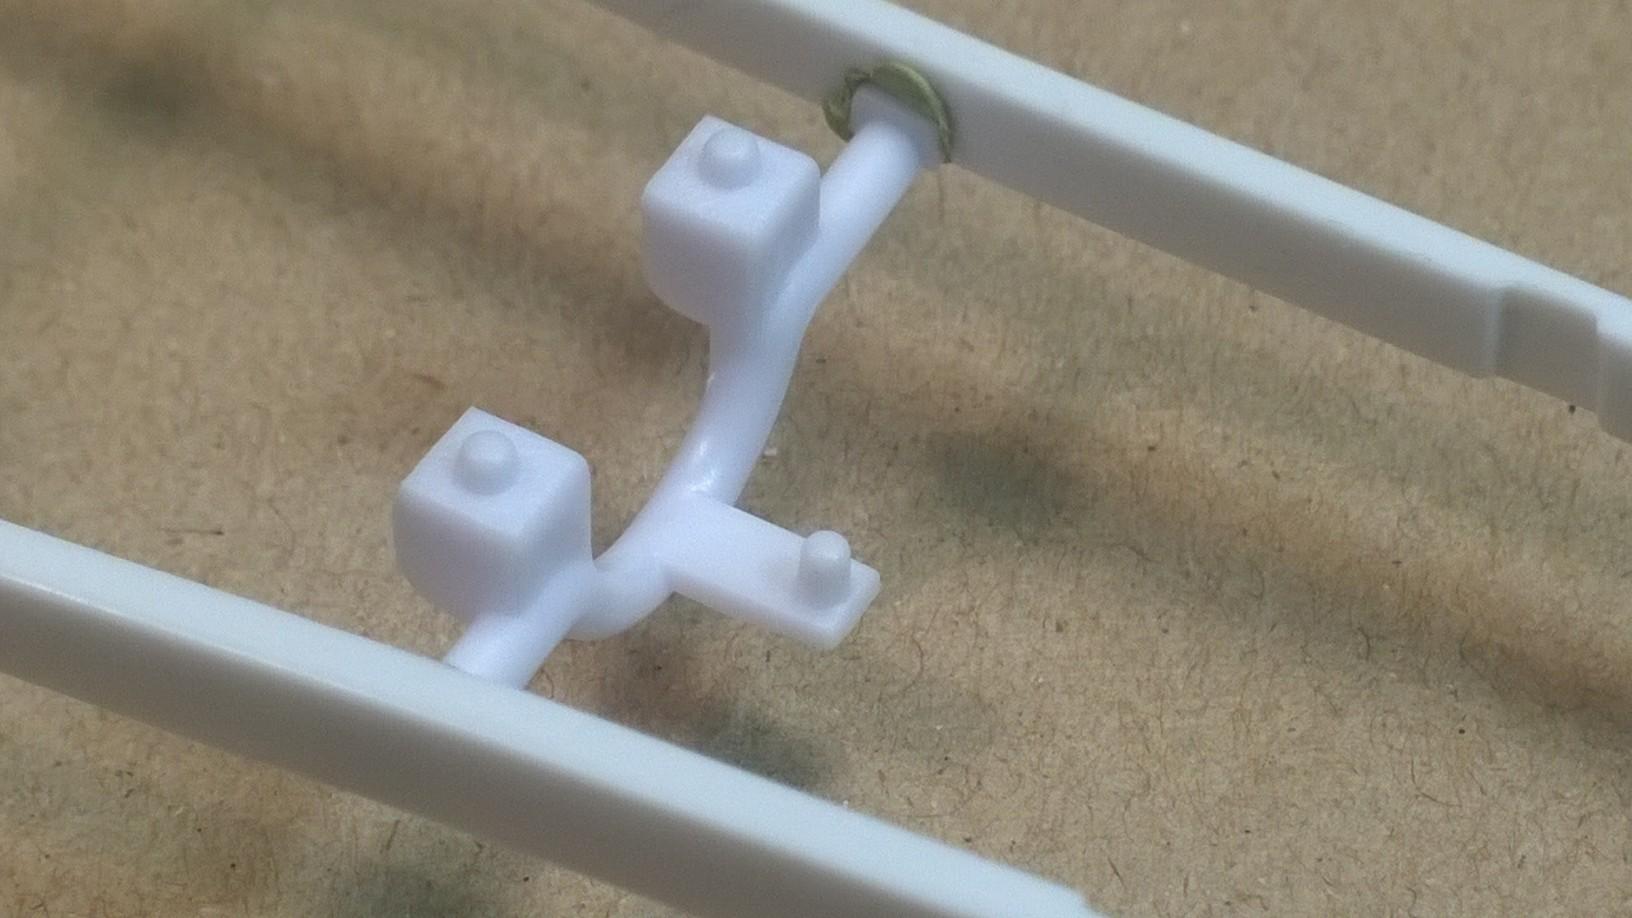
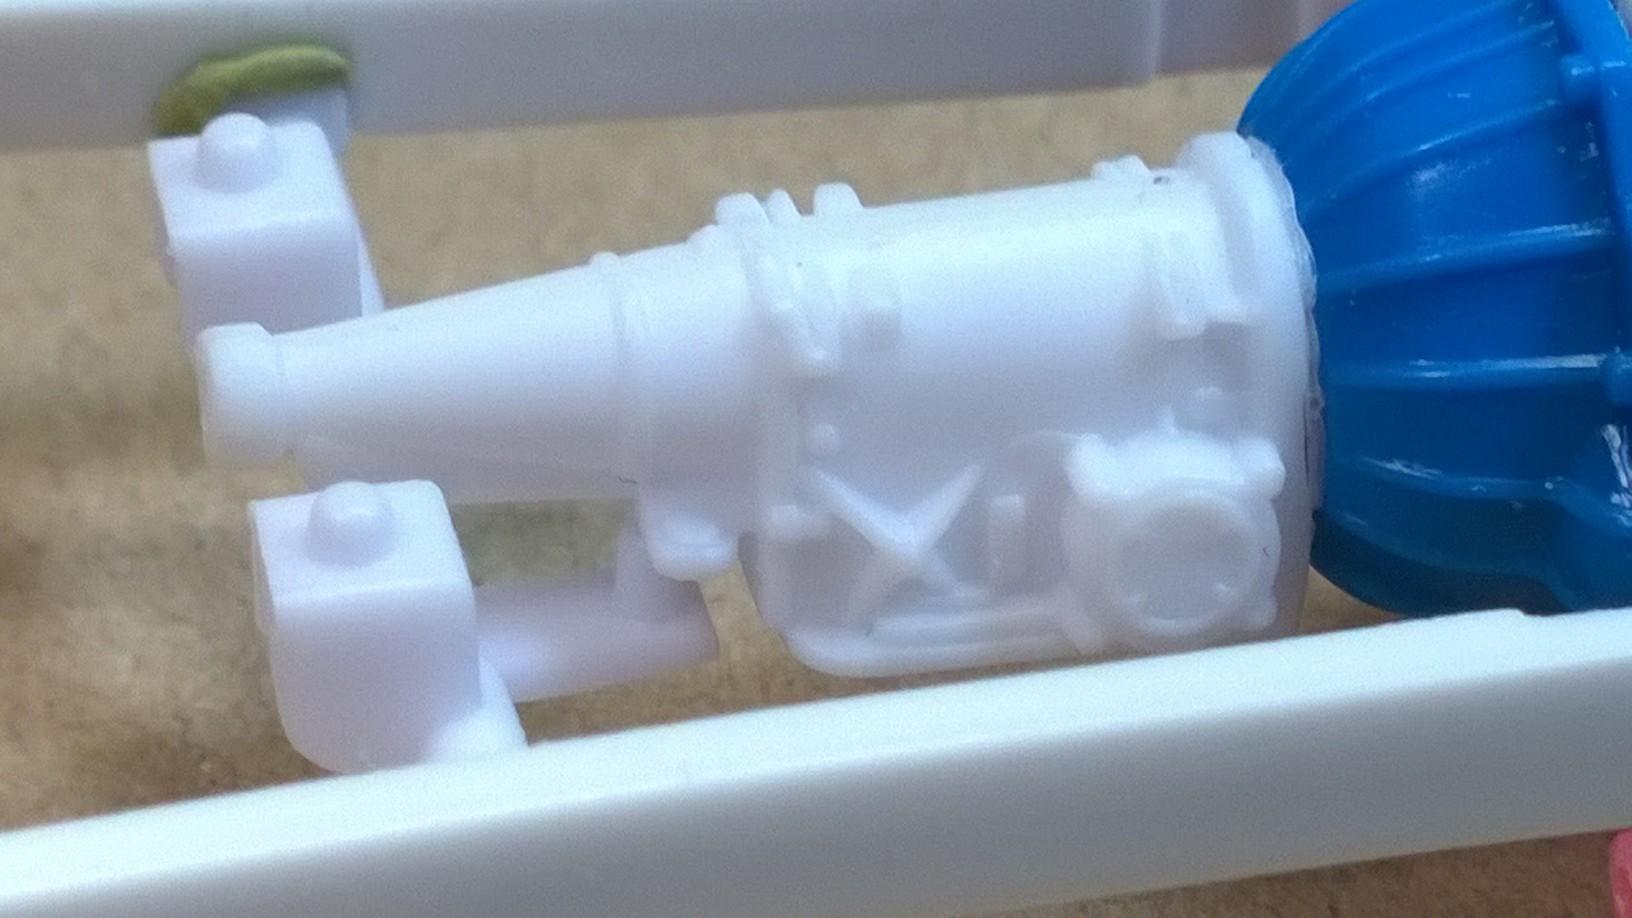
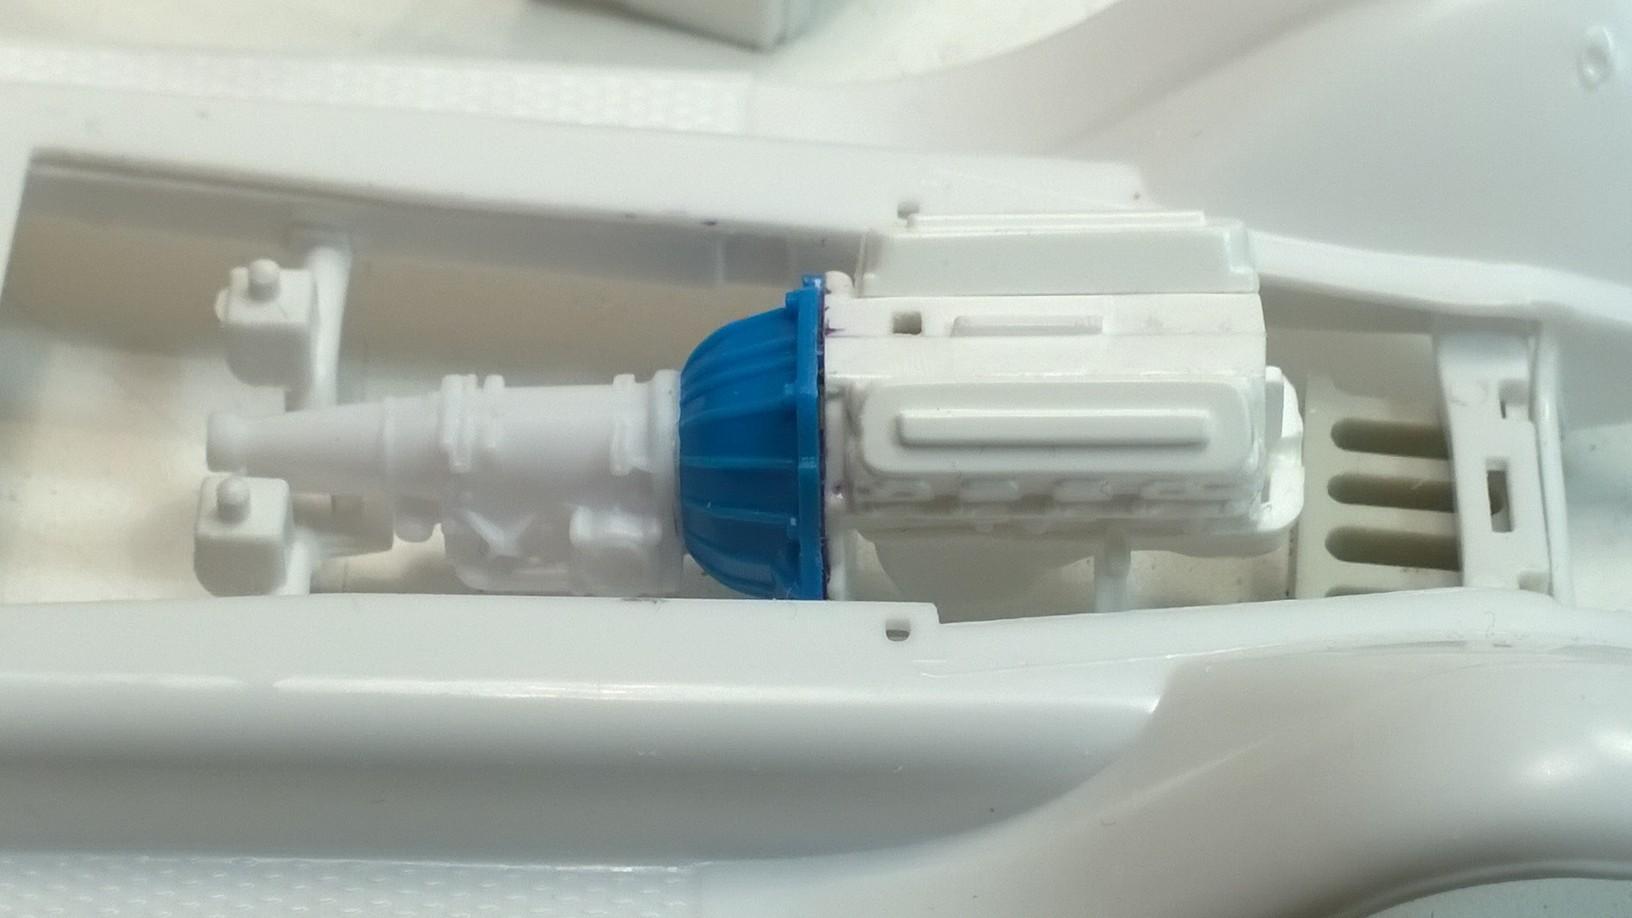
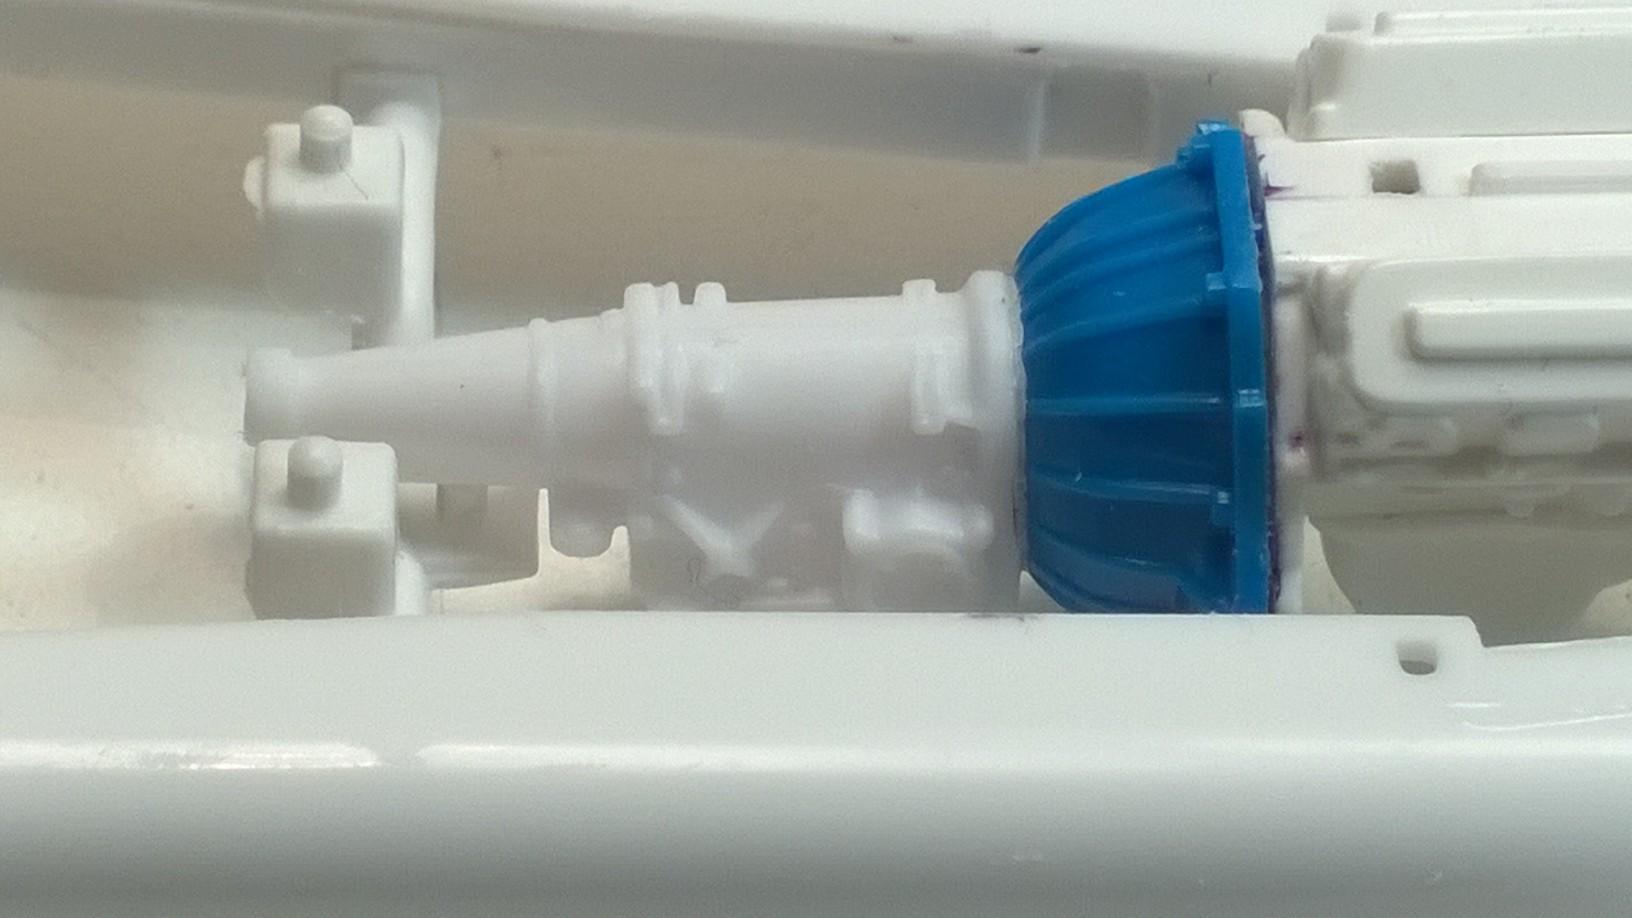
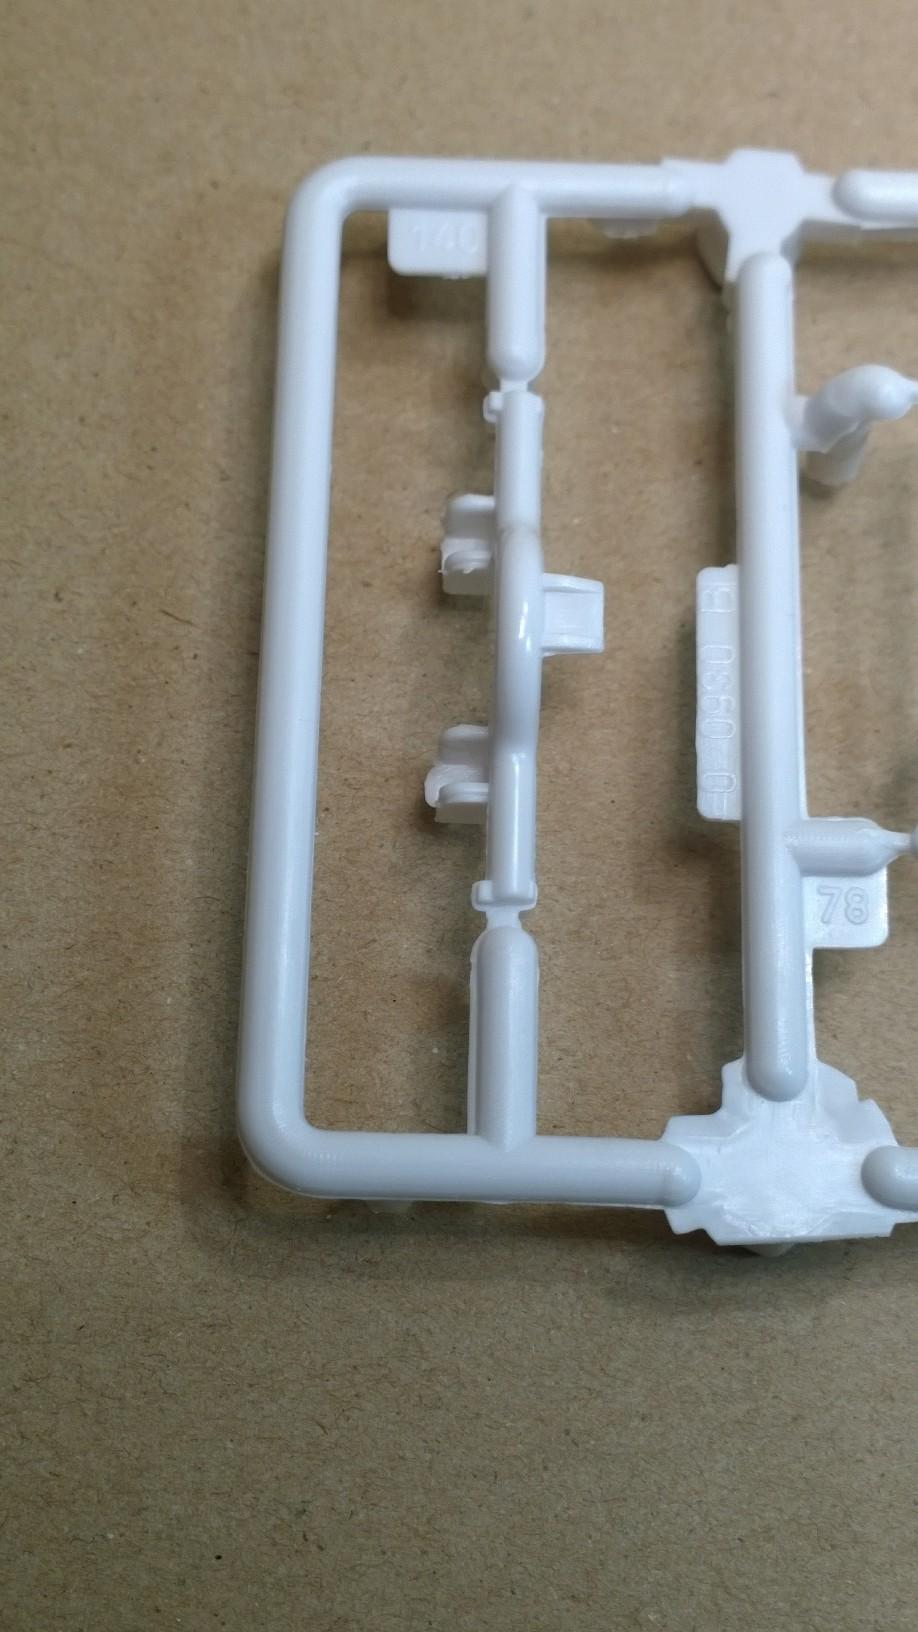
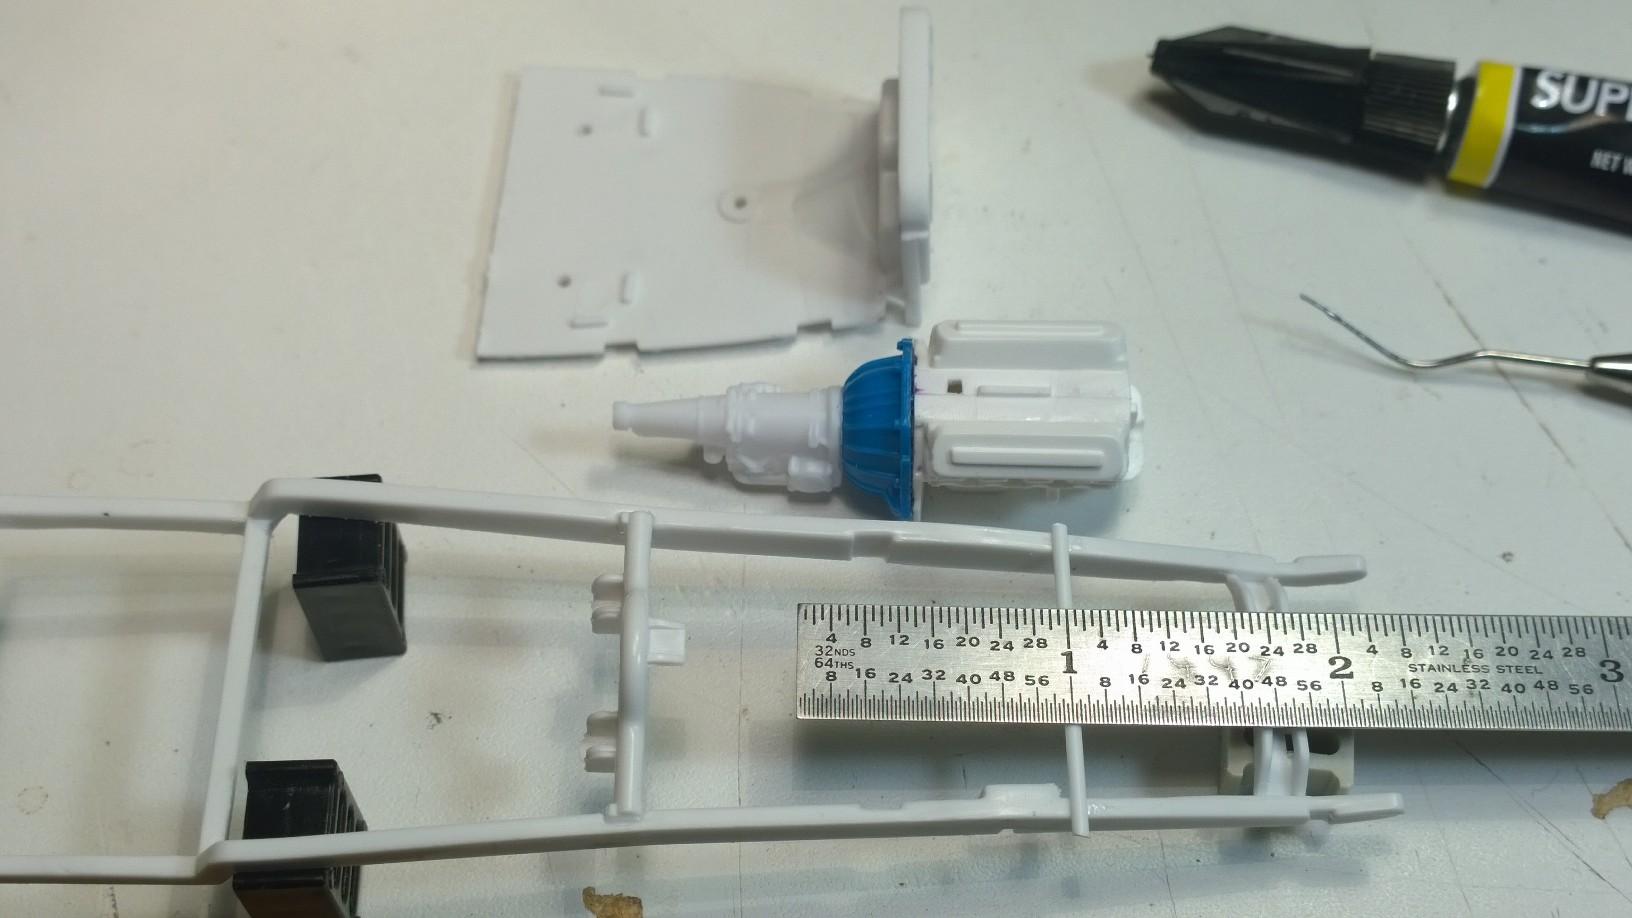
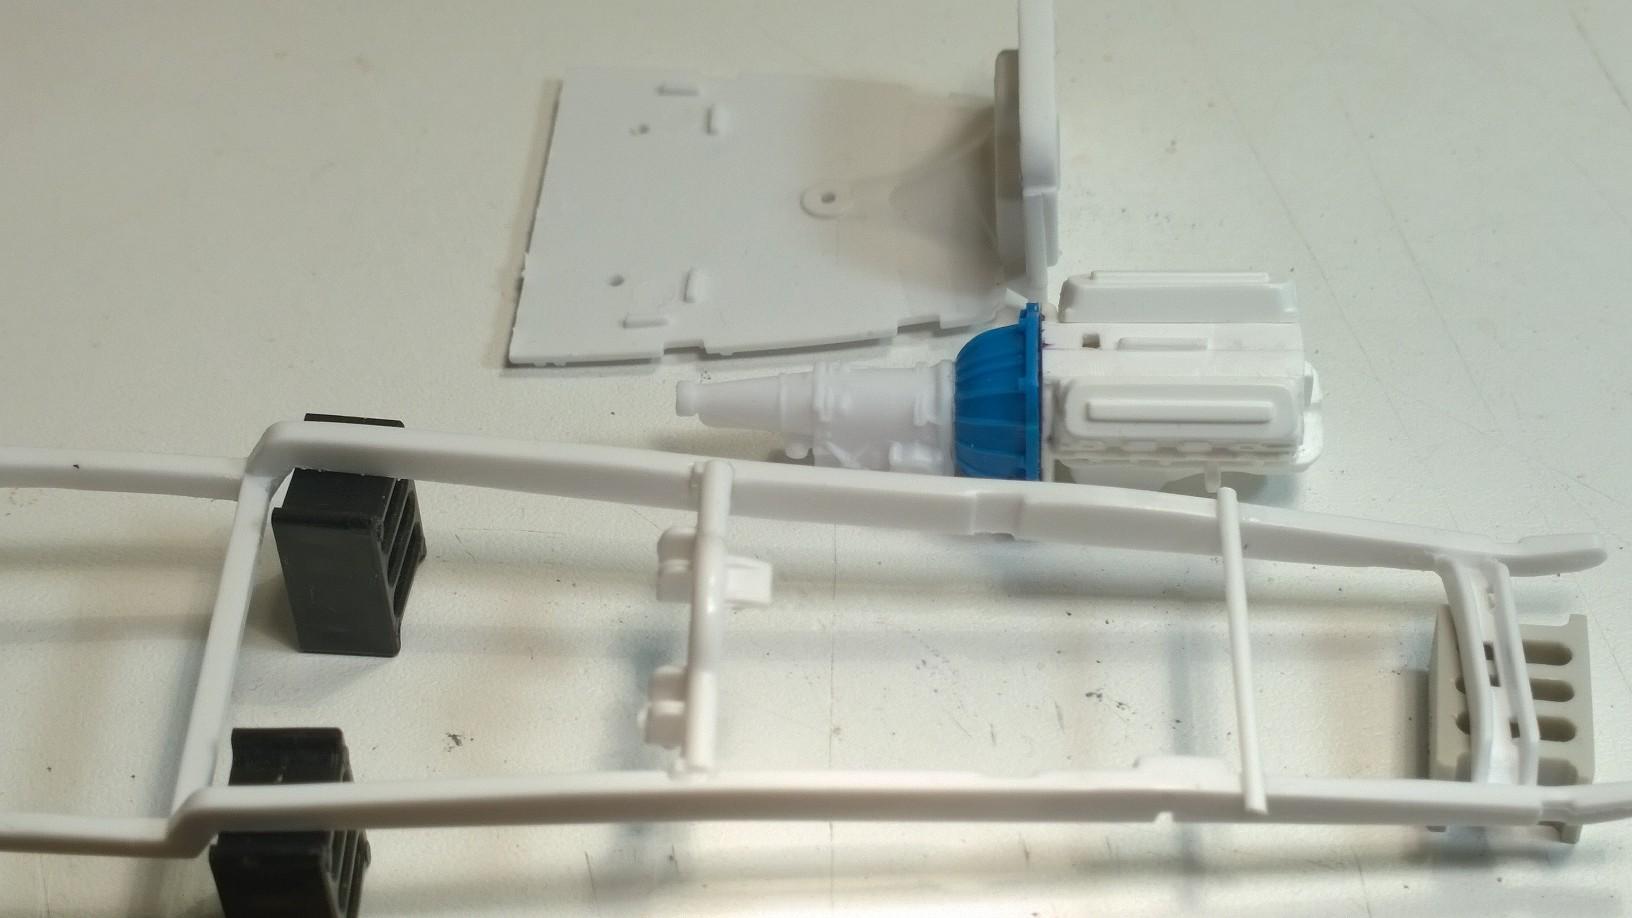
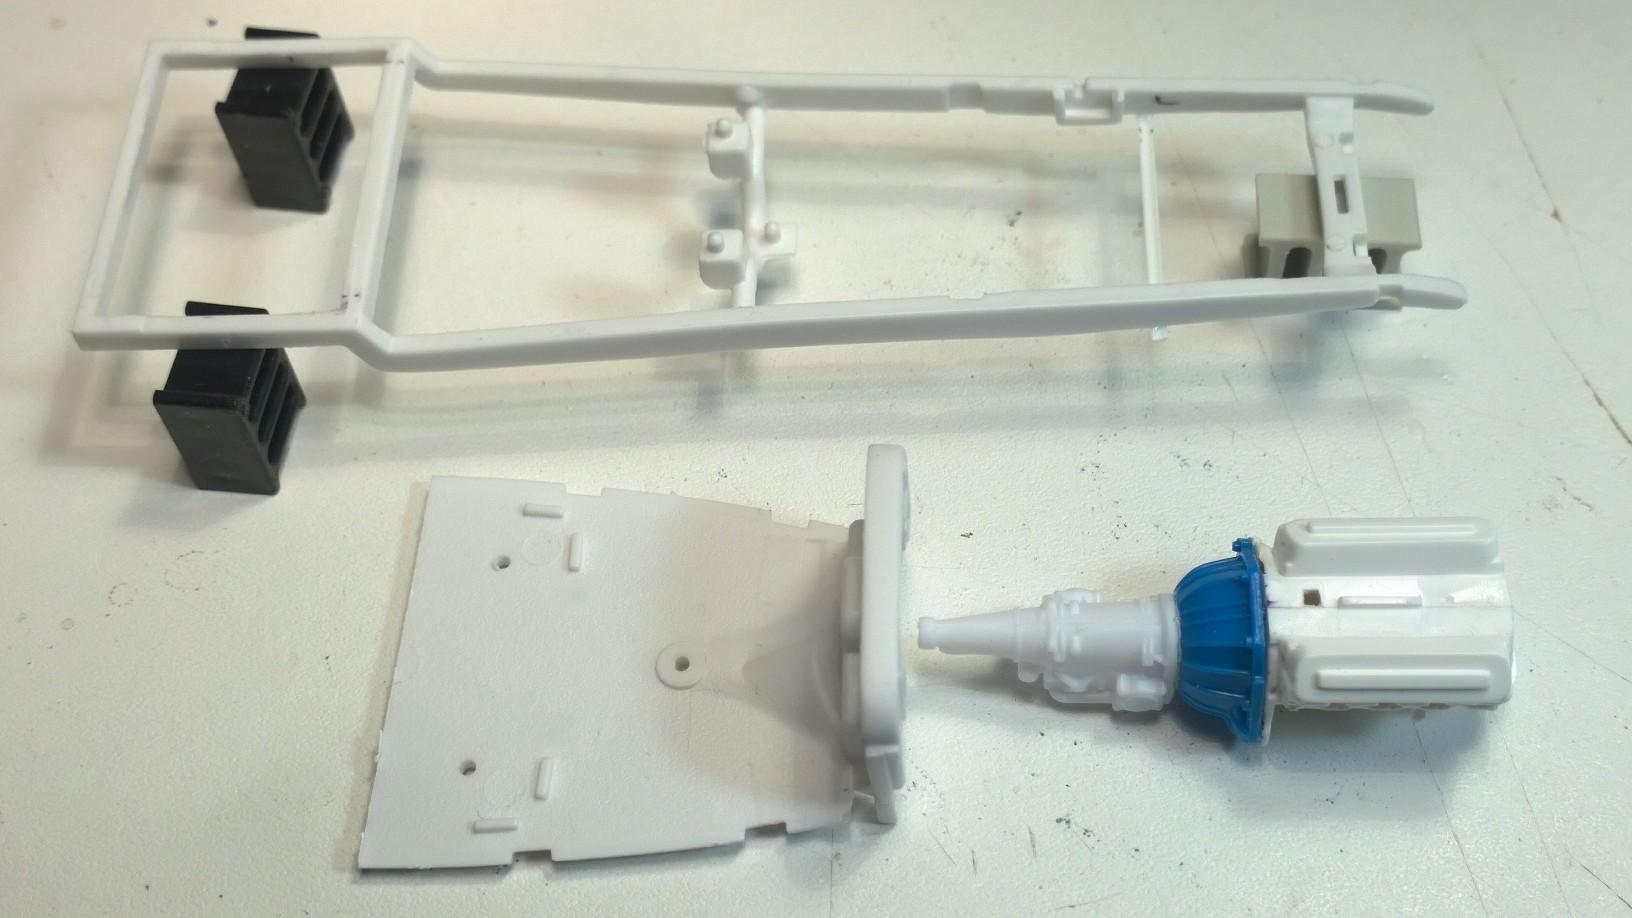
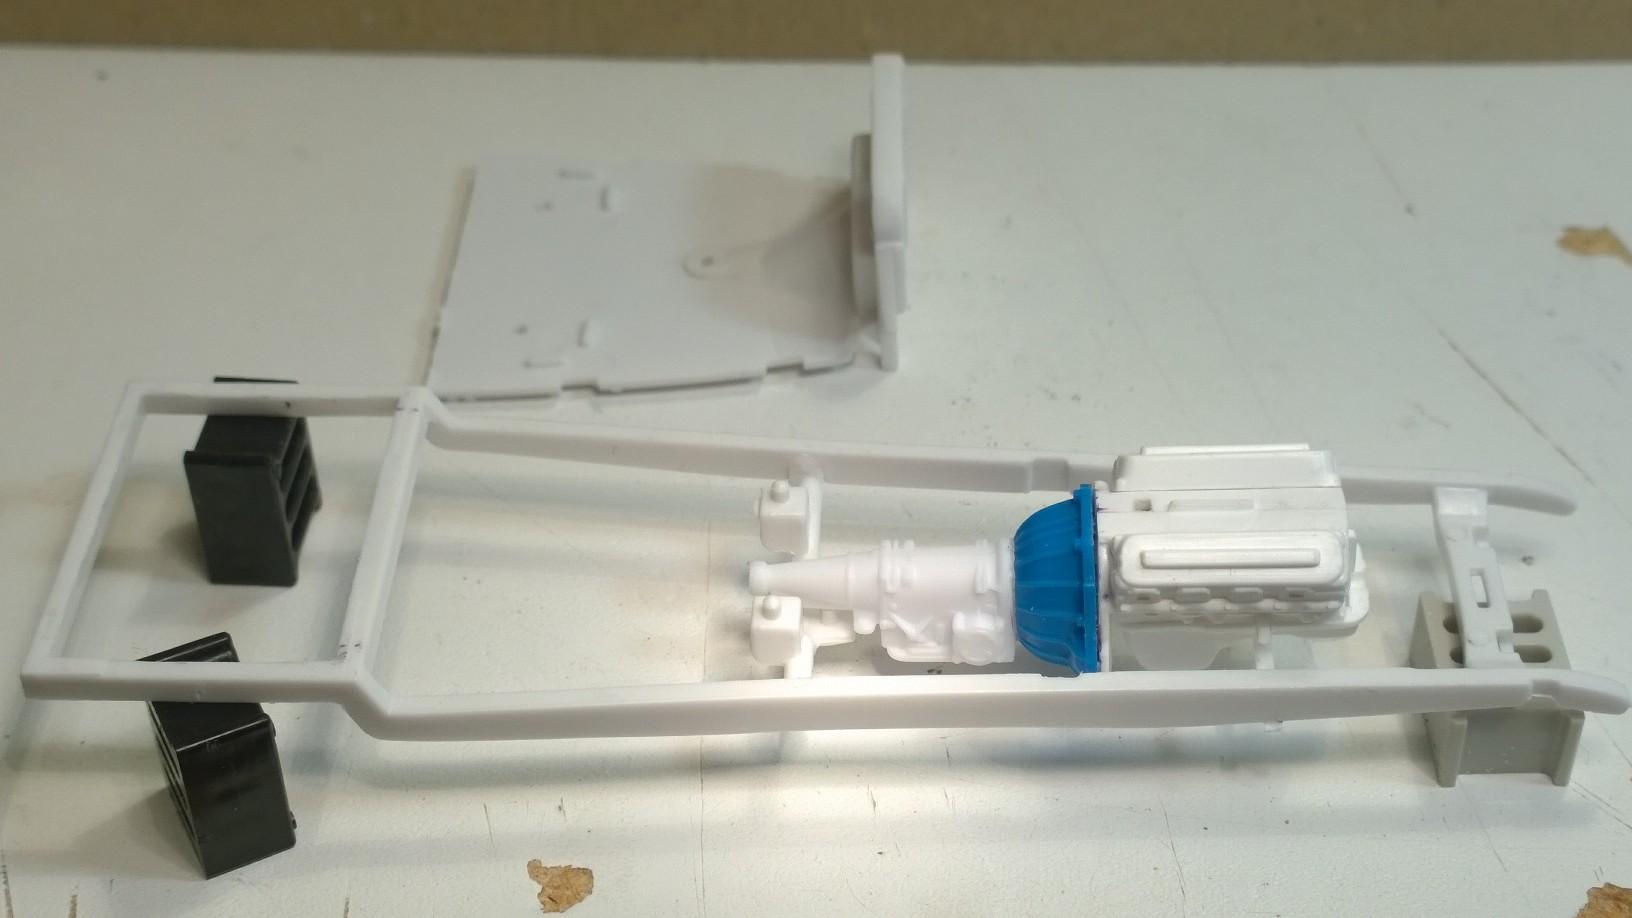
Spent some time checking out the difference between the older '29A Roadster that Revell first released and the latest offering. The Crossmembers are different for each of the '29A Roadster kits: Older 140 (right) & the newer 141 Crossmember (left) And, the adaptor was added to cover the distance from the post on the older crossmember and the pad on the C4 Transmission. 140 Crossmember... 140 Crossmember & Transmission 140 Crossmember & Adapter 140 Crossmember Adapter & Transmission 141 Crossmember 141 Crossmember & Transmission Donor Parts List Revell '29 Ford Roadster Kit 4463 Model A Roadster 2'n1 Parts #: 141 Crossmember Revell '29 Ford Roadster Kit 4322 Model A Roadster 2'n1 Parts #: 77 Fame/Chassis 140 Crossmember Revell '32 Ford Sedan Kit 85-2062 Street Rod Parts #: 407-408 Engine Halves (2) C4 Transmission Revell Dan Fink's '32 Ford Speedwagon Kit 85-7606 Parts #: 52-53 Engine Block Halves 65 Cylinder Head (2) Revell '27 Touring Kit 7144 Street Rod Parts #: 12 Bellhousing Note to self: Decision on using 140 Crossmember or 141 Crossmember TBD Any thoughts? -KK
-
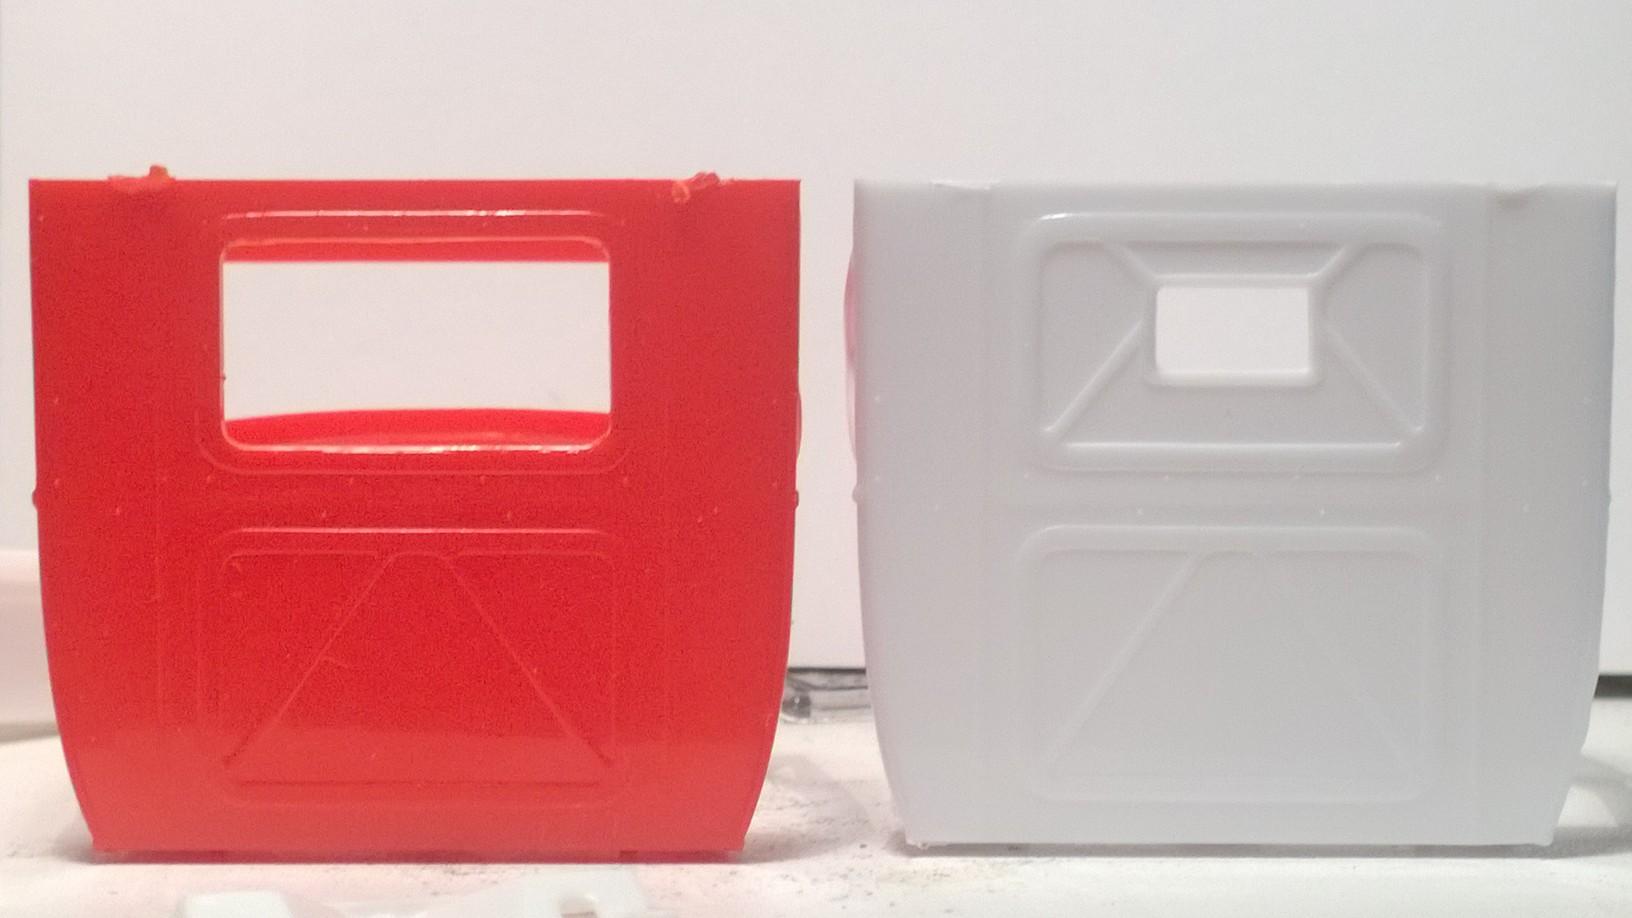
@tim boyd Noticed a modification that you made while building the replica of Jim Jacob's "Pete and Jakes" Closed Cab Pickup, I made the same modification to the '29 PU V-12 Midnight Auto Salvage... Closing in the rear big lite on the early release of the PU. The later issue came with the small back lite... -KK
-
Just an idea of where modeling has come, over the years. Imagine how many have learned something from history to current day modeling! Totally enjoying the ride on the time machine journey we've been on from the start of this thread! We've come a long way, guys! Honored to part of something so inspirational!! I want to see more from everyone following and/or lured in to the progress on all of the builds, so far... -KK
-
@Dennis Lacy I opened this thread this morning and saw this: 10,247 views! Thanks to @tim boyd & @Rocking Rodney Rat!! Good work, guys... -KK
-
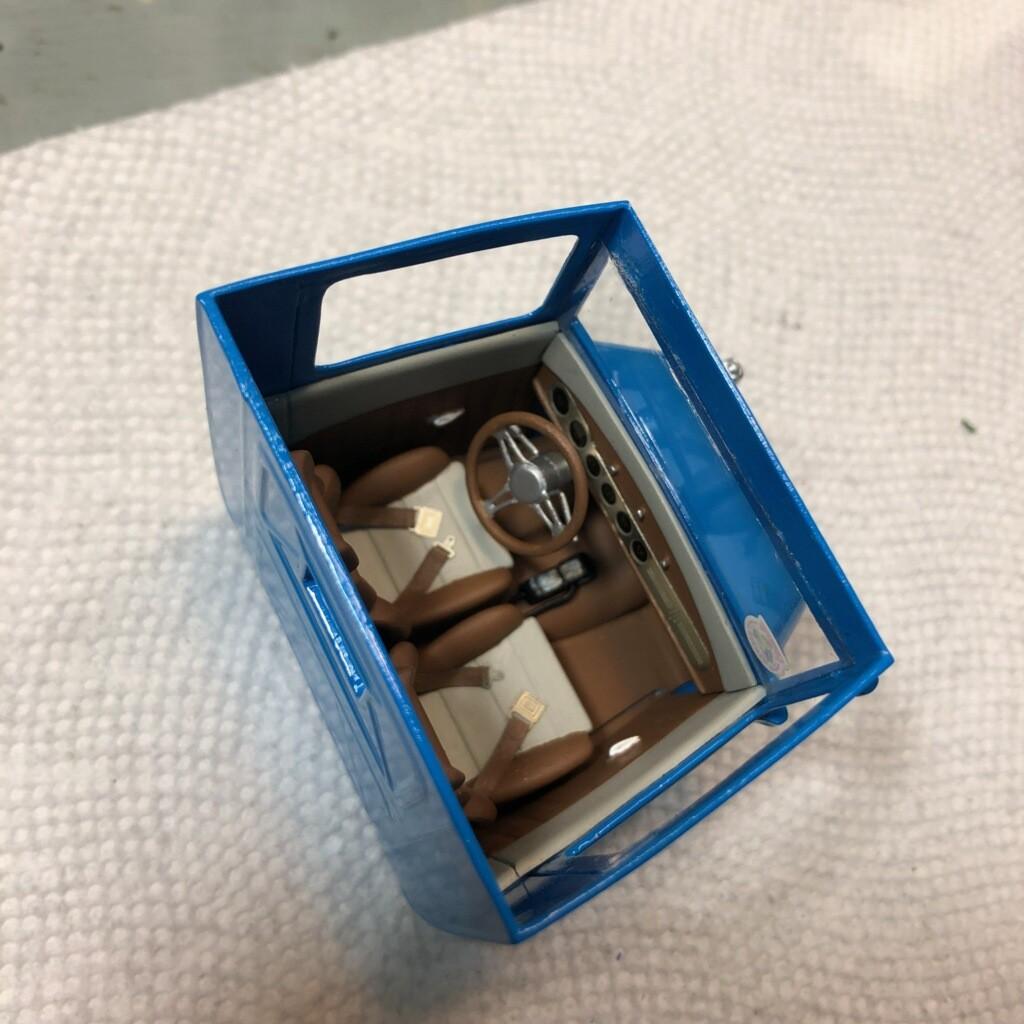
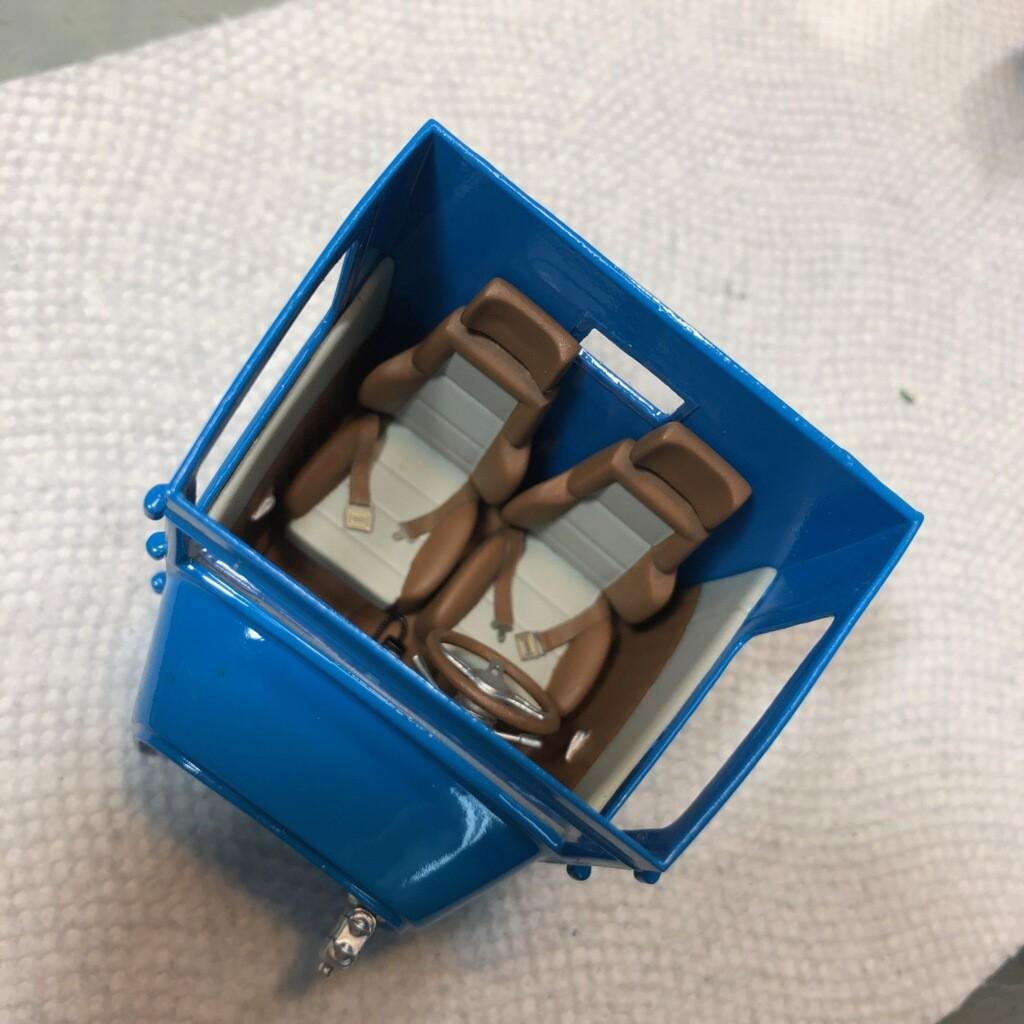
You left out two of the most impressive pictures, Brother! RRR's '29 PU Interior... did you notice the GoodGuys decal? -KK
-
SO KLEAN, MAN! Just have to share a couple of interior pic's, @Rocking Rodney Rat
-
Thanks, Steve... We're hoping Tim finishes his! -KK Jim Jacobs '29A Closed Cab Pickup @tim boyd @Dennis Lacy @Rocking Rodney Rat
-
1955 Big Block Truck
Kit Karson replied to Lorne's topic in WIP: Model Trucks: Pickups, Vans, SUVs, Light Commercial
-
@Bullybeef Thank you for your interest! It's a thread worth following! -KK
-
And this... only a Southern Cali Hot Rodder could come up with a Surfer inspired '80s '29A Closed Cab PU, like yours! From the color to the added features, this screams ADL! -KK
-
@tim boyd @Rocking Rodney Rat @Dennis Lacy OK! When you dropped the note earlier, I said to myself, self Tim Boyd is going to pull his Jim Jacob's "Pete and Jakes" Closed Cab Pickup model out of mothballs and surprise us! This has turned out to kind of a special quest for some of us. @Rocking Rodney Rat and @Dennis Lacy have been trying to get me back to the bench, for a while now. This project was what it took to get me to build something in less than three years. When I found out that one of my mentors was interested in a build that @Dennis Lacy had started to a build from the '80s as a tribute, I had to at least peak in and see what was going on! Then when I found out that @Rocking Rodney Rat was starting to pull parts together, I knew something was up. I figured I had to come up with an idea, one that was current and that would catch the eye of all builders, both young & old, alike! Getting you and the rest of the MCM Forum community involved a Tribute build and urging you to bring out such an iconic model, well... that is so awesome a awe inspiring to me and so many others, @tim boyd! Thank you! -KK Jim Jacobs '29A Closed Cab Pickup
-
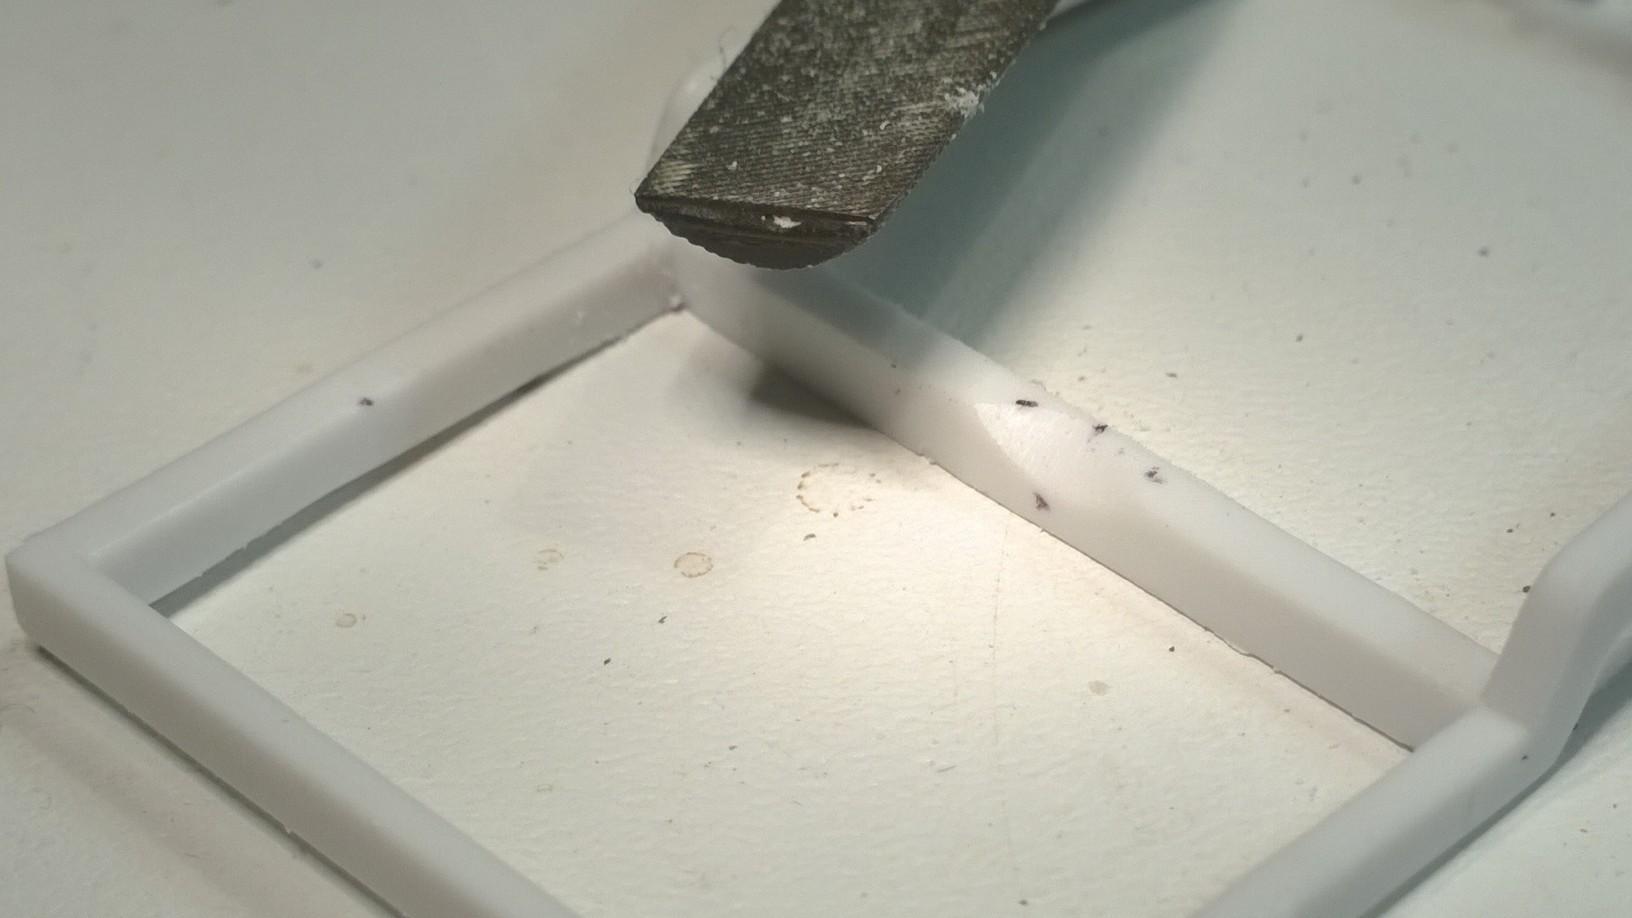
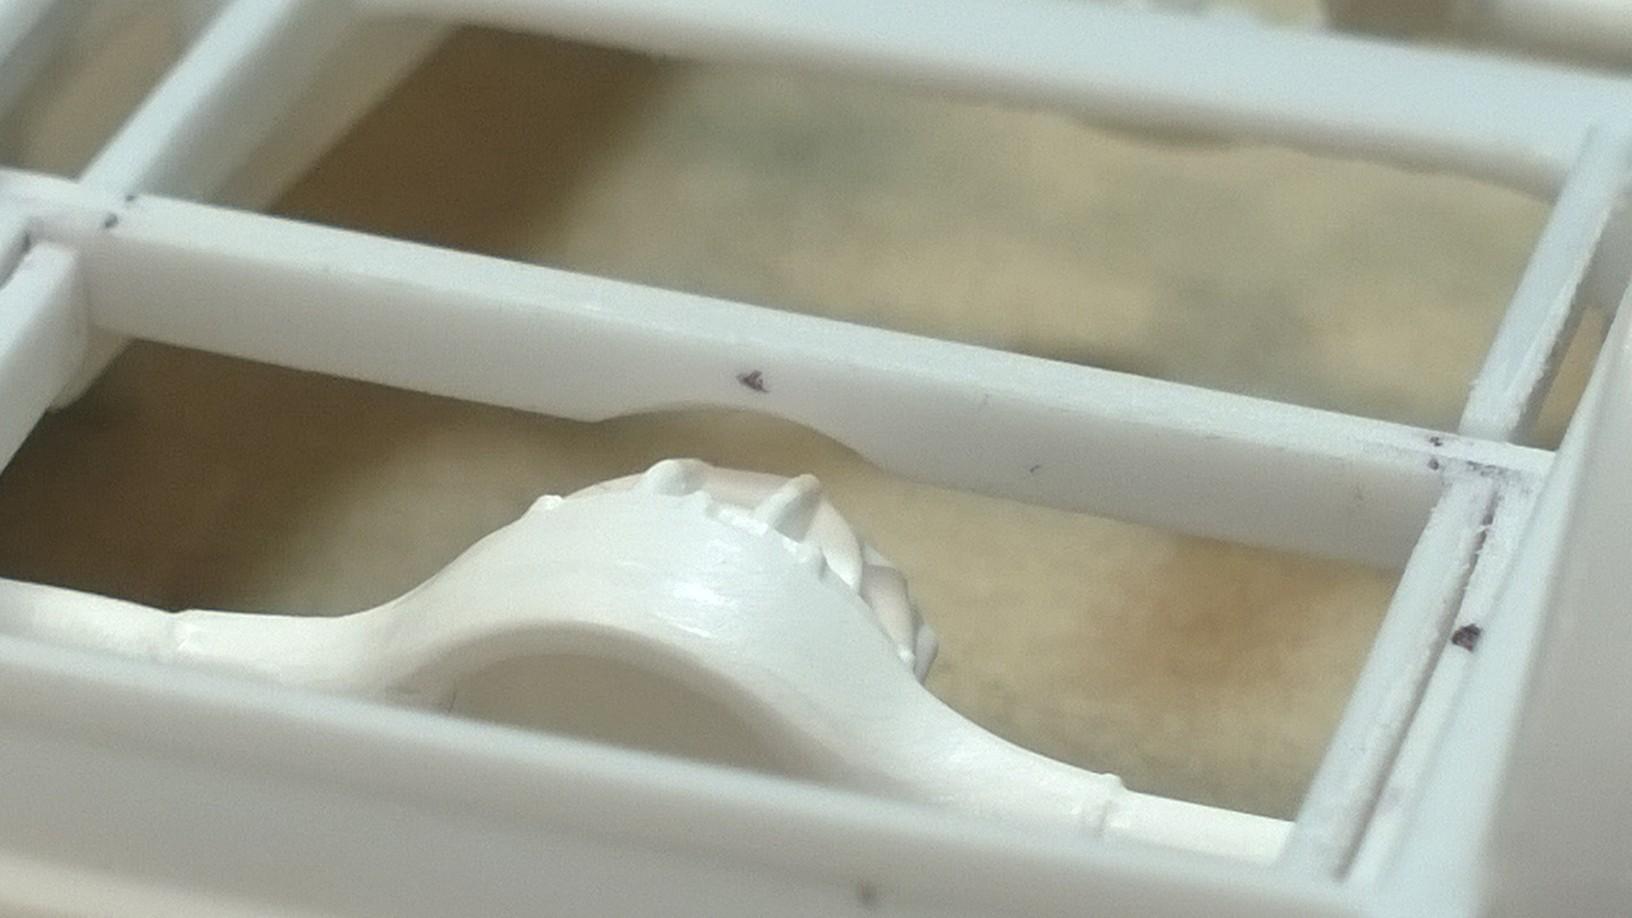
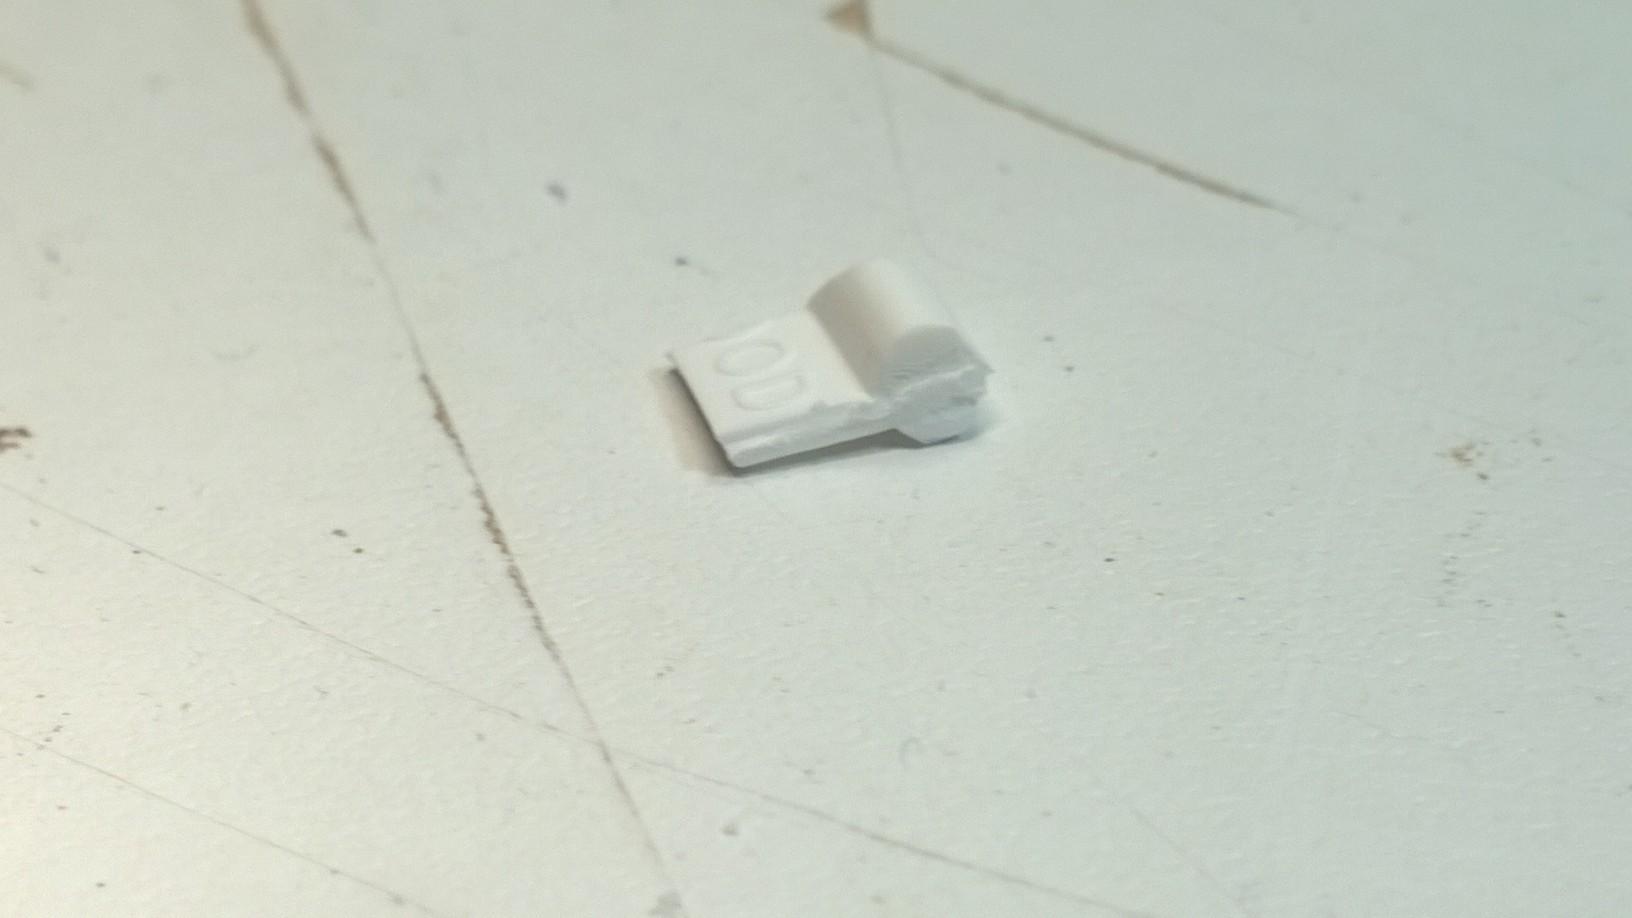
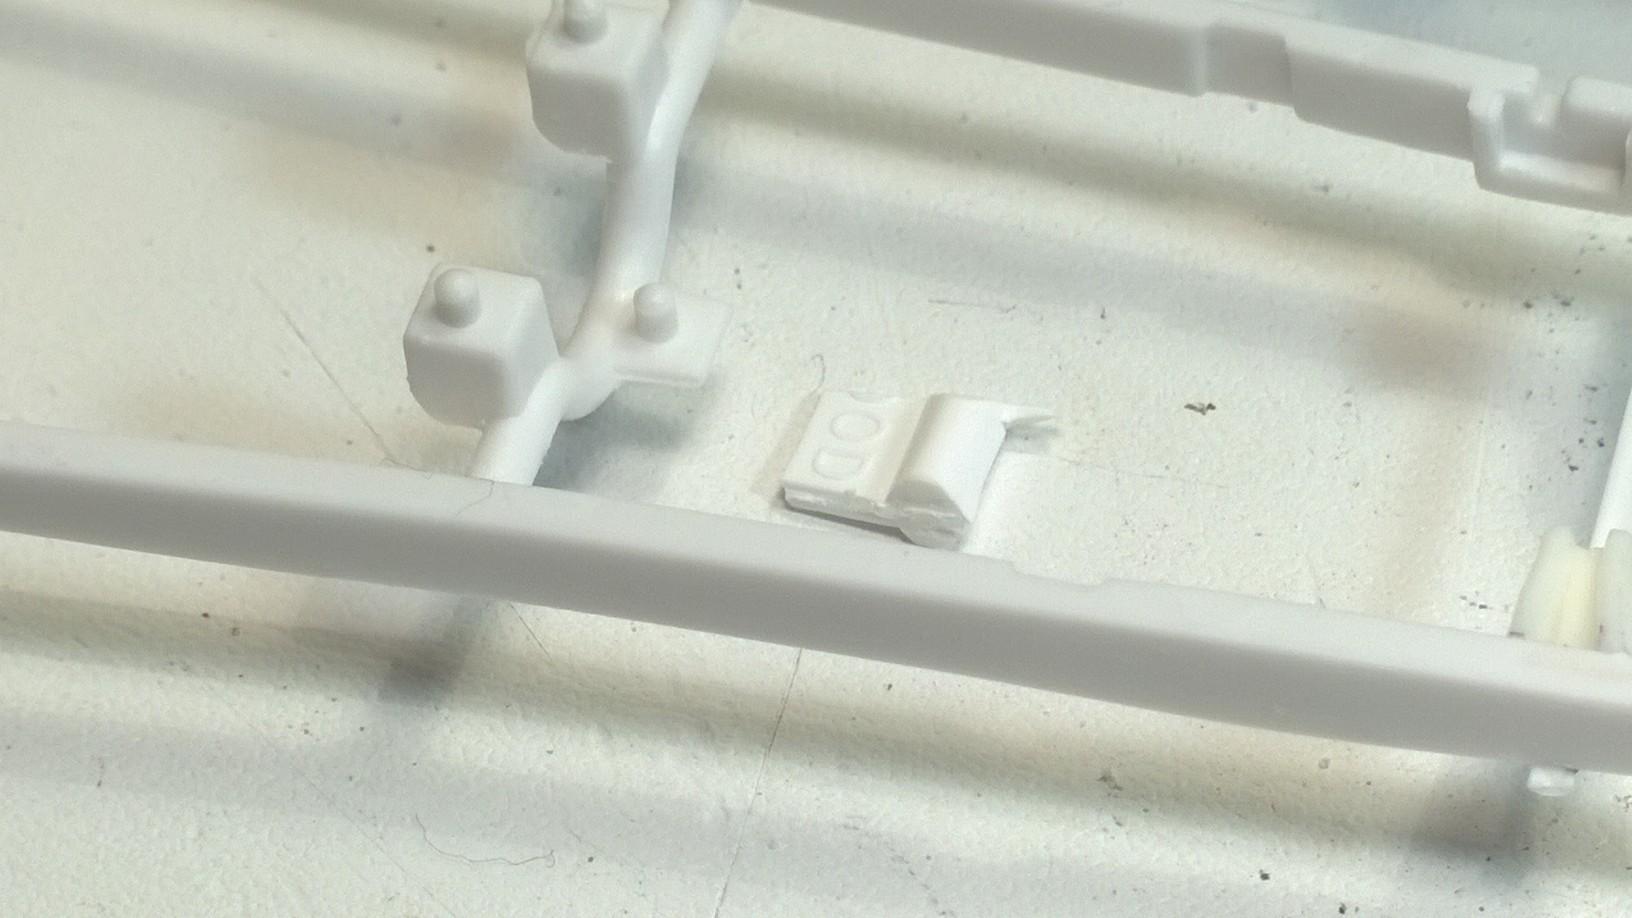
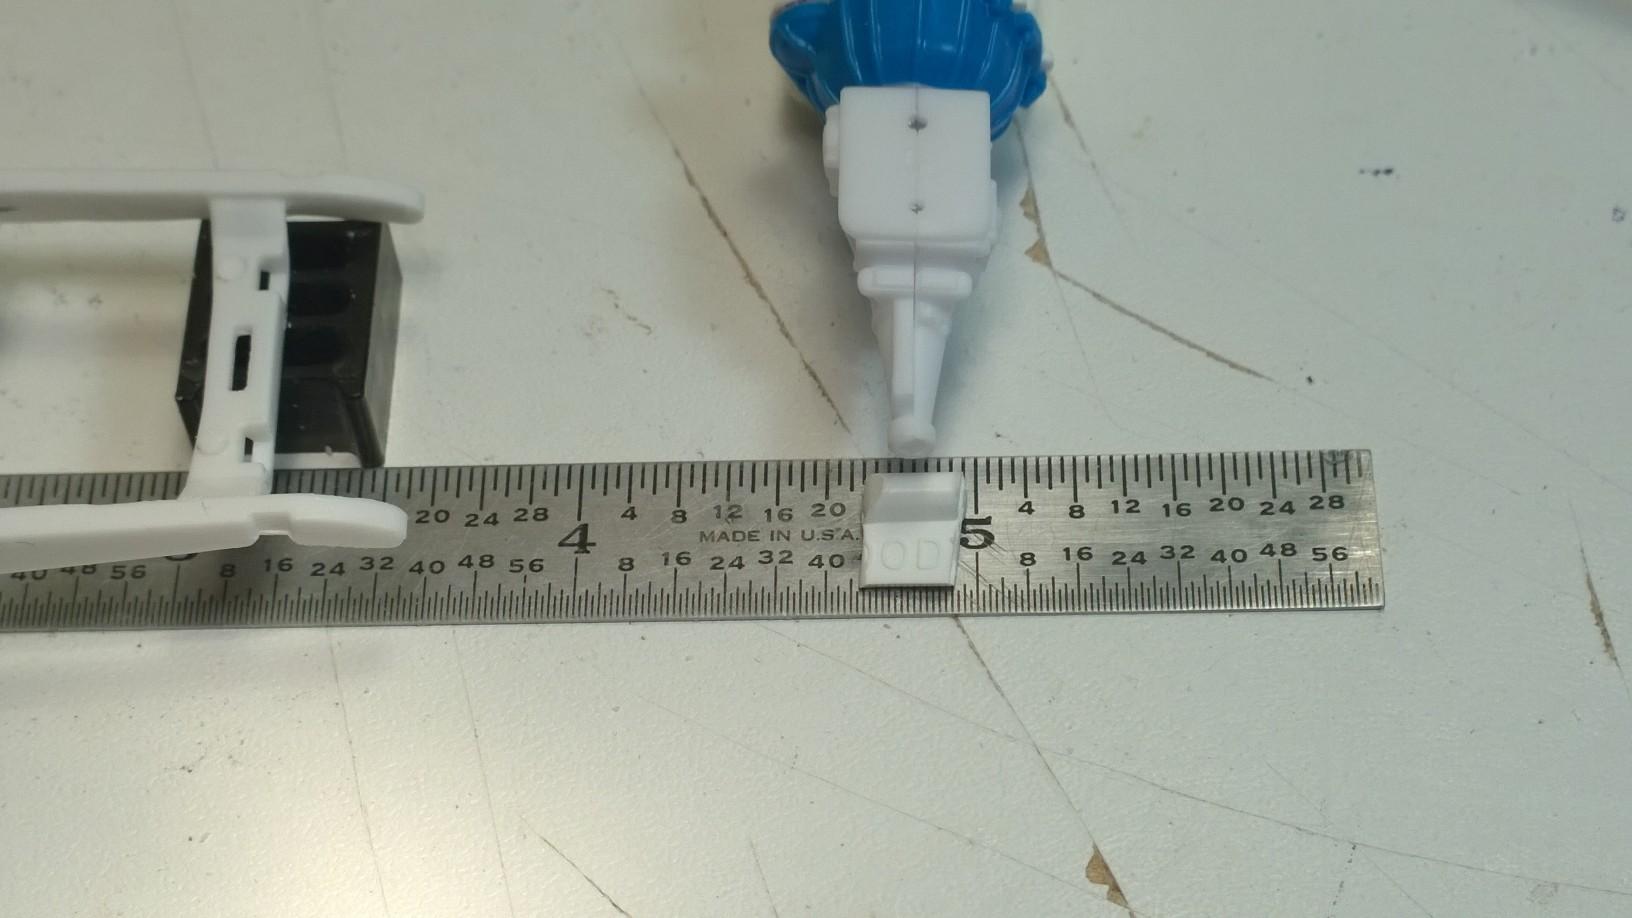
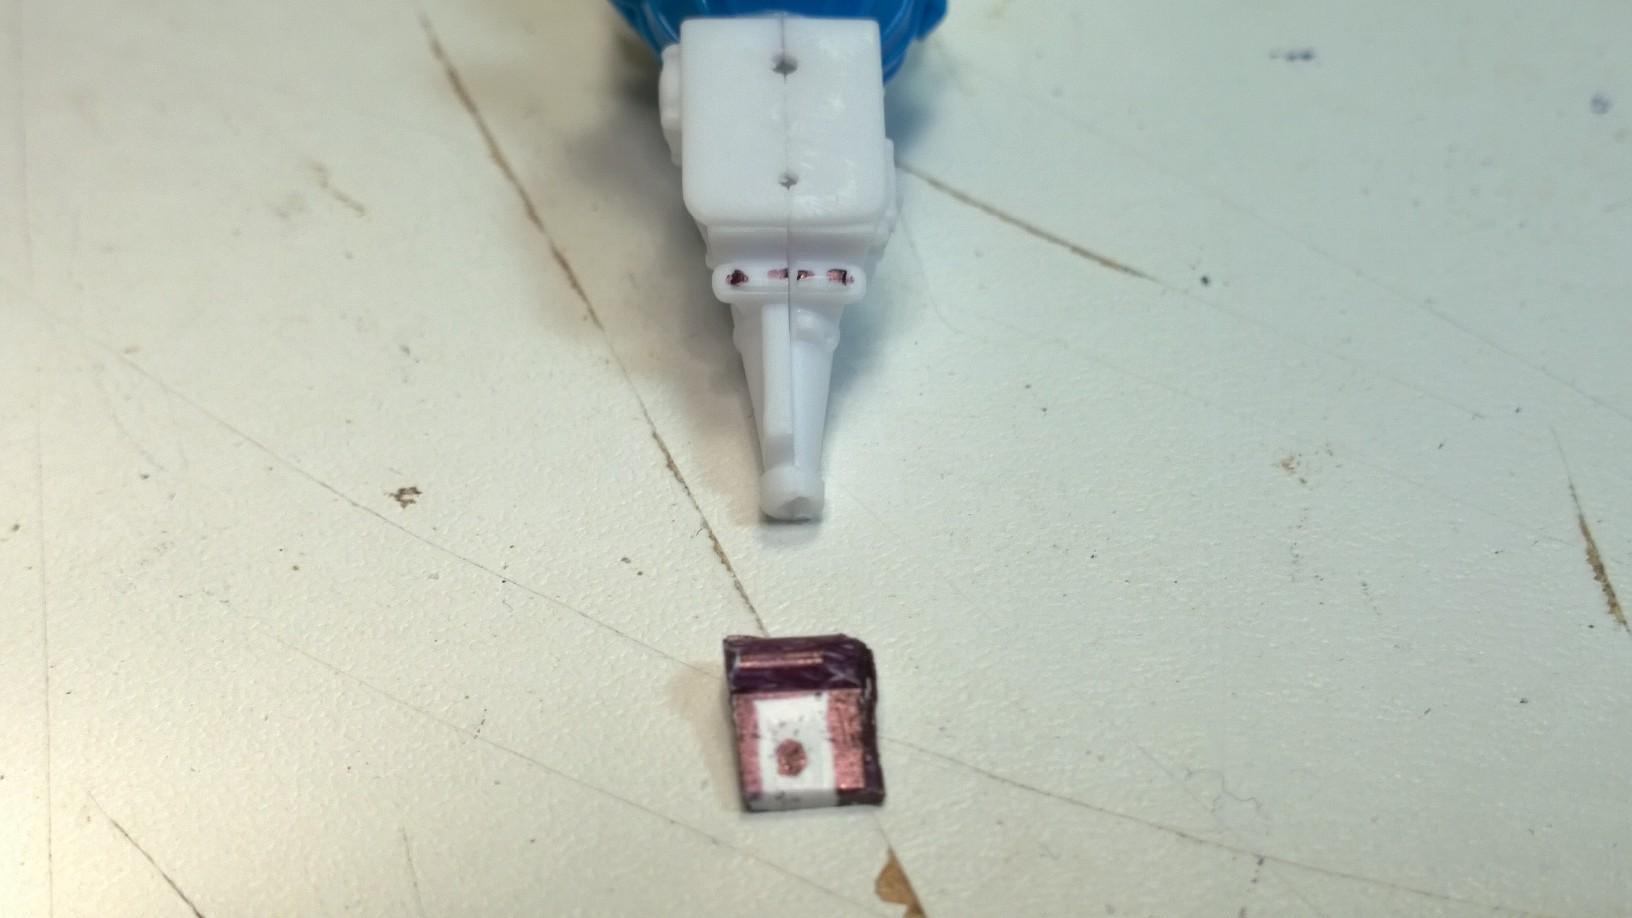
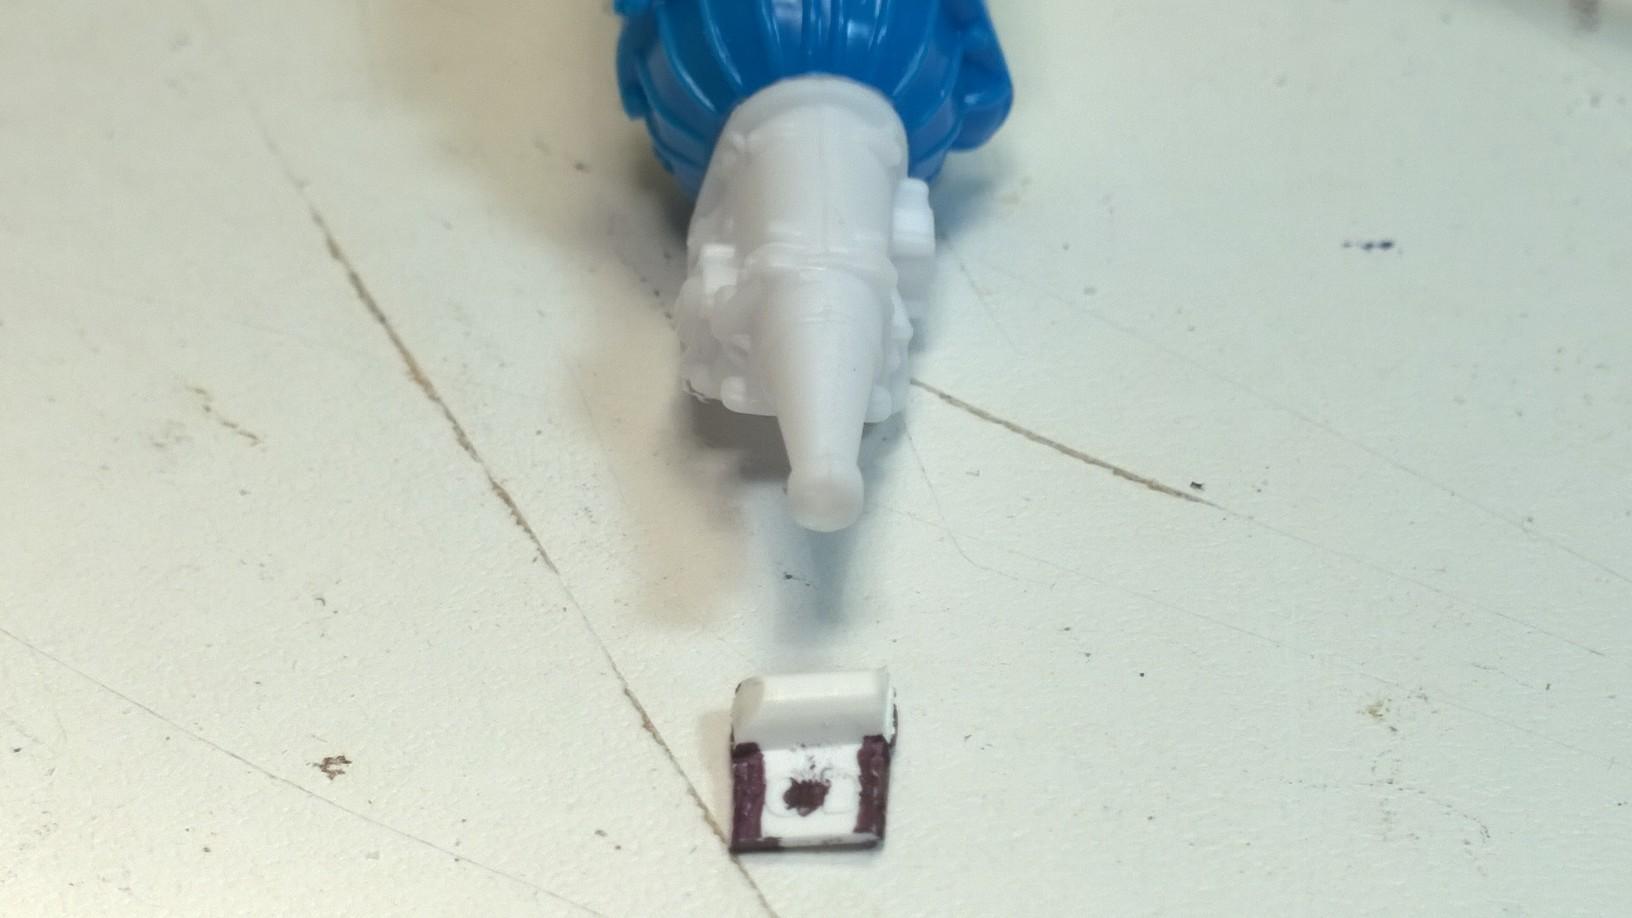
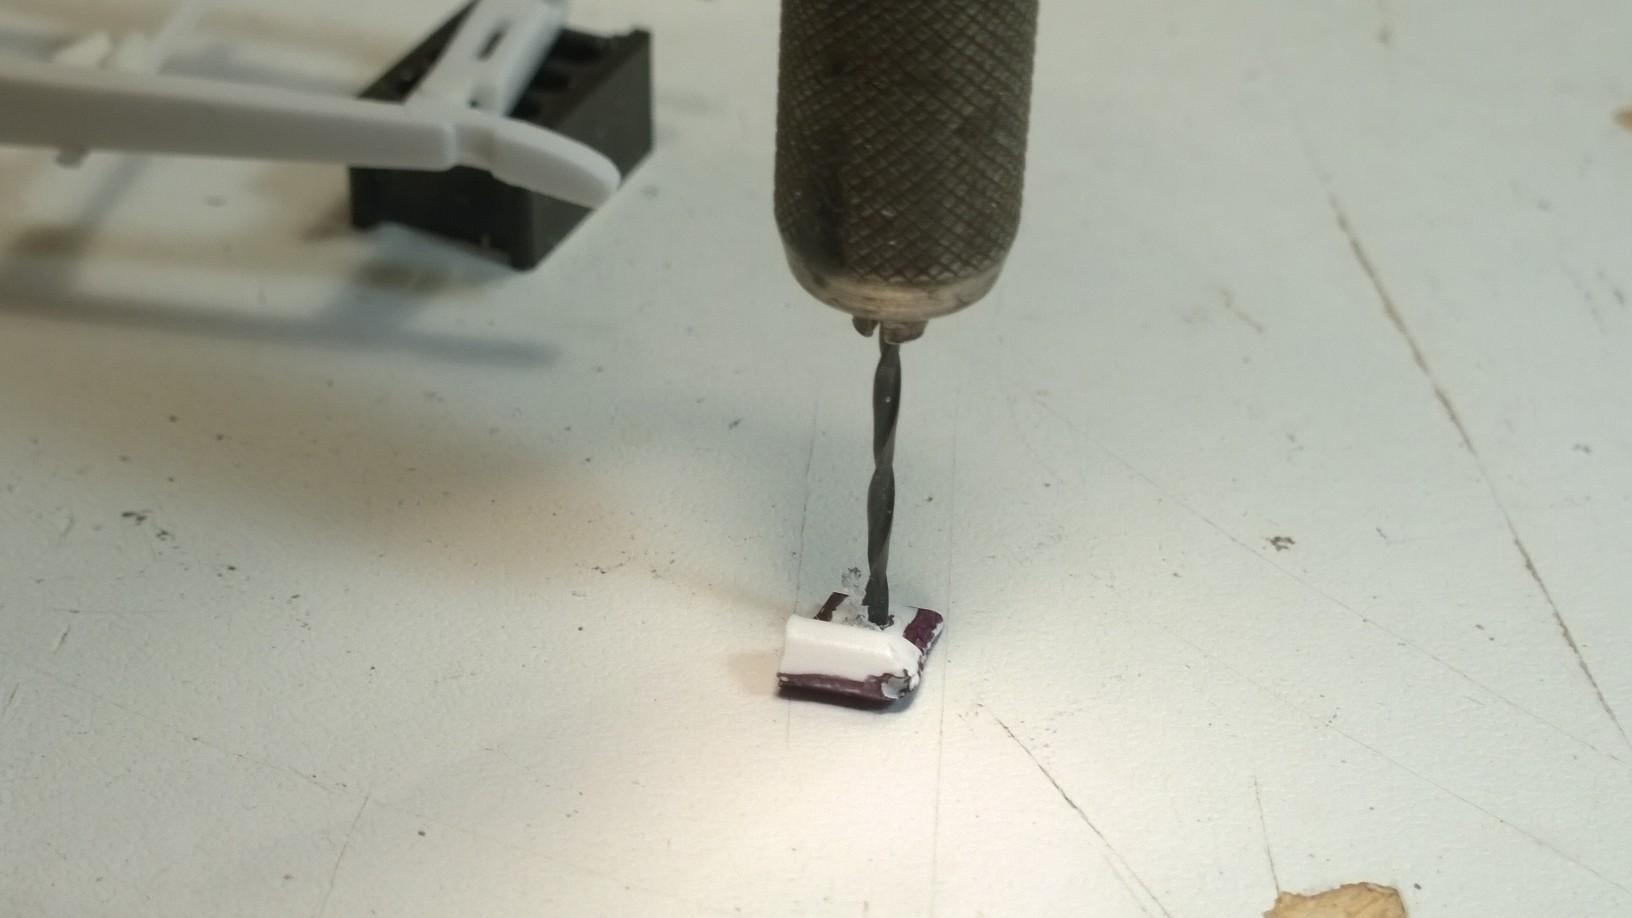
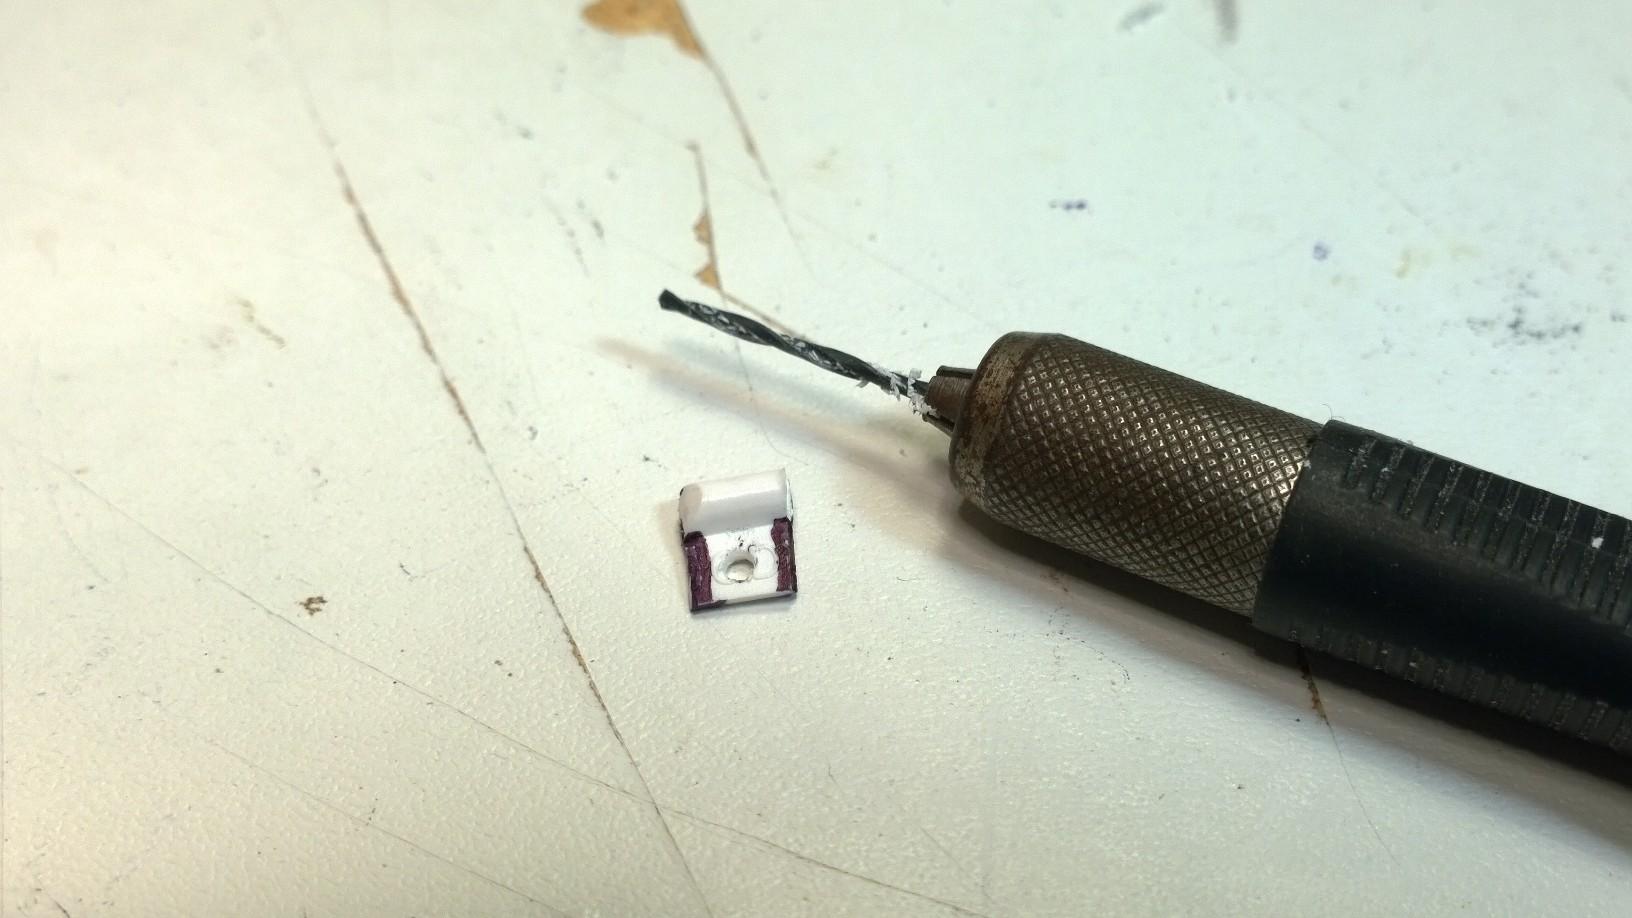
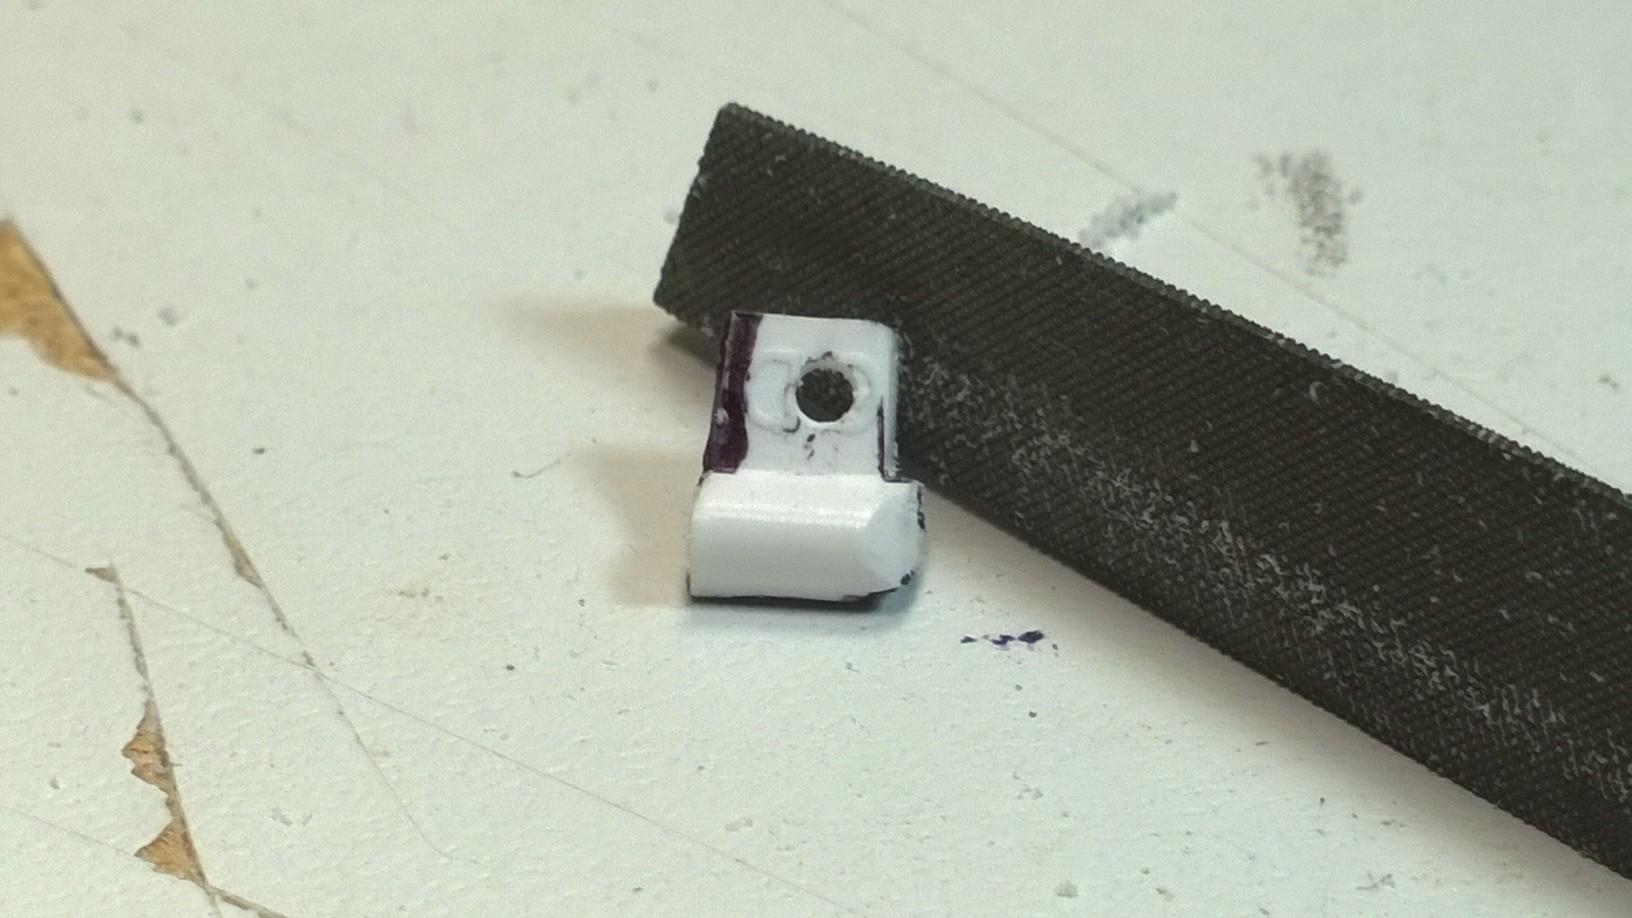
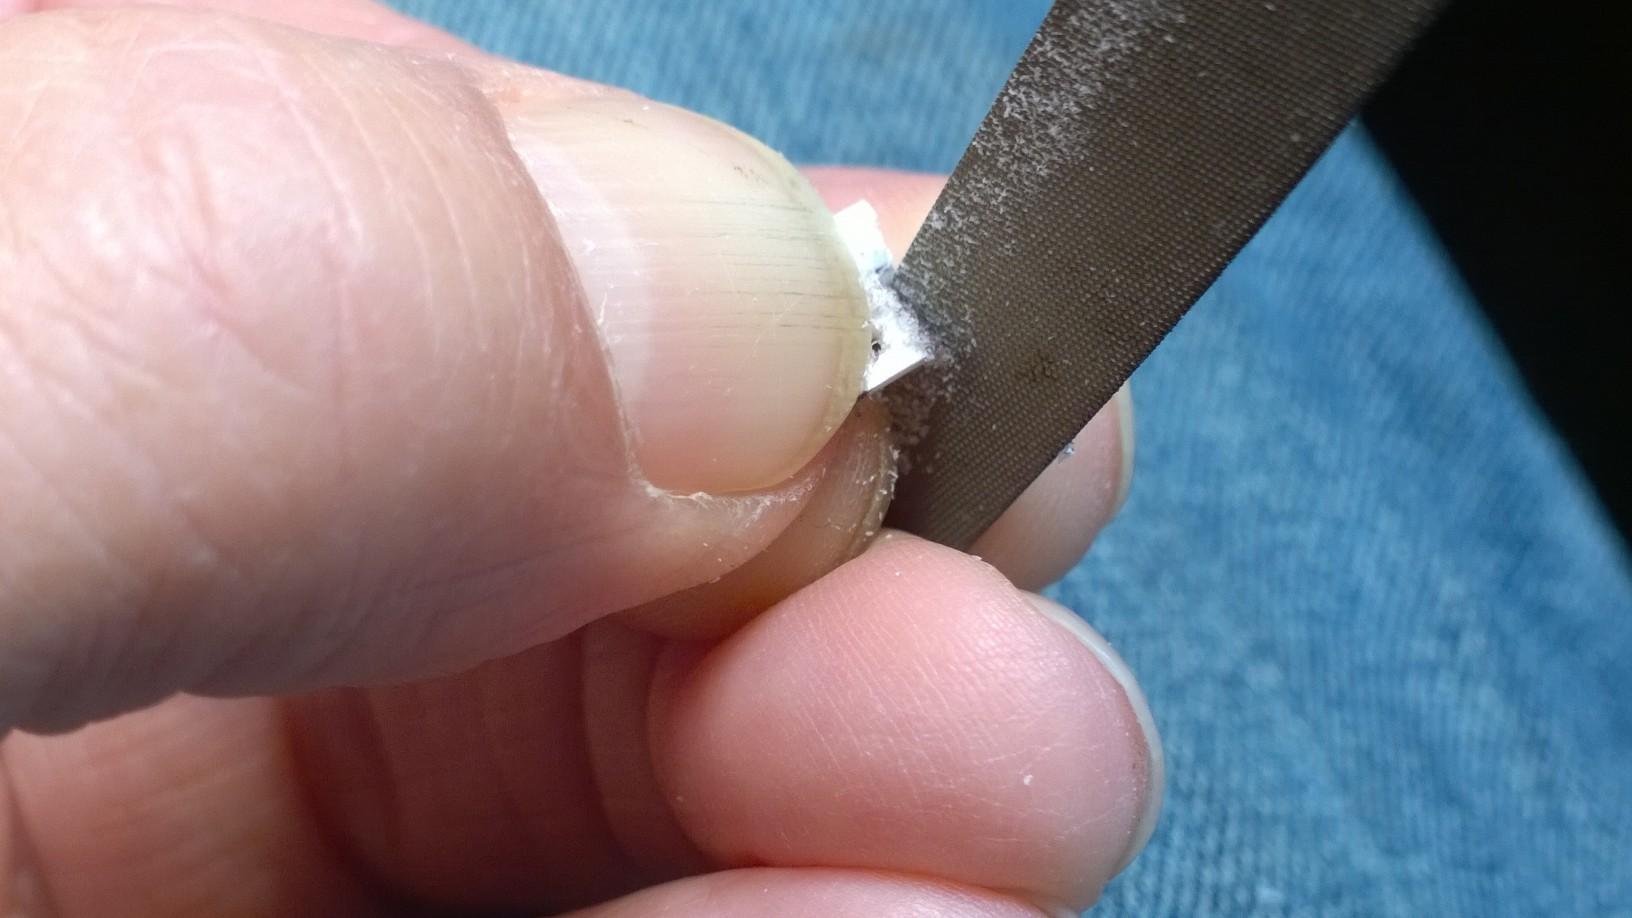
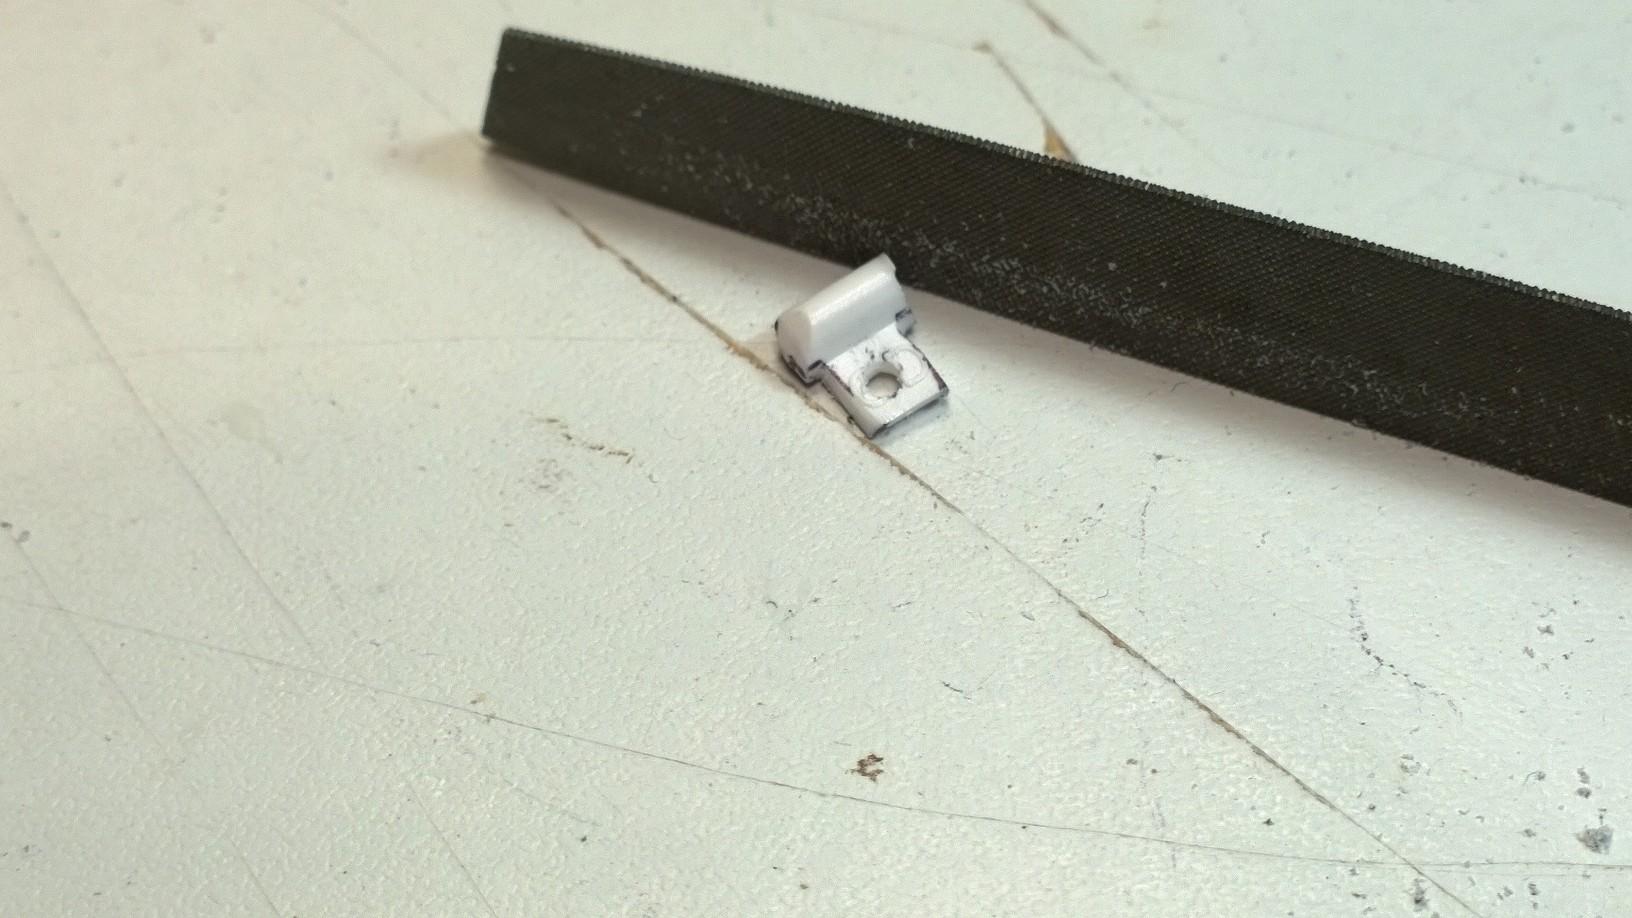
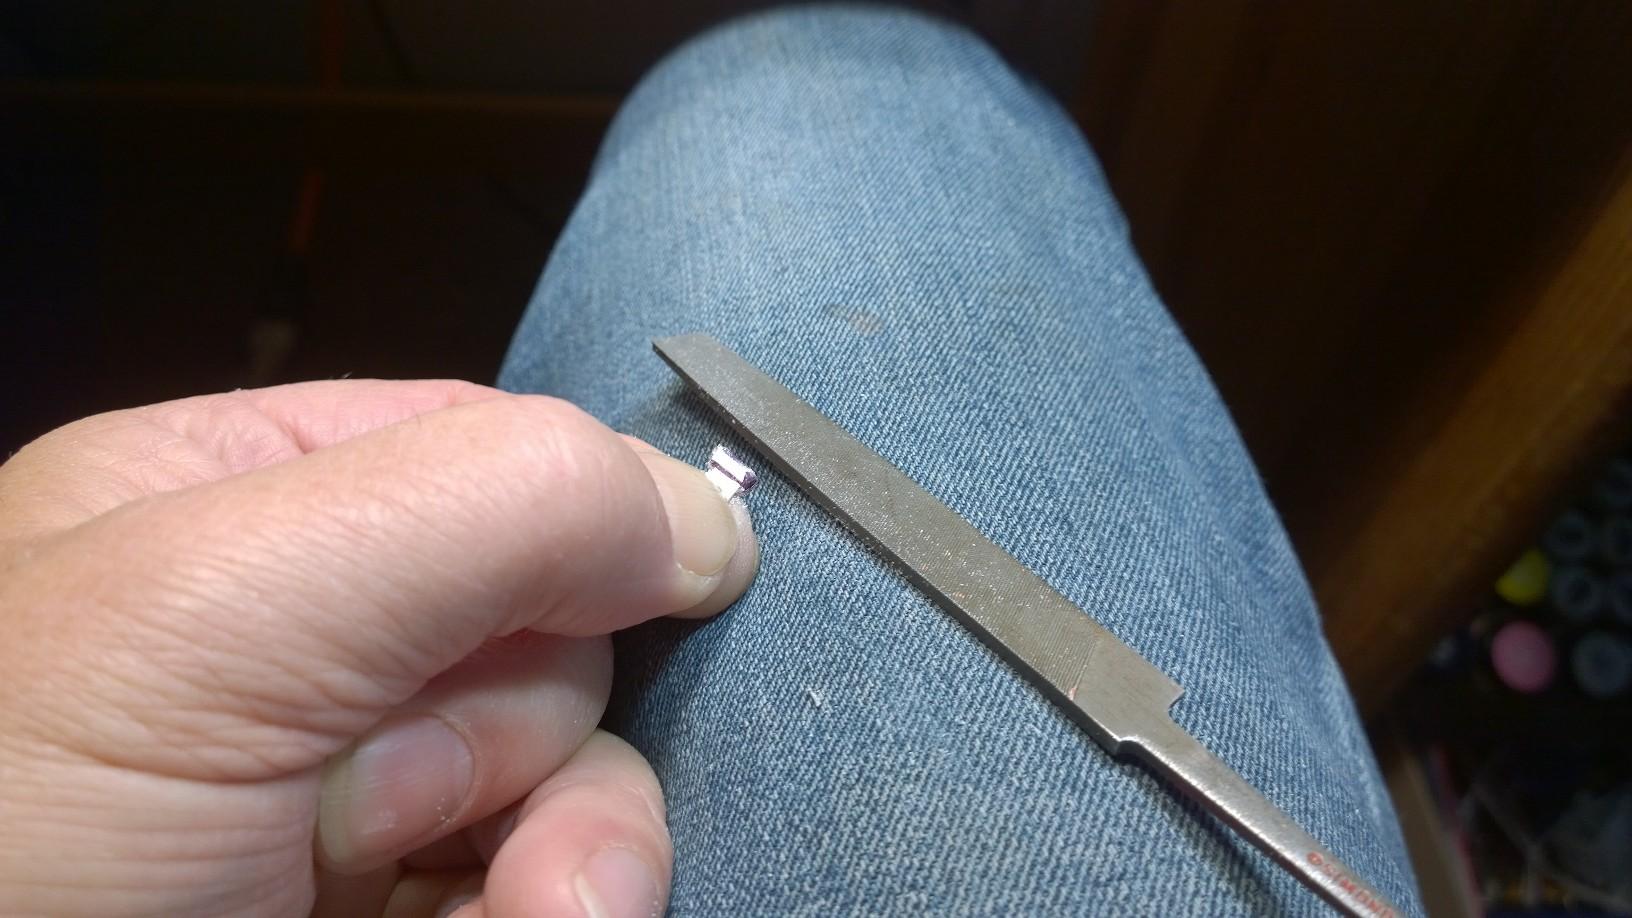
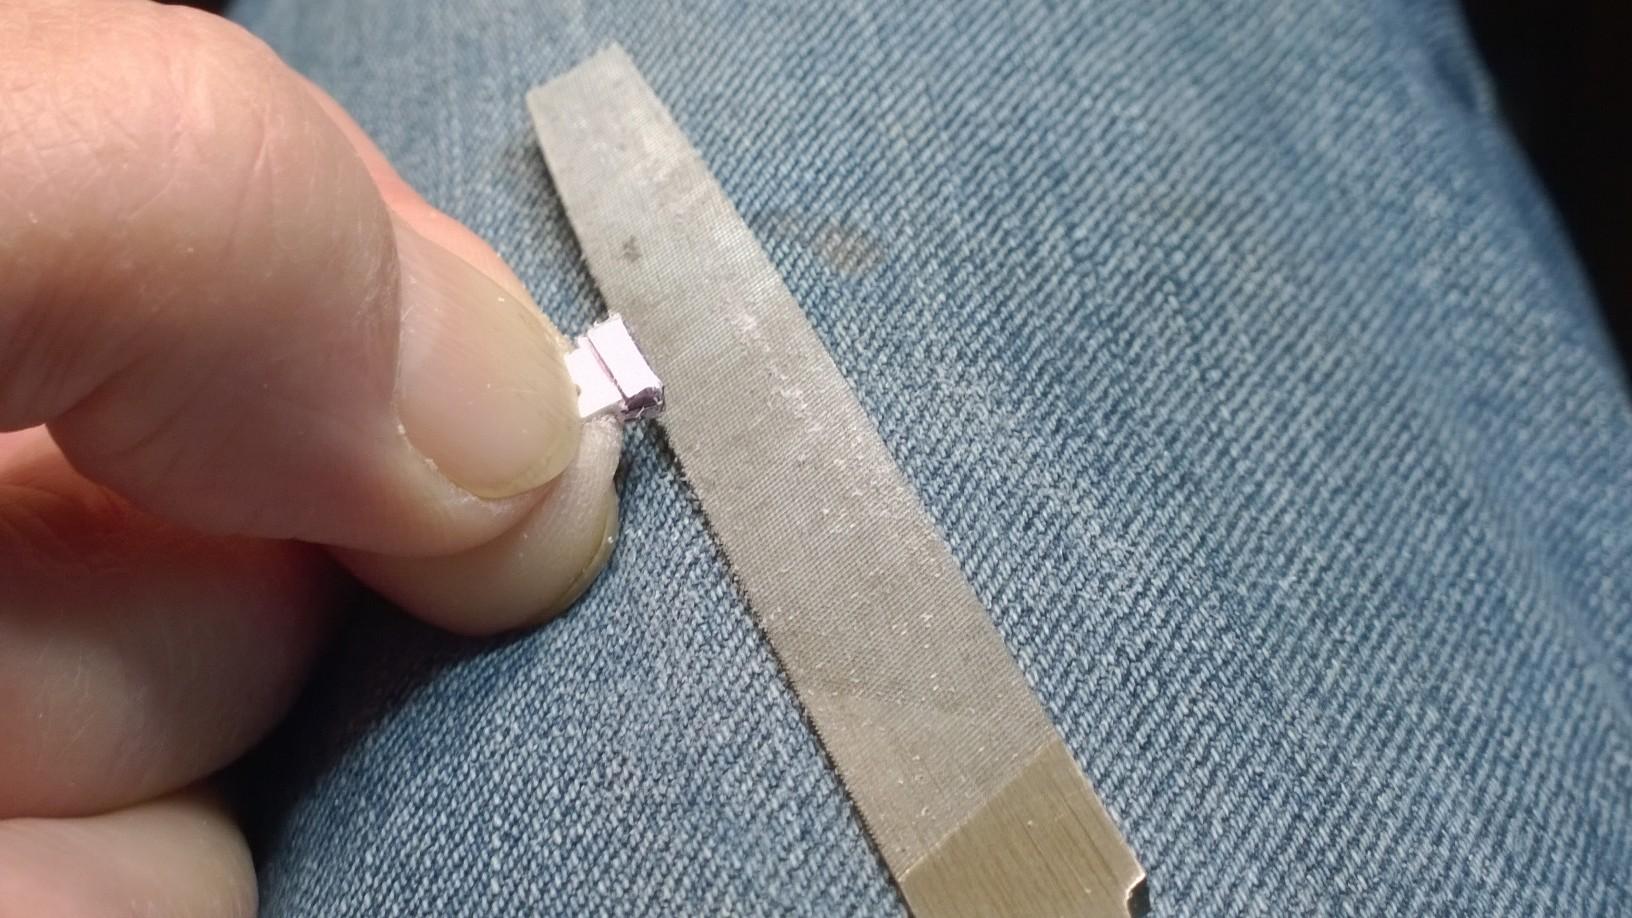
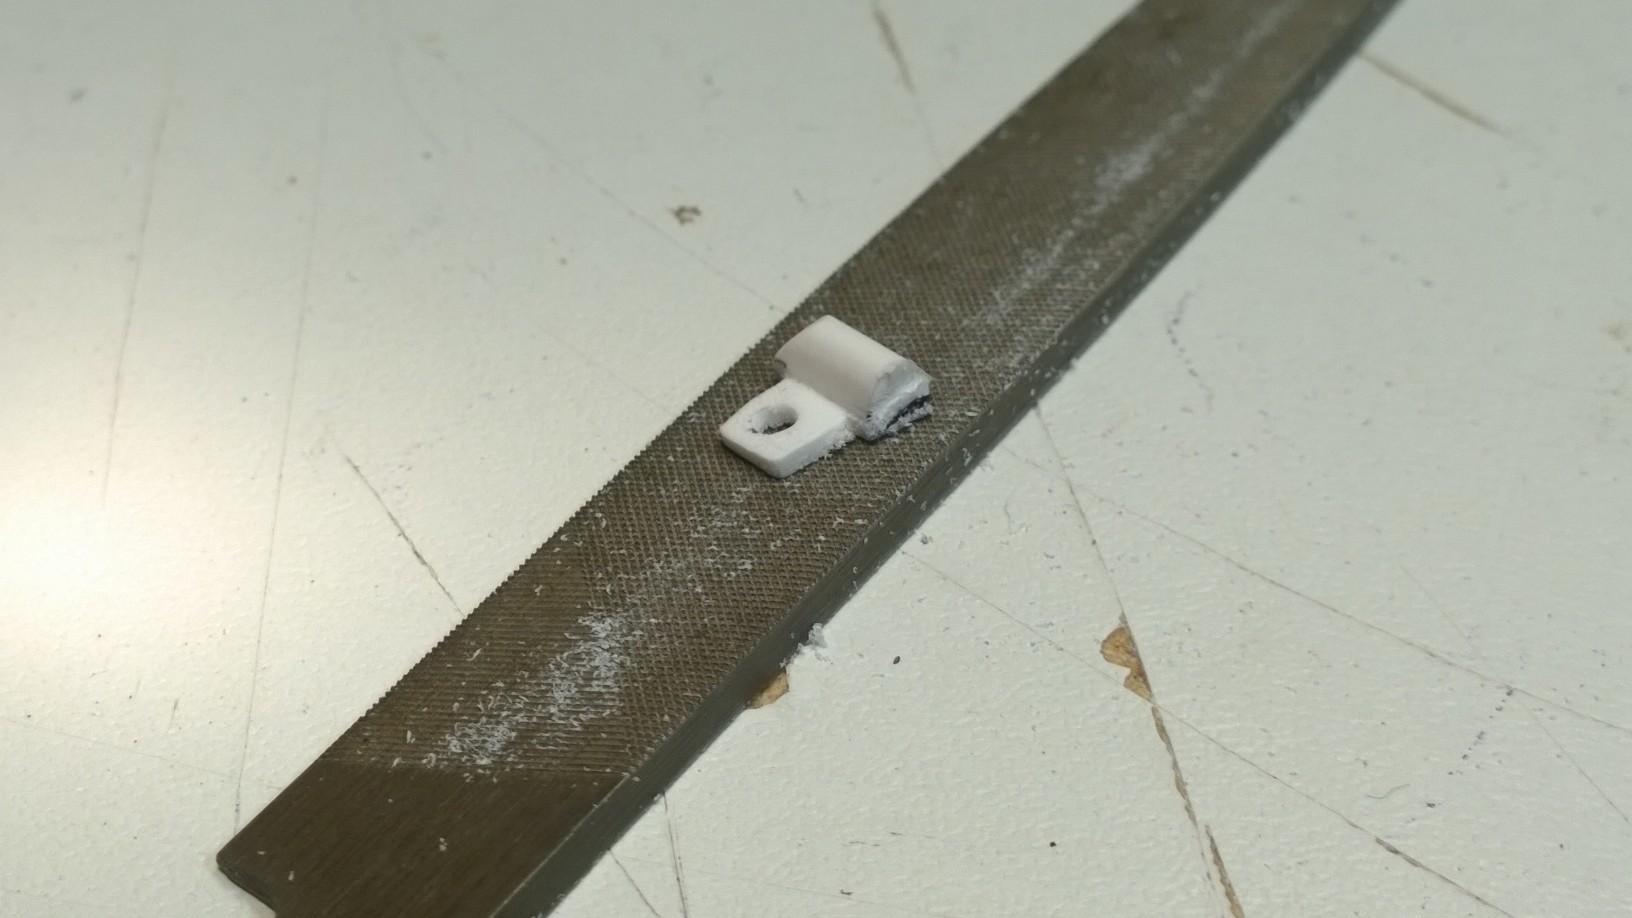
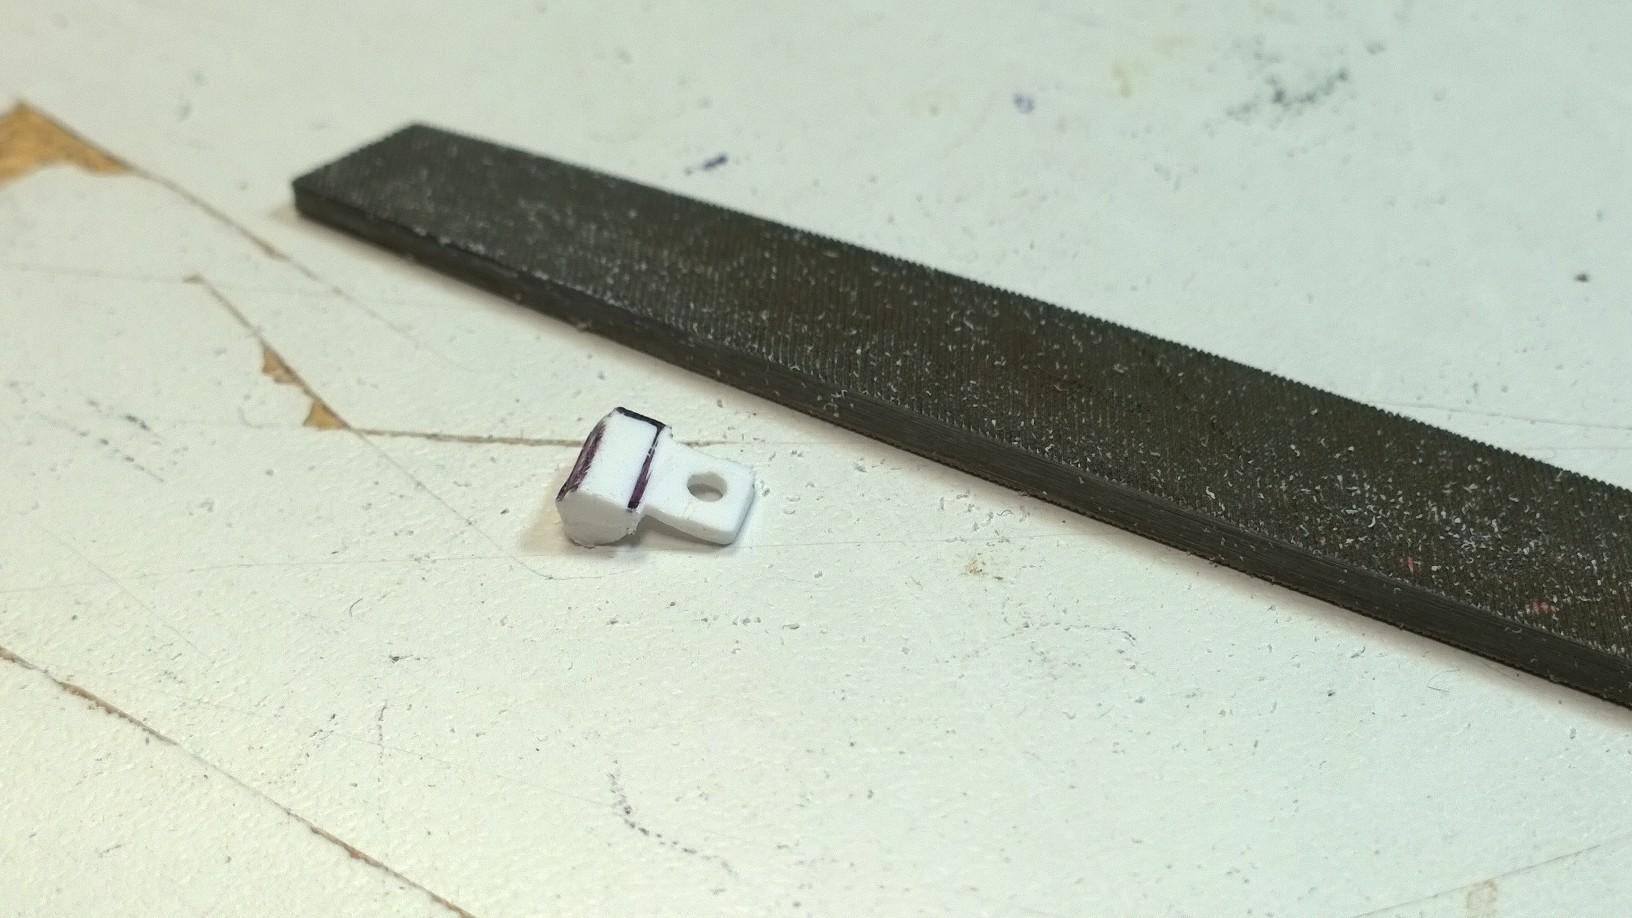
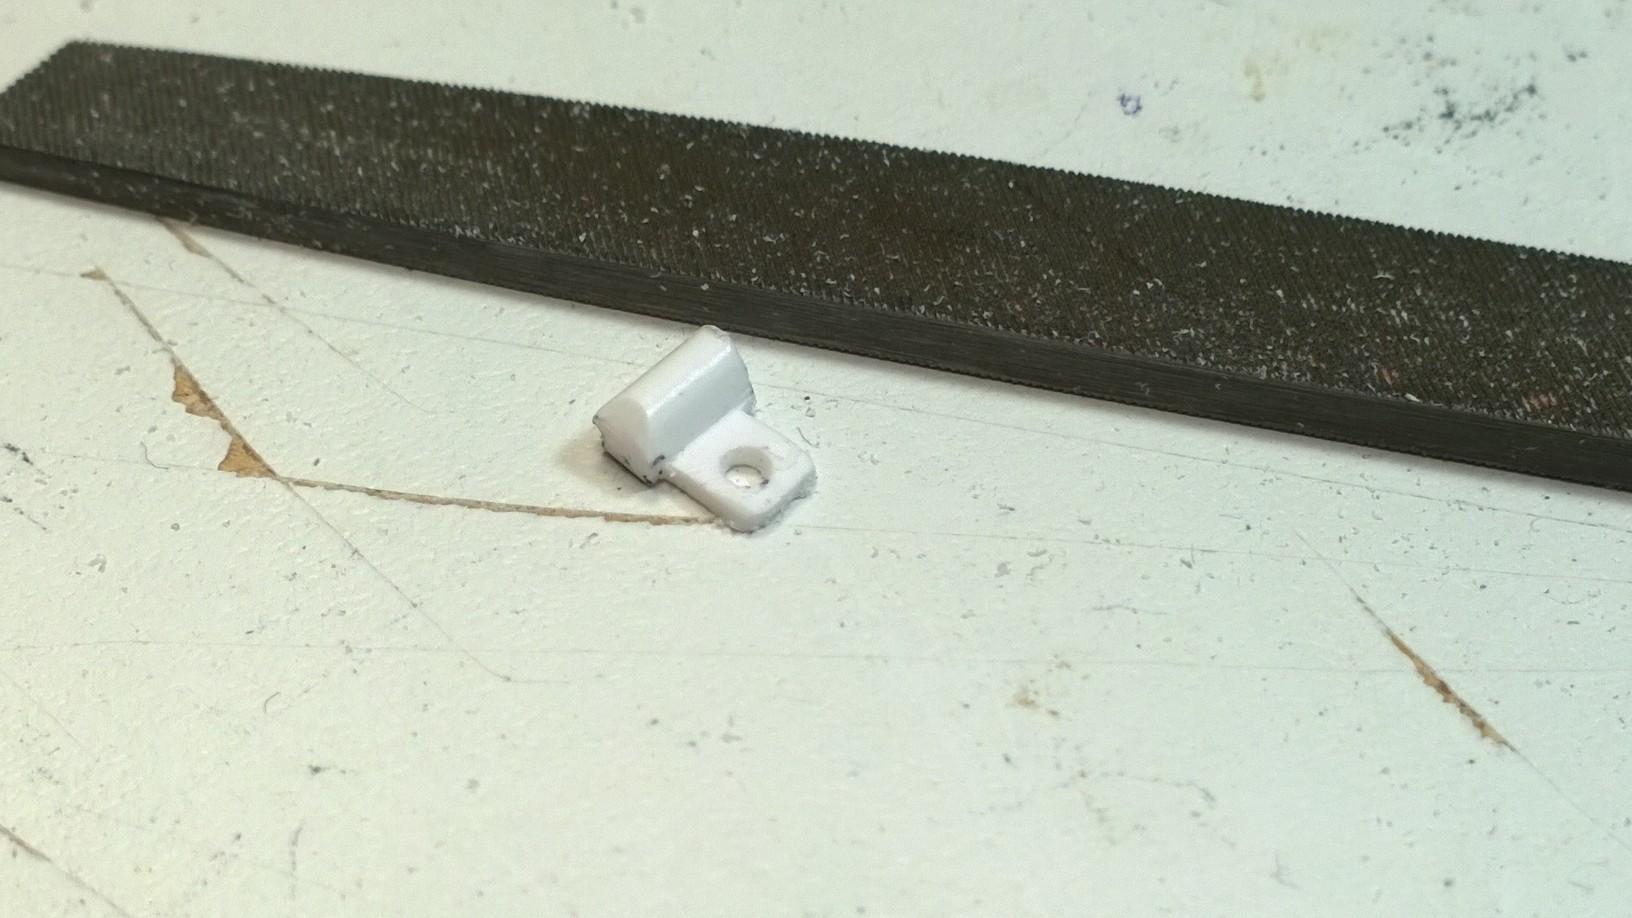
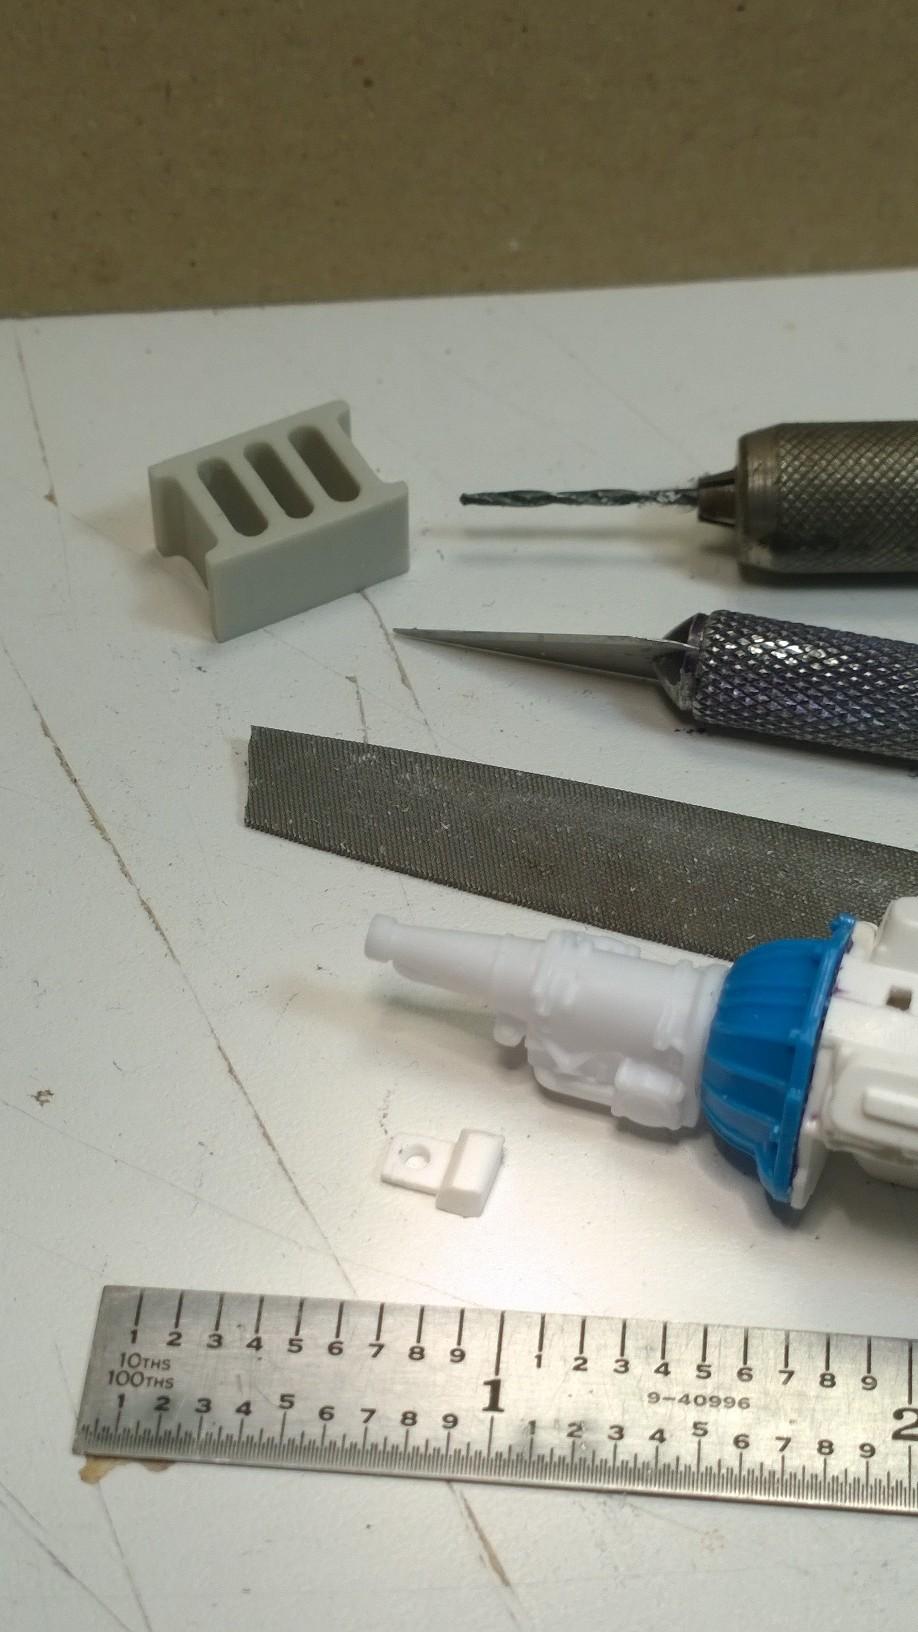
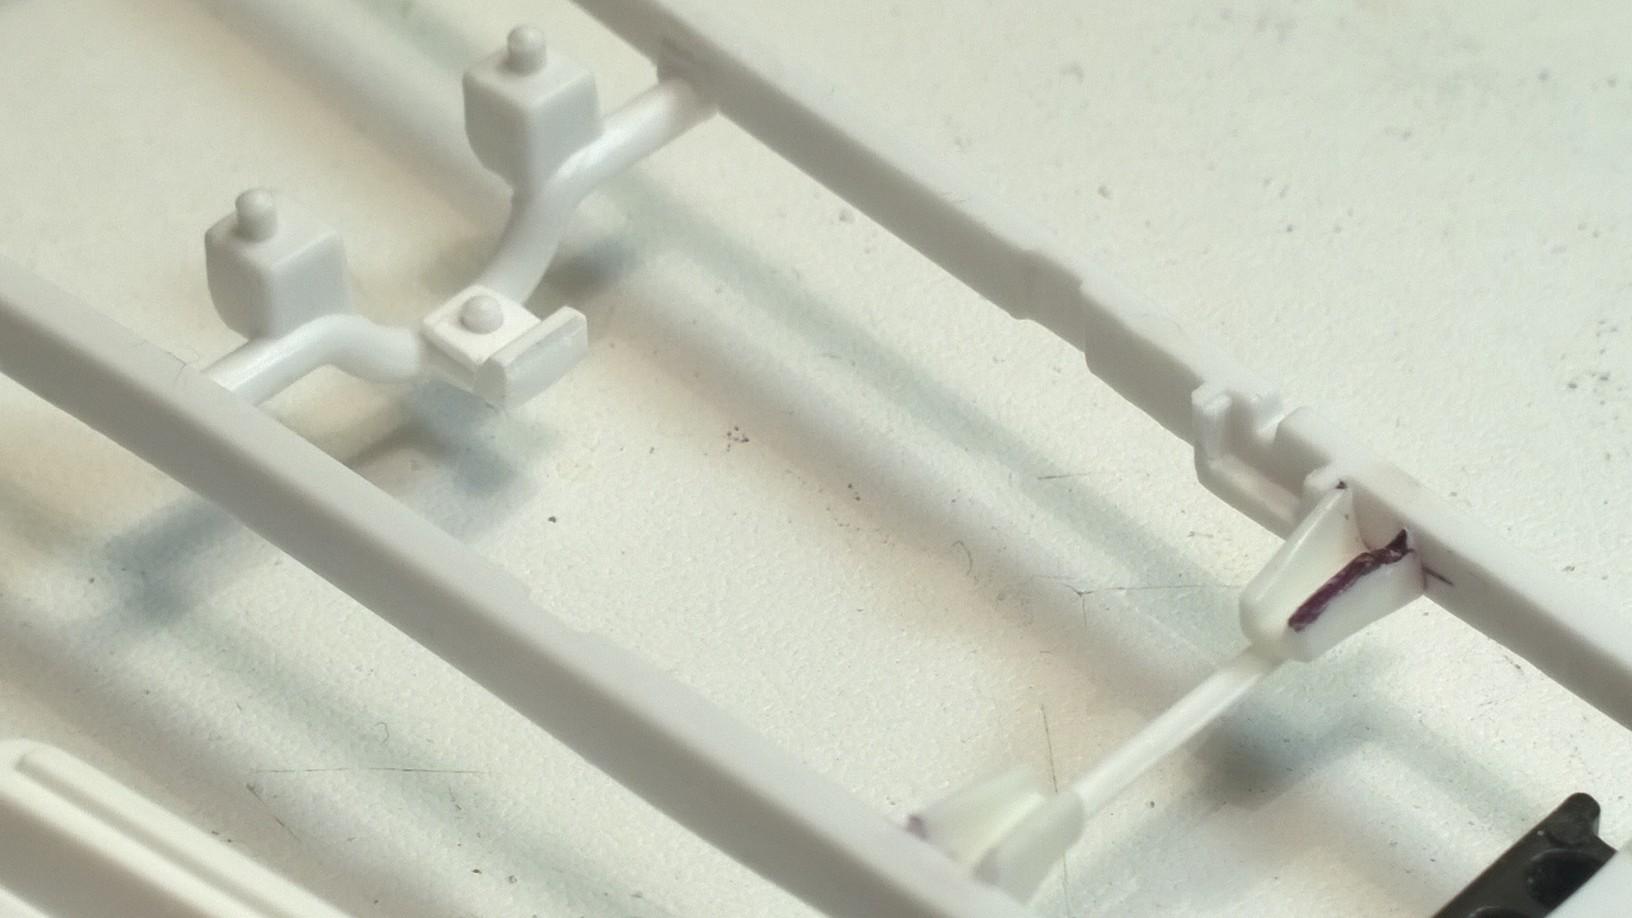
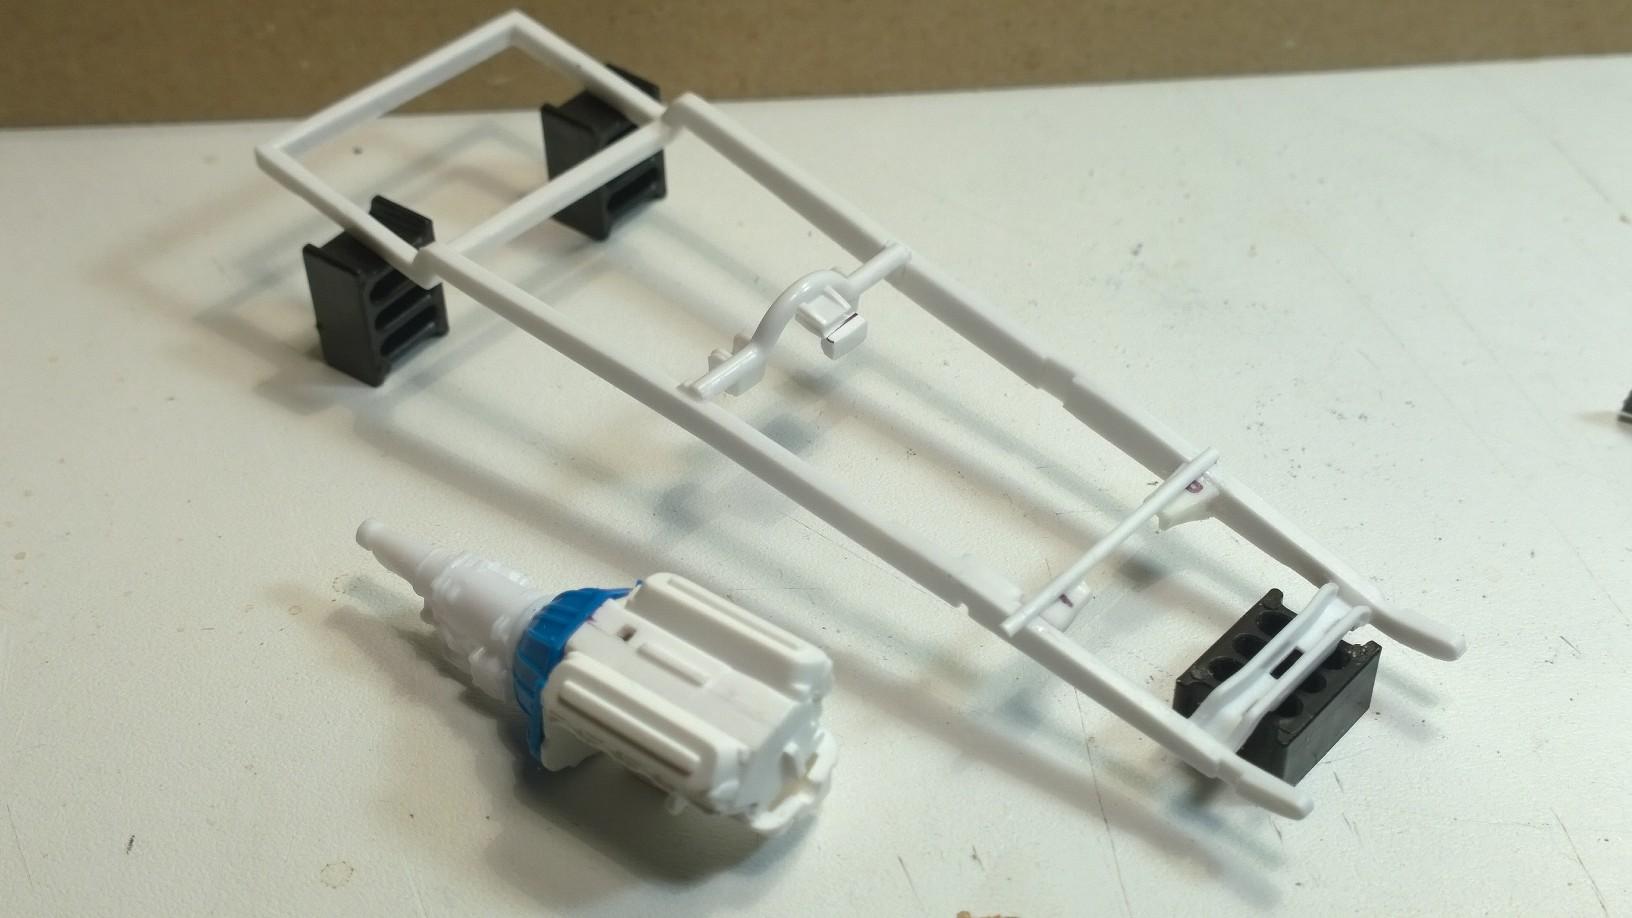
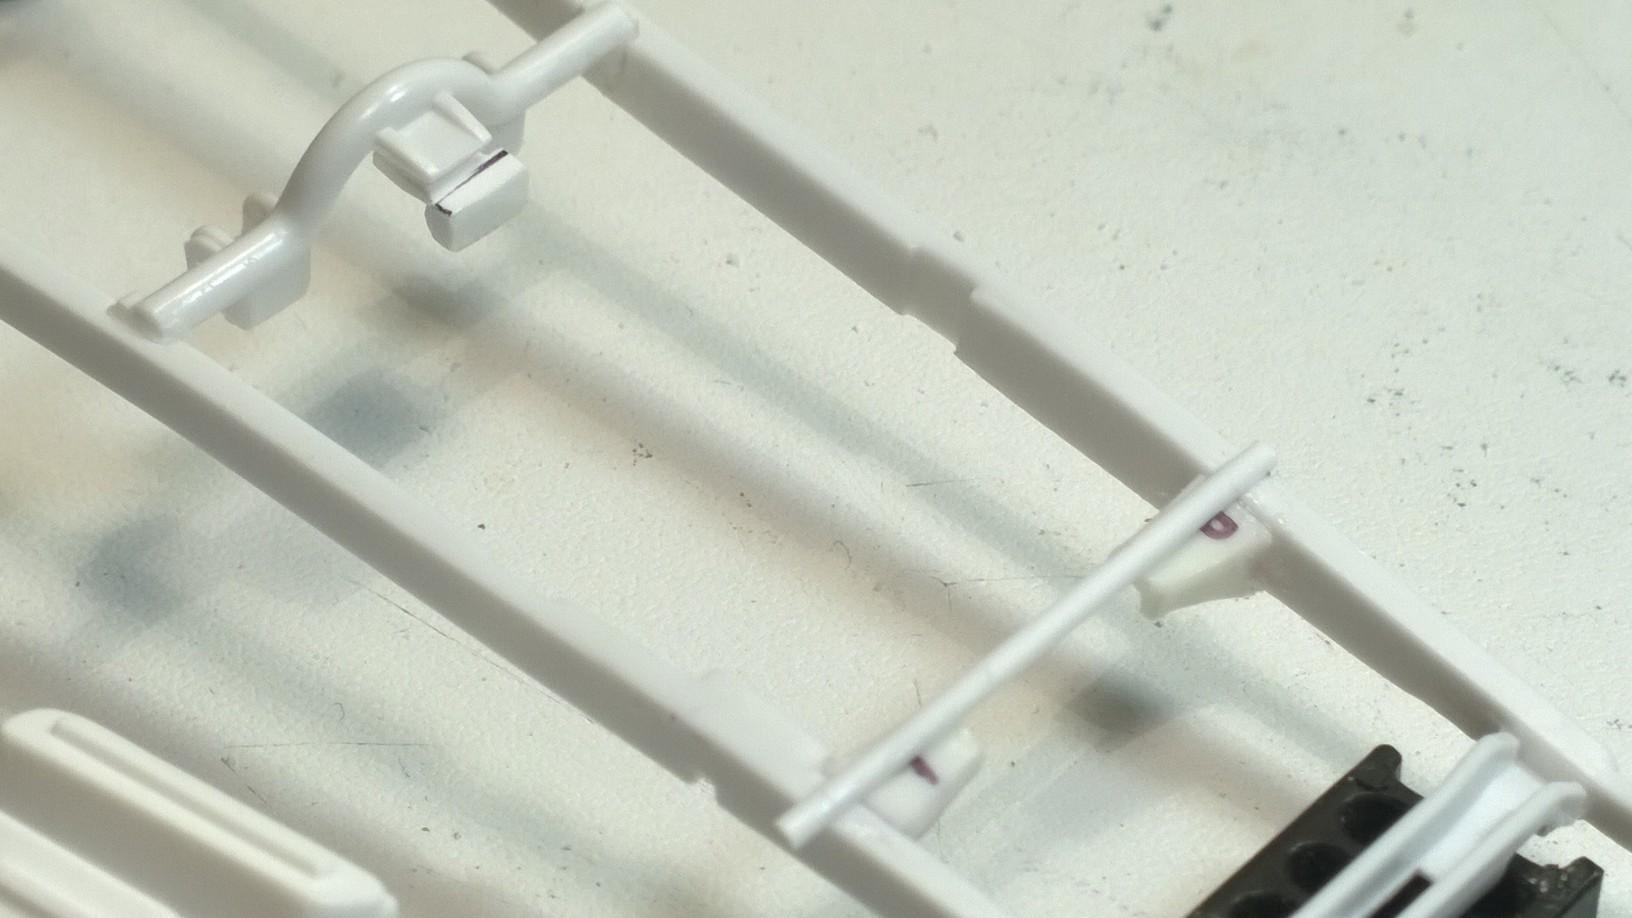
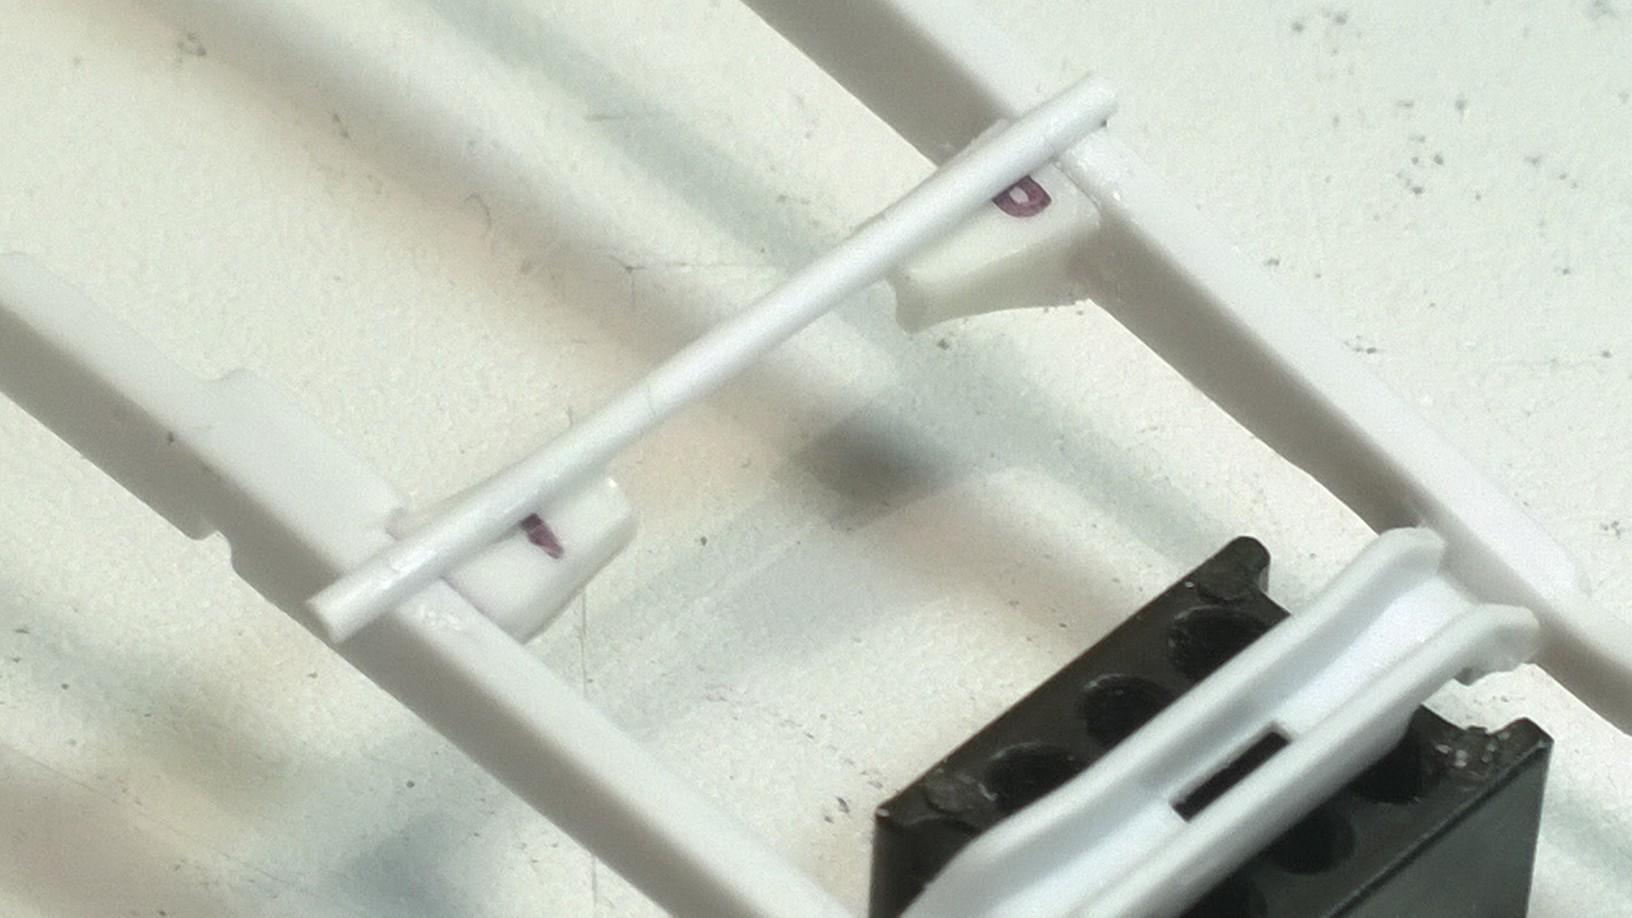
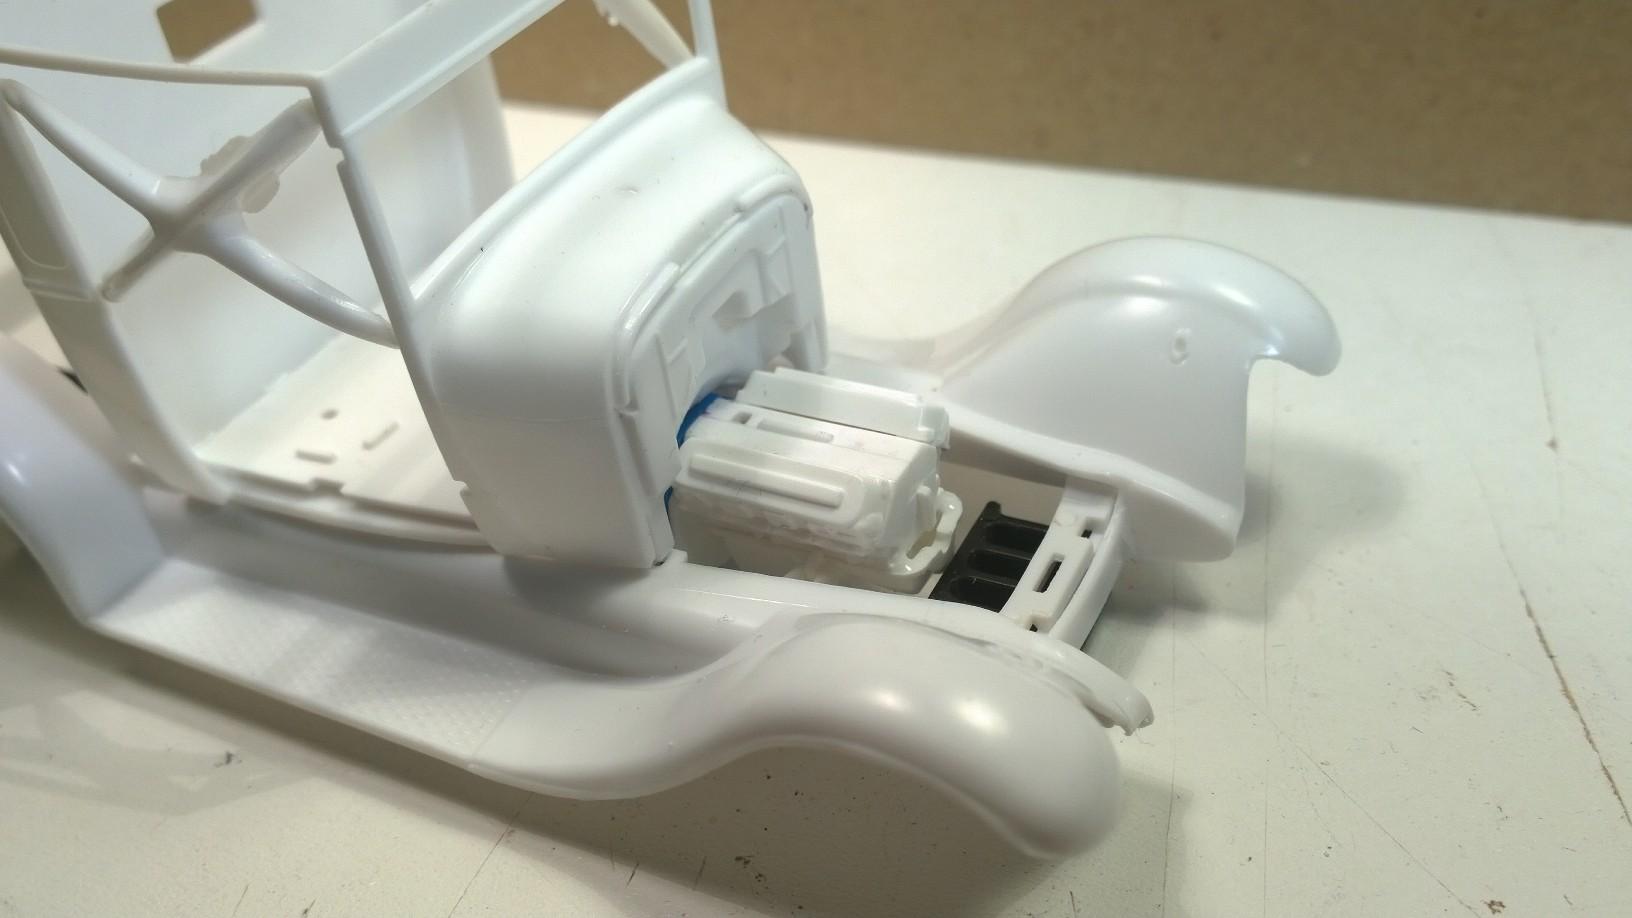
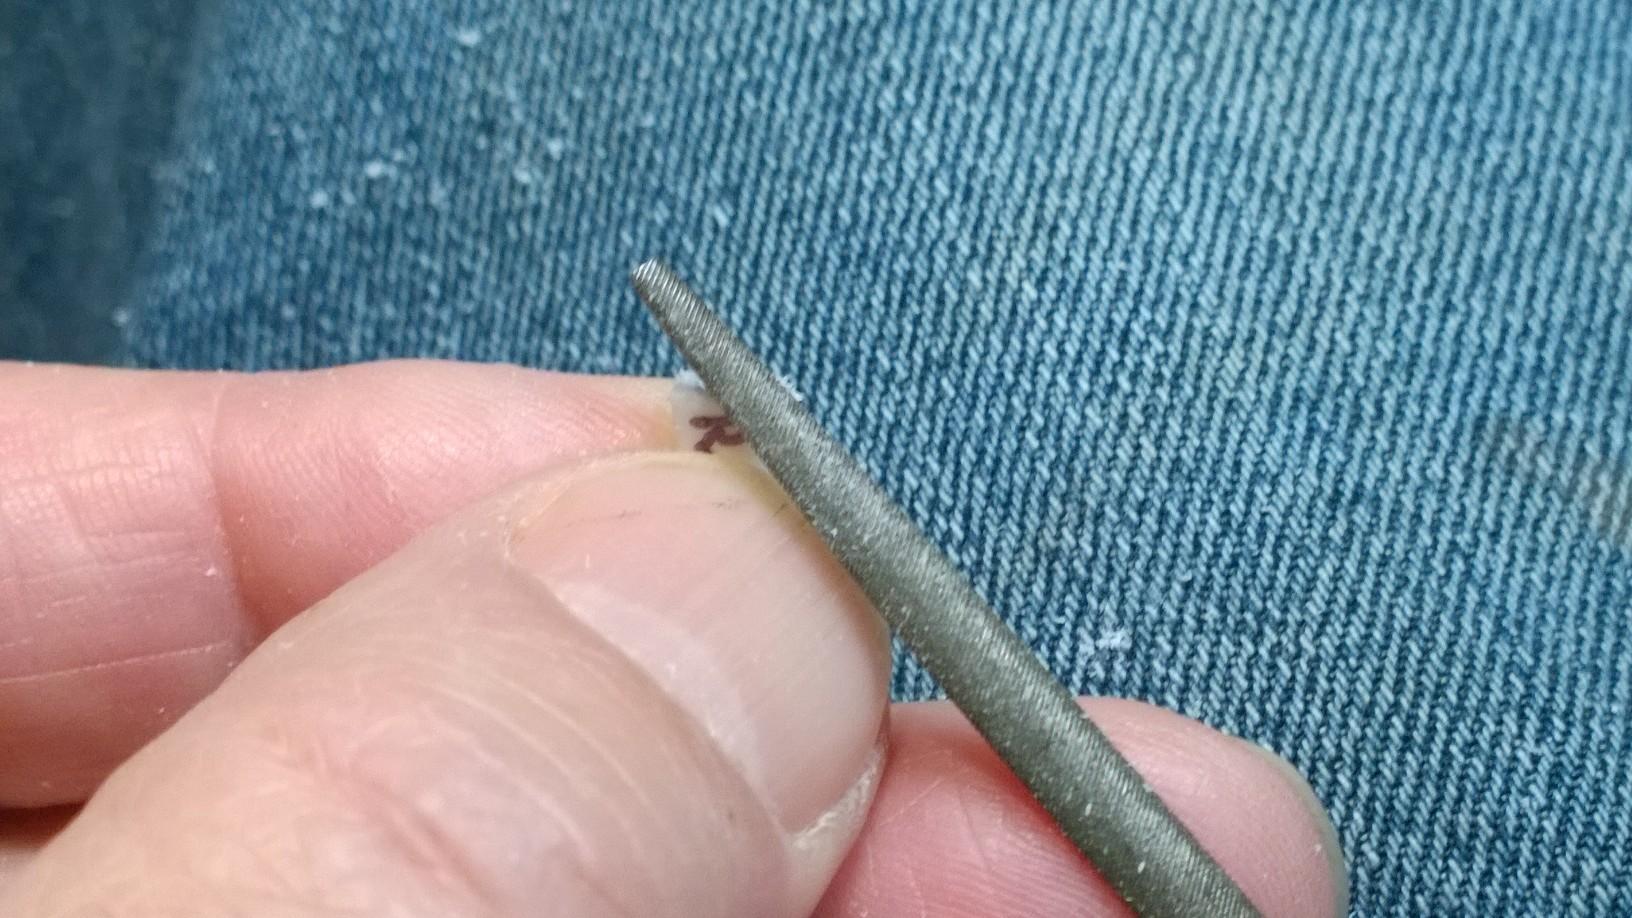
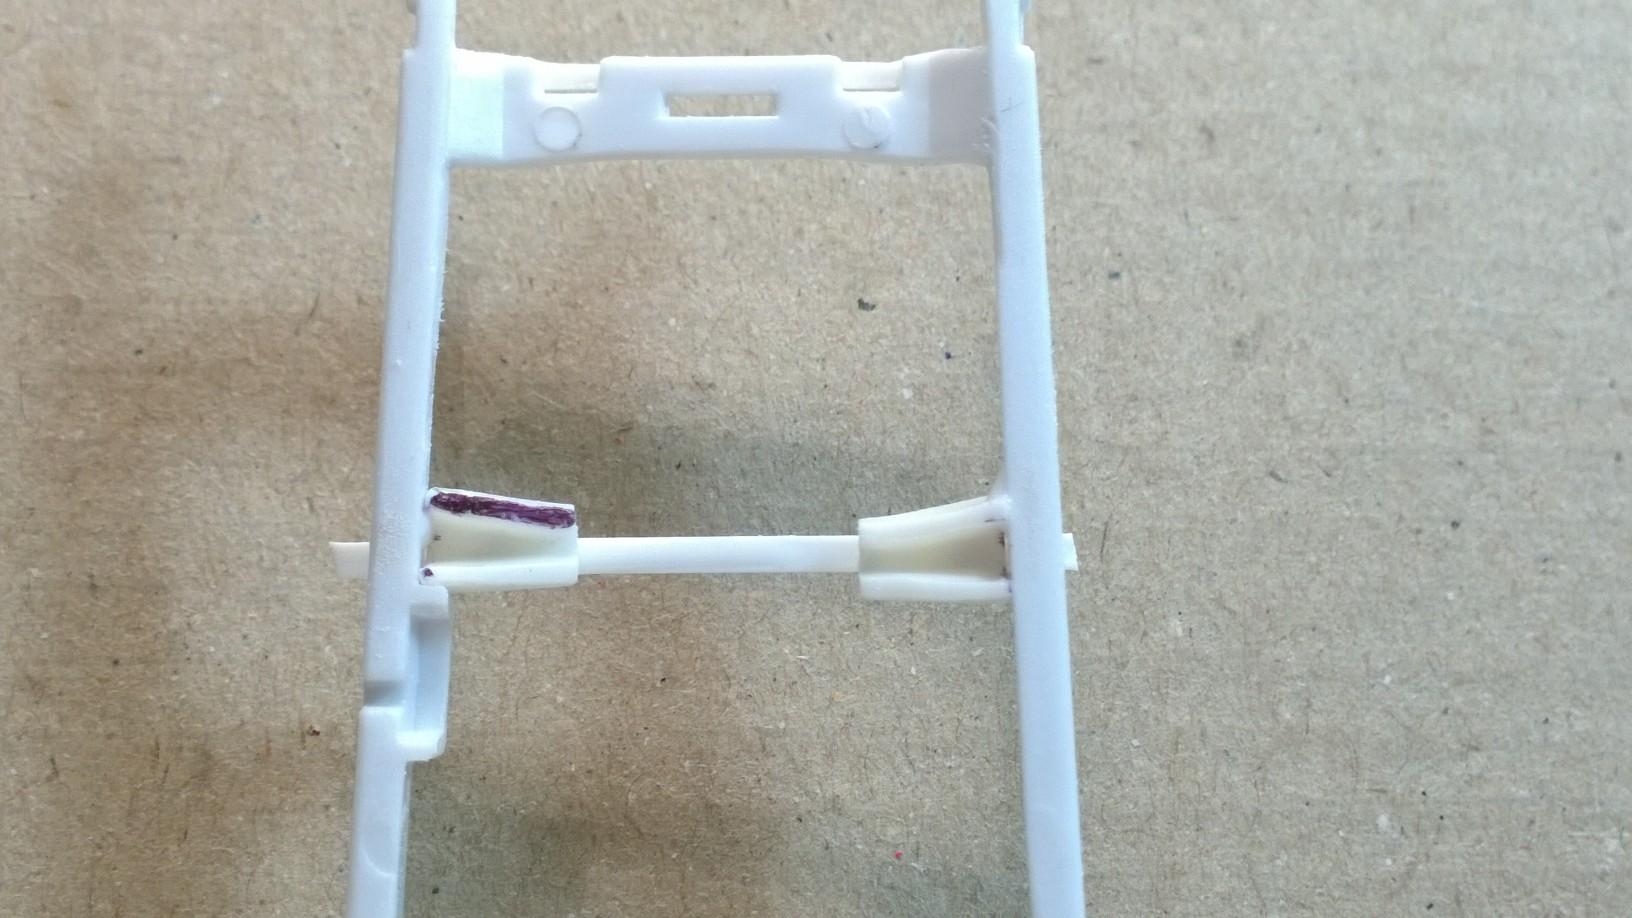
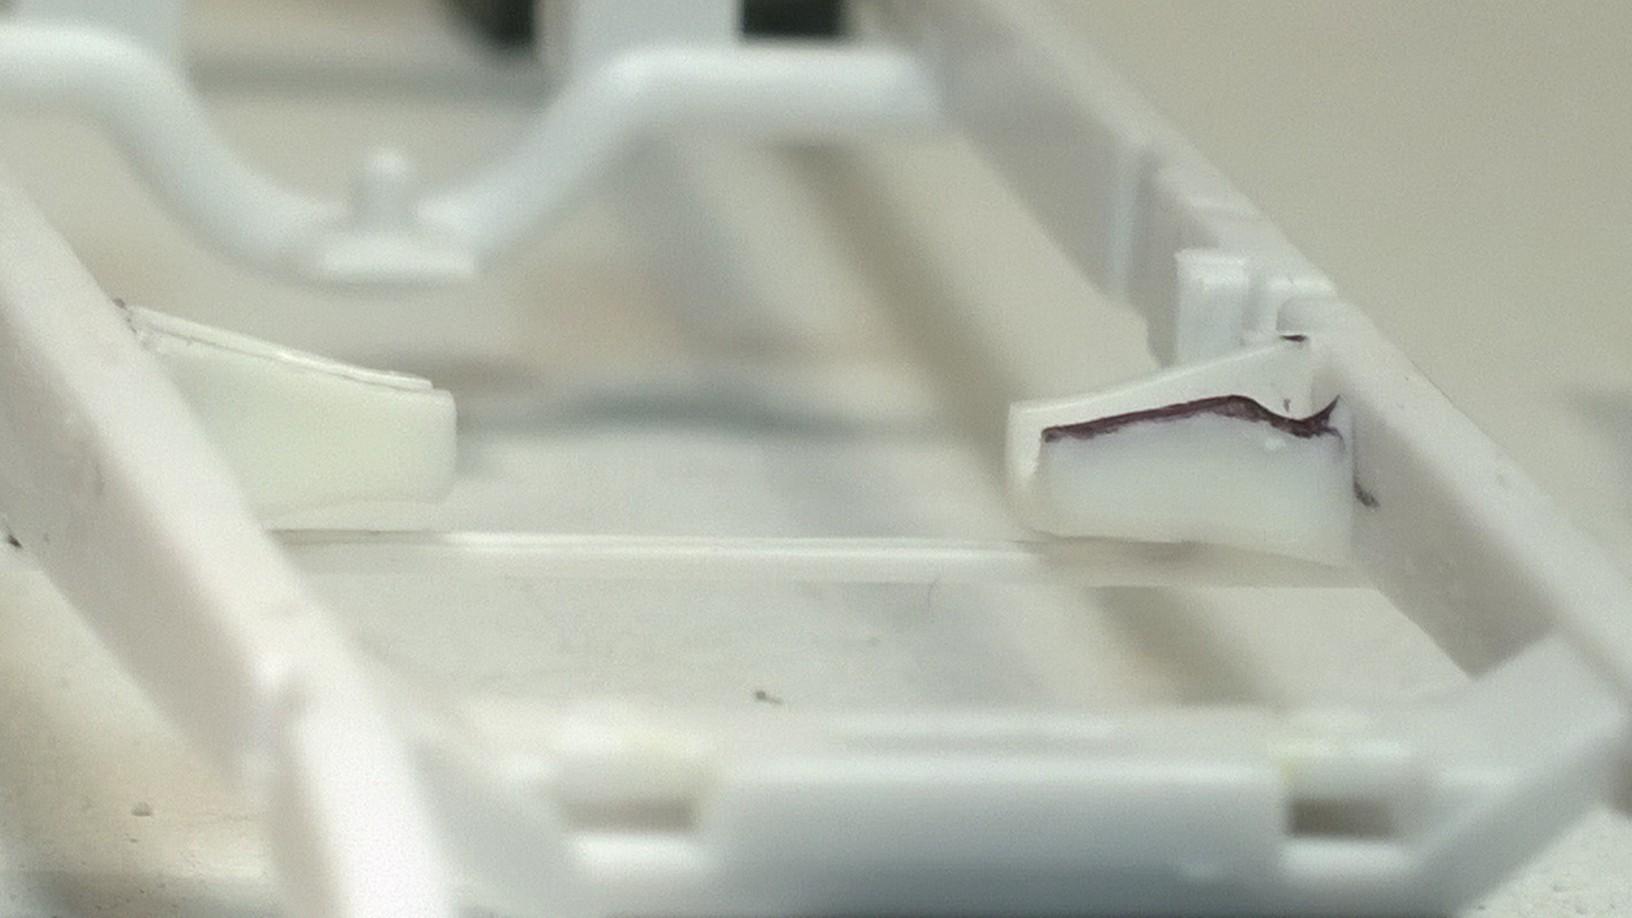
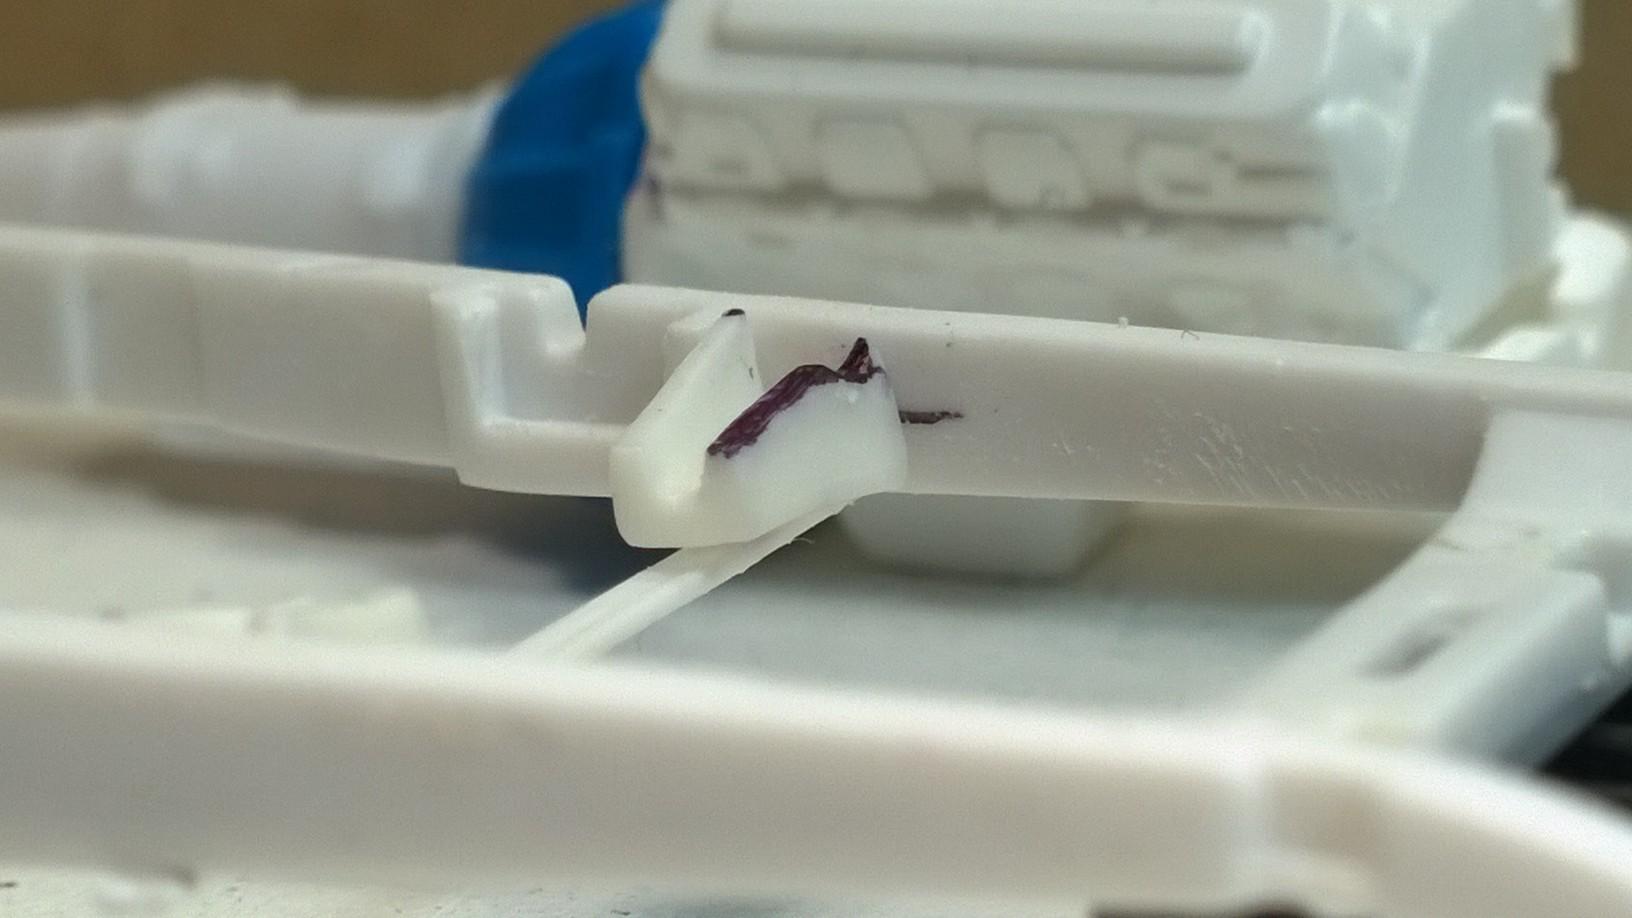
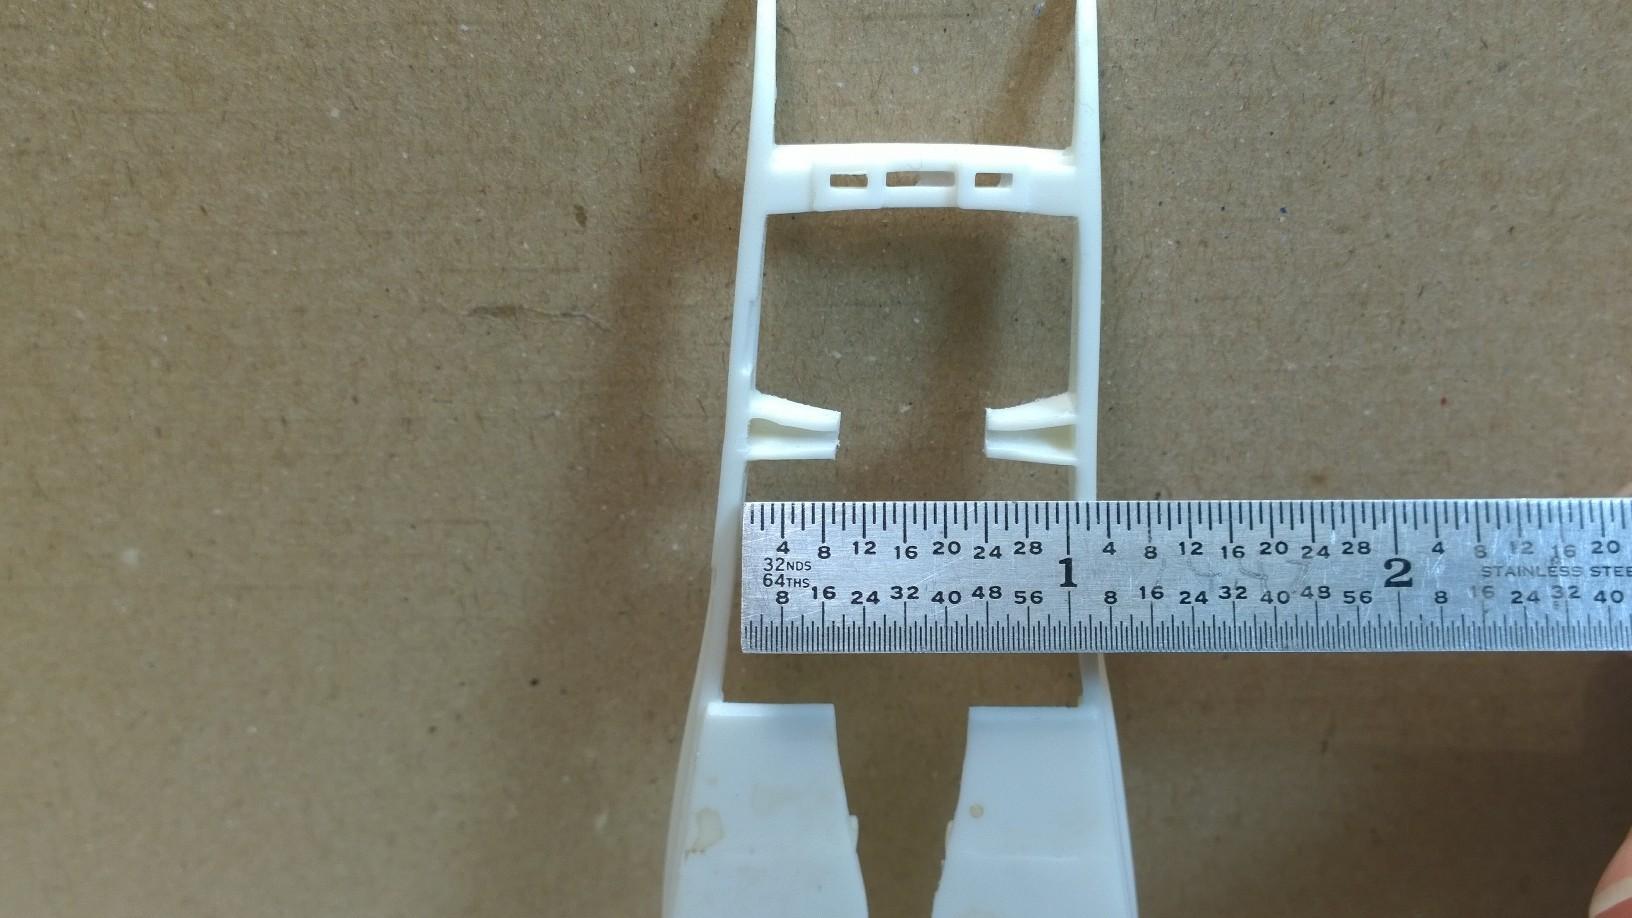
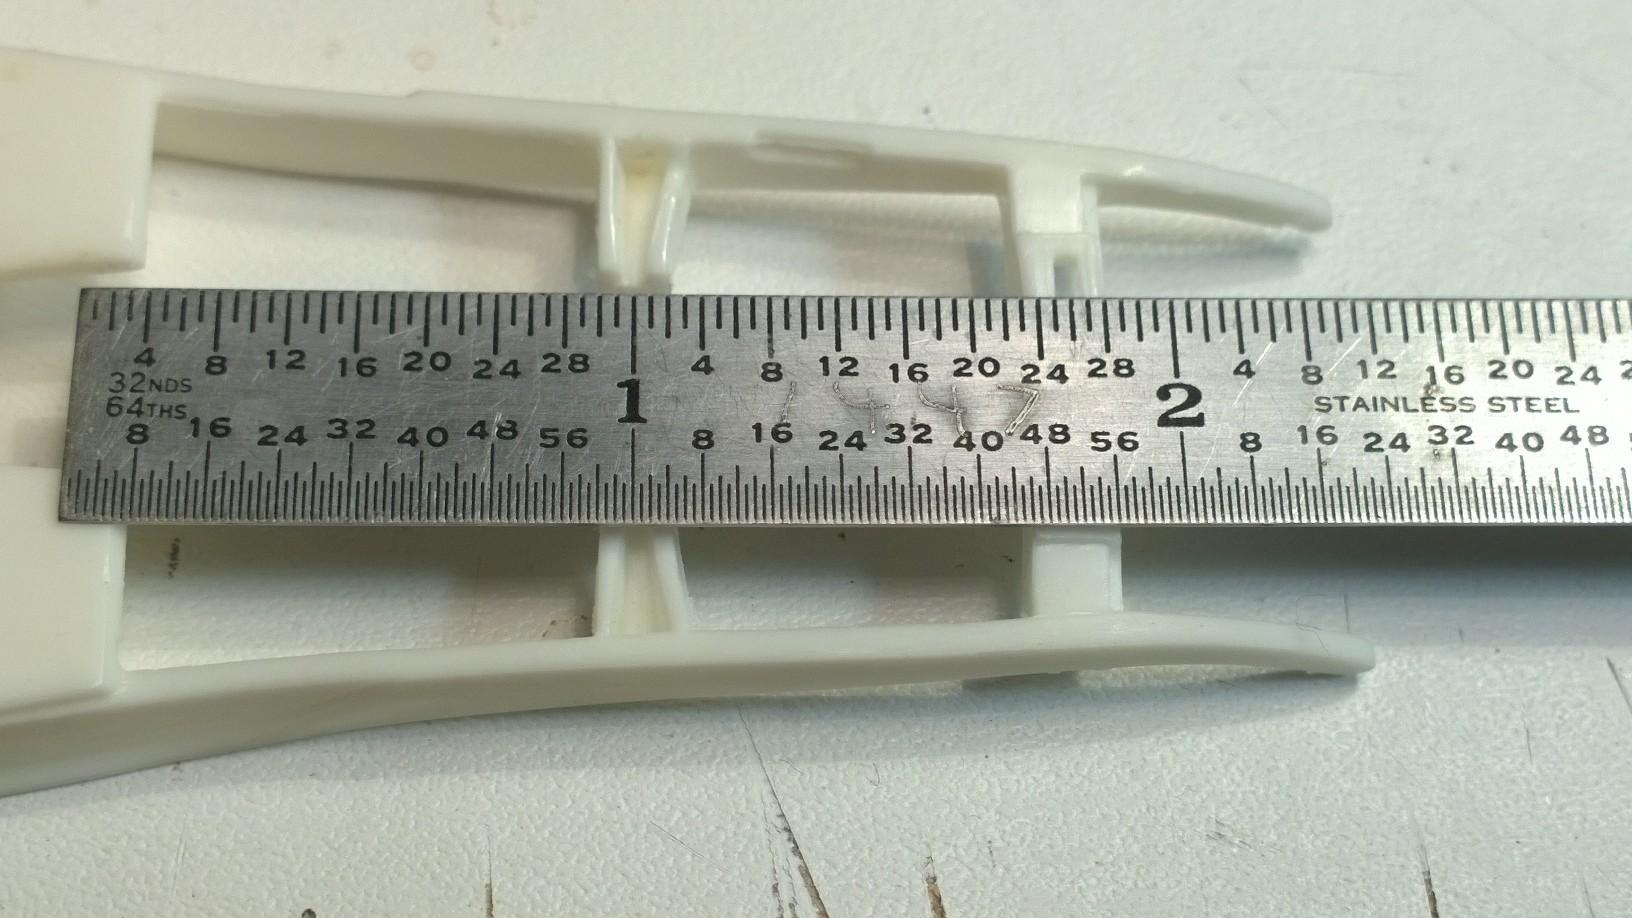
Need a Part? Mark a Part! When we left off... we needed to to make an adapter to cover the gap between the crossmember and the transmission mount on the bottom of the tail shaft. Here we're going to use a piece of sprue to make the adapter. The adapter will attach to the pin in the center of the Roadster crossmember... Just a couple of measurements: width And, length... Transfer the measurements to the piece of sprue... Black out the pattern on the bottom side... And, also on the top side... Drill the mounting hole that will place the adapter on the pin in the center of the Roadster crossmember. Using a flat file, the adapter will take shape... Remember, push your file across the surface to be removed, shave a little with each pass. Checking your progress often... here we are taking the line. Flipping the part over and shaping the underside... As the adapter starts to take shape, blacked out areas start disappearing. Almost flat on the bottom... Laying the file on the work bench and pushing the bottom of the adapter across the cutting teeth assures a flat even surface... Continue shaping the adapter from the top side... Just a quick look back, here are the tools we used to create the adapter from a scrap piece of sprue. Fitting the adapter to the pin on the Roadster crossmember... A closer look from both the top side... And, the bottom side... It's time to remove the Deuce motor mount guide... Just pop it off with a #11 blade. Time to drop the engine and transmission into place... Notice how the the pad on the bottom of the tail shaft rests on the adapter? Time to mock it up with the fenders... And, the engine and transmission... Check clearance above the chassis and fenders... And, in front of the engine relative to the front crossmember... Now, check out the firewall clearance... Looks good! Even the most insignificant part/step in the construction process lays the foundation for future assembly of the project build. Proper use of even the most basic tools helps assure that the end result is in accordance with the planed path towards the final product end. Here's a little tip: Plan your work and work your plan. -KK
-
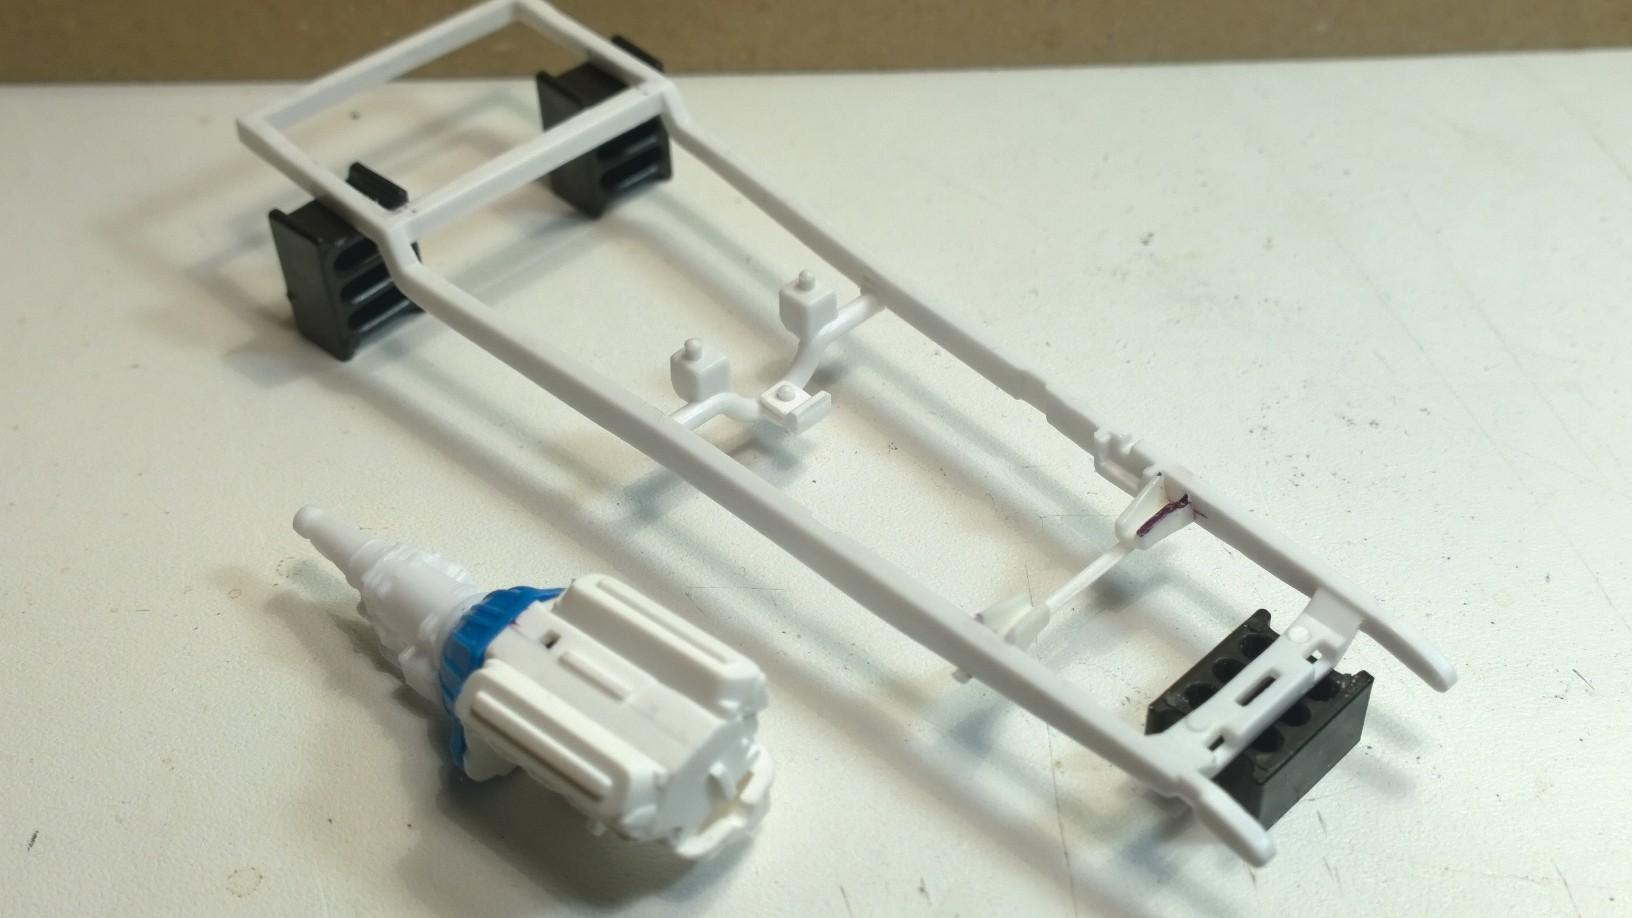
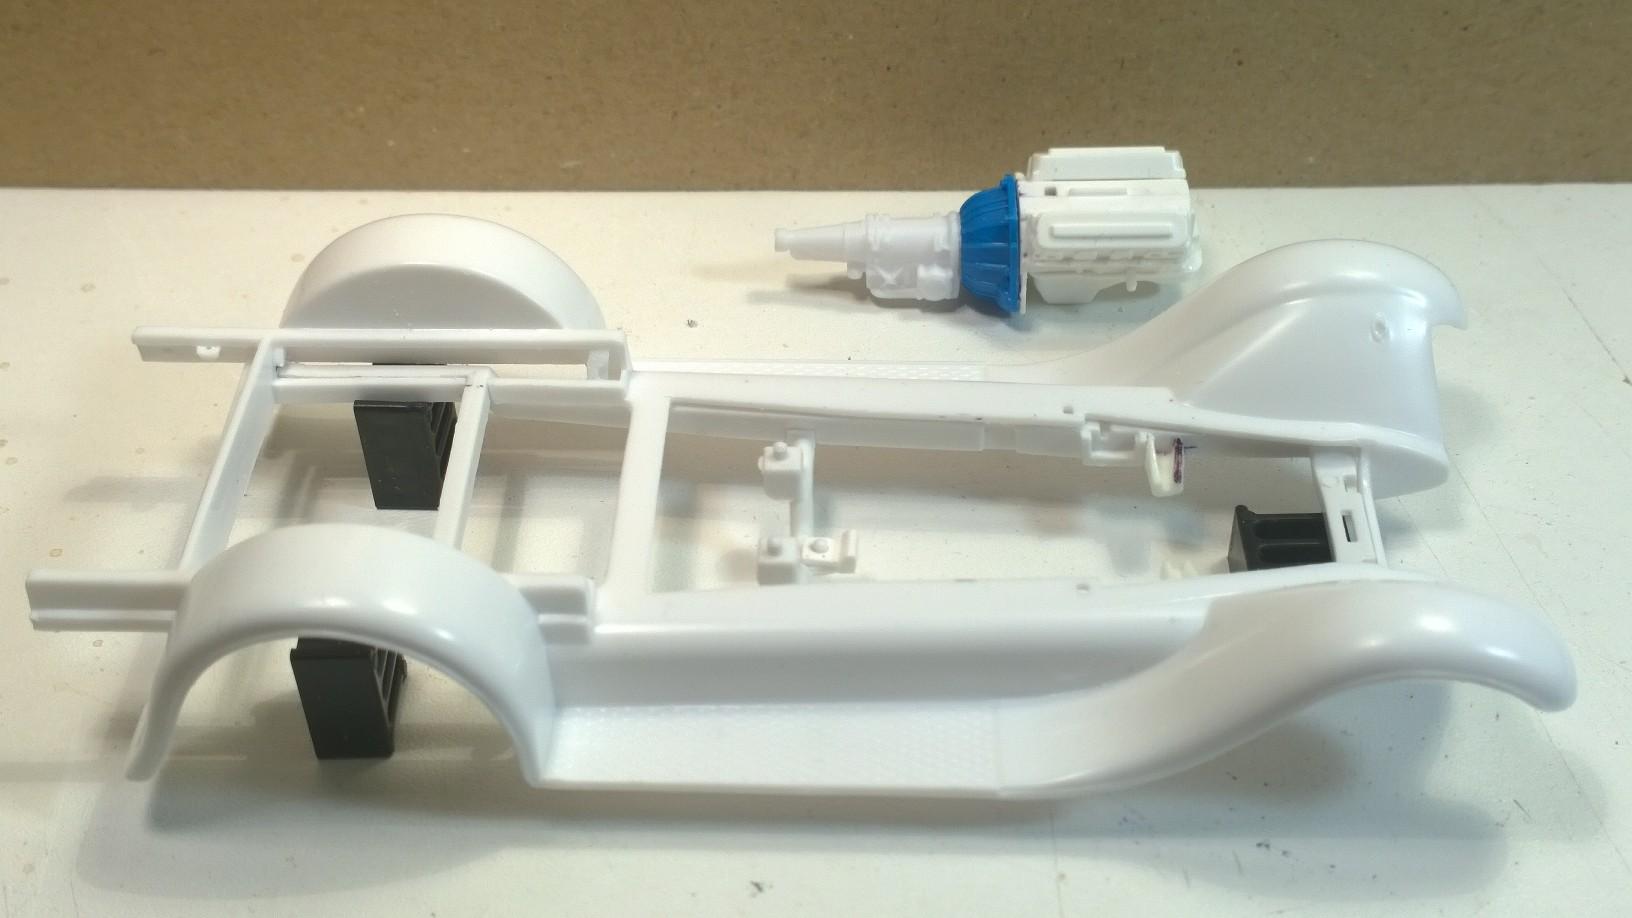
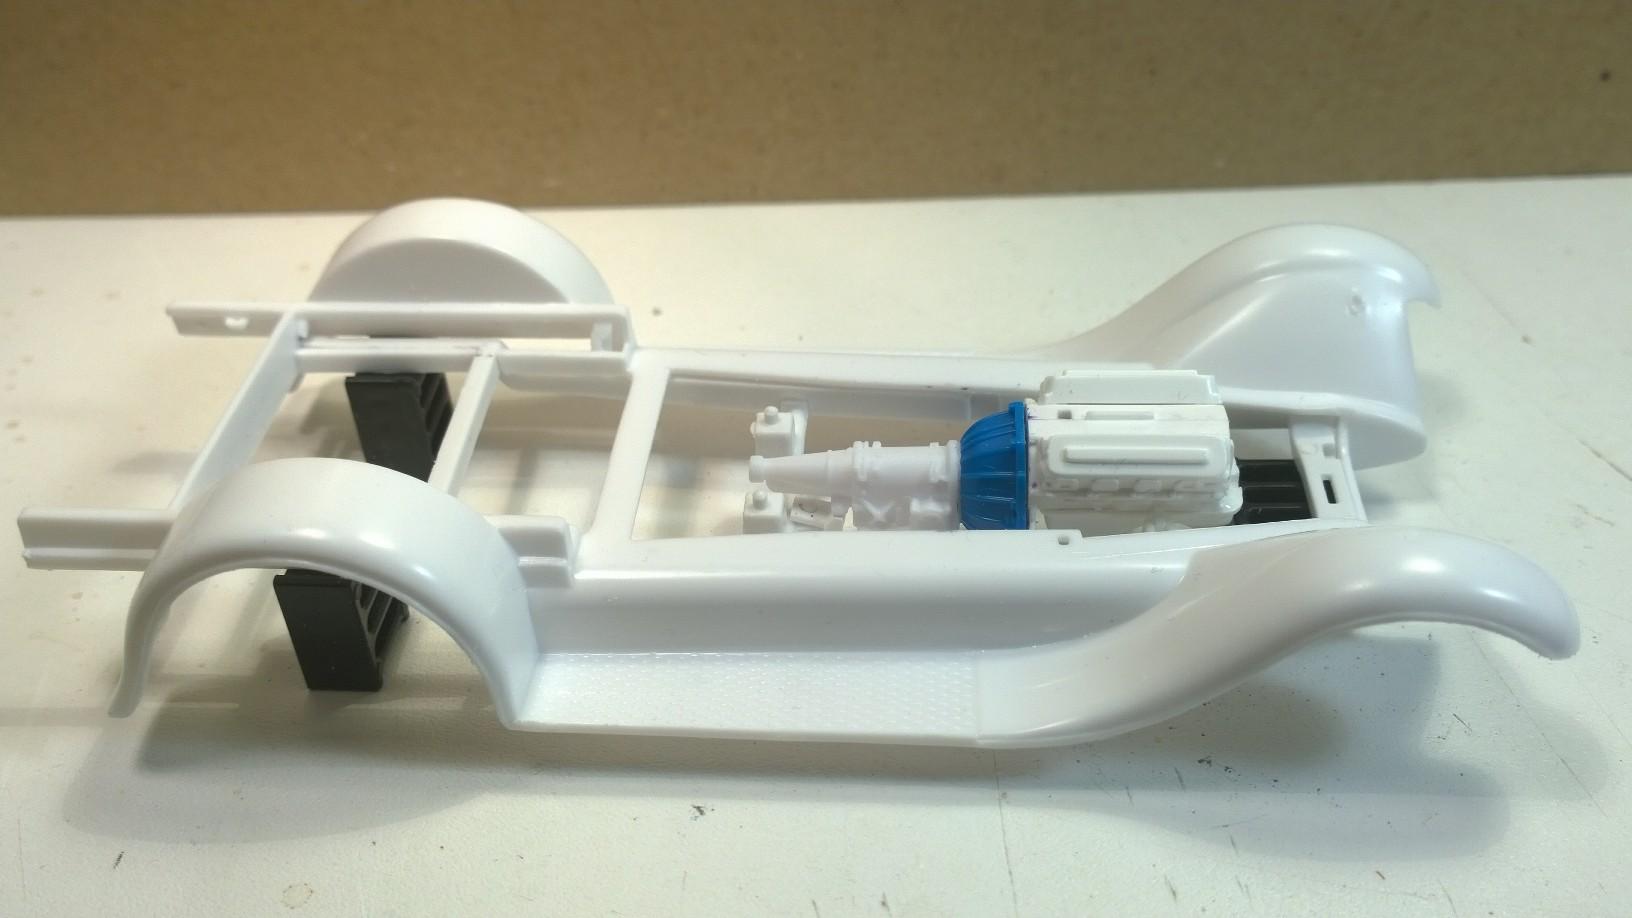
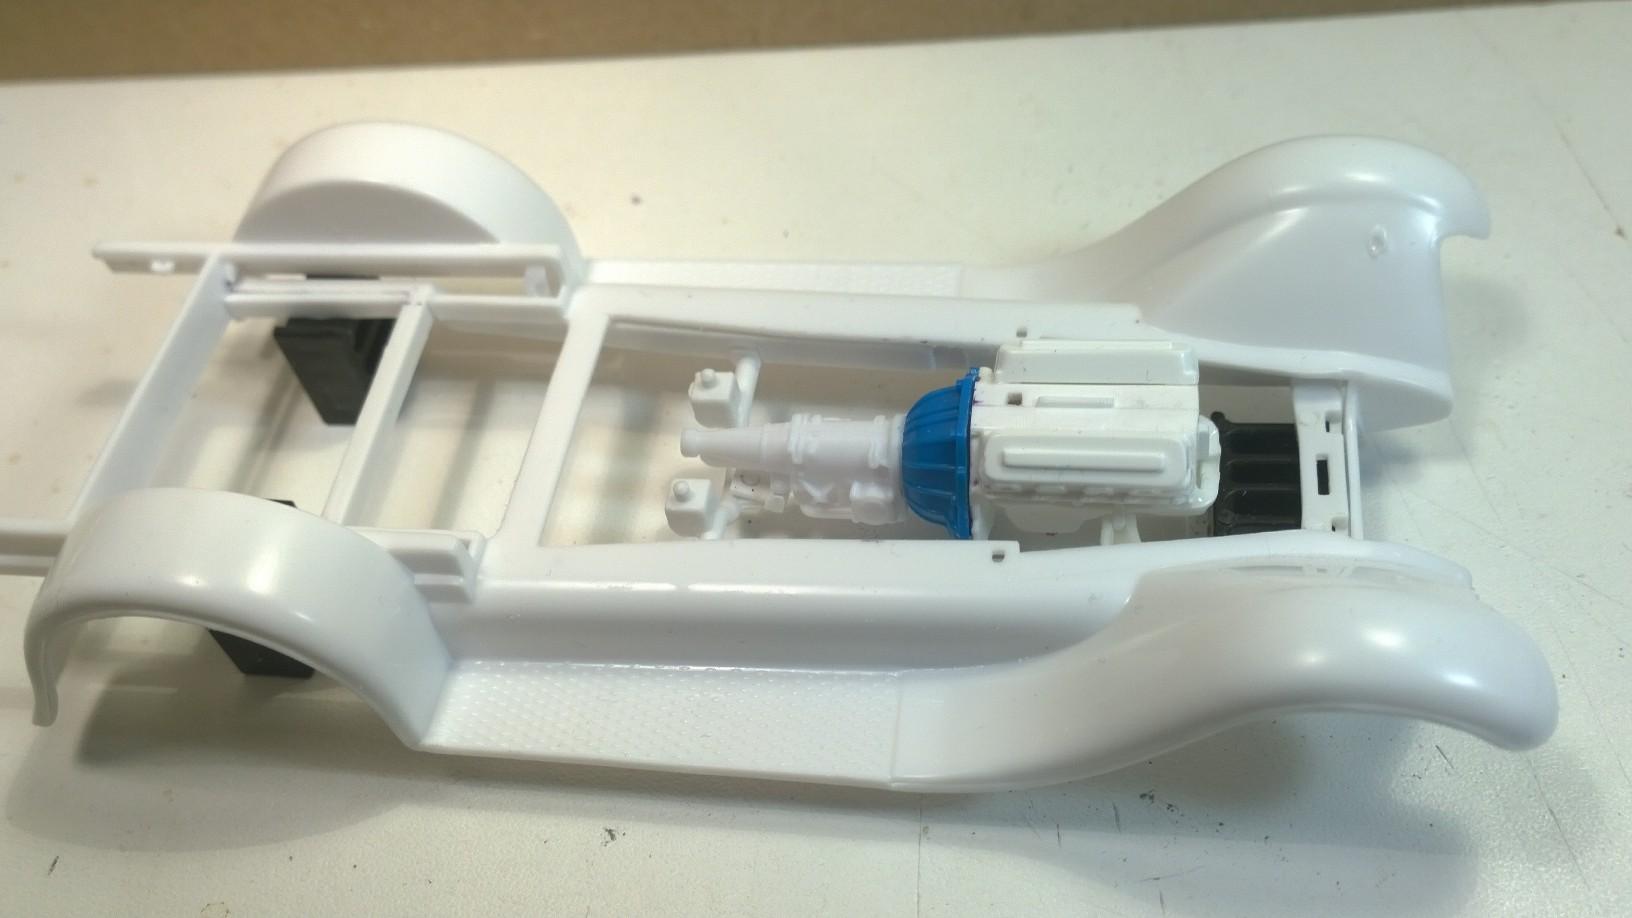
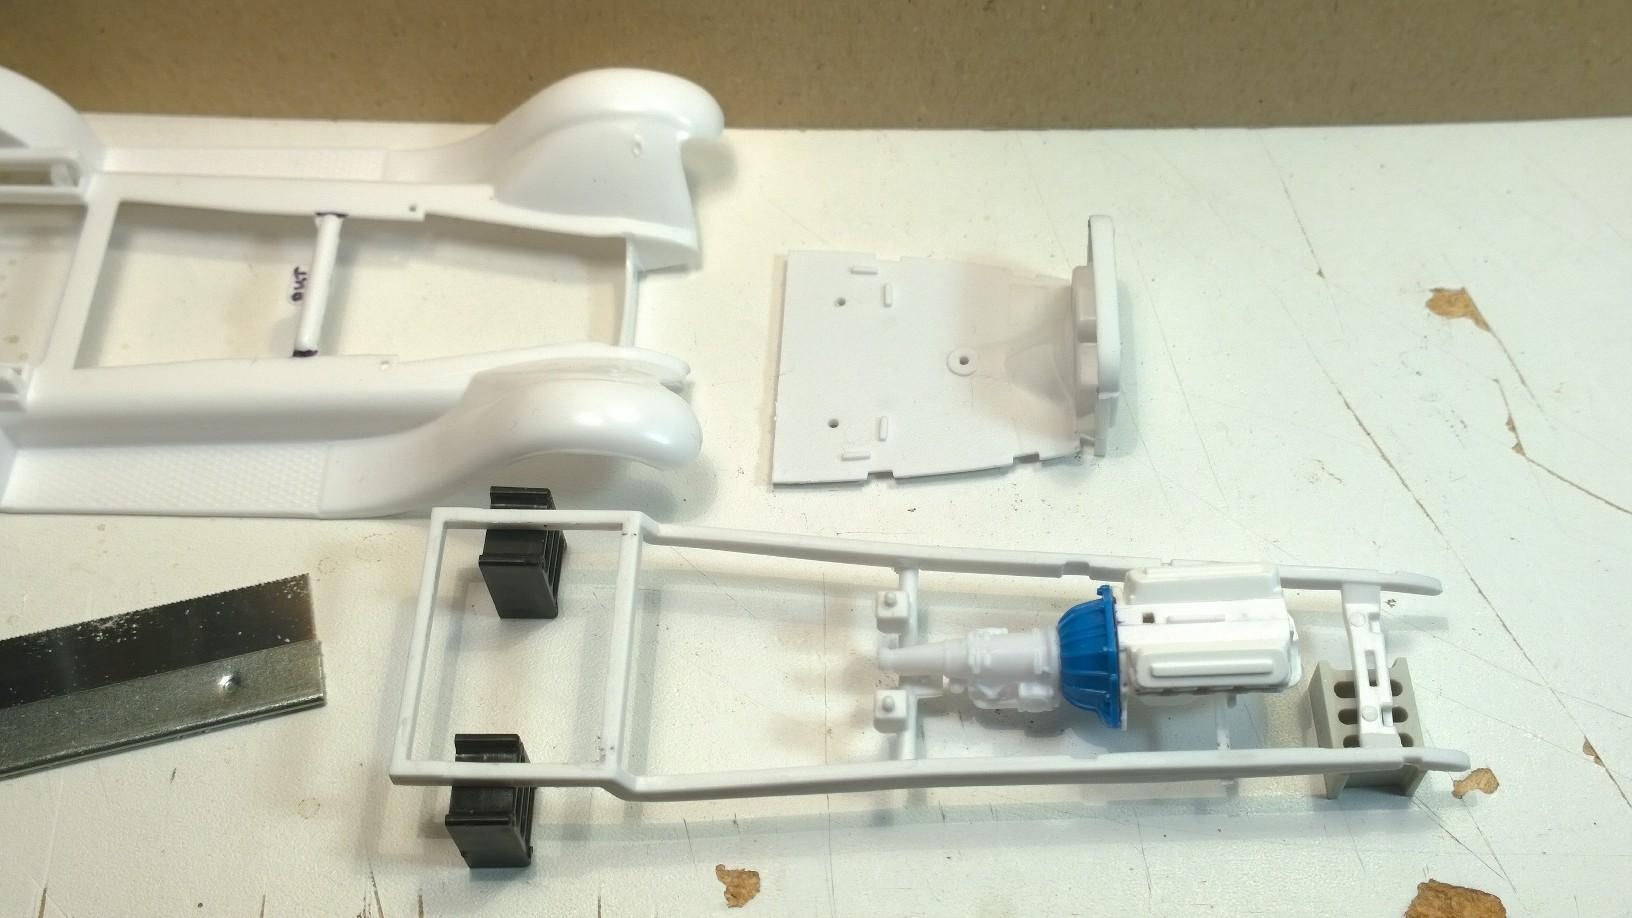
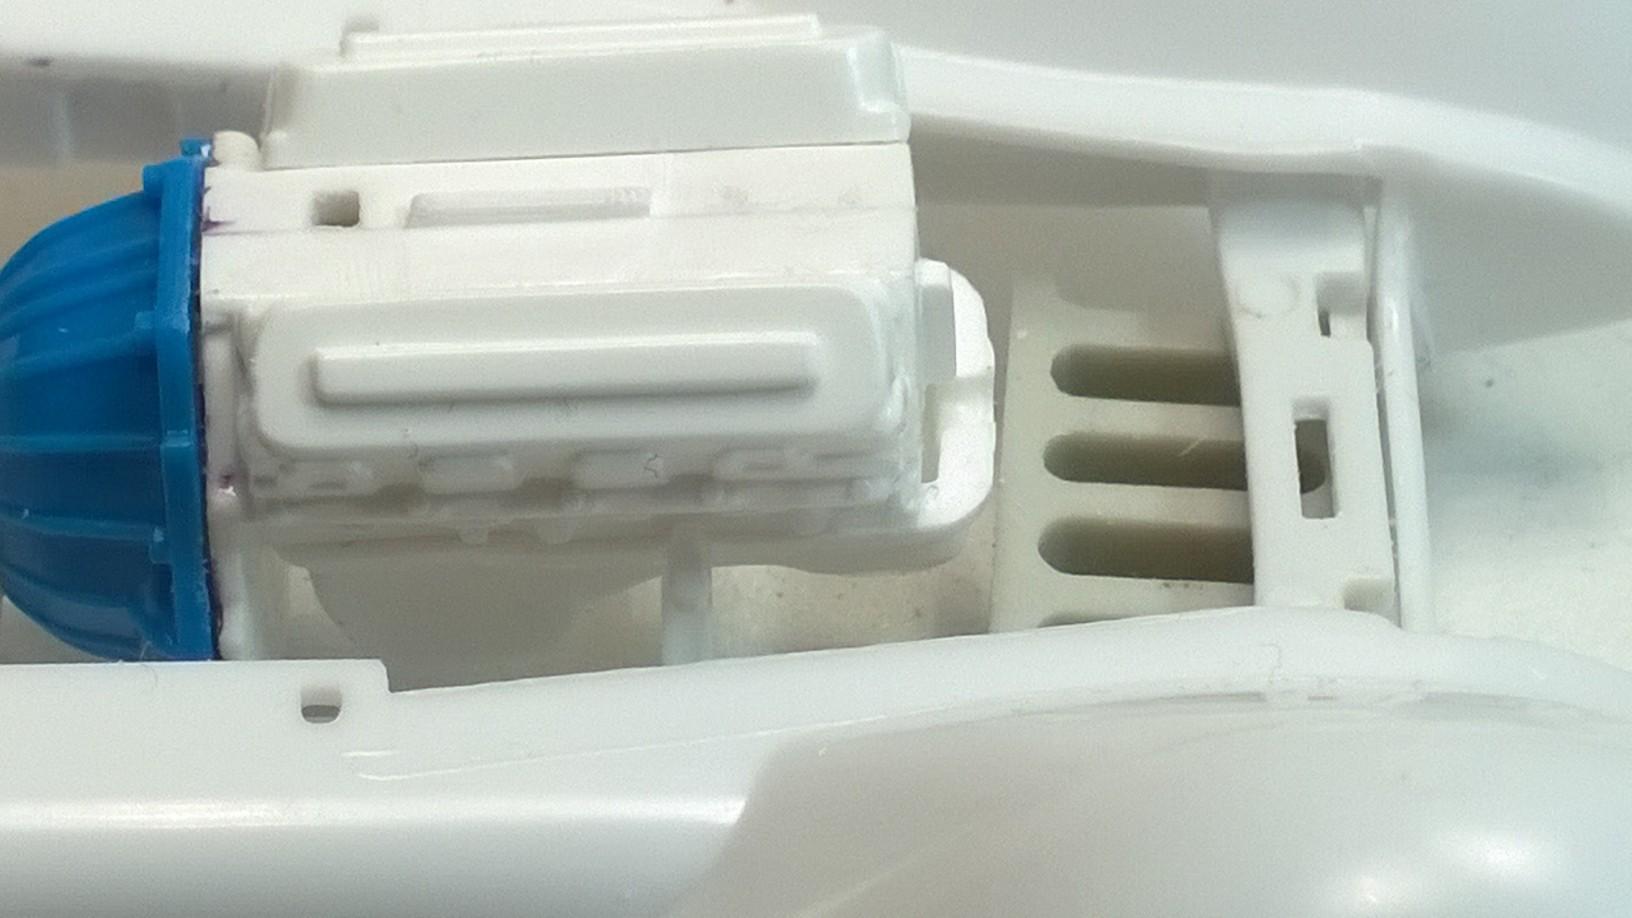
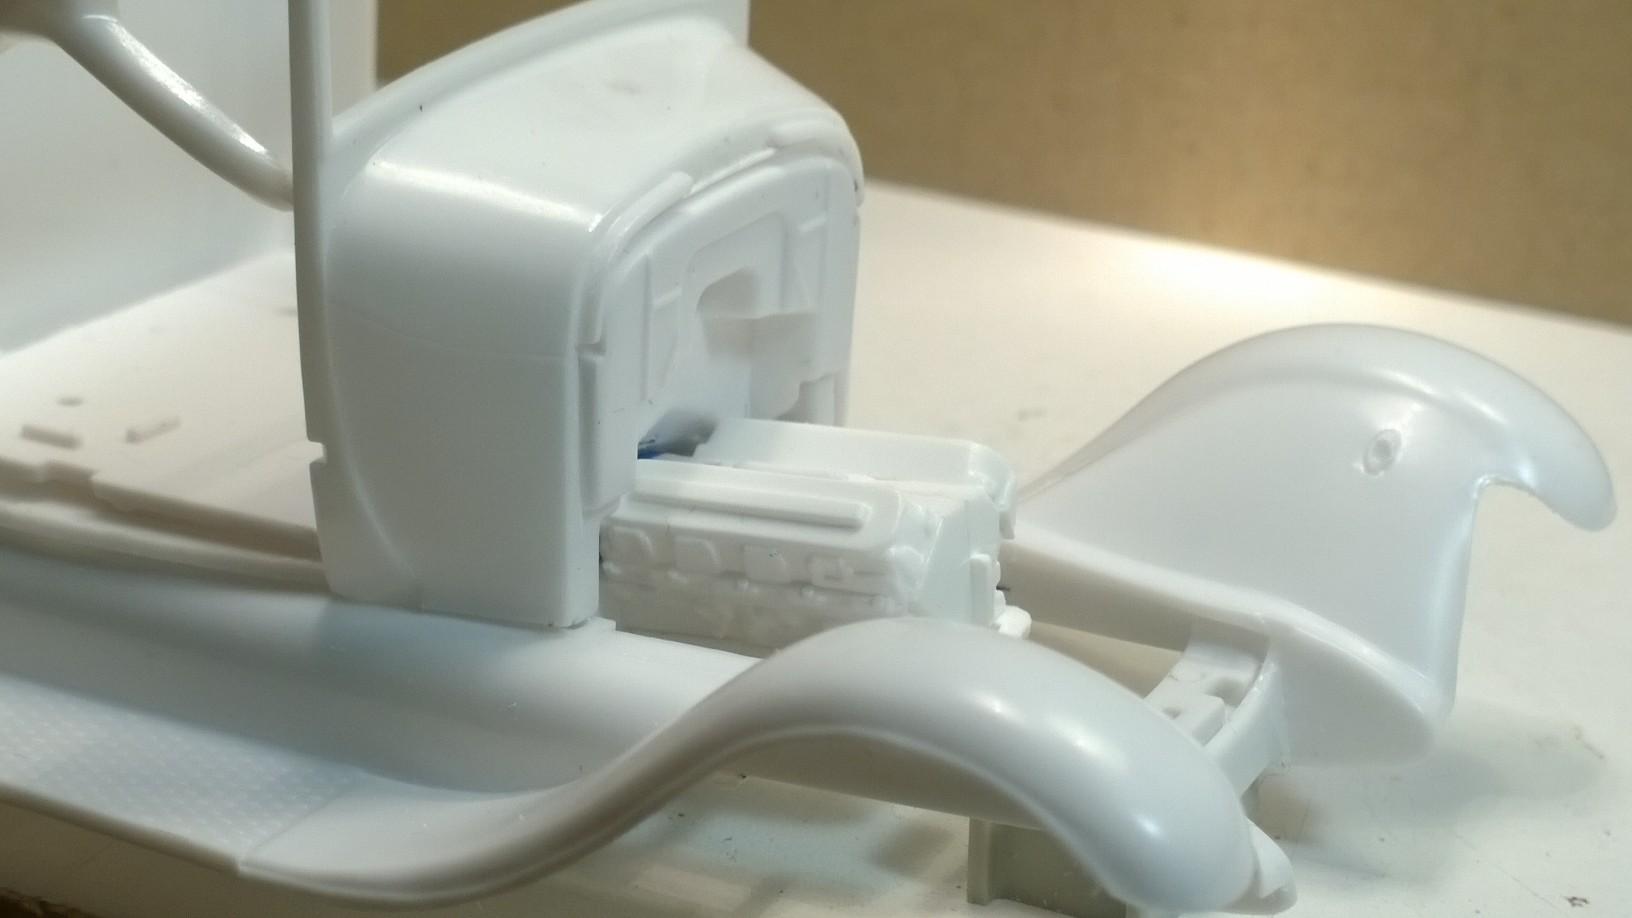
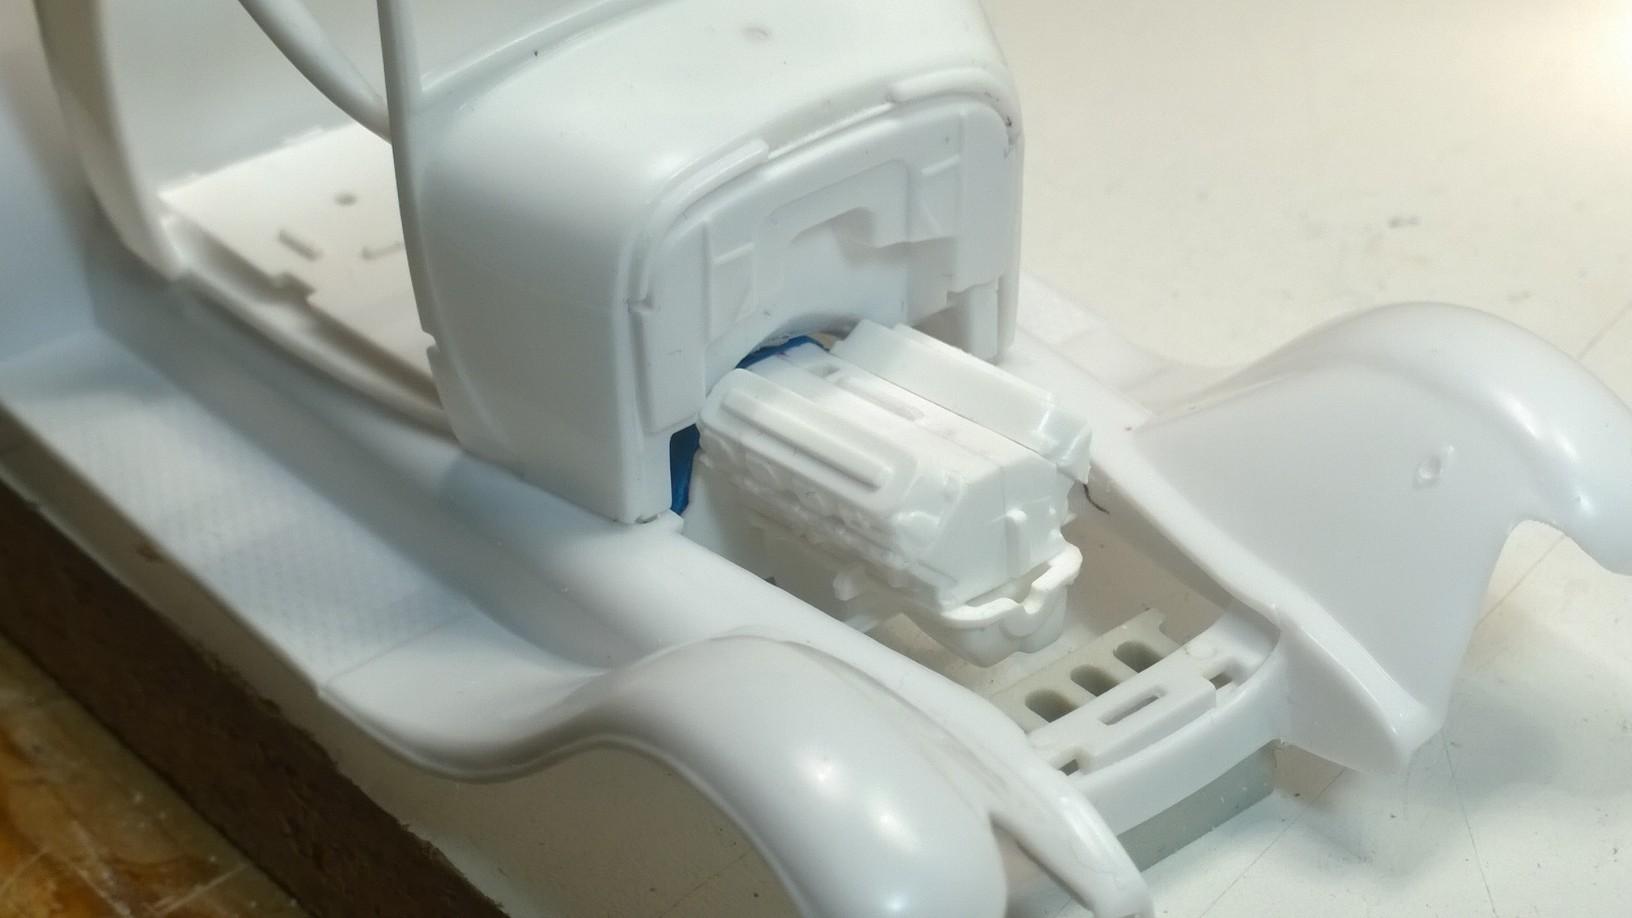
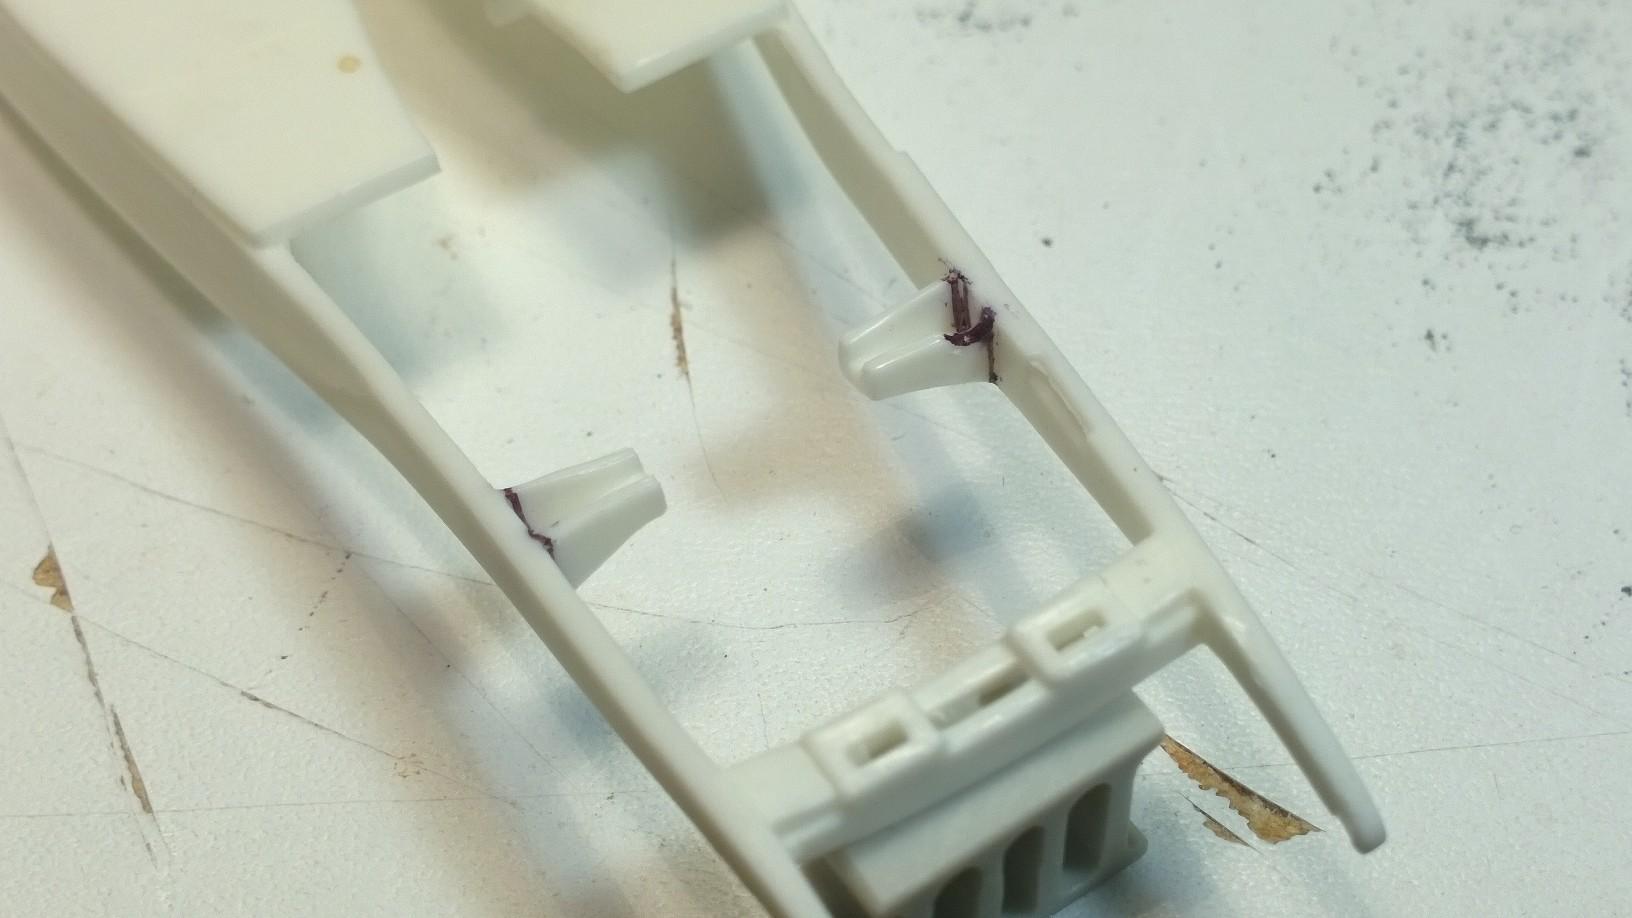
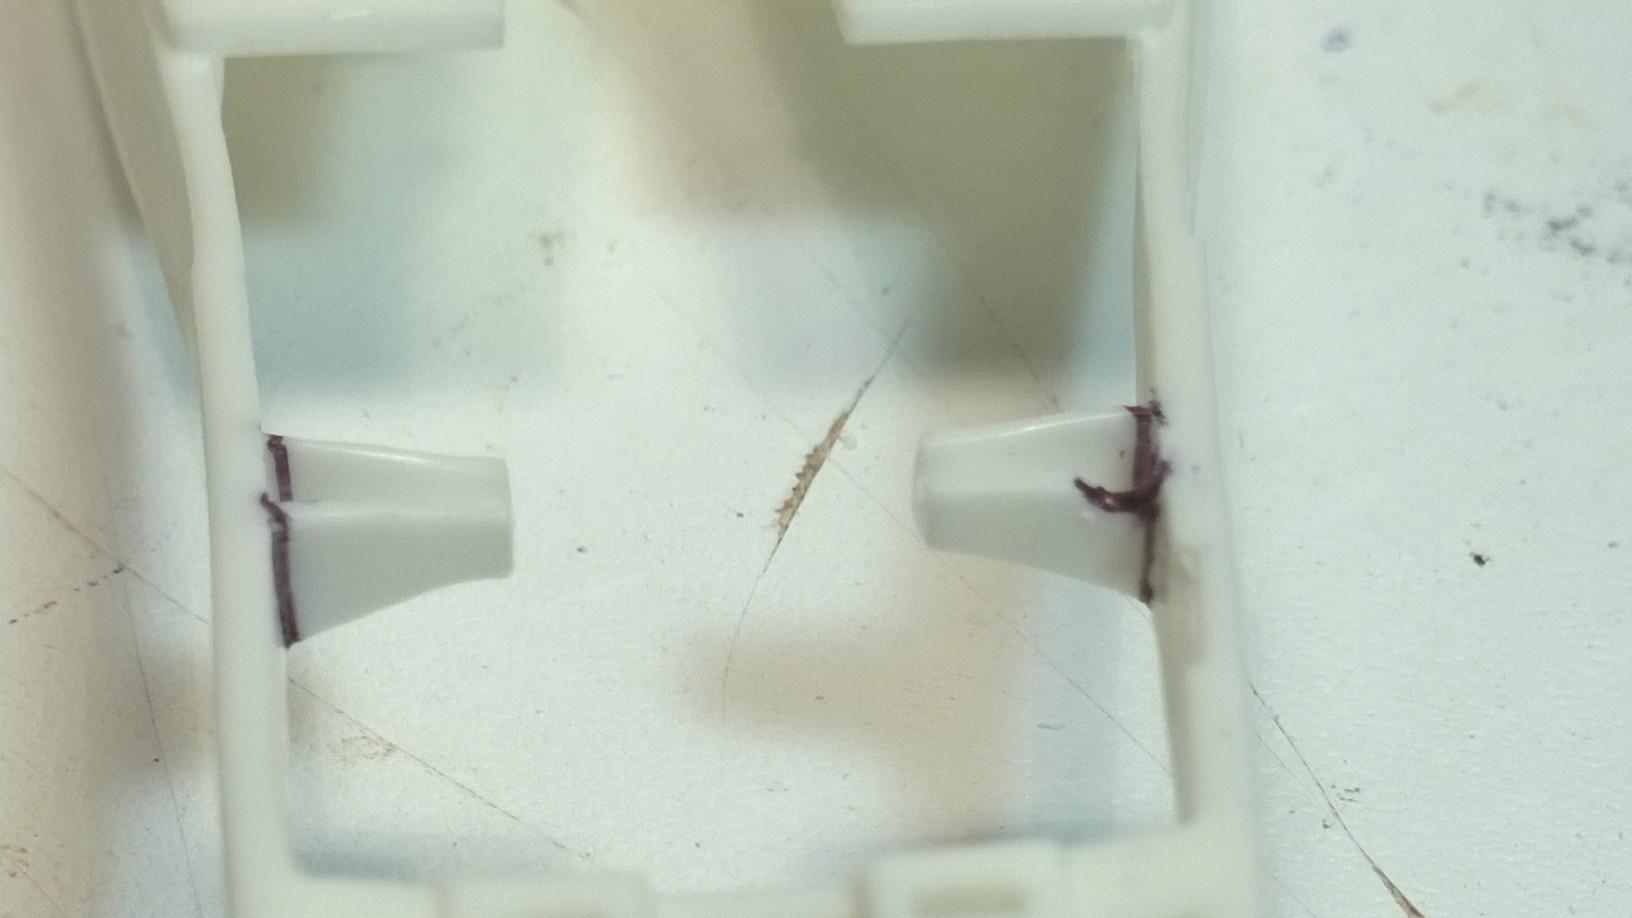
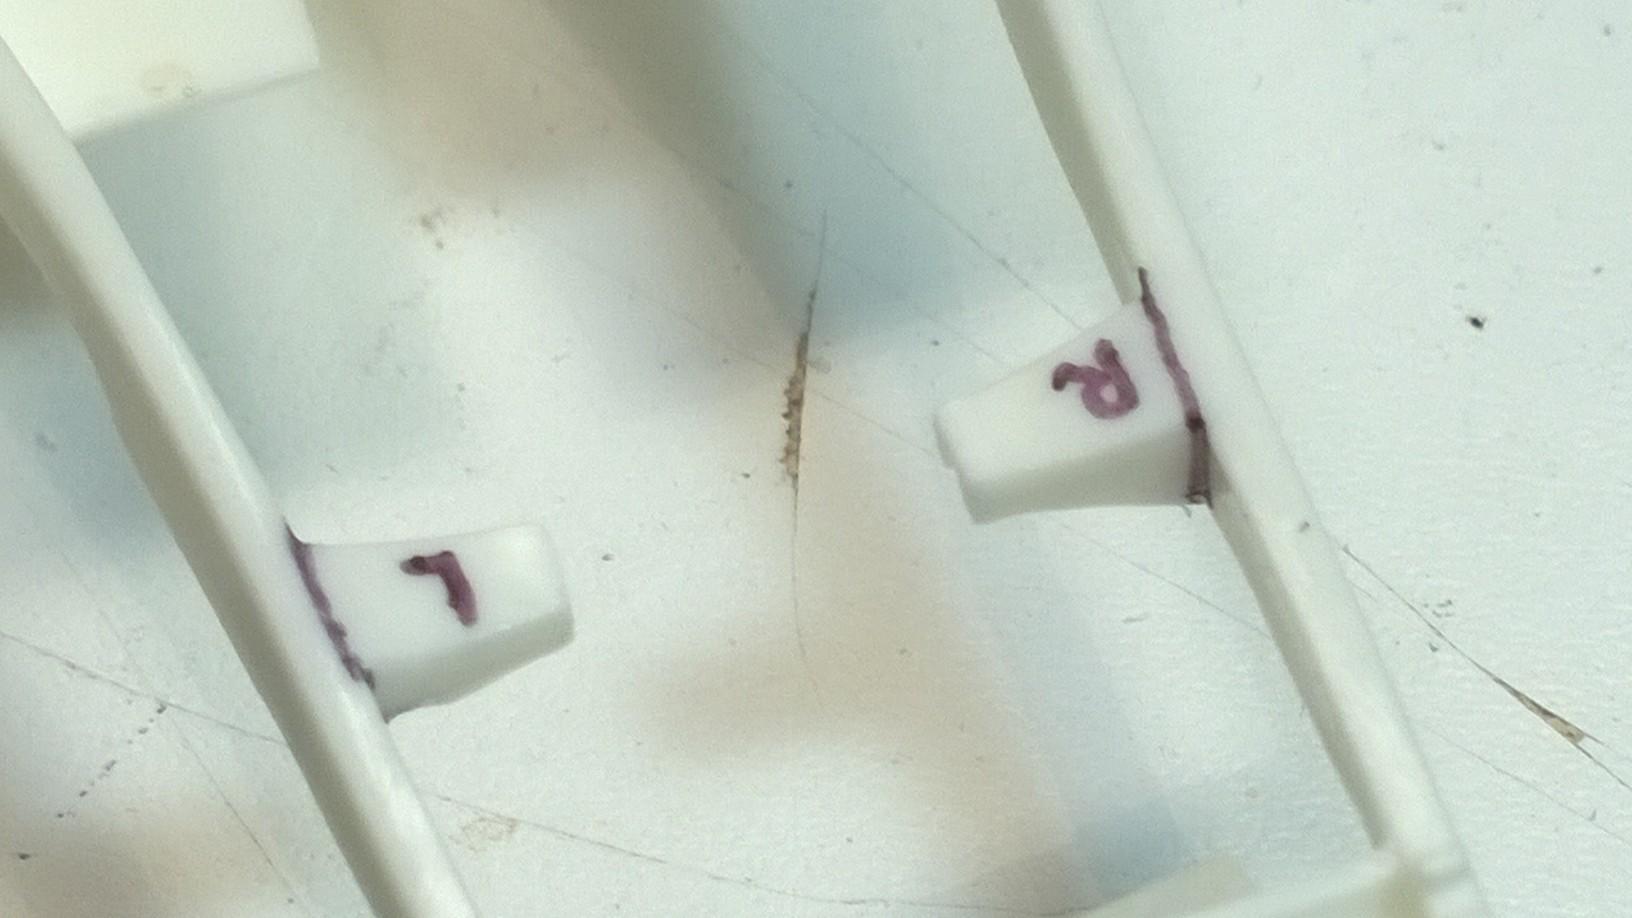
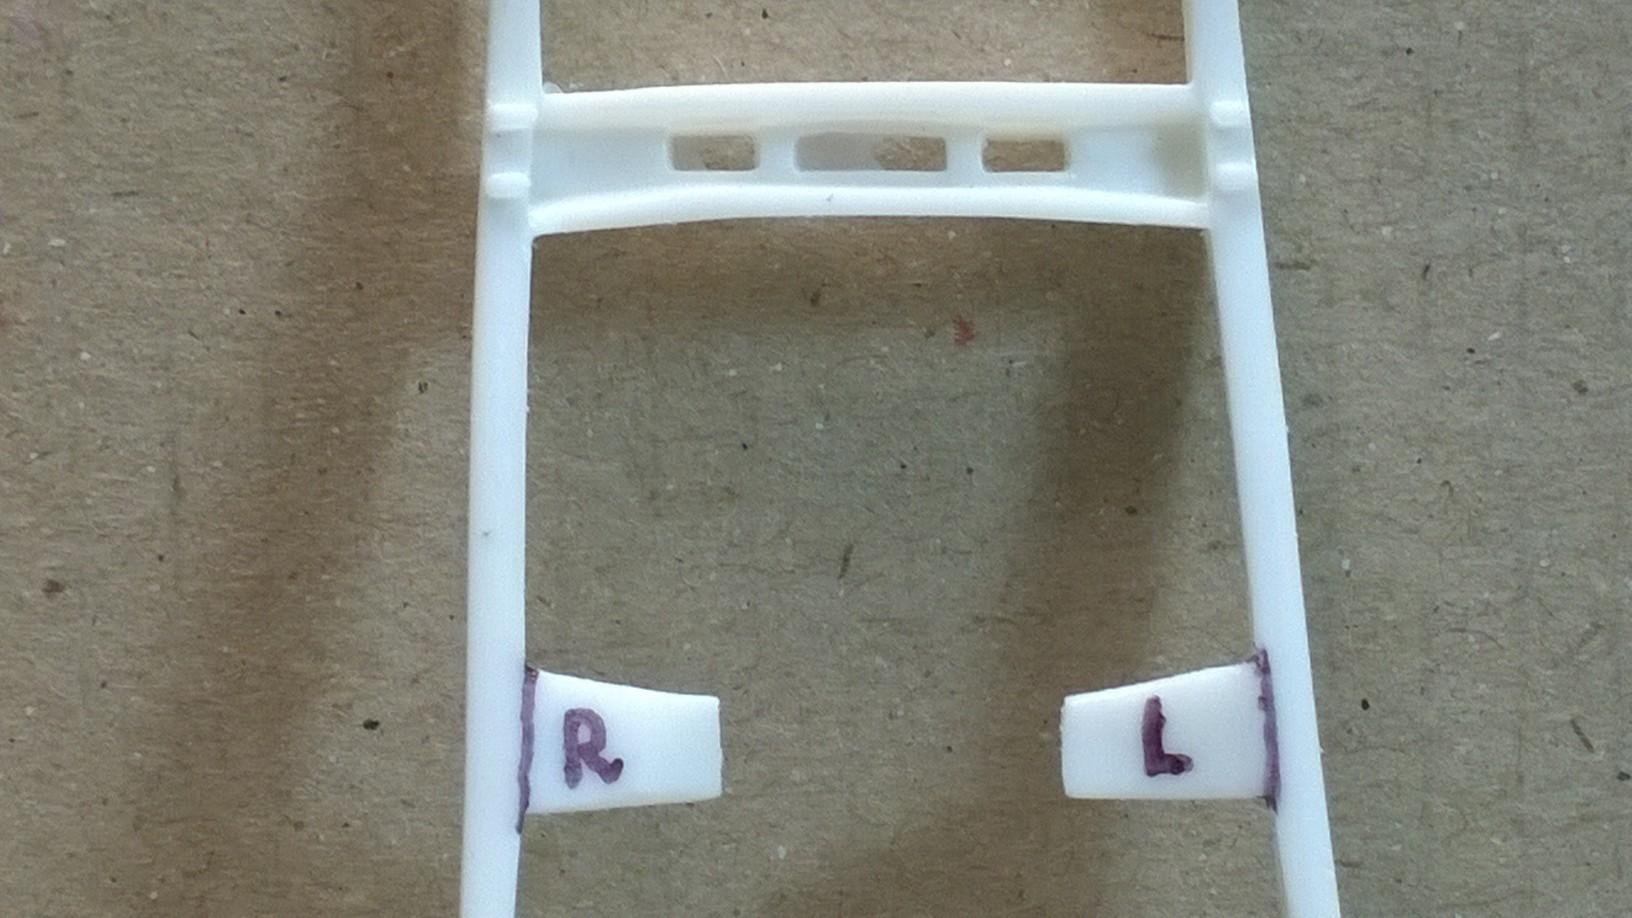
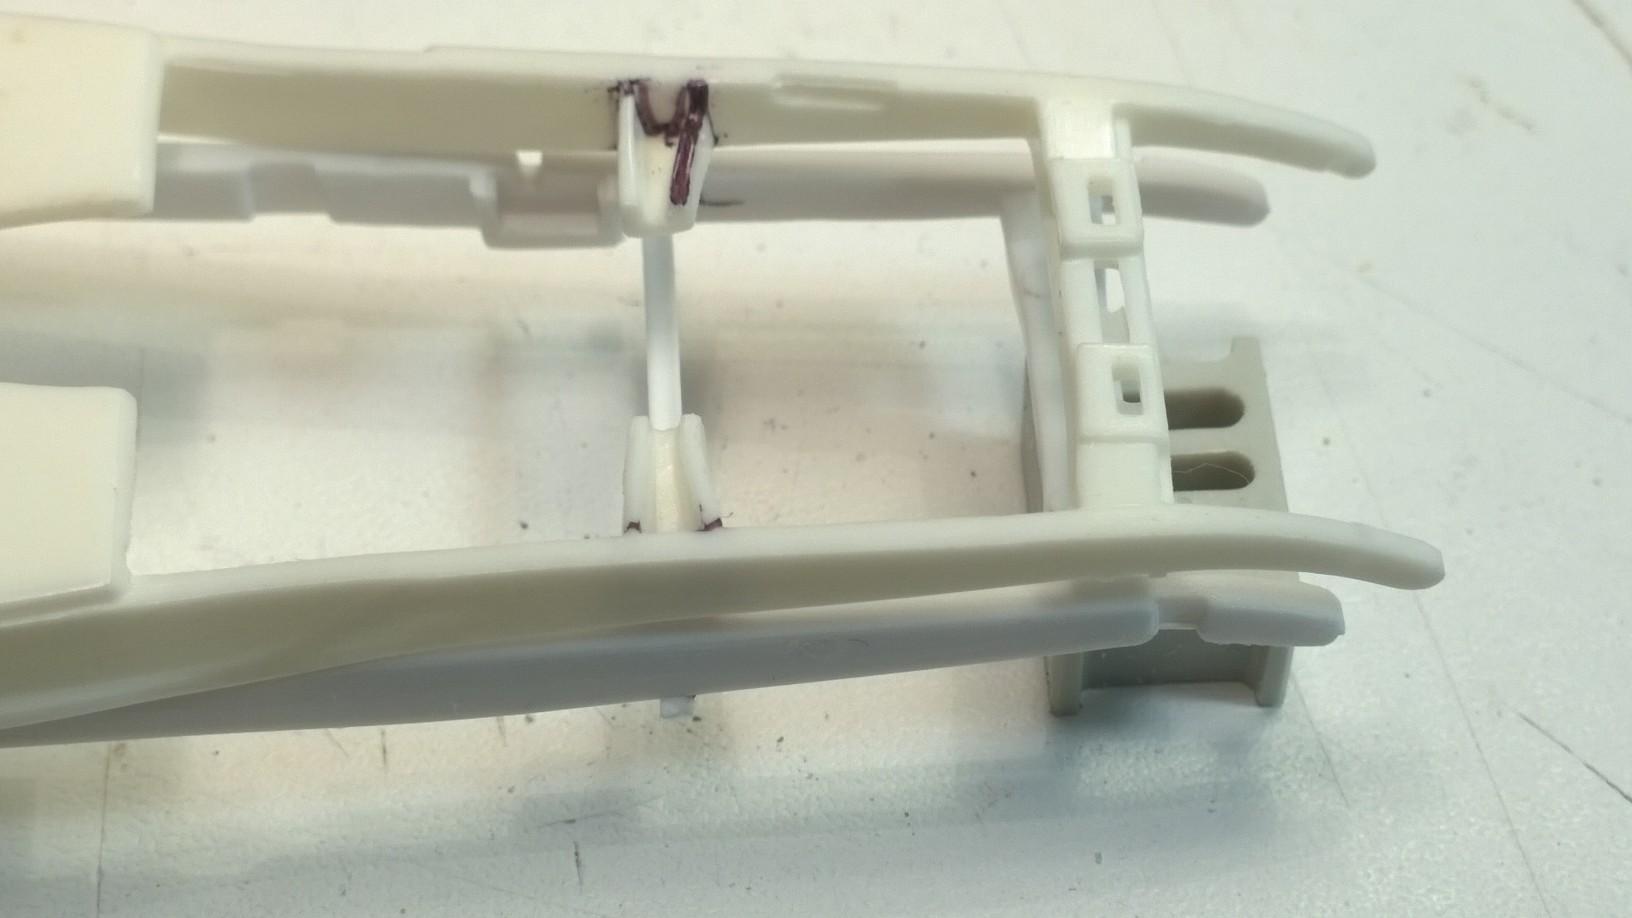
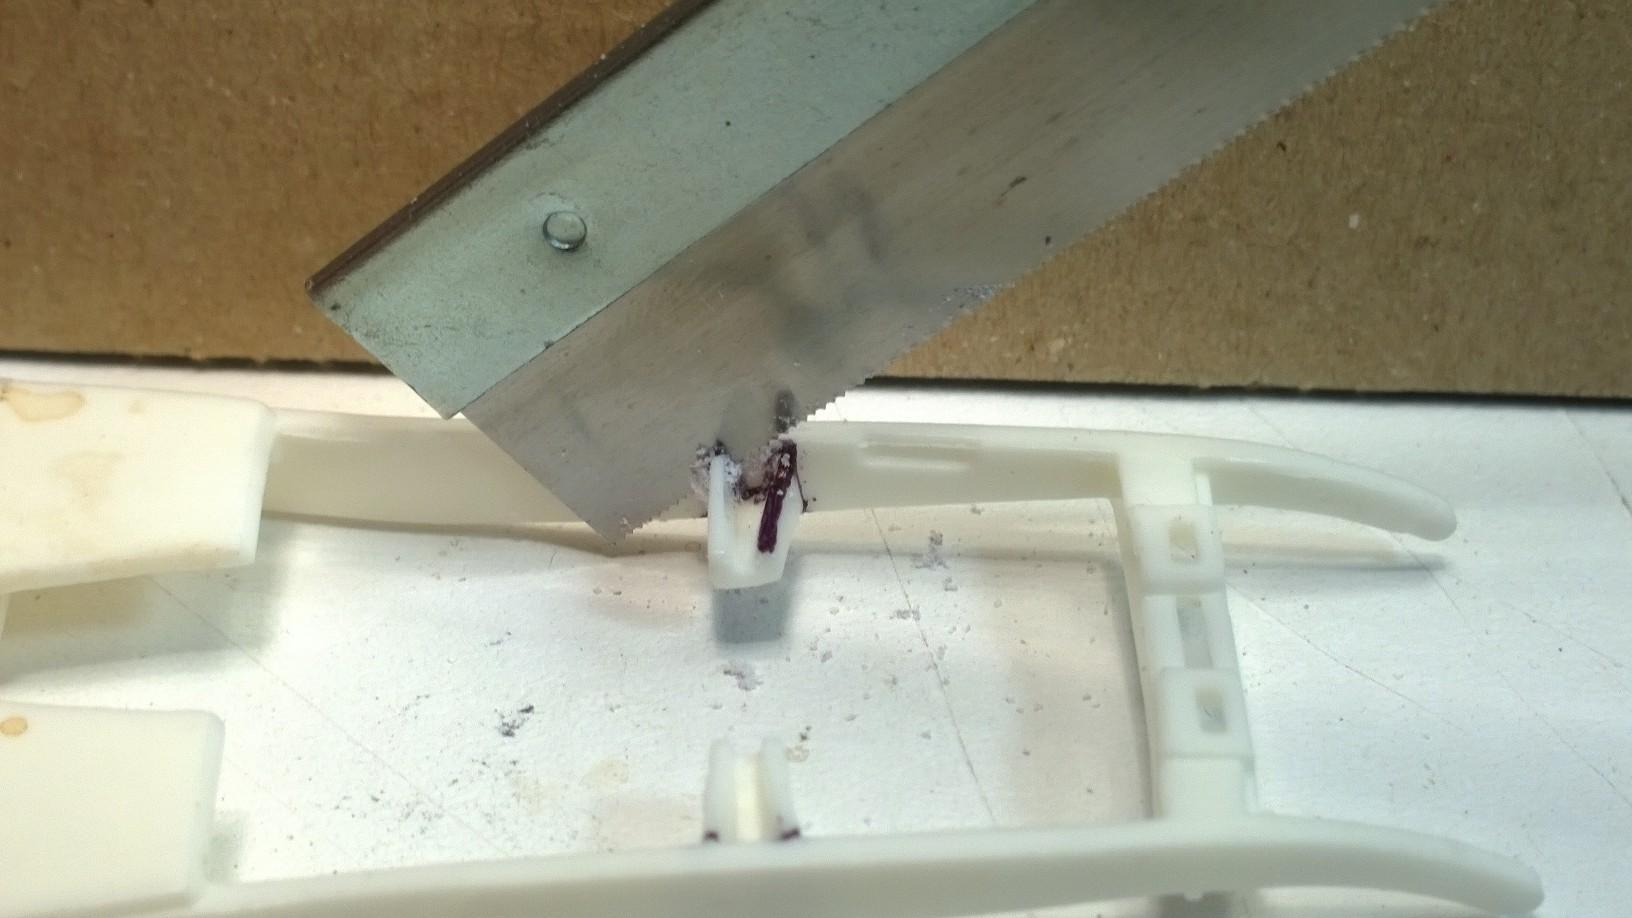
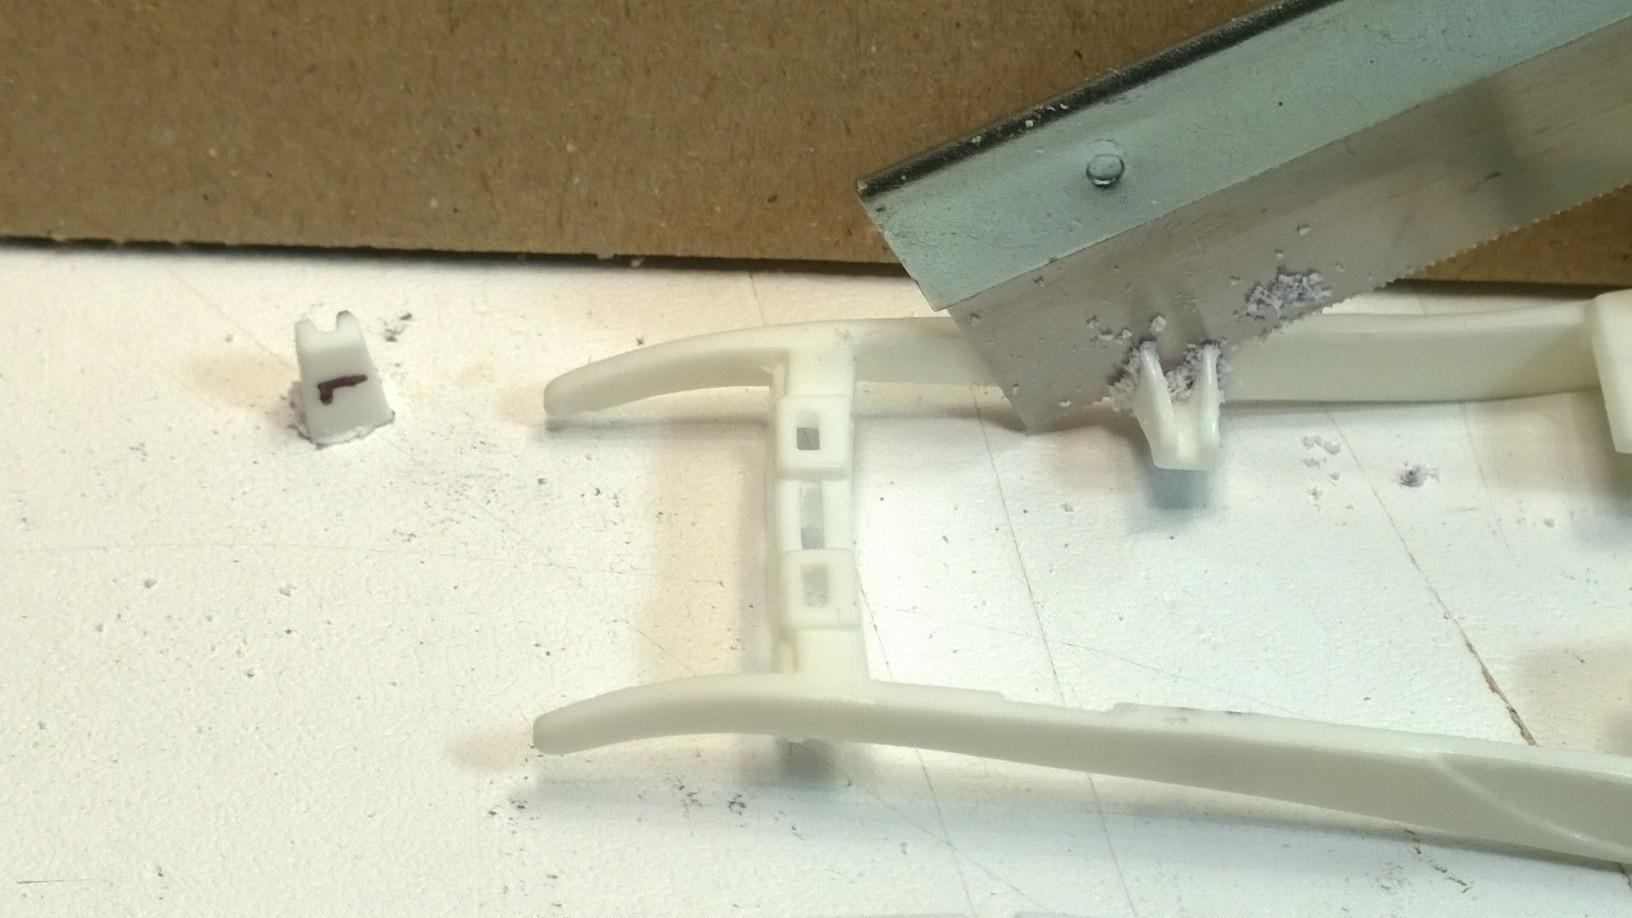
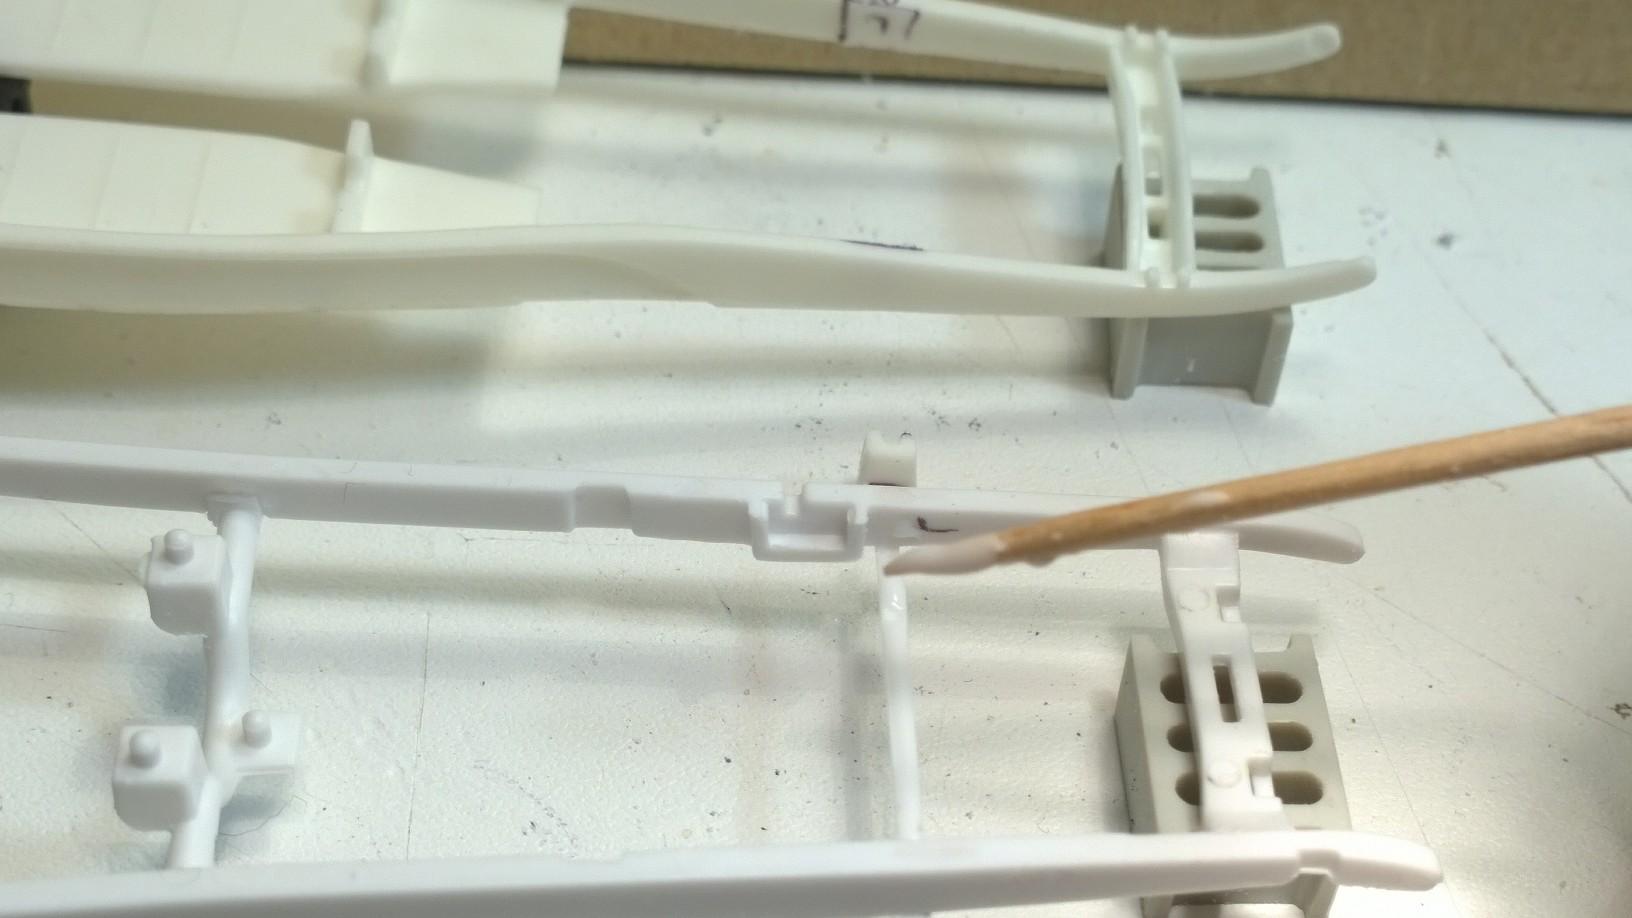
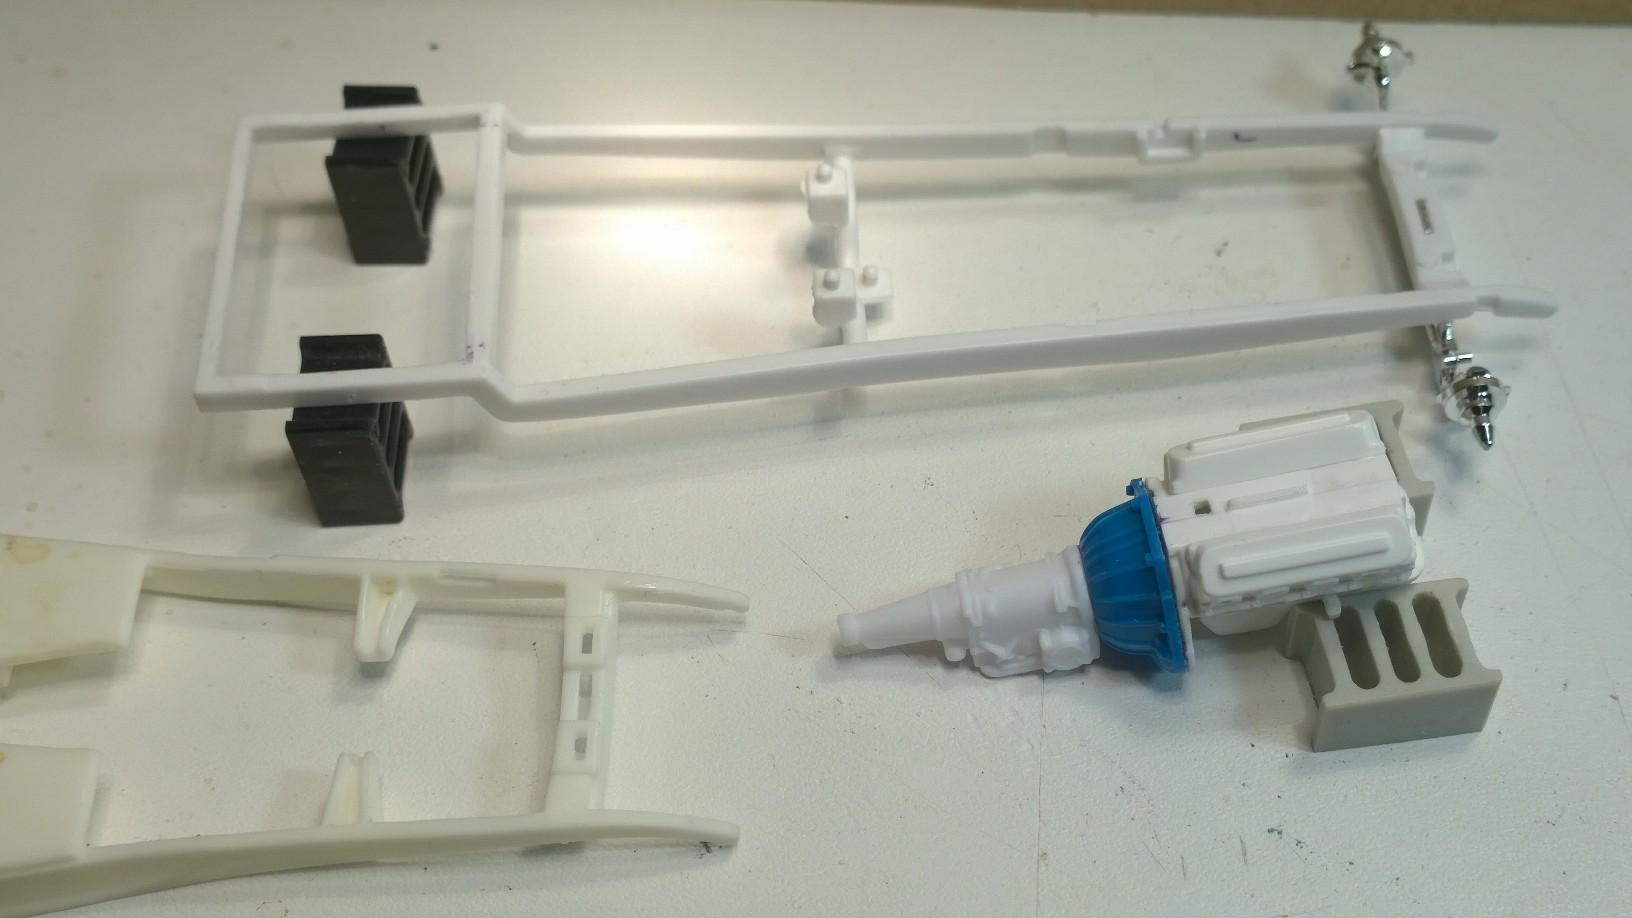
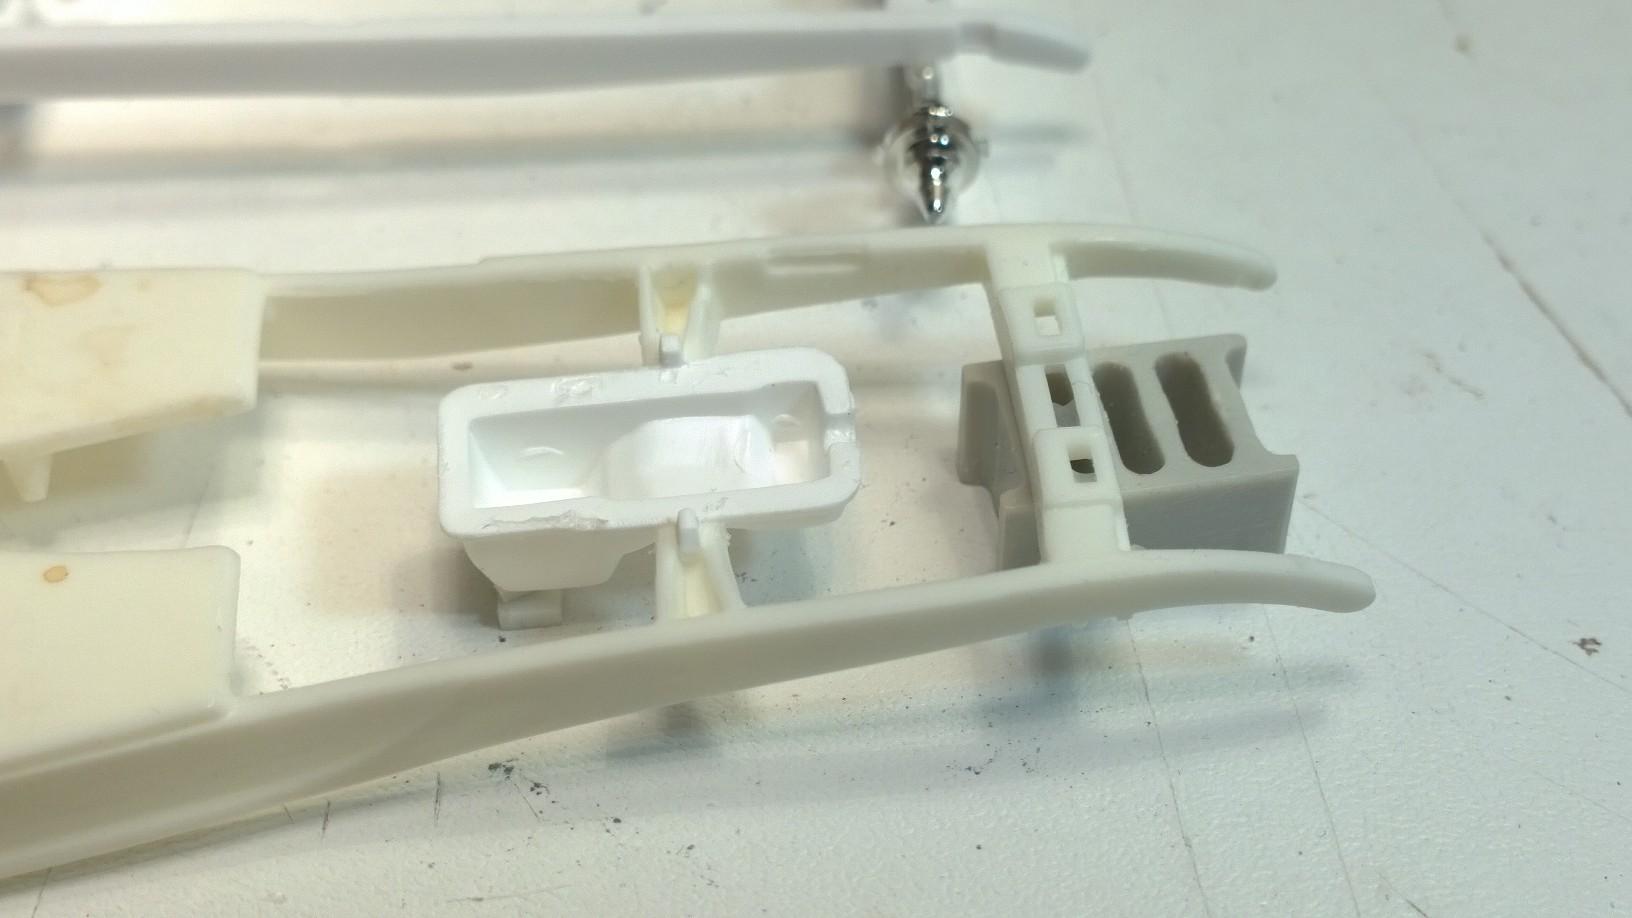
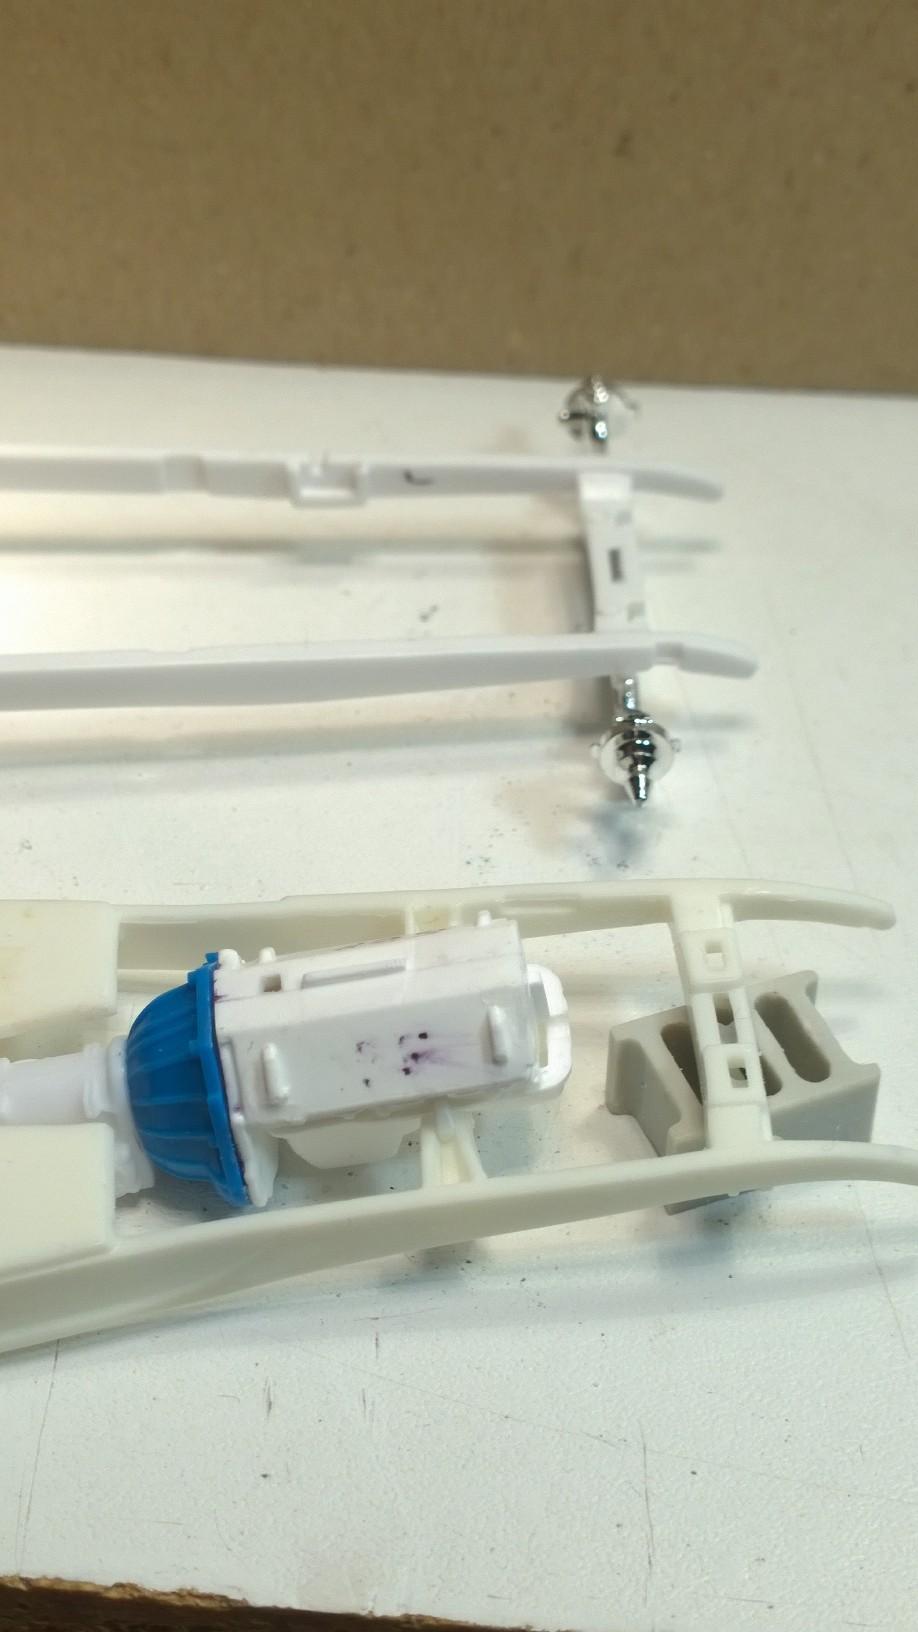
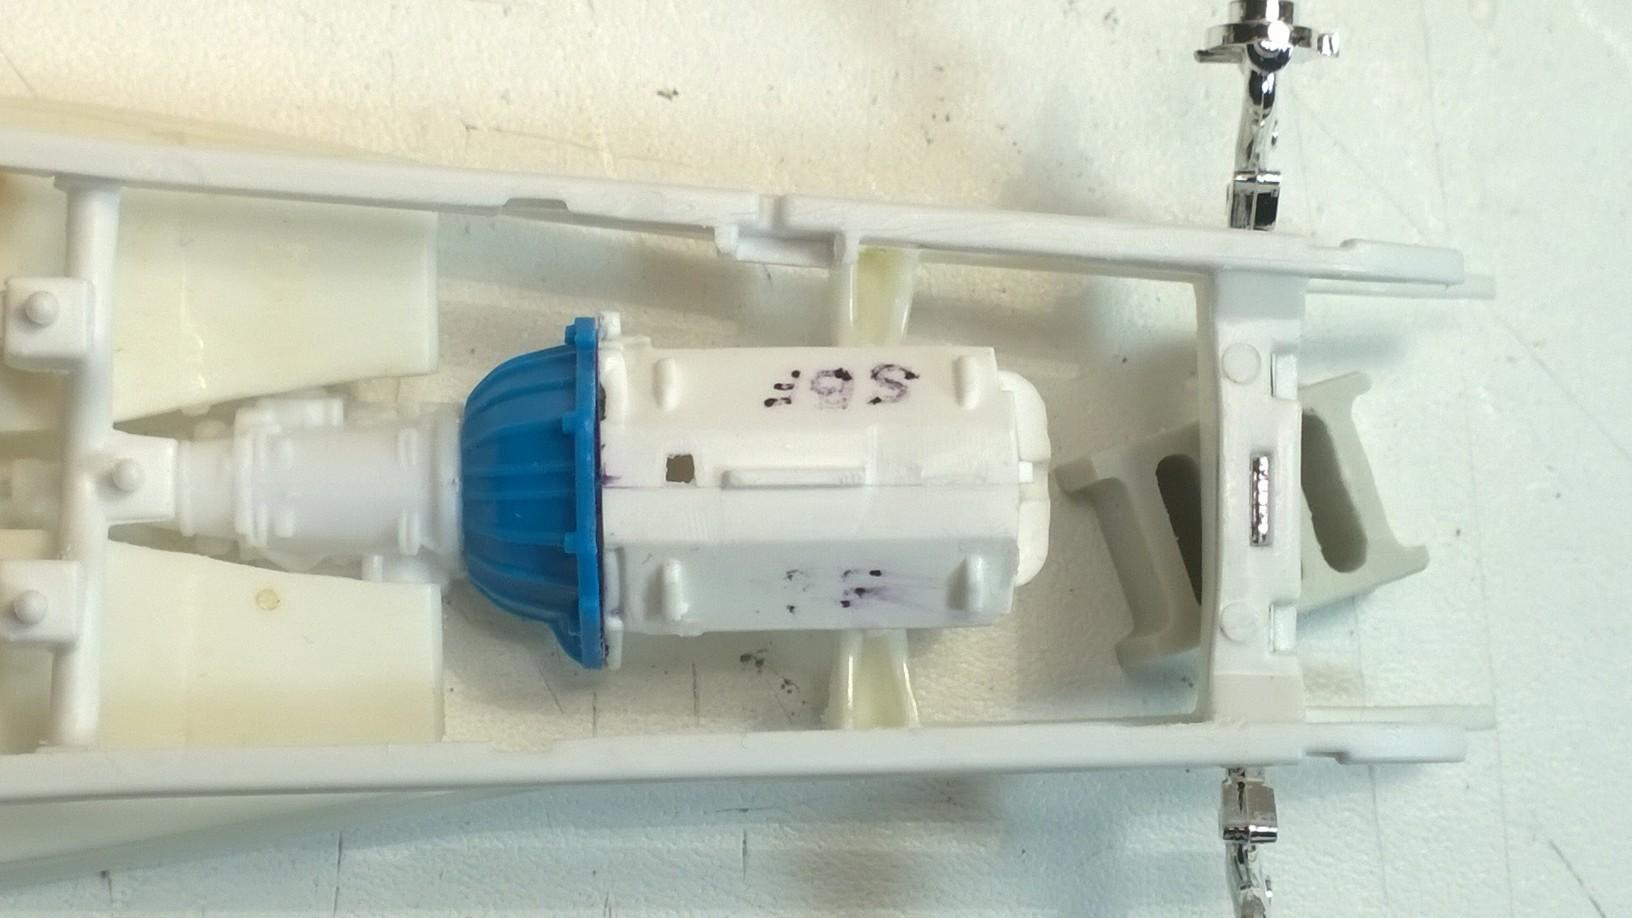
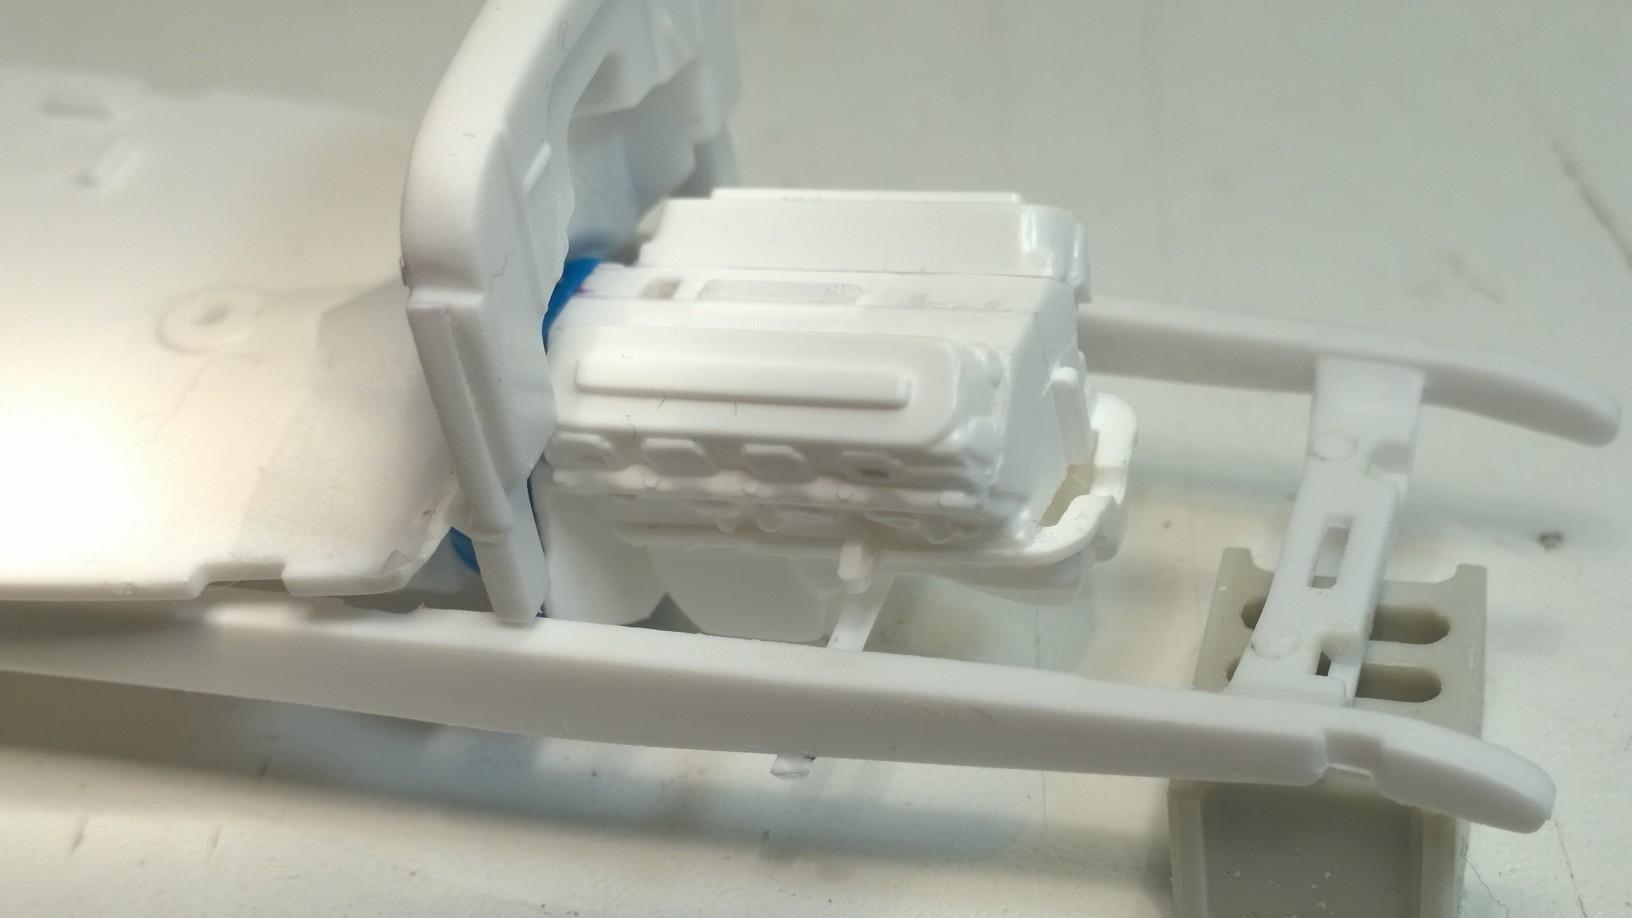
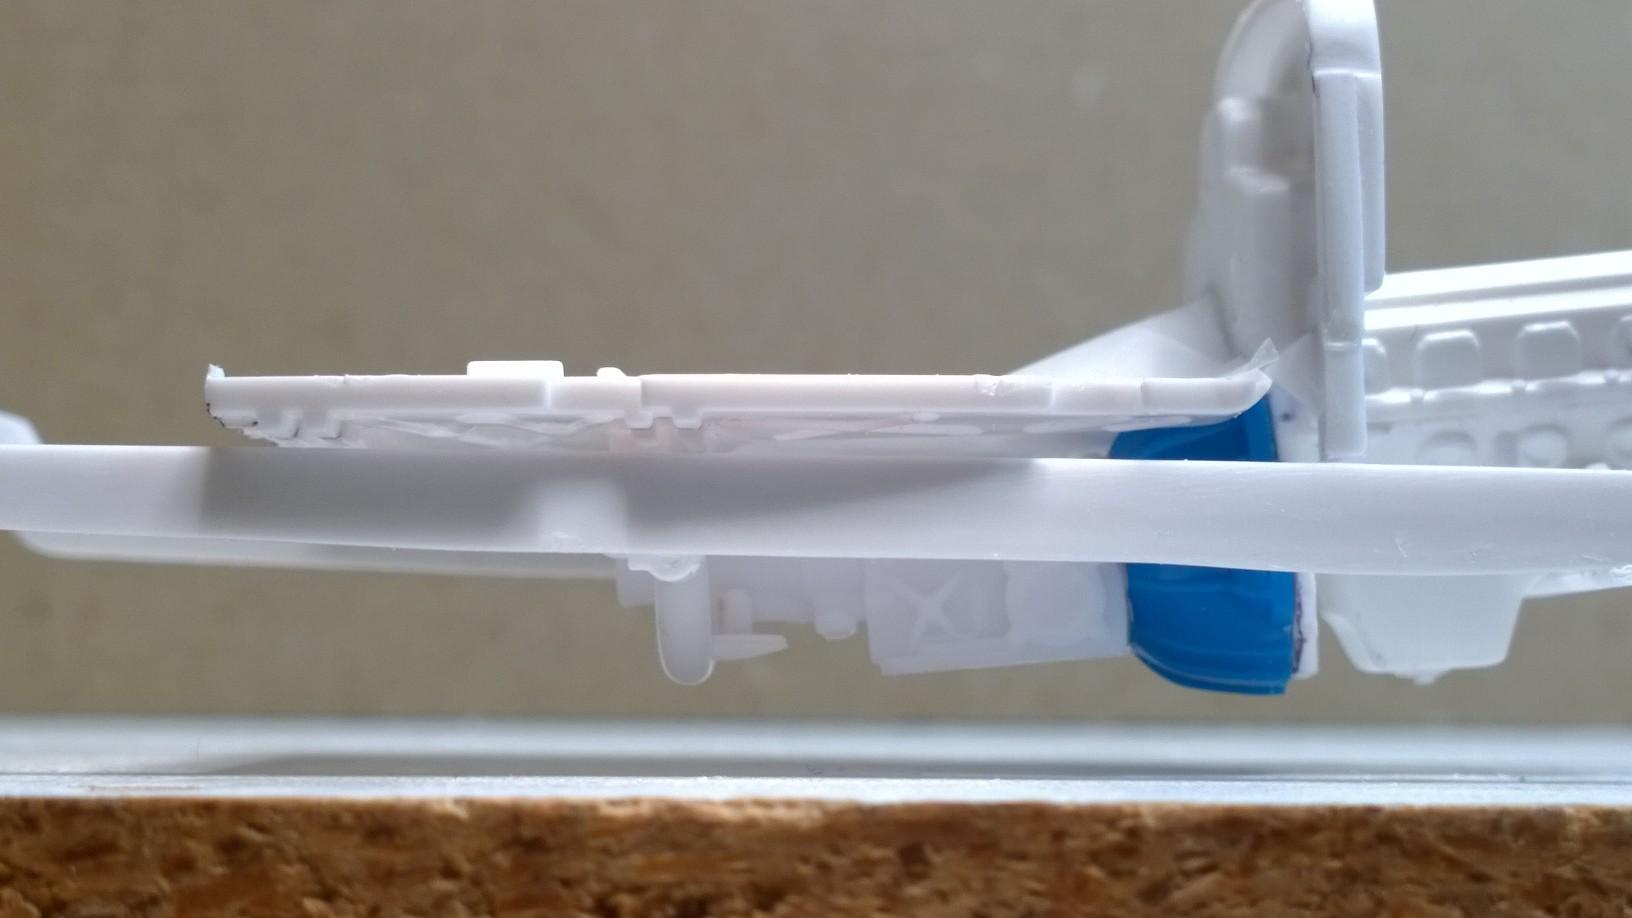
Here's the next step: the Deuce motor mounts need to be grafted into the '29 Roadster frame... Lining up the engine and transmission over the guide bar... With the fenders are mounted the powerplant sits about right! A closer look at the tranny mount on the bottom of the transmission tail shaft shows a space between the crossmember mount and the tranny mount. We'll come back and make an adapter to cover the gap. The deuce motor mounting tabs located on the pan sides line up with the guide bar! Checking the fit with the cab... everything looks like the it fits... Now it's time to collect the Deuce motor mounts and get them attached to the Model A Frame. Make the cut lines... All four sides... And, Left & Right Laying Deuce frame on top of the Model A frame to see how the mounts line up with the guide bar... Looks like the Deuce motor mount will work... Cutting the Deuce motor mounts from the donor frame is pretty straight forward... First one side... And, then the other... Here we are taking the line with the cut. Pushing the file over the edges to clean off the flash left behind from the saw blade. Pushing not dragging the file is important... the cutting groves/teeth on the file run one way. Push and lift to return to cut/file again, one cut at a time, checking your progress often. Using a file can remove an awful lot of material very carefully. Lining up the Deuce motor mount next to the Model A frame... White glue allows setting the Deuce motor mount onto the Model A rails while lining each of them up with the guide bar. Noting the placement above the guide bar... Both directions, make sure that they are ready to set with a couple of drops of CA glue. Next up, we'll get back to make an adapter to cover the gap between the crossmember and the transmission mount on the bottom of the tail shaft. -KK
-
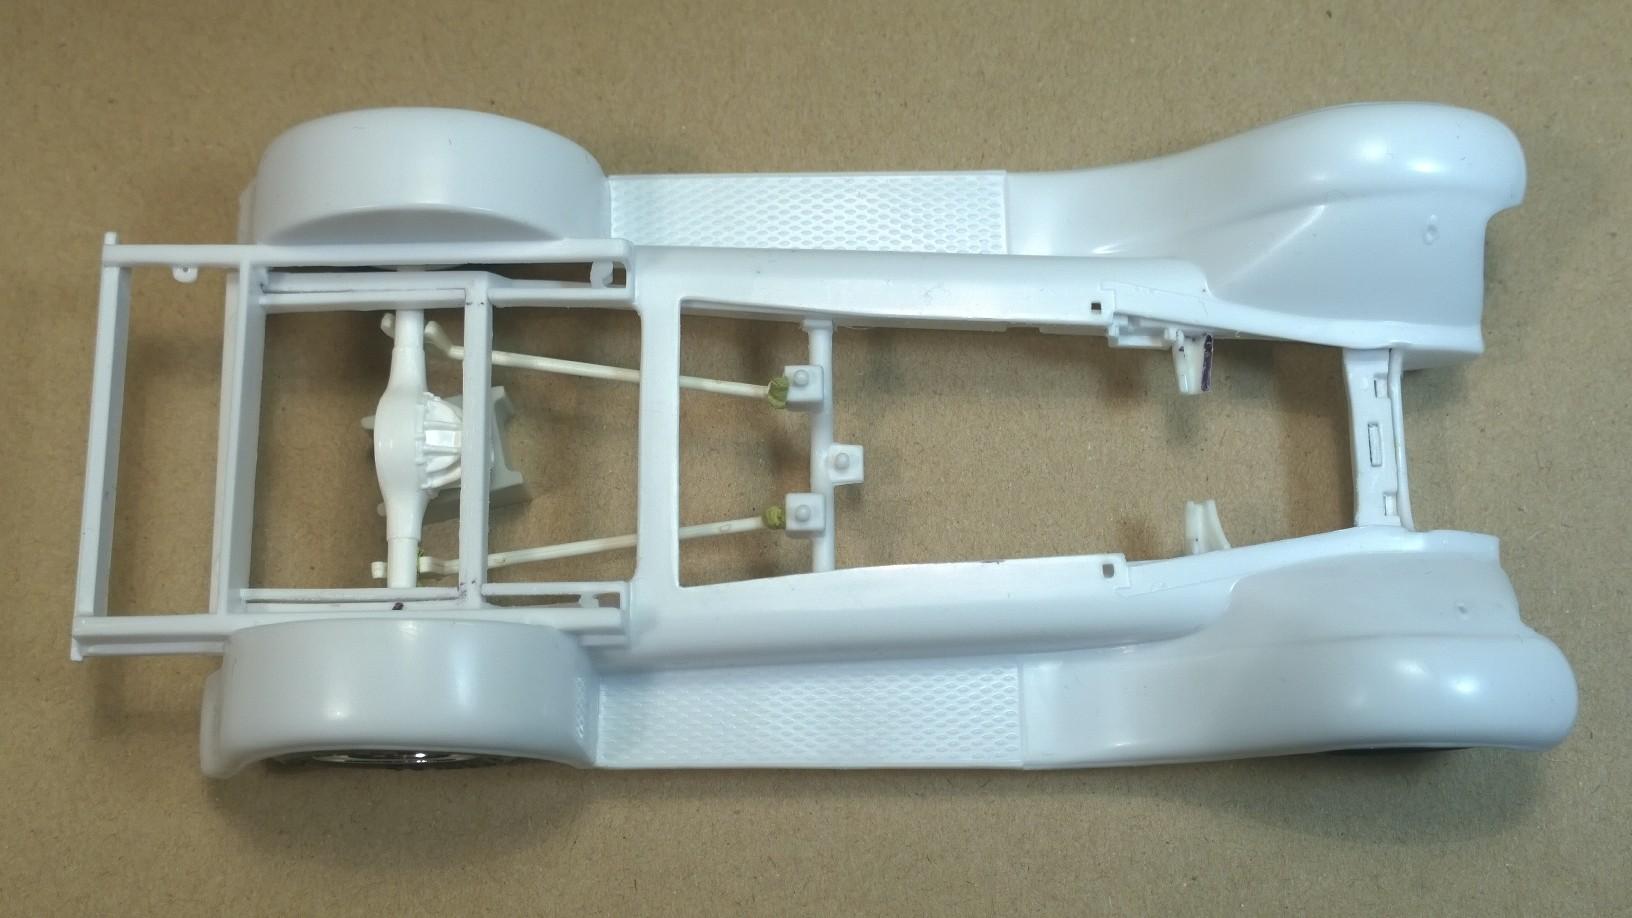
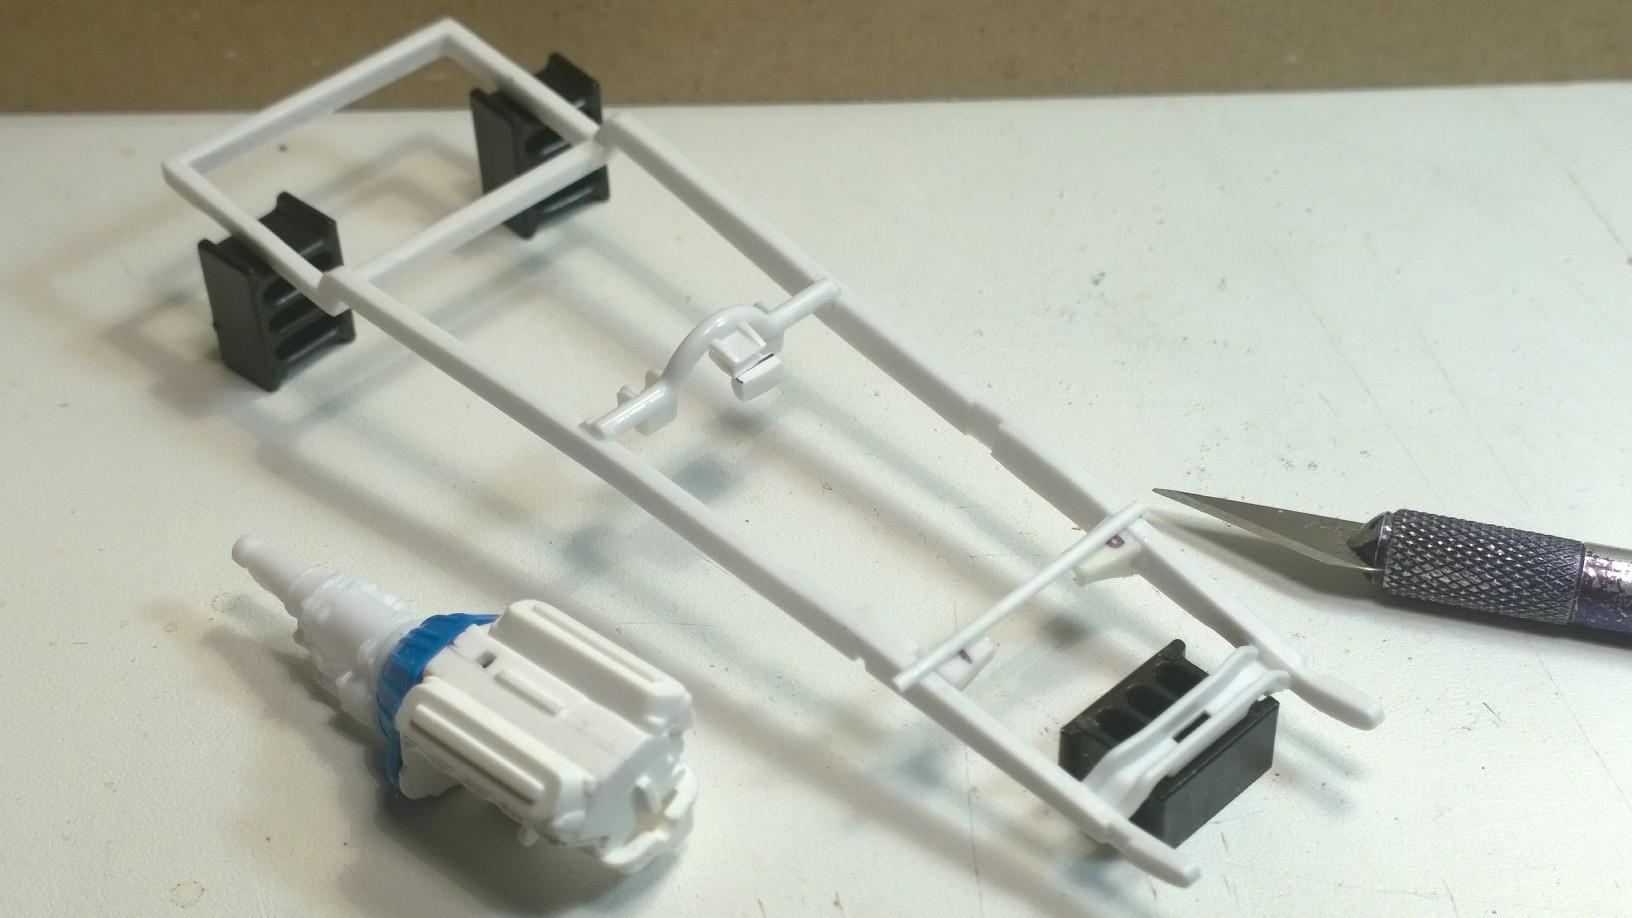
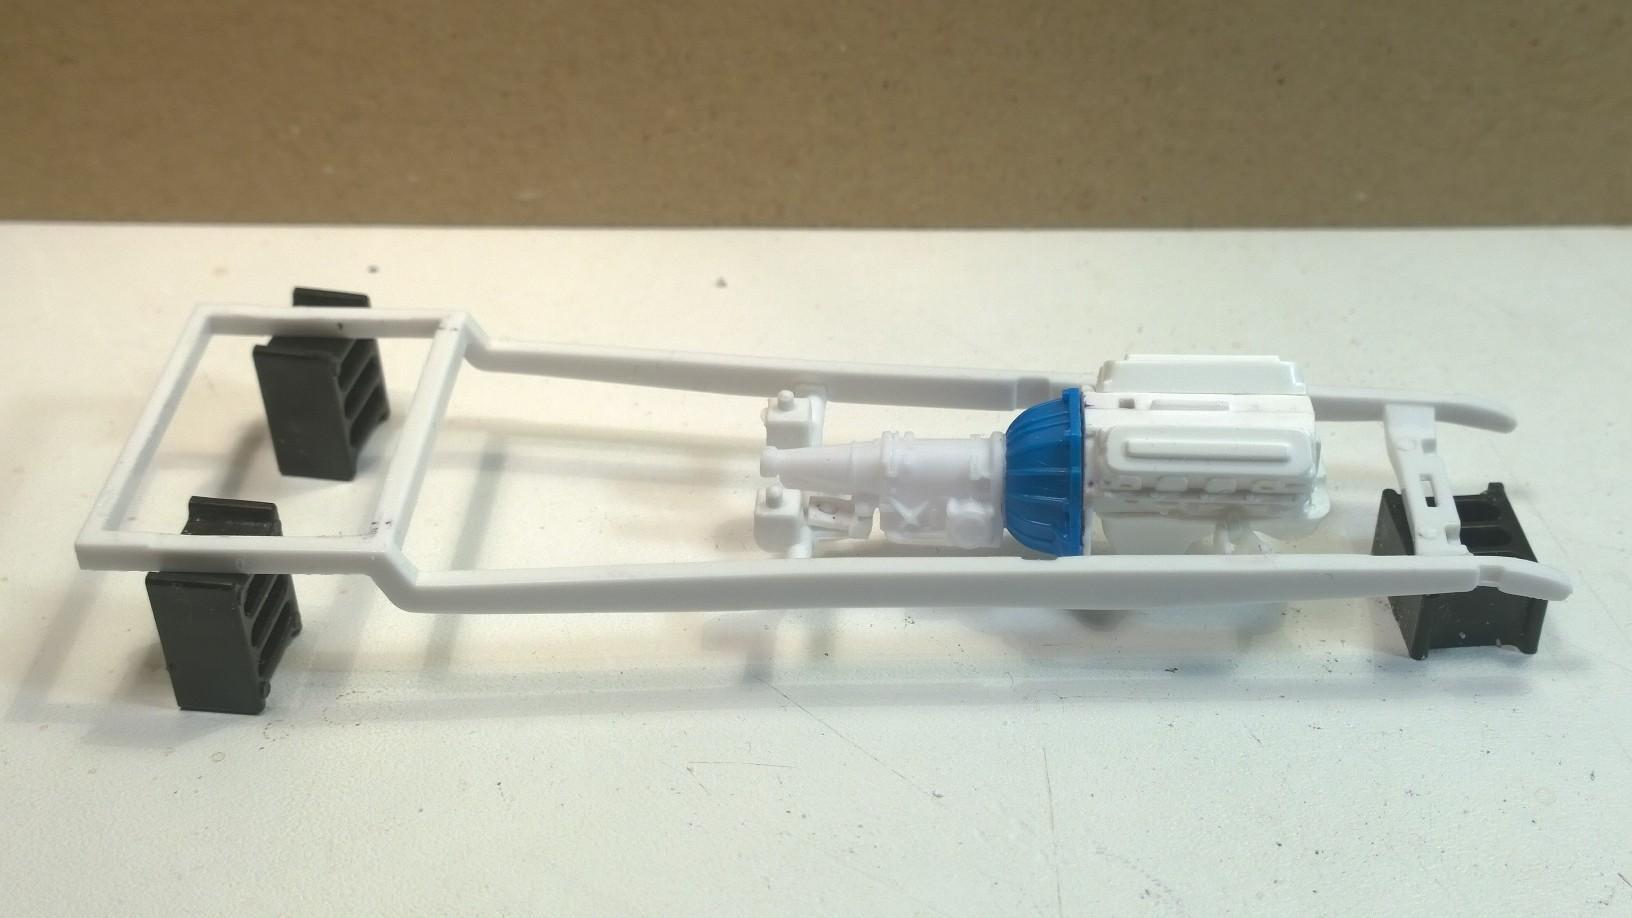
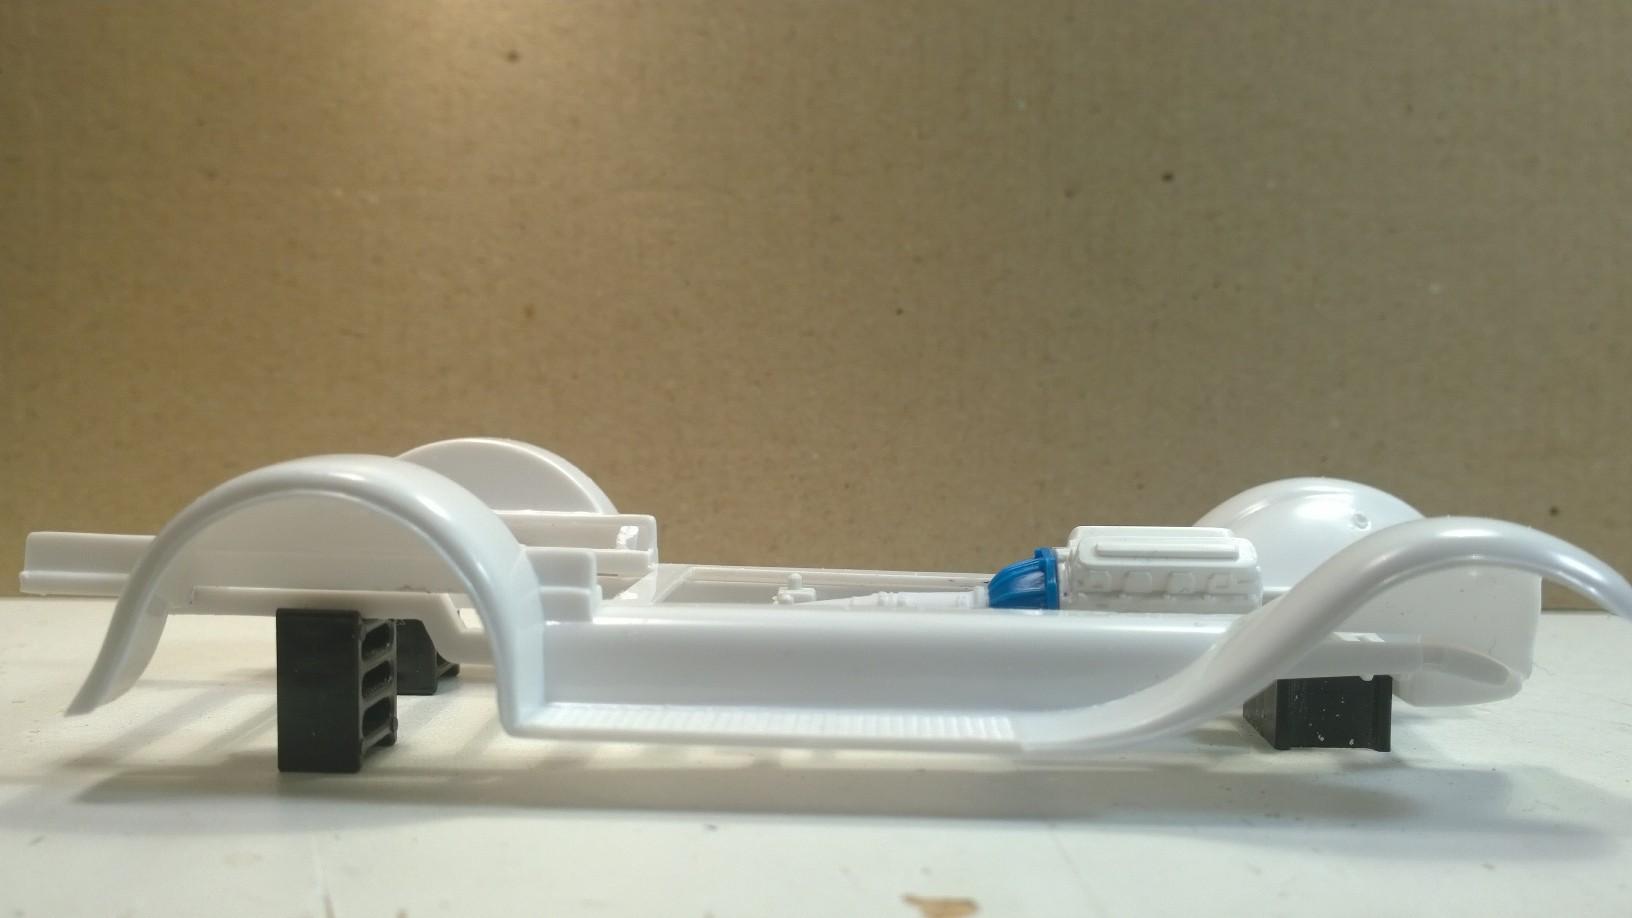
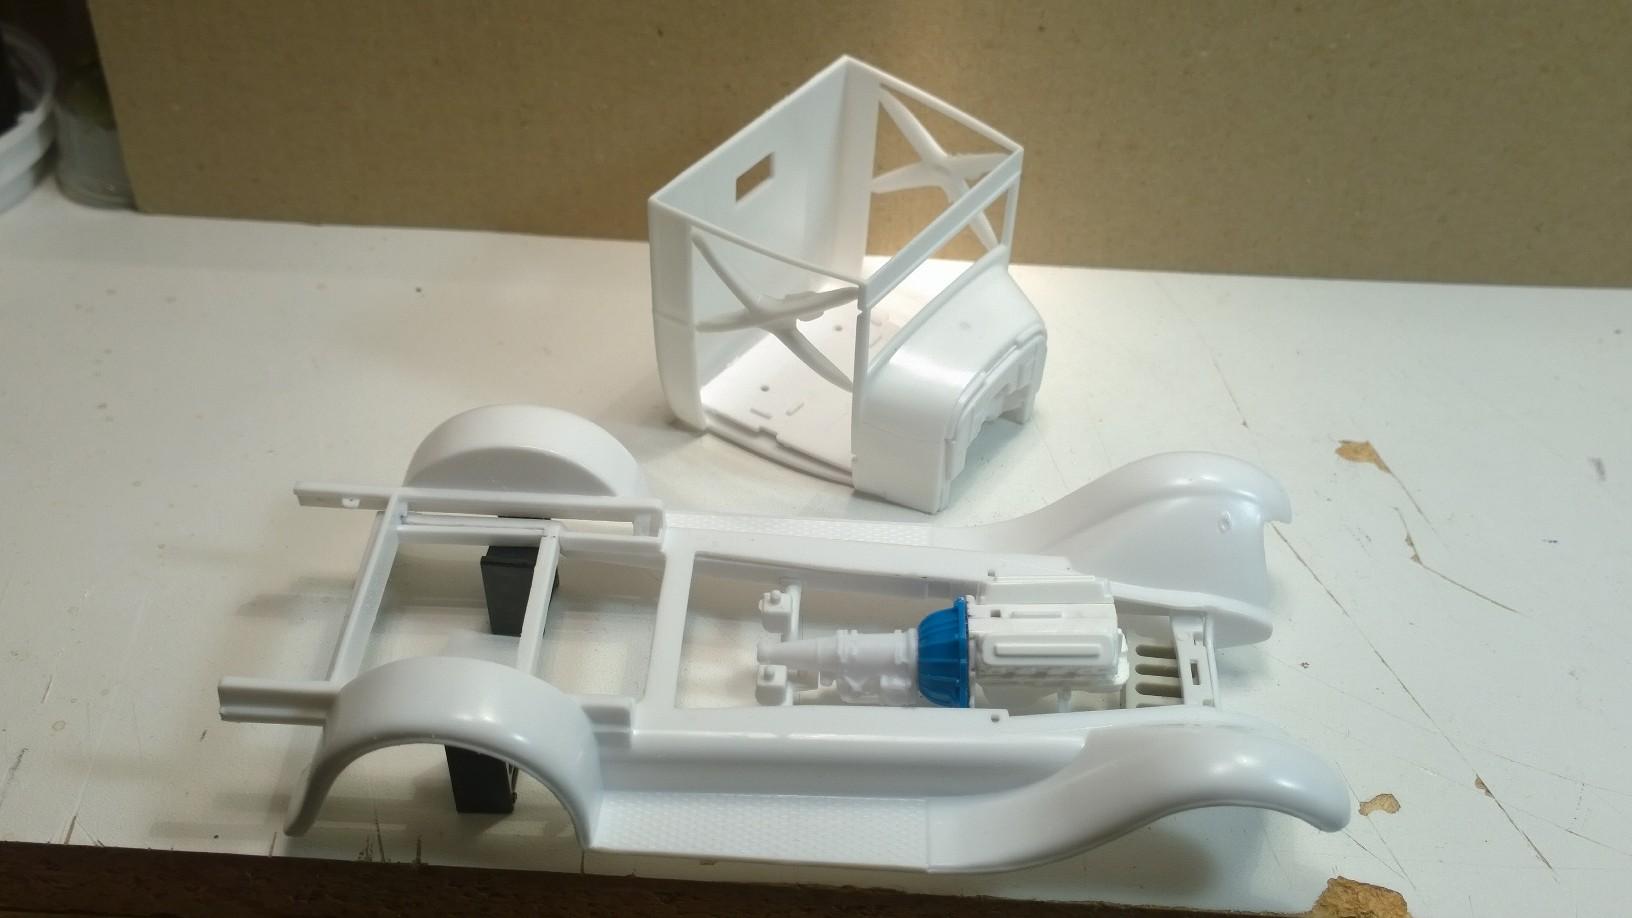
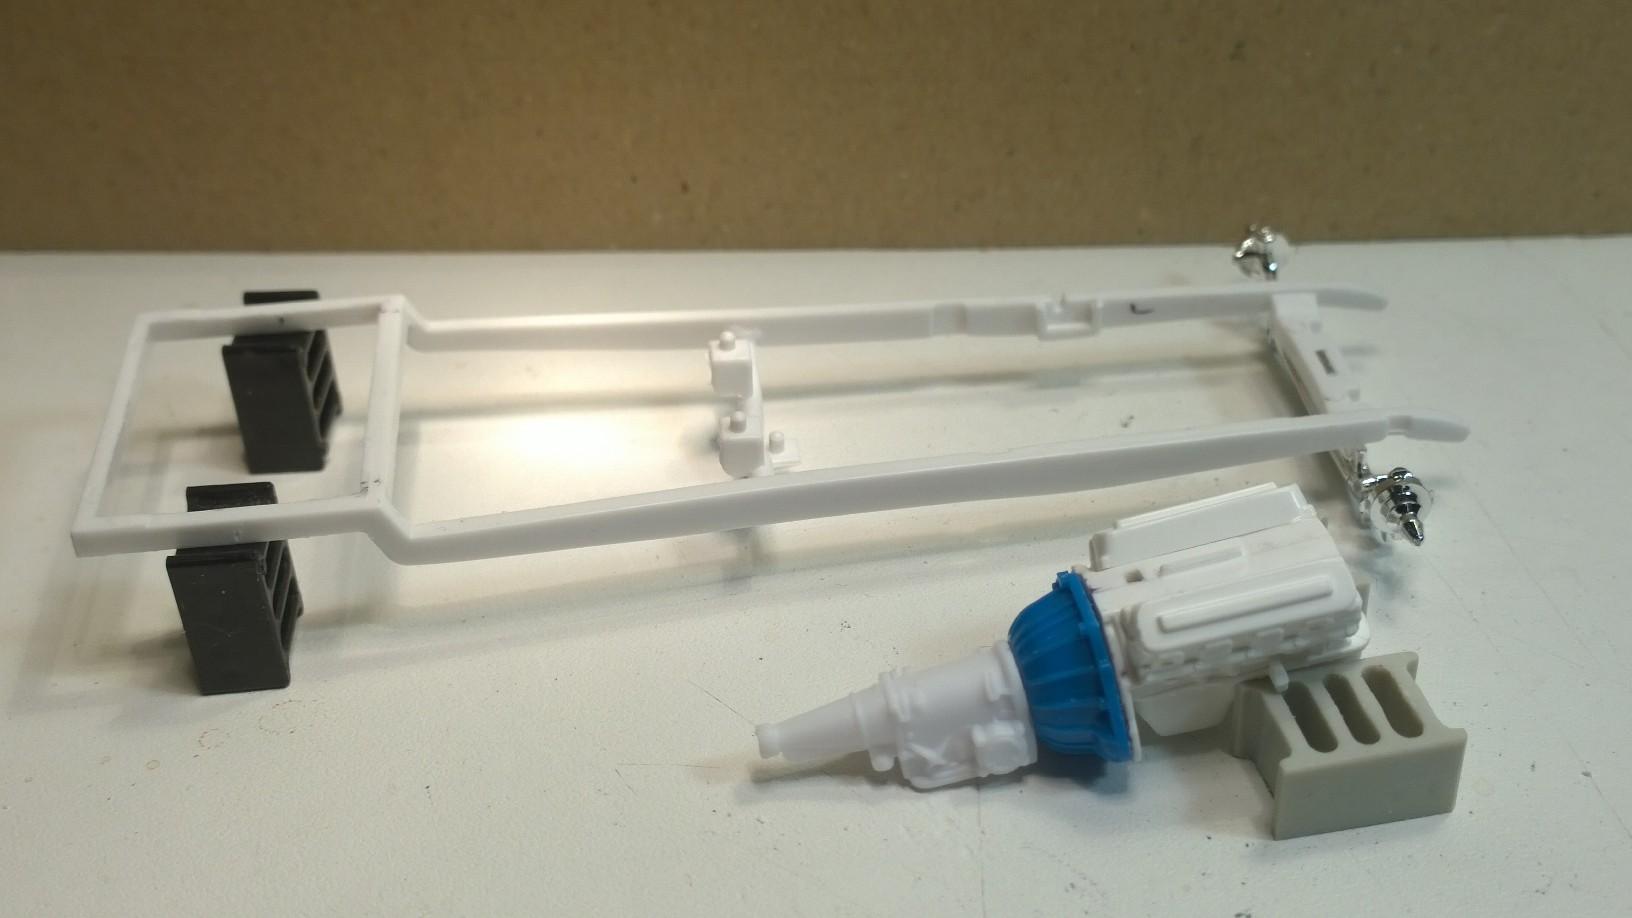
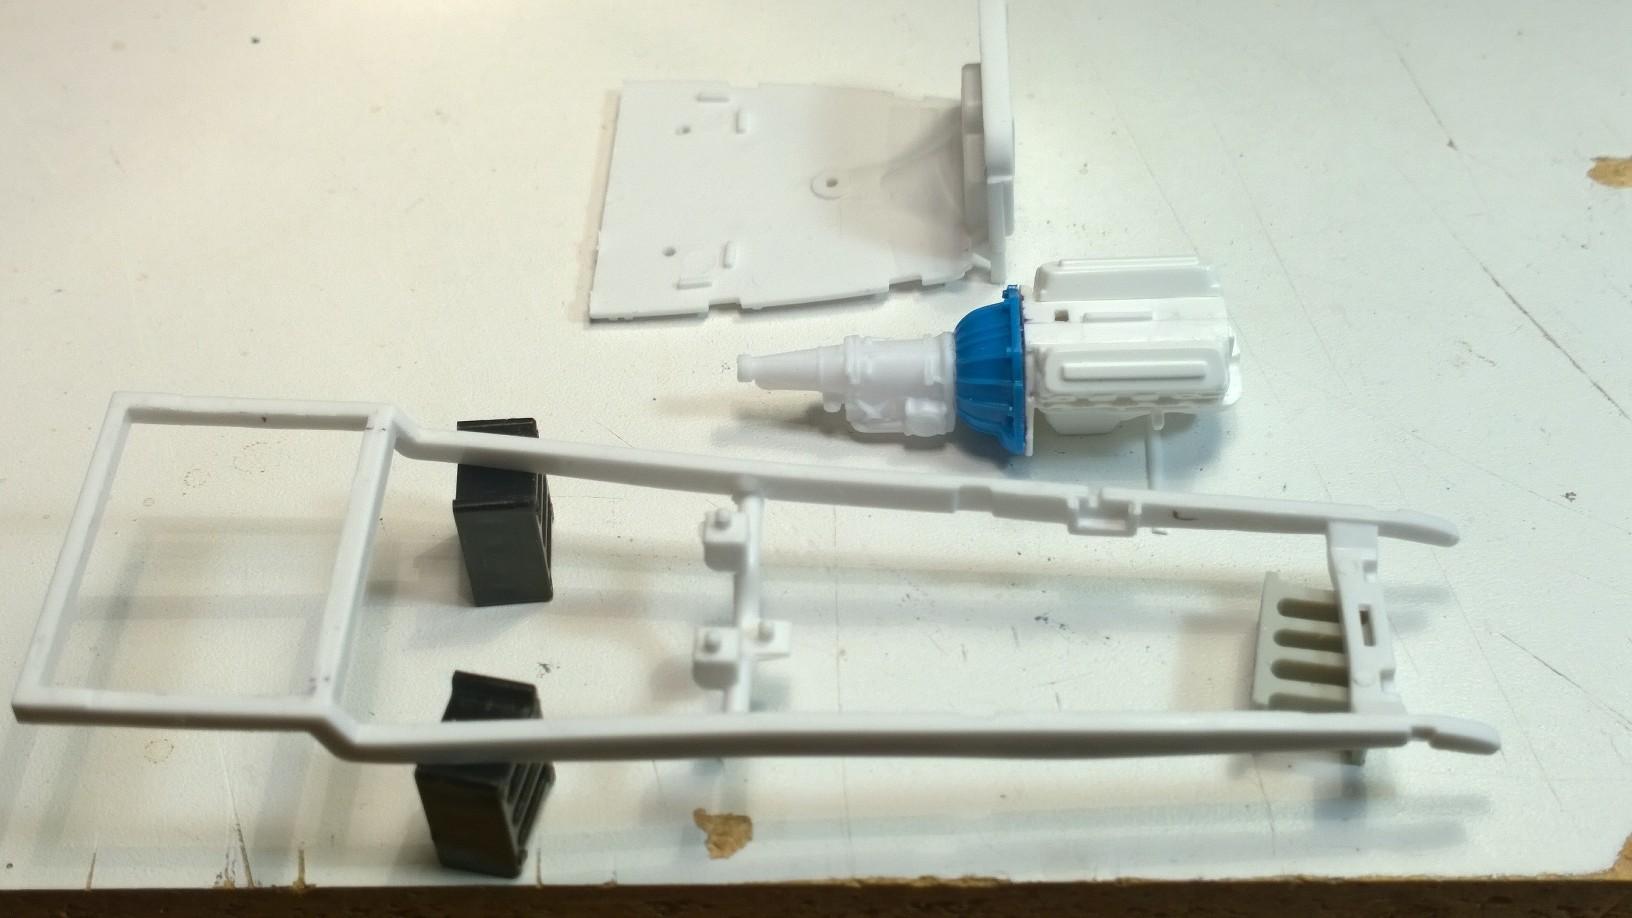
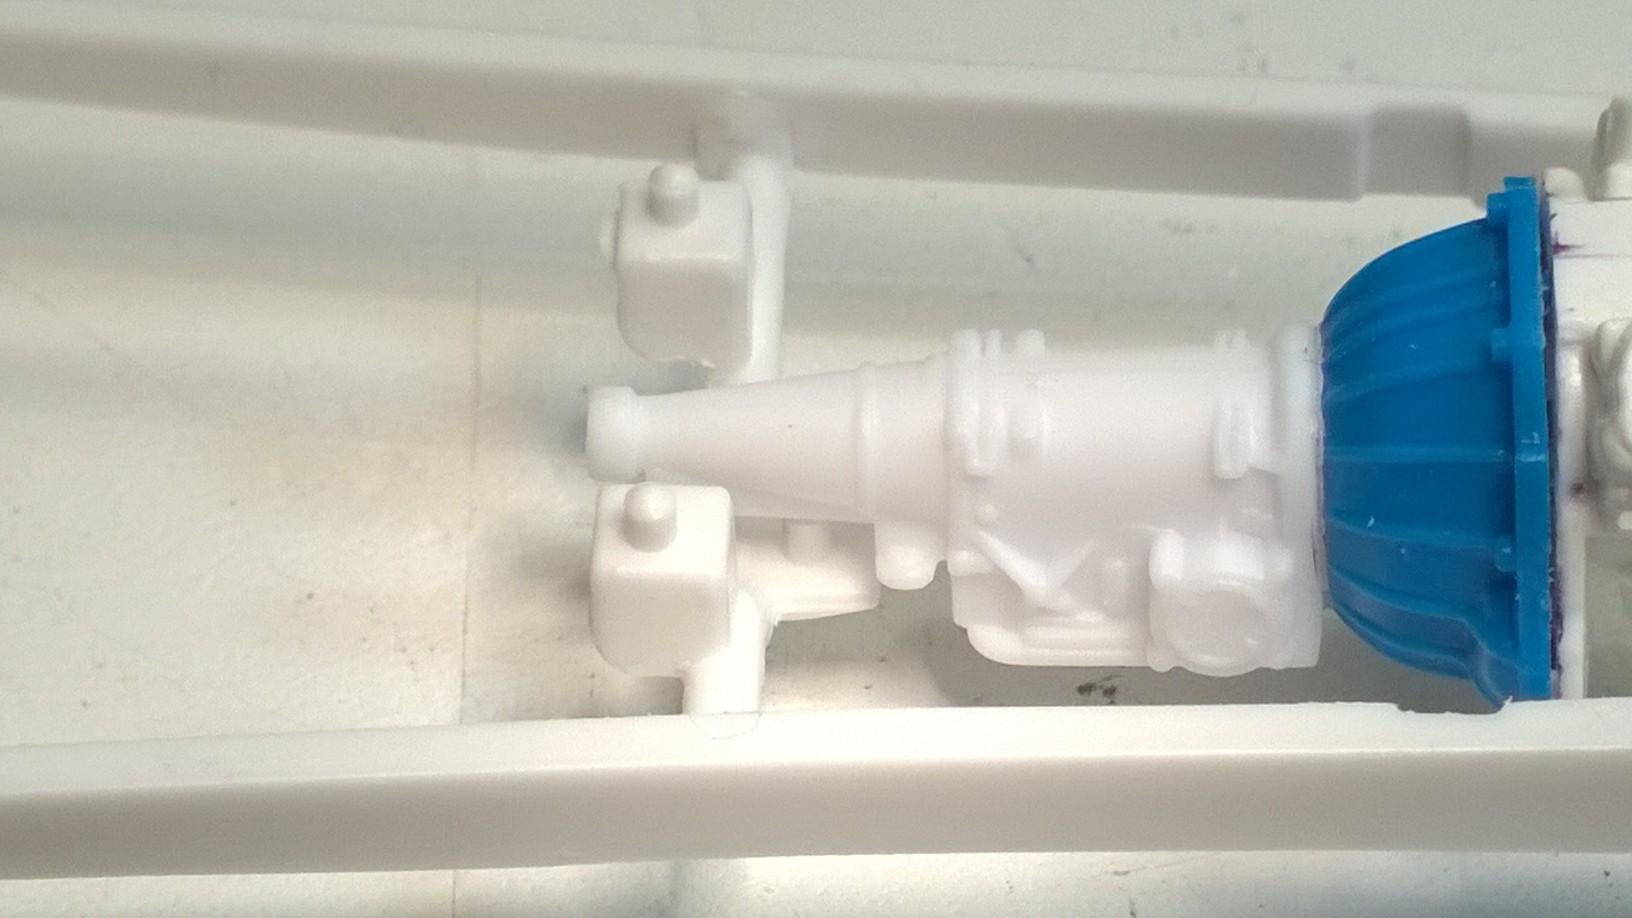
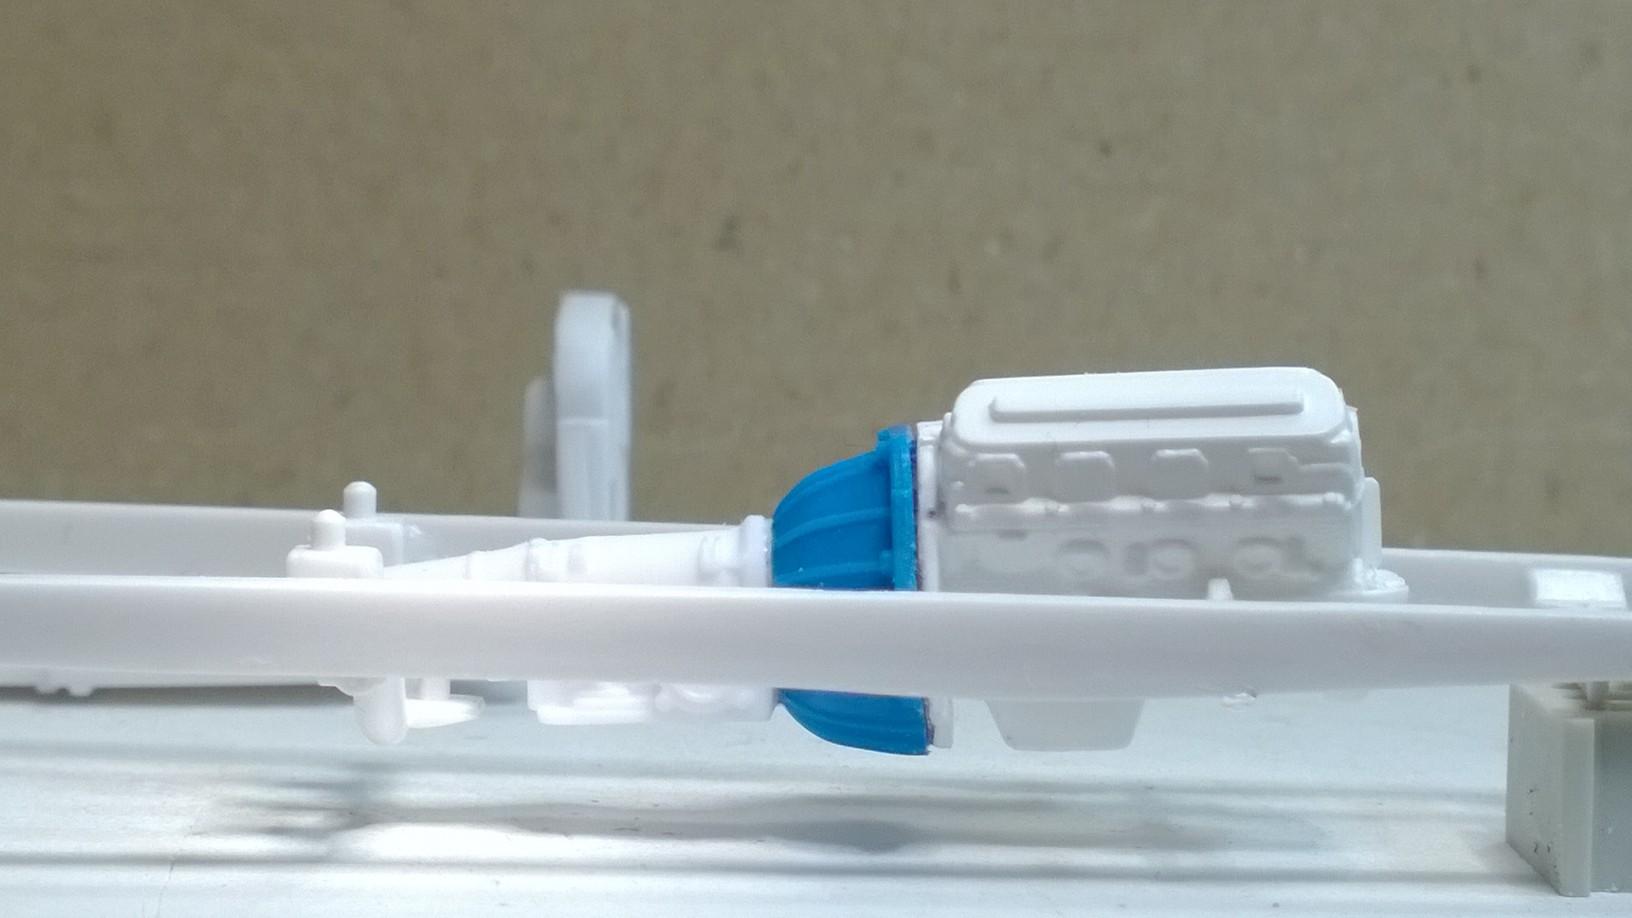
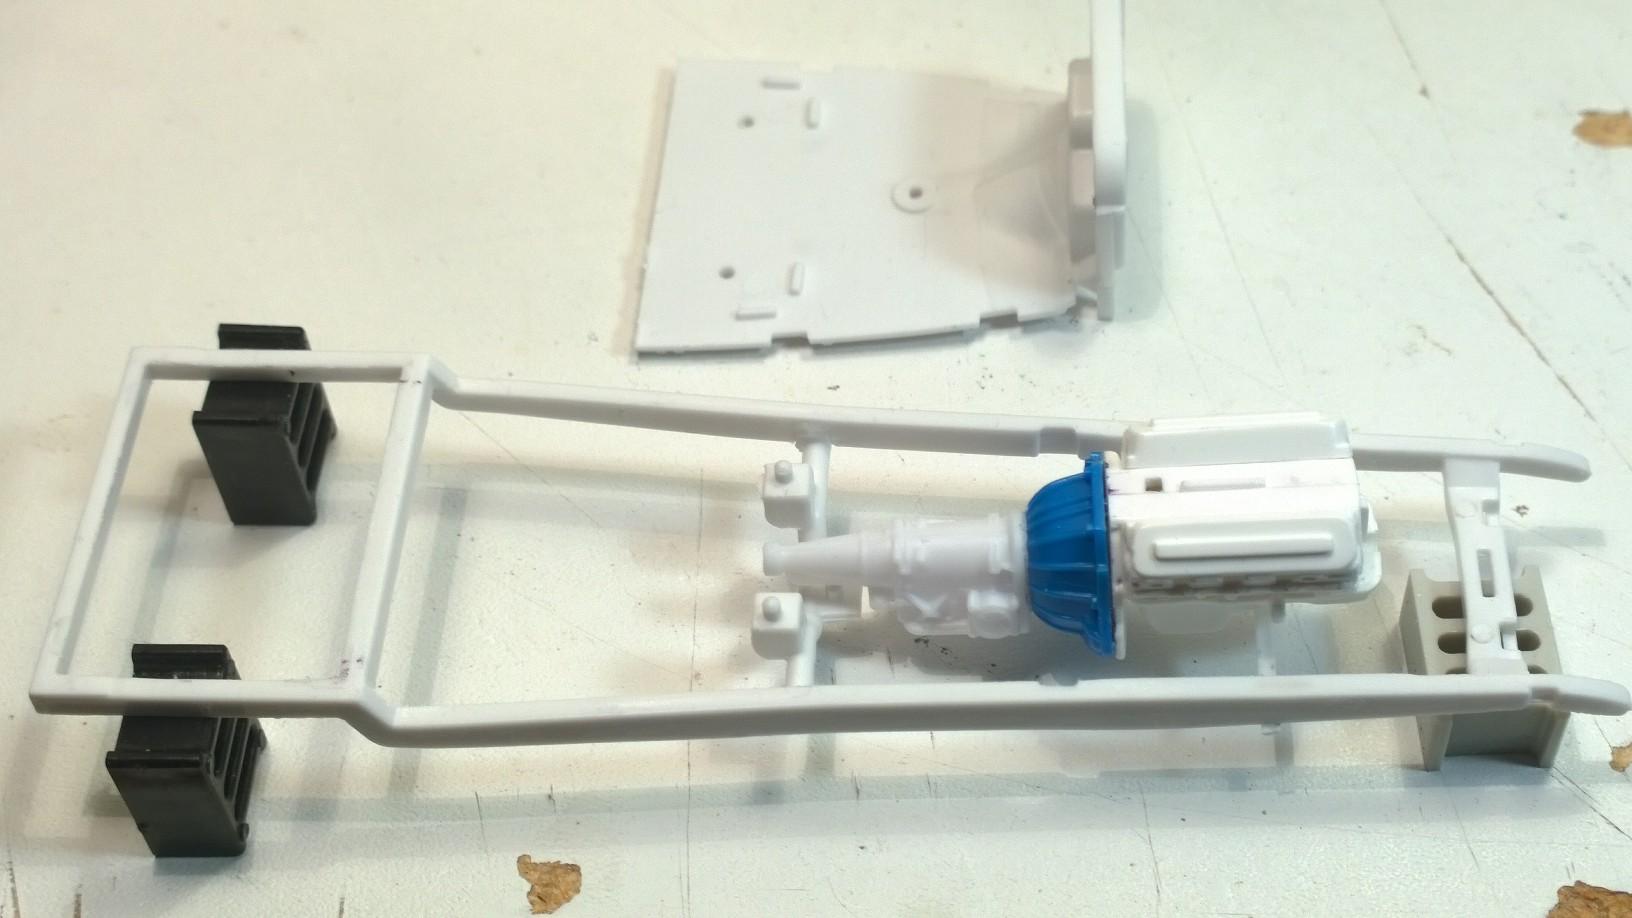
There's going to be a little cross-pollination going on in the next step of mating the cross-bread engine and transmission to the '29 Roadster frame. There are a couple of ways to attack this and staying with retaining as much of the box stock assembly, locating the '29 Roadster 140 Cross Member in the notched locator slots in the '29 Roadster frame, is where we'll start. With a little dab of white glue... placed the cross member inside of the frame rails. Sizing up the location of the engine & transmission relative to the '29 Roadster frame... (Note: the original '29 Roadster motor mounts have been removed, earlier) Because the block and oil pan came from the Revell Deuce kit, Deuce motor mounts will be transferred to our Model A hot rod frame! Here's the Deuce oil pan mounted the the box stock mounts. (If you go back in this thread, you'll see @Rocking Rodney Rat scratched built his motor mounts.) Setting the engine and transmission into the box stock donor frame shows us where the engine will need to be placed into the Model A hot rod frame. Setting the hot rod frame on top of the Deuce frame, gives us an overhead view of where the engine will be placed. A quick measure of the frame widths, shows that the Deuce motor mounts will crossover to the hot rod frame... '29 Roadster frame Deuce frame One more look at where the engine needs to set relative to the frame & firewall... Now, the distance that the Deuce motor mounts need to be placed bac from the front cross member. Here is where we need to establish a guide for placing the Deuce motor mounts in the right place within the hot rod rails. A piece of half-round rod is temporally glued across the bottom of the rails at the center point of the Deuce engine mounts. Again, eye-balling the location of the main parts, once again... Flipping over the frame... ...and, placing the engine & transmission on the temporary cross-bar... we can see where the tranny mount will need to be relative to the engine mounts. The engine & transmission sit right where they ought to be... Looks like the firewall will fit, sorta! But, there's a lot more to be done to make this all come together! -KK
-
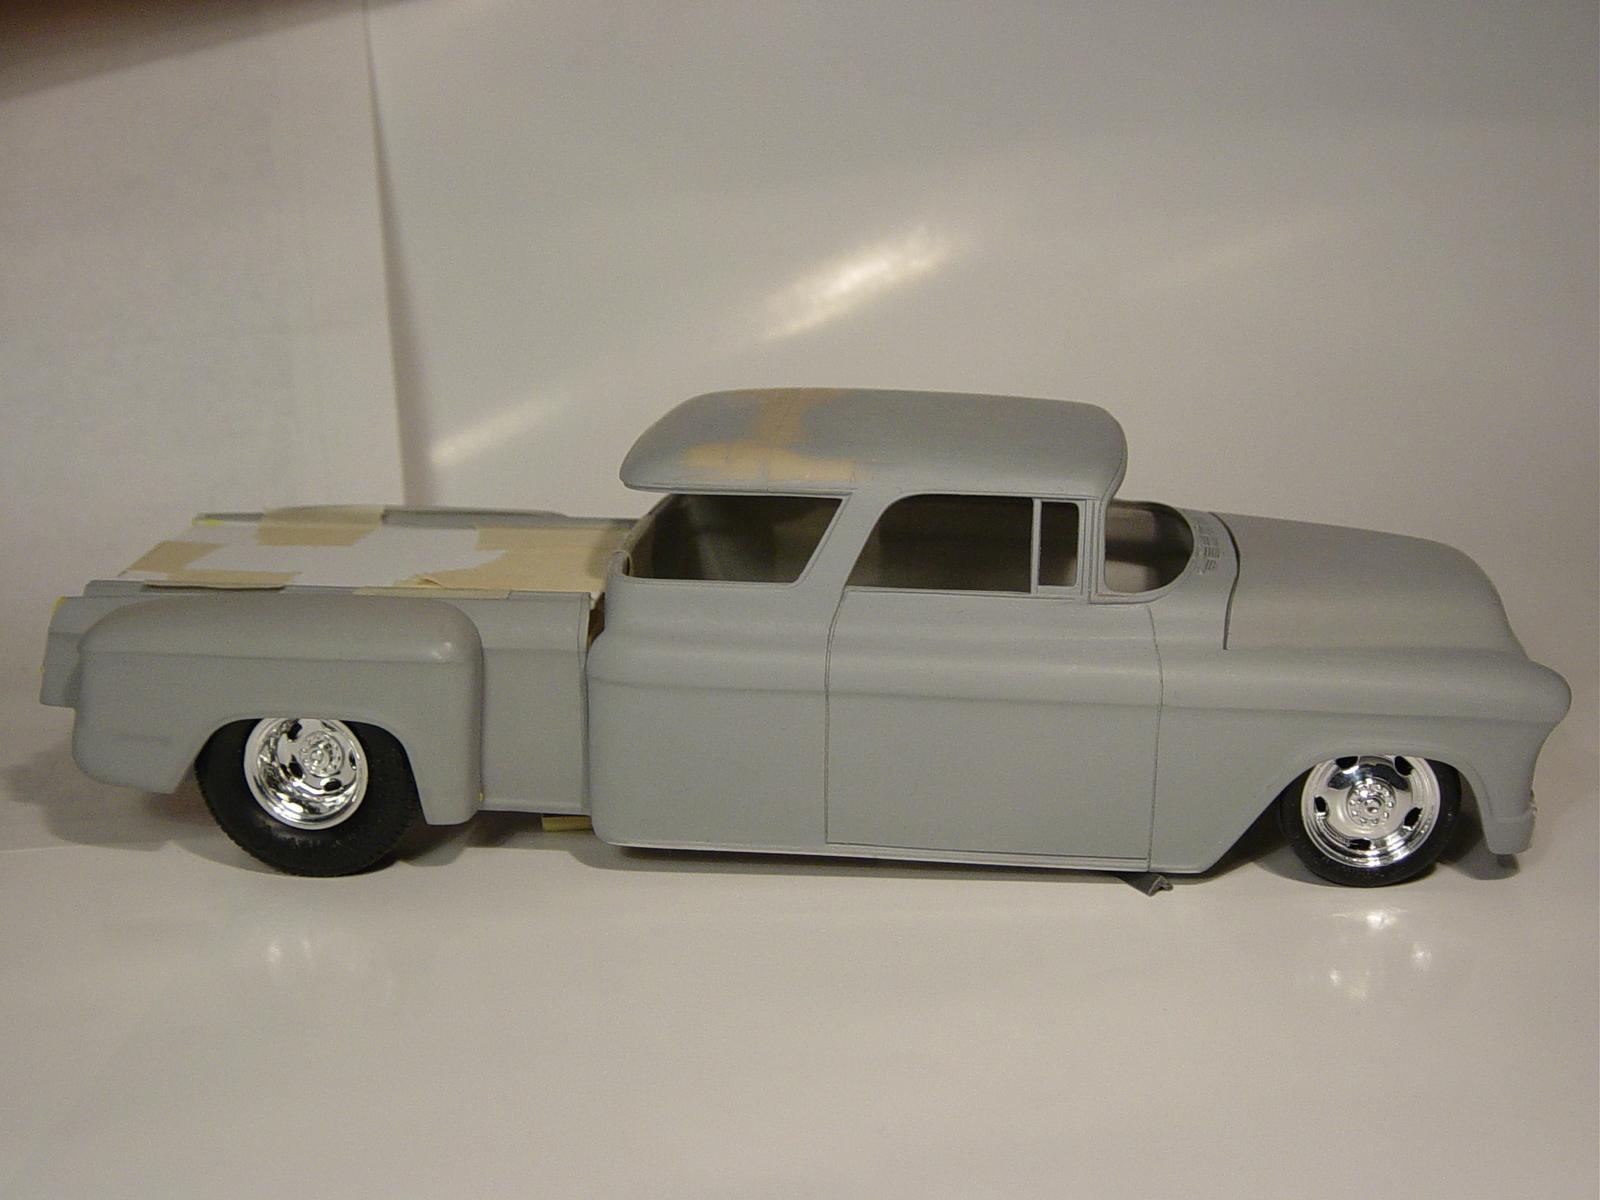
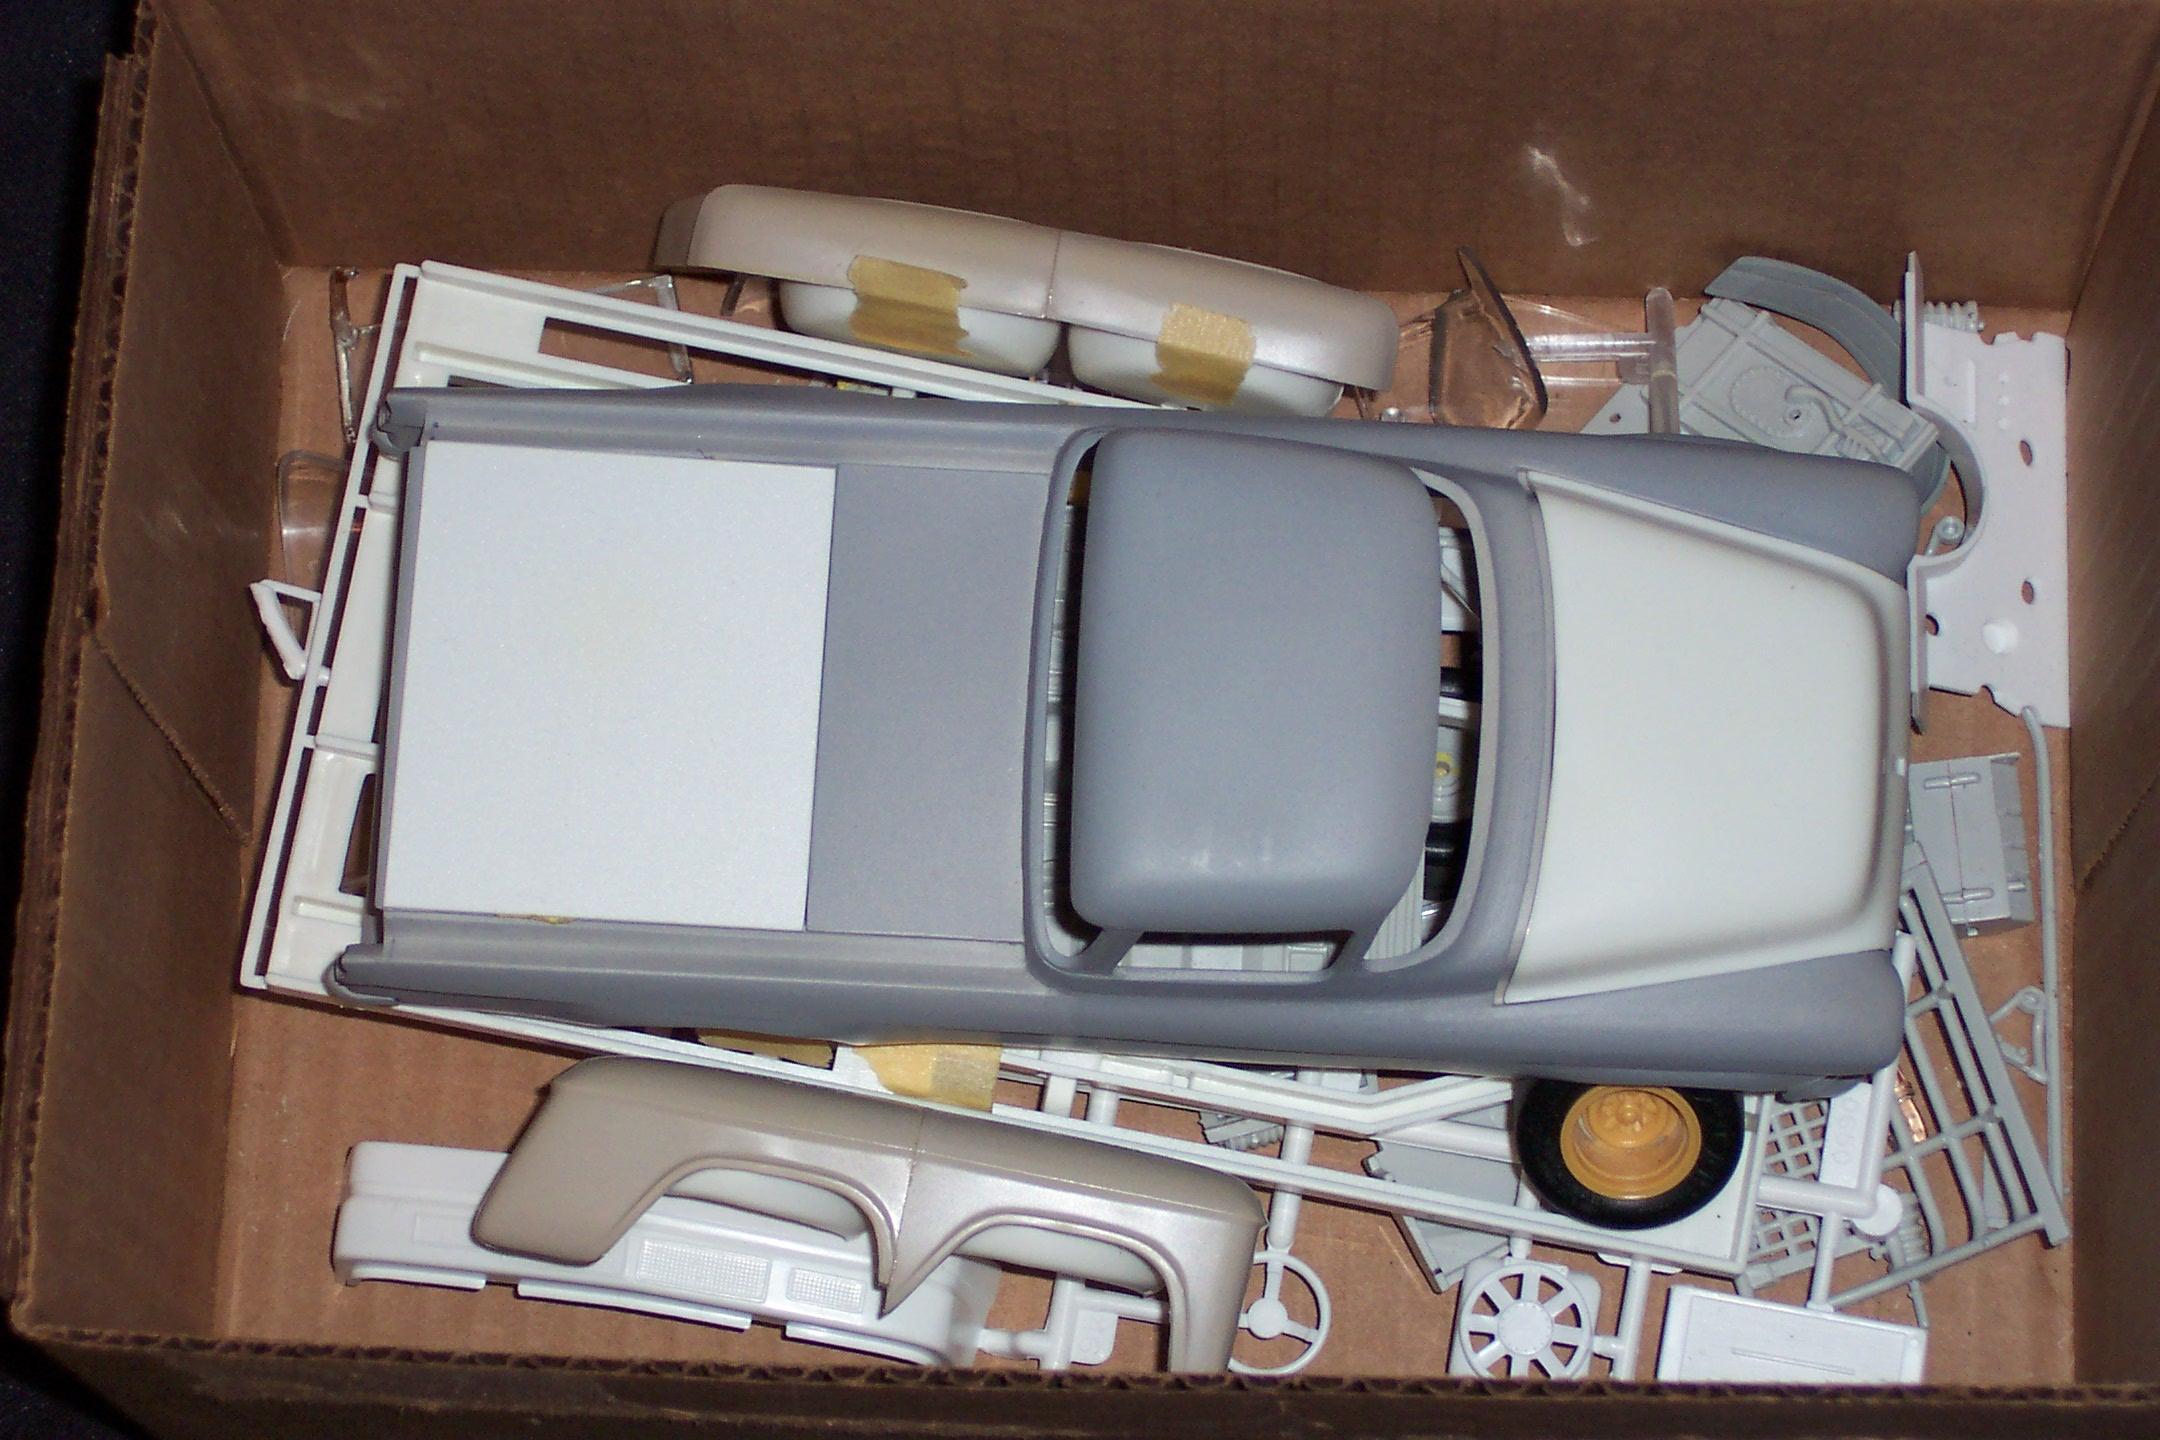
@alan barton Say WHAT!?. Brother, I'm right there with you! In keeping with identifying the Revell parts being used in this build, (although I found a pair of Monogram parts, yesterday... that might be added later) modifying many of them will come later while doing the body work, e.g. Filling in the hinges on the body, doors & box and tailgate. Not wanting to miss the opportunity to polish this '29A Closed Cab Pickup into an '80s/'90s style hot rod as this build progresses, has left several pieces in their original box stock condition during the initial steps they are presented. Sooo, to that end... smoothing the swag out of the ol' '30/'31 Ford firewall is already on my story board. @alan barton, I'm sure that @tim boyd, @Dennis Lacy & @Rocking Rodney Rat wouldn't mind seeing the parts you pulled together! I know I would!! Thanks, for following along! This is what sharing this hobby is all about!! -KK