

alan barton
-
Posts
2,105 -
Joined
-
Last visited
Content Type
Profiles
Forums
Events
Gallery
Everything posted by alan barton
-
1930 Ford Coupe On '32 Rails With Pontiac 421 Power!
alan barton replied to Dennis Lacy's topic in Model Cars
Just hop in and drive it away! That finish on the wheels leaves me breathless - I have to try that. Such a nicely balanced rod. Cheerrs Alan -
What a pleasure to the eye! Steve, I always love the way you create this cars largely by massaging what is already there rather than massive amounts of scratchbuilding or aftermarket stuff. Your ability to produce total realism in scale just blows me away. Plus, my grandfather had Pontiacs throughout the sixties including a 63 Parisienne so I have a soft spot for these cars anyway. Thanks for sharing your craftsmanship with us all. Cheers Alan
-
Randy, you can always do whatever you like to your model but in terms of what the response would be at a rod run, I would probably forego the removable insert. Especially if you are going for a fabric top. If you sand off all the mouldings and painted the roof in body colour, then a removable sunroof might look OK. At the very least, if you do use the Revell insert, after you cut the hole in the roof, make a ledge along the lower edge of the hole so that the insert drops into it rather than sitting on top of it. That would look pretty cool. I have a chopped 30 Tudor on my shelf and yeah, you can't see much inside - I ended up just doing a black interior and not worrying about it. One trick I have learnt on these bodies, if you take a small square file and relieve the back edge of the sunvisor, you can tweak the cowl a bit for a better door fit. Getting the doors and cowl aligned is always challenging on these! Cheers Alan
-
The Red Devil - Jo-han Cadillac Sport Phaeton
alan barton replied to Richard Bartrop's topic in WIP: Model Cars
This looks magnificent Richard. It is not a topic I would normally tackle but wow, what presence, both the real car and the model. You can already tell just how good the finished product is going to look! Cheers Alan -
I would have to agree, Rodney. You have the likes of Codi, Mark Jones and John Teresi pushing the limits of fabrication and machining. Then there is Steve Guthmiller and Dennis Lacey building incredible creations by basically massaging the parts that the kit manufacturers gave us to start with to produce the most stunning eye candy. And for sure, there are others, these are just some of the top guys who are particularly prolific. Best of all, they are so generous with their information - it's probably why they get such an incredible number of views. Now for me, living on the hot rod side of the street, I feel like I am part of the best scale hot rod club in existence. Tim Boyd, Rocking Rodney, Kit Karson, Ace Garage Guy, Claude Thibodeau, Dann, Dennis as above, Bernard, the list goes on. I know I've missed people, but I am just rattling these off the top of my head, probably helped by the fact the fact that they are so prolific. I don't think we have ever had such a solid core of hot rod modellers on any forum. As soon as I see any of these guys name on a thread, I know I am in for a treat. And as quite a few of these guys build real ones, you know you are getting killer info. Ive had these similar thoughts to Rodney's in my head for a while now, thanks for the prompt to air them! Cheers Alan
-
Thanks again, everyone. I love the car and the fact that so many other people enjoy it as well is truly gratifying. I have a very chopped up Monogram Beachboys 32 3 window that already has one of these noses grafted to it so I will be making a partner for this one down the track. It has been in primer for years but the success of this one has inspired me to go crazier on the coupe! Cheers Alan
-
I get truckloads of computer gobbledygook. Cheers Alan
-
Perfect! A beautiful example of early sixties craziness! This is one of those models that is so obvious when you see it done that you wonder why no-one else has done it before ( at elast, not that I've seen) You can tell your buddy Frank that you whooped him! Cheers Alan
-
Compare and Contrast - a second variation on a similar theme
alan barton replied to tim boyd's topic in Model Cars
That was exactly the model that came to mind when I saw Claude's the other day. Talk about same only different! They would look fantastic sitting side by side. I currently don't have any built 36 street rods in my collection but I do vaguely remember my brothers and I building a similarly proportioned fenderless 36 (except it would have been unchopped) about 45 years ago but I can't for the life of me remember what we did for a grille. Maybe that's why it isn't still in my collection??? We might have just given up and turned it into something else! It is a credit to both of you that you nailed the proportions on a car that "shouldn't be", if you know what I mean. Honestly, how many real ones you seen done like this? Is it just because 36 3W s got so desirable that everyone is scared to take a walk on the wild side? Cheers Alan -
Ya just can't beat 1/8th scale for realism, eh? Yeah they kill your shelf space but they just look so good! I have two 32's and 2 t buckets in my cabinets, with about another six that I am saving for when I cant see 1/5th anymore! I love your choice of colour - so often they are red or black! Cheers Alan
-
Mission Impossible - American Graffiti cop car from a wreck
alan barton replied to alan barton's topic in WIP: Model Cars
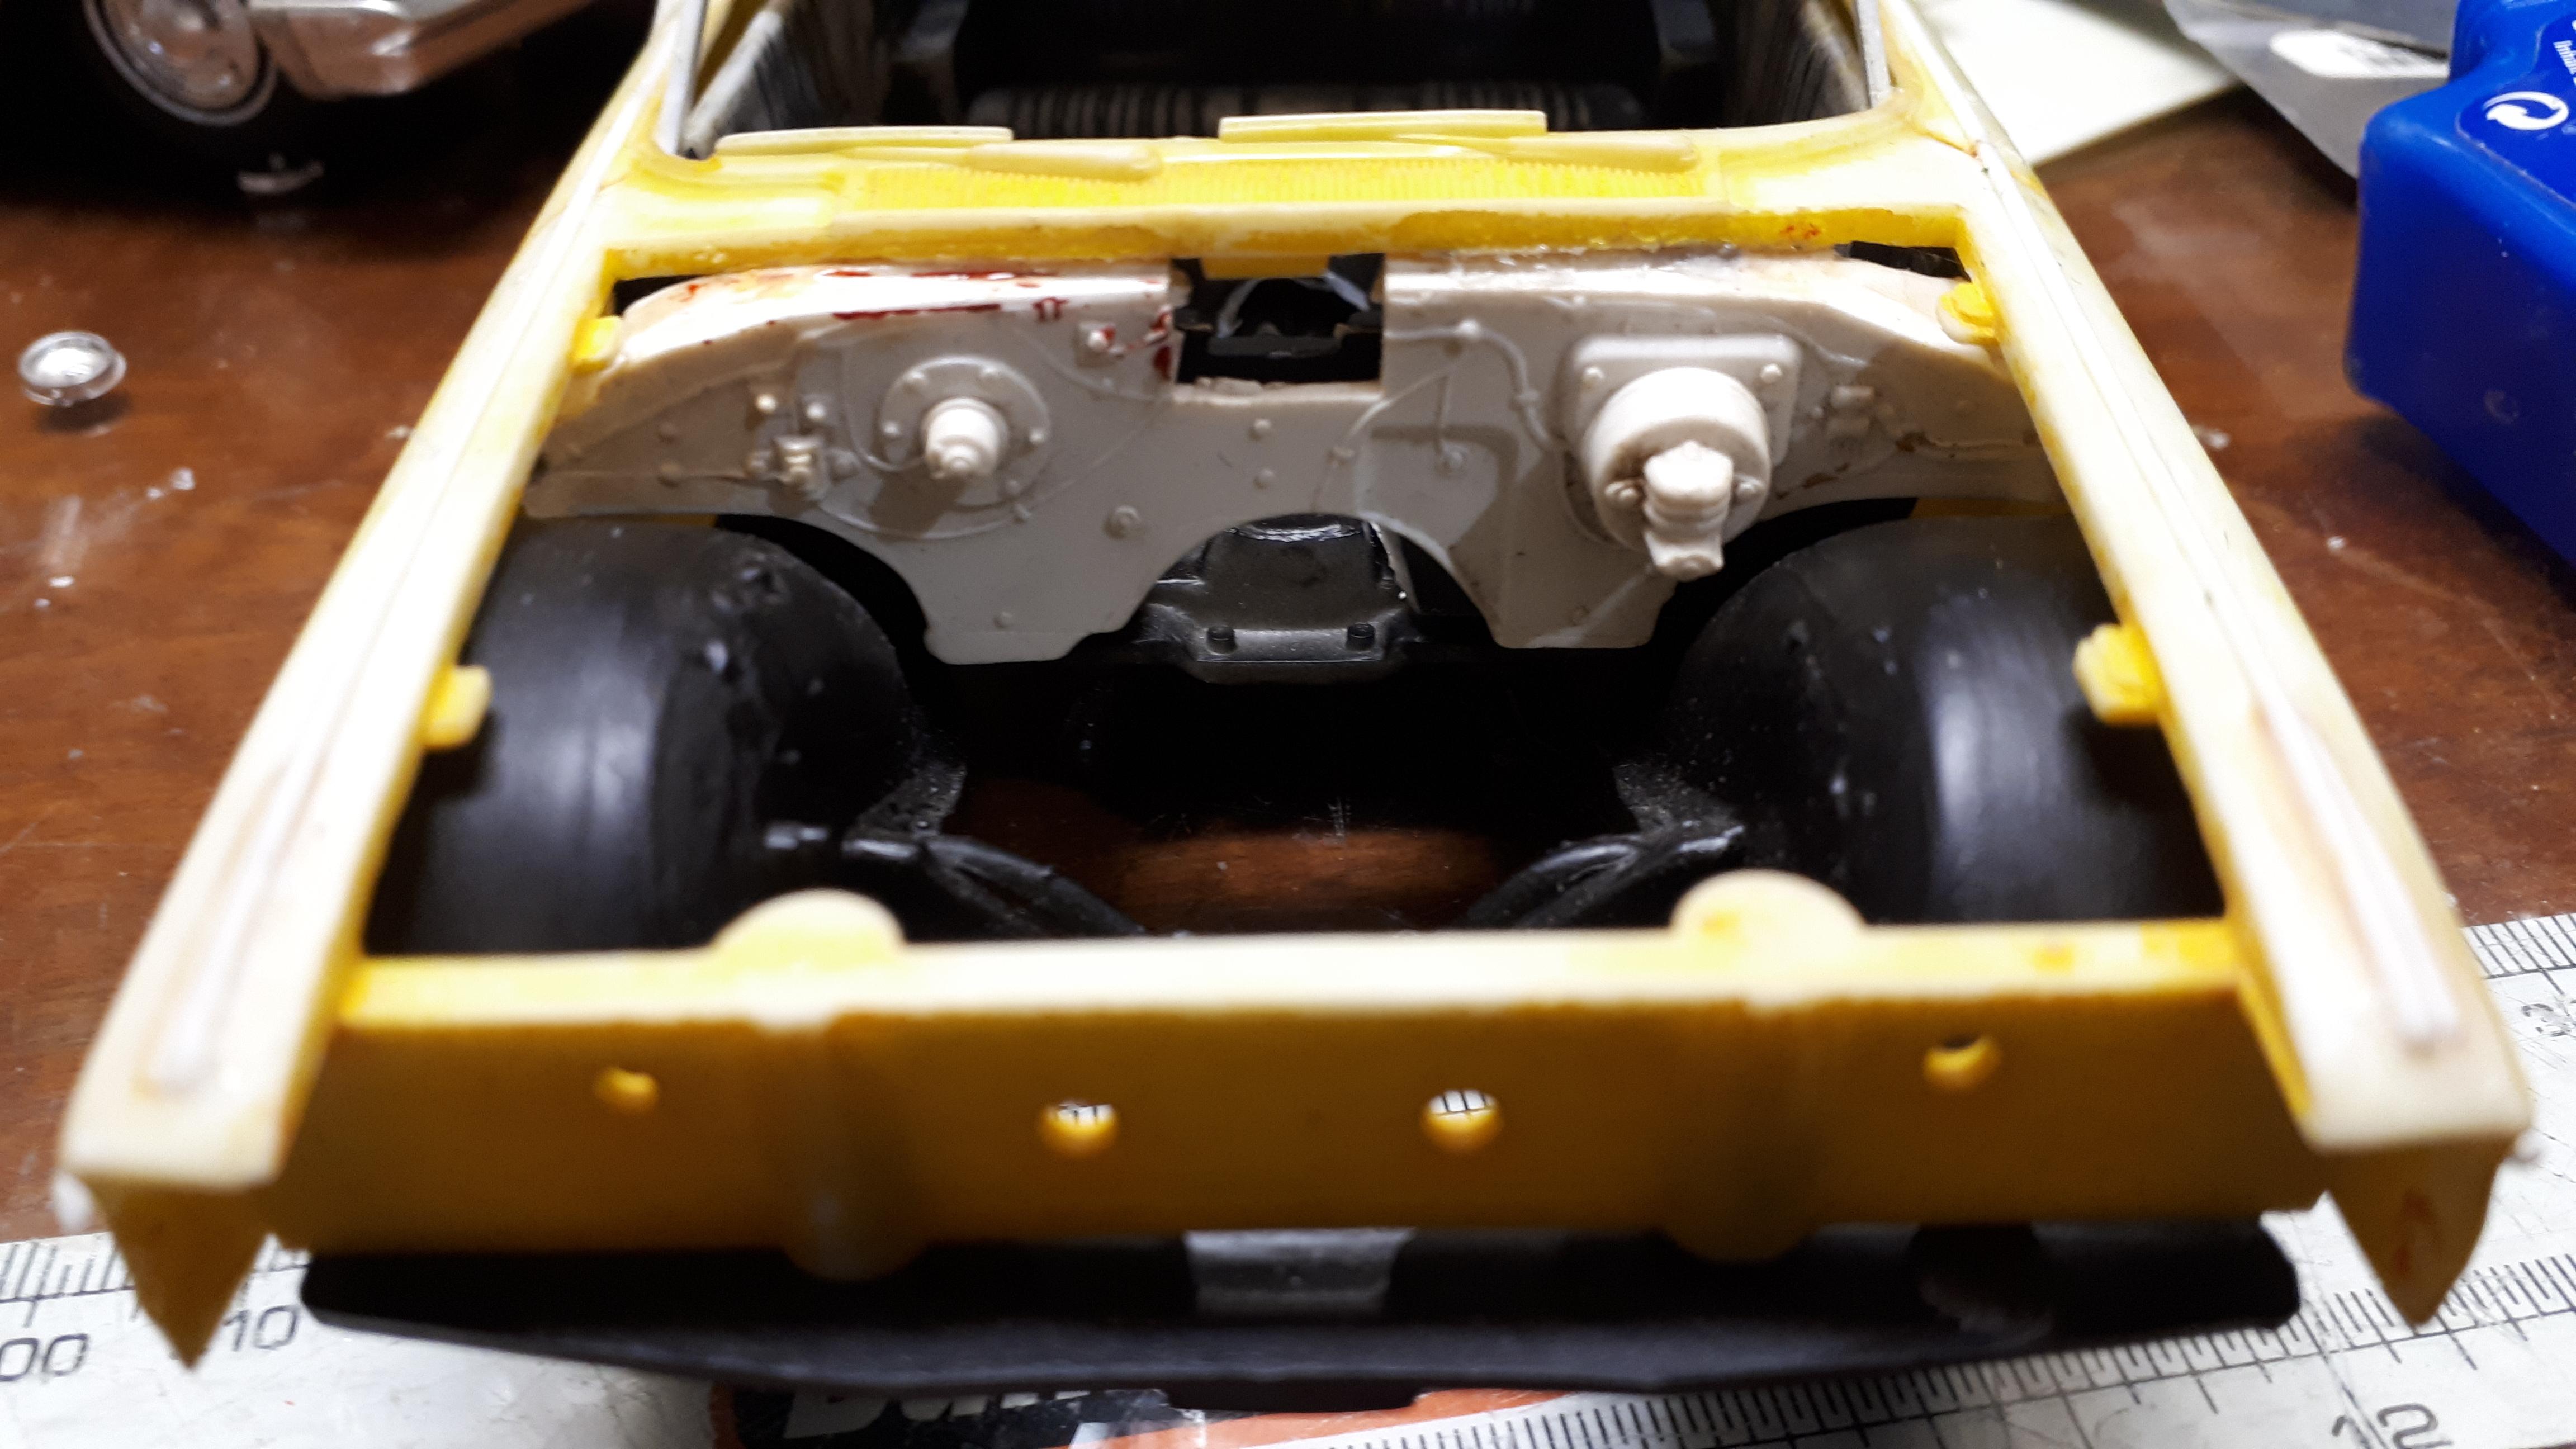
Thanks espo, it seems this thing really wants to get built. I am actually getting quite excited about a model that I wouldn't normally look twice at. It wants to get built! No big progress overnight because I indulged in a bit of parts hunting. As I was working on the body this week, it occurred to me that once the bogging and sanding begins it was going to have to cope with a lot of manhandling and I thought gluing a firewall in place might help strengthen the body. I dug through my firewall box and couldn''t believe when I found exactly what I needed! It looks almost identical to the one in my 61 survivor convertible, but it is not the same one. I have only ever owned two Galaxie models so i was at a loss as to where it had come from. Digging back nearly fifty years through my memory bank, I think my younger brother had a 63 Mercury once, the issue with the Adonis style custom parts. That must be where it came from and probably explains the engine I found the night before.
-
Circa 36: A customized blown & channeled 36 Ford 3W coupe
alan barton replied to Claude Thibodeau's topic in Model Cars
Ahh, Claude, you've done it again! First thing I noticed was how well you've blended the top onto the body - few modellers get that as neatly done as you have - me, I still haven't done one at all! And the Chrysler grille - who knew? The total package comes together way better than a list of components would suggest. Congratulations! Cheers Alan -
Mission Impossible - American Graffiti cop car from a wreck
alan barton replied to alan barton's topic in WIP: Model Cars
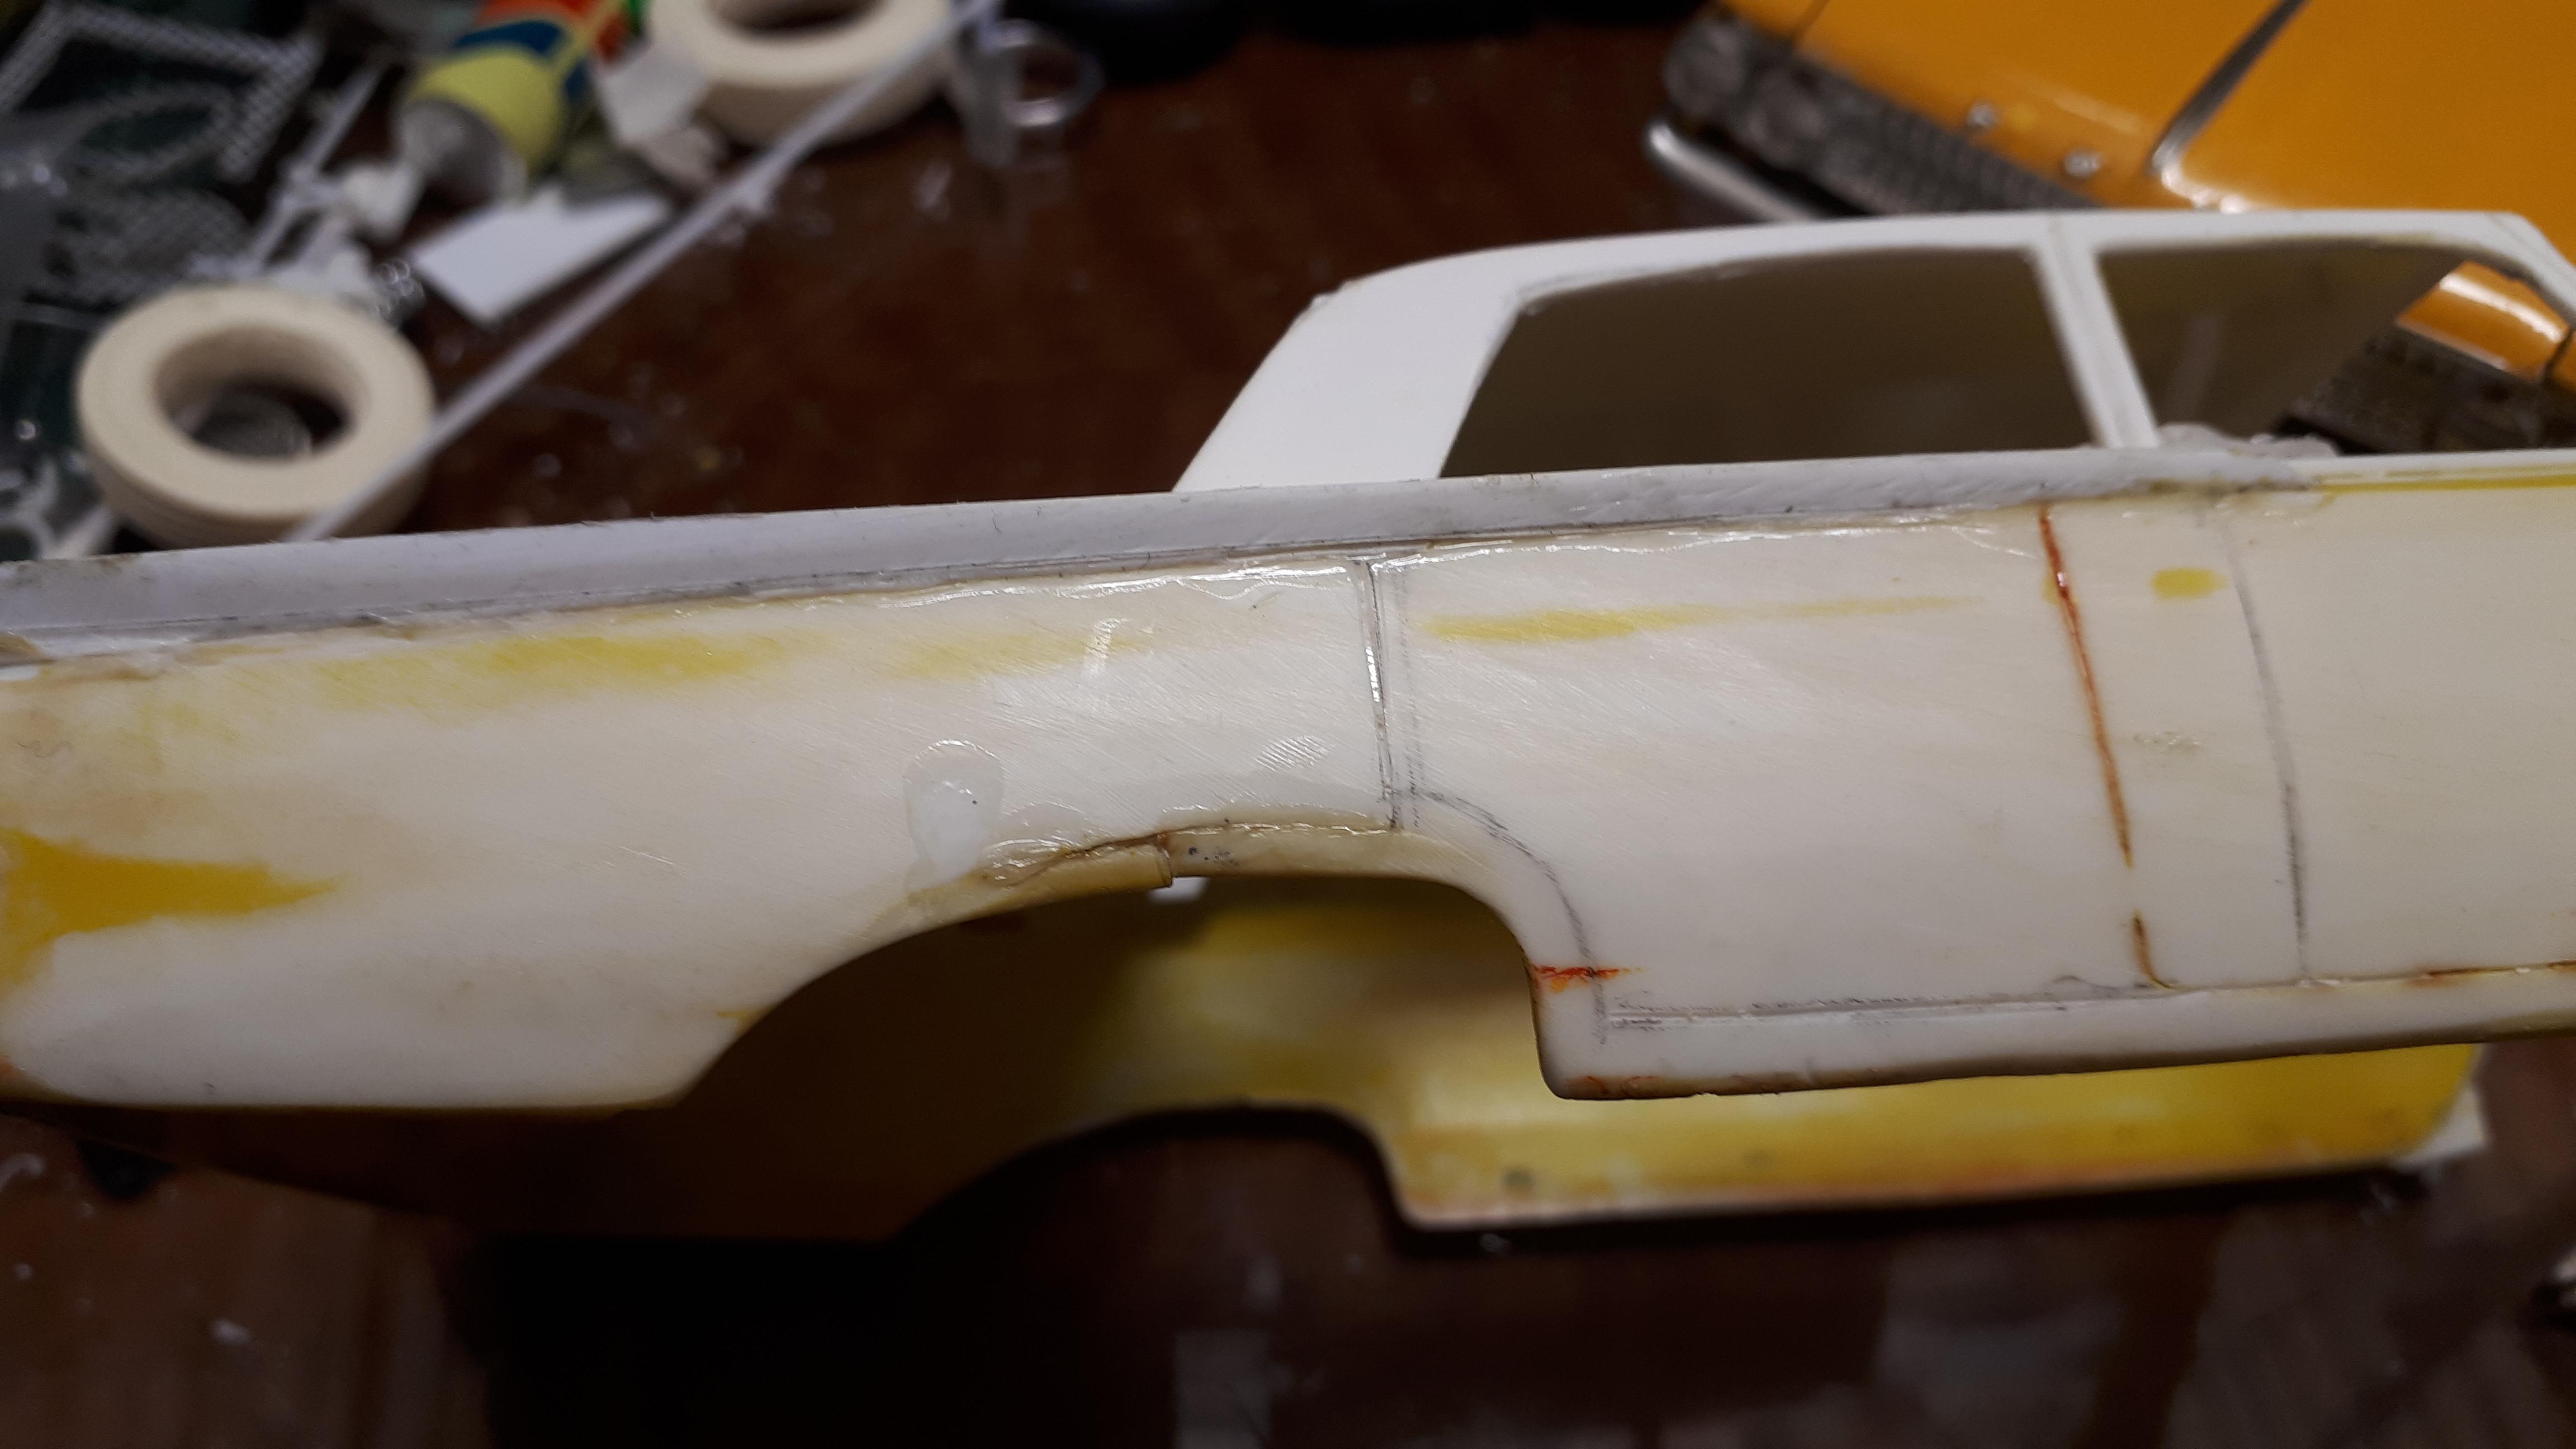
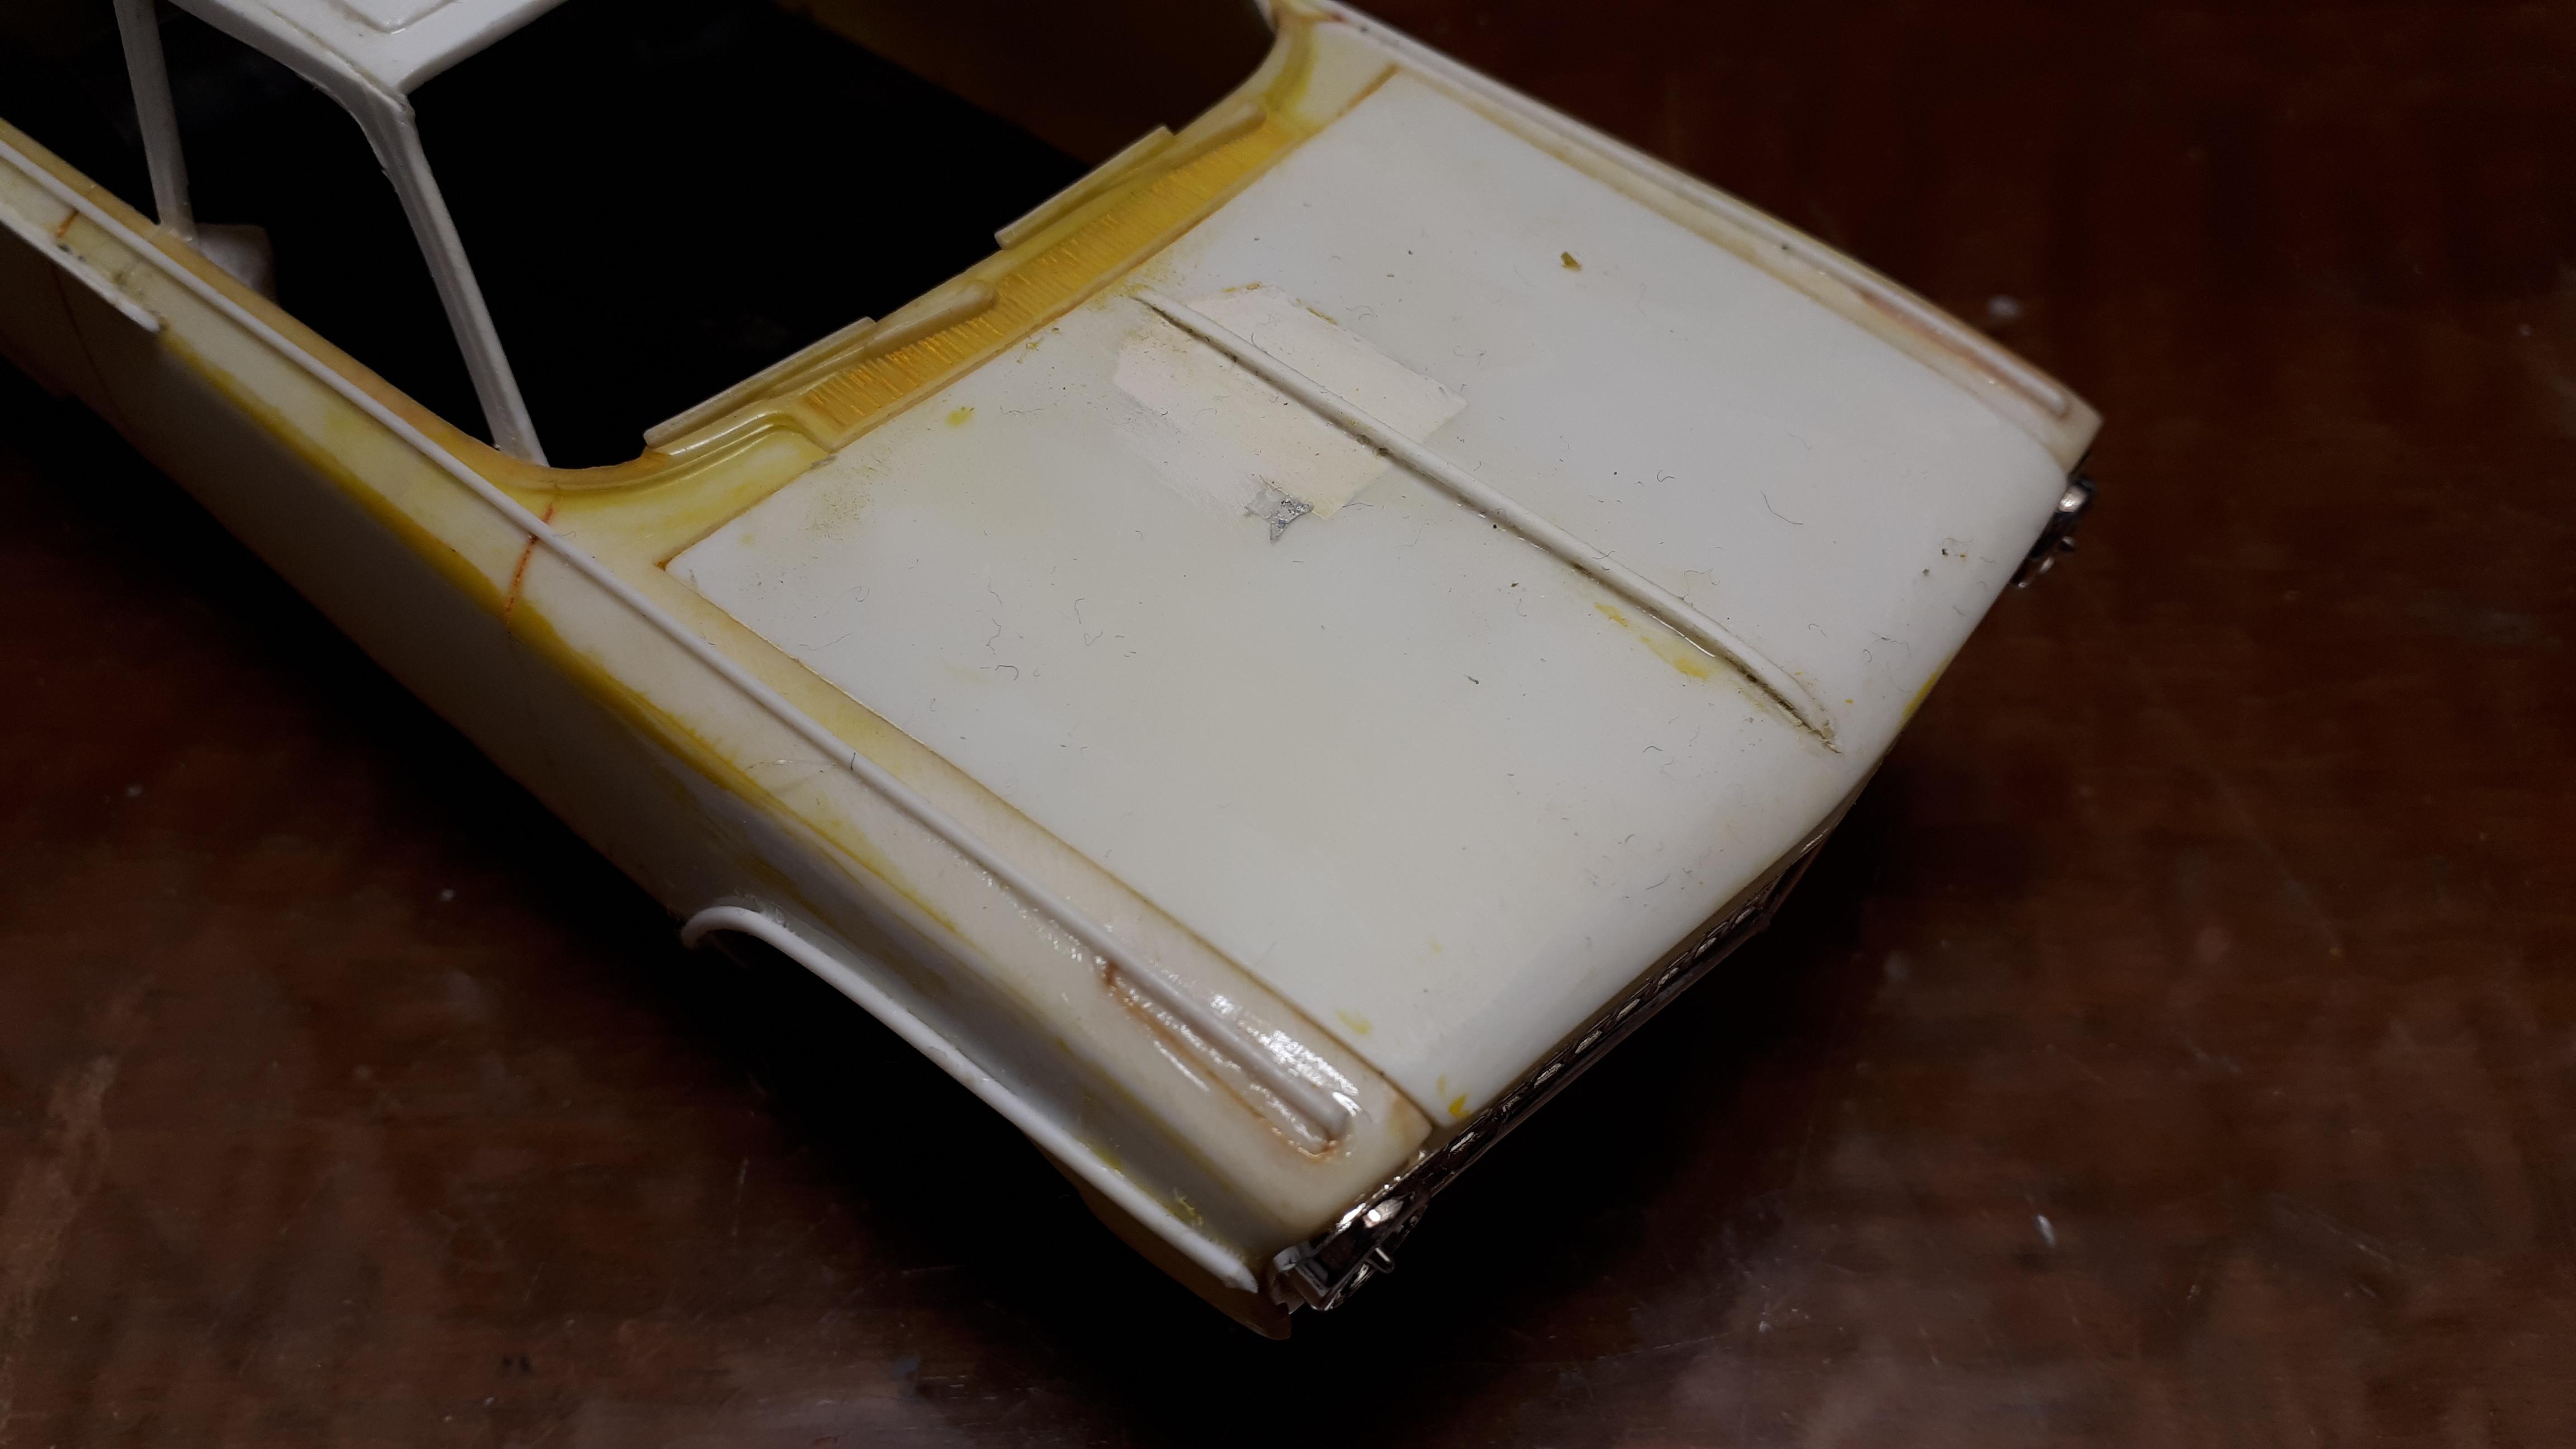
Started work on the wheel arches last night. A previous owner ( not my mate!) had removed all evidence of them. On the right hand rear he ahd actually broken through the body! I glued on some lengths of Evergreen rod to begin the reconstruction. This weekend I will get the bondo out and start bogging things up. The front wheel arch should have a sharper lower corner as seen on my survivor 61 convertible, bought and built by me back in 1973! I needed to install some spears along the top of the front fenders and my research shows the spear actually disappears and blends into a squared off window sill towards the rear of the car. I glued two lengths of Evergreen rod in the appropriate positions and will be blending this in with putty soon. I also got the hood knocked into shape. I patched the hole from the obligatory blower invasion and then added a strip of styrene to create the spear down the hood. It came up a treat and will hardly need any putty at all. I have a couple of ideas for the grille, or lack of. I still have a custom grille from my 63 and with the addition of a second pair of headlights, it would be passable. Failing that, I could just "borrow" the grille from my survivor 61, and use it for the weekend of the displays. Tonights job will be to get the front window frame sorted and then it will be bog time! I just hope it goes as well as the rear window surround went!! Here's where I'm at so far.
-
British Ford 100E Multi piece kit!
alan barton replied to Bugatti Fan's topic in General Automotive Talk (Trucks and Cars)
Noel, I have one but can't lay my hands on it at the moment. It is what I call "squintable" - yes, it is a 100E but it has some proportion issues. Its not terrible but its not right either. The most obvious flaw is that the rear quarter panels are obviously longer than they should be. The headlights and taillights are a bit average also. A friend of mine is doing a fantastic job of making one dimensionally correct and but I don't know if he will be resin casting it or not. With your modelling skills, you could fix it too! Cheers -
Mission Impossible - American Graffiti cop car from a wreck
alan barton replied to alan barton's topic in WIP: Model Cars
Not much guts involved here, Nigel - I mean, where's the risk? This thing is as close to dead as any model ever got. It was just good luck that I had a mint chassis left over from a slot car project and tonight I surprised myself by finding an original motor in my stash. Just makes it easier to fill the hole under the hood when you know it came from there. Further to Rich's suggestion of starting with a 61 Hardtop kit. Not only had I forgotten that the kit was around, as I don't build a lot of sixties cars, but sticker shock has really hit home in Australia. I went into my friendly local hobby shop last week and an AMT Coca Cola 53 F100 is ..... wait for it..... $78.50 AUS. Not sure how it converts into pounds sterling but I know it is around $54 US at the current exchange rate that is still a lot for a fifty something year old kit with some cool stickers! It's not that I want a 61 Galaxie in my collection, it is that I want to have the iconic cop car scene happening on our club diorama. i will have some more photos tomorrow - got a lot done tonight but have things set up drying at the moment so wont get them til the morning. Thanks everyone for your interest in this project. Cheers Alan -
Mission Impossible - American Graffiti cop car from a wreck
alan barton replied to alan barton's topic in WIP: Model Cars
I like the idea and this would be the ideal model to try it on, but I intend to have it displayed at the full stretch of the cable with the rear axle tearing out from underneath, so the body wouldn't have hit the ground yet. Cheers Alan -
Mission Impossible - American Graffiti cop car from a wreck
alan barton replied to alan barton's topic in WIP: Model Cars
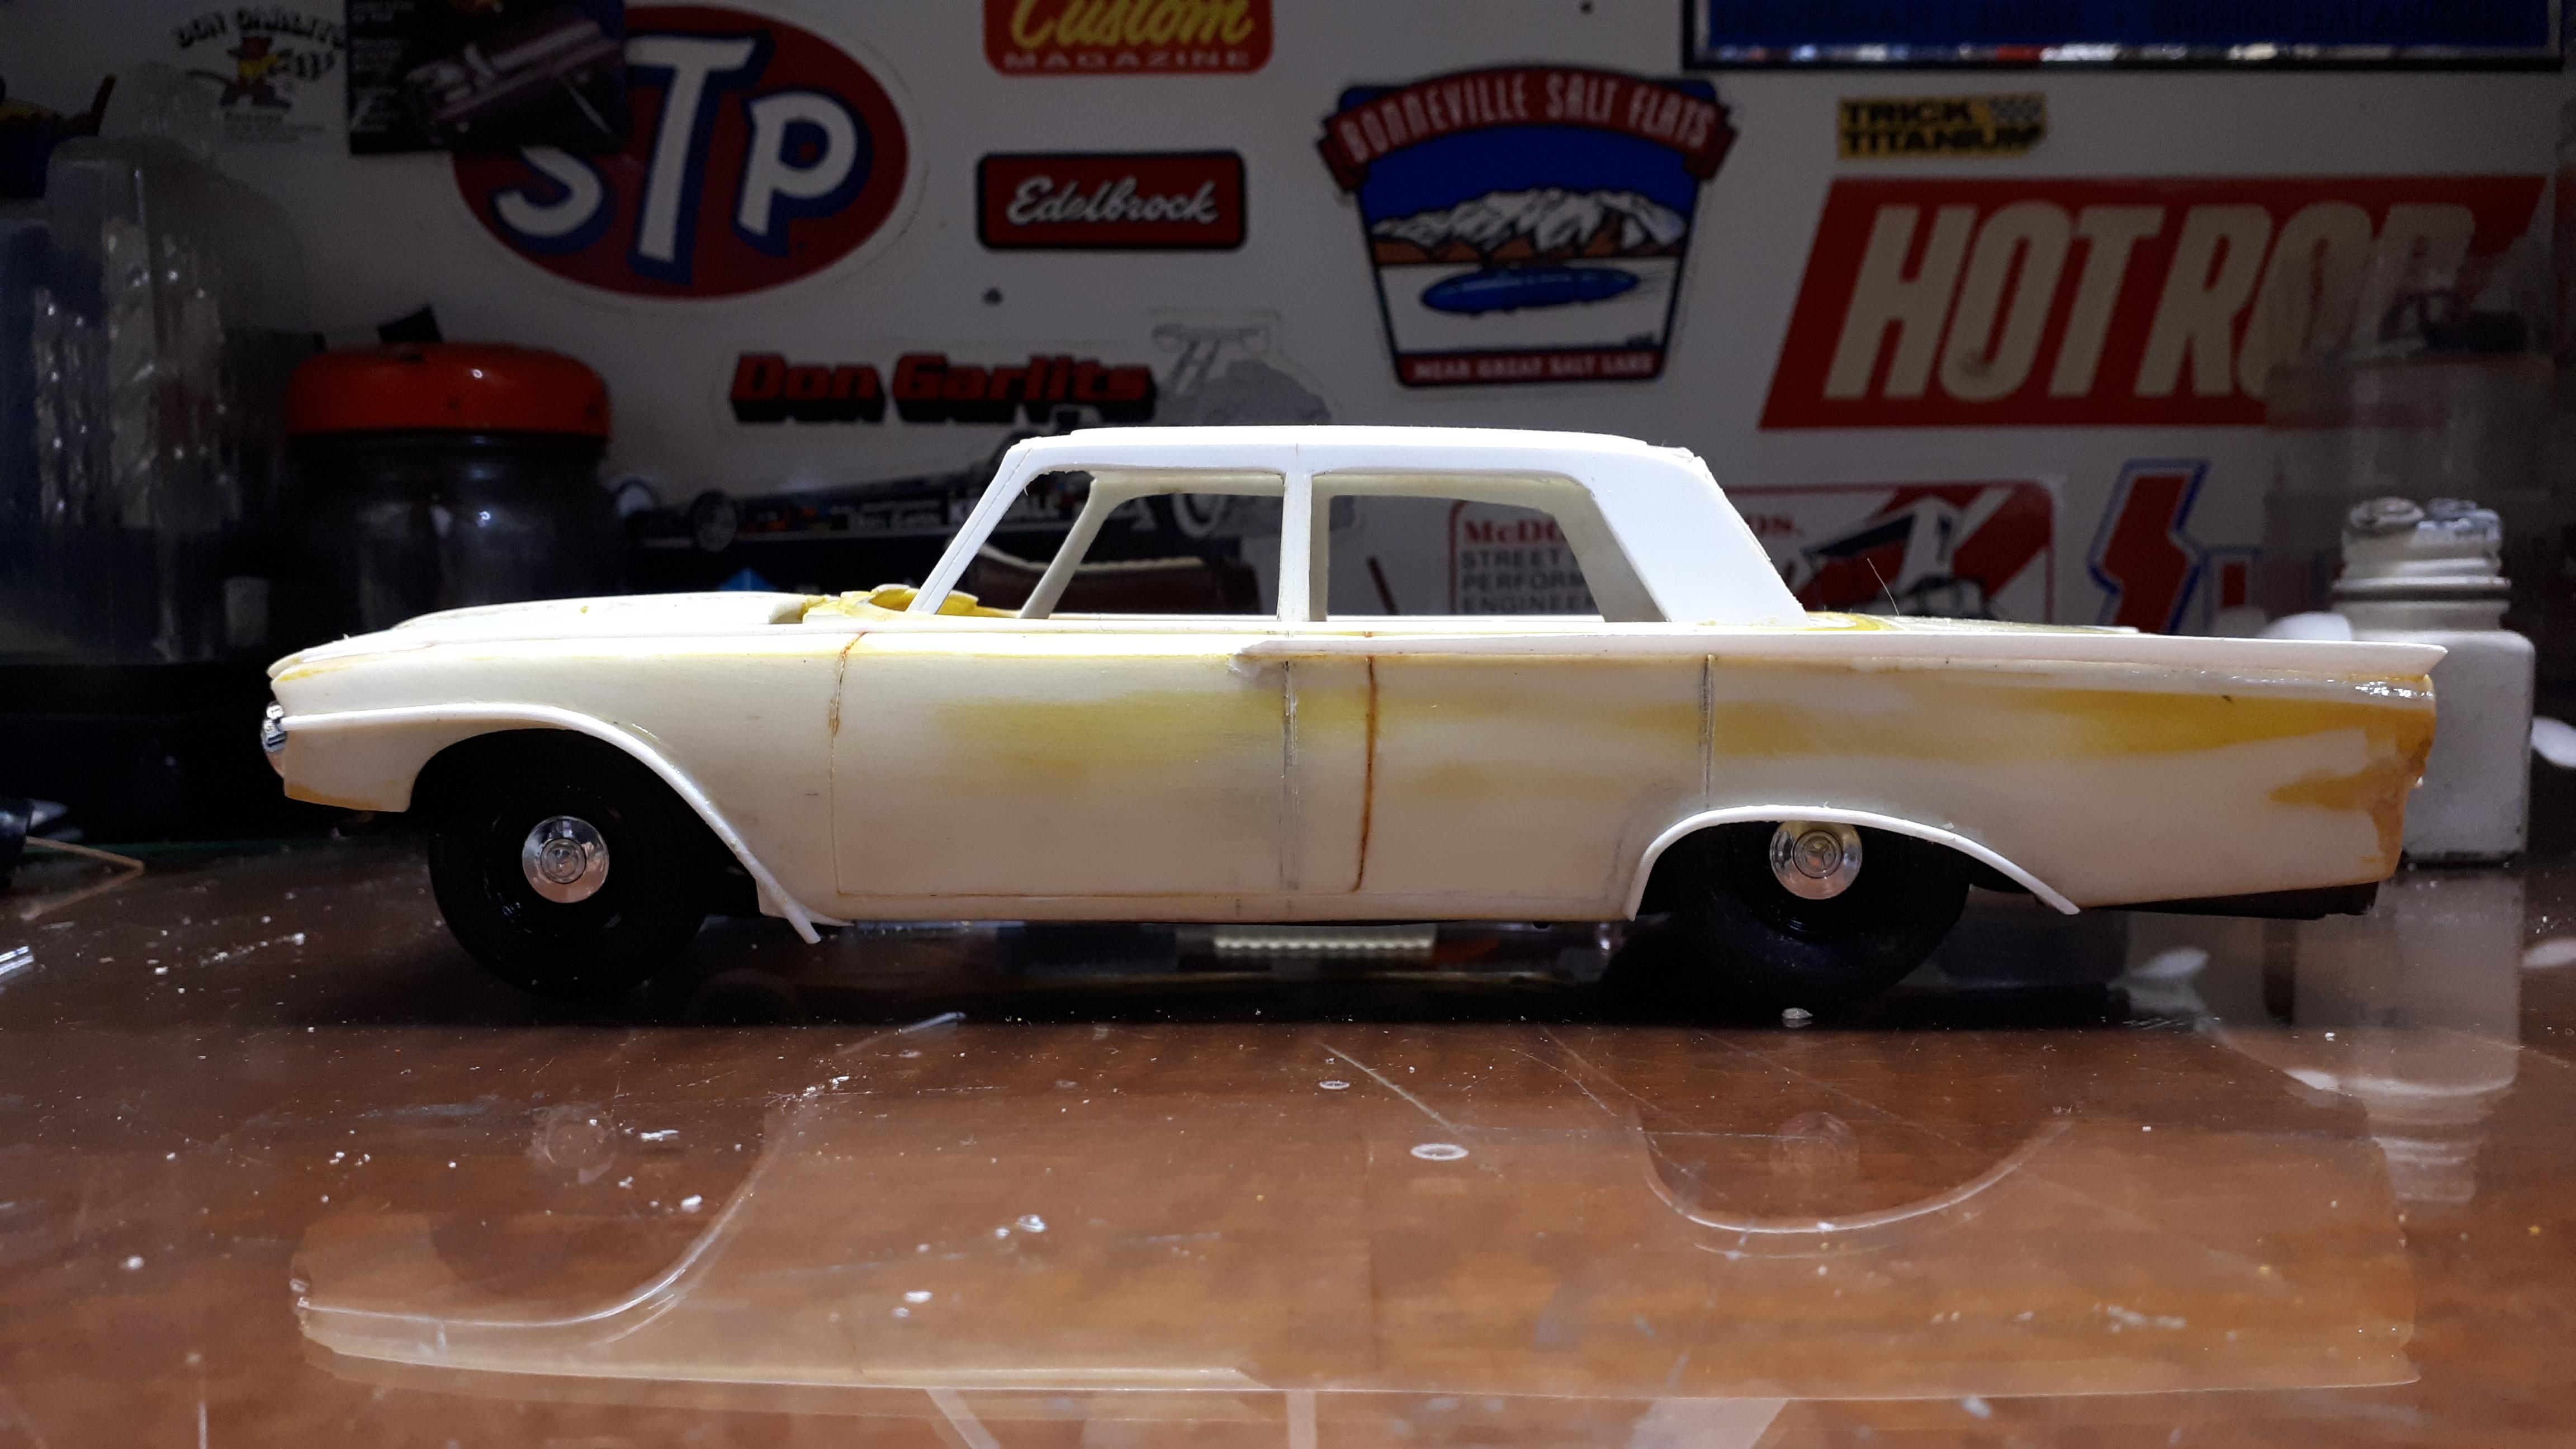
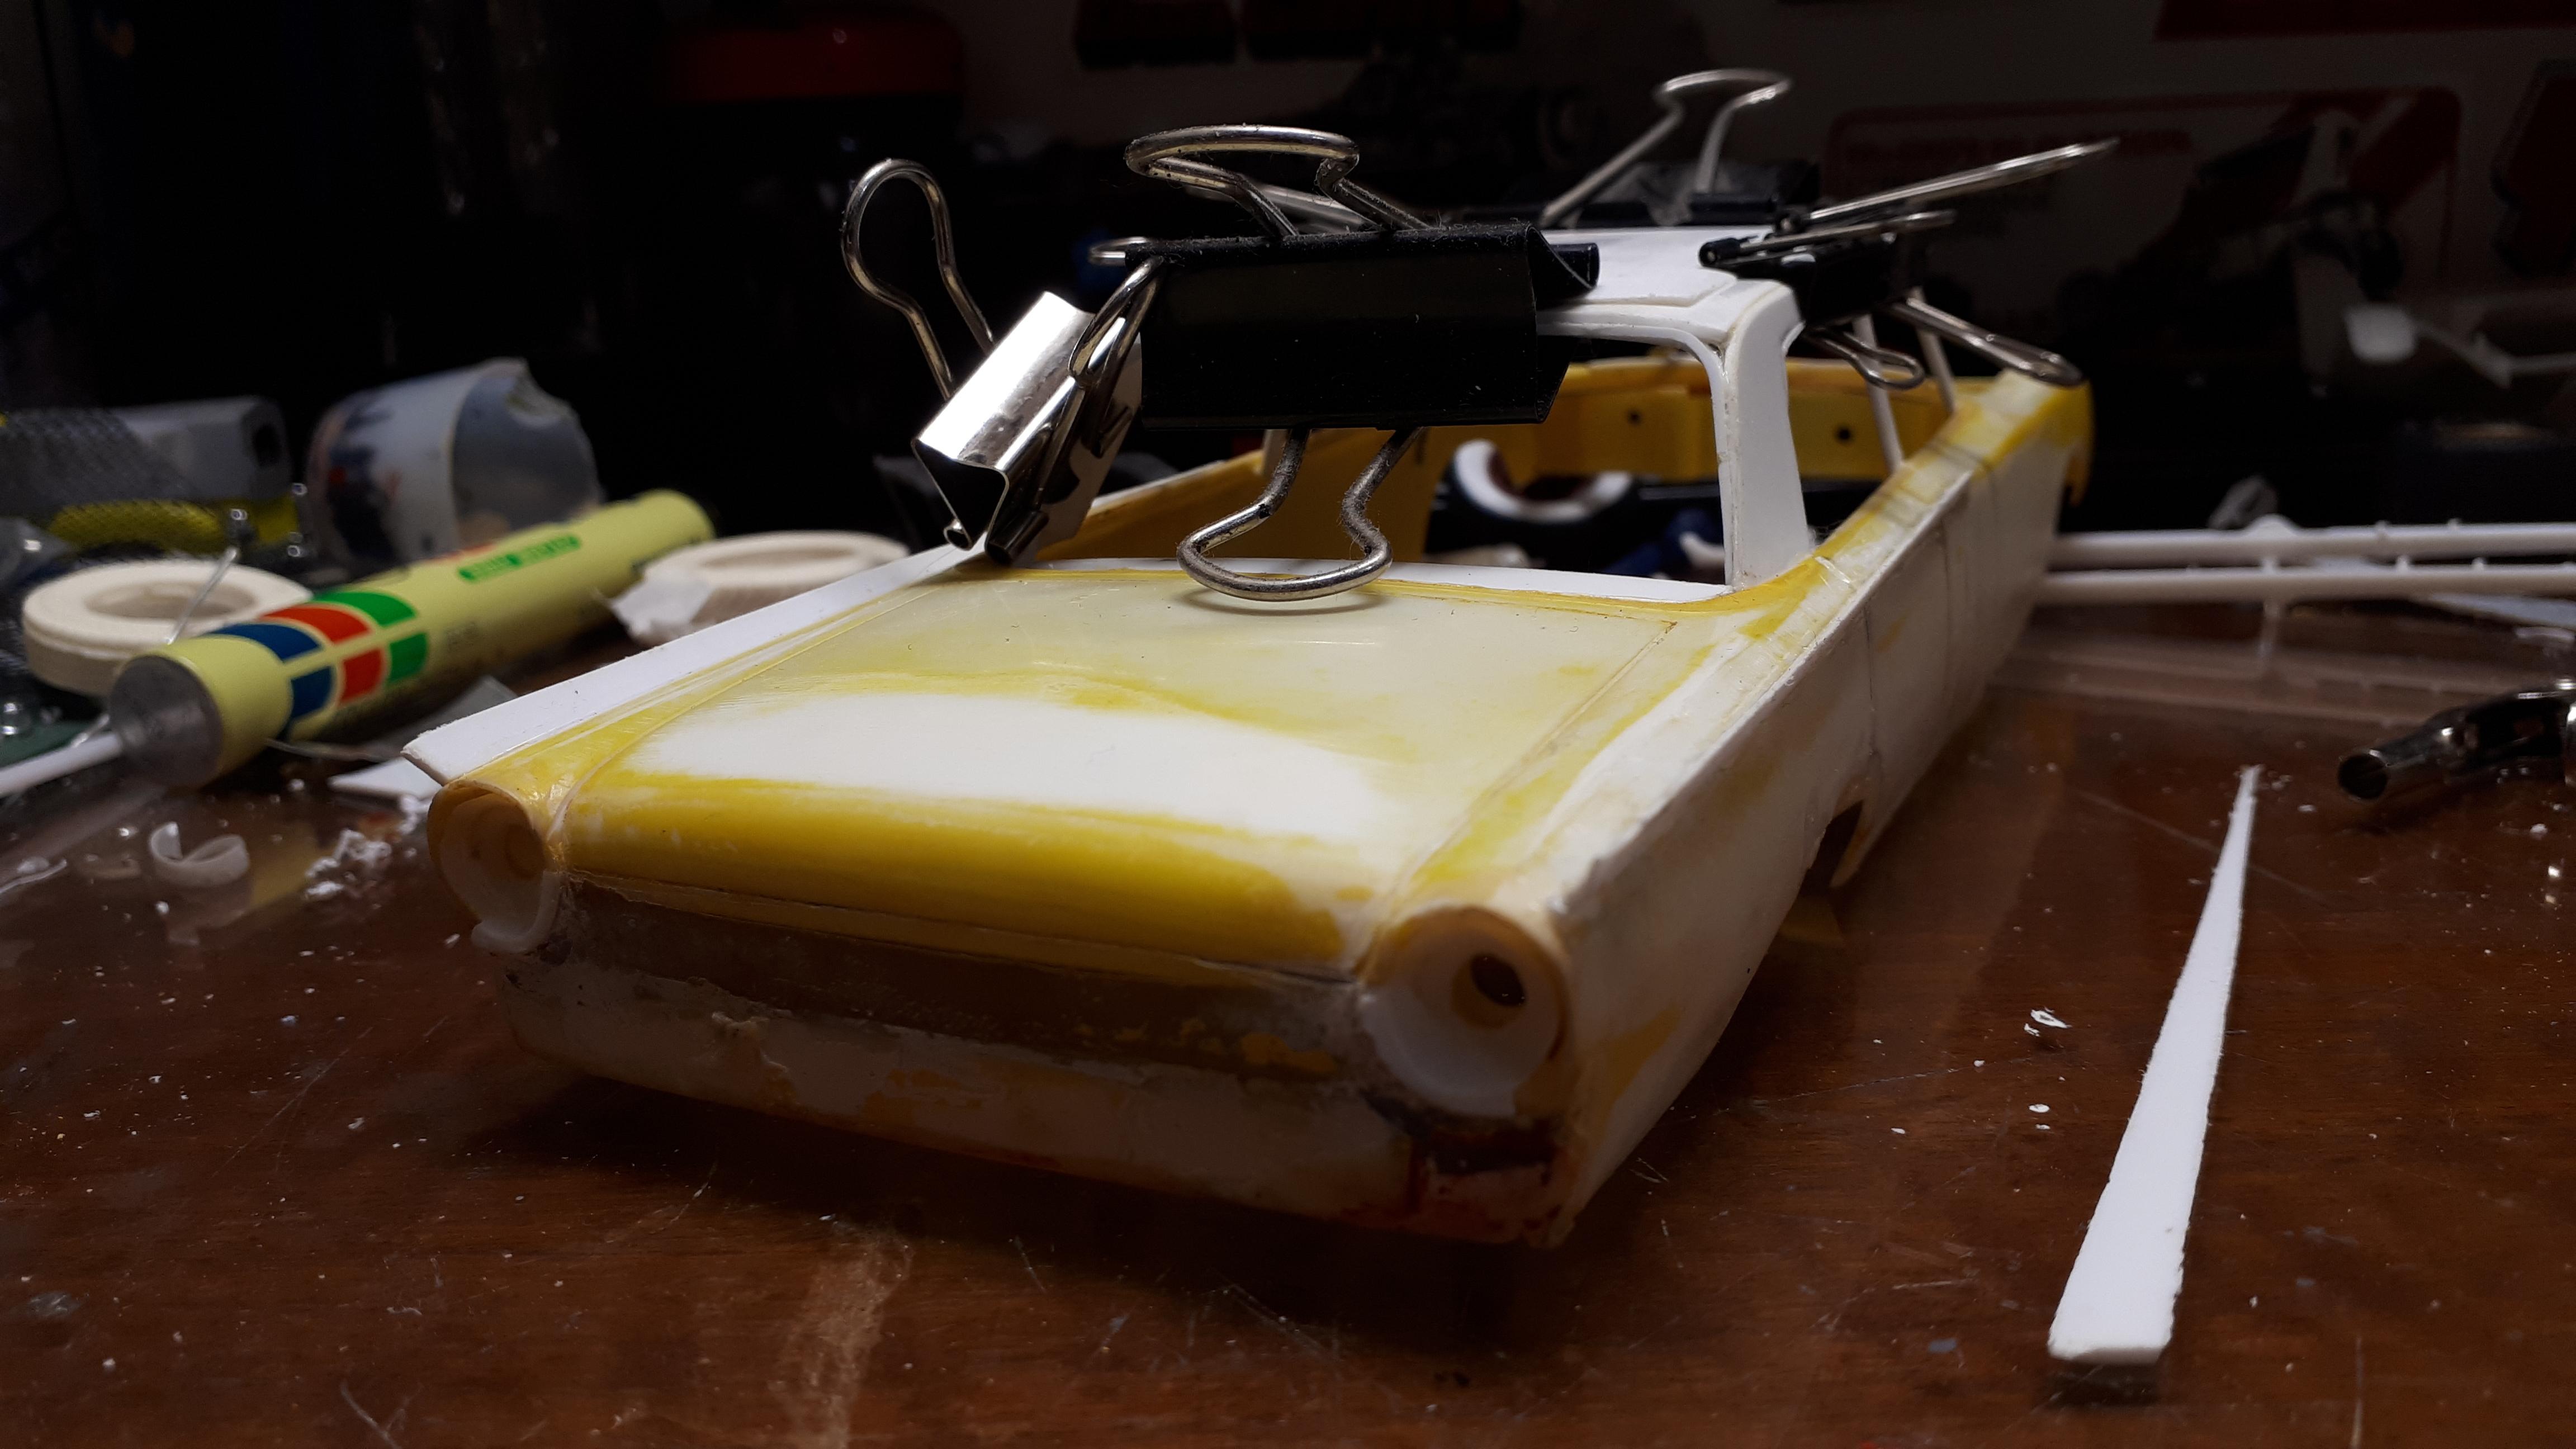
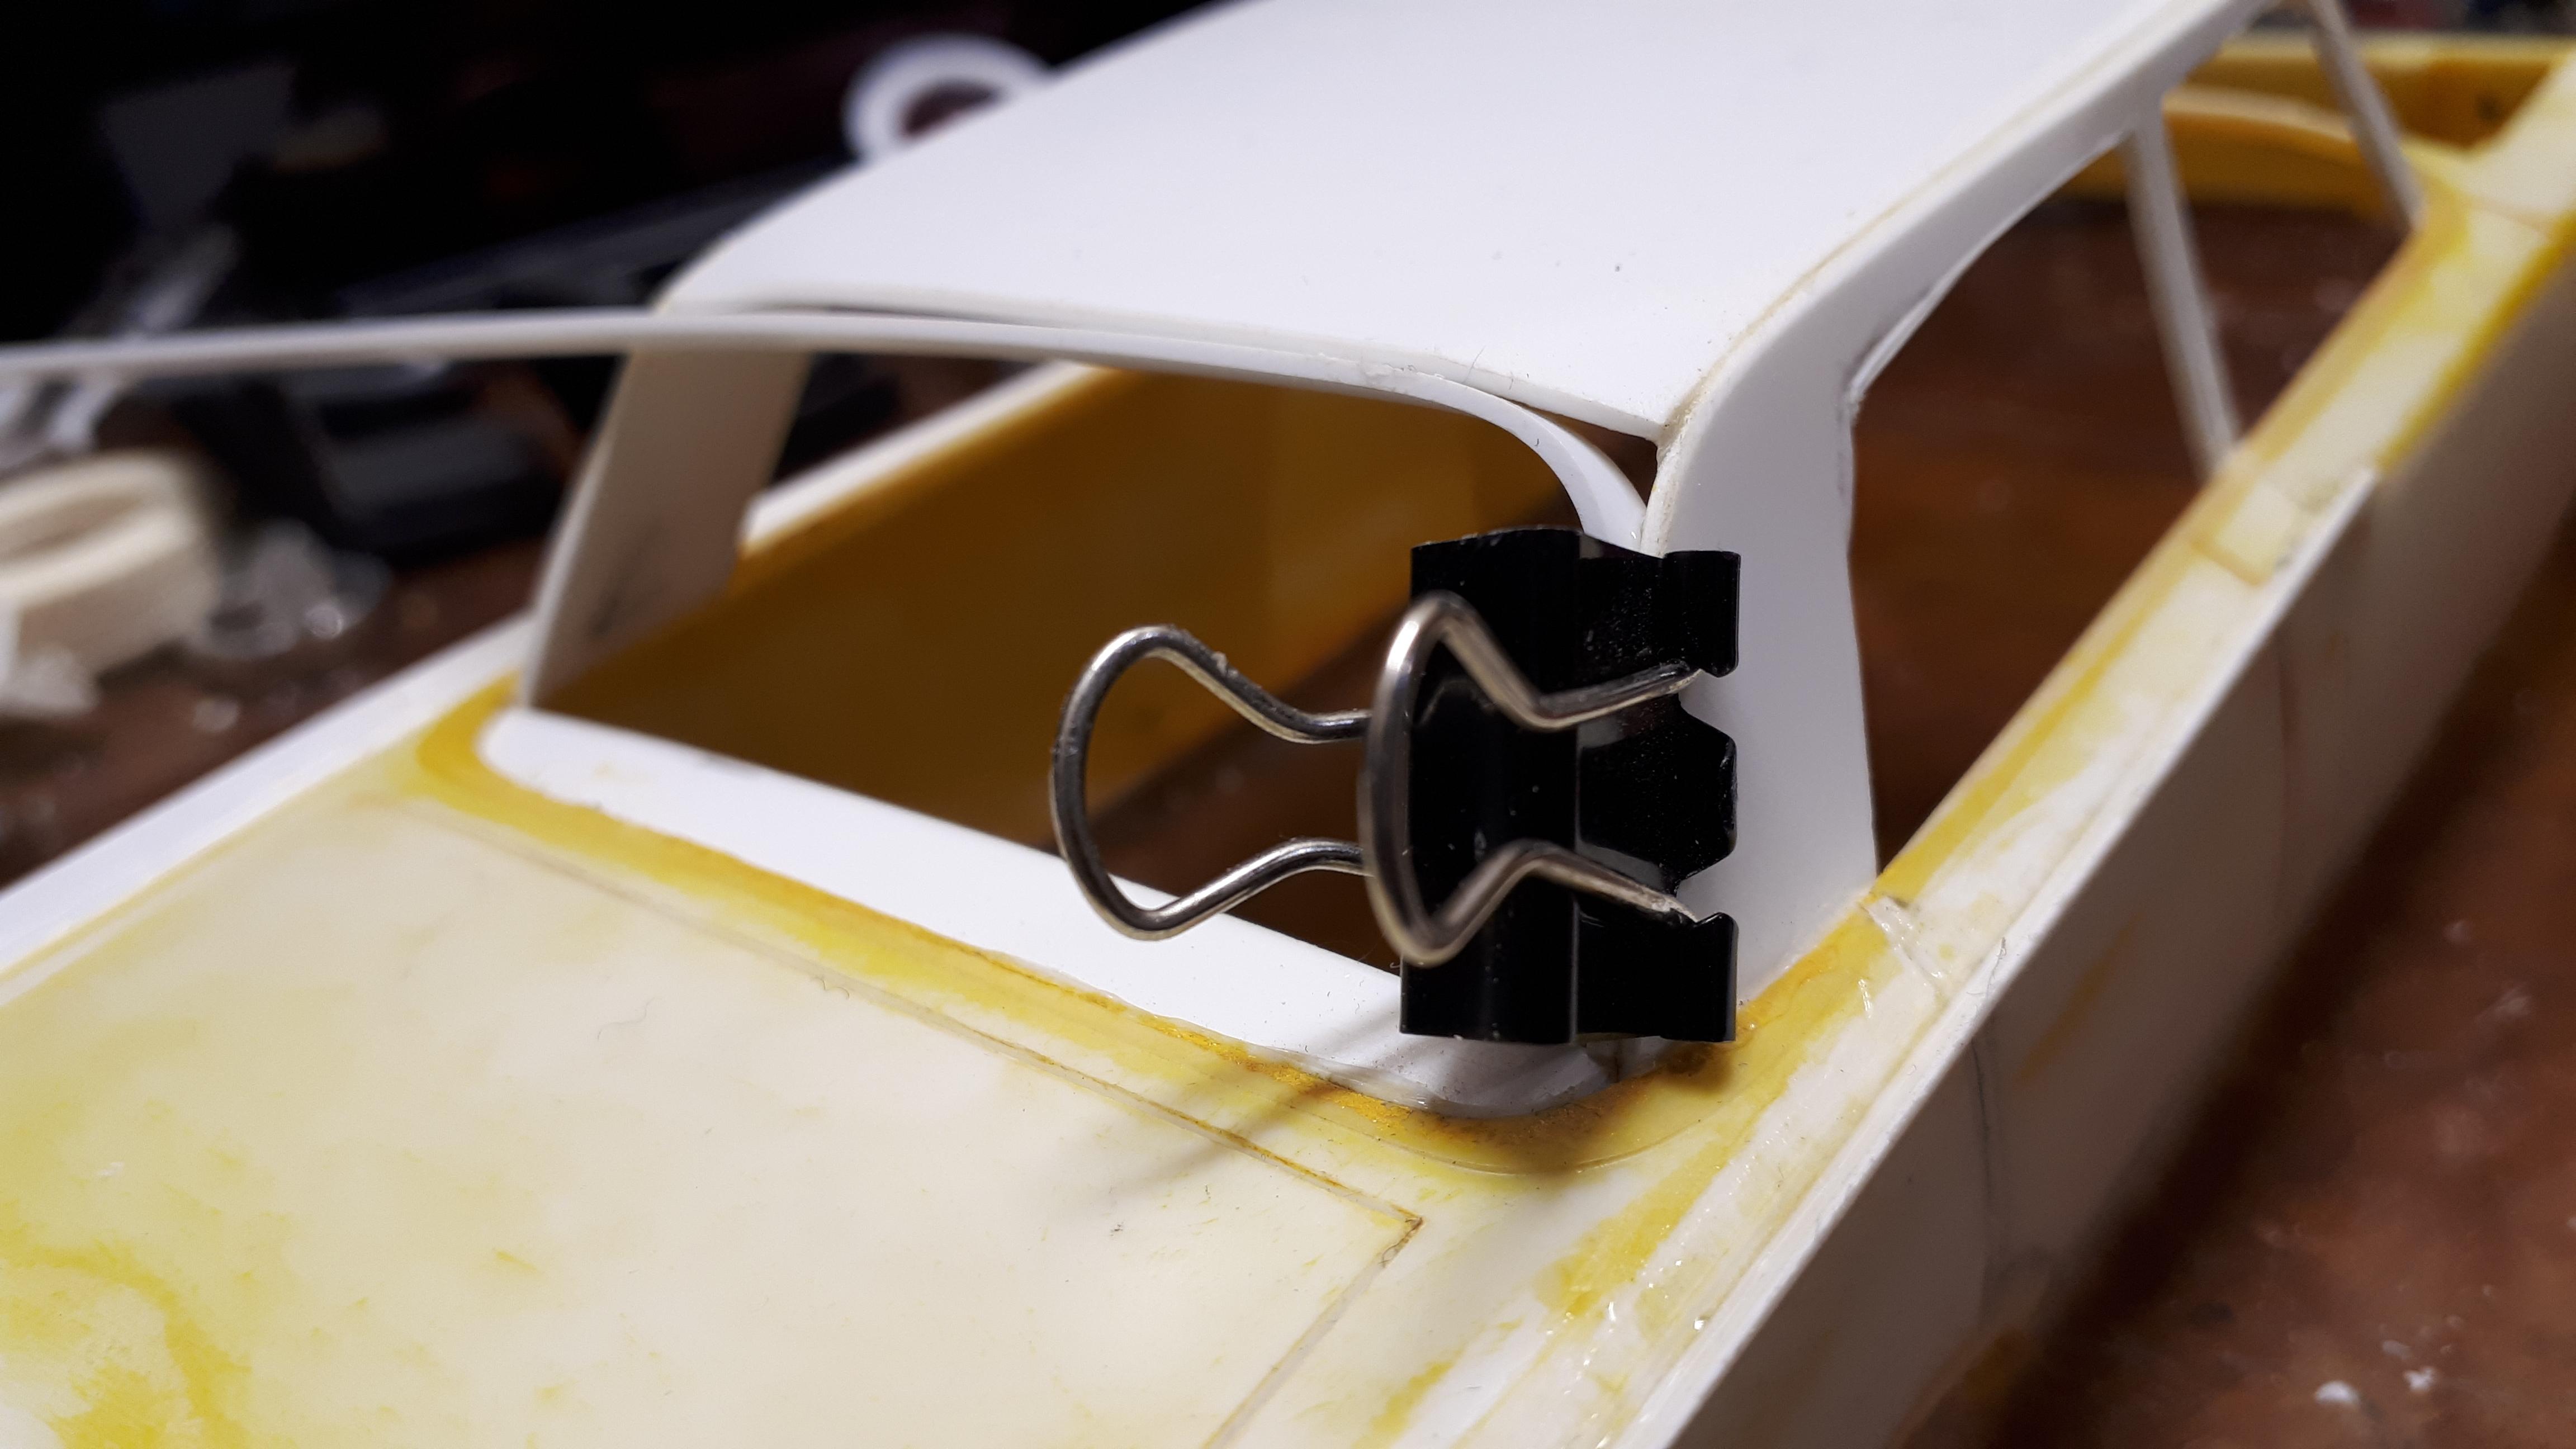
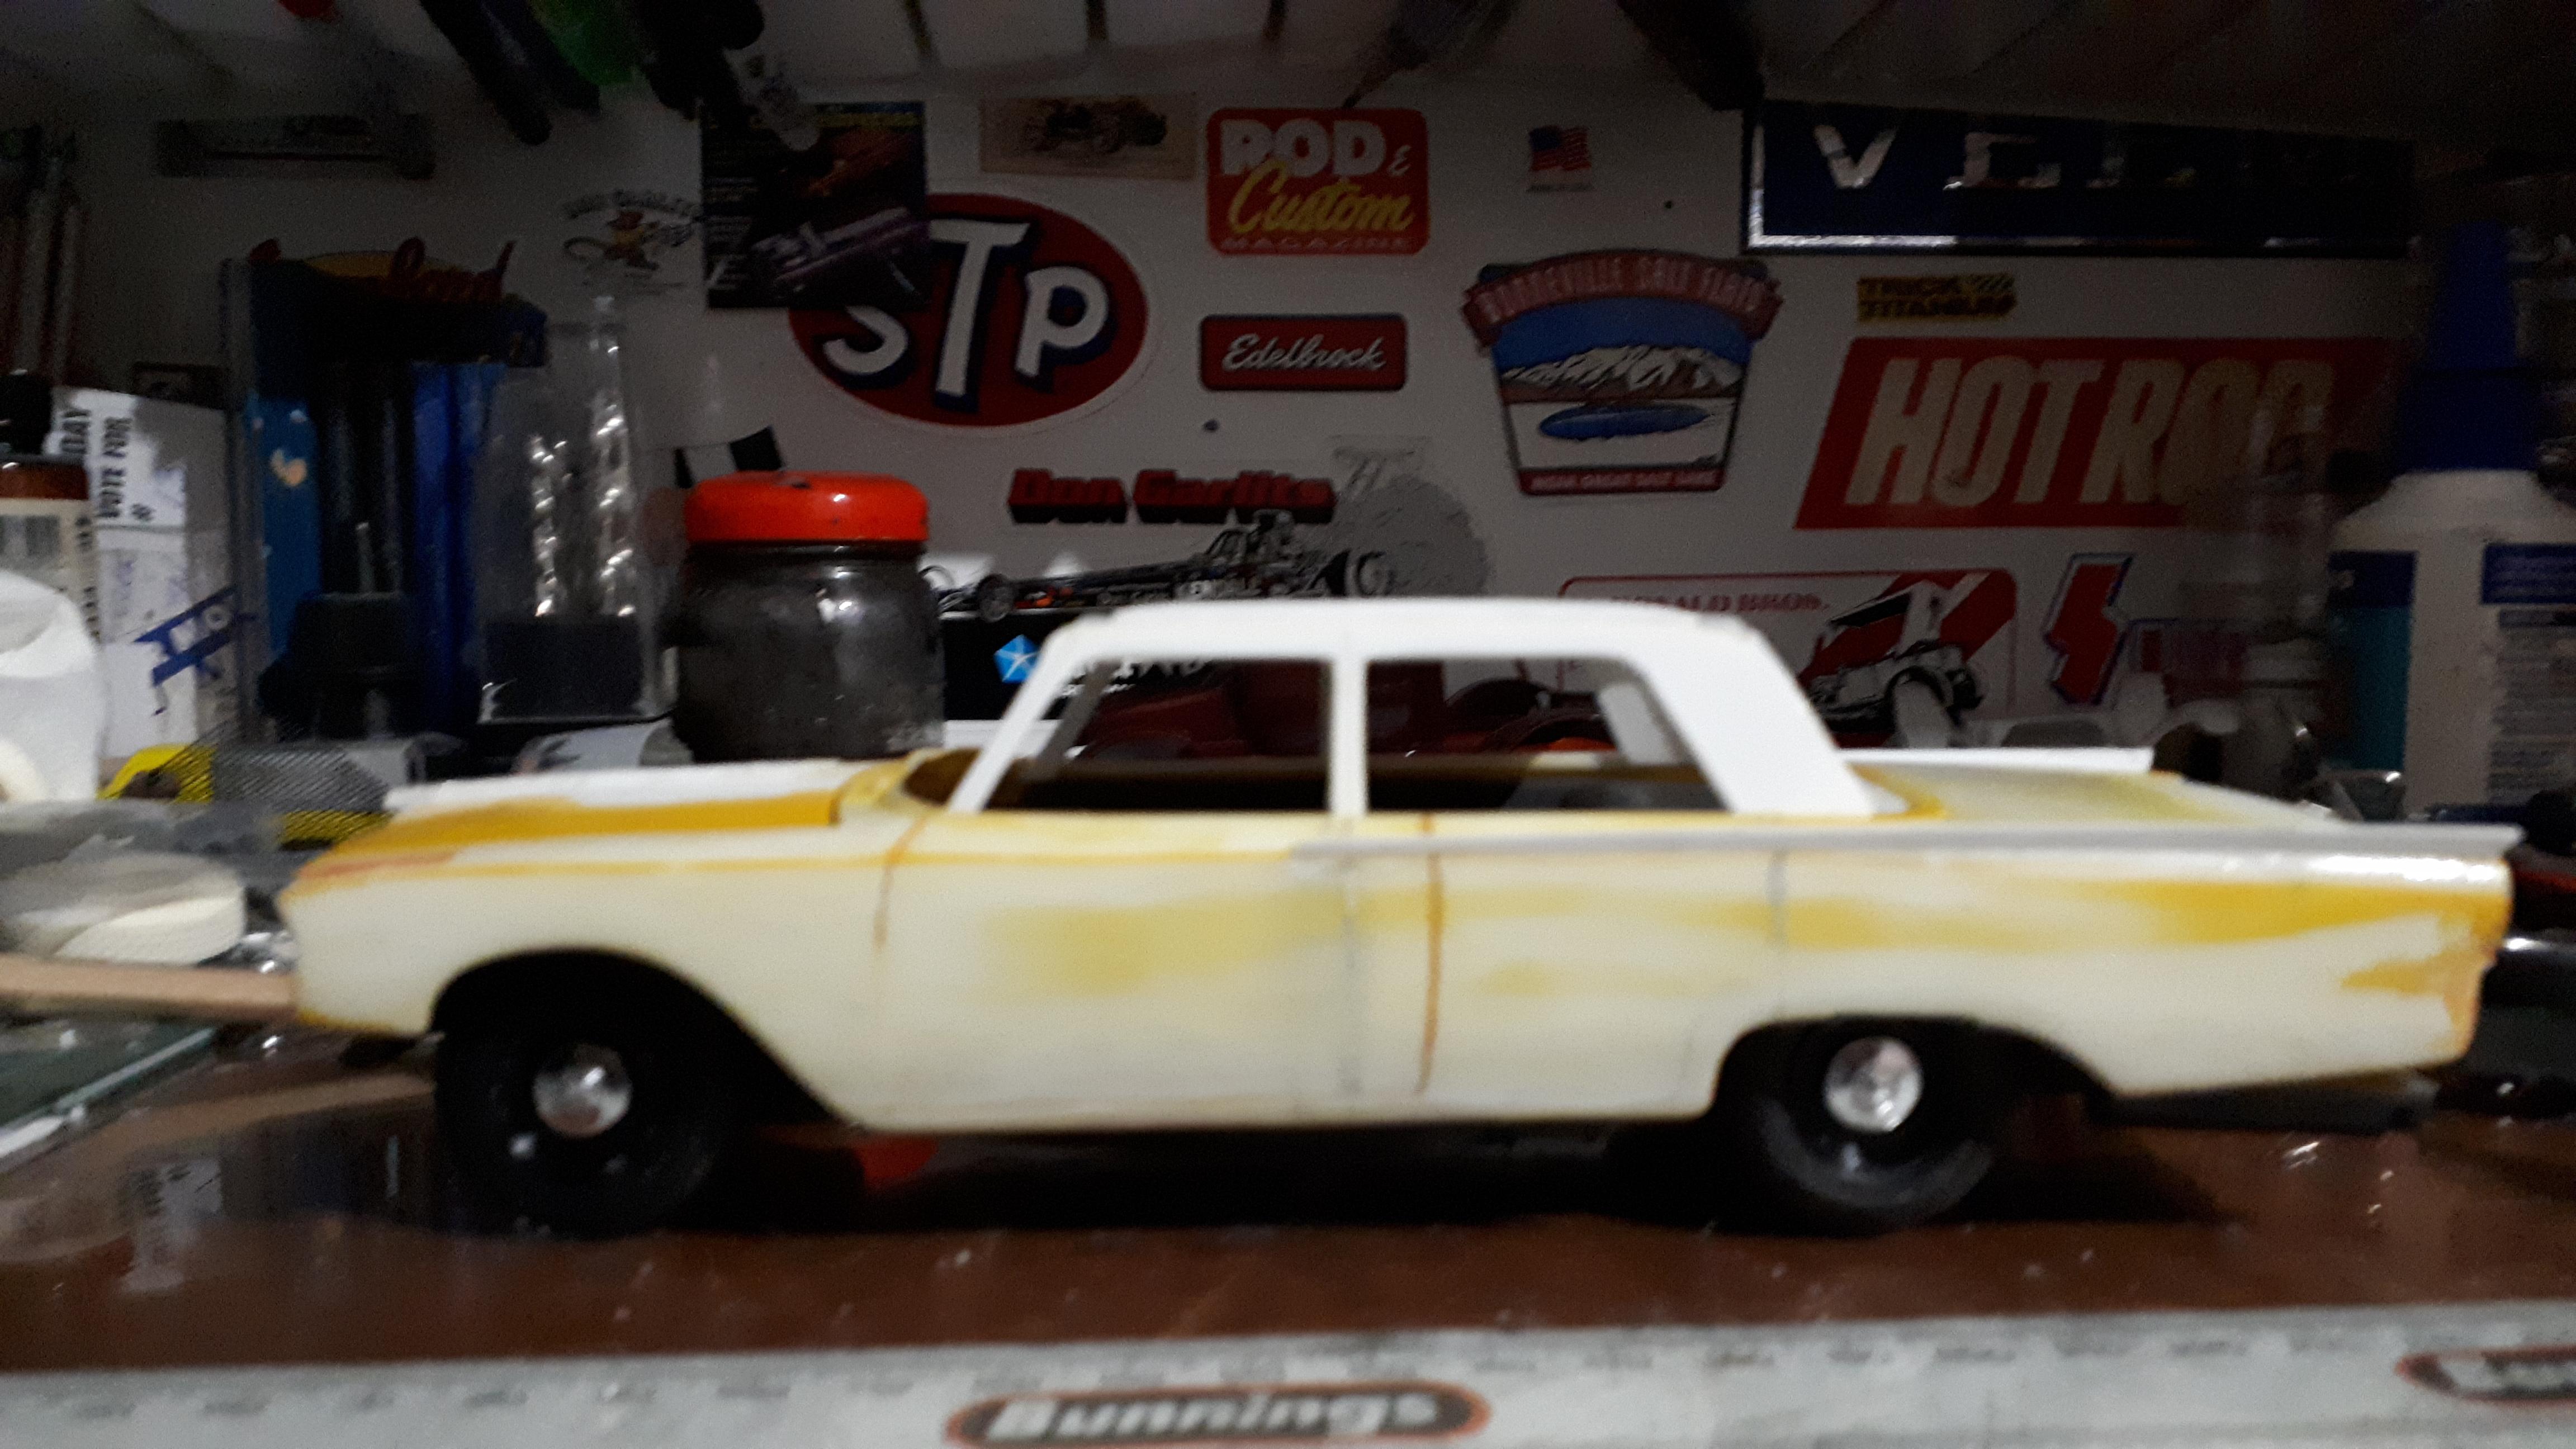
Got a little bit more done since my last post. First, I wanted to see if I could put 61 style fins on the 63 body. Turned out to be easier than I expected. In my cabinet I have a brush painted 61 convertible that I bought and built in 1973 - the one that came with a Nascar style racecar artwork on the box. It will be a valuable aid in getting this model looking "close enough". I took a few attempts to get the procedure well organised but basically it went like this. I used a ruler and pencil to measure and mark out a a piece of flat styrene a slightly oversized plan of the fin on the 61. I then heavily scribed the cut line, but not all the way through. While the fin was still attached to the parent sheet, I used a file to produce a taper along the length of the fin. This made it a lot easier to handle. I then sanded it smooth before cutting it free. I used Revell Professional glue with the long needle to really weld that fin to the body - I don't want it cracking free while doing bodywork. it took a bit of manipulating but eventually I was satisfied. From photos I could see that the very square roof had a quite round cornered rear window. For this, i took a length of Evergreen rectangular strip and checked it against the opening - looked like it would work. I cut a small angle off the end of the strip to match the angle of the roof pillar. I then manoeuvred it in place added some glue along the edge of the pillar and clamped it tight. After about a half hour I gently bent the strip to run along the underside of the roof opening, glued and clamped. After another half hour, I turned the strip down towards the truck, snipped it to size and glued and clamped. I am very happy with ow this worked out - by gluing in three separate stages, I was able to get the strip to conform to the sharp I was after. While I was constantly checking my reference photos I realised that the roof needs a little more crown to it so I cut out an undersized rectangle of styrene. filed all the edges back at an angle and then glued it to the centre of the roof. I'll finish off with once last photo I took as I headed off for work. It's sitting on my clean 63 Galaxie frame and although there is a lot of Bondo work ahead, I think I will be able to reach my destination from here.
-
Mission Impossible - American Graffiti cop car from a wreck
alan barton replied to alan barton's topic in WIP: Model Cars
Rich, you're probably right. In fact, you are right. But for me here, out in Australia, I have a problem - I will be unlikely to find one in my local hobby shop. I'm sure they are a dime a dozen on eBay but someone in eBay has decided that everyone in Australia is rich and can afford to pay twice the value of the item in shipping charges or worse ( I saw a $2 Tootsietoy on there a while back with shipping of $29.95!) And the thing is, I have this piece of junk, for free, in my model room. If this technique works, which I read about on the old Fred's Resin forum years ago, I would like to use it to simplify top chops on my favourite rods. I'm also a fa of wagons so the technique could work there as well. If it doesn't, well, no one else was going to build this blind, lame, three legged dog anyway so no harm done. But yes, it would definitely be easier! Cheers Alan -
Mission Impossible - American Graffiti cop car from a wreck
alan barton replied to alan barton's topic in WIP: Model Cars
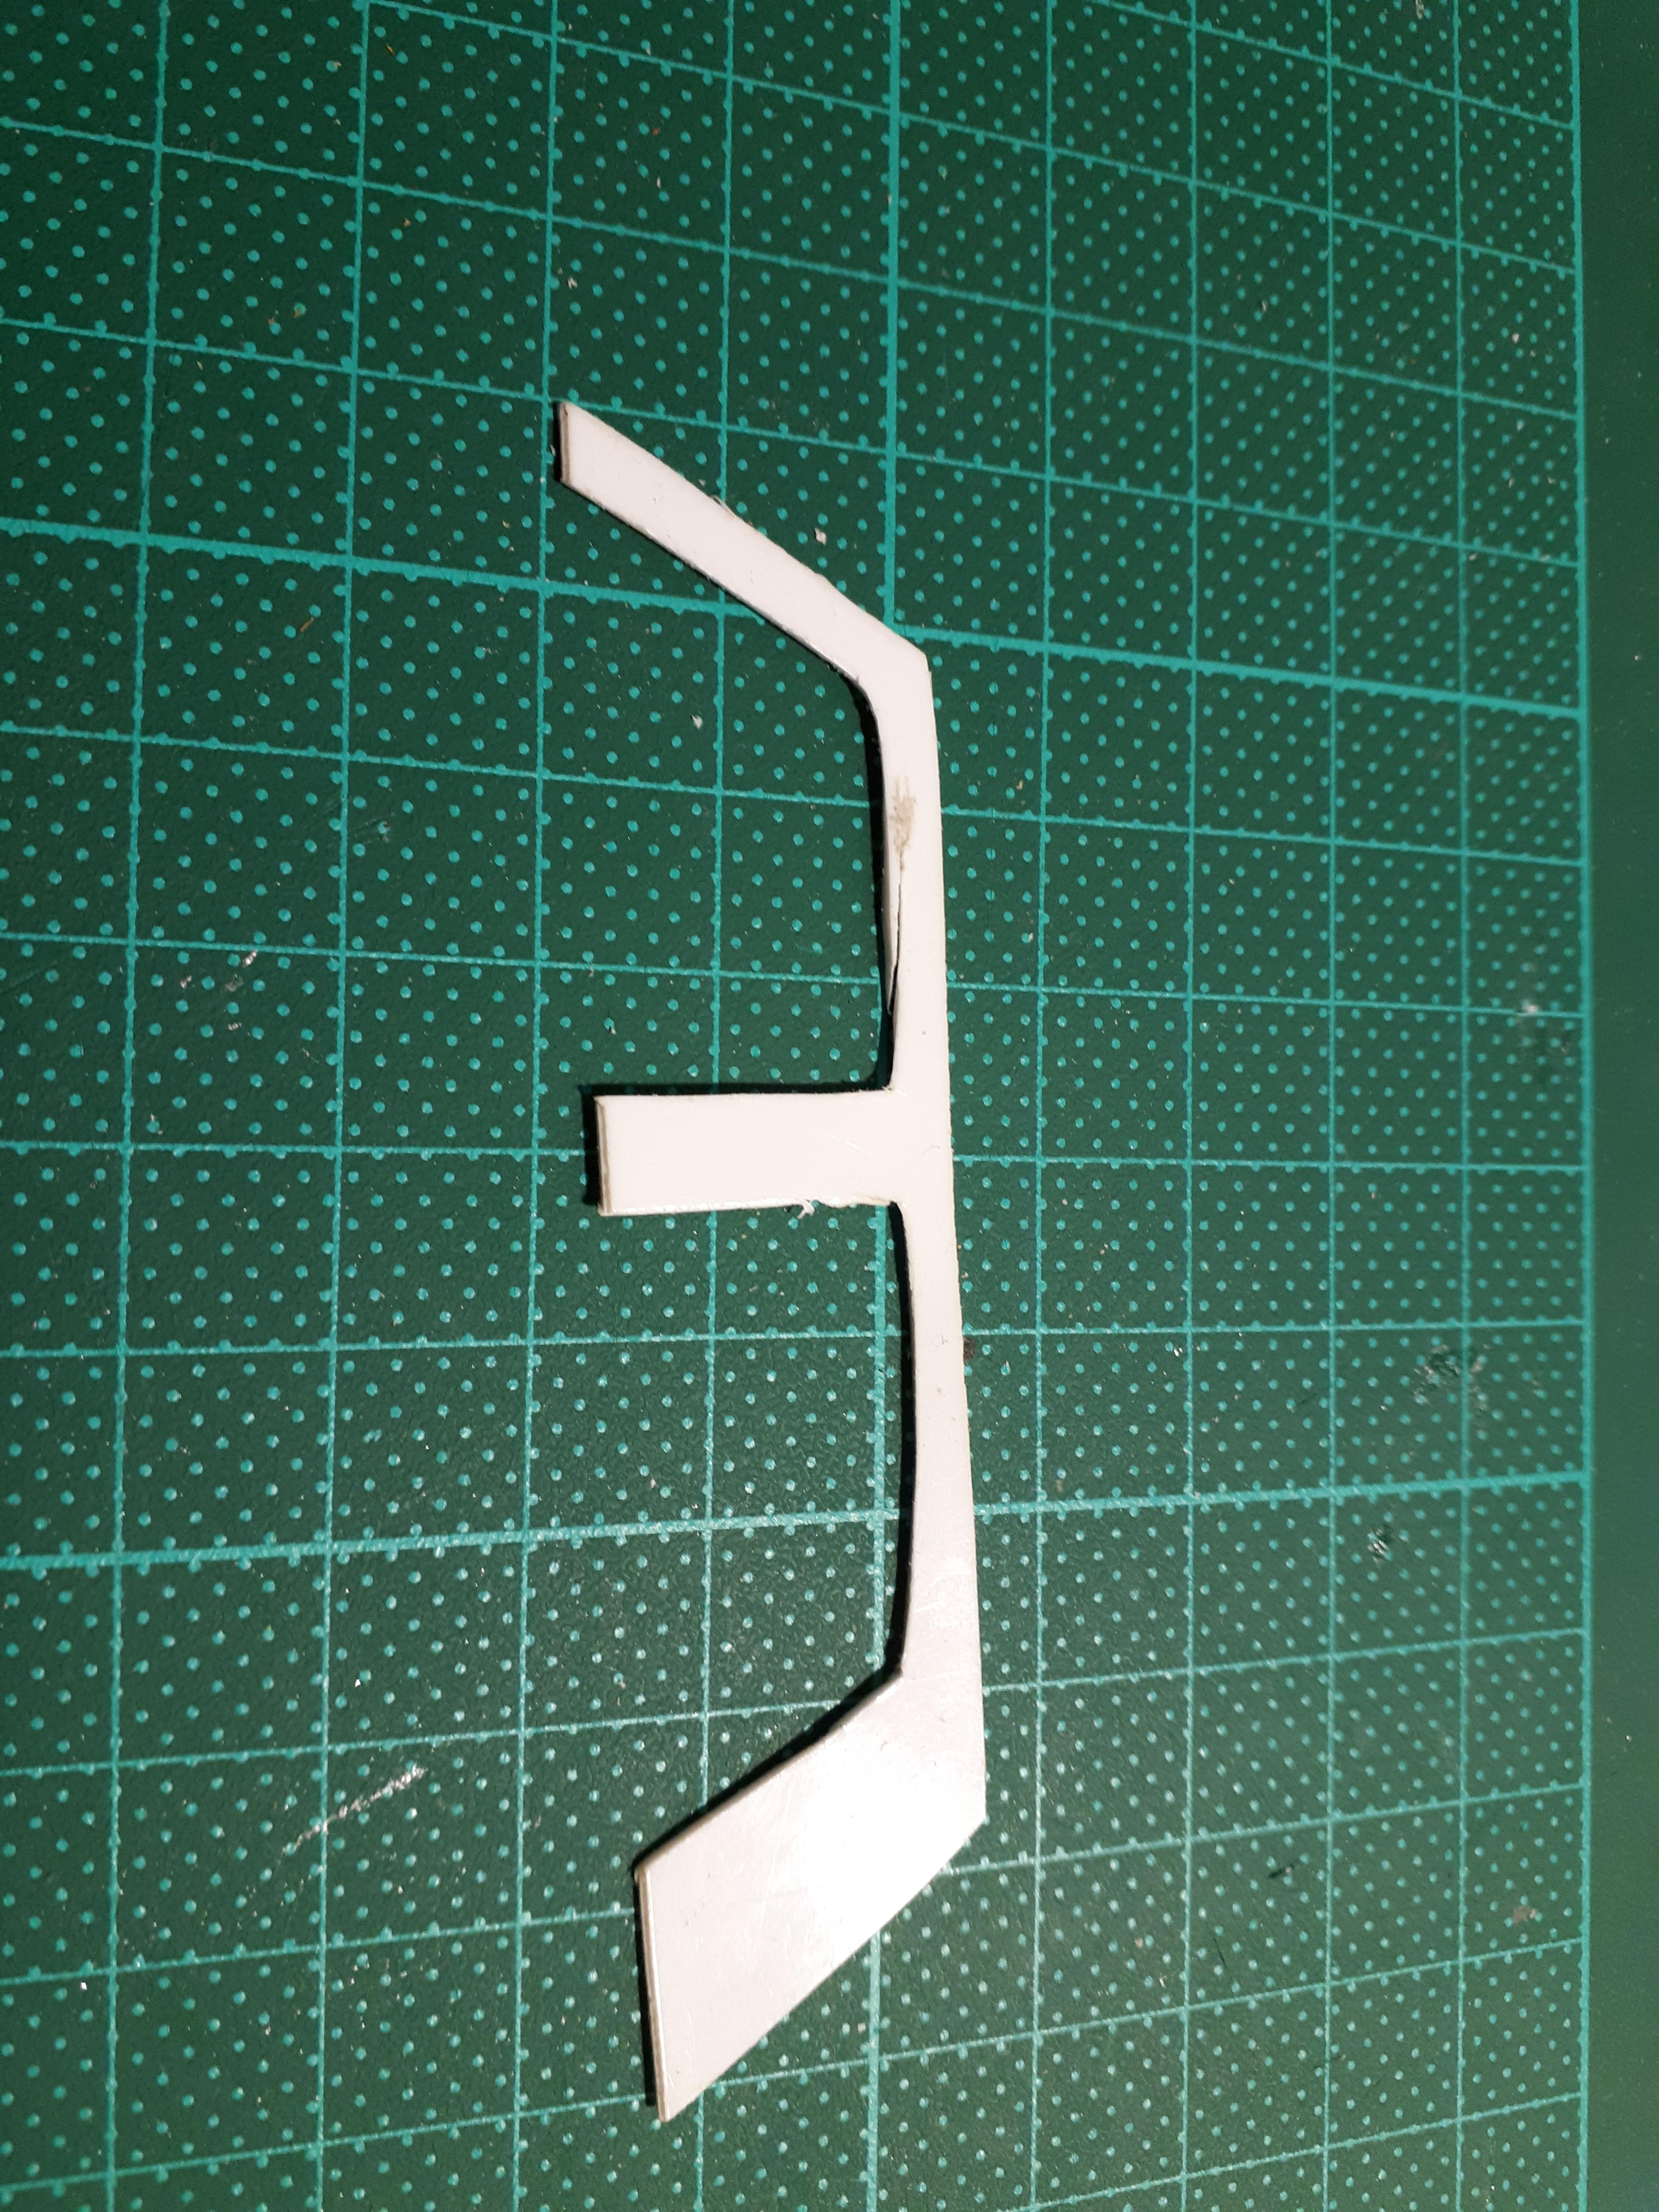
After asking Dr Google for some help I sketched out and scribed in some door lines in a four door configuration. Probably my least favourite modelling chore, I am in awe of people who can produce razor sharp, straight or curved panel lines. I know how it is meant to work but I am often disappointed with my results. Next step was to sketch up the shape of the door and window frames including A,B and C pillars. I had a straight on side view of a real car on my computer and basically held it up against the picture until the proportions and angles seemed to match. I used a razor saw to cut the door lines into the B pillar as I figured it would be way easier to do it now rather than later! When one side looked OK I traced it onto another piece of styrene and produced its twin. I then cut out a large rectangle of 1mm styrene and eyeballed it until I seemed to have the right amount of inward slope on the door frames. Using finger pressure I rolled and tweaked the styrene to put a bit of a compound curve in it as well as bending down the back two corners to match Ford's design.When everything looked right I glued it up with Testors glue in the orange tube - it gives me a heap of working time for this type of work. It's looking OK at this stage but the biggest challenge I foresee will be getting the front and rear windshield openings to the correct shape.
-
I've always been a huge fan of American Graffiti since I went into the city to watch it with my fellow hot rod club members - i was just 15! I have built a replica of the coupe and have a couple of passable 20 footer custom Mercury and 55 Chevy. Each year our club produces an epic diorama for our model show and hot rod show. This year's display, had all the shows not been cancelled, was to have been an enormous American Graffiti street scene featuring a variety of scenes from the movie. When my good mate Dave decided to shift gears from building truly stunning 1/25th scale plastic customs to building eye wateringly detailed Hot Wheels diecast customs, he passed on the relic you see here. Best I can tell it started life as an AMT 63 Galaxie, possibly a convertible. Every single piece of trim and moulding had been brutally filed off the body sanded a bit and then sprayed yellow. It came with an equally stripped hood with a honking great blower scoop and a flat black interior tub with tastefully picked out details in yellow enamel - yikes! I had already built my 63 Galaxie as a full detail slot car but still had a stock chassis sitting untouched in the box. Hmmmm.... could I backdate this sorry 63 convert into a 61 cop car all ready to have its rear axle wrenched out? My intention is not to build a 100 point concours model of a 61. If people walk past the display and go - hey, there's the cop car from American Graffiti, my work will be done. I now have until next July to get it finished so this will be an intermittent build until it is done. After all, at this point I either save it or it becomes landfill so I really have nothing to lose!
-
From The Twisted Mind Of NitroMarty..... Pontiac Club-de-Mer Gasser
alan barton replied to NitroMarty's topic in Drag Racing
That works SOOOOO well! I would add just one thing - a racing number with A/MSP - exactly the class a gasser styled sports car would run in! It is easy to imagine that hitting the strip in the early sixties. You've done a beautiful job there Marty with a perfect choice of parts. Cheers Alan -
Wow, guys, I've been truly overwhelmed by the response to my custom Tudor! It is heartening to see so many other people appreciate the history of our hobby. I had a ball building this one and as I have a very modified Monogram 3 window on the bench, utilising the same nose, I will get to have another go at something similar before too long. This time I will be able to get it as low as I like ! By the way, I noticed the firewall had popped and the door handles weren't chrome in these pictures - all fixed now! Espo, other than flipping the steering wheel and pedals, that interior tub is exactly as AMT moulded it. One change I did make, however, was to locate the interior tub into the body . Because I was not going to use the original one piece glass unit, the tub had nowhere to rest and I could imagine glue going everywhere. I took a strip of half round Evergreen and carefullly glued it to the inside of the body around the rear section, just above the waistline. This was sanded smooth and blended in and then painted flat white so that it looks like just another roll in the upholstery. This then gave me a solid stop to butt the top edge of the interior against. It worked a treat! And Steve, you are a fine example of the sort of person you meet in both the modelling and hot rodding circles. When I am talking to work colleagues about cars, they often use the term "petrolhead" to describe me. They think that I am addicted to cars. I immediately correct them. The car is just the vehicle we use (pun intended ) to meet like minded souls who happen to be some of the coolest people on the planet. Steve's generosity was outstanding - when I had a paint disaster he instantly offered me yet another Tudor body!!! Unbelievable!!!!! Fortunately with some careful and monotonous sanding I was able to save the first body. As we would say in Australia, Steve is ":fair dinkum". Steve now has a copy of the Australian Street Rodding magazine with this car in my column as a memento of his contribution. Tom, here's a shot of the original firewall. It is kinda funky but so true to the early sixties AMT era. It is on the right, my flat version is in the middle and on the left is the AMT Ala Kart firewall that I robbed the master cylinders from. I had a bunch of these so didn't feel bad sacrificing one for this build. Thanks again, everyone Cheers Alan
-
I love this! A fresh original twist on an old favourite and yet I recognise all the elements. To be honest, I am seeing more factory dream car than custom but I don't think that is a bad thing! The paint is simply sensational, I simply can't imagine a more appropriate treatment than this and that corrugated trim on the rear deck is brilliant! What makes me grin even more is that I have its alter ego started in a box somewhere here. I am grafting a 57 Fairlane roof and glass onto the Predicta - gives a Cushenberry "Marquis" look to it. It stalled because I hadn't come up with a headlight treatment yet - this is giving me ideas! Cheers Alan
-
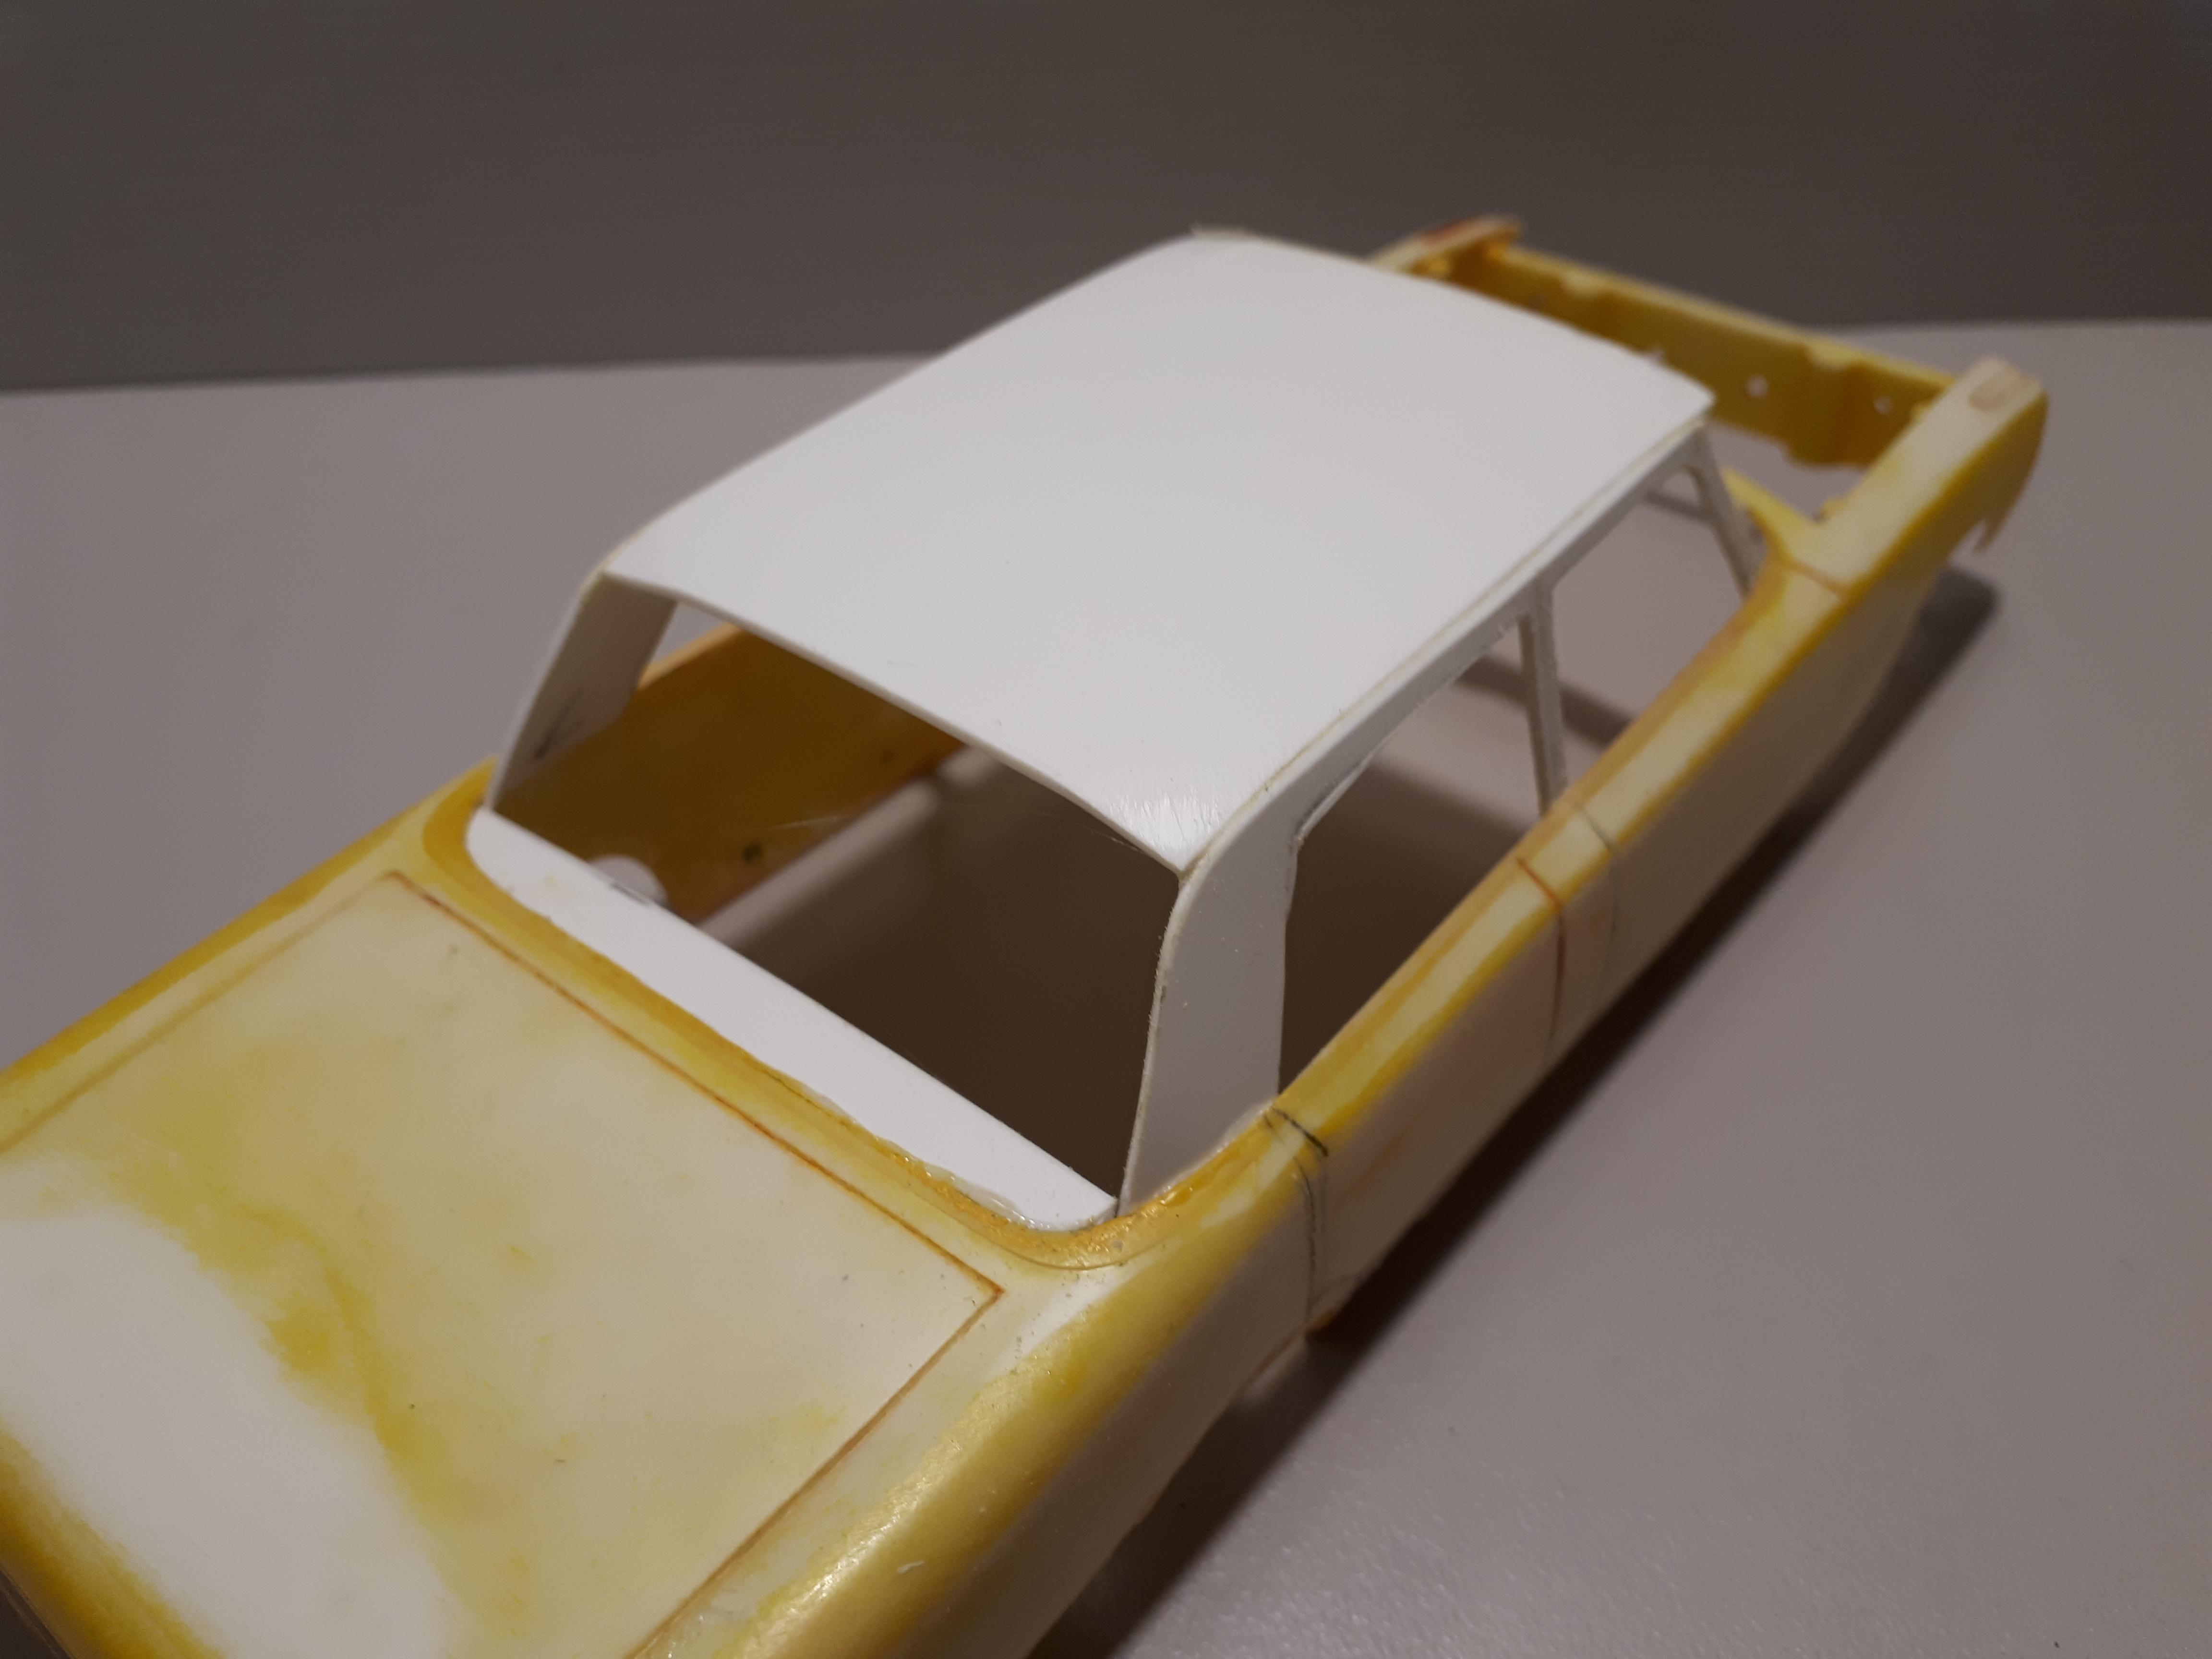
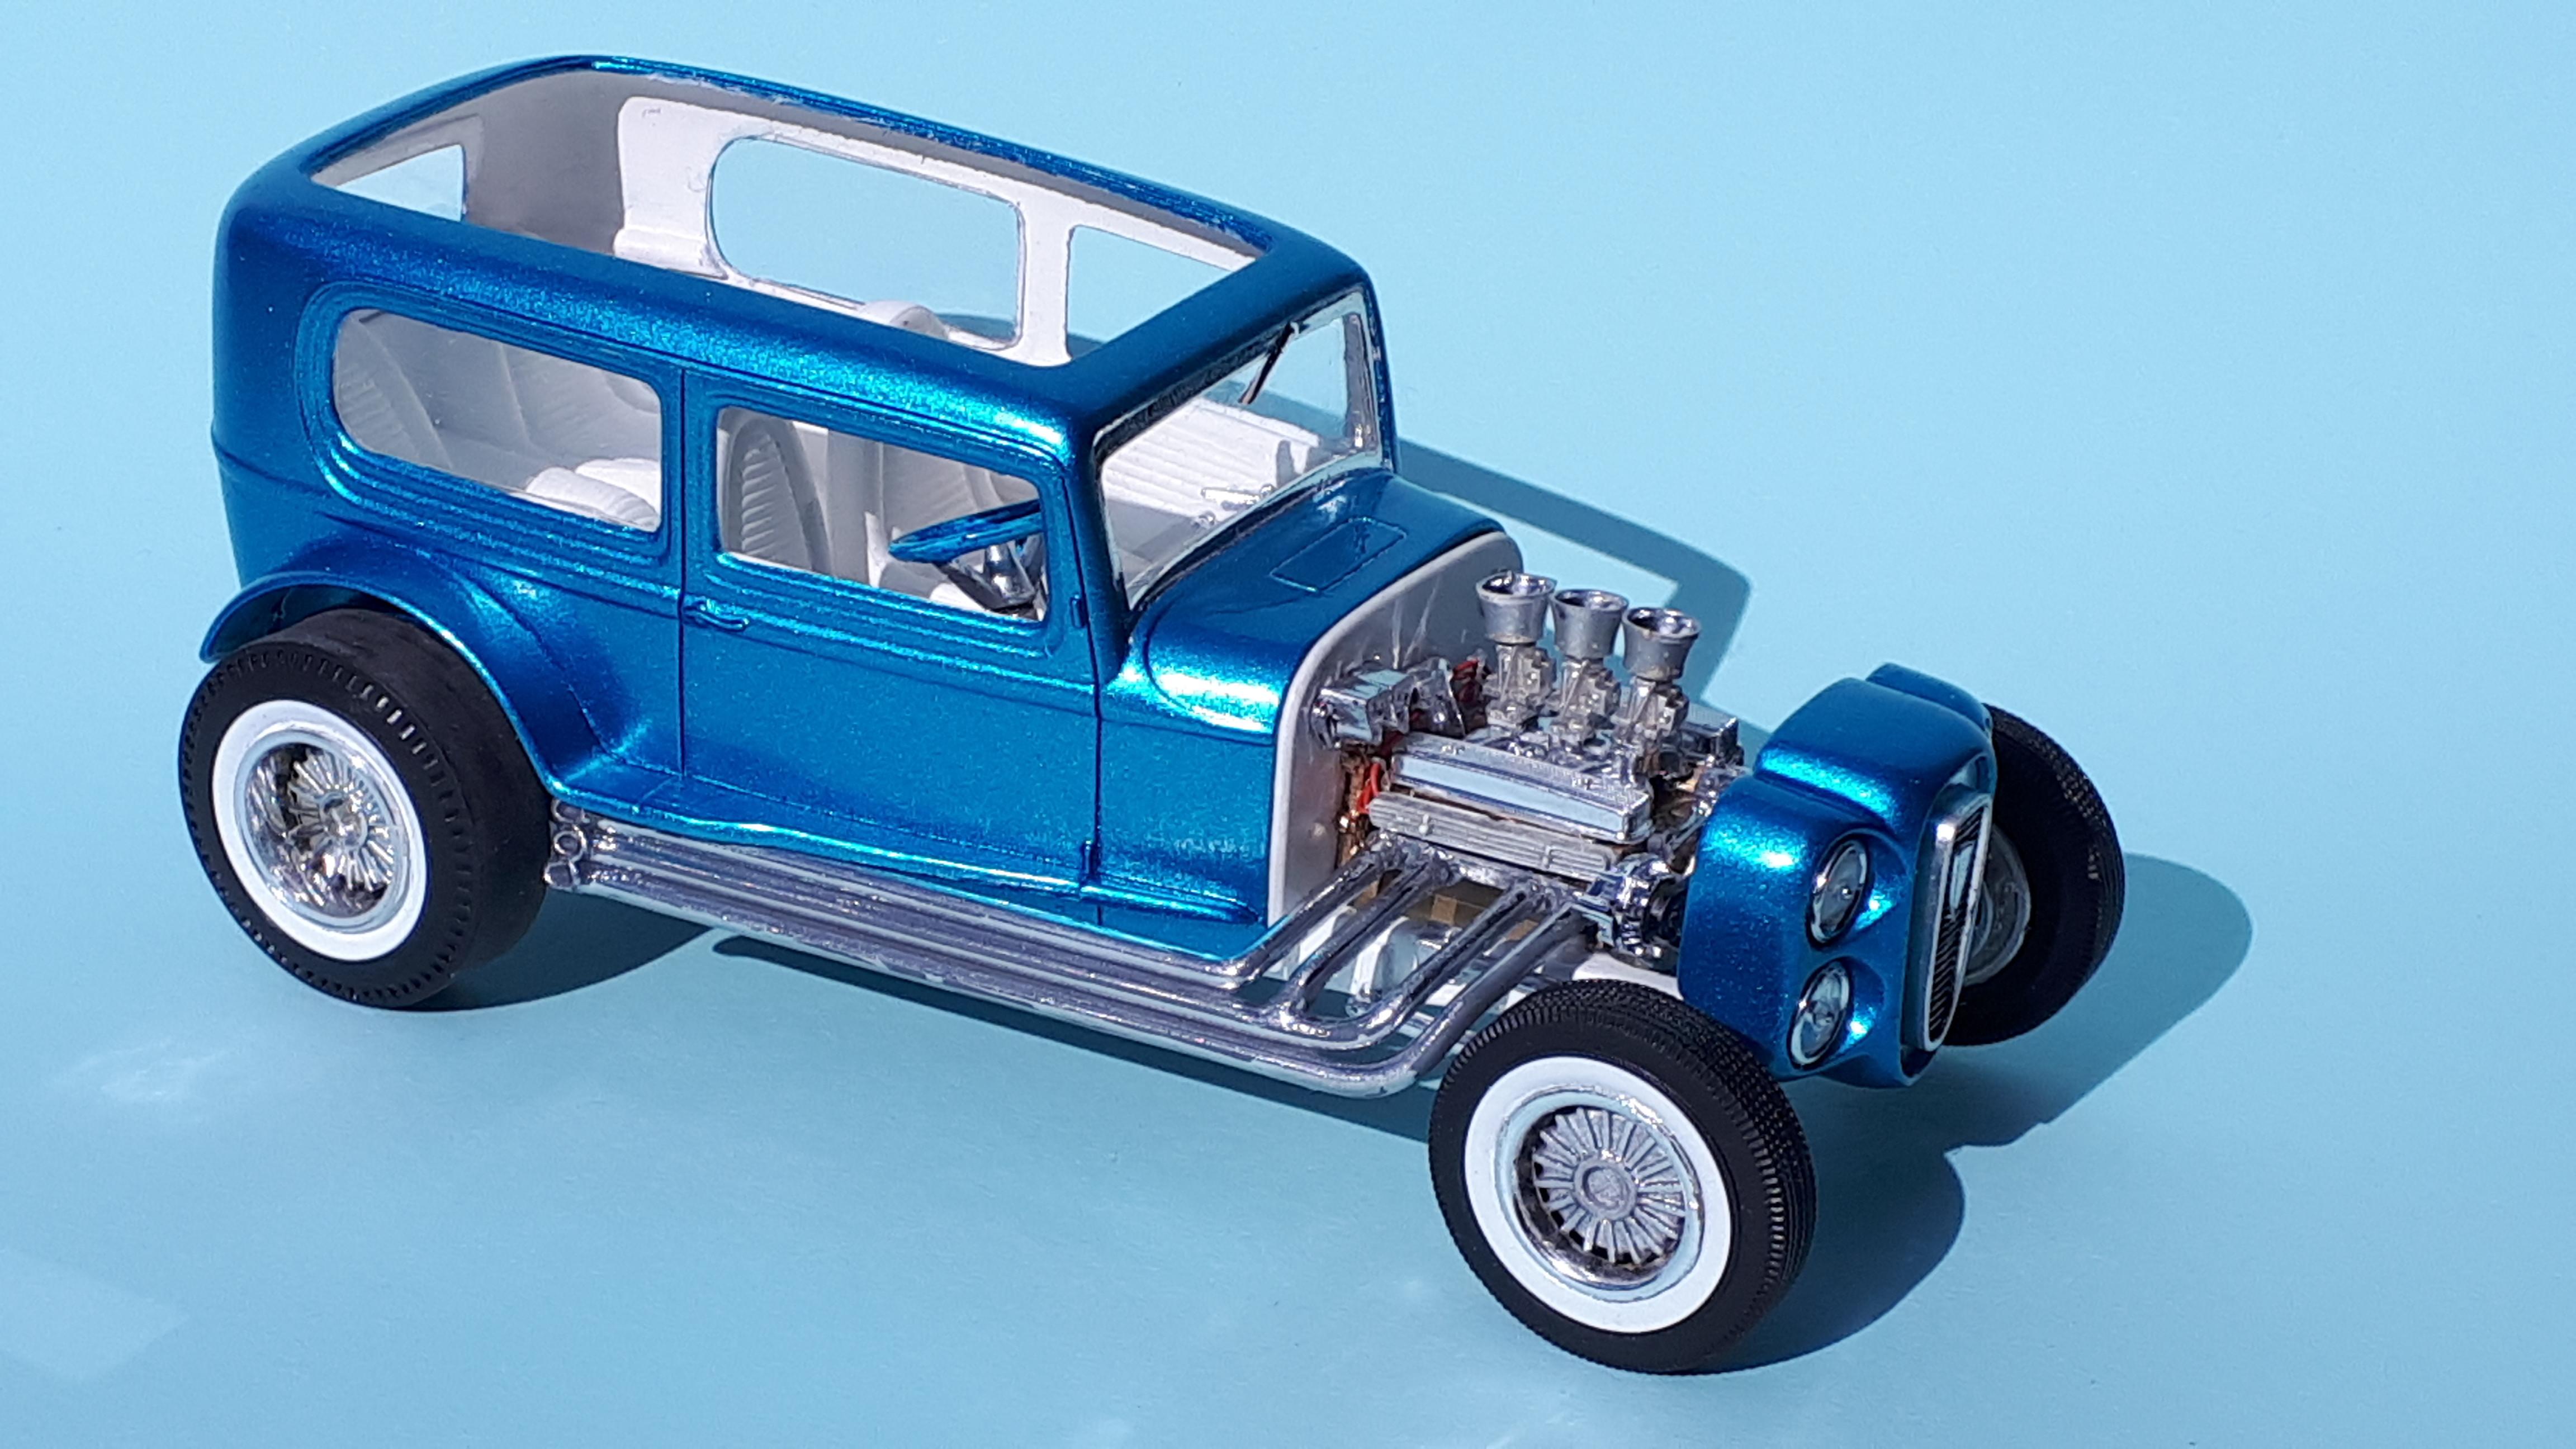
Here it is, finished at last! This is a nearly box stock build of the infamous AMT 32 Tudor from the Willys / Ford double kit. I had the frame, interior and other bits and bobs from a very gluebombed childhood build and after seeing several built models on this forum I decided to try to resurrect it, but using the AMT Vicky body instead of the Tudor ( because my two Tudor bodies were already built. You can imagine my surprise when Steve (Muncie on here) from Oregon generously donated a near mint pale blue Tudor body to the cause. His care package also included a fresh nose, headlights and front axle. It turns out that we have a lot of interests in common and if we are ever allowed to travel out of our own countries again I intend looking up Steve and wasting a few hours talking cars! So what you see here is a restored chassis, engine, rear end, wheels and interior from my childhood build with Steve's body and grille shell. I opened the roof because it is a waste to not be able to see that amazing square button tufted interior. I have made a transparent blue roof insert but haven't yet devised a clean way of attaching it to the flange that I made around the inside edge. The nailhead was freshened up with the rocker covers and oil pan from a Revell 29 kit. The wheels are originals while the tyres are from an AMT Parts Pack. I got the front end down about 2mm from the original stance, maybe 3mm but it is still a long way up in the air. I did consider using a dropped axle but in the end decided to respect the original AMT design, warts and all. I scratchbuilt a RHD firewall using AMT 29 Ford master cylinders. I loved the detail of the original firewalll but couldn't bring myself to cut up the two originals I have in the stash. If anyone is trying to restore one of these I would be happy to contribute a firewall - paying it forward and all! Colour is Mazda blue from a Duplicolor spray can with Duplicolor clear over the top. I'm really happy to build this childhood memory with adult skills and it makes a welcome addition to my AMT 32 Ford collection. I can't thank Steve enough for making it happen. it just shows what a wonderful place this forum is and the quality of people who visit here. Thanks Steve, I won't forget this! Cheers Alan
-
Mitch, that is a nice clean build of a challenging kit. I did mine as the Petty version out of the box and really enjoyed it but as you know, there are a lot of things with regard to the front and rear suspension, the engine size and exhausts and certain areas of the rollcage that make it a handful. Tony, you are dead right about this kit being a awkward but it is still well worth the effort. I extended the frame on my Petty car, just behind where the subframe joins the main frame. This helps put the tyres in the centre of the wheelarchesa s they should be. I also sanded down the wheel backs and really hacked into the discs to narrow the track and get the tyres back inside the openings. I would strongly recommend that when you do your final assembly, you use Testors tube glue, the one everyone hates, to give you lots of working time as you set up the positioning of the suspension arms to get everything where it should be. Cheers Alan


.jpg.71f54a0c2f8b5c132728a9f18ac44e93.jpg)


.jpg.99f7028162dfadeeda09ae8a46c6732c.jpg)

