Alan Barton
-
Posts
2,113 -
Joined
-
Last visited
Content Type
Profiles
Forums
Events
Gallery
Everything posted by Alan Barton
-
1936 Ford 5W Coupe - James Hetfield´s "Iron Fist"
Alan Barton replied to Koellefornia Kid's topic in Model Cars
You did a great job of capturing the essence of the original car with your model, Oliver. You're a braver man than me scribing that new curved trunk outline! Kudos for a job well done. Cheers Alan -
60's Style Chopped '34 Ford 5-Window Coupe UPDATED 11/19/18
Alan Barton replied to Dennis Lacy's topic in WIP: Model Cars
Chassis mods are great, engine choice and setback are perfect, wheels and stance spot on but one thing is glaring at me. It's not your fault, and I am not sure I could change it myself with my skills BUT after the caster finished his chop, he tidied things up with that really heavy gutter. Is there any chance it could be sanded/filed/scraped into something closer to Henry's original contours? Just a thought. On the other hand, it might disappear with a darkish paint job. Love the car, mate. Cheers Alan -
60's Banger Geek '27 T Touring - Updated 10/13/18
Alan Barton replied to Dennis Lacy's topic in WIP: Model Cars
Doh!!! You said in the first post it would be metallic my short term memory gets shorter by the day! -
60's Banger Geek '27 T Touring - Updated 10/13/18
Alan Barton replied to Dennis Lacy's topic in WIP: Model Cars
Your work continues to inspire and amaze me, Dennis. I love the way you are completing each part totally so that when it comes time for paint, this thing is going to go together like it came out of the box that way. I have a number of traditional and not-so-traditional projects on the bench at the moment and they have all benefited from your very tight approach to planning and execution. Looking at the Tub itself, there are so many things to like. The injection is a great upgrade for that banger revolution period you mentioned. I have suspected for years that those Revell wheels were a) real but I didn't know where and capable of looking far better than Revell's early silver frost chrome or their modern ultra shiny chrome. I must have eight sets or more of these and I have yet to use them - that will change very soon! Like you I am already using some of the awesome spares from the Revell Model A kits. I am so glad I bought a bunch while they were available. I just wish they were available when I did the interior of my still unfinished Revell T tub project - your interior looks much nicer than the one I am locked into at the moment. And it might sound silly, but it hadn't occurred to me to shorten the Deuce frame like you have. I am putting a resin A tudor body on one and it just looked wrong - now I see an easy solution. So thank you again. Can't wait to see this finished. I'm seeing either metallic or flake - am I close? Cheers Alan -
'32 Channeled Nailhead Roadster UPDATED 11/7/18
Alan Barton replied to Dennis Lacy's topic in WIP: Model Cars
That's gonna work! Cheers Alan -
Wow, that is even uglier than I remember! Do those two models share the same custom front clip or did AMT have two models with a similar theme on to different cars? And to think this was BEFORE psychedelic drugs became popular! Say Hi tp the guys at the club for me! Cheers Alan
-
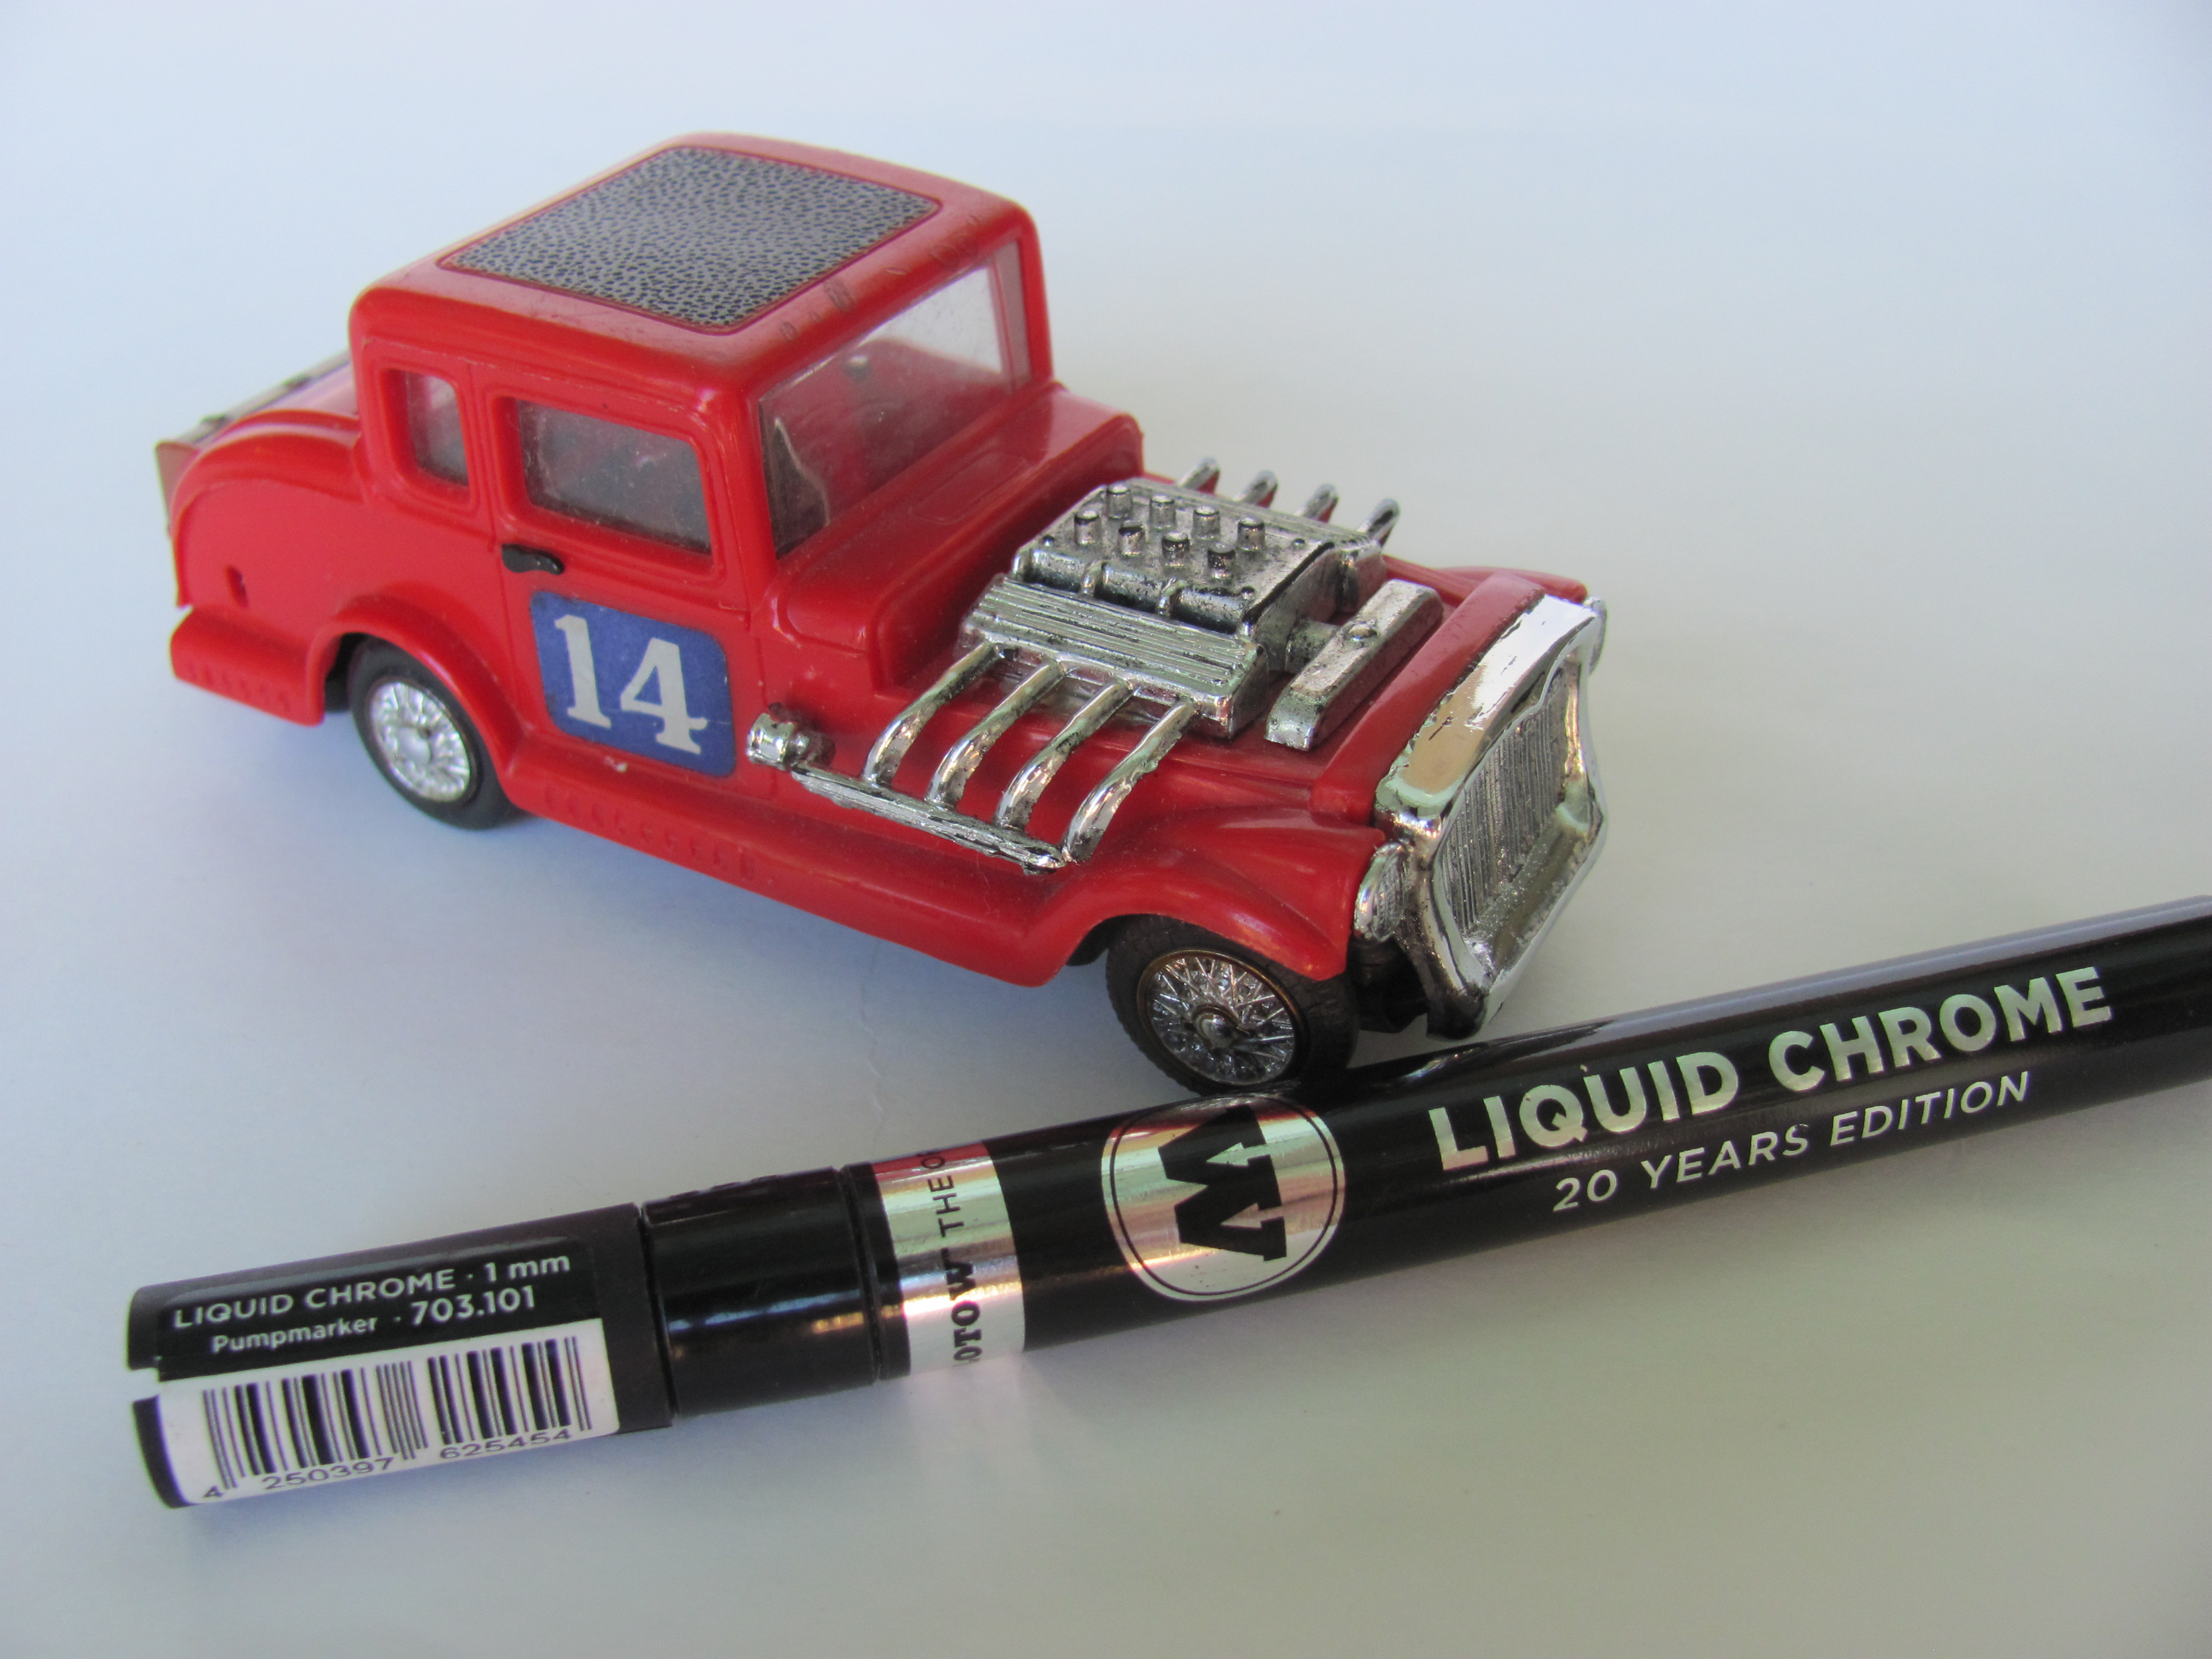
O.K., stop laughing, probably the world's ugliest toy deuce but Motorific did have a one size fits all policy - a 63 Cadillac and a Karman Ghia both fit the same chassis this Deuce is riding. But, I collect toy hot rods irrespective of how ugly they are so I I just laugh and live with it. Here is a before and after I did for the guys at my model club. The chrome on both headers had been rubbed back to black. The LHS is before, the RHS is after. Says it all really, and once again, no prep!

-
I love my Molotow pens, all three sizes. Haven't done any airbrushing as yet. I have a large toy hot rod collection and they are awesome for touching up damaged, worn or faded chrome on old toy - can make a roughie look brand new. I have also used the 1mm on chrome trim on a Motorific slot car body - these are somewhere between 1/32nd and 1/43 . One quick swipe and they look brilliant! My trick is to always shake the pen and give a few pumps on the nib before you use it so that you get bright wet chrome on the first go. I have had Molotow job in the cabinet for over a year and they still look great. The Imperial below had very faded silver paint trim - you can still see some on the lower edge of the windshield frame. The top edge of the frameand the wiperes are Molotow 1mm, no masking, the windshield is still in and in fact, the only prep was a quick wipe with my hand. This chrome is about 14 months old. On the rear of the Imperial, the fender top spear is OEM chrome, the side spear and rear window trim is Molotow. Impossible to tell the difference. Again, the window was not removed and there was no masking applied. And, I shake like a drunk epileptic on an ice rink! I would however agree with all posters that I probably wouldn't be brave enough to tackle a full length trim on a fifties classic. But I would and will be cheerfully attacking a 1/25th scale windshield trim shortly. I love BareMetal but hate wrinkles I often get on the corners of windscreen trim and the quarter vents.
-
Yeah, that rear view is pretty scary when you compare it to the real one! Kinda glad I didn't go chasing one now. I know of one SMP Elky hear in Perth but it was heavily customised so the owner just tidied it up and put it on his shelf. Cheers Alan
-
'32 Phanton -Foose build -update 2/11/18
Alan Barton replied to Rocking Rodney Rat's topic in WIP: Model Cars
I'm sure you've seen it already, Rodney, but just in case you haven't, the latest Rodder's Journal has a detailed article on a baremetal full fendered display car. I love how this is working out - your surgery is beautiful! Cheers Alan -
Thanks Rusty, you're right, I didn't notice that! I will add it to my list! Thanyou, Dominick, for t he photos of the SMP. All this stuff adds to the information available to make a 60 ElCamino as accurate as you wish it to be. Here are some photos I took of a beautiful red example at the Shepparton Motor Museum in Victoria on the other side of Australia from me. Wish I could have got closer!
-
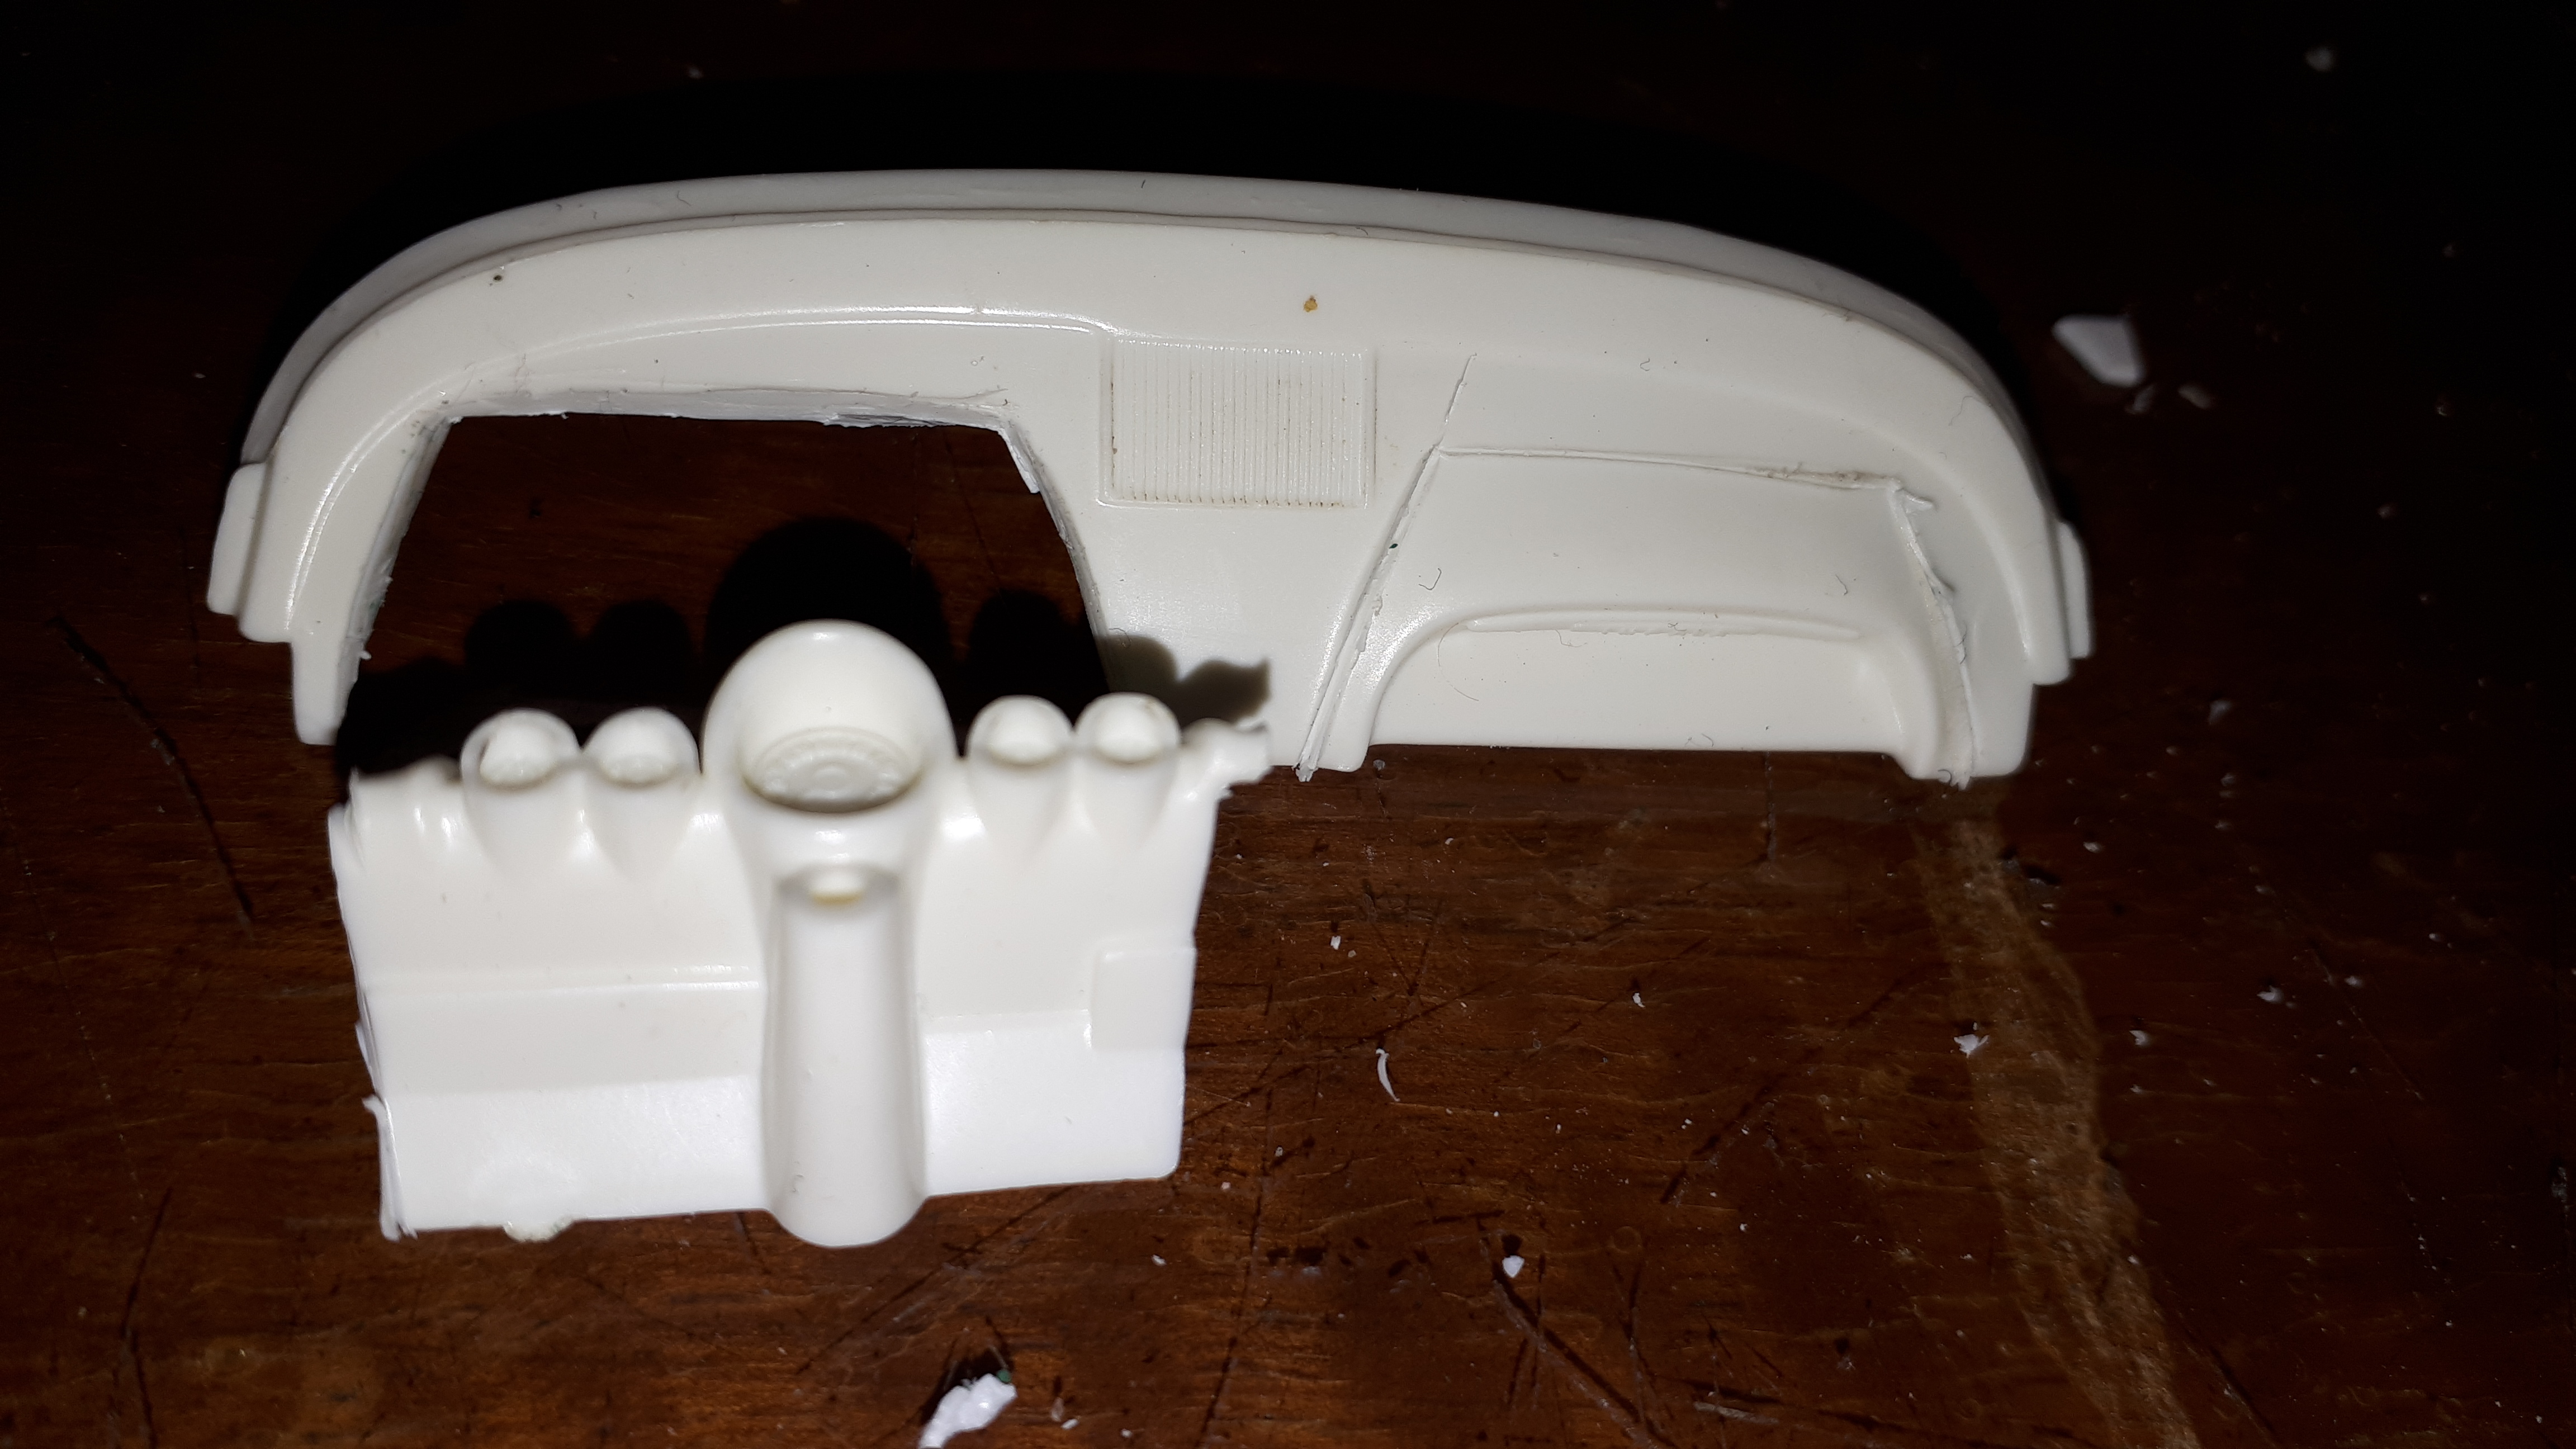
Then the fun starts! The two holes that are left are NEVER symmetrical despite your best efforts. I will often glue extra plastic to the inserts and file that up nice to make up the gaps before attempting to glue all the pieces back together. In the last photo you can see there is now a bit of curvature that wasn't there before - we can fix that!
-
Next I made the cuts. I prefer to use a sharp X-acto rather than a razor saw, to minimise the kerf because by the time you remove plastic with at least four cuts, you can end up with big gaps. I always try to leave the perimeter of the dashboard intact so that I have a frame to reference from. Otherwise it is like trying to make a jig saw puzzle out of cornflakes!
-
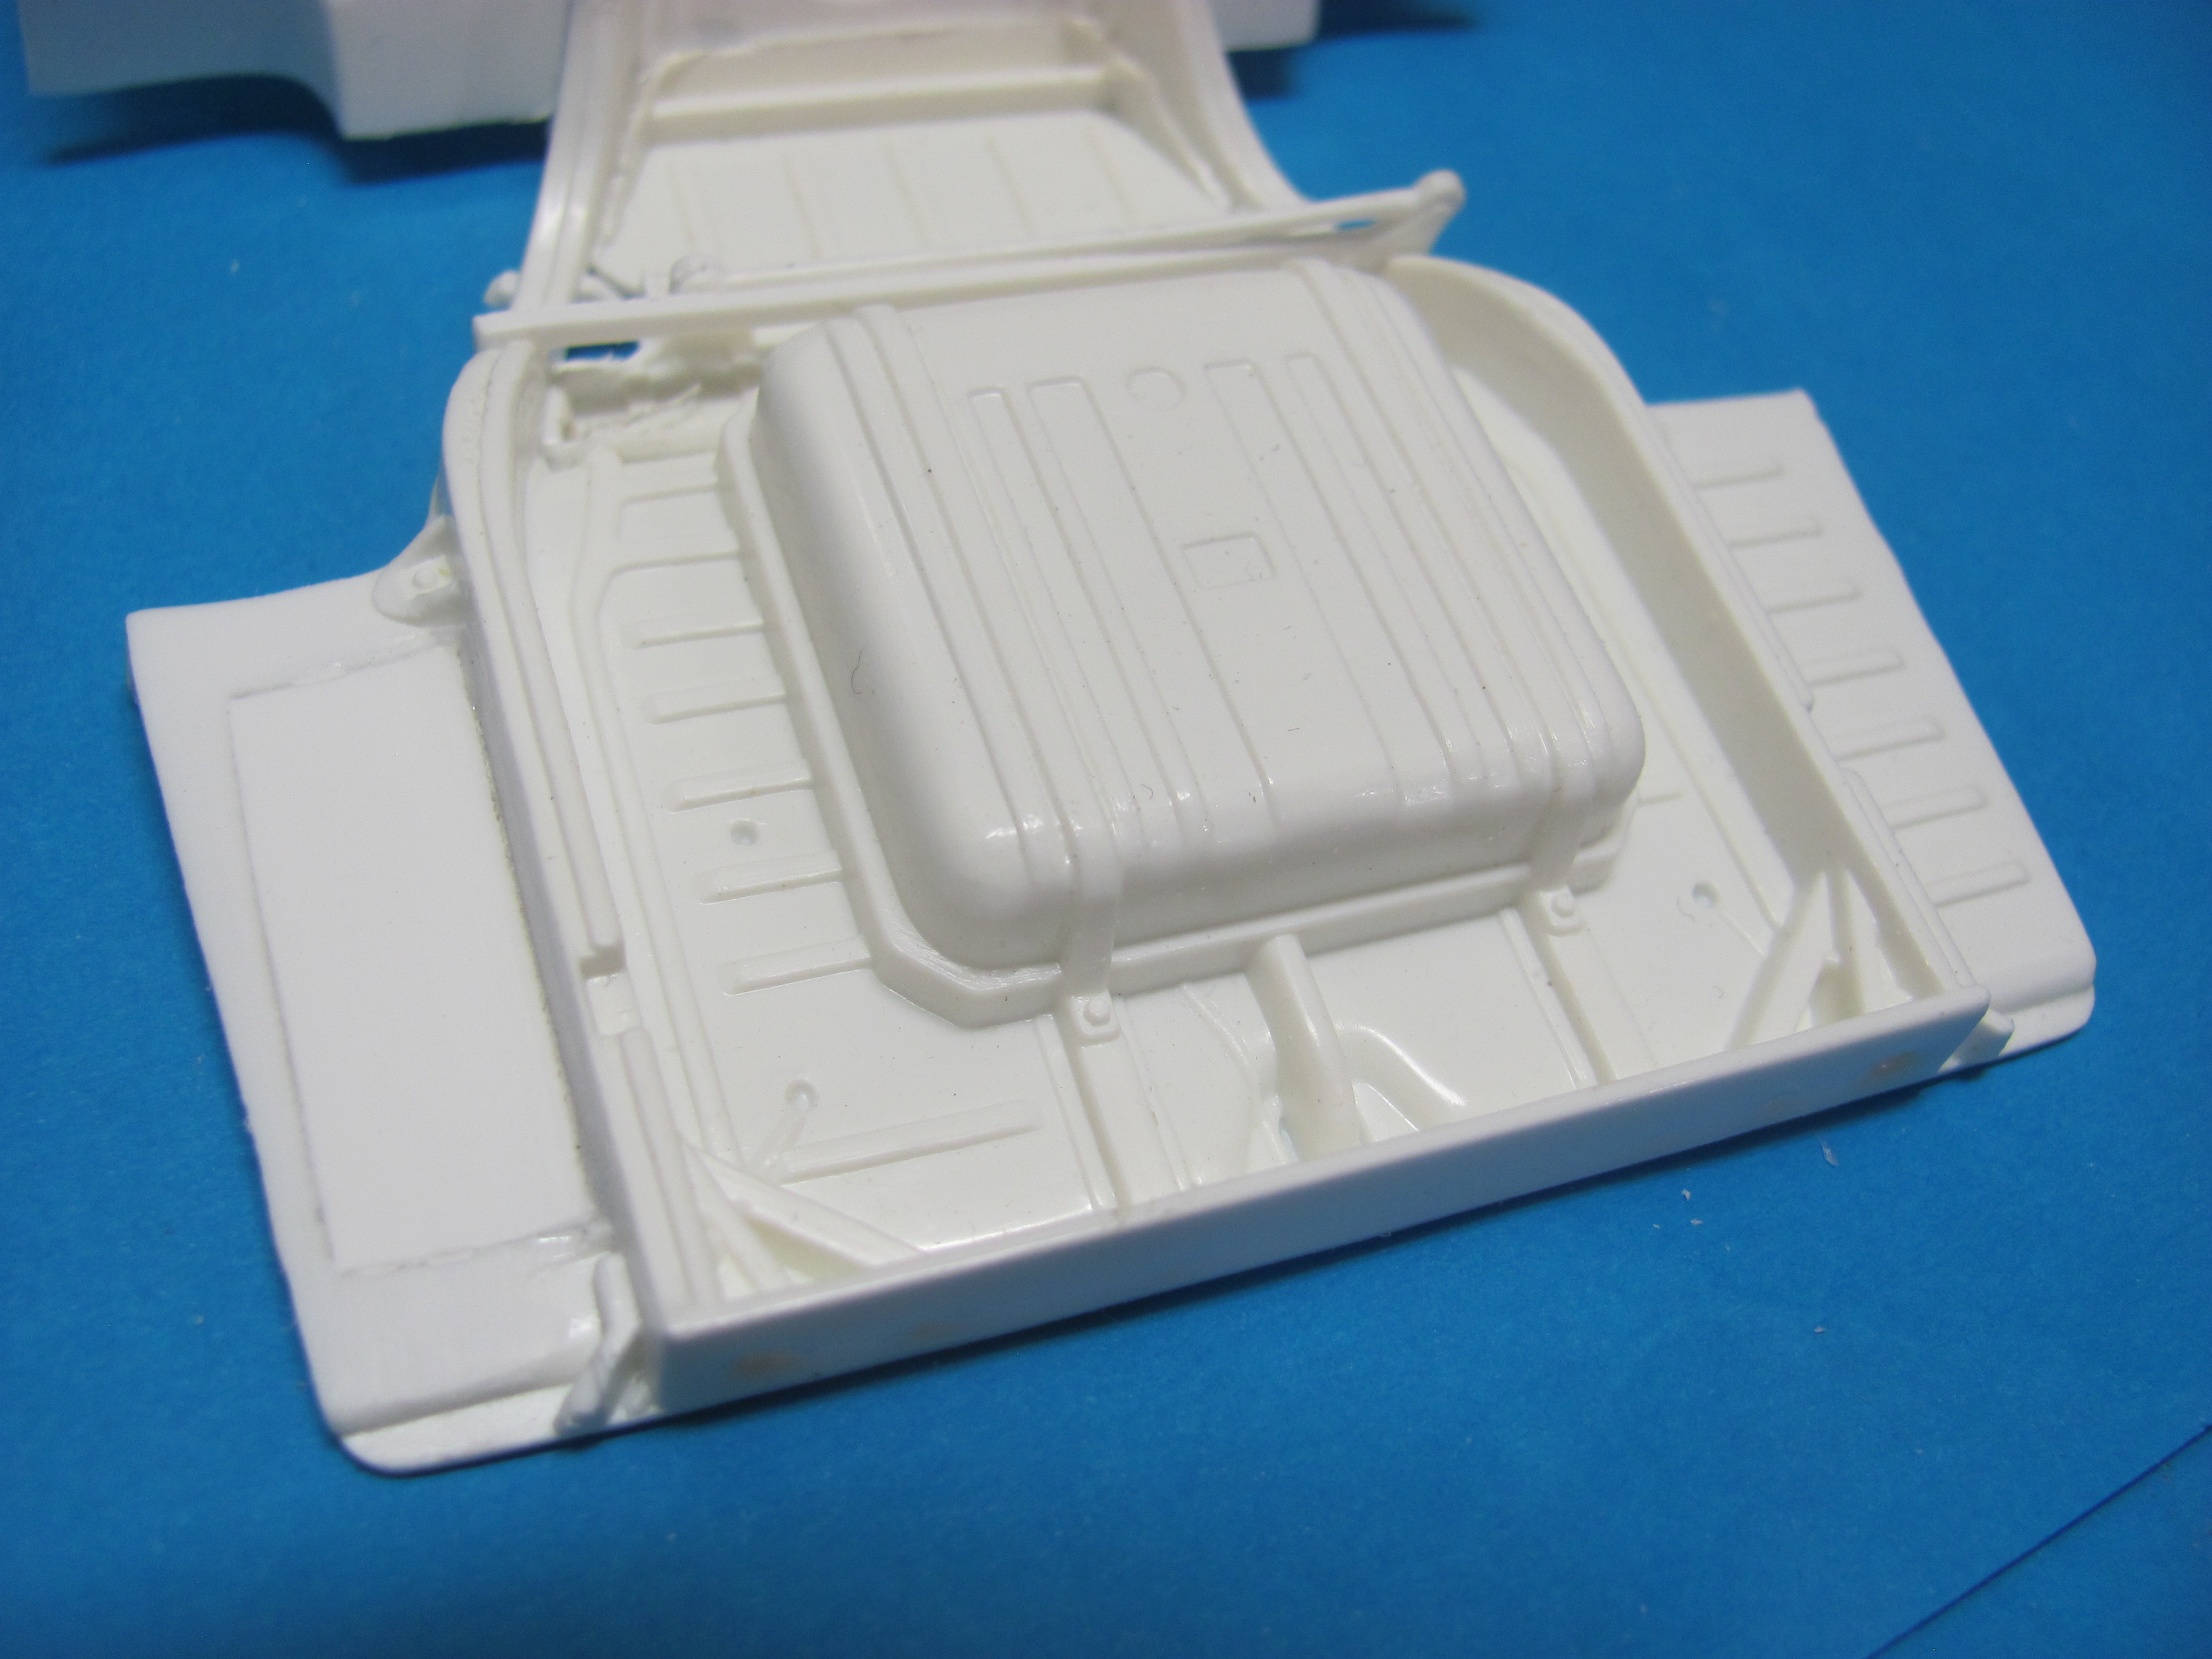
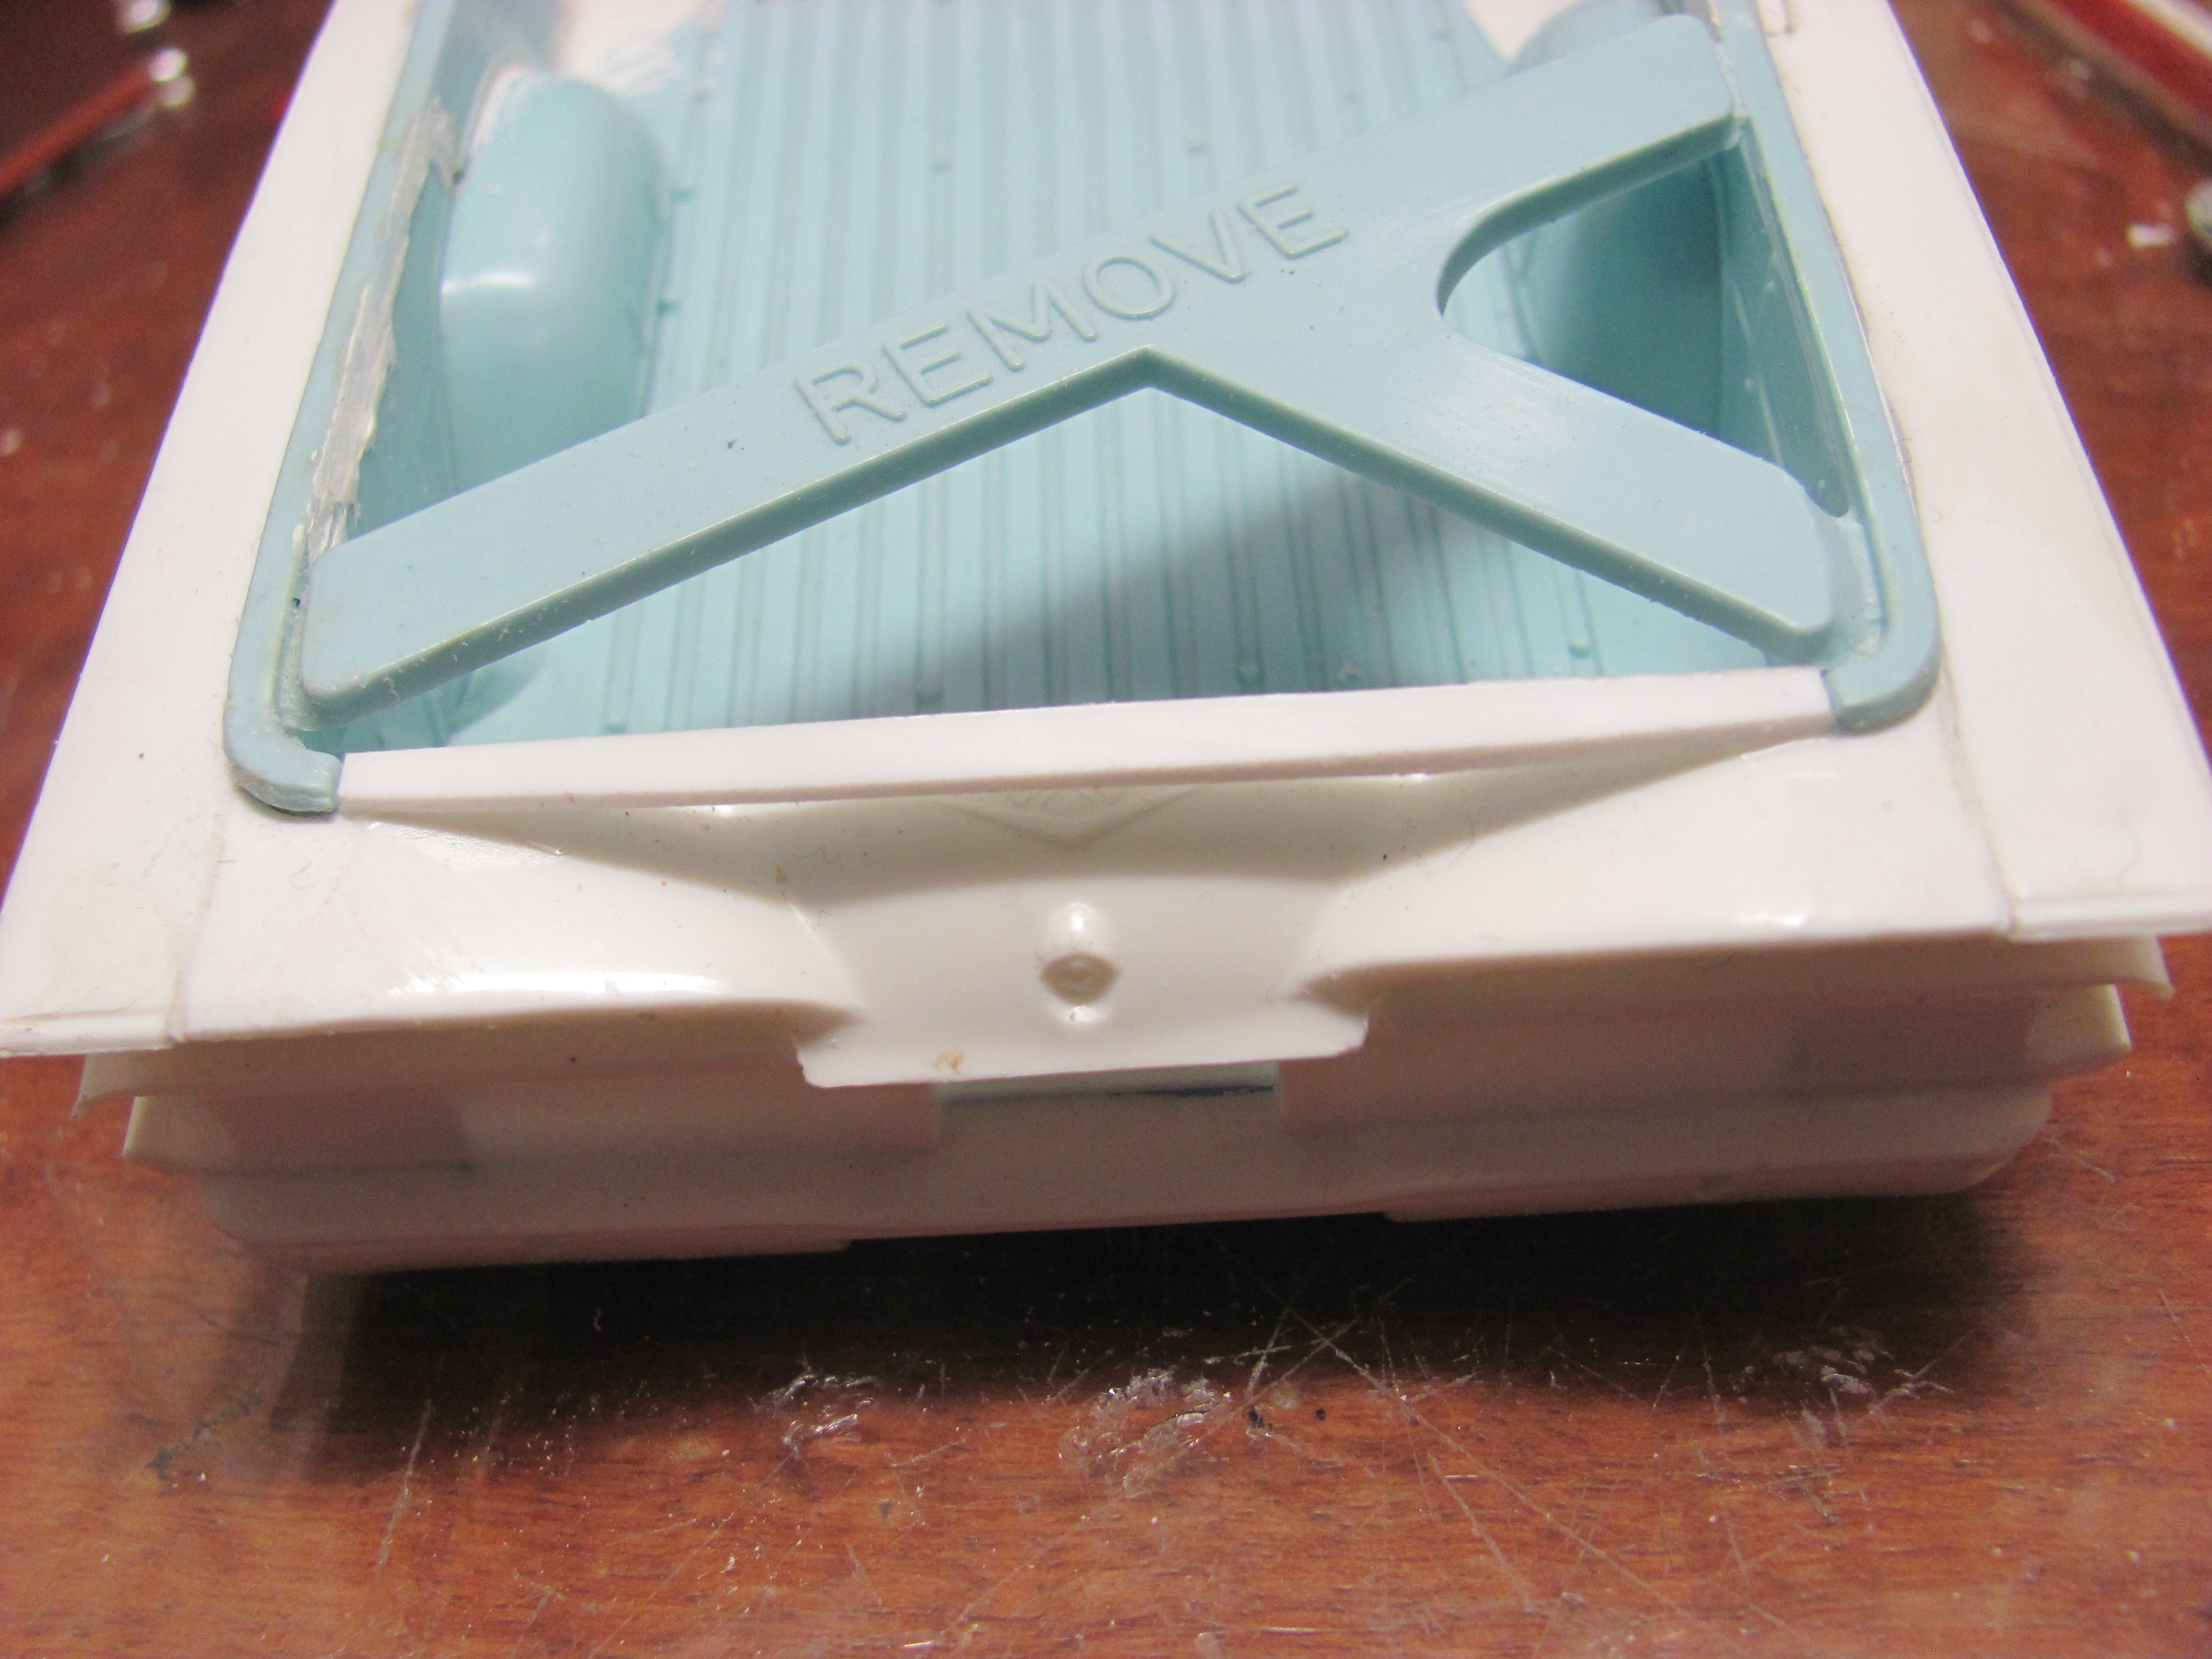
Thanks everyone for the support. Seems like anyone who wants to build a 60 Elky now has at least three ways to consider! I am in awe of Randy's precision grafting of the Bad Actor fins to the Revell body - that is a work of art! I too have a Bad Actor body from my childhood but unfortunately back then I cut open the tailgate and then lost it so it won't give me much of an advantage! Instead, I am going to use it as a donor roof on the left over AMT 59 body to produce a 59 Sedan Delivery - waste not, want not! I was originally going to do it with the Revell 60 body but ended up buying a Jimmy Flintstone resin body instead so I should eventually end up with a coupe, a sedan delivery and an El Camino version of both the 59 and the 60. I am really more of a hot rod guy but these two cars have captured my imagination since I was very young. Bob, I like your graft of the bed to the 60 better than what I did. You removed about half the width of the fin and then fitted it to the sixty. I only cut about a mm away form the bed rail and then filed the excess back to the bed rail. I realise now that this has the effect of making the bed rail somewhat thicker than it should be. I can fix it but your way would have been easier. I have also decided to go with the Impala fuel tank. This Elky is going to be a tow car and we don't want to be stopping at every servo on the way to Bonneville, now do we? I'm also not going to put that big medallion in the centre of the tailgate. I'm guessing it is a remnant from the window winder on a station wagon. I think it will be a lot cleaner without it. My Elky will be getting the mild custom treatment, possibly a tube grille, possibly side pipes so a little decking of the tailgate will fit in nicely. Also I am tackling something most of you would never have to bother with. For the last 25 years or so I have been making all my models right hand drive. I have been making all rods RHD since I was a kid but they are usually pretty easy. "Late model" cars are more complex but I enjoy the challenge. I don't think I ever do two the same way. THe biggest trap is that dashboards that appear to be symetrical and full of straight, parallel lines often aren't. When you swap pieces from sides to side it often comes out looking very irregular and getting it looking right is the challenge. I tried something different on the 60 dash. I first laid tape along the outside edge of the instrument cluster to determine the easiest, straightest cut. I then transferred that angle, with tape, to the inside of the glovebox custer. That way, when I swap the two pieces side for side, the cuts should match up reasonably.
-
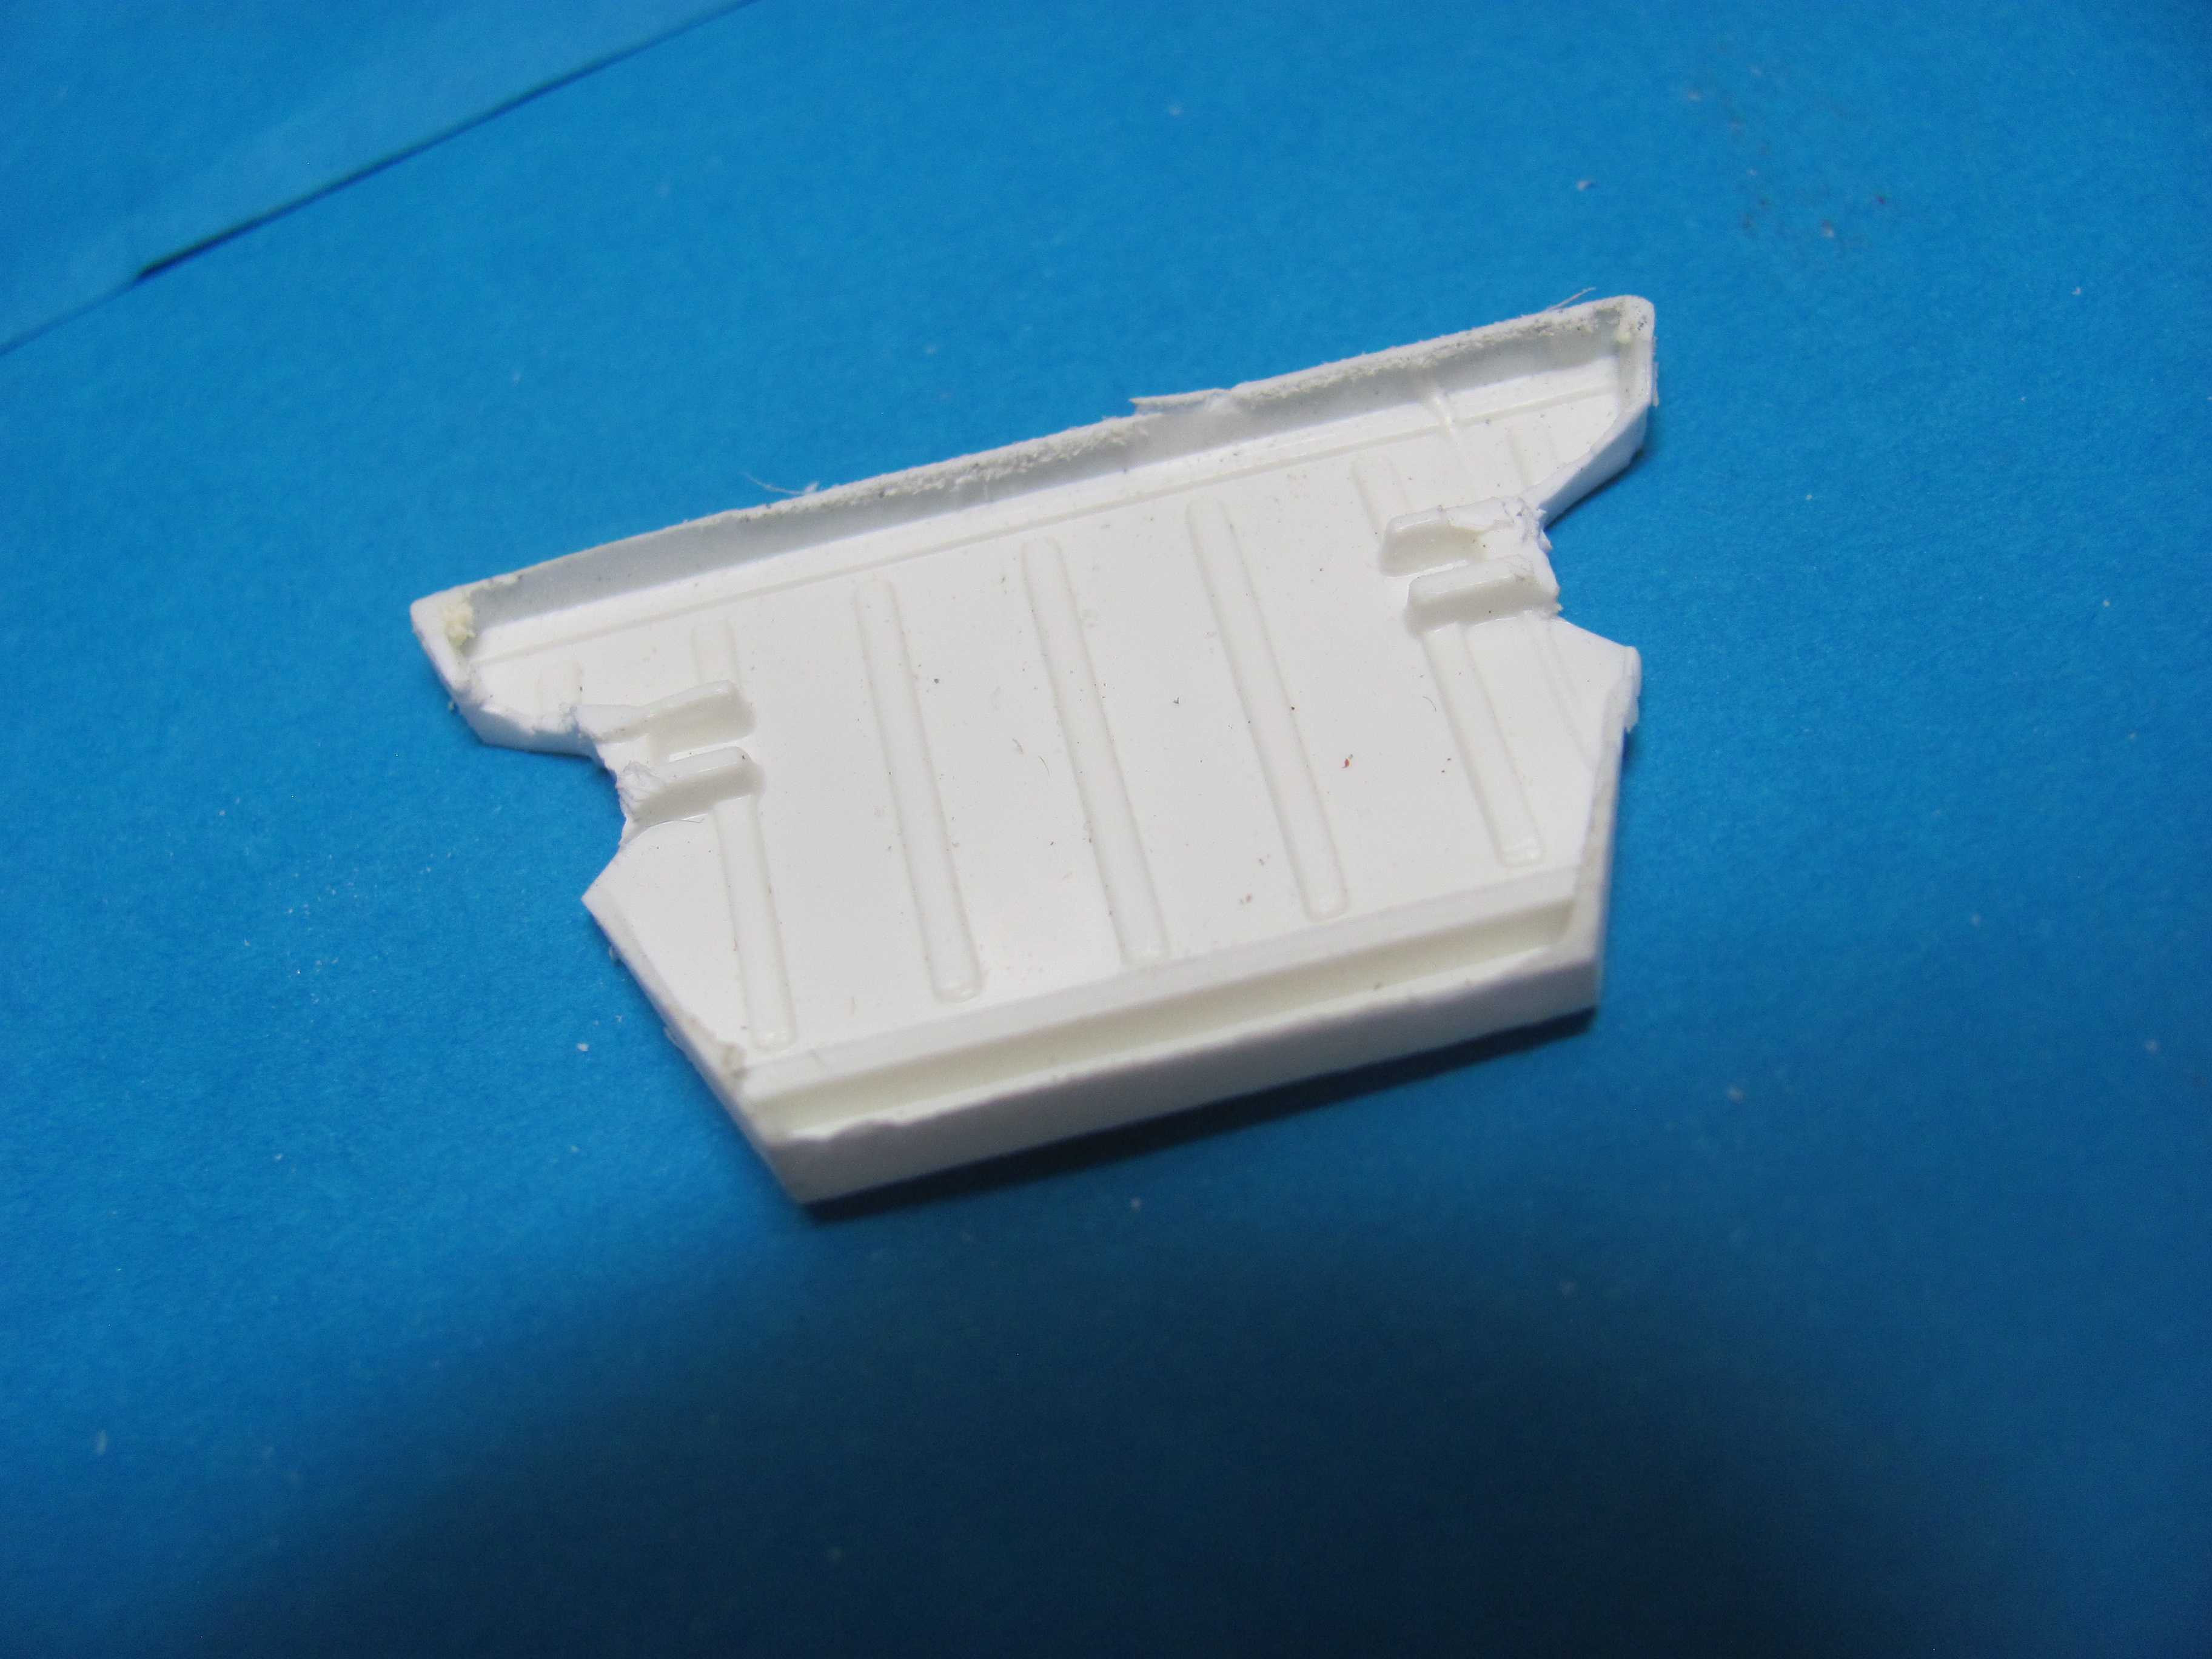
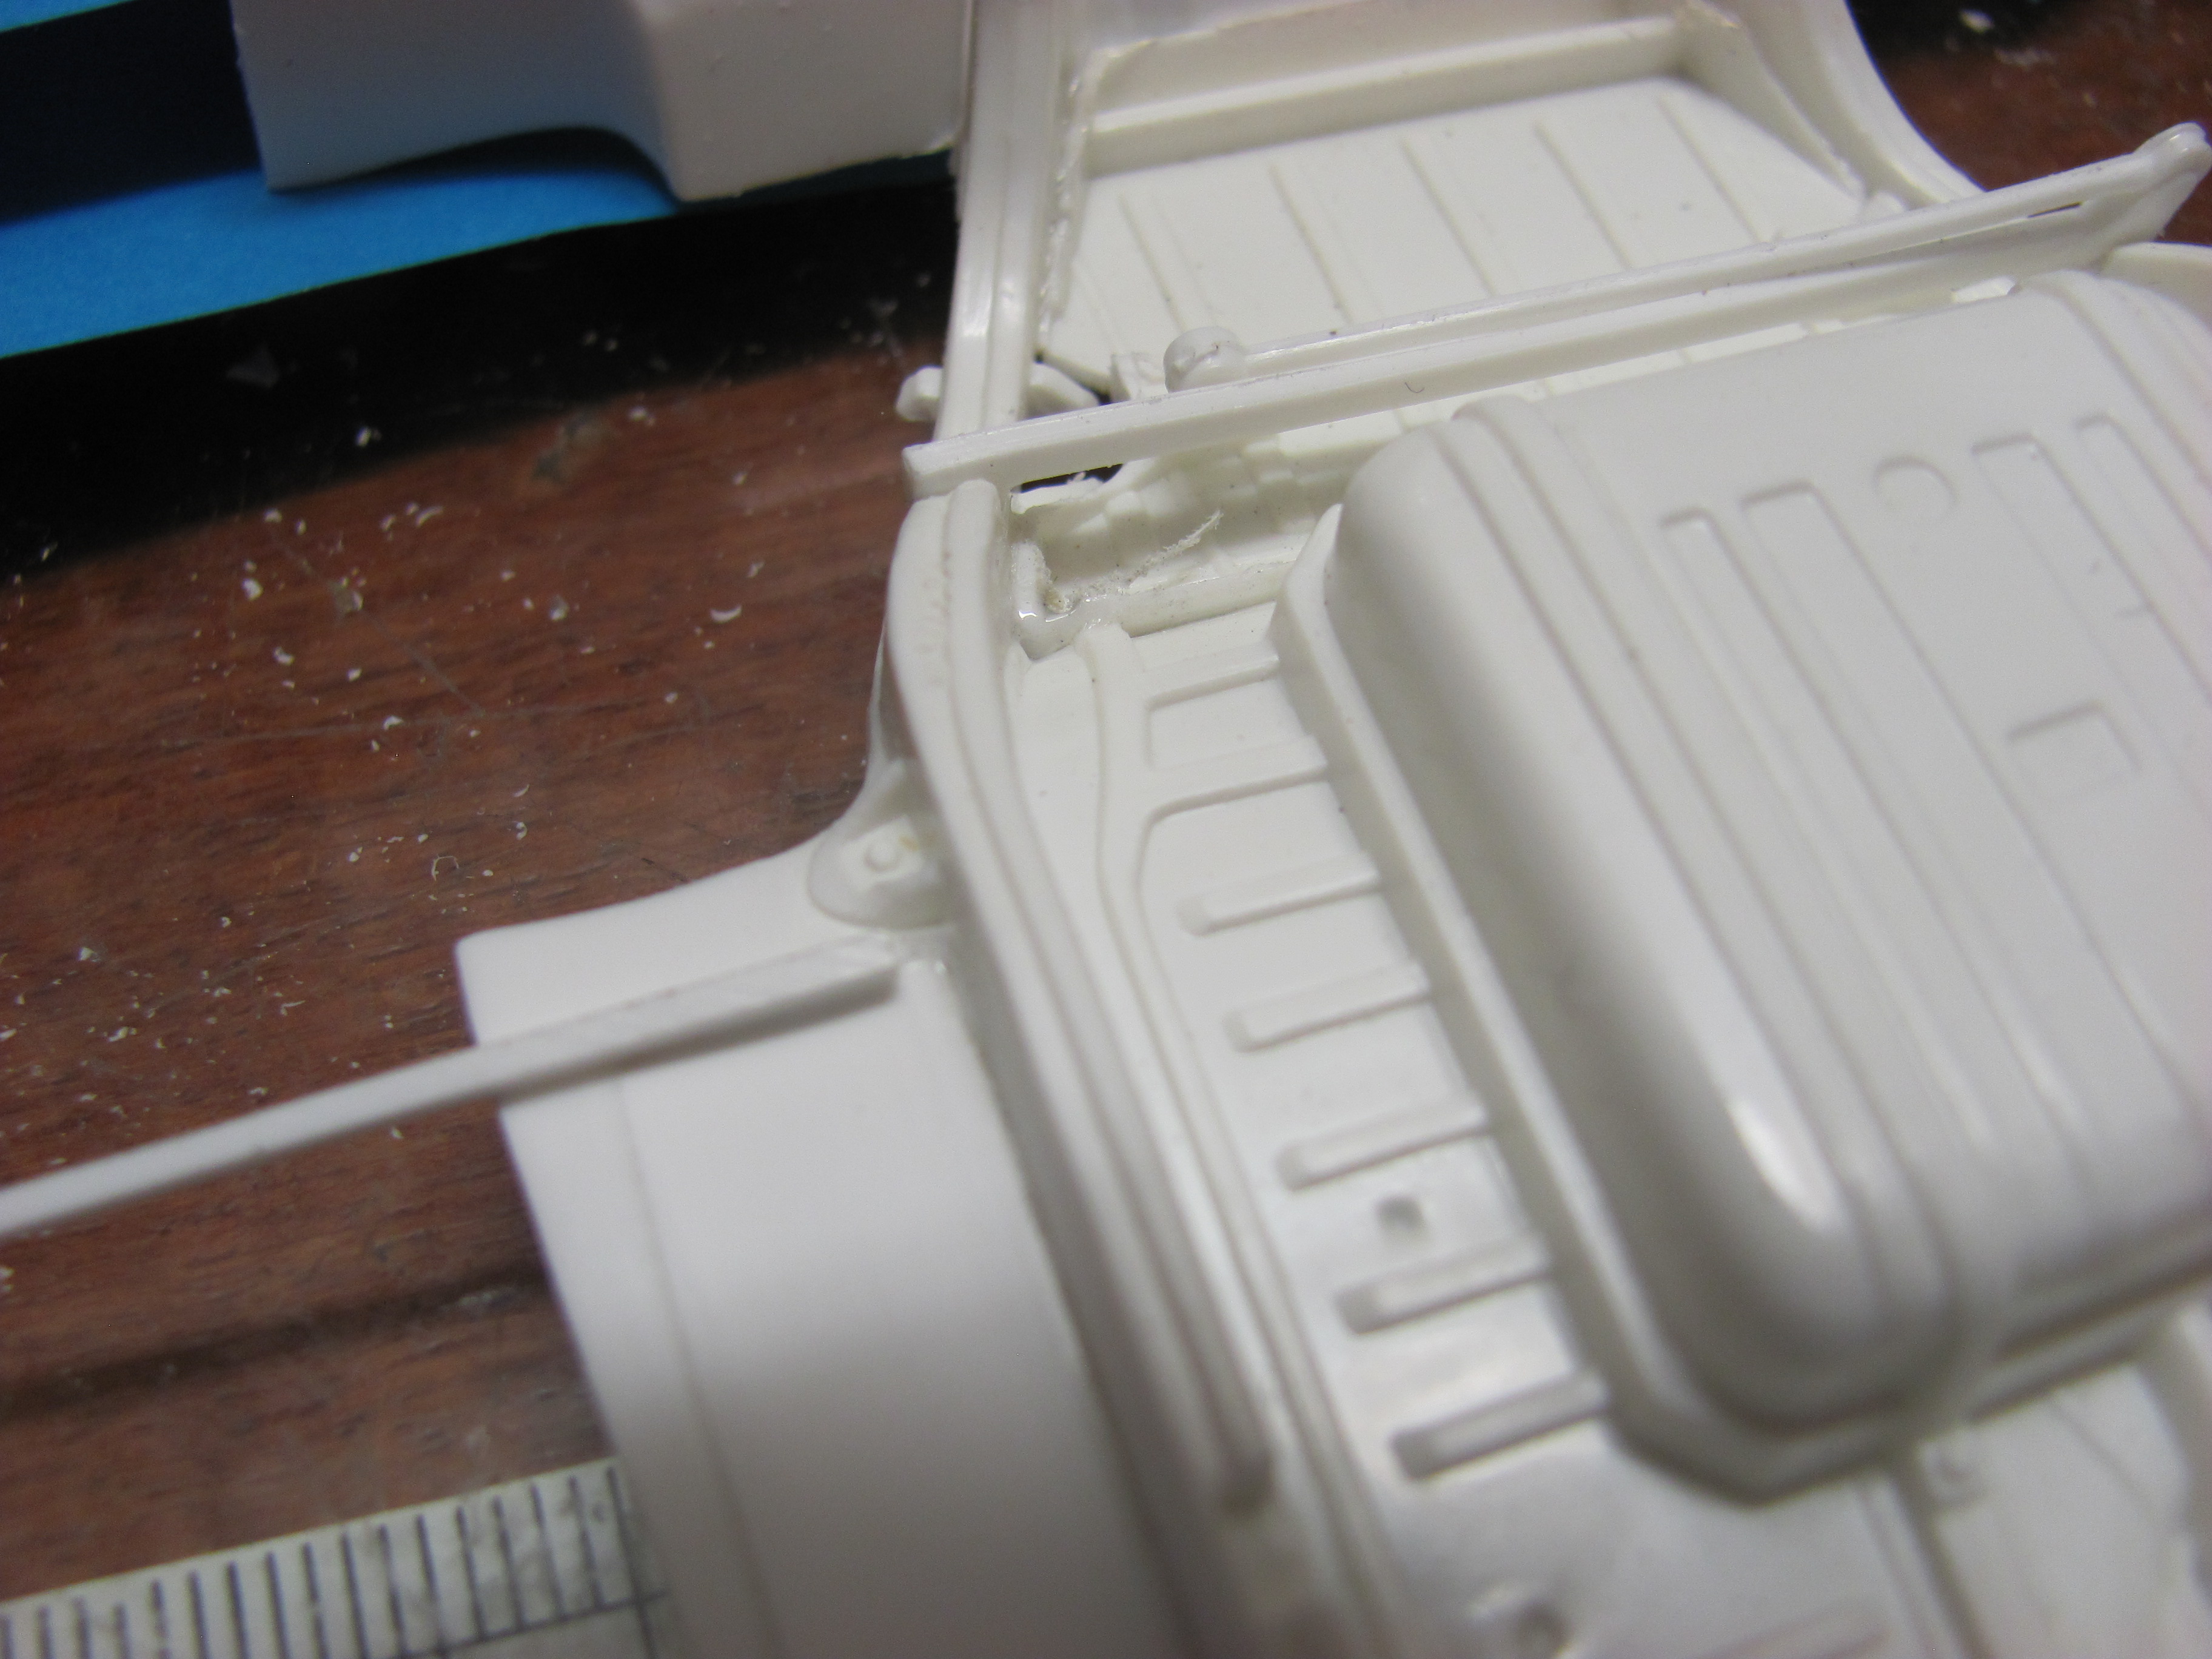
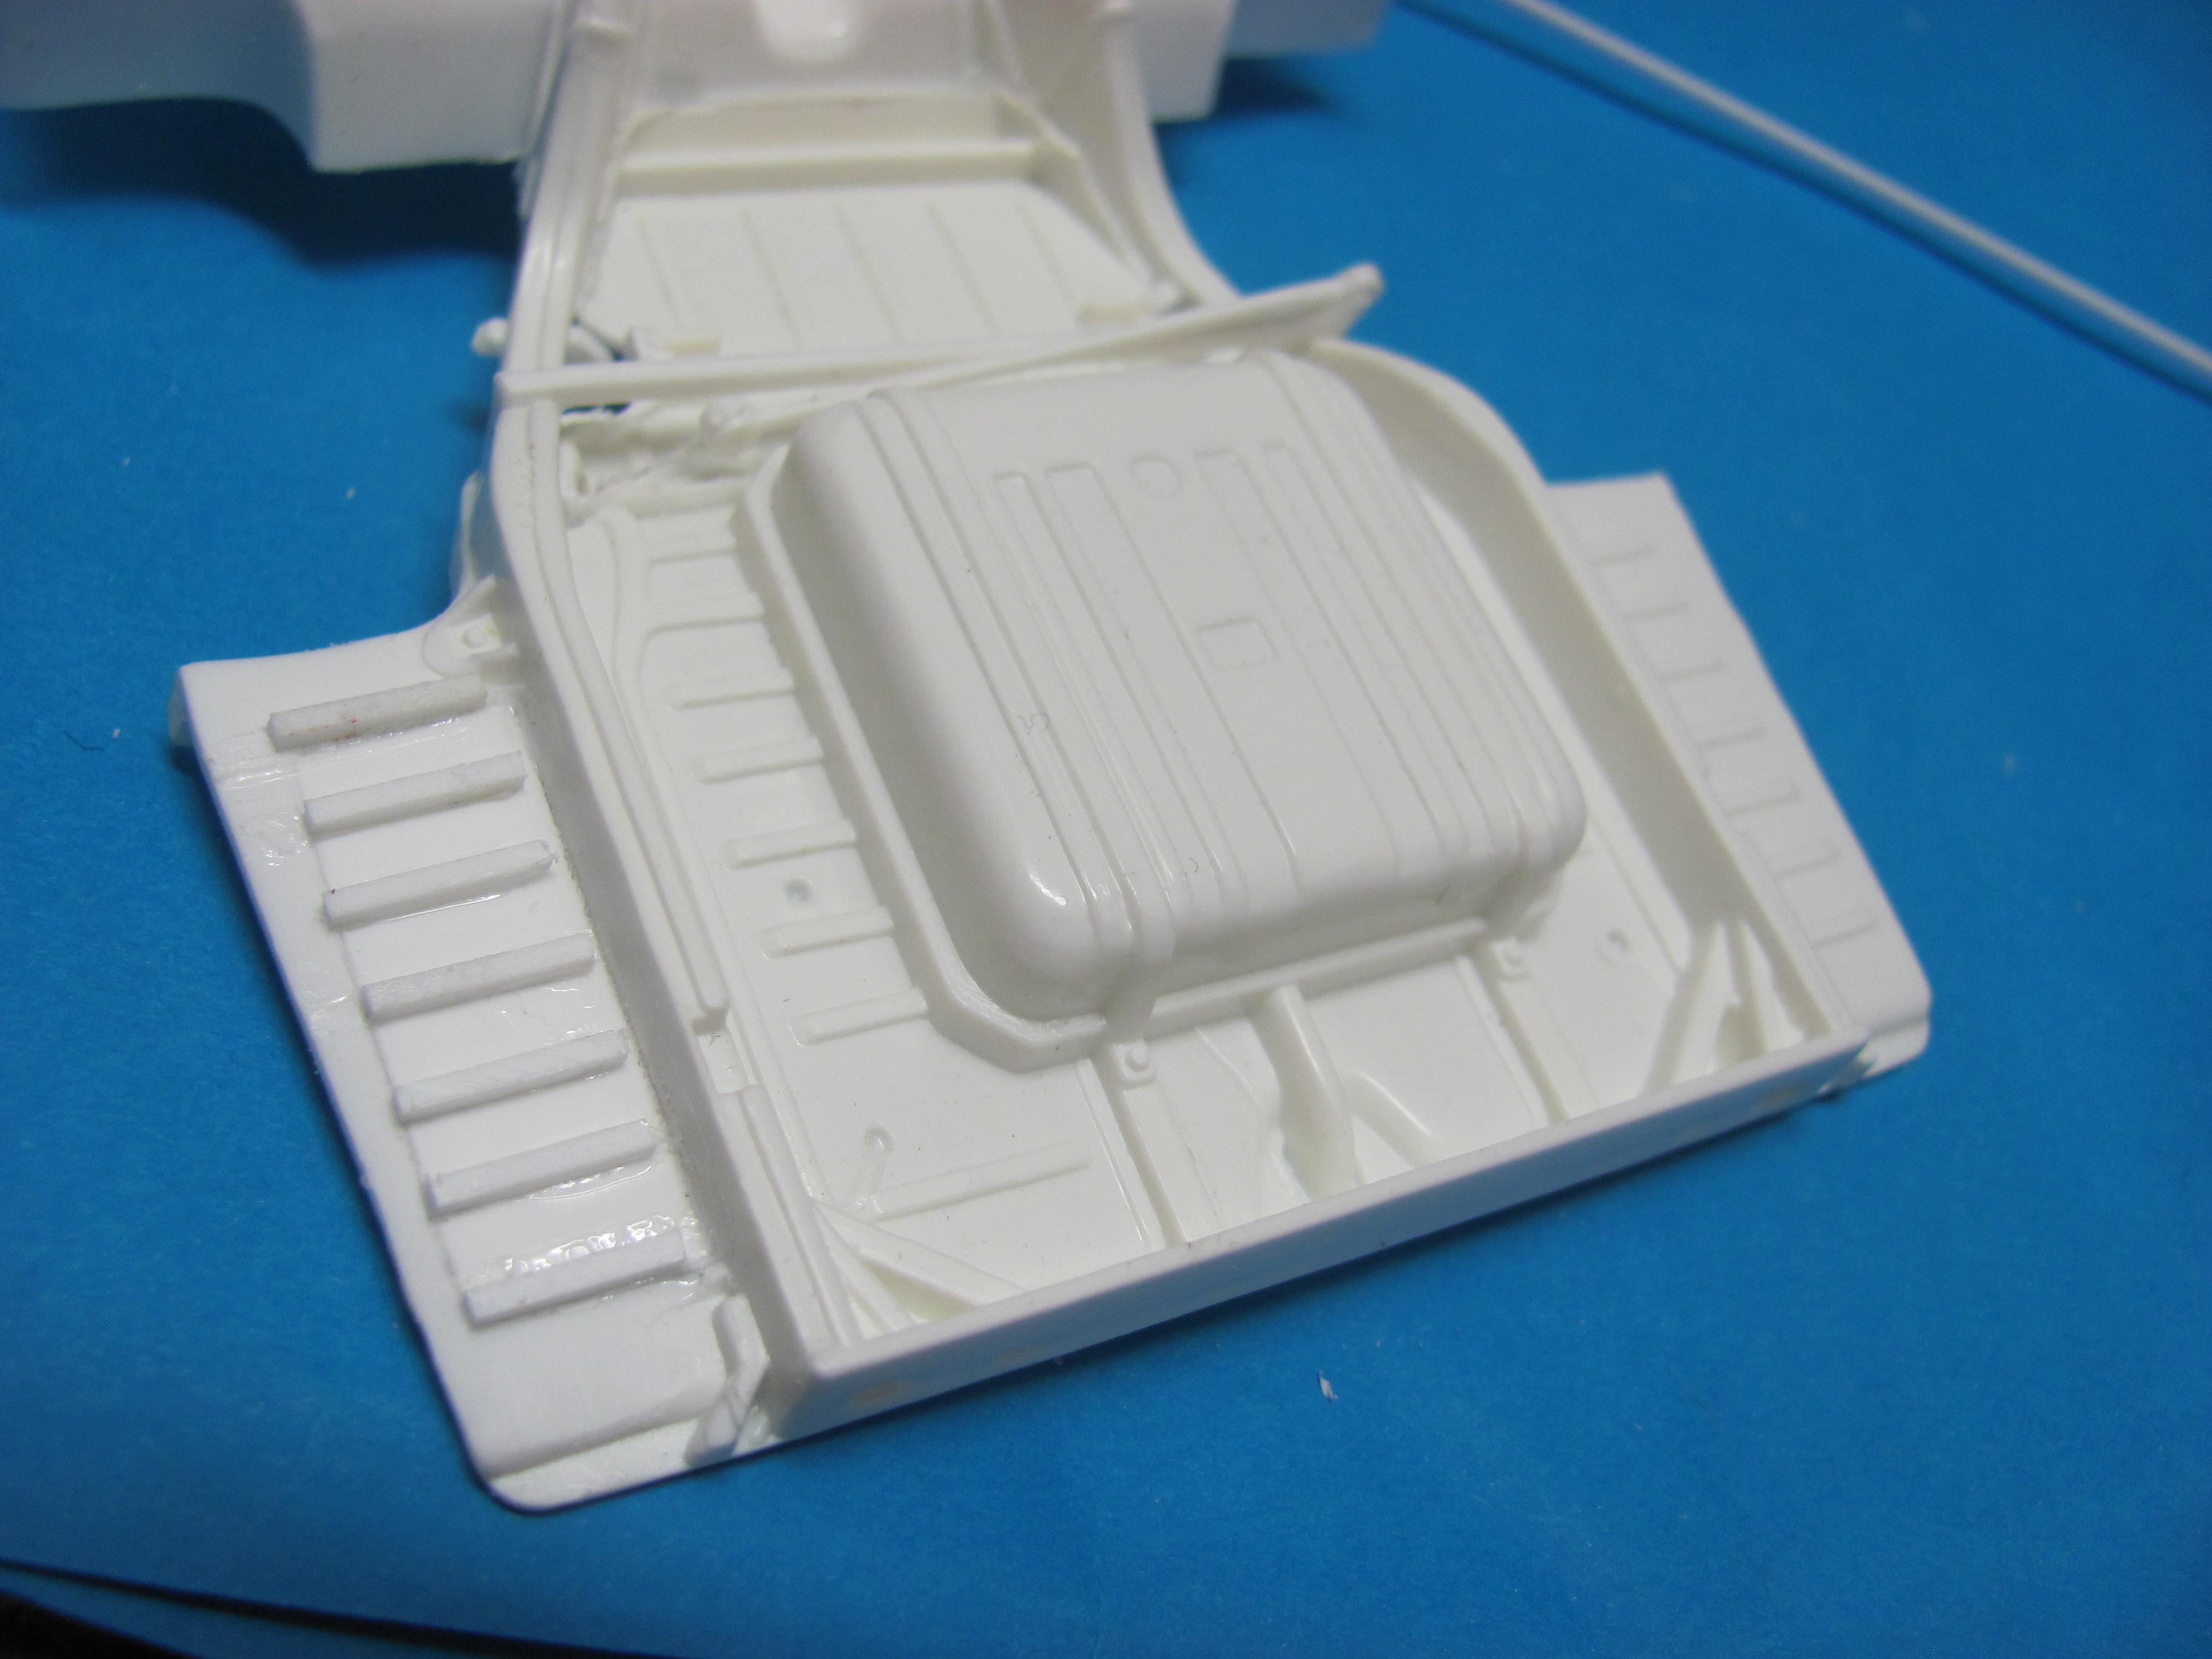
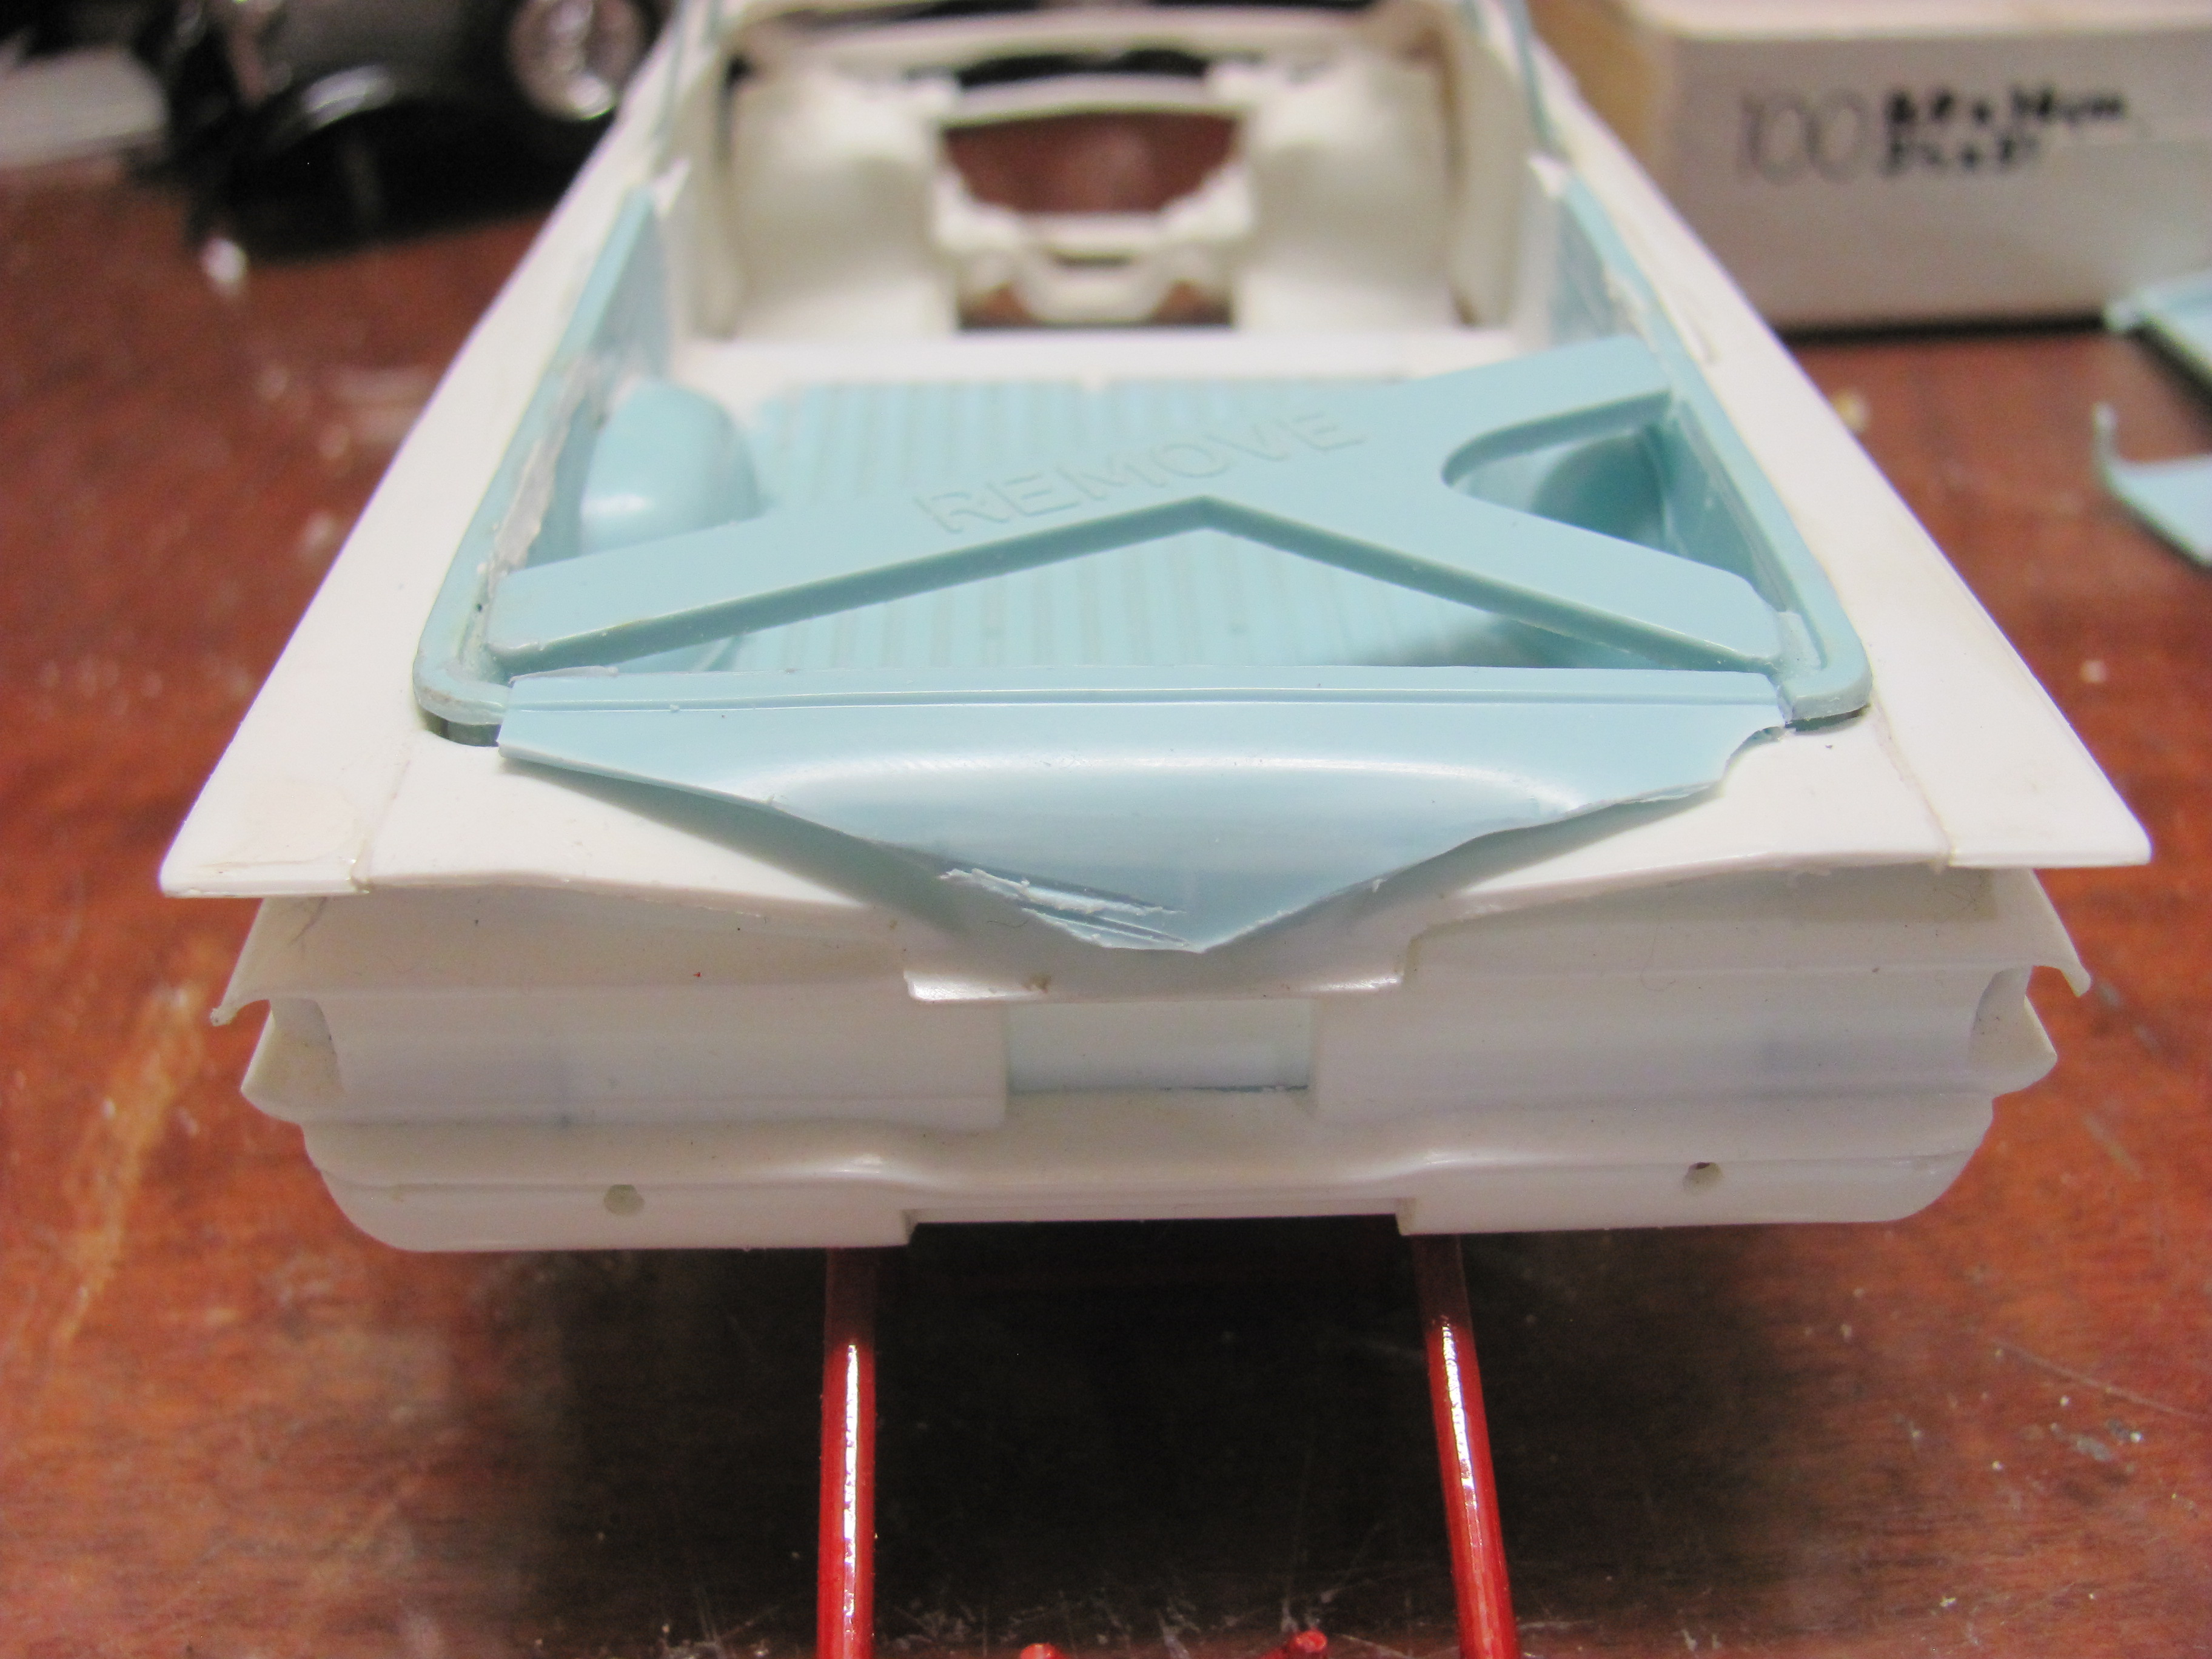
While I was waiting for the tailgate piece to dry, I though I would tackle the chassis. The Impala floor and the rear kickup interferes with the floor of the El Camino bed so I sawed off the offending section of the chassis. I then trimmed off the edges of the removed section until it fitted back in the hole that remained. It won't be totally authentic but I think when you turn the model over it will be pretty convincing. I also removed the spare tyre hump, filled the gap with flat styrene and added ribs made out of #142 Evergreen styrene strip. Theses are a little chunky at the moment but I will sand them down when they are dry. I didn't know about the El Camino fuel tank until I read Bob's post but thinking about it I should probably have had a look at the AMT 59 chassis, eh? I'm not sure if I want to go to that much work so here's the back story - I wanted more fuel capacity so I swapped out the El Camino tank for an Impala tank. Believable?
-
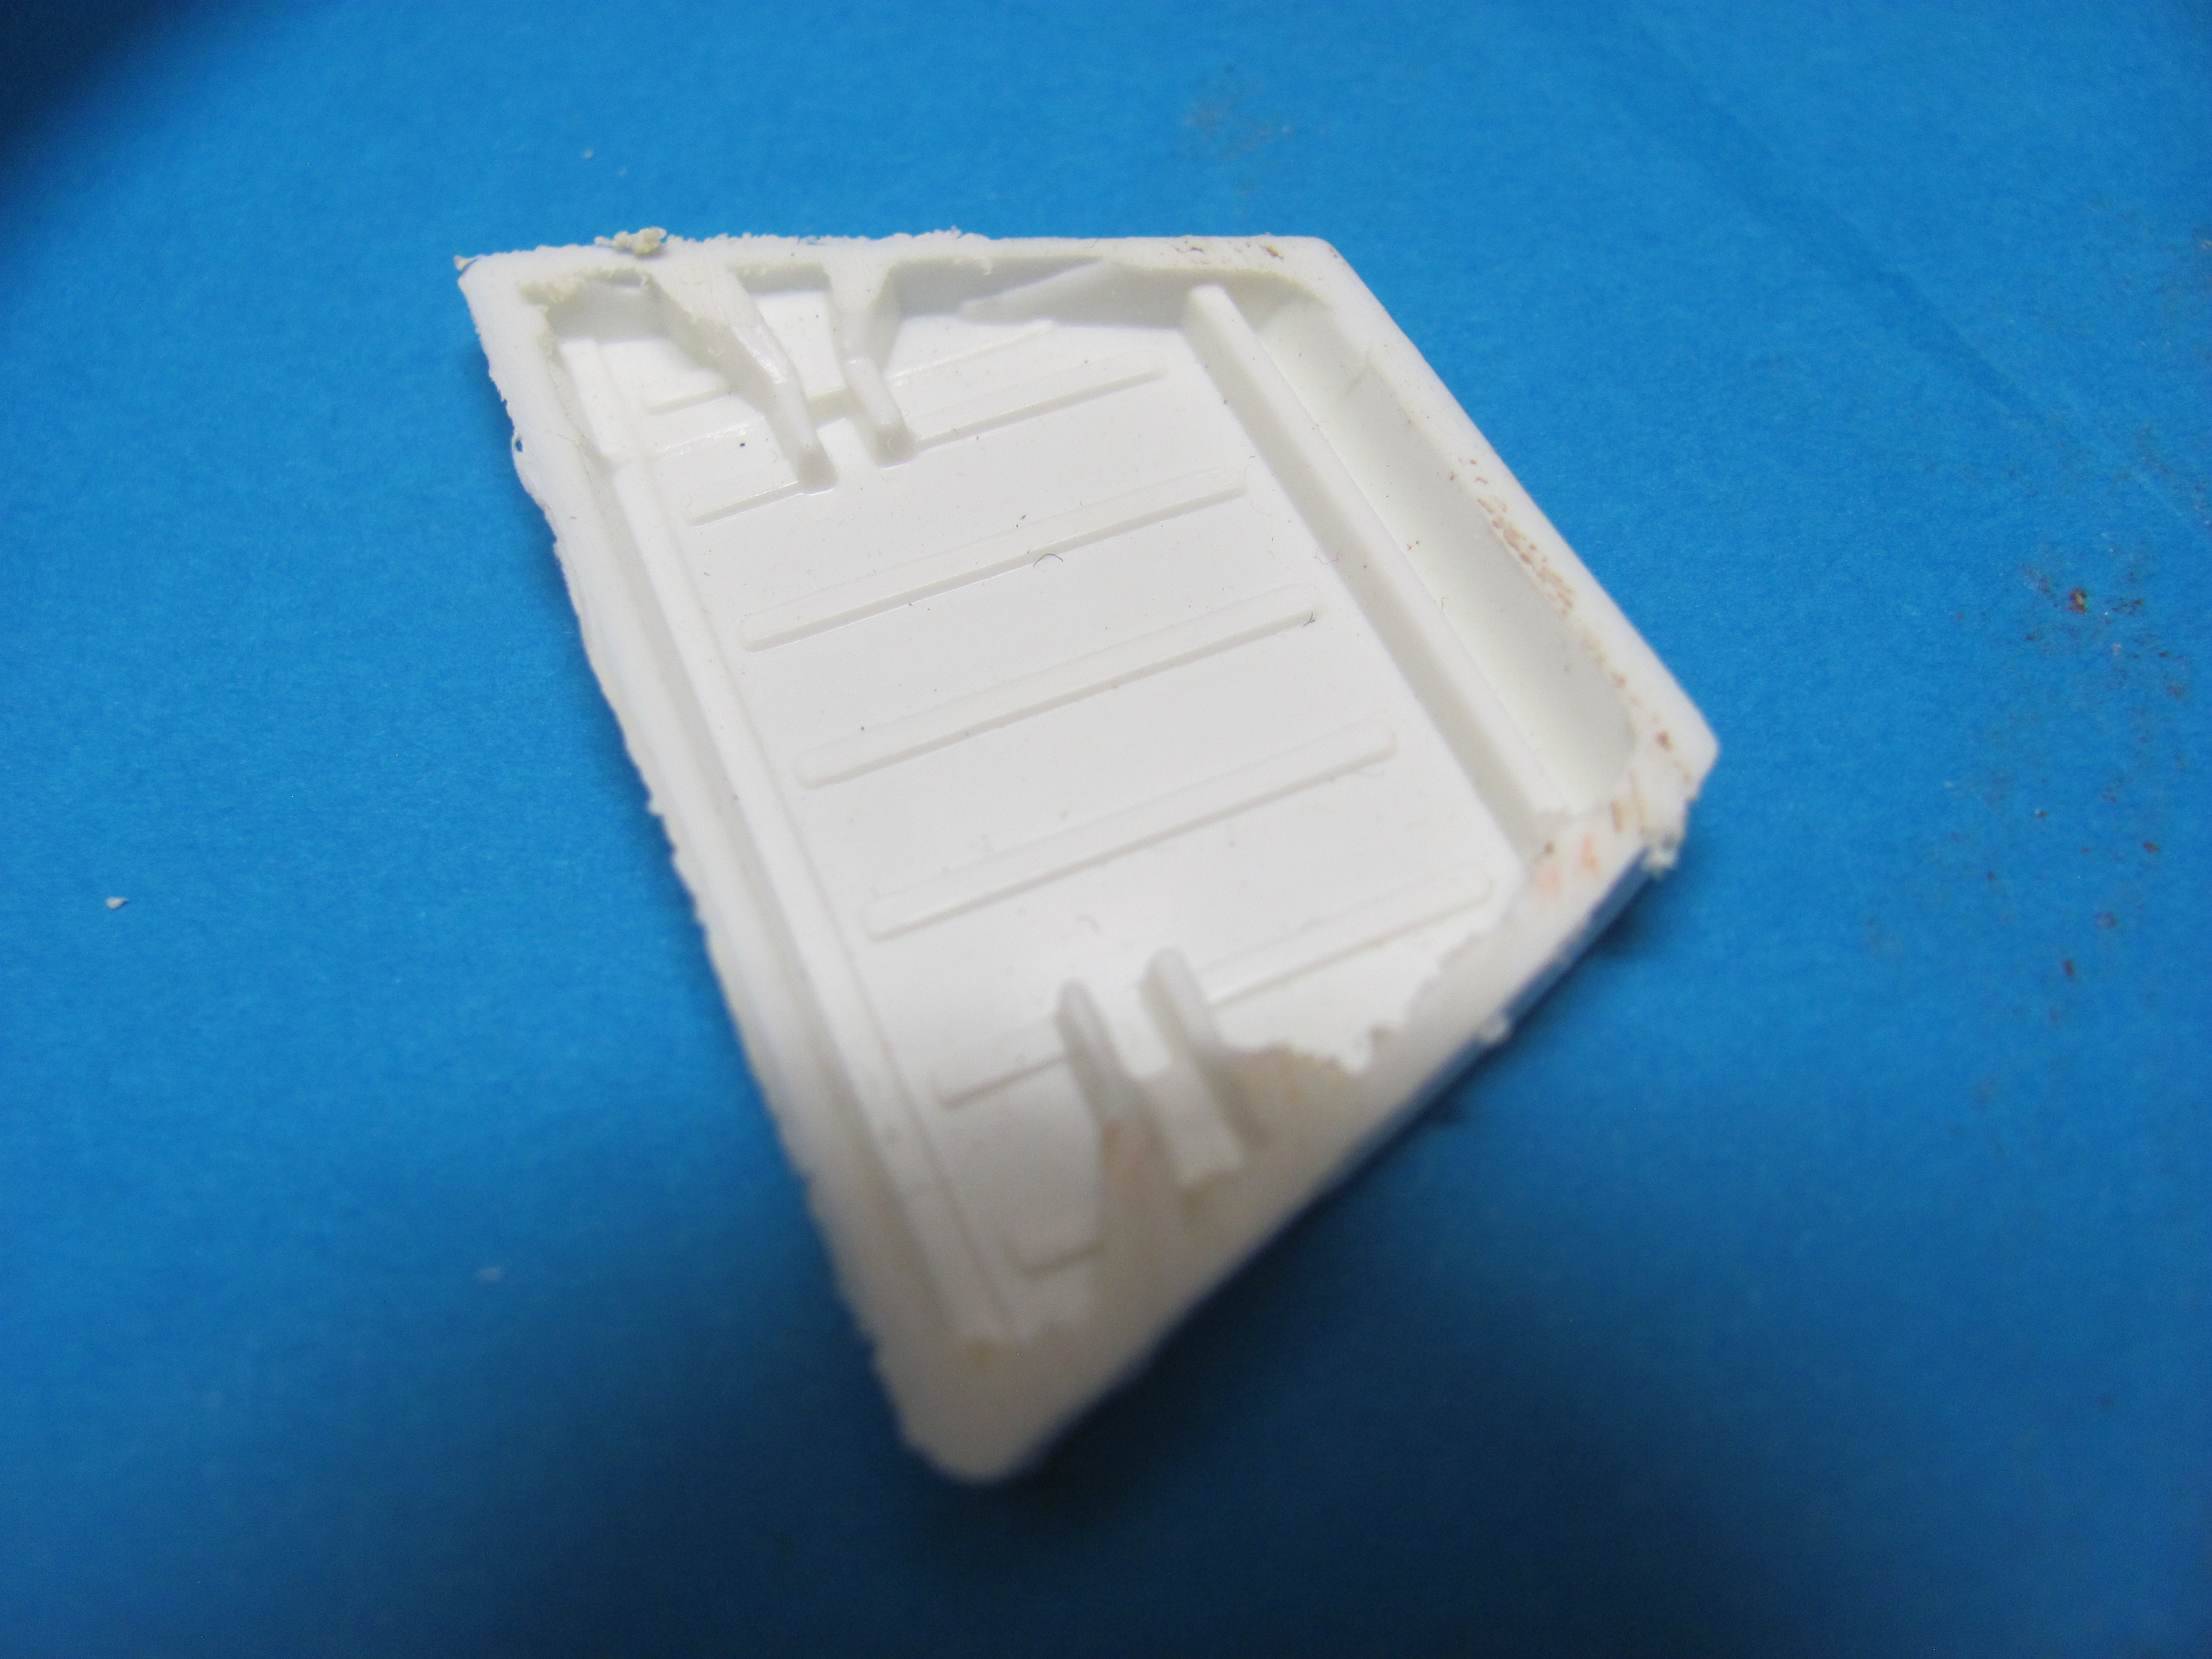
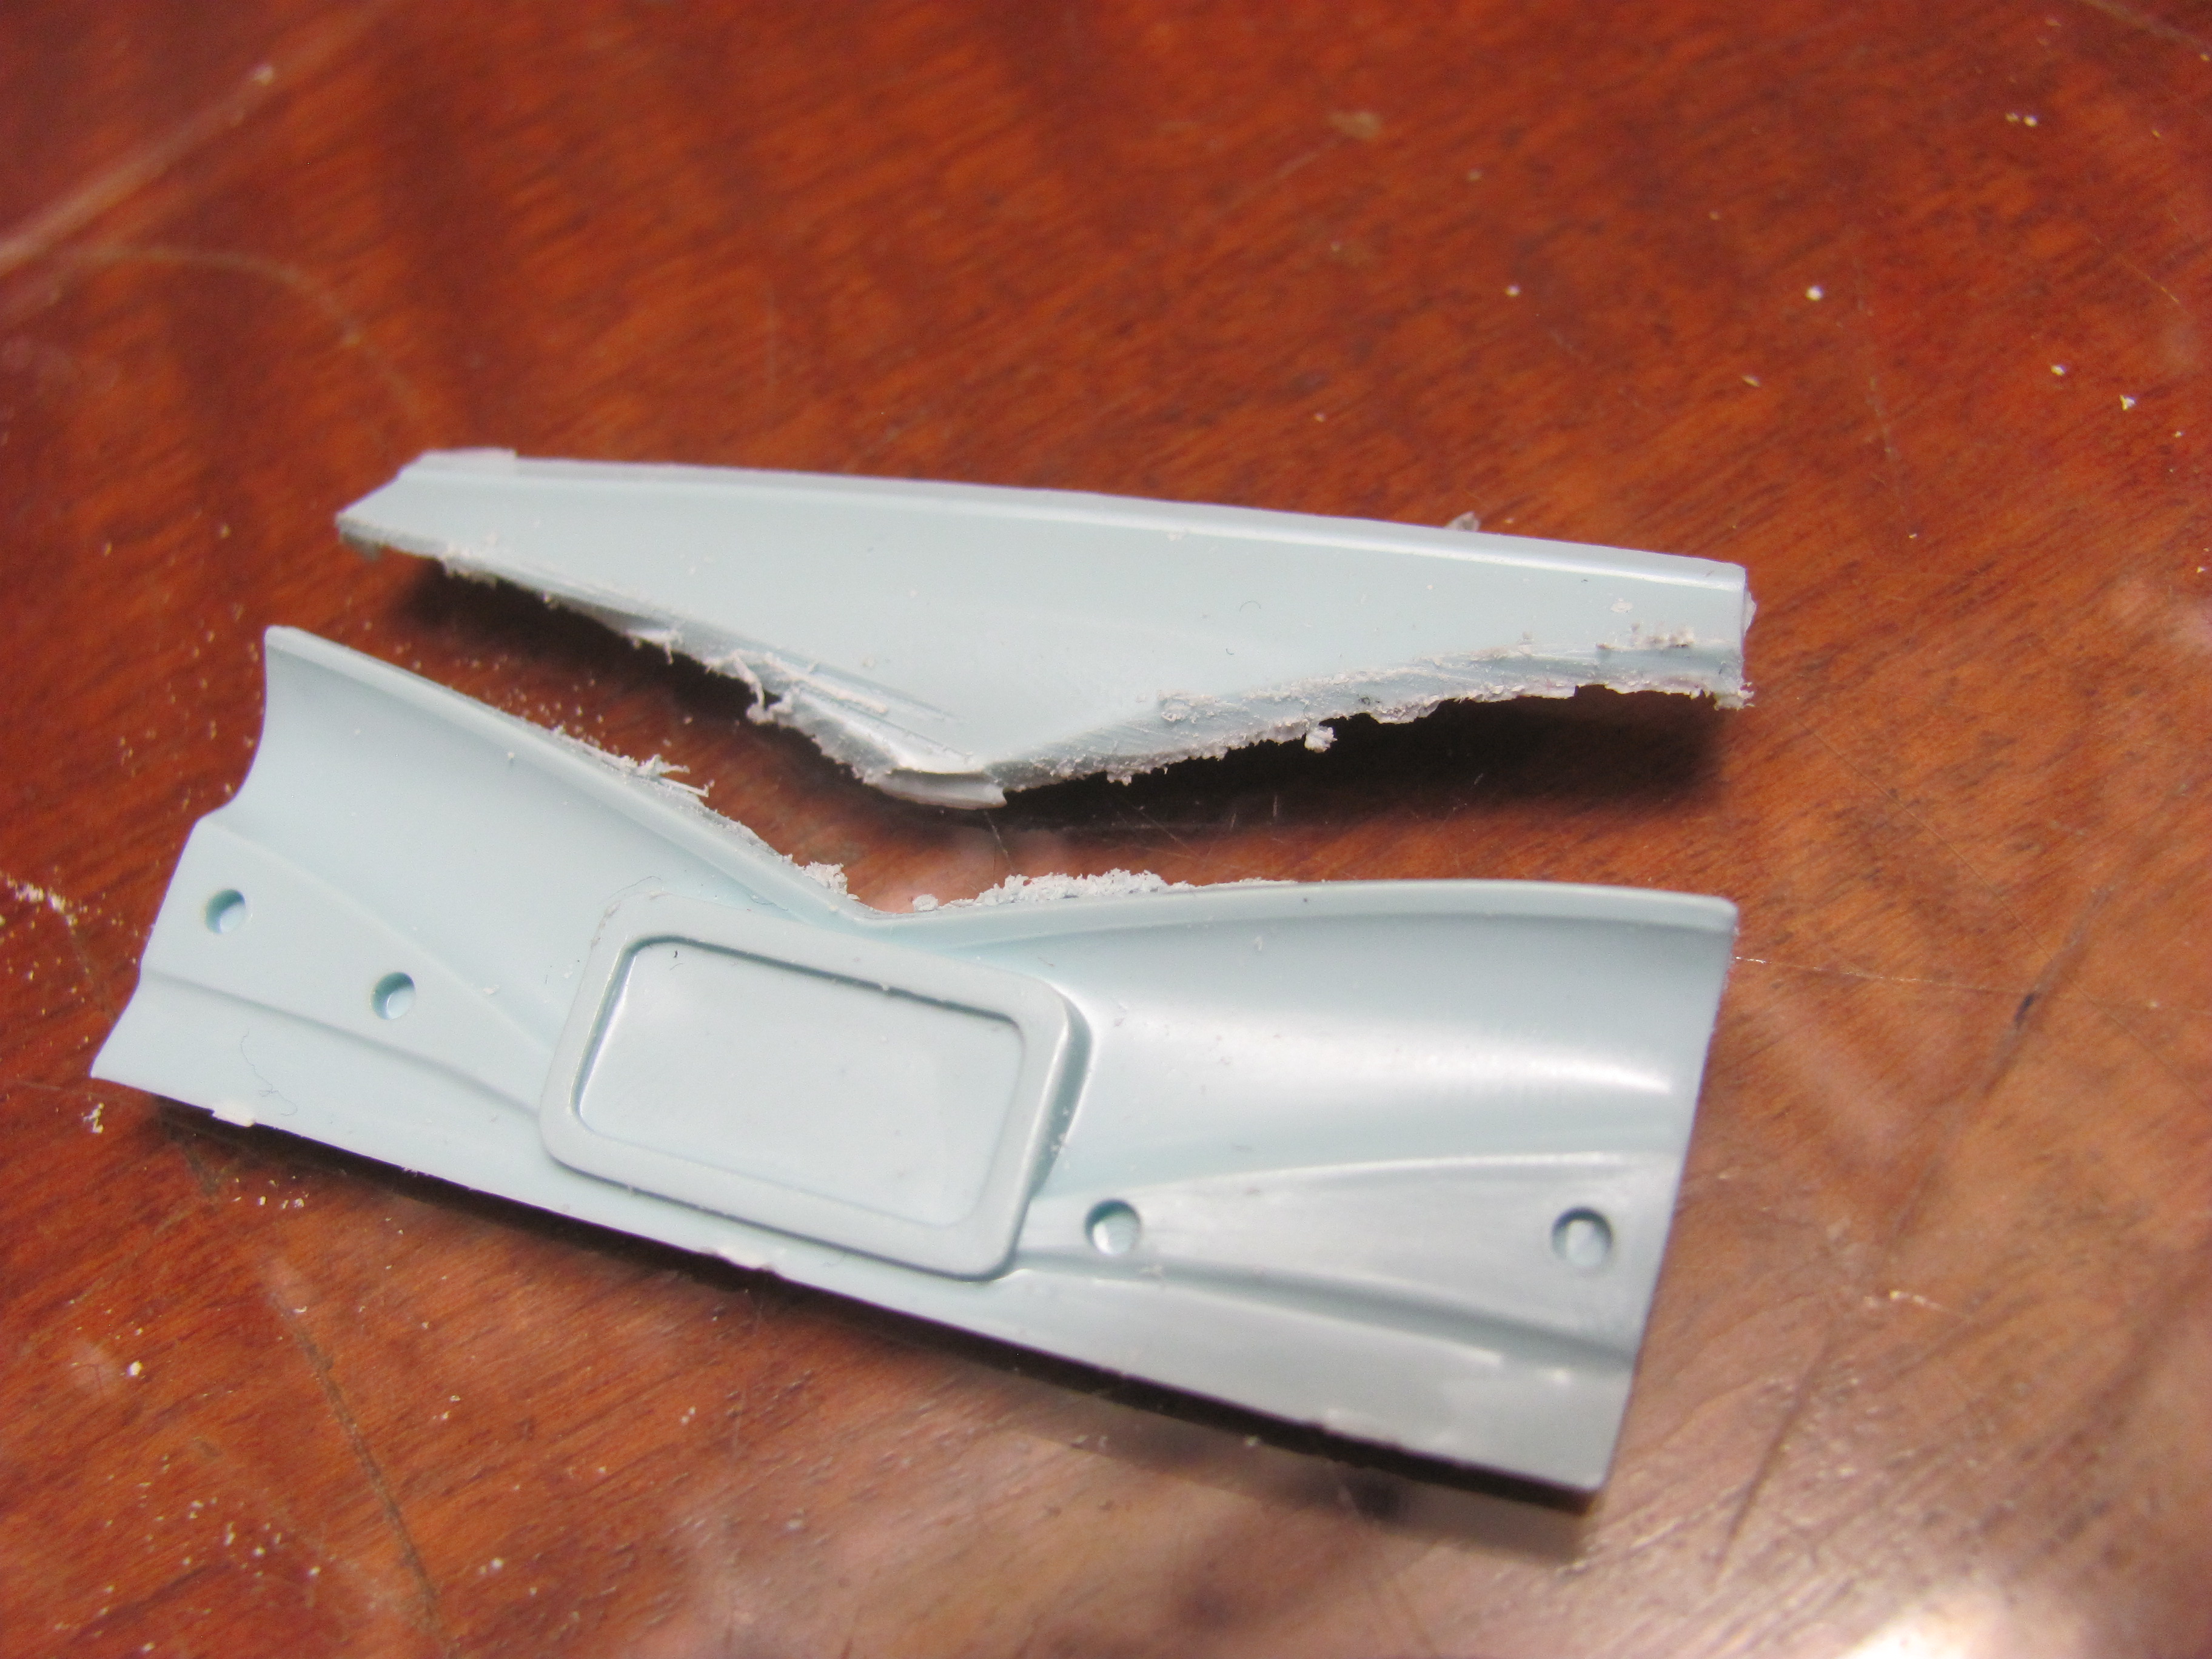
Thanks for that, Bob, I just went and read both your threads and they are going to be a huge help. I know I have already made a few errors, some that I have fixed and some that I am going to have to think about! I might even have to cheat on a few things - I am not bound to a full replica as your superb model was. We'll see how we go. I changed my mind about how I was going to tackle the tailgate. I grabbed the custom tailgate from the AMT kit and carefully sawed off the top section as you can see here. With about an hour's worth of sanding, filing and cutting I ended up with the piece you see here. Now if you are a master craftsman, please look away now! What with scraping the back of the blue piece down to a taper and trying to fit a curve to a straight angle, lets just say it is not as finessed as I might like. Still, that's why they invented putty. The main thing is I got it to fit and the top edge is lined up with the bed. Before I glued it in place I grabbed my razor saw and continued my earlier cuts up through the trunk lid - I didn't want to risk damaging the blue part of the tailgate by cutting later on
-
Using the 59 bed as a guide, I made some vertical cuts through the Impala body and down towards the bumper area. I didn't want to sever anything at this stage so I stopped short. I then glued the trimmed Impala trunk lid in place and inserted thin strips of styrene in the gaps to assist with filling. Finally, I glued a strip of styrene across the gap between the fins to start working up a new tailgate. Looking back at the station wagon tailgate, I realised that the "V" between the fins is shaped quite differently to the trunk lid to get it to meat the top edge of the tailgate at a steeper angle.
-
deleted double post
-
I didn't get a photo of this but basically I had to sever the bed from the back of the cab and slide it rearwards. Would have been a heck of a lot easier if I had noticed it before gluing everything else solid! Anyhow, This let me slide the bed right back to the rear of the car. It stopped a bit early so I took a fresh X acto to the inside of the taillight area, removing as much thickness as I could without going through. I kept holding it up to the light to check on my progress. I then took a few measurements and sliced off the end of the Impala trunk lid to get a start on my tailgate - this would prove to be not as easy as it looks! As you can see from the photo below, the lid is much wider than the tailgate opening. I have an original Crafstman 60 Chevy wagon so I looked to that for help but it wasn't much good either - the tailgate join would have passed straight through a taillight if I had copied AMT!
-
I'm just getting back into this project that I started a few years ago and then put to one side while getting a bunch of hot rods finished. I've always had a soft spot for El Caminos and although I am sure there are resin conversions available, I always prefer styrene when I can so I thought I would give it a go. I started by removing the entire roof off a Revell low rider impala that I picked up cheap in a damaged box at a local hobby shop. I then removed the entire roof and bed from an AMT 59 El Camino. It didnt take a lot of massaging to get the two lined up but as you can see from this photo, I missed something. The 59 bed is considerably shorter than the Impala quarters so it doesn't reach all the way to the back and the wheel arches don't align with the body.
-
Sorry, mate, that was 22 years ago! NNL 1996, remember? There is a similar coloured Valiant to go with it somewhere in your basement.. I found them on my 27th trip through the vendors hall and came and got you off the front desk. I do remember that it was cheap and the vendor didn't think very highly of them. That was an amazing weekend! Cheers Alan
-
C'mon, Tom, you're holding out on us! Show them the Val with the floating roof! So about the Coronet. Back in 2013 my wife and I travelled to the USA to visit New York and the north east in general, a part of the states that I really hadn't visited much on previous trips. My wife and I never do the resort hotel/guided coach tour deal, we always grab a car and hit the back roads and make a point of stopping at every antique mall we see. I have a decent sized toy hot rod collection as well as my model collection back home so there is always something to find although I must admit, models are fairly rare and the ones you do find are usually common and not that desirable. None the less I have found diamonds amongst the stones that have returned down under with me. So a week out of New Jersey and a planned visit to Tom's I spot this thing on the back of a shelf in a funny little place somewhere in Pennsylvania if I recall correctly. At first I thought someone had stuck a model in a bowl on the shelf but when I investigated I find the bowl is actually a mold made of wax into which the Coronet, complete with Ramcharger stripes,is embedded. The price escapes me but rest assured it was cheap - probably under $10. I was going to leave it behind - I mainly collect hot rods, dirt track racers and early drag and salt racers - but it kept nagging at me. My wife was encouraging me to get it and then it suddenly occurred to me - we're going to Tom's! Old kit, Mopar, weird - it ticked all Tom's boxes so we grabbed it. It now rests amongst a collection in Tom's house that can only make you smile! It would seem that the melting point of wax is not enough to damage styrene so the kit is probably restorable underneath the slime but I know Tom won't - he would rather have a hand cut off! Not sure if the original builder was trying to replicate a crash at a dragstrip but he must have got some serious air to land at such a steep angle! Certainly a very adventurous undertaking for back in the day and I can't say I've ever seen it done before. Cheers Alan
-
These look great Rob! One of the few Marlins I have ever seen built. When I was a kid there was one here in Perth, in red and black, and I used to love seeing it appear near the city. I'd love to see what Chip or Troy would do with one. I always thought the back was so exciting while the front was a bit pedestrian. Love these for all the care you have given them and look forward to extending yourself on the others in your stash. Cheers Alan
-
This really captures the look. Love the colour too! This style was also popular in Australia back then - all it's missing is a set of slapper bars! Cheers Alan
-
Lindberg '34 Ford Roadster Pickup Update #1
Alan Barton replied to Dragonhawk1066's topic in WIP: Model Cars
Yep, she's a roughie alright but swapping out the wheels and tyres and headlights for something more appropriate, mixed in with some adult modelling skills, can produce a reasonable job. Love the colour you've chosen, Craig.