David G.
-
Posts
11,321 -
Joined
-
Last visited
Content Type
Profiles
Forums
Events
Gallery
Everything posted by David G.
-
Beautiful work Marcel. Each one is fantastic! David G.
-
Beautiful! Excellent color choice, great detail work. David G.
-
Well, you learn something new every day. Thanks for posting the link Greg. David G.
-
That is sweet! David G.
-
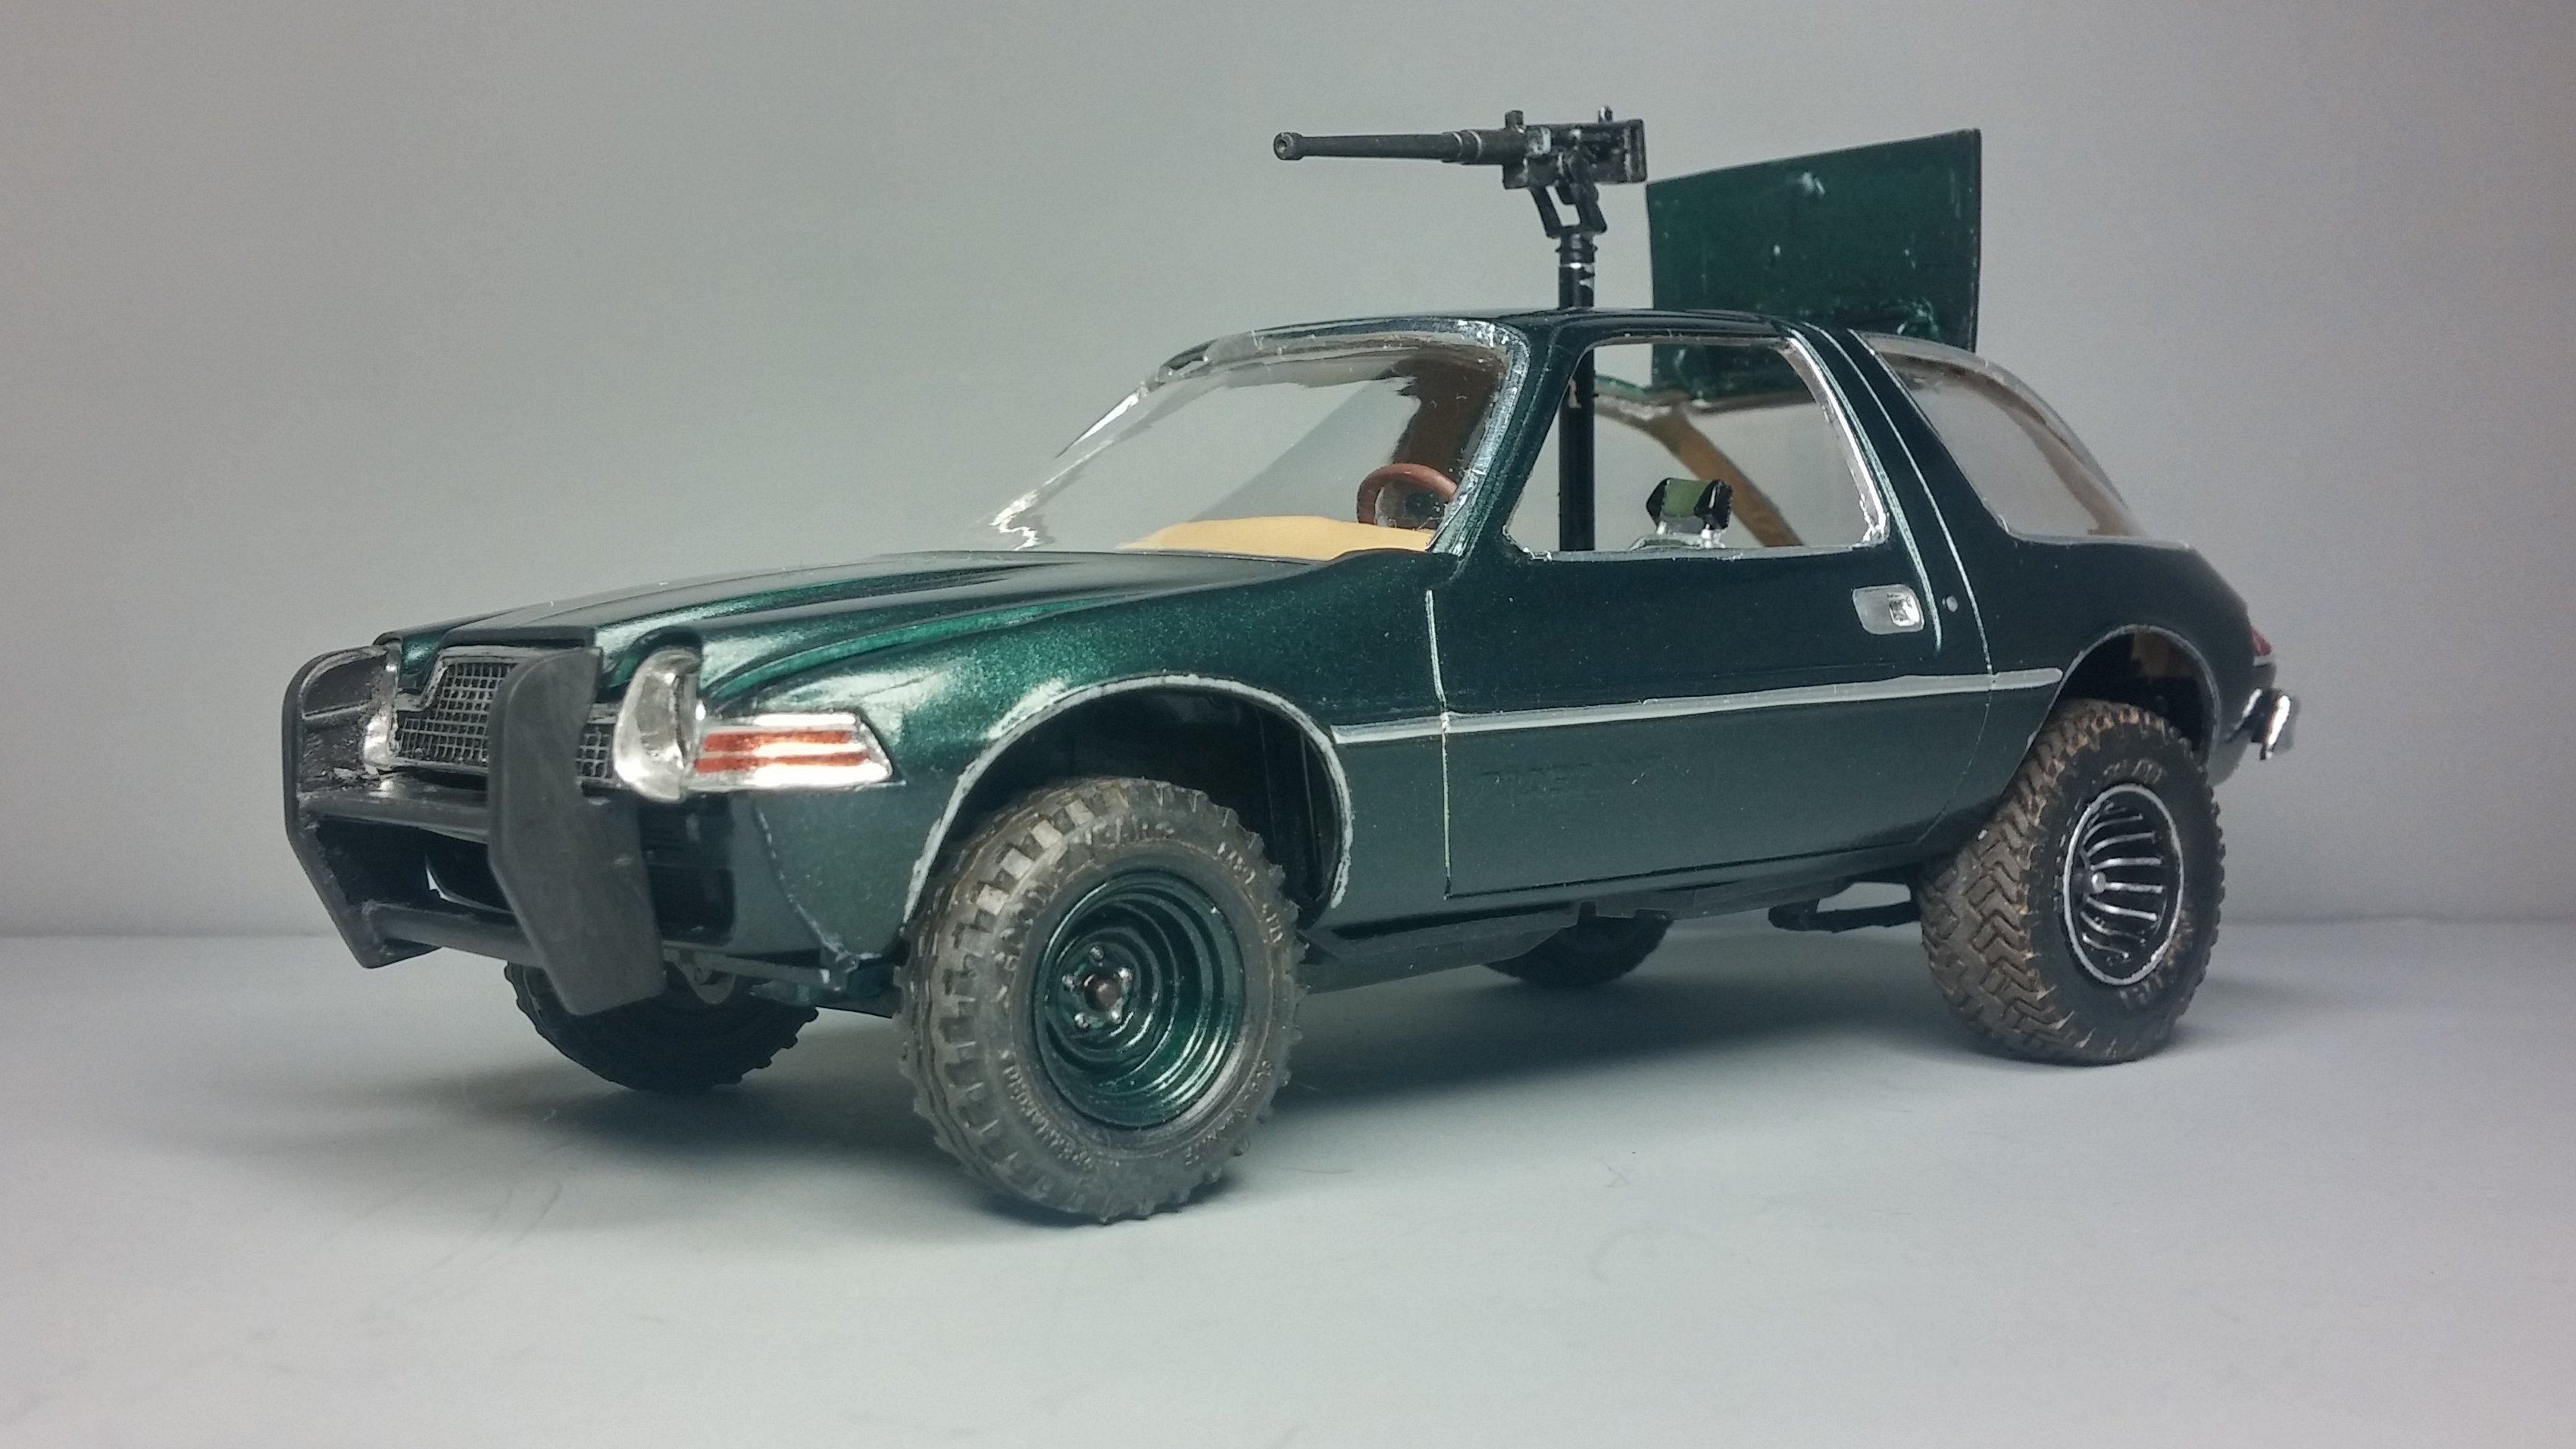
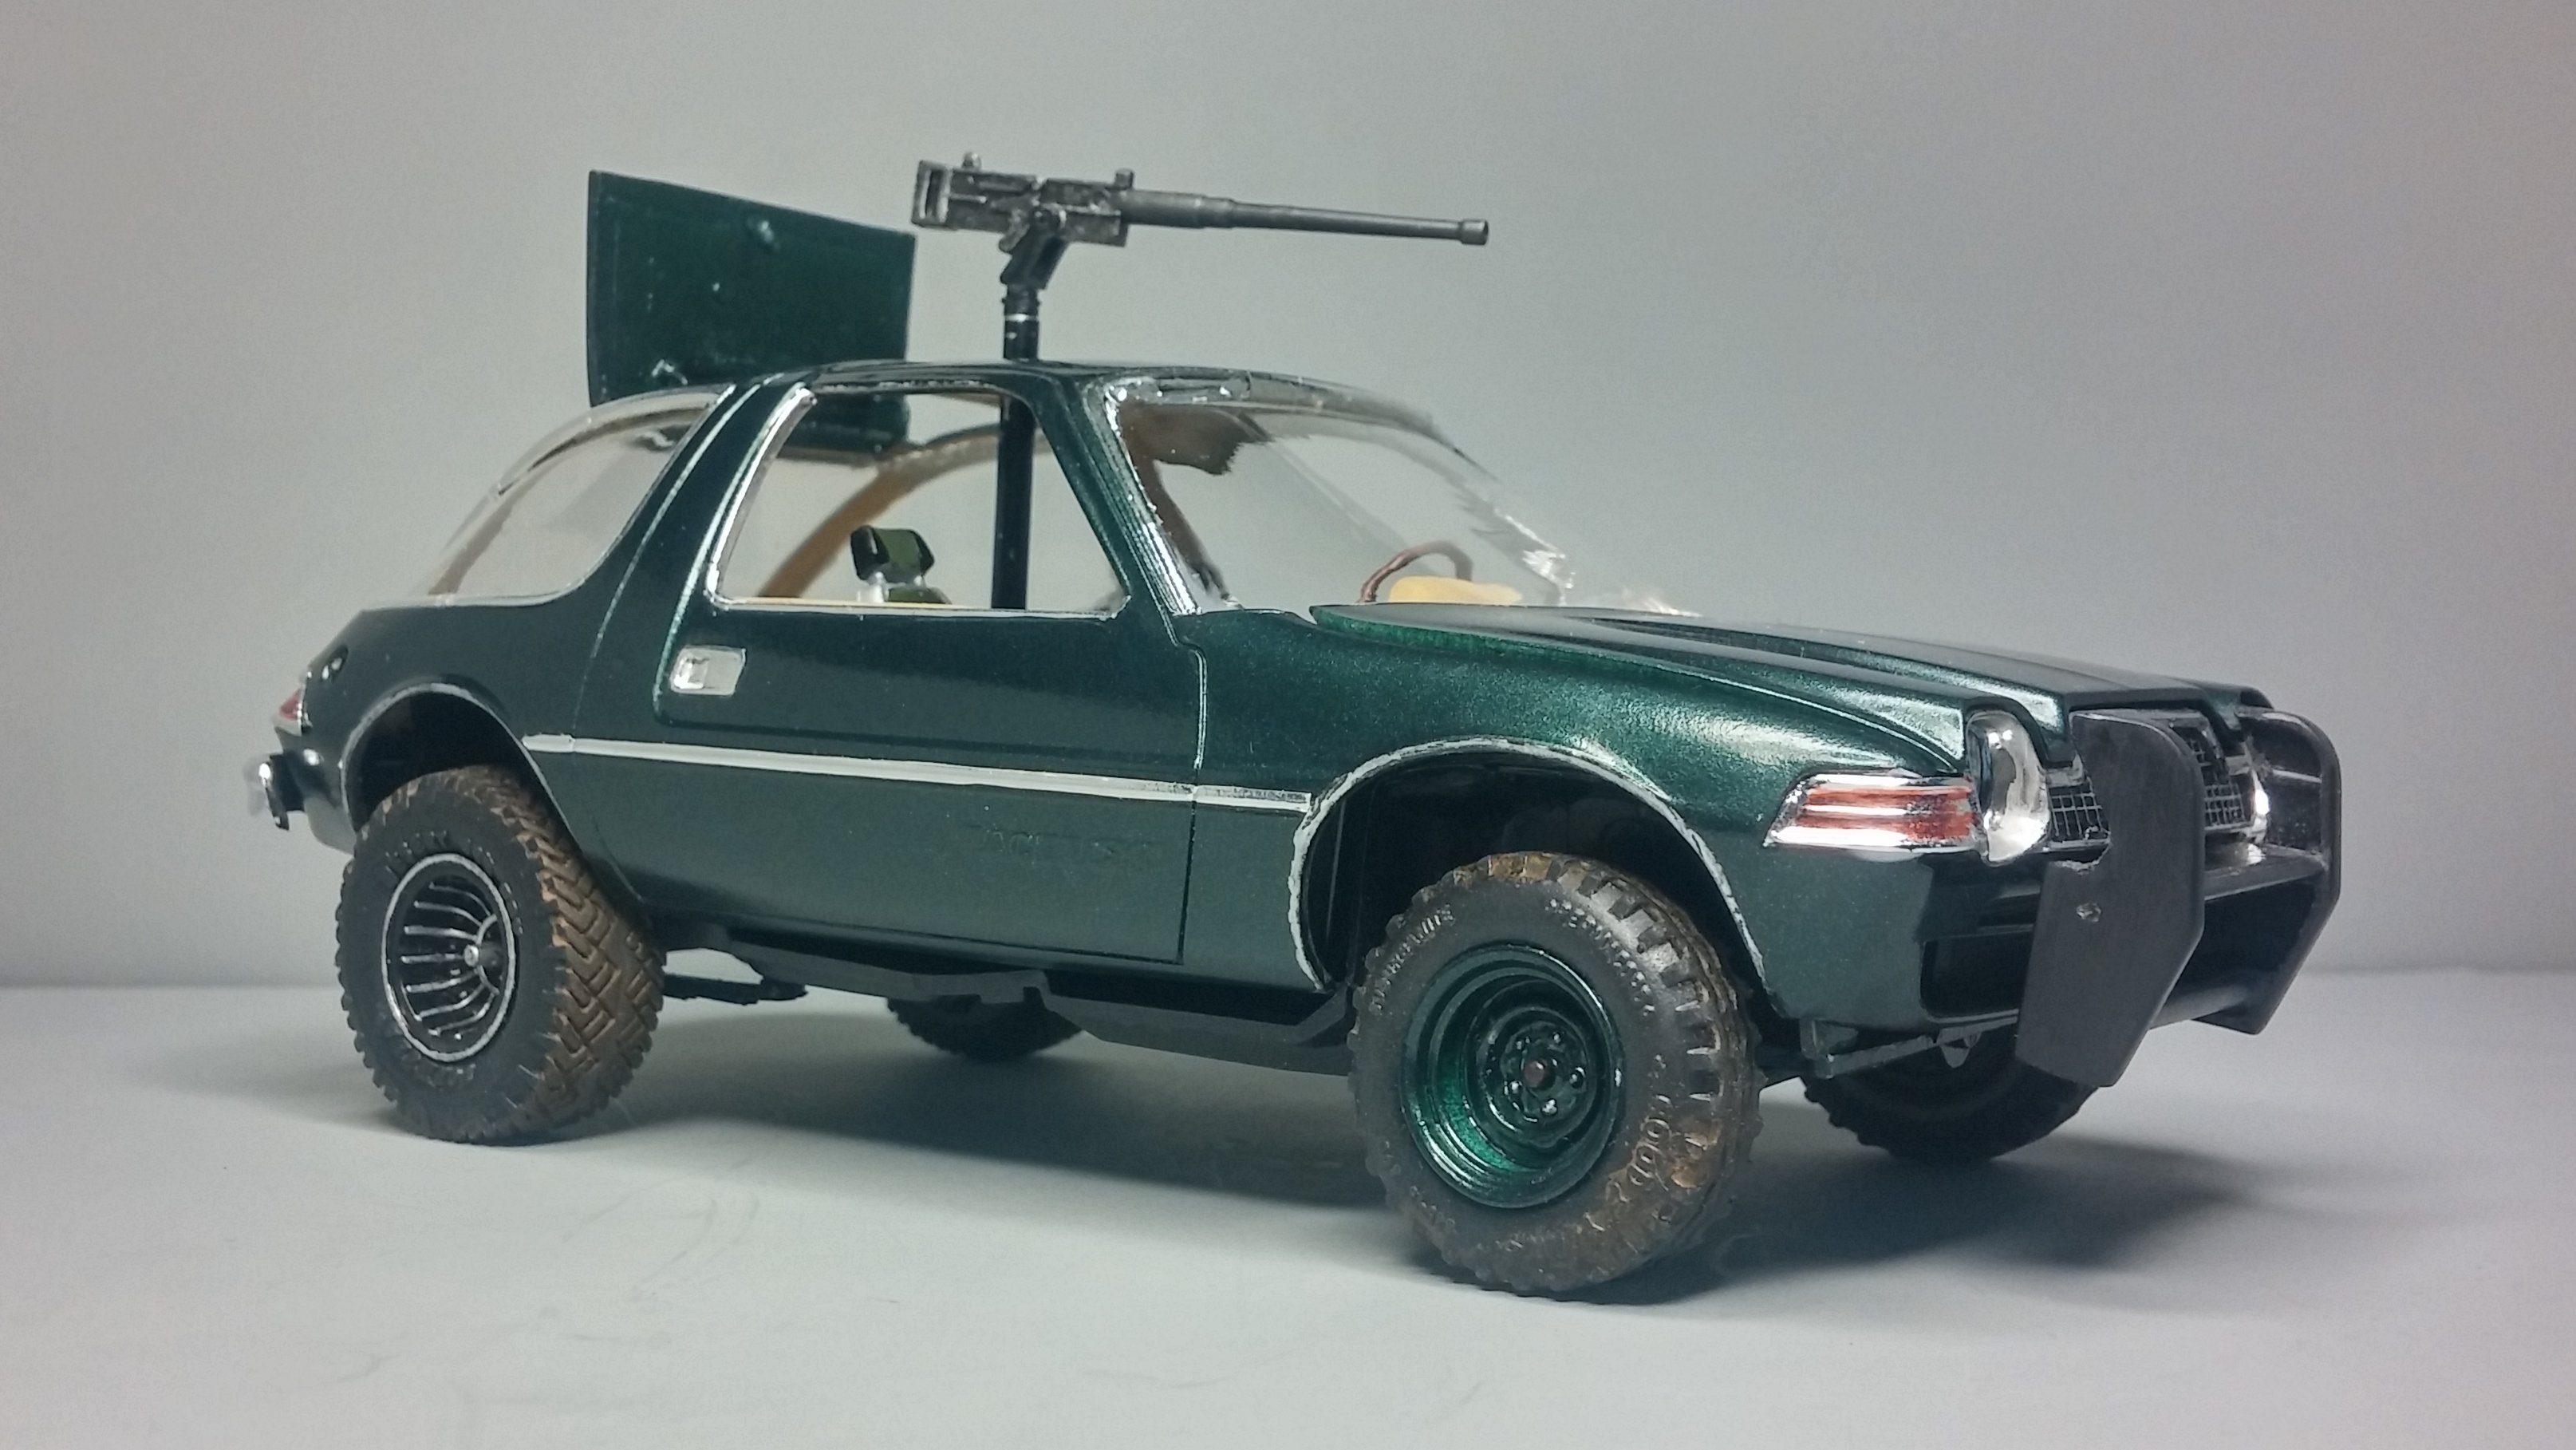
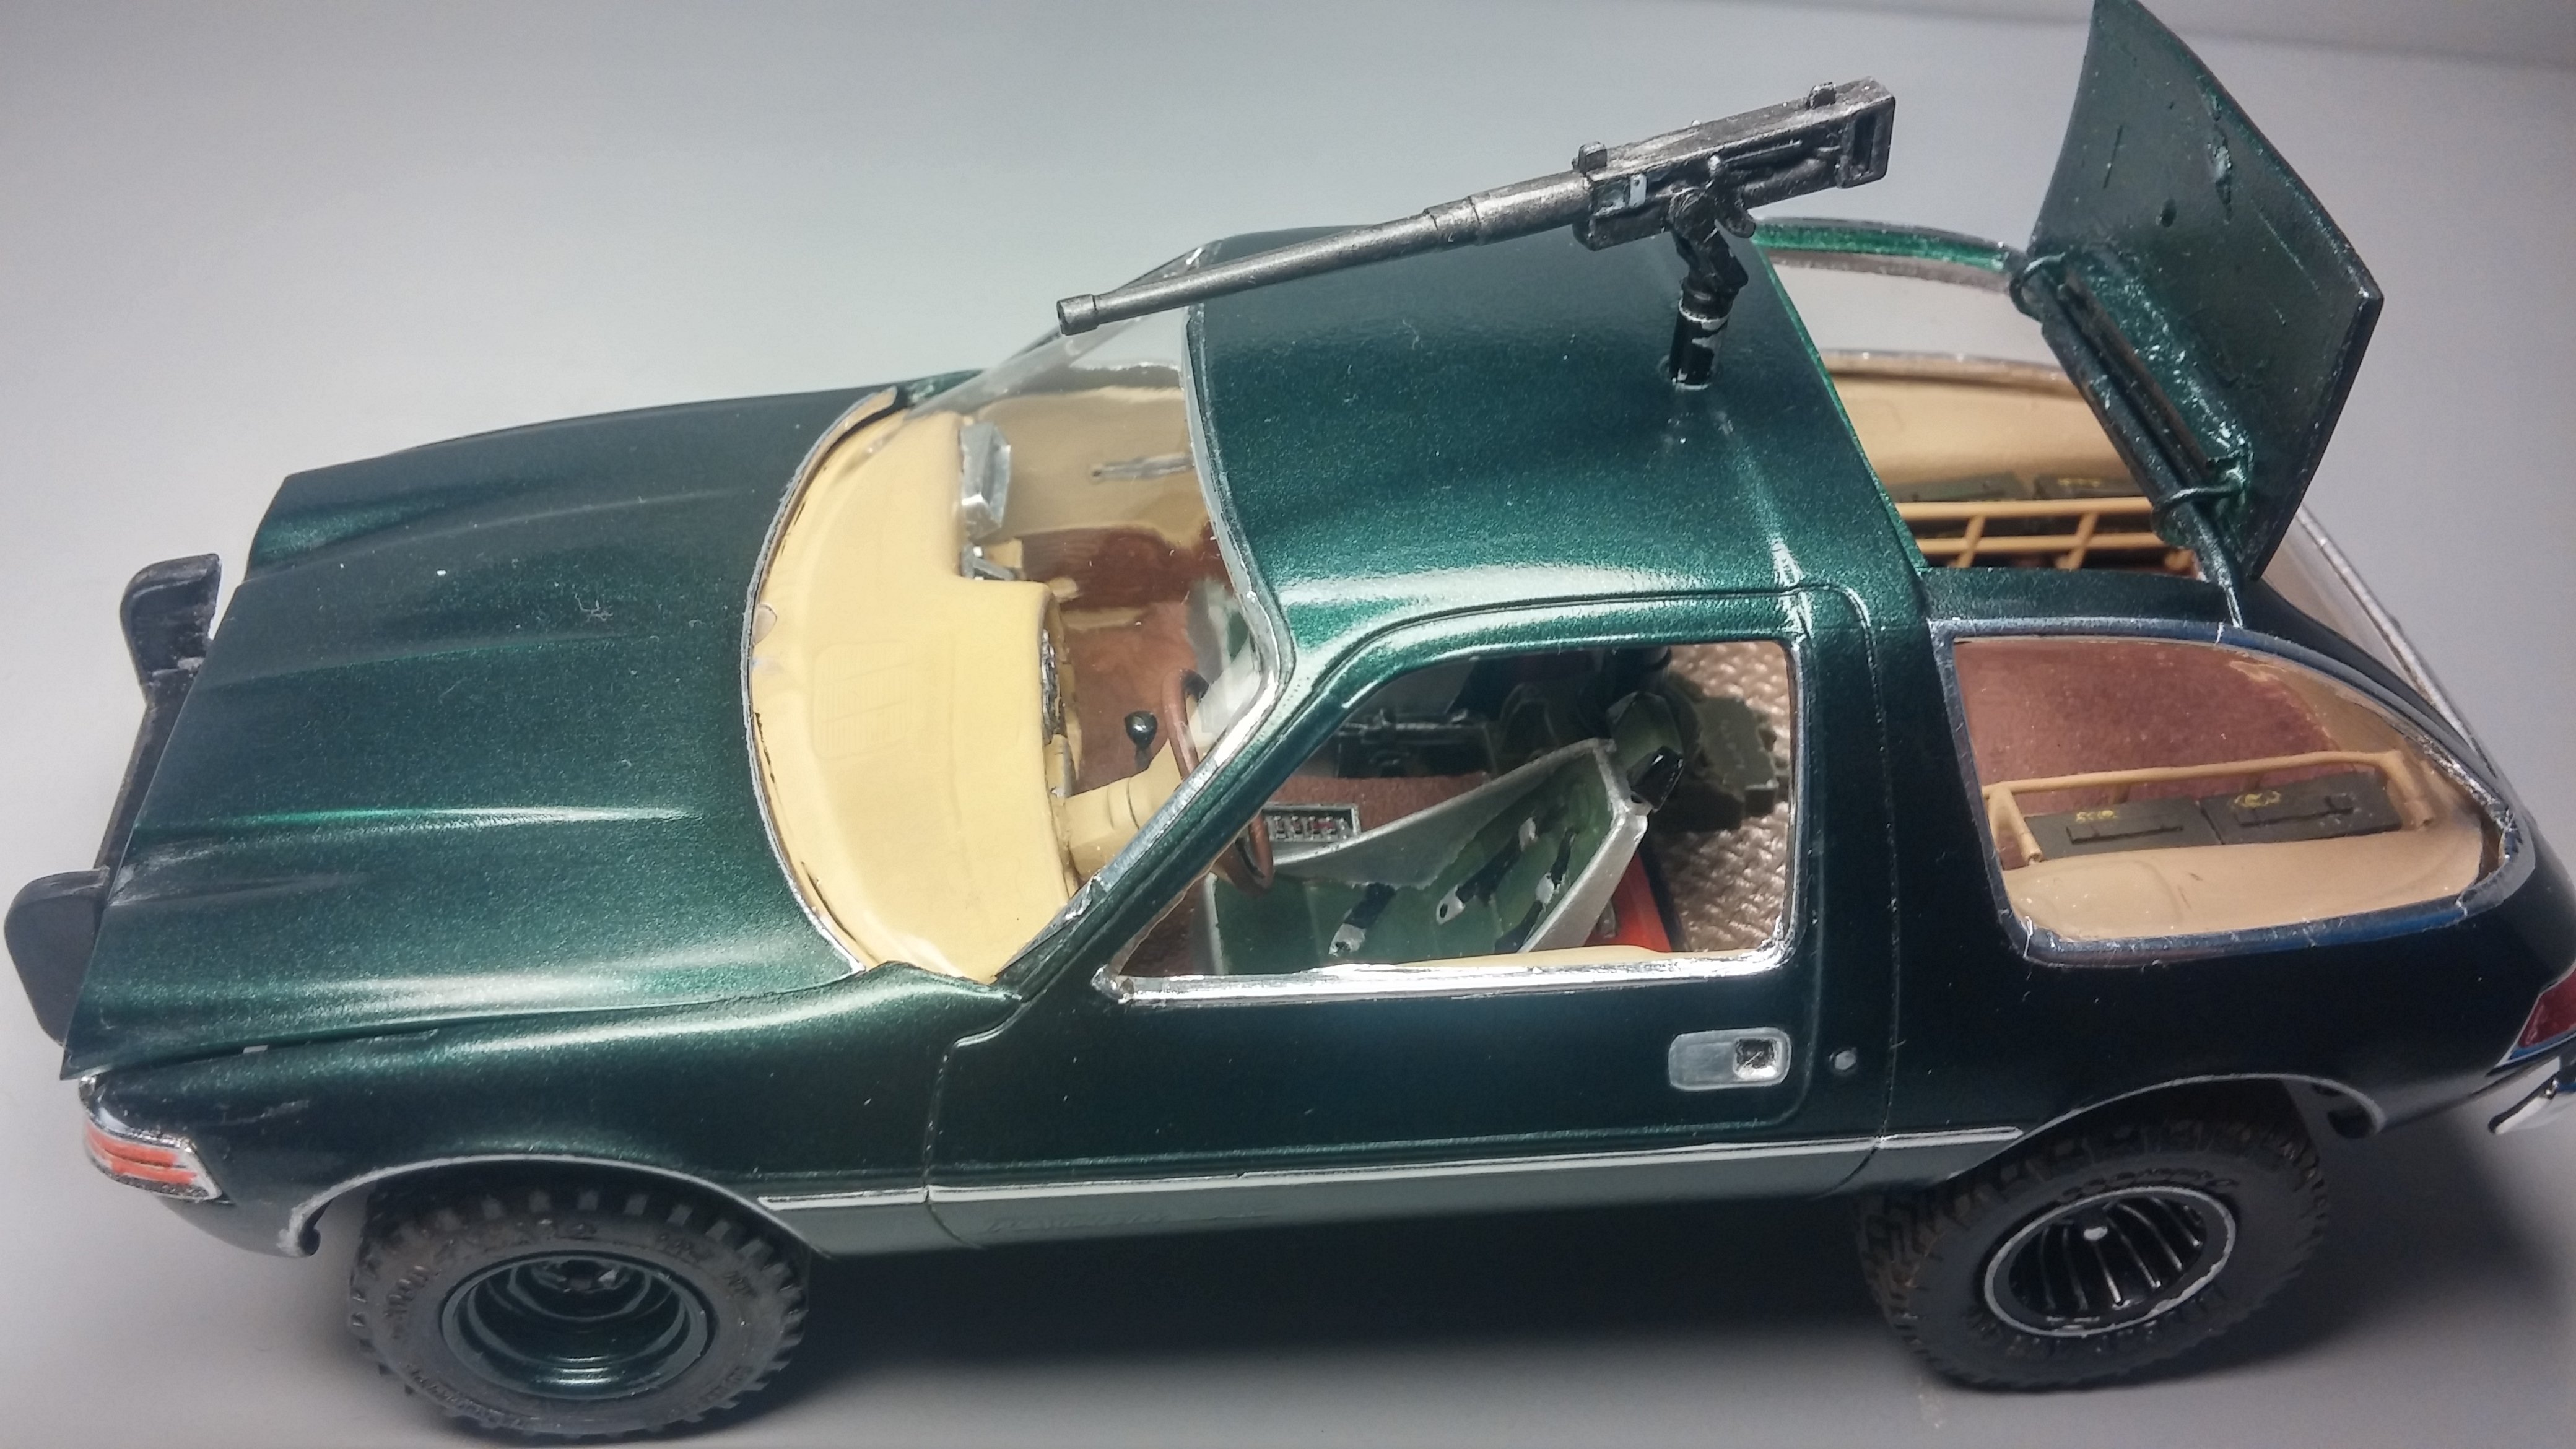
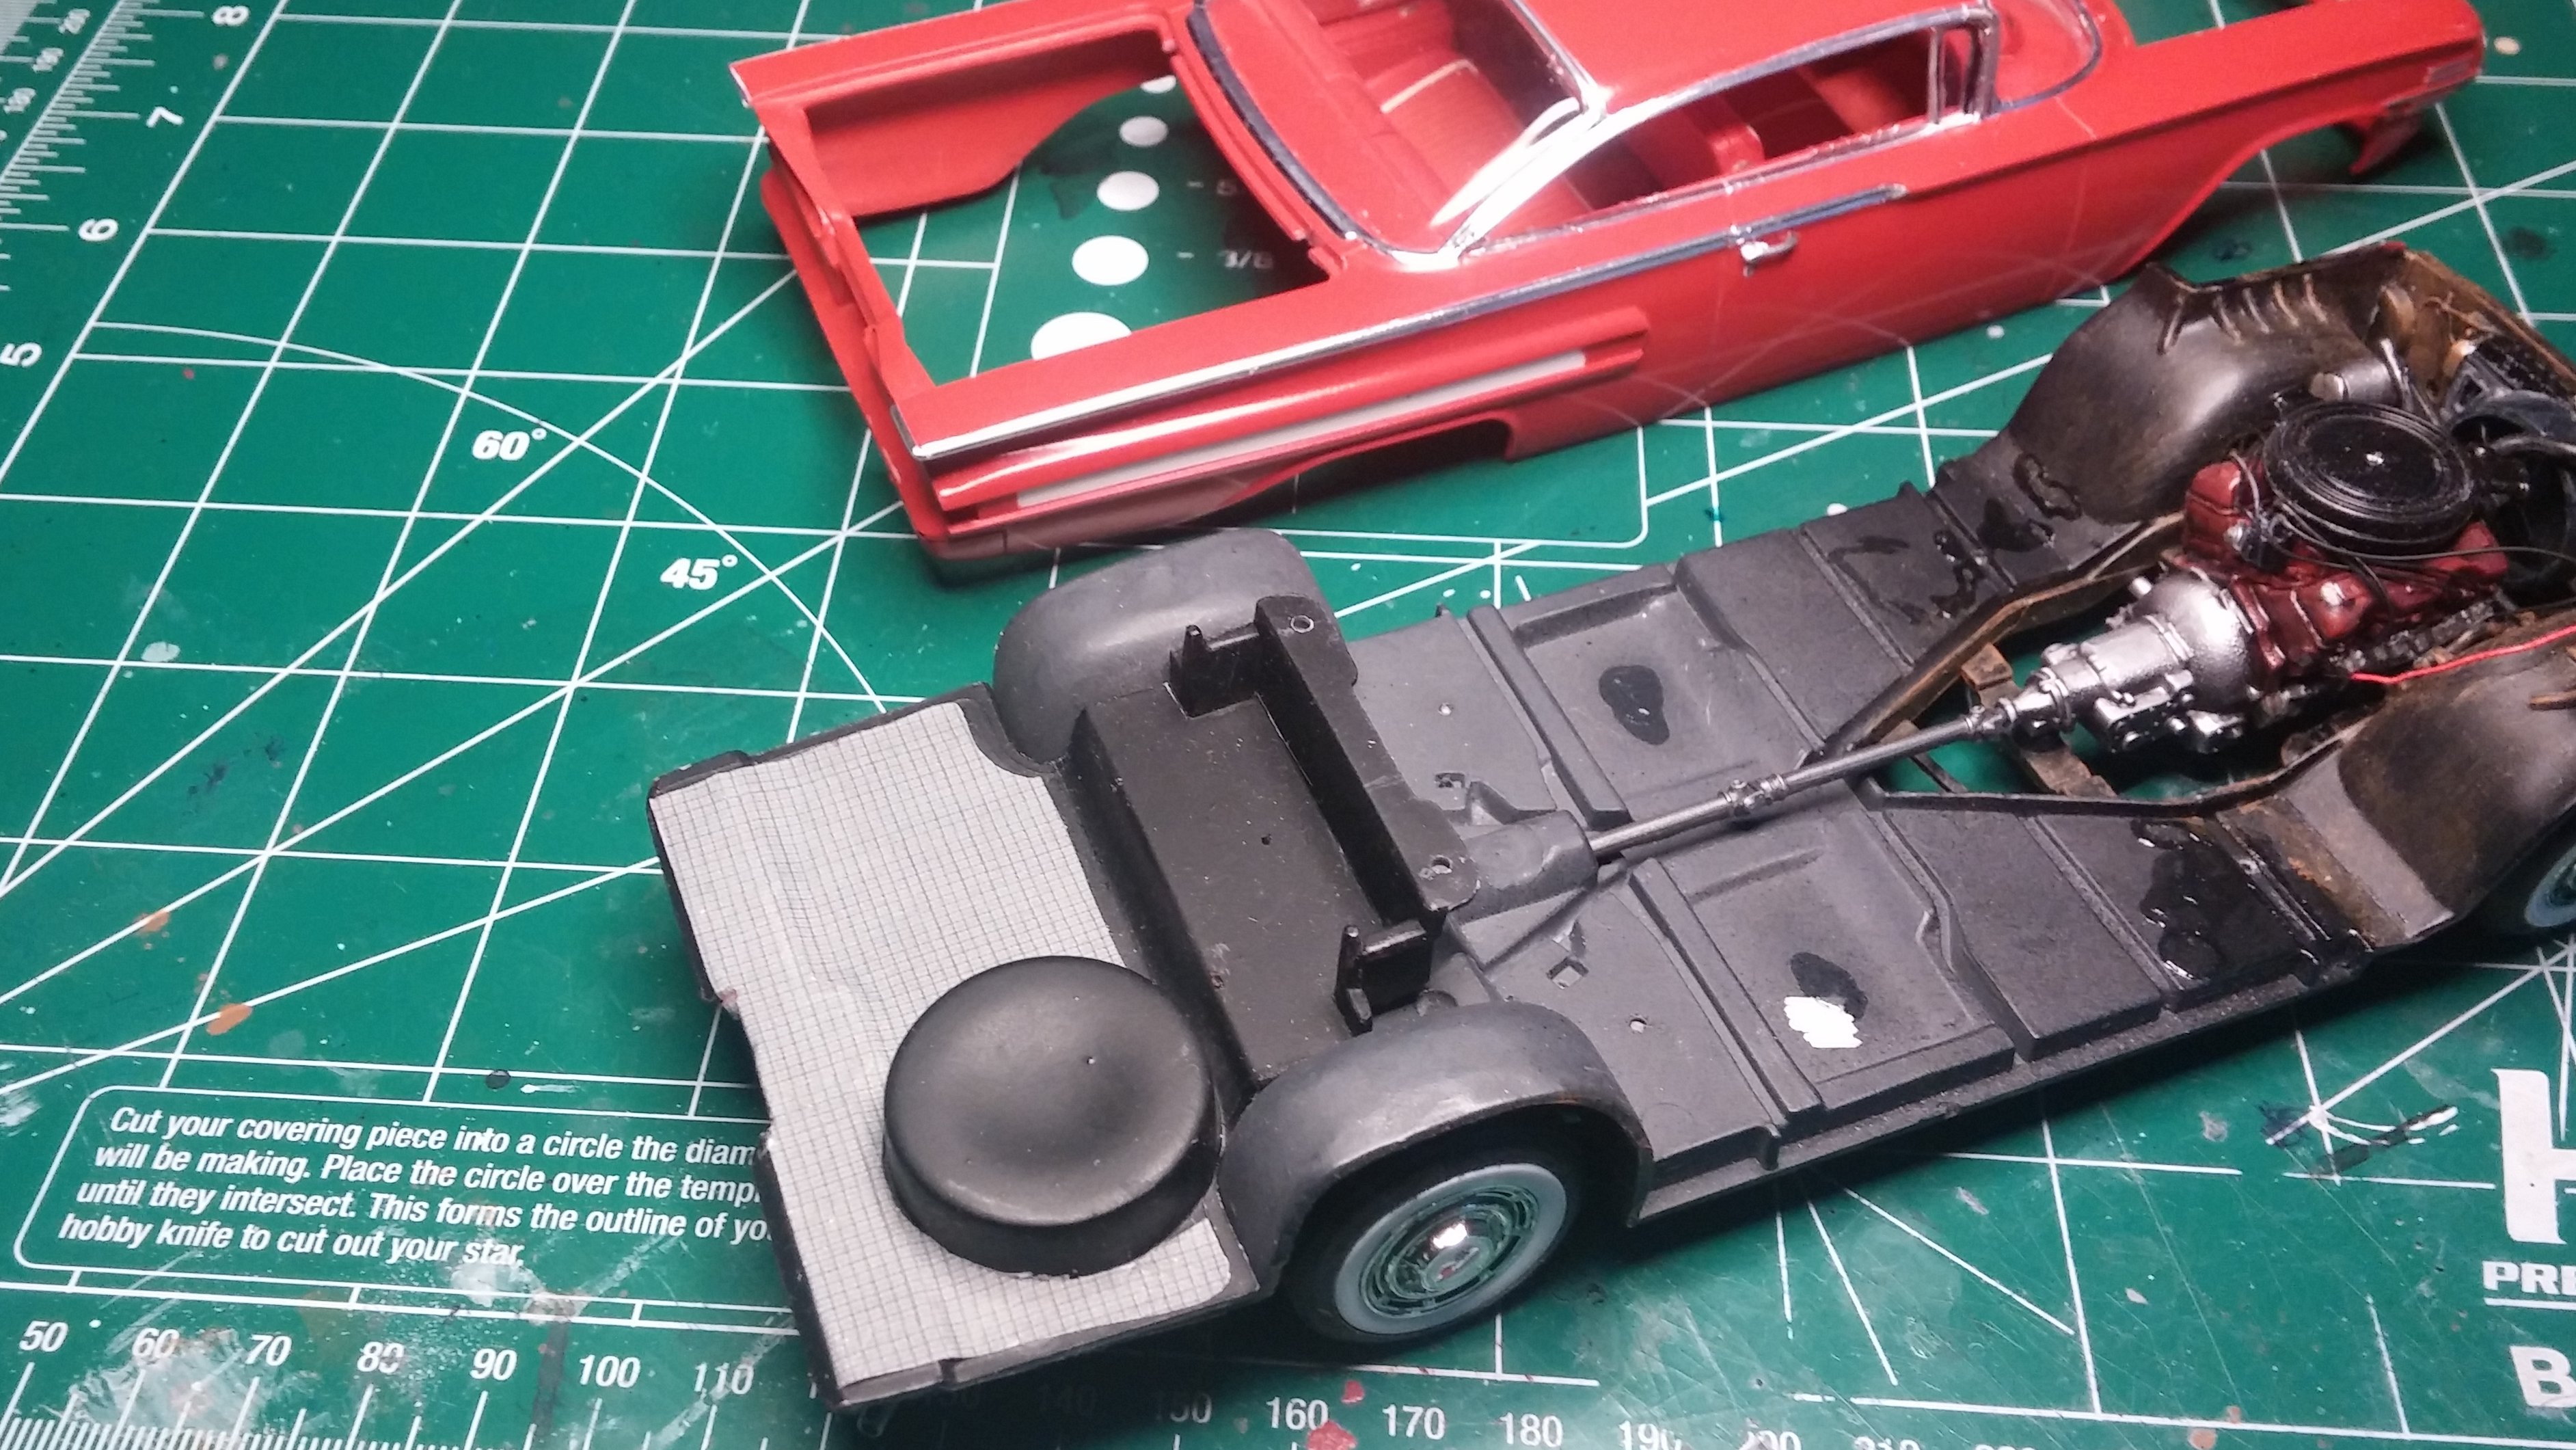
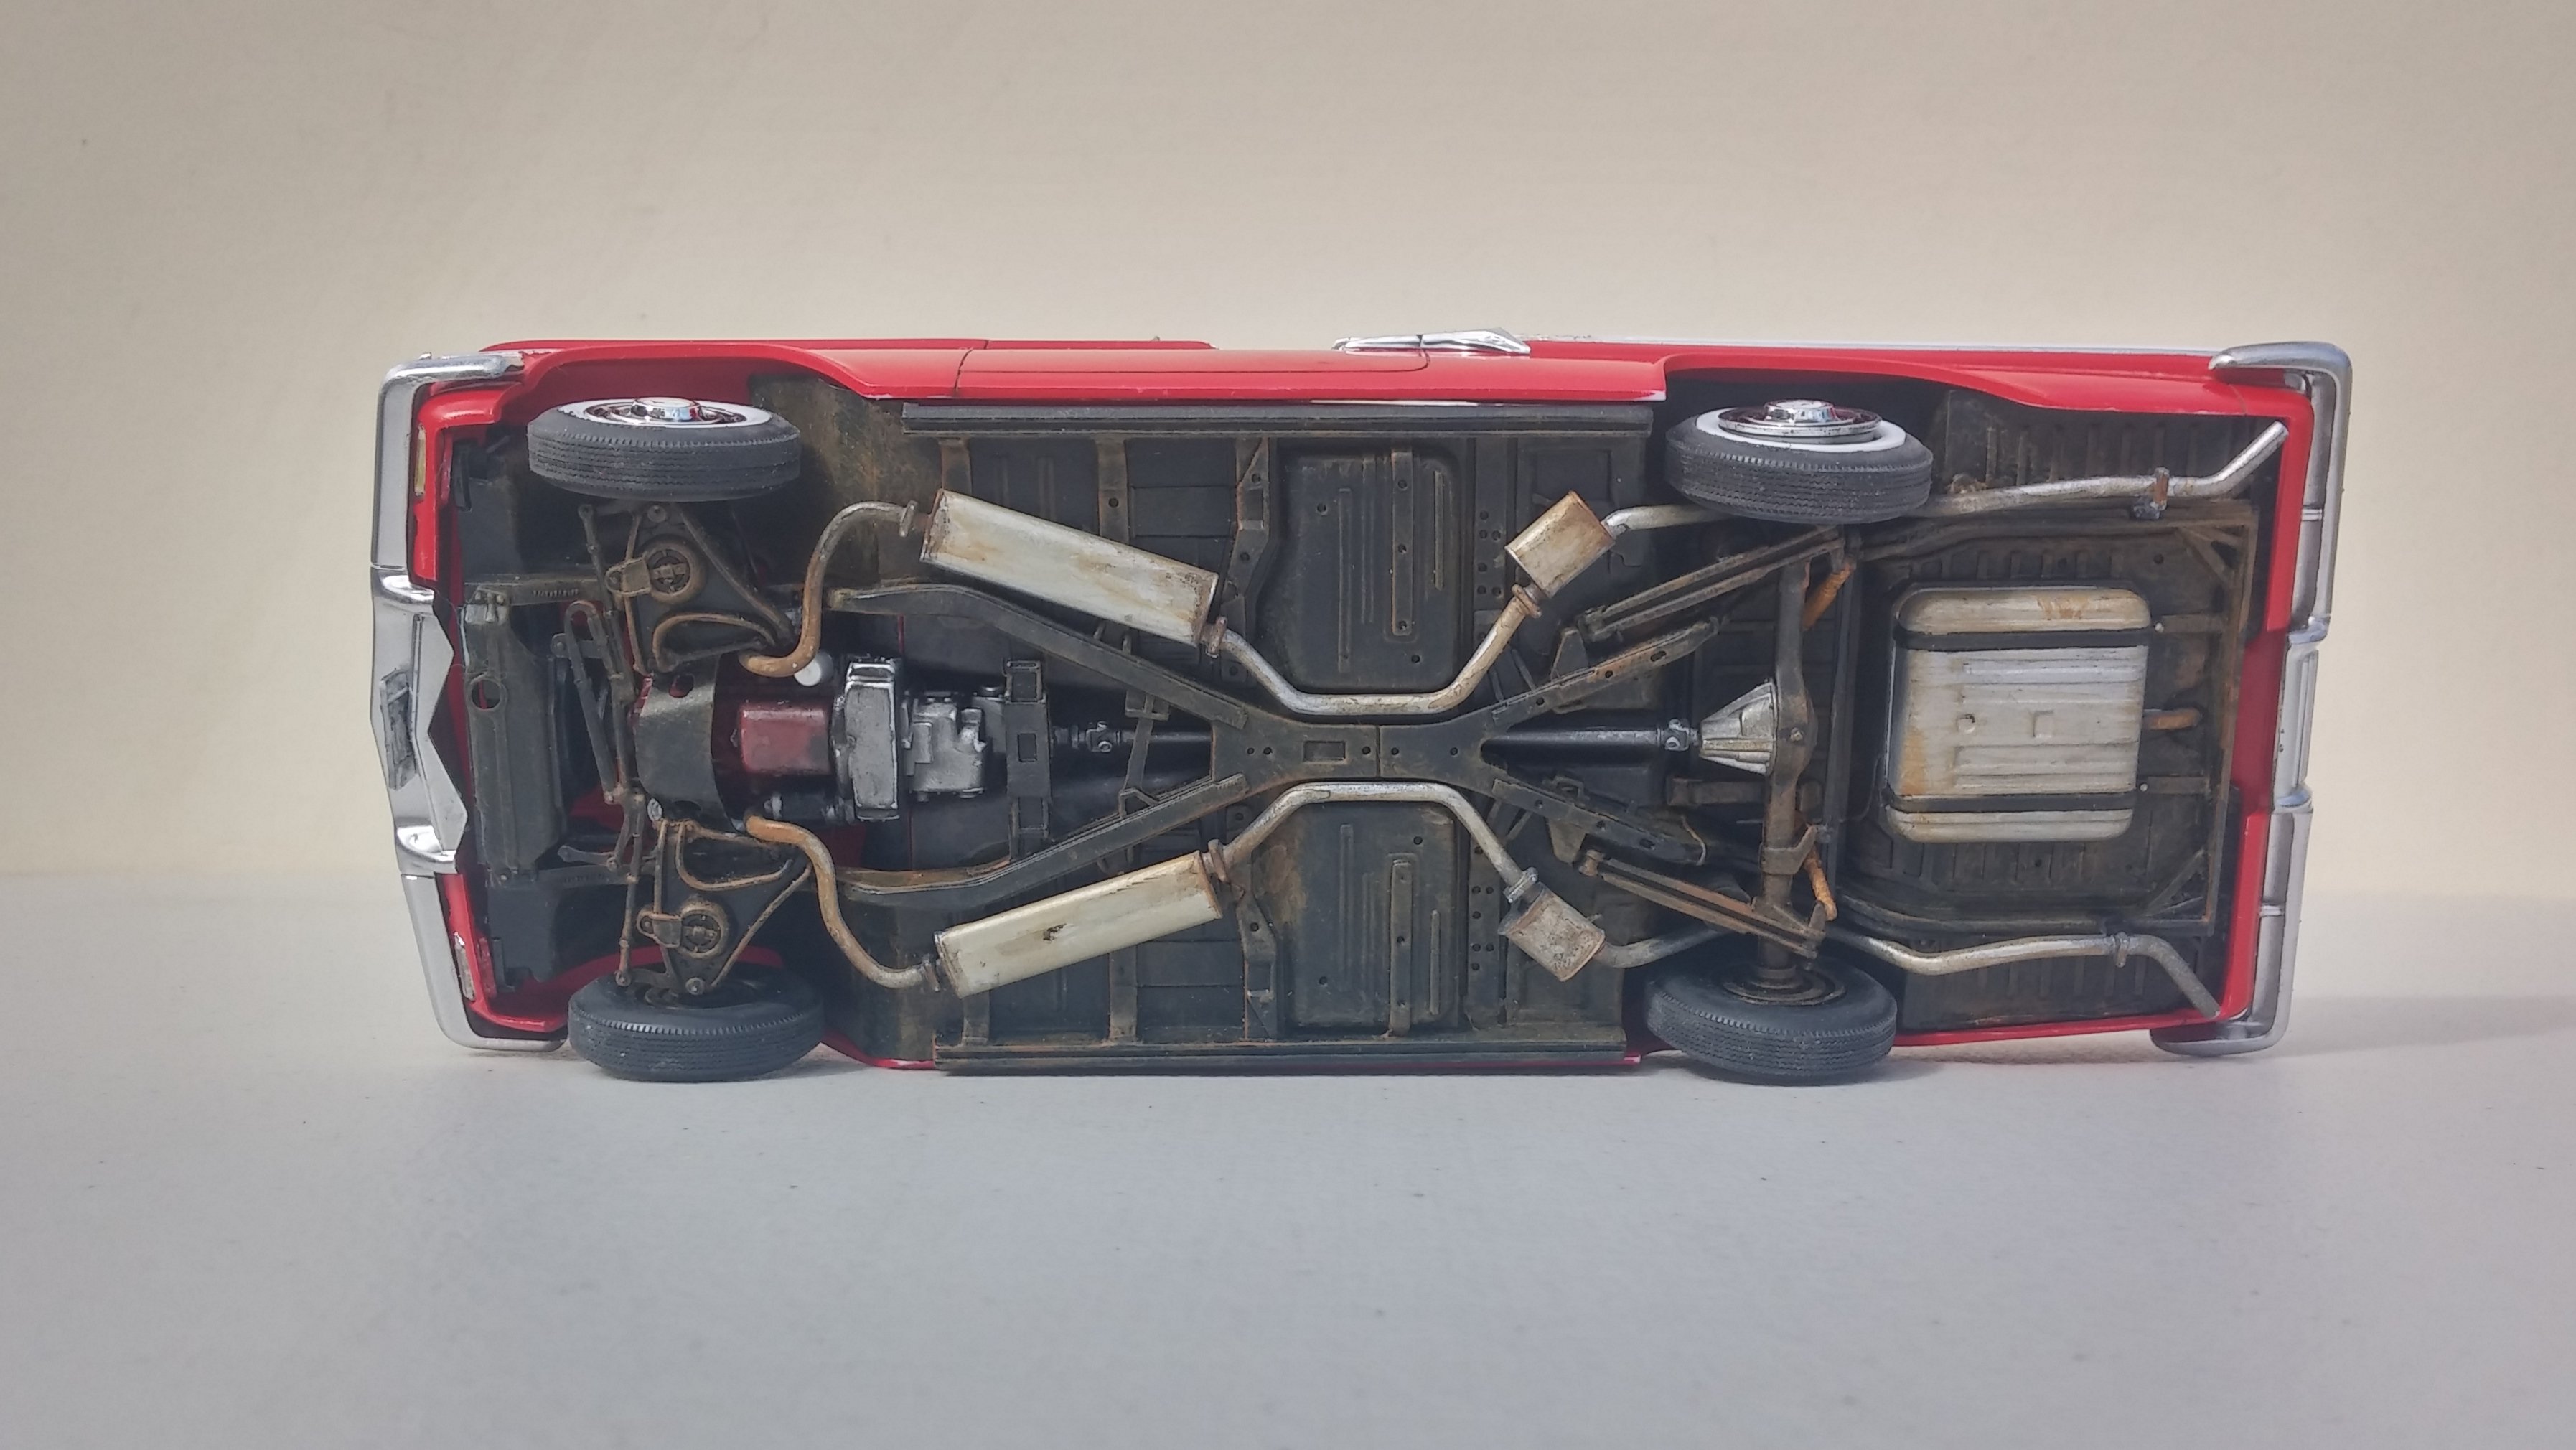
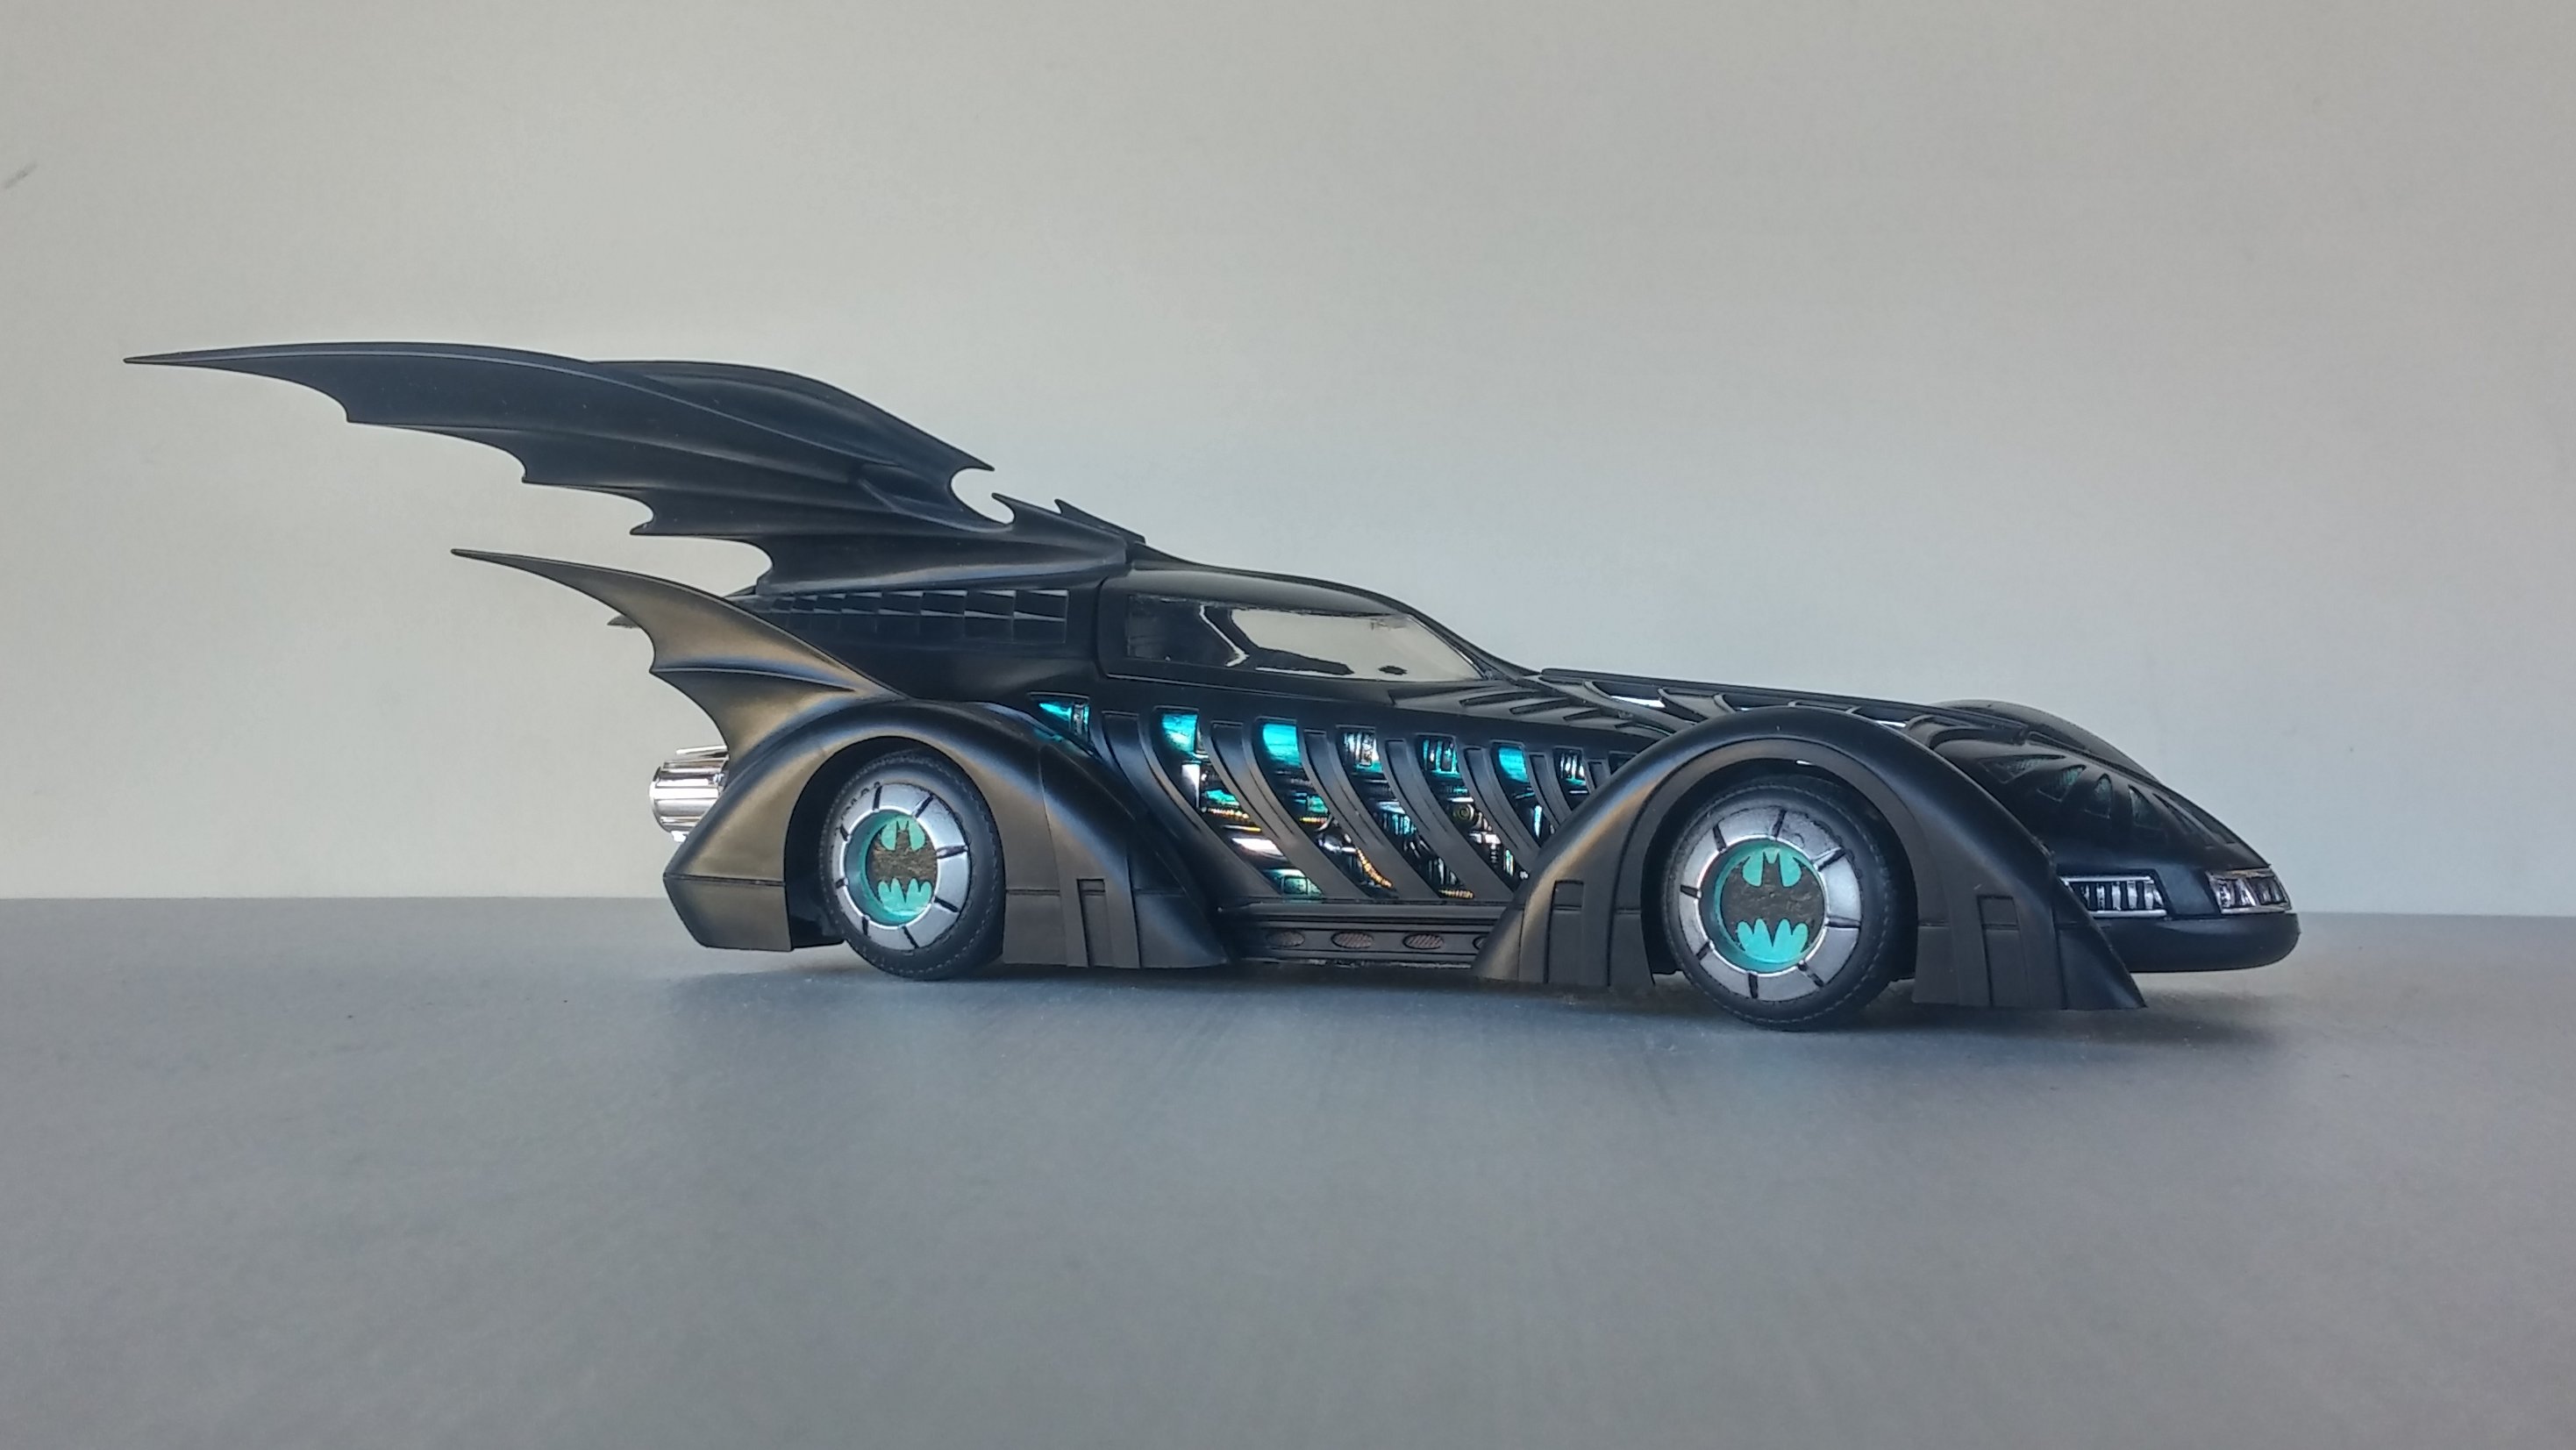
OK, I thought that I was going to finish this one last weekend but I ran into some complications. The body to chassis fit on this one has been wonky since the beginning. After installing the glass, the fit became downright troublesome. In the meantime, I'll post some photos while I try to decide how I want to deal with this. While I was struggling to get the chassis mated to the body, there were a couple setbacks. The windshield shifted and messed up the foil work on the surround and the front roll pan detached from the body. Here's the other side of the problem. With the wheels squarely on the ground, on this side, the chassis doesn't go all the way up into the body. I'm considering two possible solutions. First one is to disassemble the whole shebang and try to figure out where the windows interfere with the fit and see if they can be trimmed back far enough to allow for a proper fit. My main concern here is one of doing more harm than good. Option two is to place some sort of trim (side pipes, running board, stone guard or something) on the body to to cover up the problem. I'm leaning toward the second option. I am rather pleased with the interior though. Lots of techie weapon thingies, but not too much. I think I can still pull this off. After all, solving problems is one of the main aspects of our hobby. As always, thanks for taking the time to look and please feel free to comment. David G.

-
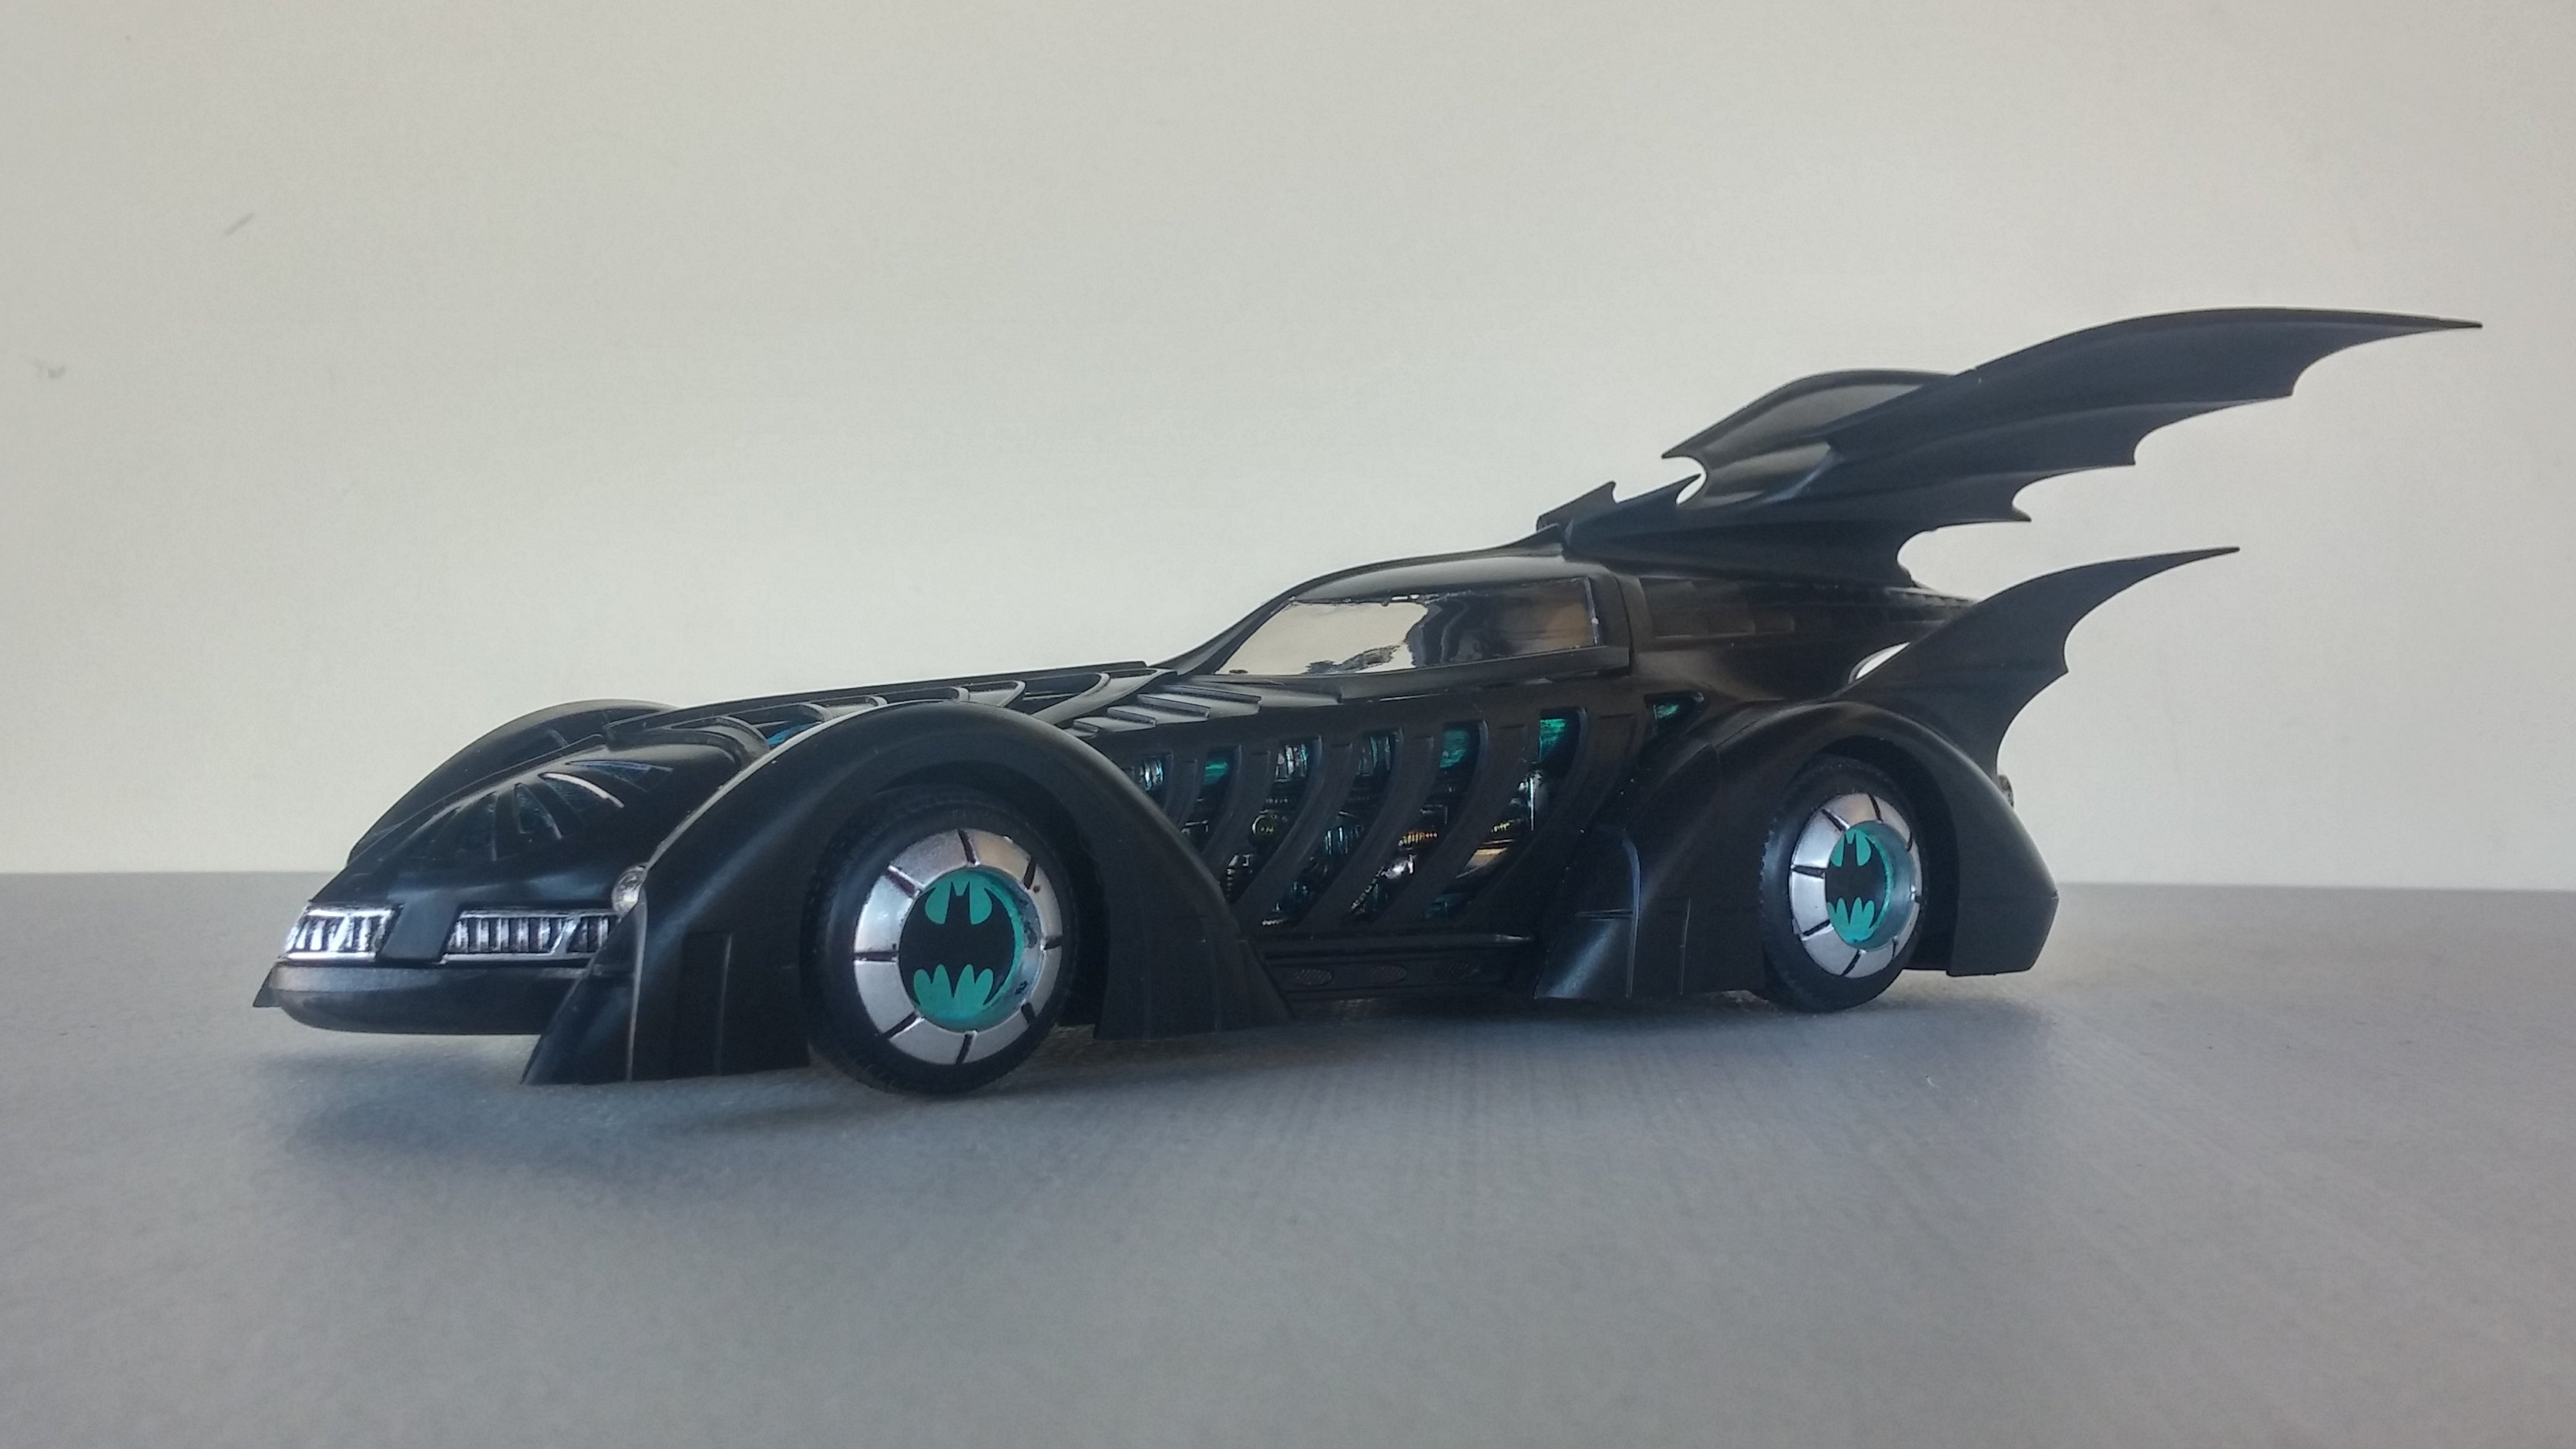
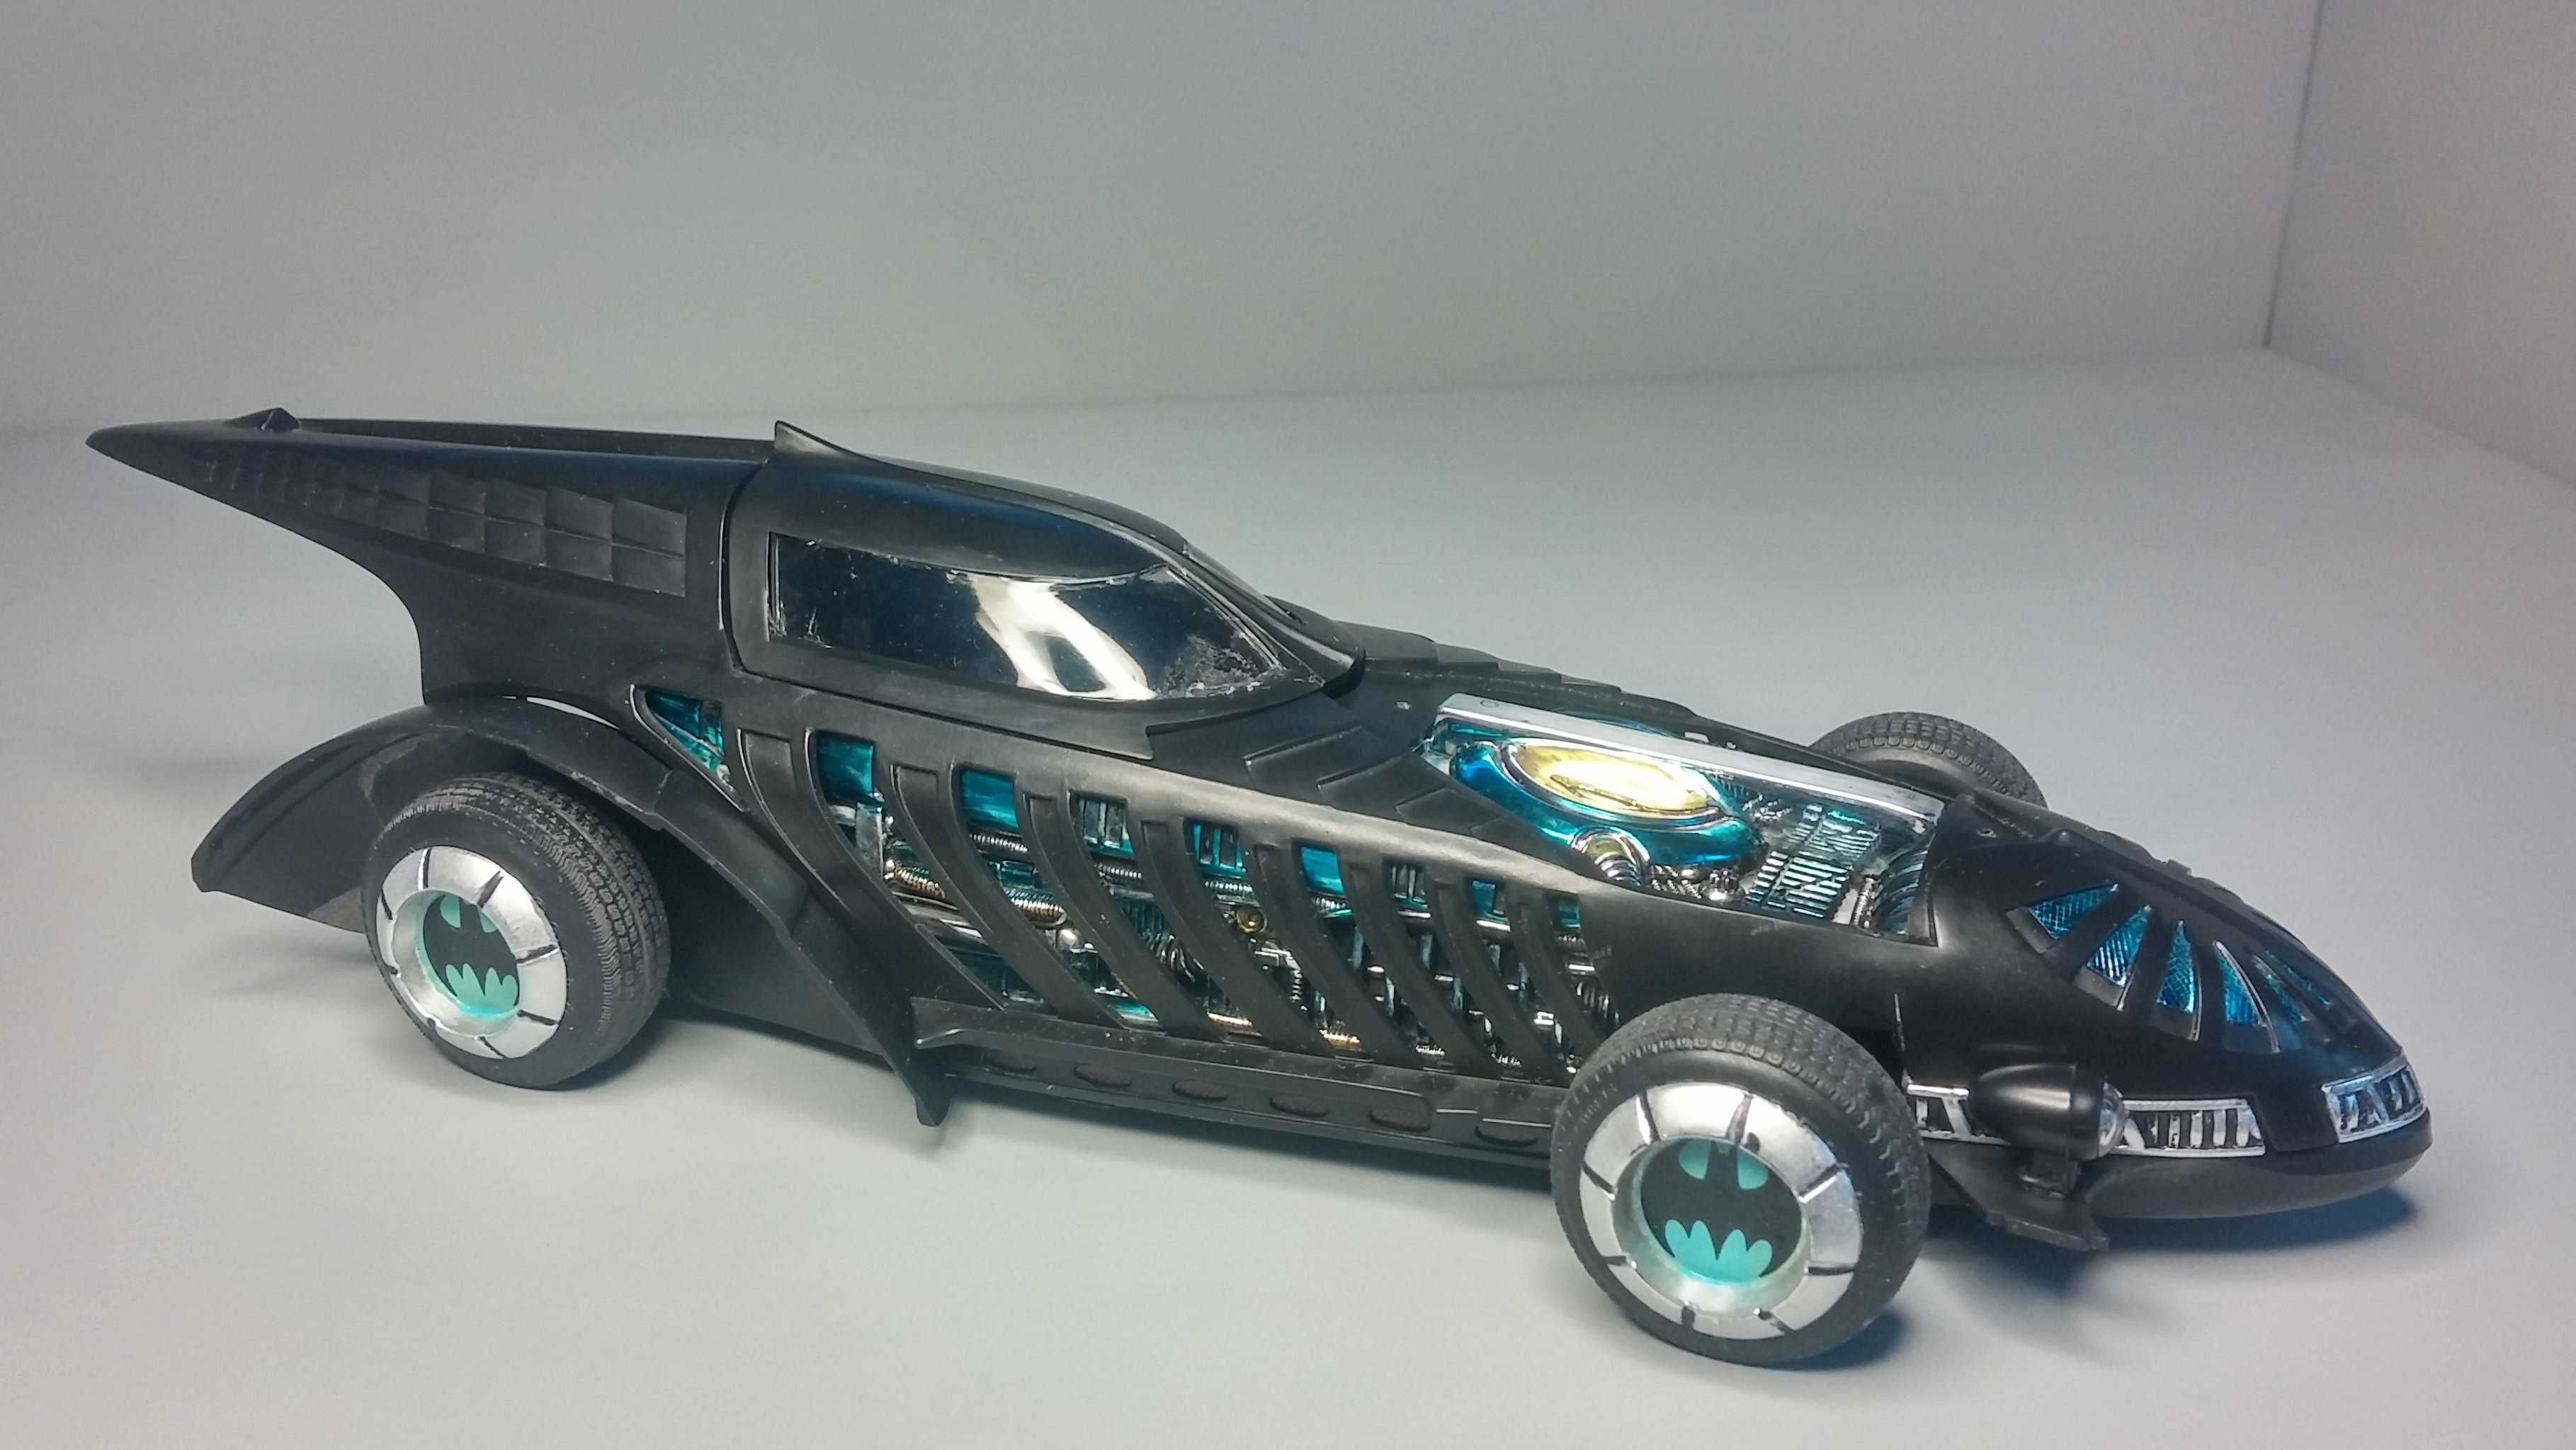
First is the Batman Forever Batmobile Next is the Time Machine DeLorean from Back to the Future. And finally a Gotham City police cruiser from 1989's Batman. David G.
-
Nicely done! David G.
-
Smooooth and deadly! David G.
-
It does now Gene! Thanks. Joe, I still don't know why I stuck with it all this time. I think, maybe the more time and effort one throws into a project, the more difficult it is to walk away from it. David G.
-
Thank you all for your kind comments. It's a relief to finally have this one done and I'm glad to know that it was worth the effort. David G.
-
Last Looks! A view of the trunk liner I made before I mate the chassis to the body for (hopefully) the last time. The trunk does open but, yeah who's really ever going to see it again. This is officially done (finally) and moved to the Under Glass section. Thanks to everybody for all your feedback and support- See ya there David G.
-
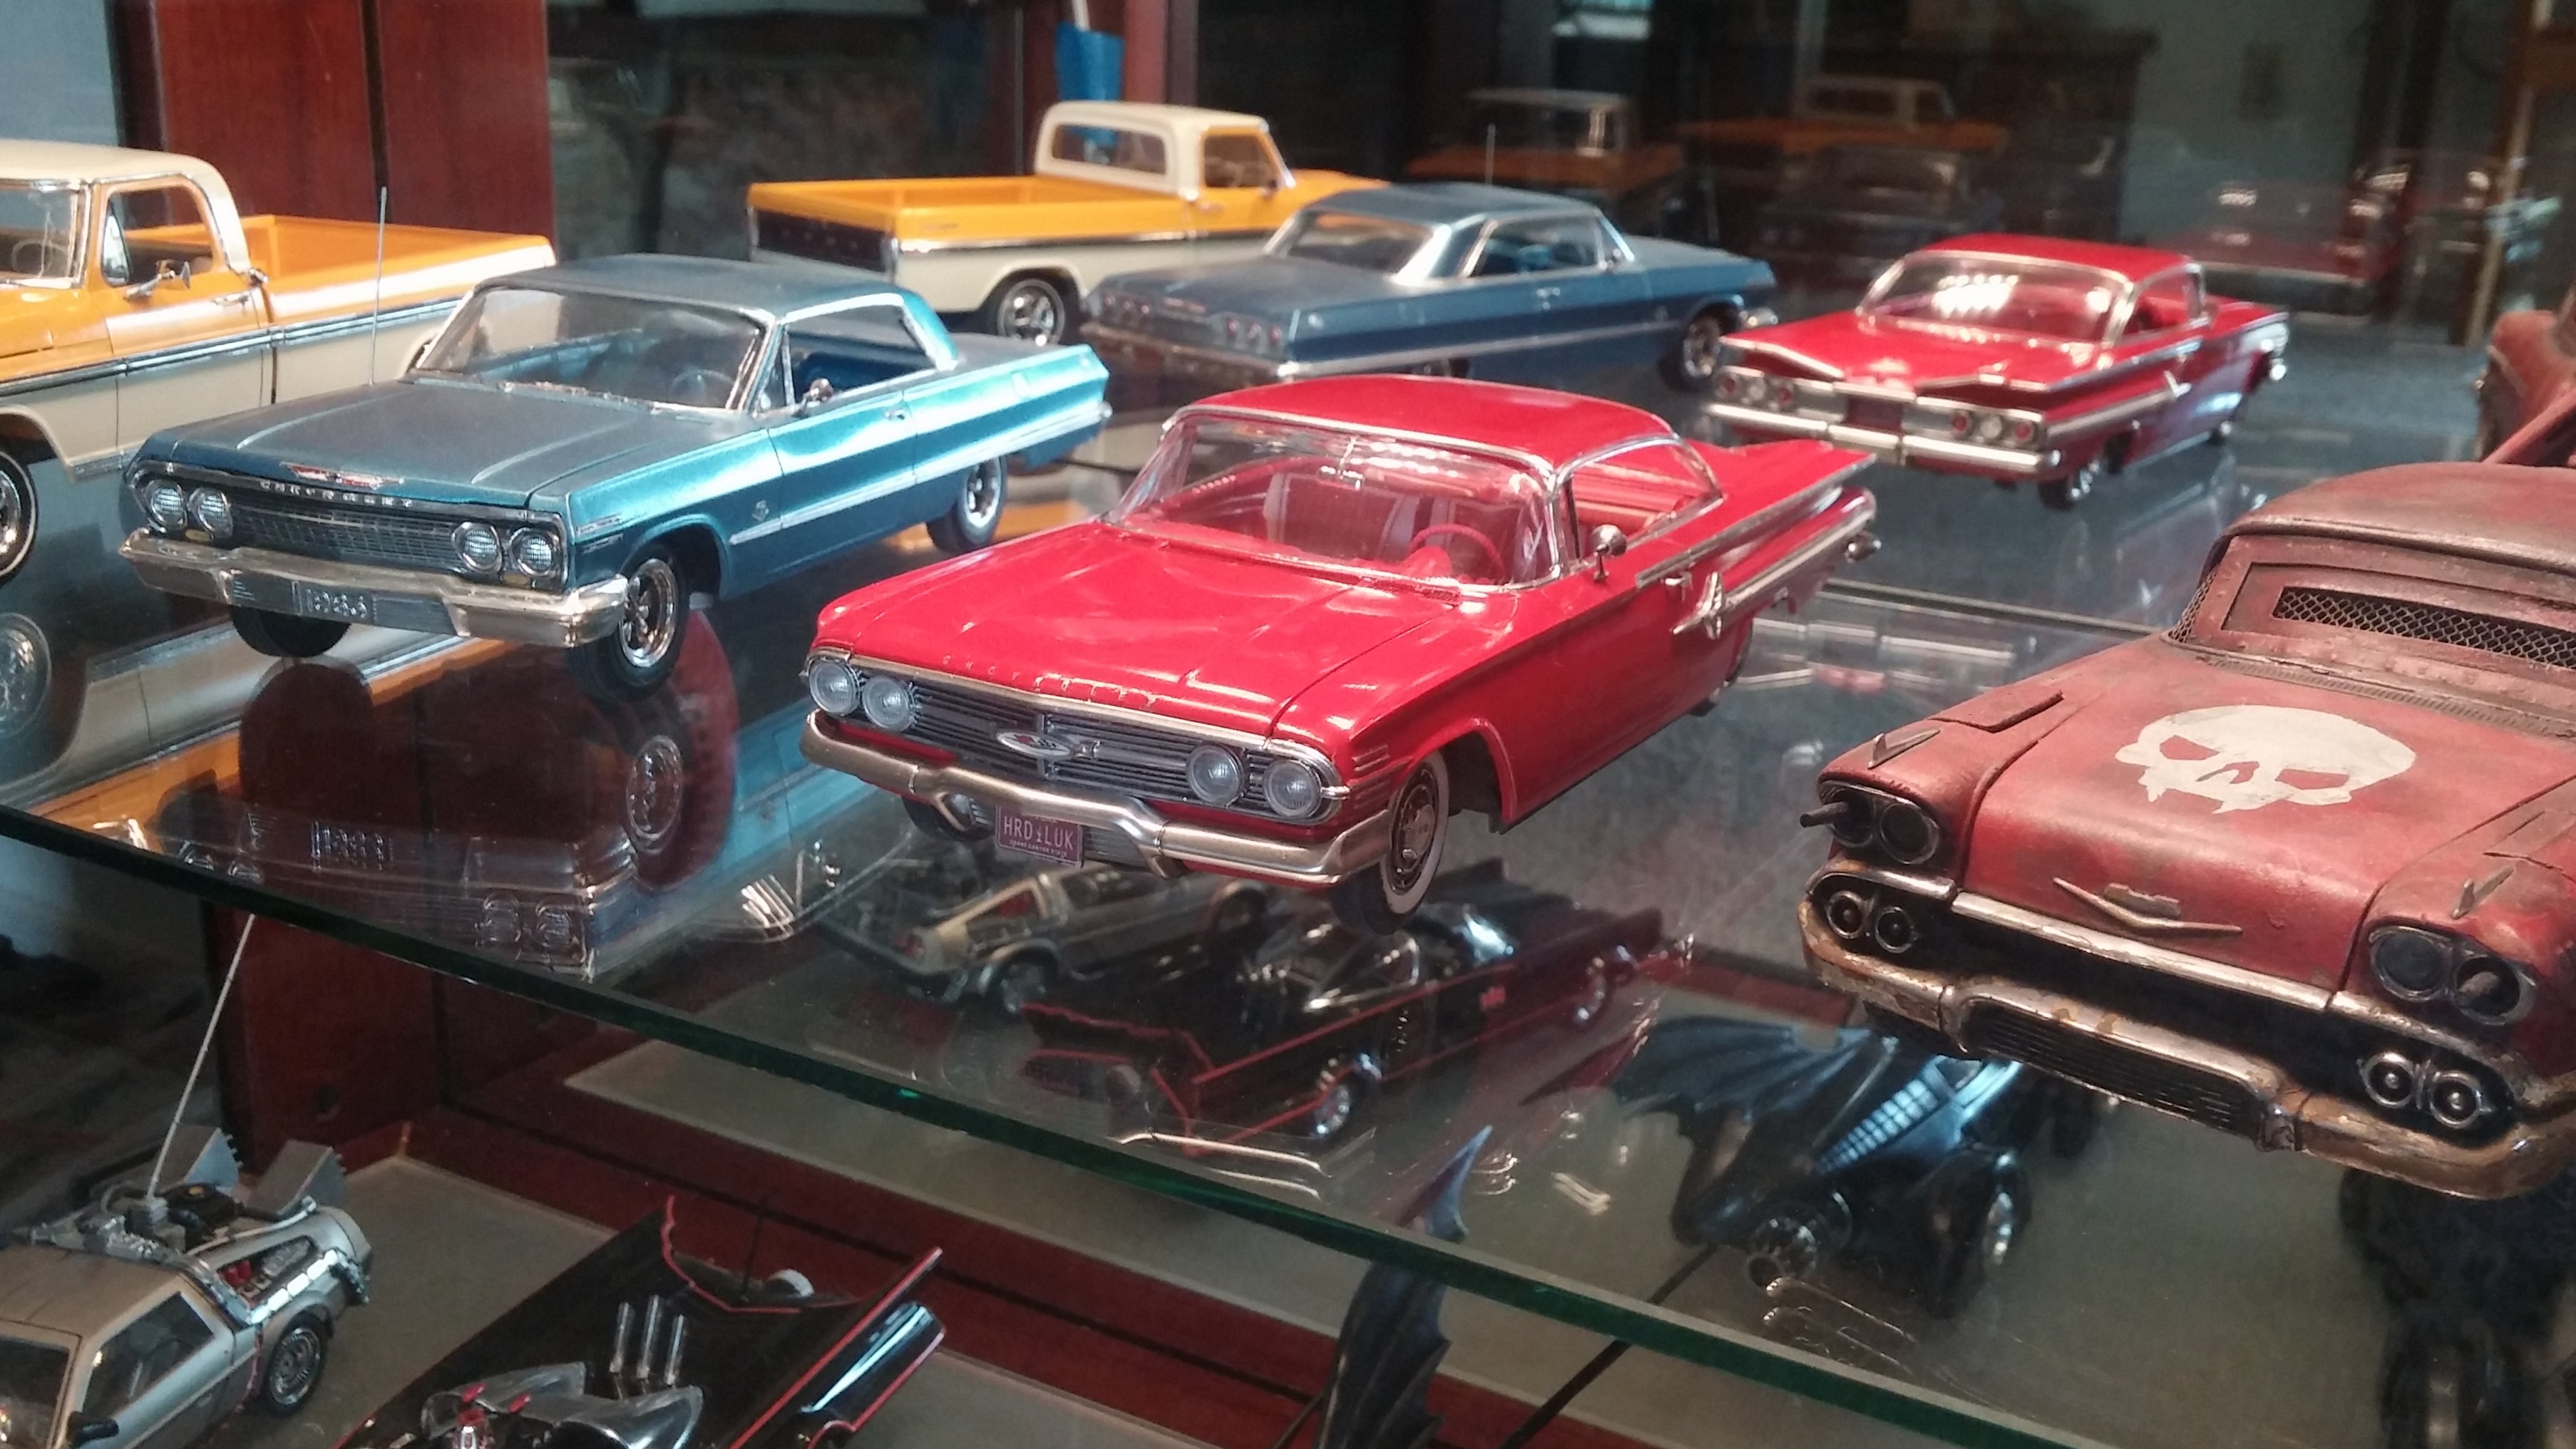
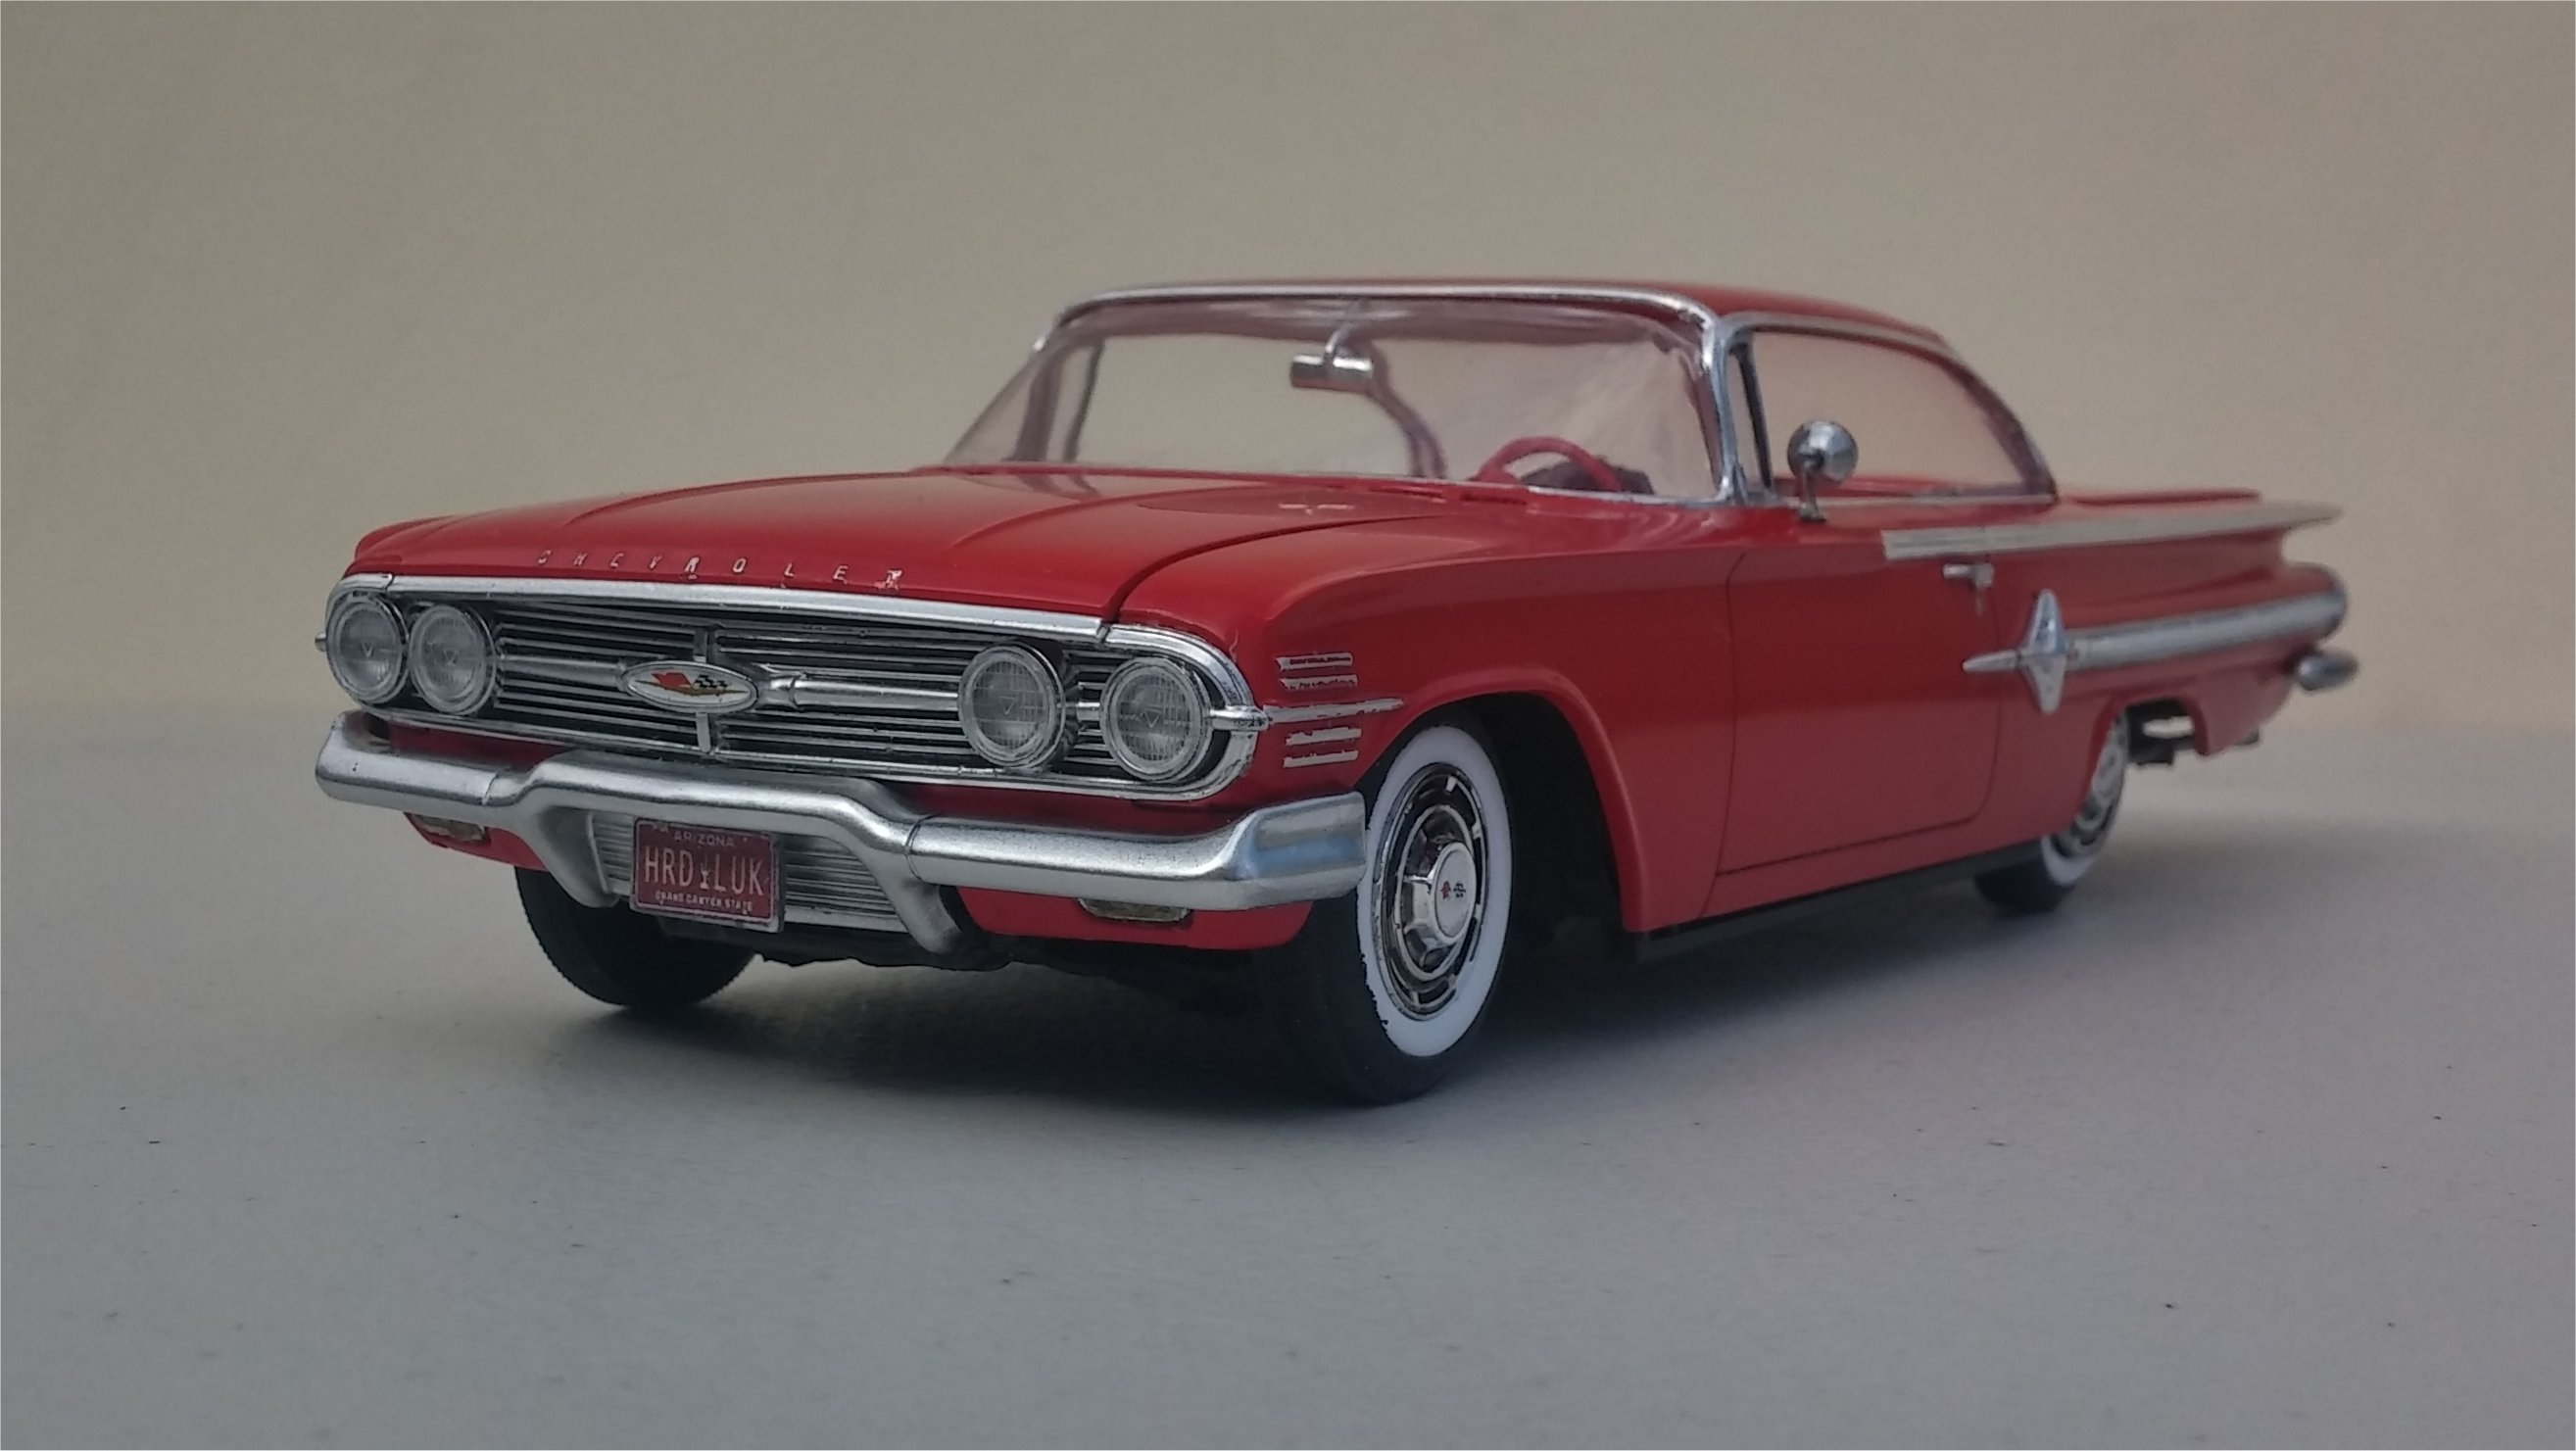
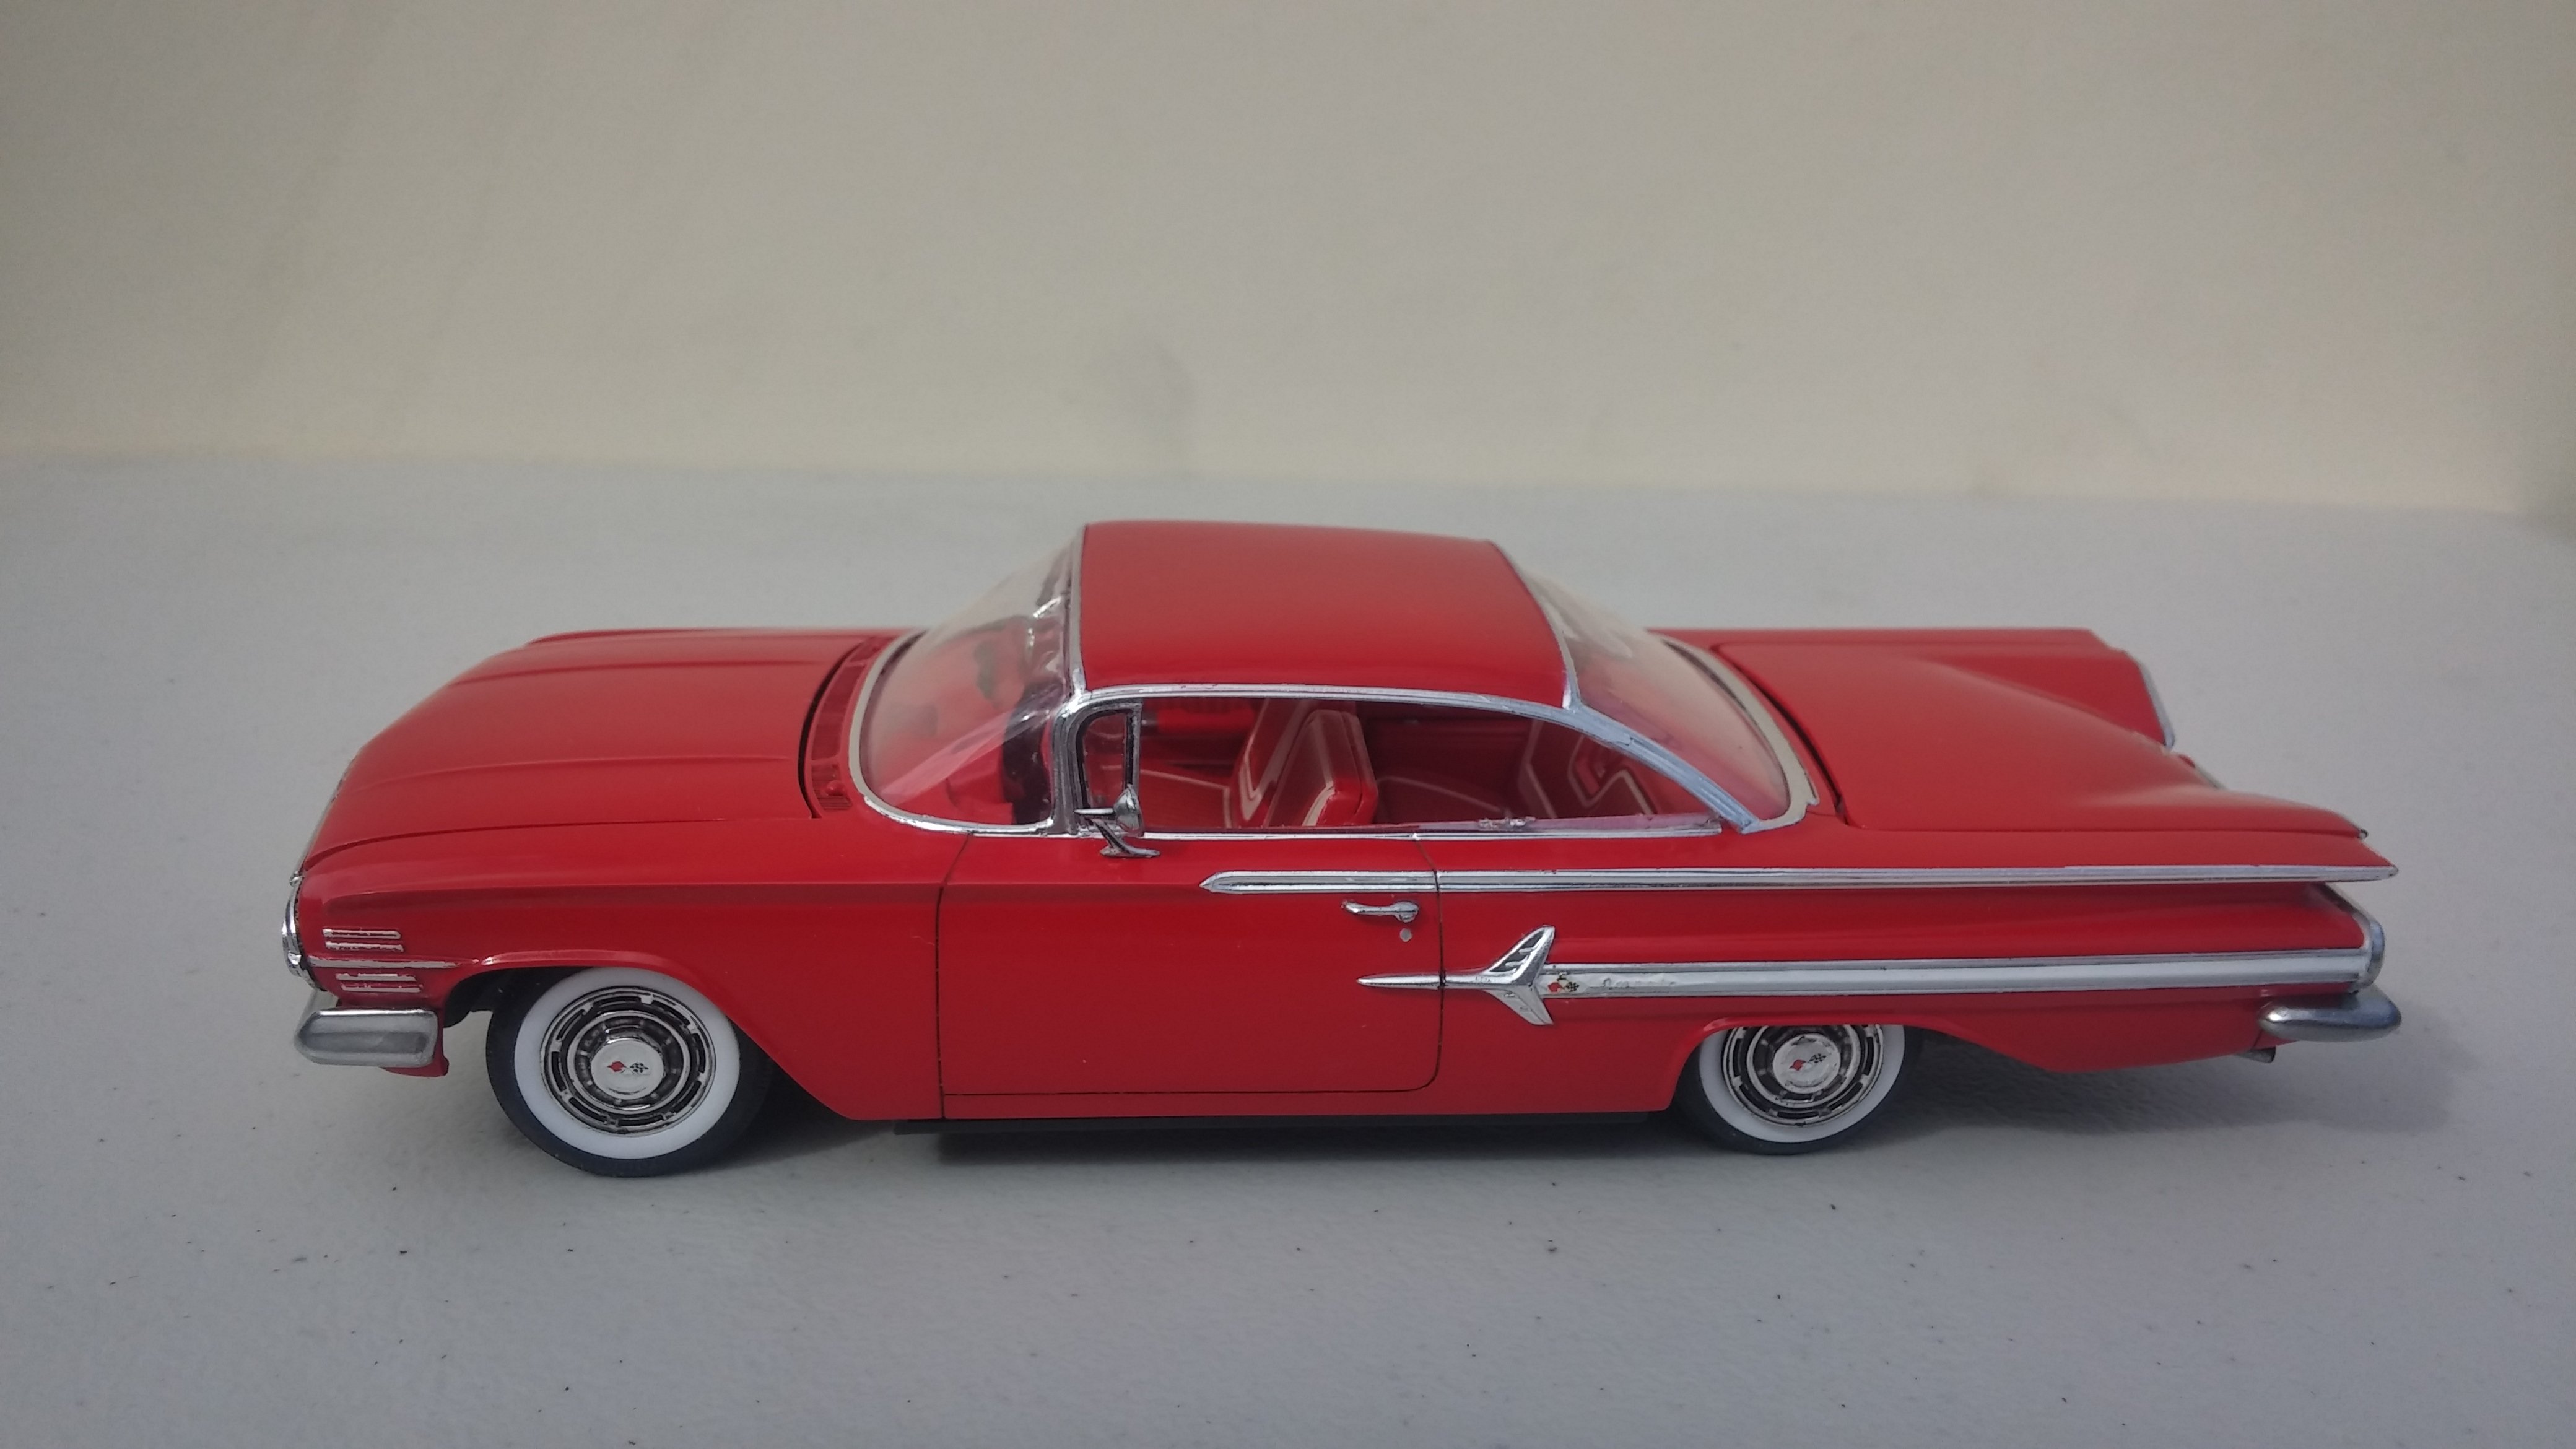
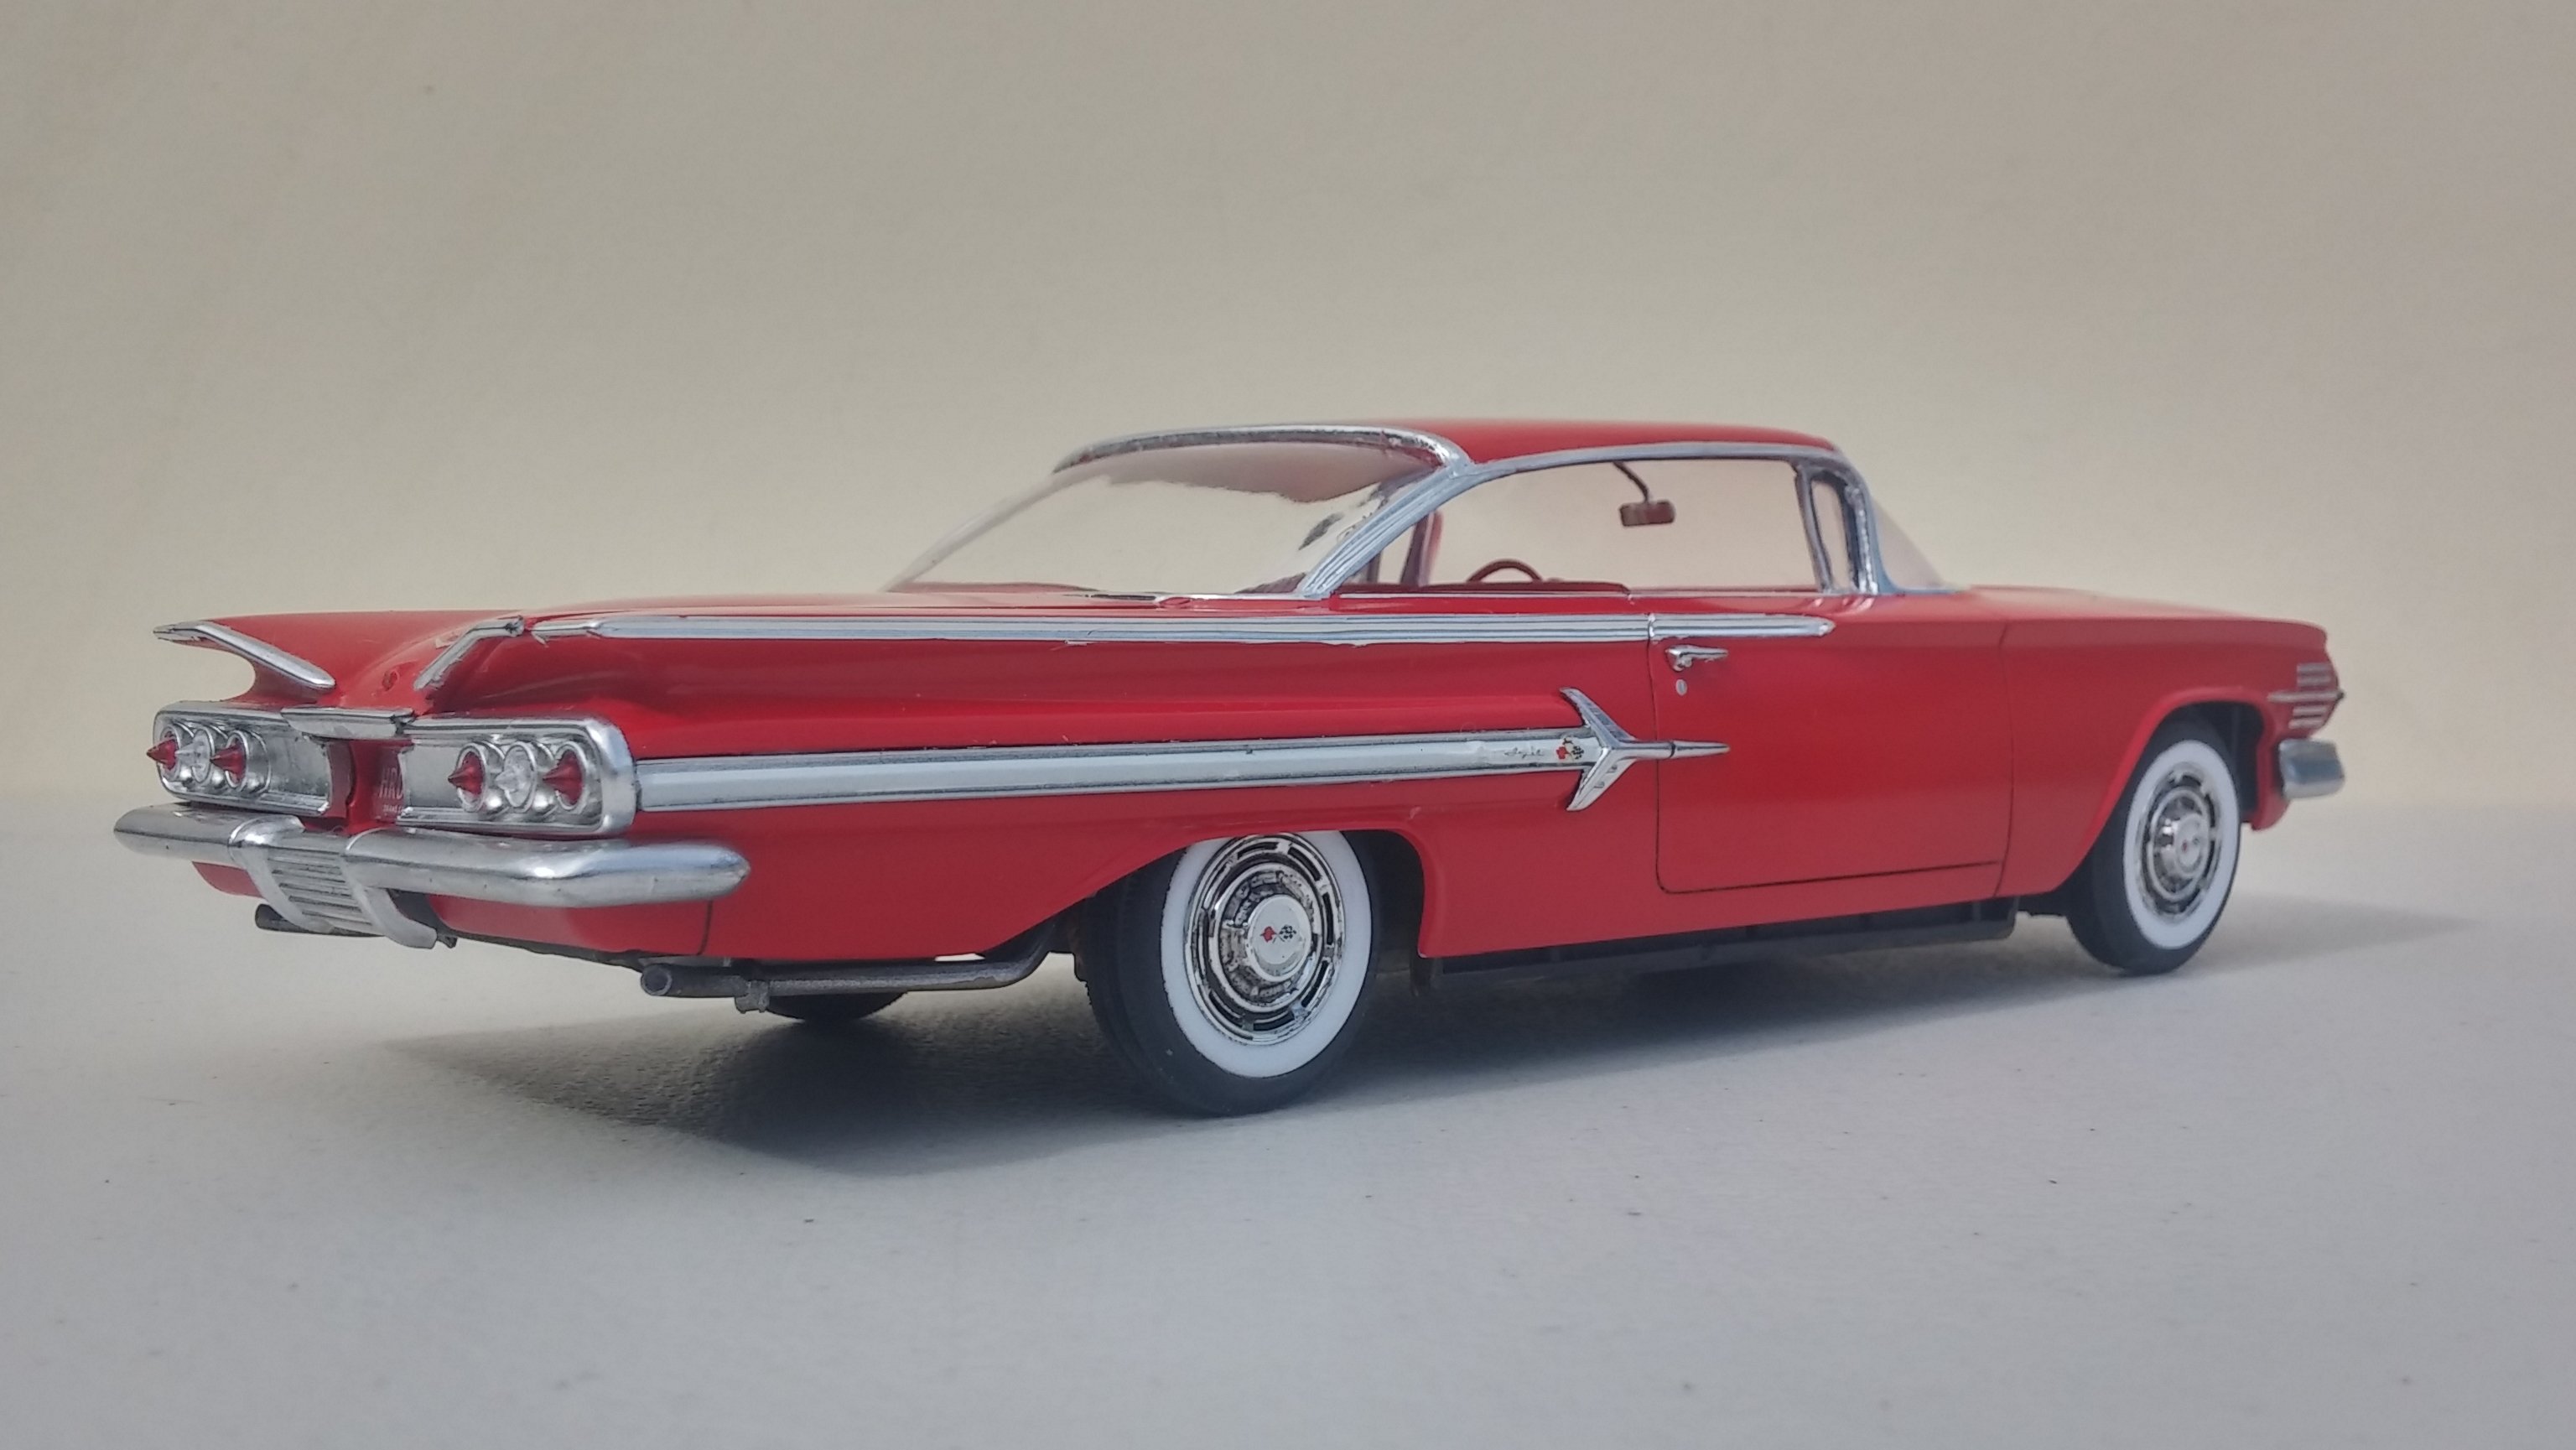
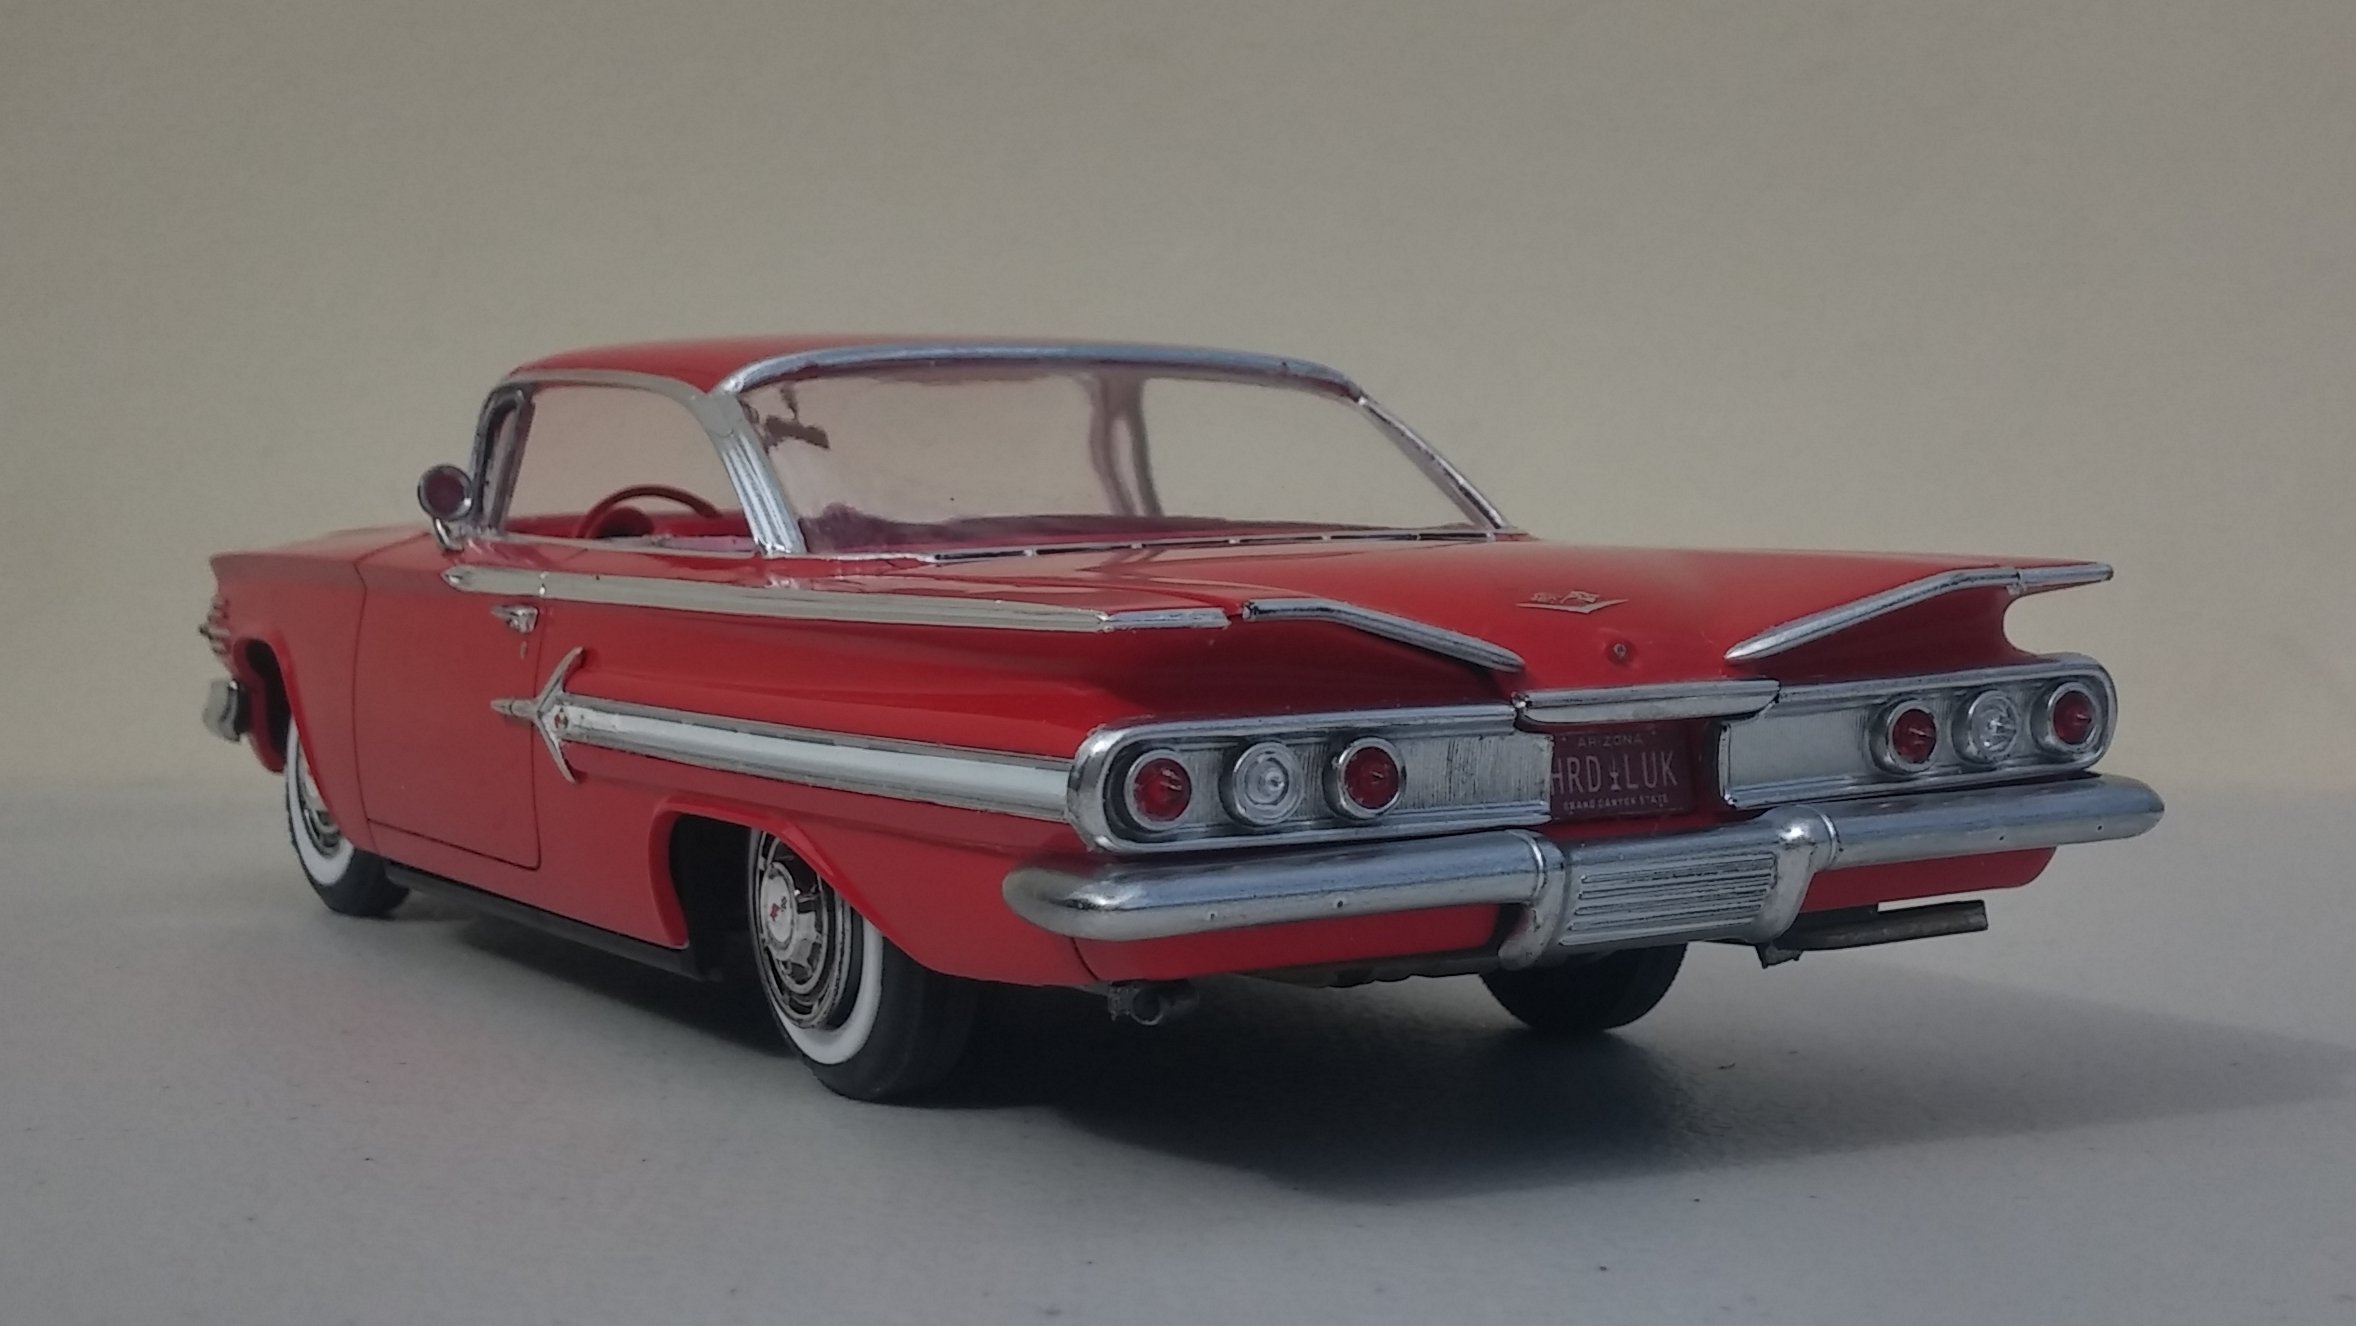
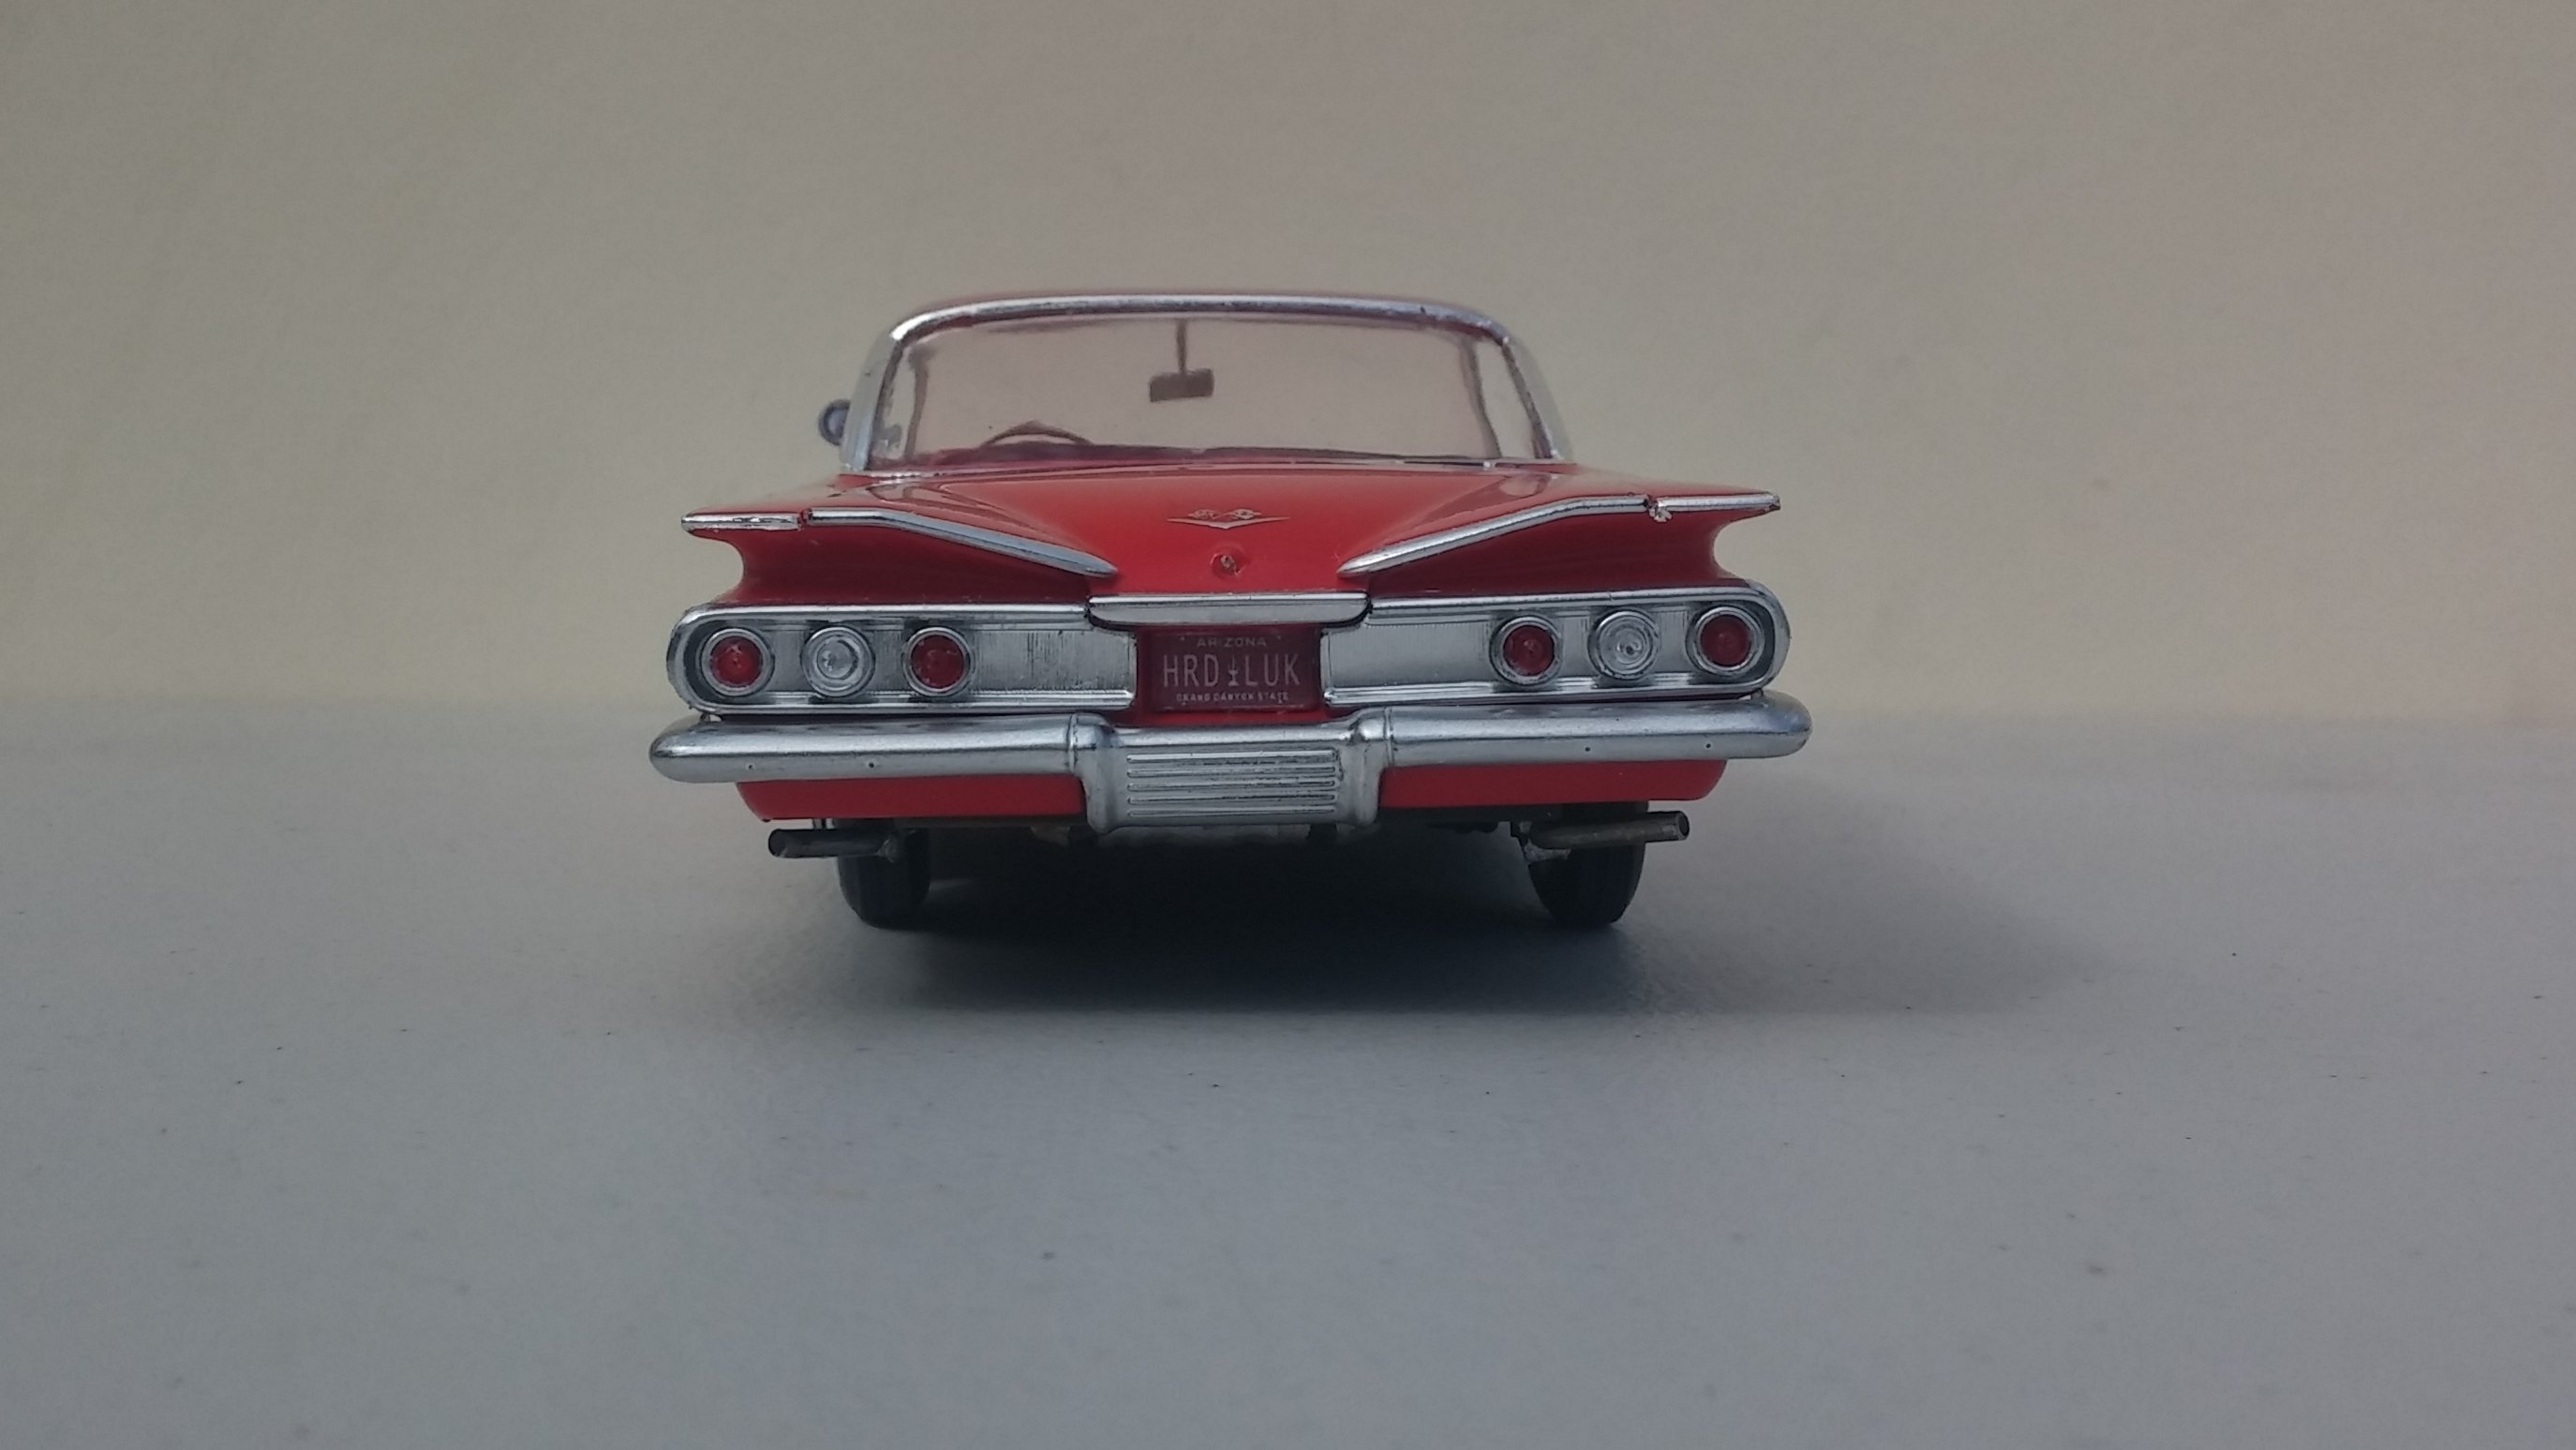
I started this kit back in 2011. When I opened it I found that the roof had been squished and twisted to one side. So I began having problems, literally, right out of the box. As I recall, it took several days to correct. I used scalding water to soften the plastic "A" pillars just enough to allow them to be moved into the proper position and held there and quenched in cool water to fix them into position. This process had to be repeated probably a couple of dozen times to gradually coax the plastic into recalling its rightful place in the universe. I had nothing but trouble with this kit from the day I started it. For those who don't know the whole history, here is a link to the build thread . With all the time and trouble I went through on this project, I made what I feel is a suitable vanity plate for the car. I know, it has no wipers. But it's an Arizona car and in Phoenix wipers are only needed about six days out of the year. Actually I lost them sometime during the past six or seven years and I don't have the patience to locate, paint and install another set. It's a shame that this is such a challenging kit as it really is a beautiful car. It's one of those designs that look like it's moving at 70 mph when it's sitting still. More evidence of the interior, chassis and body fit issues. I've always enjoyed working on the grittier details. Looks like I need to jiggle the rear wheel a little. At least it looks pretty good in the display case. As always, thanks for taking the time to look and please feel free to comment. David G.
-
 Cool! David G.
 -
Great looking build! Excellent detailing work on the badges and tail light trim. Perfect color choice. David G.
-
Nice Jag! The burled wood effect on the dash turned out great. Is there a special method you used? David G.
-
That's a good, solid looking build. Nicely Done! David G.
-
Thanks Dan and Dave! Dave, I think I mentioned that I used to live in Akron. Right off 76 near the Grant St - Wolf Ledges exit. Near where the Greyhound Bus Depot used to be. David
-
Yup, I still remember the days when you could get a real one like this for about $800.00. Yours looks great, I'd buy it! David G.
-
Thanks everybody for the kind comments. It's actually the first kit I've finished for 2018. I picked it because it seemed to be a simple build that I could knock out fairly quickly and it was. I'm pretty sure that I've built other kits that had as many parts in just the engine and chassis as were in this whole kit. I'm pretty happy with how it turned out. I wanted to tone down the flashiness but keep the feel of the car in tact. From all the comments, it seems that I succeeded. Thanks for that, it's good to know. Now it's time to get back to the other two projects which are still patiently waiting for my attention. David G.
-
Finished and moved to Under Glass. Thanks, David G.
-
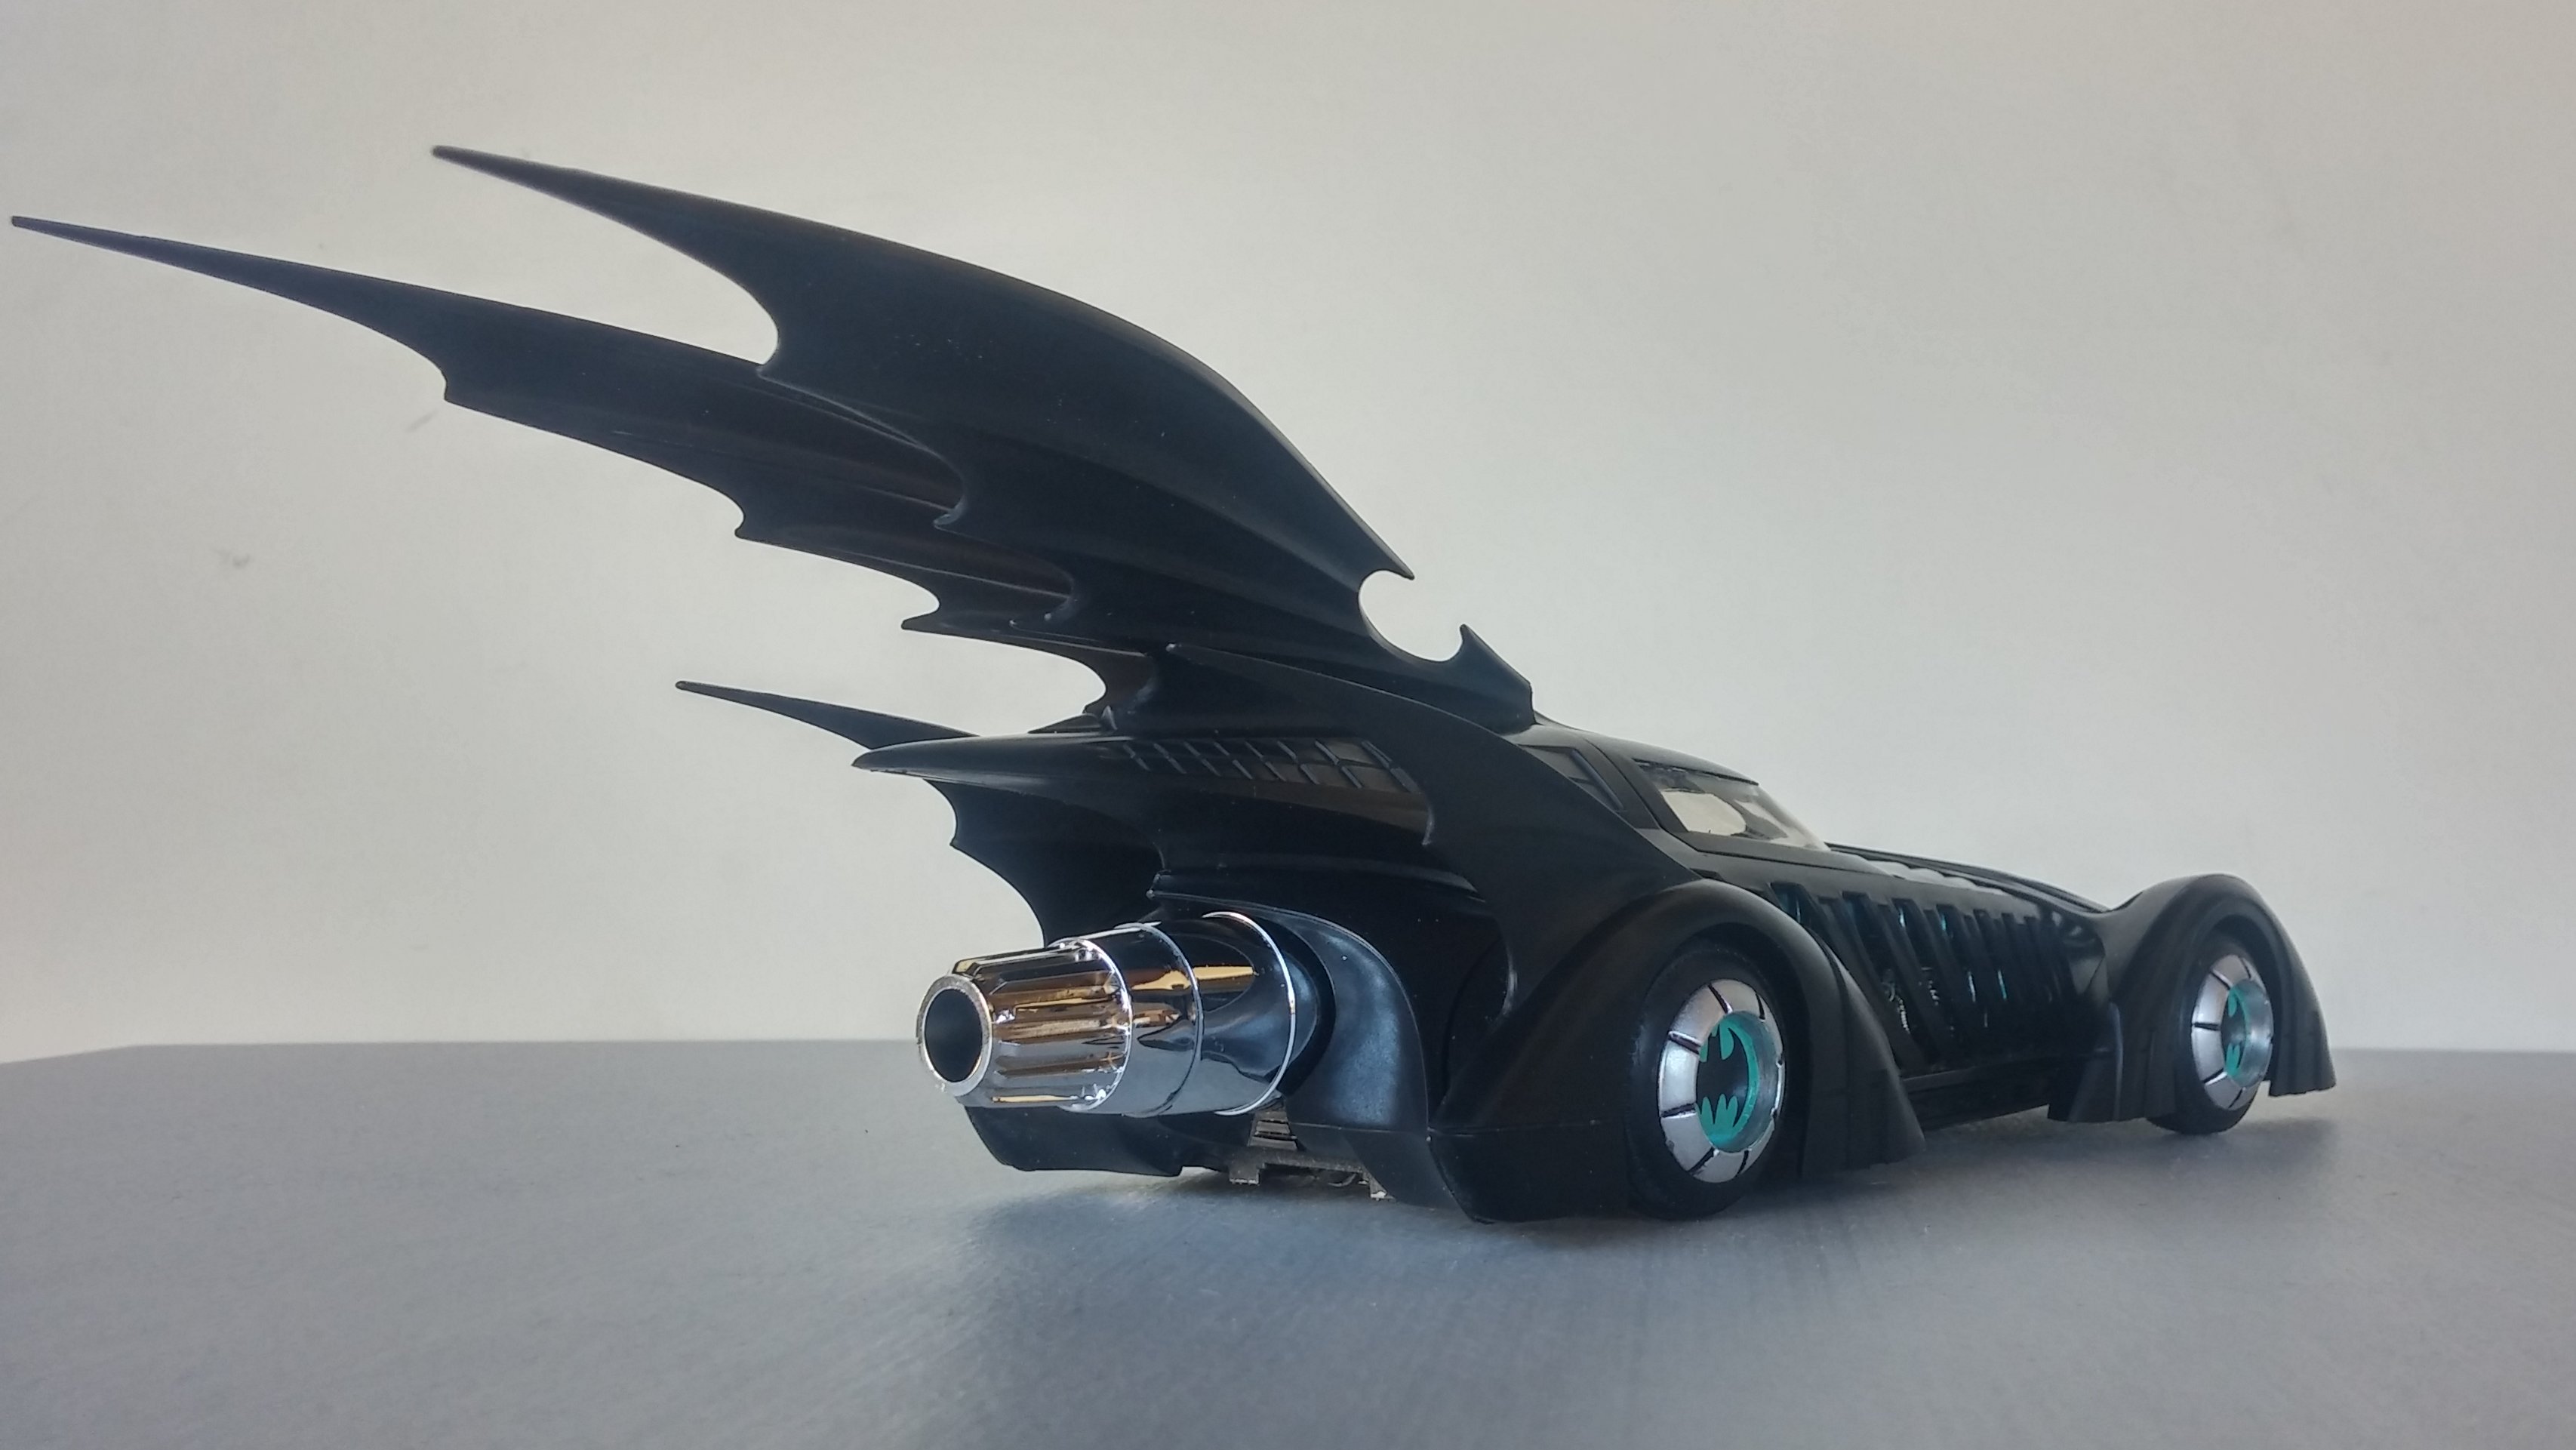
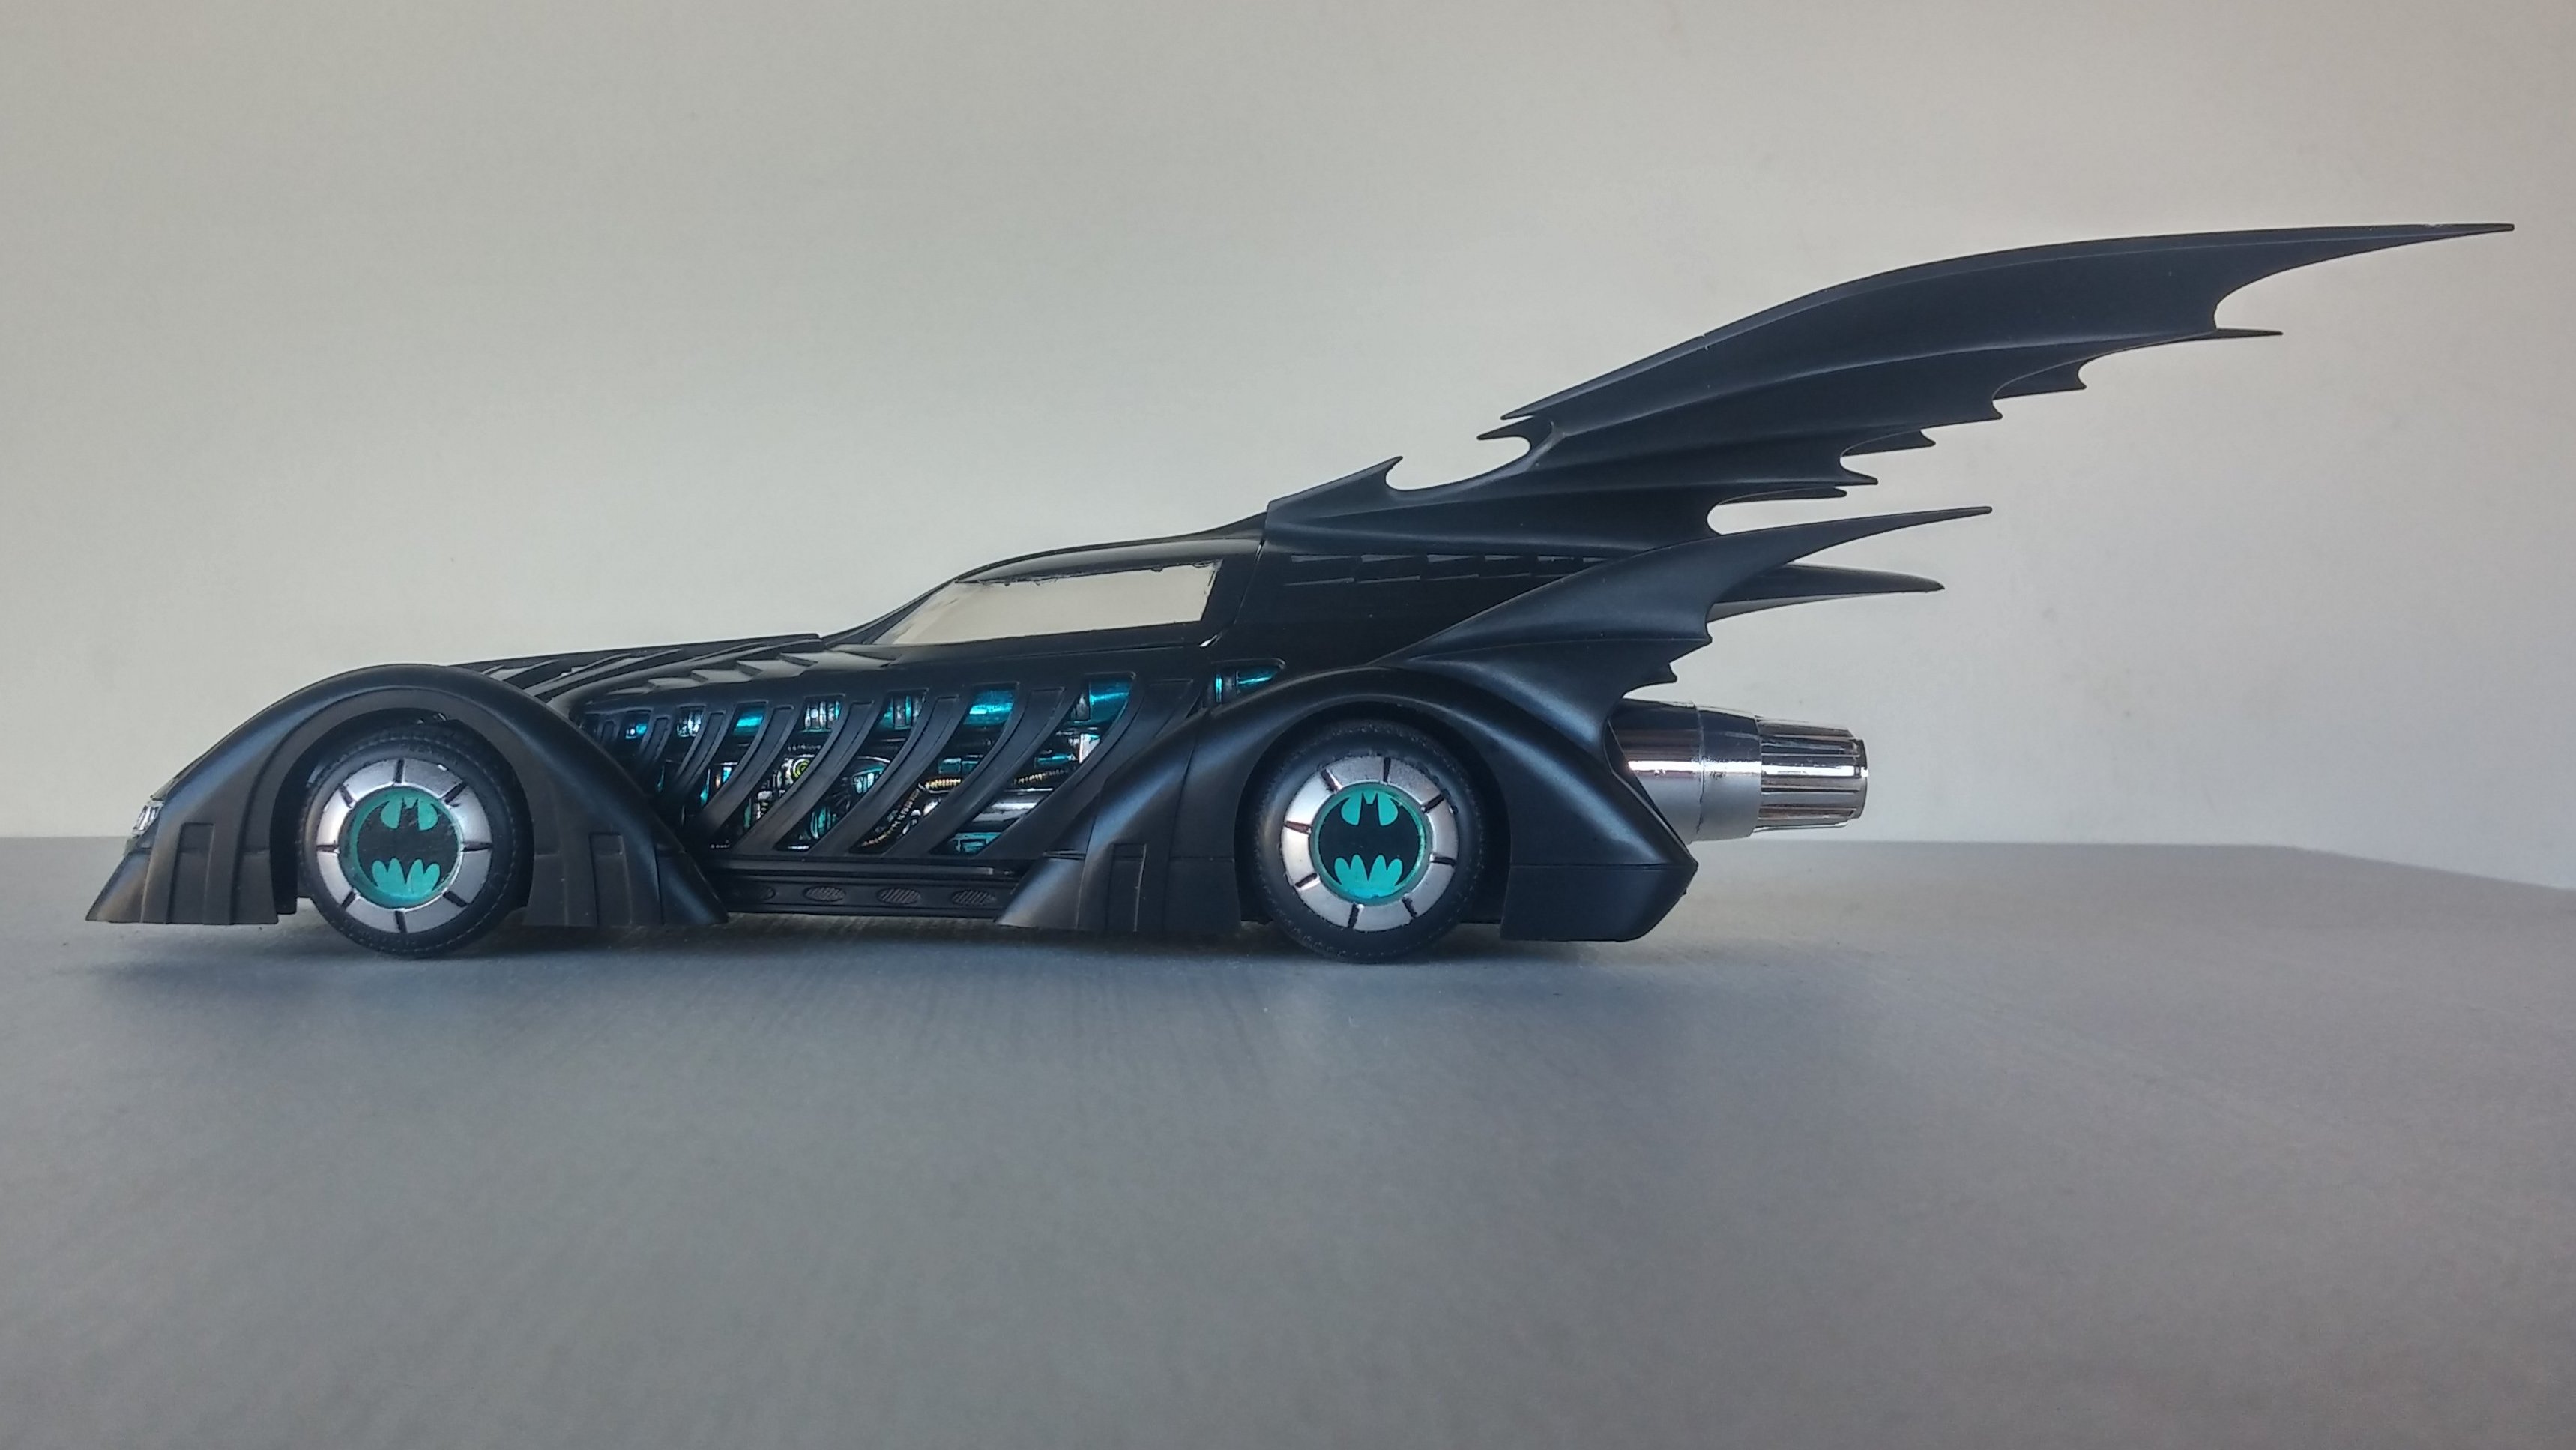
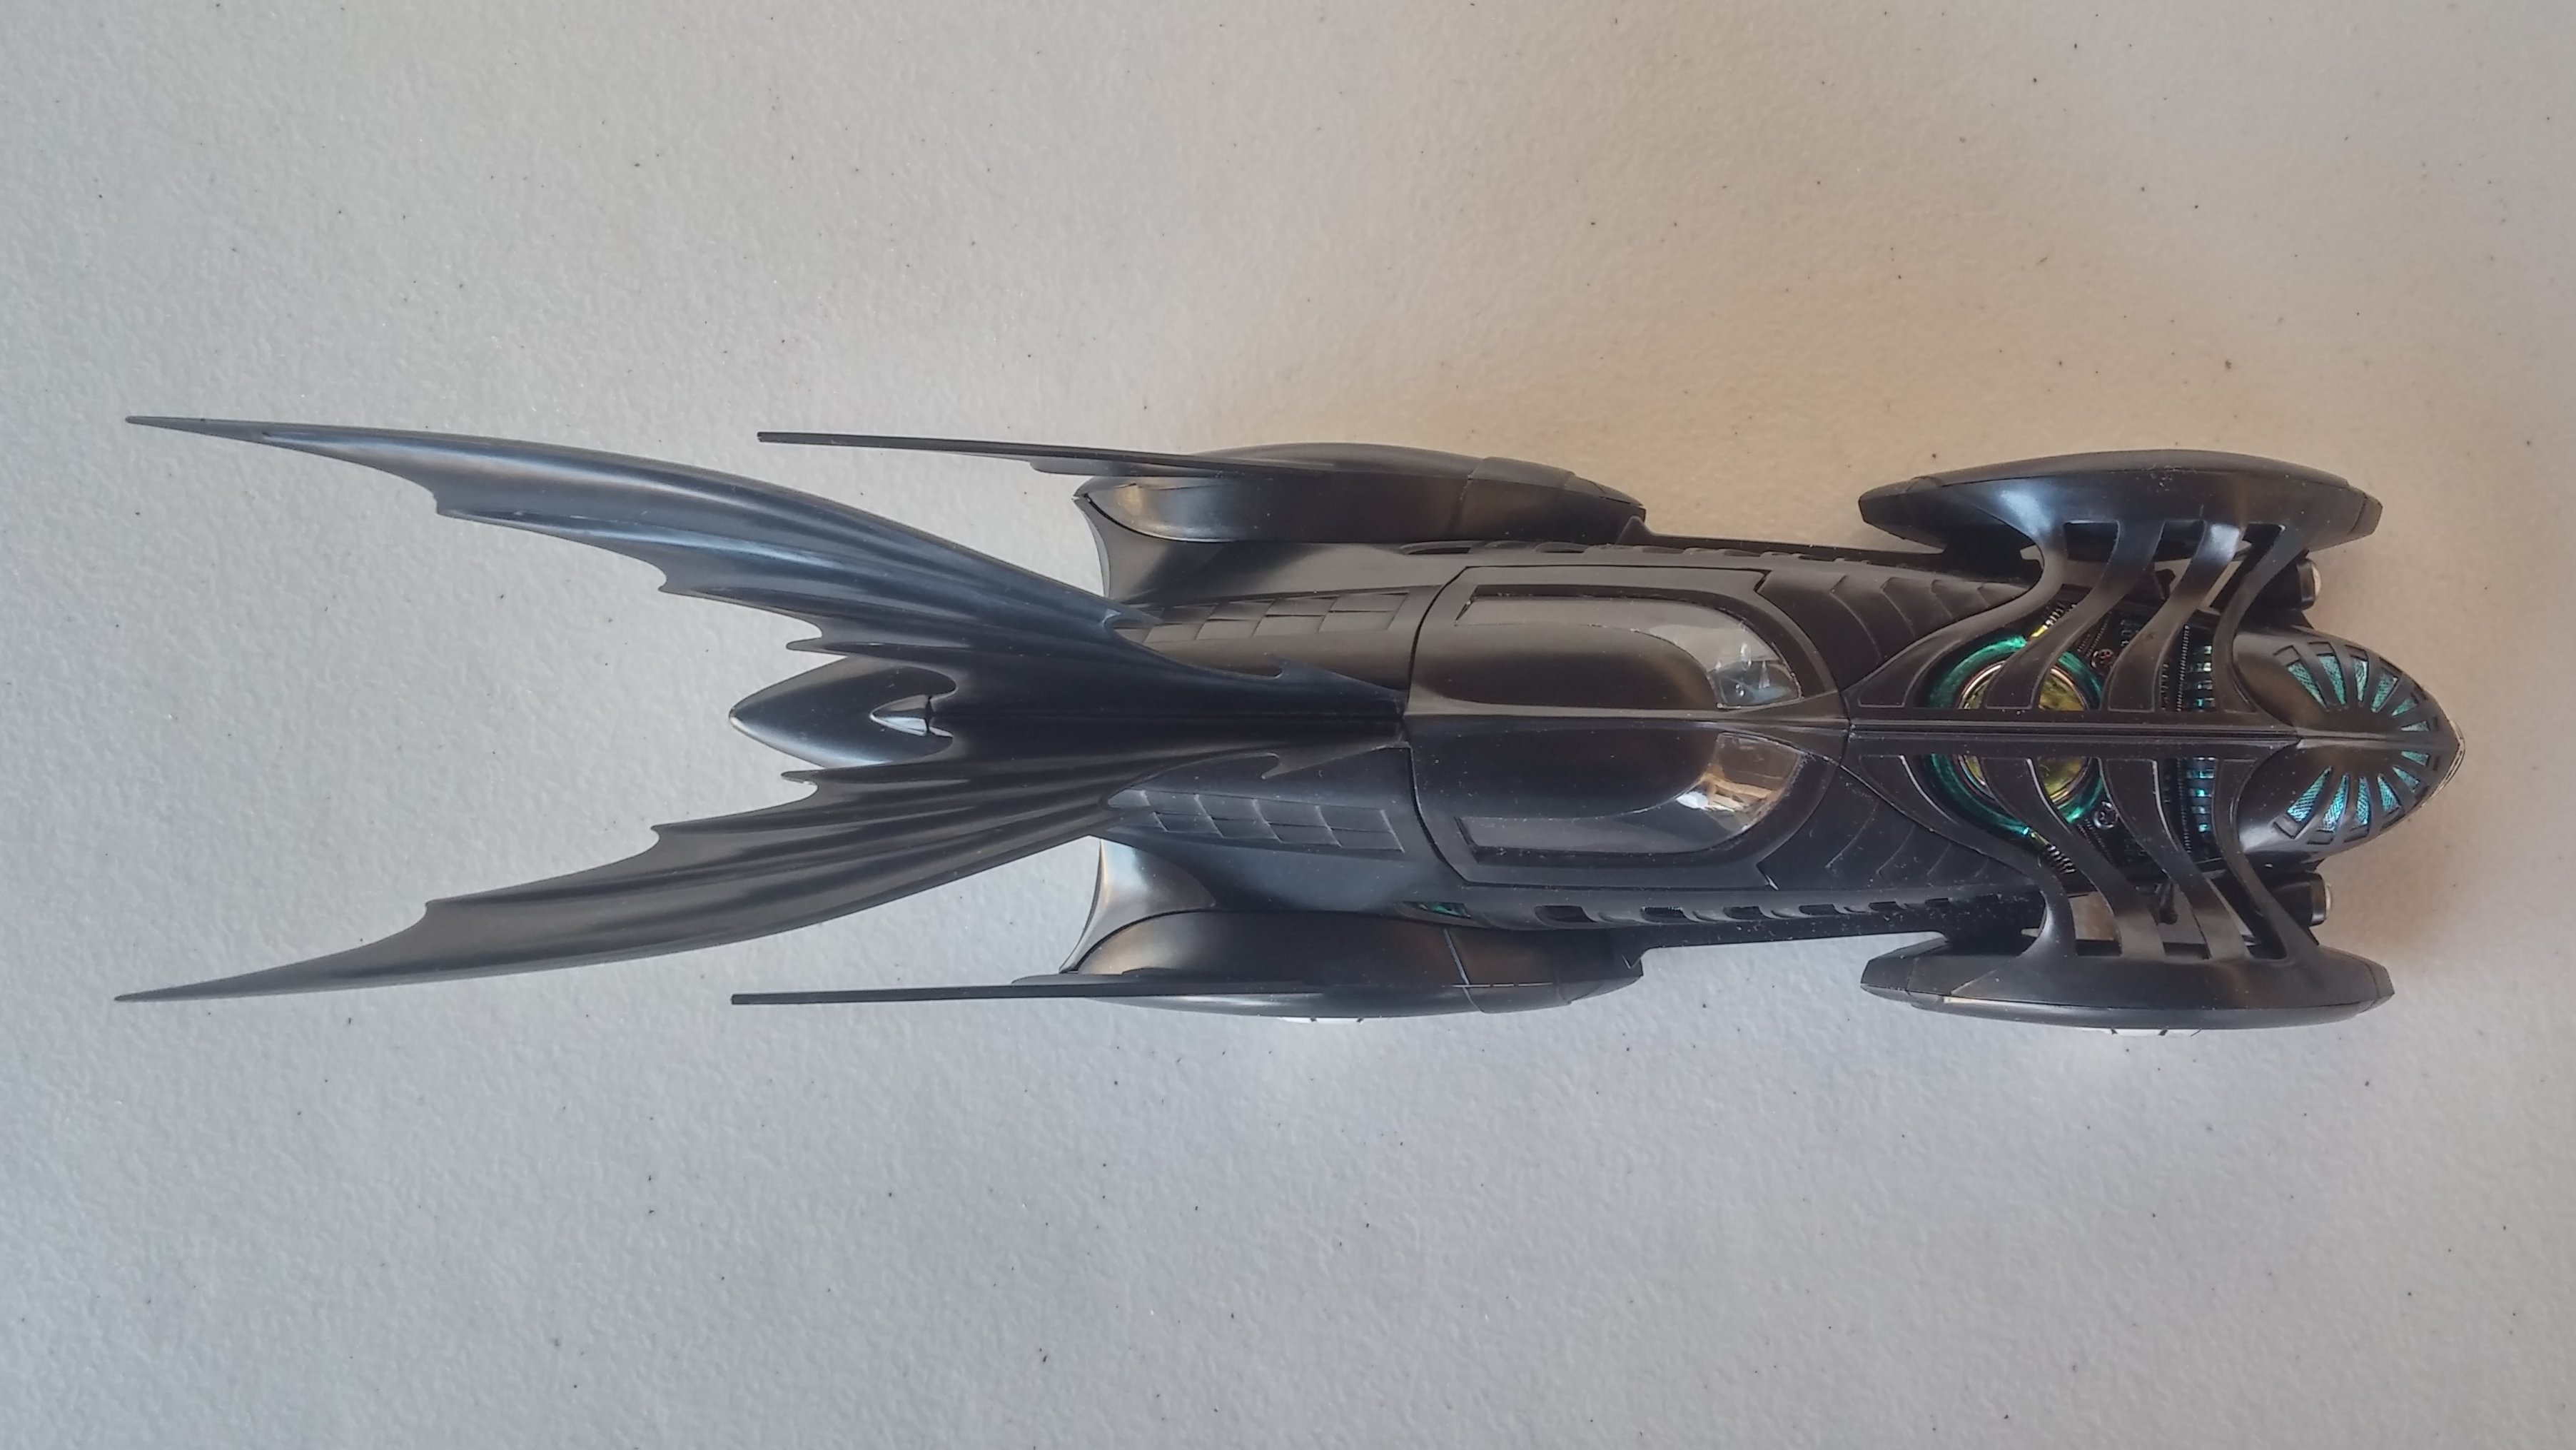
Well, here is my take on the my least favorite Batmobile. Don't get me wrong. It is a cool looking car, it just doesn't fit my idea of what a Batmobile should look like. It's also not an easy car to photograph. The view from the top is particularly striking. Thanks for taking the time to look and please feel free to share your thoughts. David G.
-
Thanks Bill, Doc and Rob for your kind comments. Mike thanks for the tip on the inks, I'll keep an eye out for those. I got it finished yesterday and took some photos, I just need to review and crop them for posting. Thanks to everyone for your comments and tips. David G.
-
Looking great Ray! I've always wanted to build a ship model of some sort. It seems that one like this would be a good starting point. Thanks for sharing your work with us. David G.
-
OK, in the home stretch on this one. Seeing it this way, I think it would make an interesting Formula 1 car. Nearly completed- Just need to add the fenders and some other bits. Gha, this thing is huge! Alright. Next time you see this one, it'll be in the Under Glass section. Thanks again for all the comments and encouragement. David G.
-
Best. Vega. Ever. David G.