David G.
-
Posts
11,324 -
Joined
-
Last visited
Content Type
Profiles
Forums
Events
Gallery
Everything posted by David G.
-
Those wagons are absolutely beautiful! I would like very much to know when they become available and how to order them. David G.
-
 Nicely Done! David G.
 -
Thanks Andre, I'm glad you like it. I don't know if this kit is still in production but it is still available. Thank you Scott. Thanks Rex. I was actually thinking that same thought. Thank you James, I am rather pleased with the way it turned out. David G.
-
Strangely, the directions call for painting and assembling the base as one of the last steps in building the kit. I decided to build my base earlier in the process so that I would have a place to lean the dang thing when I;m not working on it. The base is in the form of the uniform badge worn by the crew and will be painted in black and gold. Definite early 60's Art Deco style. Test fitting the base and stand. Though actually reversed in this particular instance, the Star Trek insignia is one of the most recognized images on the planet. A suitable resting place for a Starship. I'll have to see if I can touch up that gold bleed-under. As always, thanks for taking the time to look and please feel free to comment. David G.

-
Thanks you for the kind words and the link. I'll check it out but I think I'll be using the Potemkin set. David G.
-
I find that a magnesium supplement helps me. My neuropathy is not diabetes related so your results may be different, but it may be worth a try. David G.
-
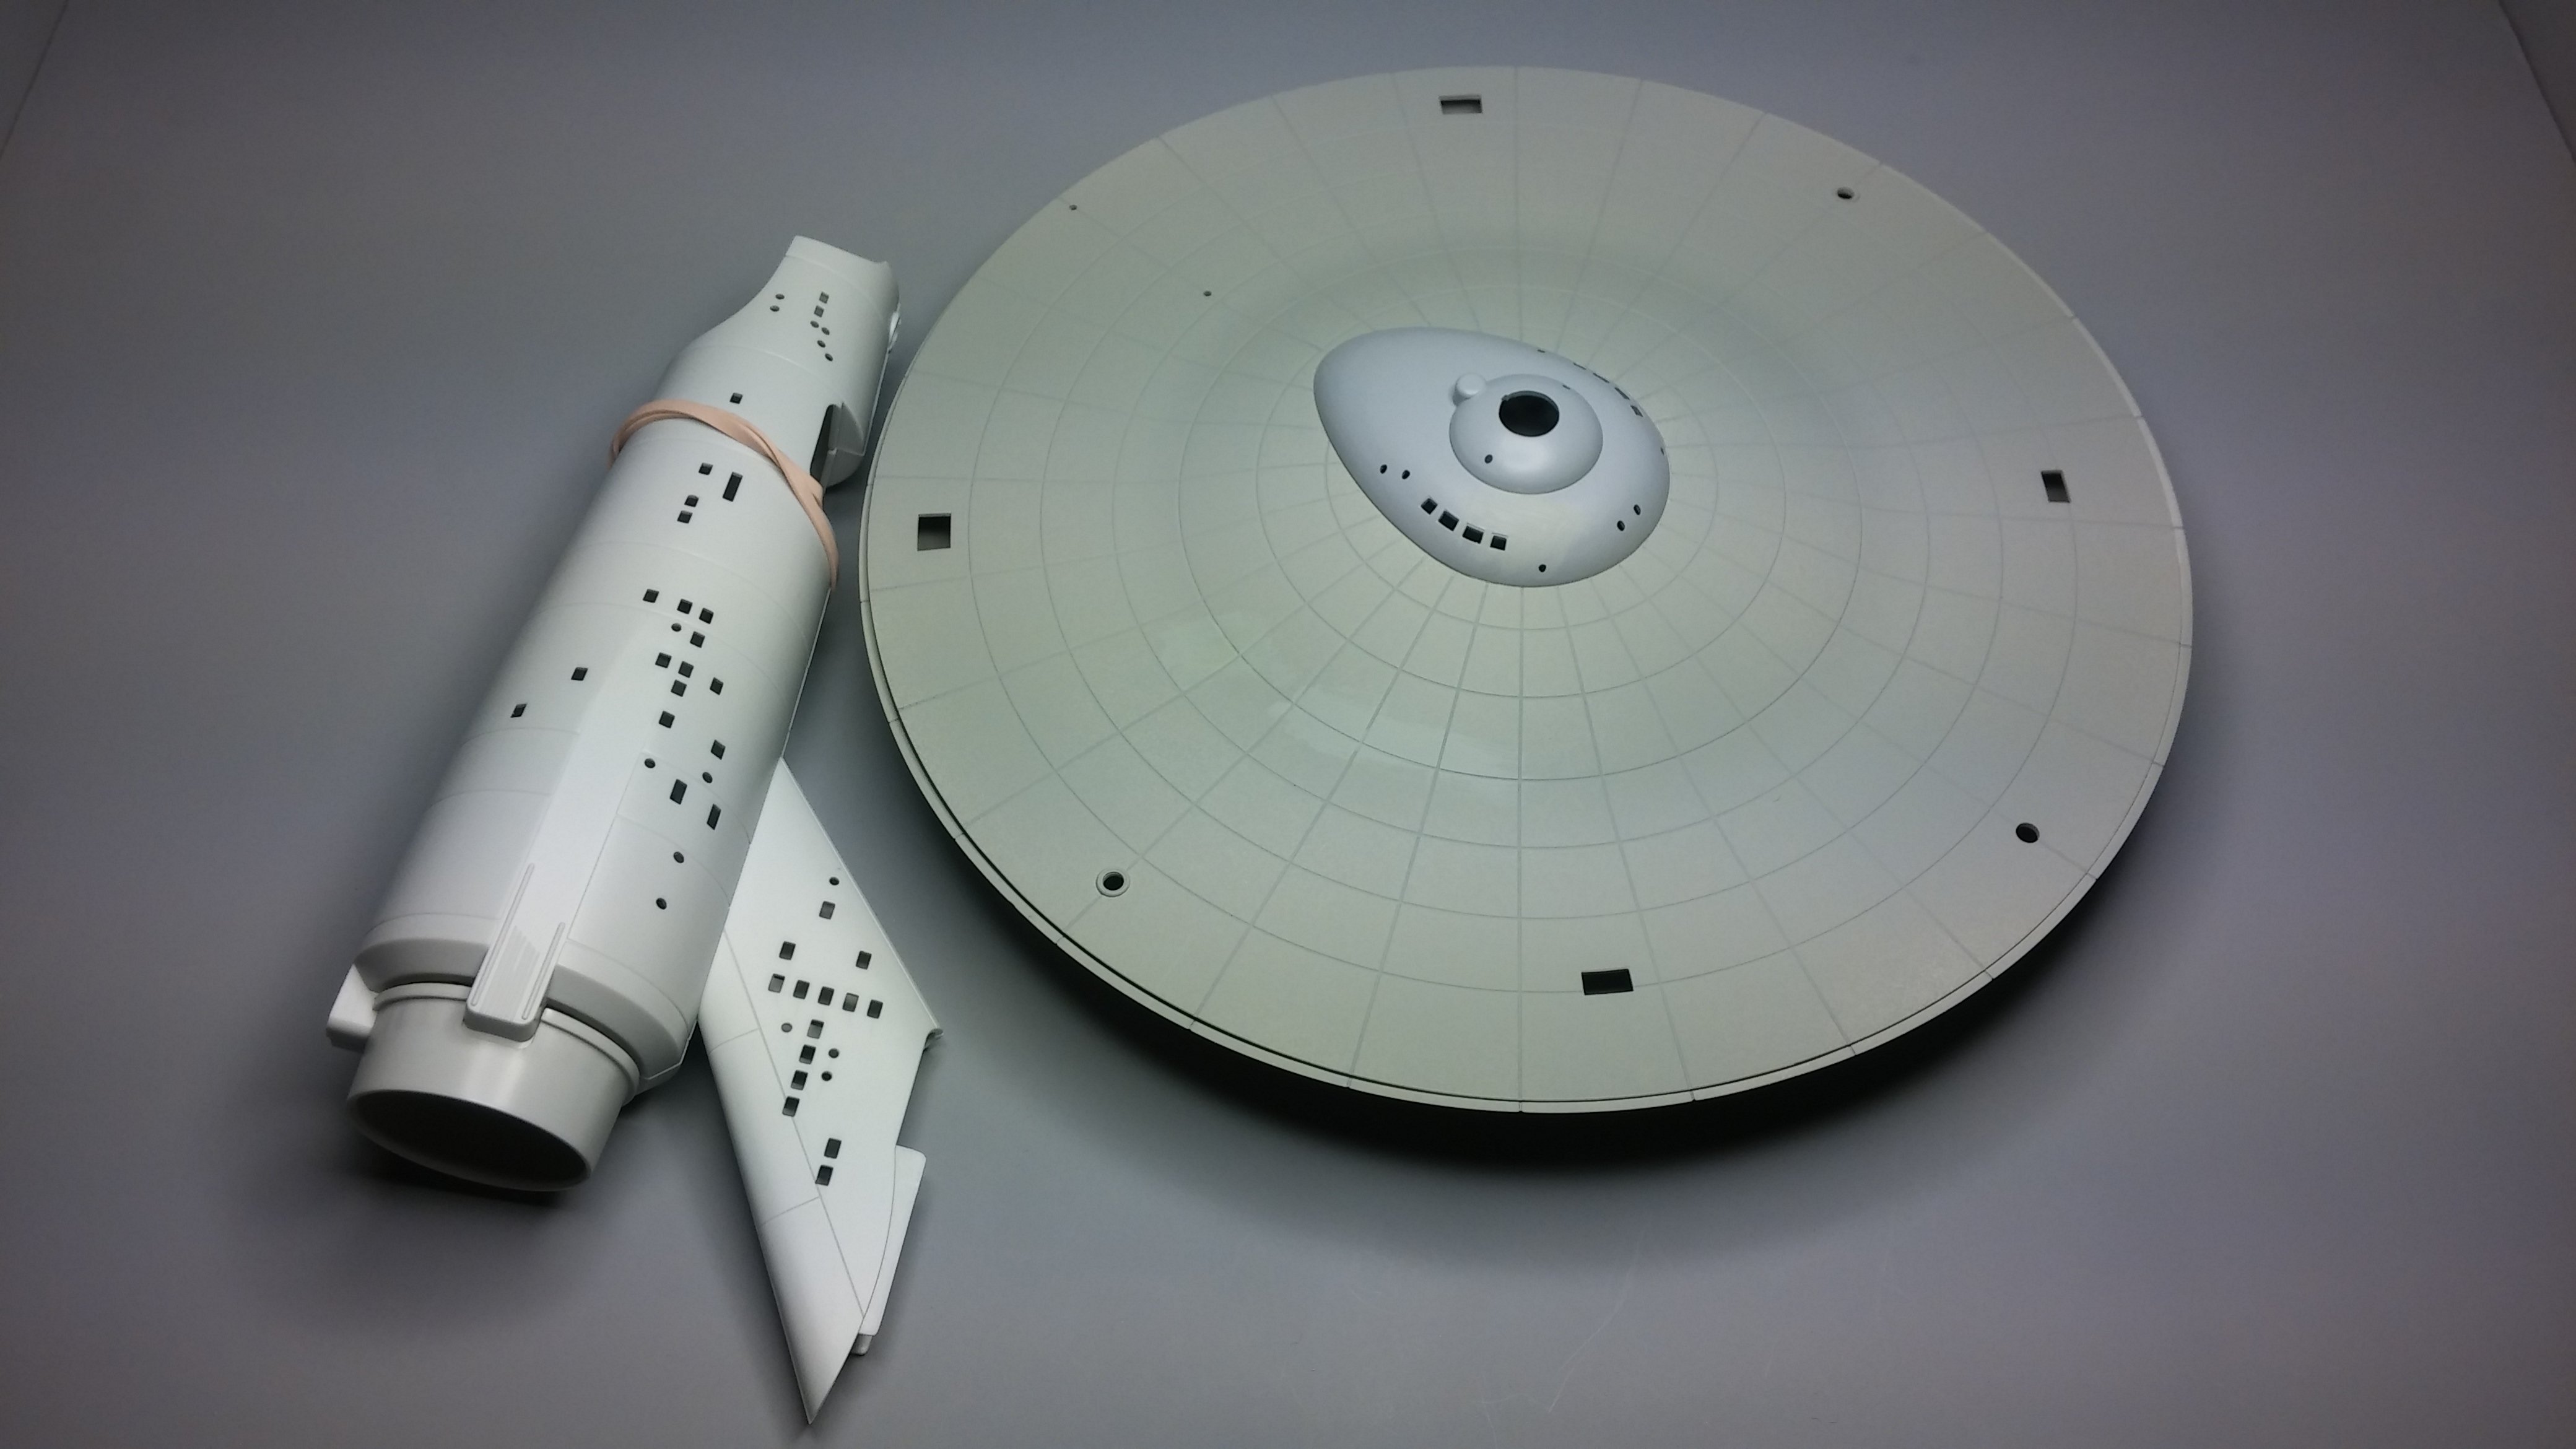
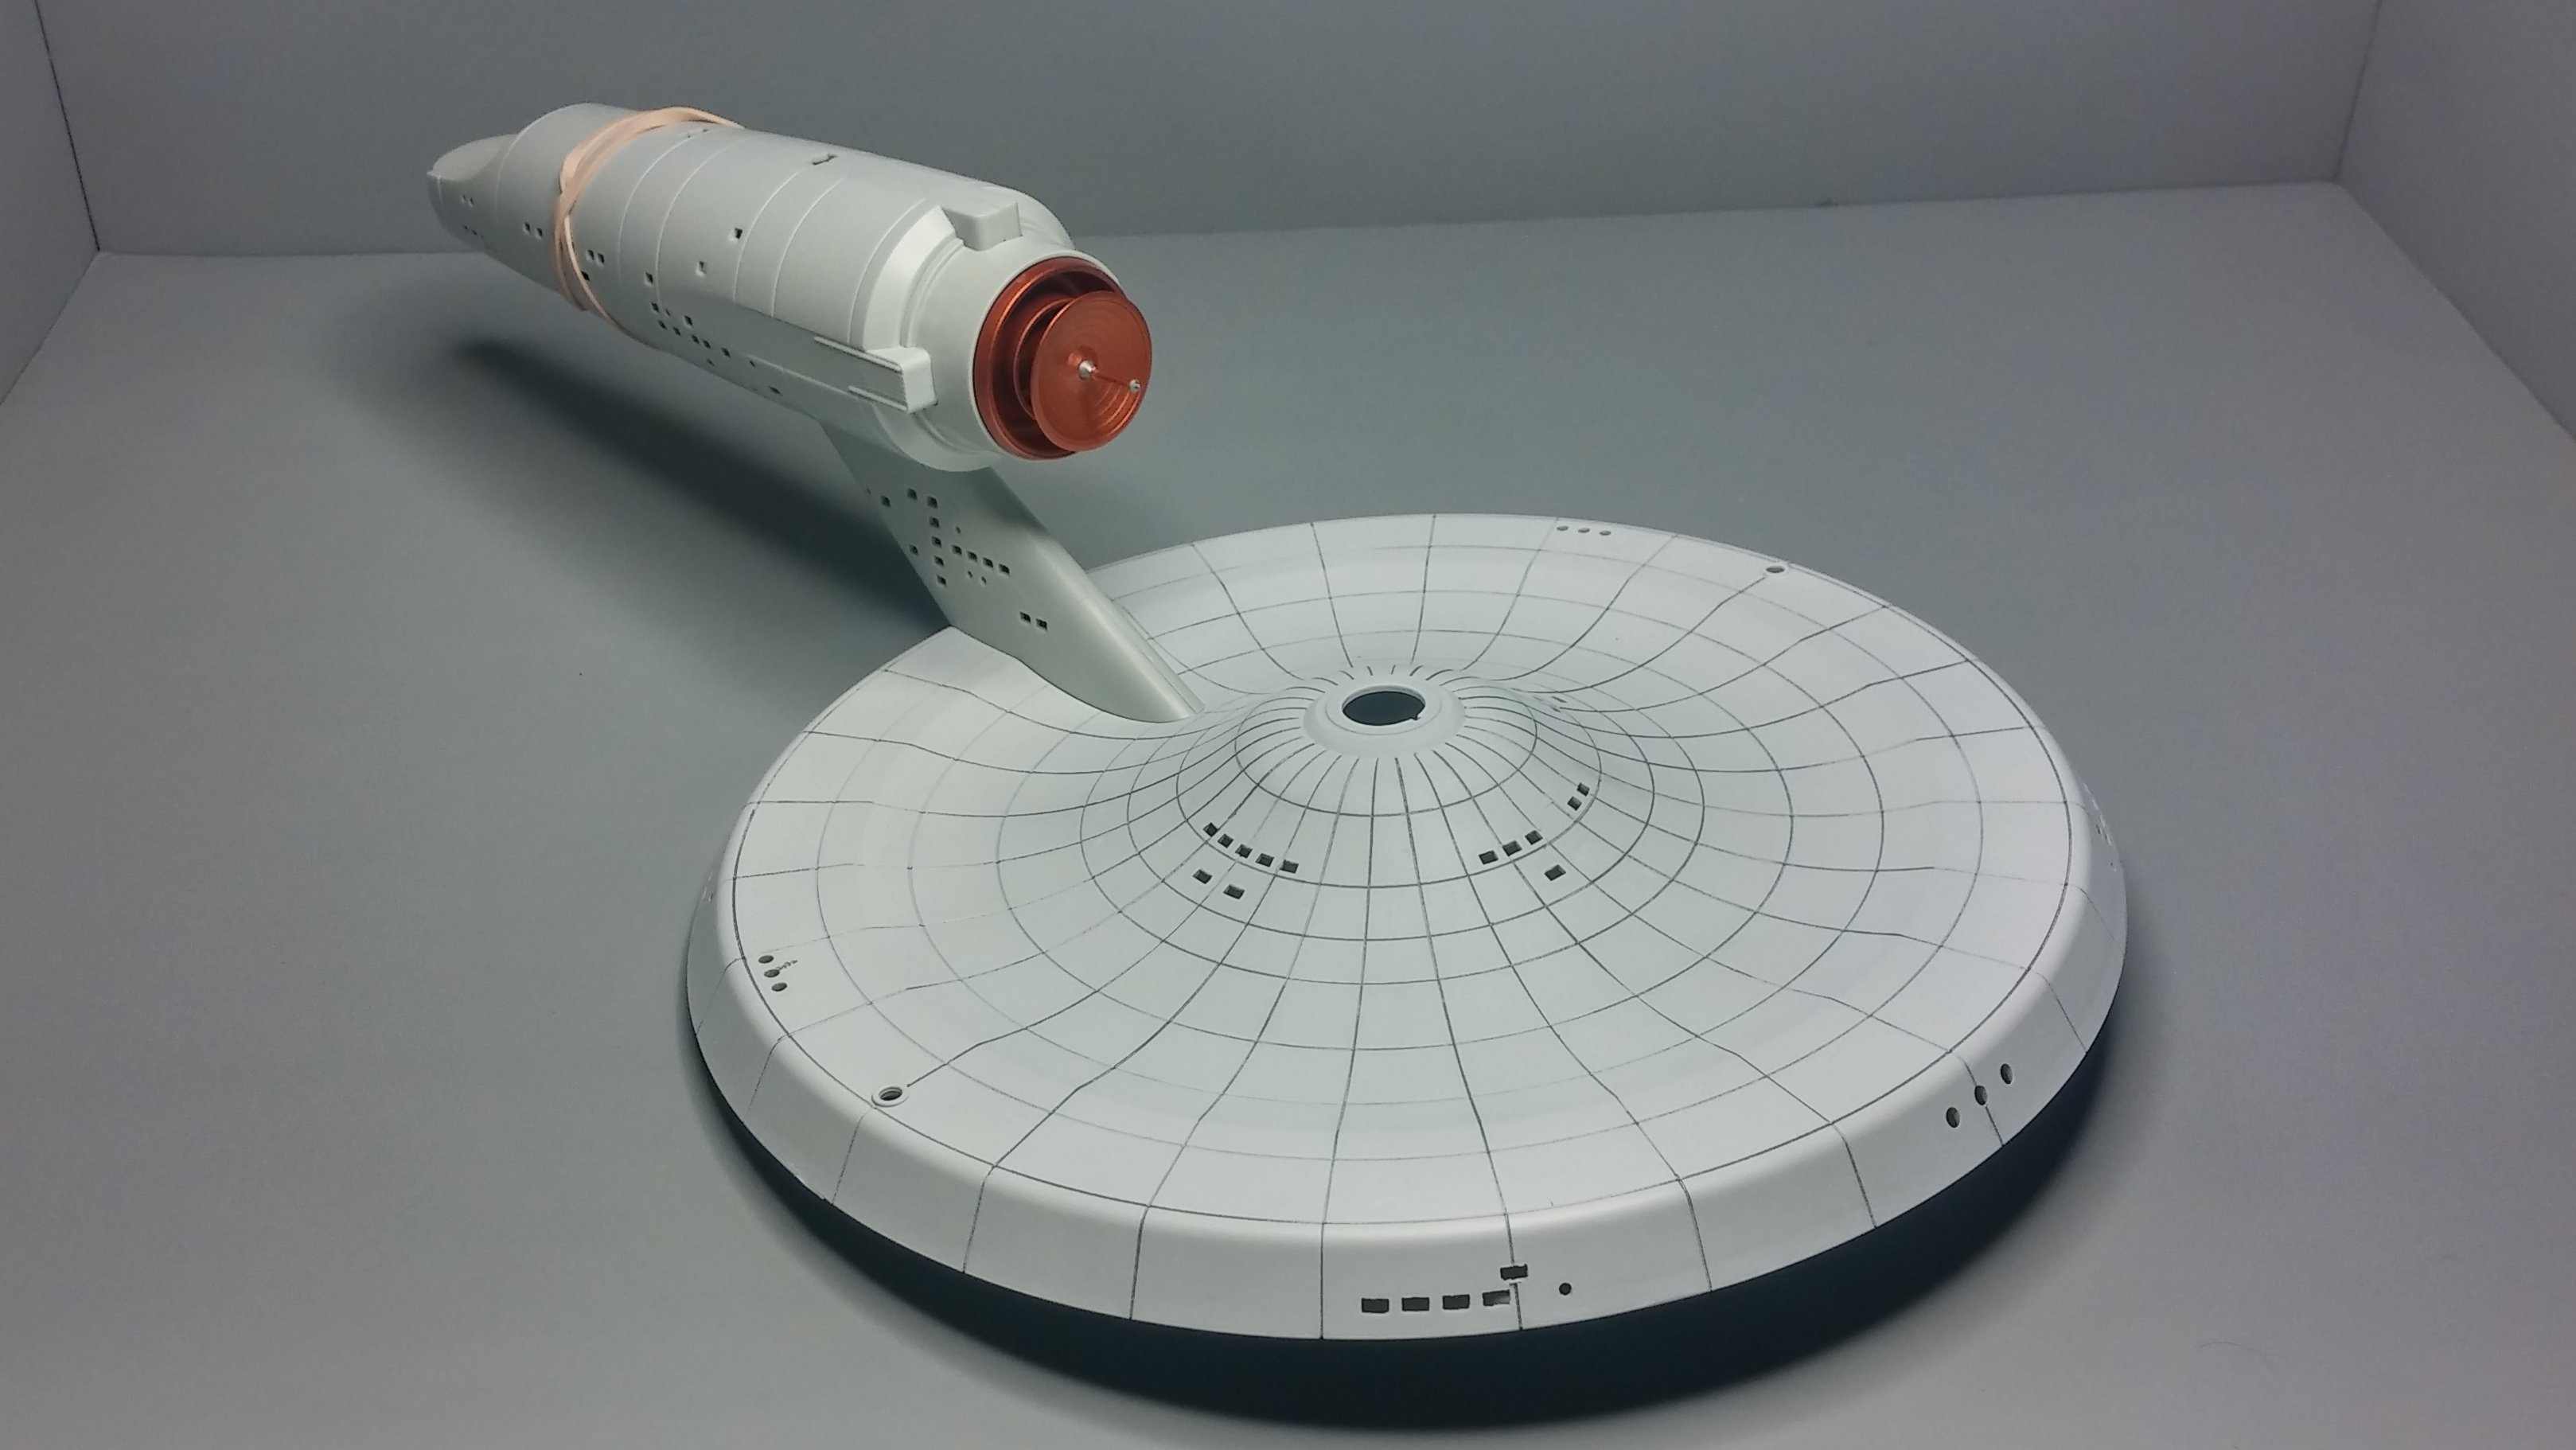
Hello everybody, here's another update. I got the prep mostly finished on the saucer section. Finished enough to shoot some primer any way. The dark lines are drawn with a mechanical pencil. Once the final color is applied the lines should show as slightly darker panel shadow lines. Hopefully. Test fitting the primary hull or saucer section with the secondary hull and scanner array. Oh yeah, I got that painted too. Though the Enterprise looked white on the old TV show, it was actually light grey. I followed directions I found online for mixing an appropriate color and this is the result. To my eye, it's a bit too dark- and a little green. On the saucer section, test dabs can be seen where I tried lightening the grey by adding more white. This obviously wasn't working. The bridge section is grey primer straight from the can. It's closer to the correct shade but still too dark. I should have just followed my instincts and mixed my own color starting with white and adding black until I hit the right proportions. The model kit is molded in plastic that seems very close to the desired color, but to leave the plastic unpainted and still achieve the desired look is sometimes more of a challenge than mixing a good color and painting it. Thanks for looking, comments and suggestions are always welcome. David G.
-
Thank you James. David G.
-
MPC WW2 JEEP
David G. replied to dshue76's topic in Model Trucks: Pickups, Vans, SUVs, Light Commercial
Nicely done! Spot on for the paint mix. I built one of these last month, it's a tidy little kit. A fun build. David G. -
Thanks Peter, I'm glad you like it. Thank you Jim. I wish that there were a few more options but I think I can be happy with Potemkin. David G.
-
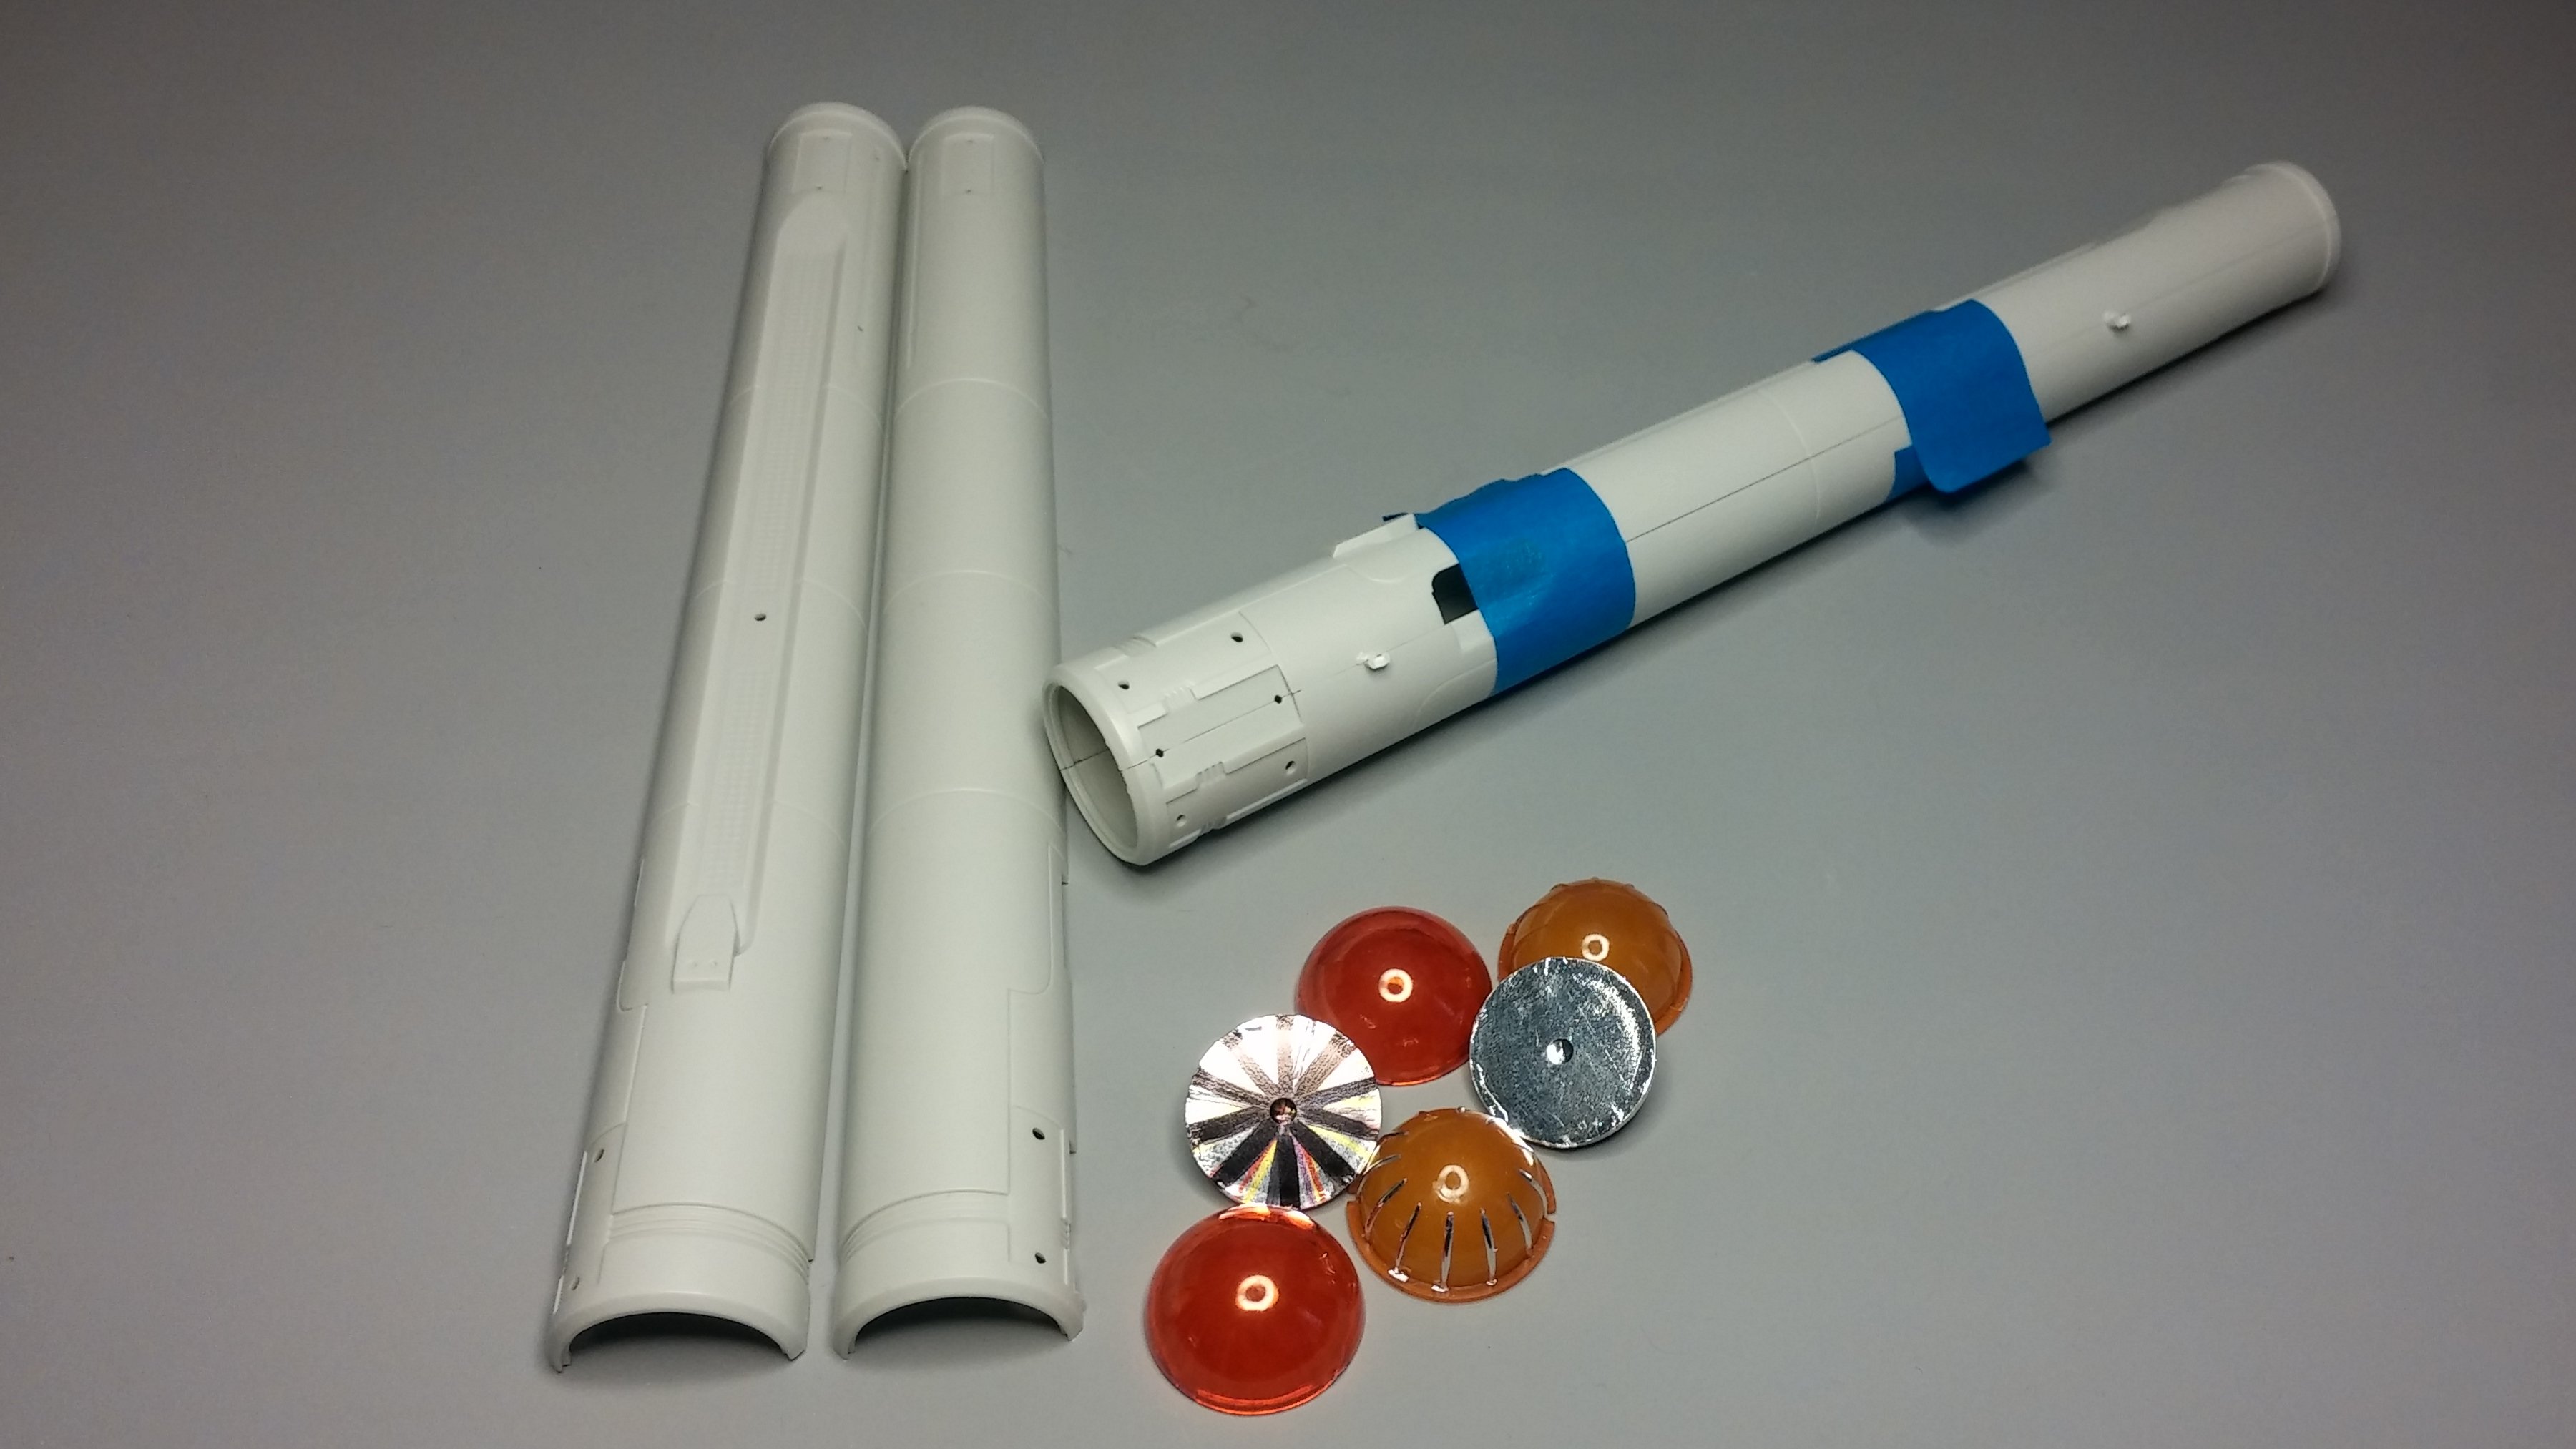
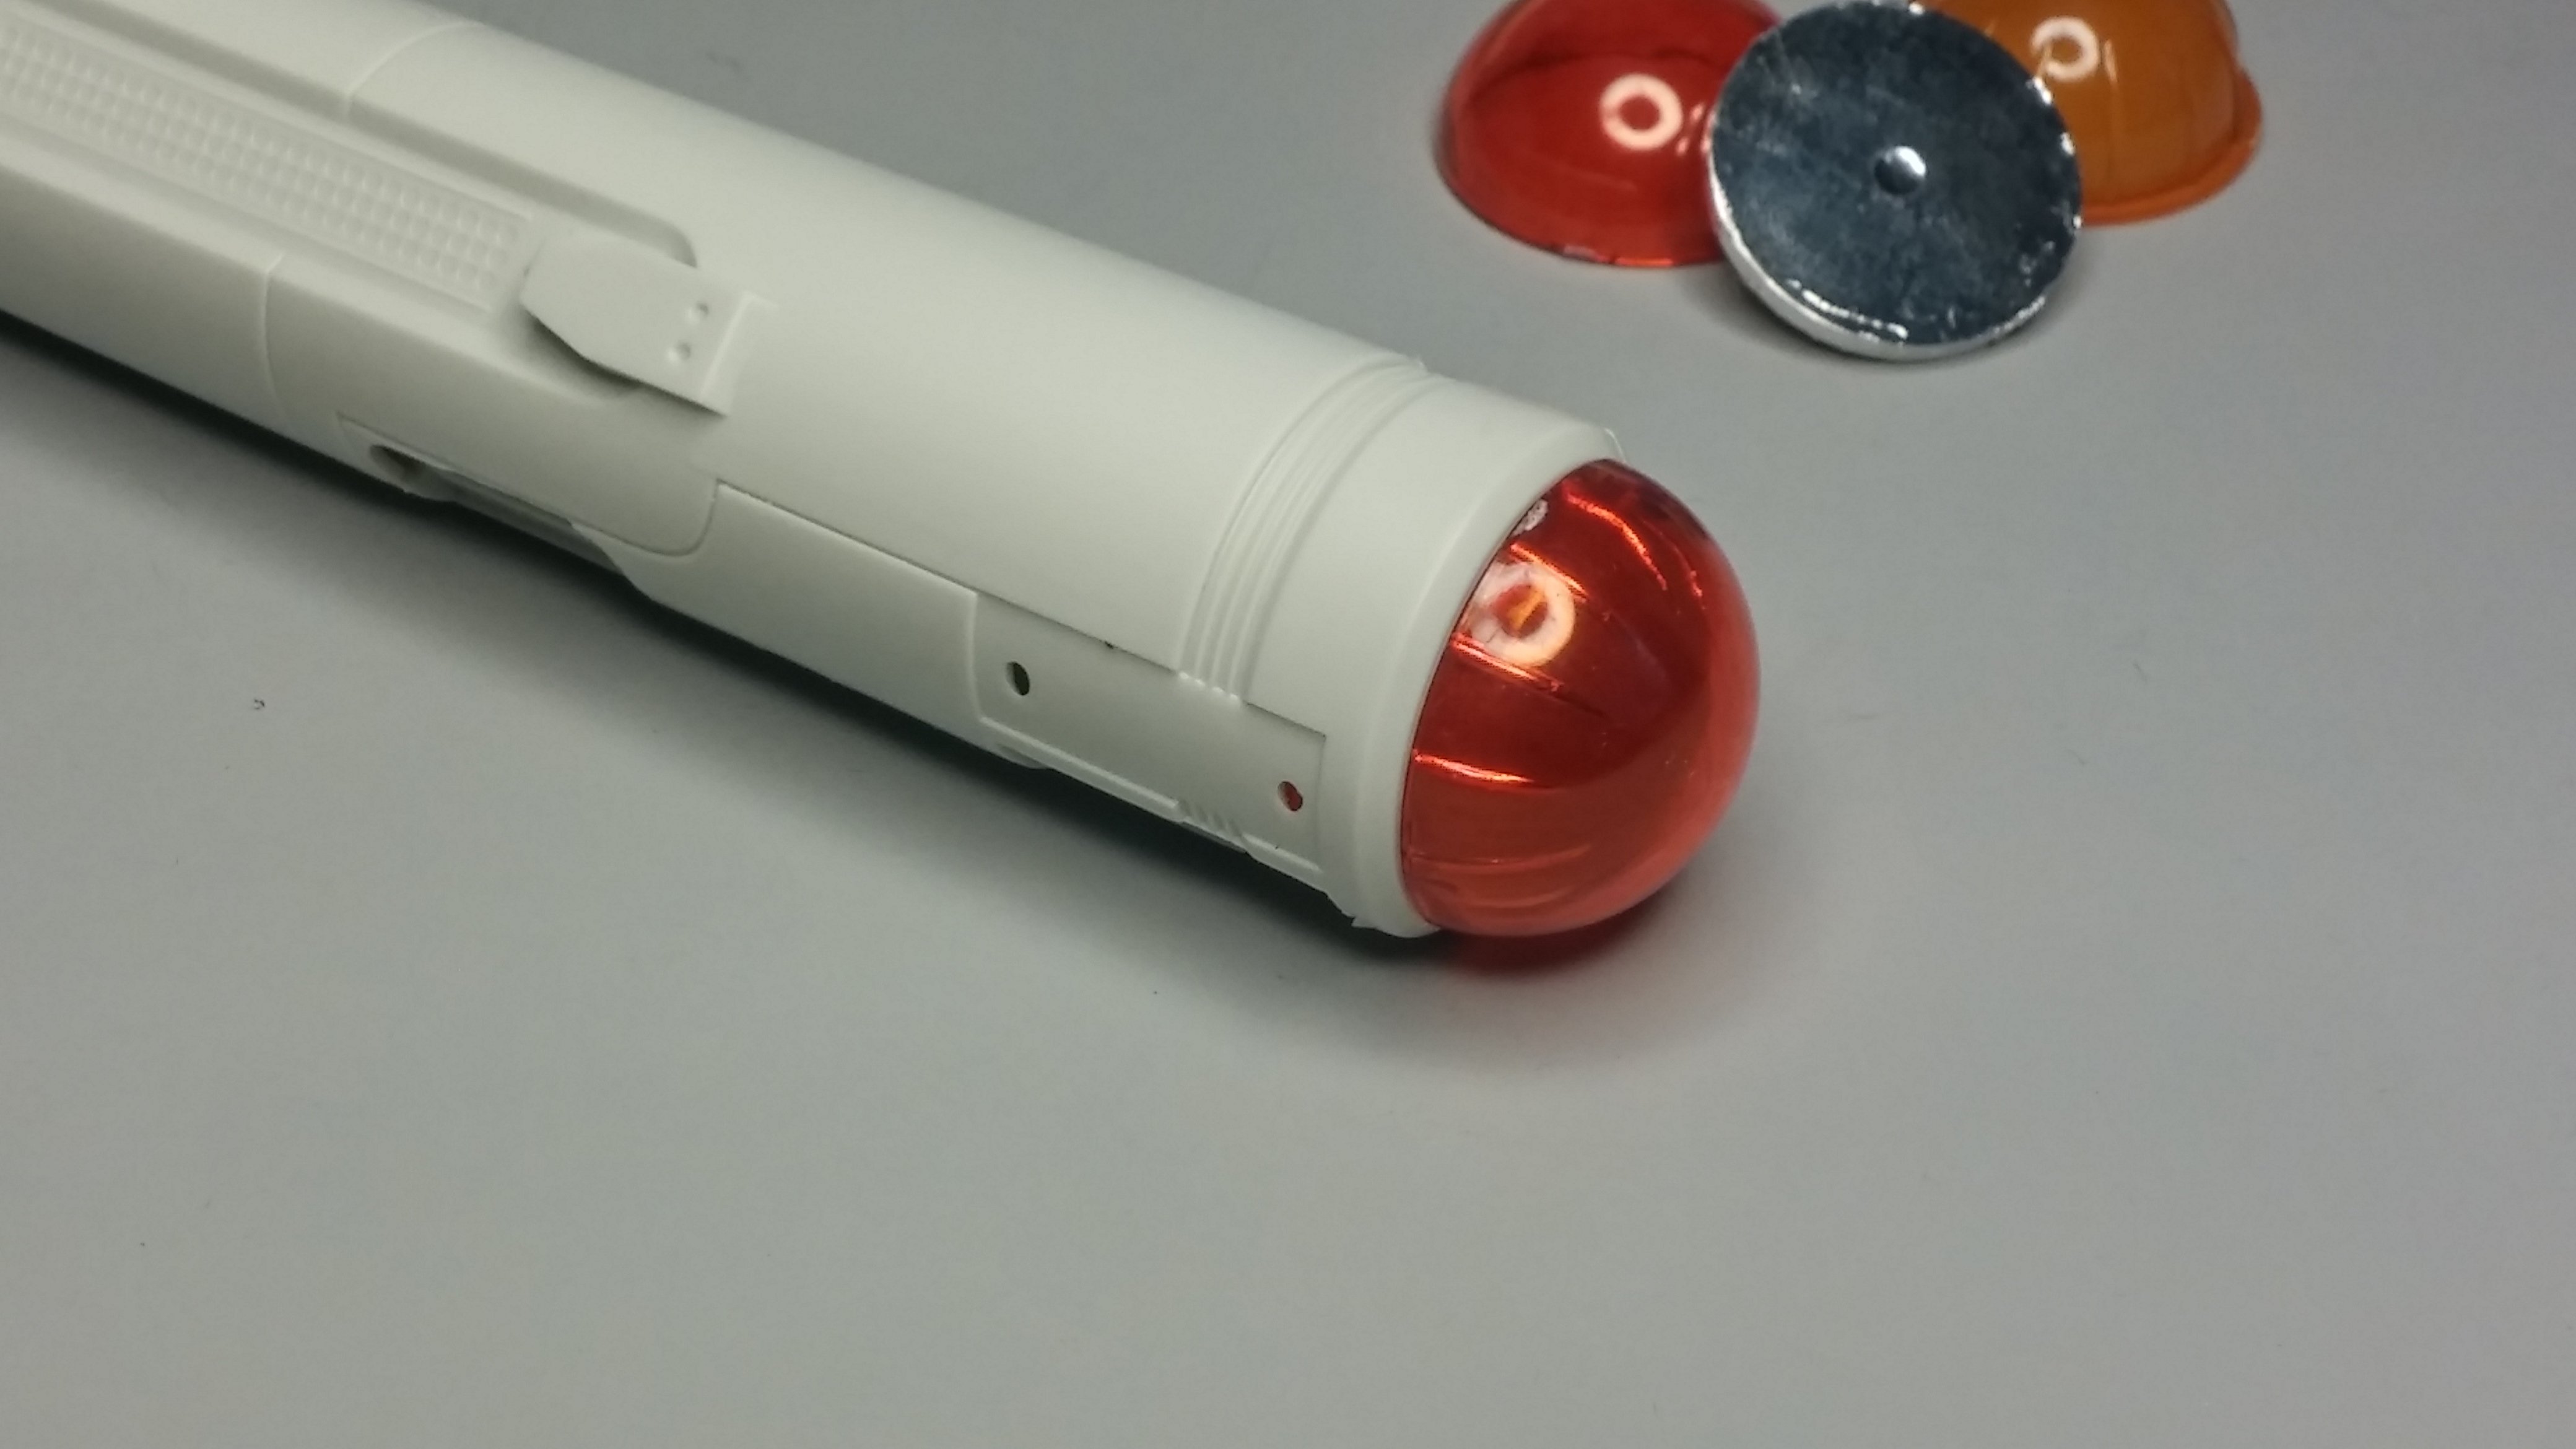
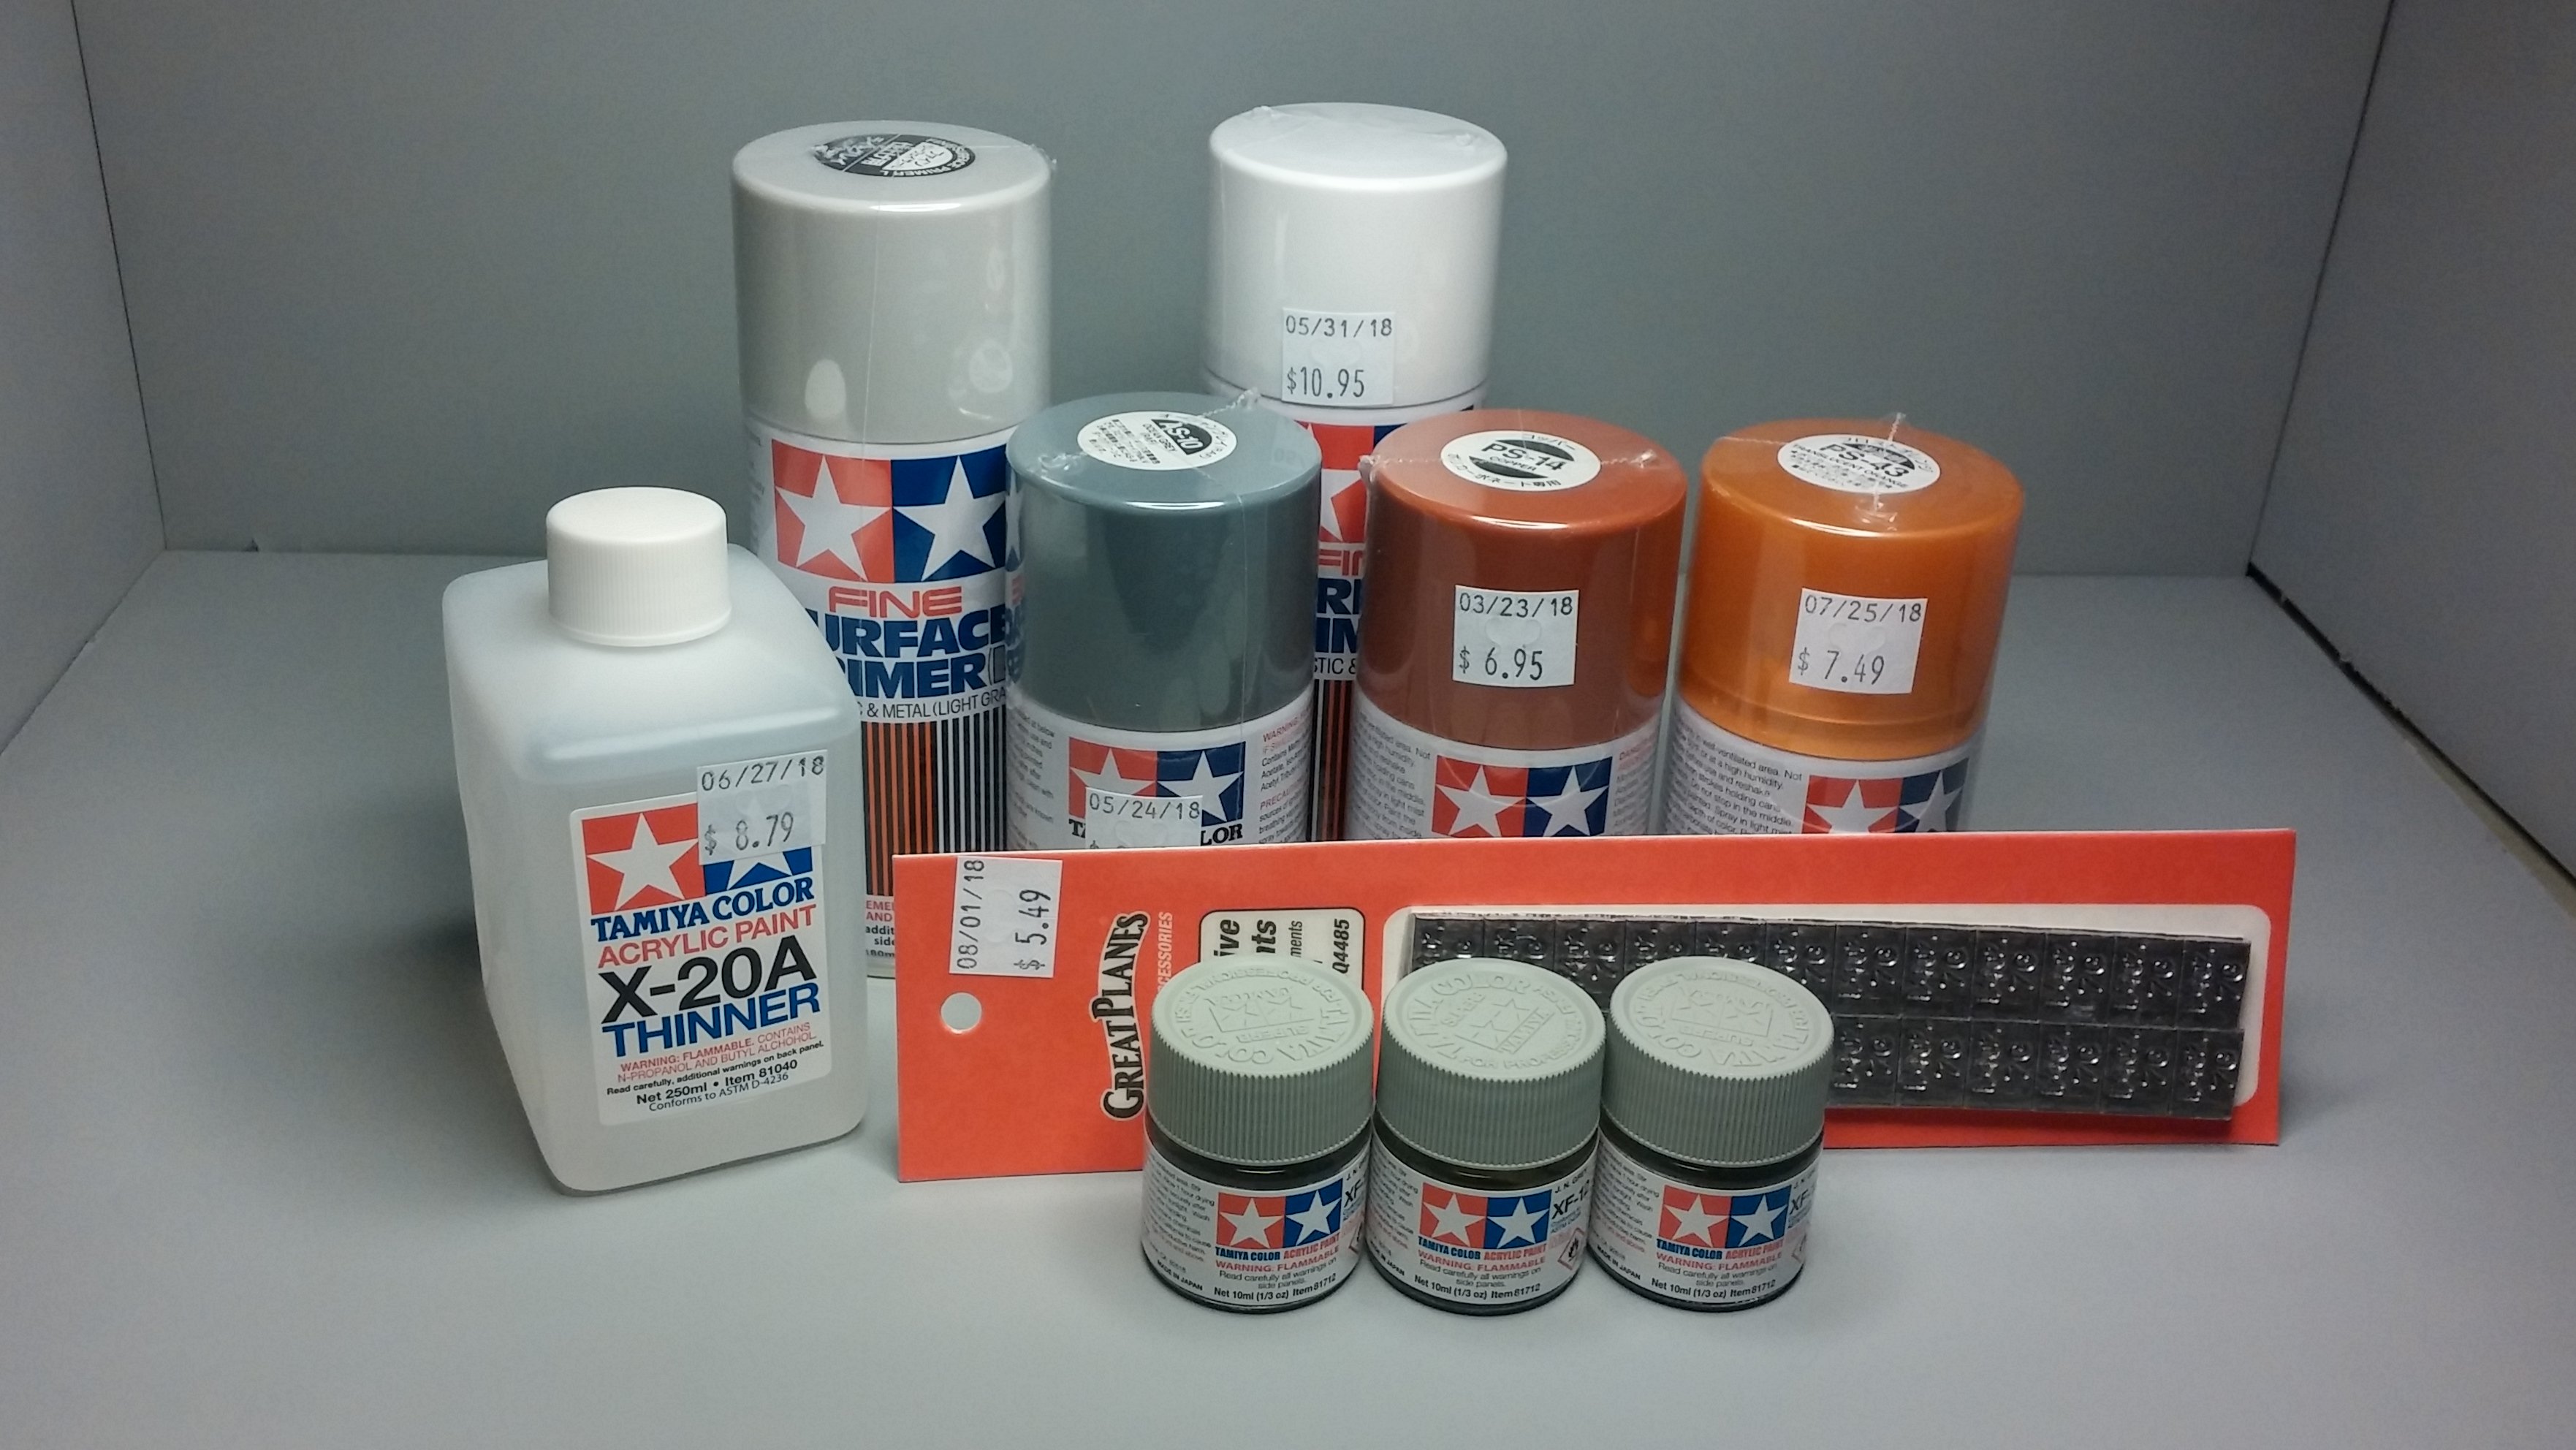
I received this as a birthday gift from my son. I have three name options, I'm leaning toward Potemkin but I'm open to suggestions. This is a big model. Here's the Jeep I built recently as a size reference. When people buy a model kit version of the truck that their dad owned in 1980 and ask me, "Can you build this for me to give to my dad for his birthday?" I kind of chuckle. Because if you just want me to glue it together, then no problem. If you want me to actually *build* it then you're looking at as much as $100.00 in paint and supplies and about 40 hours of my time. Here's about $75.00 in paint and supplies for the Starship. Working on the Bussard Collectors and housings for the Warp Nacelles. The clear bits are colored with translucent orange paint and a red Sharpie. The discs behind the collectors are covered with Bare Metal Foil as are the ridges on the orange collector. I added the radial lines with Sharpies to the disc to help simulate the "propeller" effect as seen in the TV show. It should look pretty good when complete. The internal radial lined propeller effect shows better in person... but only slightly. As always, thanks for taking the time to look and please feel free to comment. David G.
-
Excellent retro custom work! David G.
-
I remember seeing one of these kits as a child but couldn't afford to buy it. I've always wanted to build one, thank you for sharing yours with us. Excellent work! David G.
-
Aside from style and substance, I miss the rich smell of unburnt hydrocarbons and well-burnt rubber. And this... David G.
-
Good color choice- love the grille detail. David G.
-
WW II-ish Jeep by MPC
David G. replied to David G.'s topic in Model Trucks: Pickups, Vans, SUVs, Light Commercial
Thanks Hector, I'm glad you like it. David G. -
Great work on the rescue, excellent color choice. David G.
-
37 Chevrolet Road Tractor
David G. replied to DRIPTROIT 71's topic in Model Trucks: Big Rigs and Heavy Equipment
Nicely done, great patina! David G. -
Most Impressive! David G.
-
Revell Auto Transporter
David G. replied to landman's topic in Model Trucks: Big Rigs and Heavy Equipment
Looks great loaded or empty, excellent work on the tractor too! David G. -
I remember this dragster form my childhood. I may have even had a model kit like this one. Nicely Done! David G.
-
WW II-ish Jeep by MPC
David G. replied to David G.'s topic in Model Trucks: Pickups, Vans, SUVs, Light Commercial
Thank you Carl. David G. -
WW II-ish Jeep by MPC
David G. replied to David G.'s topic in Model Trucks: Pickups, Vans, SUVs, Light Commercial
Thanks Mike, I do have a second kit so that is certainly an option worth considering. Thank you Chris. David G. -
WW II-ish Jeep by MPC
David G. replied to David G.'s topic in Model Trucks: Pickups, Vans, SUVs, Light Commercial
The rope is actually a bit that I unraveled from some old clothes line and dyes with thinned acrylic paint. David G. -
Very well done! David G.