David G.
-
Posts
11,324 -
Joined
-
Last visited
Content Type
Profiles
Forums
Events
Gallery
Everything posted by David G.
-

´78 AMC Pacer with a lot of ´06 Camaro DNA
David G. replied to Koellefornia Kid's topic in Model Cars
Nicely Done! David G. -
2012 POST APOCALYPSE/ZOMBIE HUNTER COMMUNITY BUILD
David G. replied to Dr. Cranky's topic in Community Builds
Very Cool! David G. -
Looks Great! Flesh tones are difficult to do well and you nailed it! David G.
-
Nicely Done! David G.
-
No worries Lee, I completely understood what you meant. David G.
-
Thanks Bill, glad to know that you're still with me on this (so far) 5 week mission. Thank you for the compliment Lee. I struggled with the thought of addressing or correcting those points and a few others as well. But I had to ask myself what I was actually building. Was I building a replica of the model built for filming the television show? If so, which version? Or was I building a representation of a fictional starship from a 50 year old television show? I chose the latter. If I ever did decide to buy and build a model of the Enterprise, this one would probably not be my first choice. But as I mentioned earlier in the post, this is a gift from my son and I'm glad that he was thoughtful enough to select a subject that I would actually enjoy working on. My plan is to give it to him on his birthday in December. Again, thanks for the compliment and thanks for taking the time to share it. David G.
-
Sanding, filling, sanding and repainting- here they are. Not perfect, but I can live with the results. "Kep-tin. we hev waarp power!" As always, thanks for taking the time to look. David G.

-
Each one is beautifully done! David G.
-
Beautiful! David G.
-
I can almost smell the burnt rubber and un-burnt hydrocarbons! Nicely Done! David G.
-
The amount and level of detail are mind-blowing. Thanks for sharing the process with us. David G.
-
Looks Great! David G.
-
Thank you Scott. I hope to get some more photos posted soon. Thanks Jim, me too. David G.
-
Moebius 1970 4x4
David G. replied to gui_tarzan's topic in Model Trucks: Pickups, Vans, SUVs, Light Commercial
Nicely done, great color choice! David G. -
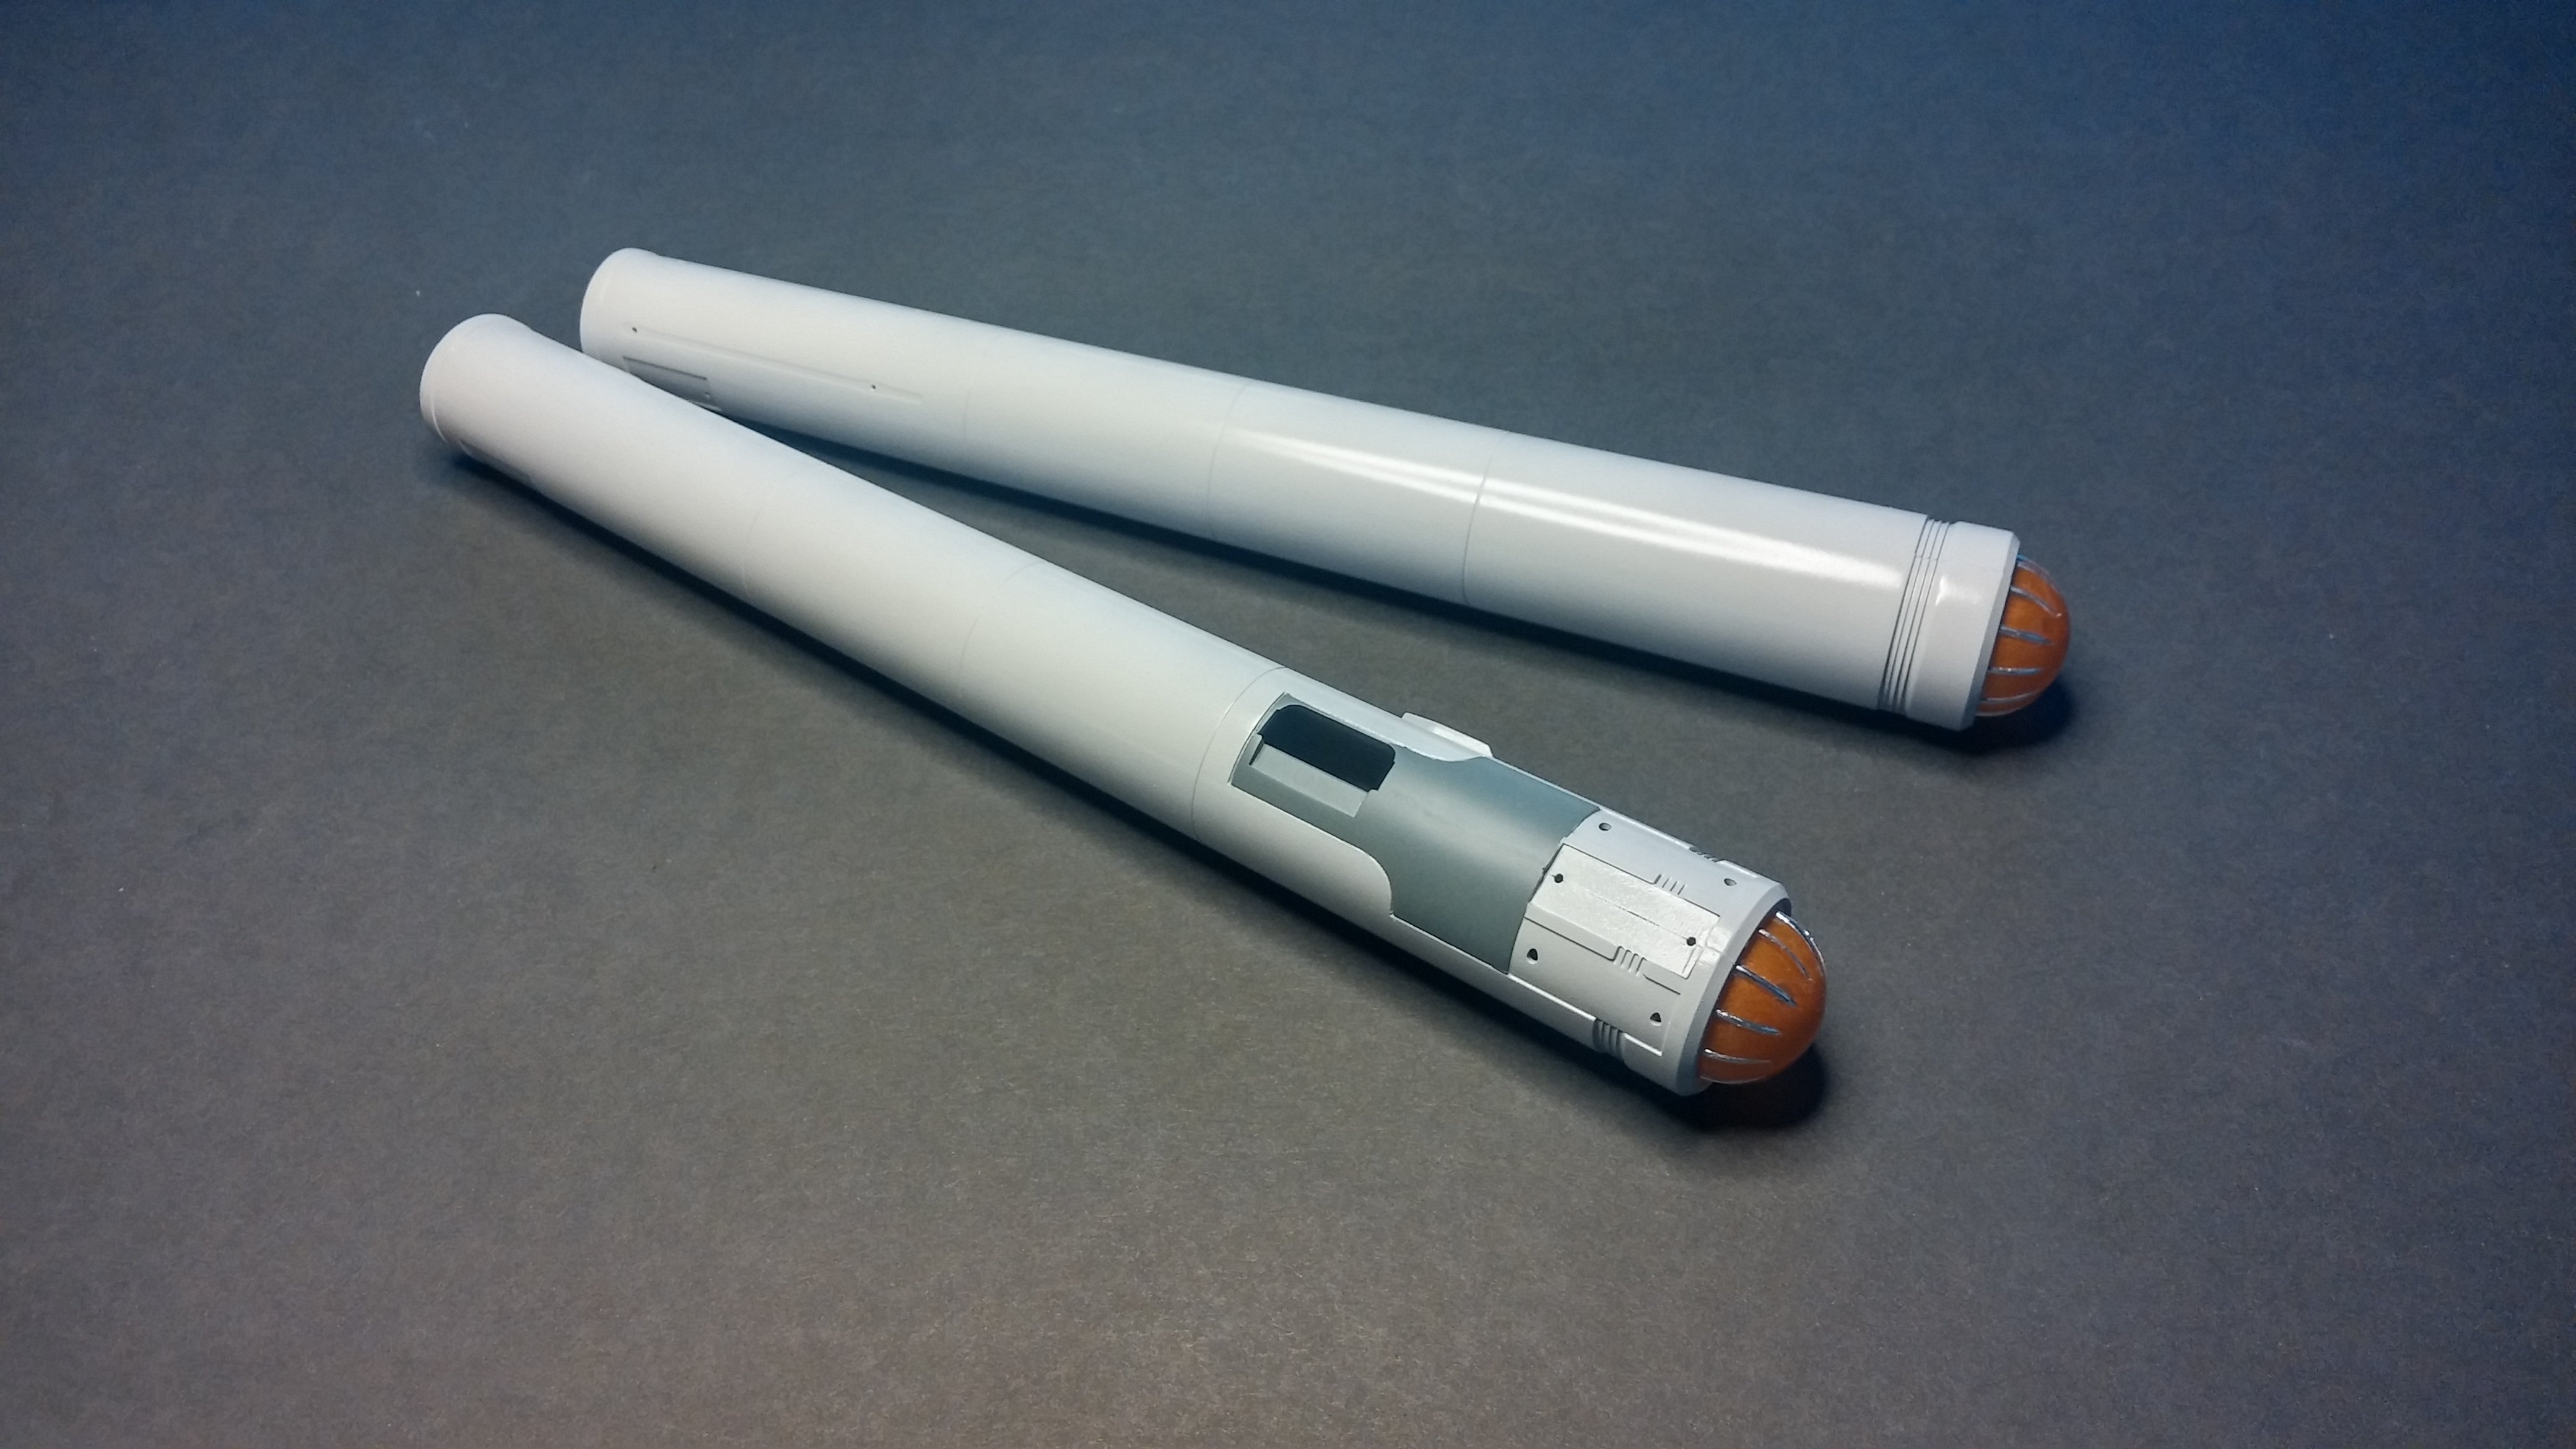
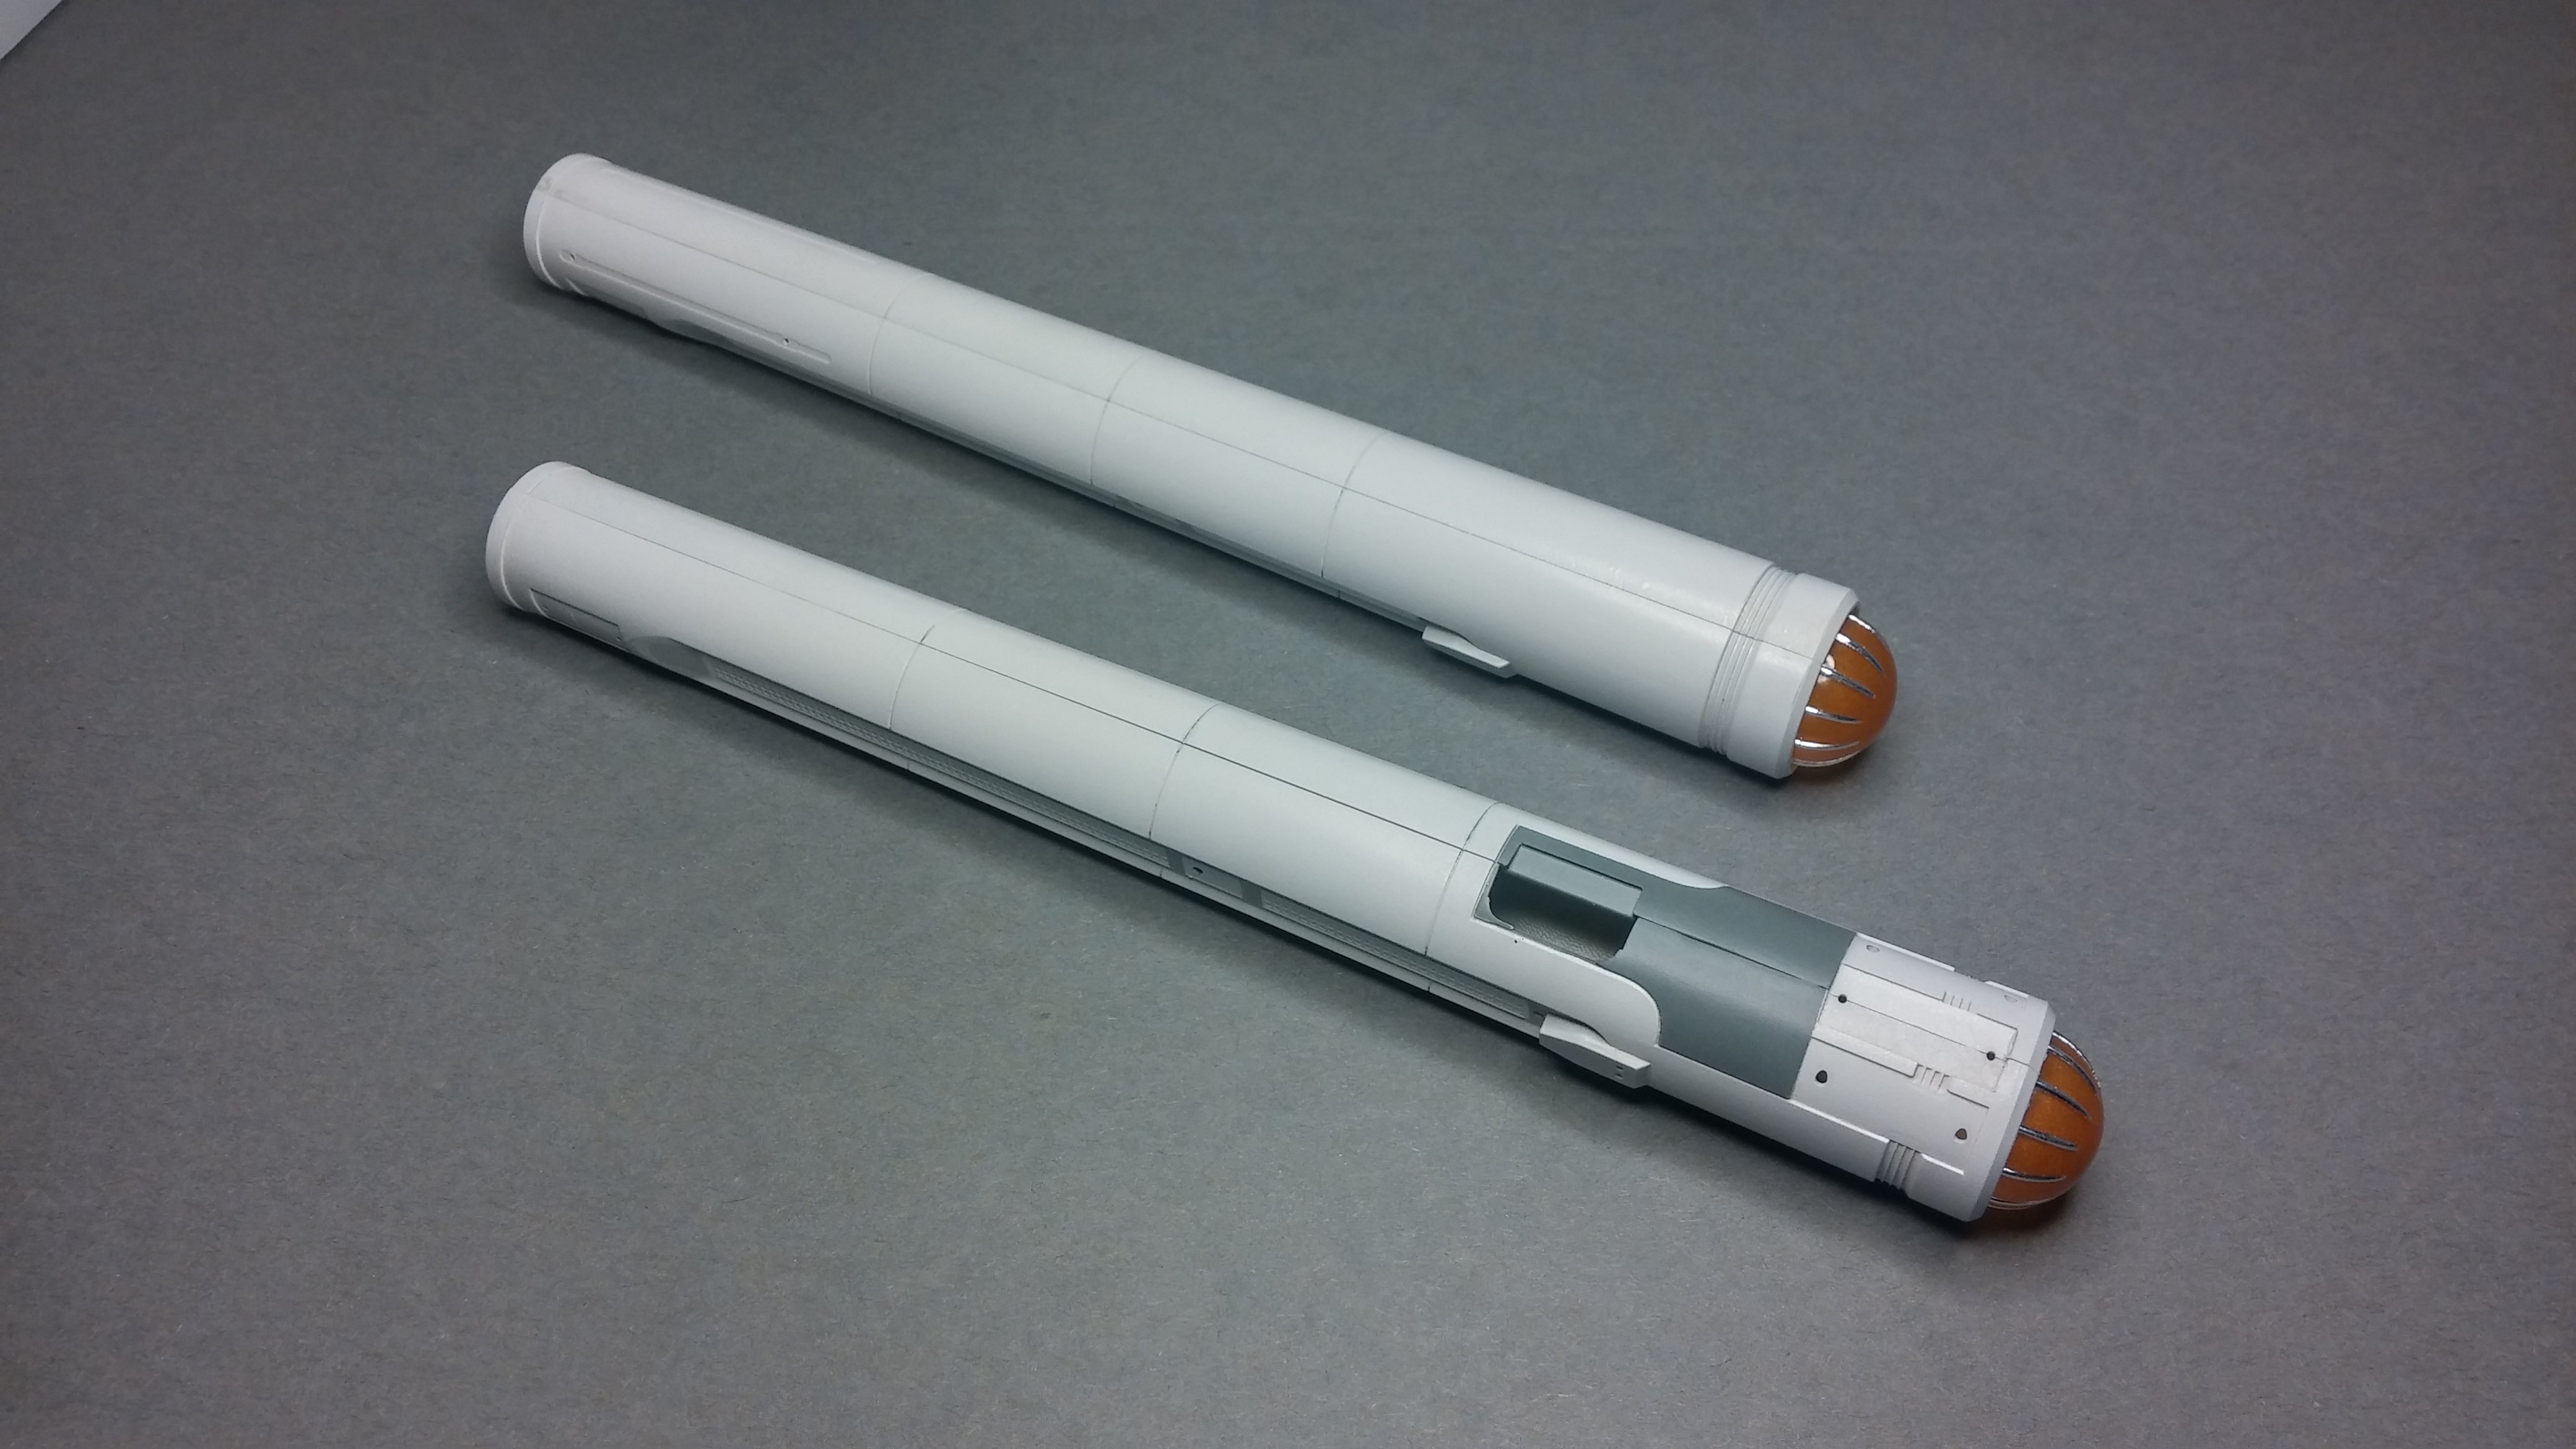
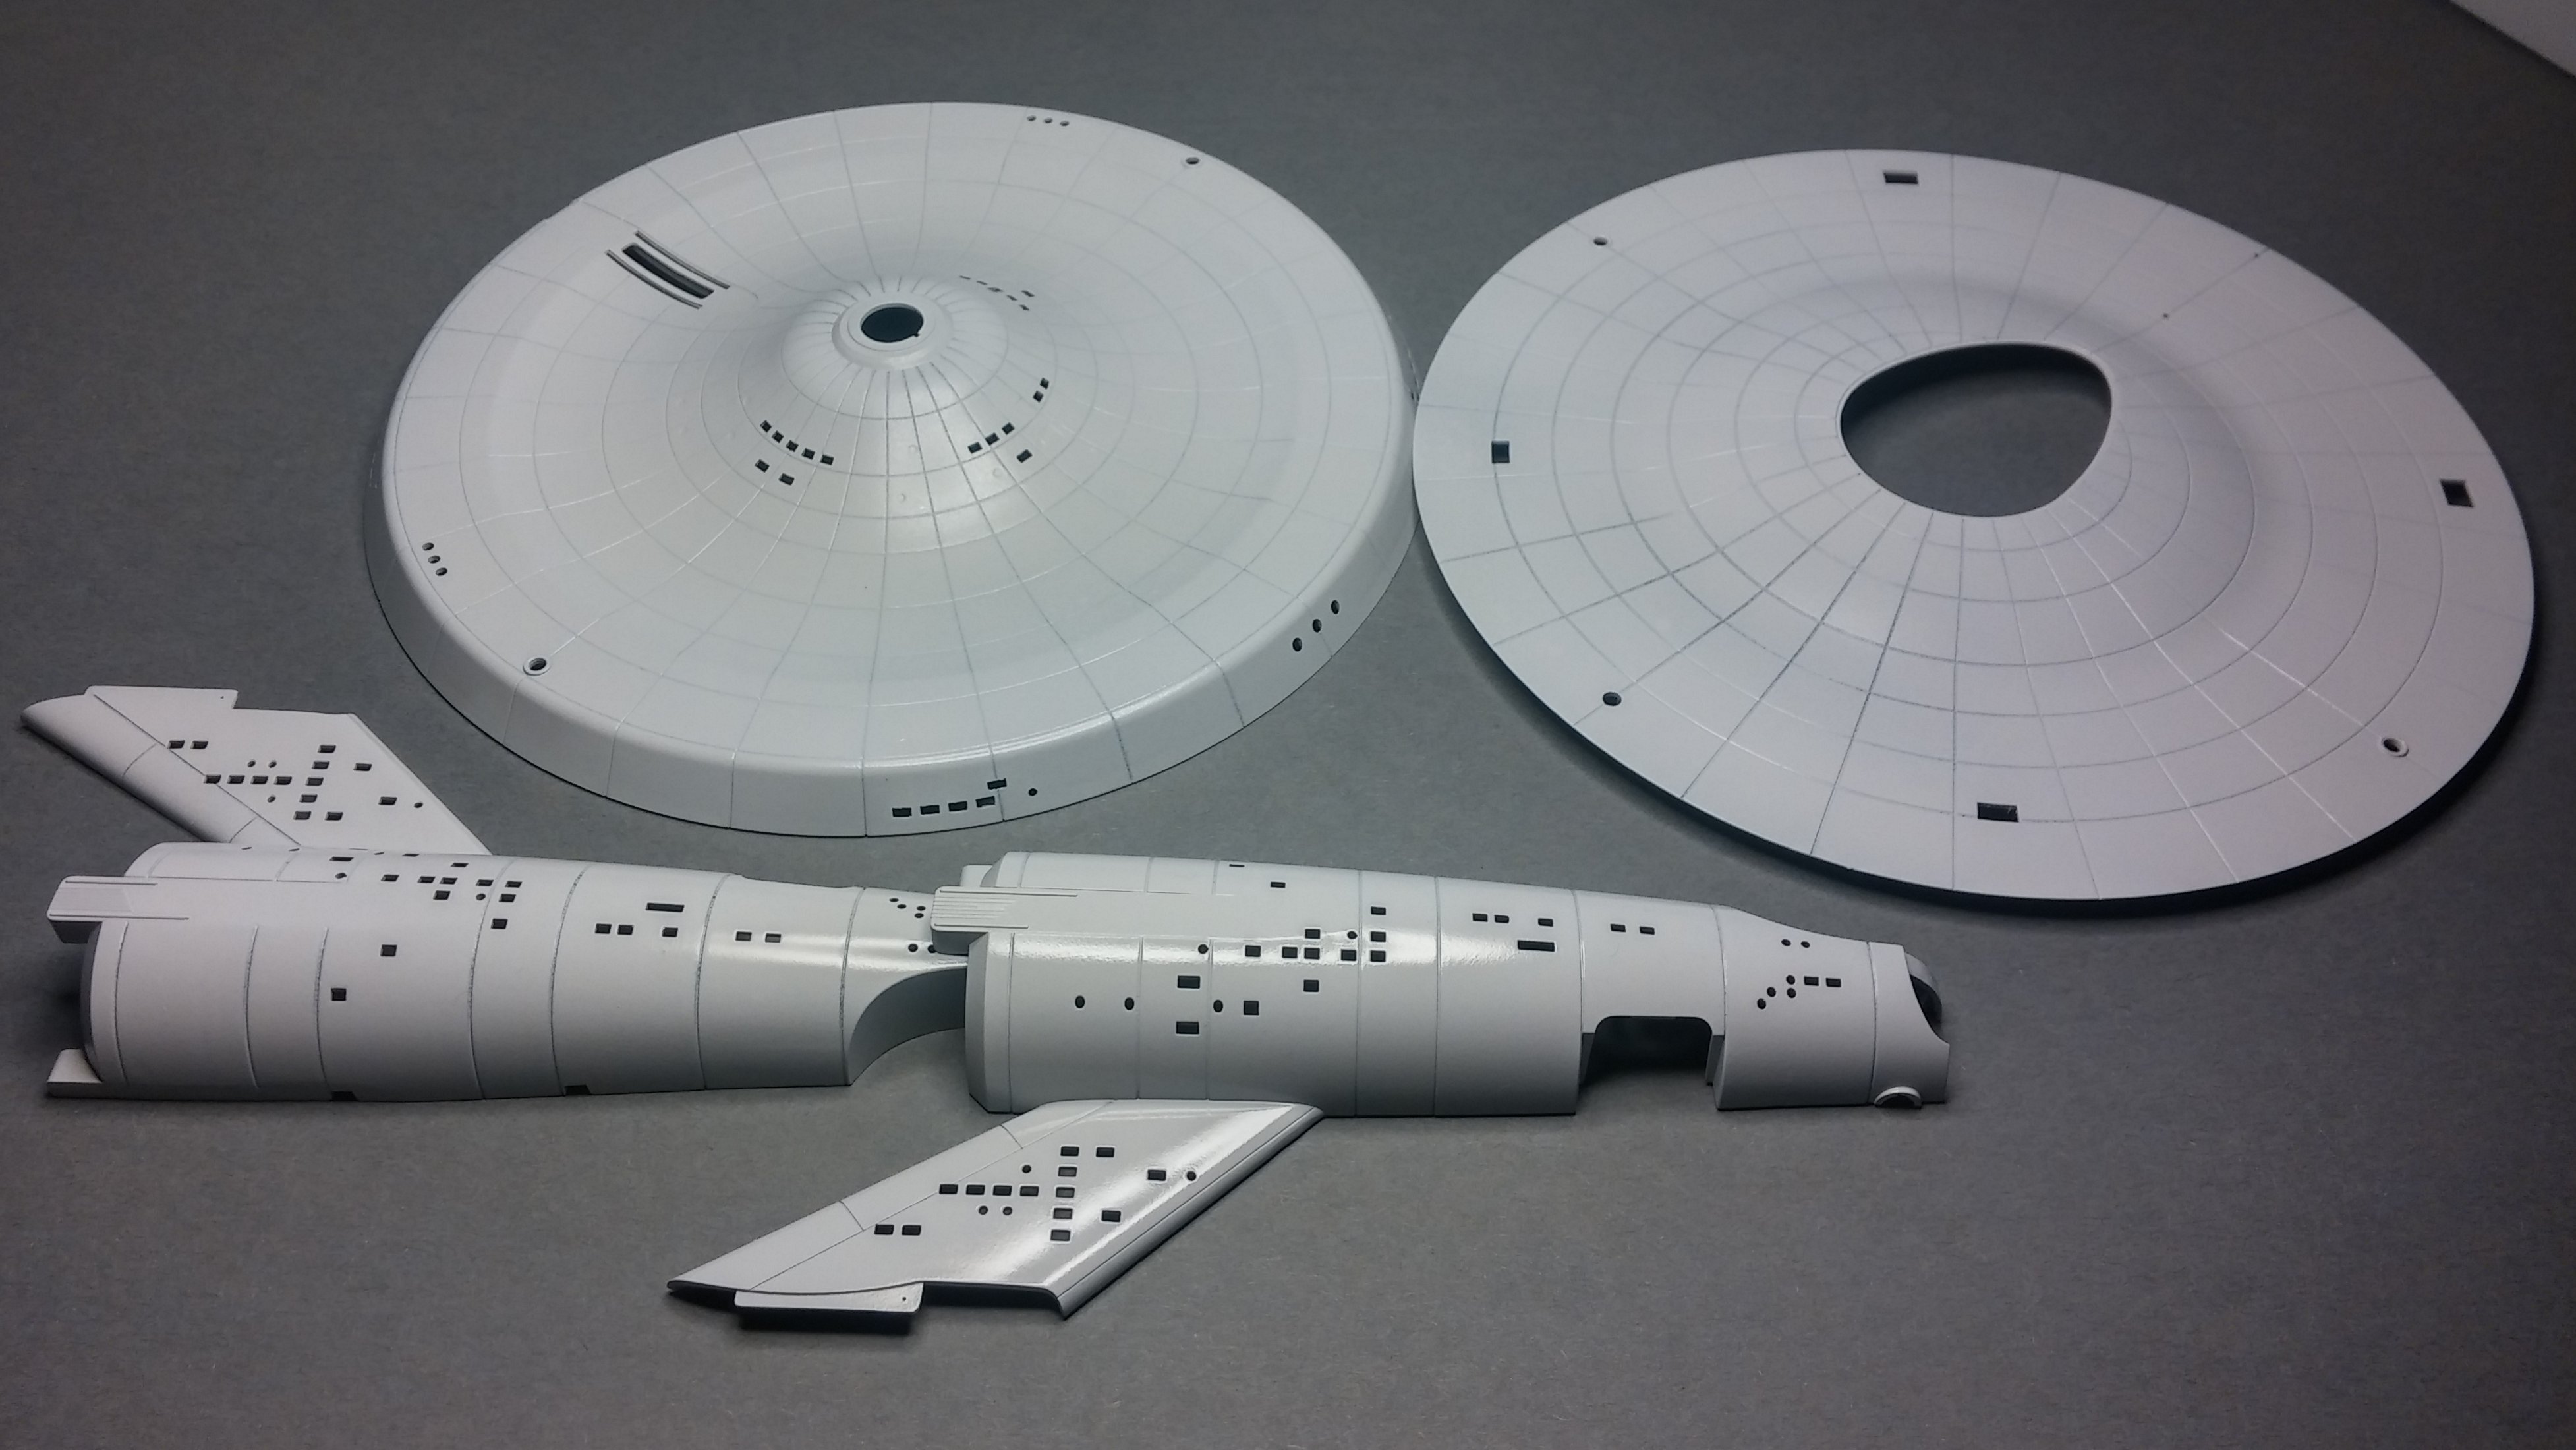
I think I've hit the stage of the build where things begin to come together more quickly; the "Tipping Point" as I like to think of it. For my automotive projects, the tipping point is usually when I get the wheels under the chassis. For this model I've decided that the tipping point is when all the prep work and painting are done and most of the minor assembly tasks are completed. I'm just not happy with the seams on the warp nacelles. Looks like I'll have to do some filling and sanding. The secondary hull is assembles and properly weighted. Also, I'm very happy with the way this photo came out. Thanks for taking the time to look. David G.
-
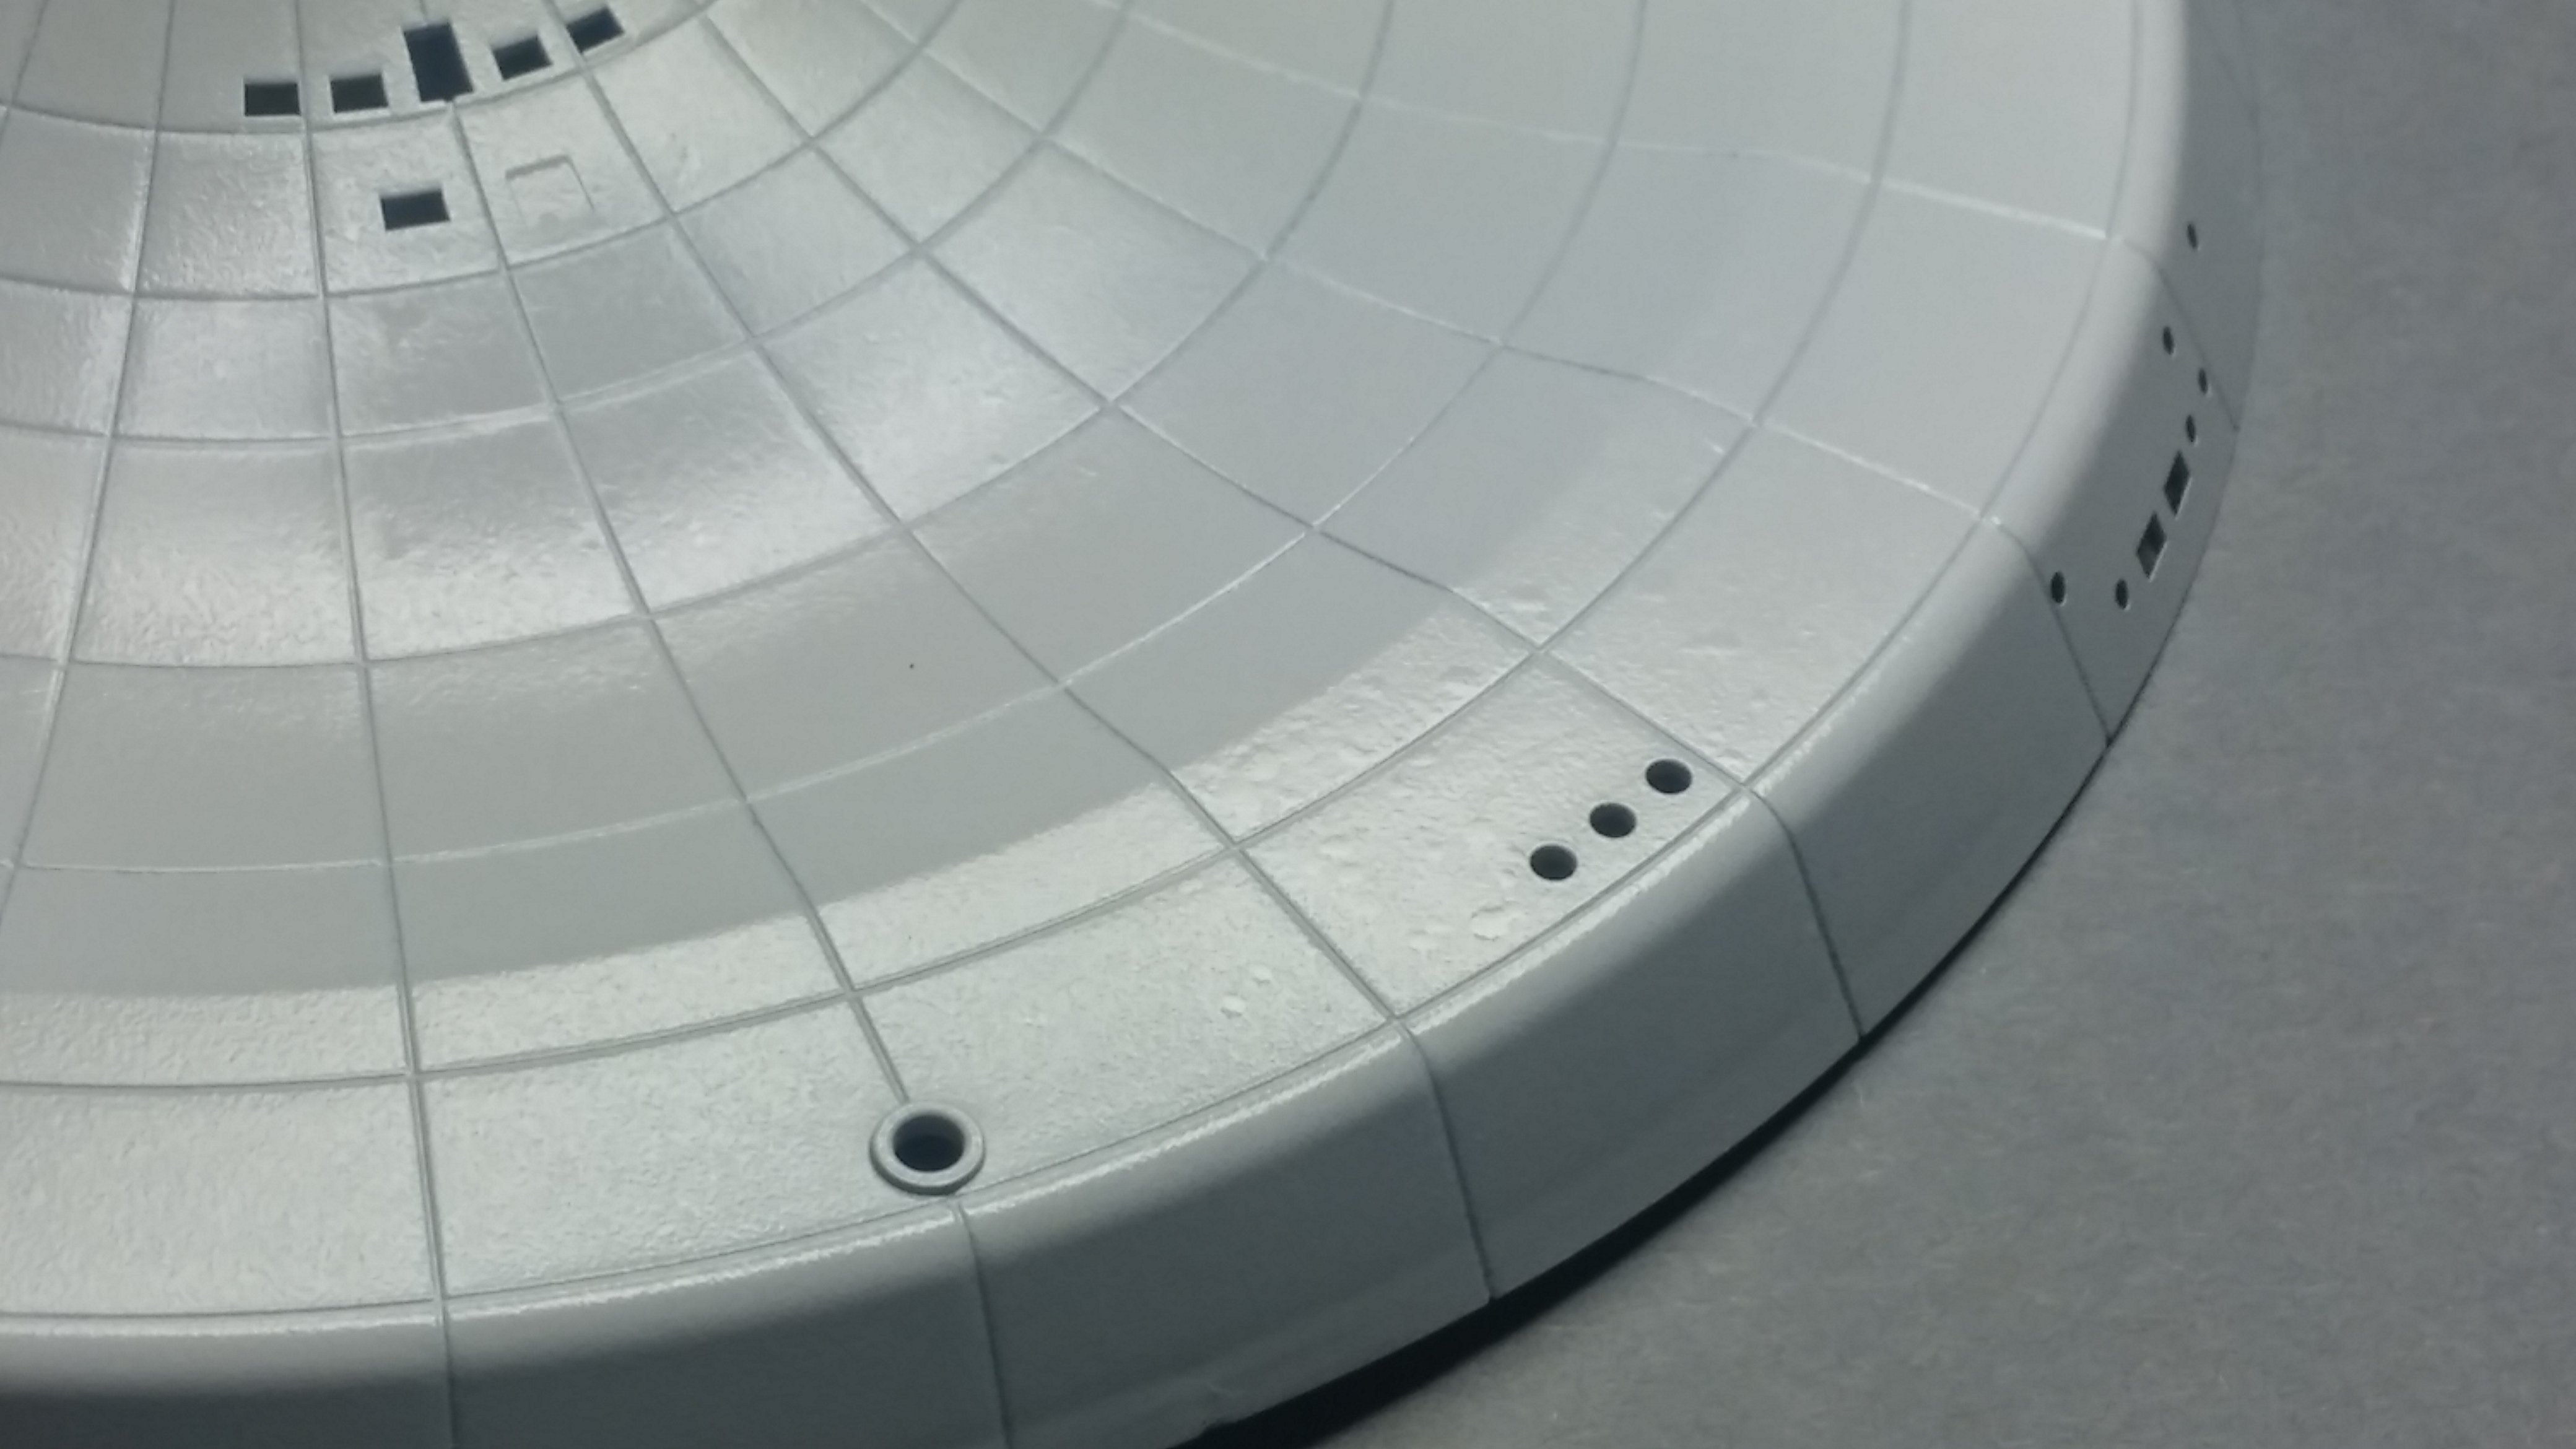
Thanks Bill. There are a few differences I discovered between building this starship and a model car kit. On this kit the windows must be placed into the hull sections from the inside before assembling the hull. This doesn't leave many options for addressing the seams between the sections. I just assembled the secondary hull yesterday and there some visible seams. I'm still trying to decide if I want to go back and address them. They are minor but they are there and they are visible. Thanks for the confirmation on that G. David G.
-
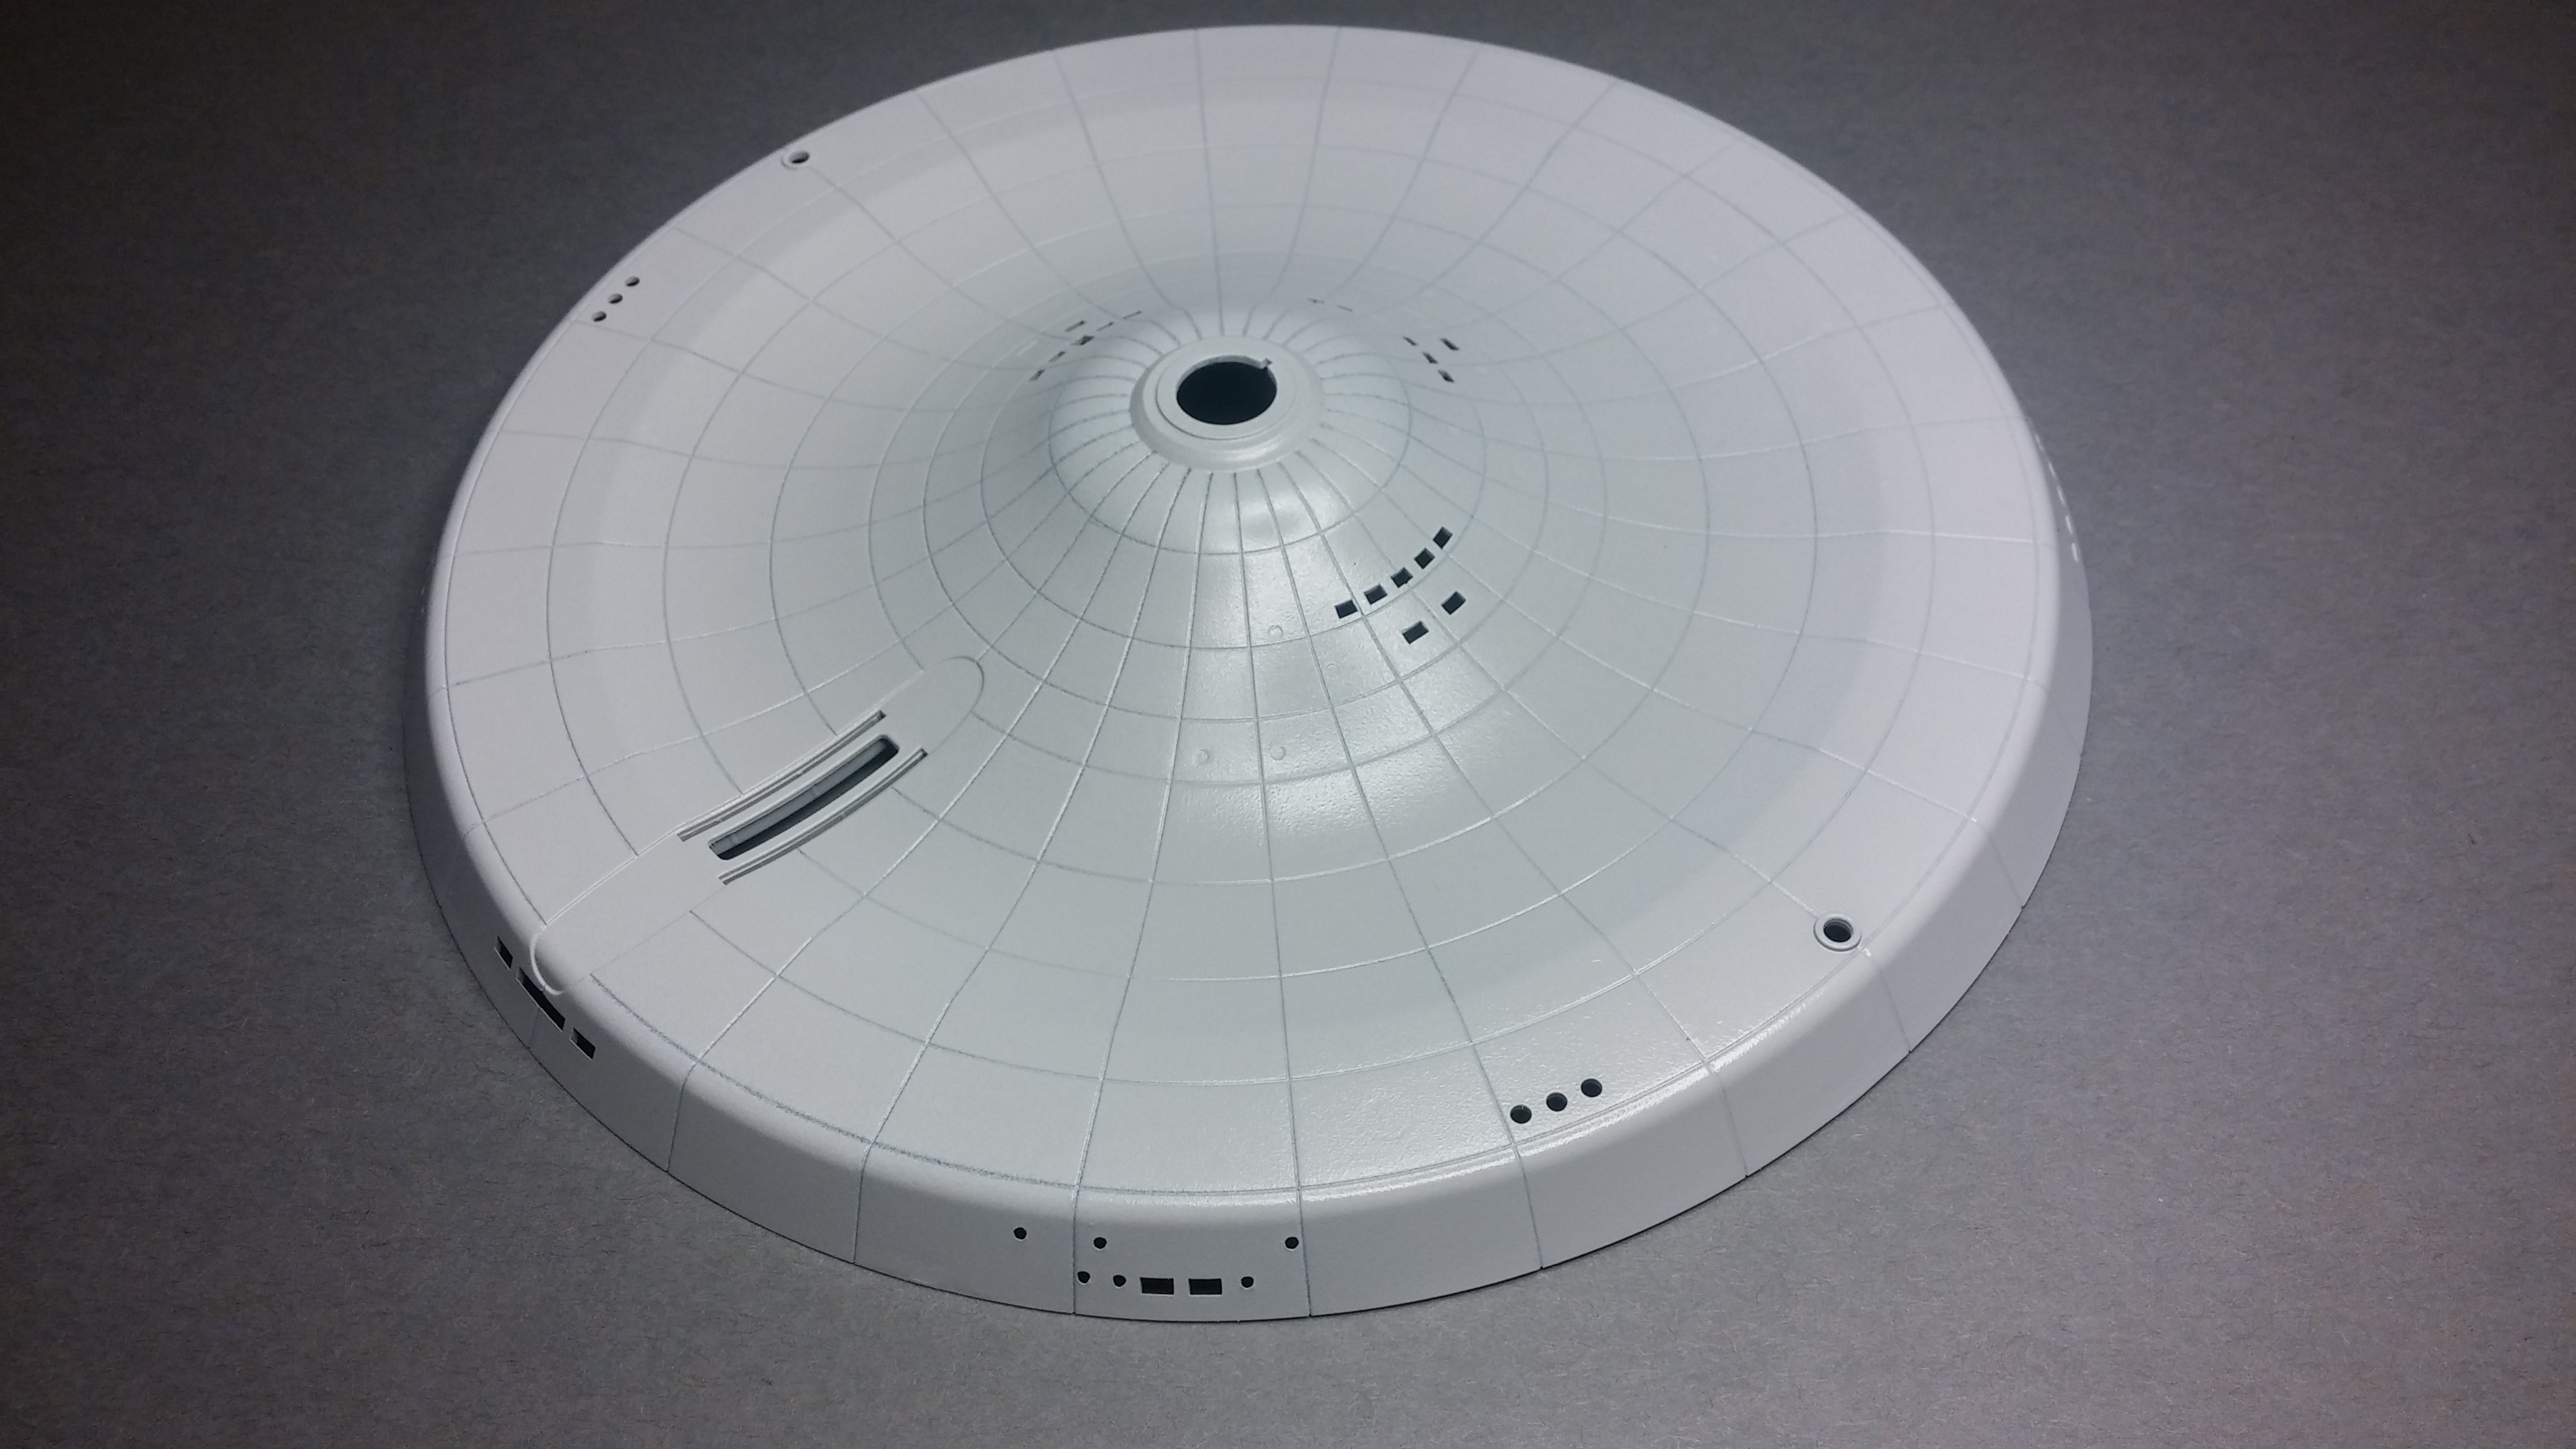
Thanks Jim. Normally I use a #3 needle but changed to a #5 believing that it would help me to cover the larger area of the saucer section. I still had my air pressure set at the level I would use with my #3 needle, 18 to 20 lbs. Knowing that I can get a good job with the #3, I switched back and got an immediate improvement. Then a thought occurred to me. Would the larger diameter #5 needle require more air pressure, maybe 20 to 25 lbs? In some ways, that would make sense. Obviously I don't get a lot of practice with my airbrush so almost every time I use it, it's a learning experience. I Now that I believe I have the spatter problem is sorted, I think I'll try to smooth out the rough areas and hit it again. Thanks, David G.
-
Looks Good! David G.
-
1960 Chrysler Imperial. 12/4, Finished!!
David G. replied to StevenGuthmiller's topic in WIP: Model Cars
Excellent work so far- everything looks great David G. -
Spectacular work! David G.
-
Lamborghini Countach Anniversary (1/24 scale by Italeri)
David G. replied to Tommy124's topic in Model Cars
Well done and nicely detailed! David G. -
Thanks Jim, I'll give that a shot.
-
1914 Stutz racer 1/16
David G. replied to Davoski's topic in Other Racing: Road Racing, Salt Flat Racers
Nicely Done! David G. -
Though this color may not be technically correct, it looks right to my eye, and that's what it's really about, isn't it? I'm even happy with the way the panel lines worked out. The top saucer section will need another coat, but other than that, the color and sheen look right to me. Well, I got the color situation worked out so it's time for the model gremlins to move on to the next activity... Airbrushing. I have a Paasche VL using a #5 needle with about 18lbs pressure. I first thinned the paint with about 50% Tamiya acrylic thinner and started getting these droplets when I sprayed. So I added a little more thinner and the paint came out of the brush like dirty water. At that point the paint was obviously waaaayy too thin, so I mixed a bit more paint and reduced it until I was back where I started. Any tips or observations will be appreciated. I'm sure that I can smooth these spots out to get a reasonable finish, but it sure would be nice if I didn't have to. Thanks again, David G.
-
I have mixed what I think will be a suitable shade of light gray. I used a 1/3 oz bottle of Tamiya X-2 gloss white with 12 drops of Tamiya X-18 gloss black. I darkened the panel lines with a fine point Sharpie and I also devised a pin set-up for the joint between the primary and secondary hulls. I'm now ready to fire up the airbrush and get some painting done! As always, thanks for taking the time to look and please feel free to comment. David G.