David G.
-
Posts
11,307 -
Joined
-
Last visited
Content Type
Profiles
Forums
Events
Gallery
Everything posted by David G.
-
Once again, some of these pics look like someone's shop photos of a real car! Love it! =D-
-
That's going to be so cool when it's done! David G.
-

Monogram's 1955 Lincoln Futura Concept Car: WIP
David G. replied to David G.'s topic in WIP: Model Cars
Hello Everybody! This one is officially completed! I've started posting the photos in the "Under Glass" section. Thanks to all of you who followed along and offered your kind comments and support. I really do appreciate you. David G. -
Monogram's 1955 Lincoln Futura Concept Car: WIP
David G. replied to David G.'s topic in WIP: Model Cars
Thank you Noel, I appreciate your comment. =D- -
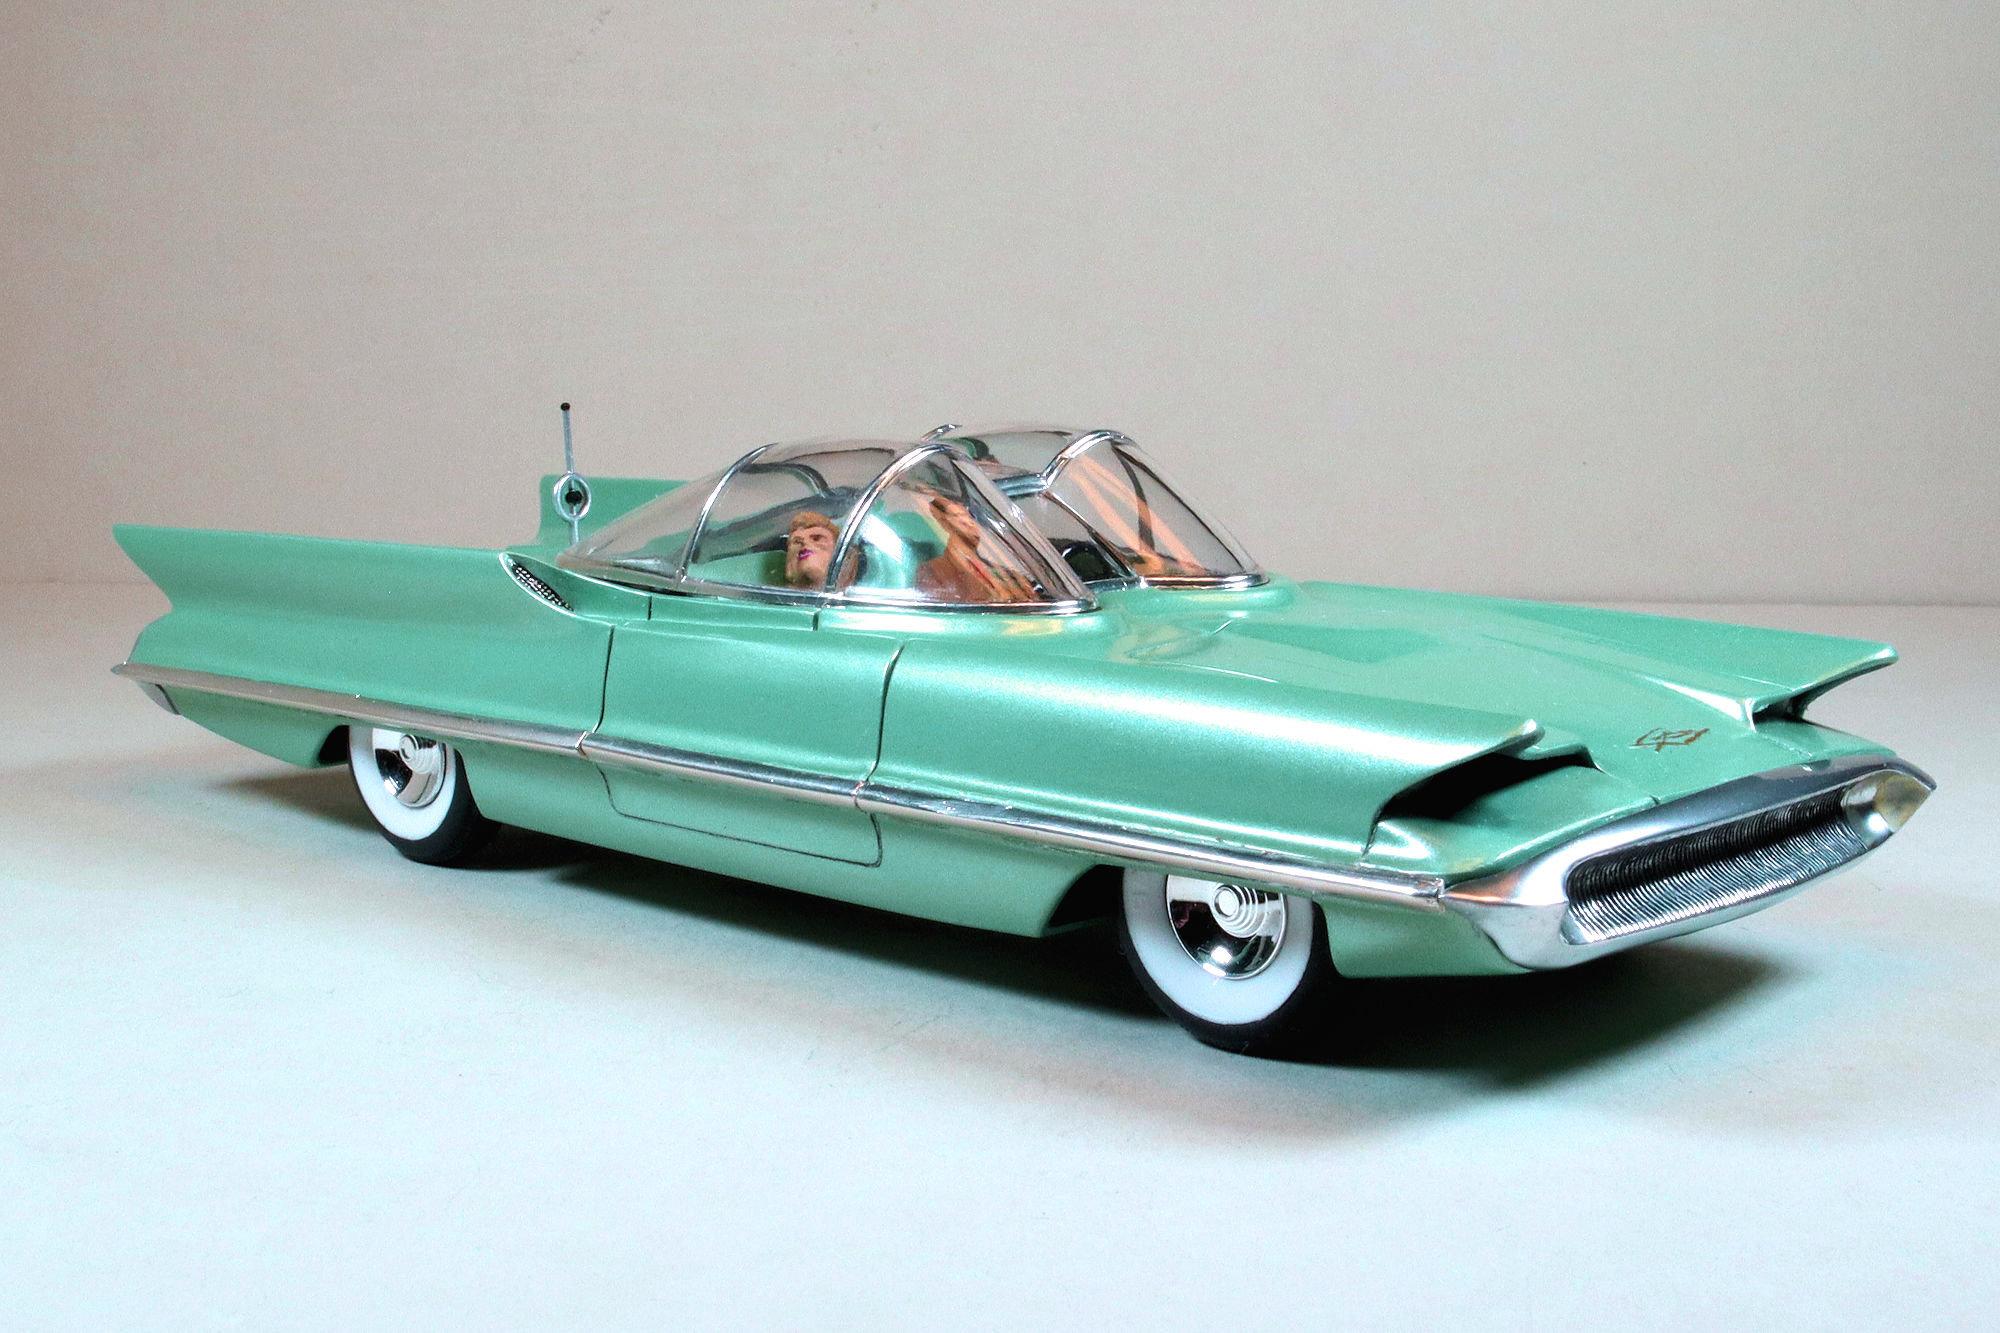
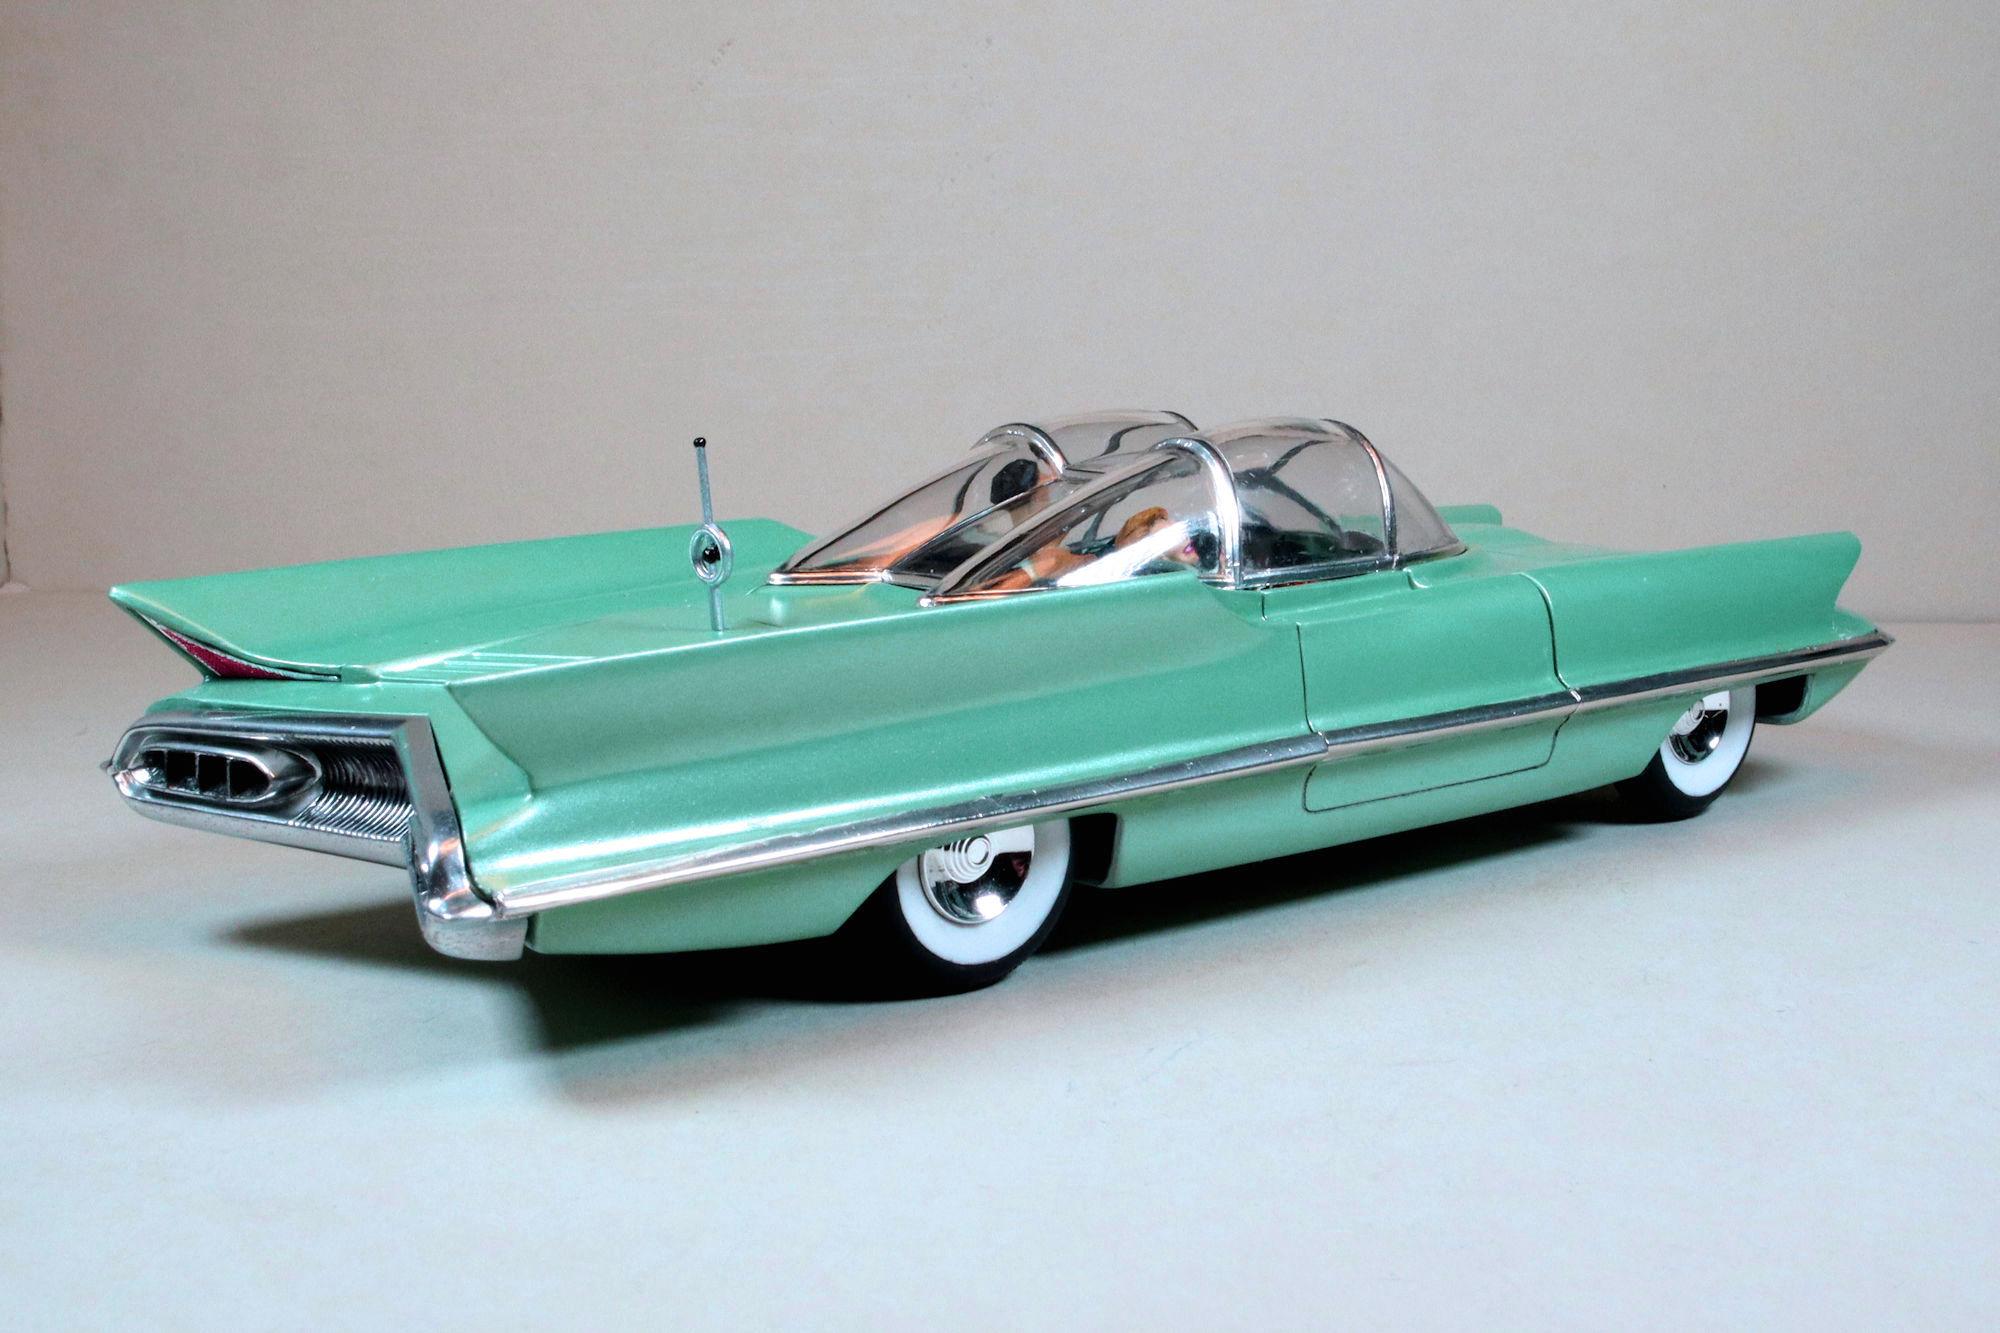
Hello Everybody! The Lincoln Futura Concept Car by Monogram. This is a 1:25 scale model of the 1955 Lincoln Futura concept car. Though not completely accurate and a little oversimplified it does have the advantage of being the most readily available representation. And it is a good representation. This kit turned out to be quite a chore to build. It's a simple kit but the multipiece body and age of the molds created numerous challenges. For those who are interested in all the gory details, here is a link to the build thread I did. That being said... On with the show! After more than six months and almost 52 hours, The Lincoln Futura Concept car is done! One of the most unique and recognizable automobiles in the world. This car is the source vehicle for the George Barris Batmobile from the 1960's TV show. I know that the original car was pearl white. The scales of thousands of fish were ground up to make the paint. Quite an extravagance if you ask me. I'm also aware that the pale green color often associated with this car is due to an error in how some of the photos were rendered. But still, in my opinion the green is a much better color for this car. Which is why I opted to use Tamiya TS-60 Pearl Green. That's all for this round. I like to upload photos in small blocks of no more than 5 or 6 at a time. Any more than that just seems like too much all at once. As always, thanks for taking a look and please feel free to post any comments or questions you may have. David G.

- 42 replies
-
- 17
-

-
Thanks for posting this Karl, it's a perfect example of the type of detail that I'm talking about! I still think little details like this add to the overall impression of realism, even though many people don't consciously register them. It's a fabulous looking model too! =D-
-
Oops! I meant to put the link in and got distracted. ? Sorry about that! Here it is. And thank you Bart for sharing your Merc there. There are also a lot of other cool builds to look at too. David G.
-
Monogram's 1955 Lincoln Futura Concept Car: WIP
David G. replied to David G.'s topic in WIP: Model Cars
Thank you most kindly Bill. =D- -
Nice work on the engine Donald. Good use of weathering techniques, I especially like the heat staining on the headers. David G.
-
Beautiful paint, excellent color choice, a fabulous looking build! David G.
-
That's a great looking build Bart! Your work on the woodgrain looks terrific. If you're interested I started a community thread earlier this year dedicated to the '49 Mercury. There are many cool examples of this iconic car shared there by other members. I would be honored if you wanted to share some photos of your fabulous example there. Thanks, David G.
-
Ah, I'm glad not to be disappointed about the cabbies. =D-
-
Thank you Robert. The paint is working out well for me, I just wish I could get a better fit for the wings. =D-
-
Thank you kindly Les. I was under the impression that London cabbies took great pride in their jobs and their cabs. =D-
-
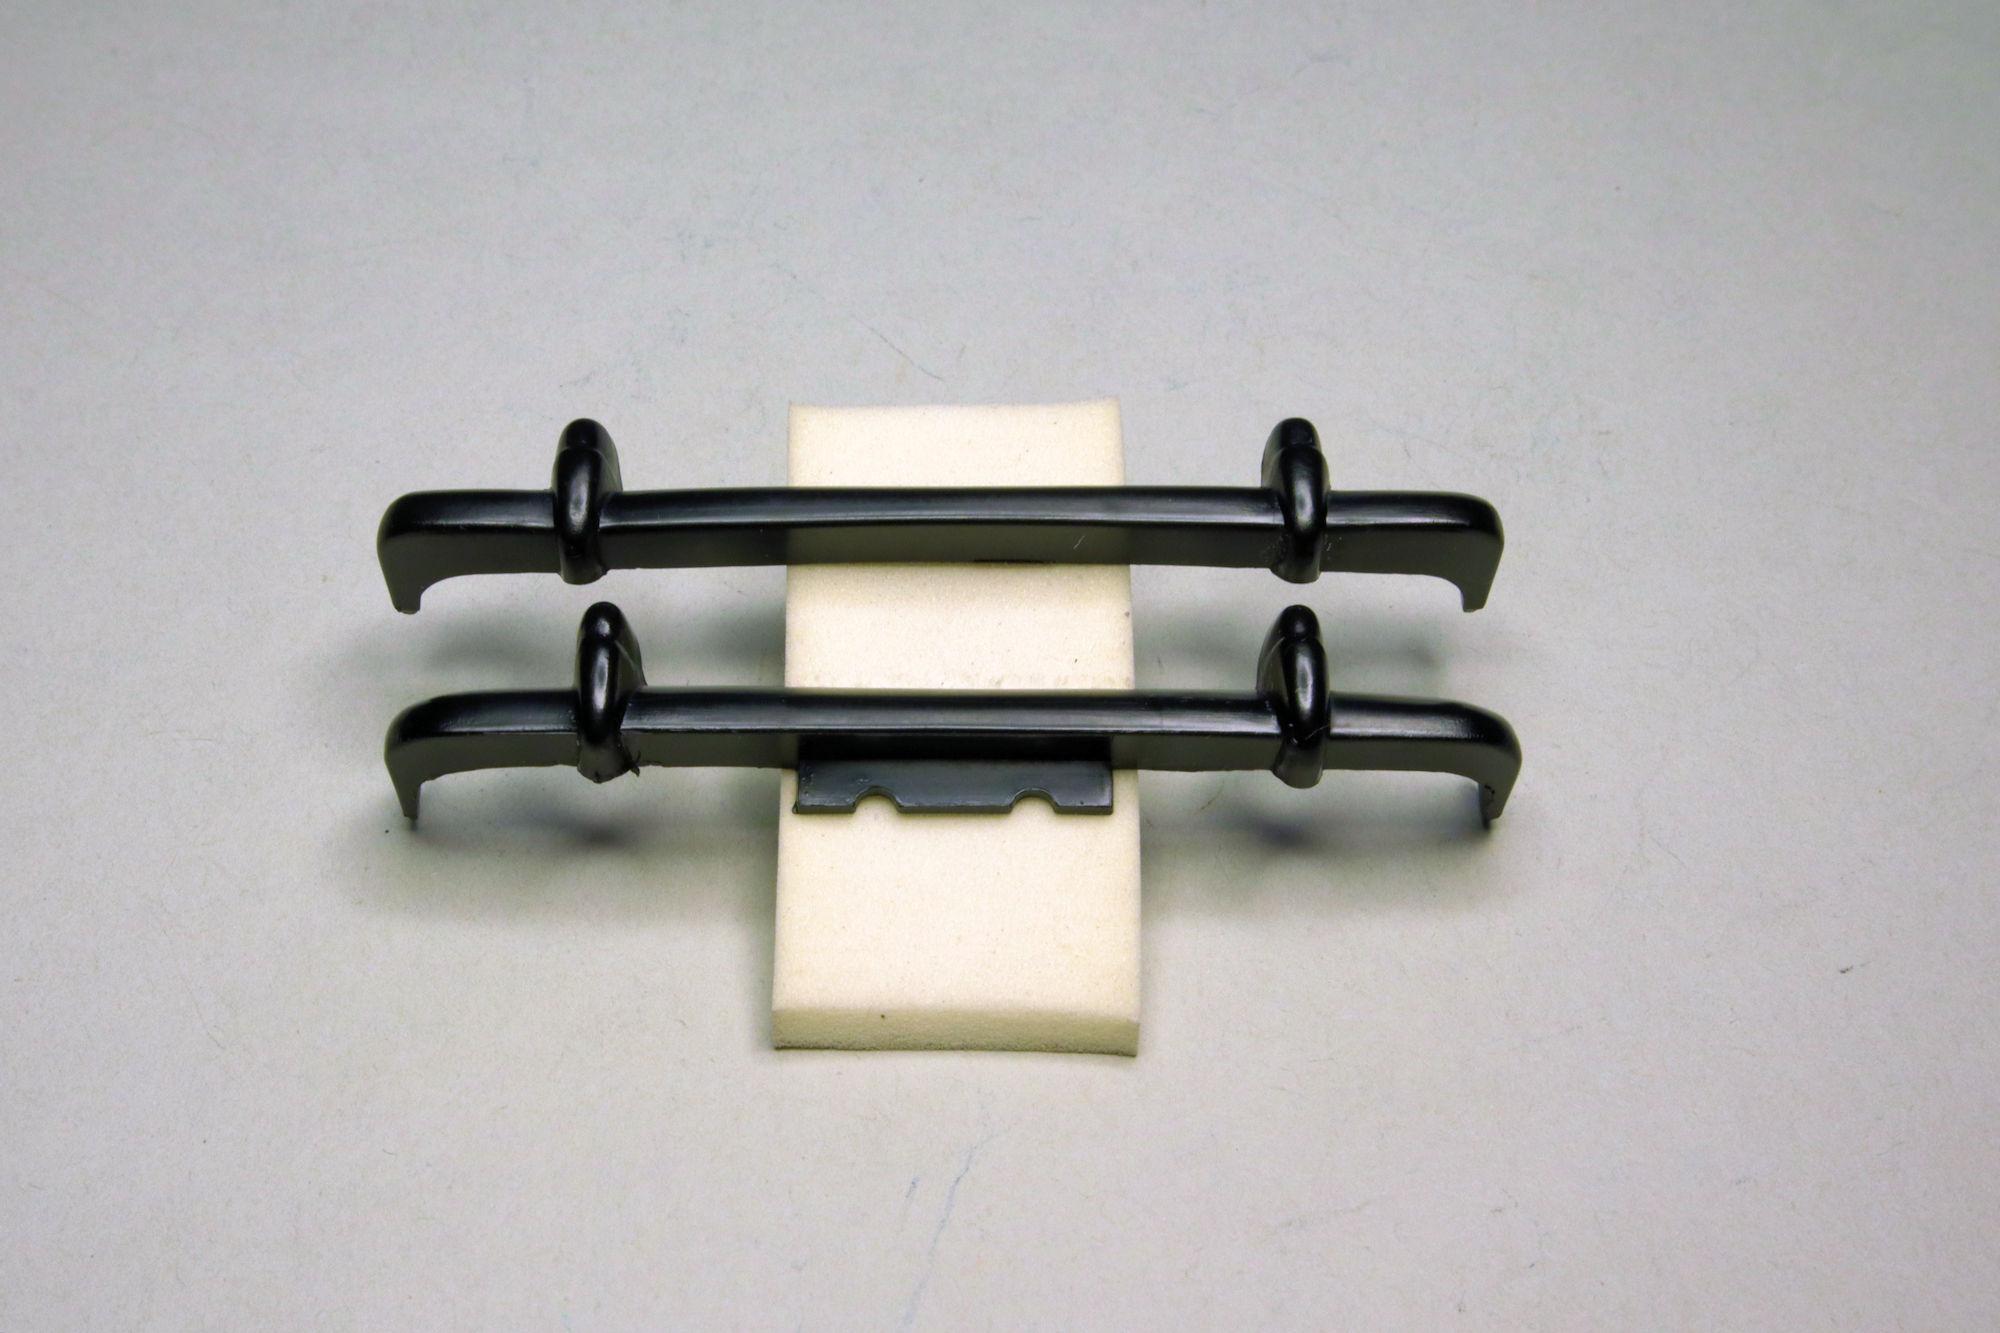
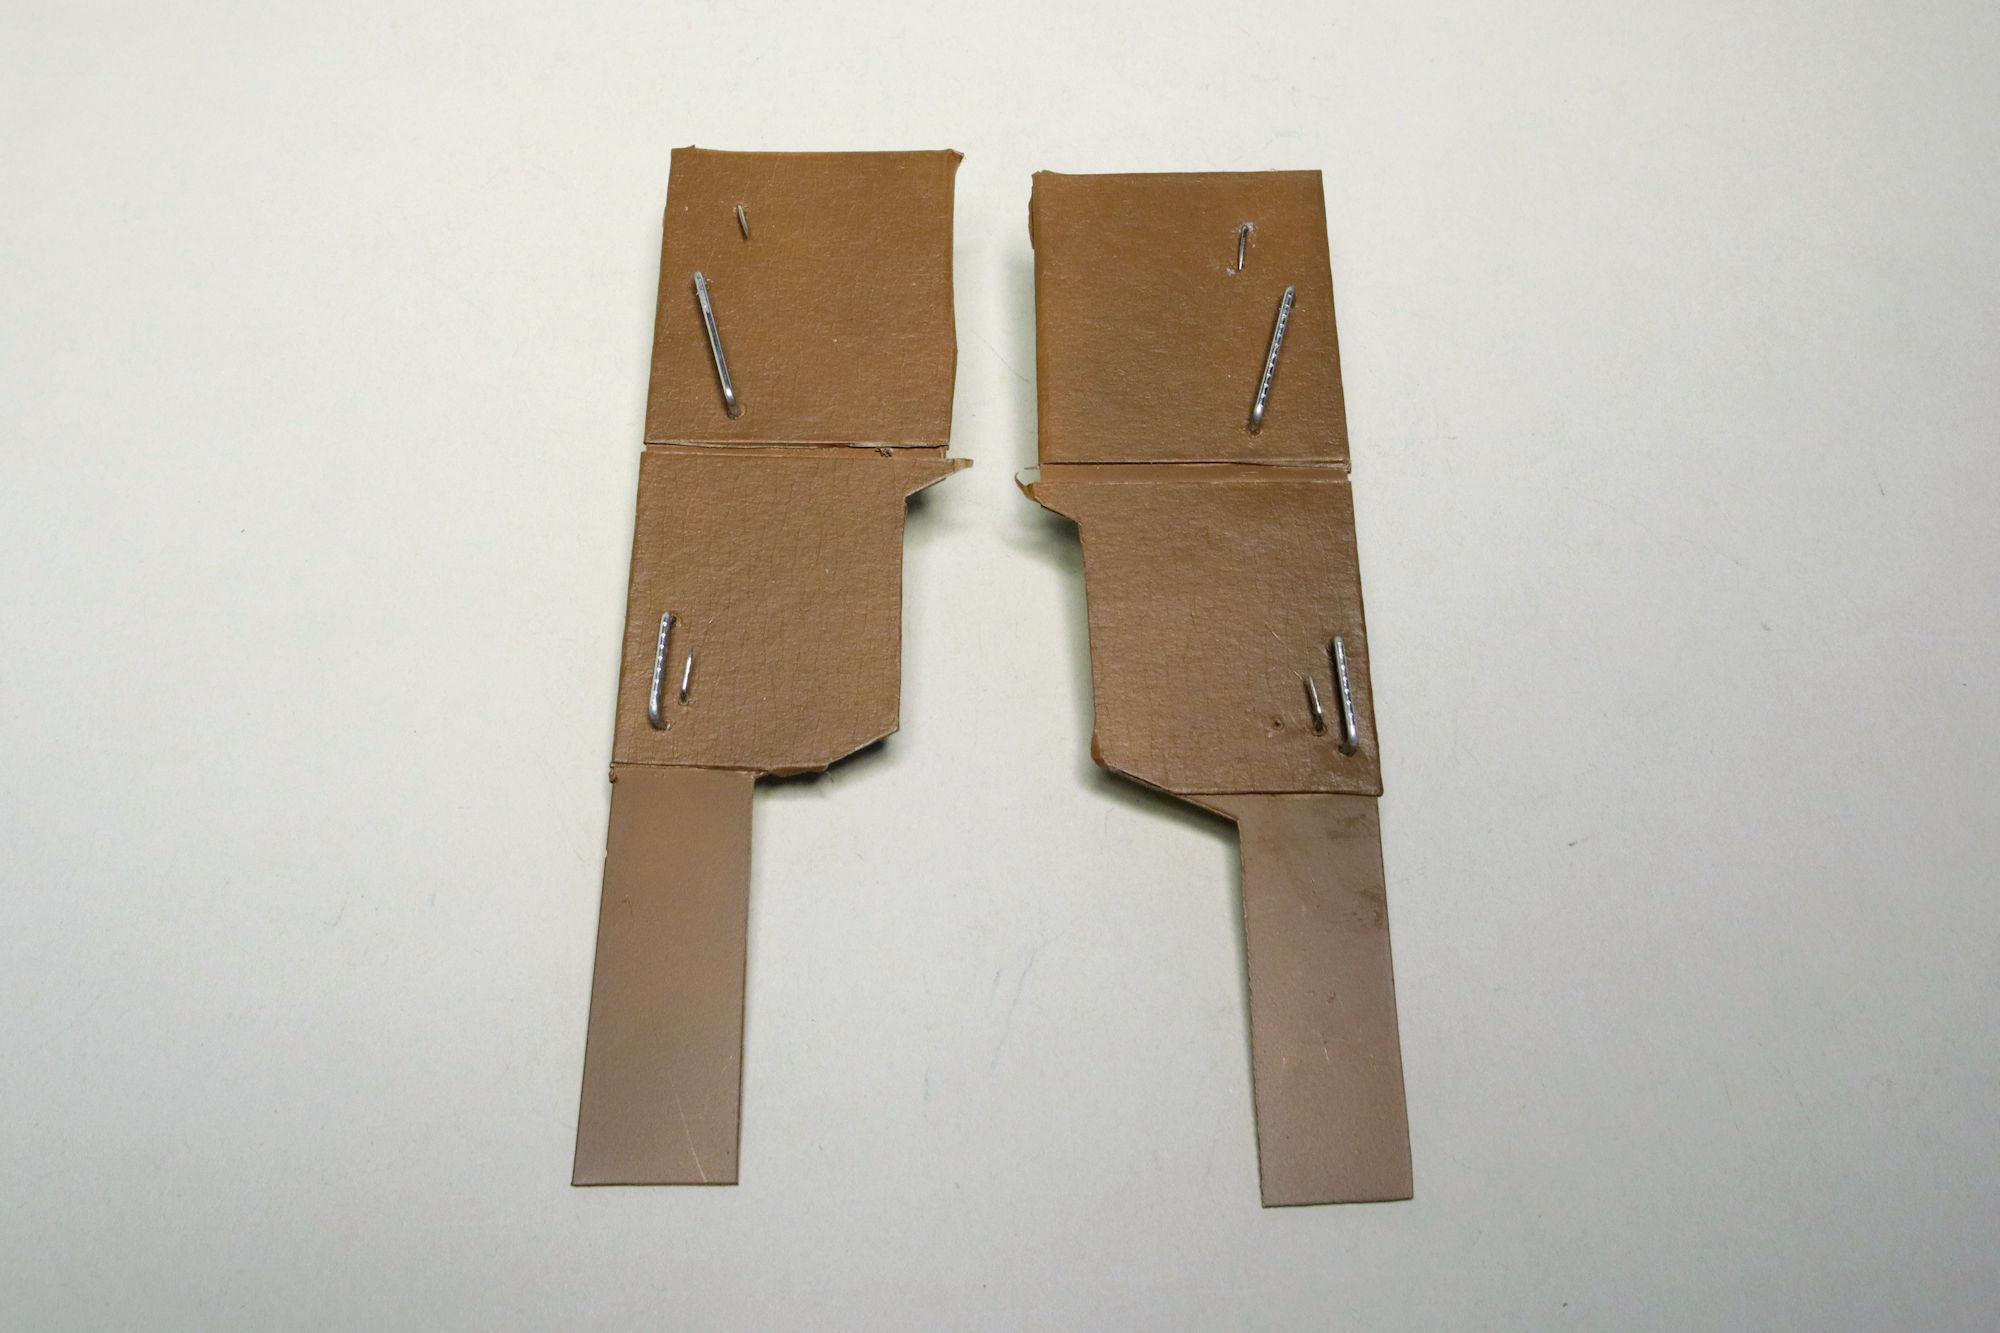
Hello Everybody! It's time for the next update. At the end of the previous building session I placed the bumpers in the stripping solution to remove their chrome. They weren't really that bad but they did gave some parting lines and flash that I wouldn't be able to easily correct without damaging the chrome. In this session I removed the bumpers from the Purple Pond and cleaned them up. The next step, after they dry is to spray some primer on them and start smoothing out the flaws. Most of this build session was spent smoothing out the flaws in the paint. I use 3M polishing cloths by Zona Tool Co. that go from 30 micron grit down to 1 micron in six steps. On the body, I've just finished the second step; 15 micron. The hood has been taken down to the 1 micron grit and after washing the dust and water spots from it, is ready for the next coat of black paint. As always, thanks for taking a look and please feel free to comment. David G.
-
Thanks Bil, I do enjoy the detail work. I think it's where the art comes into the build. The detail work is the difference between building a model and just putting a kit together. Thank you David. Yes, the paint is going to be the standout challenge of this kit. The rest of it is simple but it has enough detail to be a satisfying build. Thank you Brian. The lenses are just several layers of Tamiya X-22 Clear. I dab it in thickly with a brush, let it dry, then hit it again. I do this until it gets to where I want it, usually about three or four applications. Thank you all again for your comments and questions. =D-
-
Thank you Daniel, it's like I say: "Model builders, we're problem solvers who create our own problems to solve!" Yes indeed! =D-
-
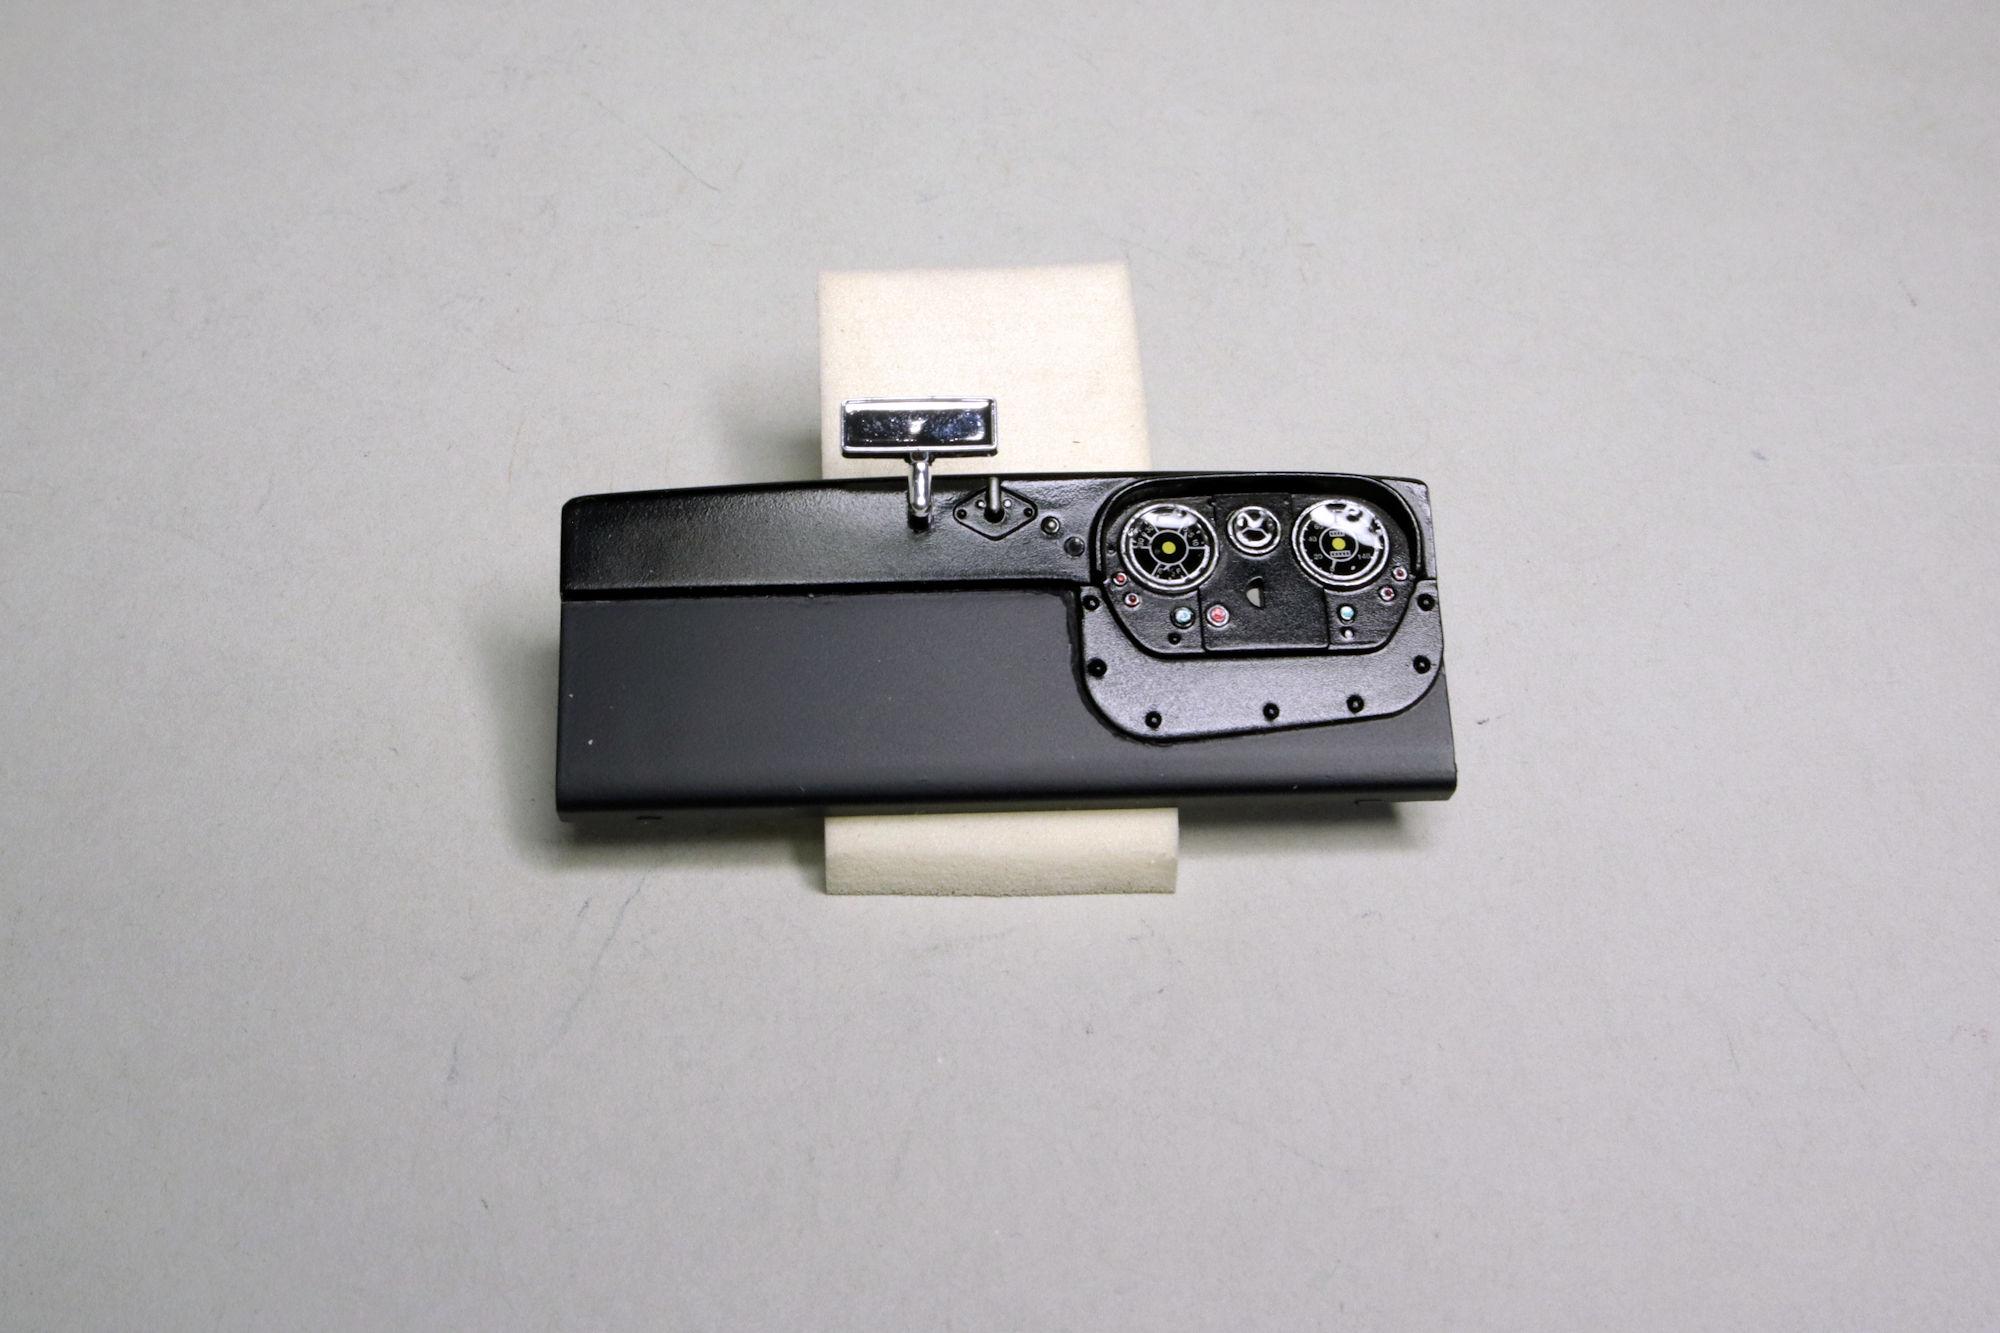
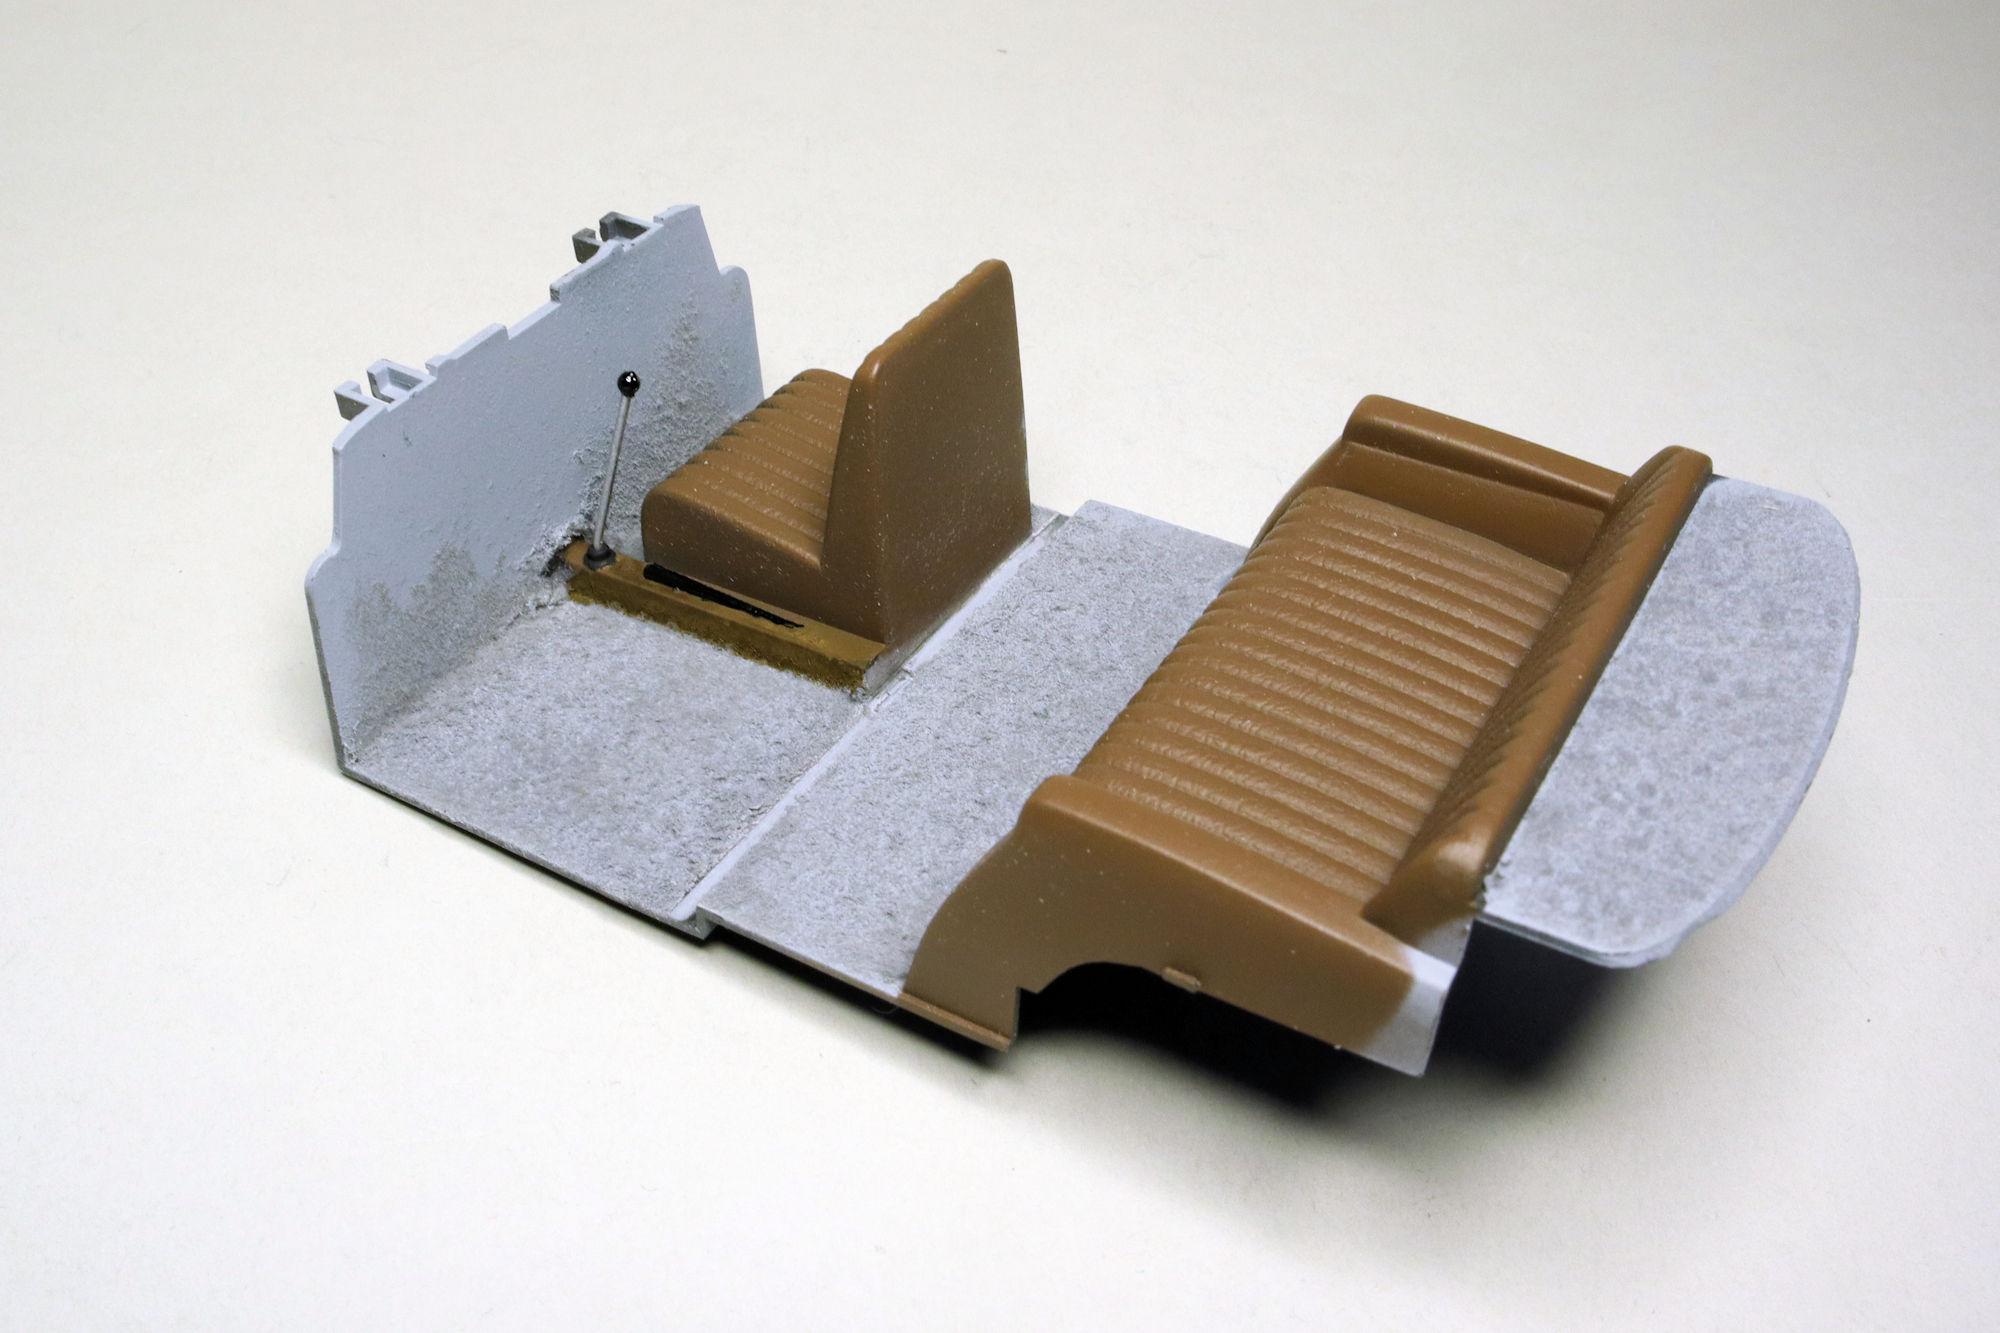
Hello Everybody! Here's what I accomplished in the most recent build session. I have the detail on the dashboard pretty much completed. I got the door panels knocked into shape. These are just meant to suggest that there is something on the inside of the cab other than unfinished, partially painted plastic. They'll be difficult to see after the model is assembled so I'm not going to spend too much time on them. Putting some of the final details on the interior plate before assembly. For the grille, I've sprayed a coat of flat clear and started the blackwash process with some Tamiya Panel Line Accent Color, black. As always, thanks for taking the time to look and please feel free to post any comments or questions you may have. David G.
-
It all sounds very Steampunk! This is coming along quite nicely David. I may have to look into finding one of these kits. David G.
-
Wow! Excellent work on the leather and wood! David G.
-
Thank you Joe, I appreciate your following along and the support you offer. Yeah, this is turning out to be quite an adventure story, isn't it? Thank you kindly James. =D-
-
Wow! Fabulous work on this Joe! I just love all the extra detail you're adding. David G.
-
Monogram's 1955 Lincoln Futura Concept Car: WIP
David G. replied to David G.'s topic in WIP: Model Cars
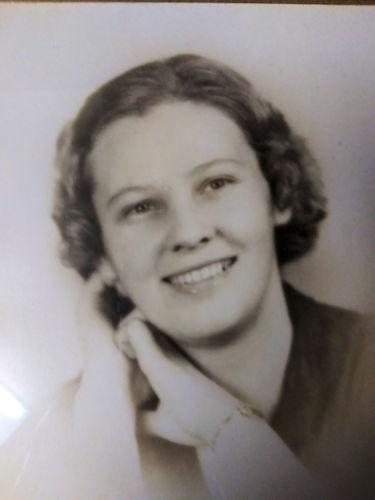
Thank you very much Len. As I was painting the figure of the woman, I actually had my grandmother in mind and how she may have looked in the late Fifties. She had auburn hair, green eyes and was quite the looker in her day. She was also rather fashionable in her manner of dress. Thanks again for the kind words. David G.
-
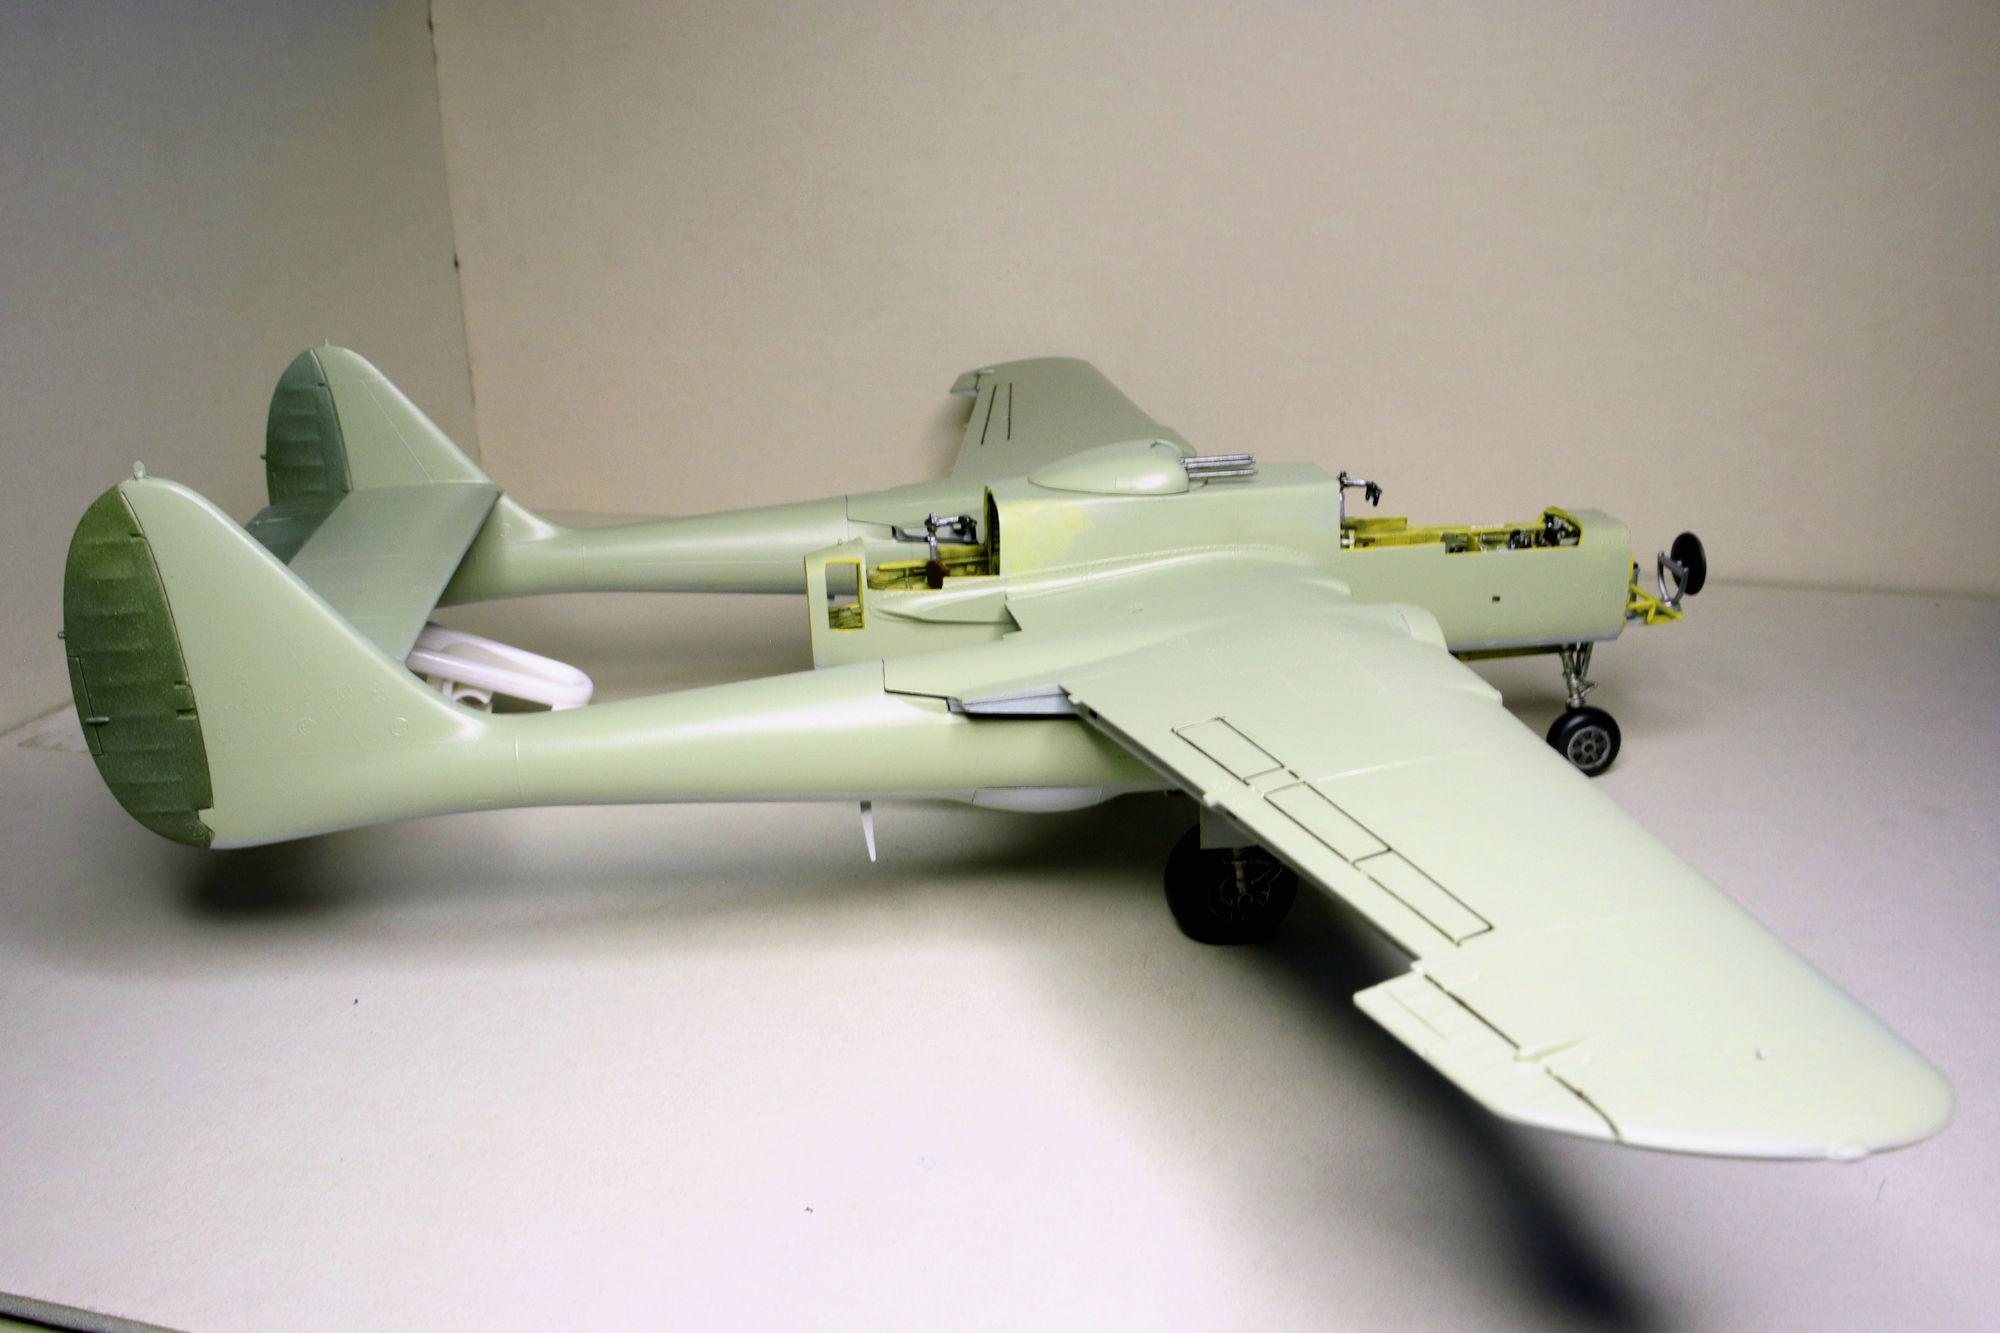
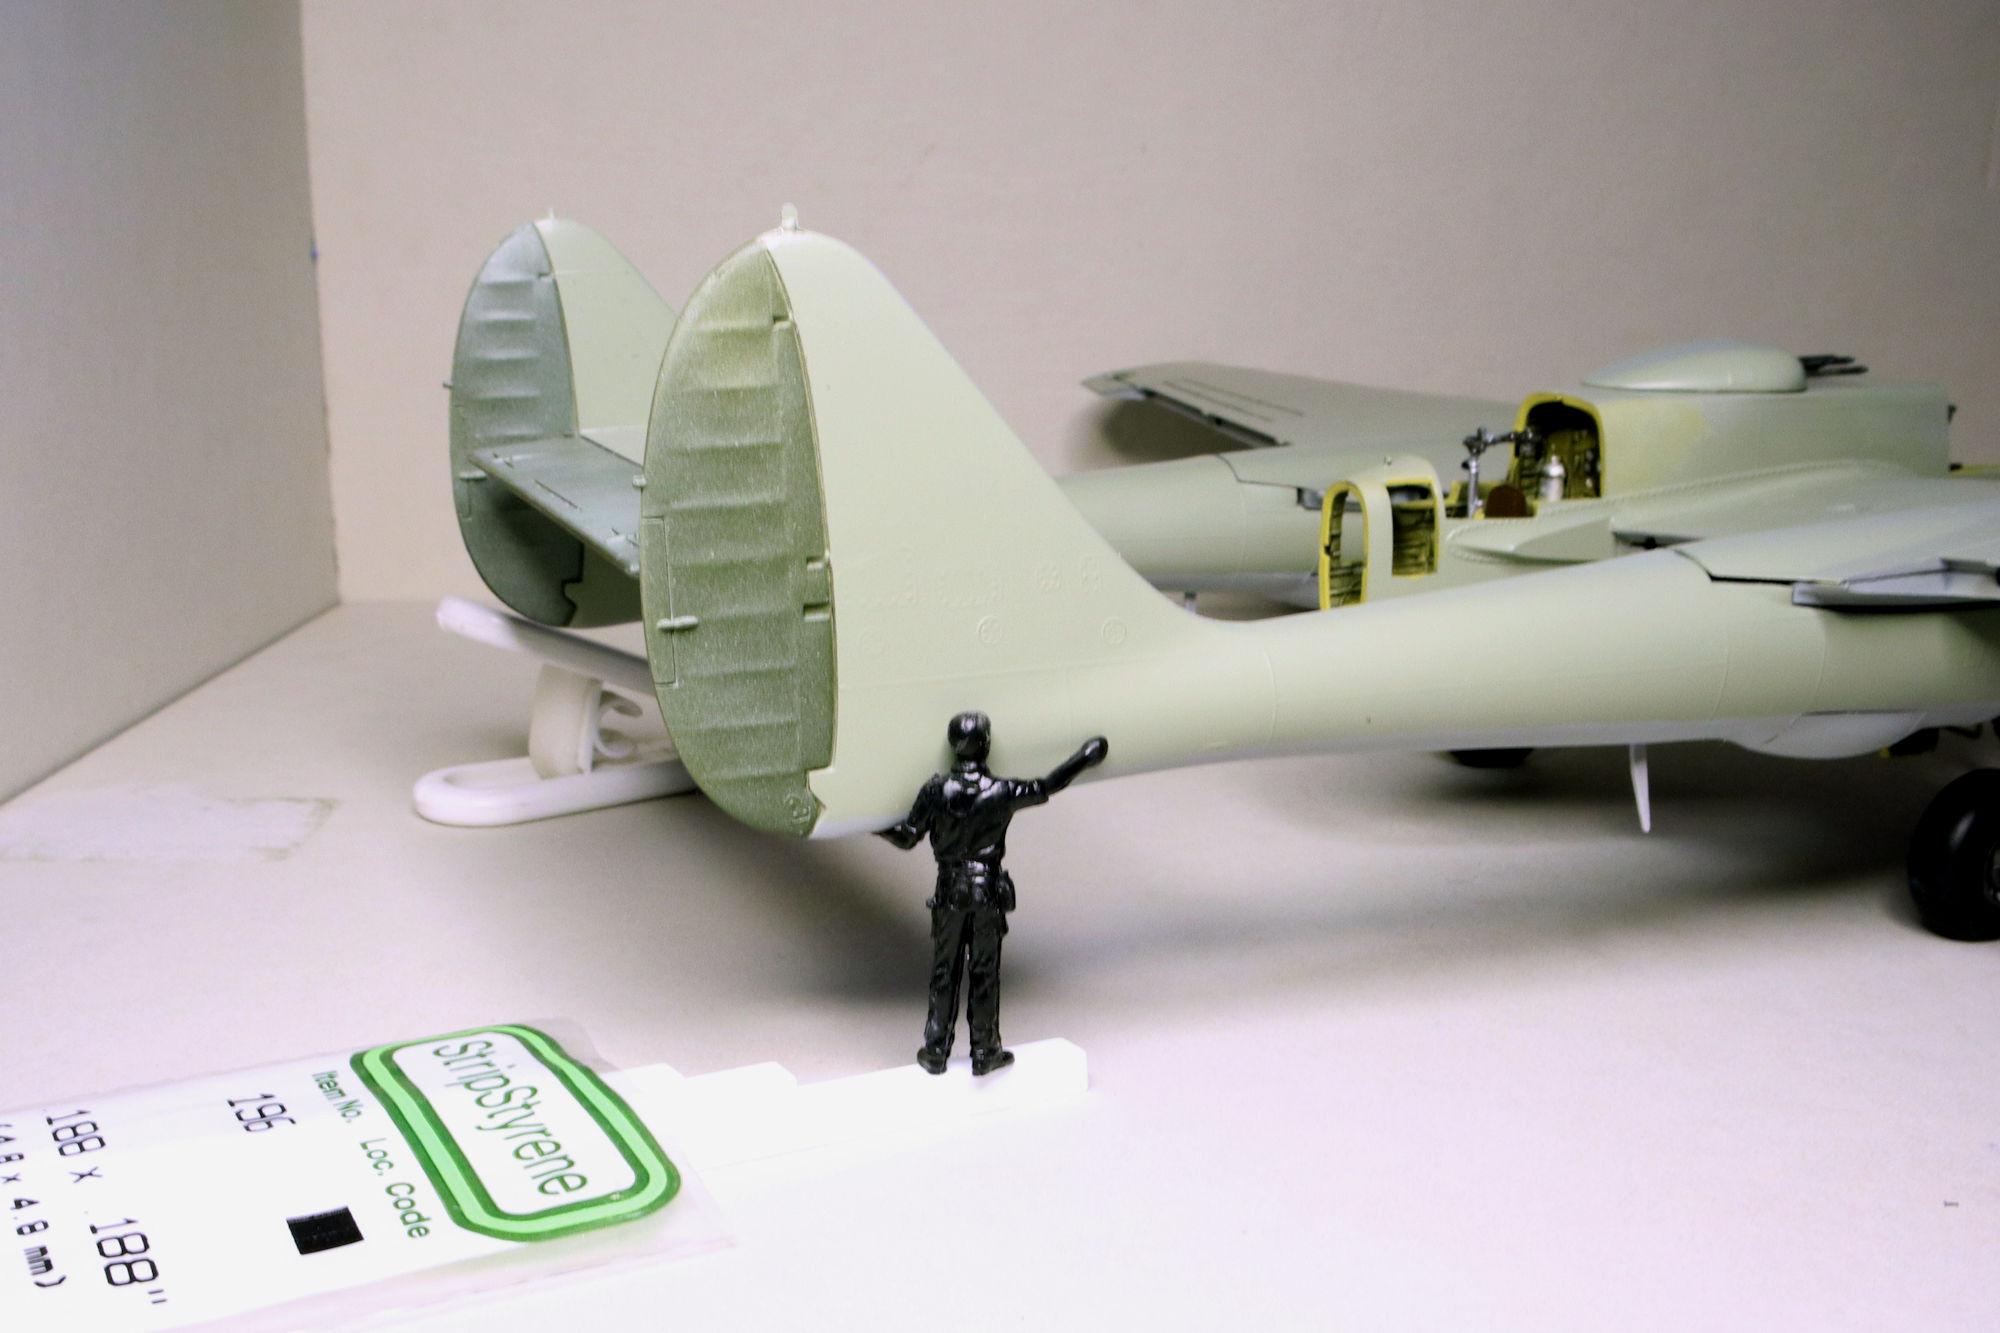
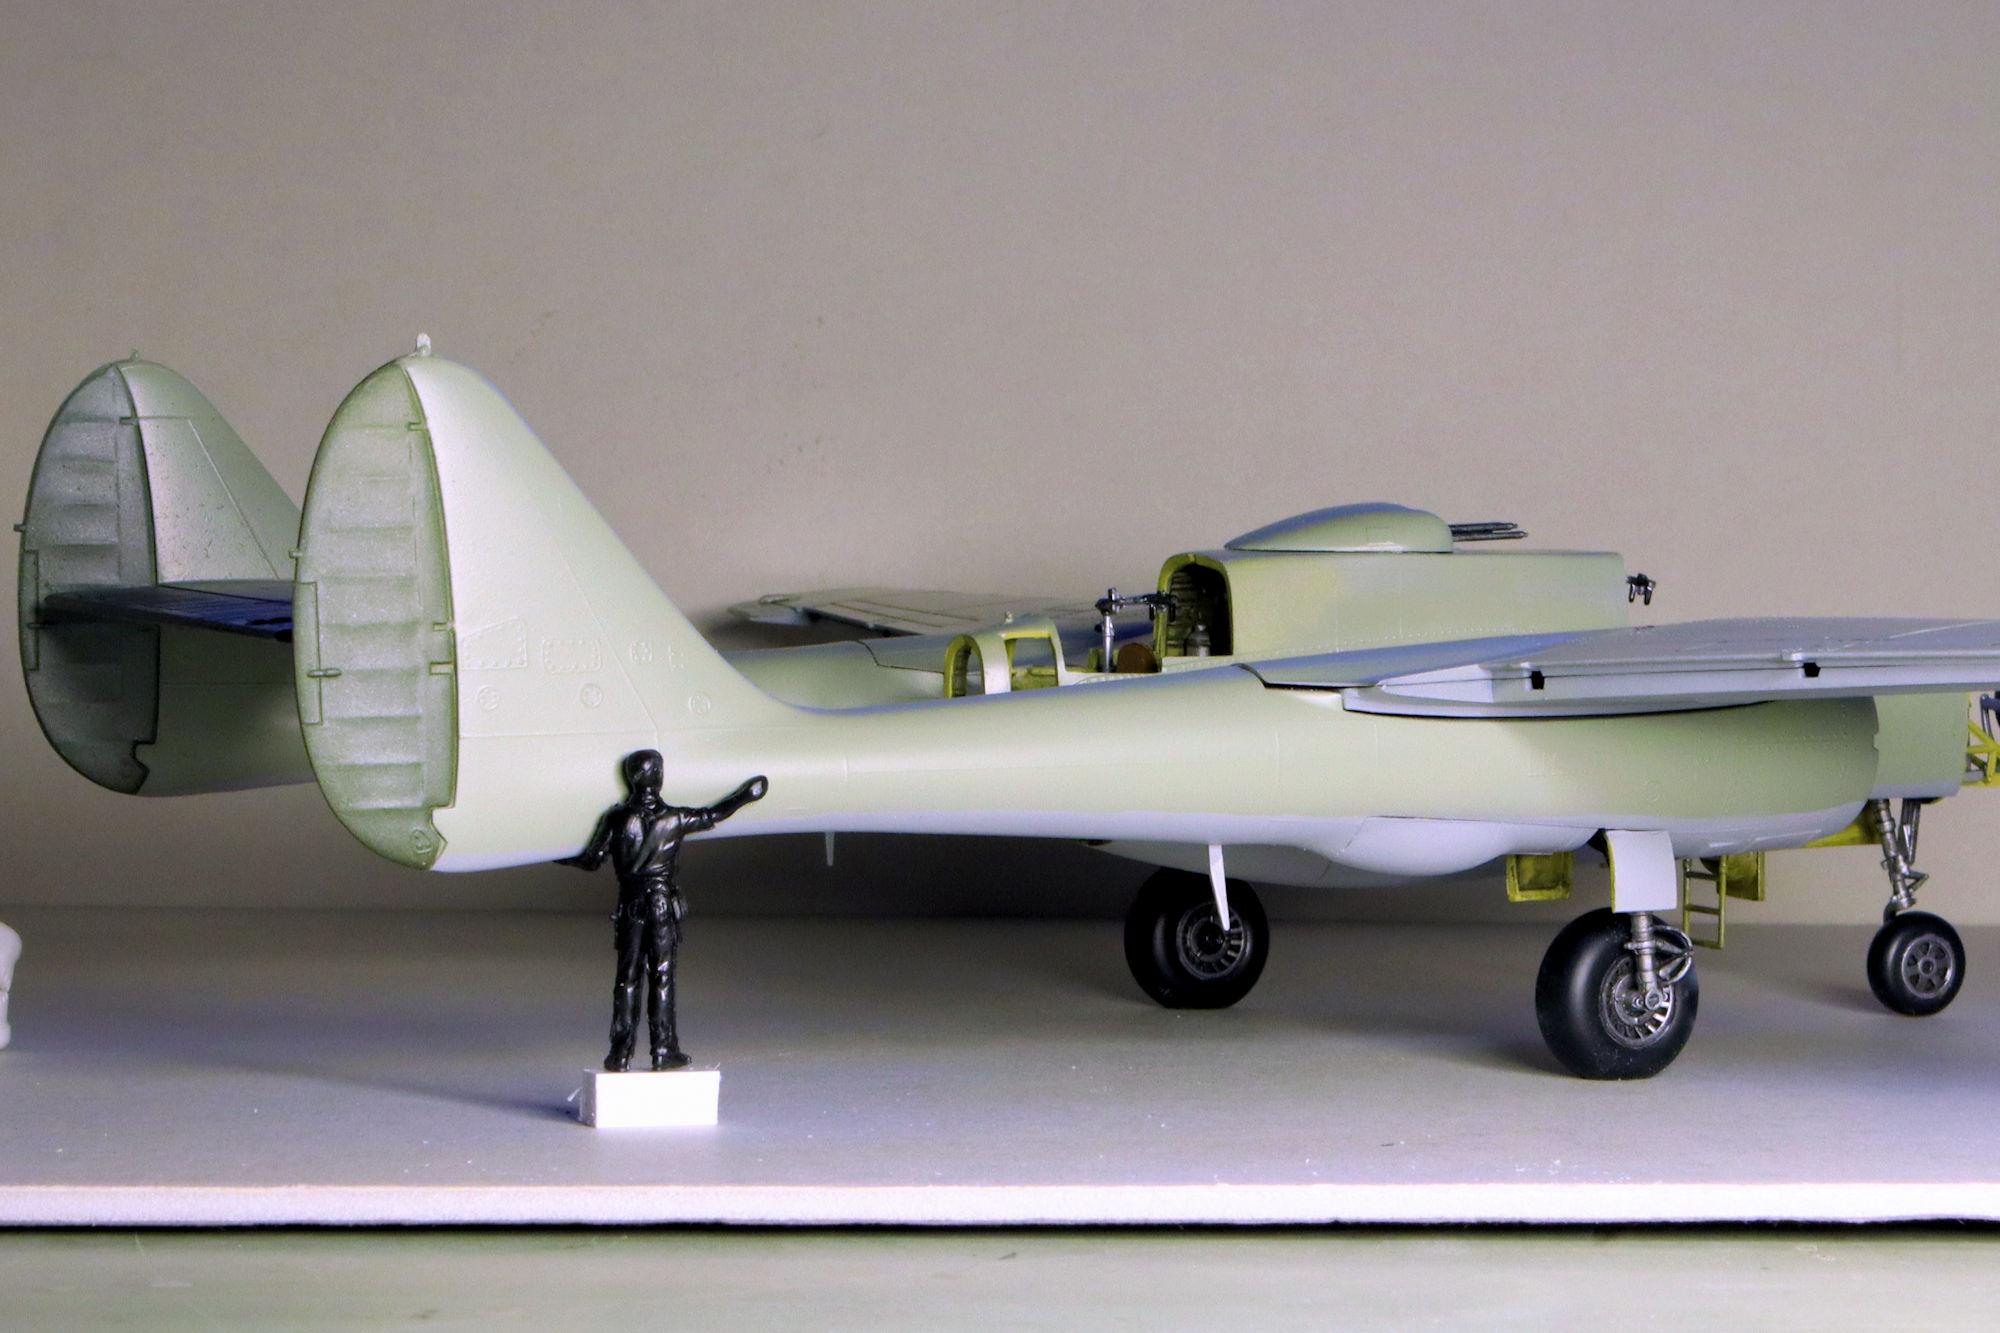
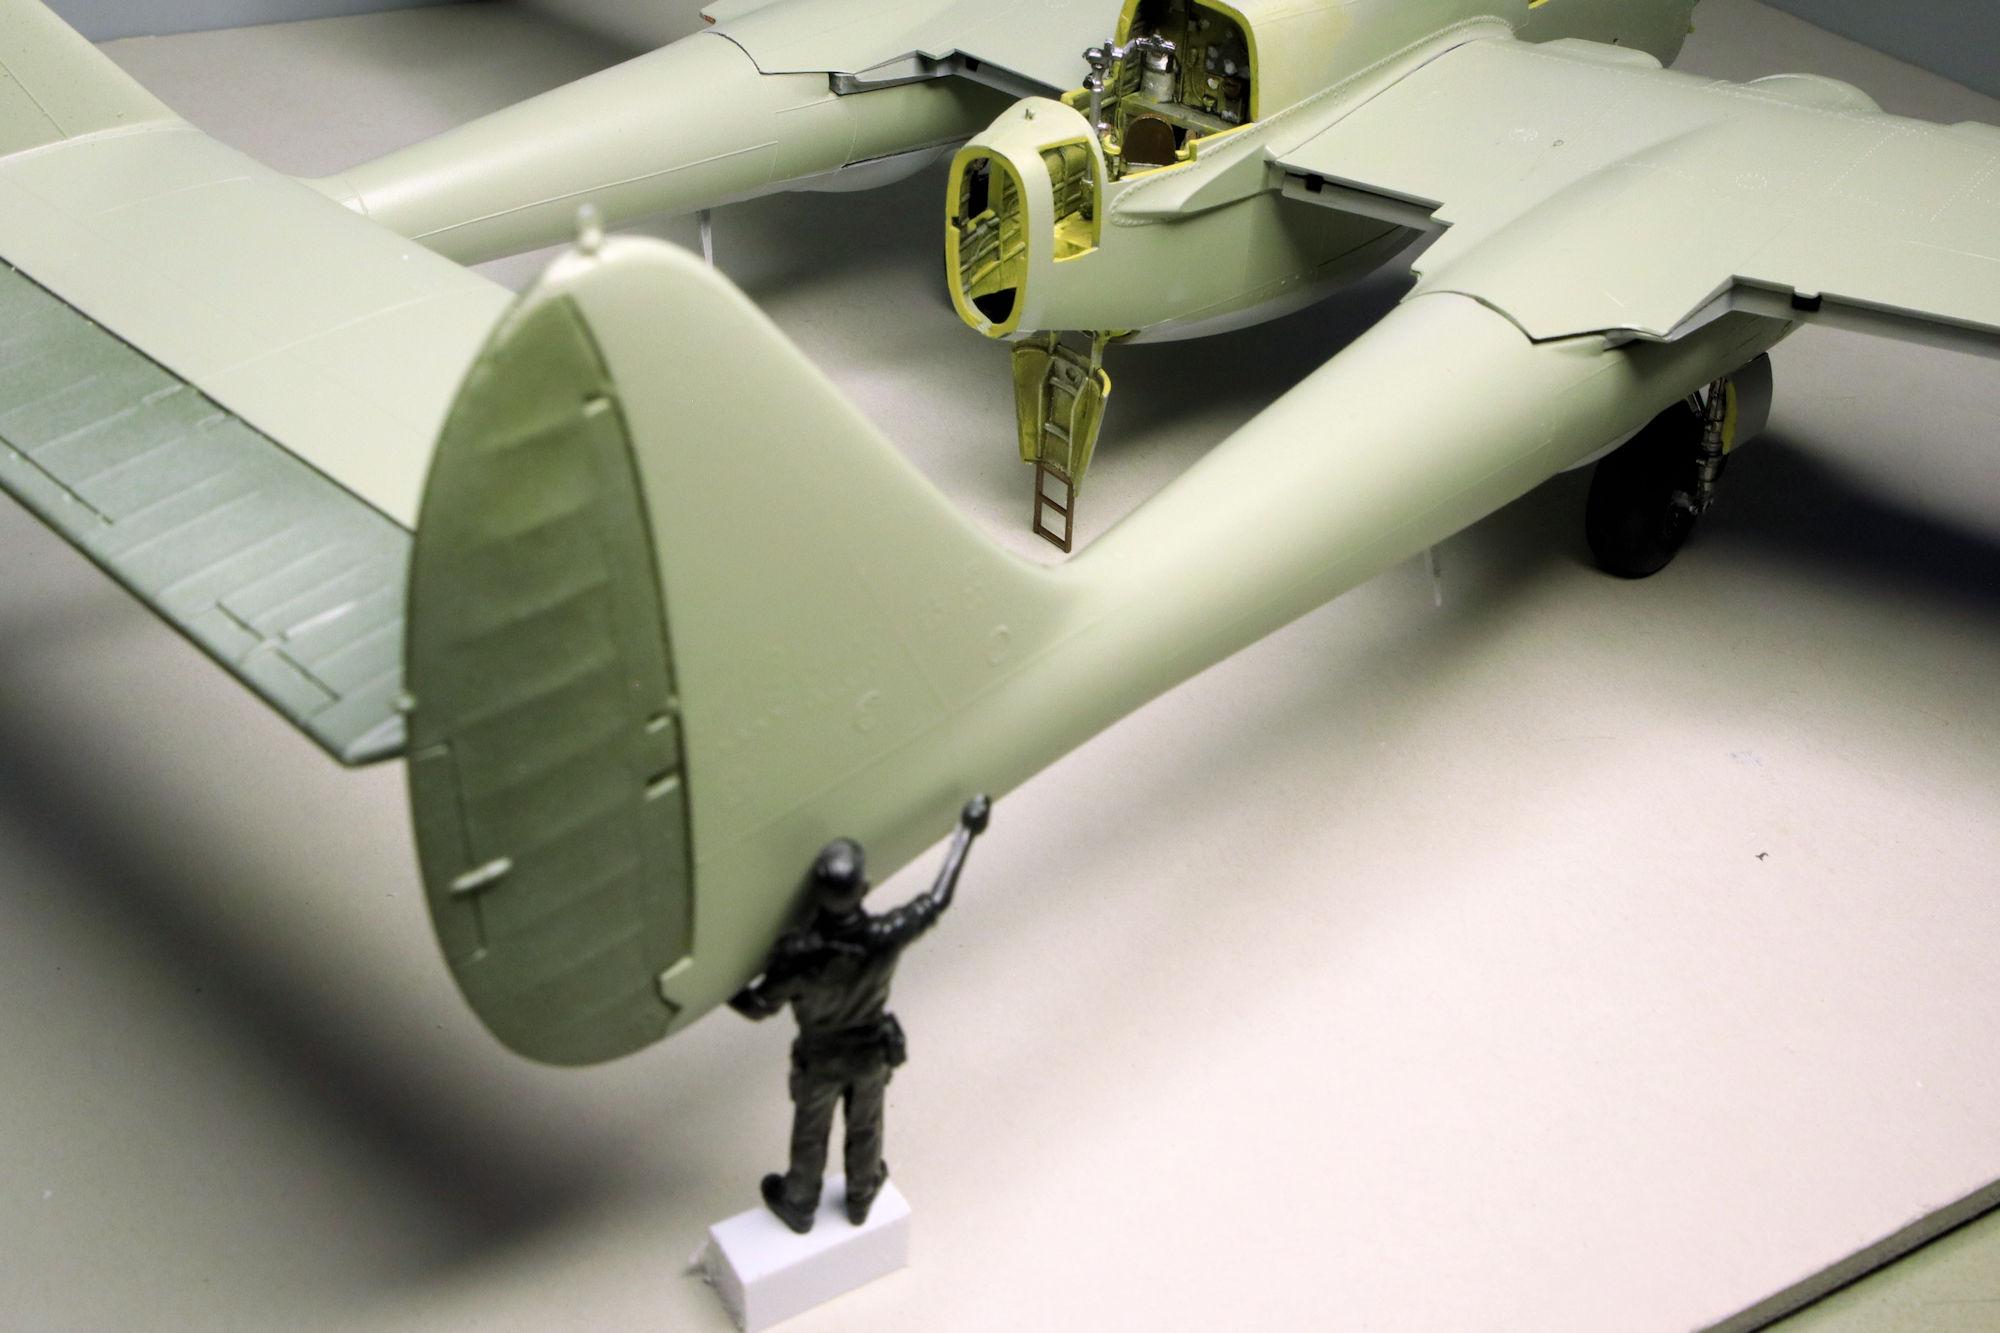
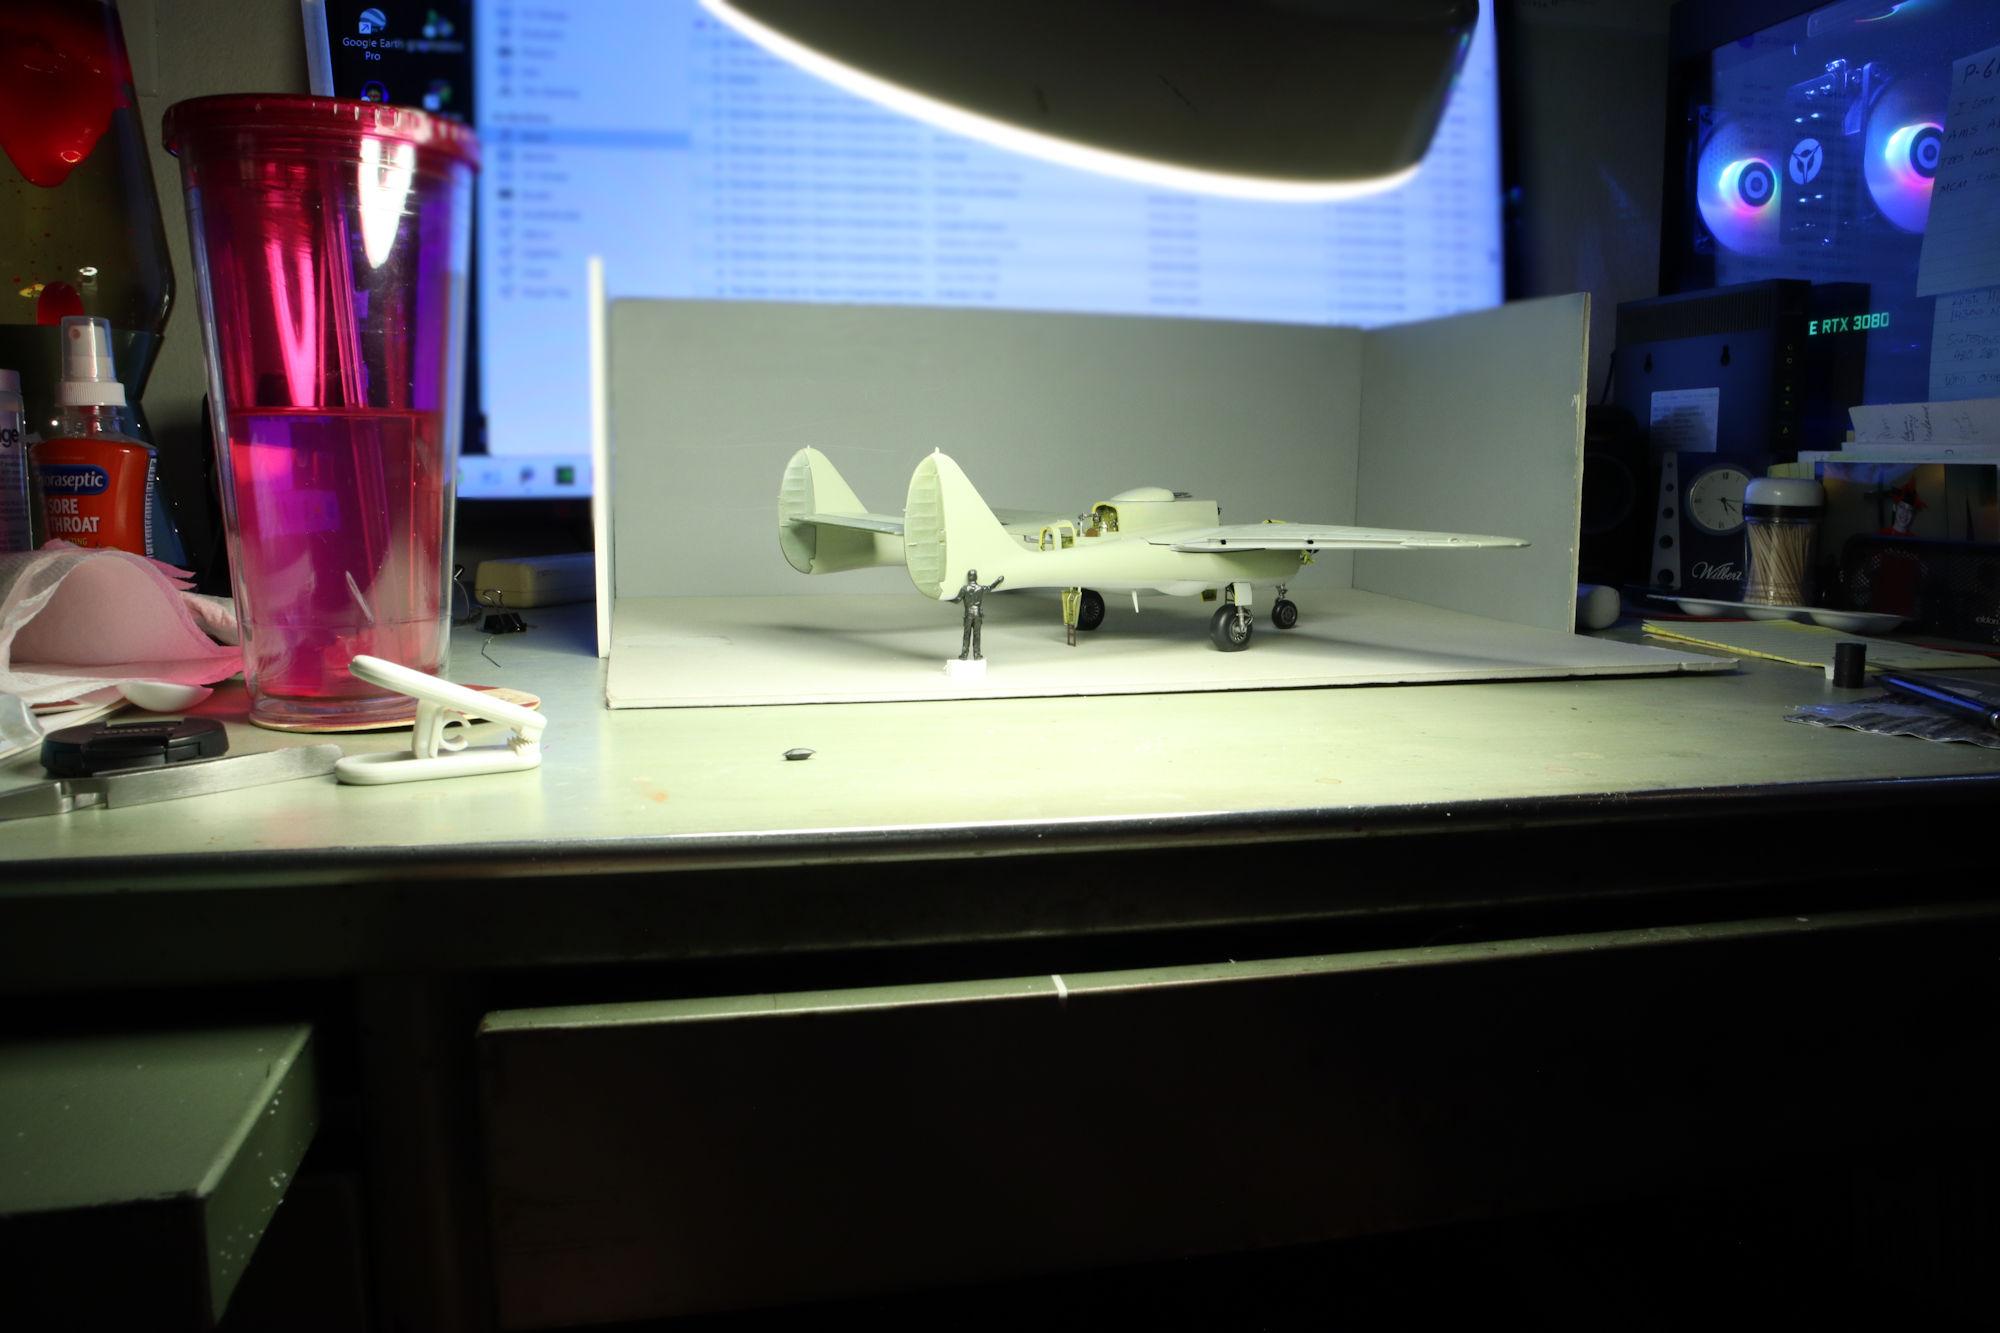
Hello Everybody! The Northrop P-61 is starting to look more like an airplane! The wings and wheels are now permanently attached. It's an airplane! Unfortunately it's a very tail-heavy airplane that needs some support to sit properly level. I'm just not going to display it with a large plastic clip under the tail. That would destroy the illusion! Playing around with some ideas, I check to see how the figures may figure in. They are "ground support" after all! Jack Tailer standing on a crate checking the tail alignment, I think I can make this work! In addition to Jack, quite luckily, I was able to find a suitable spare part to extend the ladder on the rear access hatch. This suggestion was offered to me by a fellow builder @magicmustang. I think with Jack and the ladder both working together, they should be able to keep the plane level. For those who may be curious, here's a bonus shot of my "photo studio" That's all for this update. As always, please feel free to post any comments you may have. Thanks for stopping by to have a look. David G.
-
Monogram's 1955 Lincoln Futura Concept Car: WIP
David G. replied to David G.'s topic in WIP: Model Cars
At least she's happy! -D-