David G.
-
Posts
11,307 -
Joined
-
Last visited
Content Type
Profiles
Forums
Events
Gallery
Everything posted by David G.
-

Monogram's 1955 Lincoln Futura Concept Car: WIP
David G. replied to David G.'s topic in WIP: Model Cars
Hmmm... Have you seen this one yet, Len? Thank you most kindly Noel! David G. -
That's funny! Thanks for the chuckle Tim. That is a cool story Peter. At 24 oz that is one heavy N-scale loco! ? It must have felt like a brick when in hand. I actually did look into depleted uranium and it's currently about $35 per gram. Knowing that I need around 2 oz to balance the plane, that would be about $2000.00 worth of depleted U! And I don't even know how to work with the stuff! ? If I did buy several ounces of the stuff, I'm sure it would be delivered by an agent of whichever federal regulatory agency is most applicable. I'll stick to lead shot, thanks -D-
-
Monogram's 1955 Lincoln Futura Concept Car: WIP
David G. replied to David G.'s topic in WIP: Model Cars
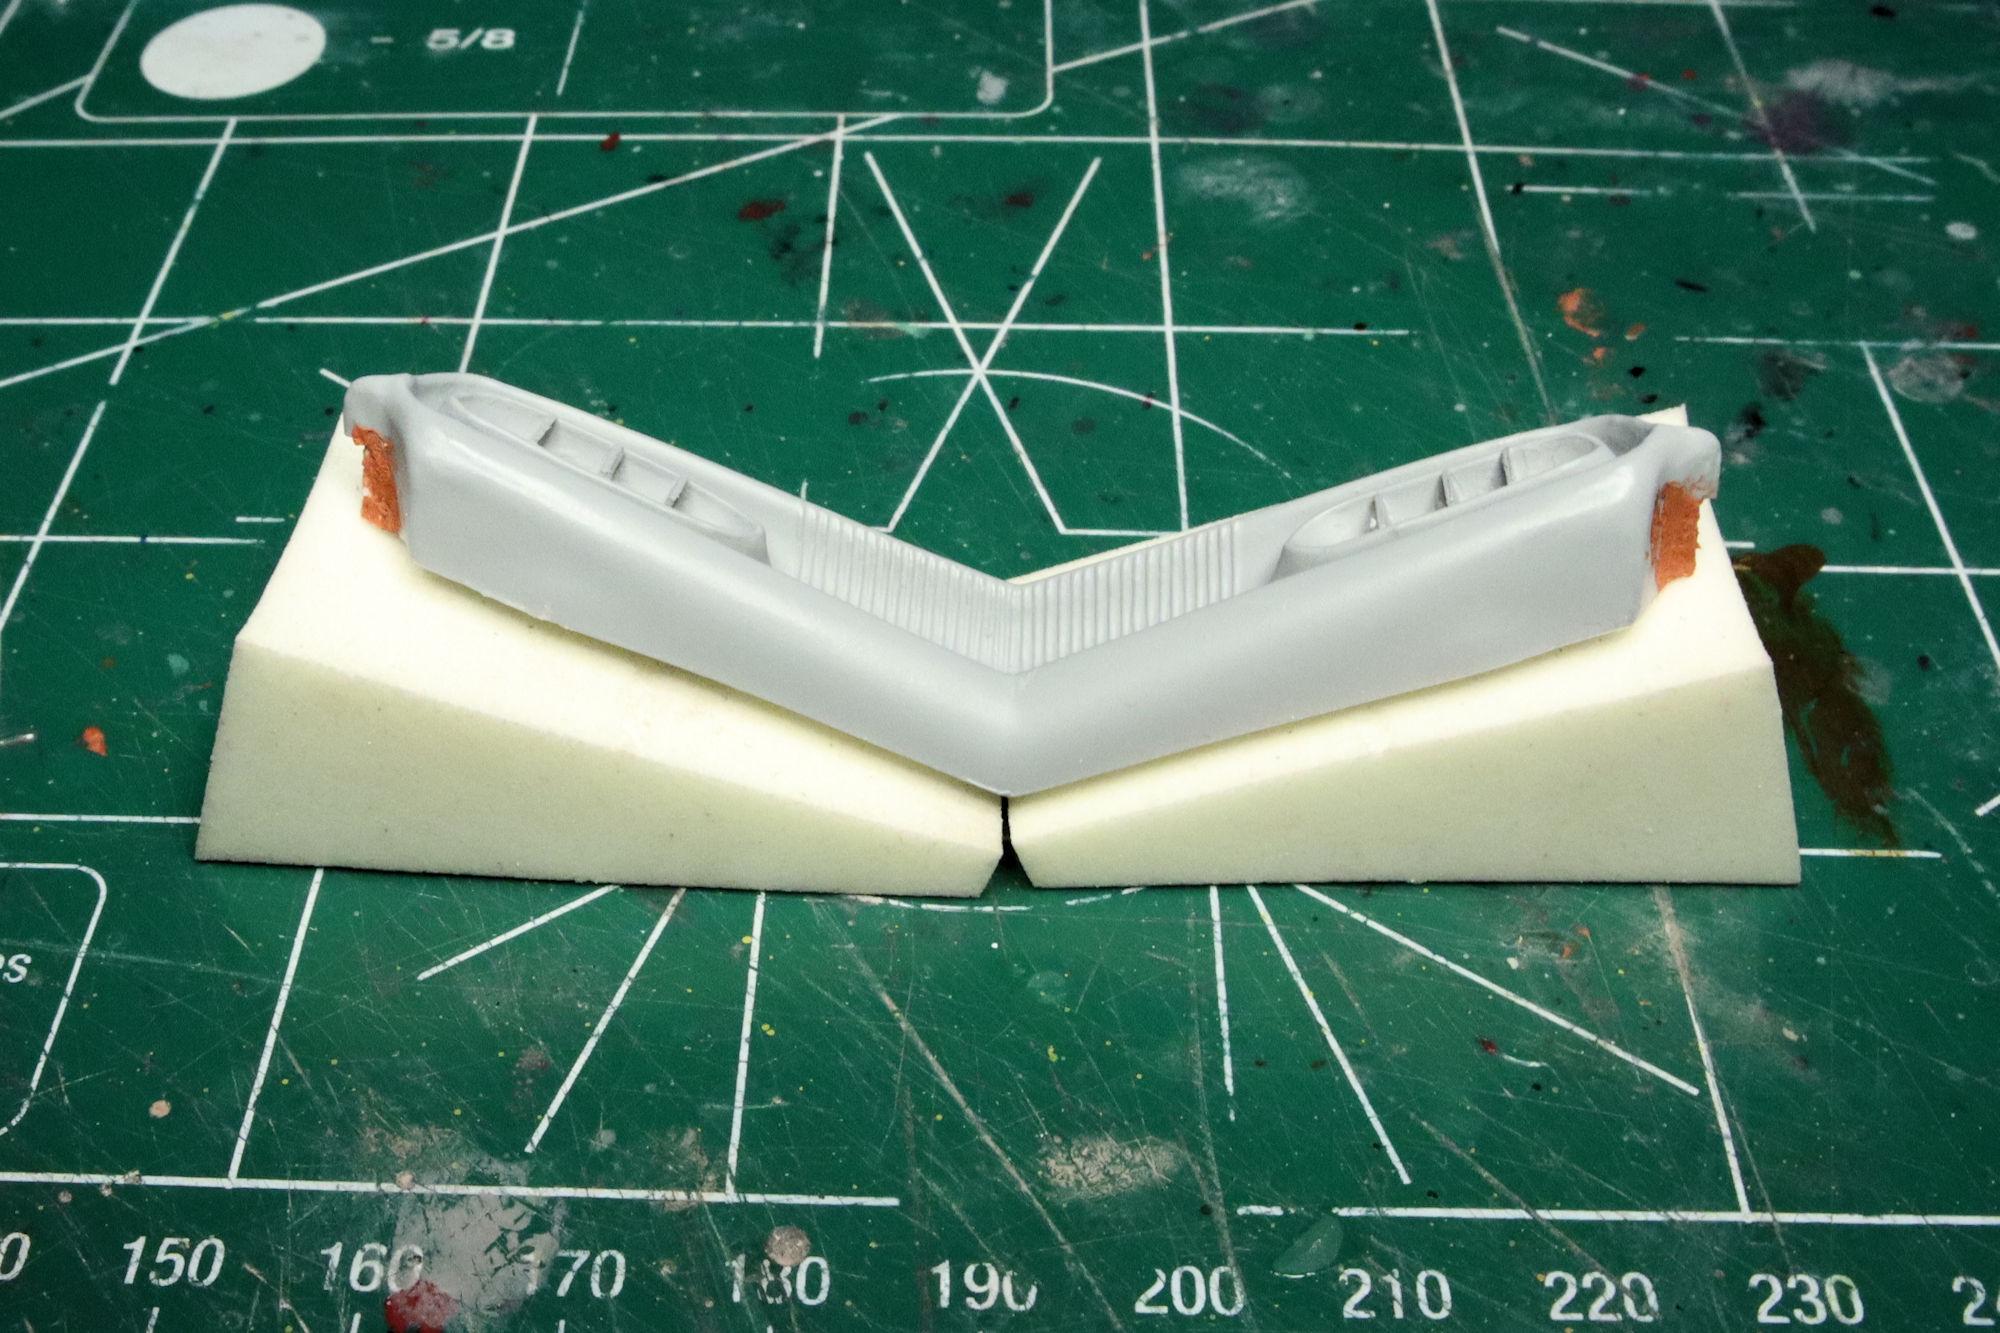
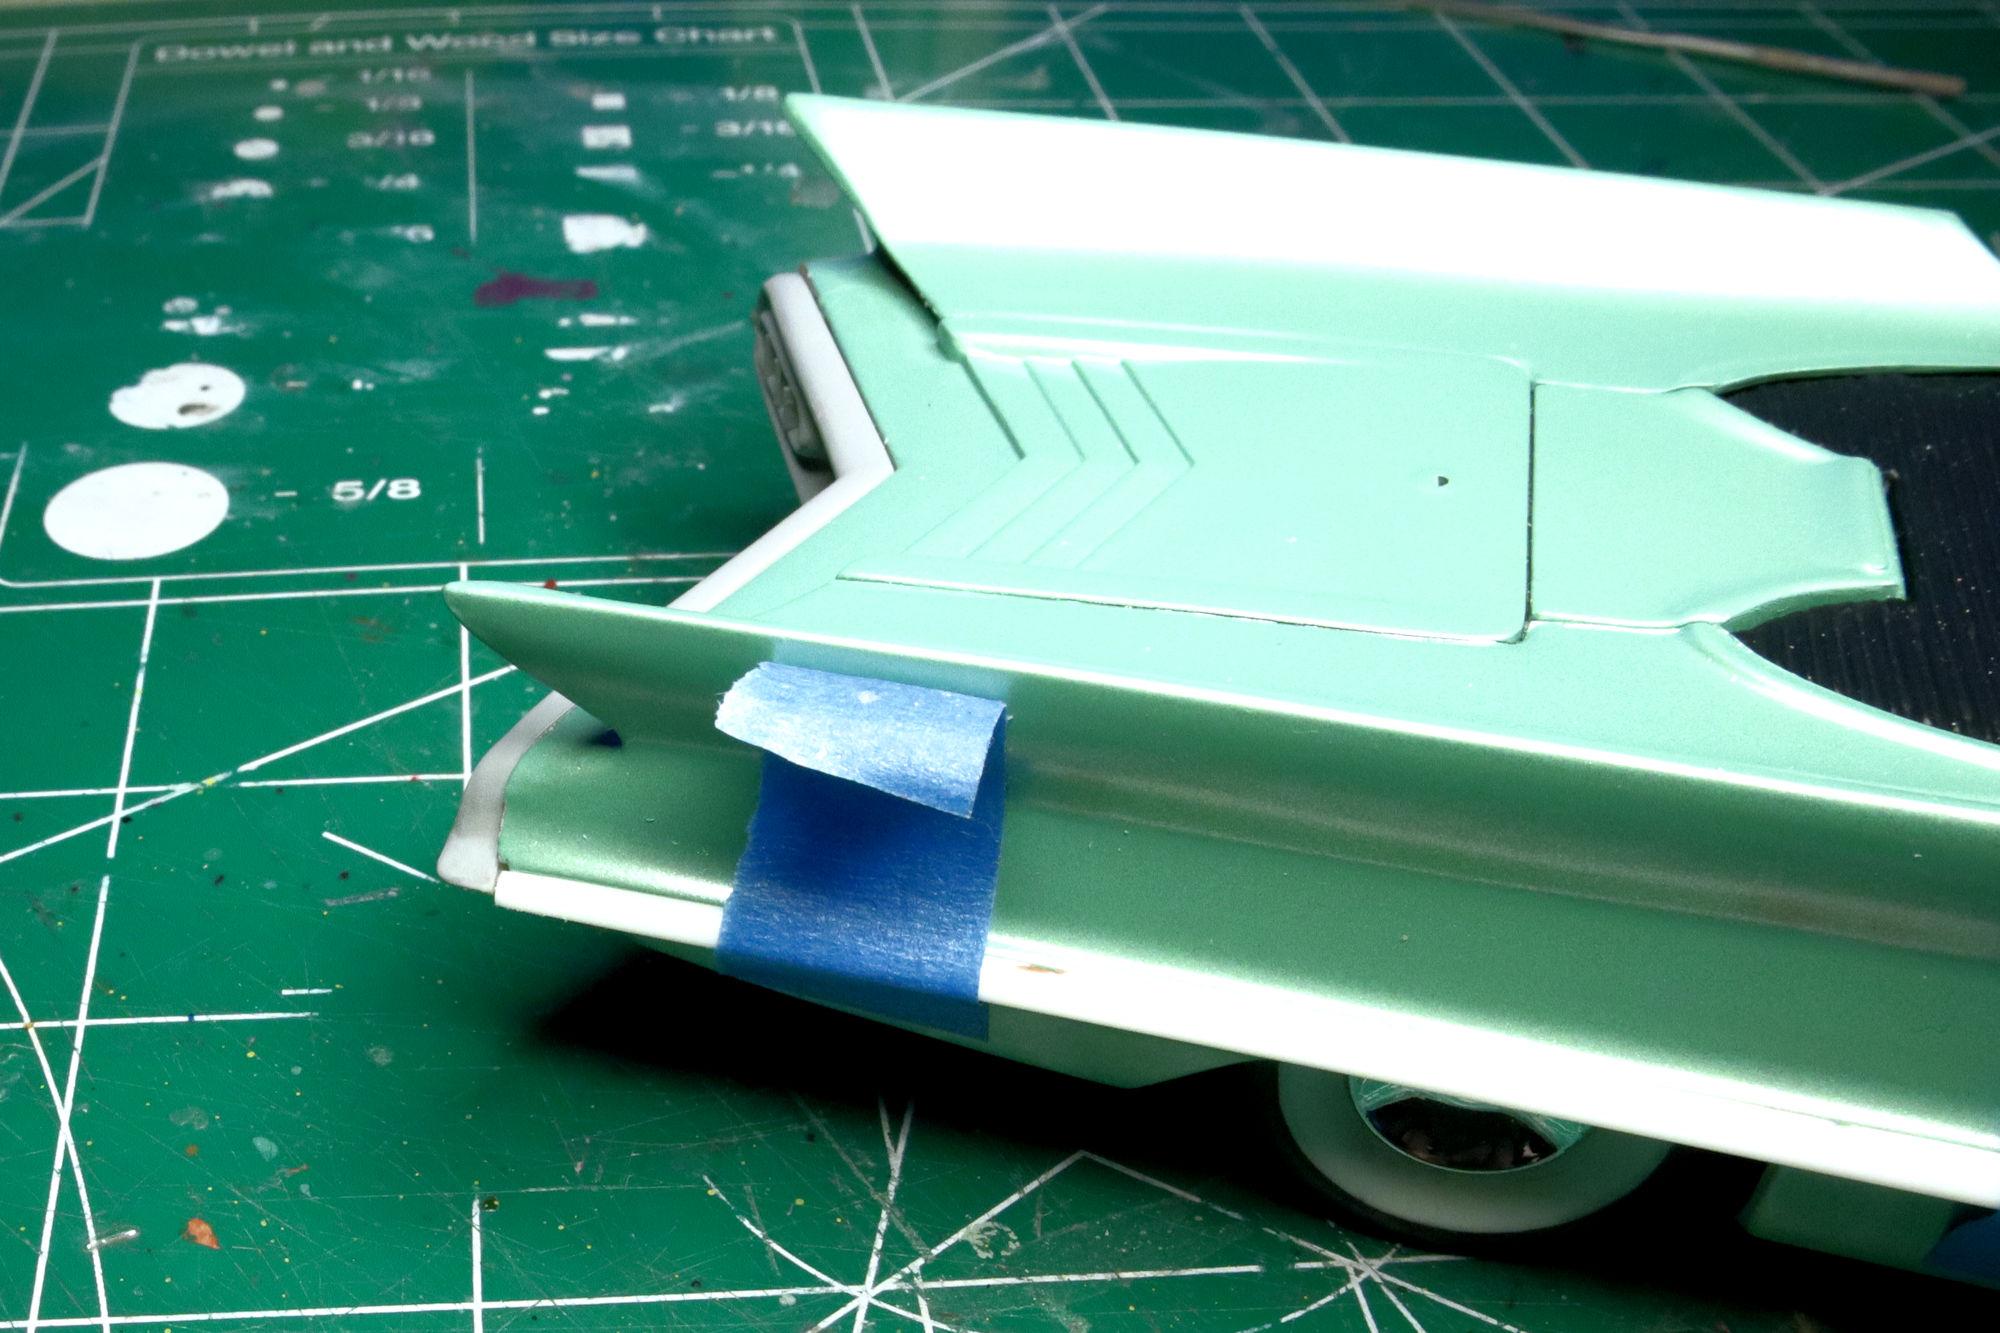
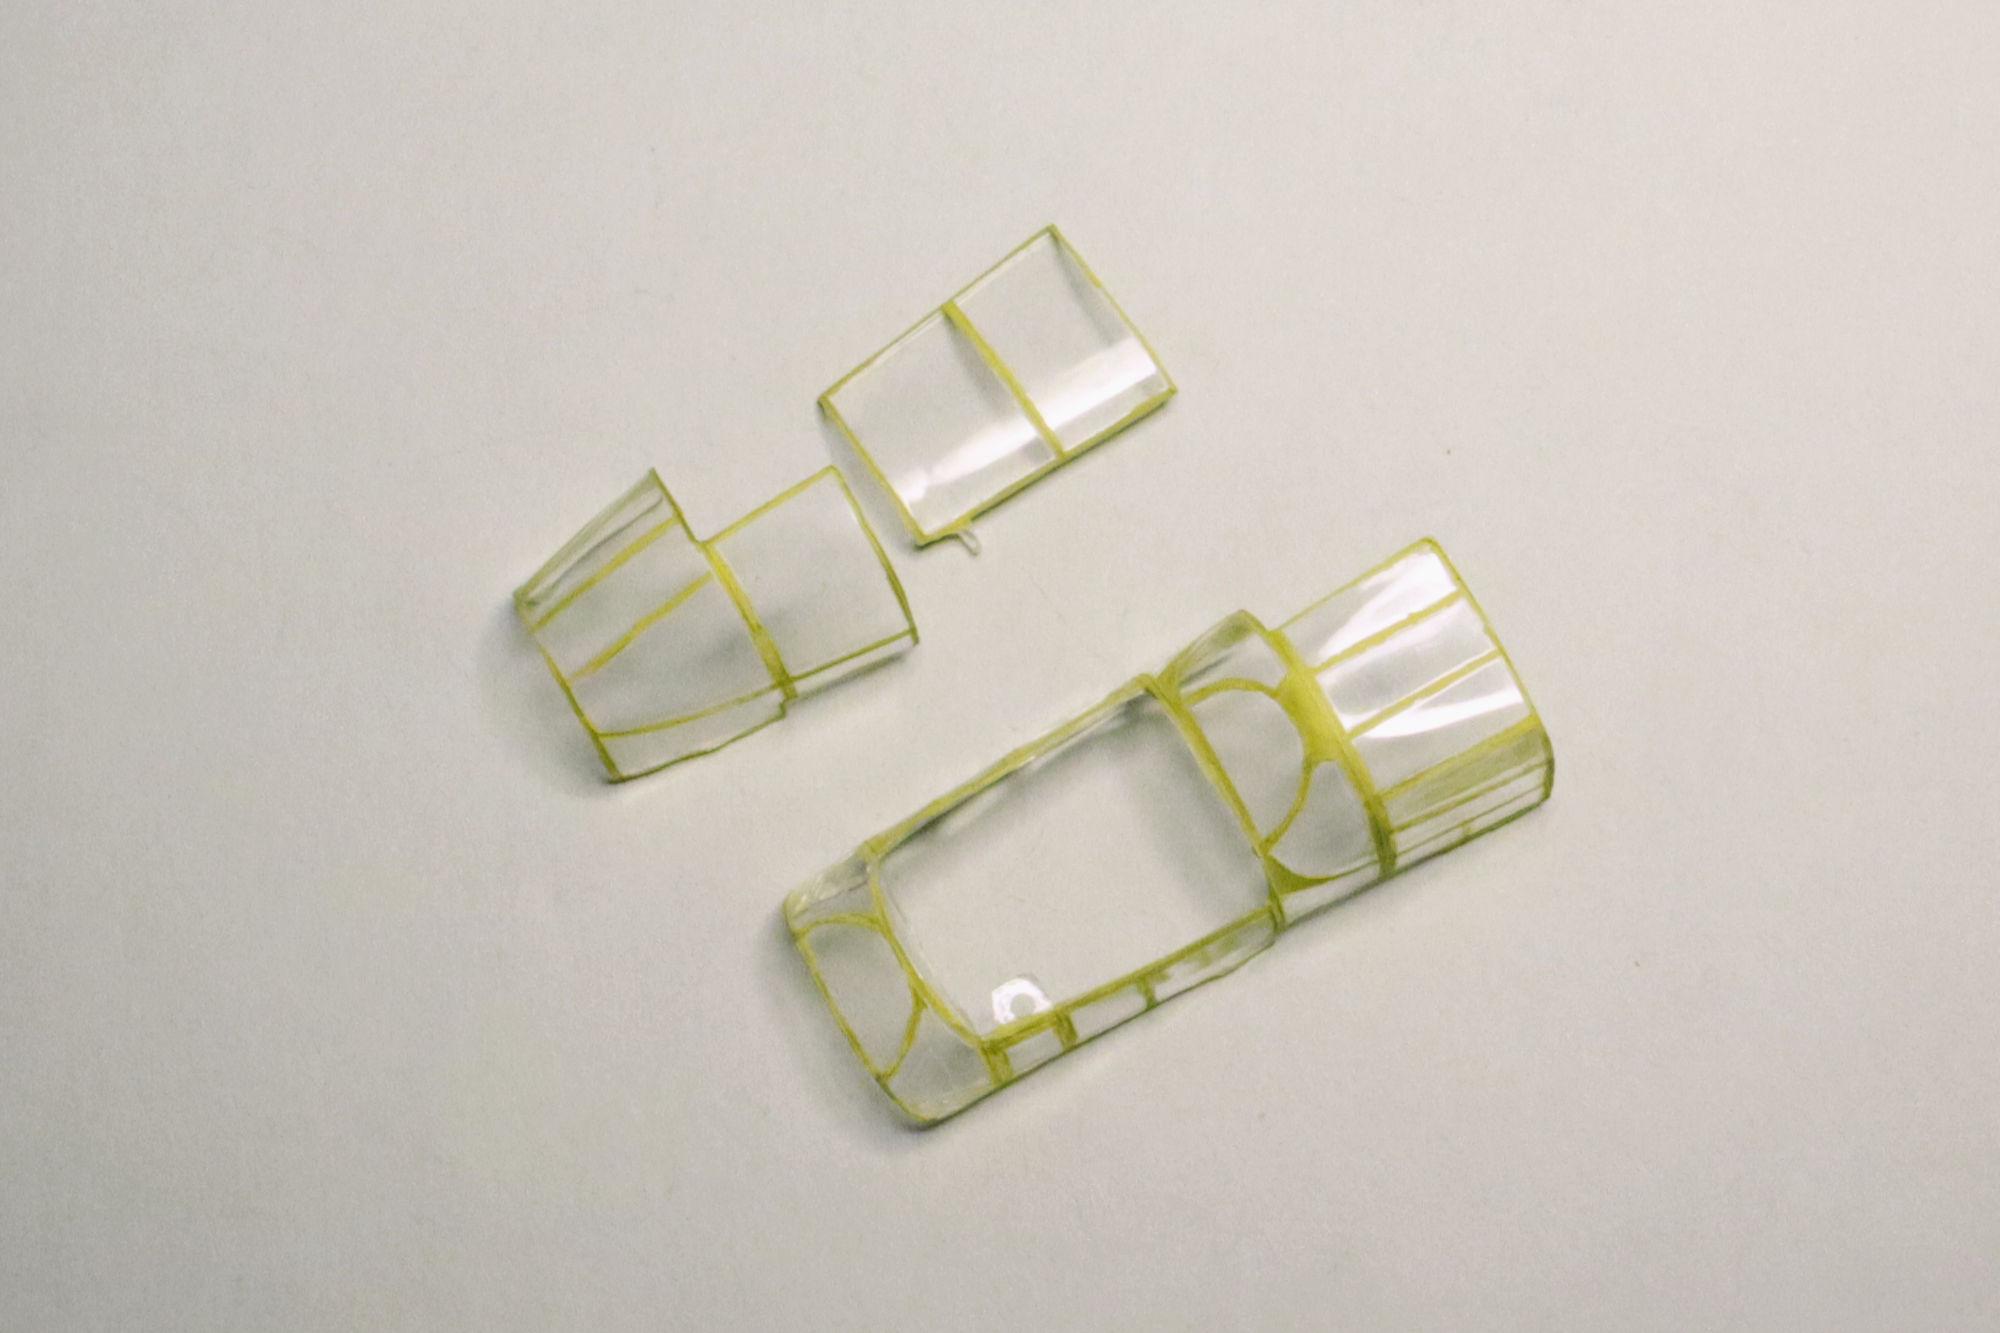
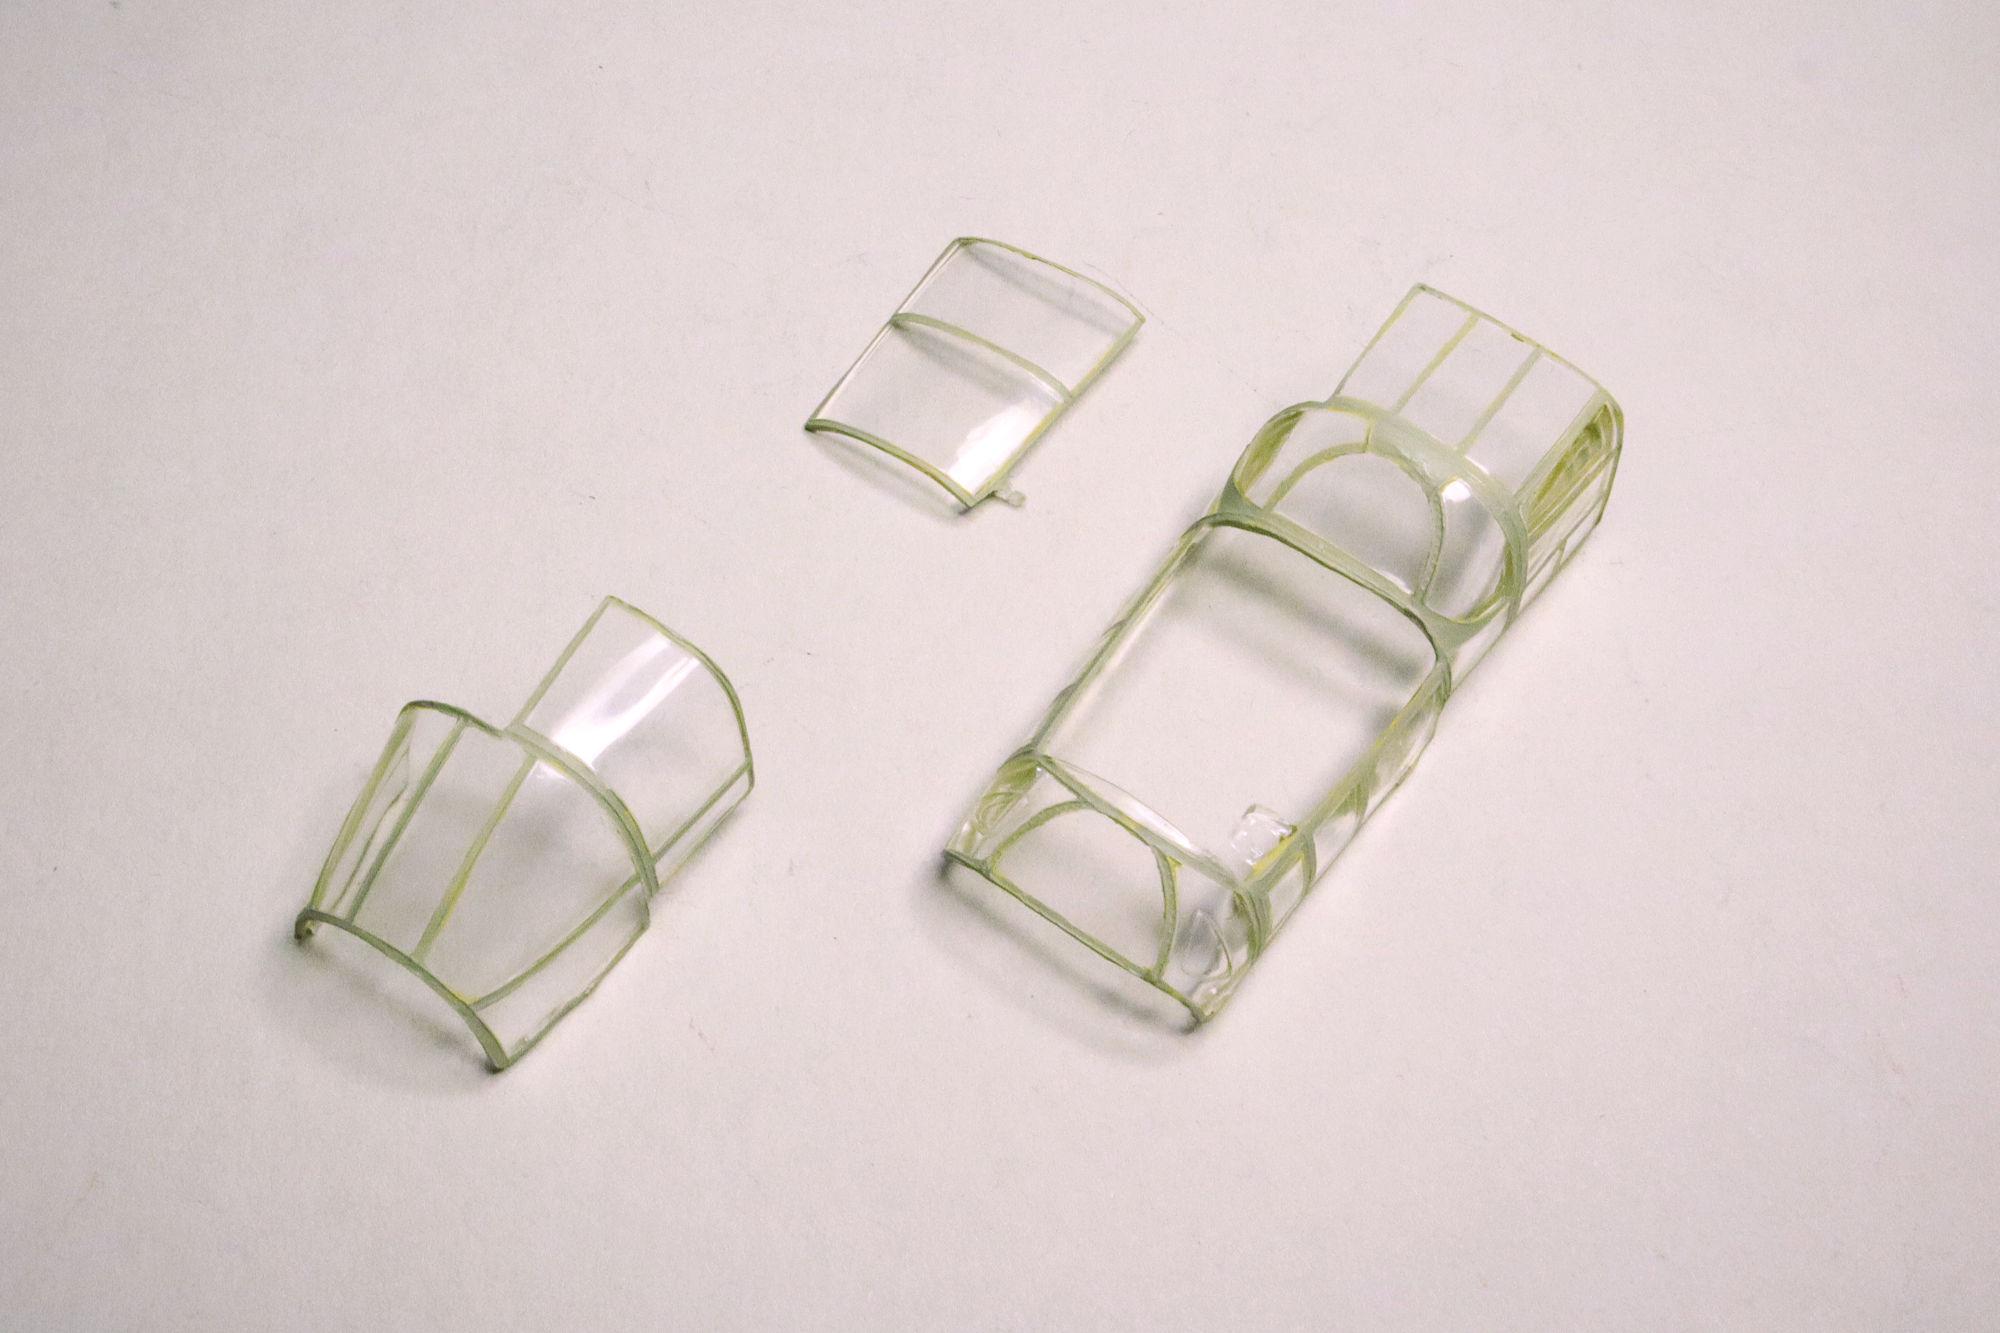
Hello Everybody! I must be getting close to completing this one. Because I'm starting to think about what I plan to build when this one's finally finished. Hmmm... We'll see. It's time for a putty party! The view from the top is pretty good. The bottom lines up pretty well, except where the moldings and bumper meet. It could use a little more work there. After a little sanding, filing and fussing, it's finally fitting! Now that I have the fit, it's on to getting the finish done. Next step, chroming the bumper! As always, thanks for your time and please feel free to share your thoughts in comment form. David G.
-
I'm considering that too Peter, all options are on the table. I plan adding weight in those locations if I'm unable get enough in the nose area. It should be pretty easy using the open gear bay doors. It's too bad I can't get some depleted uranium, it's almost twice the density of lead! Thanks for your suggestions Peter, I'll certainly be considering that as an option. David G.
-
That's a beautiful color, it really looks great on that car! David G.
-
Finished my 2 revell cudas, plum crazy purple/tawny gold
David G. replied to Nicholas's topic in Model Cars
That's a nice pair of Cudas! David G. -
A good clean build, nice work on the paintjob. David G.
-
Nicely built and detailed, well done! David G.
-
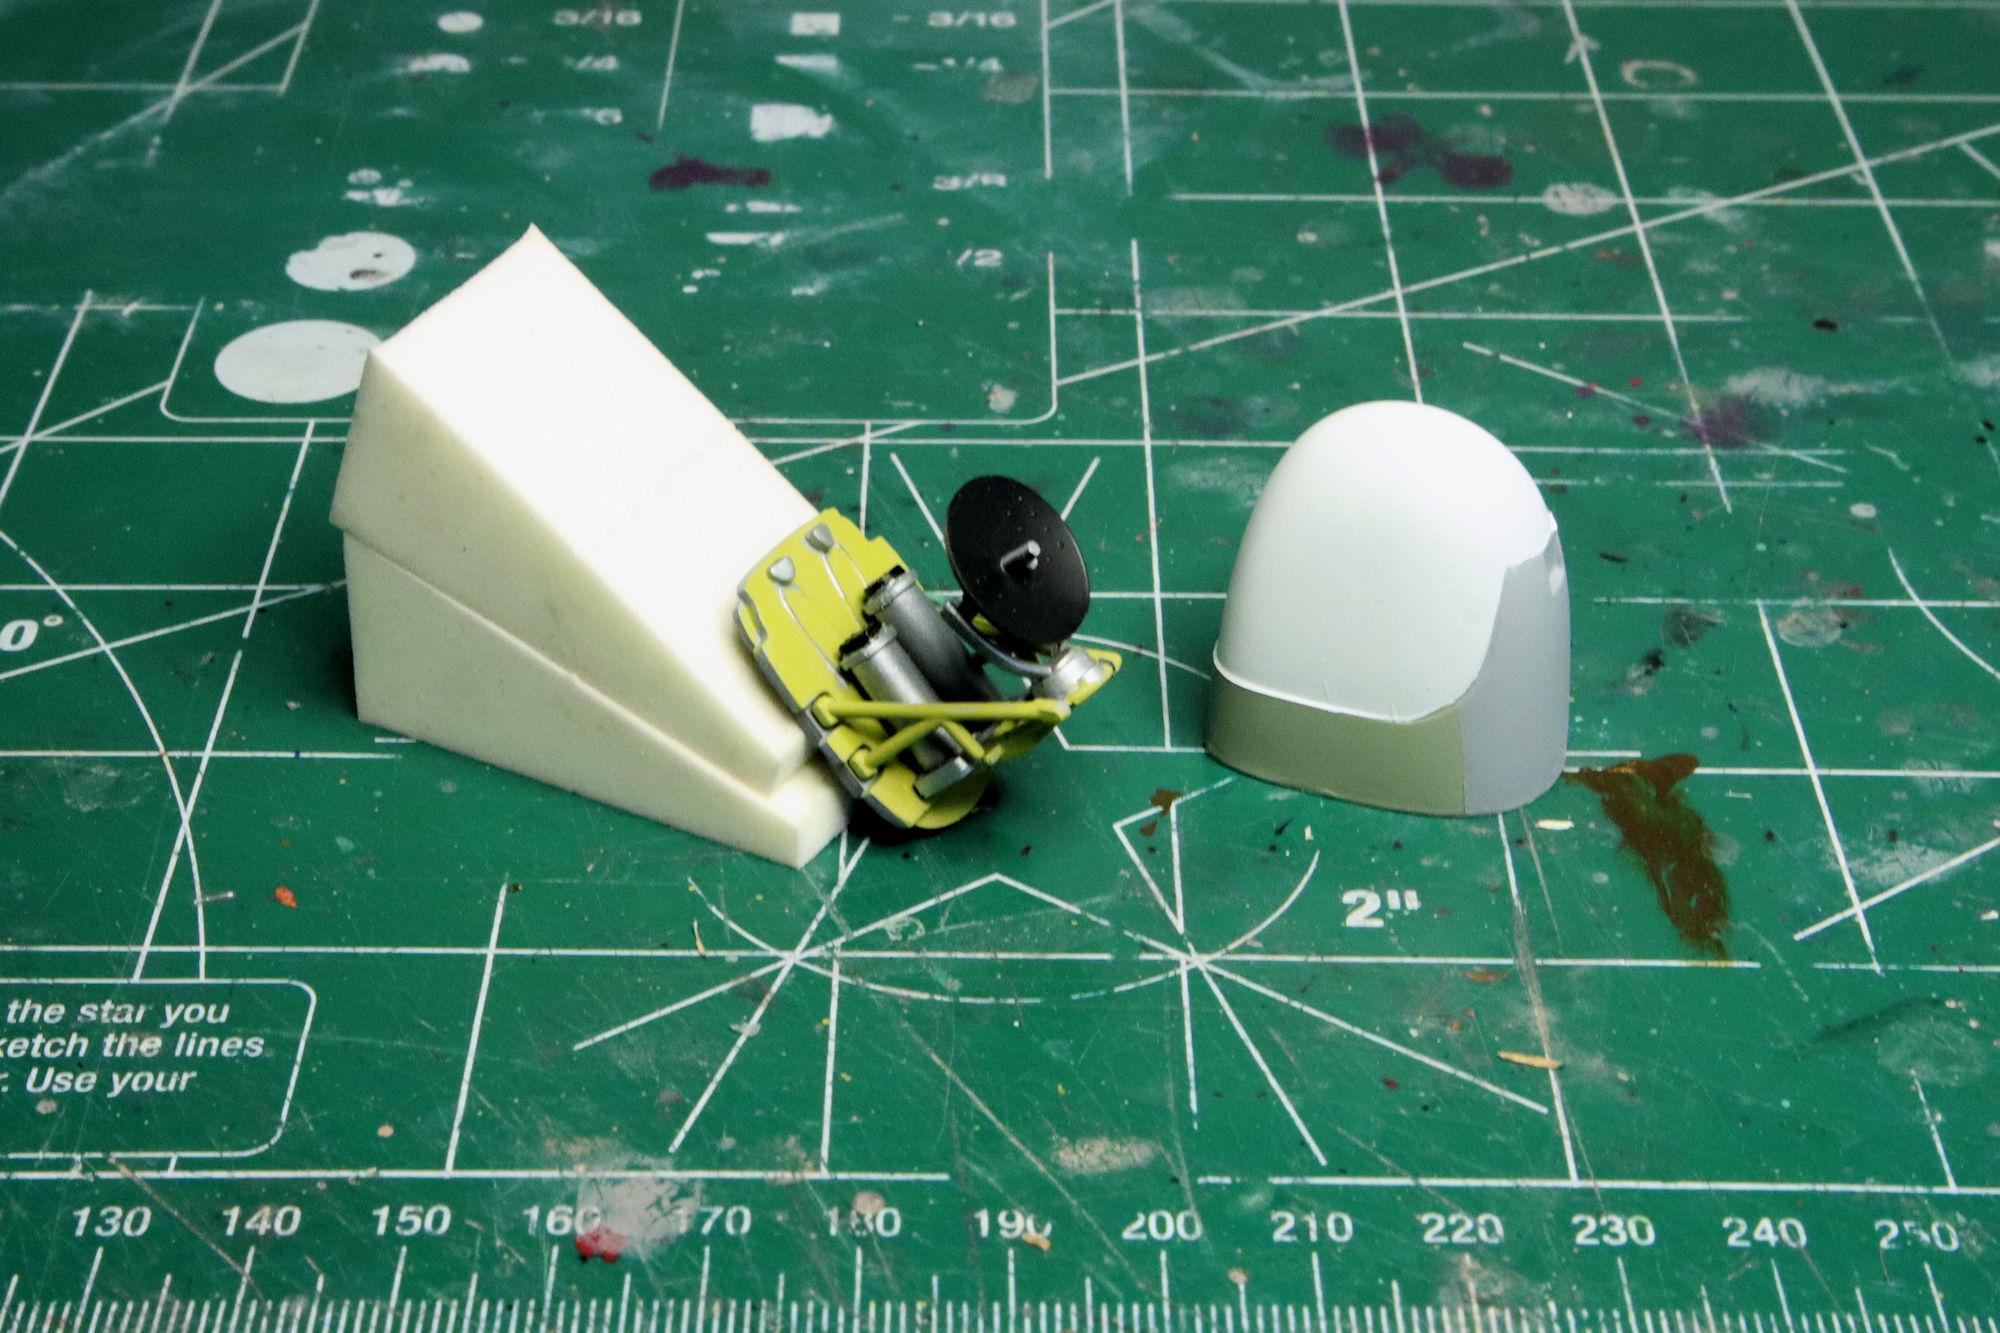
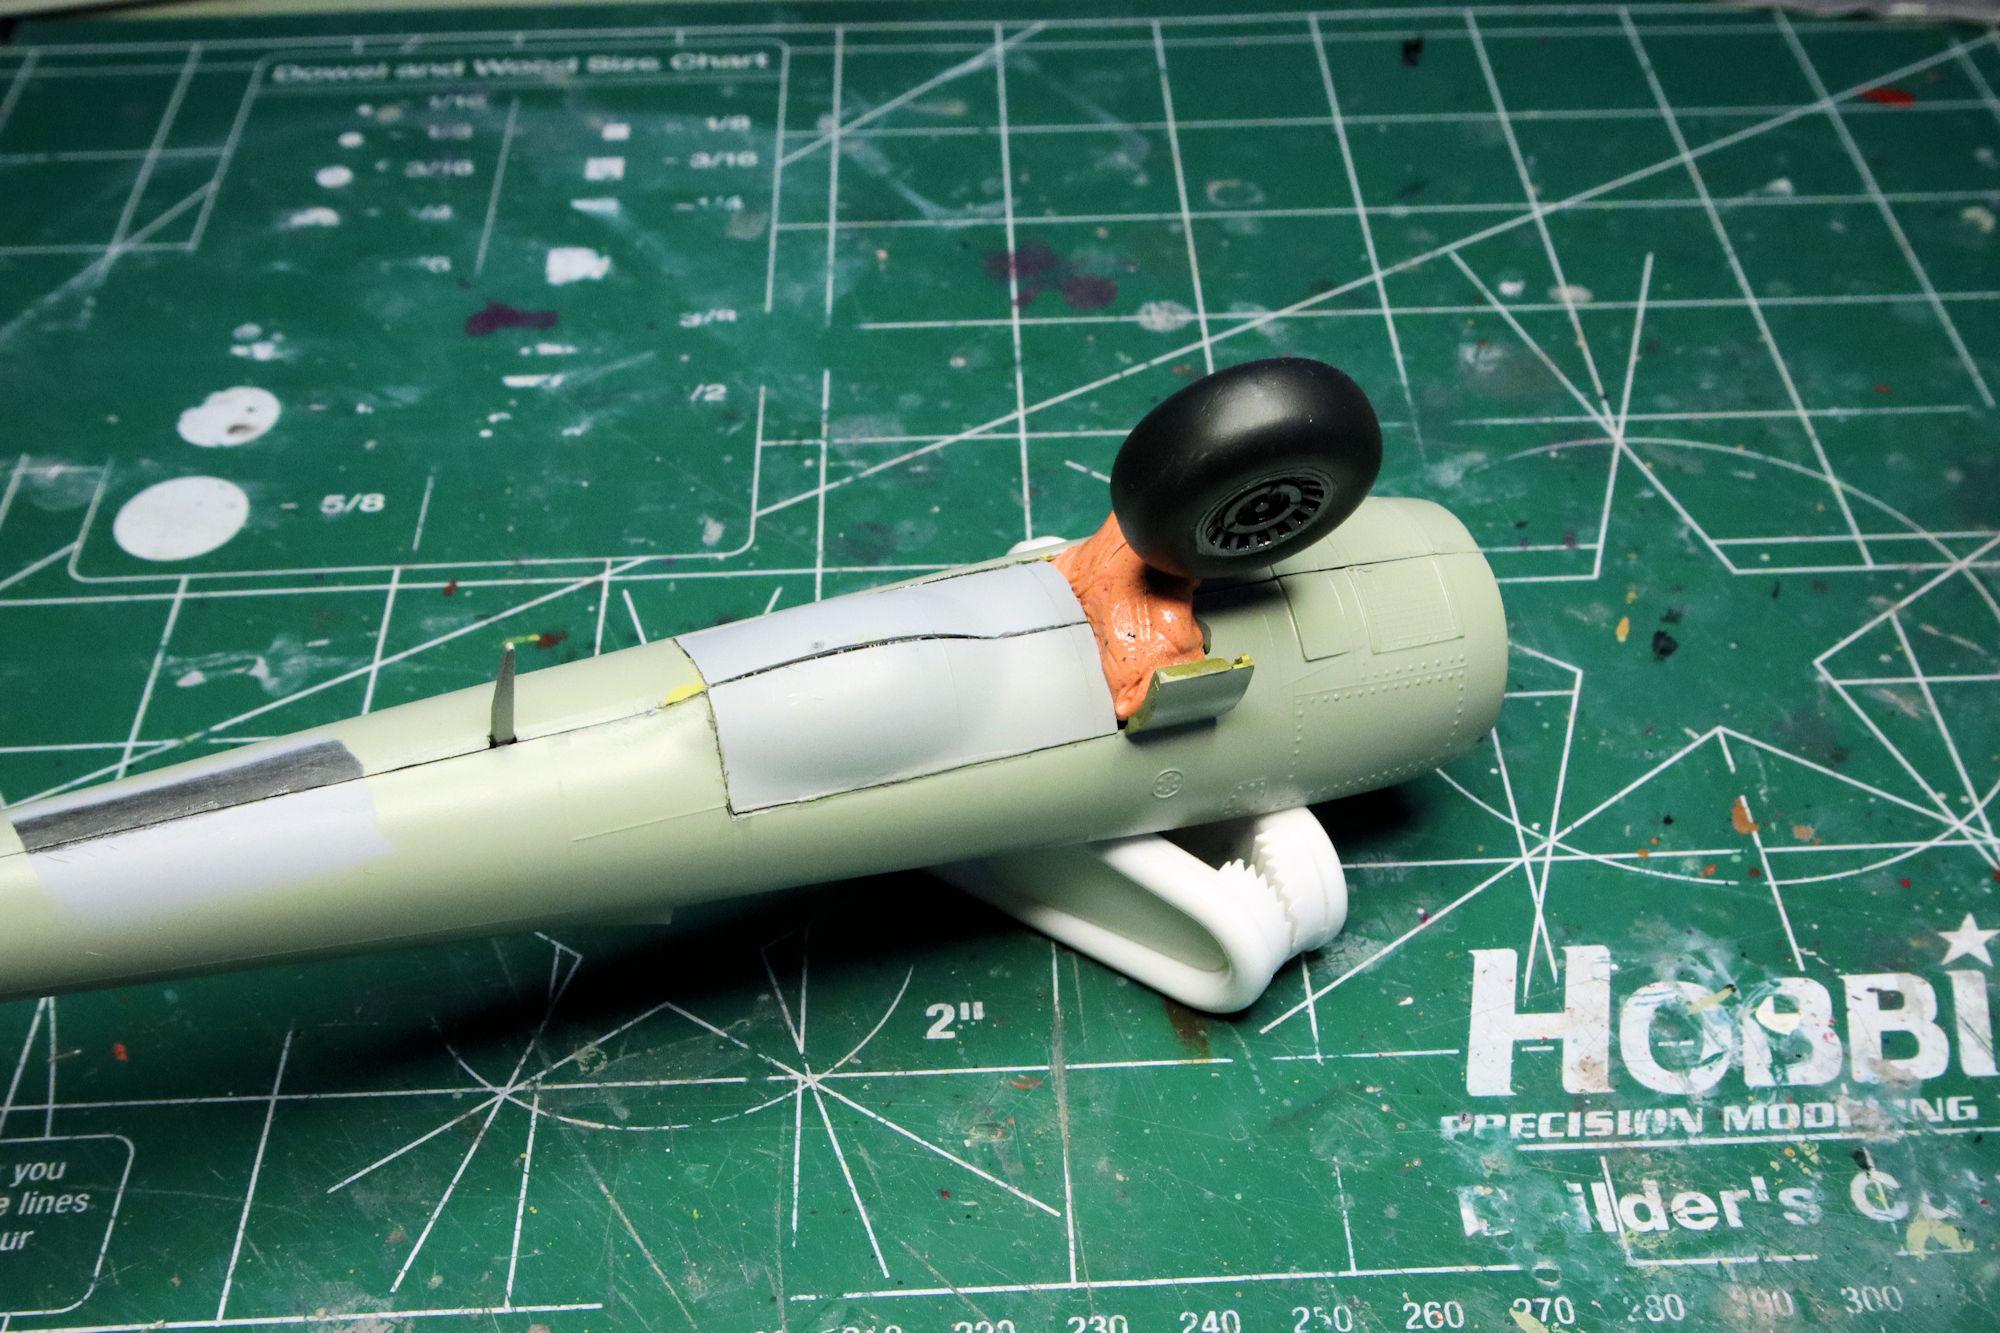
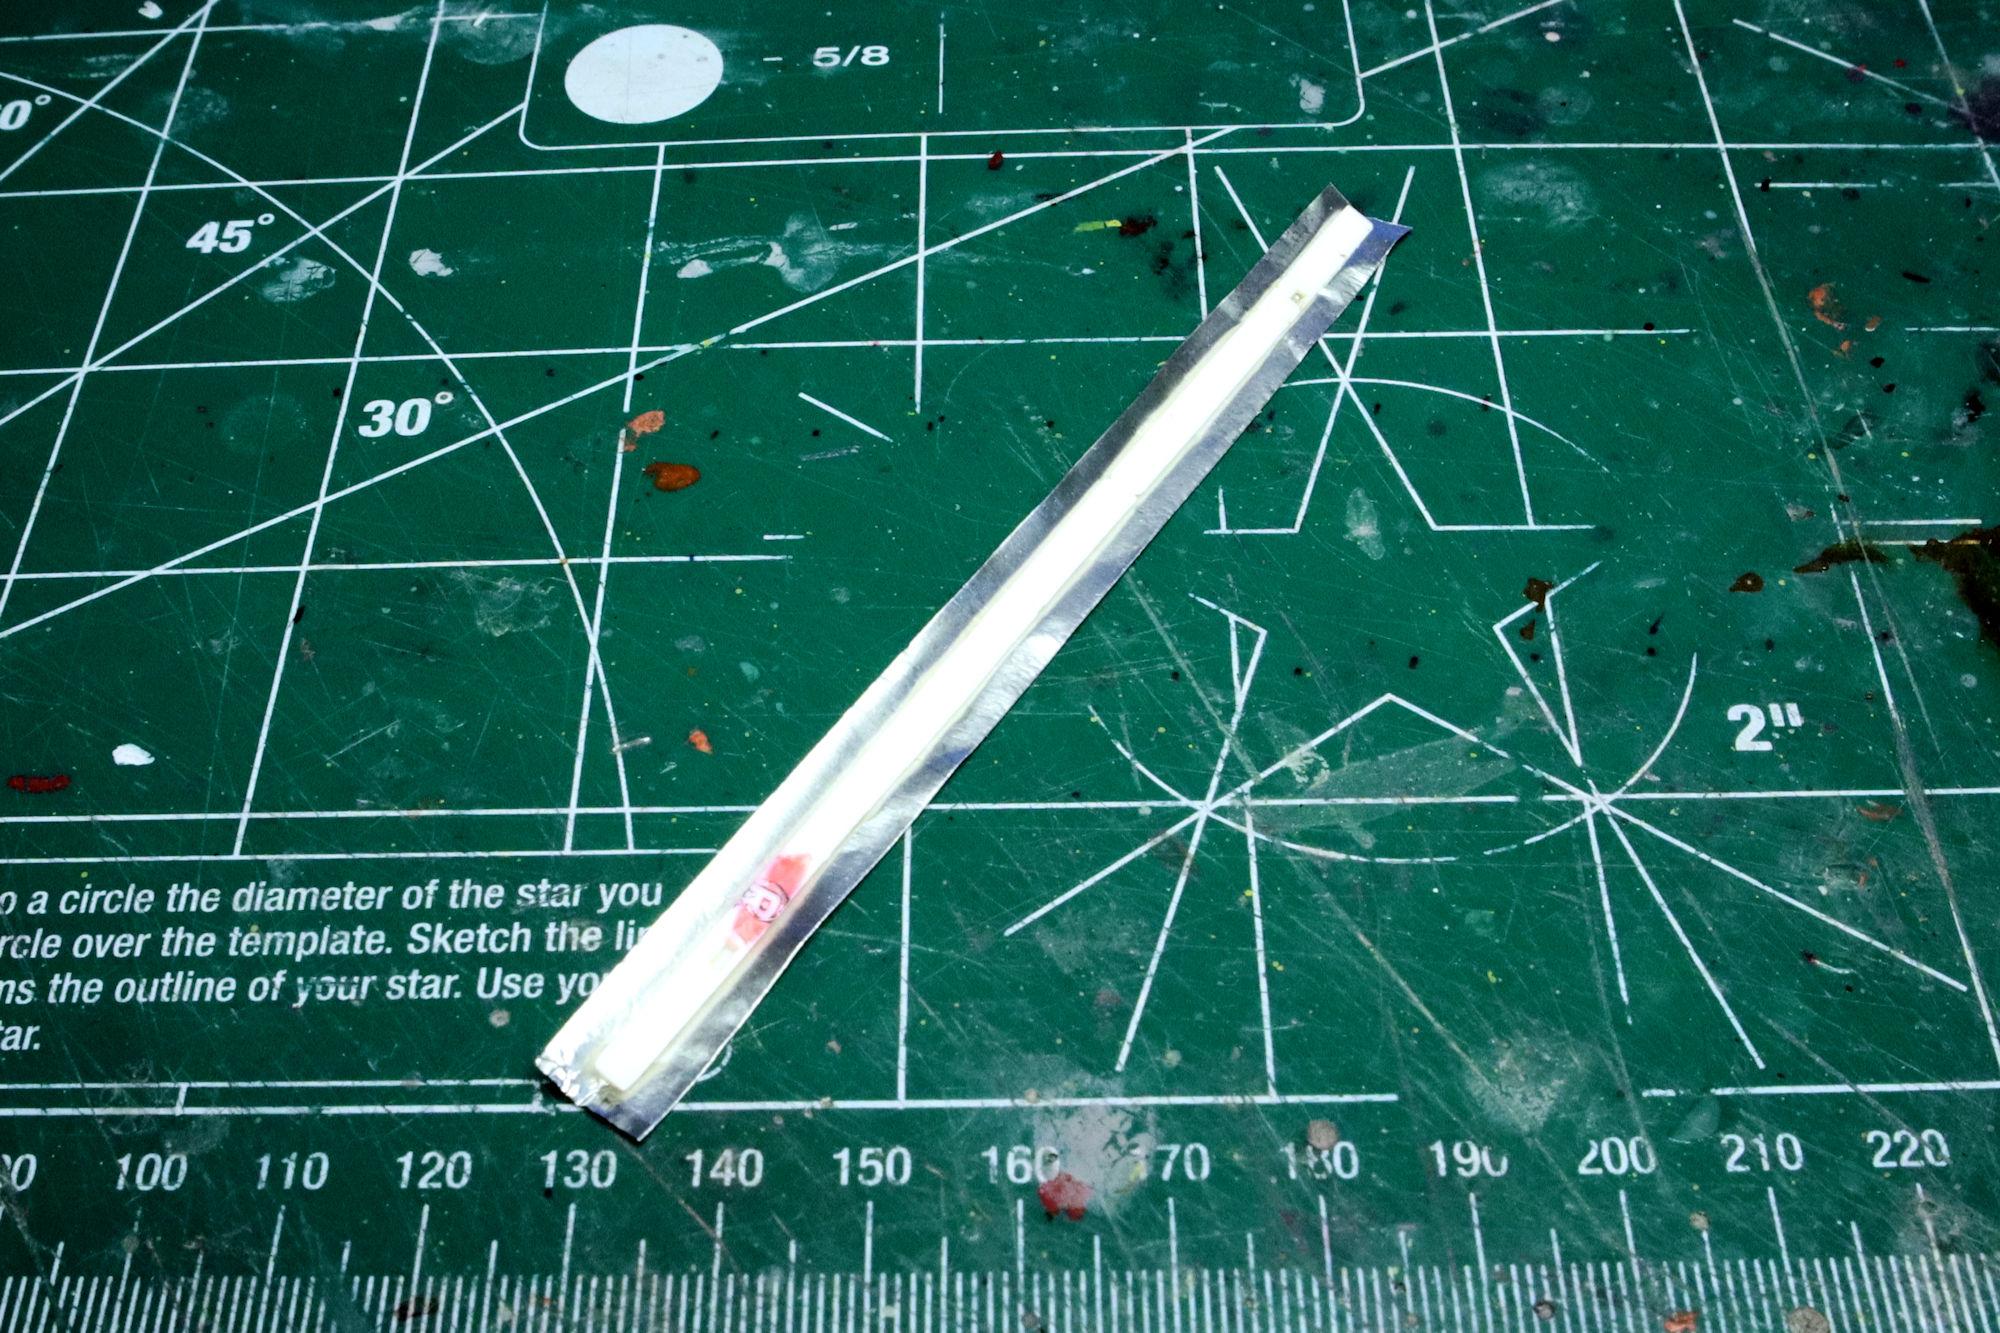
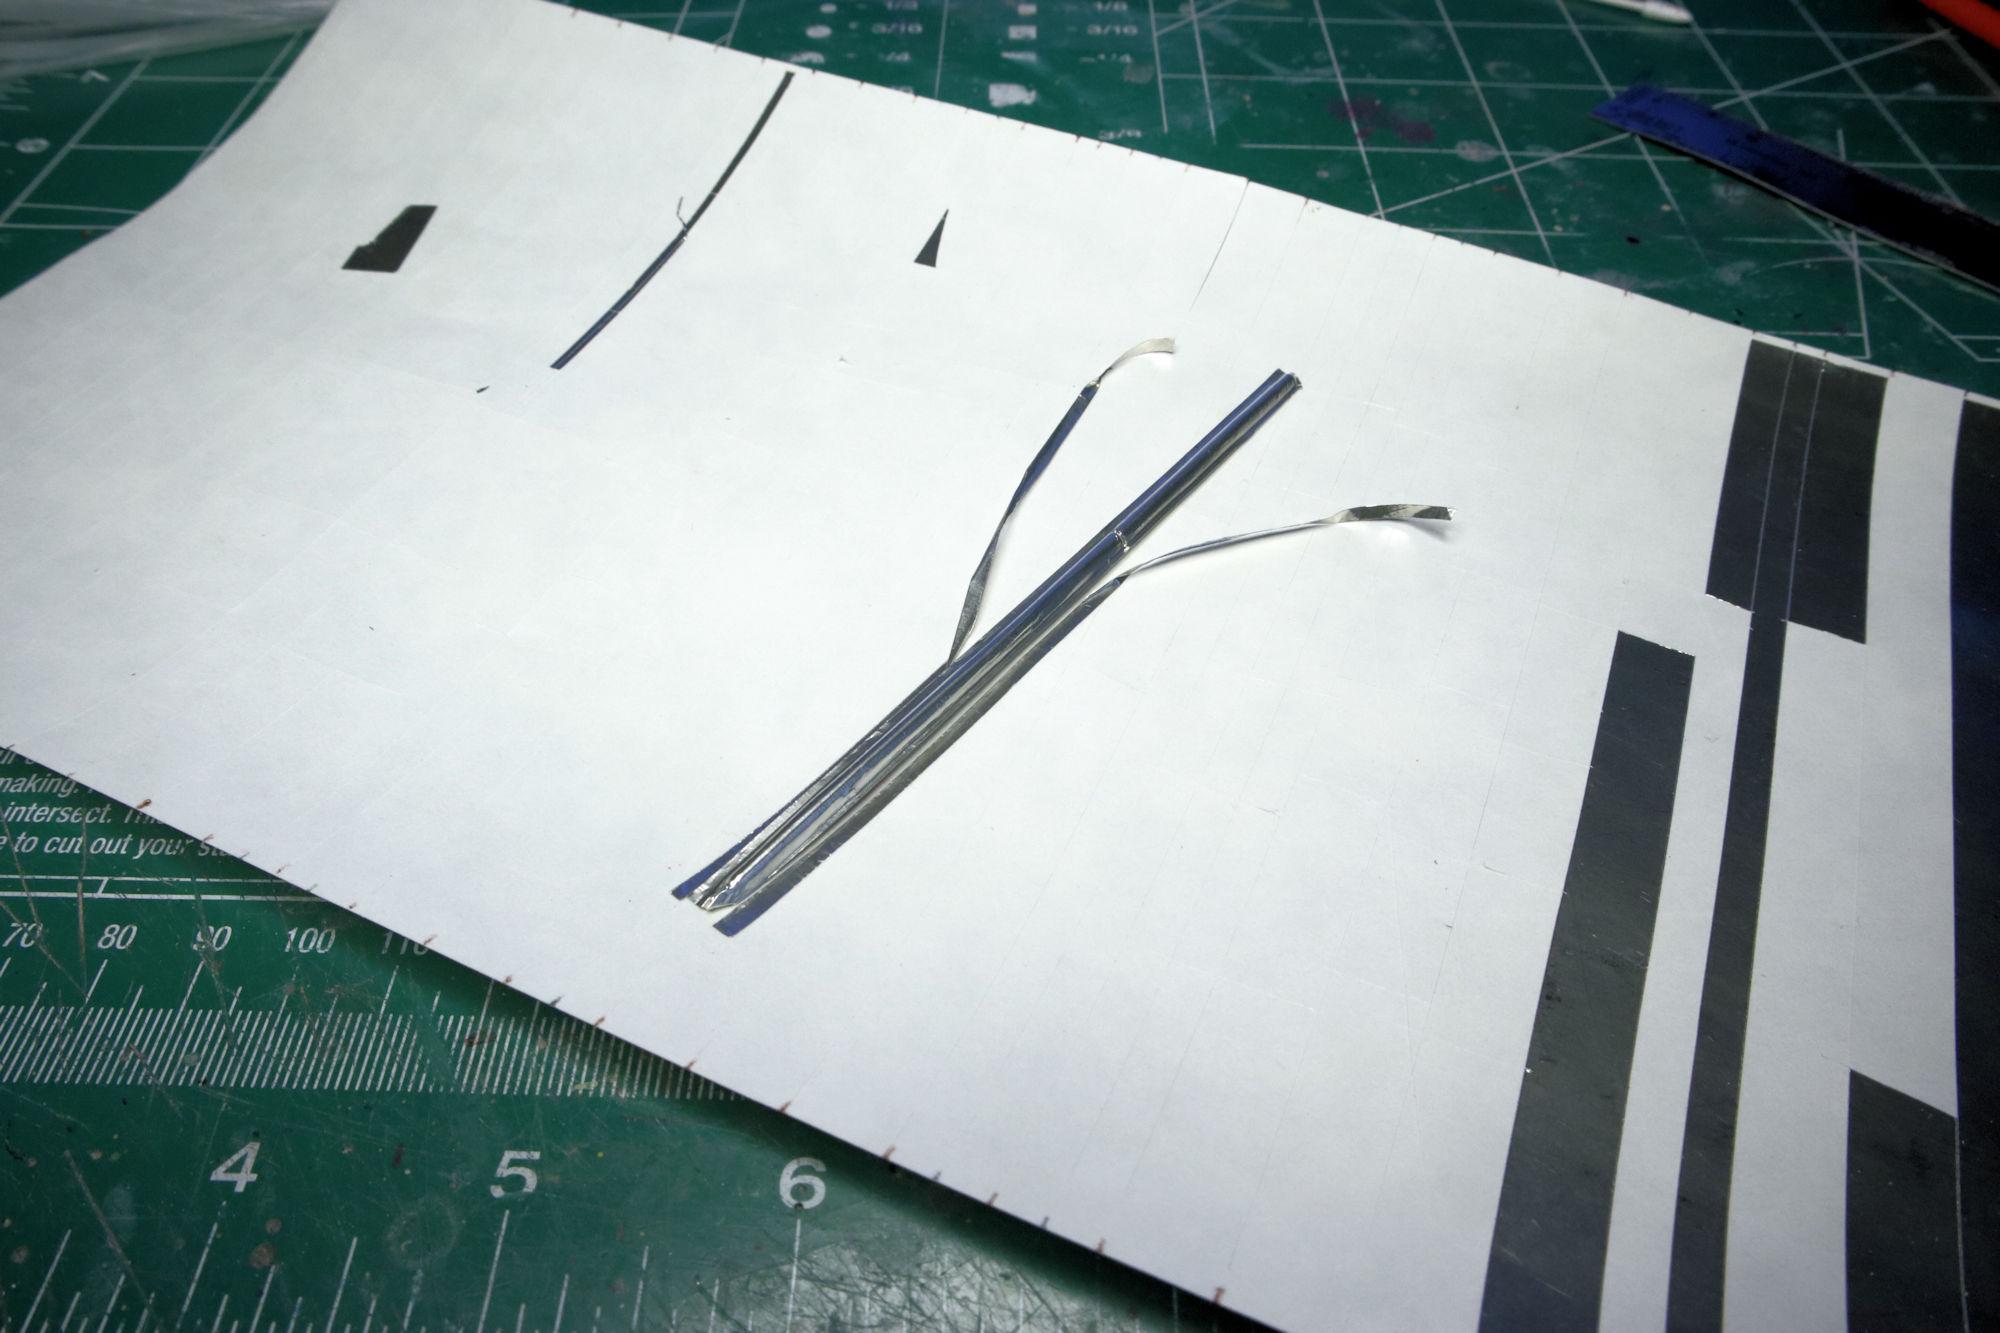
Thank you most kindly Joe. Thank you for taking the time to share your thoughts Juergen. I have been considering the weight and balance matter throughout the build and I have a few options in mind. I've already purchased some lead shot to use somewhere in the nose of the aircraft. I have considered, as you suggest adding the weight to the nosecone which covers the radar unit. I do want to keep the radar unit and display the aircraft with the radar exposed as a point of visual interest for the diorama I'm planning. There is some space between the cockpit and the radar unit and under the floor as well. I'm going to see how much weight I can get into those areas. It may not be enough but I'm going to try. I already filled the hollow space within the nosewheel with lead shot. Silly, I know. But doing that did bring its weight up to a little over 1 gram and every little bit helps! If I'm not able to get enough weight into the nose to balance the plane, I am prepared to make use of the clear styrene support provided in the kit. It's not an ideal option but every scale model has its compromises, doesn't it? You have no need to worry about your English Jurgen, I had no difficulty understanding your message. Your English is waaaaay better than my Deutsche! Thank you again for taking the time to share your thoughts Jurgen. It was most kind of you to do so. David G.
-
It's nice seeing this one back on the bench. It's been a while! ? The engine and chassis look great, good color choice too. David G.
-
That's some clean and tight detail painting Bob, nicely done! David G.
-
Monogram's 1955 Lincoln Futura Concept Car: WIP
David G. replied to David G.'s topic in WIP: Model Cars
Thank you kindly Jim. Don't worry, I'll get it finished. I've come too far with this one to quit now. I just needed some time away from it. David G. -
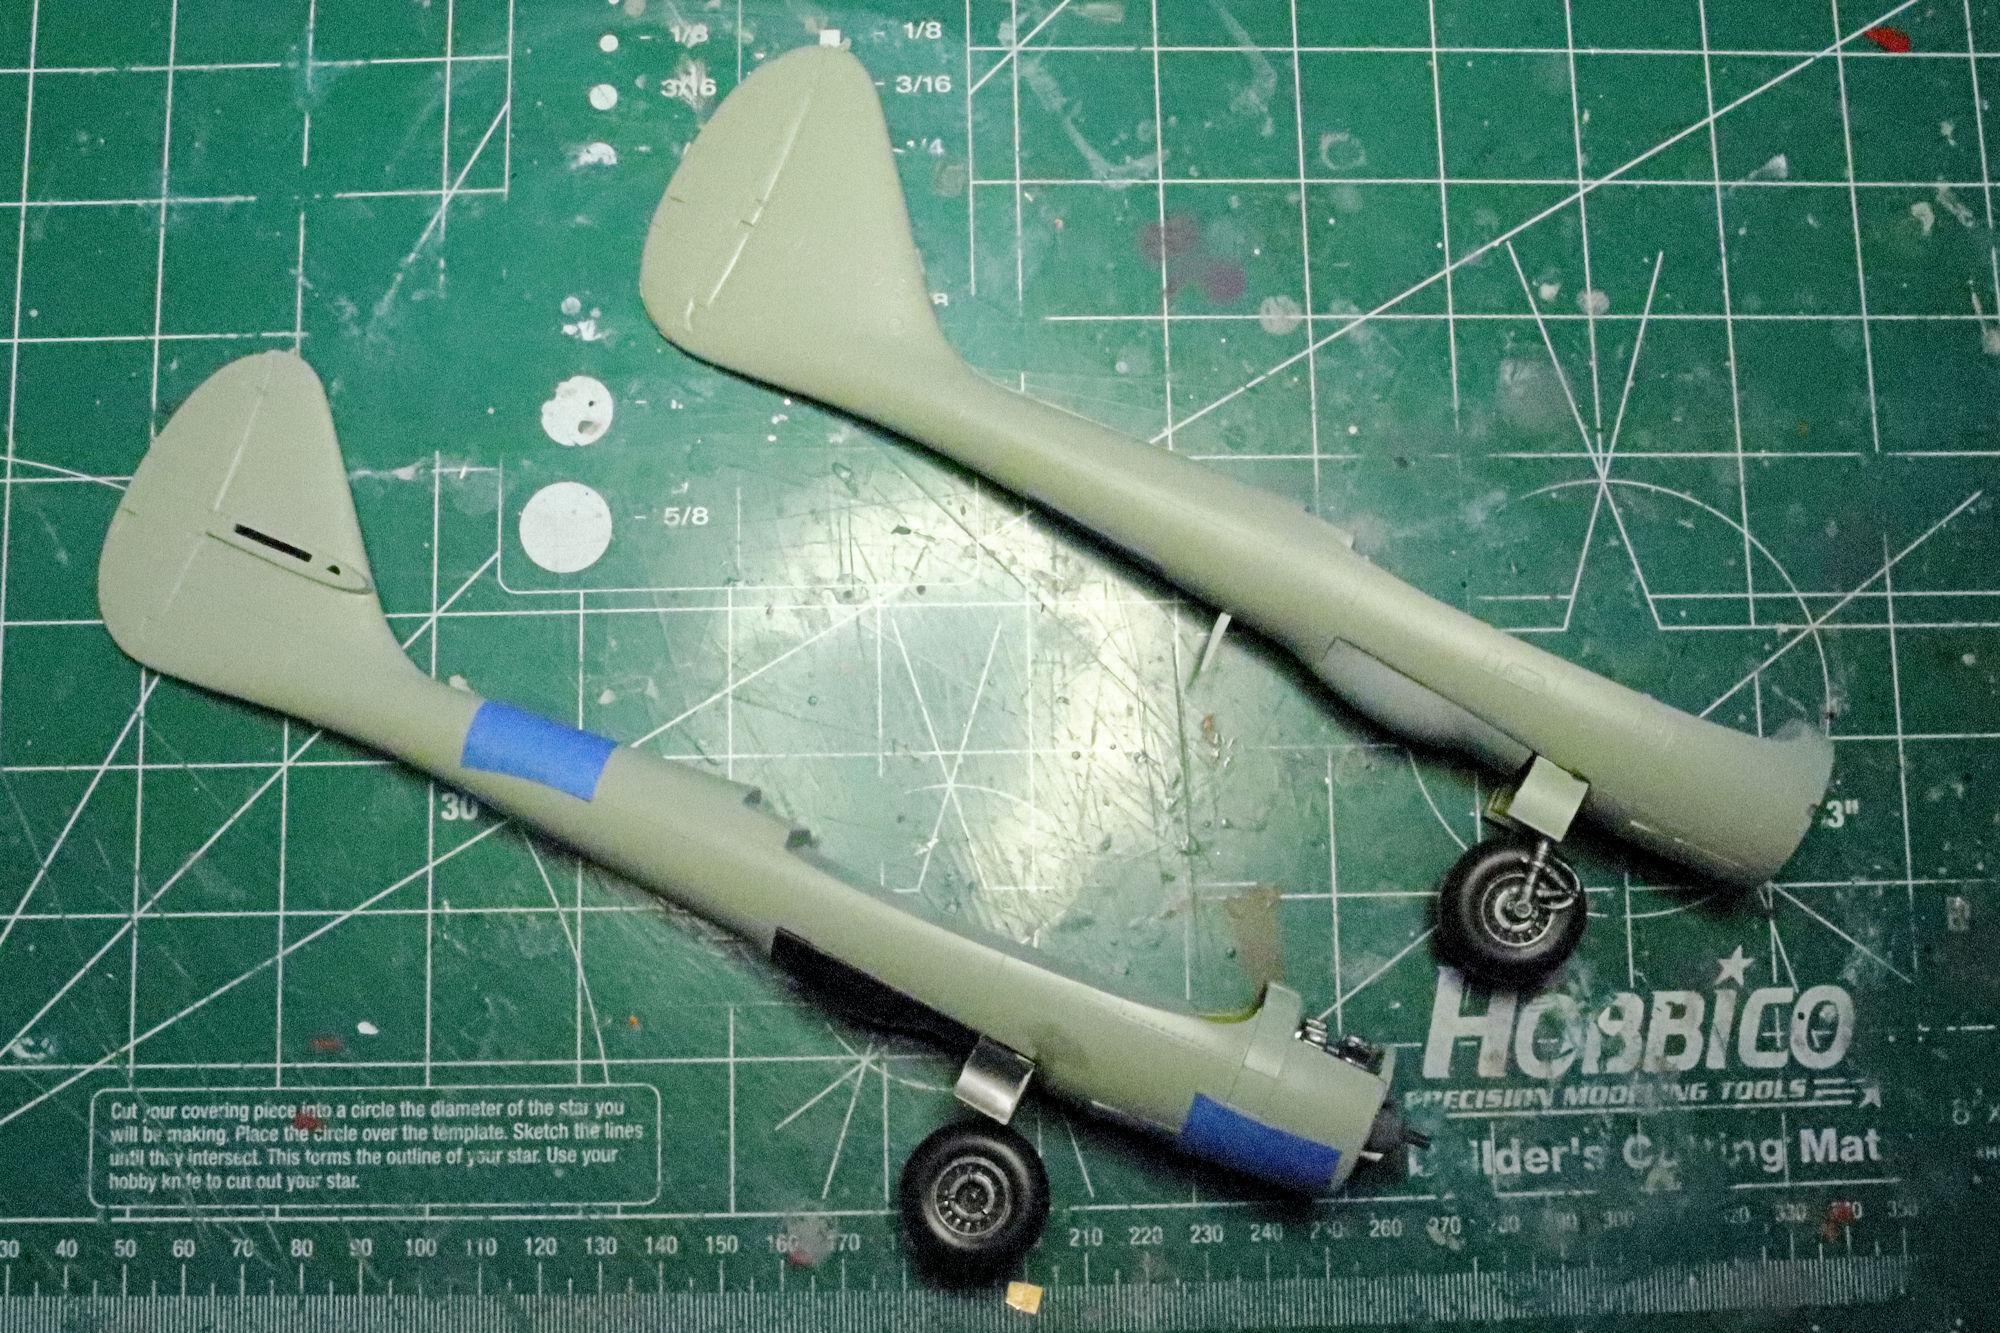
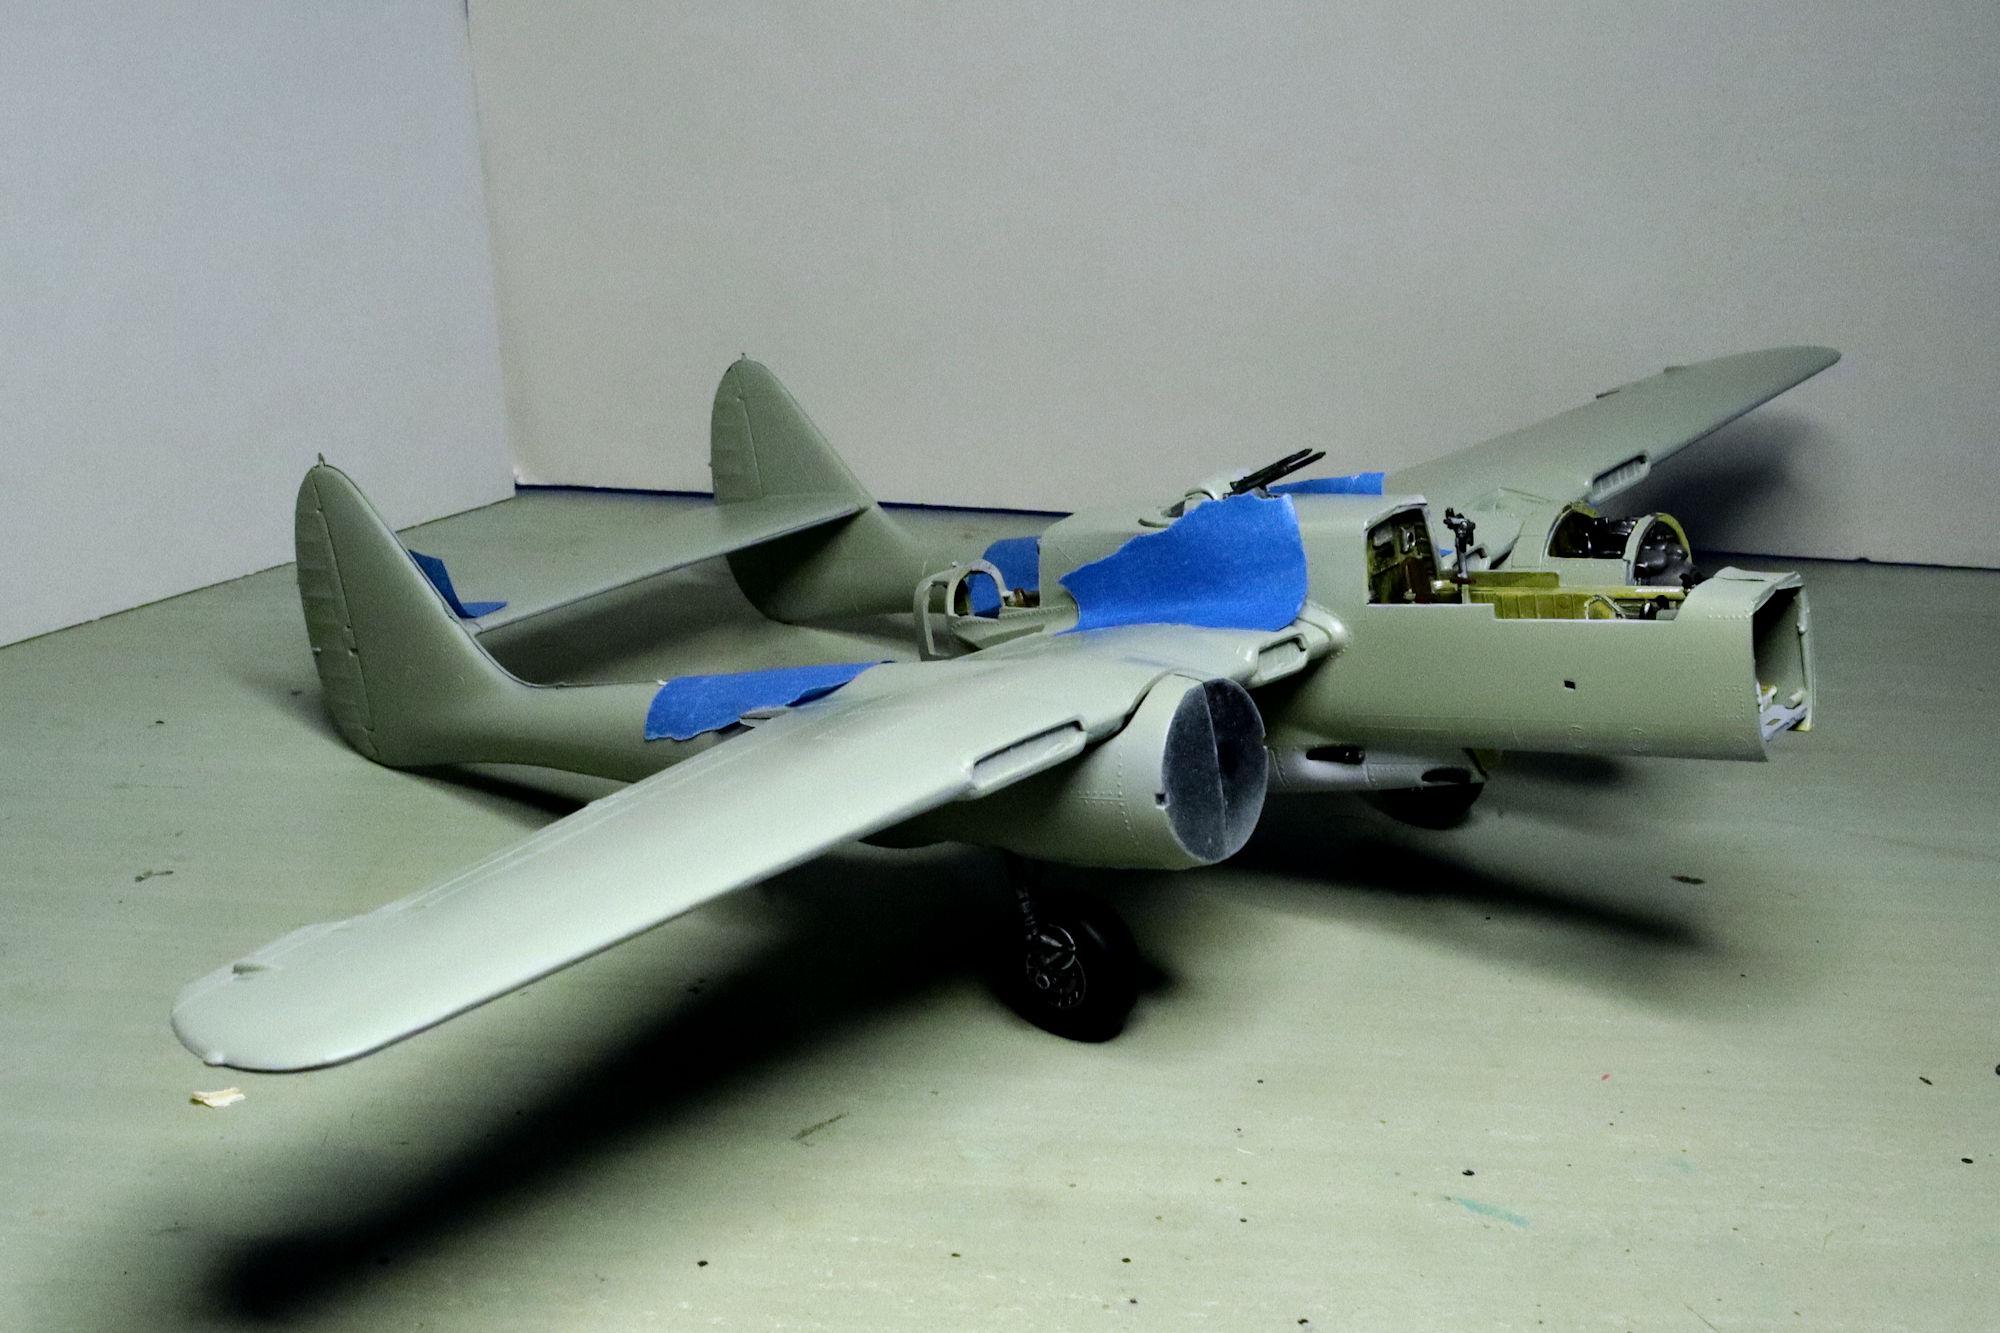
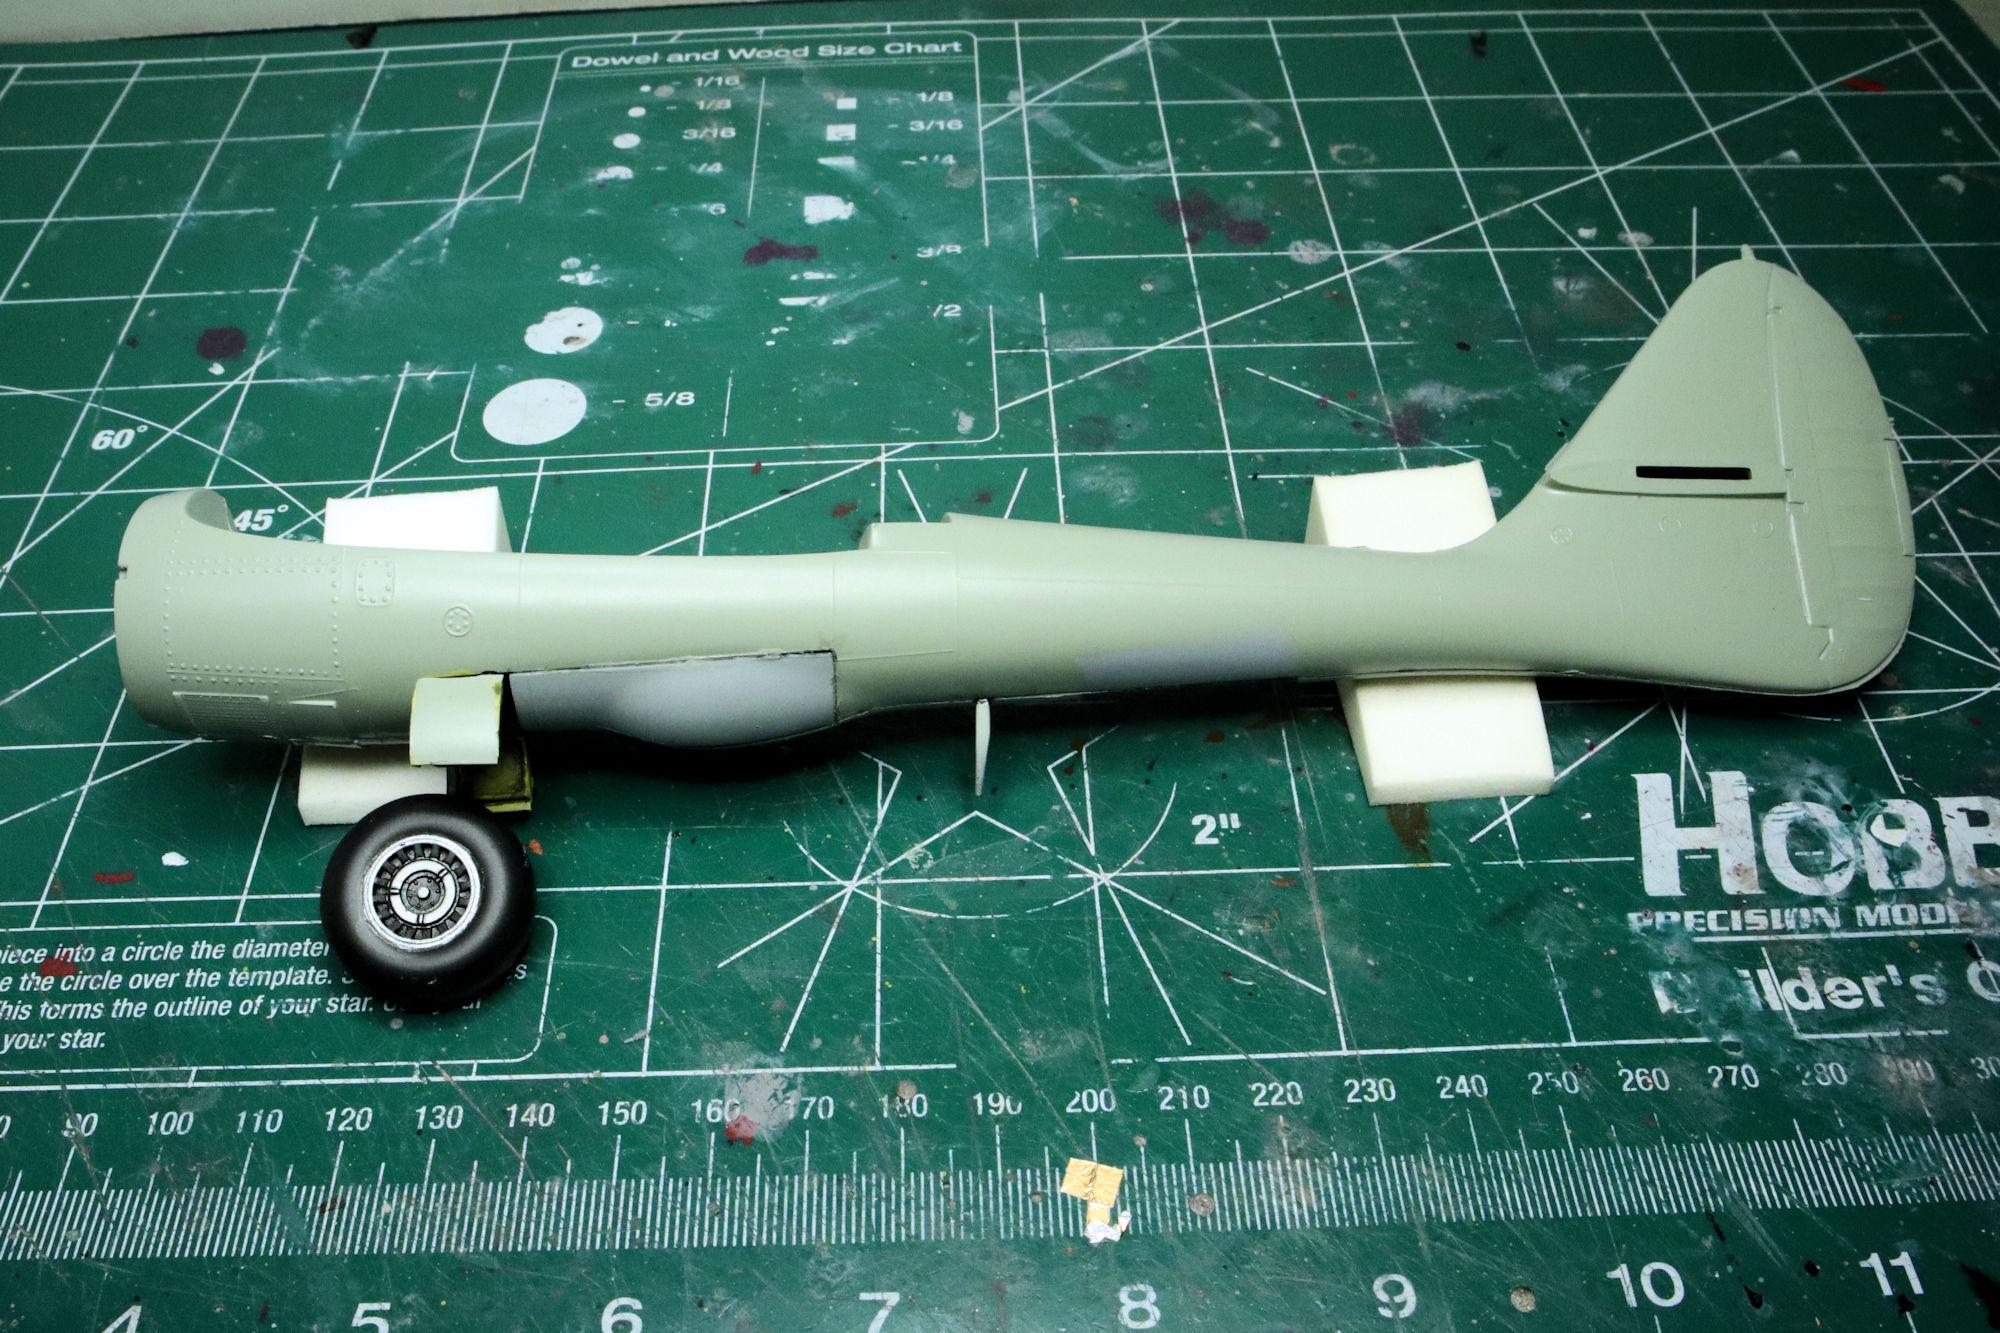
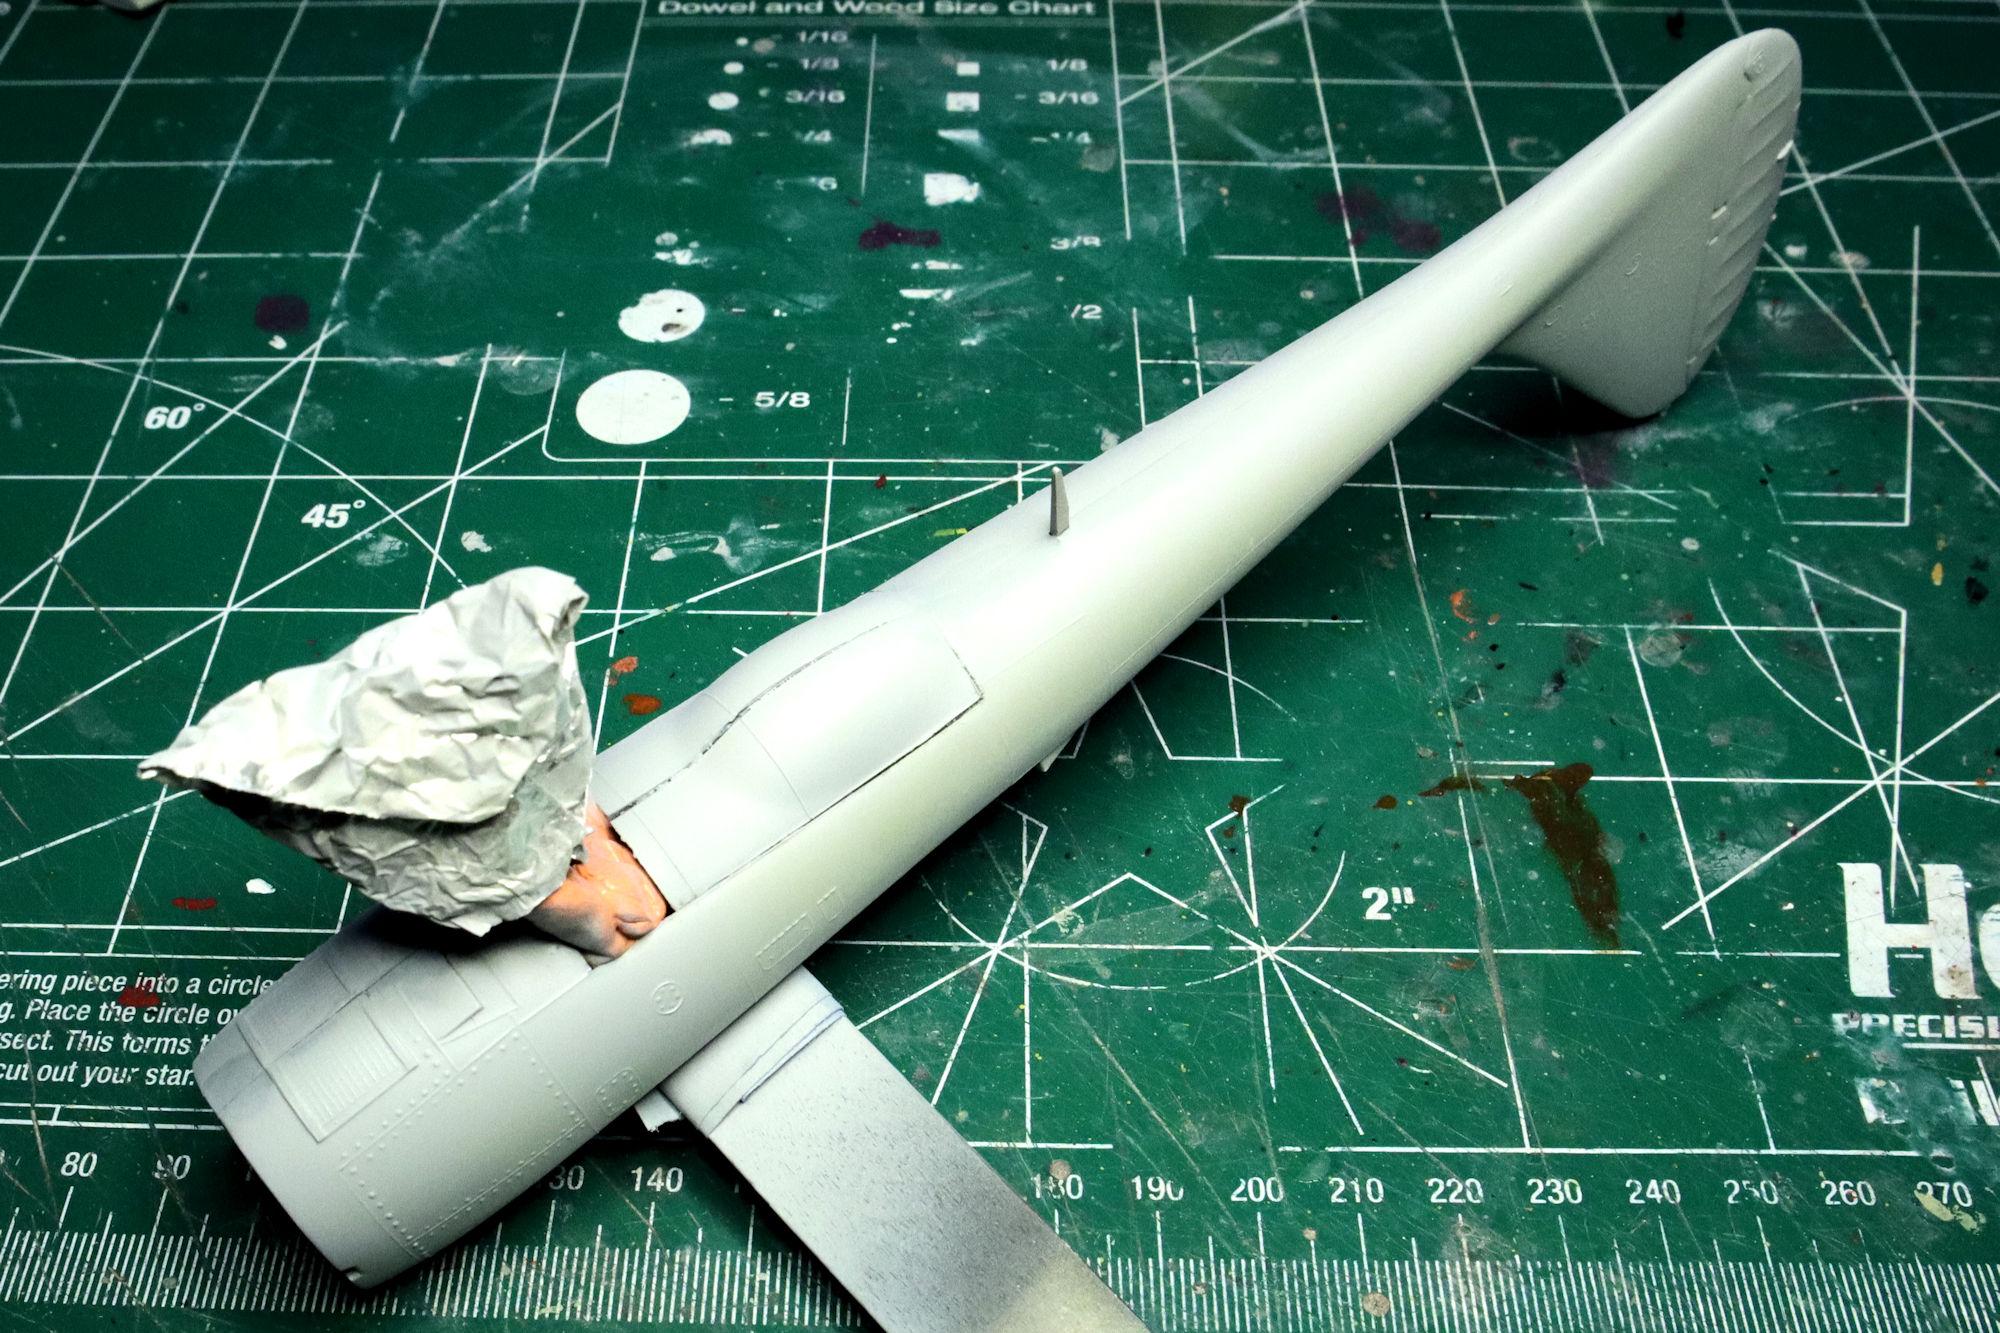
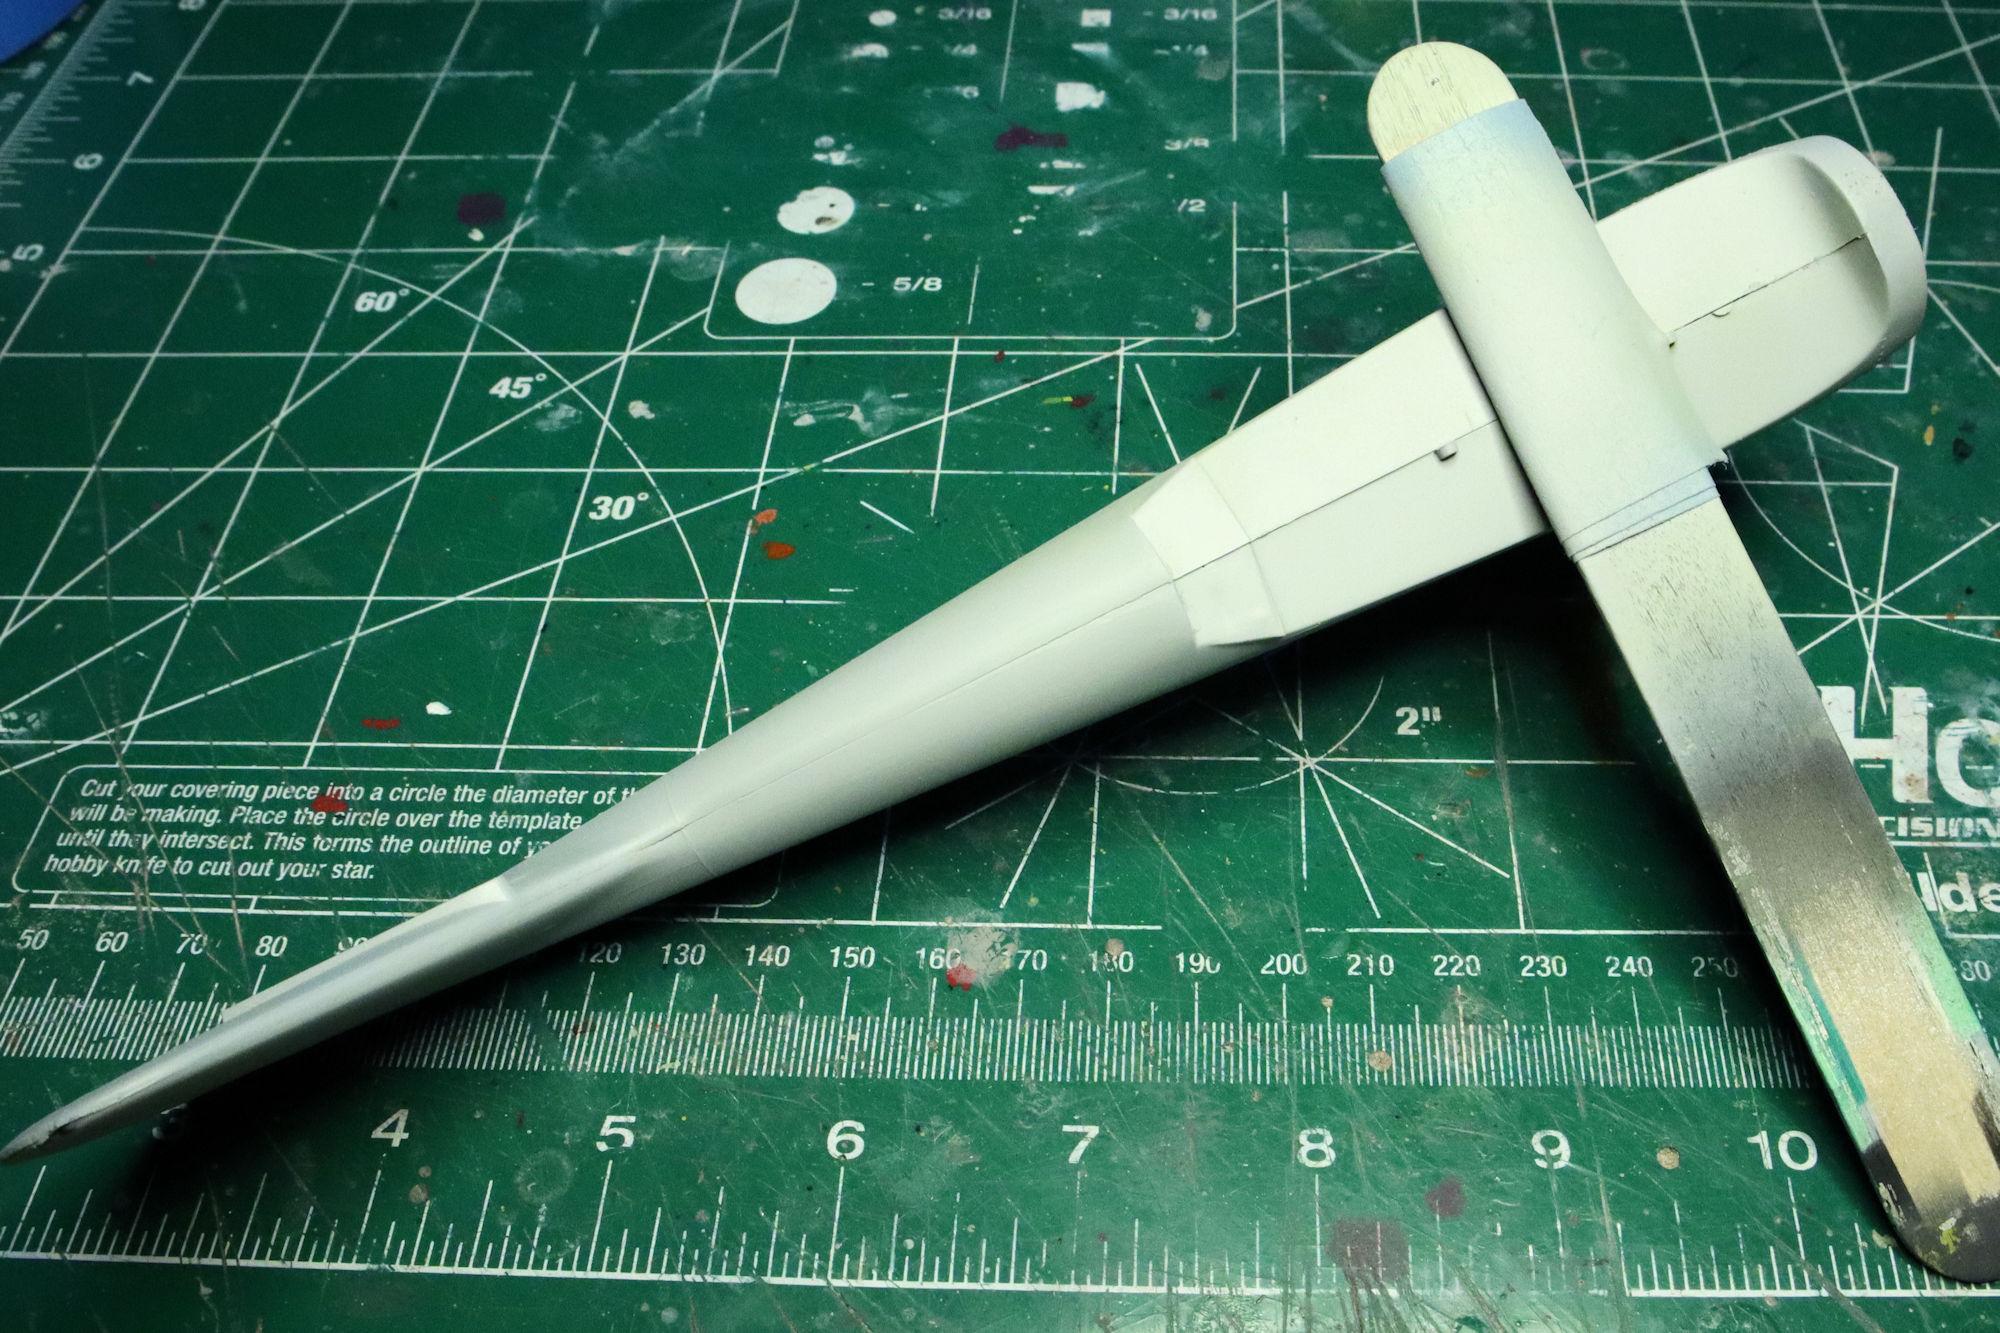
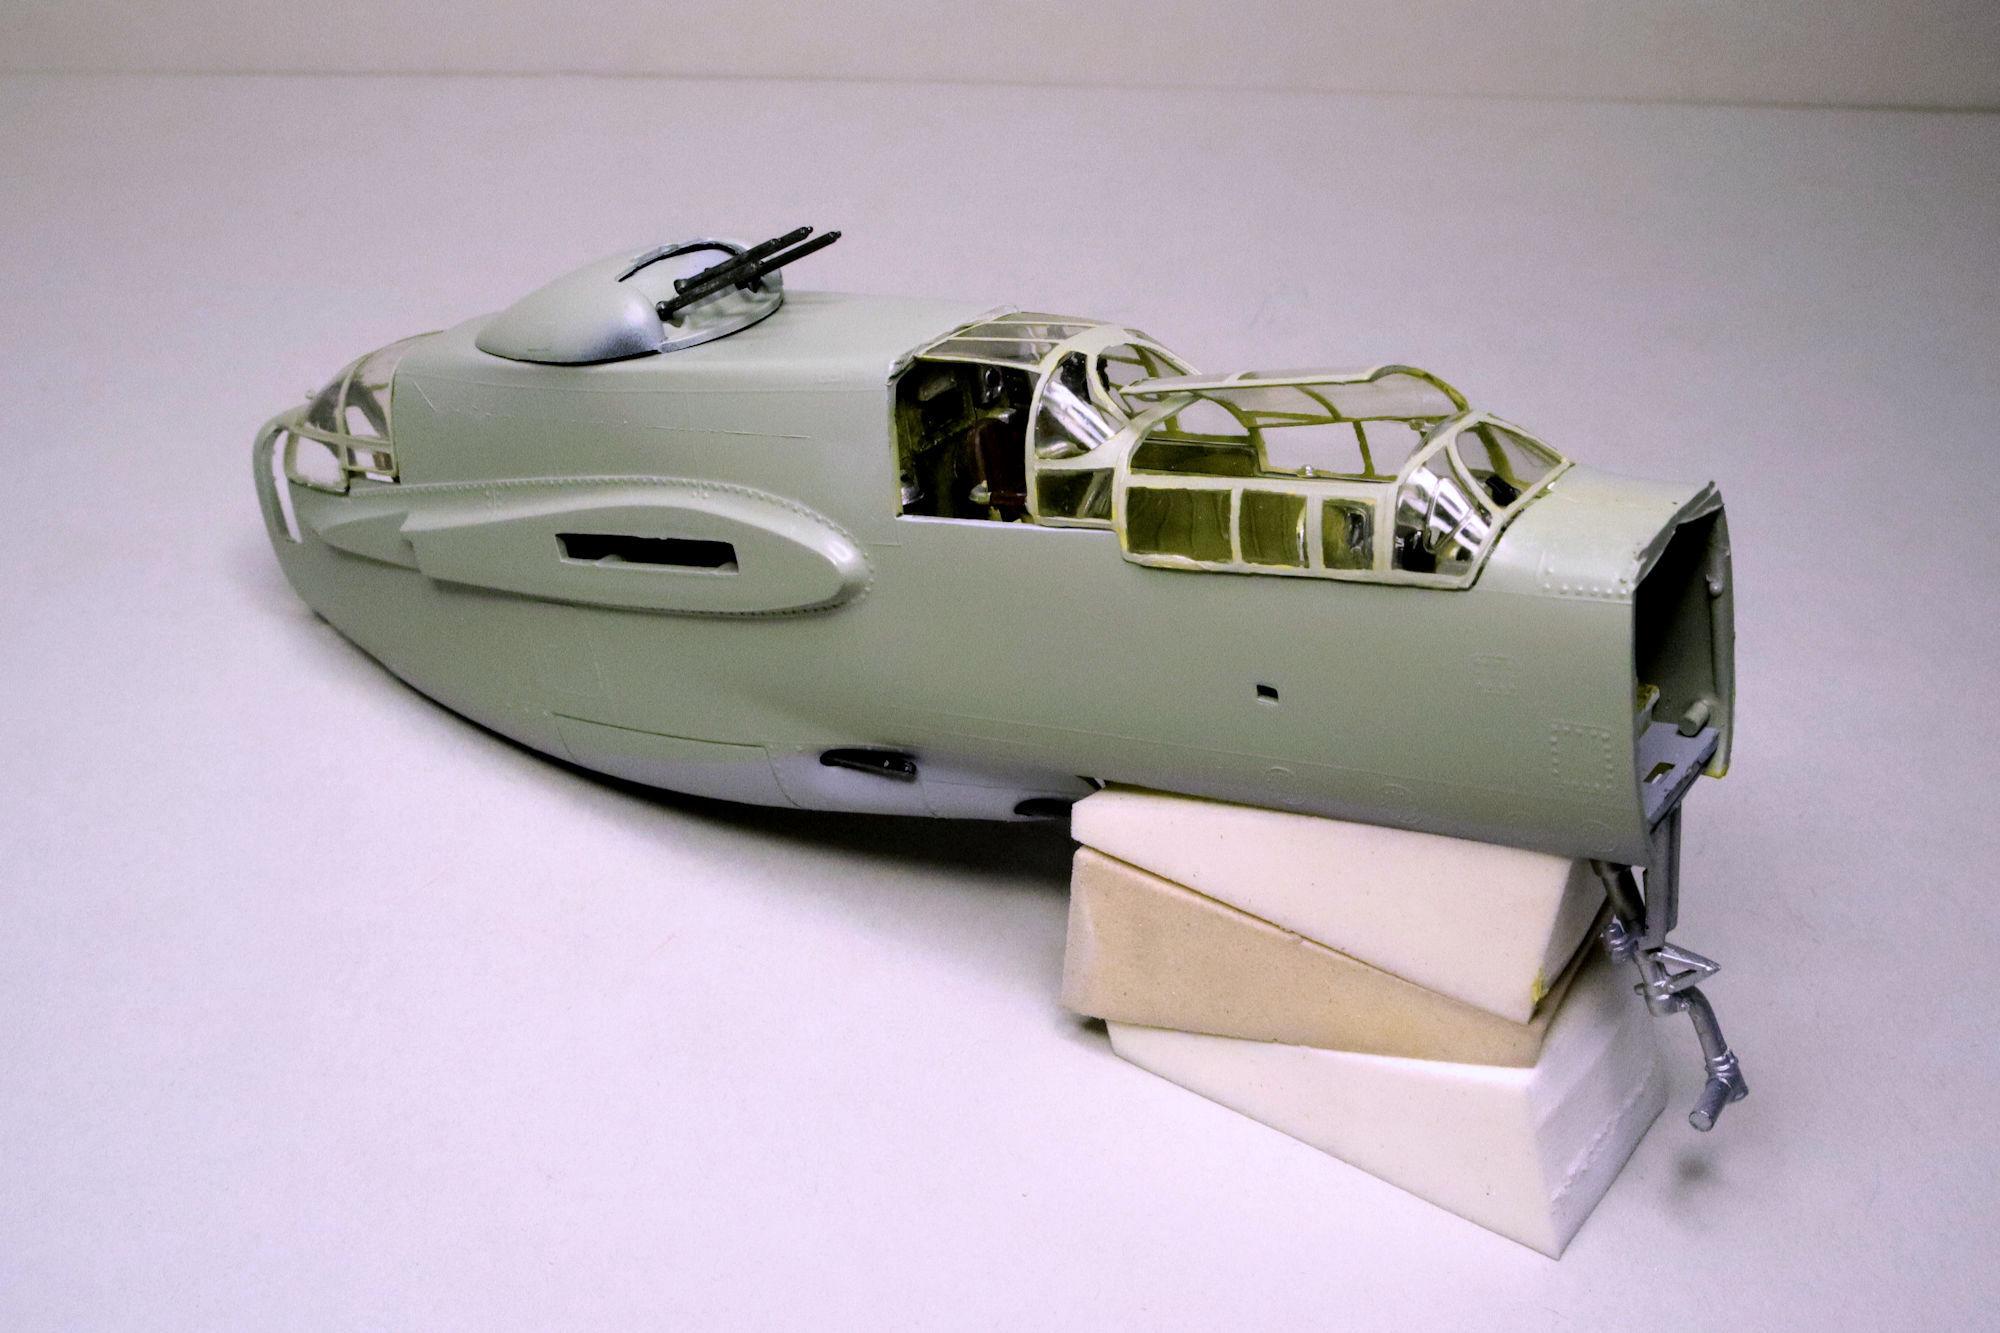
Hello Everybody! It's time for another update on Revell's Northrop P-61. I'm working on getting the booms put together. The problem is that they have to be assembled before I can build them. This means placing painted, finished subassemblies into a structure that has yet to be assembled, painted and finished. Here I have the finished and painted landing gear and doors that have to go into a boom that will still need to be glued together, filed, sanded and painted. This isn't a big problem if the larger pieces go together neatly and cleanly. These do not. There are some significant alignment problems that will need to be addressed. But not before I do a quick test fit. Yes, I know that the plane is supposed to be level. I'm working on that too. With both of the booms knocked together, it's time to get on with fixing their issues. I'm using Silly Putty to keep paint out of and off of the areas that are already painted and finished. After a couple rounds of filling, priming and sanding, the lower section is mostly done. The upper section still needs a little more work. As always, thanks for taking the time to look and please feel free to comment if you wish. David G.
-
That's shaping up to be one sweet looking hot rod! David G.
-
Good call building the surround for the tray! It looks much better that way. David G.
-
That dash detail is fabulous! The rest of the interior is great too. David G.
-
It's good seeing this one back on deck. Nicely done with the outbuilding, good interior detail. David G.
-
Nice work with the Molotow pens! I generally have to use a brush when I apply it. The interior detail is really good. David G.
-
Tamiya Aston Martin DBS... One from the Top Shelf!
David G. replied to jaymcminn's topic in WIP: Model Cars
Excellent detail painting! Great looking interior so far too. David G. -
Monogram's 1955 Lincoln Futura Concept Car: WIP
David G. replied to David G.'s topic in WIP: Model Cars
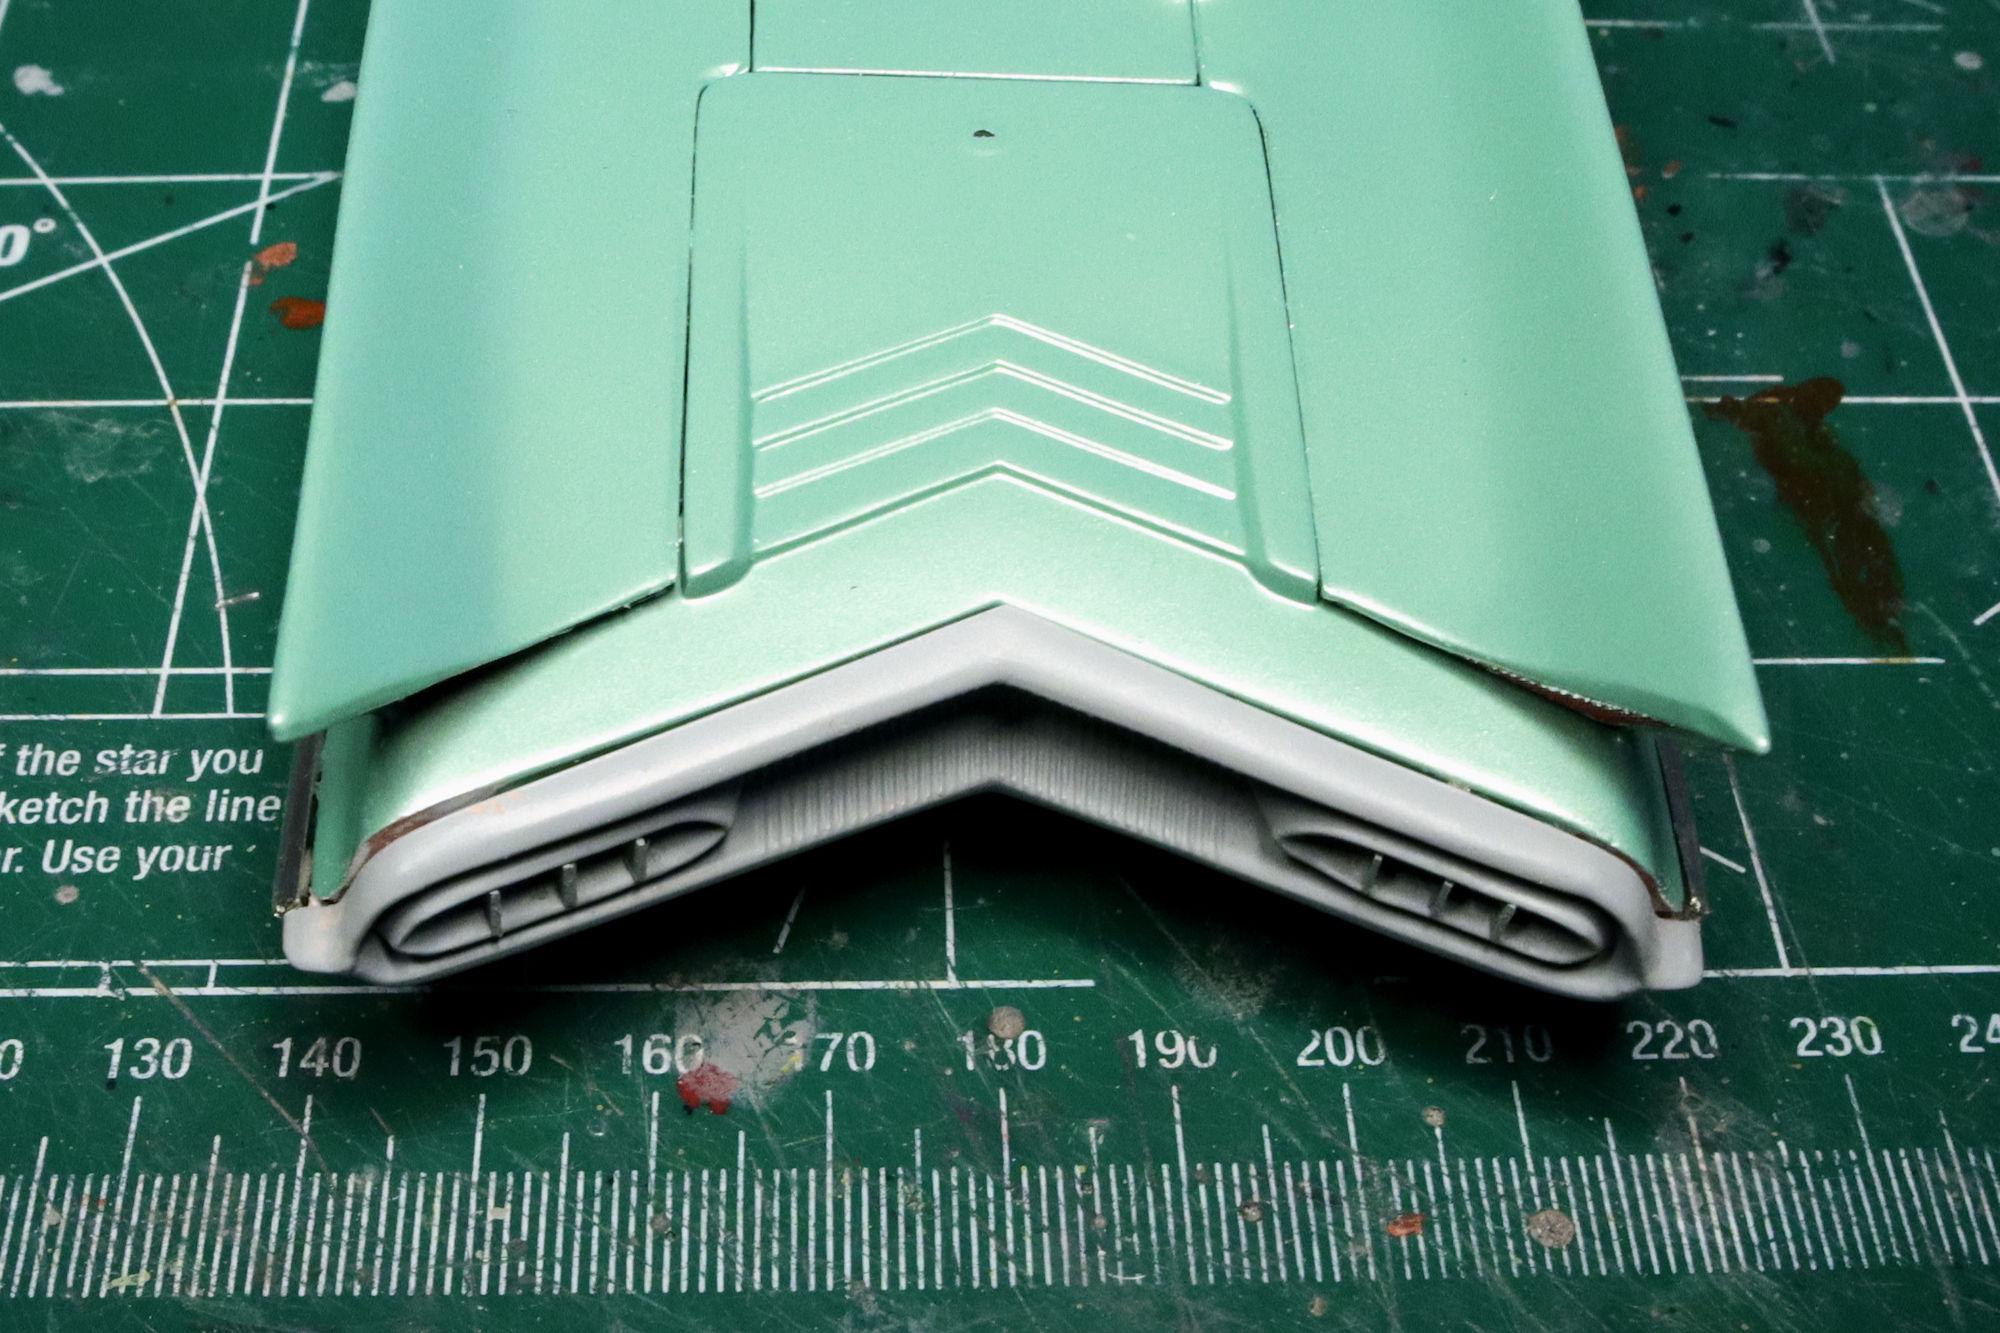
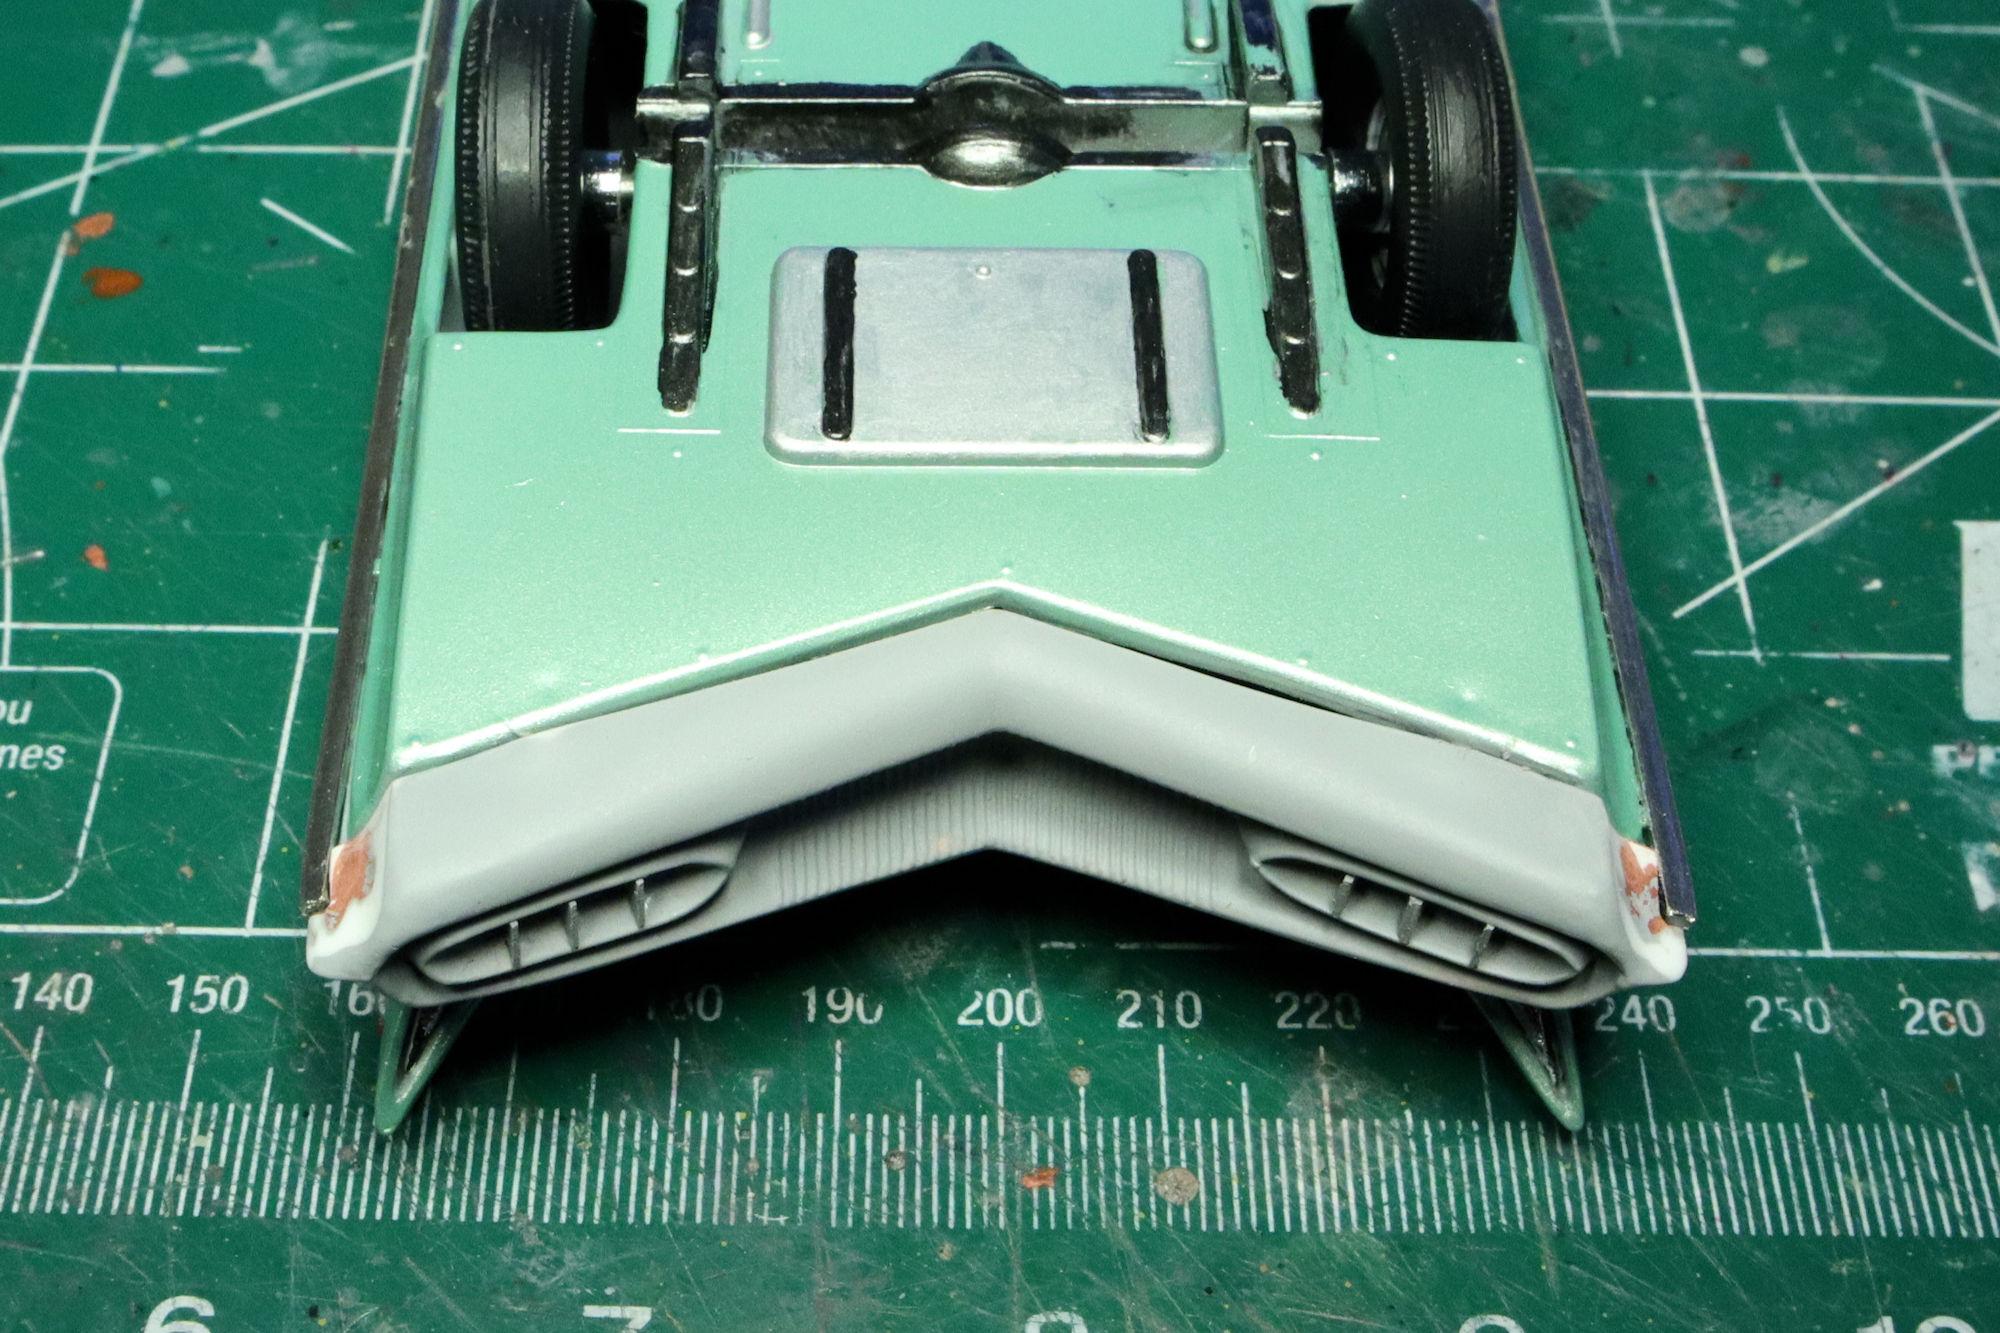
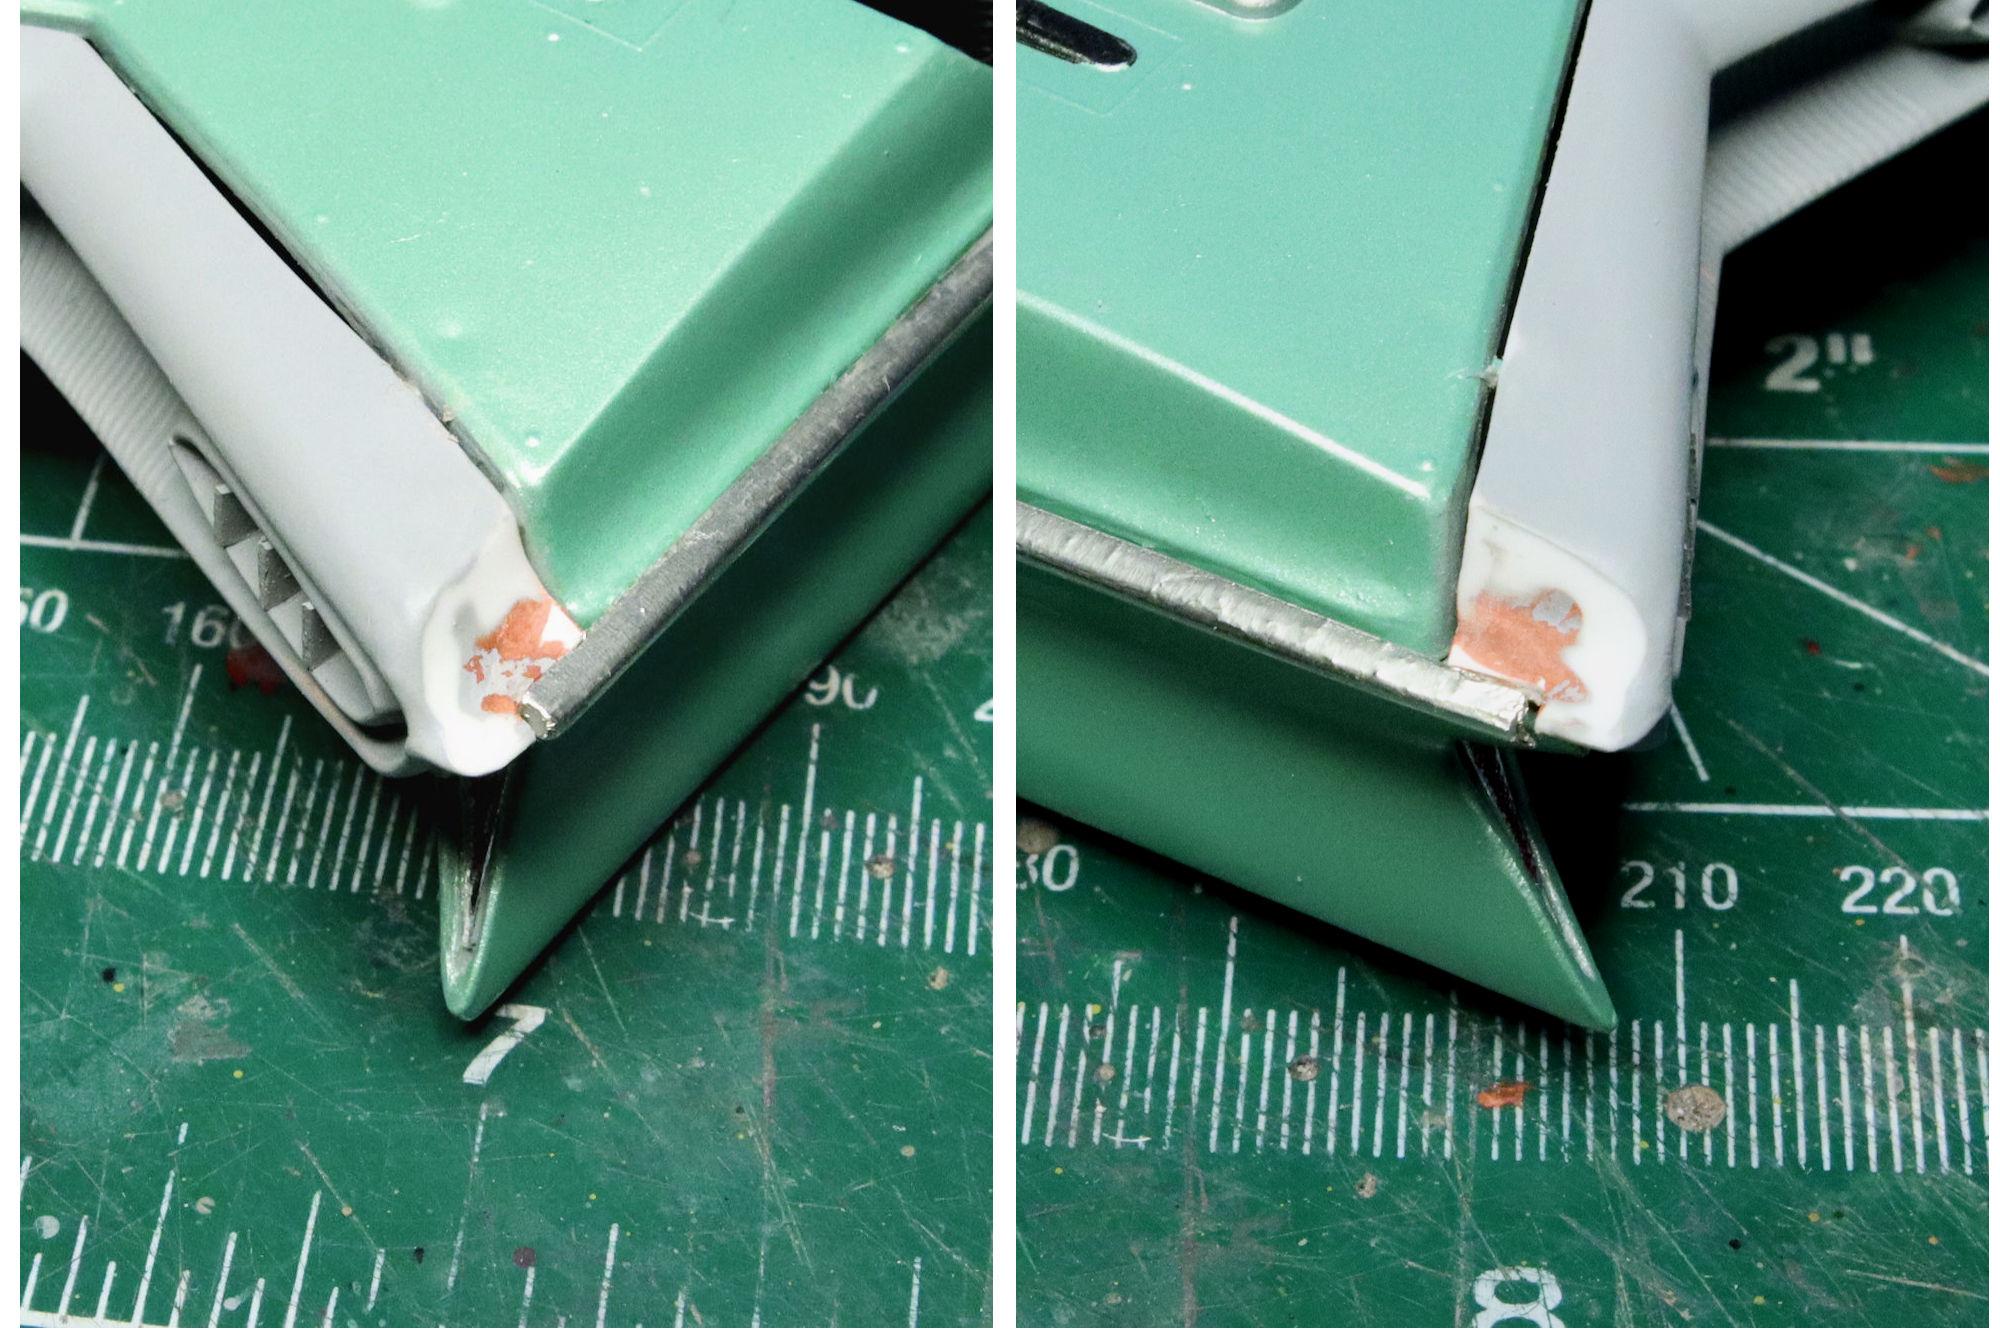
Hello Everybody! I feel that my feelings of frustration and futility have faded enough to put this one back on the bench... Yay! Before I go any further fitting the bumpers, I have to get the side moldings permanently in place so I so I can fit the bumpers to them. I decided that rather than painting the chrome finish on the side moldings, I would use Bare Metal Foil. I thought it would be better to apply the foil *before* mounting the molding pieces to the body. This would give me the option to correct any problems or even remove the foil and paint them without the risk of damaging the body. I measured and cut a strip of foil and placed the molding on the foil rather than trying to place the foil on the molding. Once I did that, I used the coated backing paper as the surface to burnish BMF to the molding and trim it to size. I left about 1mm to wrap around the edges to help hold the BMF in place after the molding is installed. I did this for each of the four separate molding pieces. With the side moldings in place, it's time to fit the bumpers! It seems hard to believe but I'm really close to having this one completed, I hope to have it wrapped up soon. As always, thanks for taking the time to look and please feel free to share any comments you may have. David G.
-
Again, so much like the real thing, it's difficult to tell the difference. These could easily be shop photos instead of bench photos. Excellent work Daniel! David G.
-
Thank you Greg. Jumping in like that is part of the fun! David G.
-
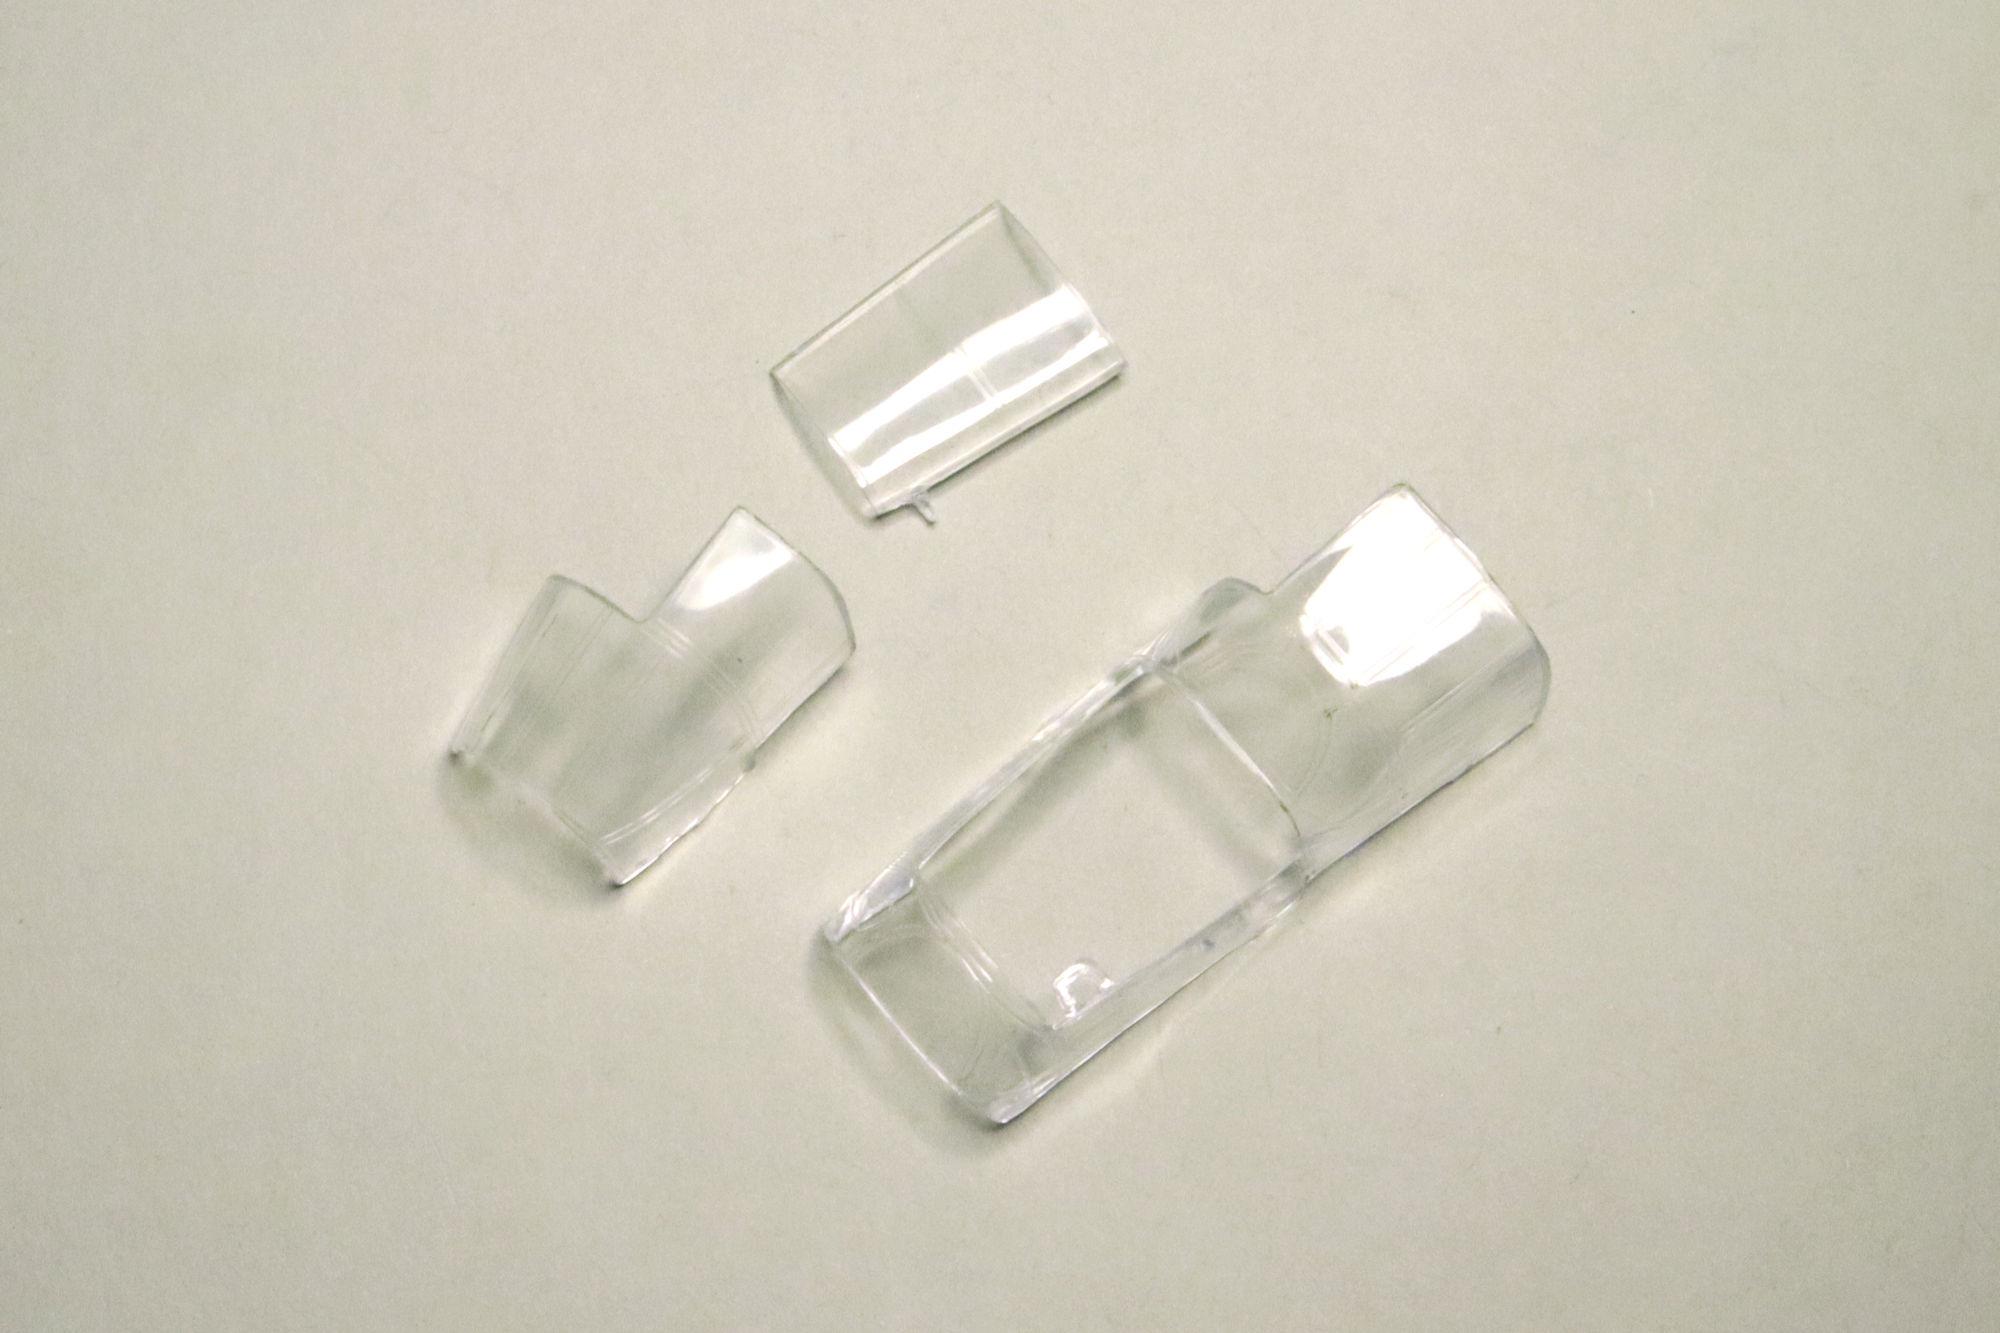
Hello Everybody! Here's another update on Revell's P-61 Black Widow... the struggle continues I was wondering how I was going to paint the zinc chromate on the inside of the canopy frames when a brilliant thought occurred to me. The gray-green on the outside of the canopy frames needed a second coat to get good coverage so why not put that second coat under the first one? Remove the paint that's already on the canopies, paint the zinc chromate first, then paint the gray-green over top of the zinc chromate! The zinc chromate would show on the inside of the canopies and provide a good base for the gray-green on the outside! Brilliant! I can't be the first person to come up with this but it is the first time for me. So now the green is gone. Here's the first coat, the zinc chromate, Tamiya XF-4 Yellow-Green. Here is the second coat in Tamiya XF-76 Gray-Green. Everything still fits well enough and I think the color on the canopy frames is a good match to the rest of the plane. The zinc chromate can even be seen on the inside of the canopy frames! As always, thanks for taking the time to look and please feel free to comment. David G.
-
My kindest thanks Joe, it's nice having one's skills and efforts recognized. ❤️ Thank you Tim. I do have some plans for adding weight, I'll have to see how it works out. Revell does provide a clear plastic stick to hold the tail up but I'd rather use weight if I can. Thanks, David G.
-
That chassis is clean and sharp! ? Great looking paintjob! David G.