David G.
-
Posts
11,307 -
Joined
-
Last visited
Content Type
Profiles
Forums
Events
Gallery
Everything posted by David G.
-

Monogram's 1955 Lincoln Futura Concept Car: WIP
David G. replied to David G.'s topic in WIP: Model Cars
The paint, I'm not sure of. I needed some gold and it's what was available at my local hobby shop, and a good gold it is too. It seems to be some kind of enamel hybrid. Thank you for the compliment David. I am trying to make this one worth my while and so far, I'm happy with the results. Thank you Andy. I was a bit taken aback by the amount and level of work needed to bring this kit up to what I consider an acceptable state. So much so that it sat in my stash for several years before I screwed up the courage to have a go at it. In many ways, it's more like a DIY toy kit than a model. Rather like a disassembled promo, very much a product of its time. David G. -
Monogram's 1955 Lincoln Futura Concept Car: WIP
David G. replied to David G.'s topic in WIP: Model Cars
Thank you so much Steve. I got lucky that day, my hands were unsarcastically steady. Thank you Bob. I do wish that they would update some of these early kits. I do get tired of correcting their shortcomings. Thanks Bil, I'm especially pleased with how well that turned out. David G. -
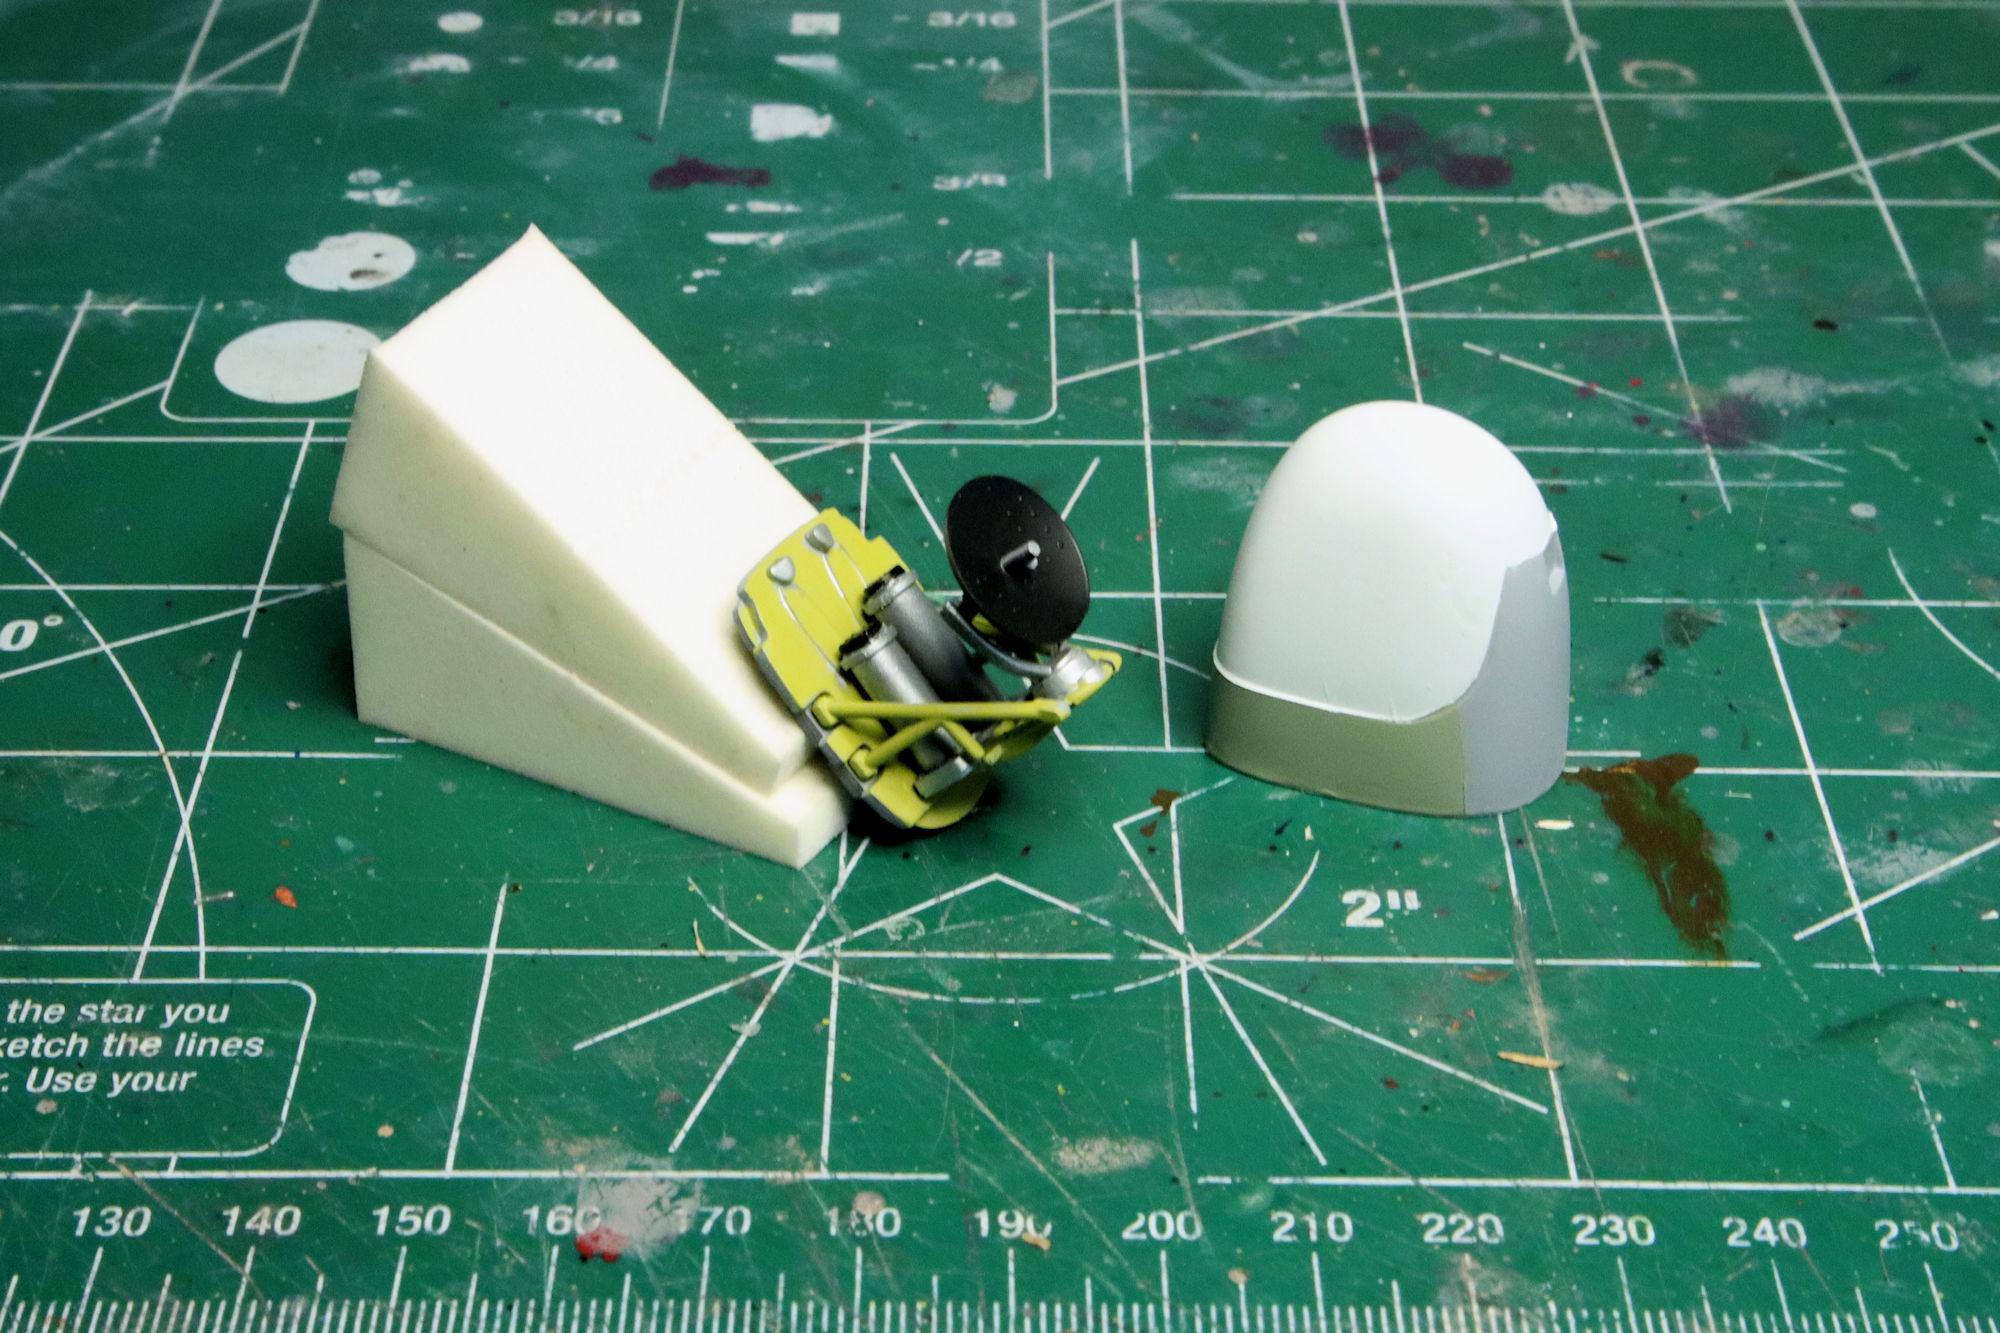
Thank you most kindly. Though it will be the focal point of a diorama, I hadn't considered attaching it to the base. It's going to be displayed in a curio cabinet and I want to be able to dismantle and remove the diorama. Also I plan to add more to the diorama as I'm able, I already have a Tamiya 1:48 fuel truck to build and add later. Thank you for your comment and the link Joe. I did think about changing the nose gear to support the added weight but that's more effort and expense than I'm willing to go through for this kit. I only paid $12 for the kit on clearance at Michael's. It's hard for me to believe that this kit is still listed as high as $40 full retail! ? The web site does seem like a good resource, I'll certainly keep it in my queue. That, and even with all the weight I could add, the plane still barely balanced. I could have put the larger nosecone on but I didn't like the way it looked on this version of the plane and I want to display the radar unit anyway. It's a nice added detail and goes well with airfield repair theme of the open cowling and exposed weapons. It's like I said, every scale model is a compromise with reality. The plastic rod is a compromise I'm willing to make for the image I have in mind for this kit. Thanks again, -D-

-
The "waste-not-want-not" Starliner project
David G. replied to customline's topic in WIP: Model Cars
Dang, that looks great Jim! I just love the color! David G. -
That is amazingly cool! ? The paint looks great on it! Well worth the wait. David G.
-
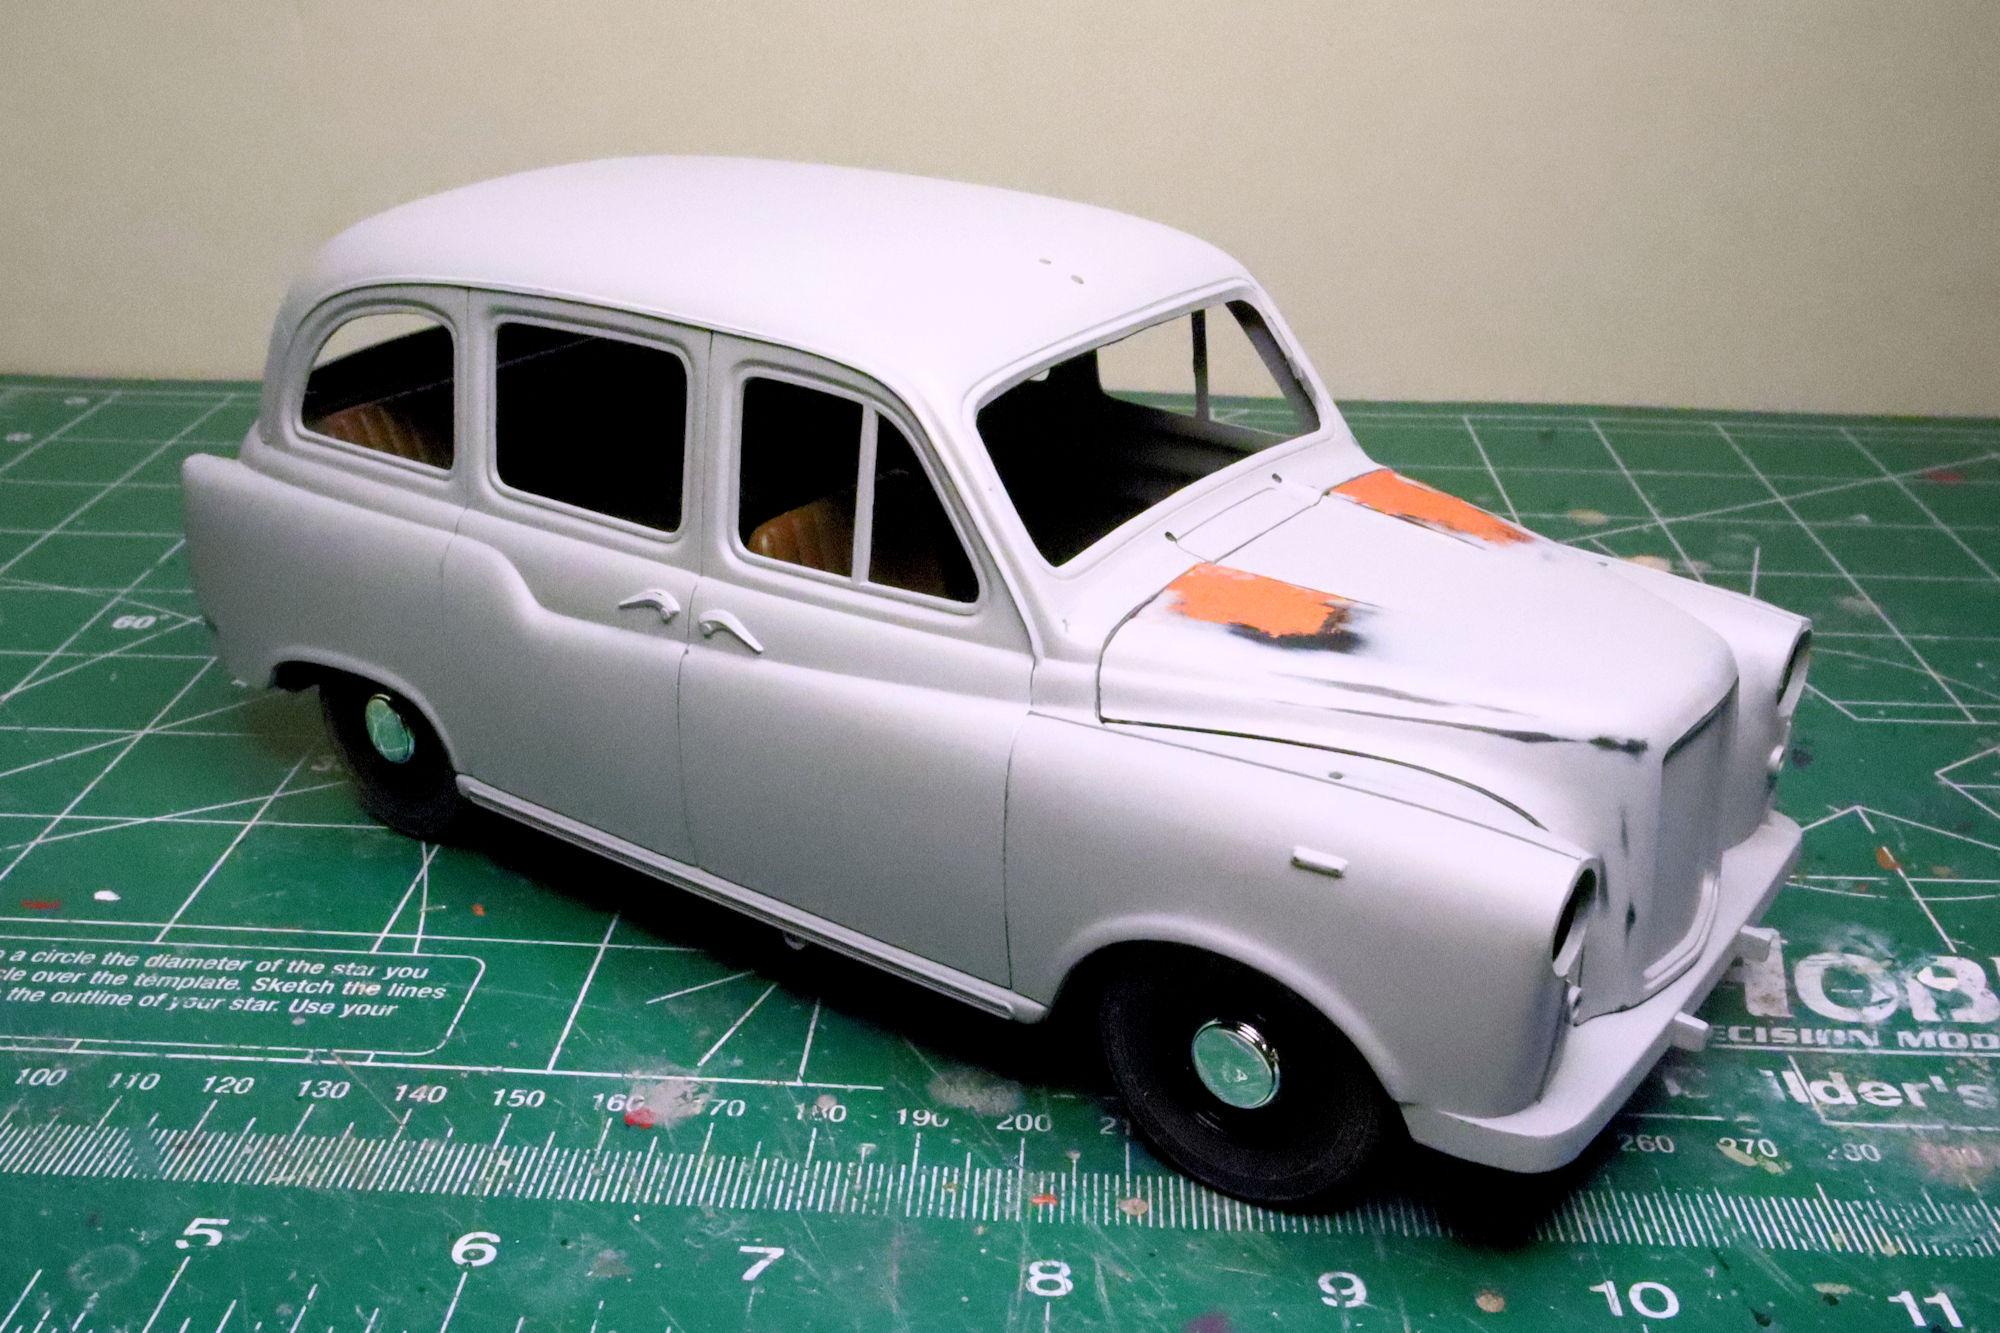
The Edsel is looking good Jim! The paint issue on the hood looks like some light crazing. I just had that happen when I put the first color coat on the London Black Cab I'm currently working on. I've had it happen a few times before and the texture always seems to follow casting flaws; those areas in which you can see where the plastic meets in the mold when its injected. When I get this result, I usually let the paint rest for a day then I hit it again with what I call a "drench coat" of paint. That usually fills in enough of the texture that it will sand out easily. It sounds like we both used the same technique but in a different sequence. David G.
-
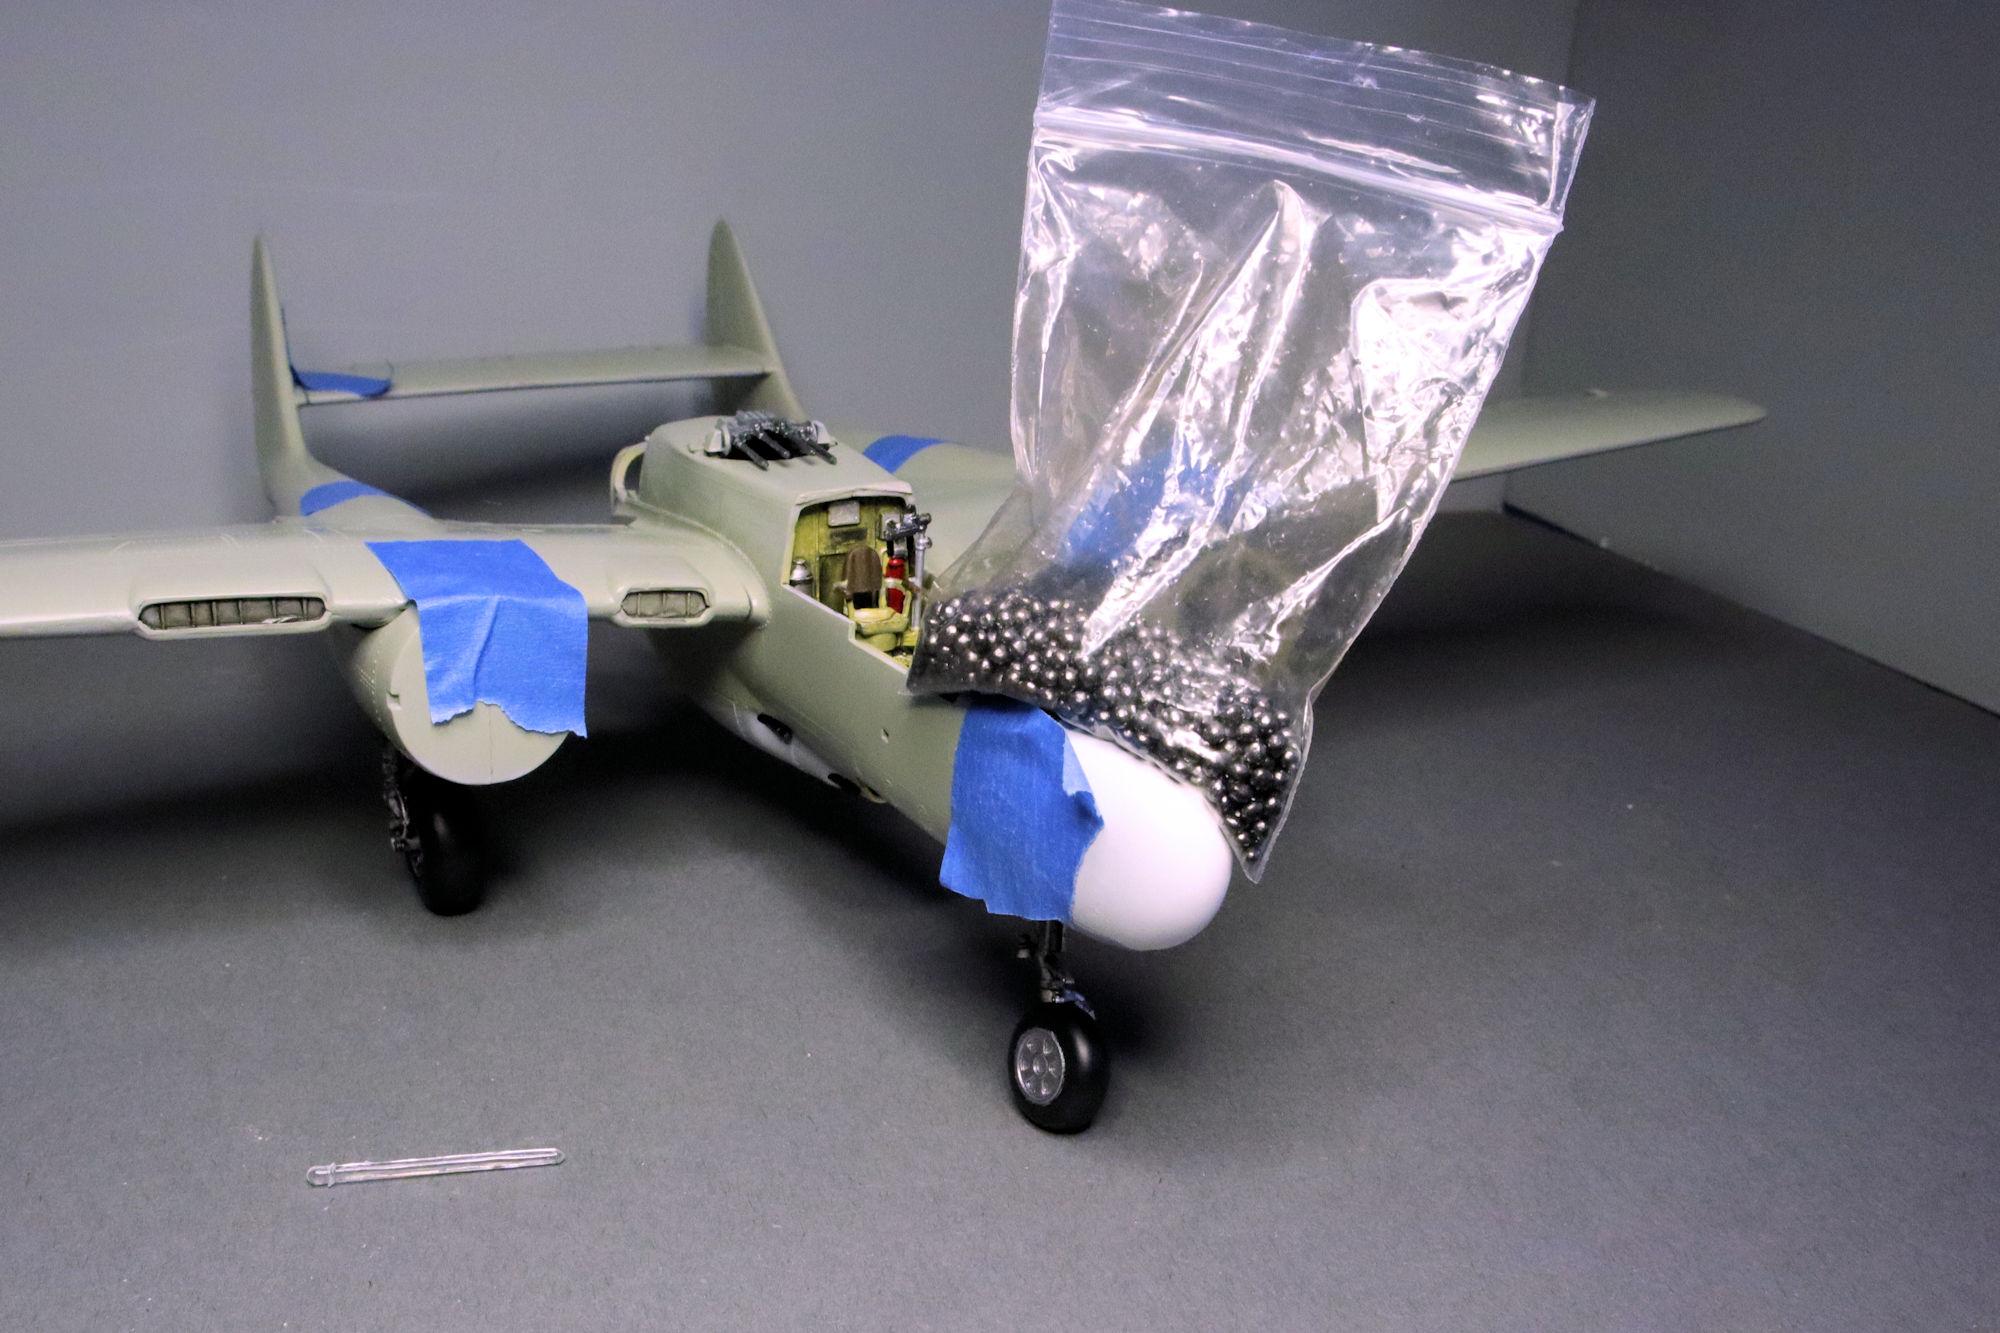
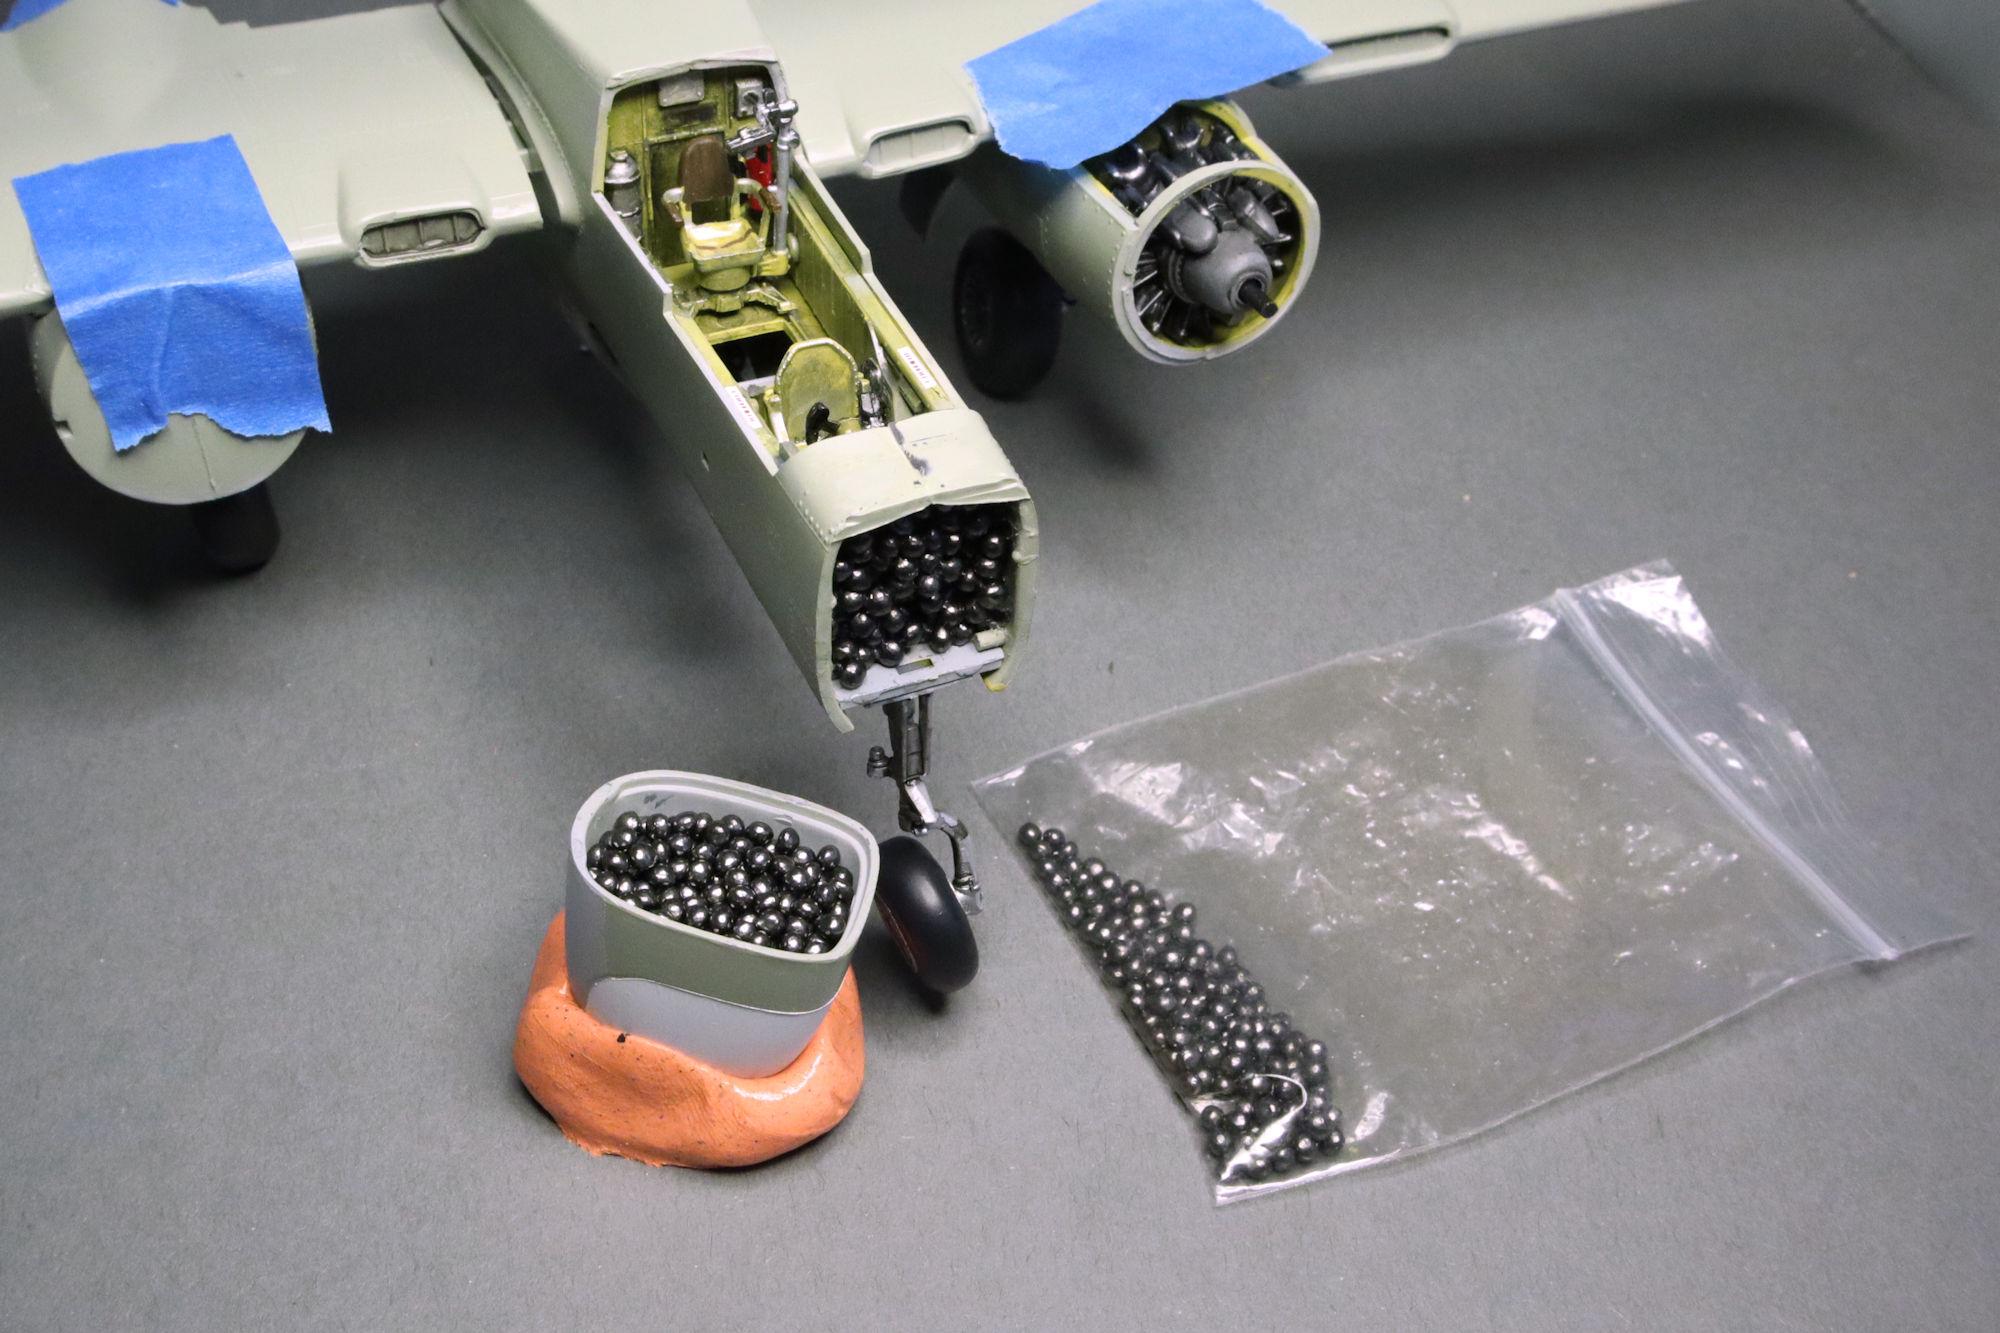
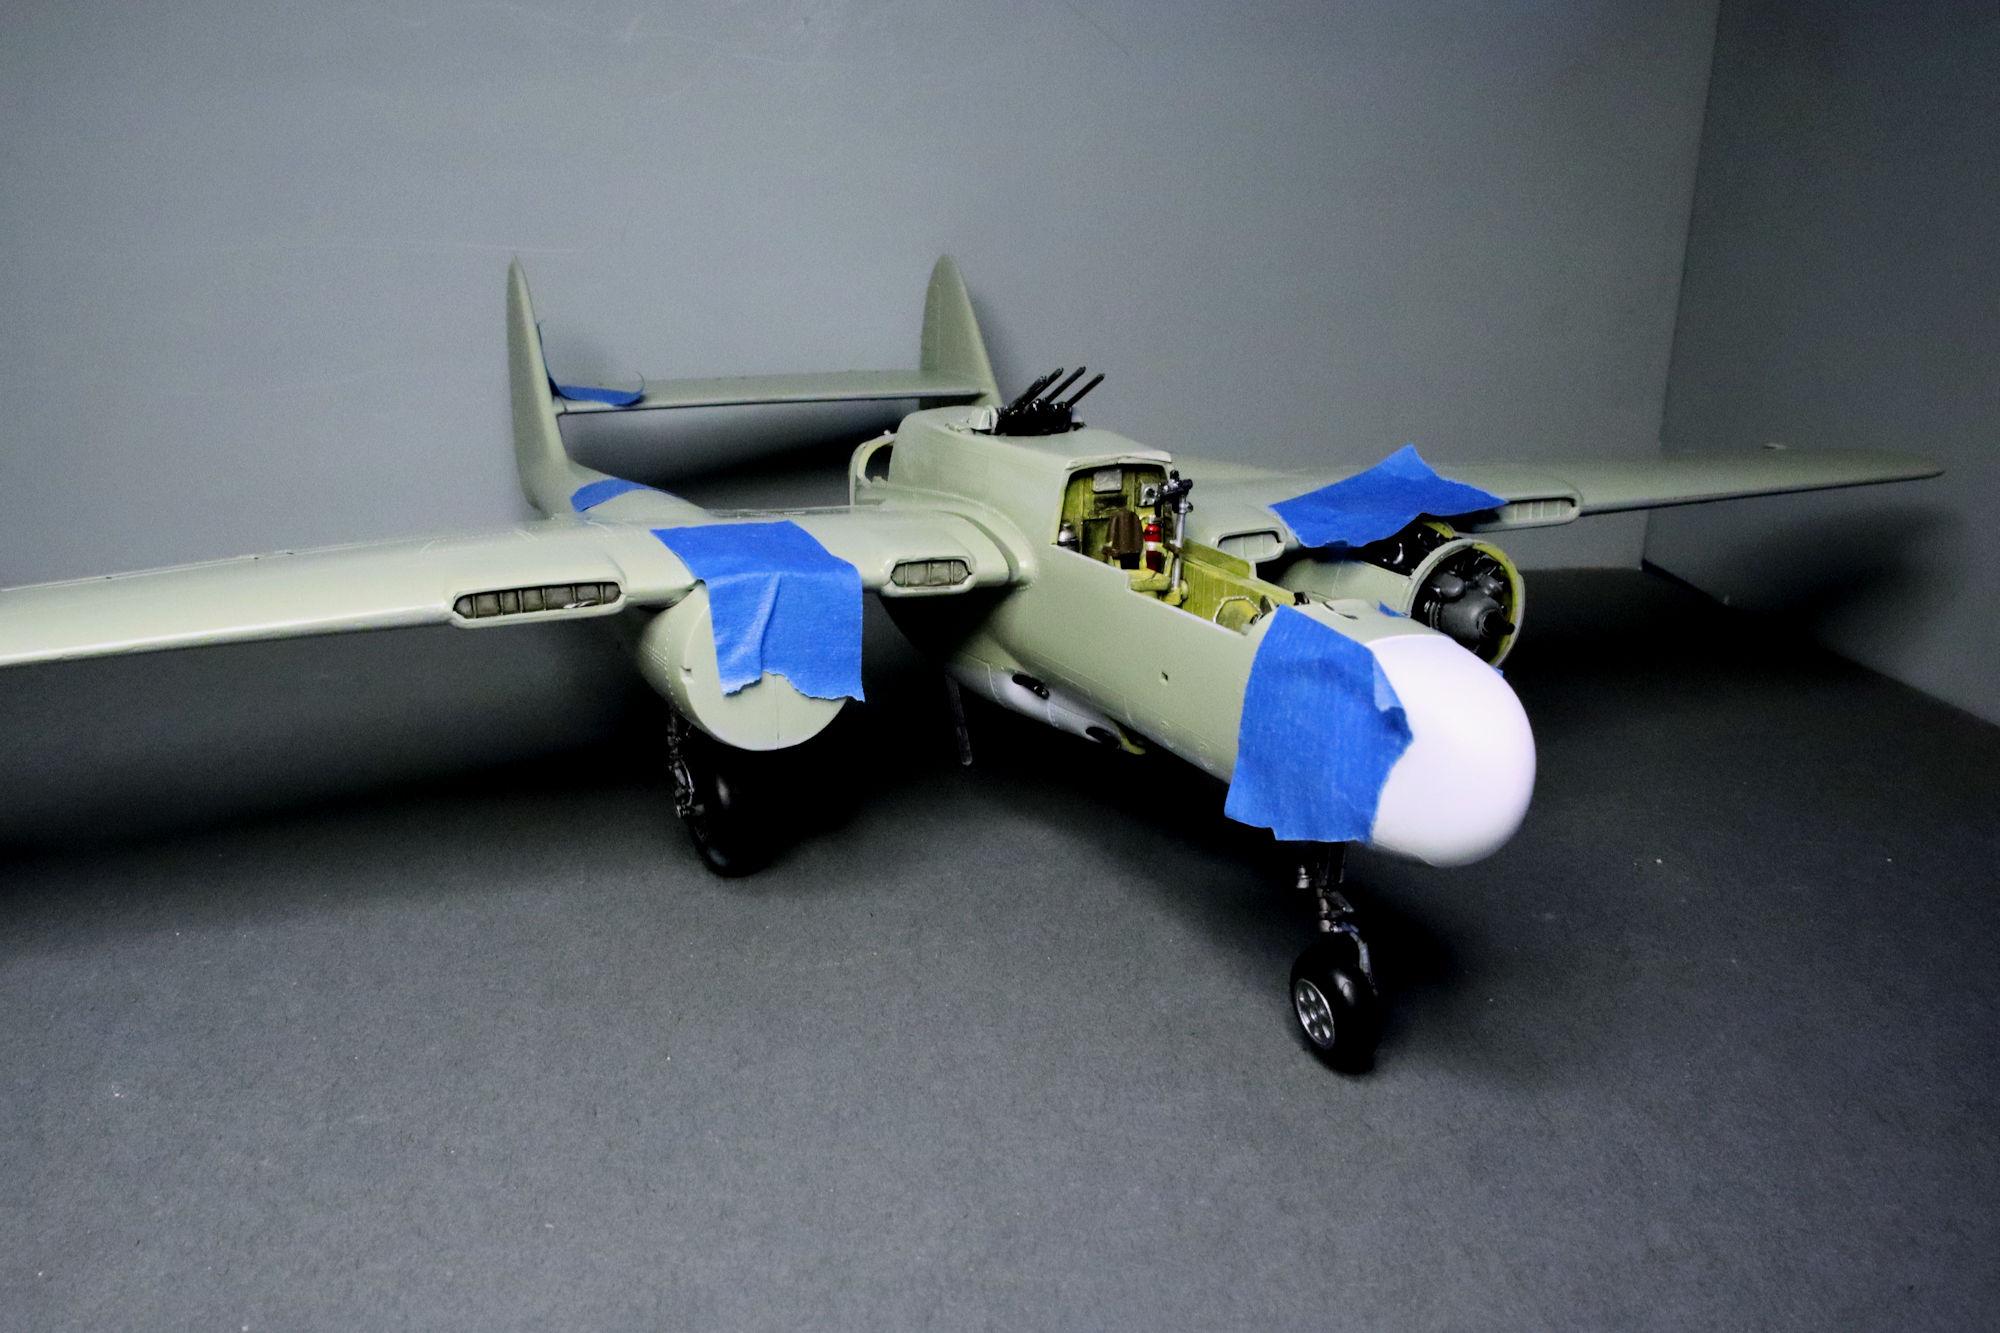
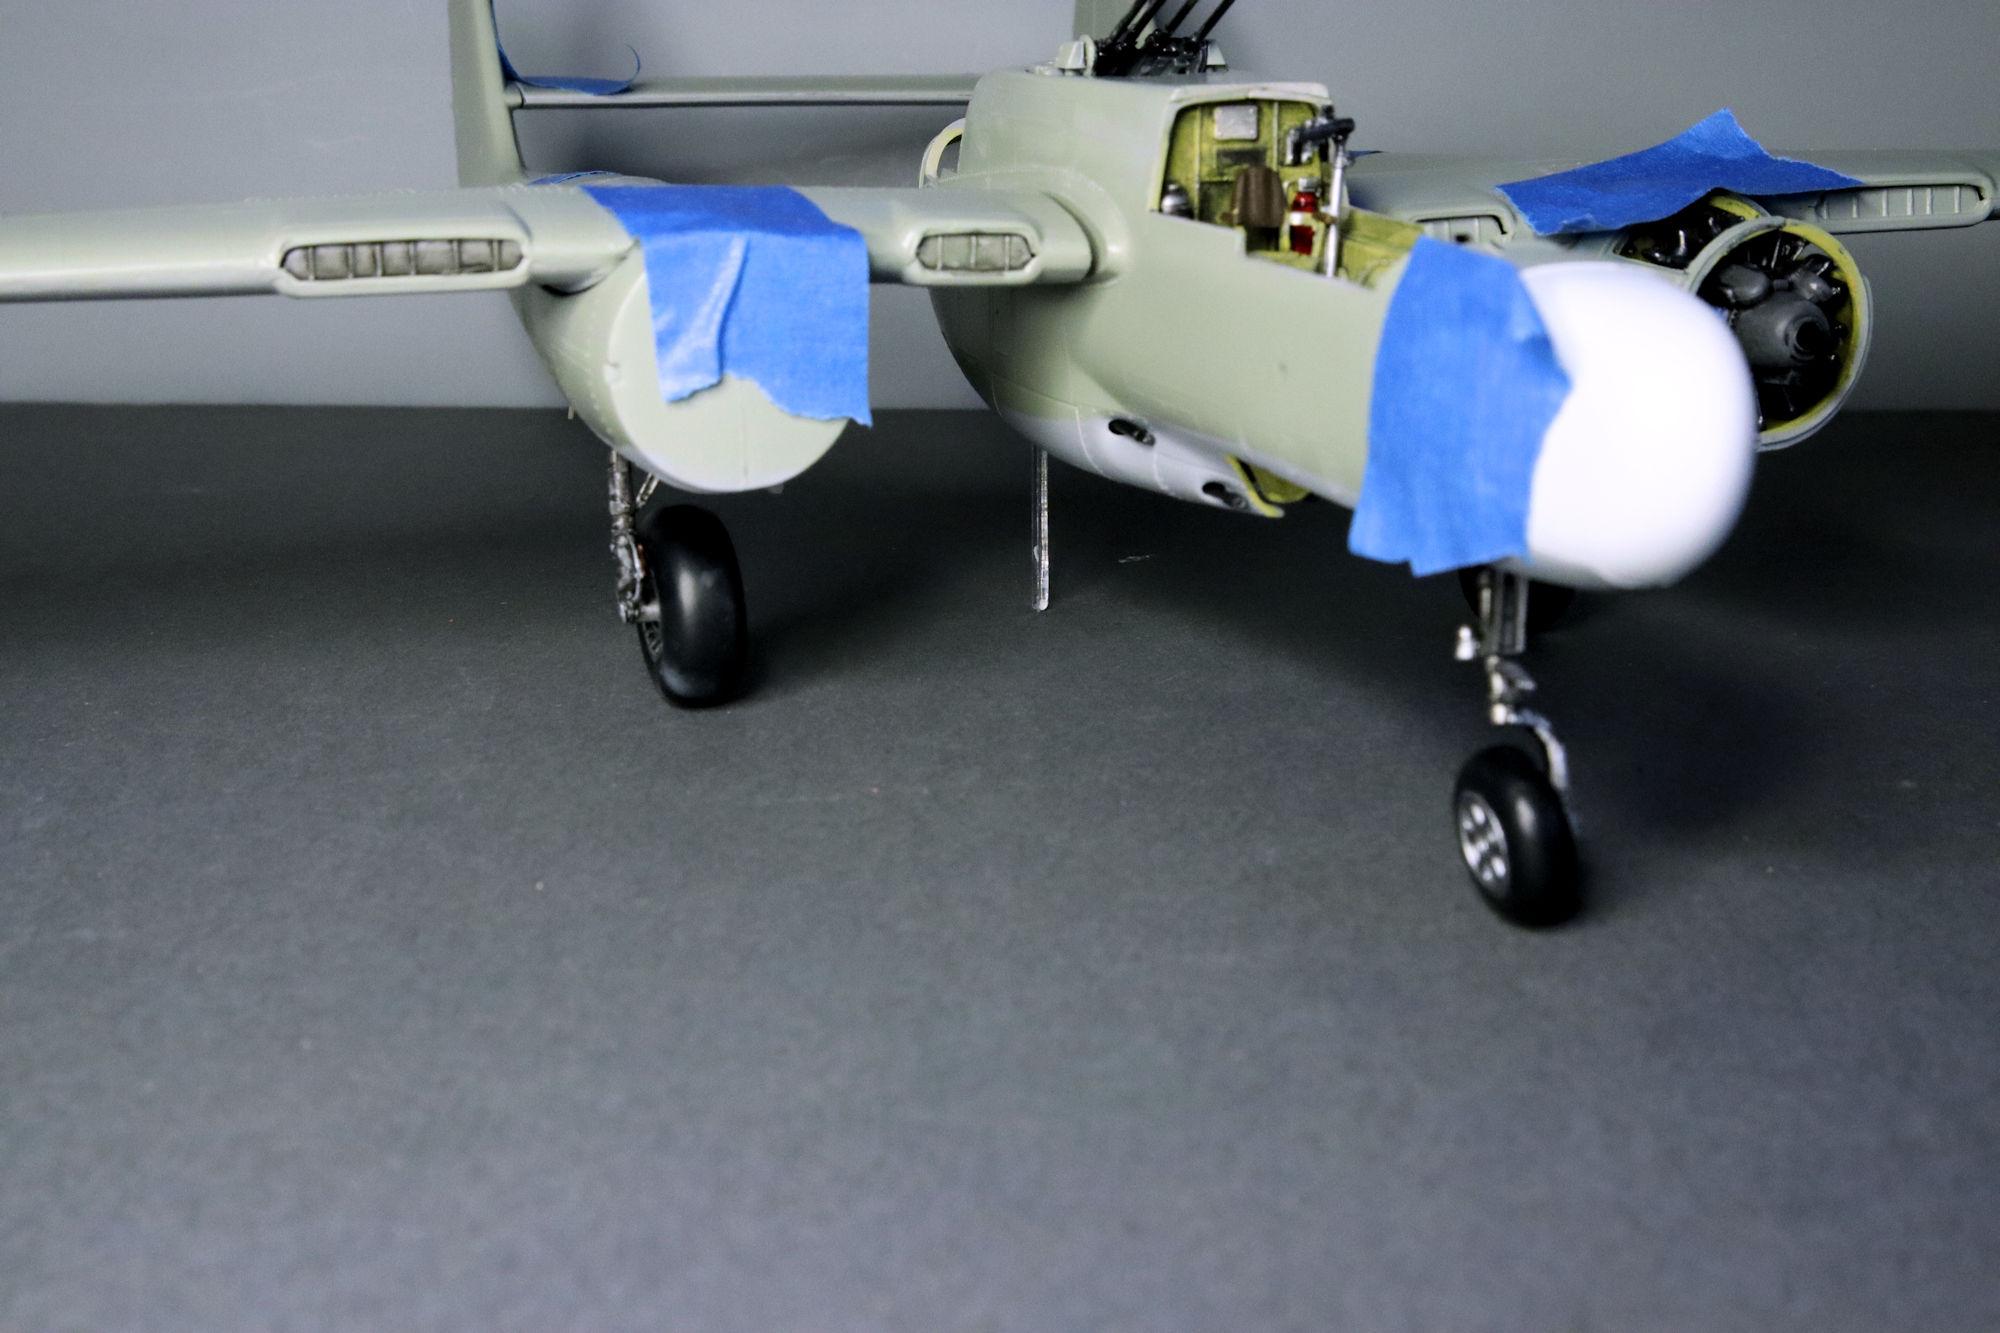
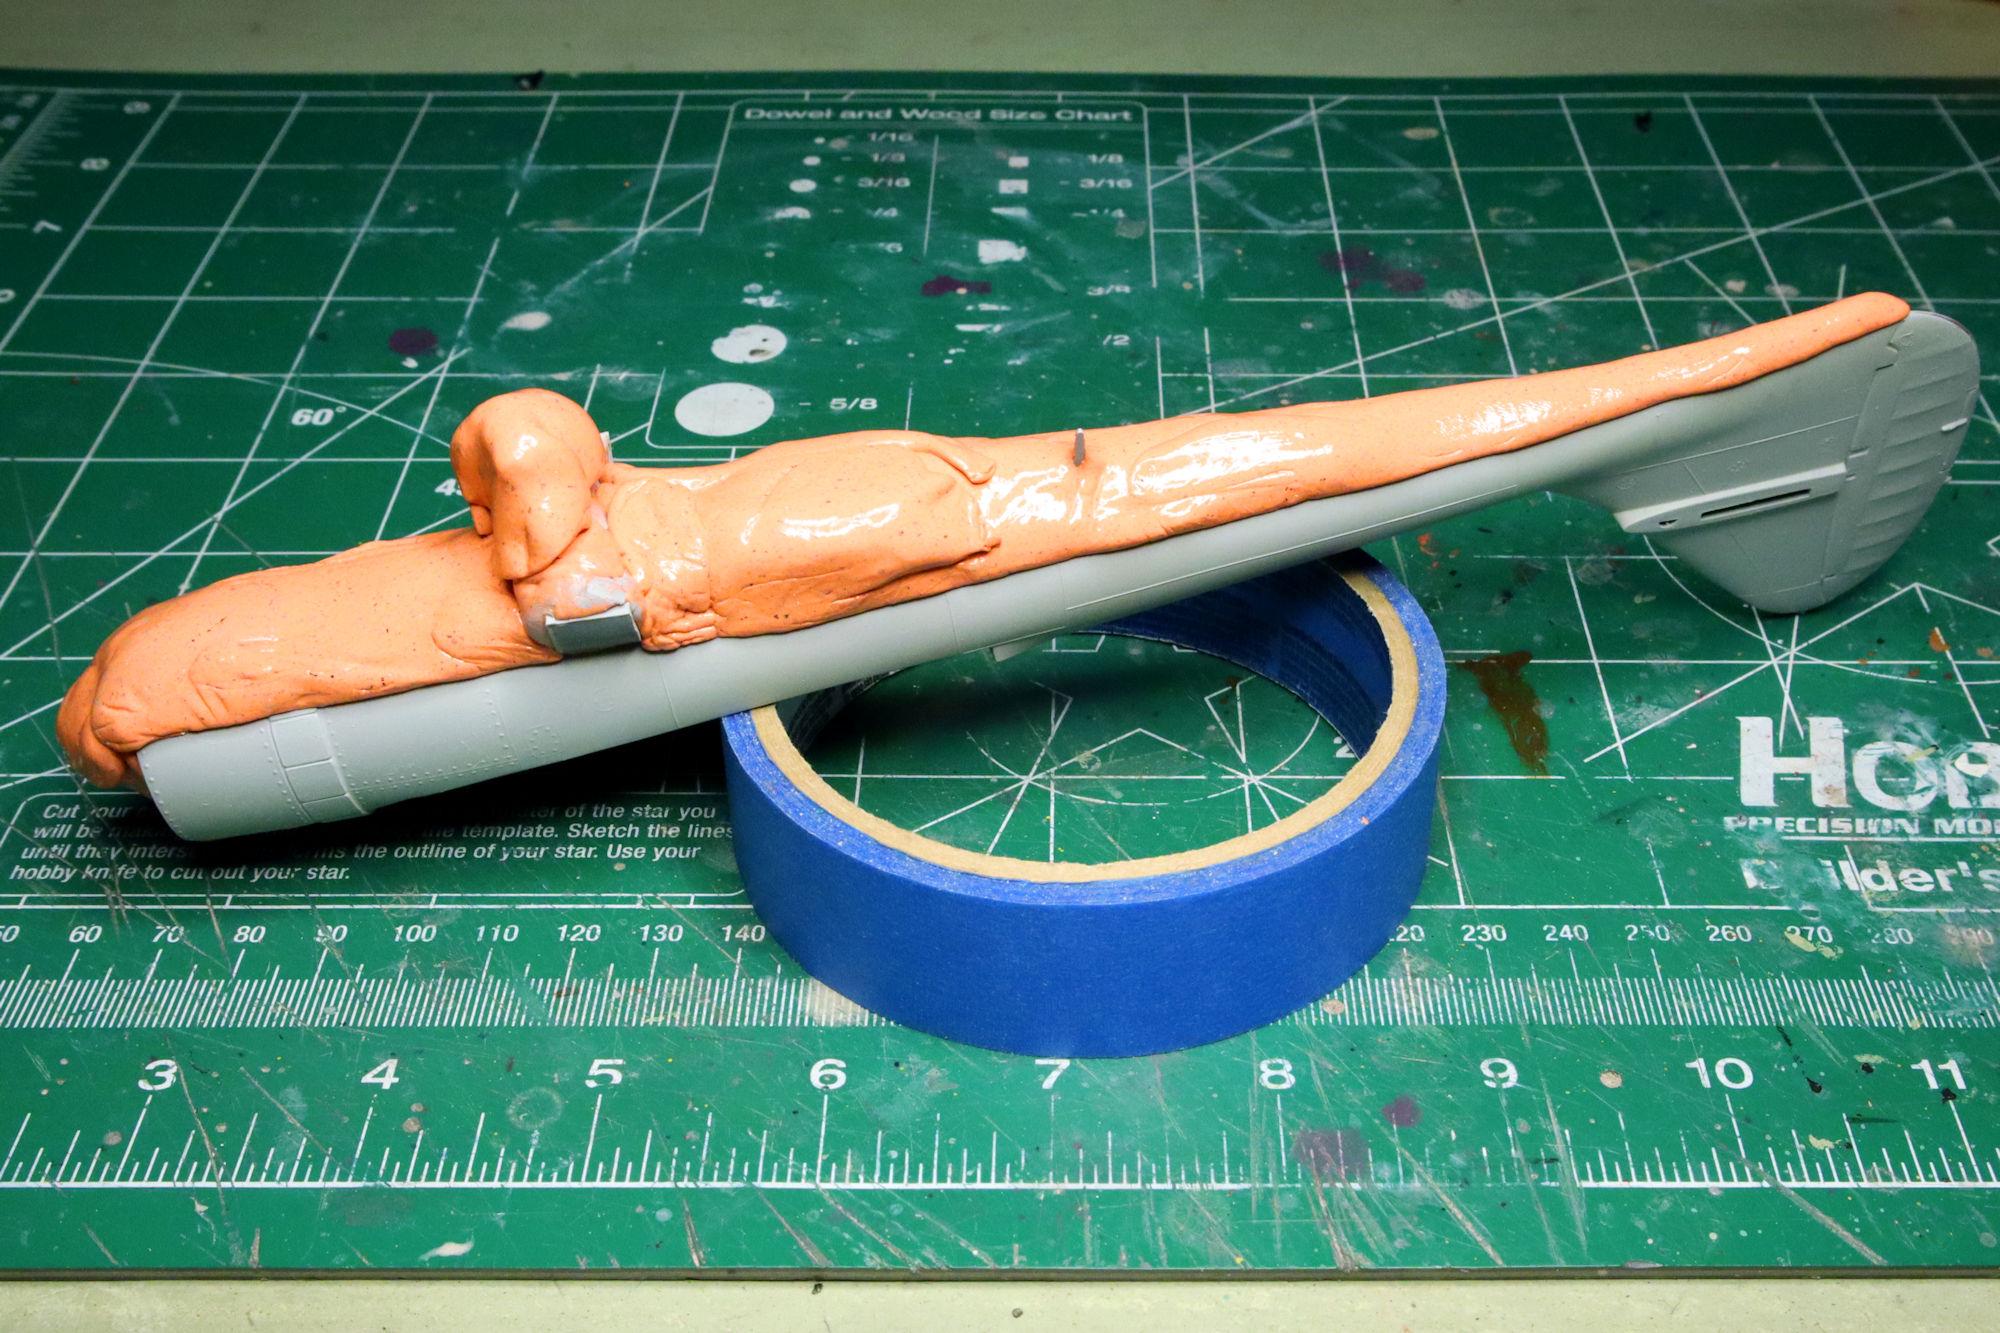
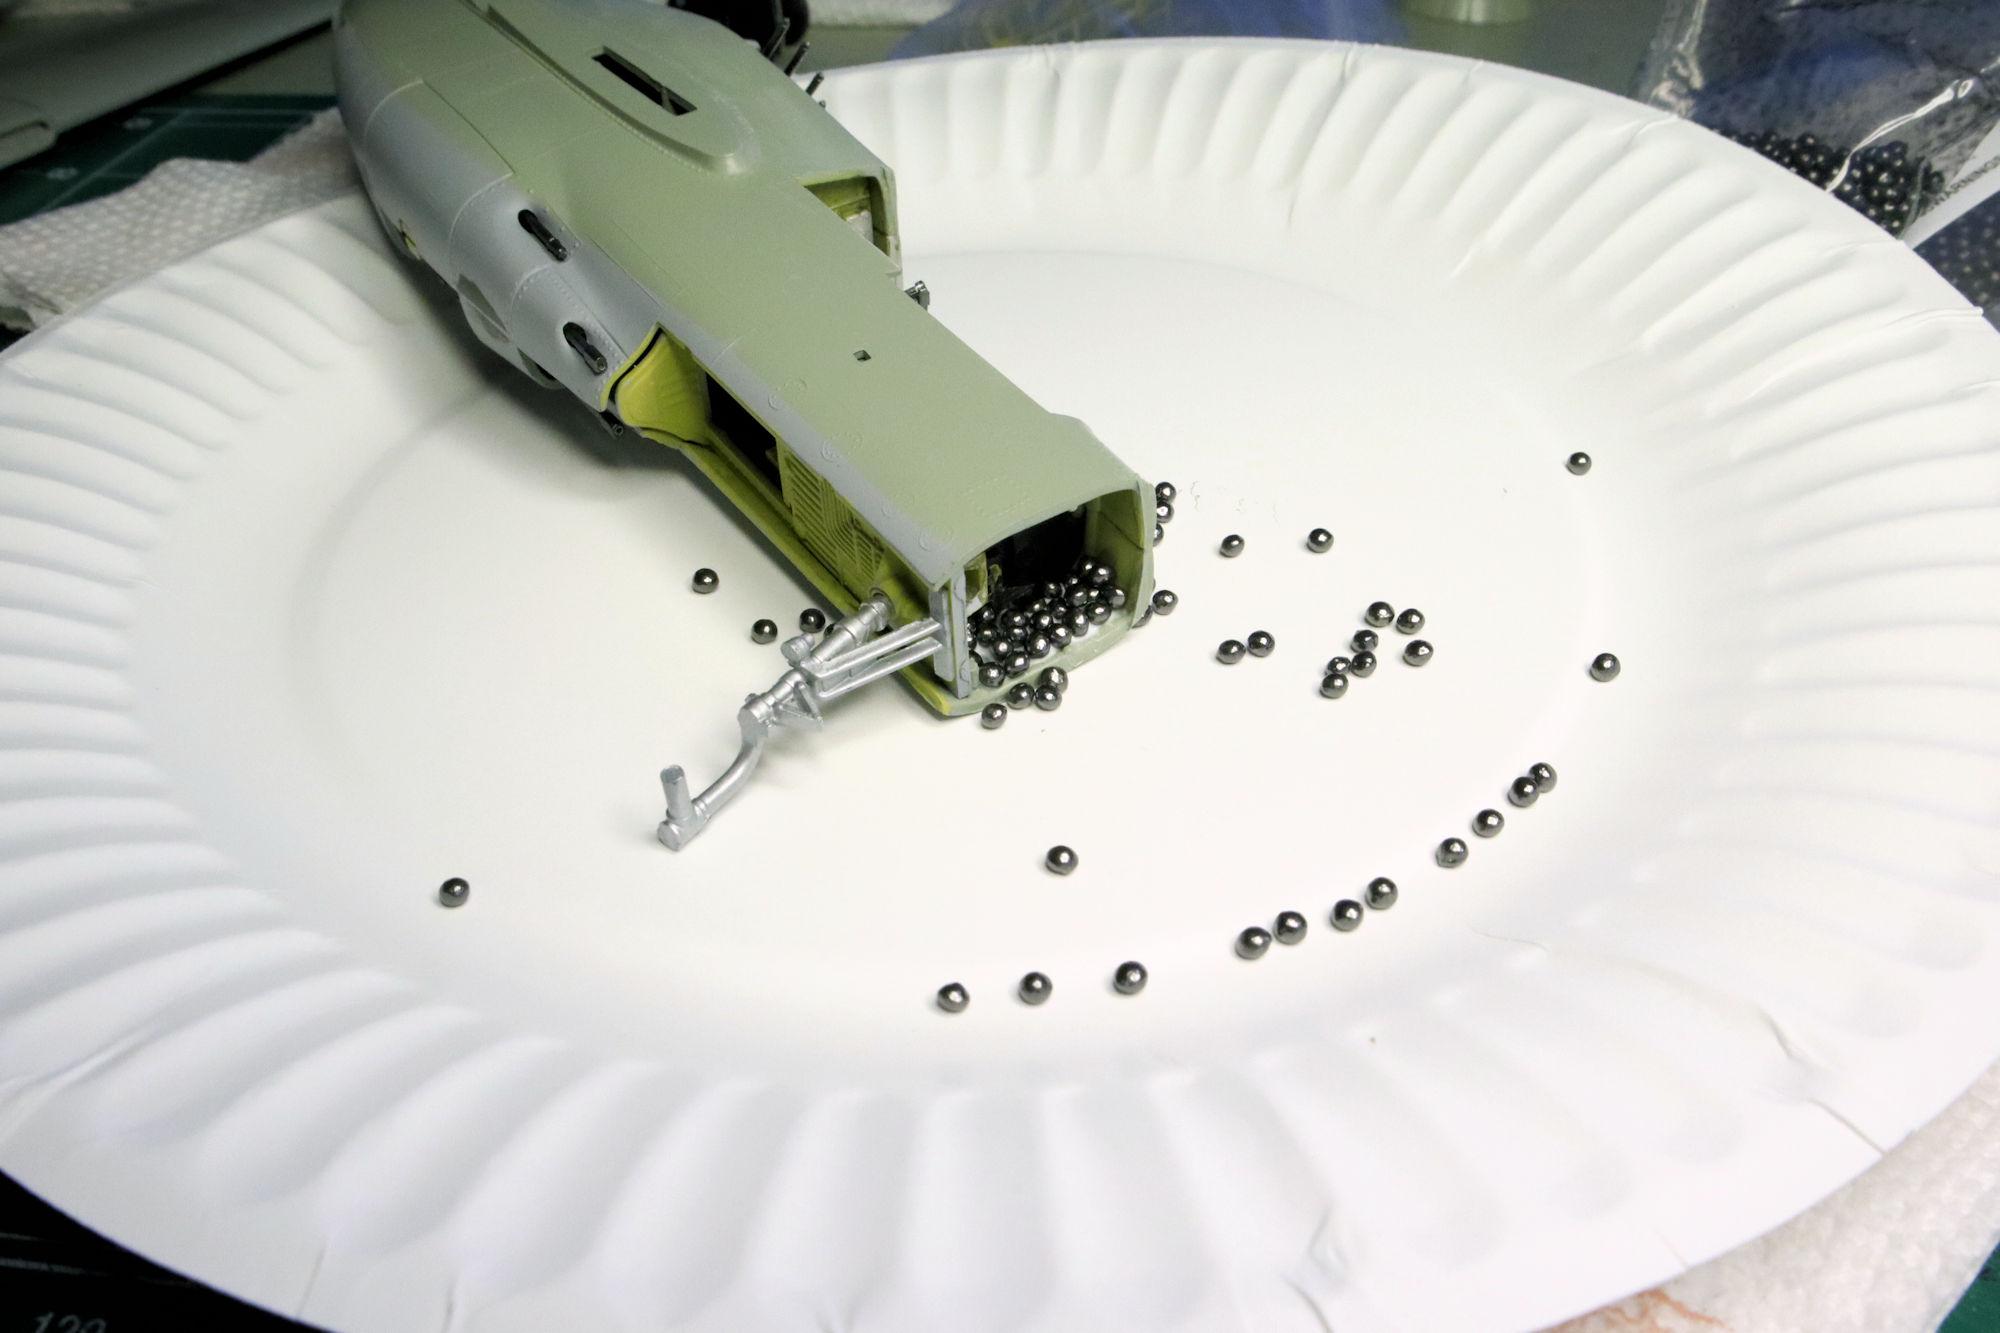
Hello Everybody! Here's the next update on the Northrop P-61 Black Widow. With the plane assembled in "test fit" mode, it's time to assess the weight and balance issue. To balance the plane on its wheels takes a little more than 2 oz of lead shot. This is in addition to the weight I've already placed in the space forward of the cockpit. The alternative provided in the kit is the clear plastic stick seen on the lower left. It goes toward the rear section of the fuselage and holds the plane's tail off the ground. Taking the 2 ounces of lead shot needed to balance the plane and adding as much of it as I can to the nose cone, there is some left that won't fit. Even with this, the plane barely balances. Also, the nose is unsettlingly heavy. The plane will be part of a diorama so I don't plan on handling it much. but I have concerns over what effect that much weight may have on the front gear over the long term. Given all that, the plastic stick is starting to look like the better of the two options. It's barely visible from a normal viewing angle. Even straight-on, it's not too bad. Every model ever built is a compromise with reality, it's something we just have to accept sometimes. To me, the plastic stick is really no different than the strings that are often used to suspend model airplanes or a clear plastic rod used to hold up a space ship or hovercar. It's something I can live with. So I guess that the weight problem is solved and everything is in balance... On with the build! David G.
-
Monogram's 1955 Lincoln Futura Concept Car: WIP
David G. replied to David G.'s topic in WIP: Model Cars
Yeah, it does look like an evil robot! Thank you David. Yeah, I always like to give each kit I build my best effort, I think that that is a trait we share. David G. -
Ah, that makes sense! I should have figured that out on my own. ? Thanks again for the kind comment. David G.
-
Monogram's 1955 Lincoln Futura Concept Car: WIP
David G. replied to David G.'s topic in WIP: Model Cars
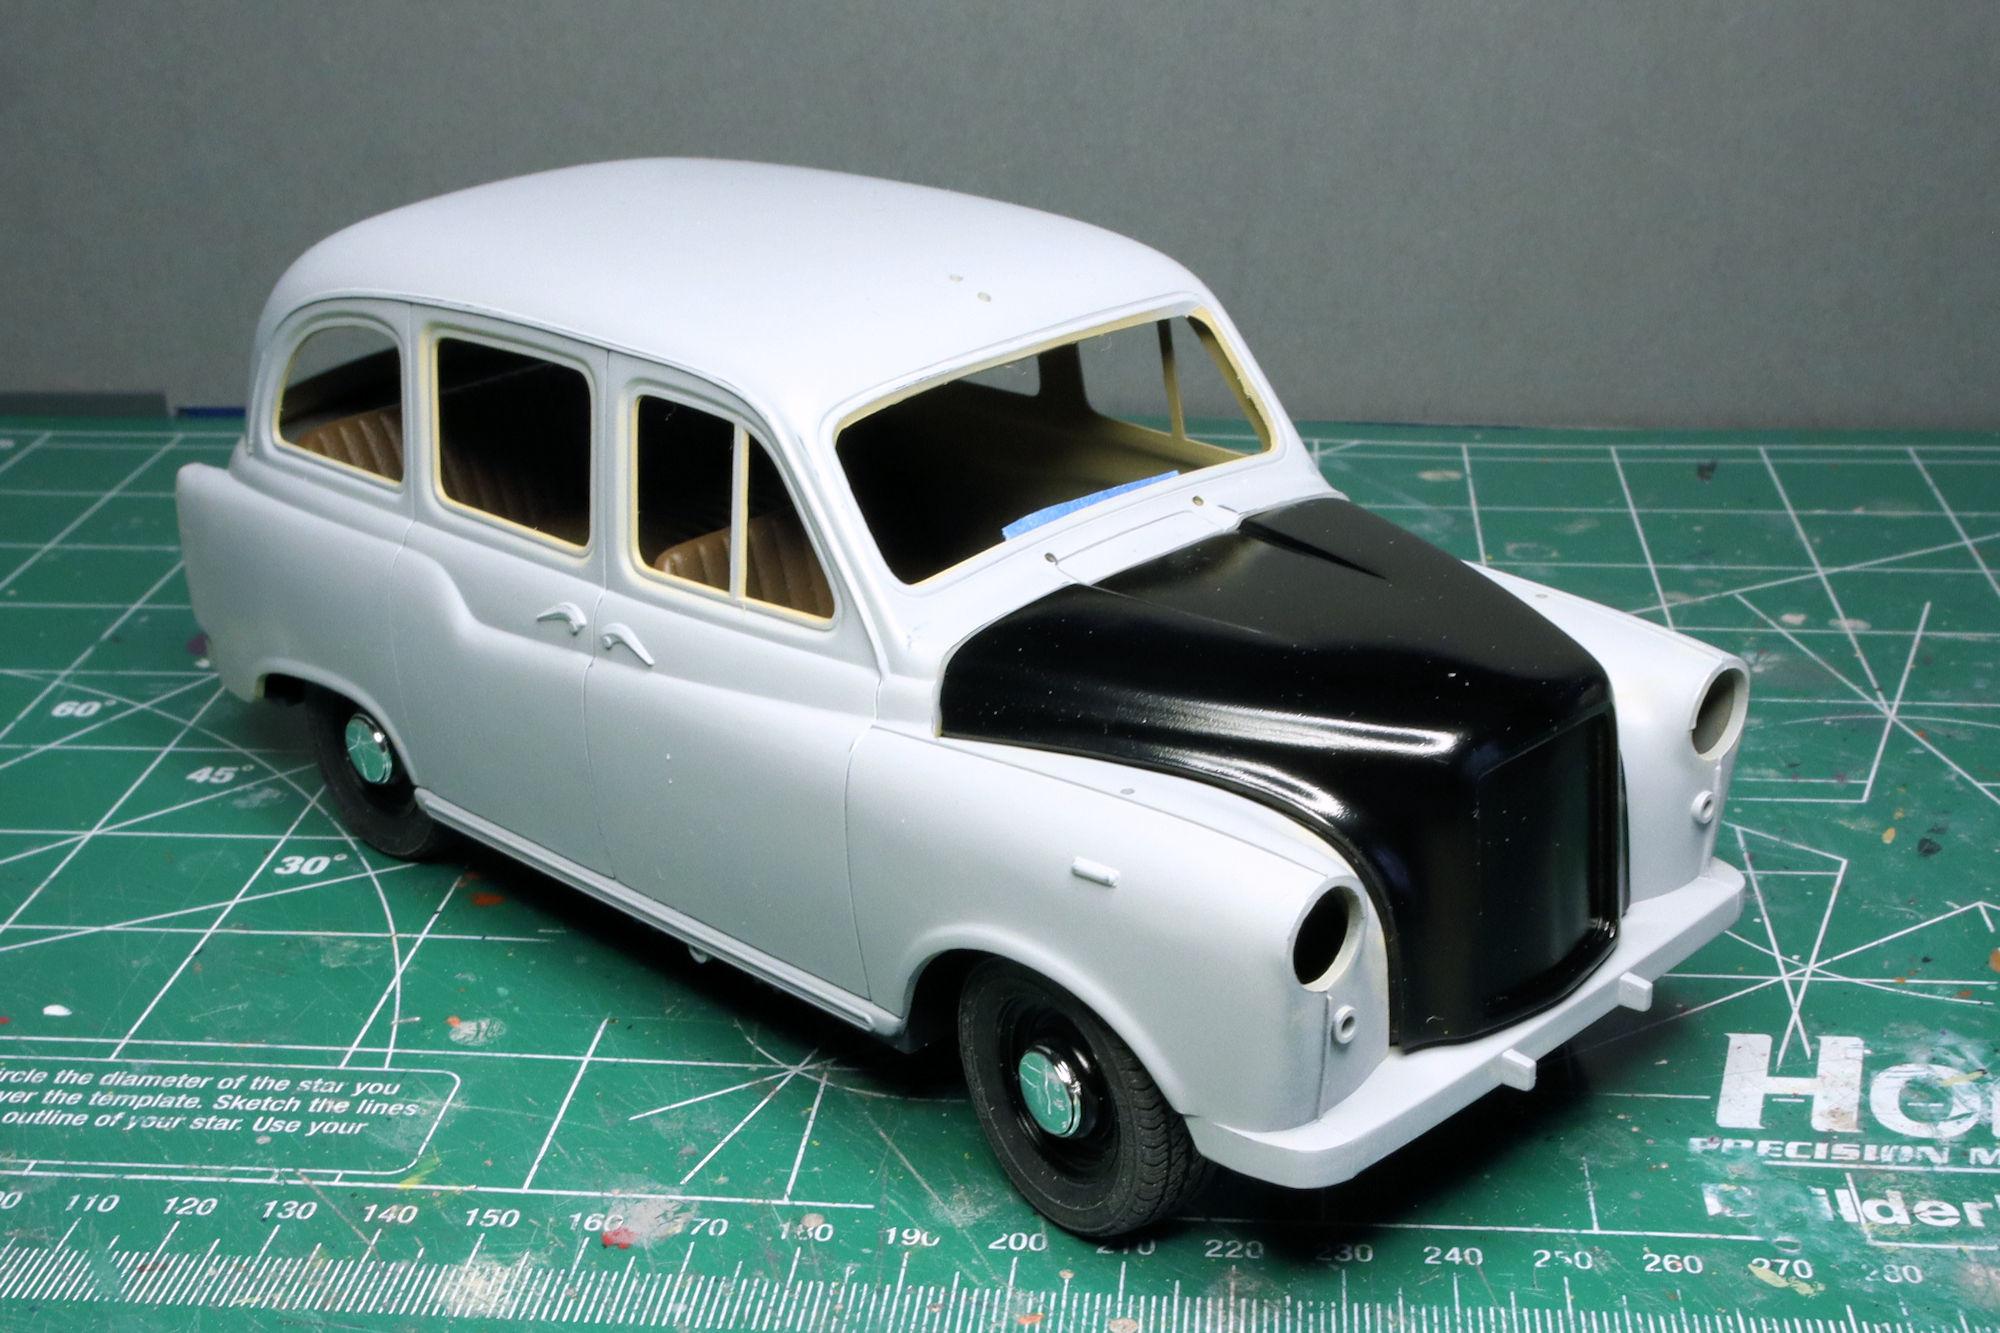
Hello Everybody! It's getting close to what I call the "Buttons & Bows" stage of the build. It's the stage where I'm wrapping up the little details right before final assembly. Yes. Yes I did! I've also been working on the bumpers. I sprayed the front bumper (the one on top) with some Rustoleum chrome paint. My prep wasn't as good as I would have hoped and there were some flaws I wanted to correct so I smoothed ant polished it a little more. I also wanted to do a blackwash of the grille area in the center. Since both the chrome paint and the wash are enamel based, they blended together and made a bit of a mess. It's not bad and it should look better once I put on the second coat of chrome. This series of events inspired me to pre-shade the rear bumper prior to applying the chrome paint. I'll have to see how that works out. As always, thanks for taking the time to look and please feel free to comment. David G.
-
Thank you Carl. The air cleaner. Yeah, this one is pretty much a paint can. A paint can with tubes! Thank you Bil. Is "power barn" a nickname for an engine? Or maybe the Cab itself? The Cab does kind of look like a barn on wheels... in an elegant sort of way, of course. Thanks, David G.
-
Nice weathering on the exhaust. David G.
-
I'm still watching the show, amazing work! David G.
-
Shelby Cobra Daytona
David G. replied to 2whl's topic in WIP: Other Racing: Road Racing, Land Speed Racers
It's great seeing this one back on the bench. That's some crazy assembly work on the windows! ? A beautiful shade of blue too. David G. -
Everything looks so "in scale" ? Seeing this work reminds me of the model railroaders who scratch-build brass locomotives. David G.
-
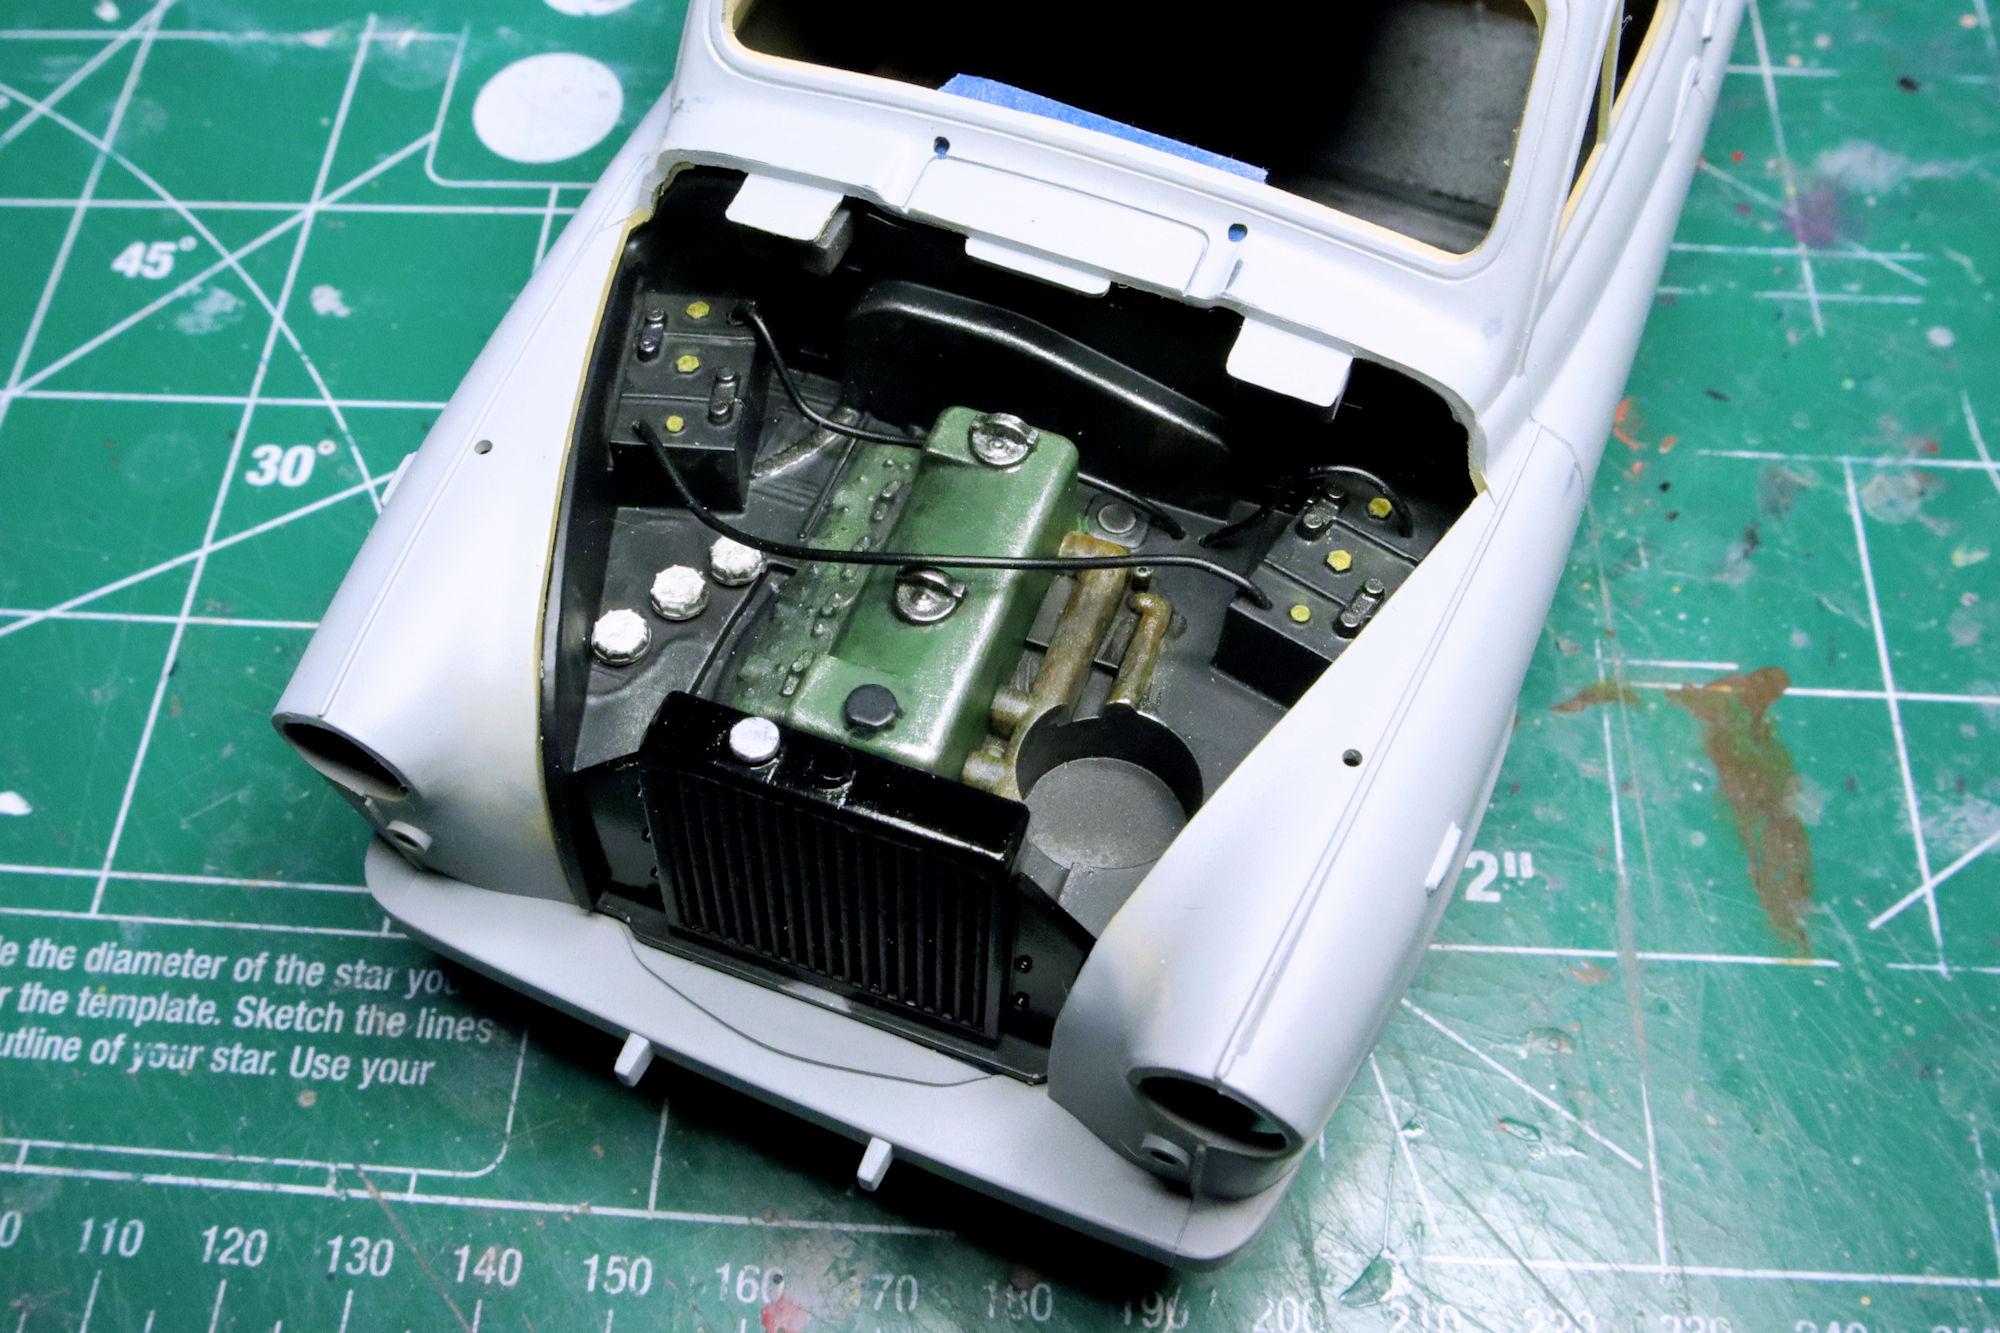
Hello Everybody! It's been a little while so here's the next update on the London Black Cab. Filling the sink marks. A little paint and a little more work to do. Meanwhile... under the hood, a little detail painting is under way. As always, thanks for tsking the time to look and please feel free to post any comments you may have. David G.
-
Thank you very much Joe, I appreciate your comments. David G.
-
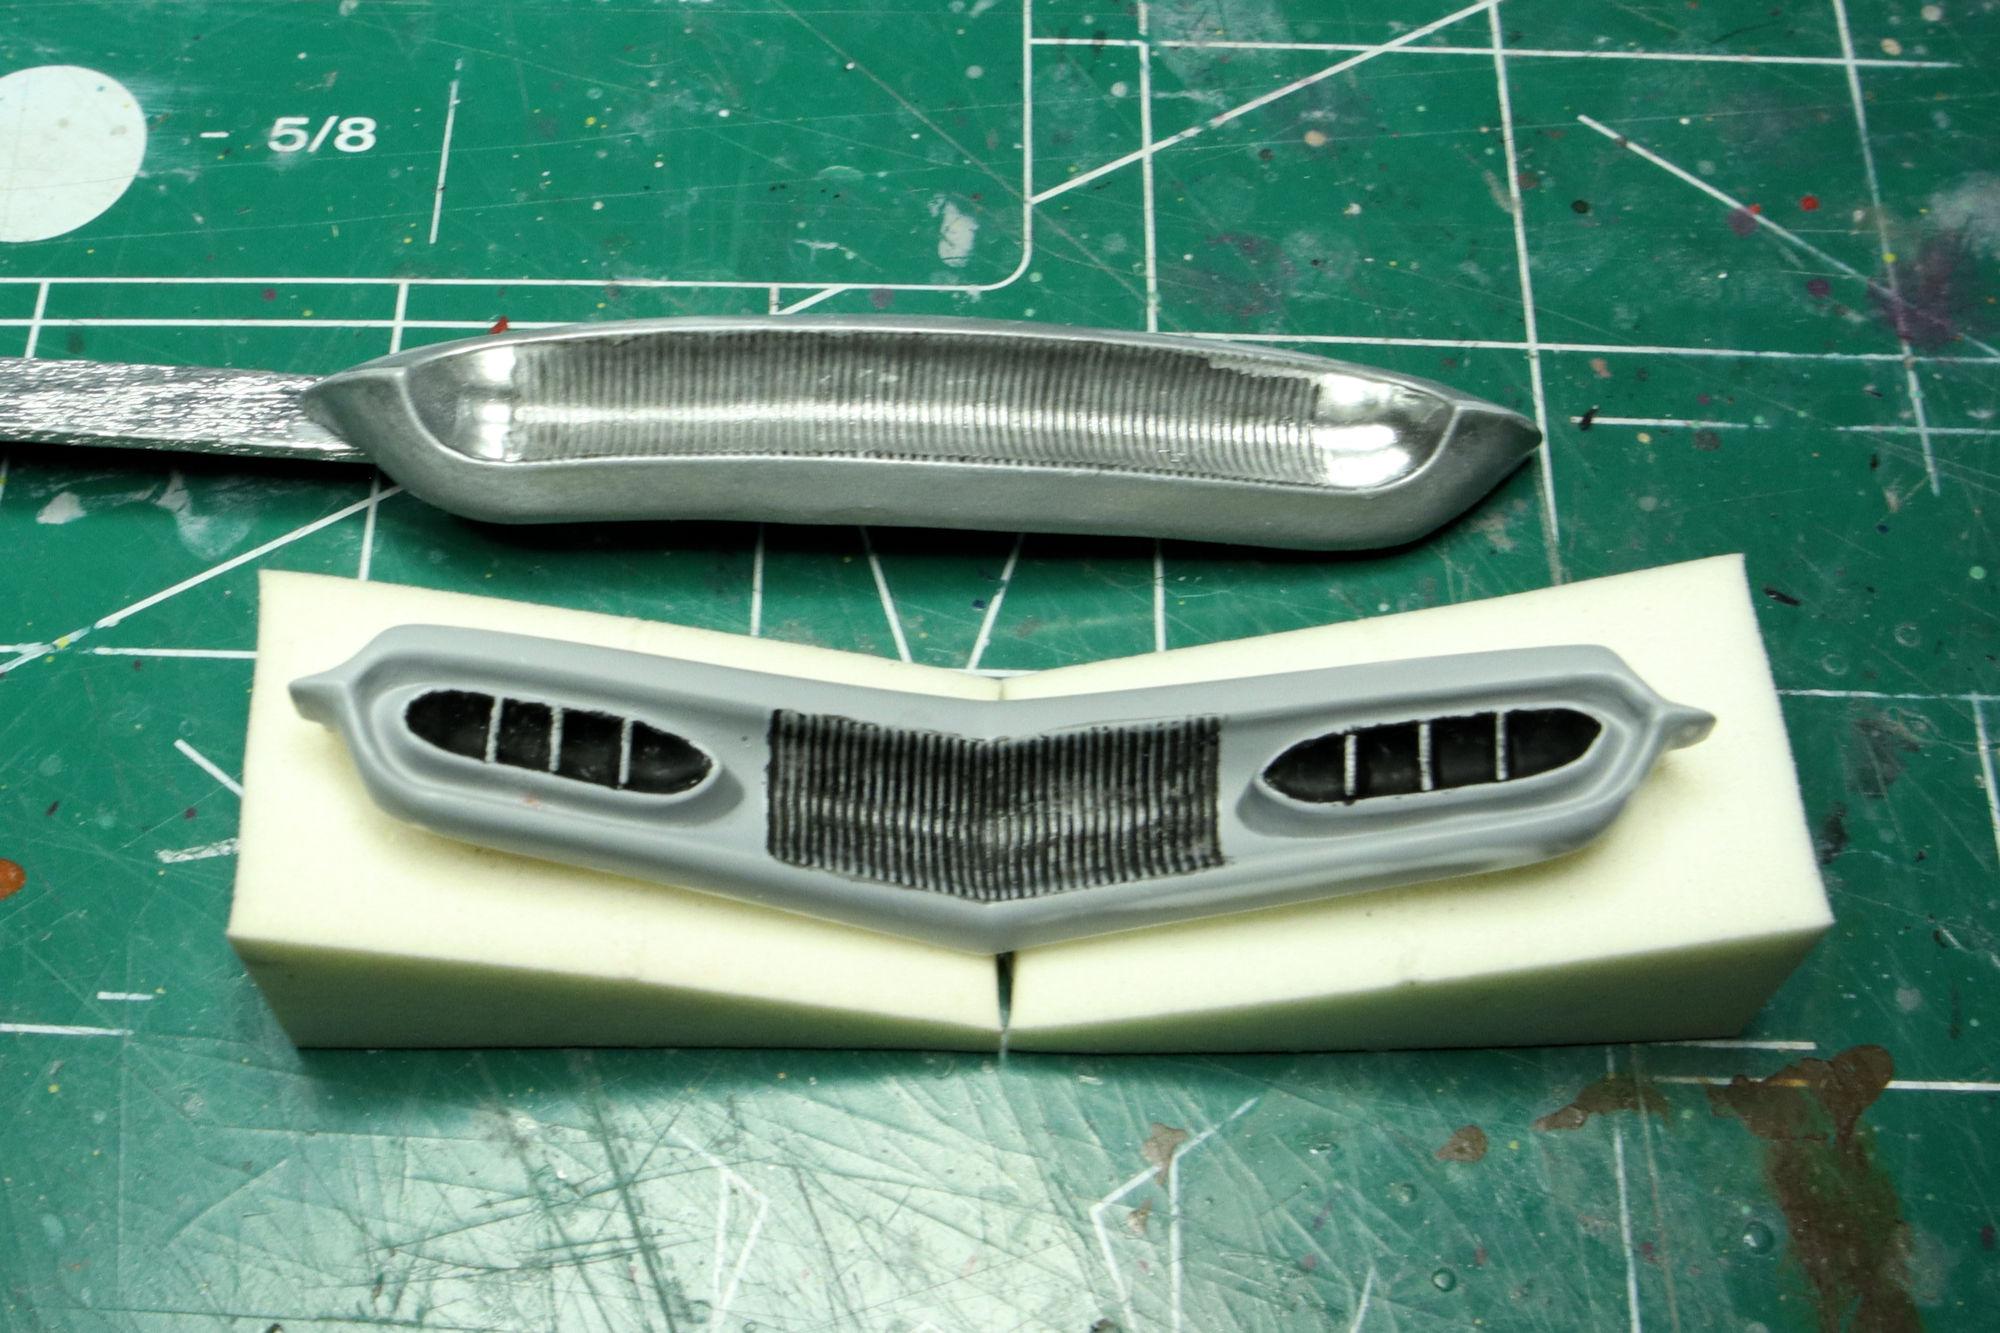
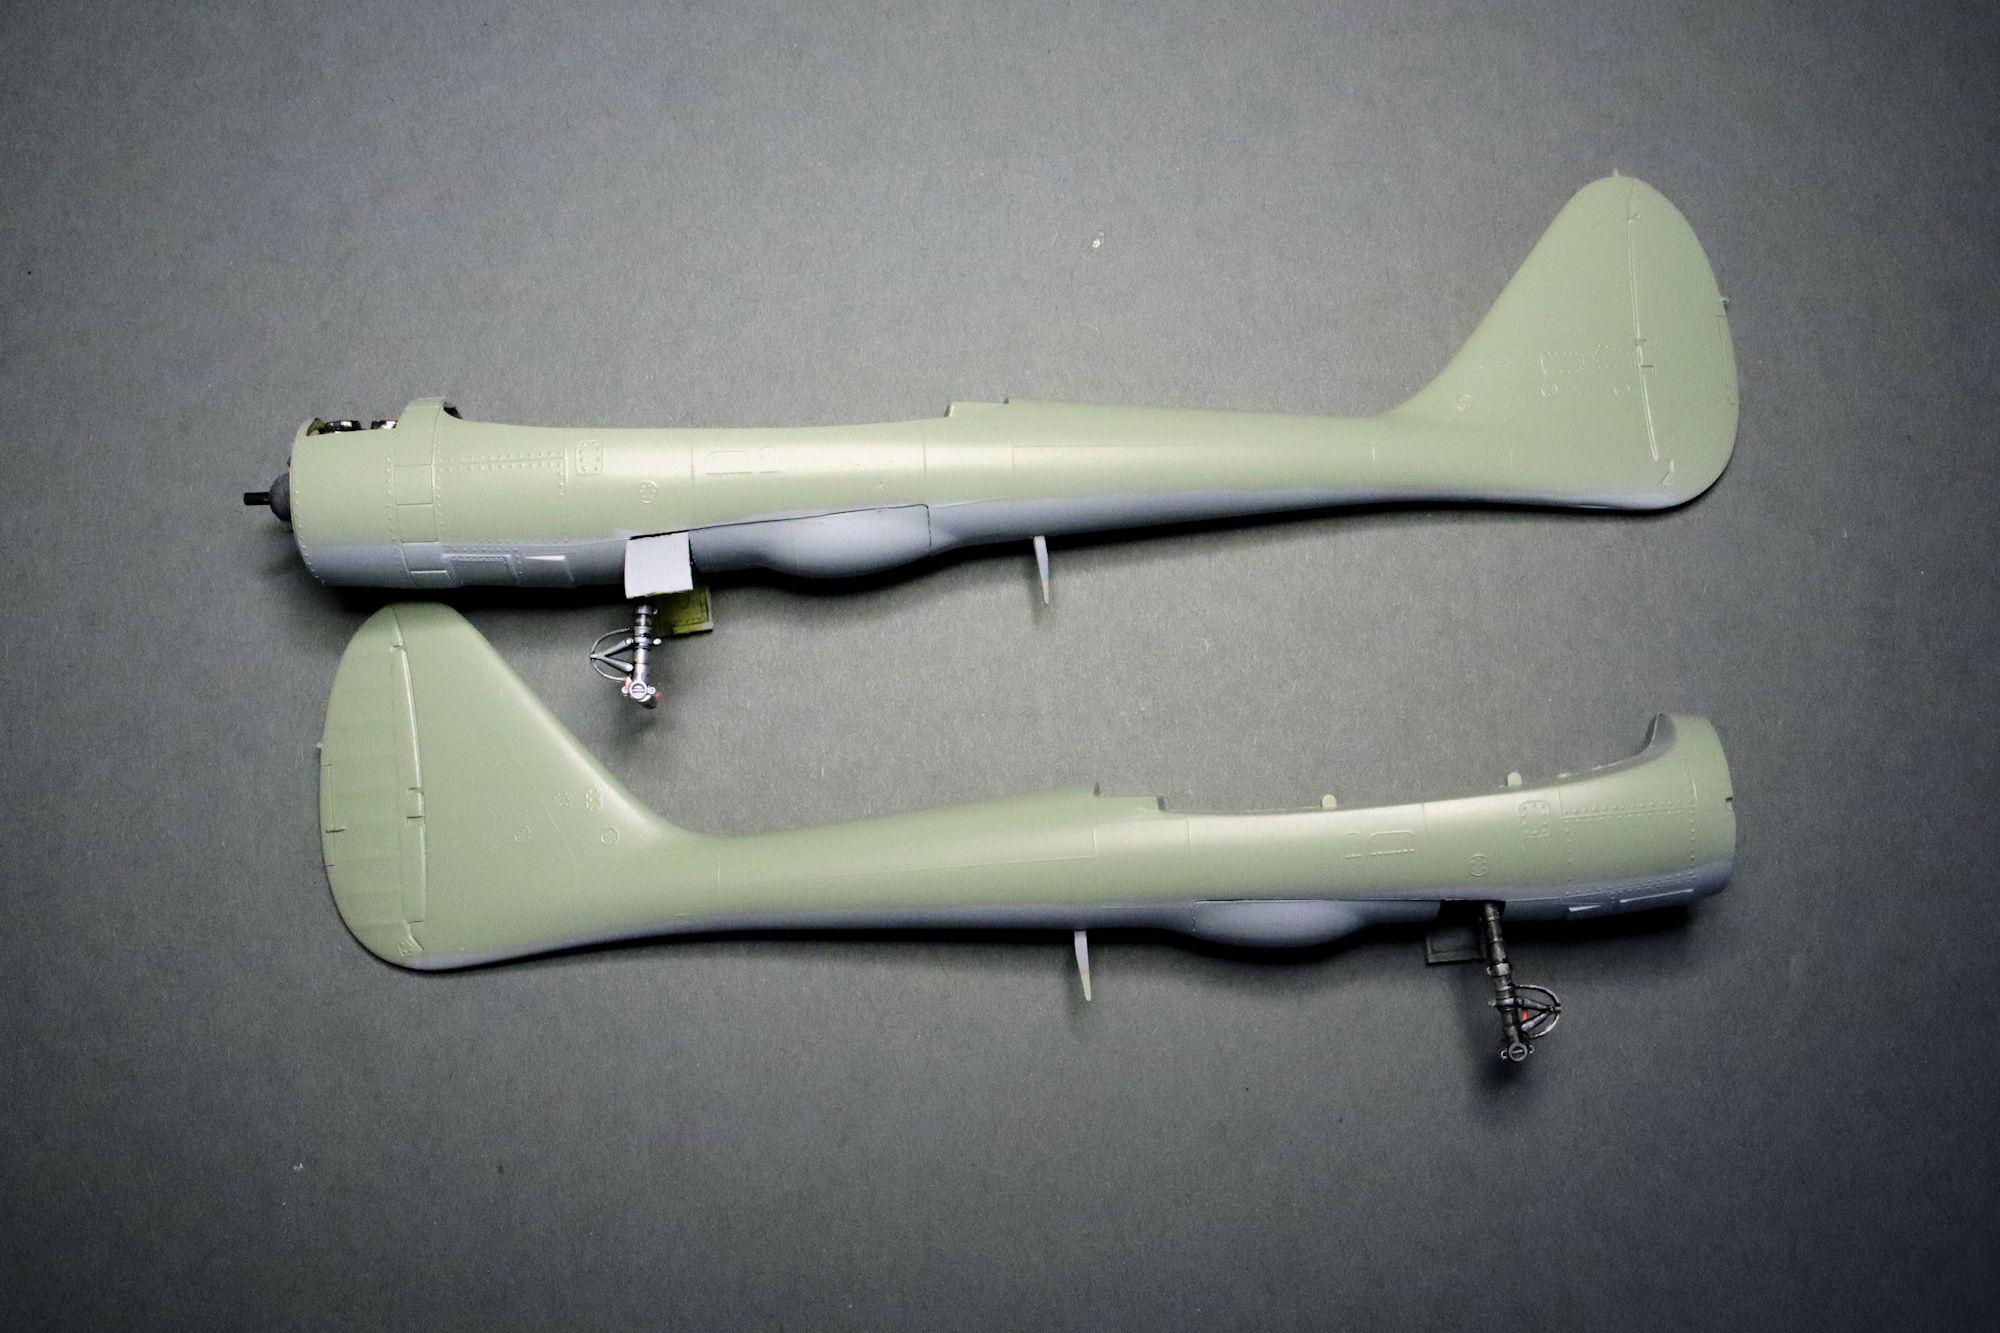
Hello Everybody! I finally feel that I'm on a roll with this build. I find myself looking forward to working on this one and feeling a sense of accomplishment after each build session. I love when that happens. I got the booms as smoothed out as I feel they need to be, so it's time for some paint. I plan to use the gray primer as the belly color with Tamiya AS-29 Gray Green on top. Silly putty is best material I've found for this kind masking. Except that now I have no way of setting this down until the paint is dry! Luckily, Tamiya lacquer dries in minutes. Masking the open cowling and exposed engine of left boom is a little more involved. But the color mask is still the same. The end results are satisfactory. As always, thanks for taking the time to look and please feel free to comment. David G.
-
Tamiya Aston Martin DBS... One from the Top Shelf!
David G. replied to jaymcminn's topic in WIP: Model Cars
Dang! That is one sweet looking interior! ? Great use of colors and excellent detail. David G. -
The building looks good in that location, Paul. For the hand tools, I've seen some people find a good image of tools on a pegboard and just print it to scale using a regular printer. In 1/64 scale one doesn't really need much more than that. I grabbed this one from Amazon, it just took a few seconds to find. Cheers! David G.
-
I continue to be amazed by the details you've added to this kit, Daniel. It's more of a complete overhaul! The original designers of this kit would be stunned to see what you've done with it! David G.
-
Fabulous work on this one Topher! I like the way you used the colors to pull it all together visually. David G.
-
It's nice seeing this one back on the bench Bob. The paint and trim look great! David G.
-
Yeah, it was two different companies. I'm glad to have you following along Joe. I finally feel that I'm getting a handle on this build. I find myself feeling that I actually "want" to work on it instead of feeling like I "have to". David G.
-
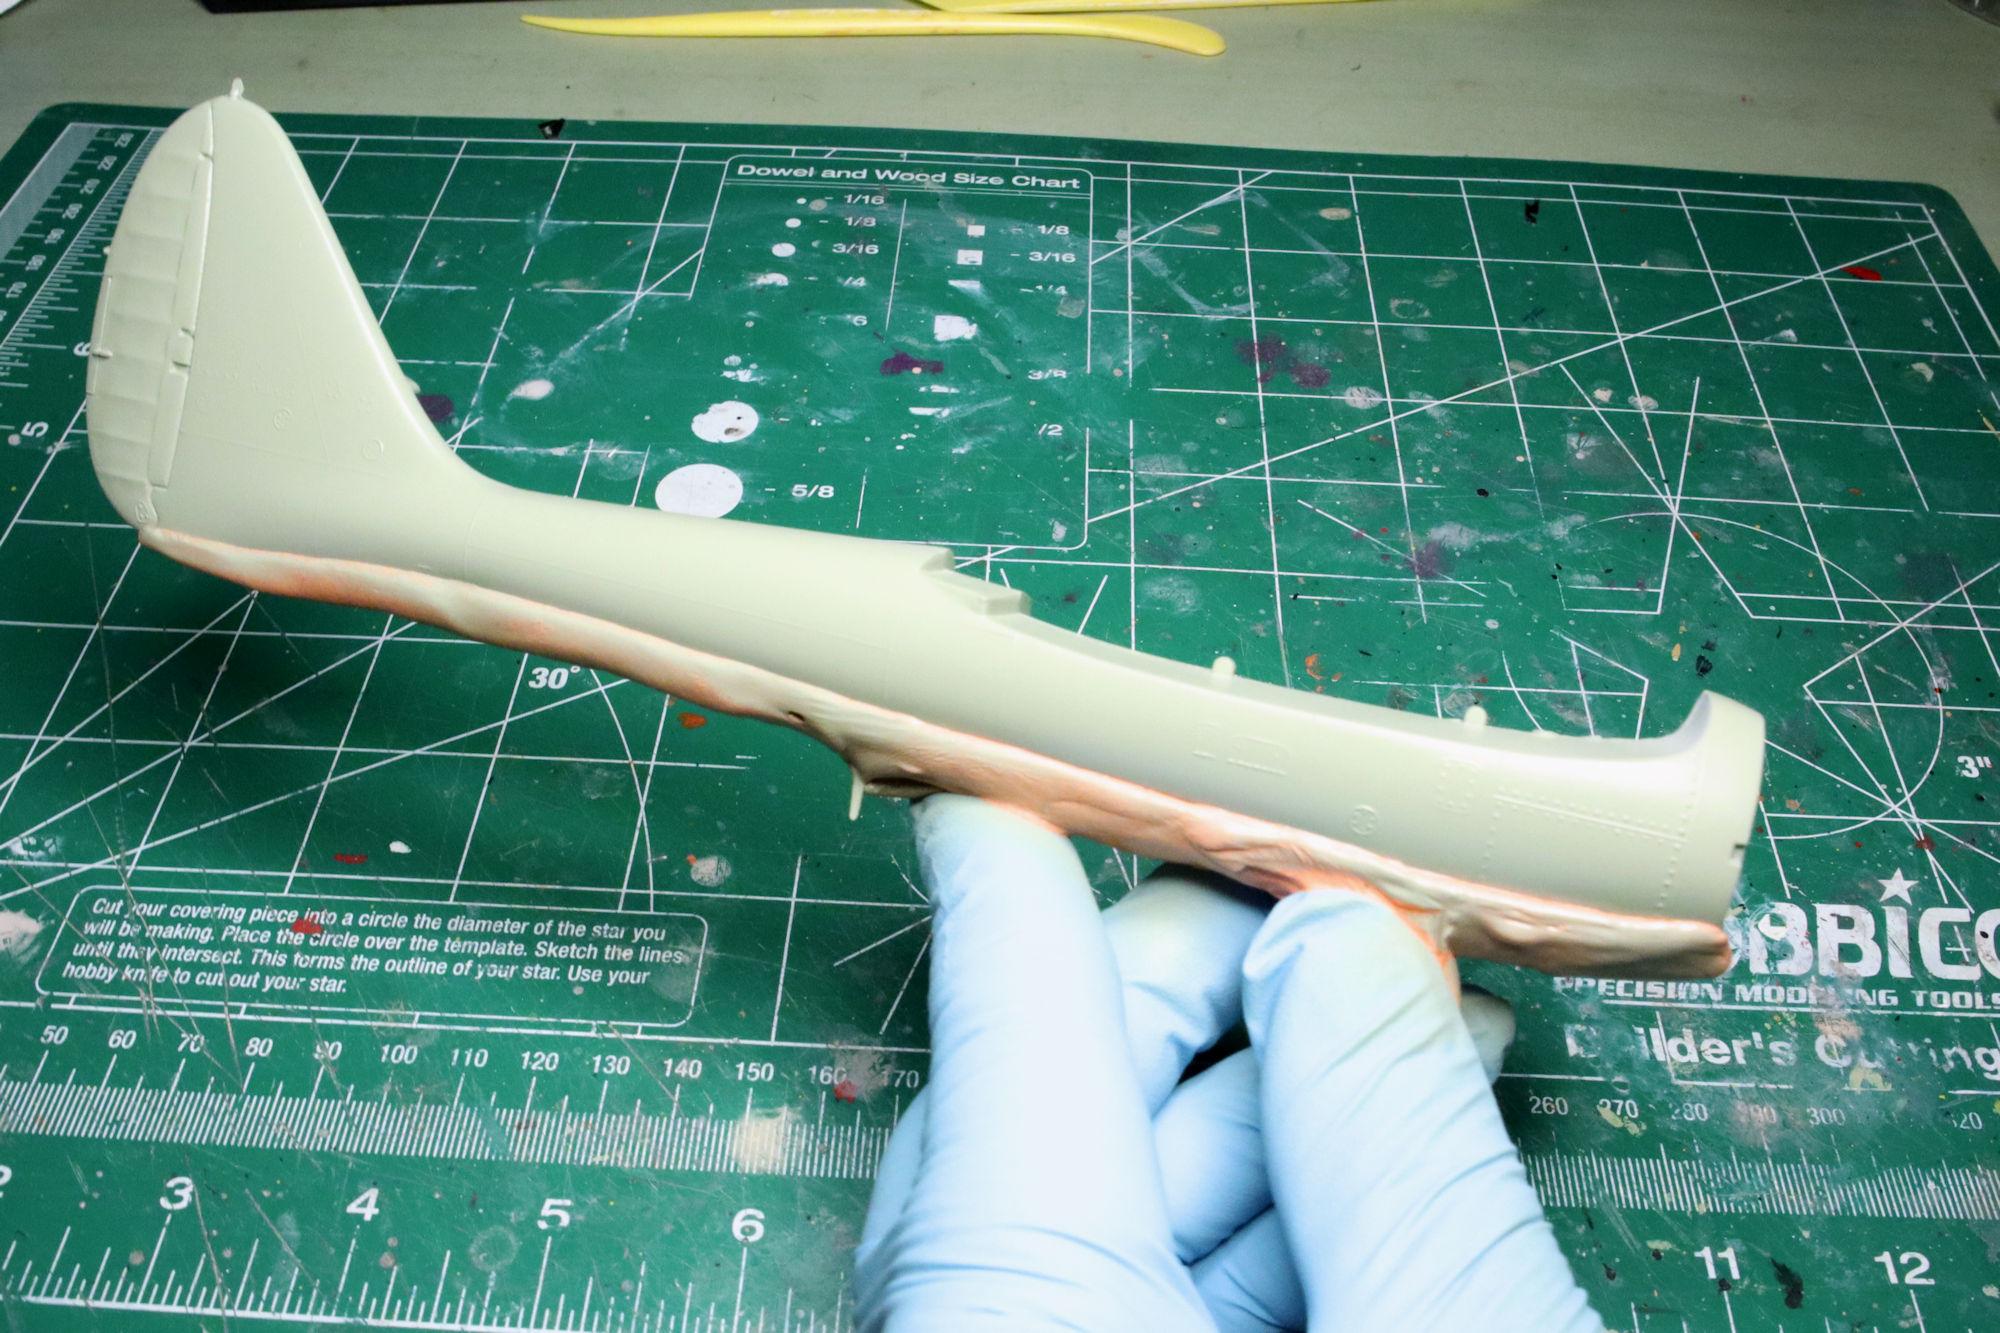
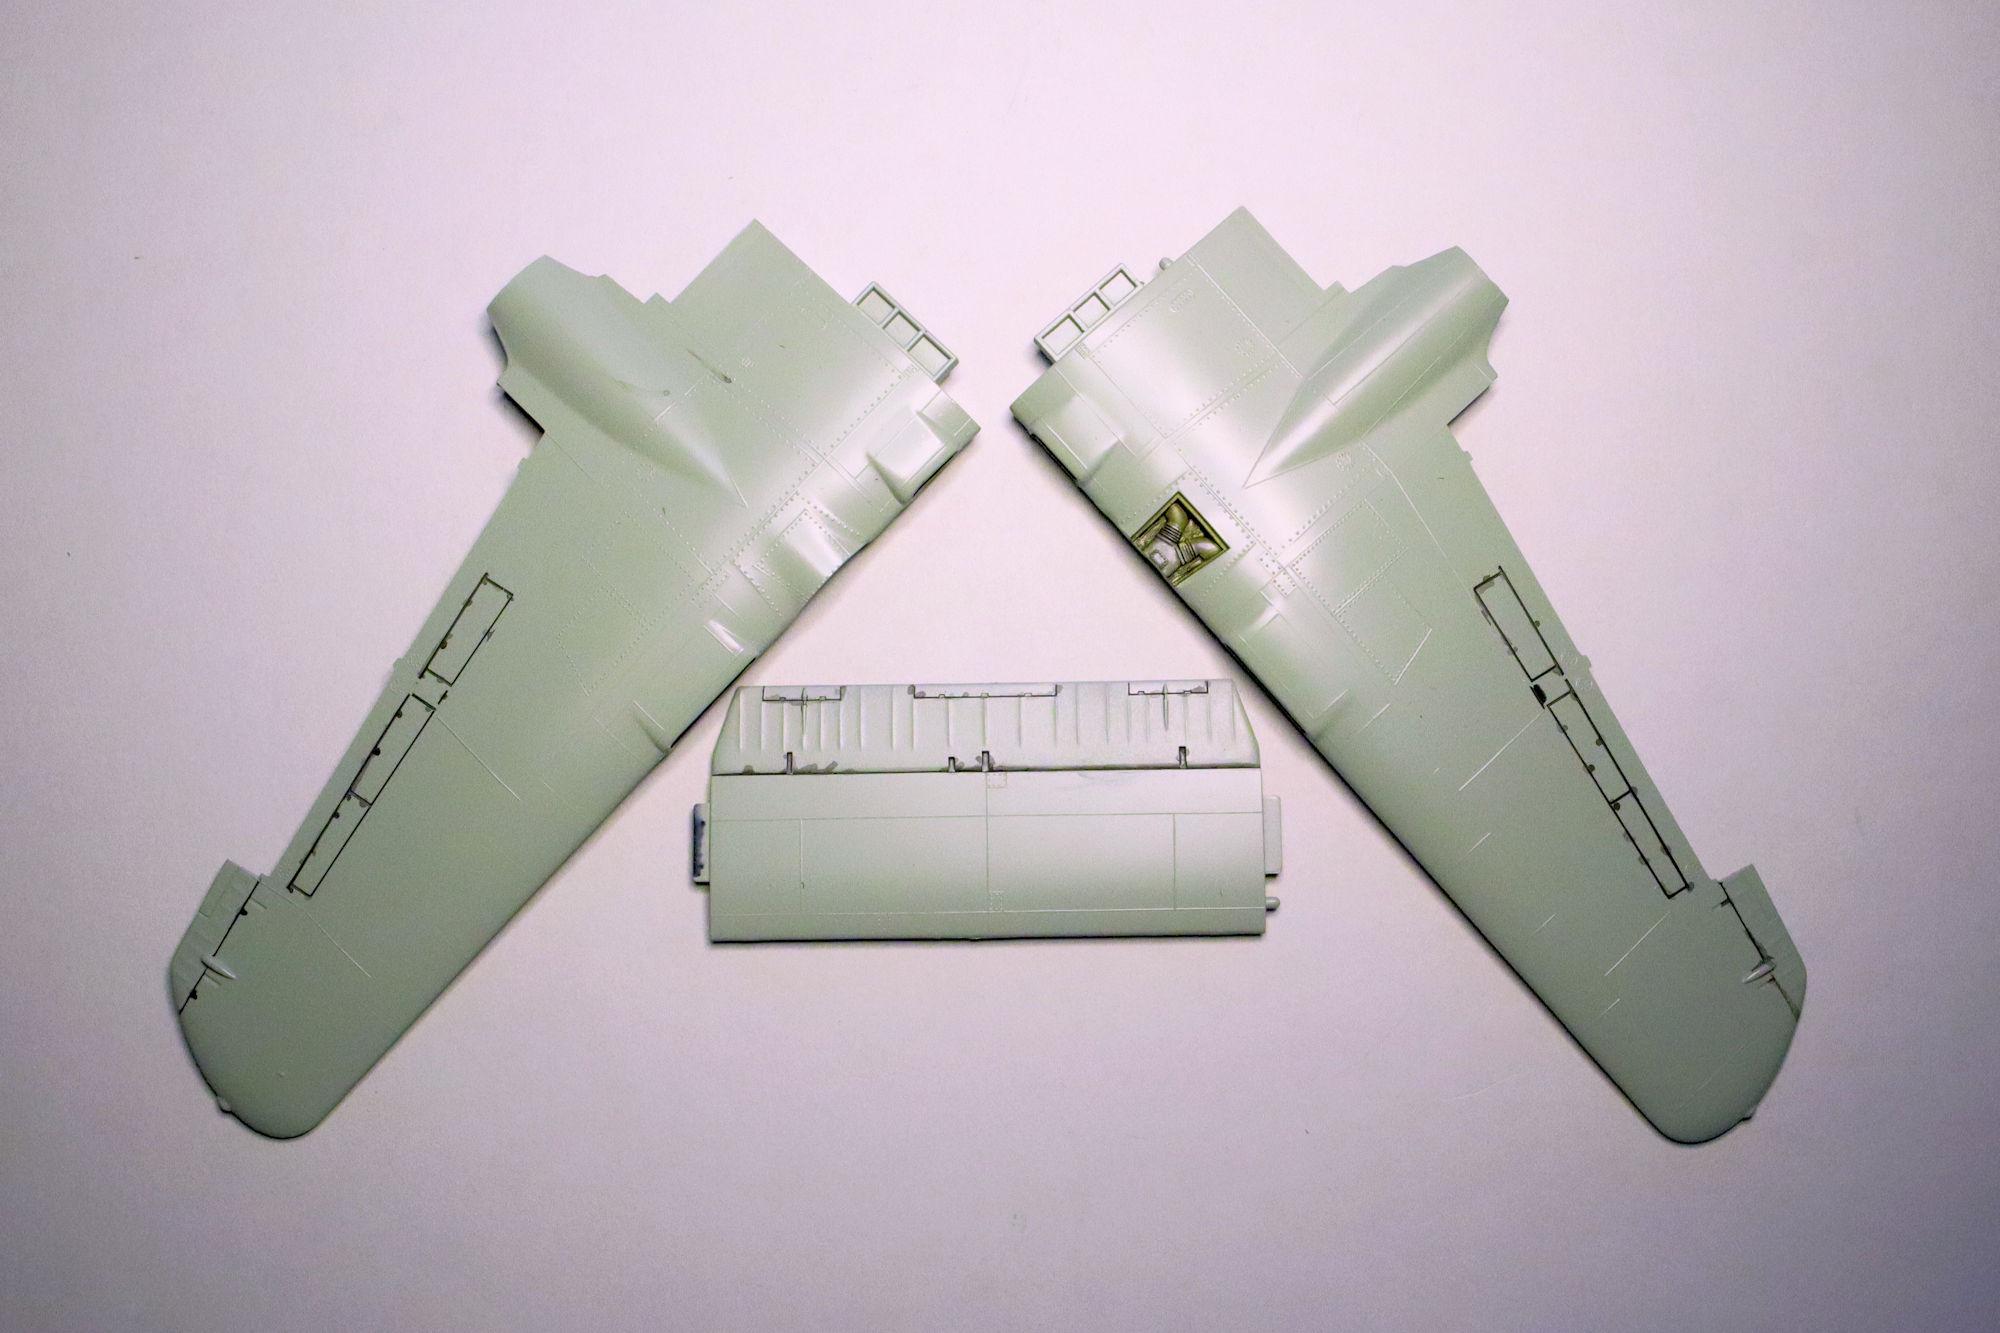
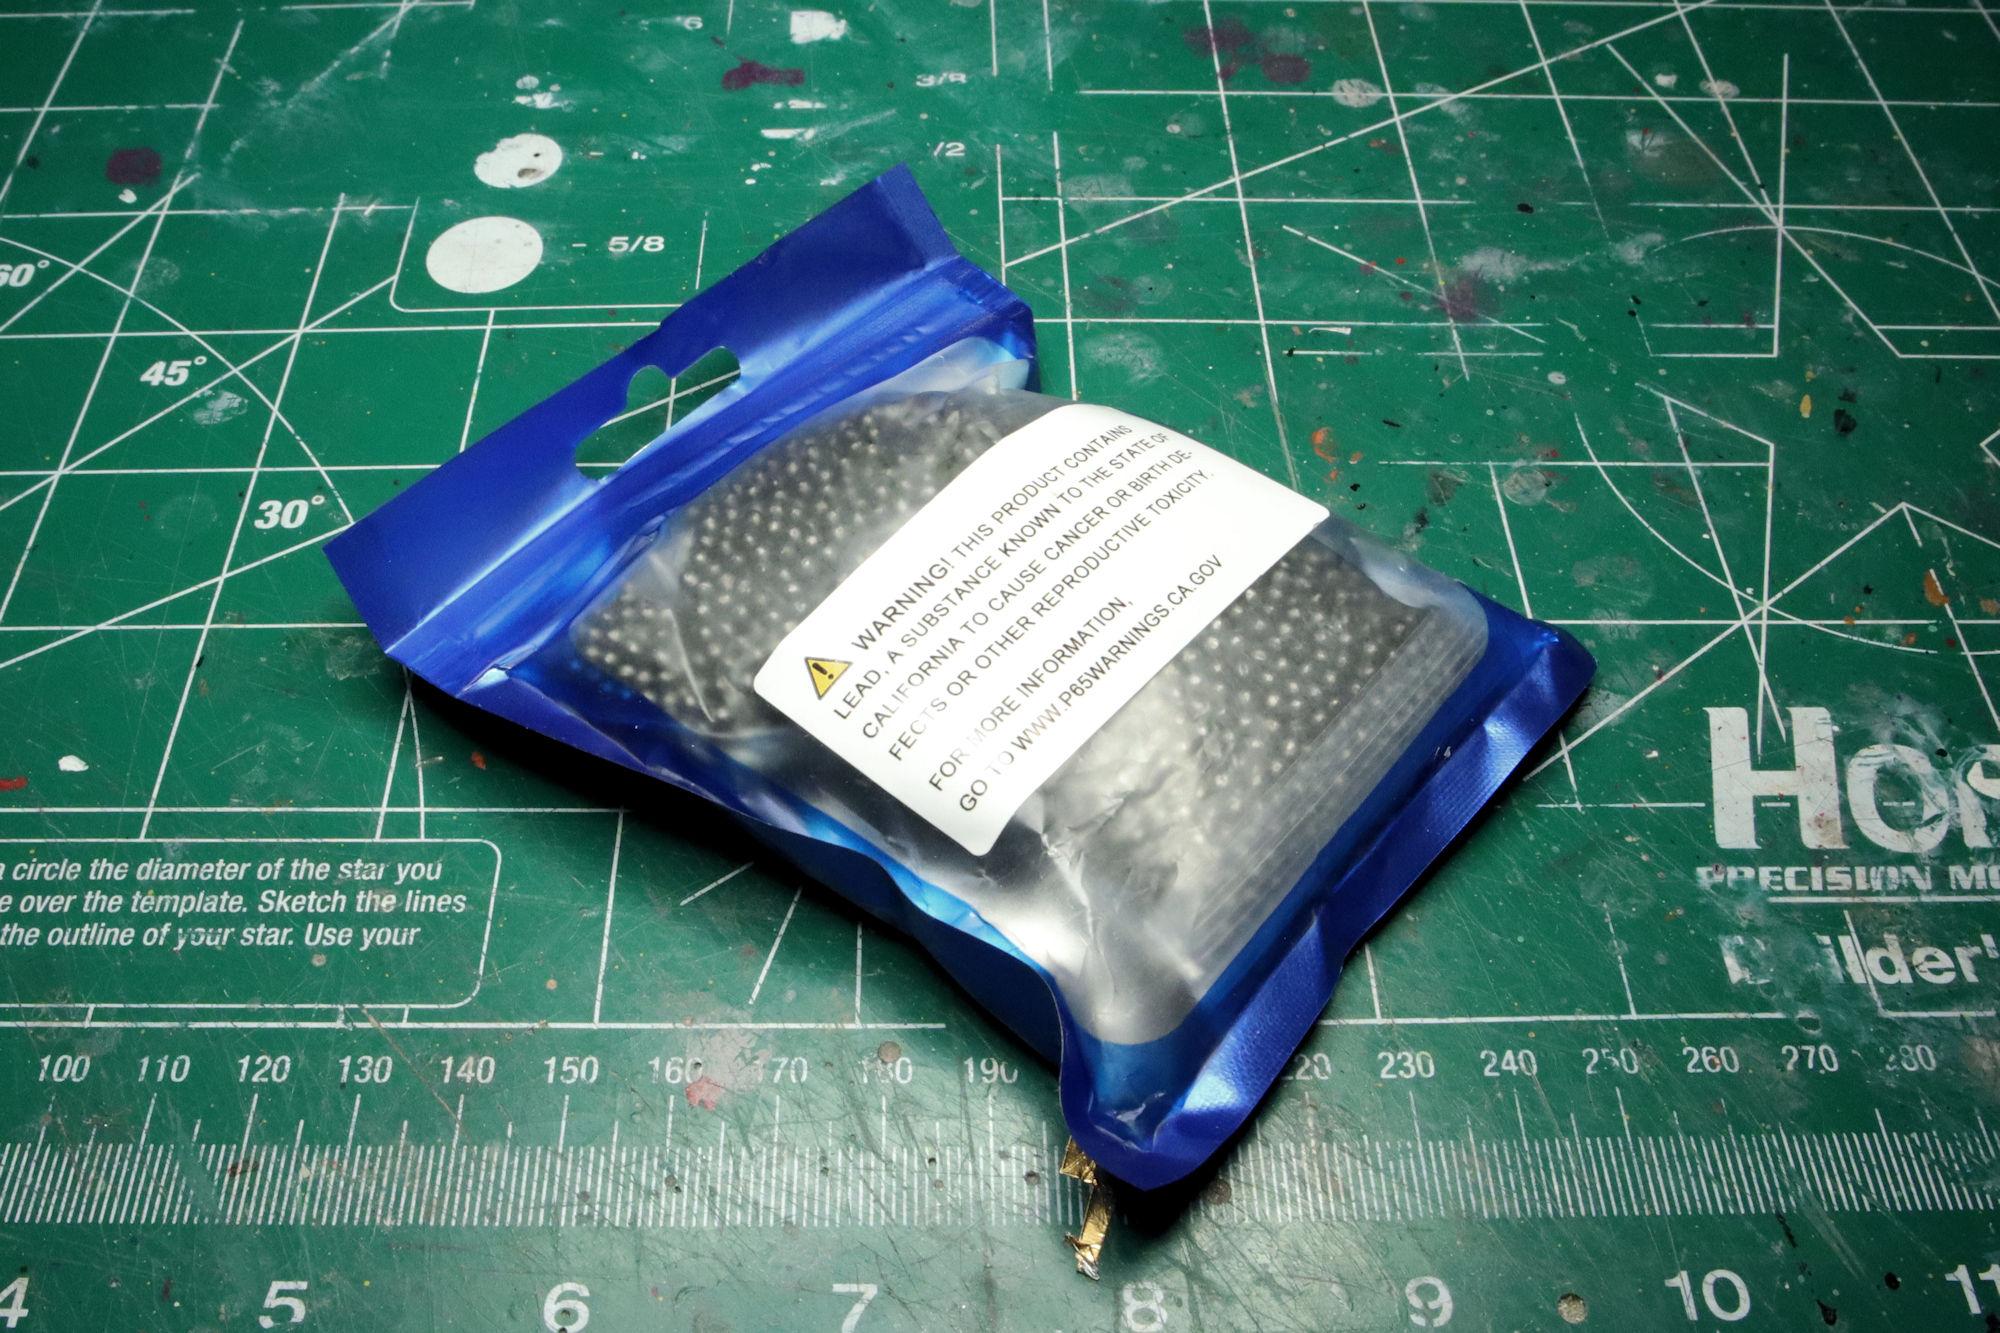
Hello Everybody! Progress, however slight is progress! I ordered 2 pounds of lead shot. I know that I only need a couple of ounces but it was either this or 25 pounds! Besides, I'm sure to find other uses for it. Starting to fill the nose section with lead shot. I plan to use PVA and build up in layers, eventually filling the entire cavity. I also started adding some panel line darkener to the wings. As always, thanks for taking the time to look and please feel free to comment. David G.