David G.
-
Posts
11,326 -
Joined
-
Last visited
Content Type
Profiles
Forums
Events
Gallery
Everything posted by David G.
-

1955 Ford Panel Truck
David G. replied to Zippi's topic in WIP: Model Trucks: Pickups, Vans, SUVs, Light Commercial
For the calipers I think red is good but maybe also consider gold or white depending on the final color scheme of the truck. David G. -
Hello Everybody! This one is completed and is now posted in the Under Glass section. Thank you all for your kind comments and support throughout the build. David G.
-
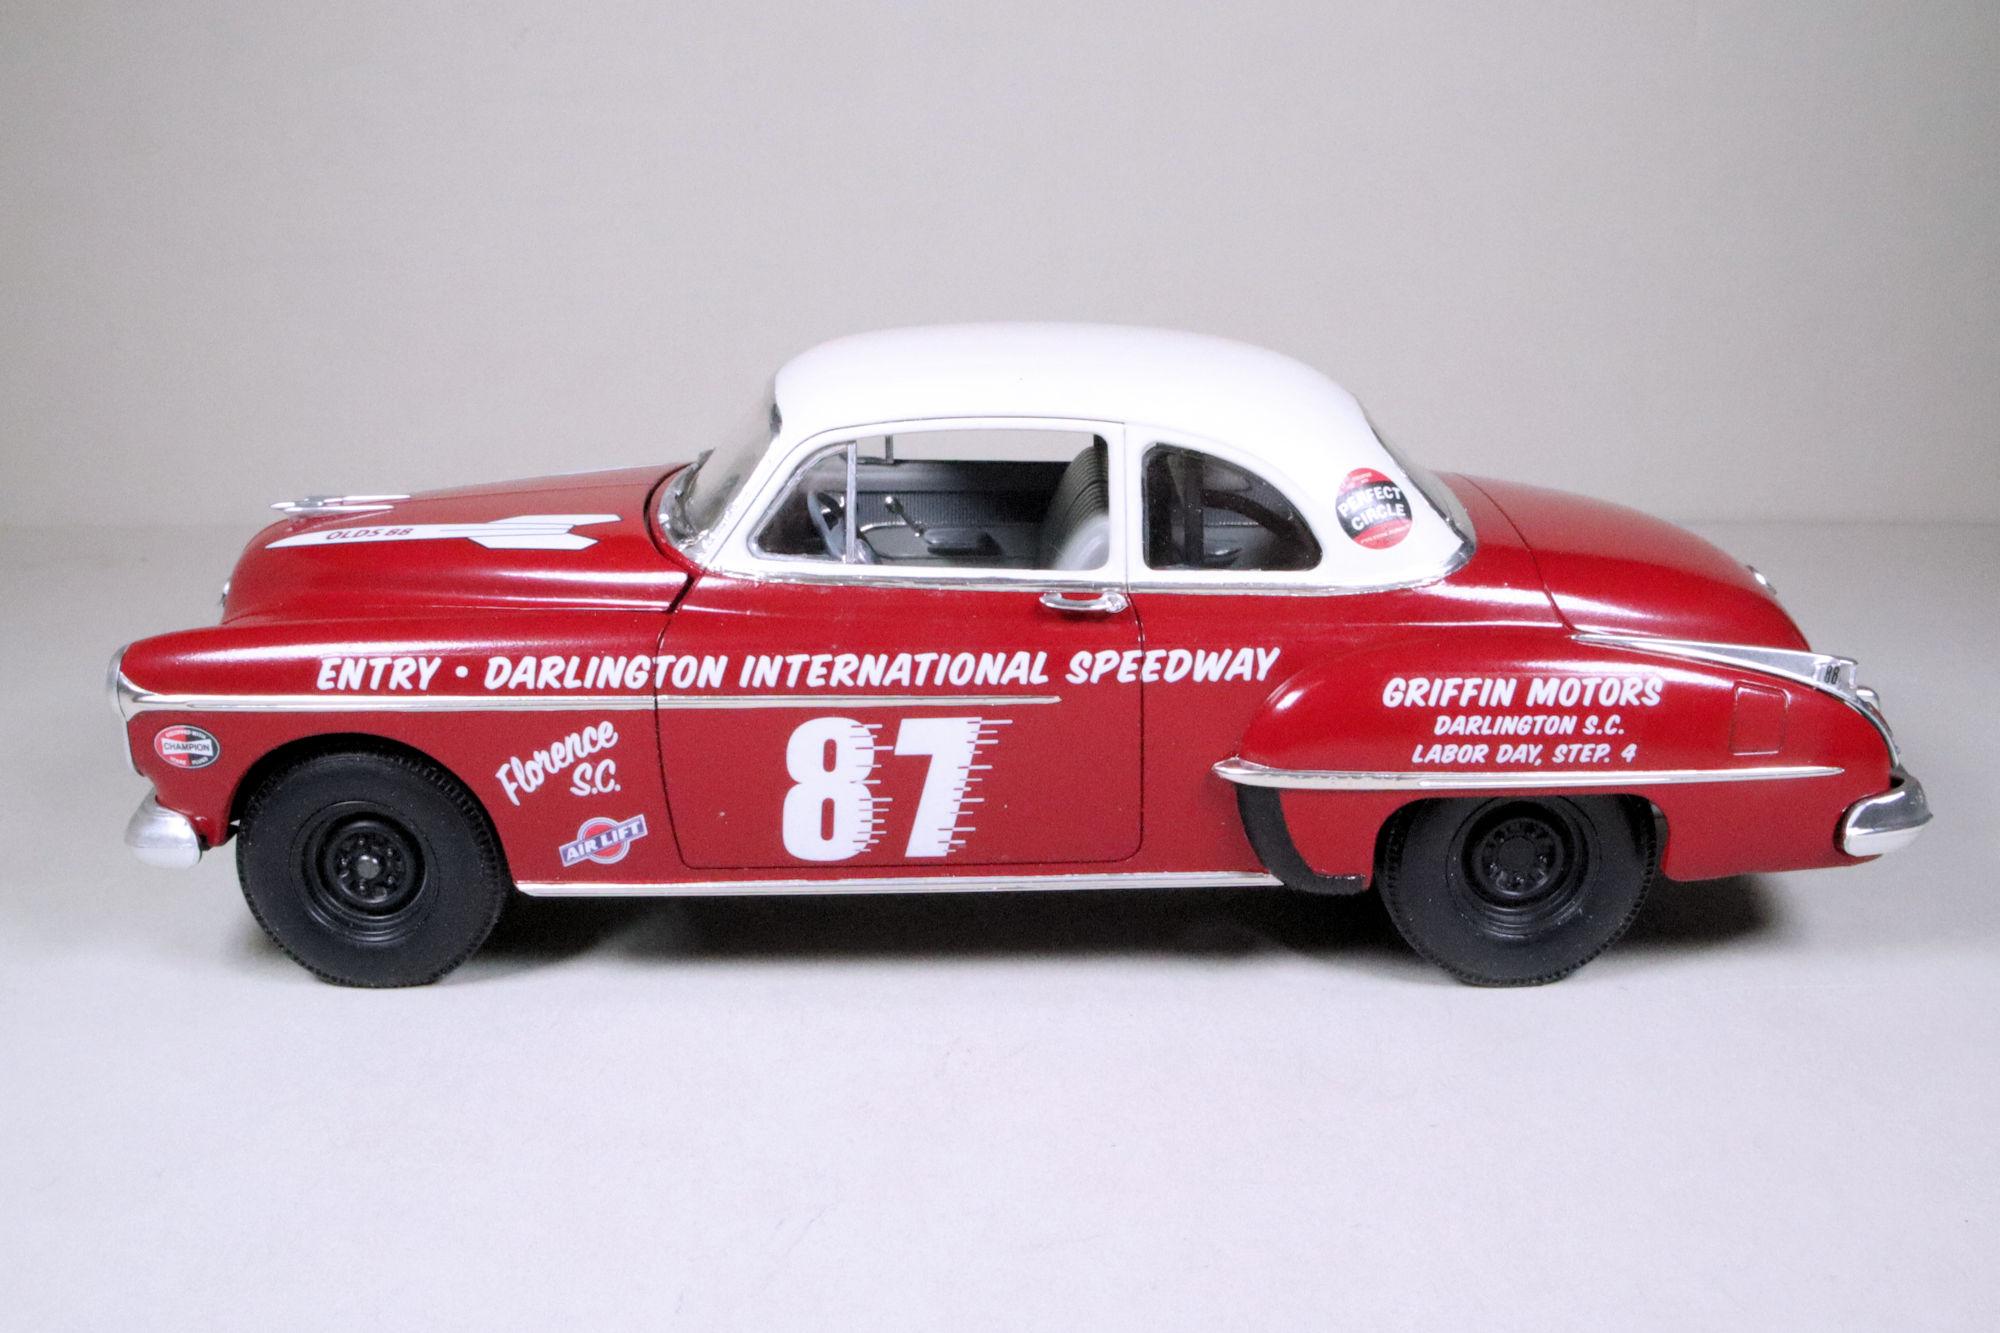
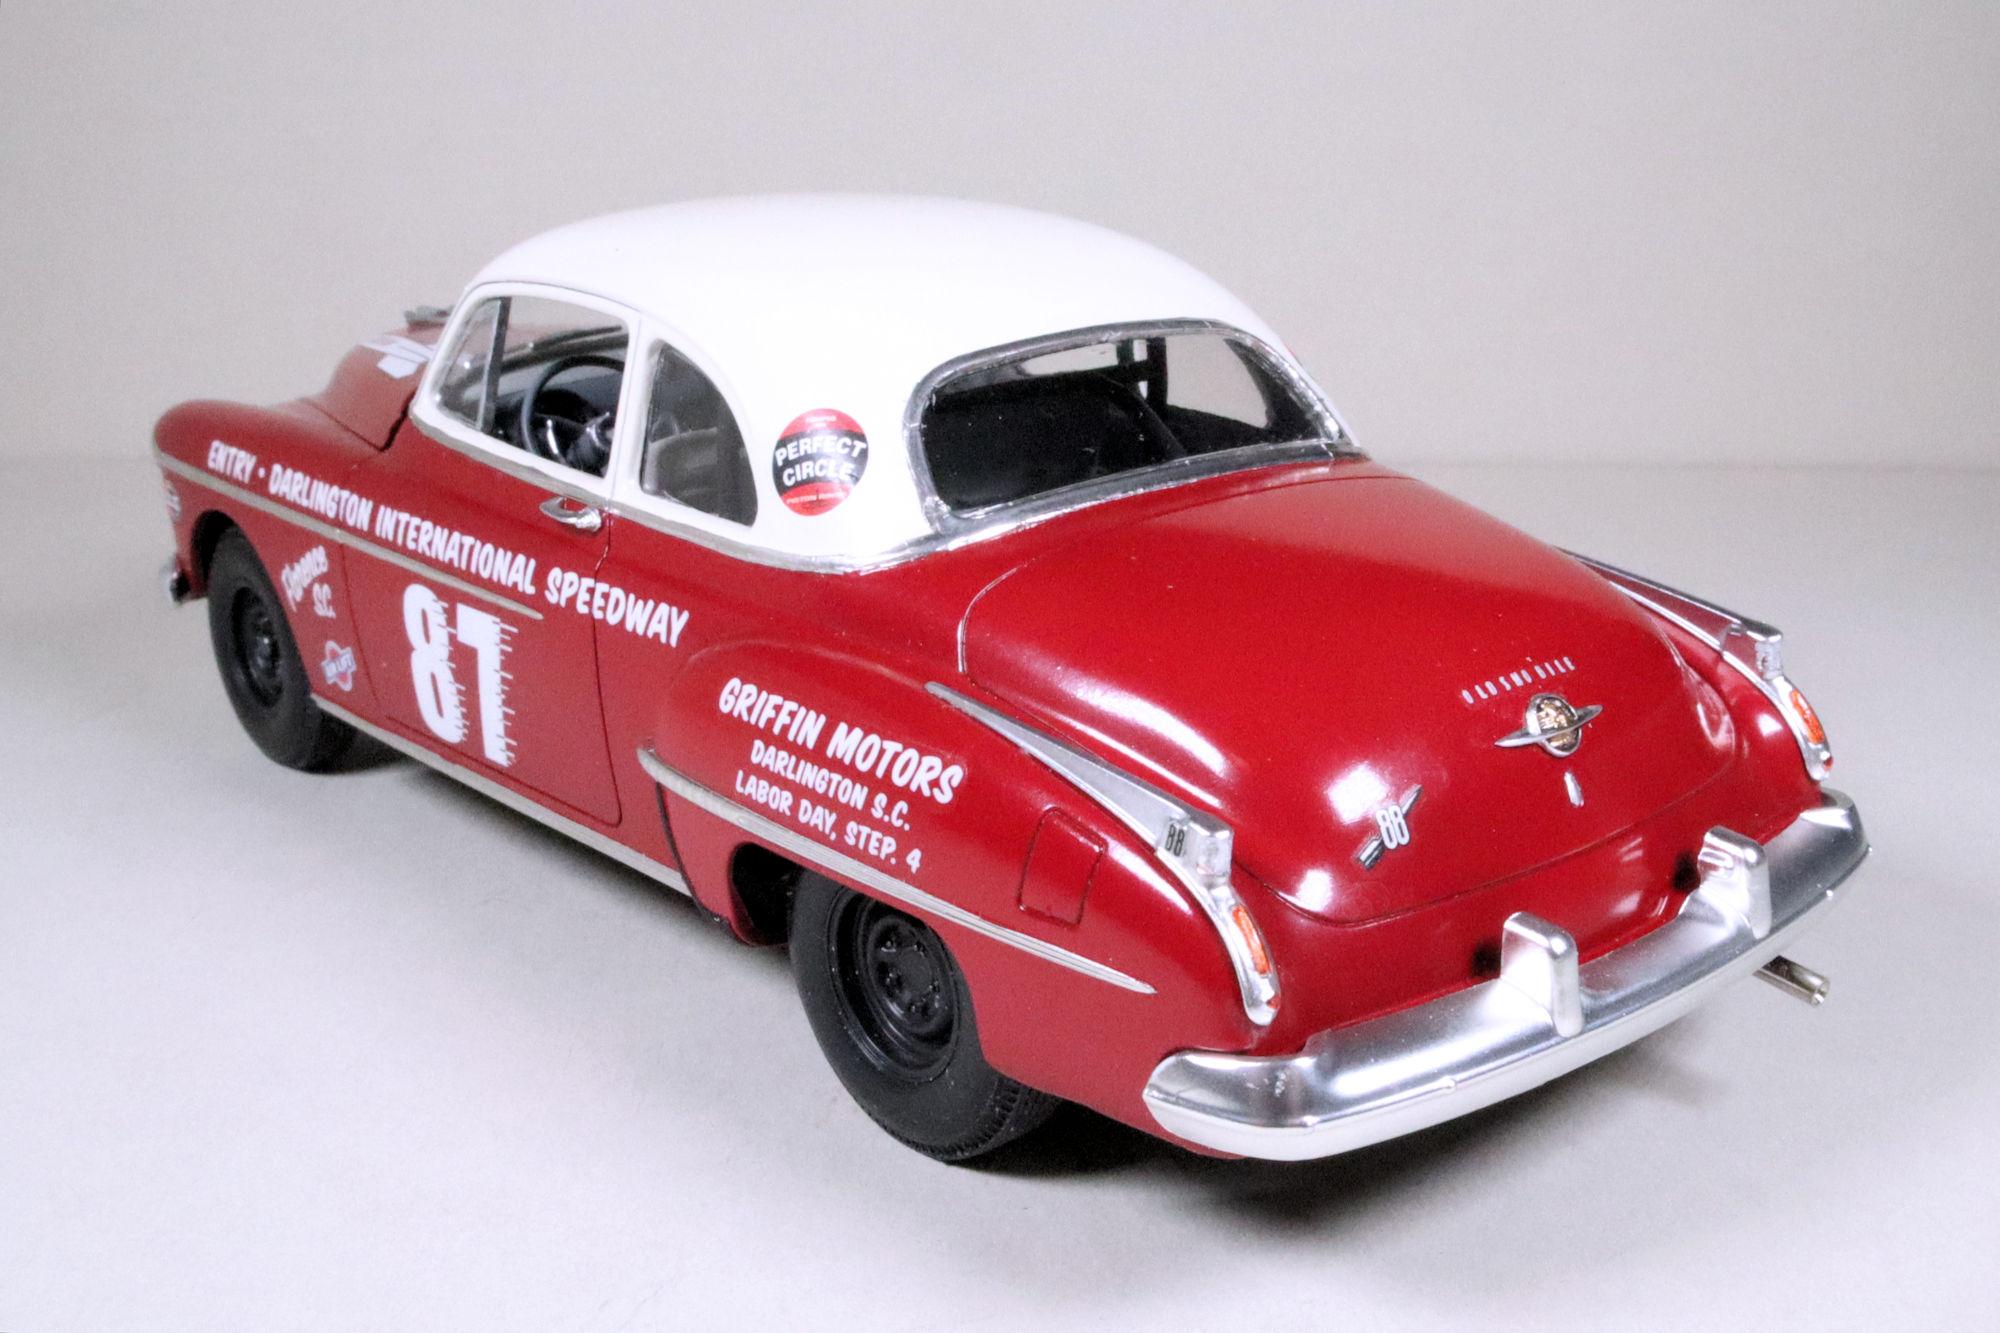
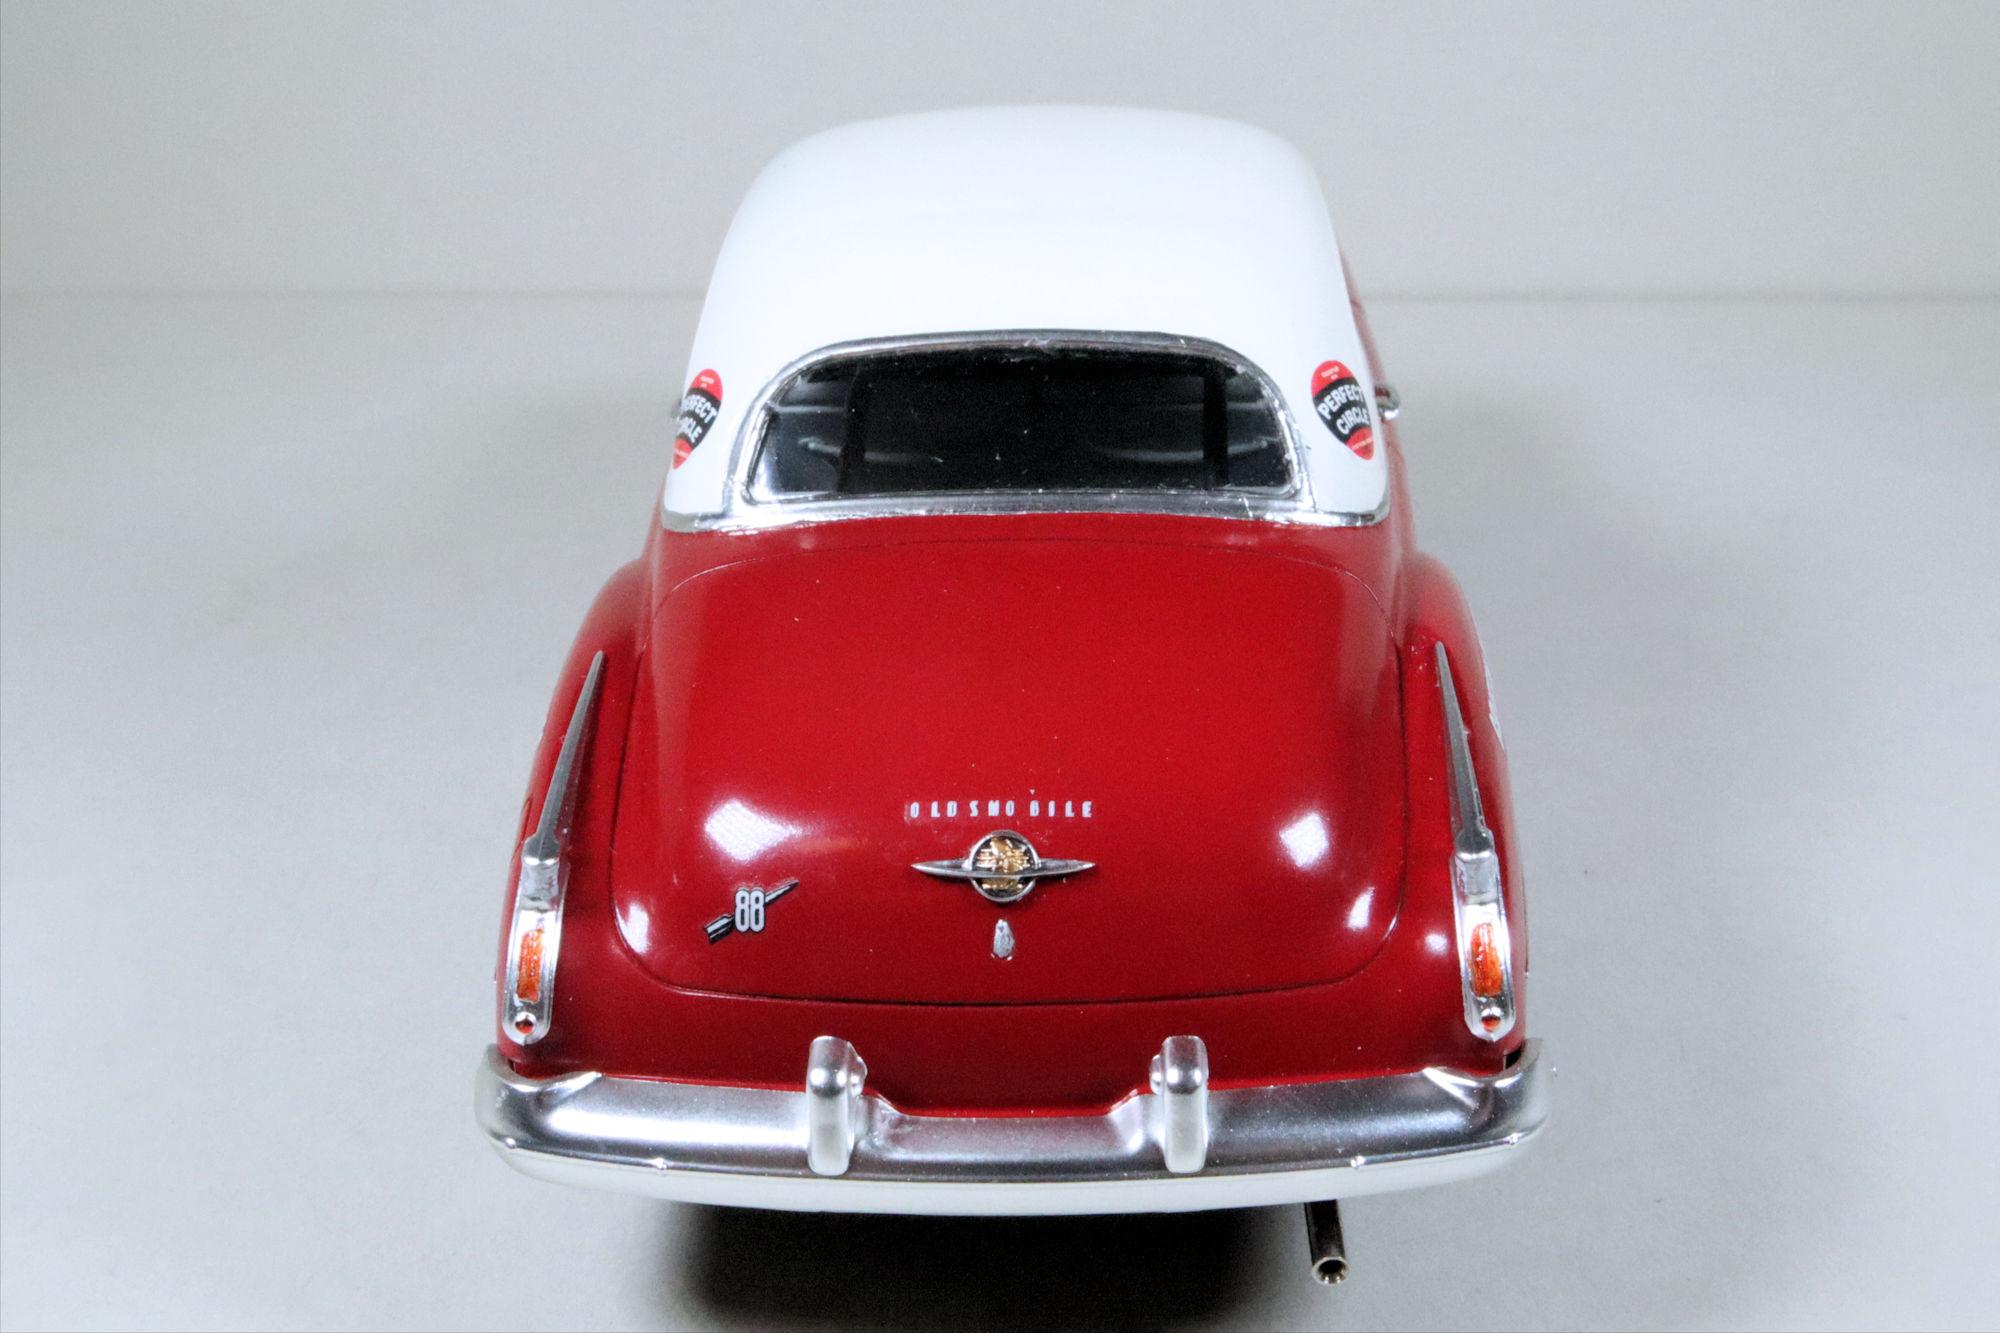
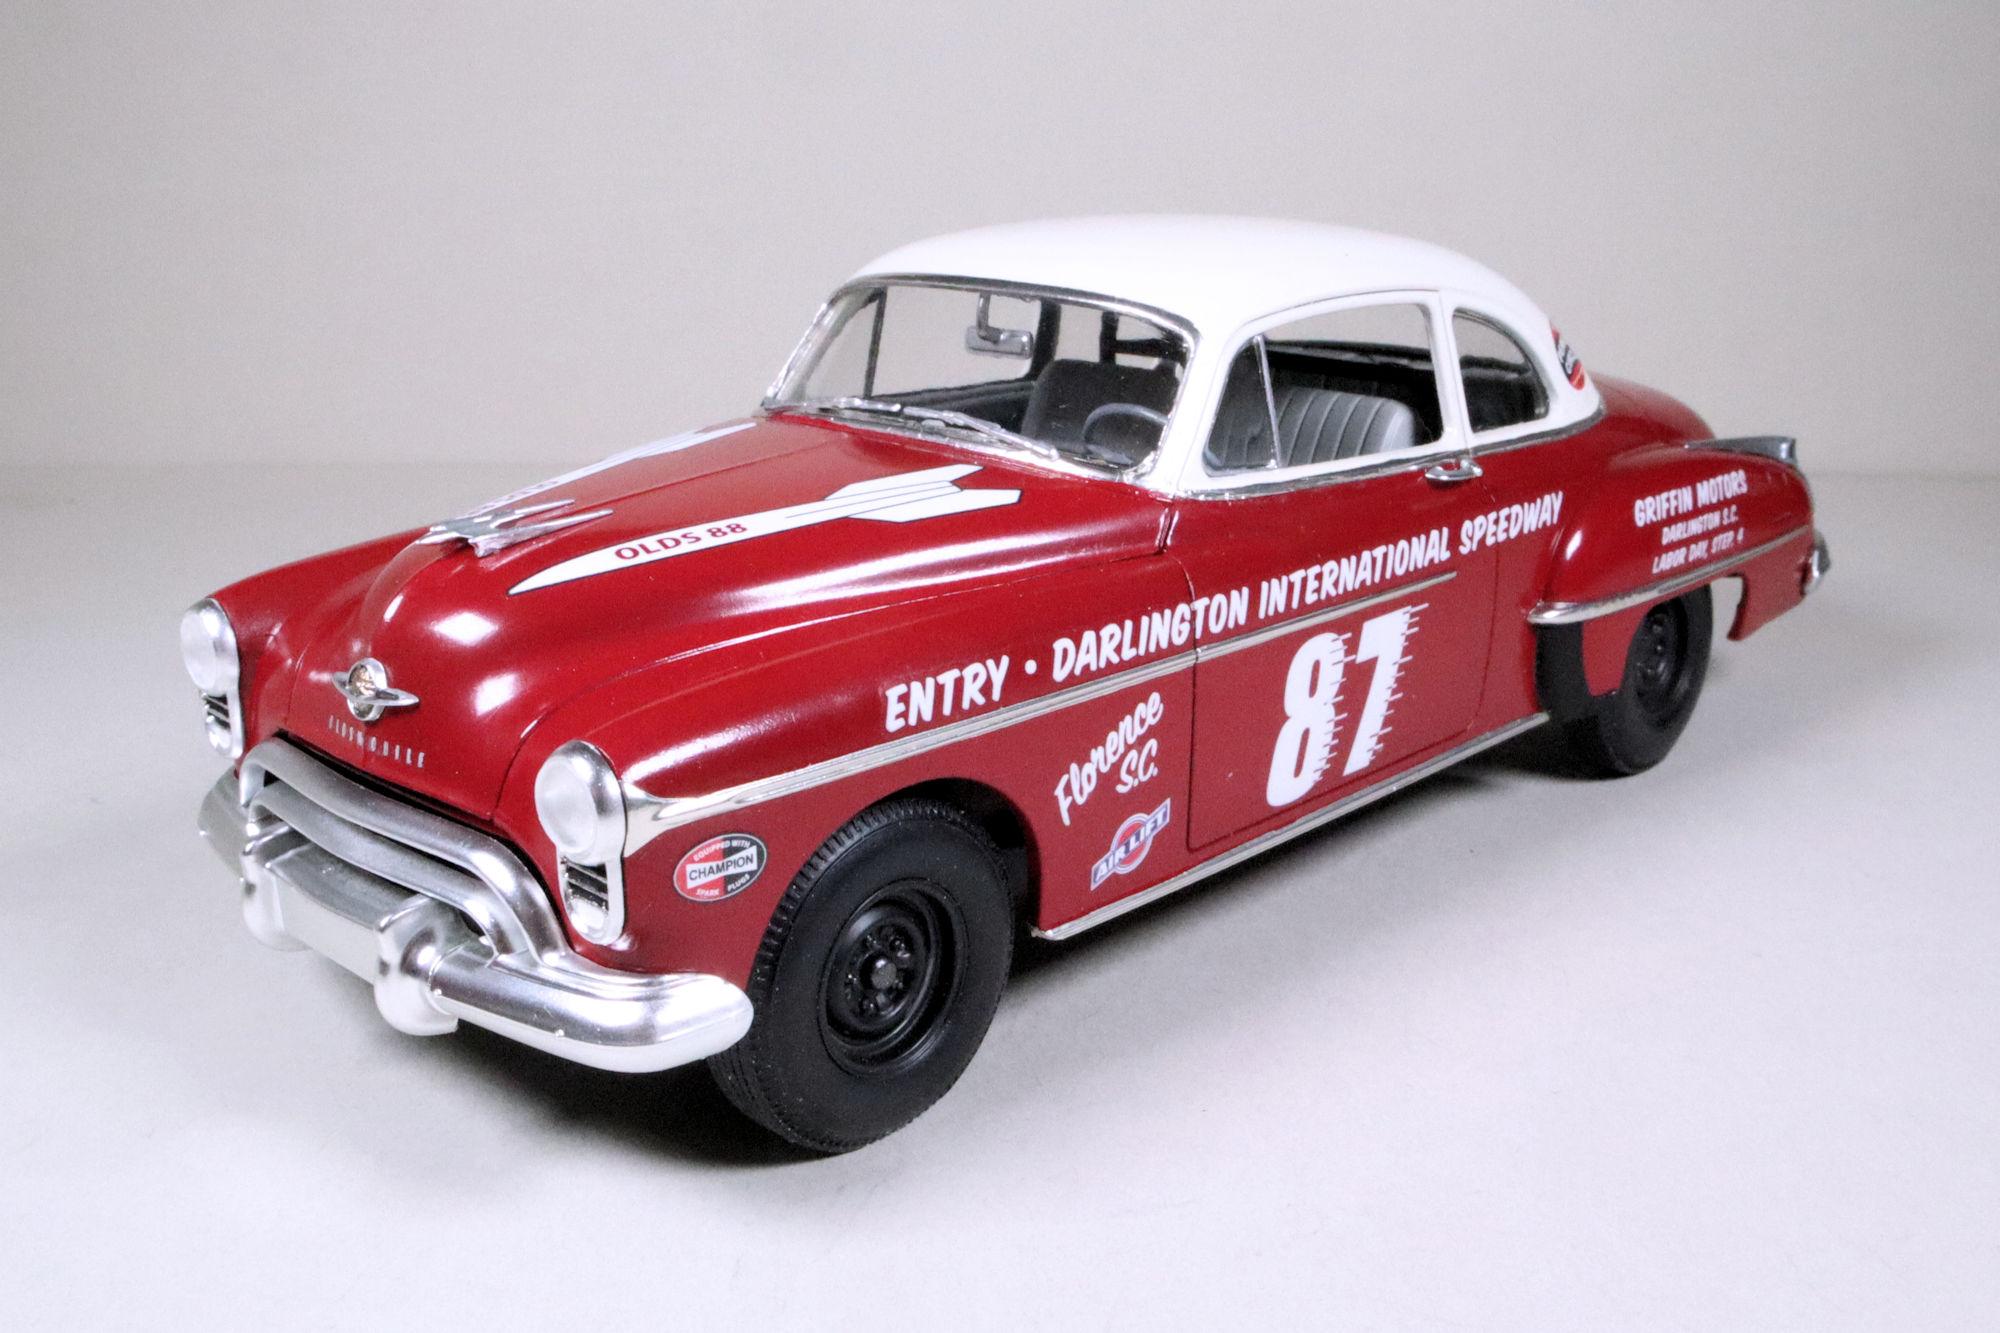
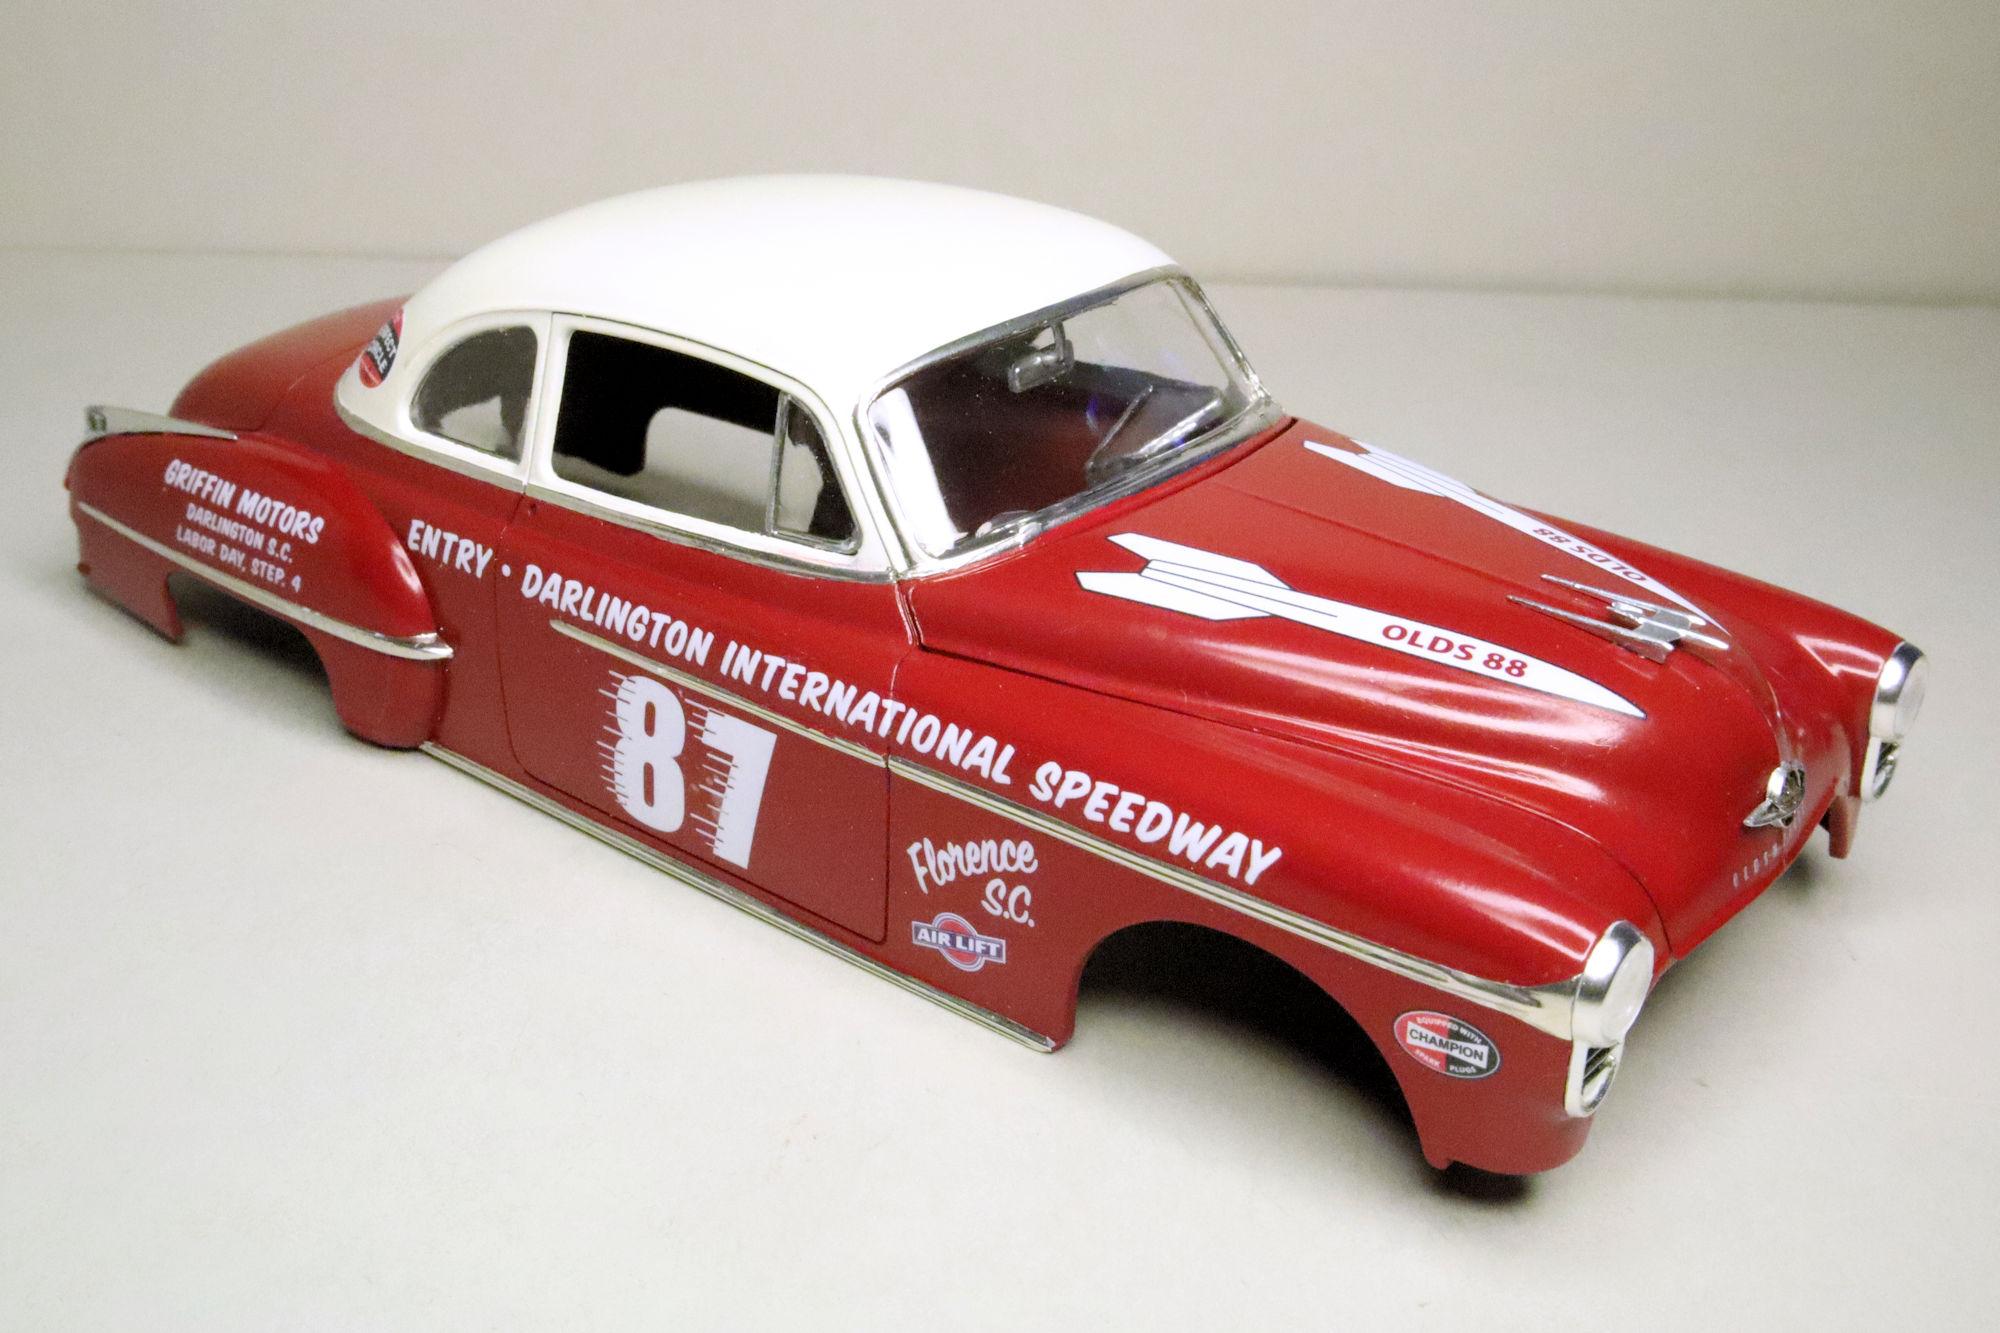
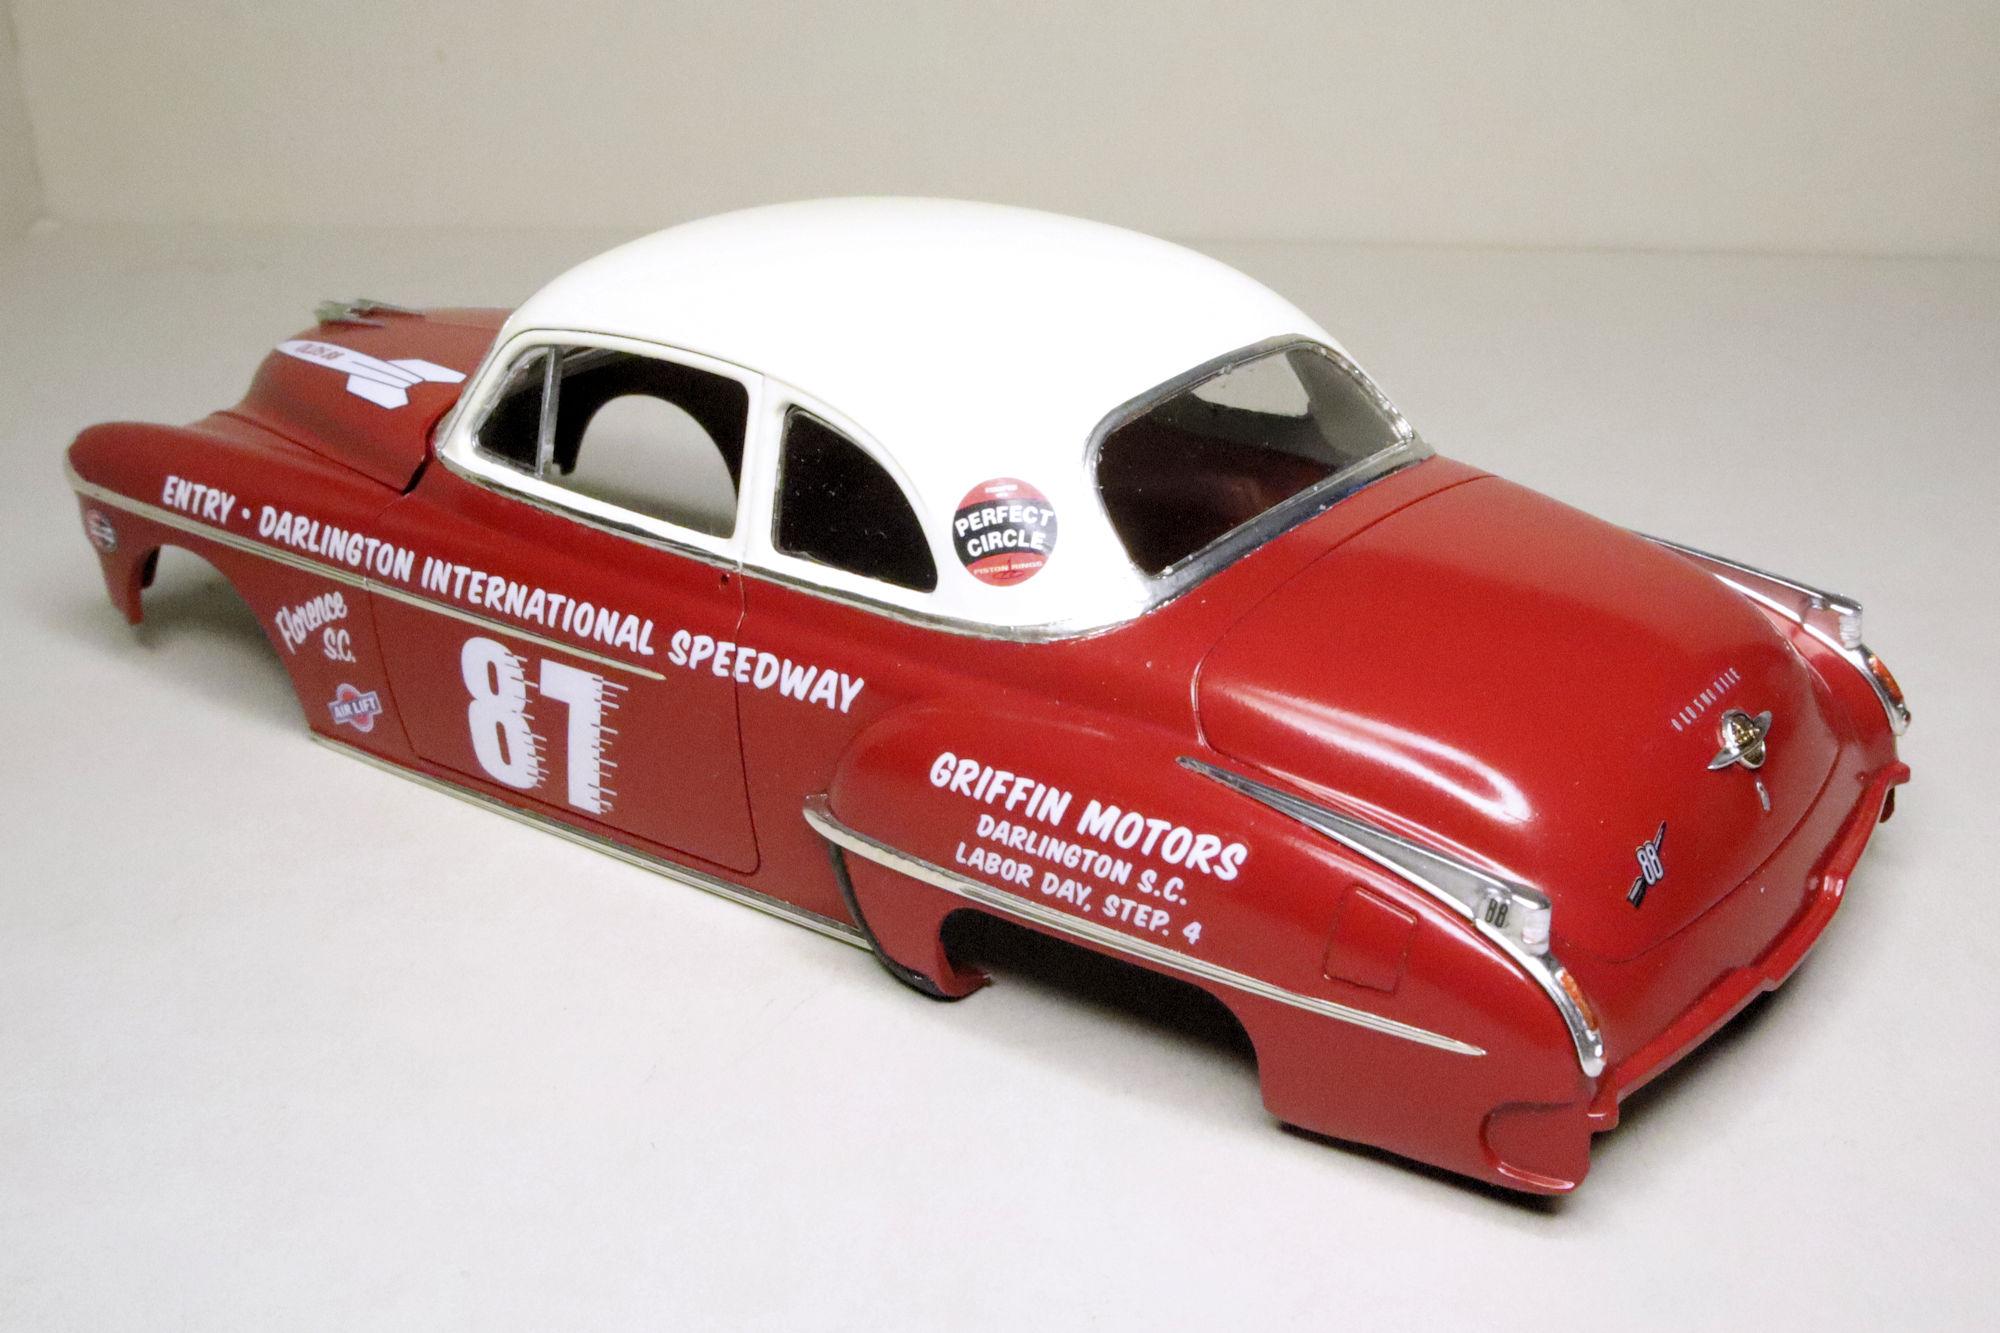
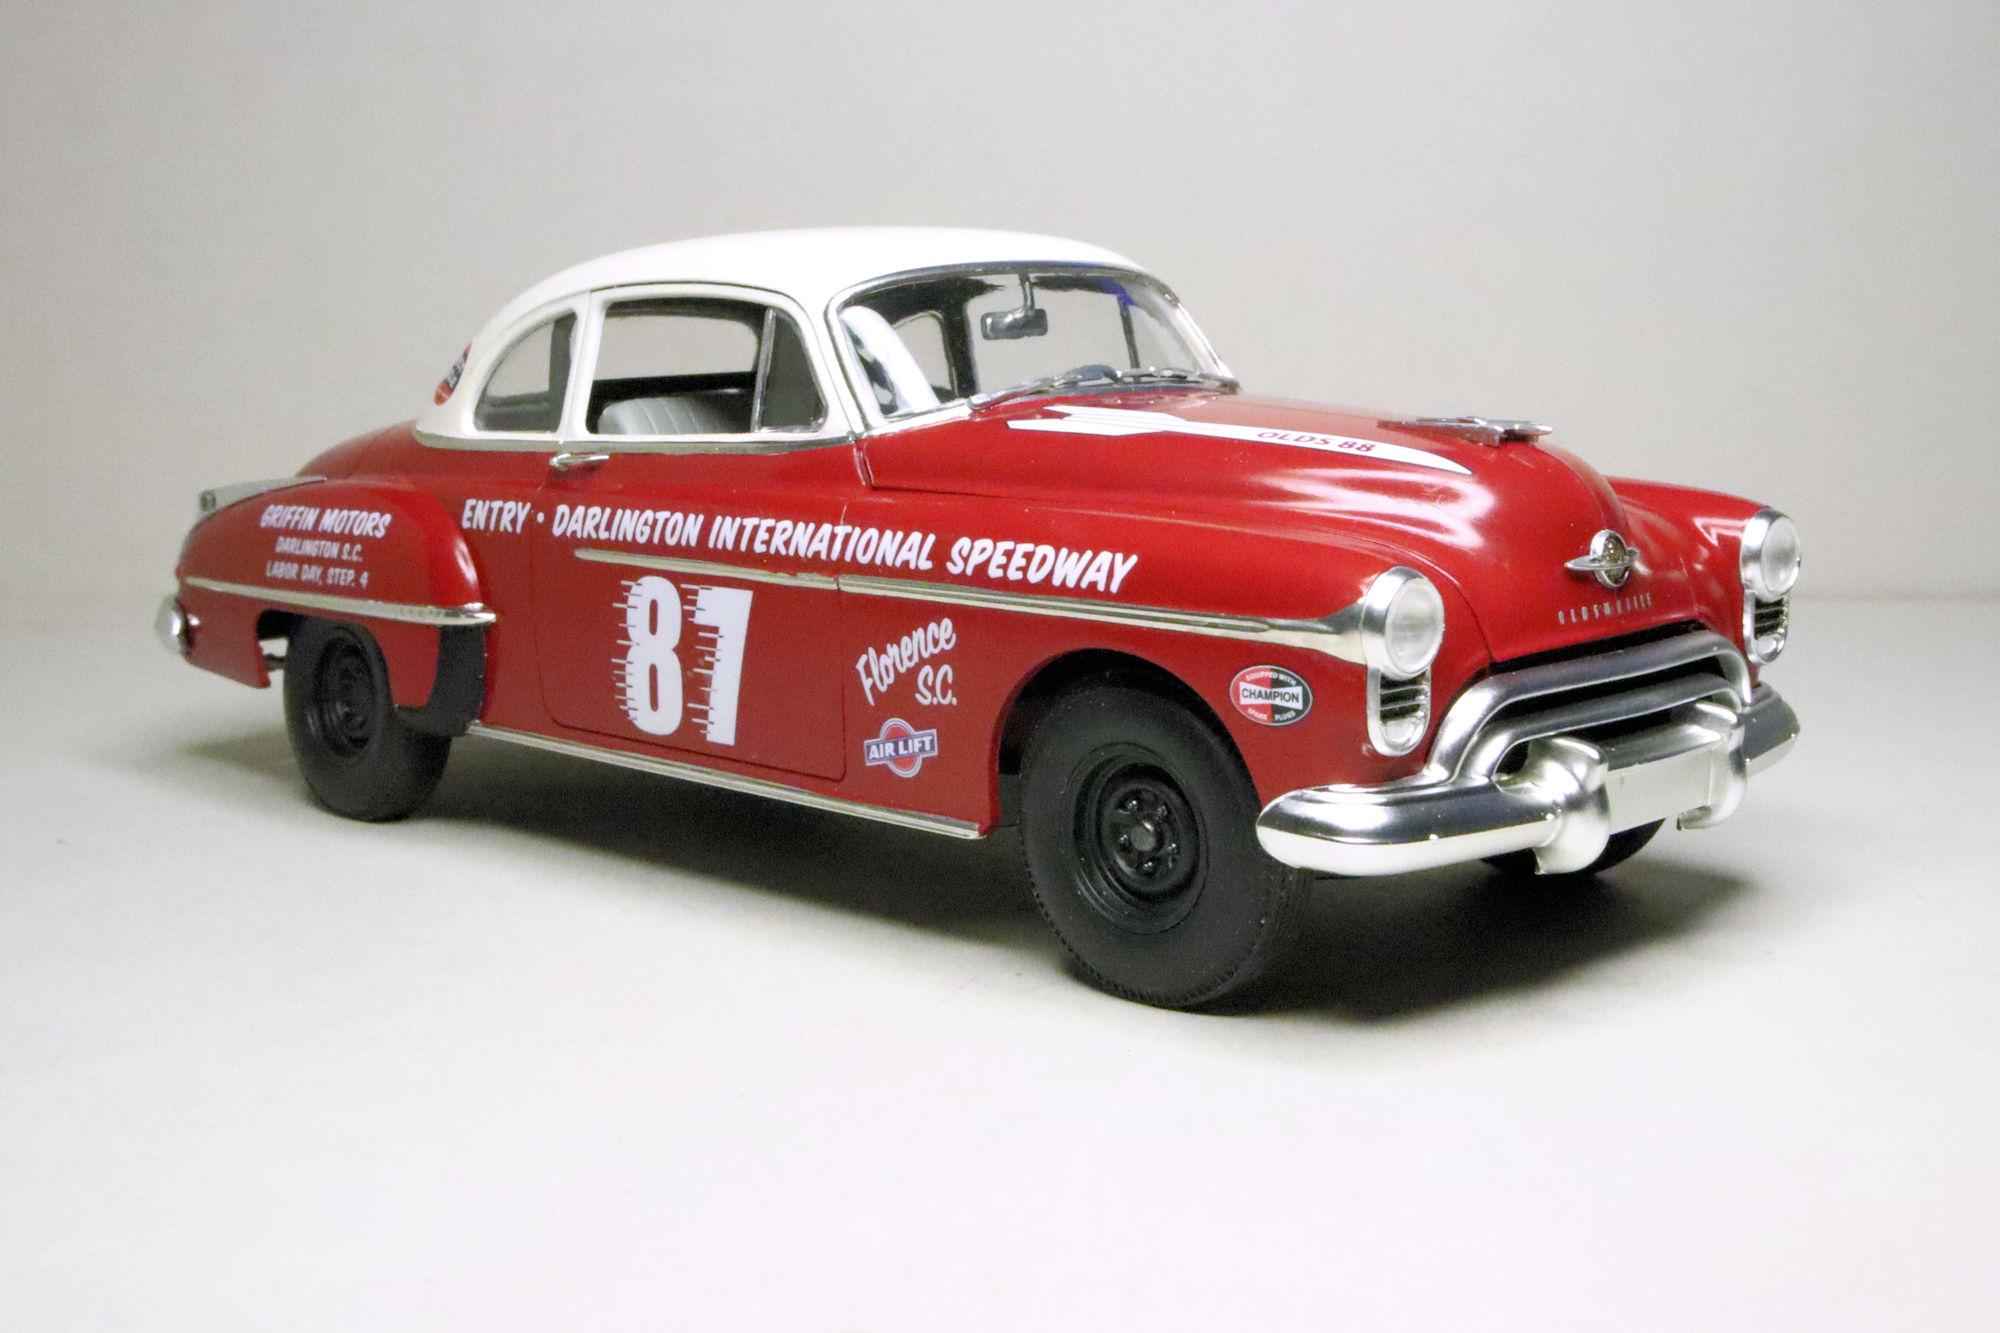
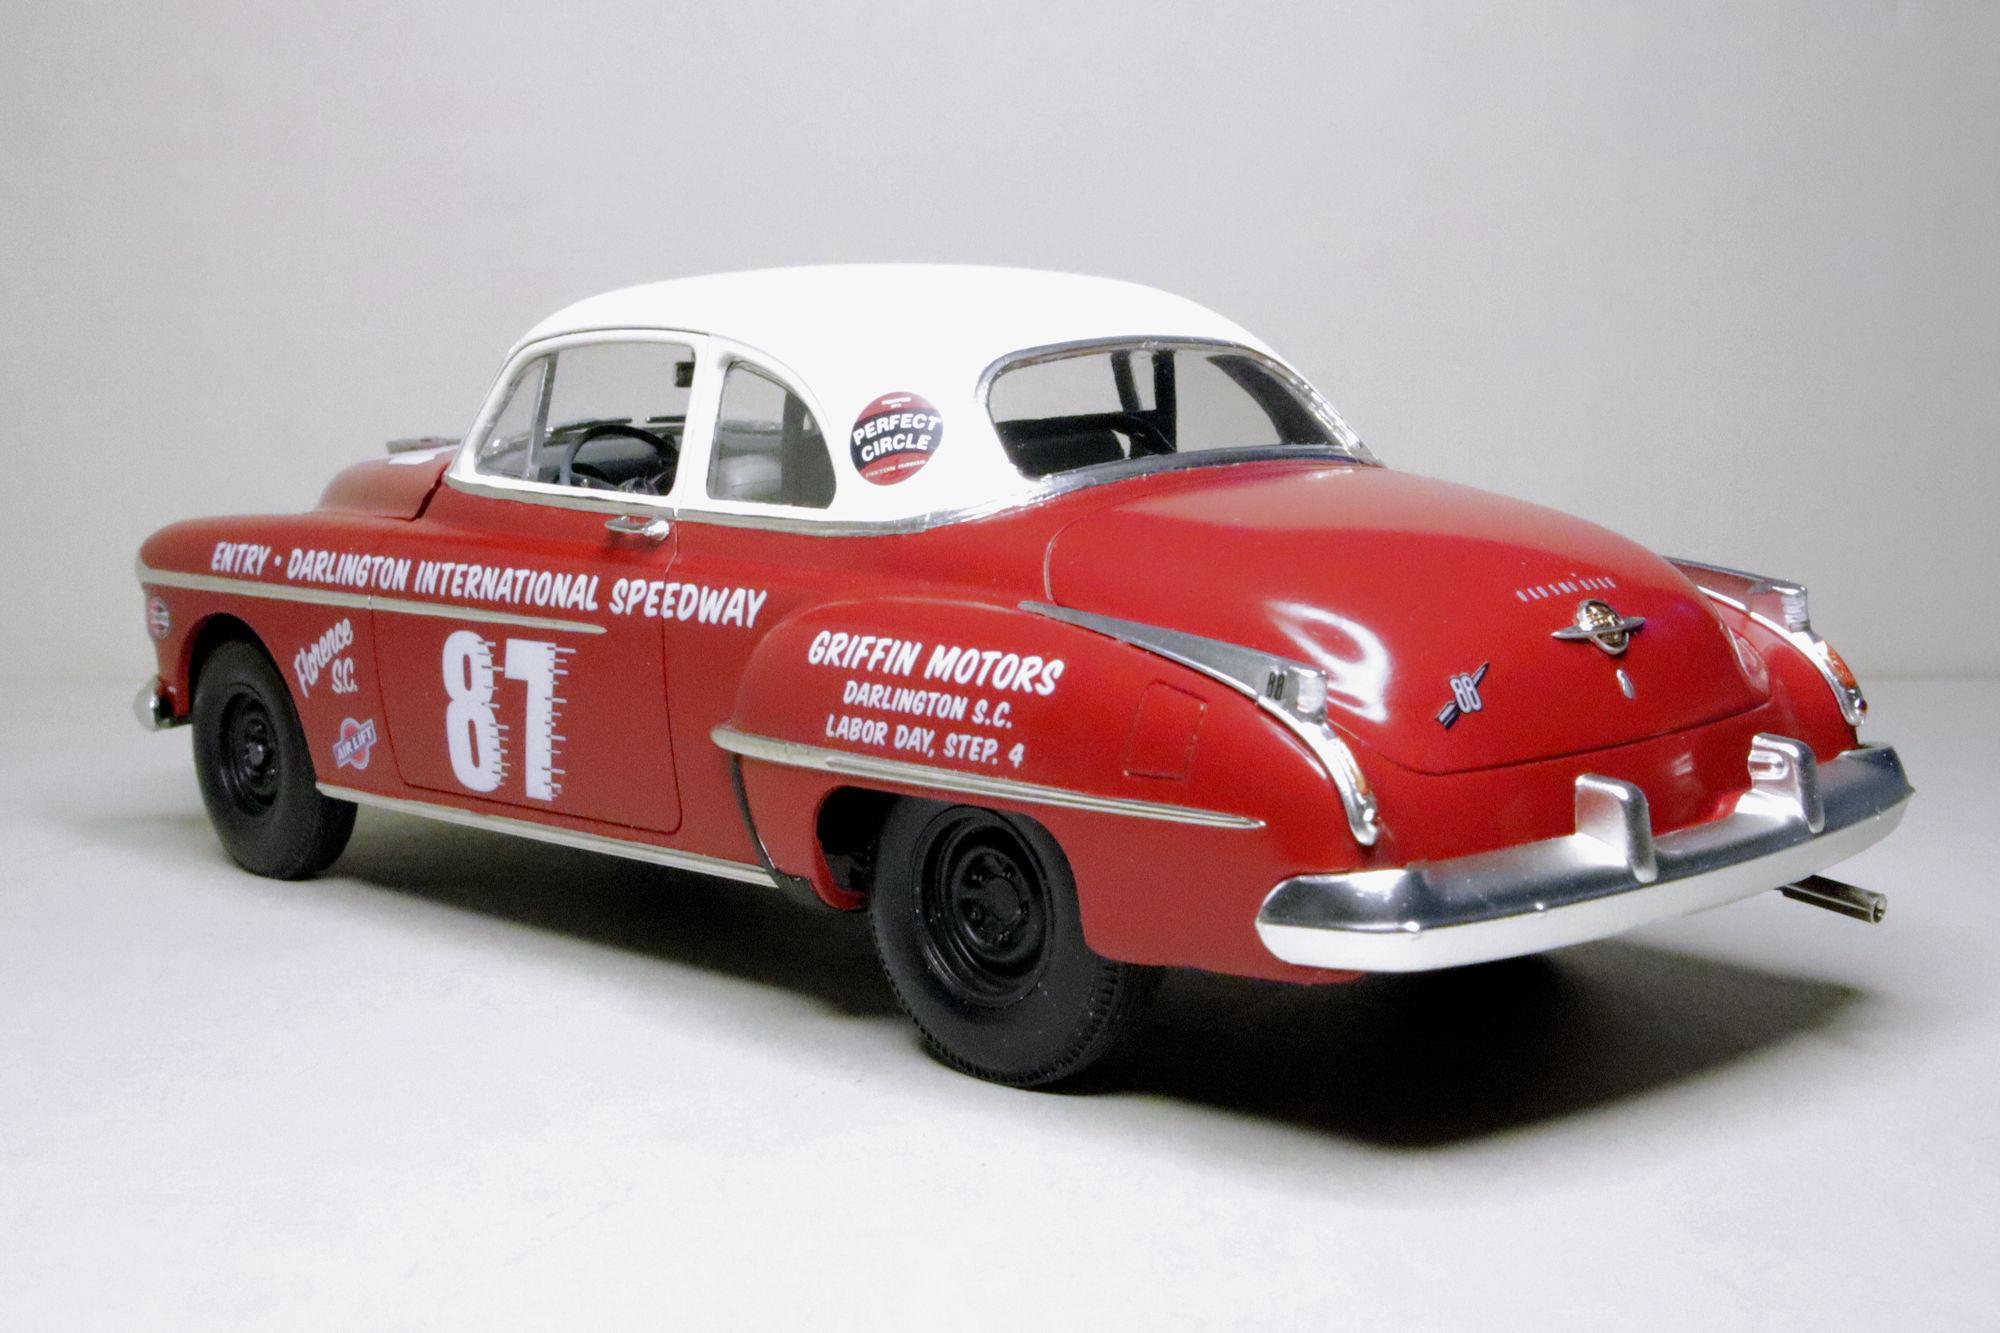
Hello Everybody! This is Revell's 1950 Oldsmobile Club Coupe, it can be built one of three ways. First is stock, which would be my usual choice. Option two is a replica of the winner of the 1950 Pan American Road Race. I have to admit that did I seriously considered this building one. And finally, (not pictured on the box) there's a traditional Stock Car, pre-NASCAR. This goes back to the old ASCA (American Stock Car Association)- from the early days. Back when Stock Car racing used... stock cars. This is the version I chose. I have a complete WIP Build thread if you're interested in seeing what went on behind the scenes. Now, on with the show! 1950 Oldsmobile Club Coupe, build completed! Though not a direct representation of the actual Stock Car, the decals were easy to work with and look good on the car. Of the three options offered I chose the Darlington Stock Car. Which wasn't even pictured on the box. This was a great kit to build, well engineered and nicely cast. As always, thanks for taking the time to look and please feel free to post any comments or questions you may have. David G.

- 16 replies
-
- 22
-

-
Who doesn't love a mock-up? Let's see yours!
David G. replied to Belairconvertable's topic in WIP: Model Cars
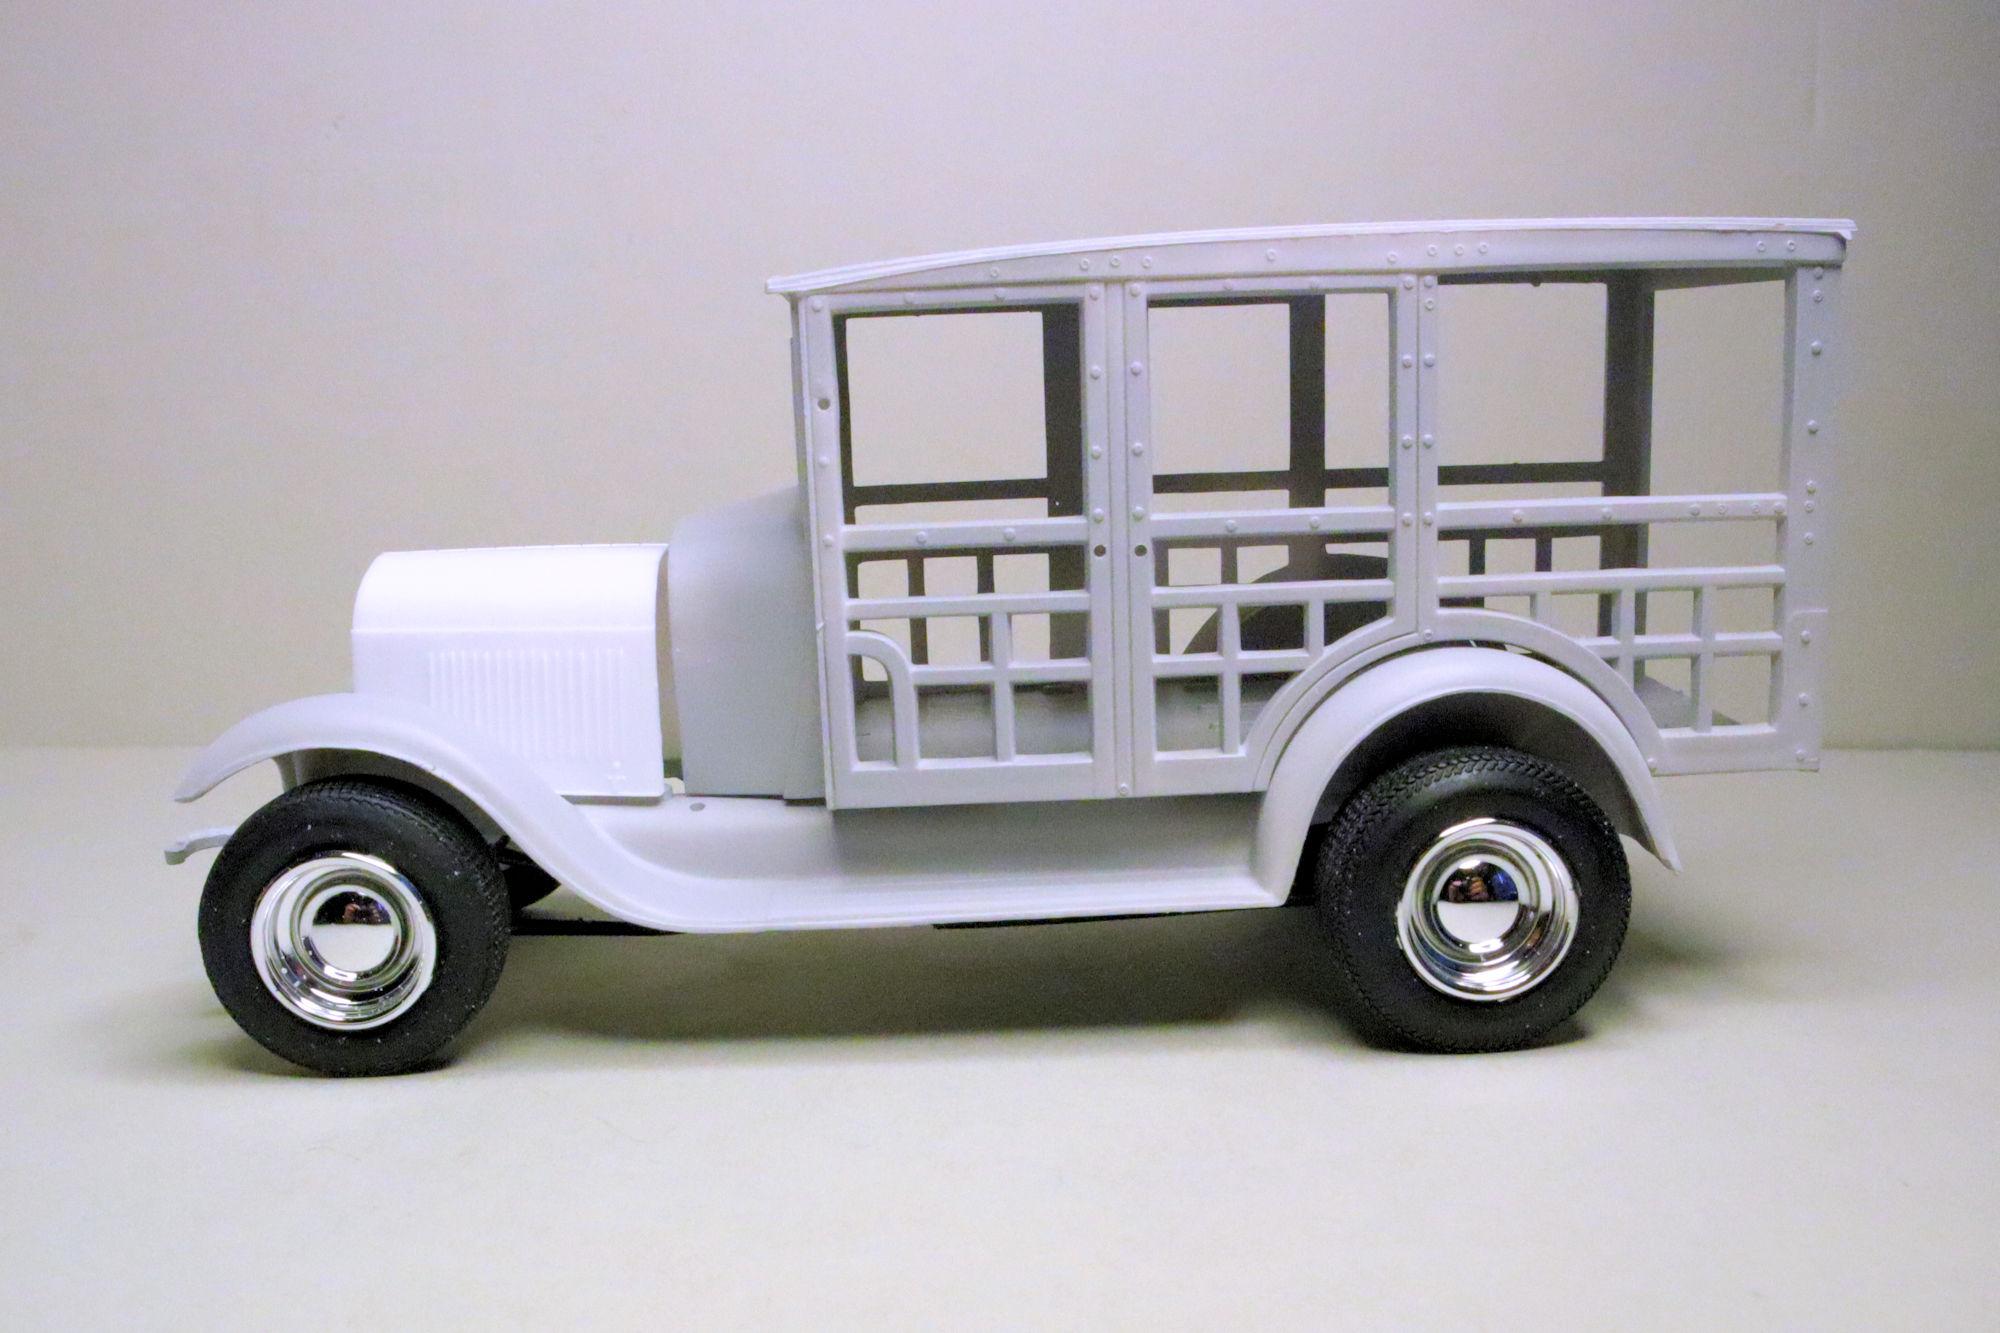
Hello Everybody! I just started AMT's 1929 Ford Woody/Pickup kit. The first thing I wanted to do was get the right stance and profile. So I assembled the axles and did a mockup with a number of different wheel sets. I did find a good set of wheels and tires in the parts box. They have kind of a Western Smoothie look which is much better than the Keystone Cliche' Classics or stock wood-spokes in the kit. I will of course dress them up a little. =D-
-
Rolls-Royce No Chemicals, No Paint, No Harmful Glues
David G. replied to Anglia105E's topic in WIP: Model Cars
Good progress on this David. It's nice knowing that this kit is getting the love and attention it deserves. David G. -
Thank you John. I agree, this is a really good kit. If I come across any more of these, I plan to grab 'em up. I'd like to build each of the offered versions. But a gasser, now that's intriguing! David G.
-
1955 Ford Panel Truck
David G. replied to Zippi's topic in WIP: Model Trucks: Pickups, Vans, SUVs, Light Commercial
Wow Bob, that's about as low as it can get! Now all we need is functional air bags! David G. -
Wow, I'd almost forgotten about this one Anton! I'm glad you didn't though. Seeing all the detail you're throwing into this makes me smile. David G.
-
Rolls-Royce No Chemicals, No Paint, No Harmful Glues
David G. replied to Anglia105E's topic in WIP: Model Cars
That's a clever bit of engineering with the cocktail stick David! The only non-toxic fume free suggestion I might offer to fill in the dimples would be hydrocal plaster. Though it would likely be tricky to mix in teaspoon proportions and then there's the matter of painting the fill afterword. It probably wouldn't bond with the plastic either unless you mixed some PVA into it. Hmmm. She does have a good stance in profile. David G. -
Thank you kindly Bob. =D-
-
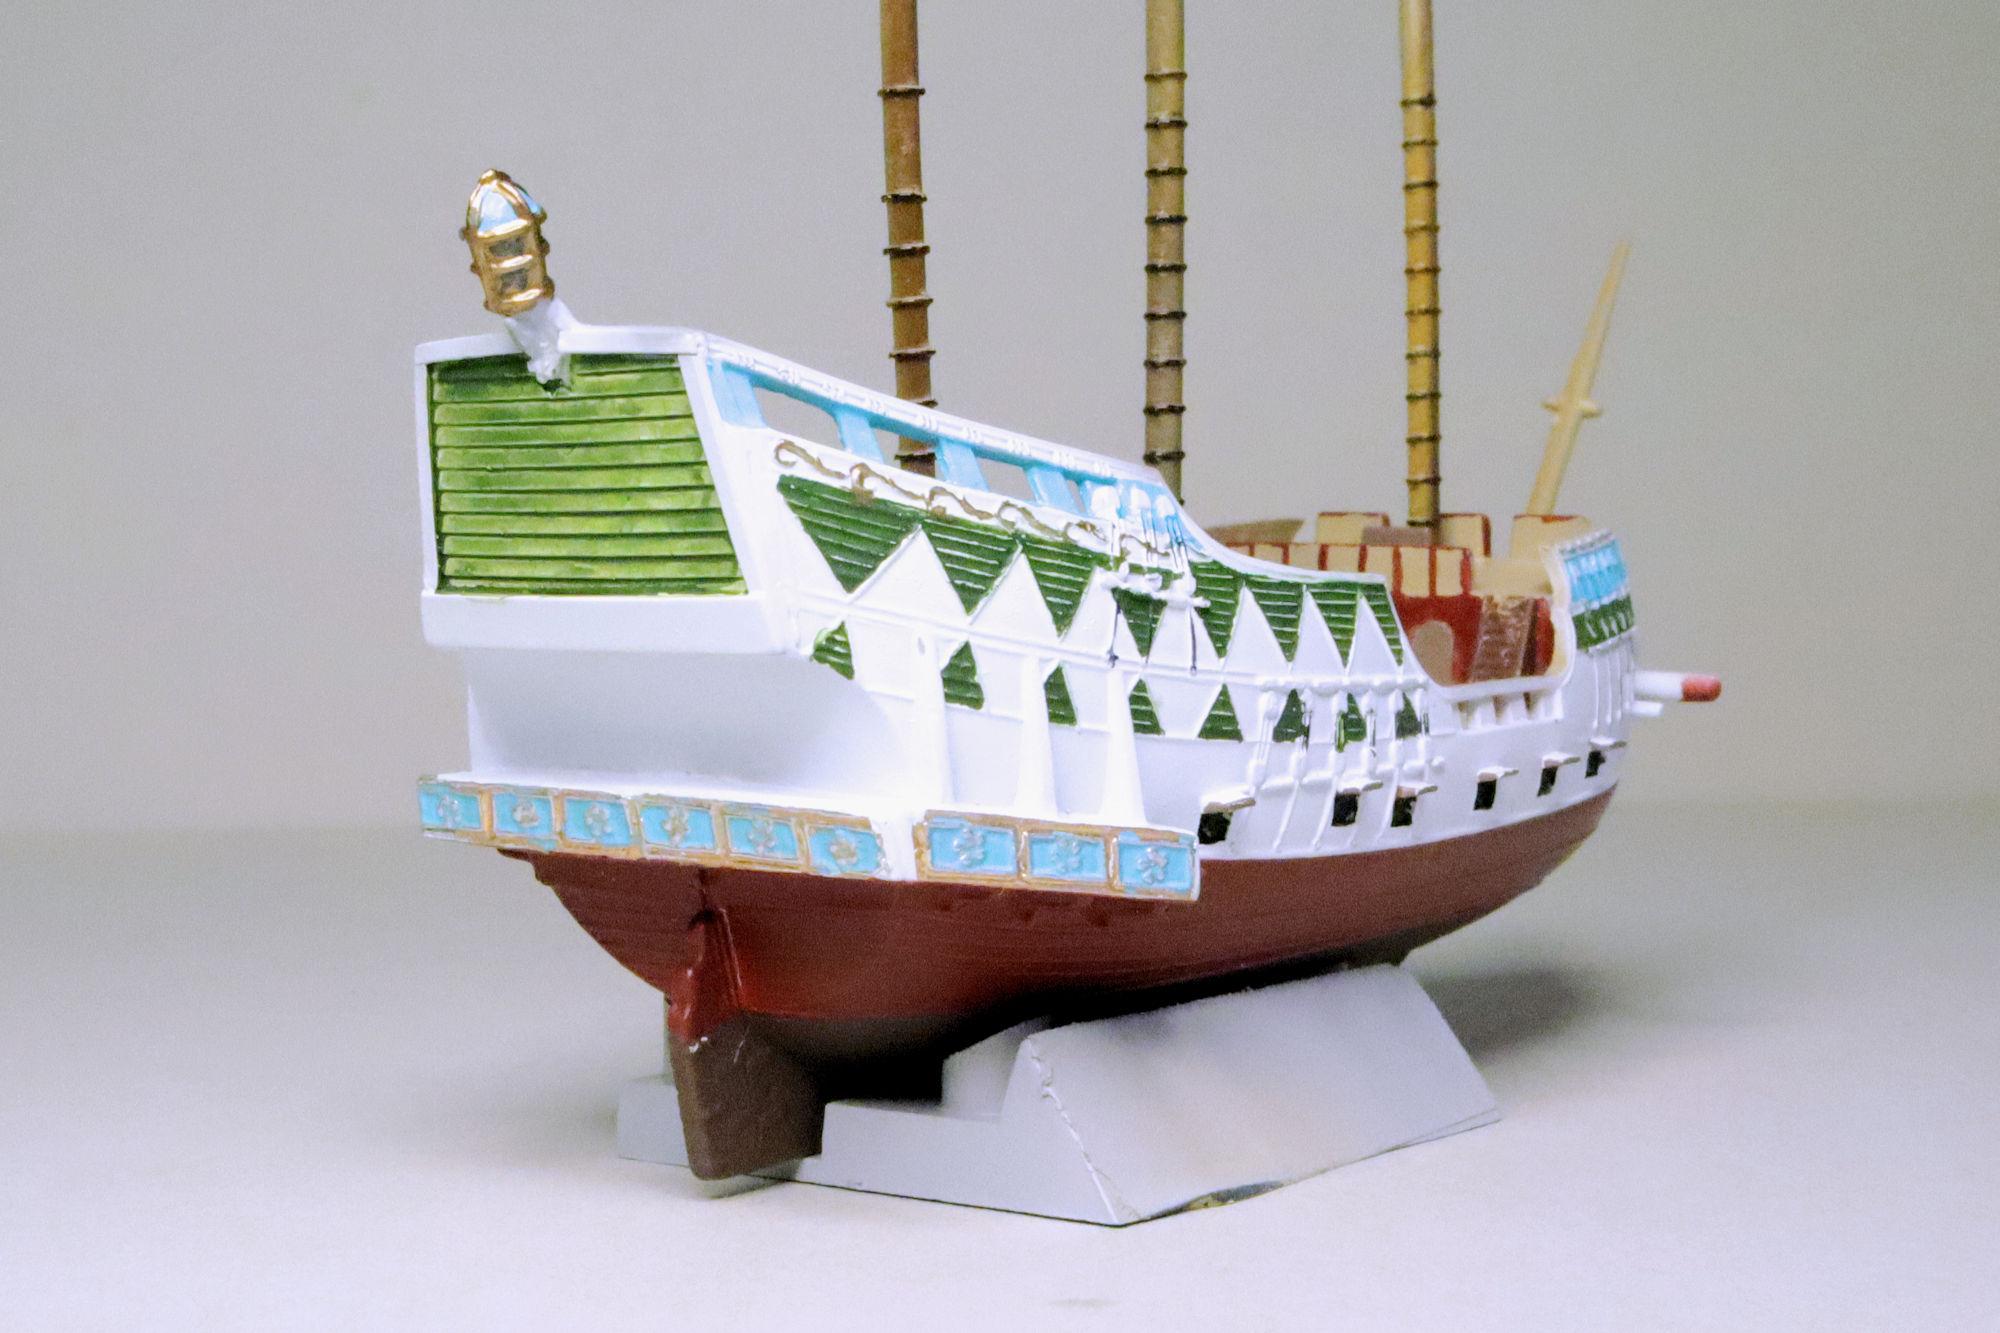
Thank you David. I was really surprised to discover how colorful and opulent looking many of these ships actually were. Thinking about it, it makes sense though. These vessels were functional emissaries of the Empire and often the first representation of the Crown that people of other countries would see. England had a reputation to uphold. I've learned so much about so many different topics through "playing with these plastic toys" as some would see it. David G.
-
Thanks! Yeah, it's like I say: "Back before Stock Car Racing became the National Association of Same Car Auto Racing." =D-
-
That looks great Bob! Sorry to hear about the whole BMF situation. Getting old sucks. It seems that we spend the first twenty-five years of our lives pushing to find our limits and then the next fifty years trying to live within those limits as they slowly shrink around us. David G.
-
Rolls-Royce No Chemicals, No Paint, No Harmful Glues
David G. replied to Anglia105E's topic in WIP: Model Cars
That's quite a good shine David! I see also what you were saying about the transition between the wings and doors. Aside from the parting seams, it's not bad at all; nothing like the abysmal mess I dealt with. It wouldn't have been so bad it it were just one side but... It looks like you got lucky with your kit. David G.
-
She is indeed, thank you. I found that photo while researching this build. 😮 It's the only one I saw with the speed likes like that. I figures that it's probably a replica with two right-sided number decals. Or they just didn't pay attention to which side was which. Thank you David. =D-
-
Rolls-Royce No Chemicals, No Paint, No Harmful Glues
David G. replied to Anglia105E's topic in WIP: Model Cars
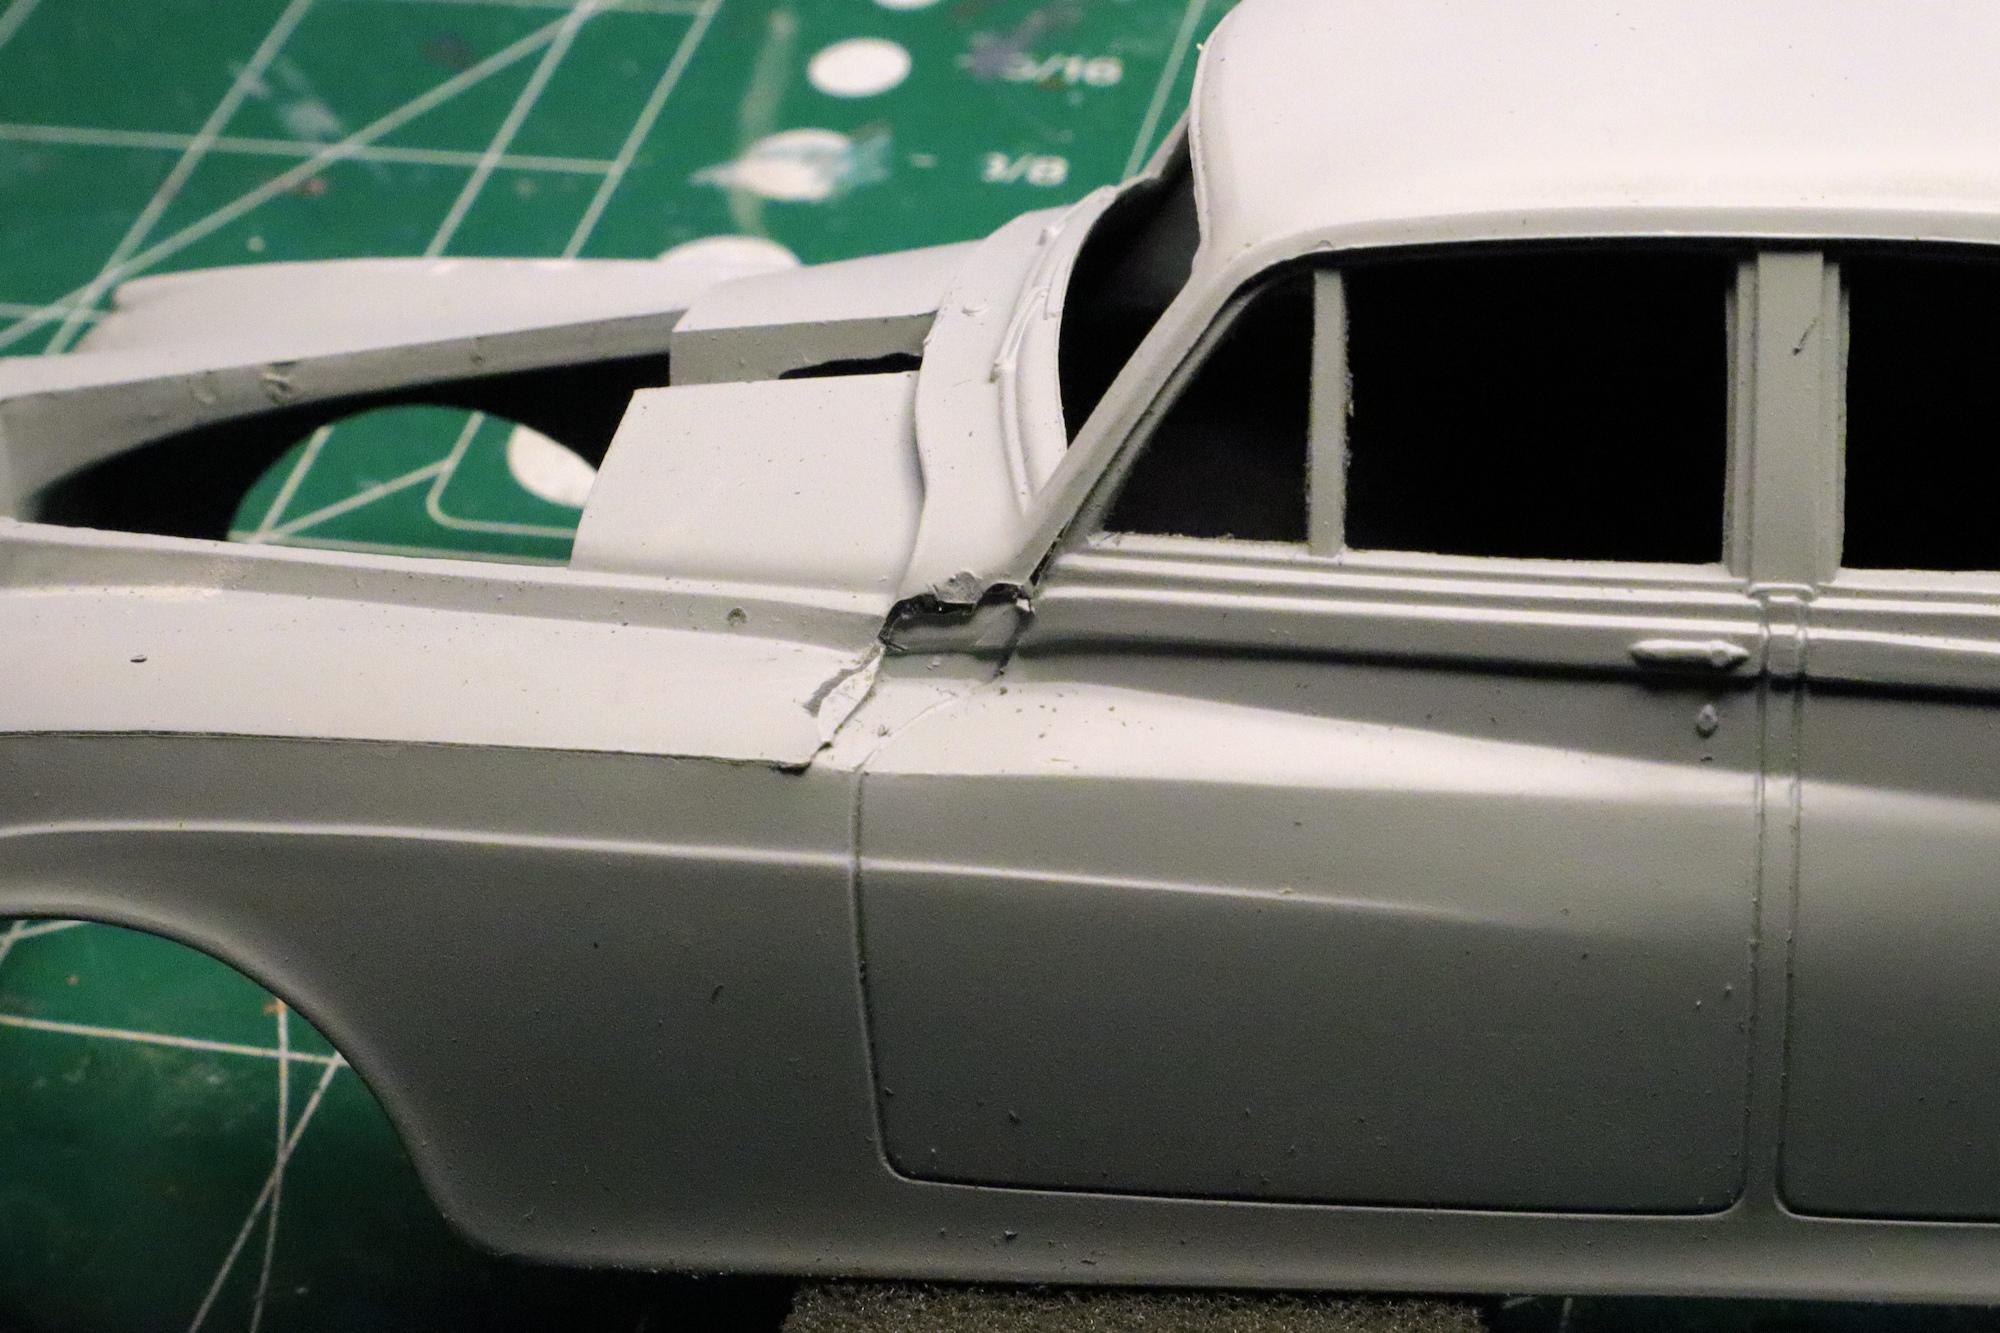
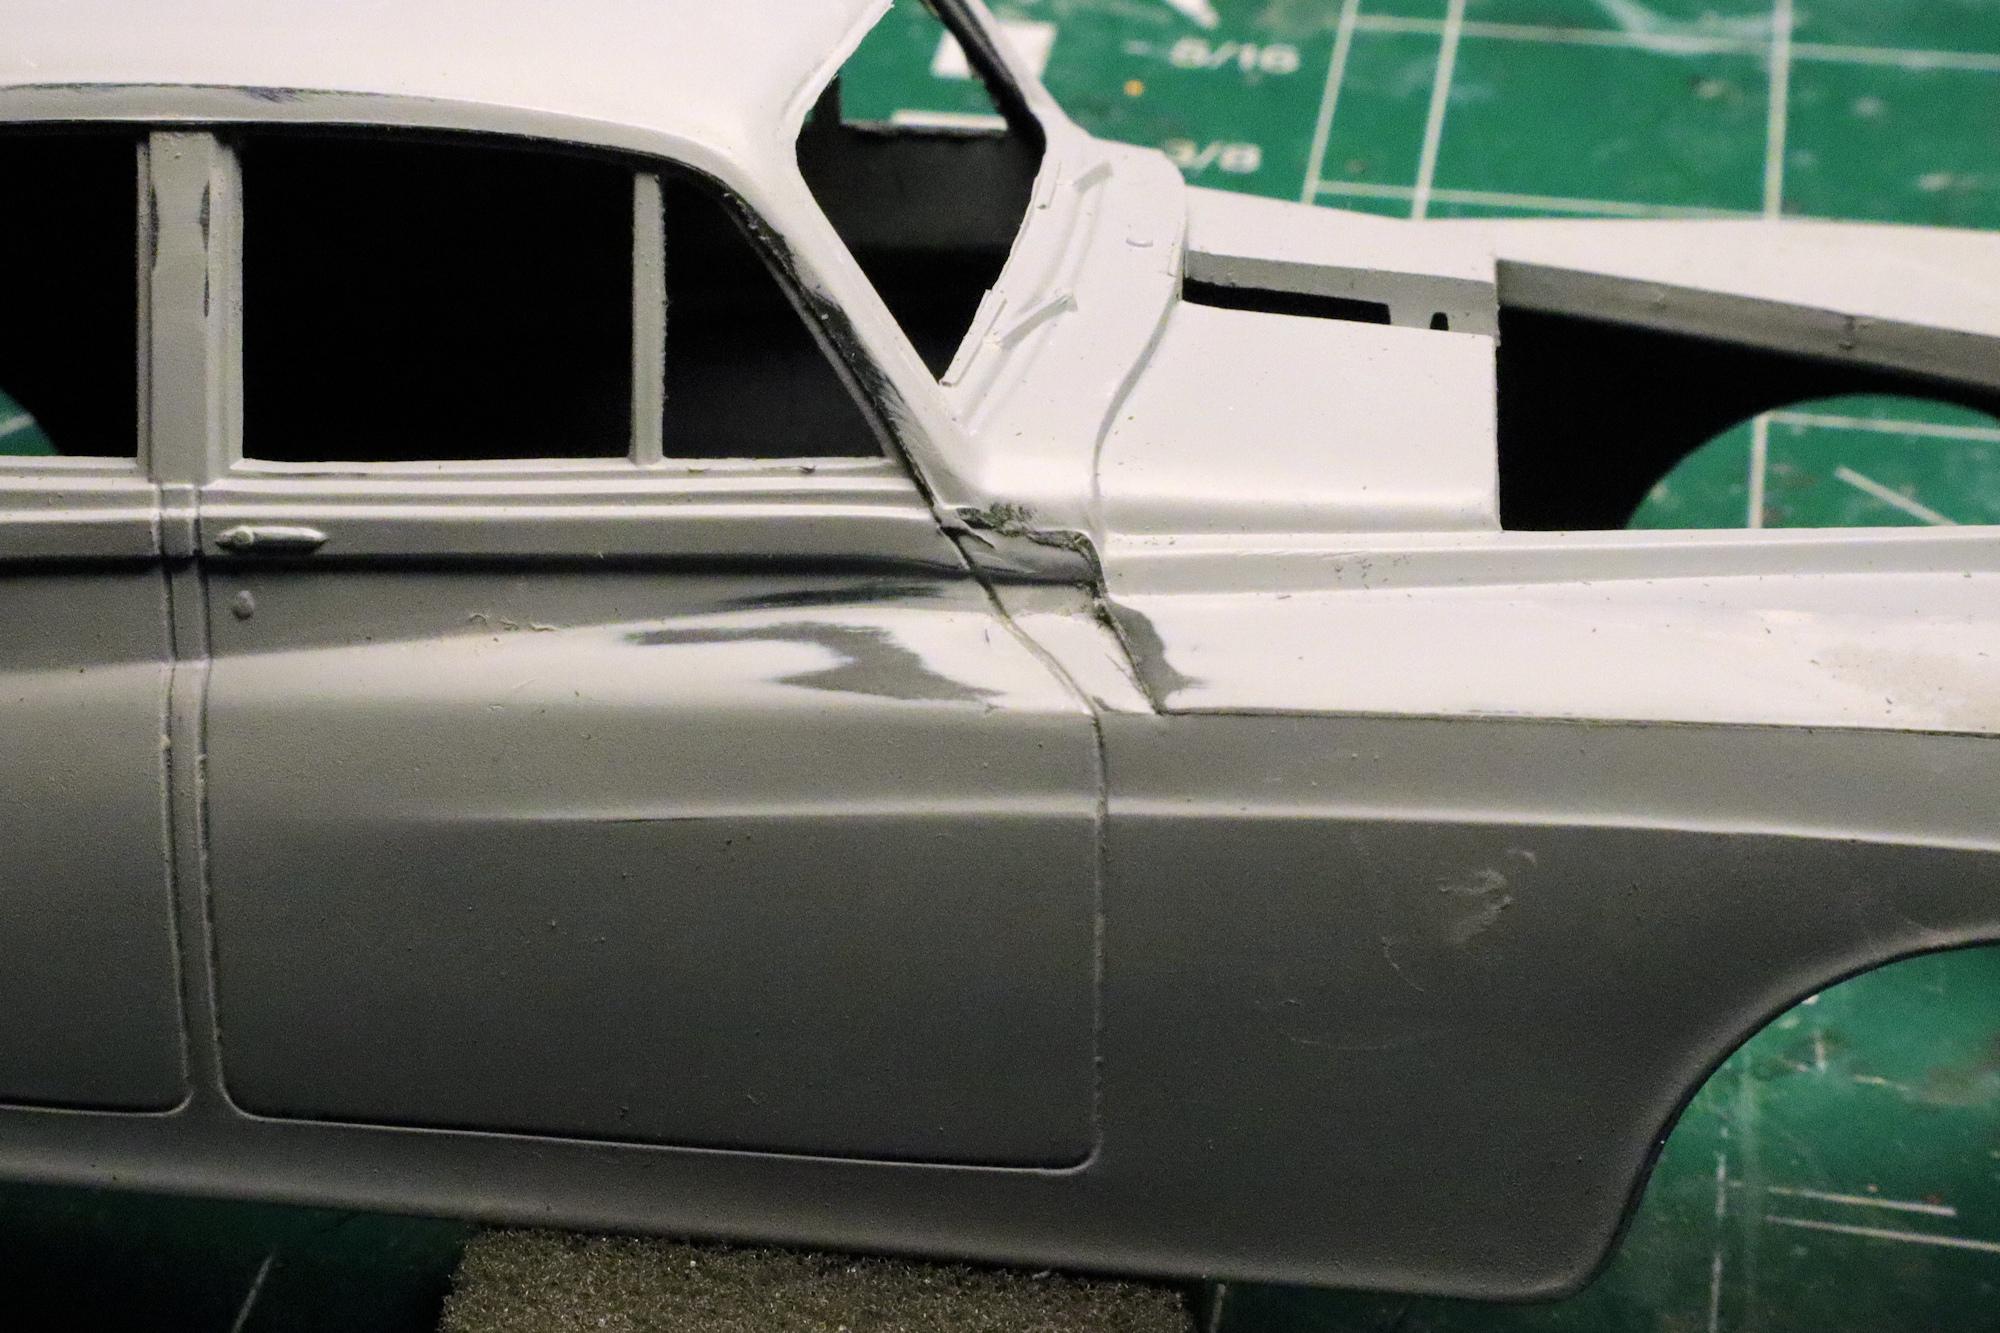
I think they're excellent photos, I snatched a copy of them for my own reference. As a young man I frequented scrap yards in search of parts to keep my own cars running. I would often spend hours just exploring and visiting the old ghosts that seemed to haunt such places. Poking about old wrecks like the one in those photos you uploaded, I could feel those old cars for what they once were. In some I could see the potential of what they could once again be. From the photos, this feels like one of those cars. In what it is now I can feel what it was and see what it could be again. Great progress on the polishing! I like the properly sized mascot too. I wish I could have found one for the Rolls I built. David G. -
Hello Everybody! Over several build sessions I was able to apply remainder of the decals, install the windows and add the chrome bits. I also bought some BMF black foil to put on the gravel guards. Just the edge of which can be seen in this photo. Last night I got the whole thing scraped into a pile and assembled. I can see some touchup I need to do on the BMF door spears and a couple of other locations. Other than those few items, this one is done! I'll get some better photos to post in the Under Glass section later this week. As always, thanks for taking the time to look and please feel free to comment as you see fit. David G.
-
Thank you Michael, slow and steady. Well, slow anyway! =D-
-
Rolls-Royce No Chemicals, No Paint, No Harmful Glues
David G. replied to Anglia105E's topic in WIP: Model Cars
Based on your description and the photos you shared, your version of this kit is almost identical to the one I worked on a couple of years ago. Right down to the proportion of wheels to tires. I believe your Hubley kit is the of original release and the Minicraft that I built is a re-pop. From what I can see in the photos you posted it looks like the transition between the wings and doors is in a somewhat better state. David G. -
The paint looks good. David G.
-
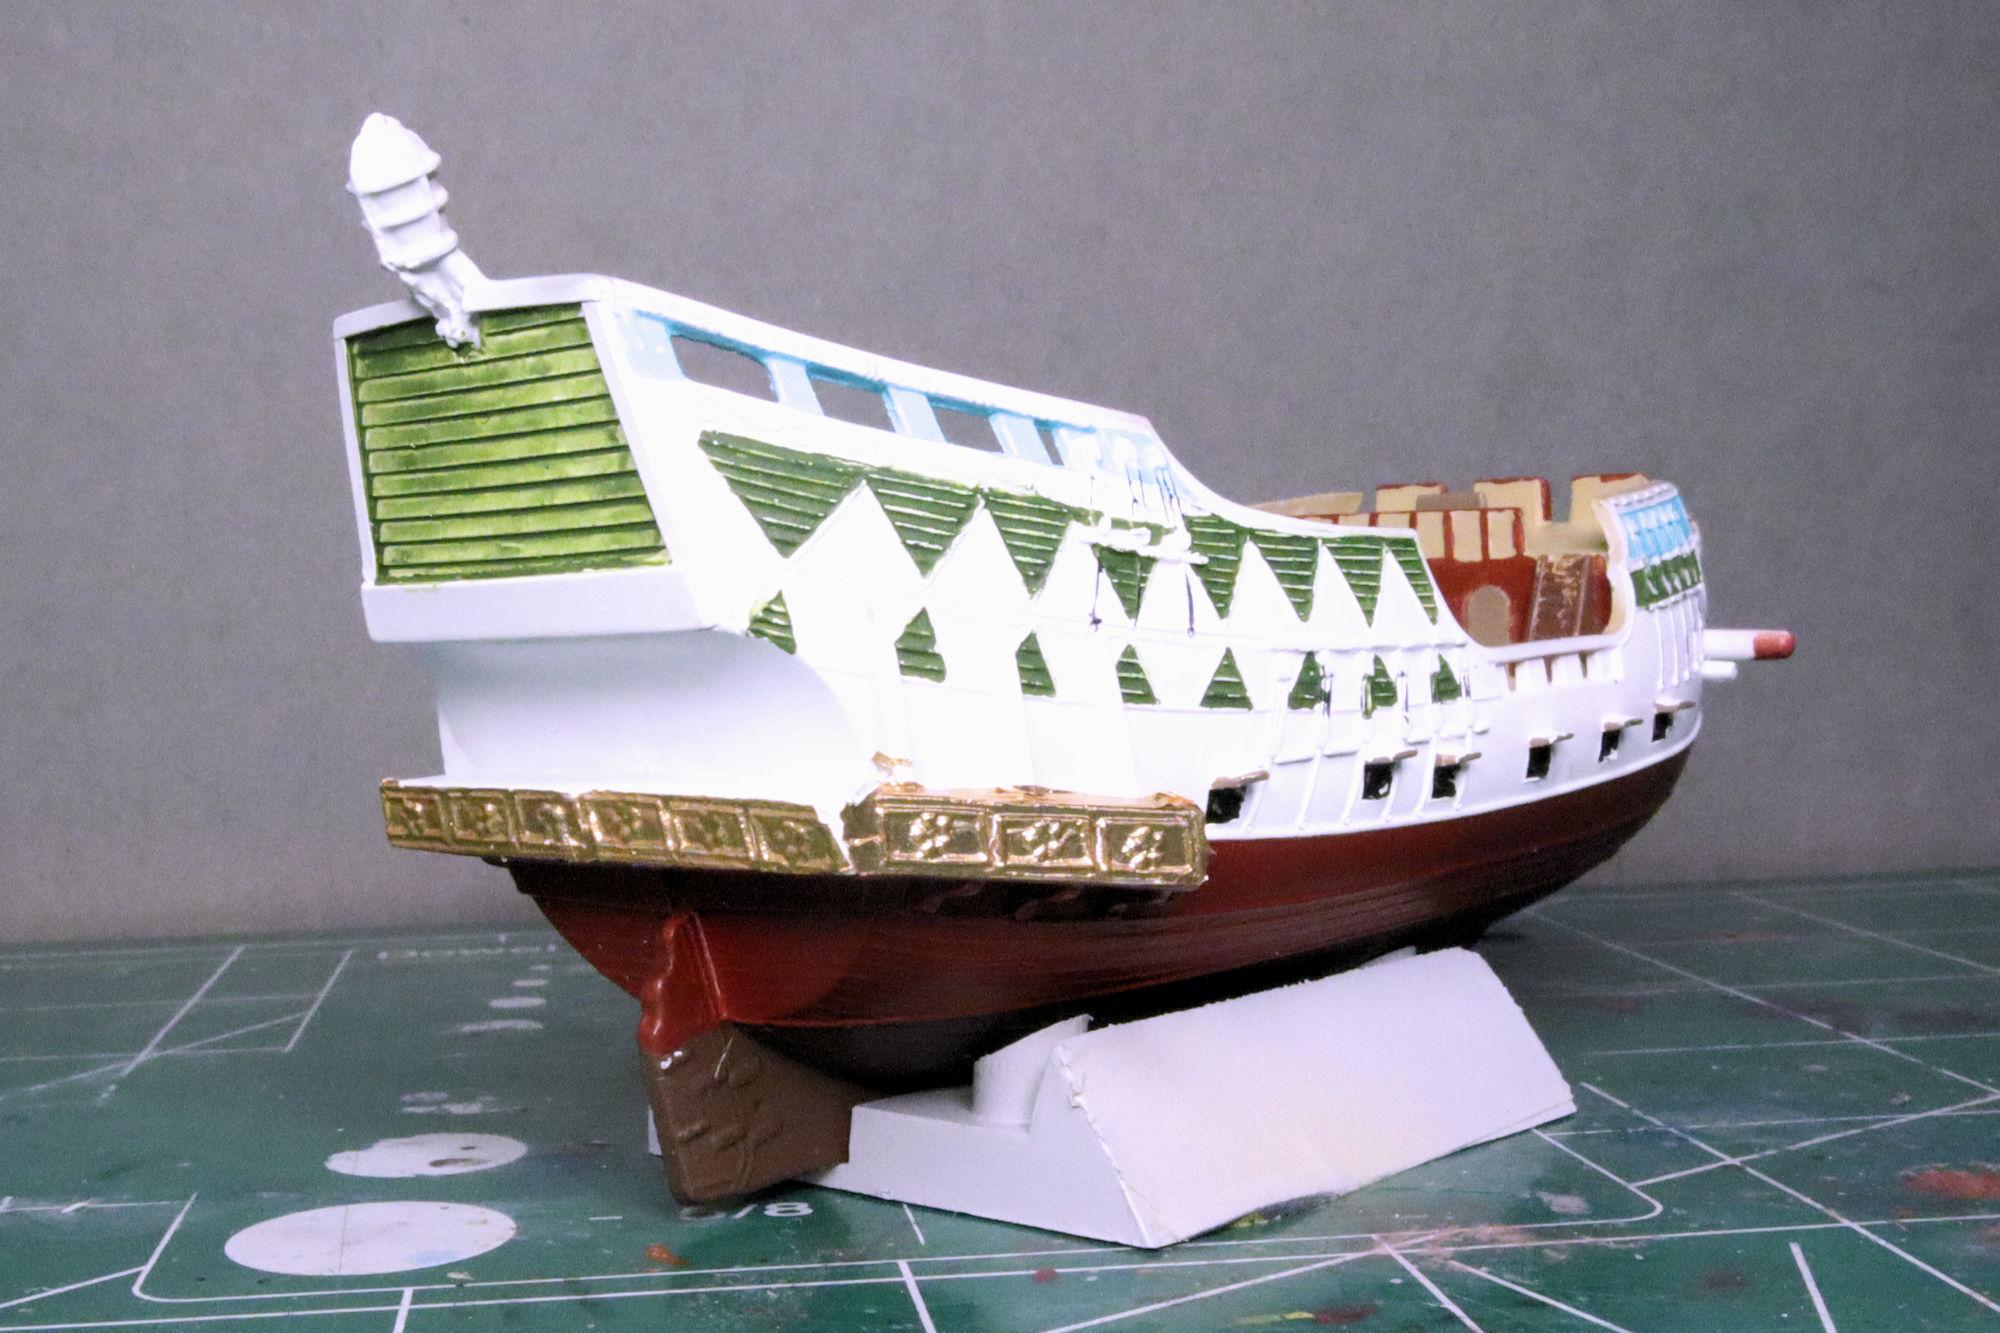
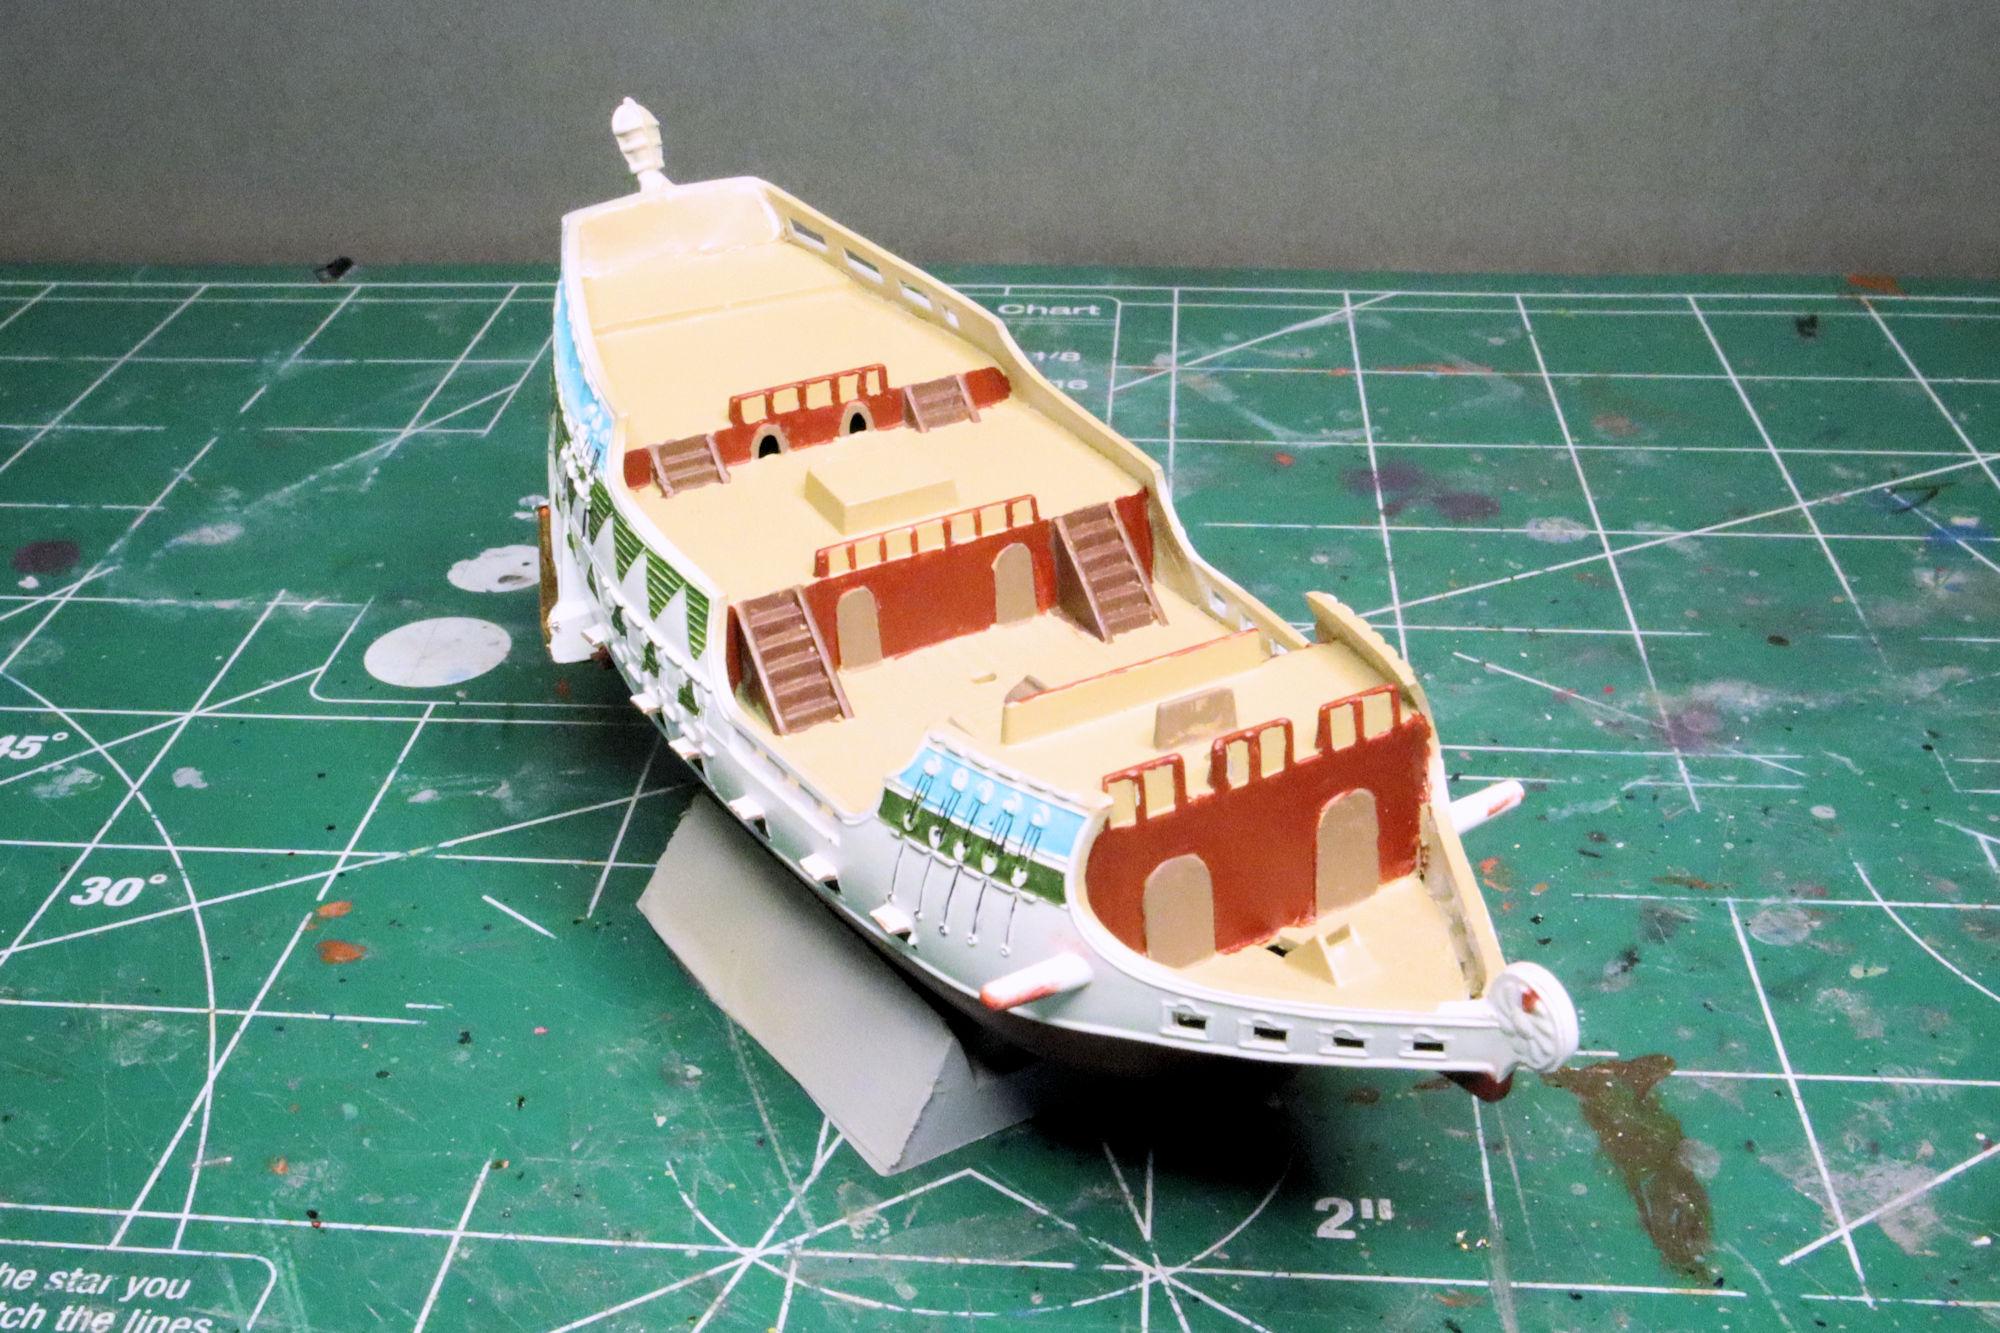
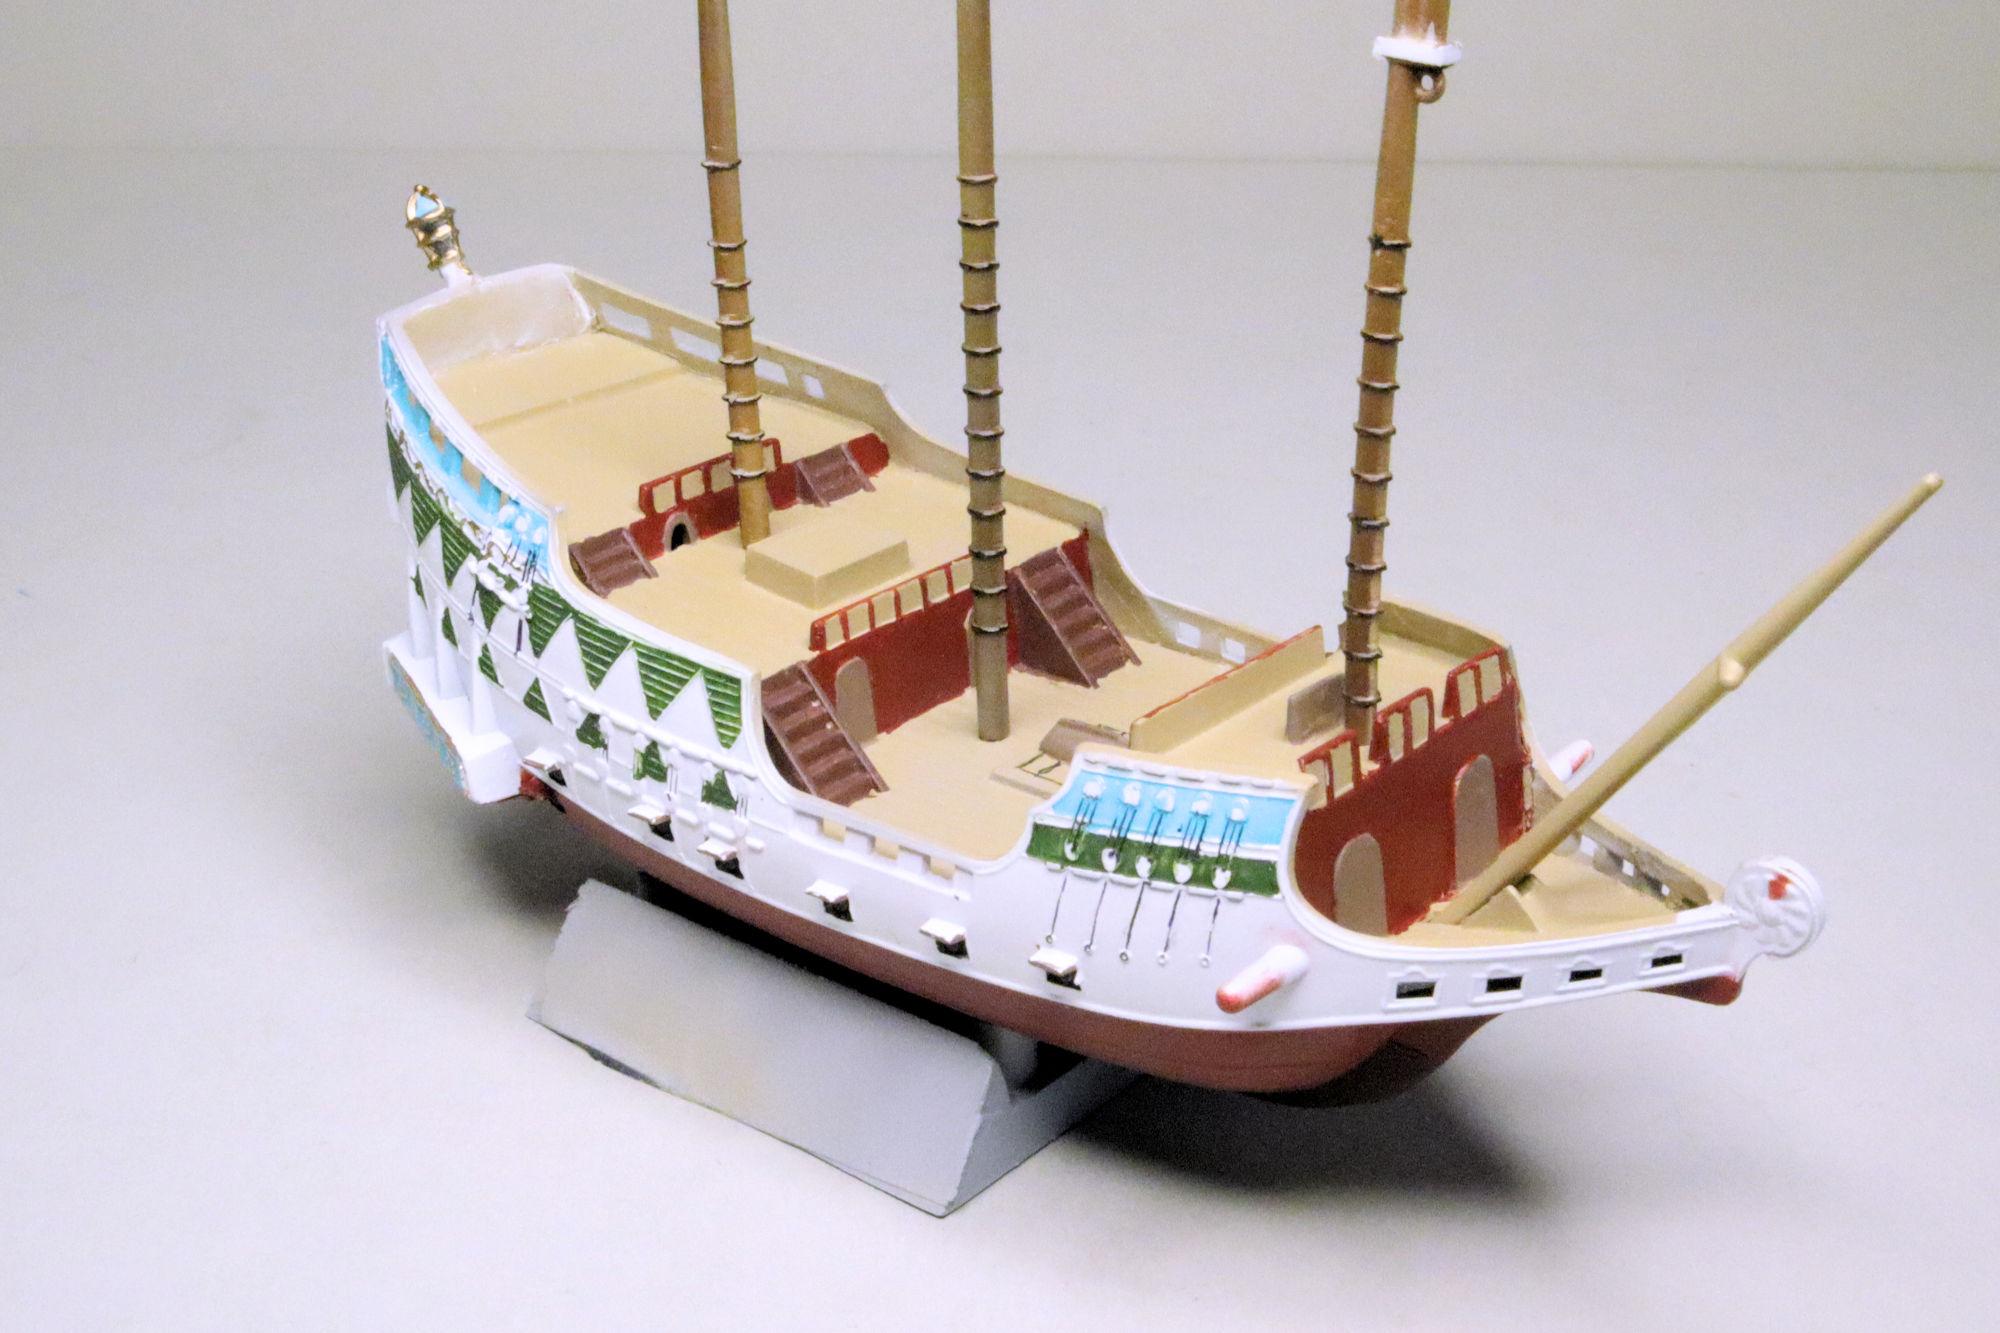
Hello Everybody! I do plan to finish this one. It's not particularly difficult just more of a slog than anything else. To try to replicate the blue and gold of the rosettes on the gallery area I decided to start with some gold BMF. I brushed on a coat of turquoise enamel paint, let it dry for a few hours then cleaned off the frames and rosettes. It'll need a little more effort but I think I can make it work. I made a first pass at throwing some color at the decks. I expressed some of the Tamiya TS-33 Dull Red from the can and brushed it on along with some XF-68 NATO Brown and XF-52 Flat Earth. The second pass at the deck detail got things cleaned up a little but there's still more to do. As always, thanks for taking the time to look and please feel free to post any comments you may have. David G.
-
Wow Jim, you're right. This one has been going on for a while! It does look great though and it's been a lot of work to get here. The decal on the package shelf is perfect! David G.
-
Rolls-Royce No Chemicals, No Paint, No Harmful Glues
David G. replied to Anglia105E's topic in WIP: Model Cars
It's nice seeing your progress on this endeavor David. The polishing technique you've worked out seems to work very well, I'll have to keep it in mind for future use. I think I may be the forum member you're referring to. As far as the mixed results, the polishing actually came out rather well. The only problems I had were some issues with my attempted clear coat. I did of course paint the livery markings but the Gulf blue is as cast. The build turned out to be one of my favorites. In fact it's the one I use for my avatar here and on my Face Book page. Back onto the polishing topic, have you considered Novus products? I believe their phase 2 & 3 compounds are water-based, at least they have no odor that I can detect. And their #1 seems to be a thin acrylic solution. Just another suggestion. I can't wait to see more of your work on the Rolls. I'm glad you were able to find the other one that's still left on the planet. David G.
-
Oh yeah, the dreaded "axle hole" Nice work filling that and on the other details too. Great looking engine! Thanks for posting them.
-
Rolls-Royce No Chemicals, No Paint, No Harmful Glues
David G. replied to Anglia105E's topic in WIP: Model Cars
Maybe the reason you're having difficulty finding any more of those old Minicraft Rolls kits, David is because you have most of the ones still in existence! For paint have you considered Tamiya acrylics? I know they're a solvent based acrylic but their solvent is essentially the same as glass cleaner. Though I'm not sure if even that is within your safety zone. David G.