MrObsessive
-
Posts
9,785 -
Joined
-
Last visited
Content Type
Profiles
Forums
Events
Gallery
Everything posted by MrObsessive
-
 He had answered a number of times, including my response when I ordered from him. His cut-off time for this round I think is the 25th. I don't think he'll be putting up another group buy until sometime next month. If you'd like something when his group buy comes up again, I'd answer right in the post what you'd like, and then follow his instructions in his post as to what info to put in your PayPal payment.
 -
1/25 Lindberg '66 Chevelle Super Sport
MrObsessive replied to Casey's topic in Car Kit News & Reviews
What's weirder is I think Chevy was the only one that had this roofline among the A bodies back then in '66-'67. You could get a pillared sedan from the other divisions, but they had the "tunnel back" glass in those too. -
Finally got this one done! 1959 Buick.........Updated Pics!
MrObsessive replied to MrObsessive's topic in Model Cars
WOW! Thanks for the nice words fellas! Has it REALLY been nearly sixteen years since I built this?? The years are whizzin' by too fast! IIRC, I started the '63 Turbine Car not long after this one was done. I still have both, and they're always in a case to keep the dust off of 'em. -
Interesting you mentioned Paul Hettick......I was talking to Robert the other day, and I said I may get a third car to go with my newest order. He's got a 1970 Buick Riviera, which is another car I thought about "transforming" one of these days. Robert asked me to hold off, because he wanted to run the body by Paul to check for any inaccuracies. I told him Paul has a VERY good eye in picking up on wonky body lines, so keep me posted! Yes, his list of cars is ever growing, and according to his latest post, he wants to get into one offs and show cars in the not too distant future. He was taking requests for what we'd like to see. One of them I asked about, he said he's going to be printing it come next year. Which car was that?? This one..............

-
If they modeled that true to scale, it would still be a bit short. Caddy's of that era ran 121.5" wheelbases, while the '76 Delta 88 ran on a 123" one. I don't think any of the kit makers have ever kitted any of the larger B body frames except for the '70's Chevy Caprices. Either which way, I have some stretching and massaging no matter what chassis I use.
-
FINALLY! A new gen Charger kit! I've been hoping that someone would finally kit this car, ever since the newer body restyle in 2011. Better late than never! That '66 Mustang Fastback should be a good seller. I always thought they did a better job of getting the lines correct on that one than Monogram/Revell. Let's see how many of those end up with '67 Mustang chassis' underneath. ?
-
Bob, I did drop Tom a line on FB messenger. I'll let you know if he answers back, but I did say for him to drop a line here when he gets the chance.
-
Thanks for the link Erik! That reinforces what I thought about using a stretched '67 Chevy frame and floorpan. Good interior pics..........the dash especially I saved into a folder for future reference.
-
That is lookin' absolutely terrific Bruce! In regards to the rear wheels, all the original Big Block Cobra's I've ever seen, seem to have those wheels tucked in somewhat. I too thought that the side pipes stuck out just a wee bit too far, but then I ran across a pic where I saw a Cobra that had the same positioned pipes. ?♂️ I didn't want to go through the hassle of re-threading screws and messing something up, so I left it alone.
-
Rob, the crazy man inside of me says to perhaps use the AMT '67 Chevy, floorpan, and some of the interior and go from there. At least those are all separate pieces, particularly the frame rails, so stretching them out would be easier. The dash if I can get a file for that, I may 3D print it, or make one from scratch.
-
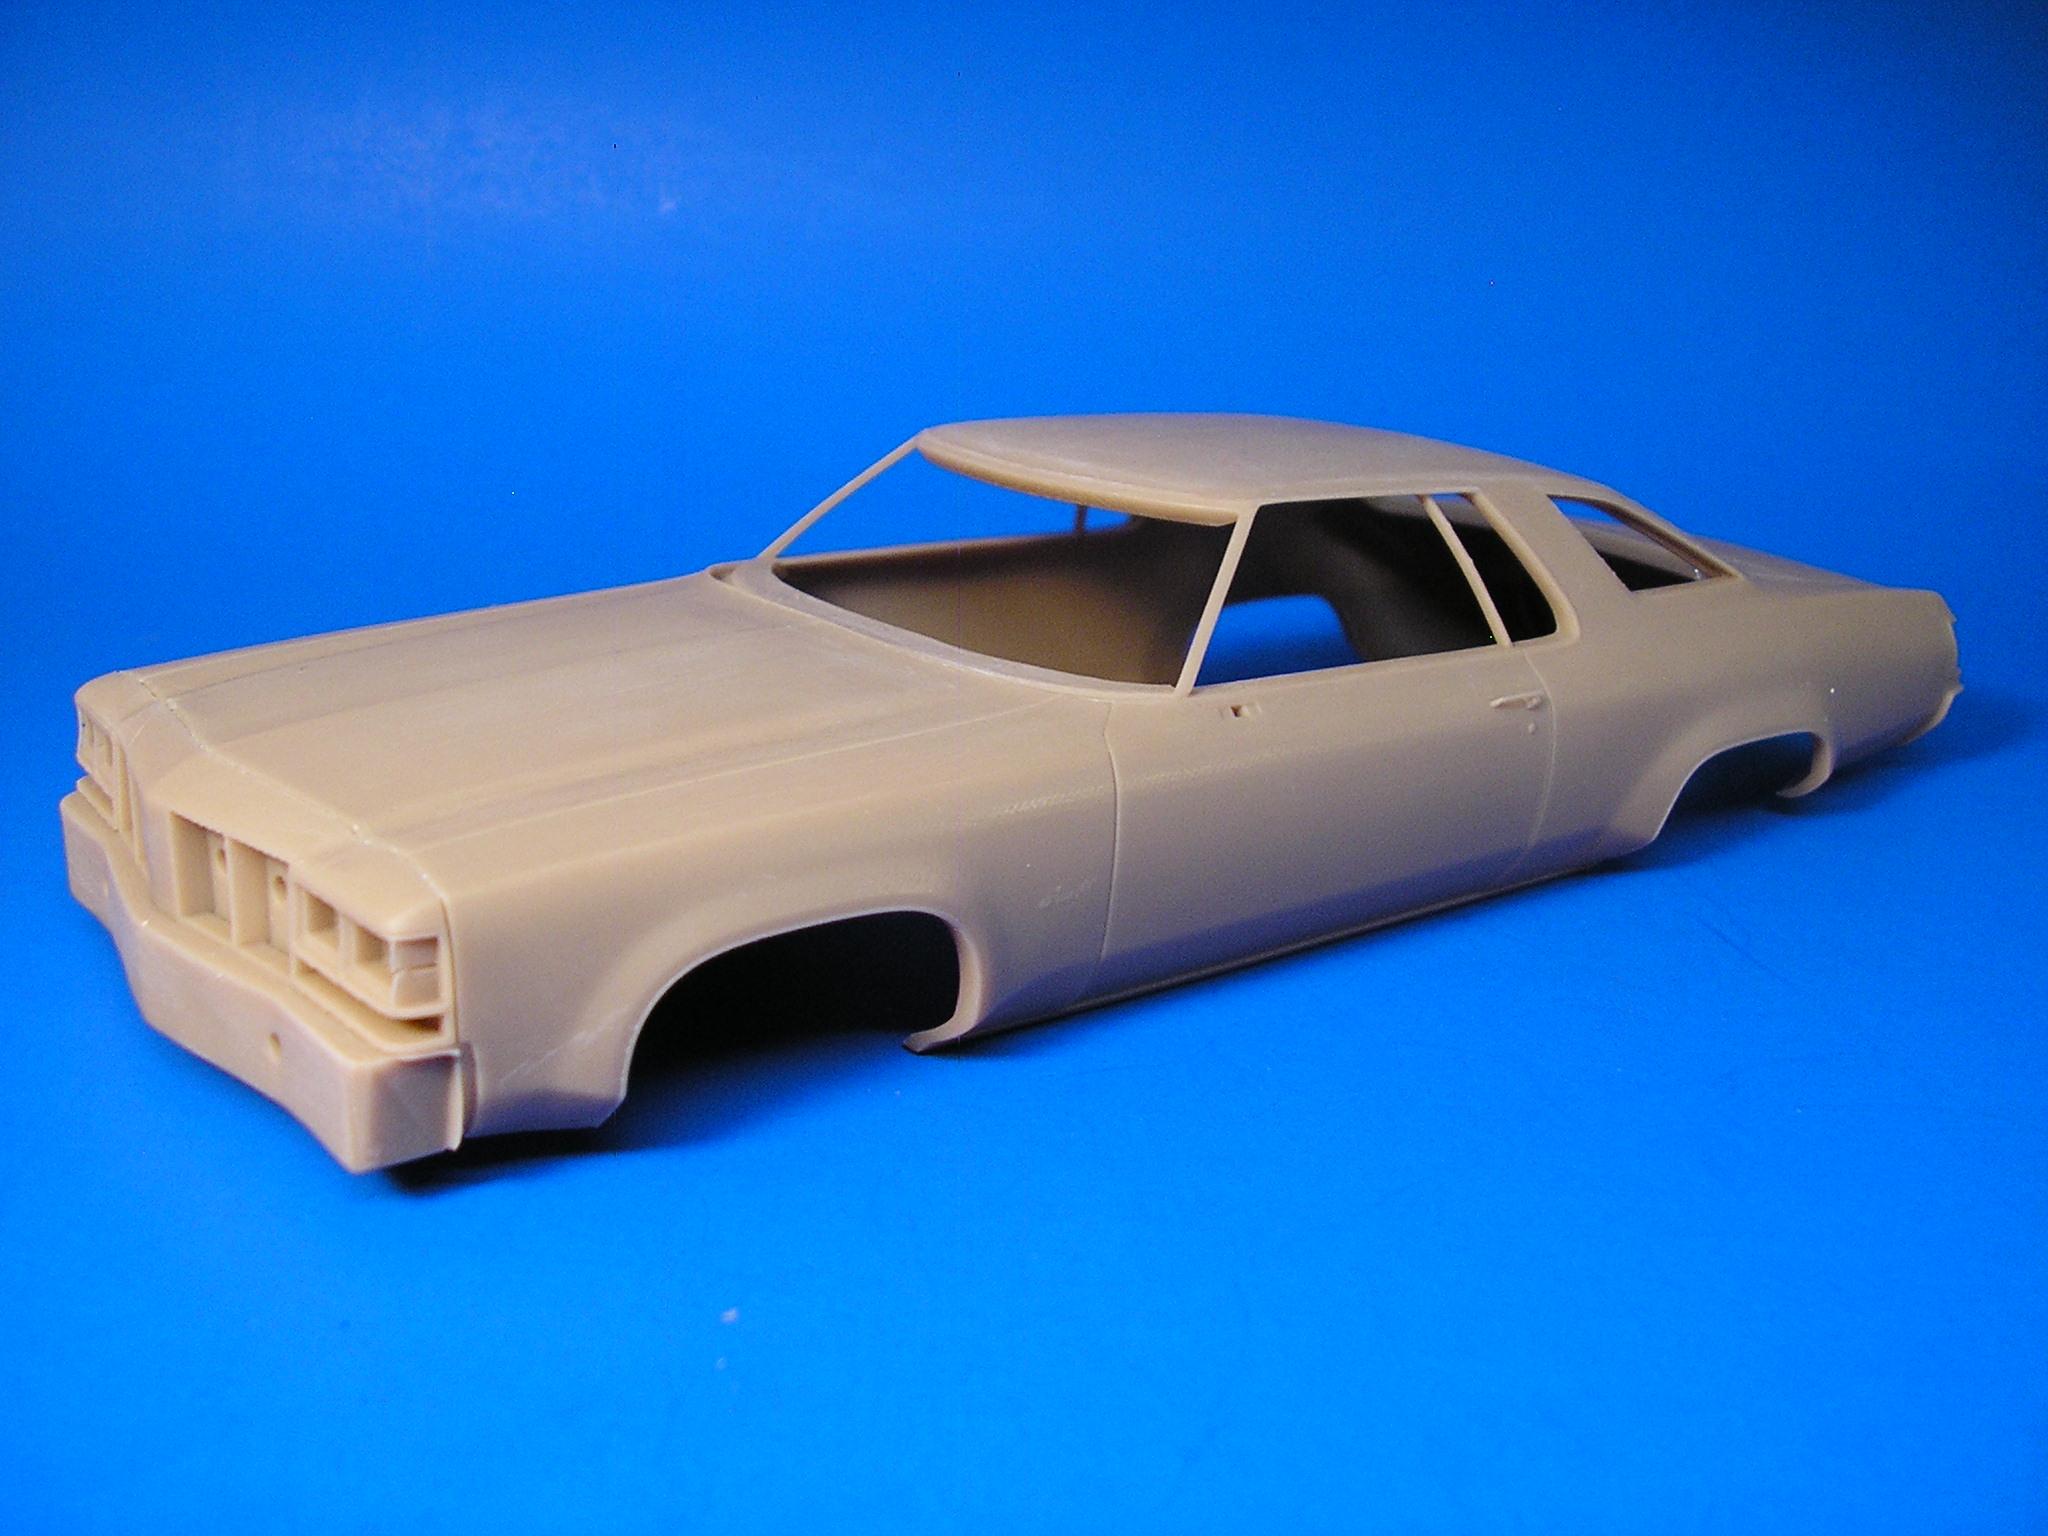
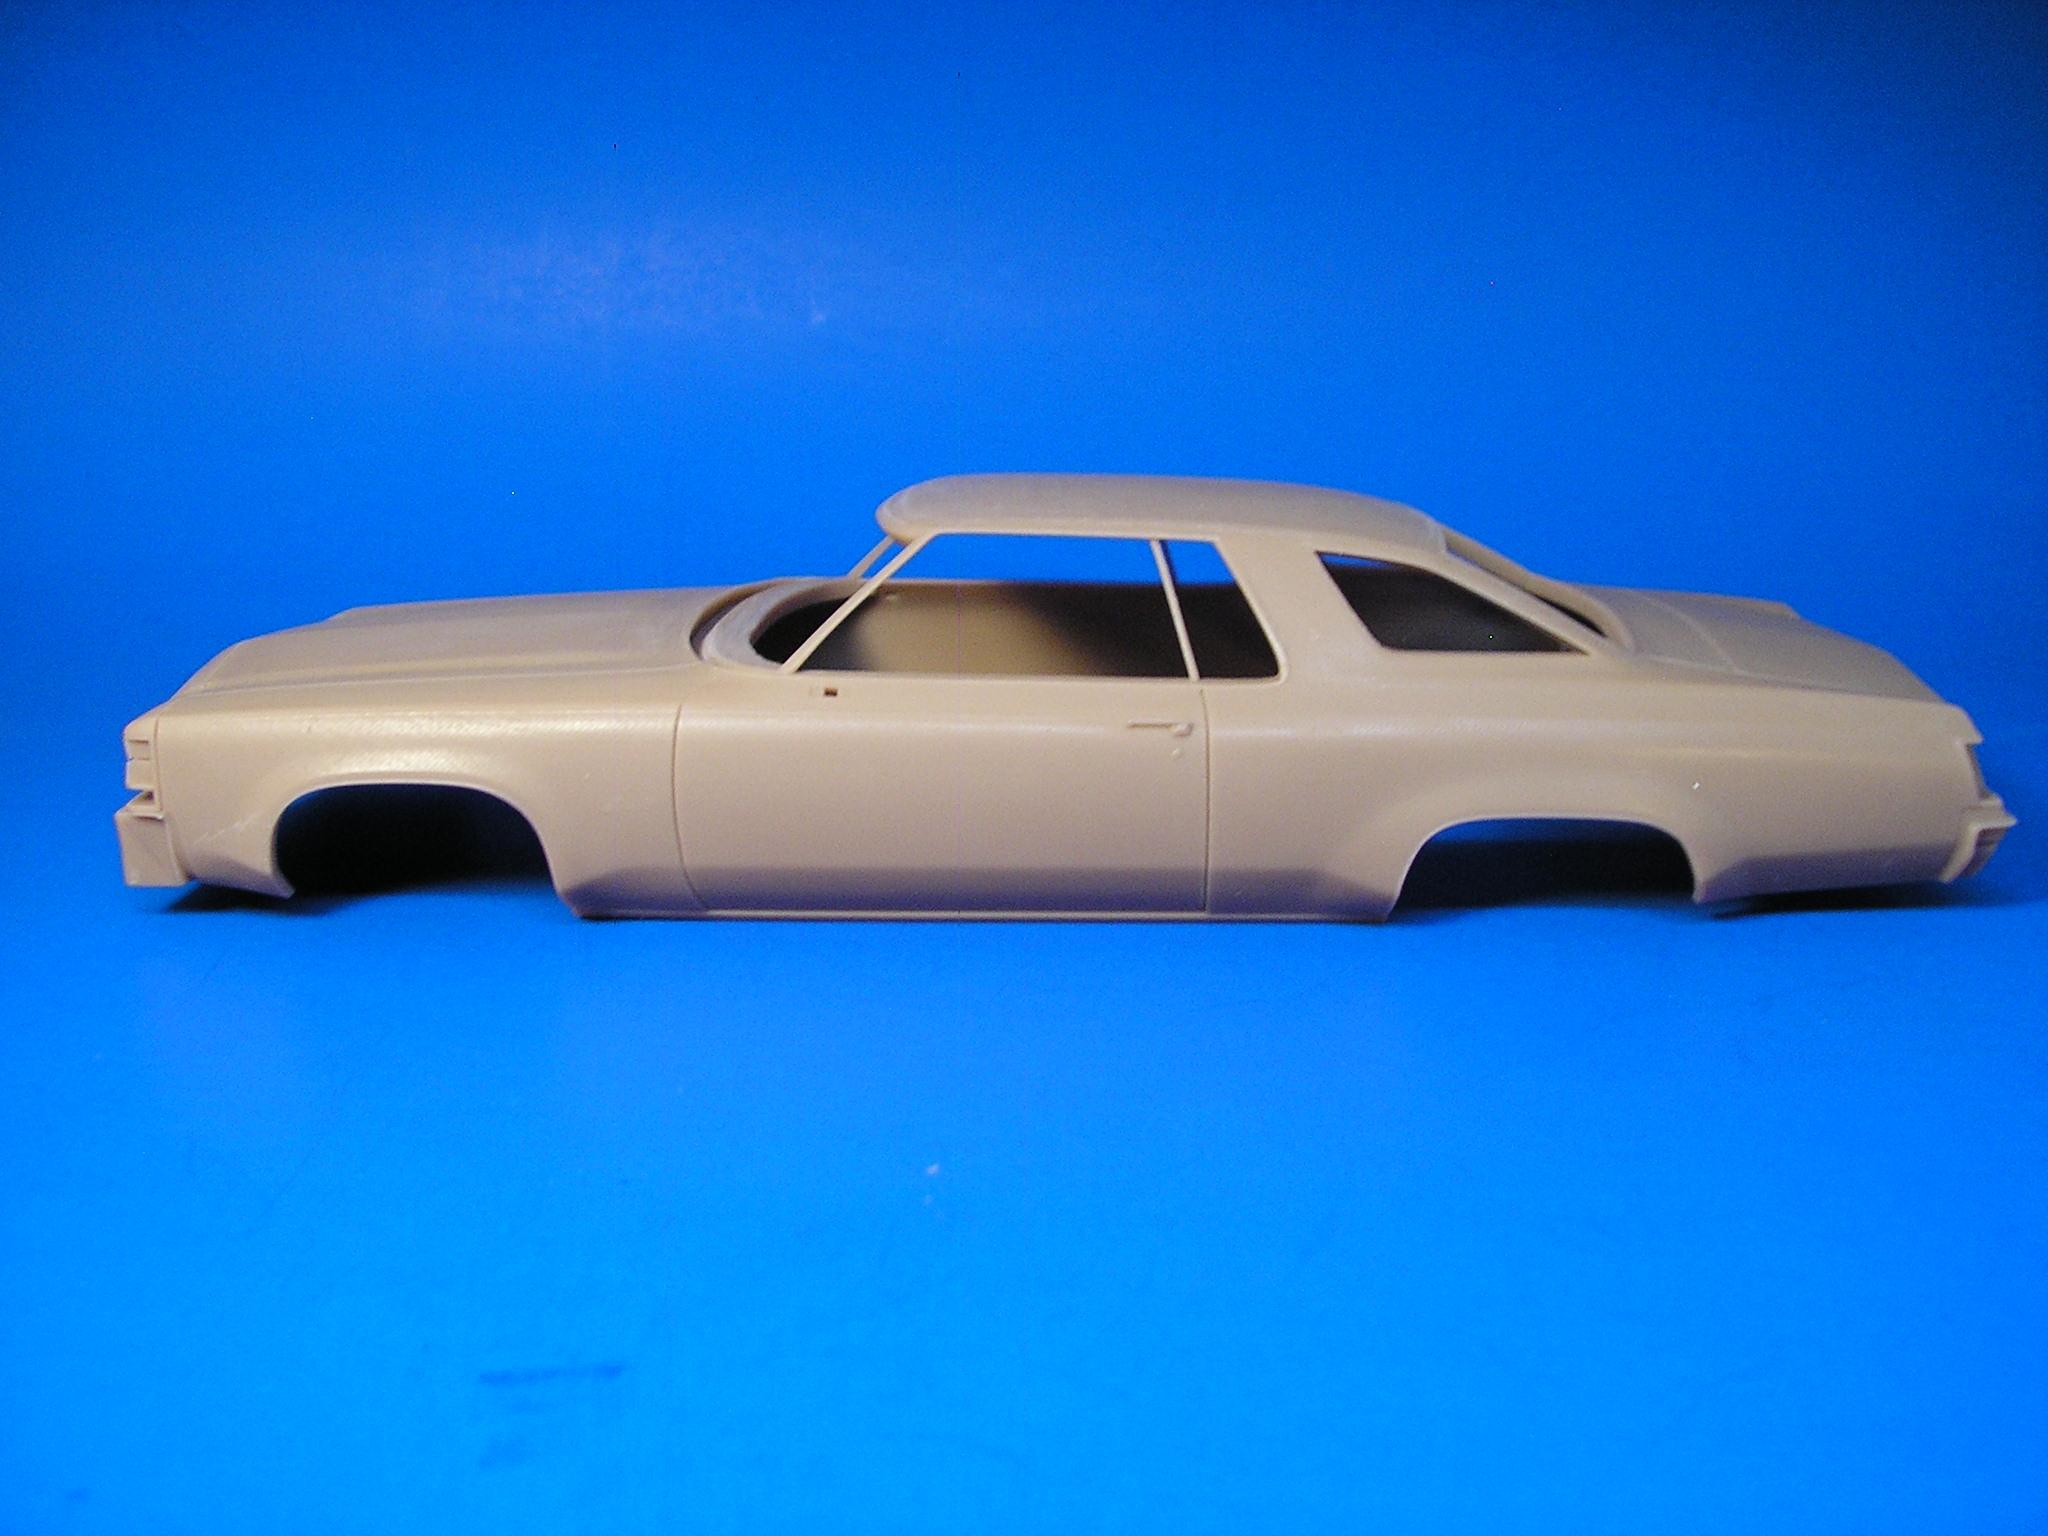
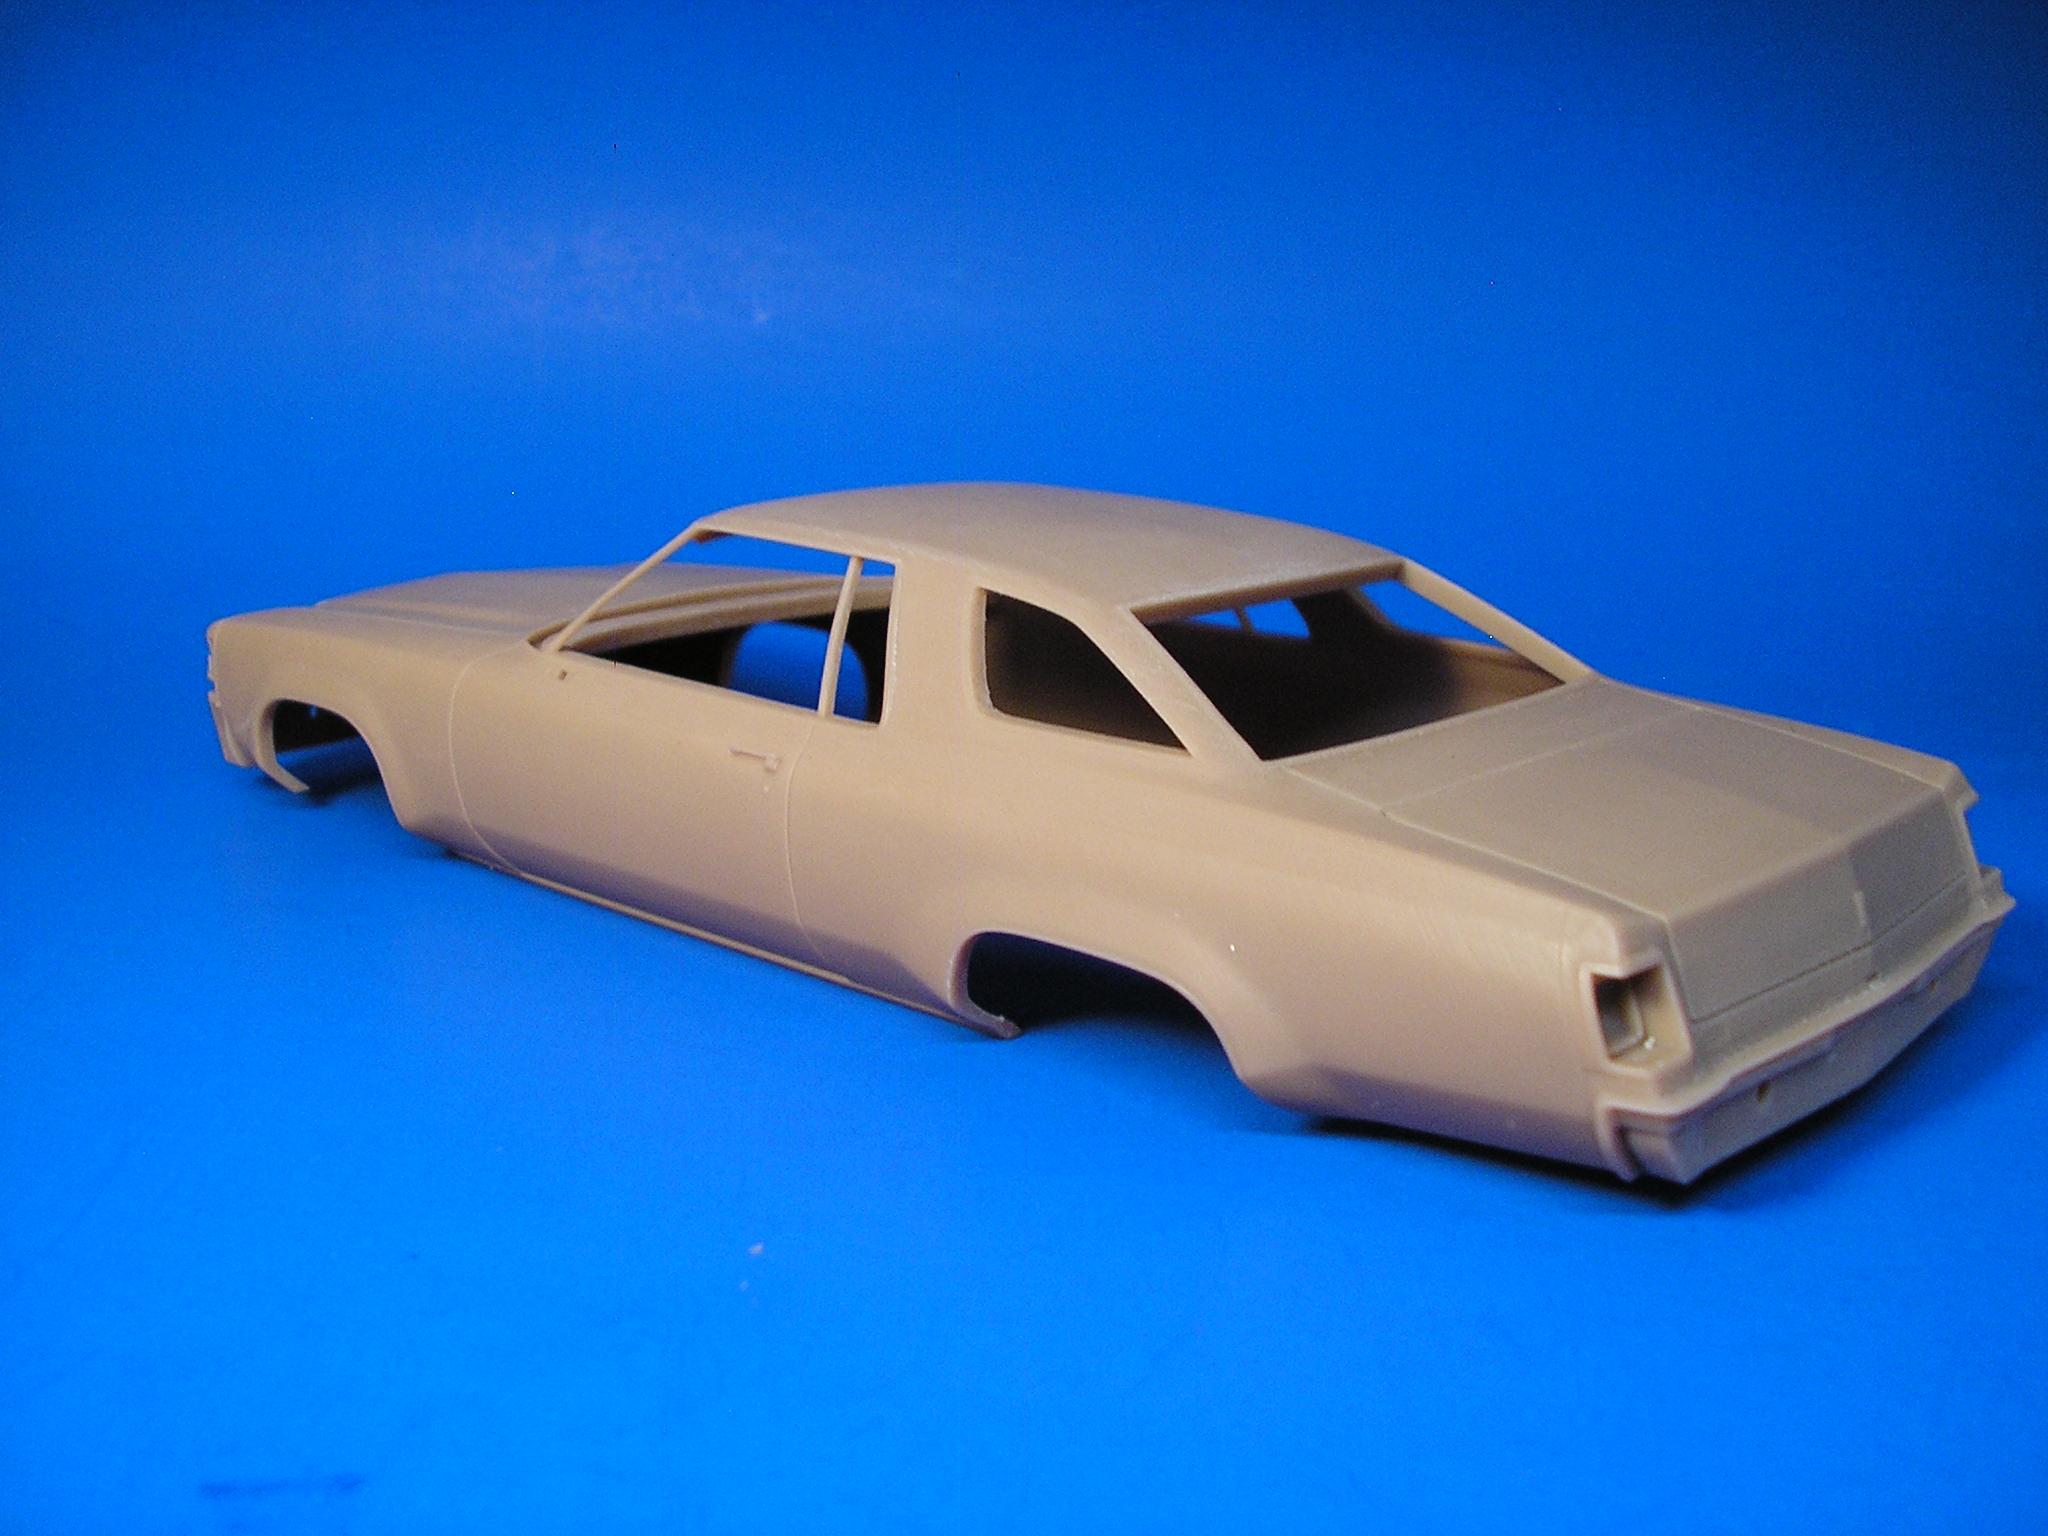
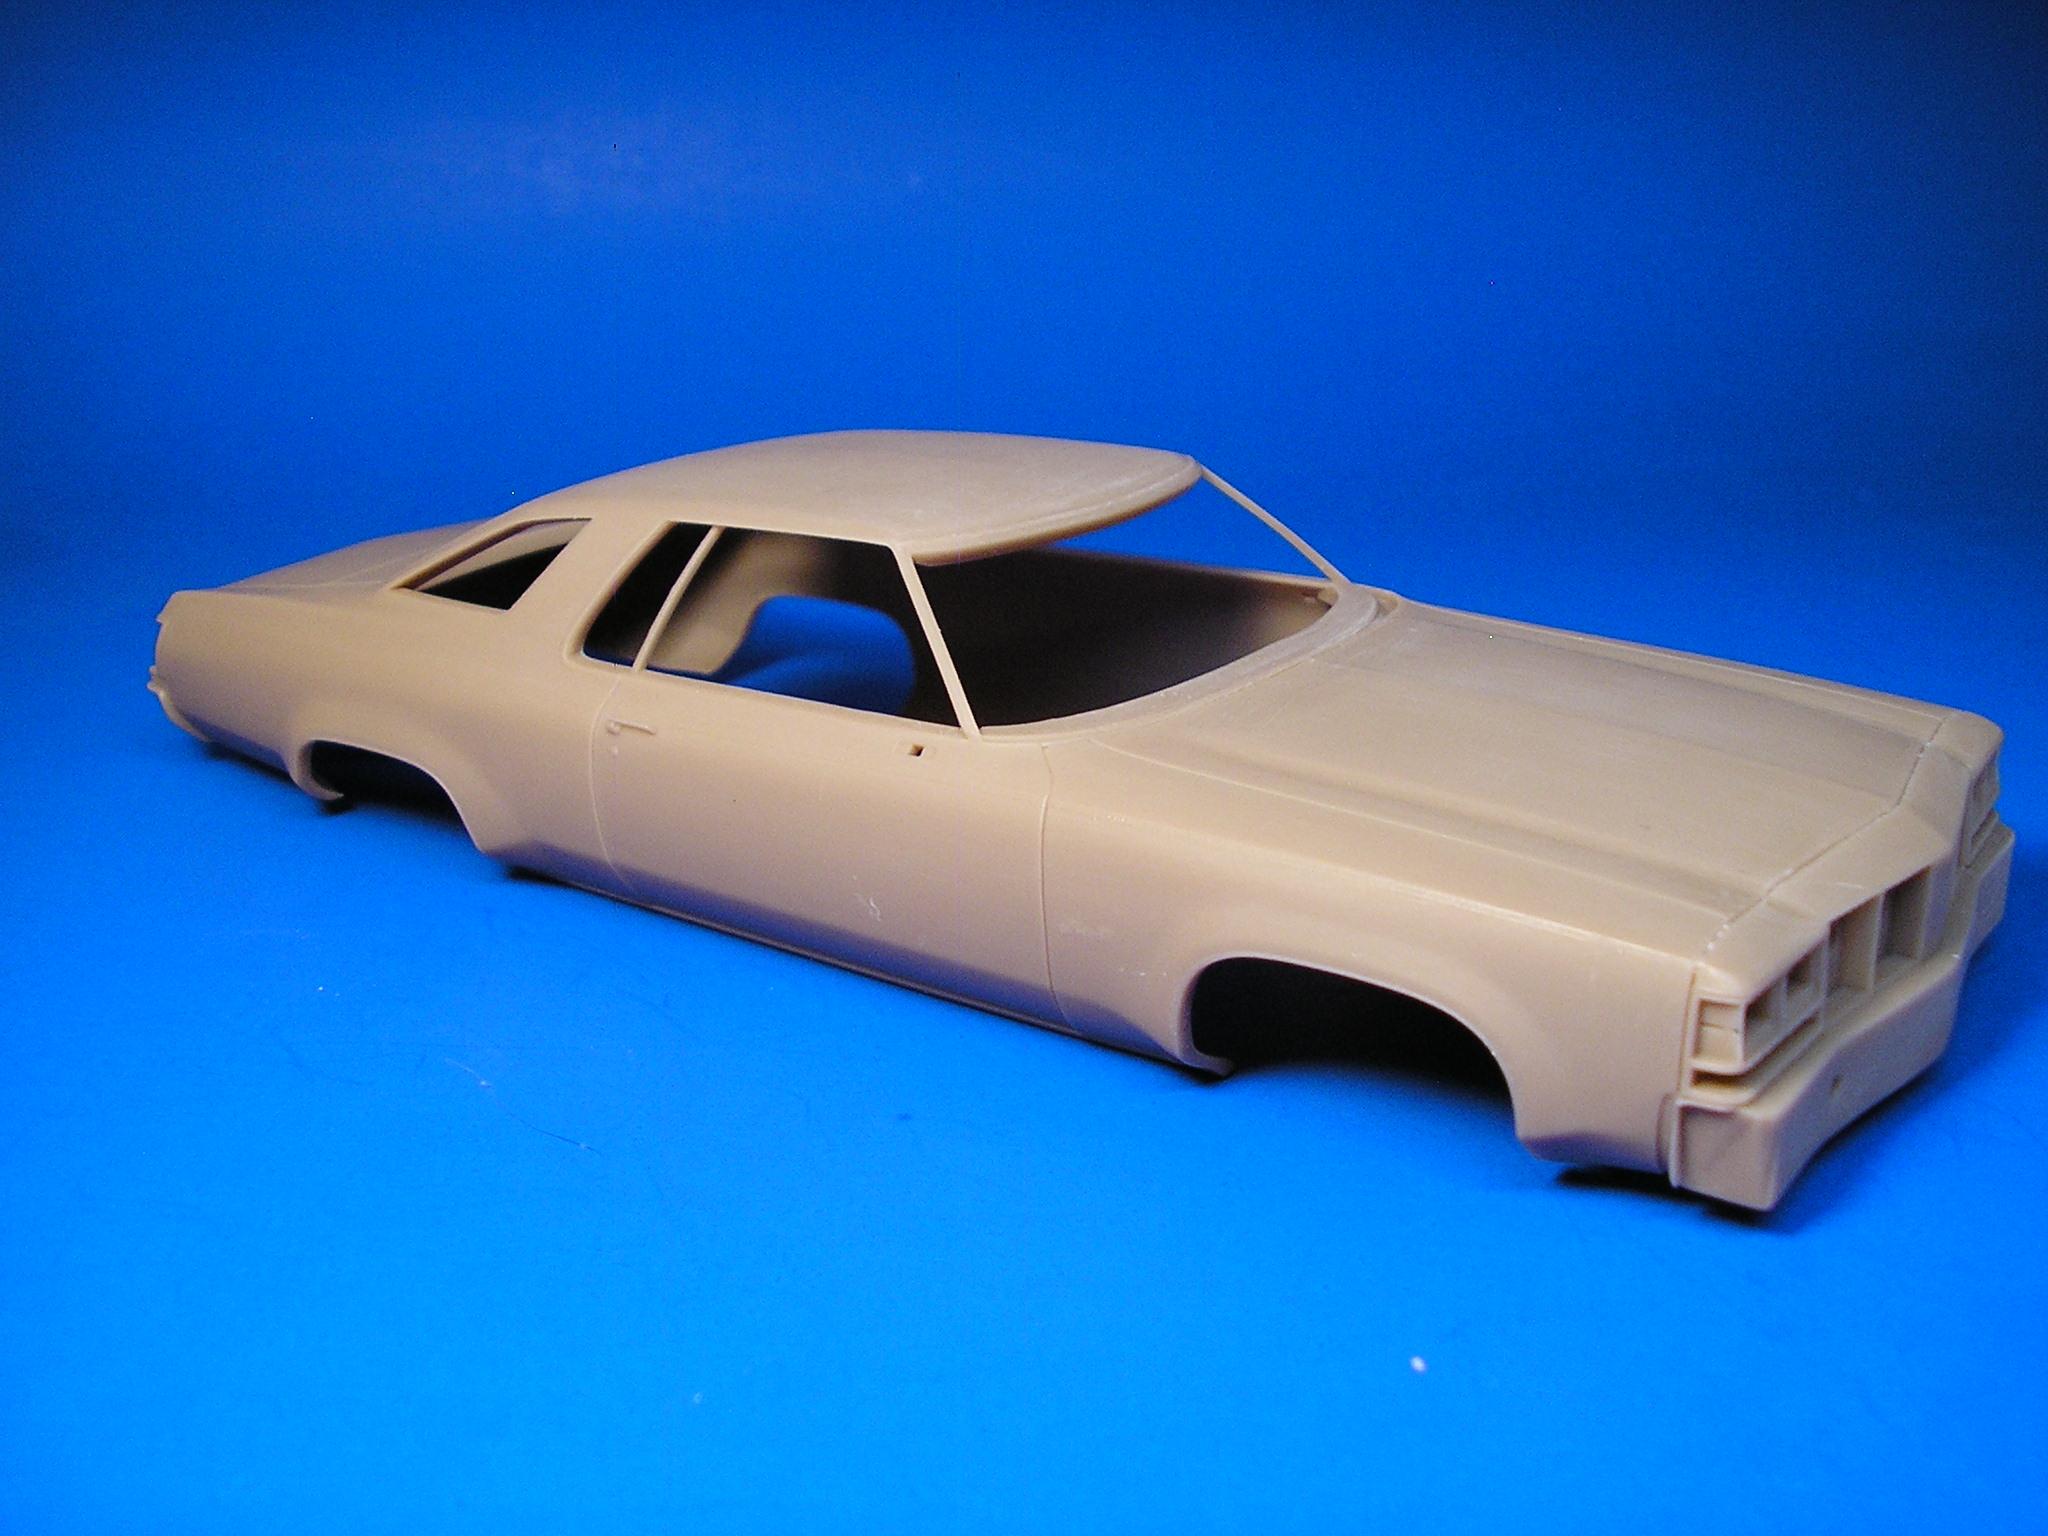
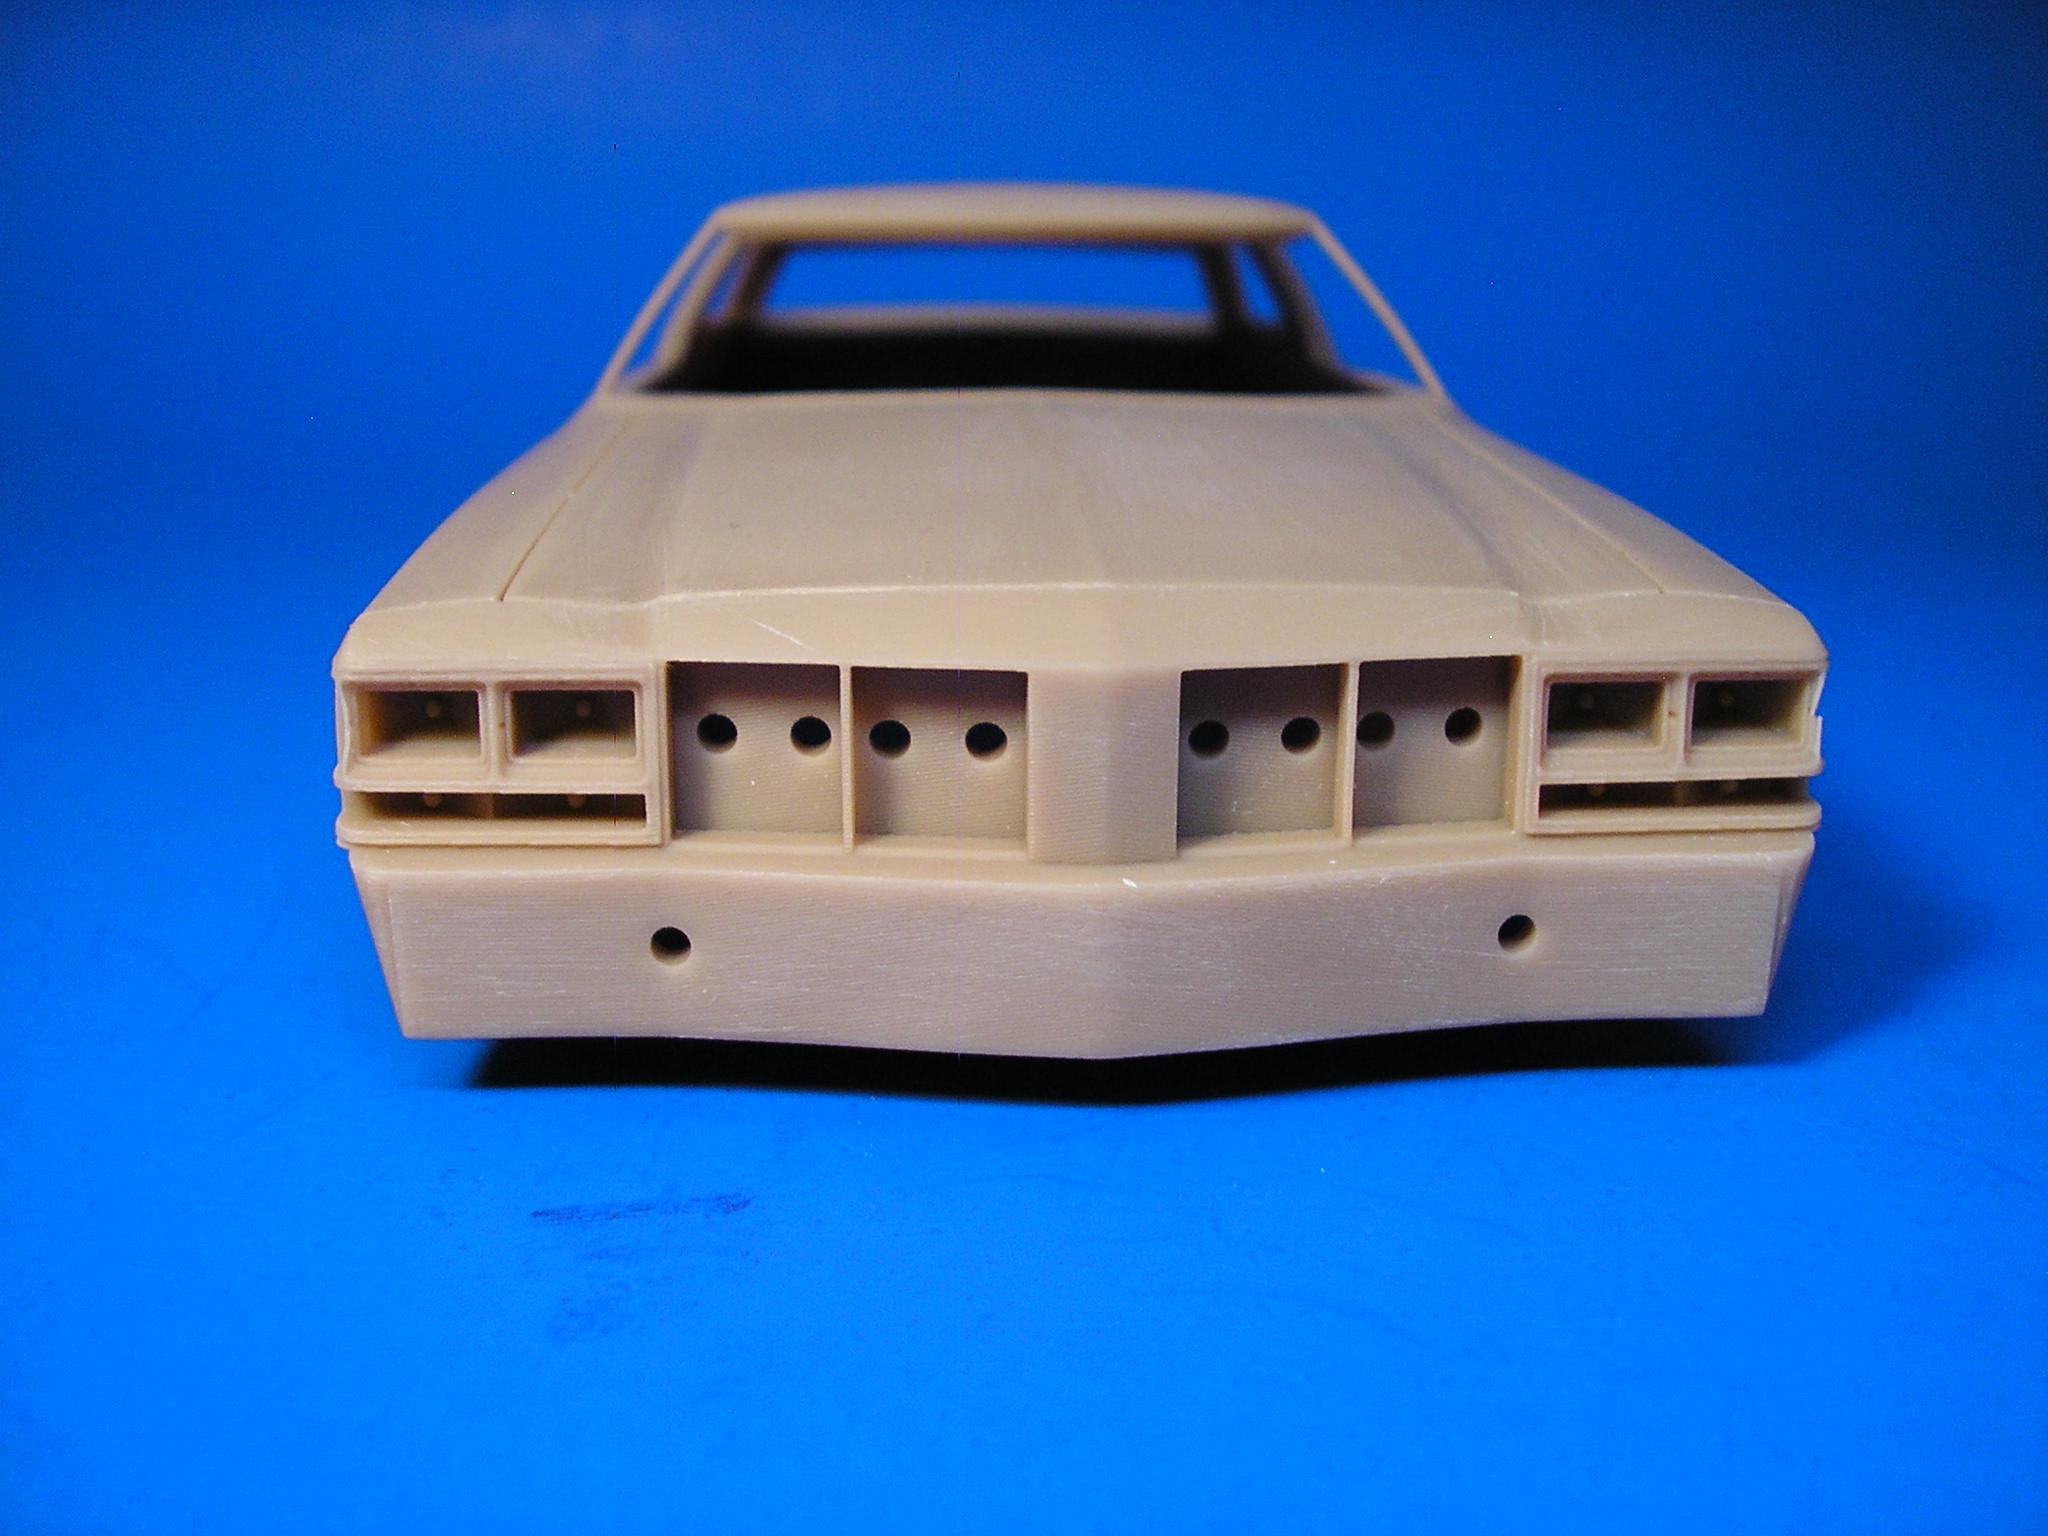
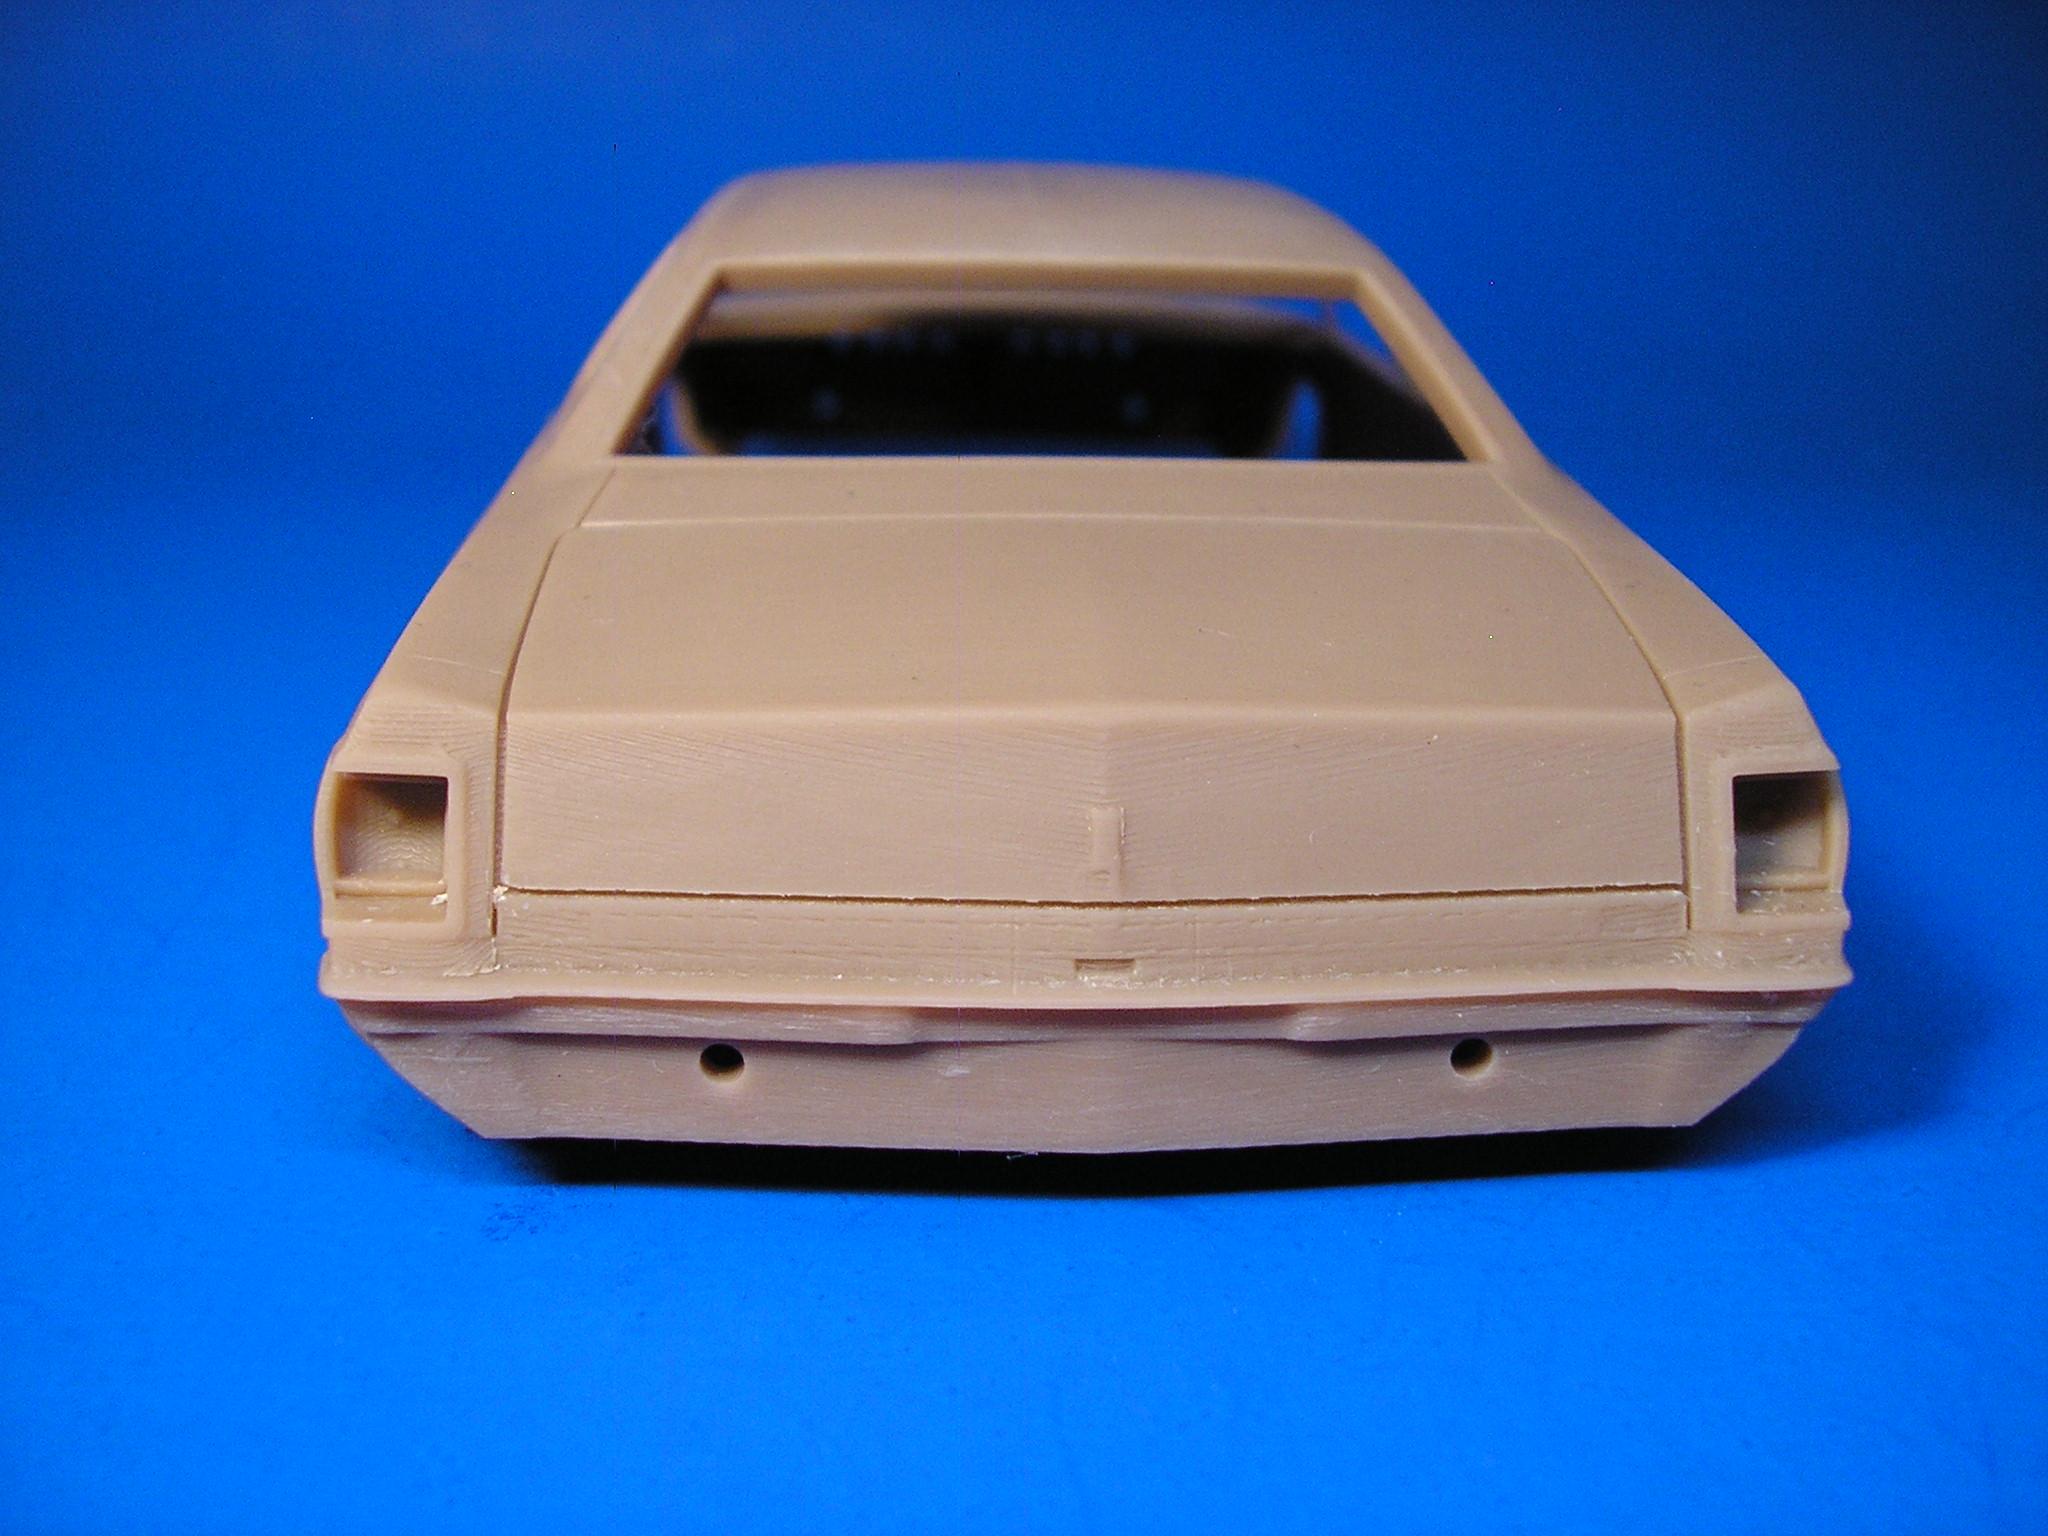
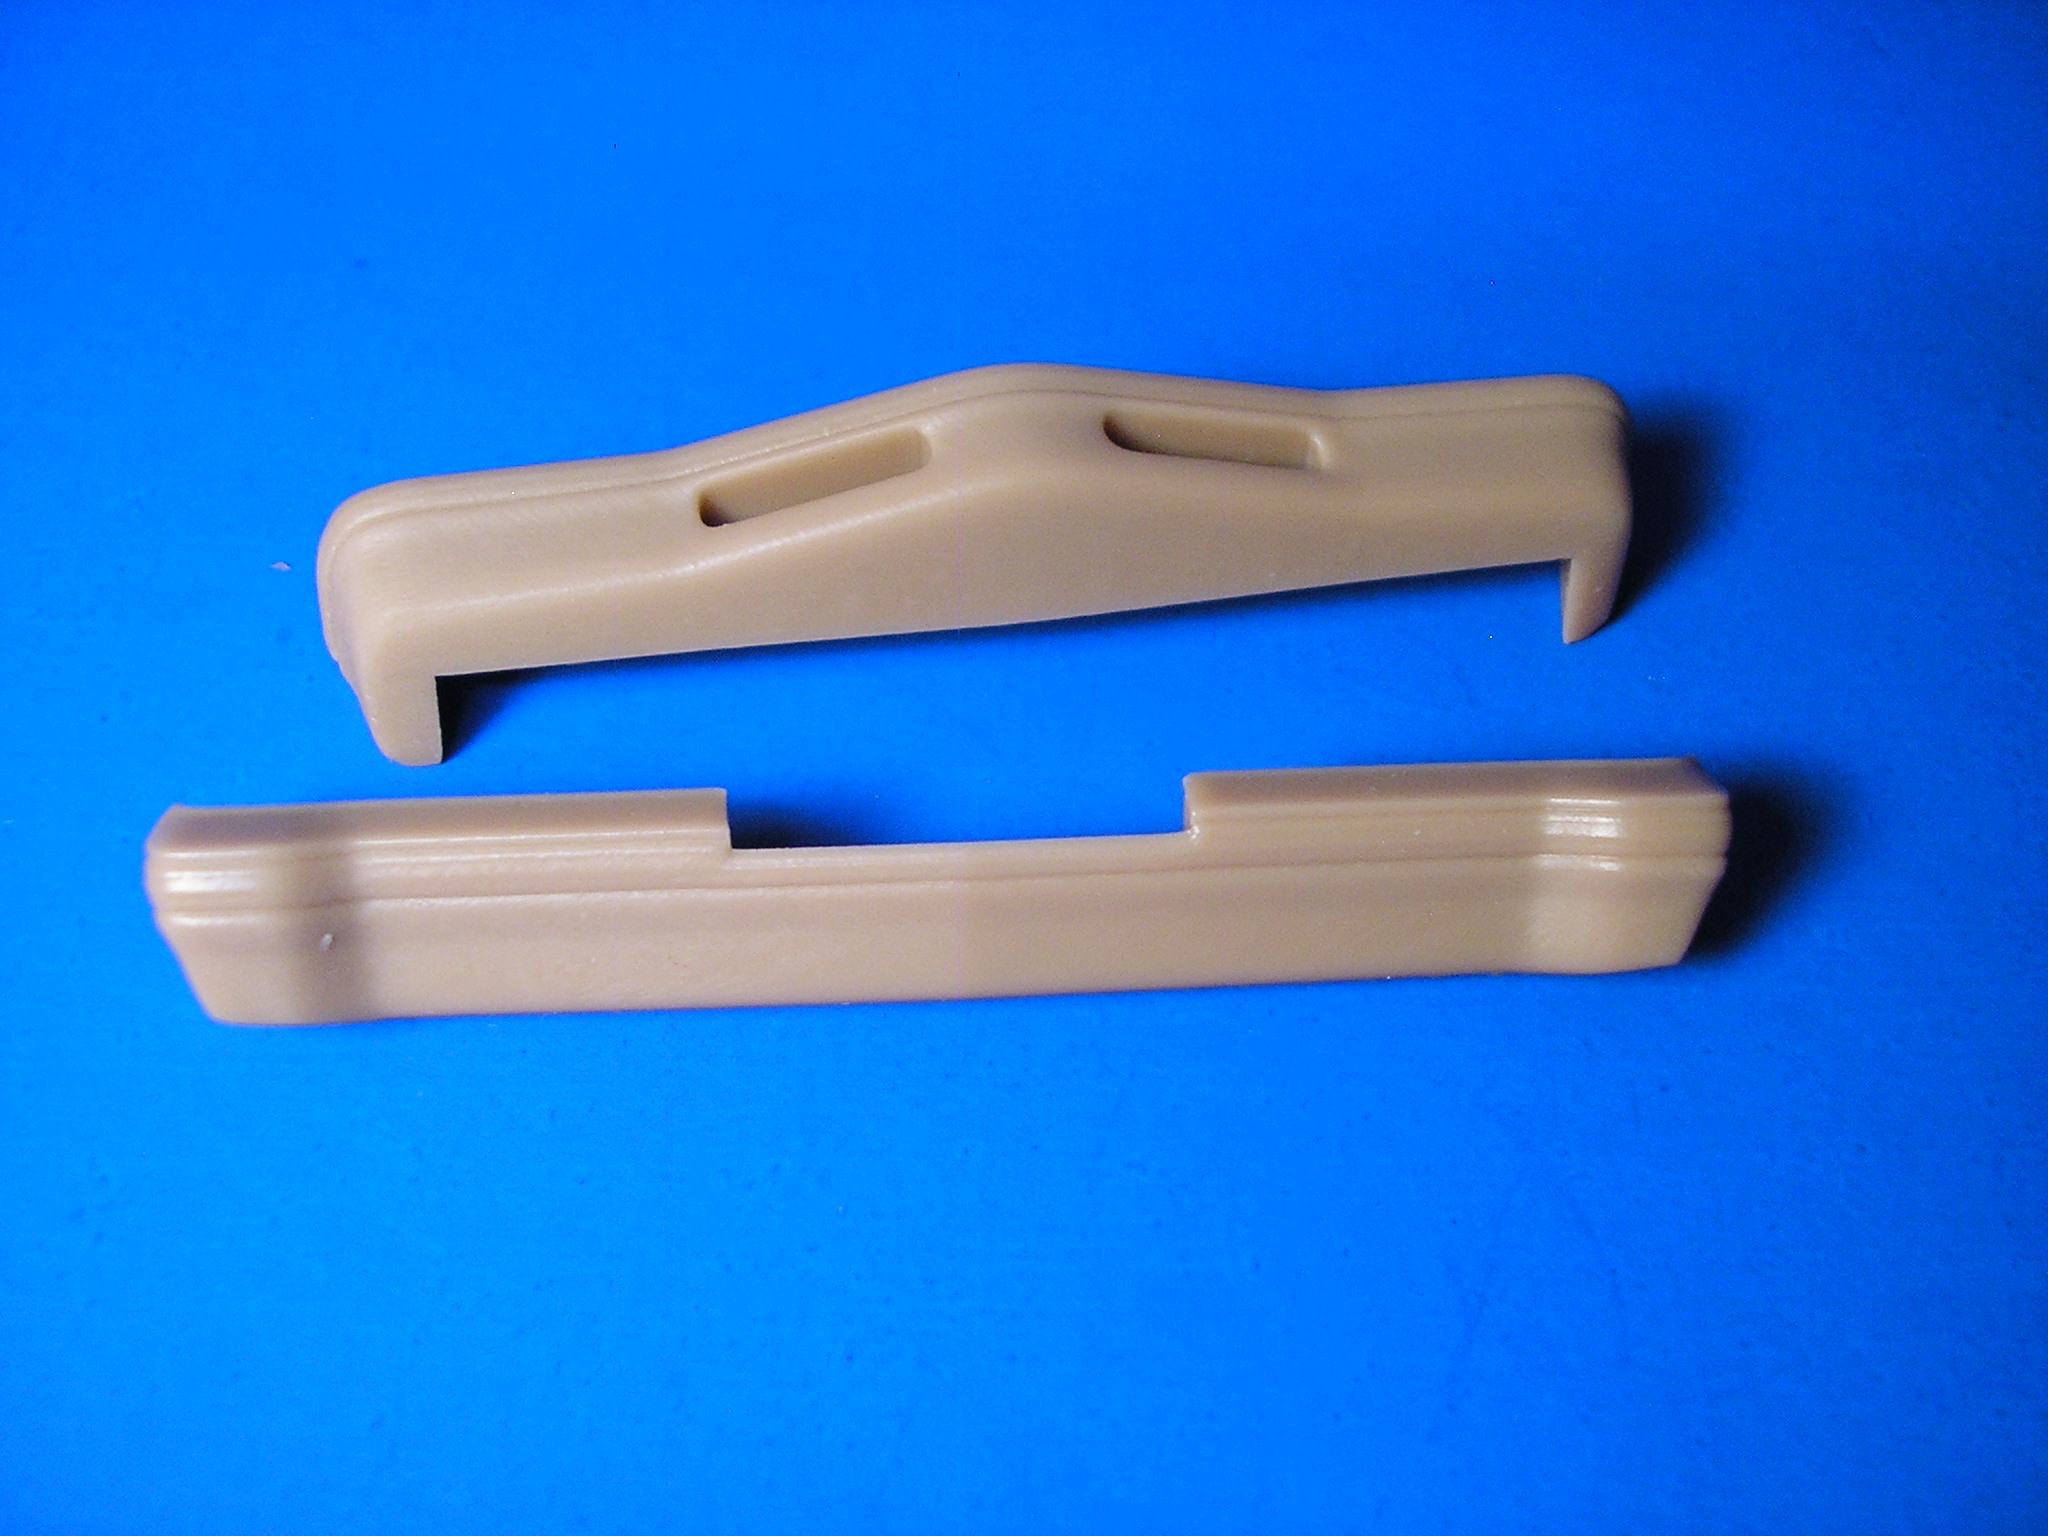
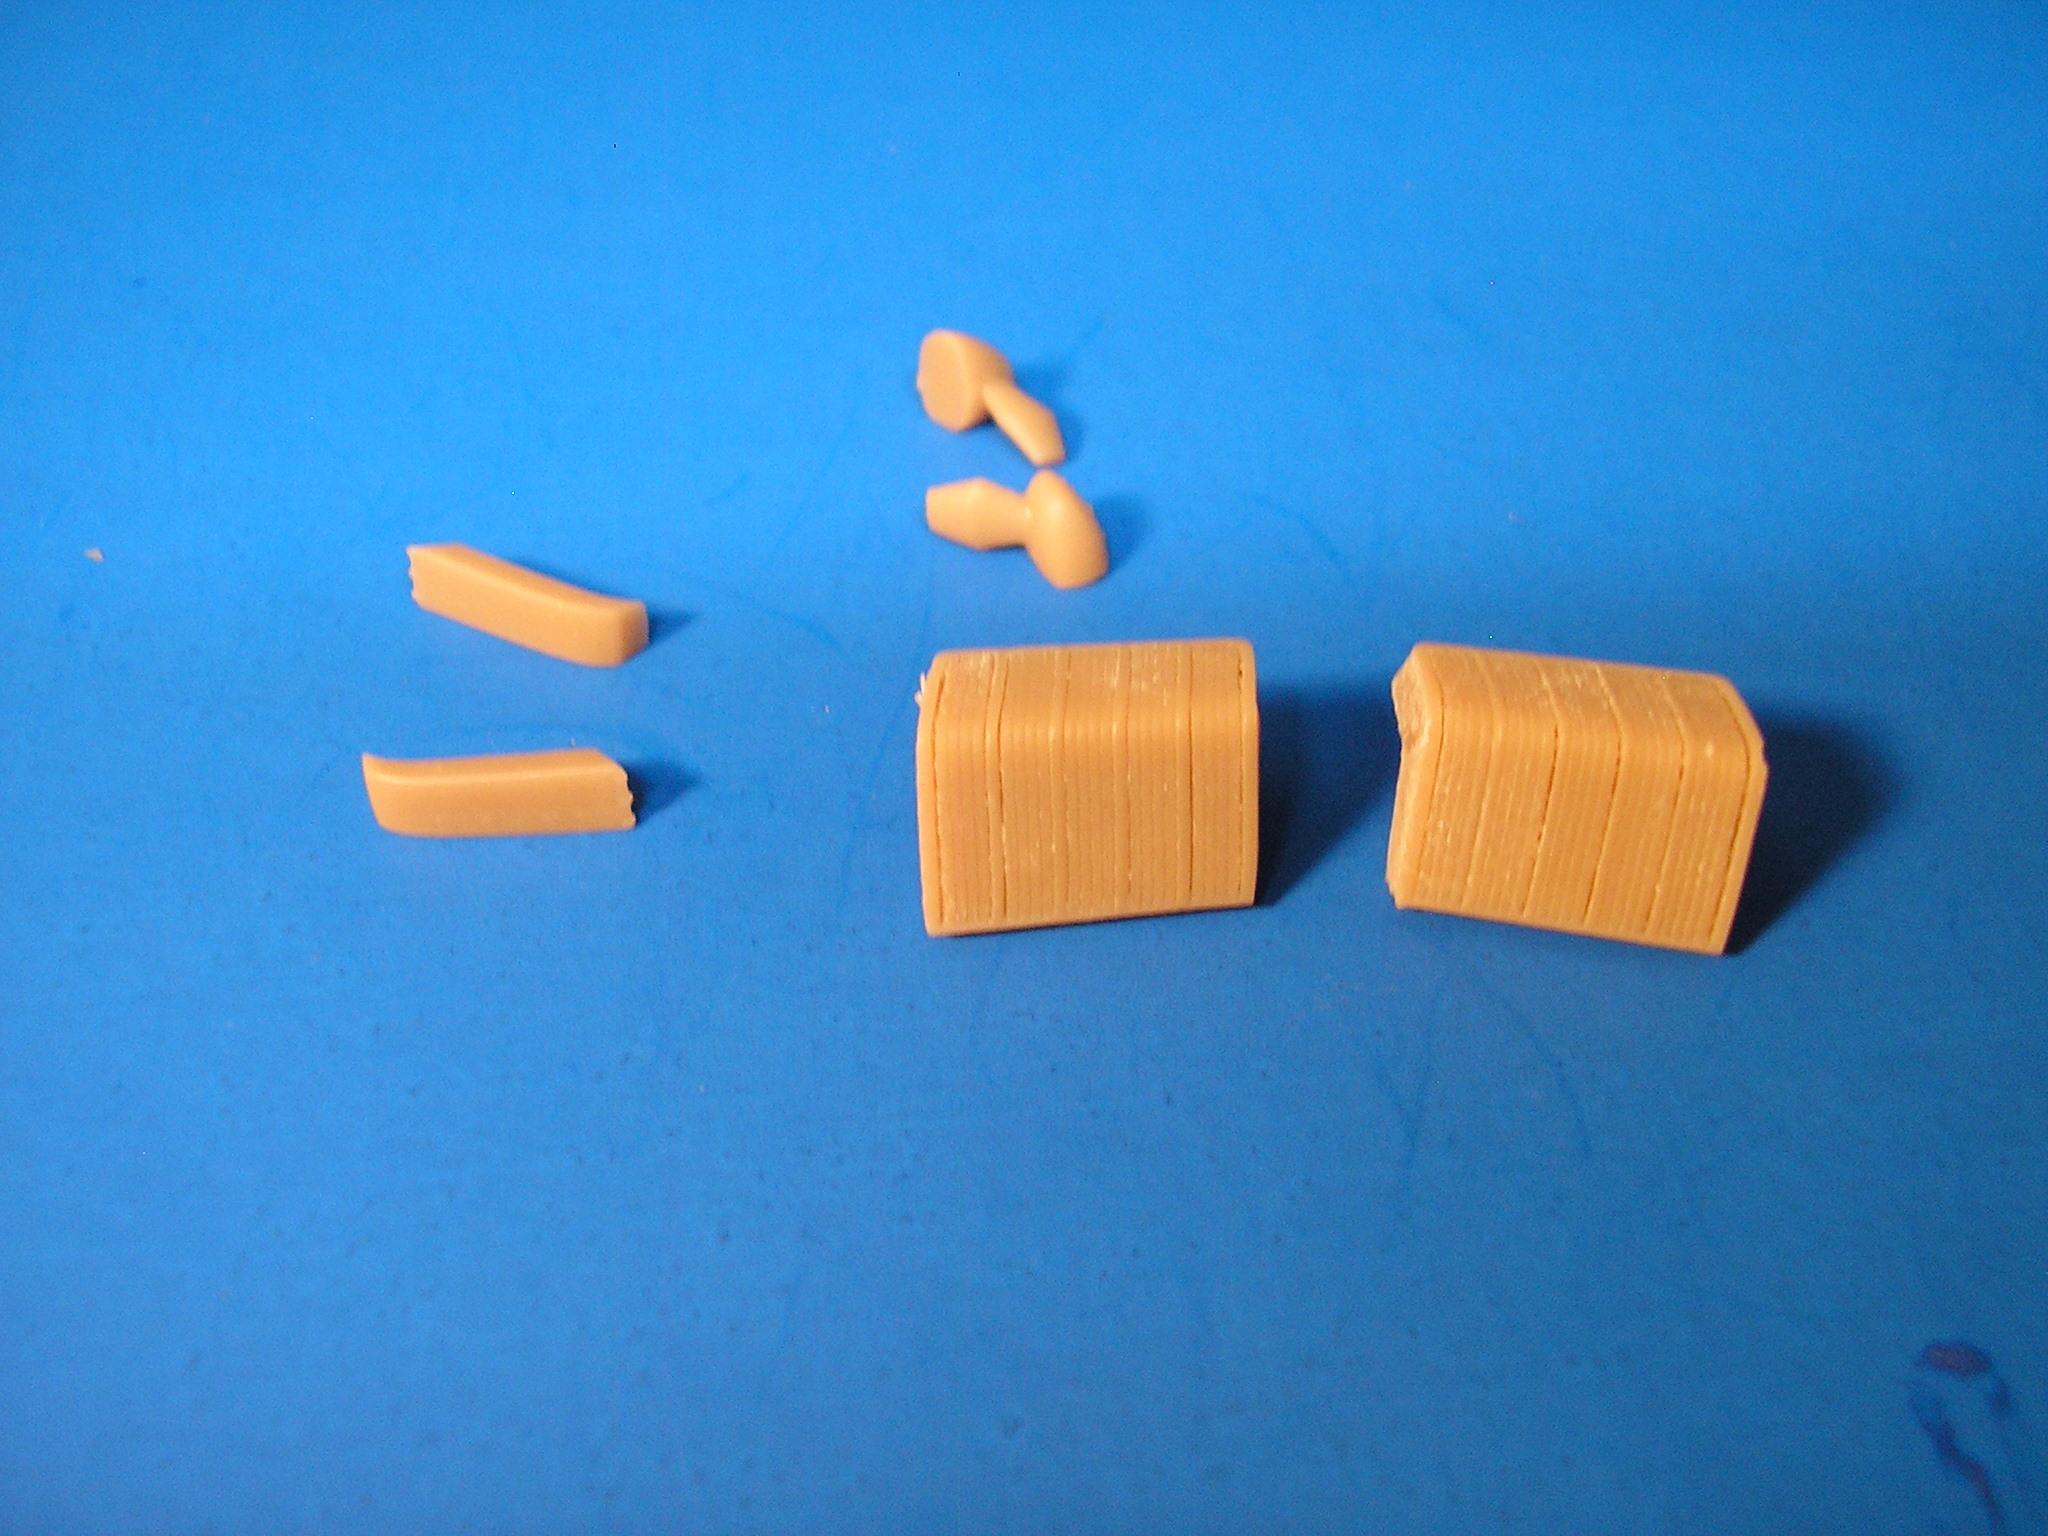
Car #3 is one of those cars you just don't see on the road any longer.....not even so much at a show. When Robert mentioned in his list that he was going to 3D print and cast this one, BOOM!.....I jumped at the chance! It's a 1976 Olds Delta 88, and it would be the last year for the traditional "land yachts" from GM. '77 would start the whole downsizing craze and things just wouldn't be the same after that. Once again, this is an absolutely excellent casting, with nary a proportion out of place! I'd go for the half vinyl roof option once again on this (it's soooooo "1970's"), and I'd half to source out some sort of chassis, interior, and engine to make this a full detail build. Hats off to Too Many Projects......keep crankin' 'em out Robert! Here are some pics..........
-
Car #2 is a car I've liked ever since the first one hit the road. I was in Junior High School when this was new, and I always thought they had an imposing if not outright wild appearance to them. 1973 would see the last of the "Boattails" and these are bringing decent money in the 1:1 world these days. This is another excellent casting by Robert Burns. Looking at the side profile of the car, it has the correct curvature of the roof which is a bit lacking in other versions I've seen of this car in scale. The body is modeled with a whole vinyl roof, but I'd build mine with the half vinyl top option as it looks better to me. I have all the bits and pieces to build this one with full chassis, engine detail and all, it would be a matter of putting in the correct seat patterns for a '73, and of course, adding the trim for the half vinyl top. Here are some pics...............
-
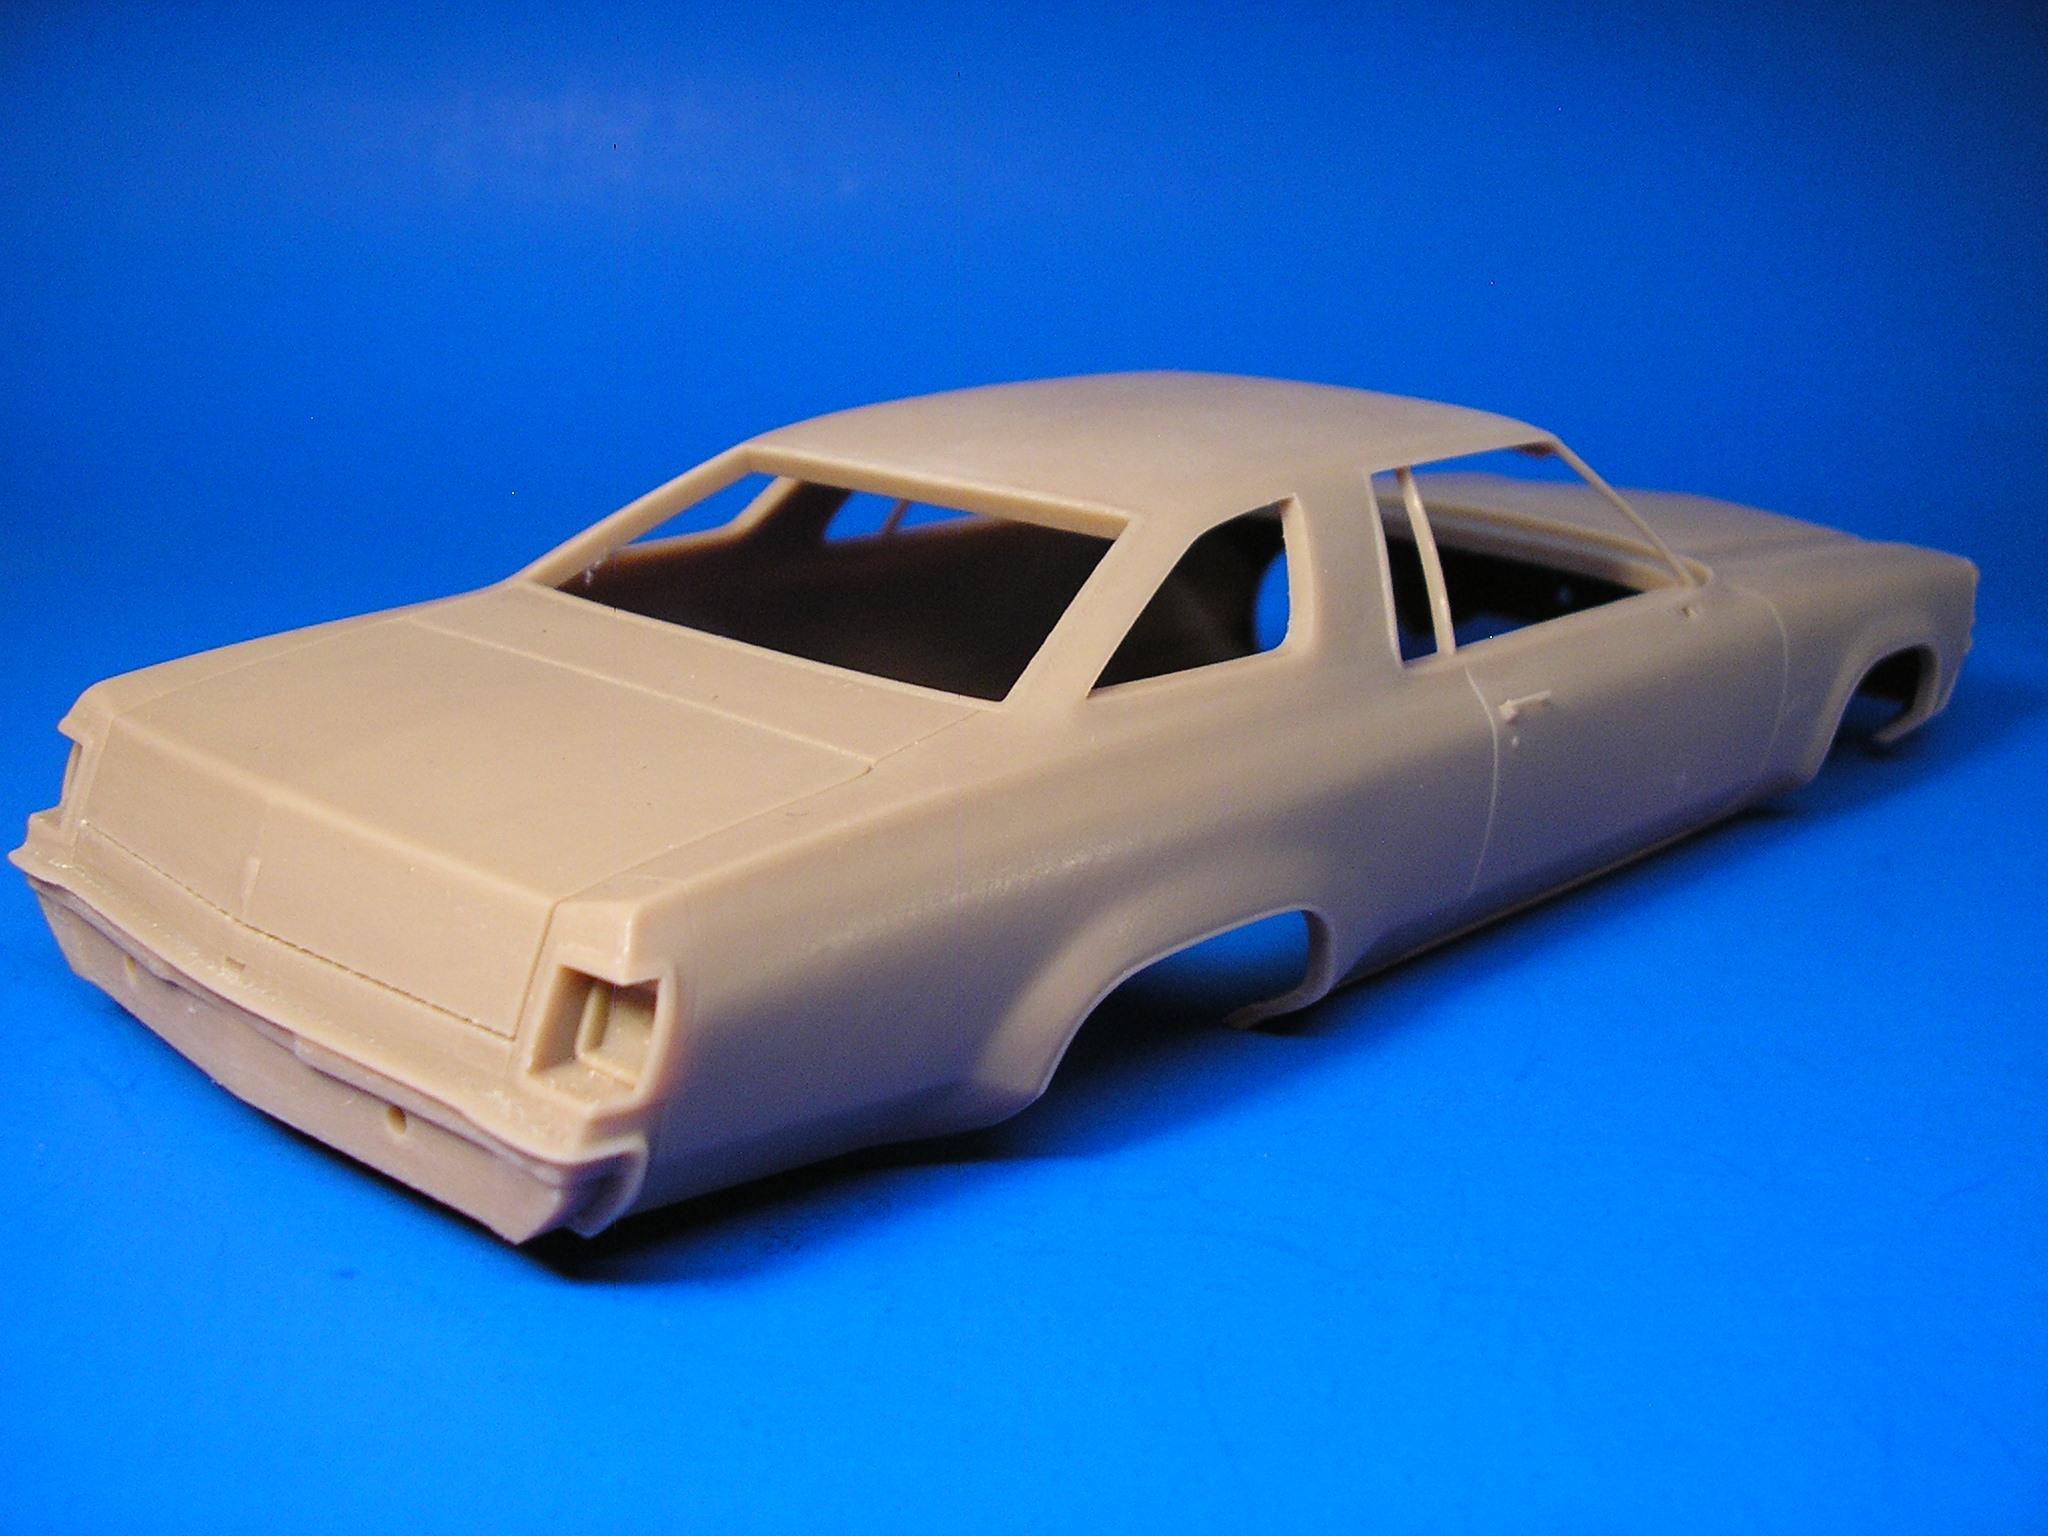
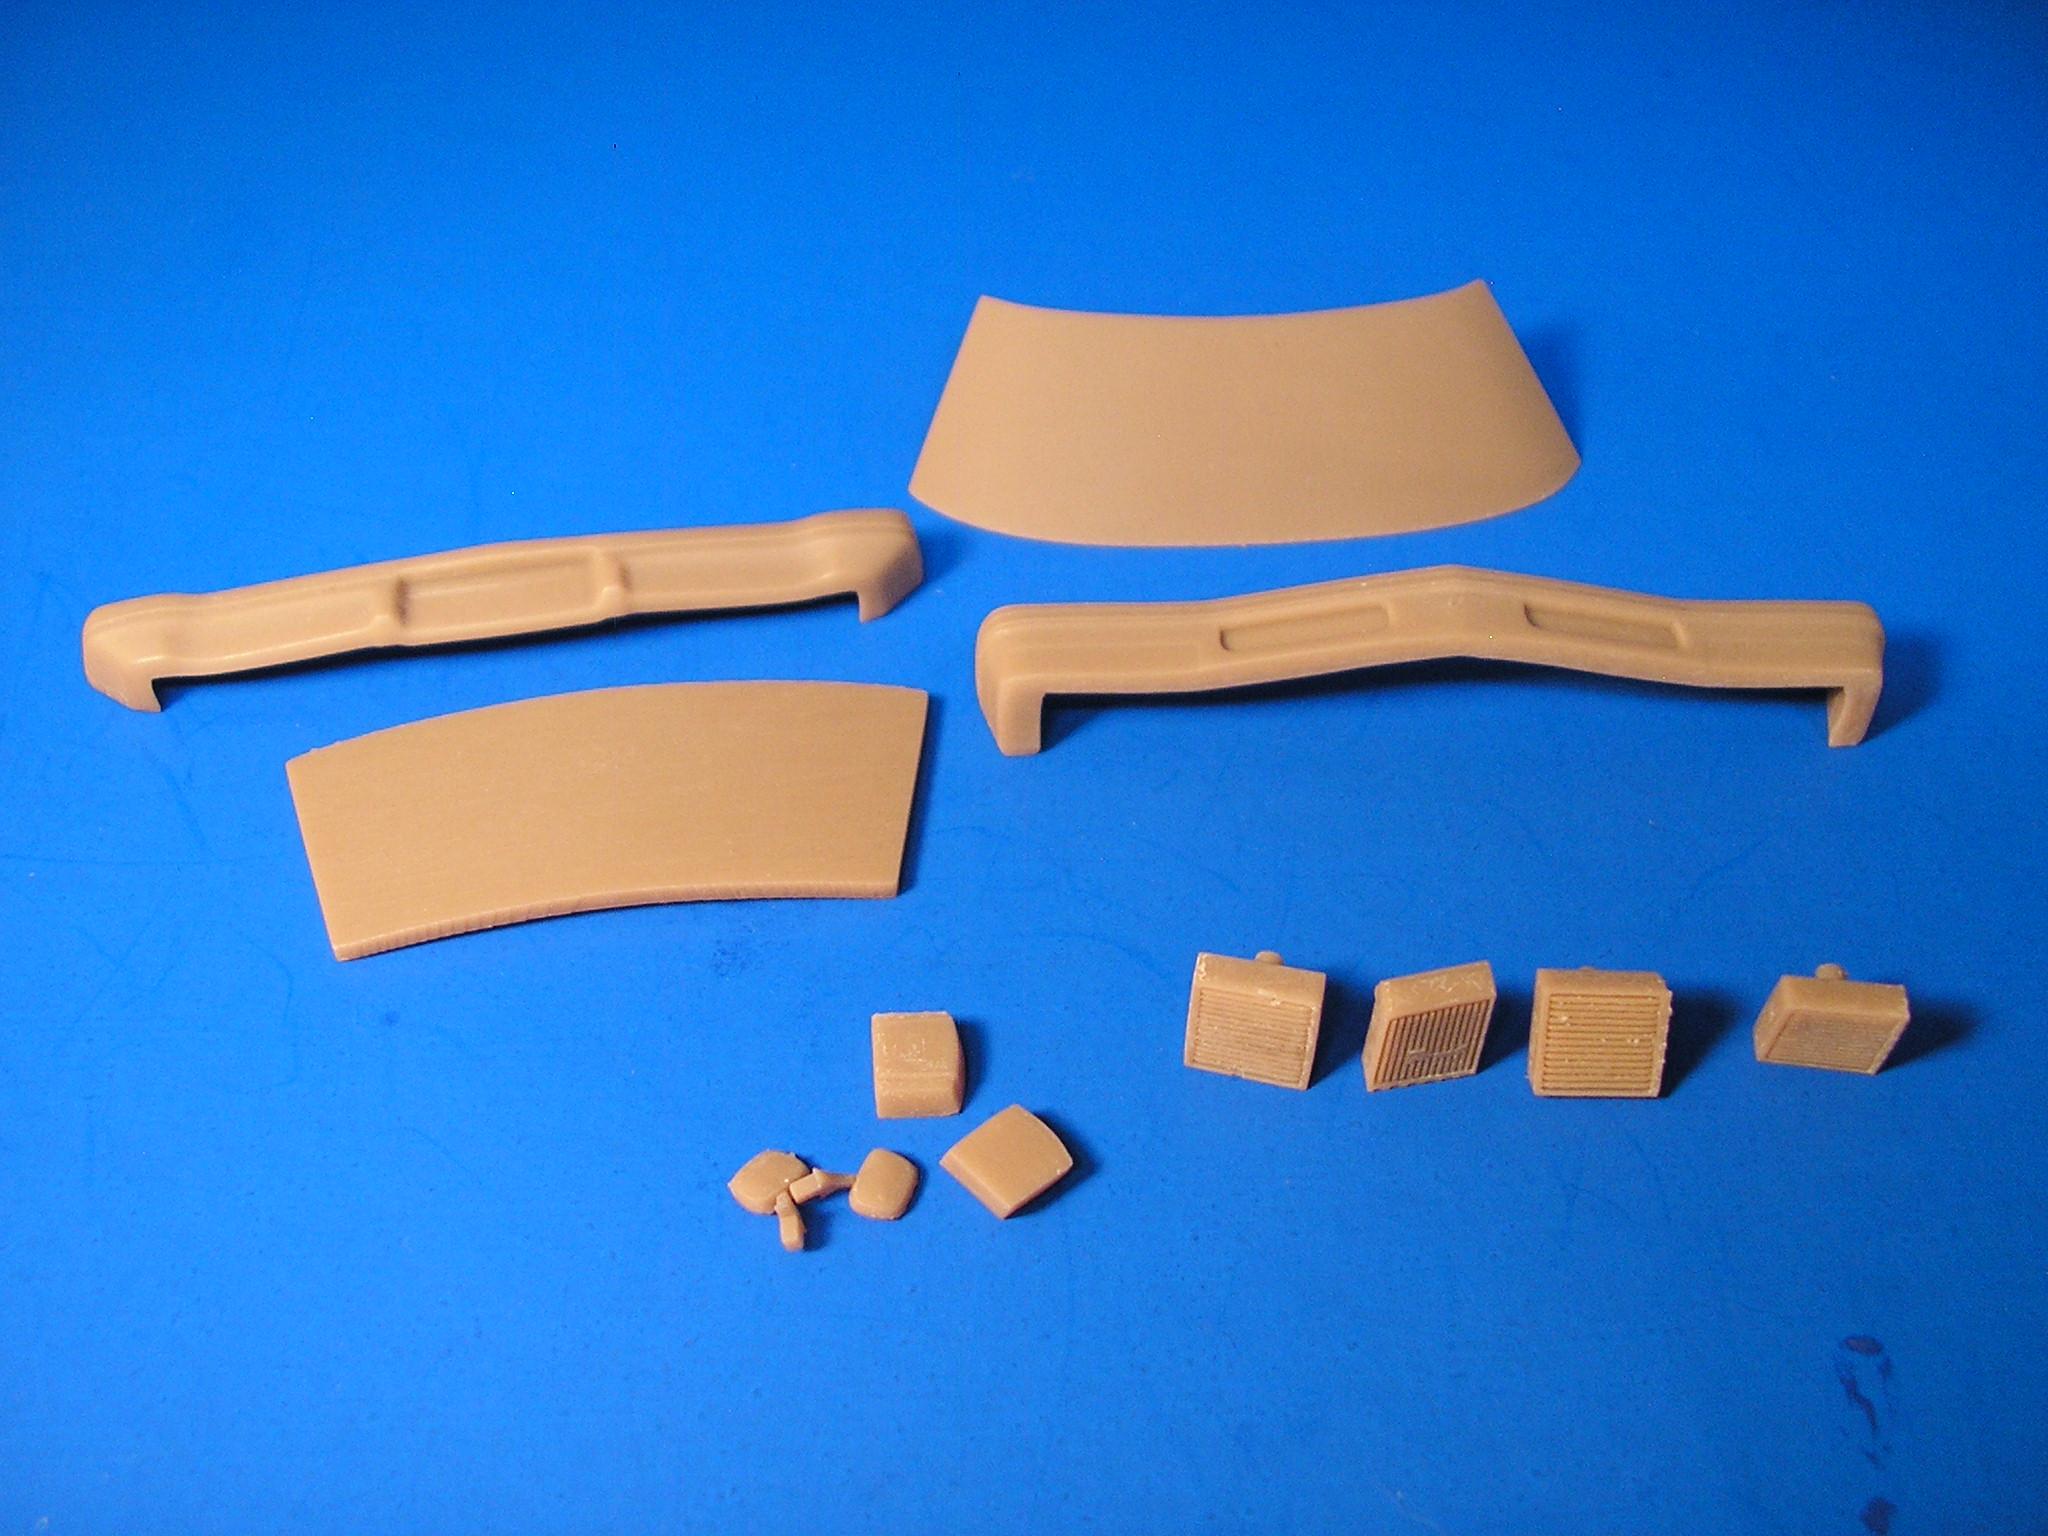
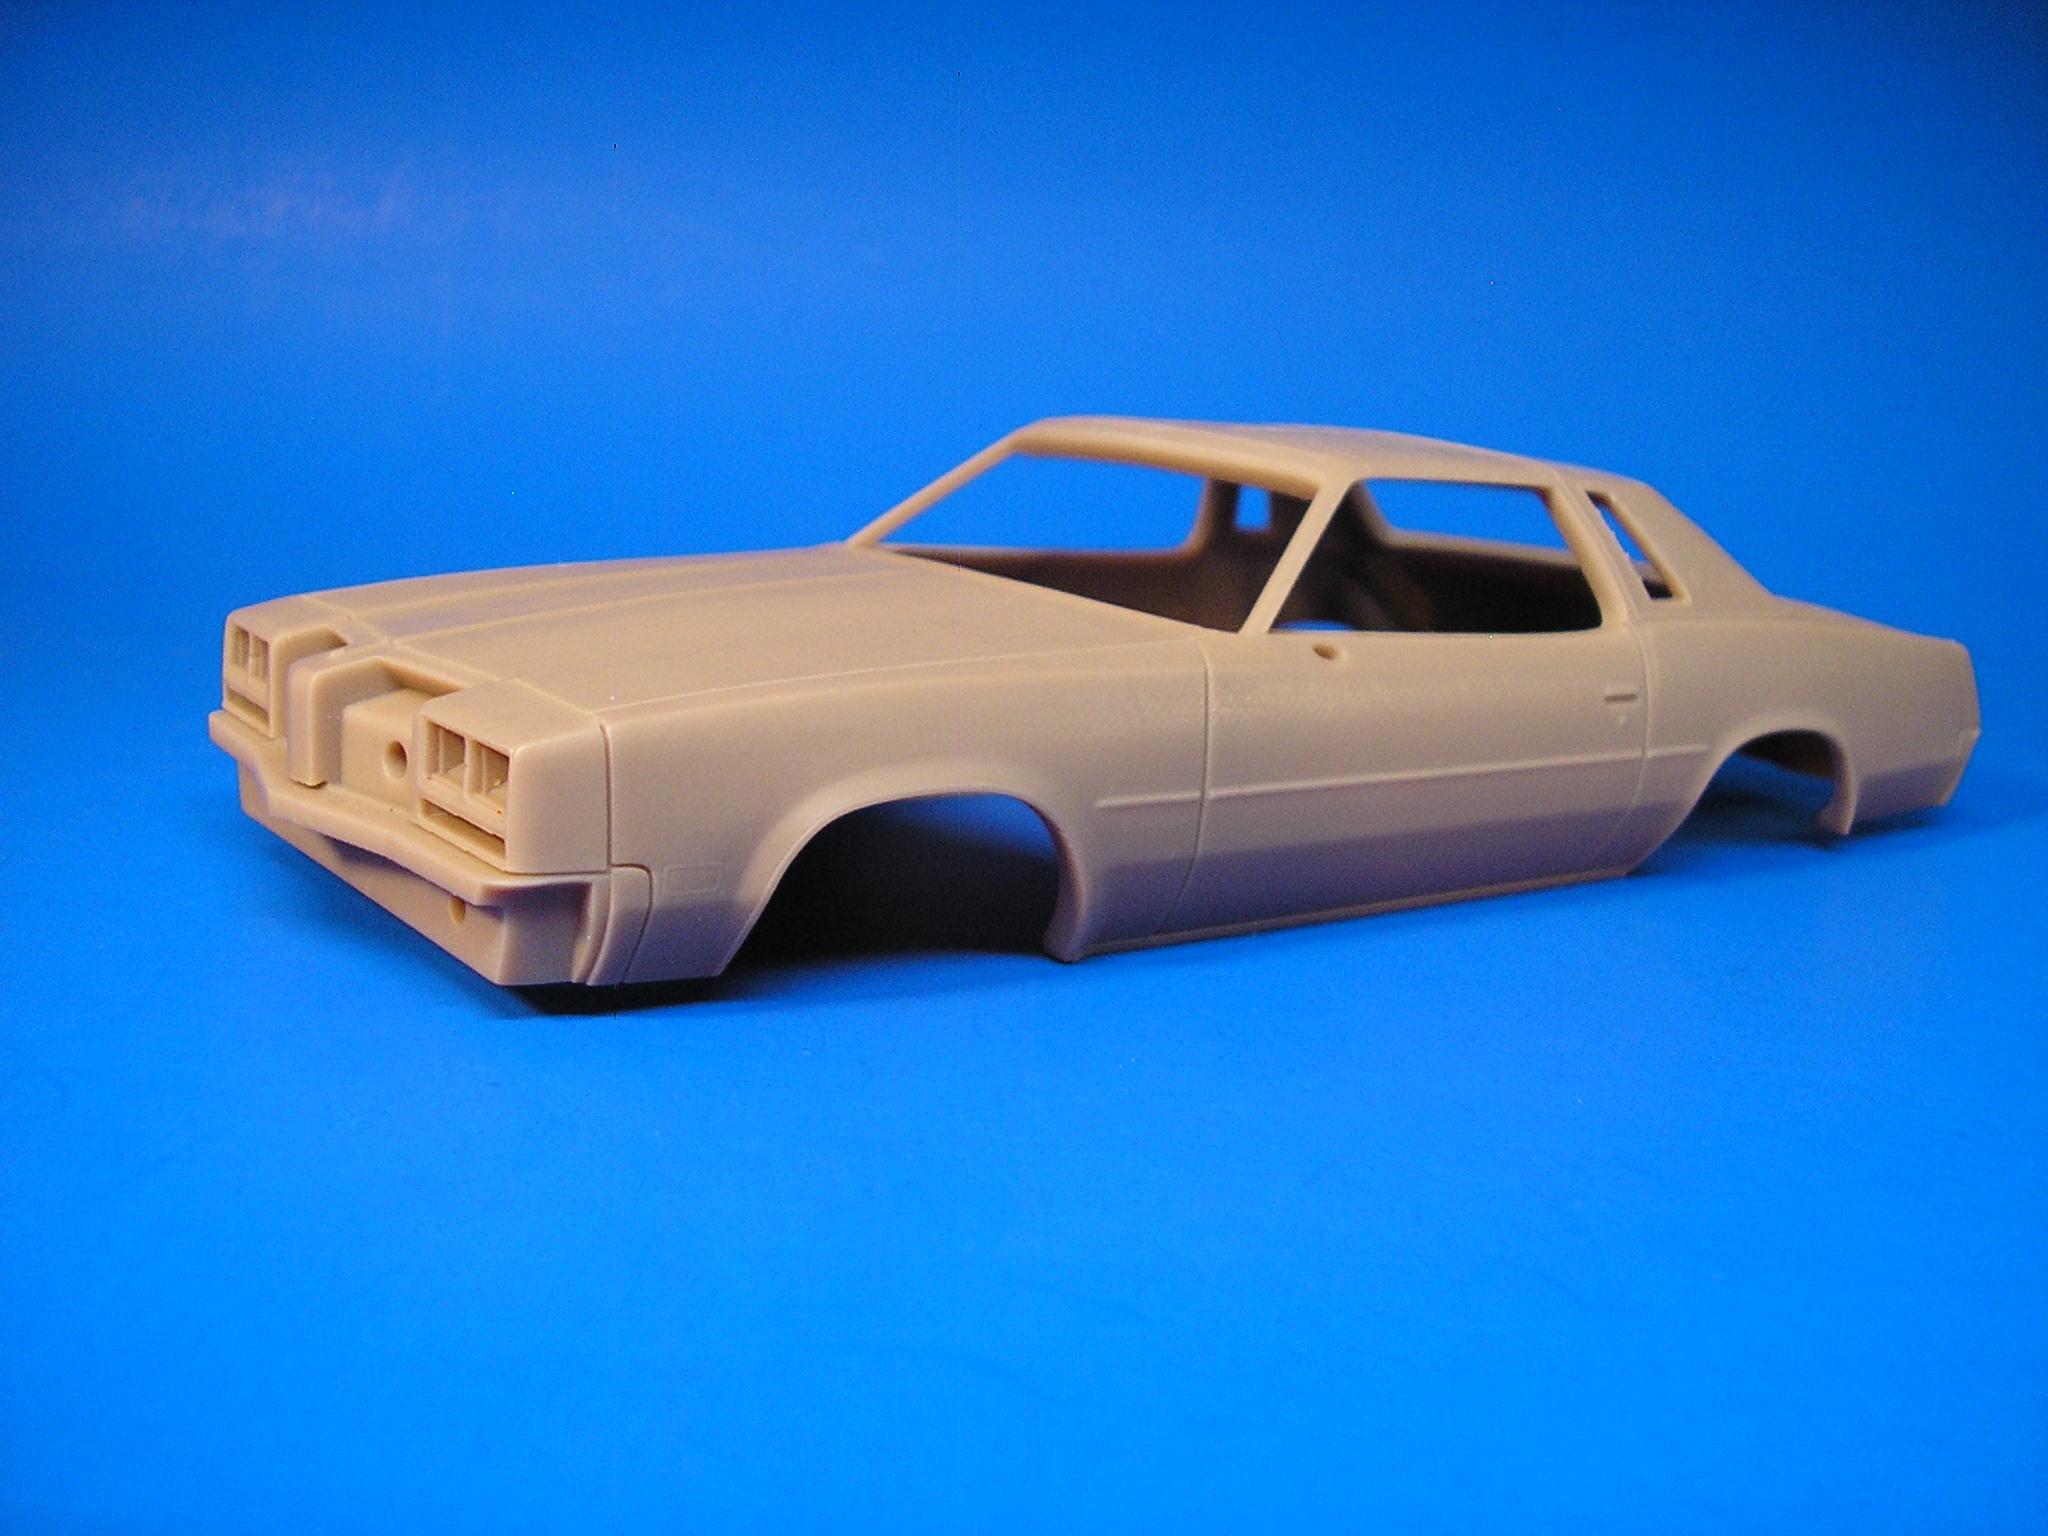
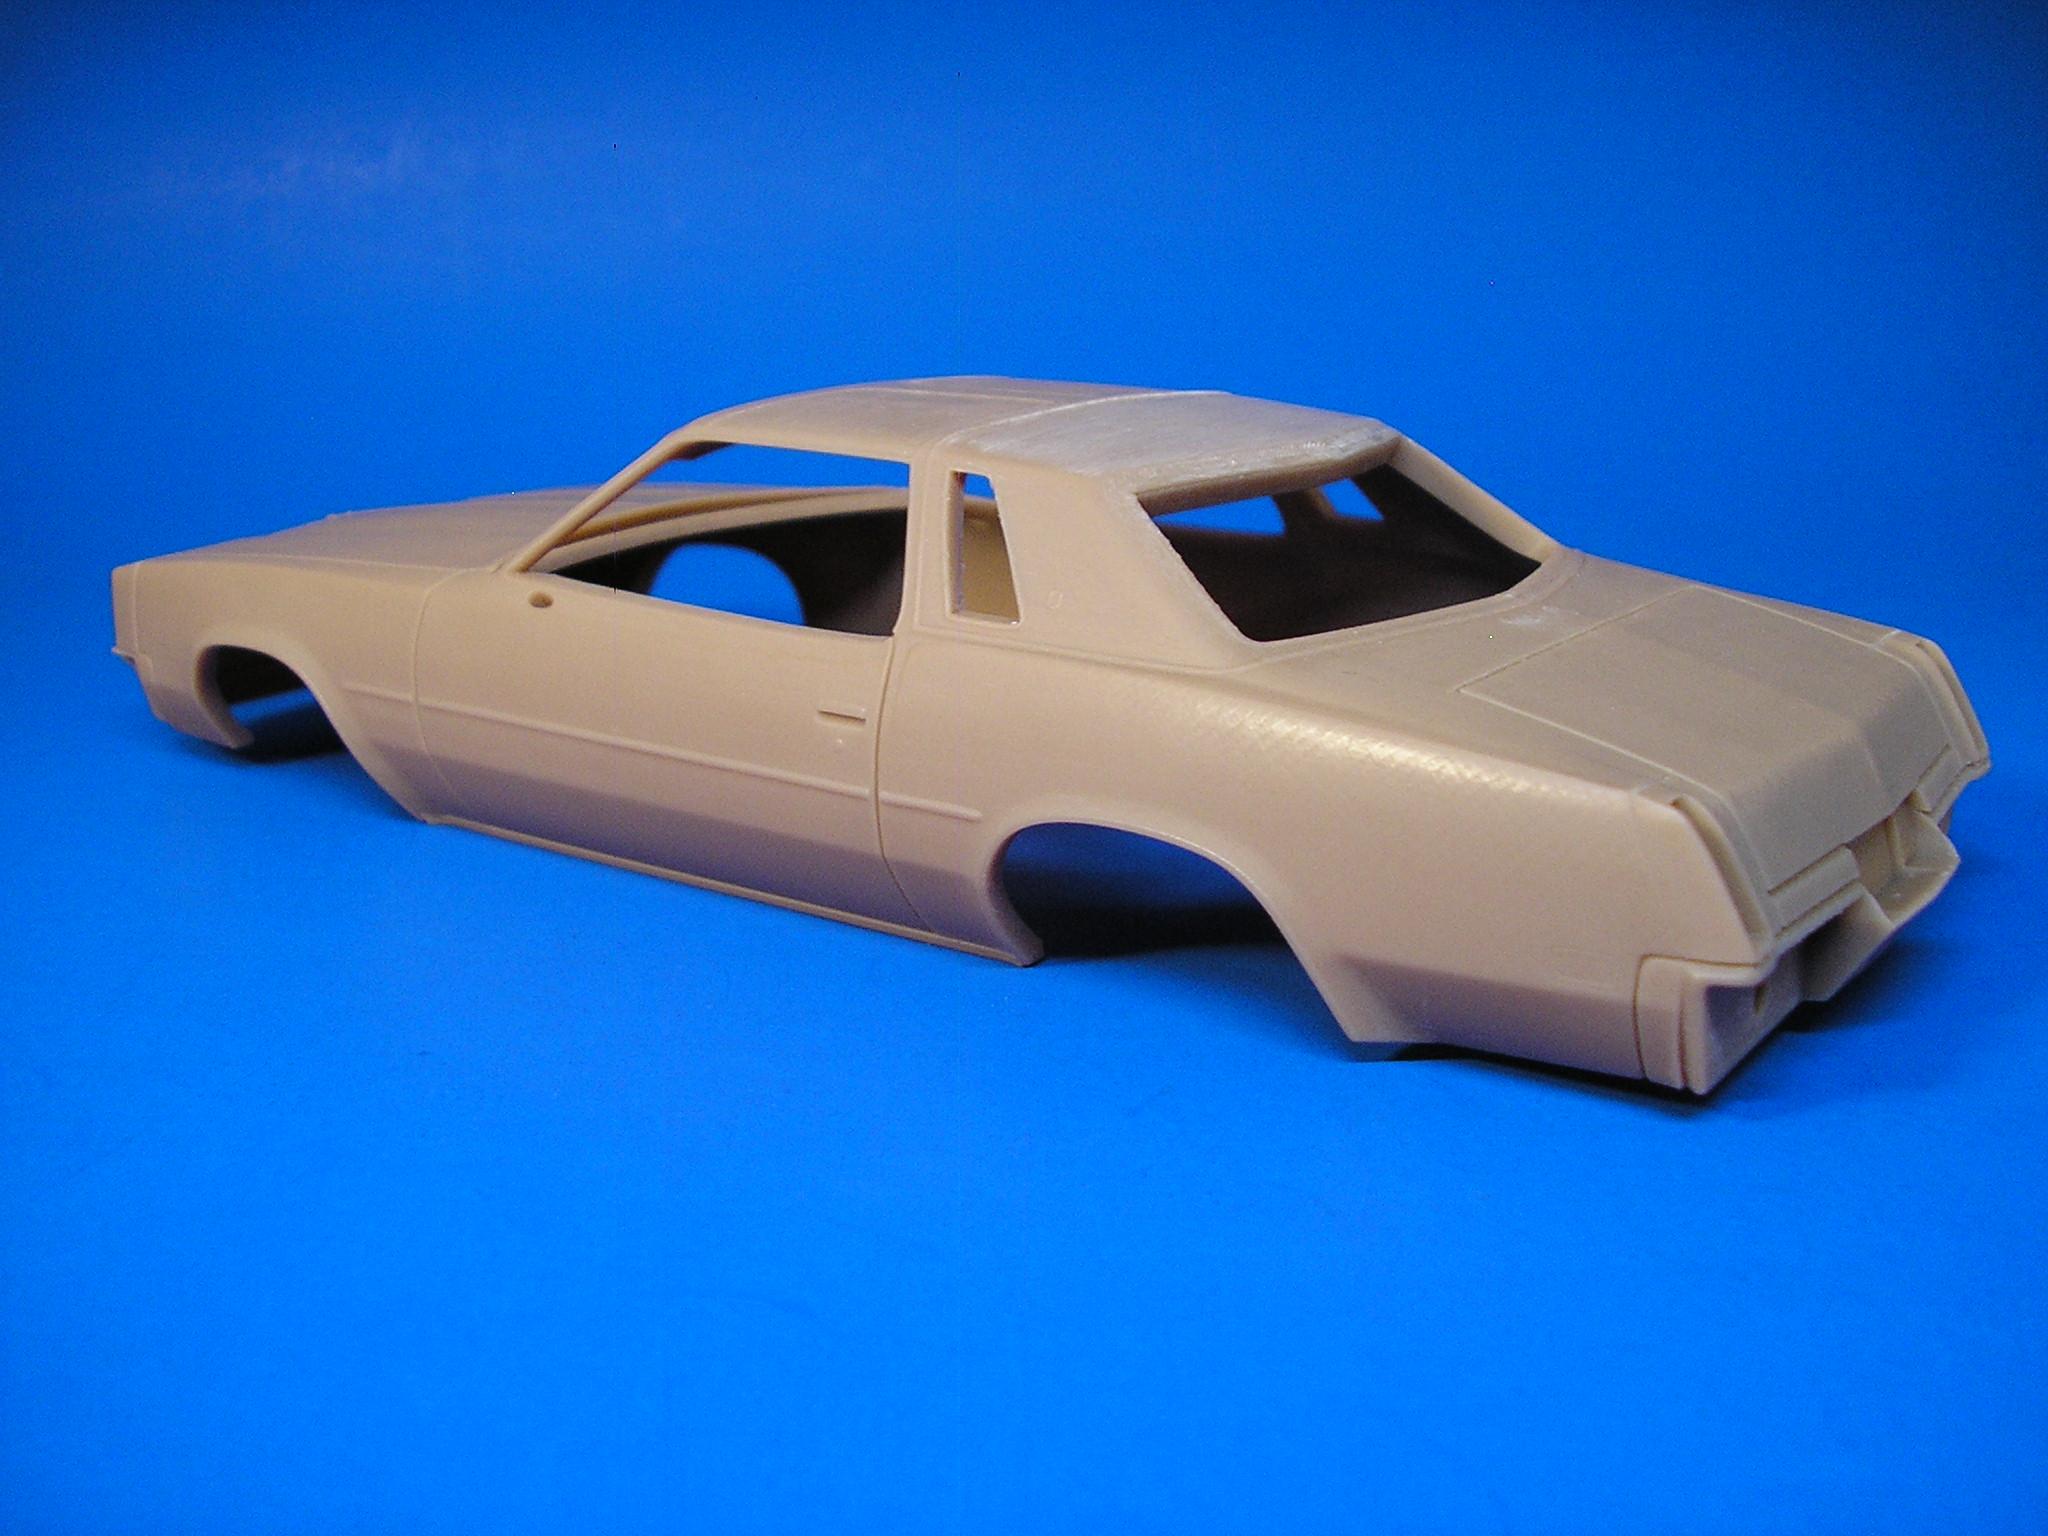
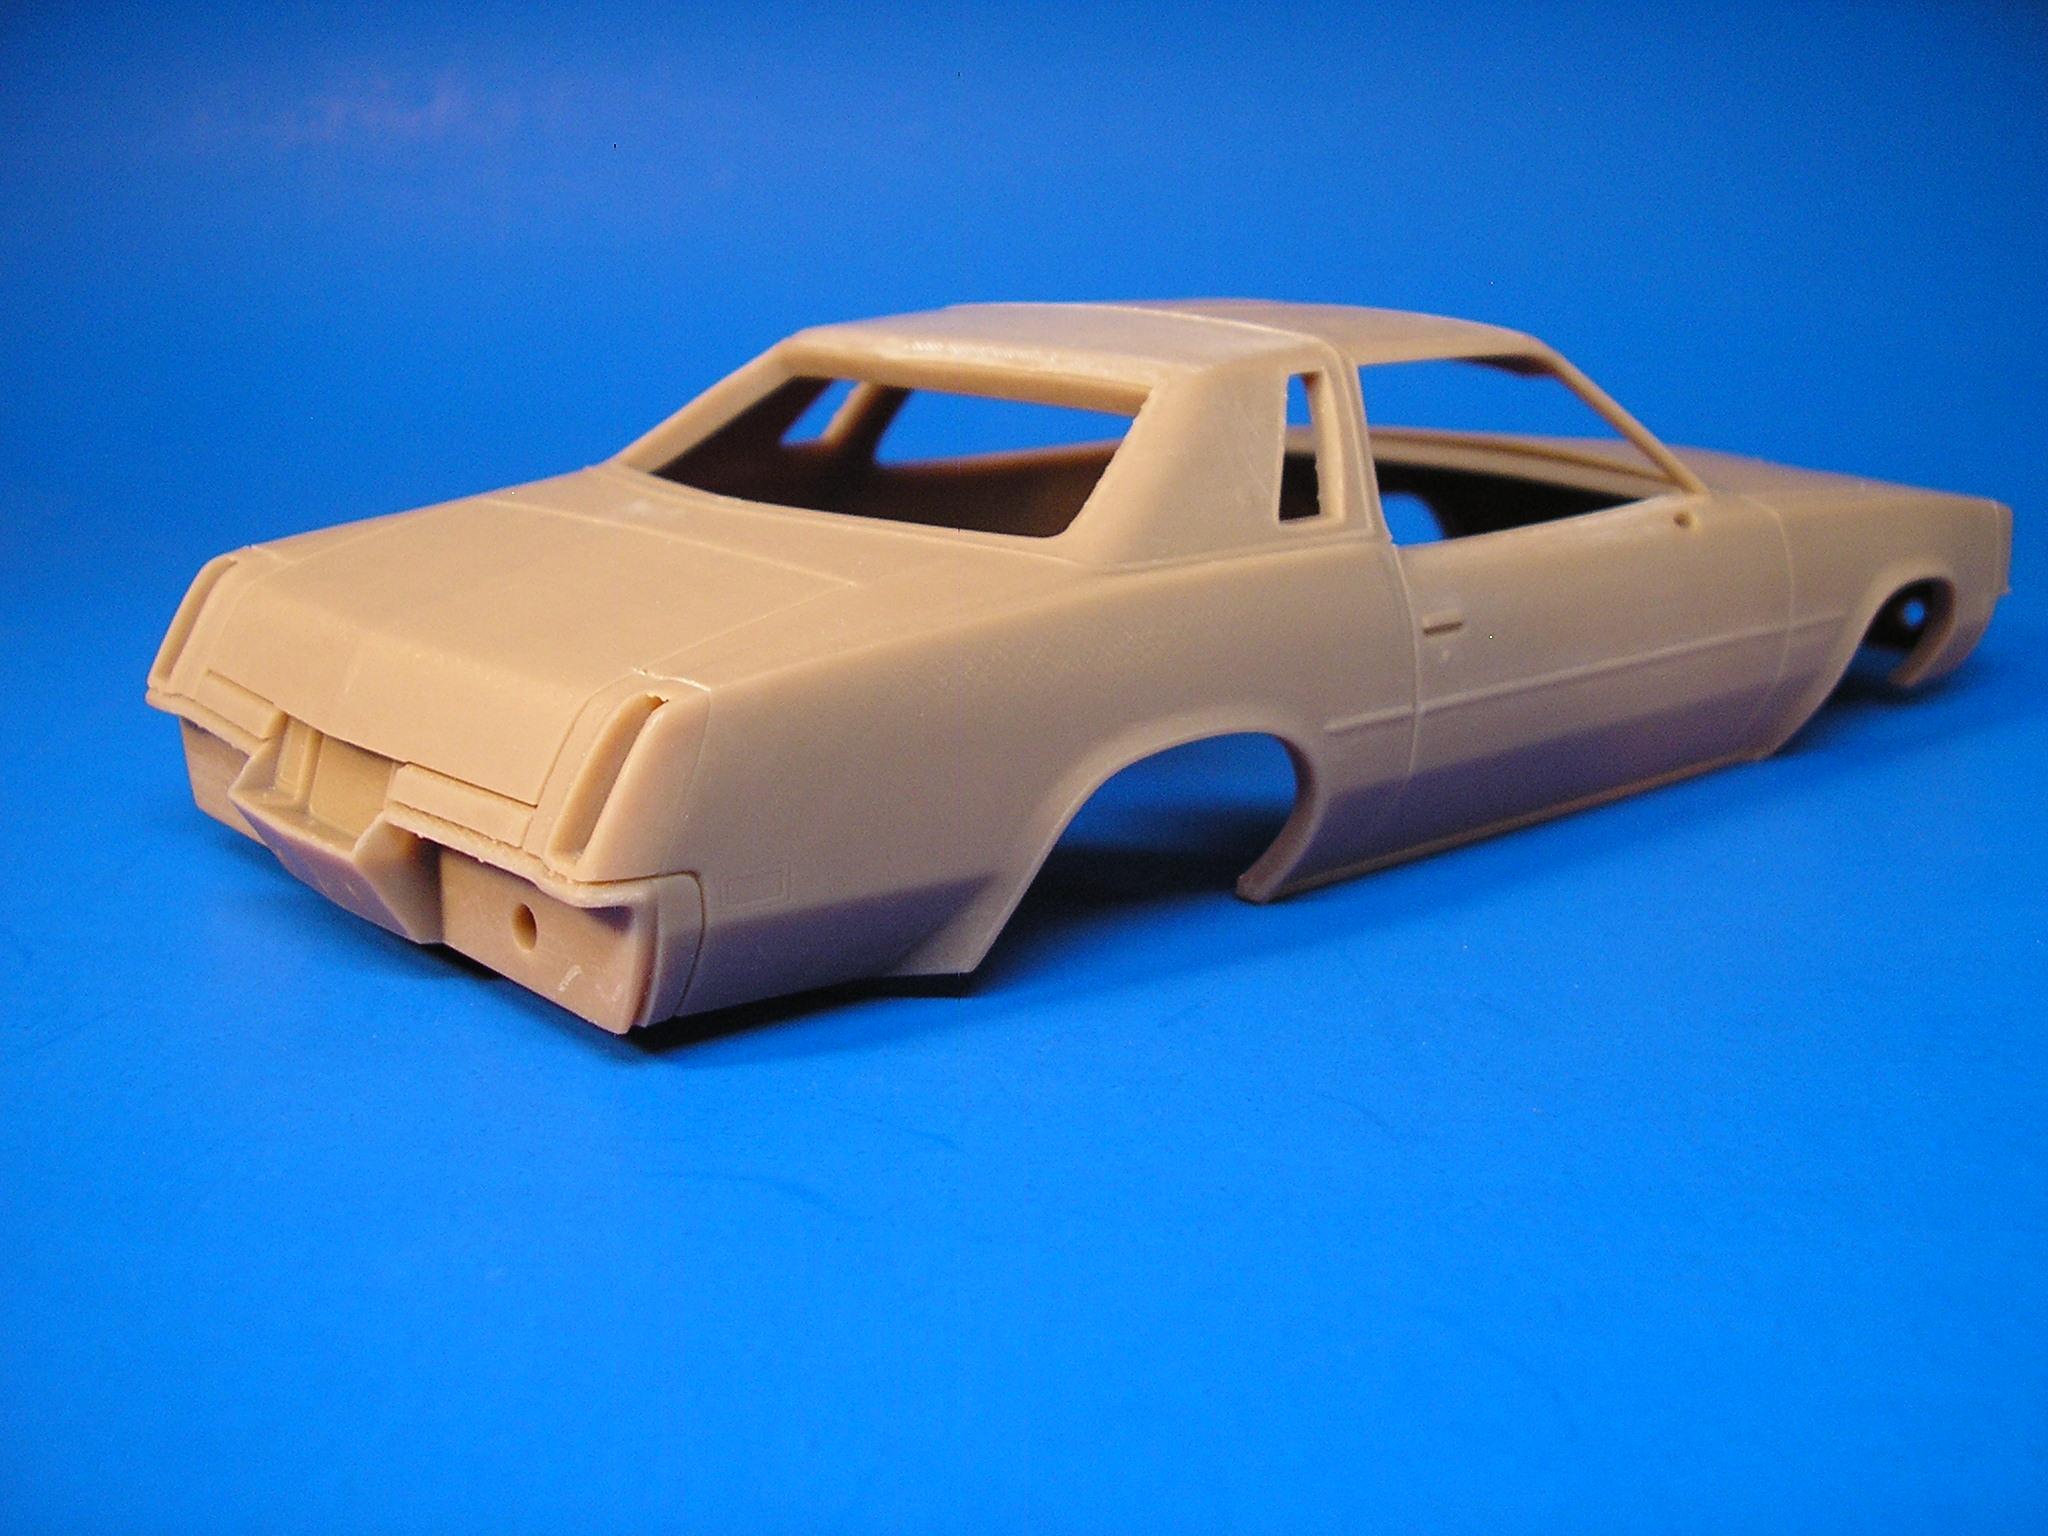
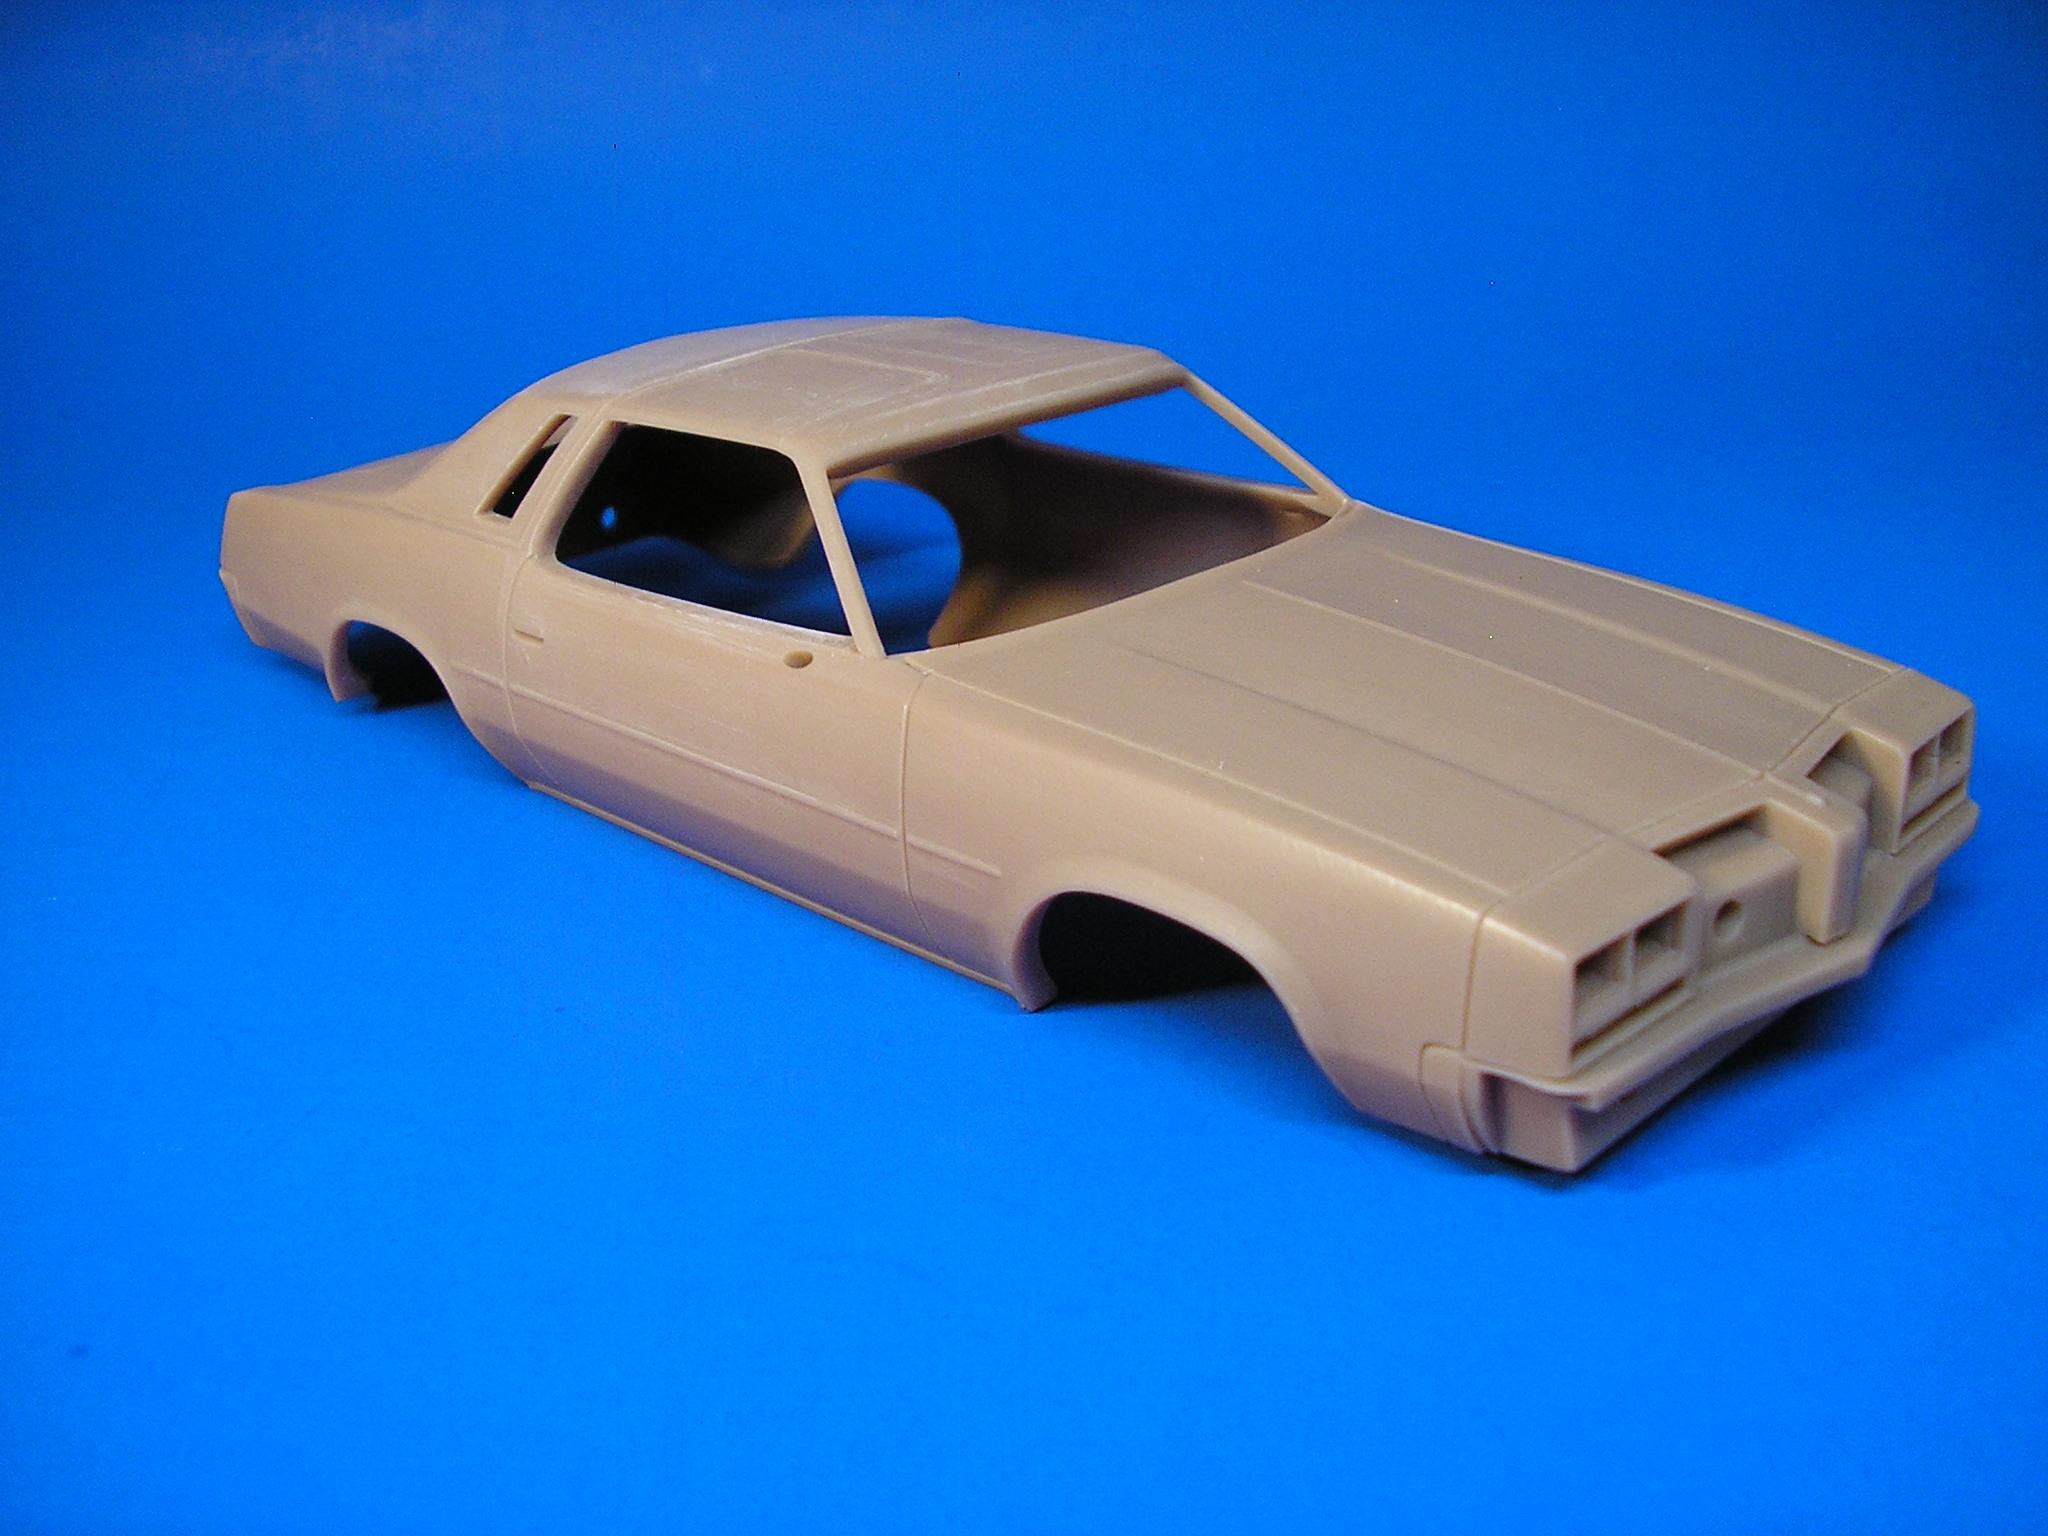
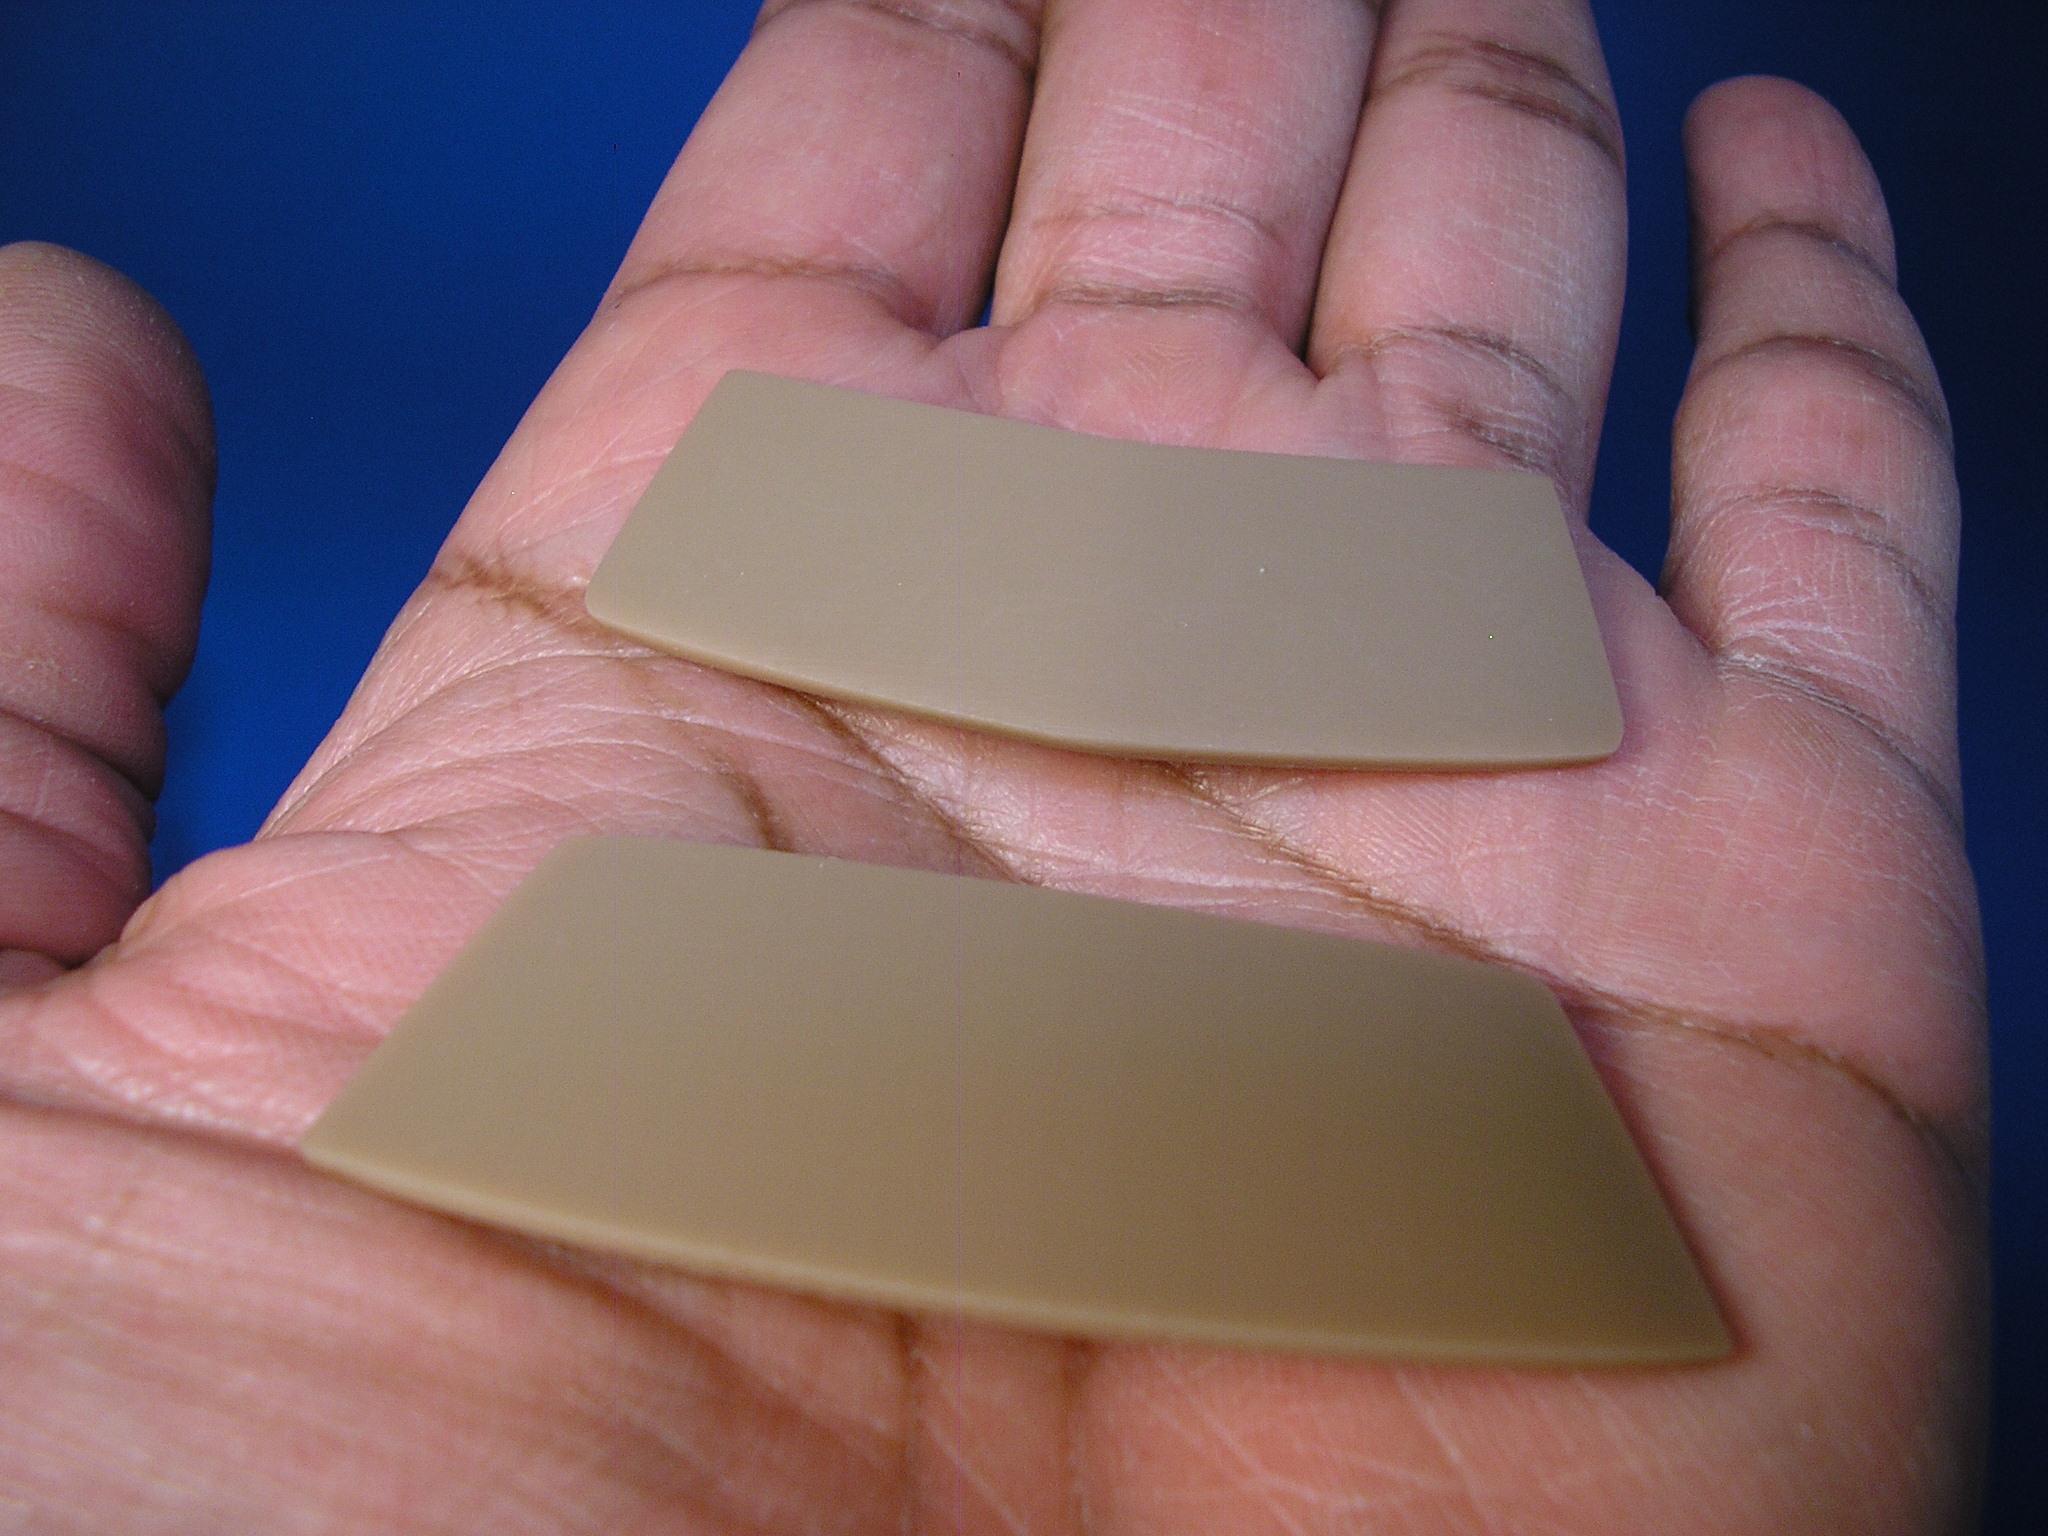
I posted this on my FB page...........us lunatic fringers will LOVE this one! I was having a rough day today as I was trying to get the 3D printer to put out a set of decent wire wheels. My day was made MUCH brighter when I could hear the mailman come up near my driveway, and put something on my porch. What I got was the three bodies I ordered from Robert Burns, and I was tickled PINK! I'm going to do separate posts on the three, and the first of these is probably my favorite. A 1977 Olds Cutlass Supreme, which was the exact car I had when I took Driver's Ed way back when this was new. I have to say that this is THE BEST rendition of this car I've seen to date! Proportions to my eyes are spot on, although I'm not a real big fan of the T-Top option on these cars. When the time comes for me to build this, I'd go with the solid roof, with the half vinyl top option. Here are some pics of what you get............it's interesting that Johan never kitted this car. They stopped with the '75 and that was the car I had intended to convert to a '76-'77 had I not seen this one by Robert. This saves me a whole lotta work! On with the pics............ I ABSOLUTELY could NOT resist mocking this up! These are geared naturally for the serious hobbyist. At the moment Robert offers no interiors or glass....I can come up with that for this one among other things. I know some of you don't like FB, but I have to say, you can come up with some real terrific stuff on there! At times, that's the only place where items like this can be had. Stay tuned for a couple more............
-
Those were Borrani's once made by Detail Master. Unfortunately, they're pretty much unobtainium now. Similar types might be found on the 'Bay, perhaps by KA Models and some other aftermarket companies.
-
I'm sure I seen him on FB in the last few days. Perhaps, like a lot of us, life gets in the way and one is super busy with just that.
-
That looks like a nice set-----I may look into that if it's possible to get it here in the States. I built an XK-SS a long time ago as I converted mine into a D-Type. That can be one heck of a fiddly kit, but they look great when patience is used to get it together.
-
73 Century GS
MrObsessive replied to yellowsportwagon's topic in Car Aftermarket / Resin / 3D Printed
Ha! You got that right! ? I ended up ordering two more bodies from him, and then after looking over the list some more, I saw ANOTHER one that I'll end up getting (1970 Riviera). The first three I ordered back in December, I just got notice that they're to be delivered today. Later on, I'll post pics and I'm sure those of us here on the lunatic fringe will be tickled by what I've gotten from him. Stay tuned........... -
Doug, that looks to be one super sharp file! Proportions look good to my eyes as it's got the shorter body (especially the rear quarters) for an 88. I see you've got it in Blender.......I'd love to see the printed result! Who was the vendor that makes the file? I've might have run across some of their items when I was surfing for a particular car the other day.
-
73 Century GS
MrObsessive replied to yellowsportwagon's topic in Car Aftermarket / Resin / 3D Printed
That is to my eyes..............PERFECT! I'm getting three bodies from Robert.....a '76 Olds Cutlass Supreme, '76 Olds Delta 88, and a '73 Buick Riviera. I got the tracking number from him the other day, so hopefully the package will be here in the next couple days. BTW, for those interested, Robert has a new list on FB. It can be seen here, and it's for a limited time he's taking orders. ? Yes, I ordered a couple more bodies from him......his work is EXCELLENT! -
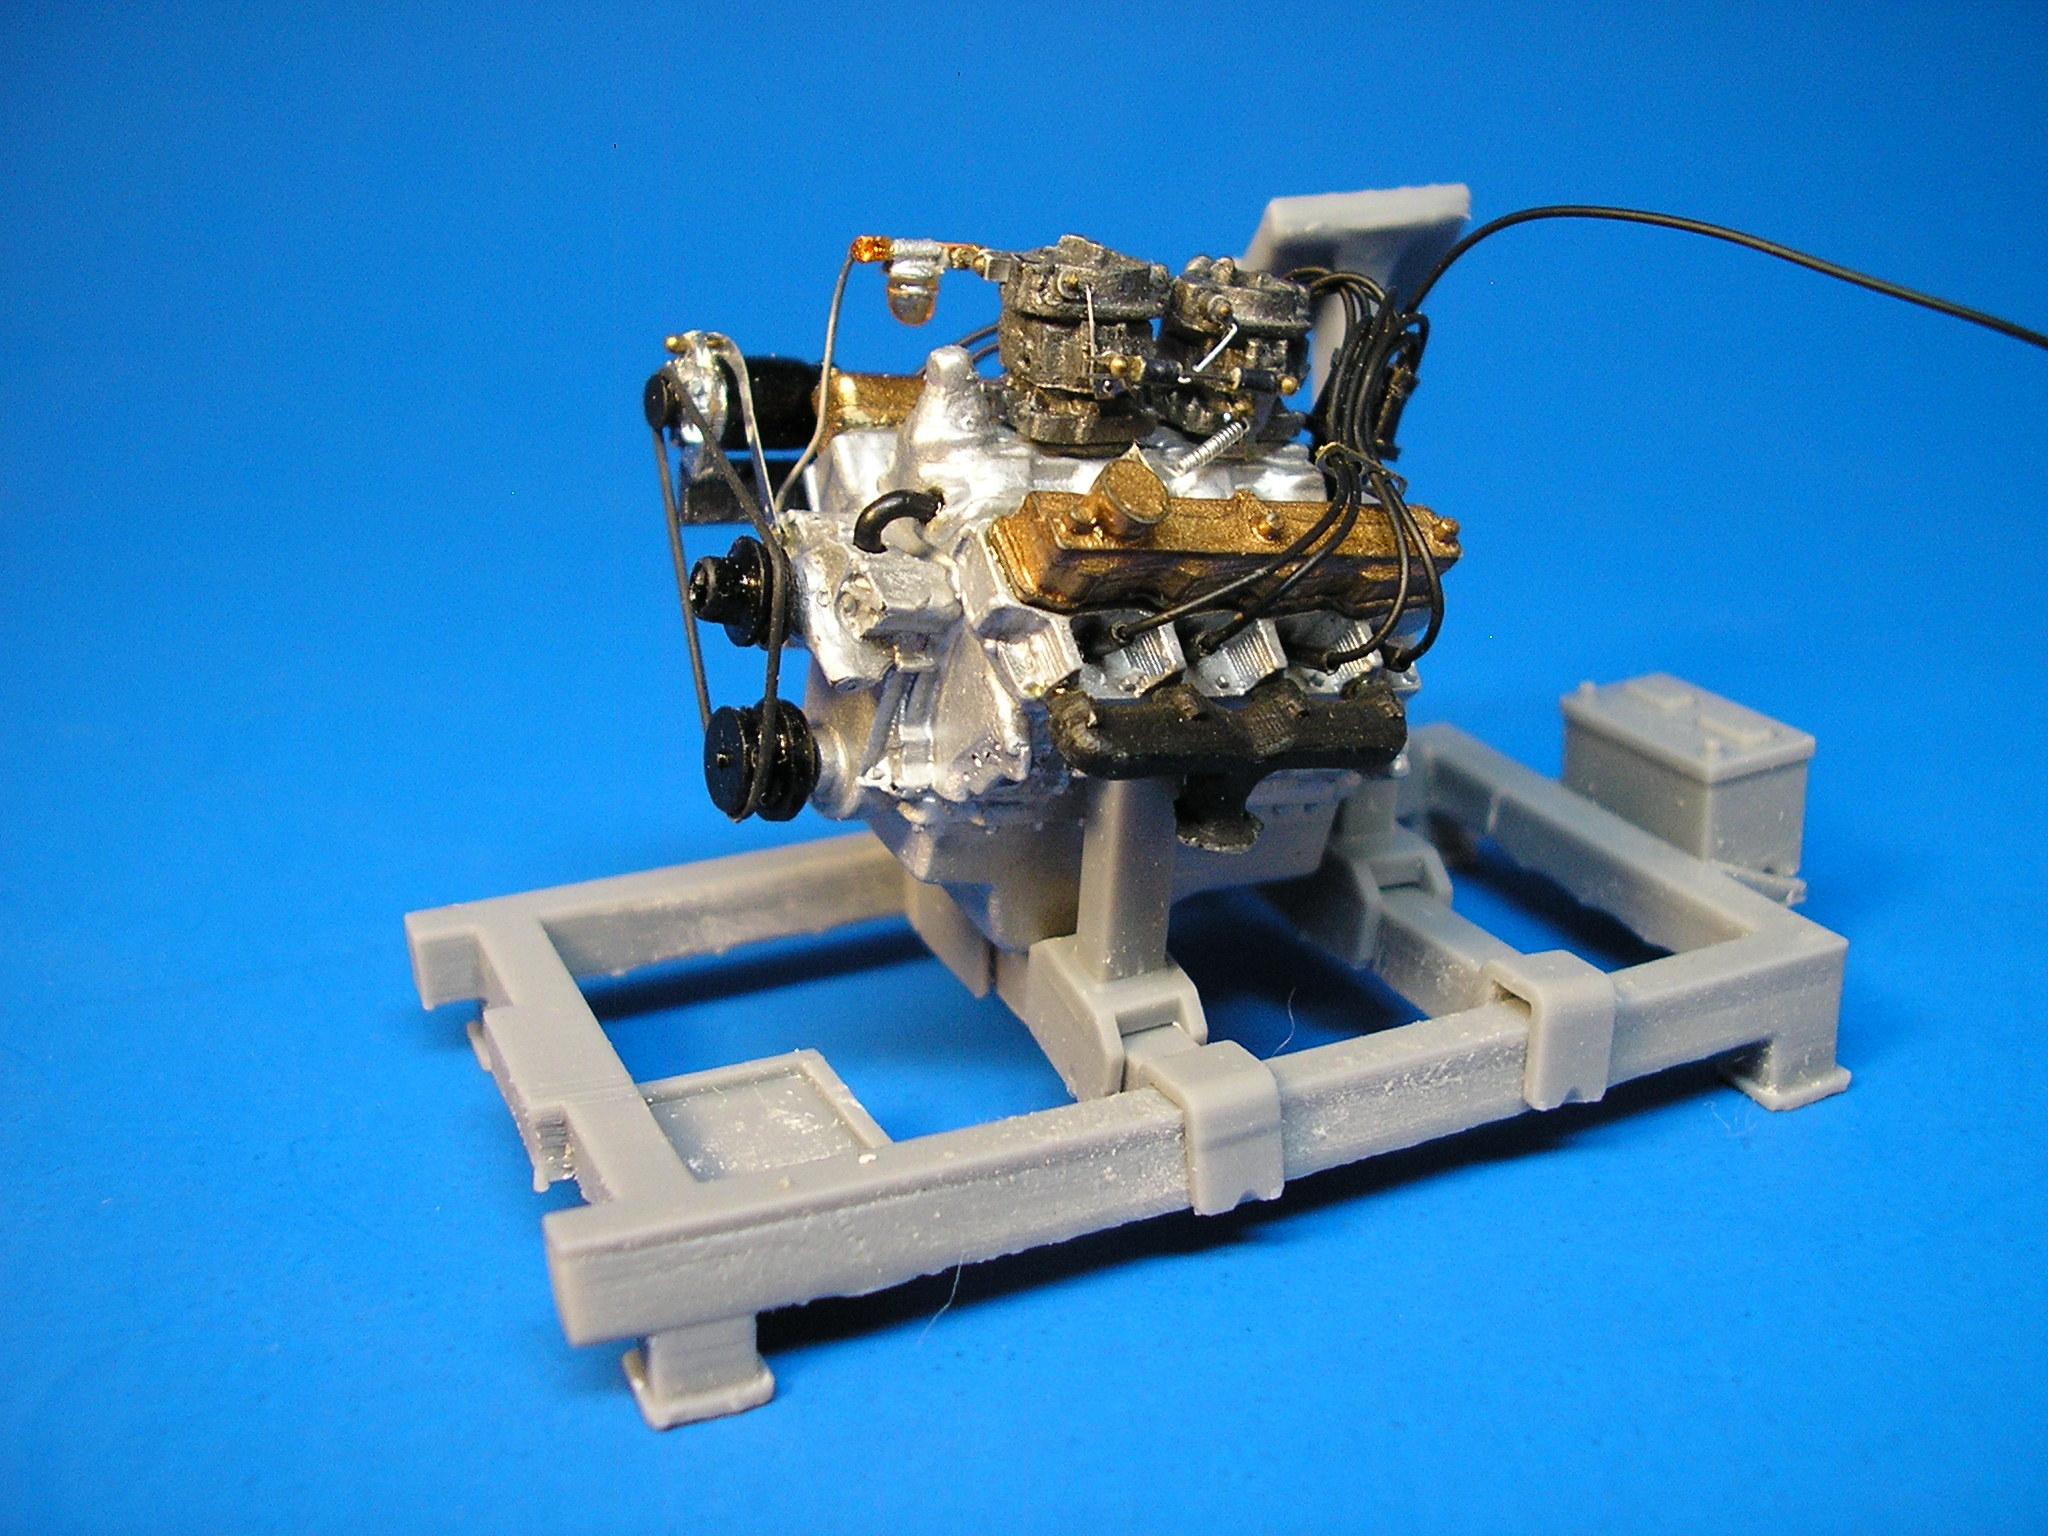
Well, I prettied up and painted my first real 3D printing. A huge thanks once again to @my66s55 for all of his help in getting my printer going, and the gremlins that plagued the first several tries. I built this pretty much out of the printer as I'm not up on dyno stands, and what gets hooked up to where. It's painted Ford Engine Blue, and I added a fuel line from the gas tank to fuel pump, and also added some gauge decals to the control panel. The .stl files BTW came from ScaleSpeedGarage.com. Fun little project, and I did print another stand for future use for my WIP engines down the road.
-
How to Apply Super Thin CA Glue?
MrObsessive replied to afx's topic in Model Building Questions and Answers
Somewhere in my tool stash, I have an item that has a very tiny fork shape at the end of it just this purpose. It picks up a small drop of glue like that and you can put it where you'd like without the mess. Darn if I can find it right now............I'd take a pic of it. You can put a drop in one of those cheap plastic condiment cups (a pack at the store is very cheap), use the tool to pick up a tiny amount. -
Yes, I still have that one. ? I showcased the earlier one as I wanted to show on my FB page what got me interested in 3D printed several years ago. It's gotten some nice comments as there's still no kit of this engine ever done. The newer one I got from you, I'd like to put that in some sort of Plymouth. Not necessarily a Fury, but perhaps one of the other derivatives. A neat four-door hardtop comes to mind! ?
-
Dennis, thanks for suggesting Alibre. I'm checking them out right now, as I have some things in mind that need to be printed, but just aren't out there yet as printable files.
-
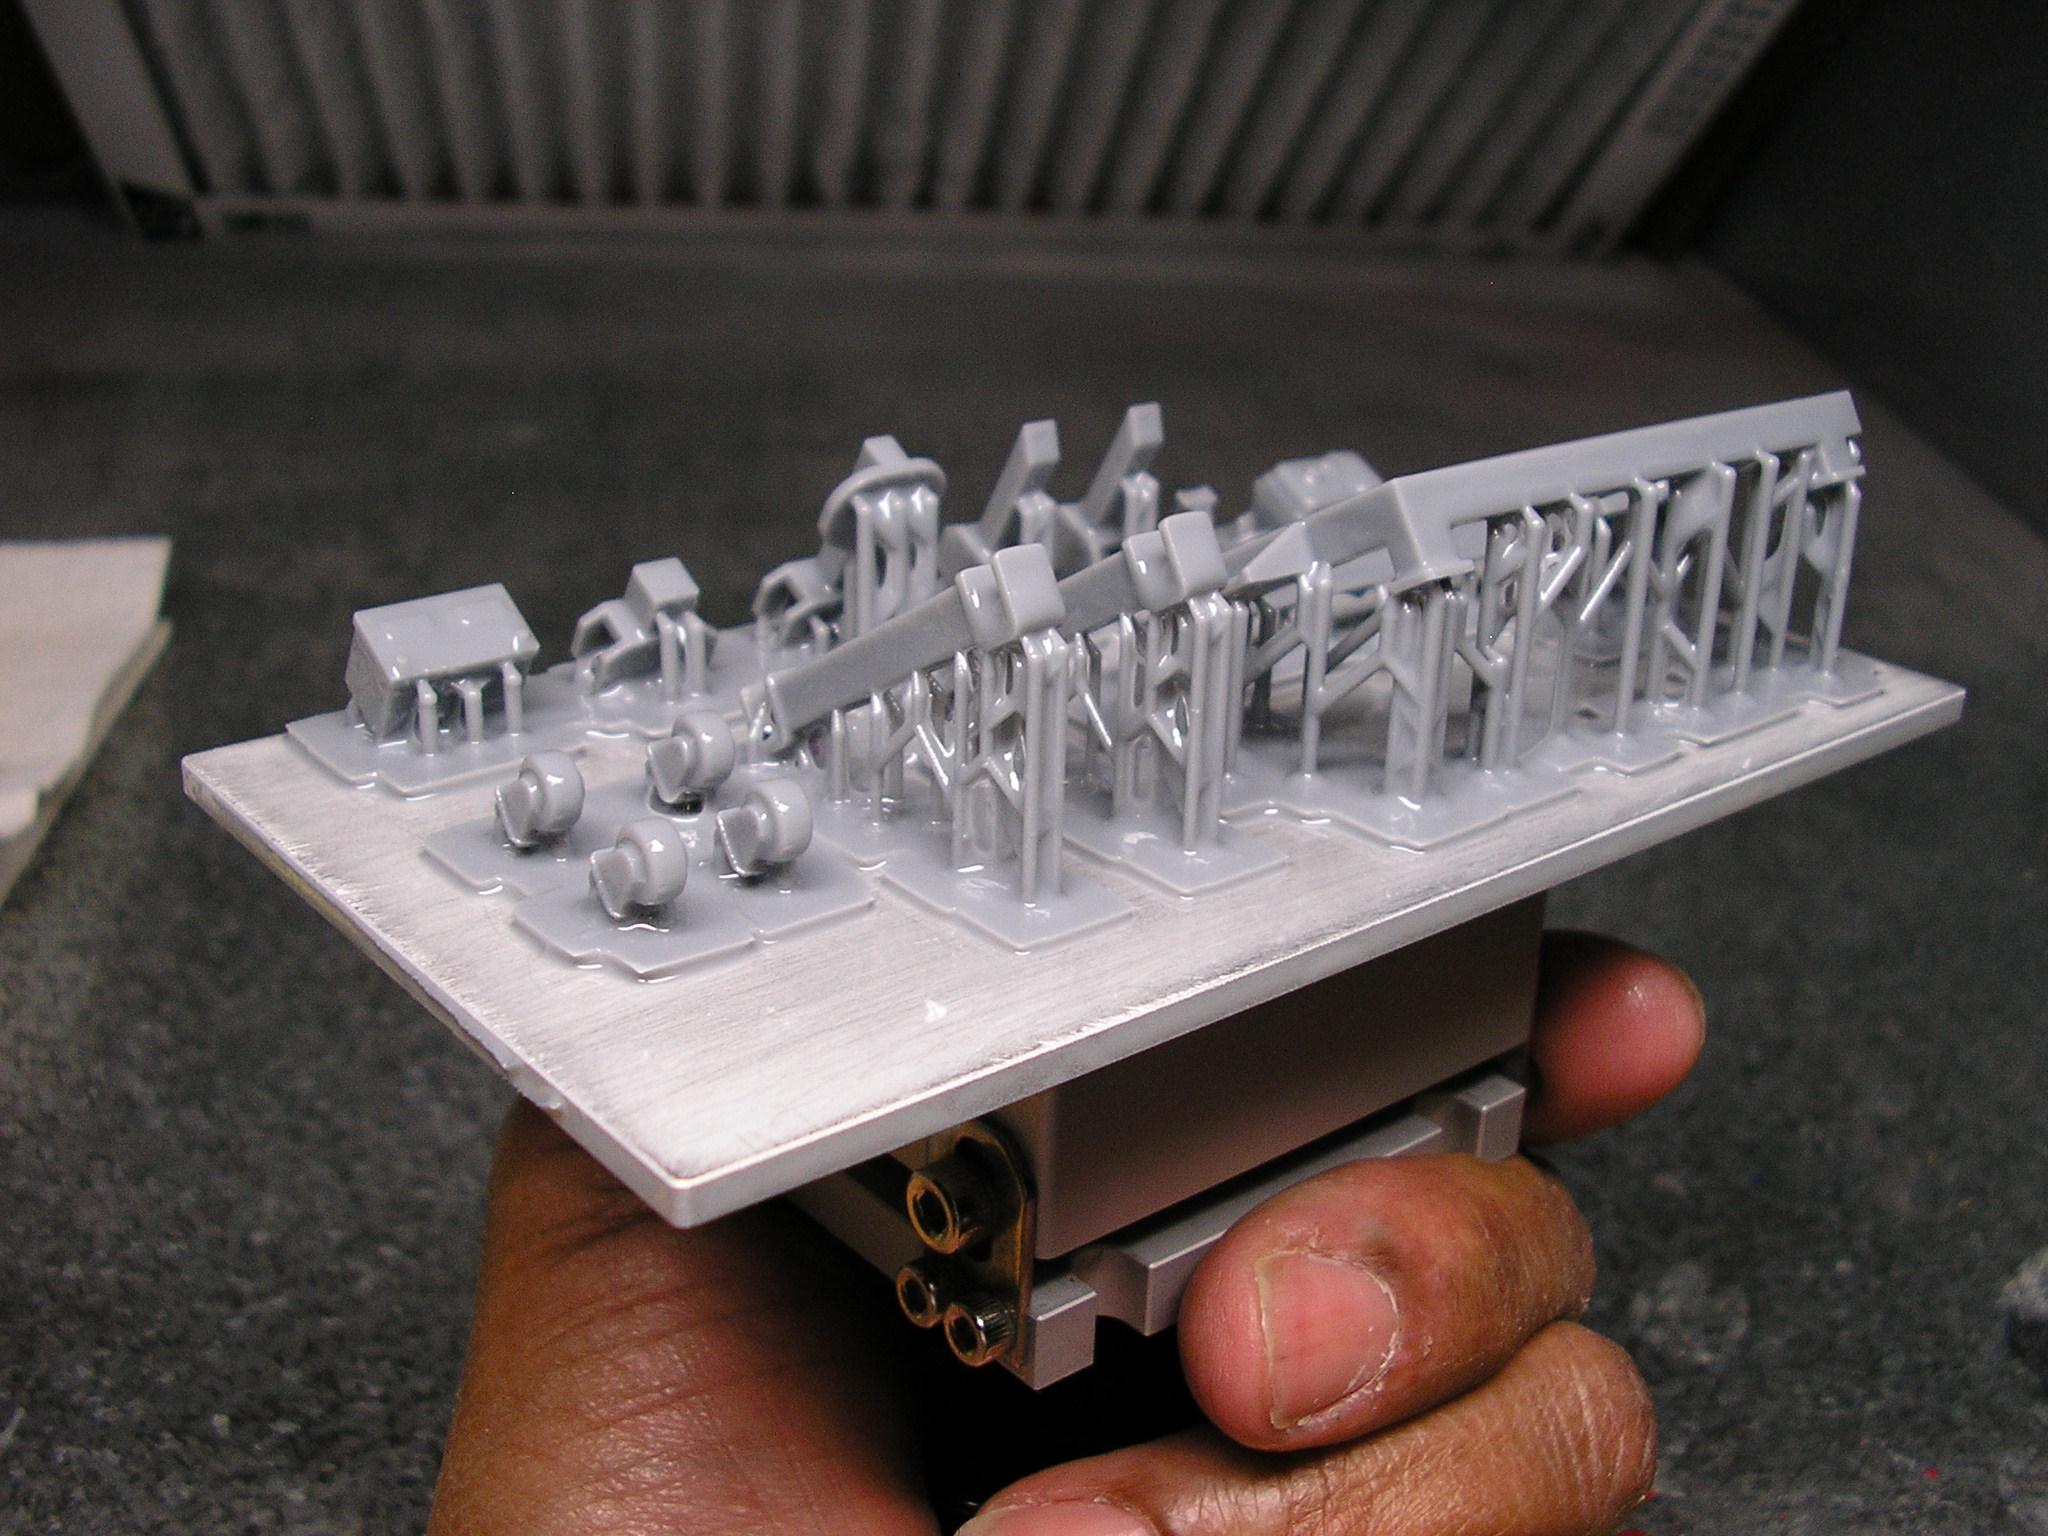
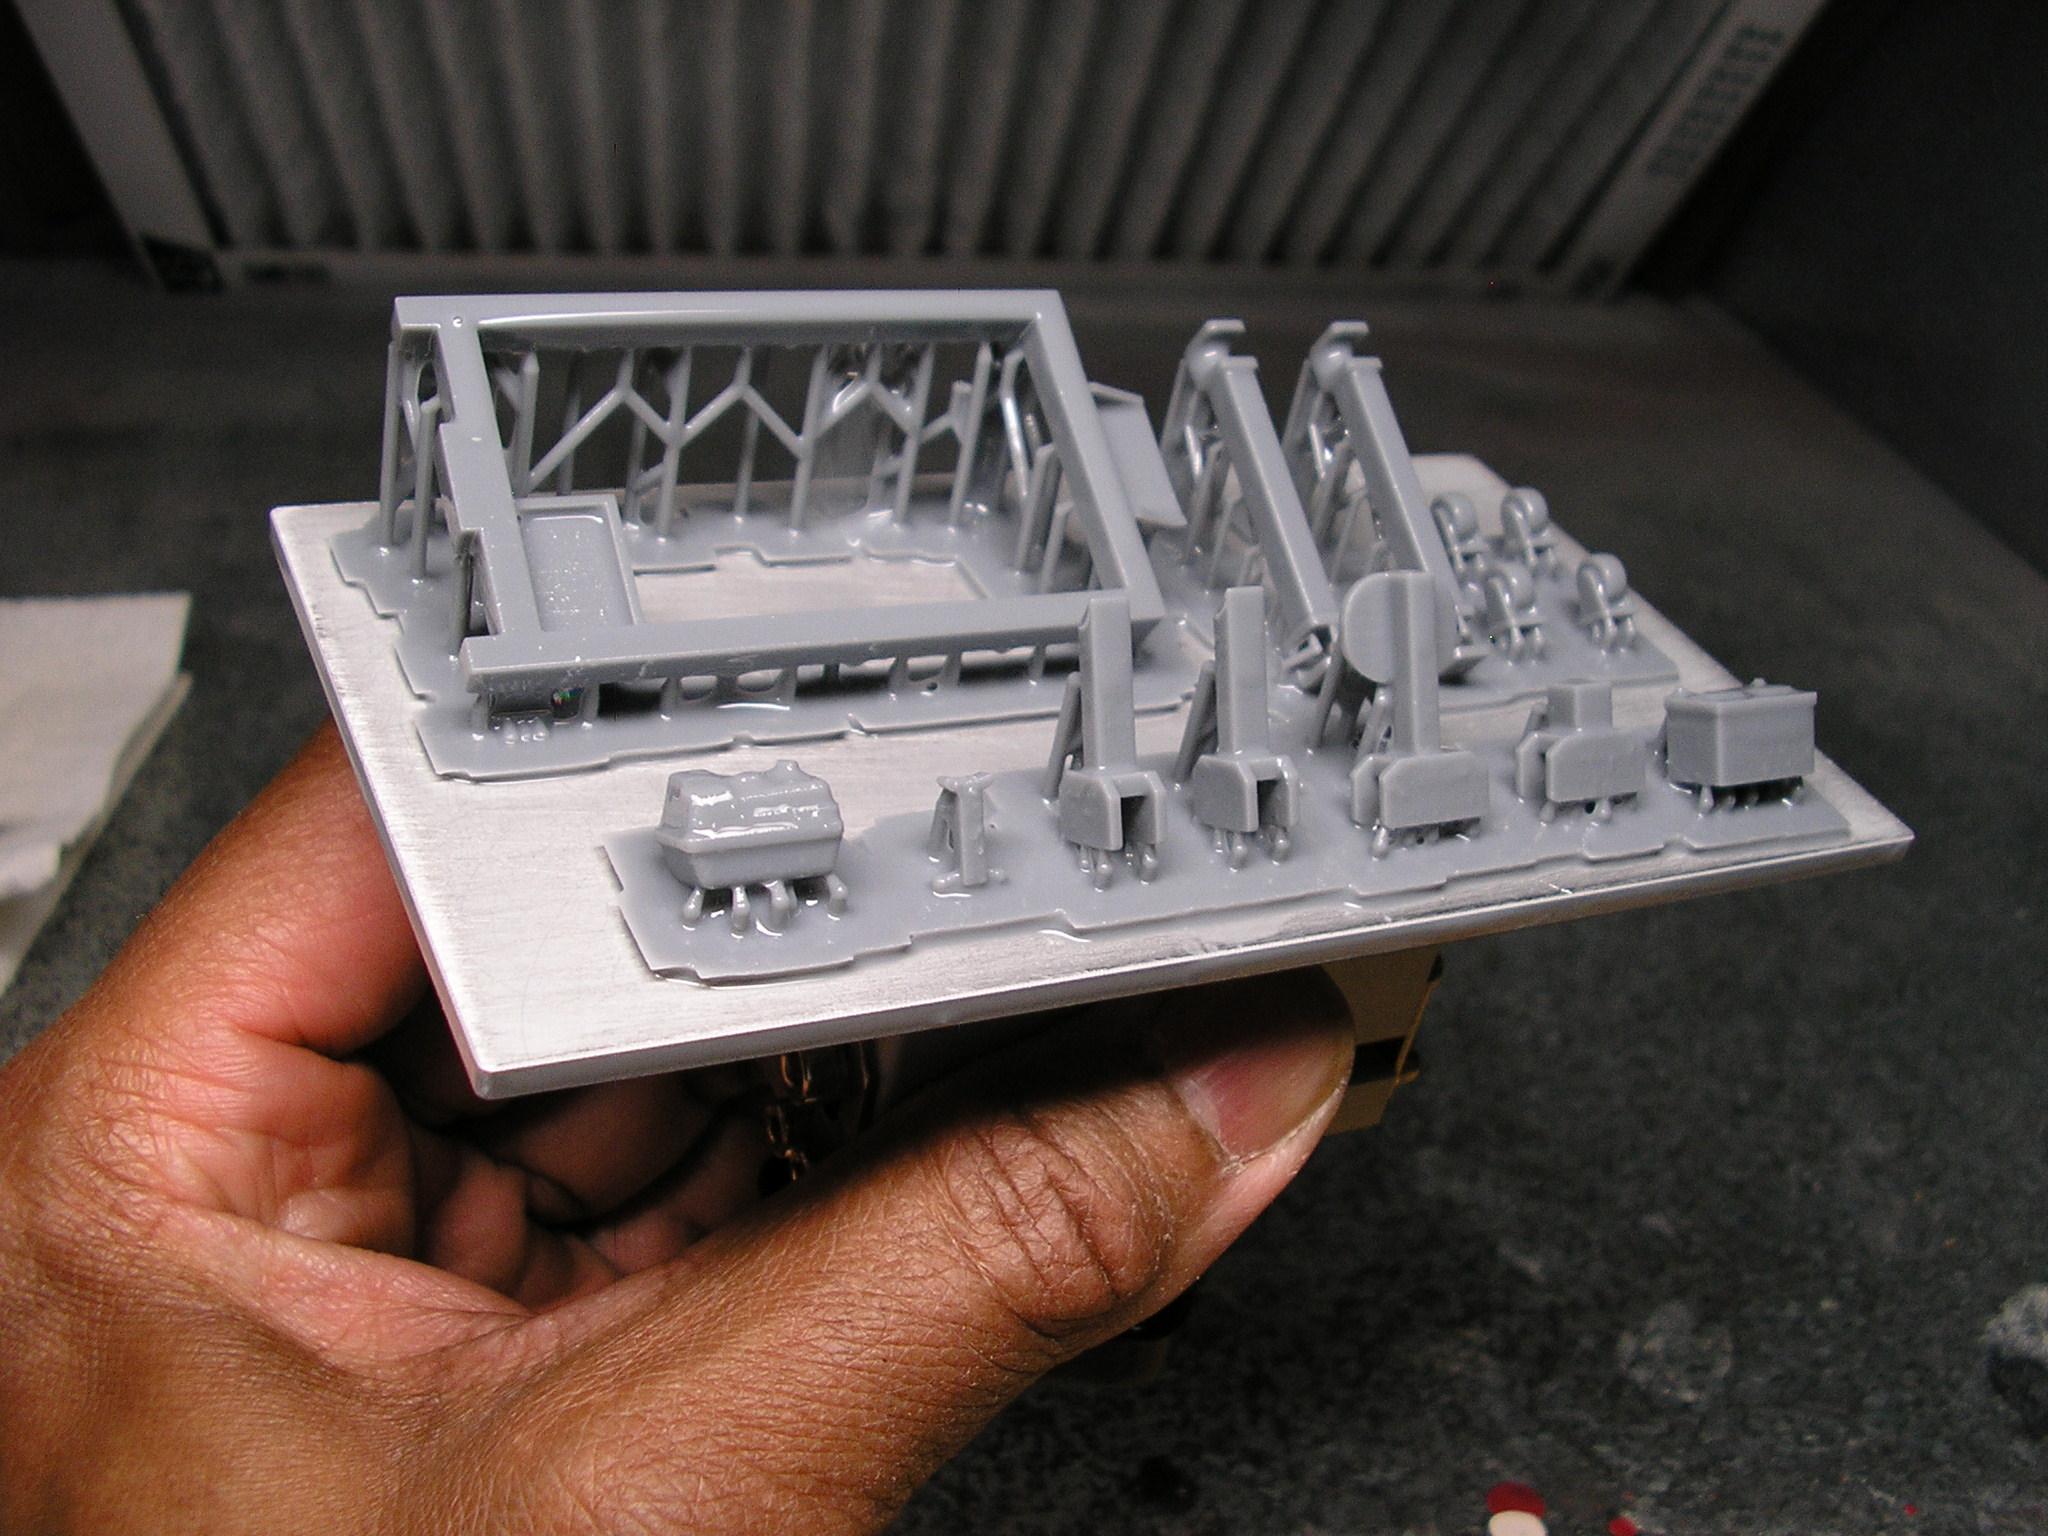
A couple weeks ago, I signed up to get monthly .stl files from ScaleSpeedGarage.com. In the January pack, they have on the site files to download and print a neat engine dyno stand for which they're running a contest, and the deadline is on March 15. The first attempt at printing this came out not so good.......the second attempt was 100% better as can be seen below. The engine on the stand was printed as a test shot by @my66s55and I did a complete thread on it here, as it was my first introduction to anything 3D printed. I liked this test stand so much, that I did another printing last evening, and here it is just as it came out of the printer. I didn't include all the parts to the stand as this one will be for WIP engines to have something to sit on. The first one above I printed, I'm going to pretty and paint that one up, enter the online contest, and we'll see how it goes. Doug, I tried your tip for the second printing of the stand, and it worked like a charm! Hardly a pit or dimple to be seen on the parts, and it saved a lot of stress trying to get the parts off the supports ?
-
I'm following along and taking notes! I LOVE what I'm seeing so far! I hadn't paid attention to the lower "tuck under" of the rocker panels.............thanks for pointing that out as that looks so much better. I also see you thinned out those way too thick C pillars. That was actually another thing that immediately got my attention right behind the awkward looking rear quarters and trim Keep up the super terrific work! Round 2............PLEASE pick up the white courtesy phone! ?