250 Testa Rossa
-
Posts
1,115 -
Joined
-
Last visited
Content Type
Profiles
Forums
Events
Gallery
Everything posted by 250 Testa Rossa
-
Curtis Turner SCCA 1966 Mustang
250 Testa Rossa replied to Leo64's topic in Other Racing: Road Racing, Salt Flat Racers
I bought a set of his wheels for my build of the Yeakel Plymouth AA/FD dragster that Tom McEwen drove. They are really nice! -
Curtis Turner SCCA 1966 Mustang
250 Testa Rossa replied to Leo64's topic in Other Racing: Road Racing, Salt Flat Racers
I think I saw this one at the Spirit of Speed Contest a couple weeks ago. -
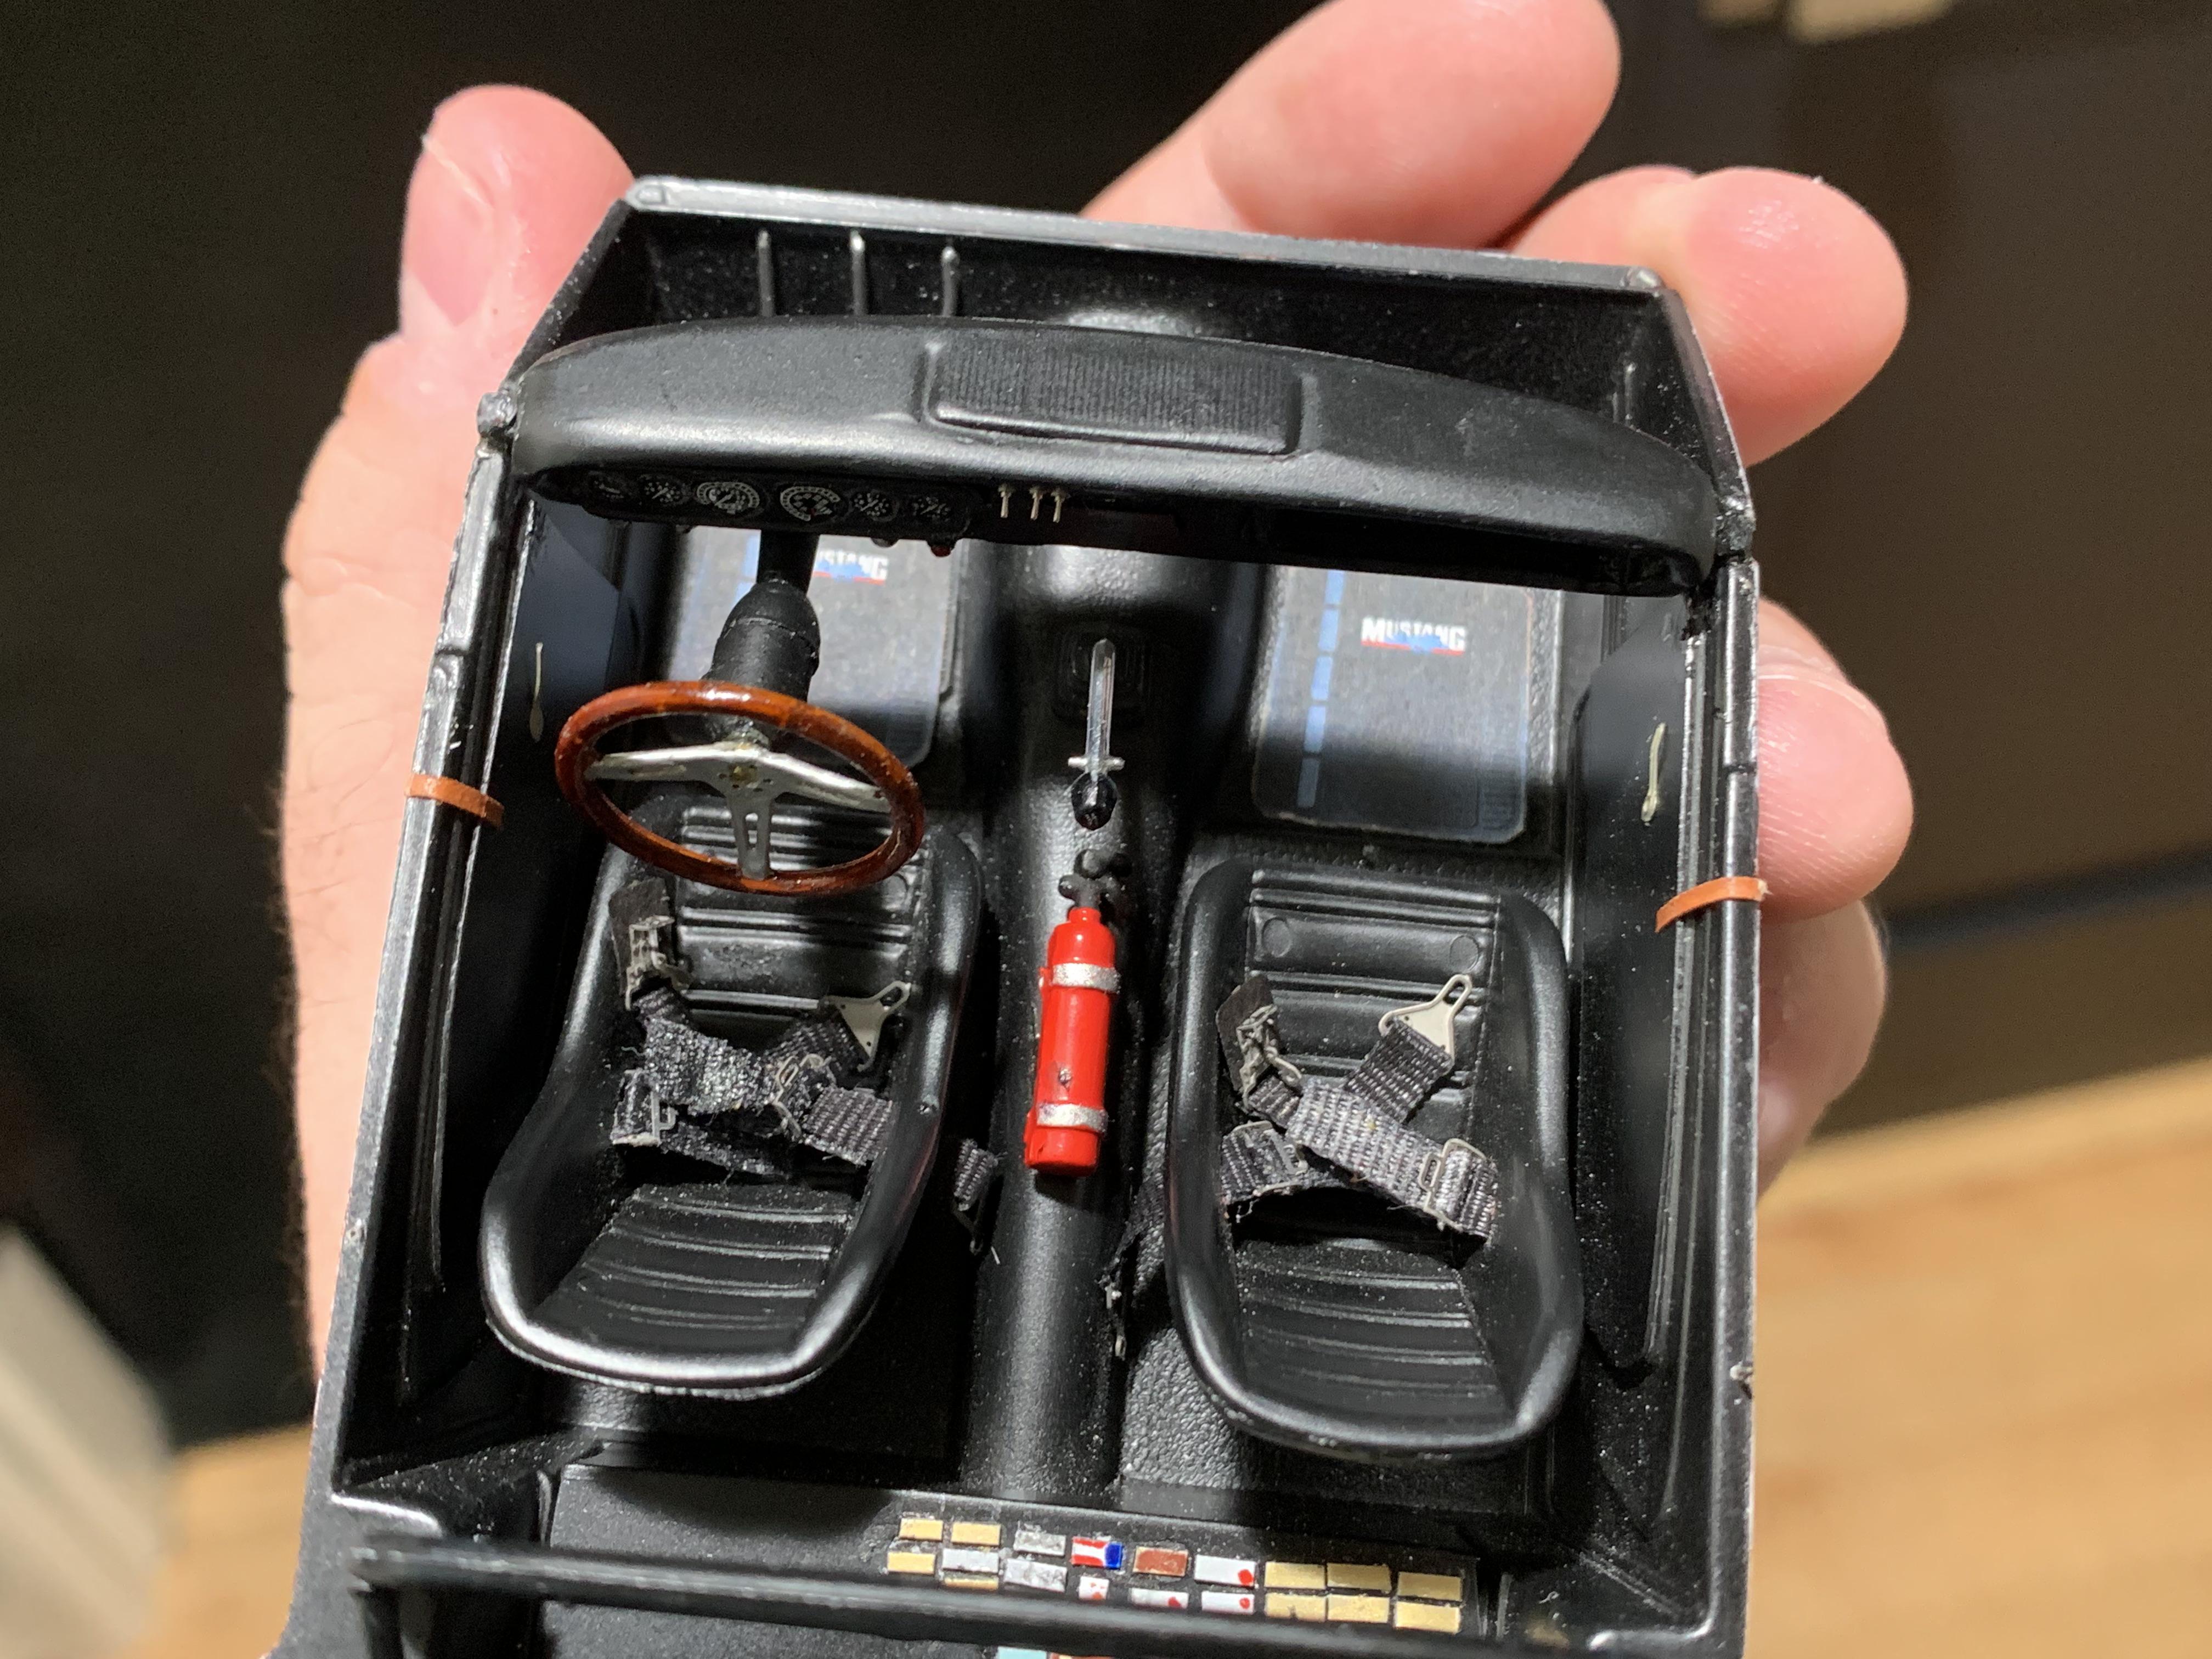
The seat belts are 1/24th scale RB Productions belts. I am hoping to post more progress in the coming days.
-
I plan to replace the tires and wheels with items from Speed City Resin. You ought to check them out. My buddy Scott makes a good product!
-
Can't wait to see this one as well! I have the same kit and plan to use some aftermarket parts on it.
-
It's coming along!
-
New approach with the rear valence. Laid a piece of .020" over the original part, cut it to shape, and sanded it down until it was thin enough to my liking. Might need a bit more tweaking, and some more detailing bits.

-
I should be getting my order on Monday or Tuesday
-
I'm working on that right now as we speak!
-
I have an original with the correct interior pan, and it does have the Jeffries badge on it.
-
Decided to work on the left rear flare and shape it. Used Evergreen #107 styrene strip, sanded to shape, and Tamiya epoxy putty was used on top, and the shape was carved with a clay tool.
-
Looks great!
-
Wound up using a suitably sized half round to enhance the rear valence. Used Tamiya Polyester 2 Part Putty, and feathered out with a putty knife. Will be sanded smooth.
-
What did you do for the Yenko decals? I need to get some
-
This part
-
Well, I wasn't happy with the way the body was coming out, so I started over. We've all been there, and I'm sure you know the saying "s--- happens", and I ended up getting a new body and rear valence panel. I just need to know how to make the rear valence look like a two piece unit that is up to par with the real thing. I tried using that Tamiya 2 part epoxy putty and it actually separated from the panel, causing my part to not be flush. I will provide pics of the new body, and what I am trying to achieve before I put the license plate on. Any advice will be greatly appreciated. Thanks!
-
Me with the car in May 2021.
-
Thanks. I will try that.
-
Yes! Those? Just need to know the best way to recreate these.
-
Thanks guys! Right now, I'm trying to figure out the bumps on the rear valence panel.
-
Thanks guys. It's been a long journey.
-
Okay, guys. I know I've been really hesitant about posting this, but this is my current build, a Monogram 1965 Shelby GT350 R-Model. Shelby American built 36 of these in 1965; the first 2 cars (5R001, and 5R002) being prototypes, and 34 production cars, which were broken up into three batches (5R094-5R108, 5R209-5R213, 5R527-5R540). The car I decided to tackle is 5R101, which is the eight production R Model, and has an incredible racing history. 5R101 was also the most winningest R Model to have competed in vintage racing, racking up 52 wins and 24 podium finishes between 1979 and 1986 with Alan Bolte at the wheel. In 2003, 5R101 was invited to the Goodwood Festival of Speed. Since there are so many different versions of 5R101 throughout the years, I have decided to build the current version of the car. Right now, I am working on doing the rear valence panel, but would like to know how to add the bumps that are under the taillights. So far, I have the interior completed, along with the lines underneath the chassis.
-
I'm actually going to be doing a somewhat current version of the car. In 1965/66, Briggs Cunningham made a lighter rear deck that is on the car today. After the Sebring 1966 race, Cunningham retired the car, and it was on display at the Briggs Cunningham Automotive Museum in Costa Mesa, until 1987 when the cars were purchased by Miles Collier, who owns the 904 to this day.
-
R-model Shelby Mustangs
250 Testa Rossa replied to 65slotcar's topic in WIP: Other Racing: Road Racing, Land Speed Racers
It looks great! -
R-model Shelby Mustangs
250 Testa Rossa replied to 65slotcar's topic in WIP: Other Racing: Road Racing, Land Speed Racers
How did you get the front valence to fit so flush?! I may need to do this with my build!