Nitro330
-
Posts
287 -
Joined
-
Last visited
Content Type
Profiles
Forums
Events
Gallery
Everything posted by Nitro330
-
A very cool 55. I've always thought about doing one. Will enjoy following this.
-
Thanks Guy's, appreciate it very much. It really was a fun build.
-
Thanks, that's really cool that you recognize the car. Being from the midwest, I had never seen it before.
-
Thanks Rich!
-
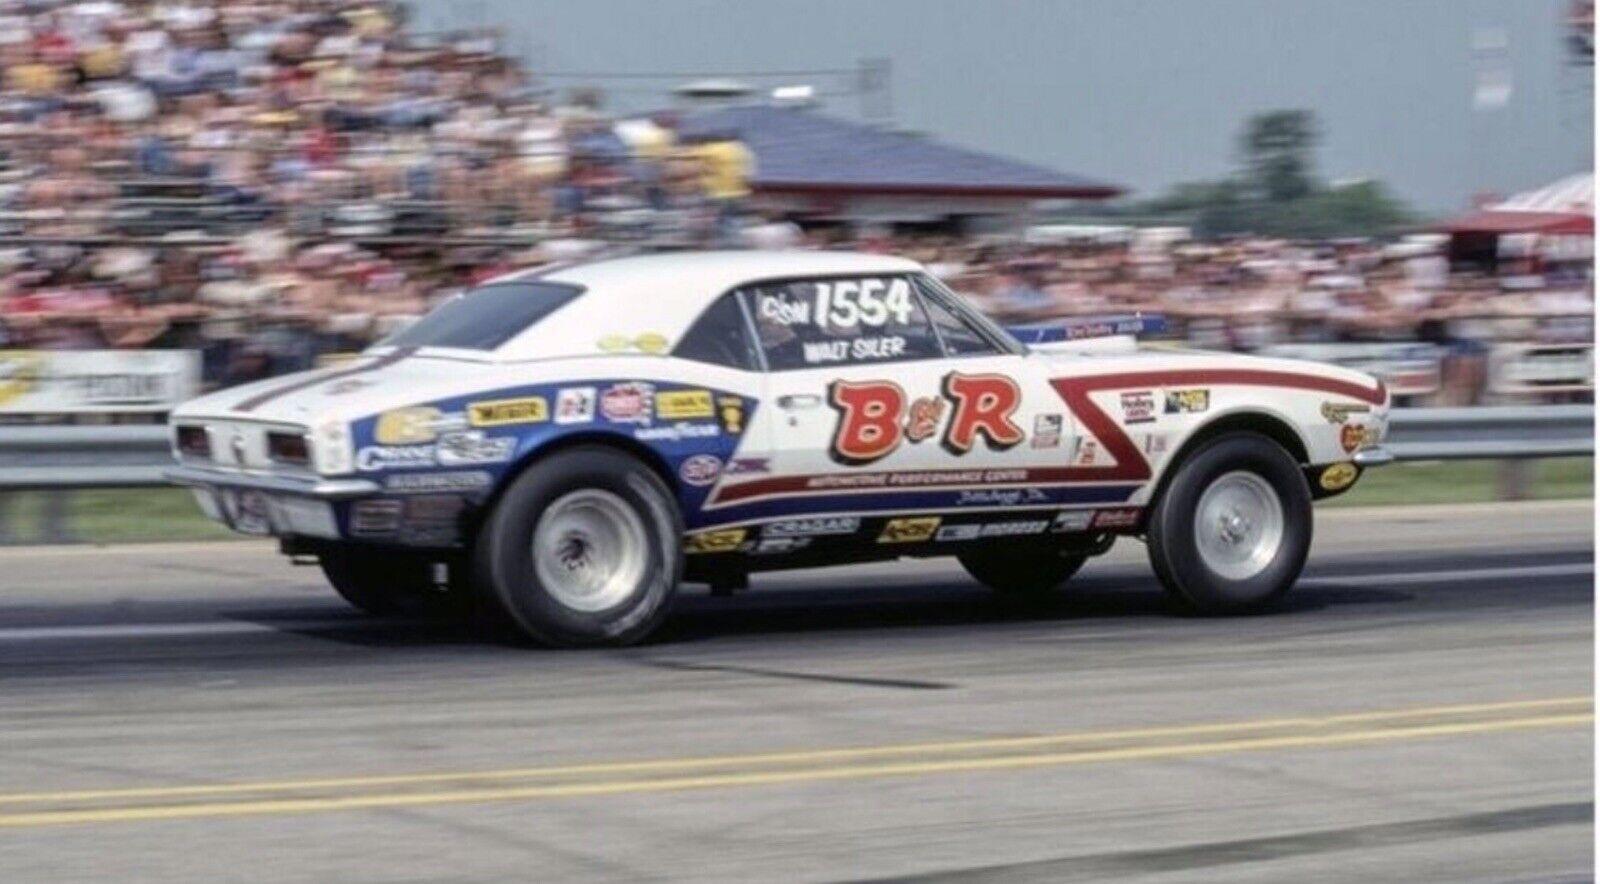
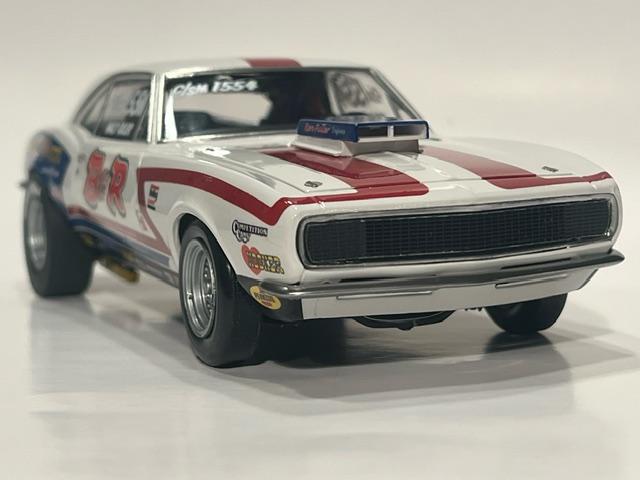
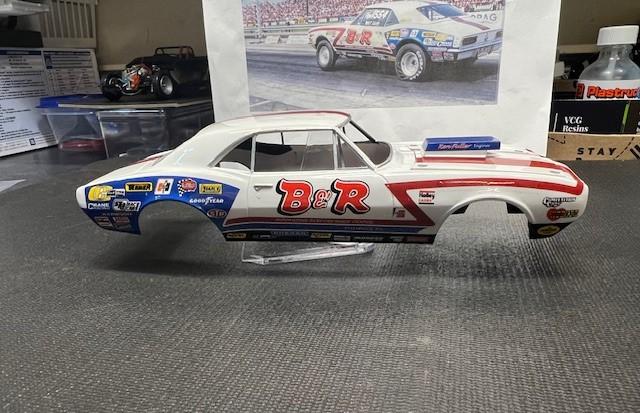
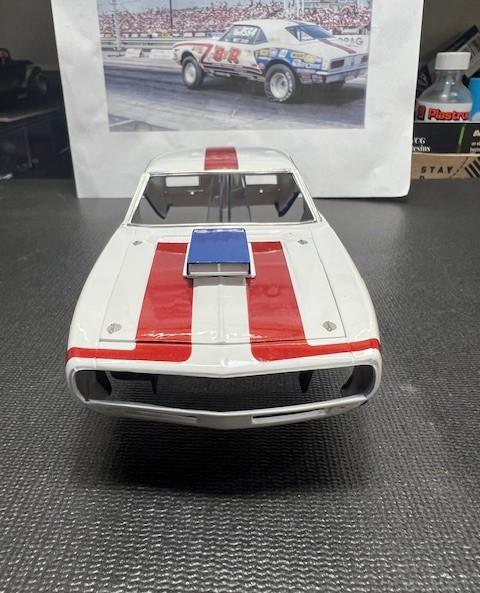
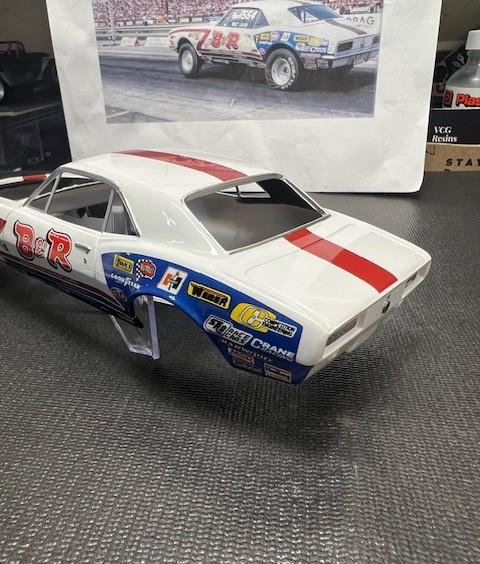
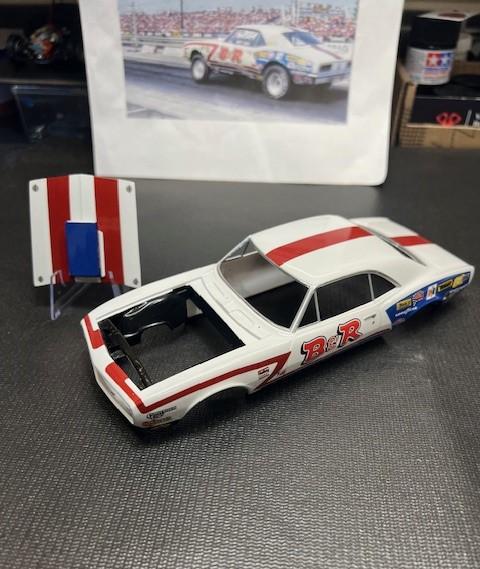
Finished it this evening. There is also a WIP topic for this if you have not seen it. Pretty pleased with it for the most part. I think it makes a pretty good representation of the actual car (see last picture). As usual, sorry for the crappy lighting in the photo's. LOL!

-
Well, I think I am calling this one complete. Spent my evenings this week getting it finished. Here is a little sneak peak. Finished photo's are in the Under Glass Drag Racing page. Take a look and let me know what you think.
-
Hey, thanks Kevin. The decals came from The Glory Years Decals and Graphics (eBay). Yeah, those aftermarket super tricks are much nicer. I'll have to get some of those for future projects. I just pulled some out of the parts box.
-
Very cool Bob. Those fastback Mustangs make killer looking pro streeter's. Like the way you went with the black components on the engine.
-
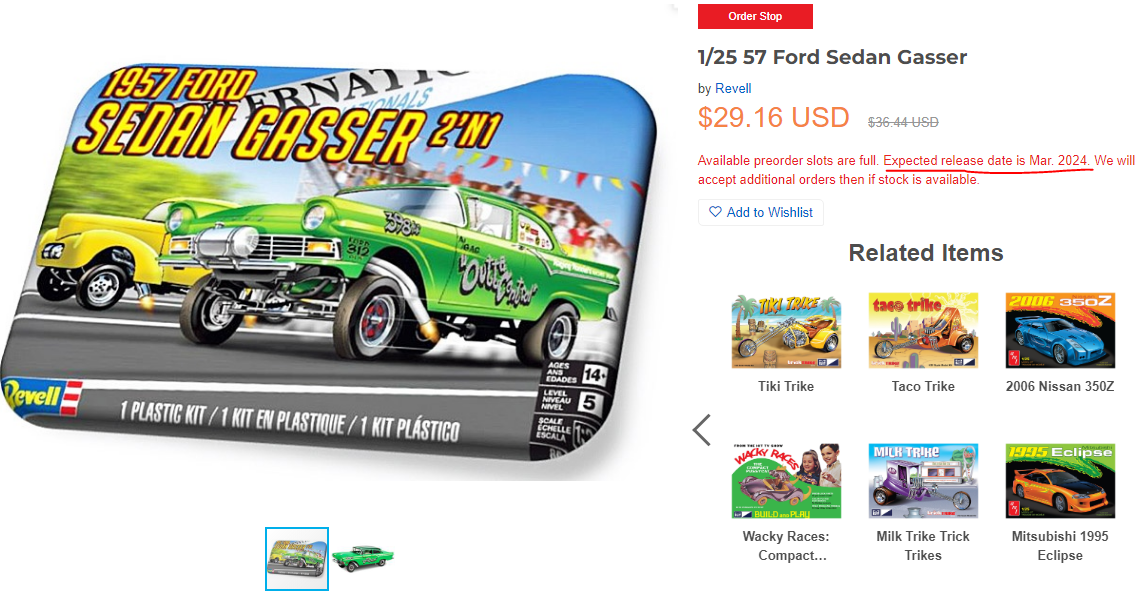
Thanks guys! I hadn't seen anything about this being reissued and was surprised by the ad.
-
I have been looking for this kit and can't find it anywhere. Last time I did see it, the price was crazy on eBay. Does anyone know if this is being re-released? I saw the ad below on HobbyLink Japan. It says expected release of March 2024?
-
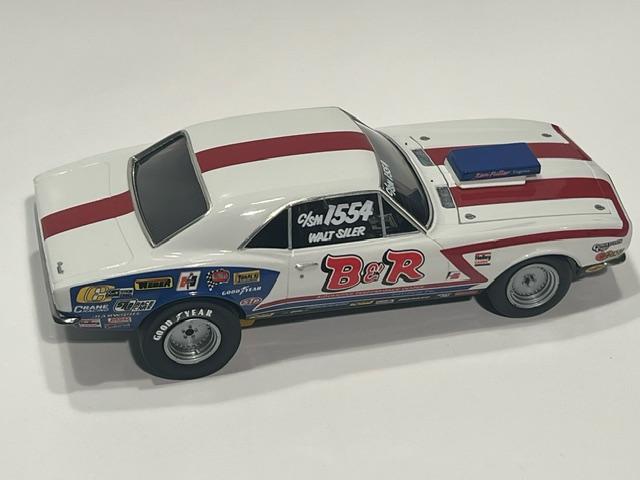
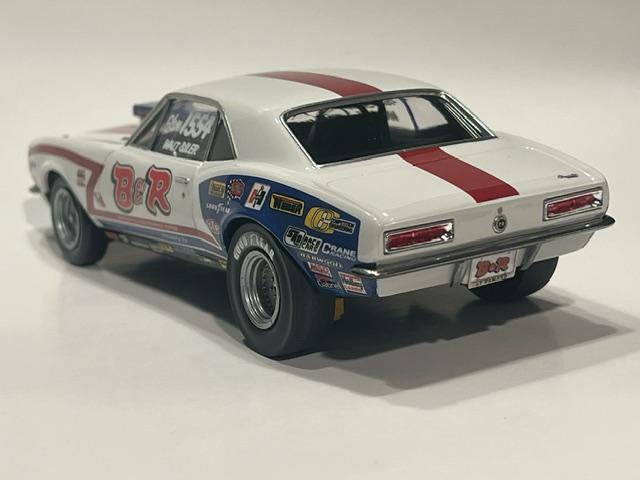
Got the decals and clearcoat on and then 8 hours in the dehydrator. Looks pretty good. Those decals were one piece for the sides. It was not fun!!! These aren't super quality like Slixx, so I had several places where the ink cracked on the red. I was able to mix up a red that closely matched and made some touch ups. Took a lot of setting solution around the rear fenders. Added a few photoetch pieces before the clearcoat (gas cap, door/trunck locks and hood pins). I now use Acme Finish 1 automotive clearcoat and love it. Very easy to use and provides a high gloss and super durable finish. Hoping to get the windows in and started on final assembly tomorrow. Maybe, if the stars align, I could have it finished next weekend.
-
Great job on the paint Scott! Those colors look like a great match. It will look awesome once the decals and clear are on.
-
’72 Dodge Demon Drag Racer 1/25 scale
Nitro330 replied to AmericanMuscleFan's topic in WIP: Drag Racing Models
Amazing as always Francis! Your craftsmanship and knowledge is unbelieveable and a joy for us to see. -
Thanks everybody, appreciate it!
-
Thanks Mike! It took a little bit to figure out what psi to use and how much to thin it, but I like the way it covered and once I got the clear on it, loved the color. And it's pretty cheap!
-
Good luck with yours John, I'm sure it will turn out nice.
-
Thanks everyone!
-
Thanks! The tires/wheels are from Jays Resin Wheels 1948 (eBay).
-
Thanks Daniel, hoping to get it completed in the next couple of weeks.
-
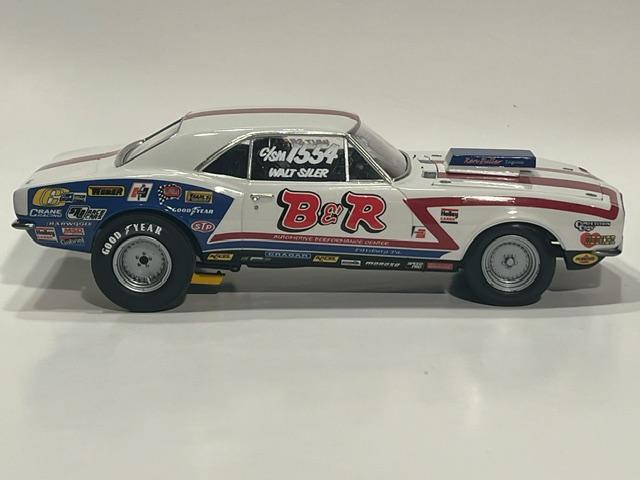
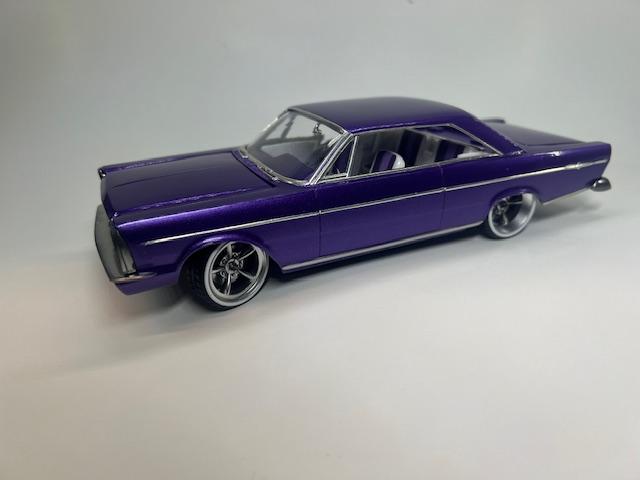
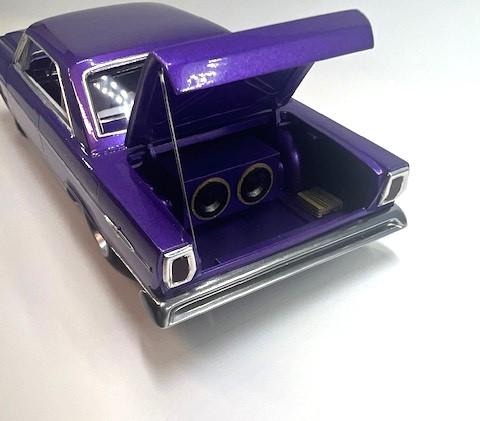
I usually have a simple build going while I am working on a detailed build. That is the case here. Been doing this one while working on the 67 Camaro drag car on the WIP page. This is not my normal wheelhouse. First time I have ever used a kits custom parts (bumpers, grill, headlights/tail lights). Only non-kit things I added are the tires/wheels, air cleaner, distributor and speakers/amps. This is not a good kit and the age of the tooling is apparent. This was also my first time ever using acrylic paint on a body. It's Createx Pear Plum. And yes, I know there is no radiator hose yet. Kit did not even come with one. I will make one up and try to get a couple of decent pictures in the sunlight where you can really see the color. Please excuse the crappy lighting.
-
Nice build Bob and great color! Those Willy's kits are a fun build.
-
Finally got it painted this week, including the engine compartment. Used MCW Ermine White enamel, came out pretty nice. Still need to paint the headliner black. Also got the BMF on the window trim. Added wing windows and side window trim. Will be making the side glass for it. Next up is decals and clear coat. Will not be able to get to that until next weekend. Hopefully next update will have body just about finished.
-
Thanks Roger! Thanks Rich! The regulator is from Iceman Collections. Thanks Will, appreciate it!
-
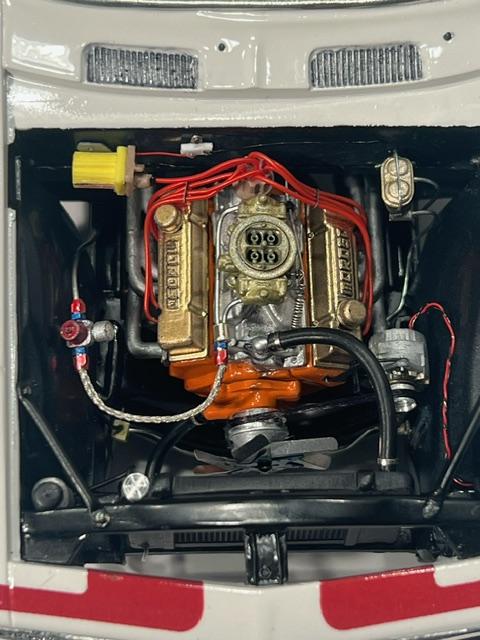
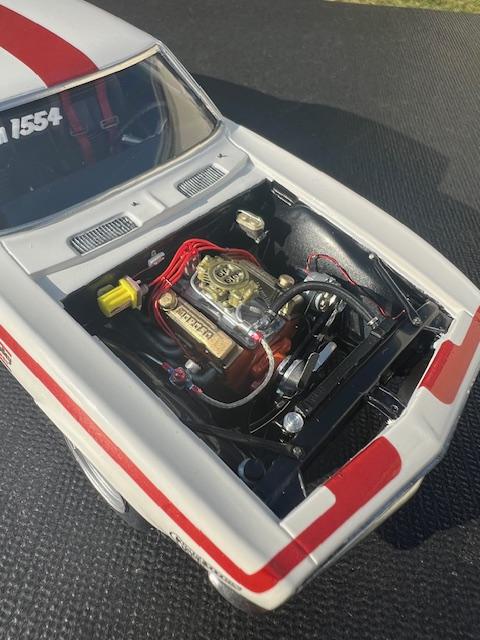
Been getting a little bench time most days the last week. As I mentioned before, I cut out the radiator support and got a new one made up this week. Not perfect, but looks much better and moves the radiator a little closer. Made up the fender/radiator braces out of copper tube. While I was concentrating on the engine compartment, I got some misc. parts done (fuel pressure regulator, super coil, lower radiator hose, master cylinder and that tiny white thing is a ballast resistor). Also, worked on the back bumper. The kit does not have the bumper braces, so I made up some out of square rod. I am quite happy with the way they turned out. Body received first color coat today and is in the dehydrator. Hoping to get started on the BMF and decals next weekend. I have a busy next 3-4 weeks, so I am going to try and fit in bench time wherever I can.
-
Coming along nicely Roger. Great job on the engine plate!