Nitro330
-
Posts
287 -
Joined
-
Last visited
Content Type
Profiles
Forums
Events
Gallery
Everything posted by Nitro330
-
Looks great Roger! That is a lot of work in the engine compartment. Looking forward to see how you mount the coil overs.
-
Thanks Dennis, thanks Roger! Appreciate it.
-
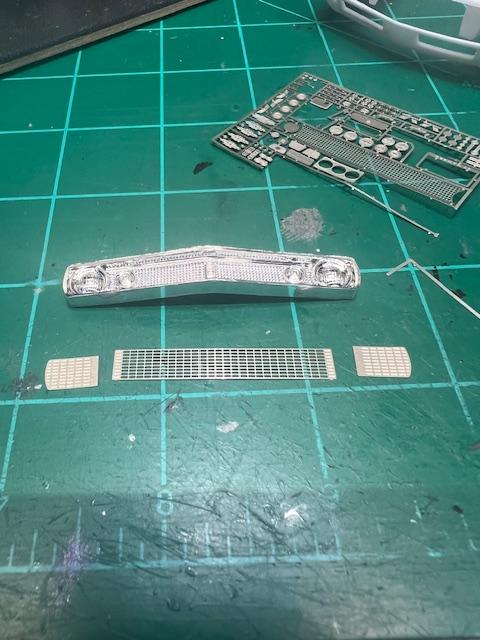
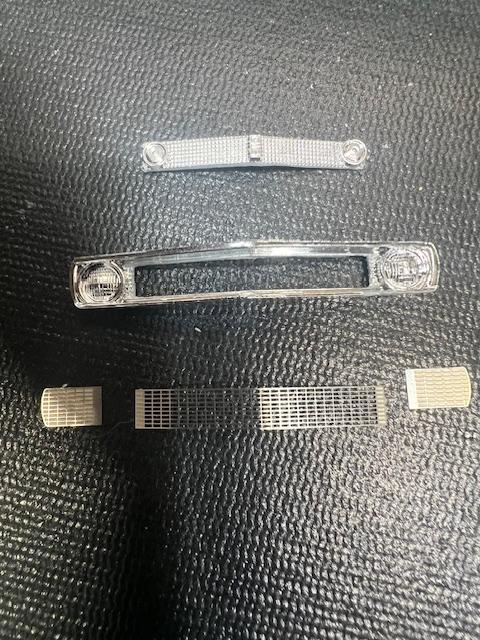
Worked on the photoetch RS grill the last couple days. Wasn't sure how I was going to do this so I figured I would start with cutting out the middle of the grill. Took a while, but came out nice and the photoetch piece fit perfectly. Next I had to grind down the molded-in headlights. Another slow and tedious job, but got them down to a decent depth. With a couple of adjustments, they fit nice. Rechromed the grill surround and painted the photoetch black with a thin chrome trim on the edges. Now it has a decent 67 RS grill. Also, did a test fit of everything today and realized that in this kit, the radiator is about three blocks away from the engine, so I'm going to cut out the radiator support and will try and come up with a new one that is a bit closer. Wouldn't be a build without the setbacks I guess. After going back and forth, I decided to remove the molded-in washer fluid reservoir too. It was also a pain to cut out, but I was able to patch it up okay.

-
Awesome build Tony! Looks great in Hemi orange with the slotted wheels.
-
Great looking funny cars and cool dragstrip diorama. I have always wanted that Black Magic kit.
-
This is so cool. Great job on this. Love the old dragsters, they were so simple, but badass!
-
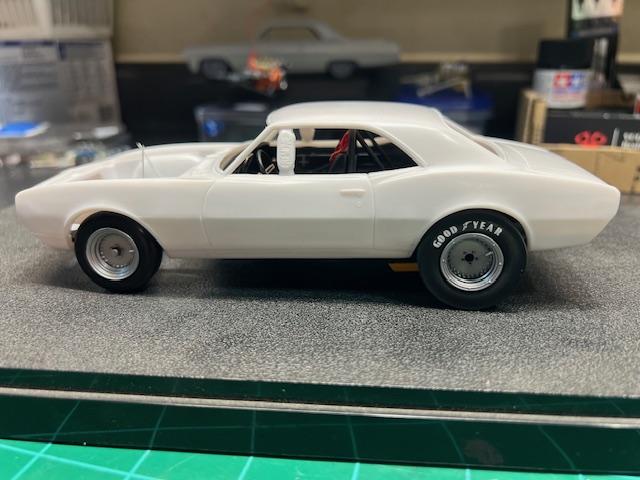
Got some bench time the last couple of days and got the interior finished. Just need to find a tach in the parts box. Doing seatbelts with the photoetch is about my least favorite thing to do! Has some detail pieces besides the seatbelts added (stearing wheel spokes, door emblems and window cranks). Anyway, it's pretty simple but looks alright. Also got the tires/wheels mounted and couldnt resist seeing what it looks like so far. Started working on the hood scoop. Using one from the Grumpy's Vega kit, but am taking a lot off the bottom because this car ran a much lower profile scoop. It will be a bit lower than the picture below and mounted a little farther back. Now, besides working on the body, i will be figuring out the layout and hookup of everything under the hood (radiator hoses, coil, fuel pressure regulator, etc).
-
Very cool Phillip! I really like these old school kits. Sure, they're simple, but they are fun and make a cool shelf model when done.
-
Thanks Rick, I'm hoping it comes out alright.
-
Really cool tips DW! I'll have to check out the guitar string.
-
Your welcome Roger, looking forward to more updates on the Demon.
-
Thanks Will. What I like about it is that it holds the lines secure. I have used photoetch pieces before, but they didn't hold very well.
-
-
Looking great Niko! Love the stance and great work on the brake lines!
-
Thanks Niko and Jeff, I appreciate it! Finally feels like I am making some progress.
-
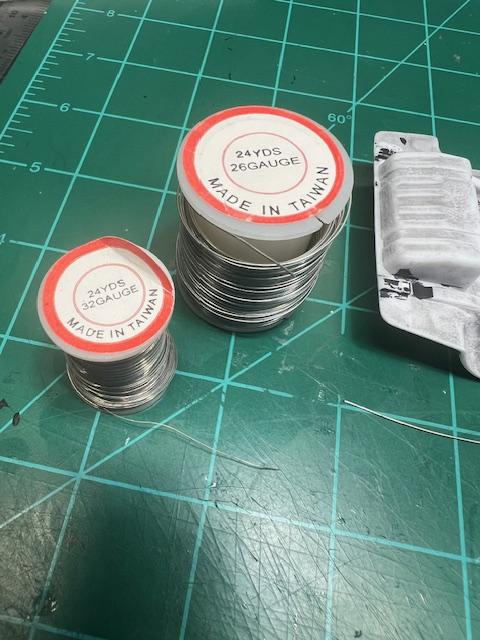
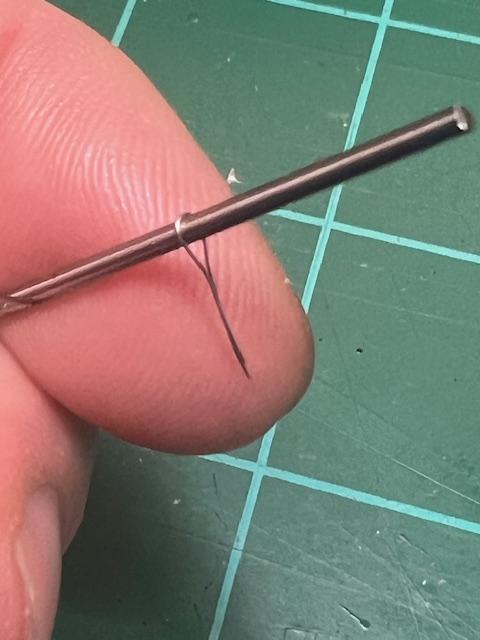
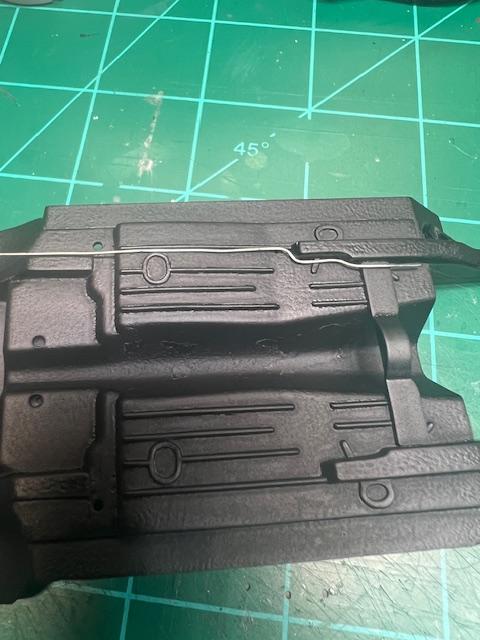
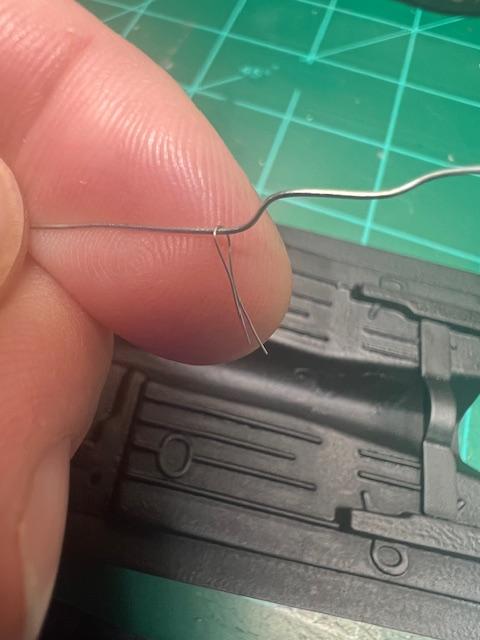
Thanks Roger! Here is how I tie down the brake/fuel lines. Pretty simple just takes a little patience. For me the most difficult part is just getting the line bent the way I want it. I use different gauges of wire I get from Hobby Lobby. For brake/fuel lines I usually use 26 or 24 gauge. For the tie-downs I use 30 or 32 gauge. Once I get the line bent, I figure where I want the clips and drill a small hole under the line in each spot. Then I wrap about a 1 inch piece of the small gauge wire around a drill bit to creat the "tie-down". Just insert the two lengths into the hole and pull/twist on the other side. Once I get them fairly tight, I add a drop of super glue to hold them and cut off the excess when dry.
-
Well if it's only going to be one, that is a spectacular one! Great photo's too, looks like a real car. The detail and perfectly clean build are just awesome!
-
This is awesome! And yep, on our block it was my older brothers in our tiny one car garage. Every weekend there was a crowd working on something.
-
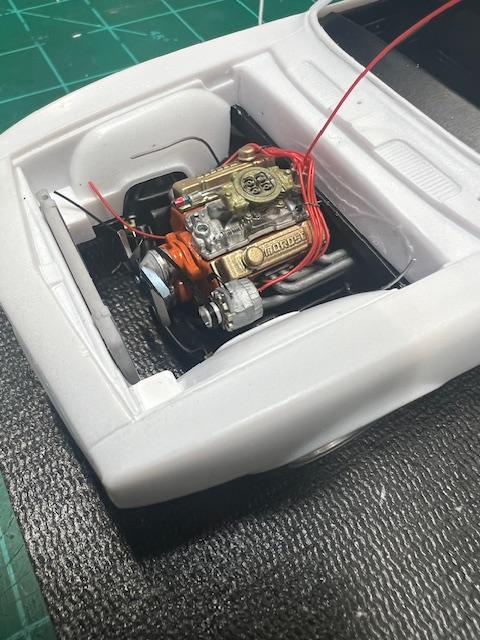
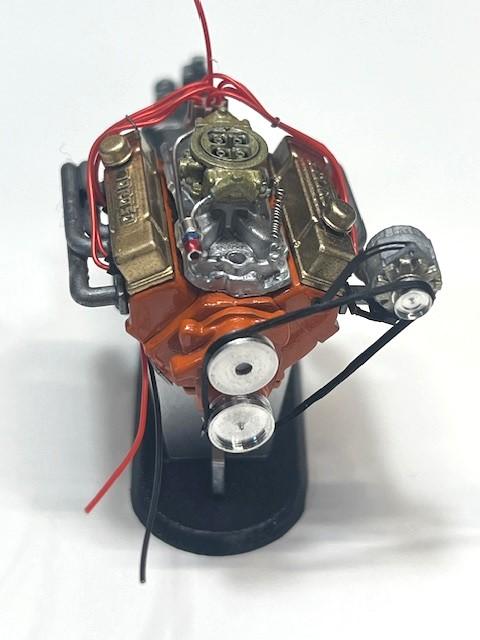
With a foot or more of snow outside, it was a good weekend to get some bench time. I actually got the engine just about done. Only parts original to the kit are the block, water pump and oil pan. Struggled a bit with the alternator, but made a lower brace to hold it in place, it is very delicate, but should stay if my clumsy hands don't knock it off. I've still got to look around the parts box for a flex fan. Next up is finishing the interior, front end and then moving on to the body. Still have several decisions as far as underhood detail and layout.
-
Wow! Just saw this one Scott! Love all of the builds you have posted, but this is my favorite. Awesome job on the ramp truck and the roadrunner is really cool.
-
Looking forward to this one. You don't see that version done very often.
-
Thanks Guys, appreciate the feedback! Wish I had more time to work on it and provide more frequent updates. Did get the Chevy orange on the block today so hopefully will get some progress on the engine in the next week or so.
-
Very nice looking build, love that you set it off with Panther Pink. Super cool.
-
Super clean build and paint looks great. Awesome job!
-
Awesome job Scott, looks great!