Rockford
-
Posts
1,944 -
Joined
-
Last visited
Content Type
Profiles
Forums
Events
Gallery
Everything posted by Rockford
-

My own Sundance
Rockford replied to Rockford's topic in WIP: Model Trucks: Big Rigs and Heavy Equipment
Made some progress on the truck. Reshaped the top of the windshield and added the screen rubber. You know a W900 looks right when it has the appearance of a surprised beagle. Built a visor, just needs final trimming, refitted my fuel tanks in the correct position. I'm going to have to lose the licence plates from the front bumper. I'm hopeful it's going to look the part.
-
Glad to see it back on the bench!
-
My own Sundance
Rockford replied to Rockford's topic in WIP: Model Trucks: Big Rigs and Heavy Equipment
Added the airtanks hanging from the chassis. Fitted the quarter fenders I shaped when I was building the Aerodyne. Added rear mudflaps, they're just temporary, the real things were black. Biggest job has been stripping the paint from the cab. Soaking in methylated spirit softened the paint and then I set about it with a grey Scotchbrite and cocktail sticks. Only paint left is in the Kenworth insignia, I'm going to use a magnifying glass and a straight pin on them tomorrow.
-
Mostly scratchbuilt Dodge L1000 cabover
Rockford replied to Repstock's topic in Model Trucks: Big Rigs and Heavy Equipment
Absolutely brilliant! Even down to the heat resistant lagging on the doghouse and the wiring to the headlight buckets! Utter perfection. -
Dodge Cabover
Rockford replied to Repstock's topic in WIP: Model Trucks: Big Rigs and Heavy Equipment
Wow! I'm off to Under Glass to have a look. -
2023 BRGB Movin' On Kenworth
Rockford replied to leafsprings's topic in Model Trucks: Big Rigs and Heavy Equipment
The AMT kit would actually be ok for the pilot but such a poor effort for the series. Your build captures it well. -
5600 International
Rockford replied to Gary Chastain's topic in Model Trucks: Big Rigs and Heavy Equipment
Excellent job on this project. Looks the business. -
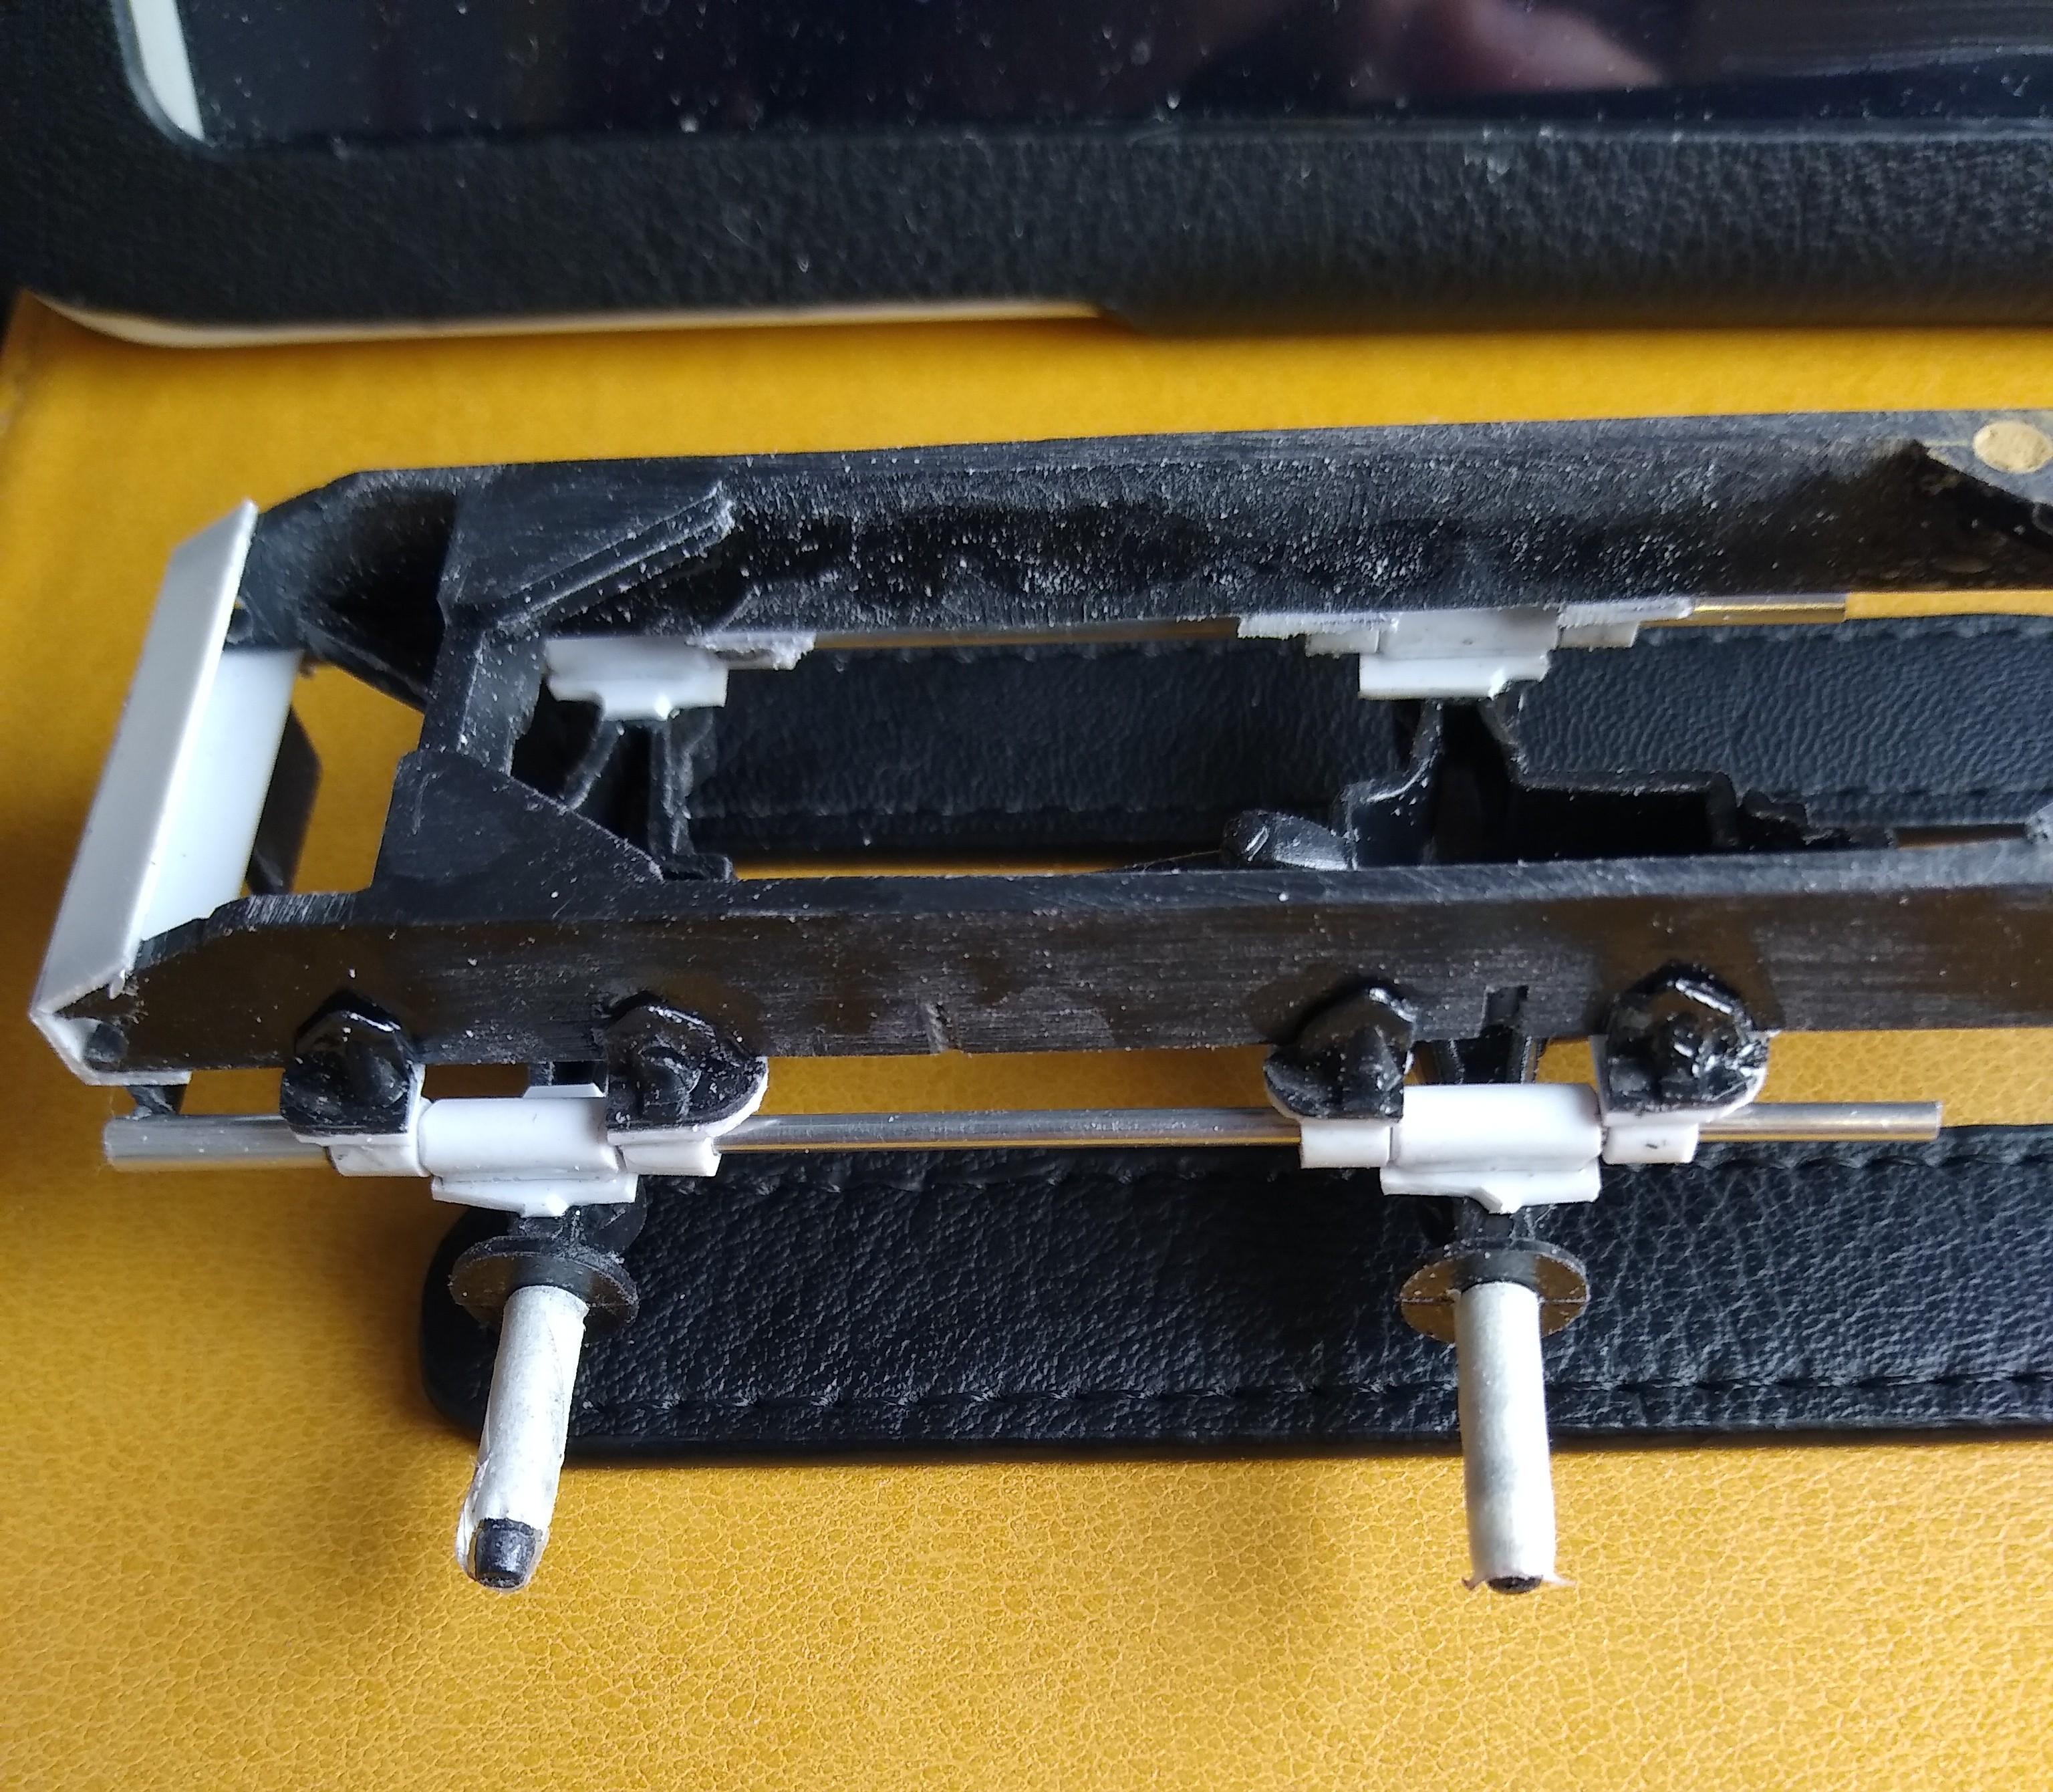
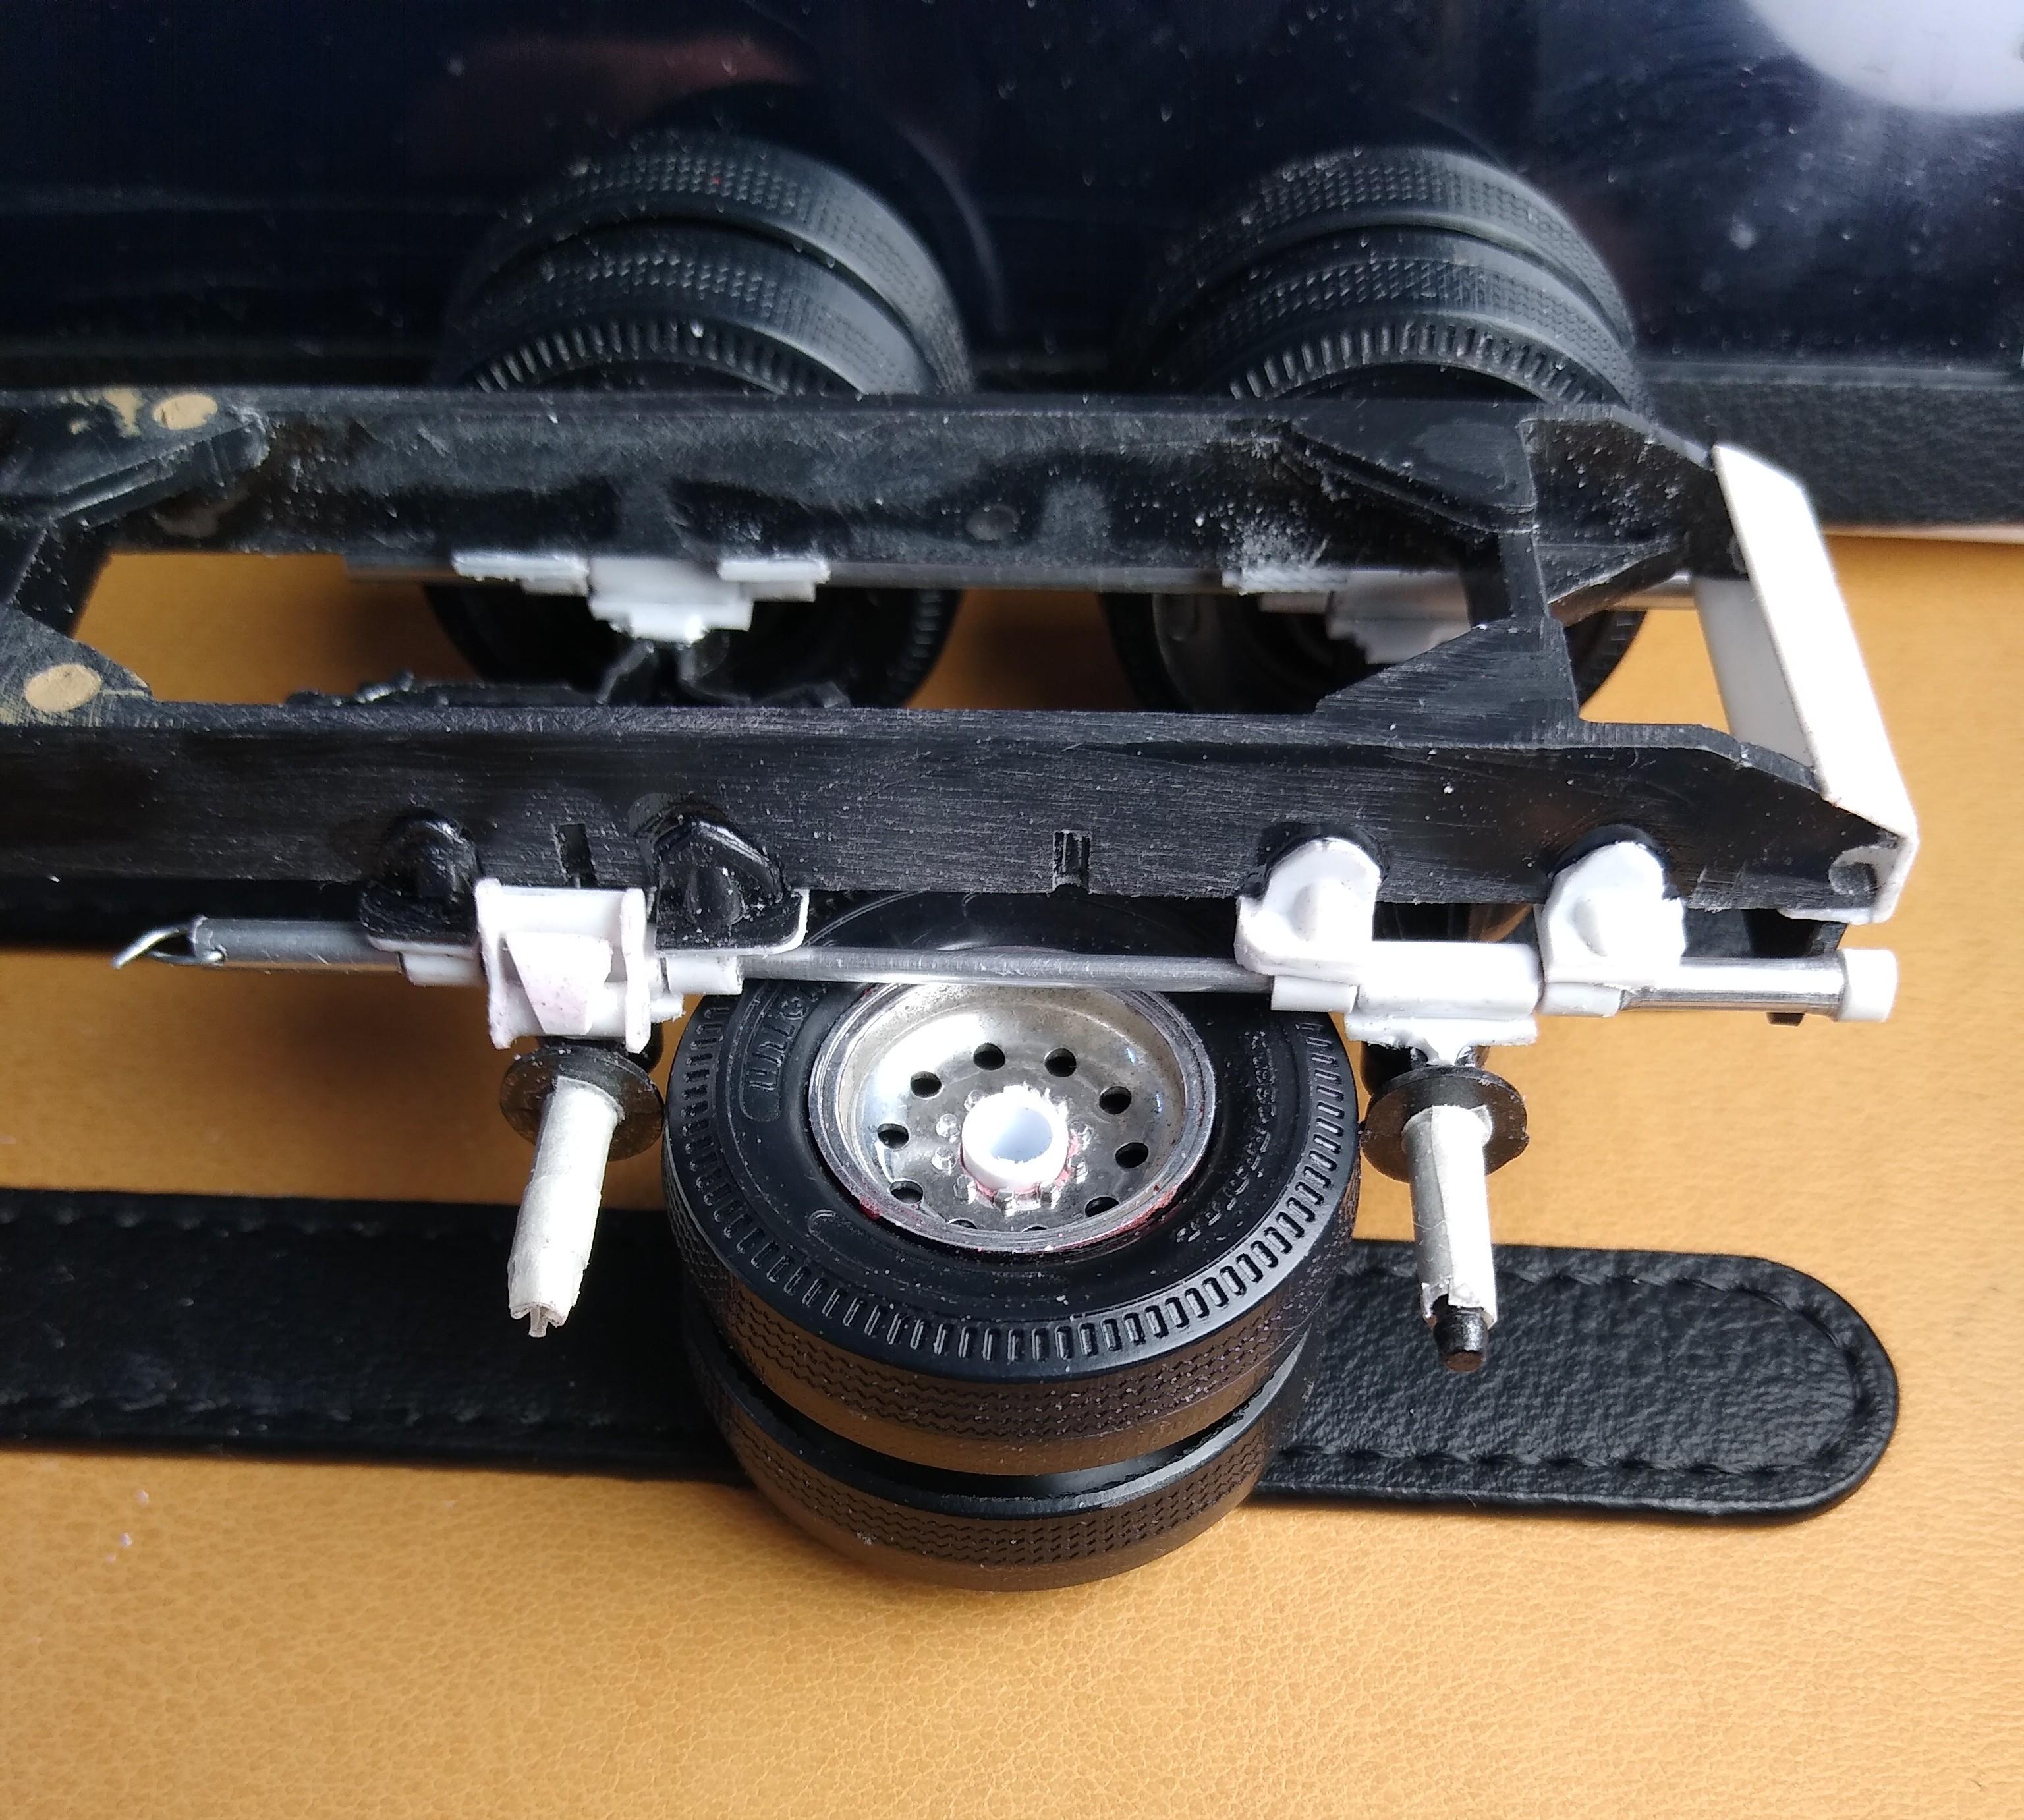
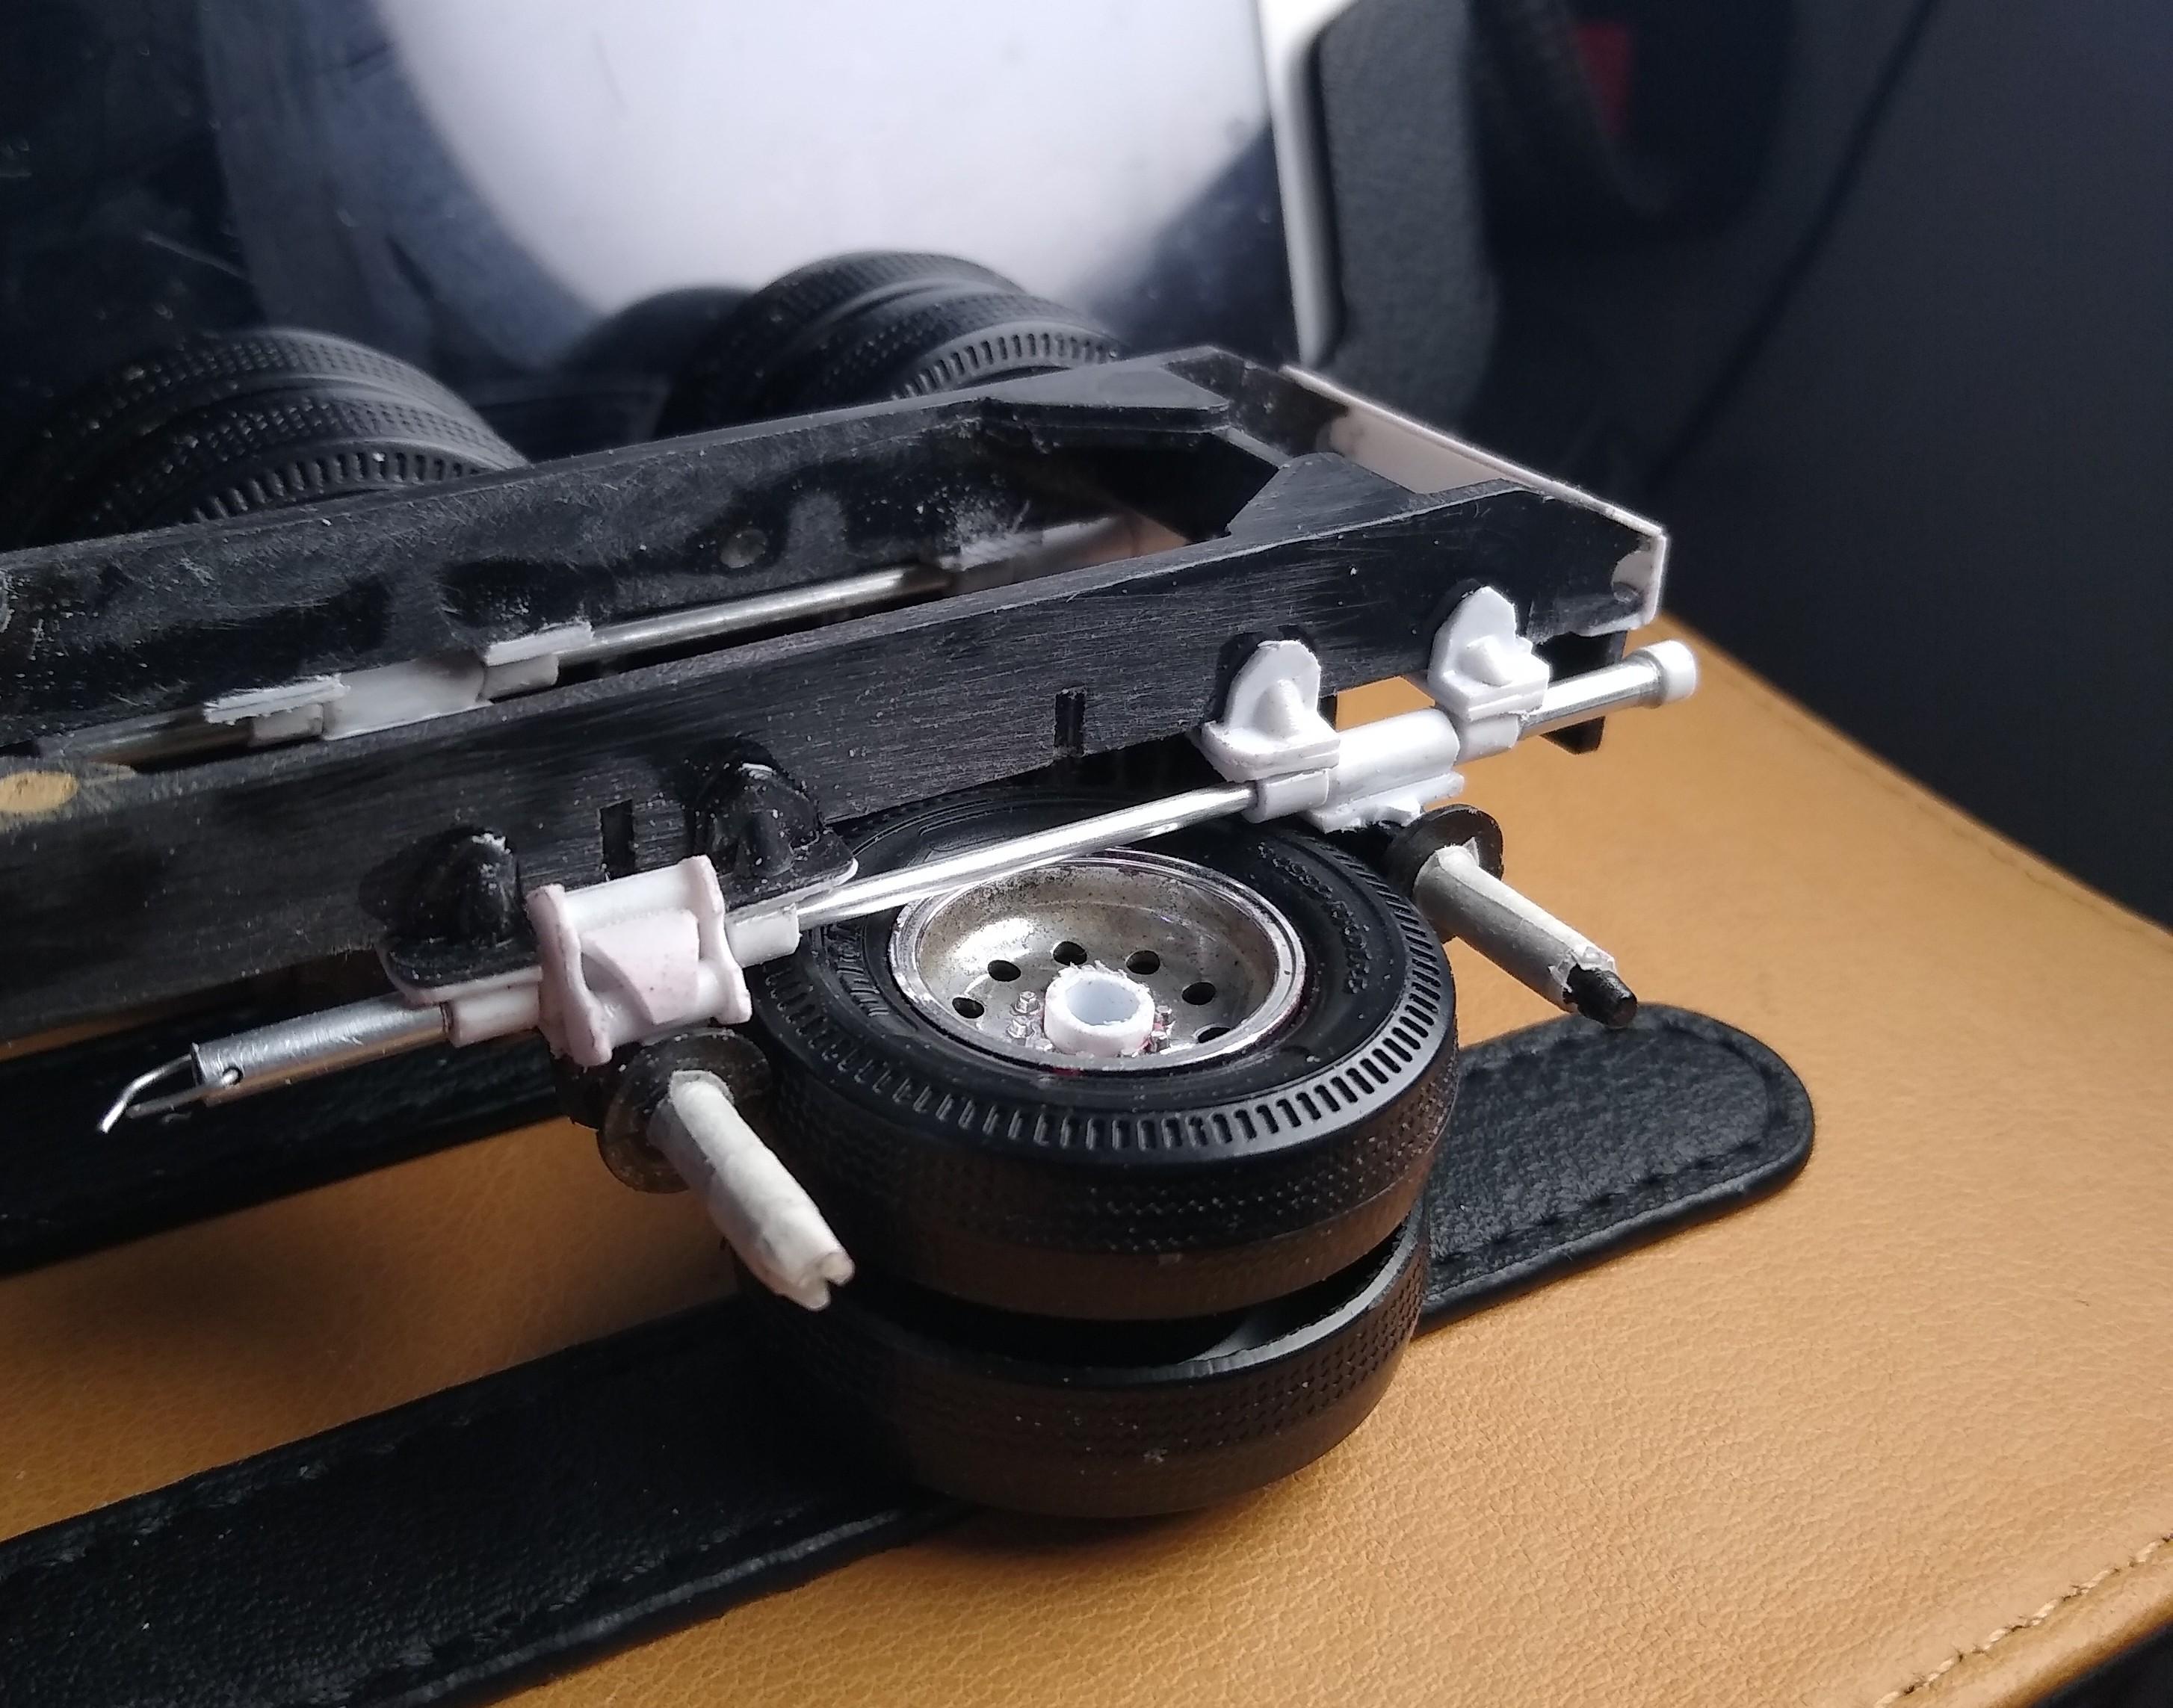
My own Sundance
Rockford replied to Rockford's topic in WIP: Model Trucks: Big Rigs and Heavy Equipment
There's not much about the KW torsion bar suspension on the web but I gathered what I could and set about it. I used the perches for the Hendrickson rubber suspension from the kit as the brackets for the torsion bar mounts with some hollow tube. Some ali tube slides right through as the torsion bars themselves. Only the front axle bellcranks are visible, the rears being tucked inside the chassis so I can hide them with the fifth wheel plate. Fashioned the bell cranks and the links out of plastic tube and card. Added the adjusters to the rear end of the bar and it doesn't look too bad all said and done. I wouldn't want to work on the real thing though, all bushes and bearings that wear out.
-
A nice old van trailer for the 351?
-
Looks brilliant that mate, excellent scratch building. Well done.
-
2021 Pierce Ascendent Tower
Rockford replied to Chariots of Fire's topic in WIP: Model Trucks: Big Rigs and Heavy Equipment
Impressive stuff. The operable suspension is excellent. You cast your own stuff then? -
My own Sundance
Rockford replied to Rockford's topic in WIP: Model Trucks: Big Rigs and Heavy Equipment
Too true. I must be mad. -
My own Sundance
Rockford replied to Rockford's topic in WIP: Model Trucks: Big Rigs and Heavy Equipment
Short answer, no. Long answer: not yet. No aftermarket for me, not a caster, might try my idea from the W900 Aerodyne, but not sure. ? -
My own Sundance
Rockford replied to Rockford's topic in WIP: Model Trucks: Big Rigs and Heavy Equipment
I was going to try to get away with a kit suspension but you've pointed out the elephant in the room now haven't you? ?It got me thinking though, and I think I've got an idea on that one. Watch this space. -
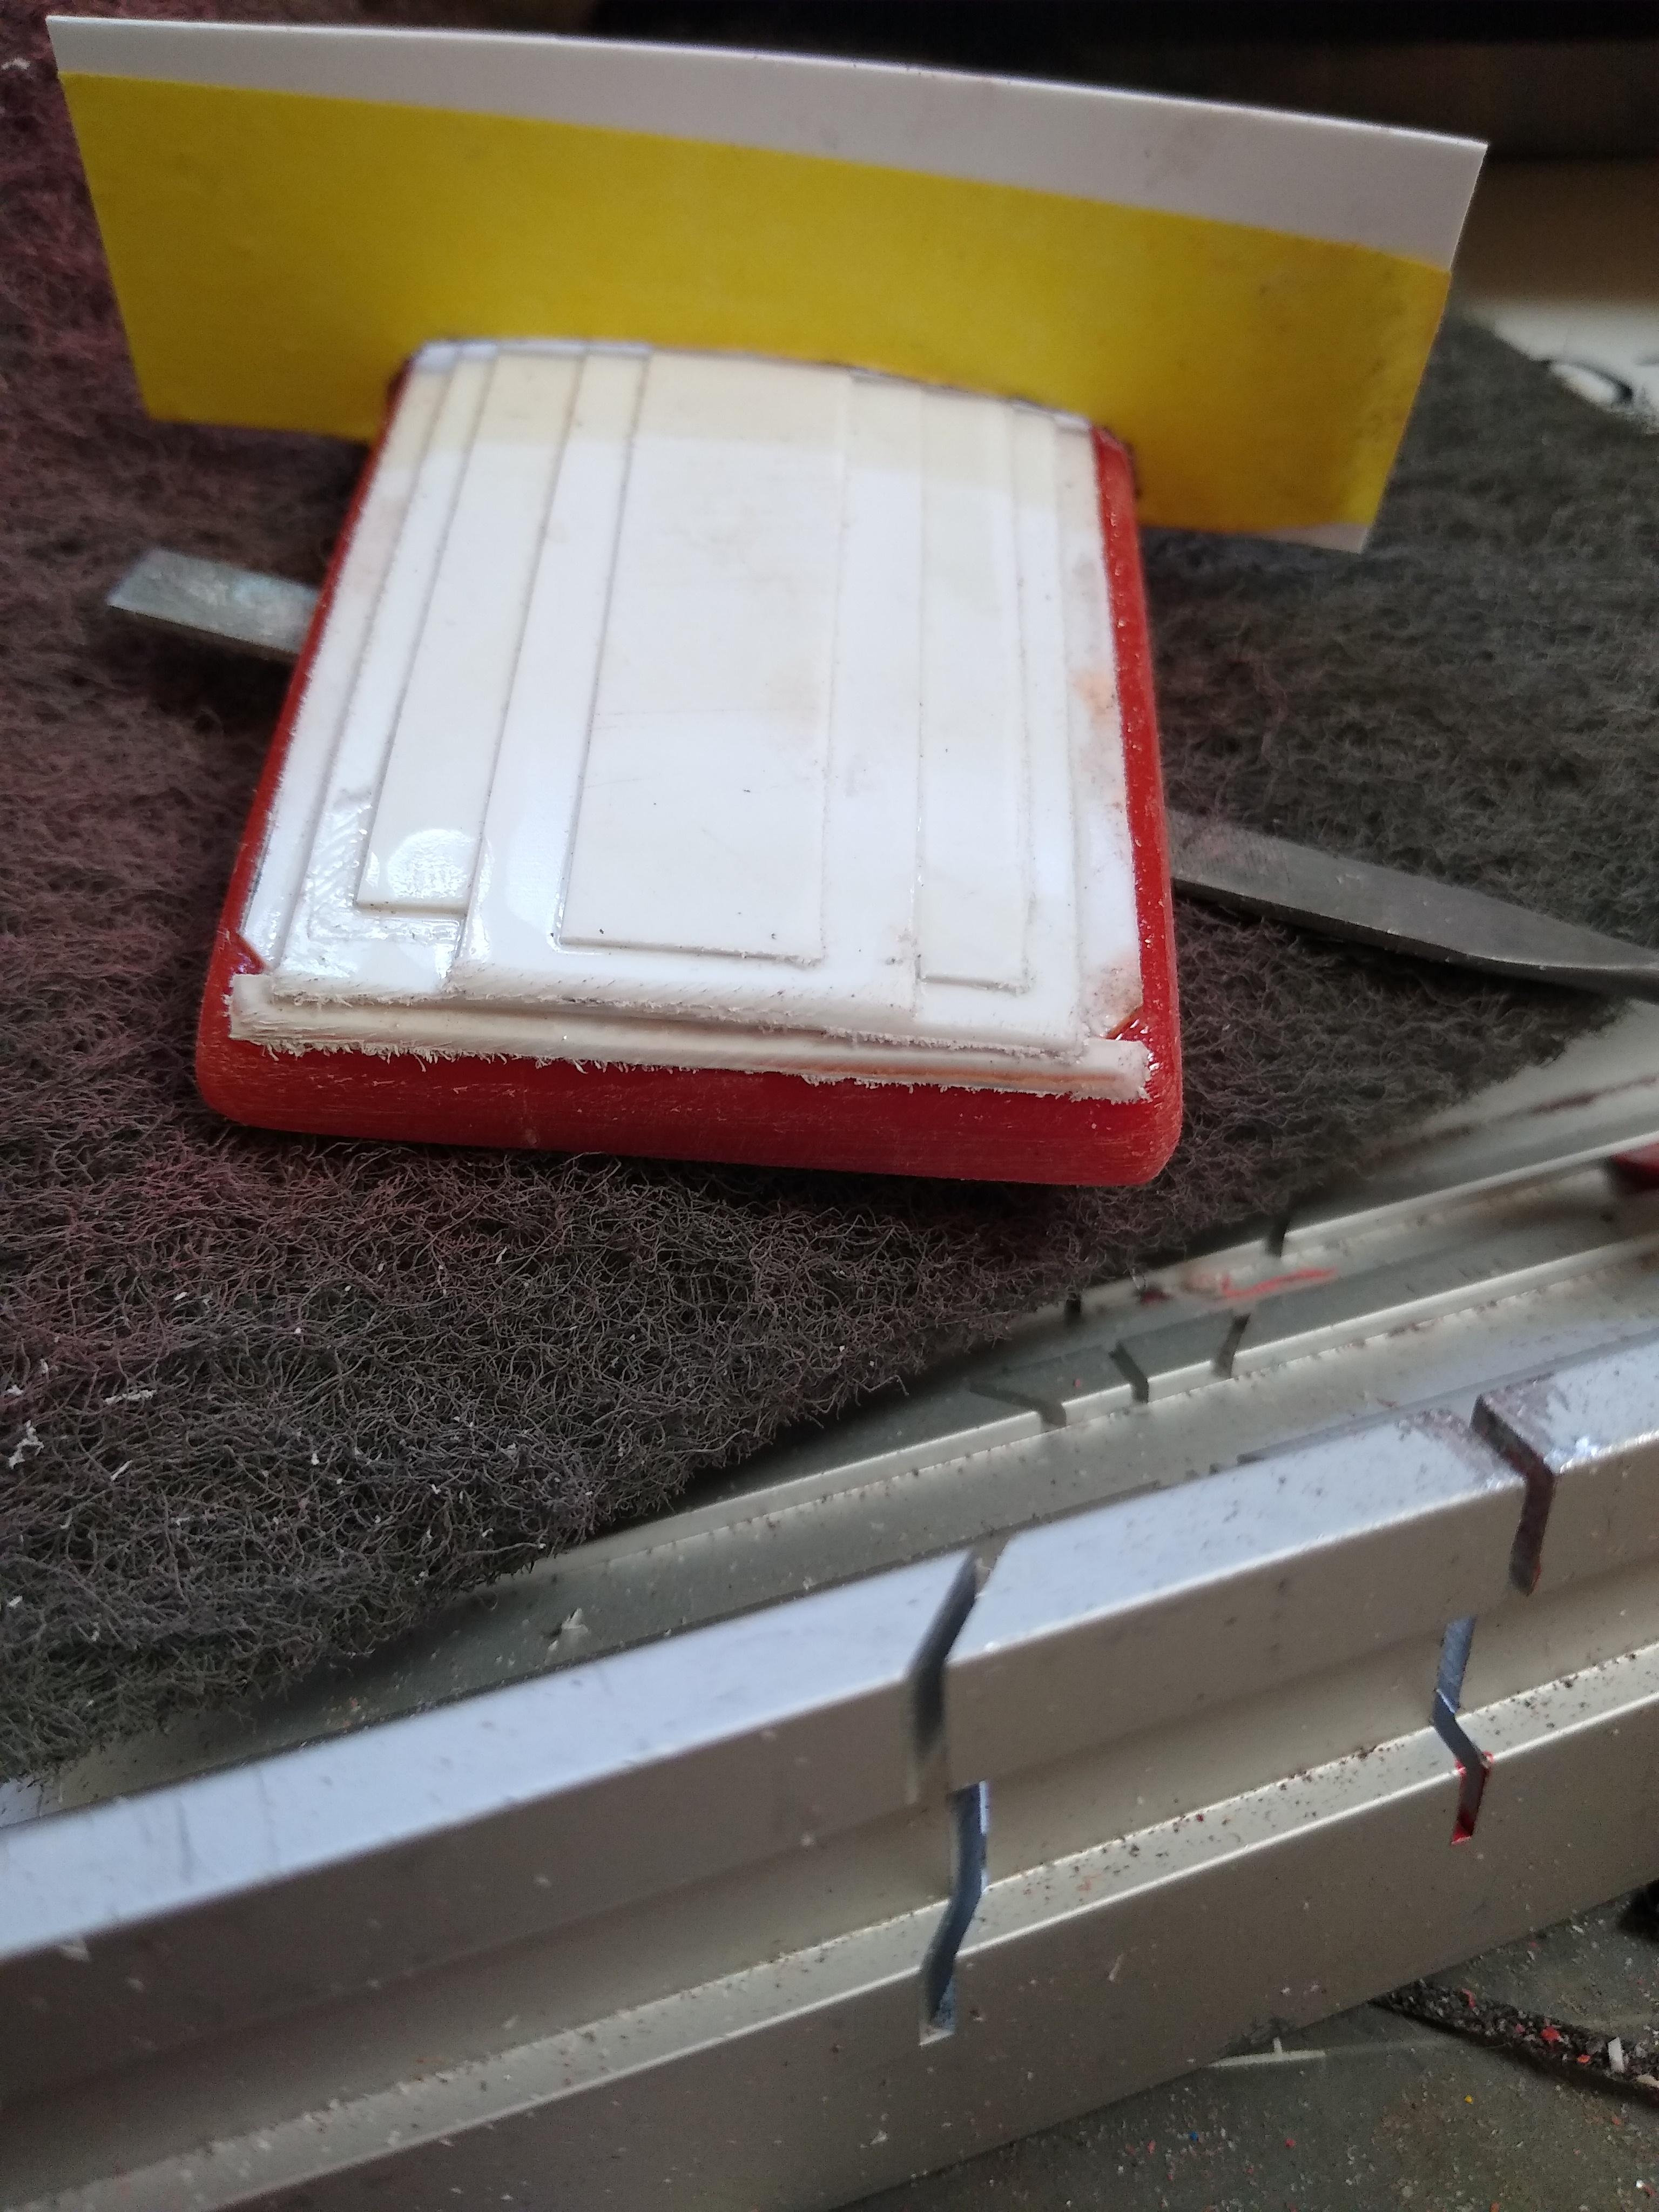
My own Sundance
Rockford replied to Rockford's topic in WIP: Model Trucks: Big Rigs and Heavy Equipment
Thanks Gary. -
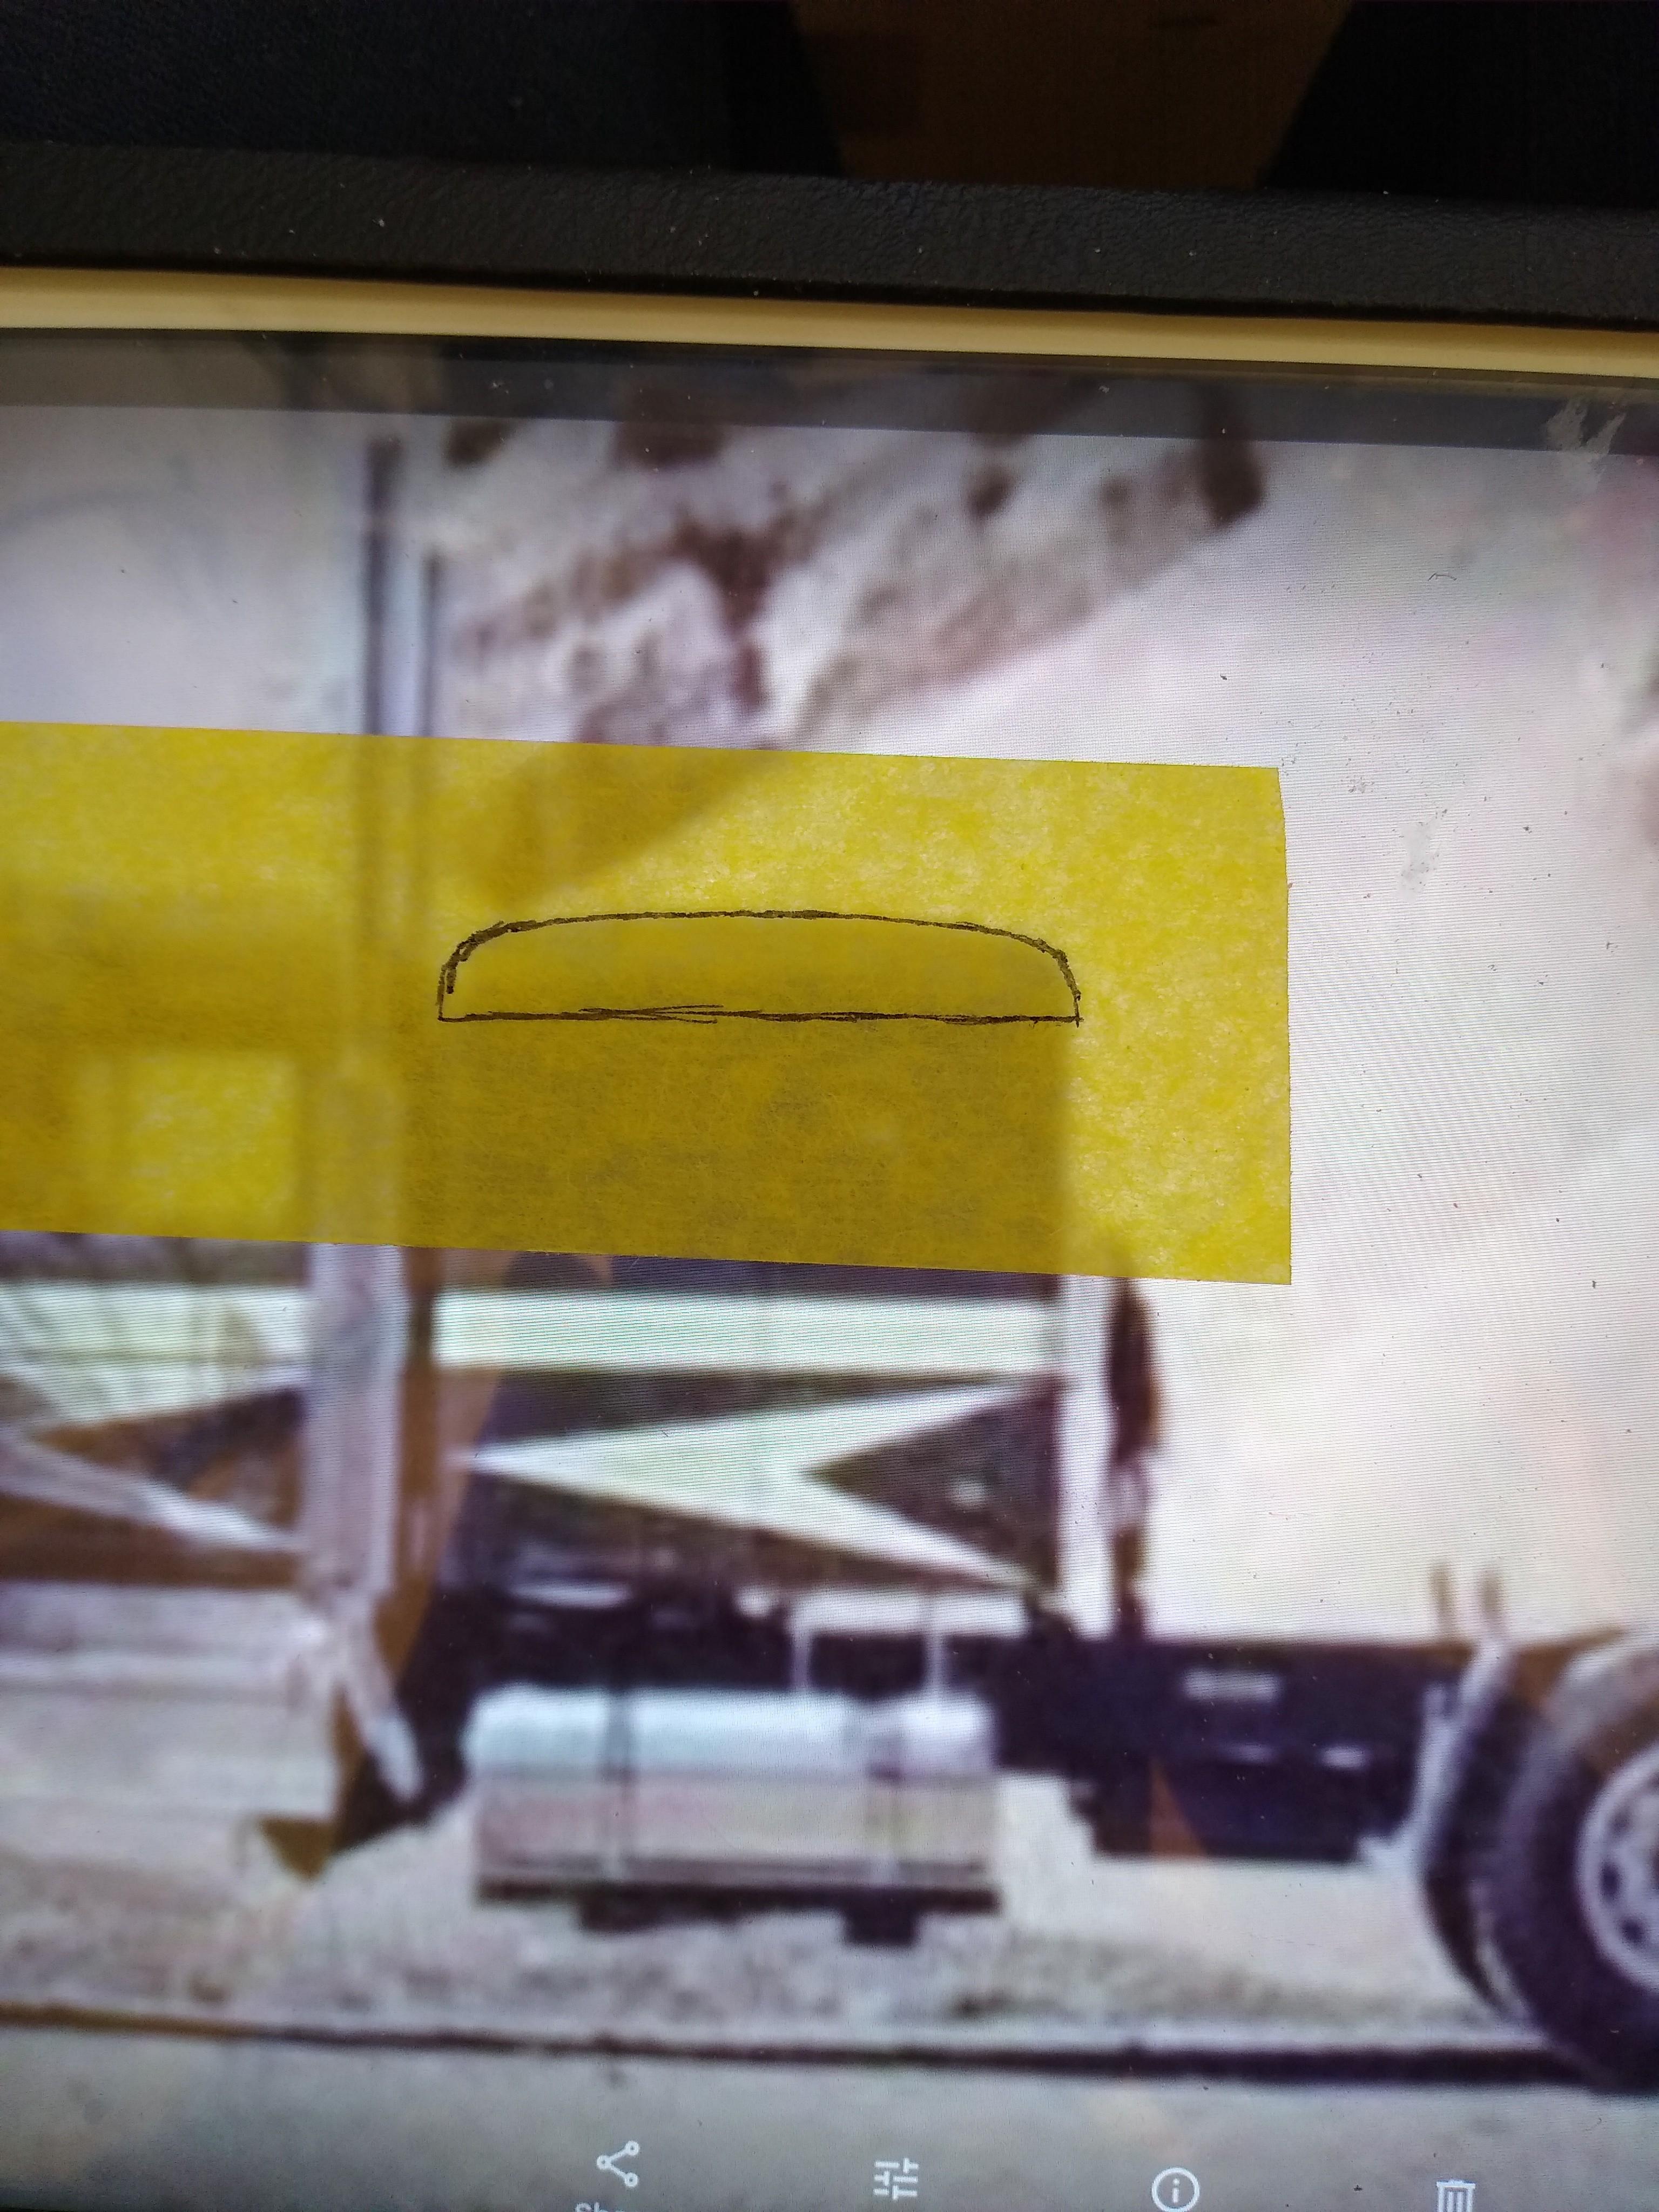
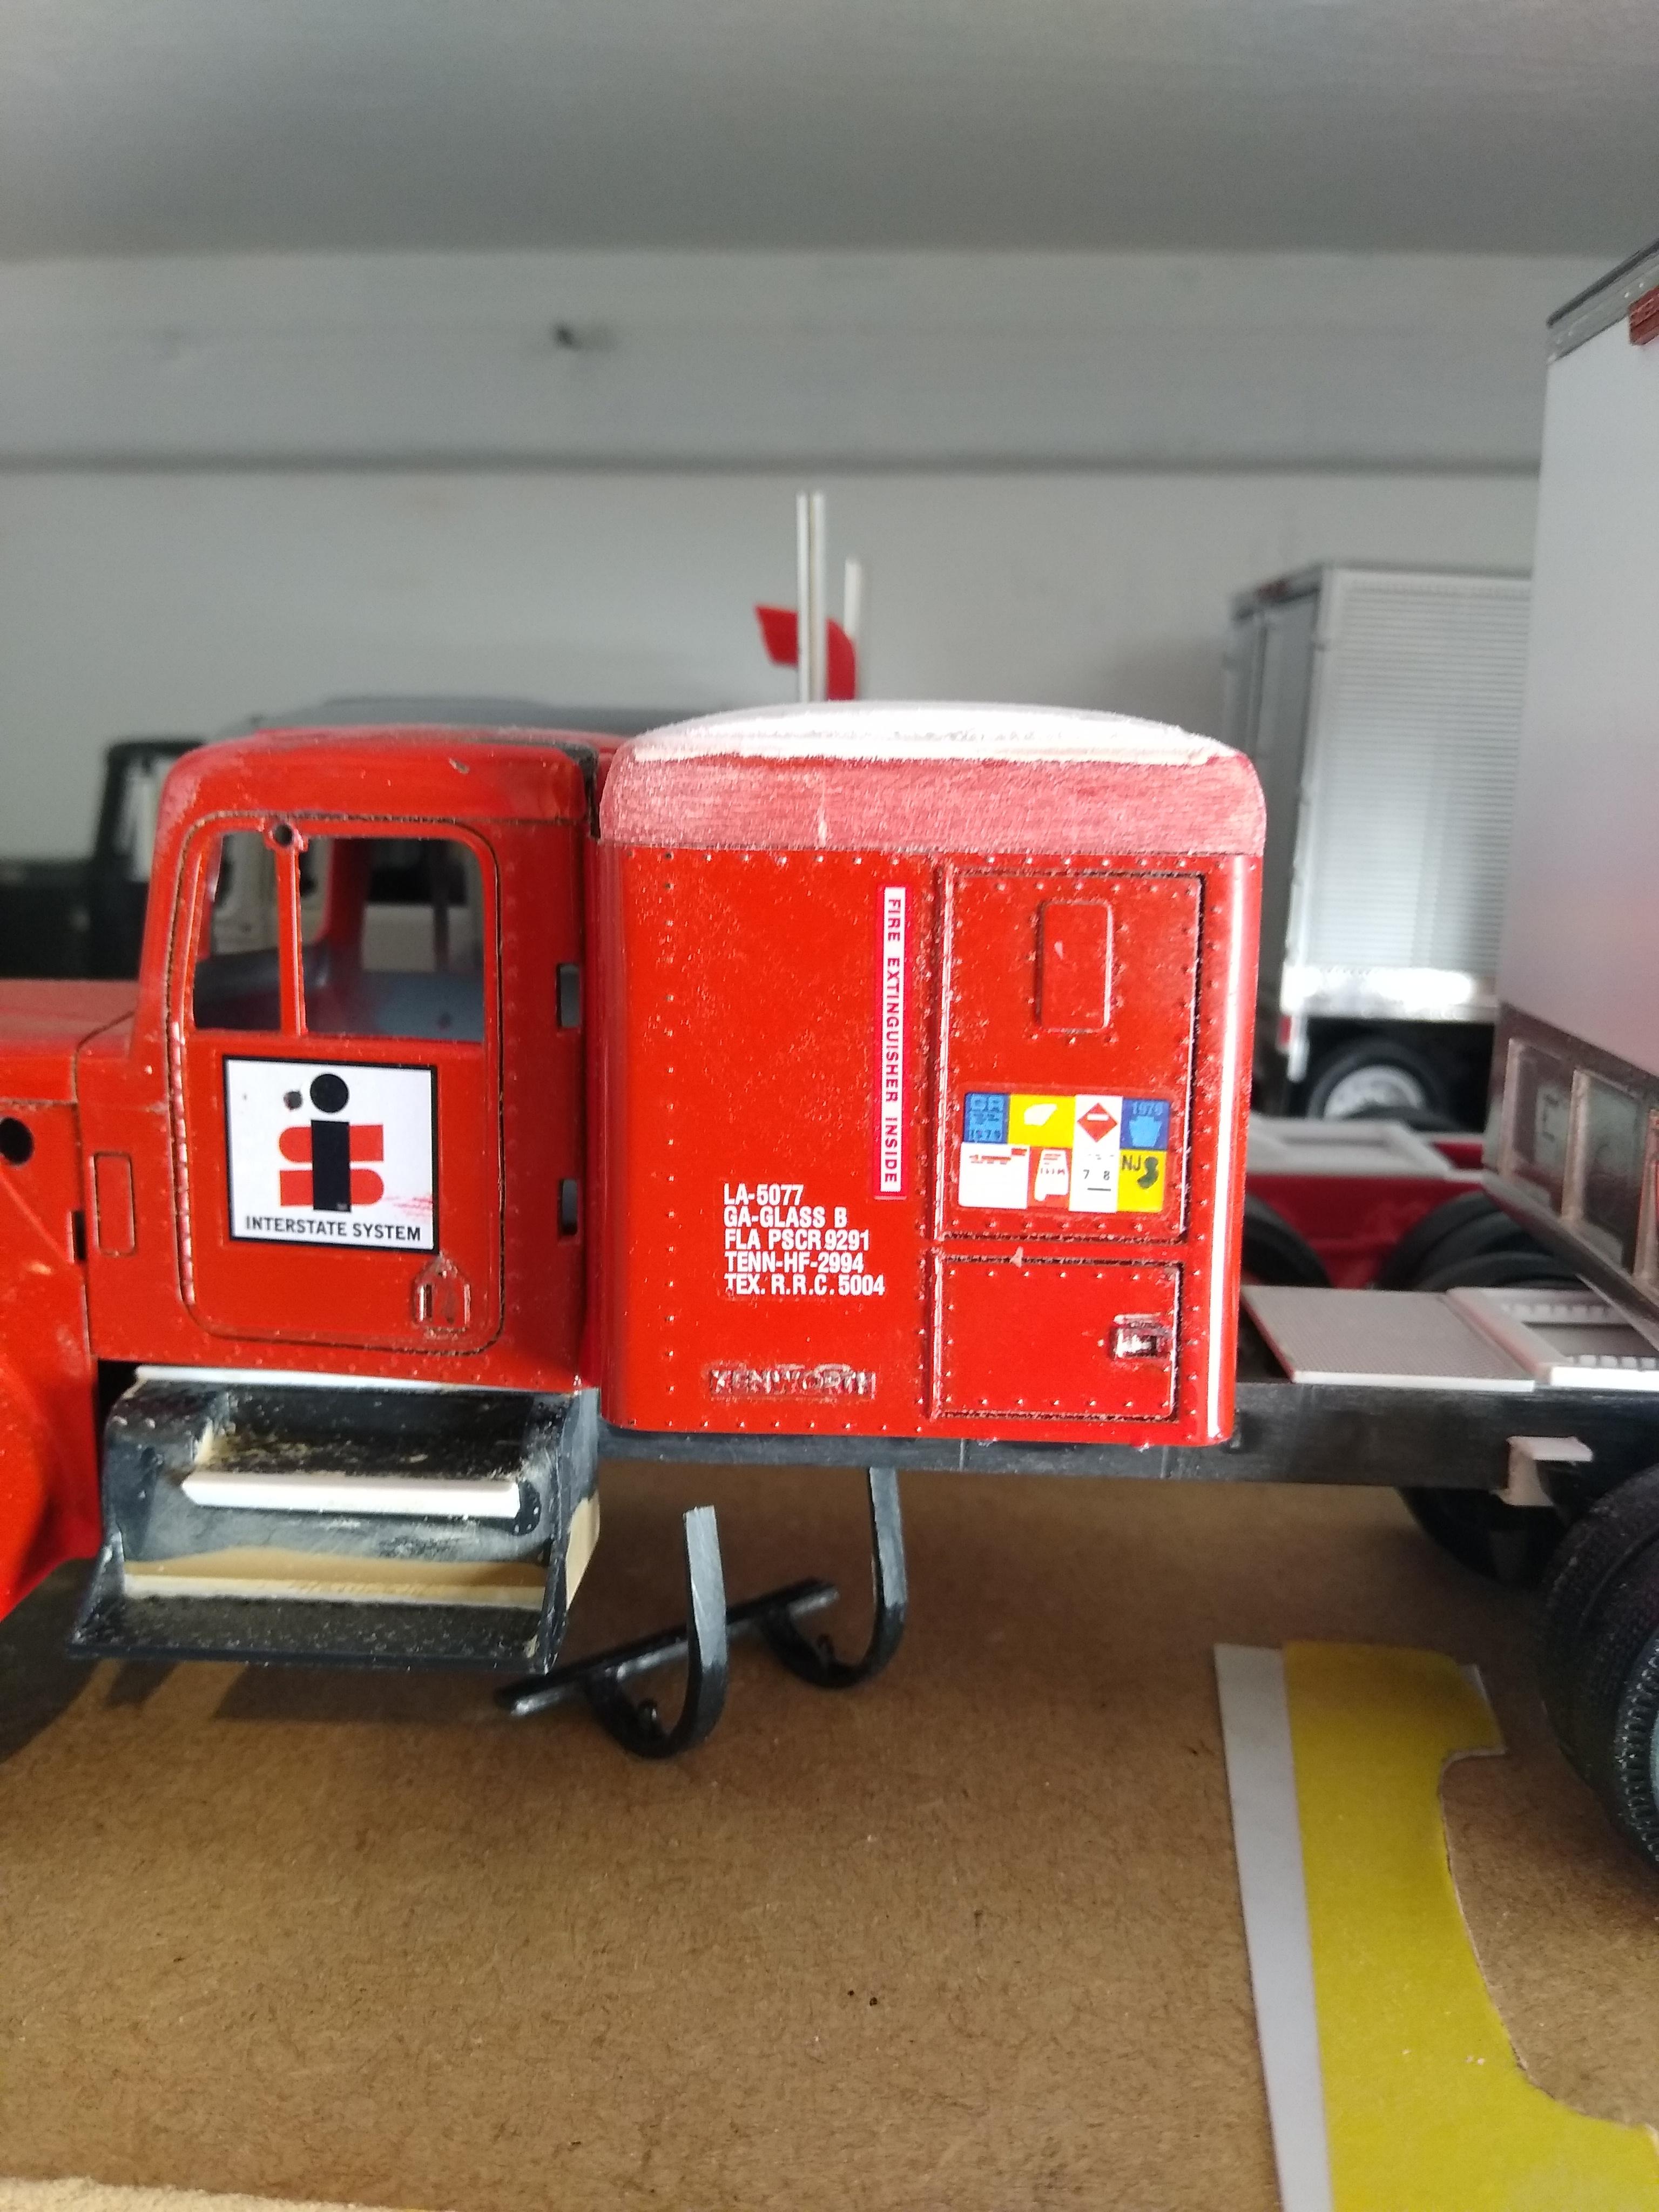
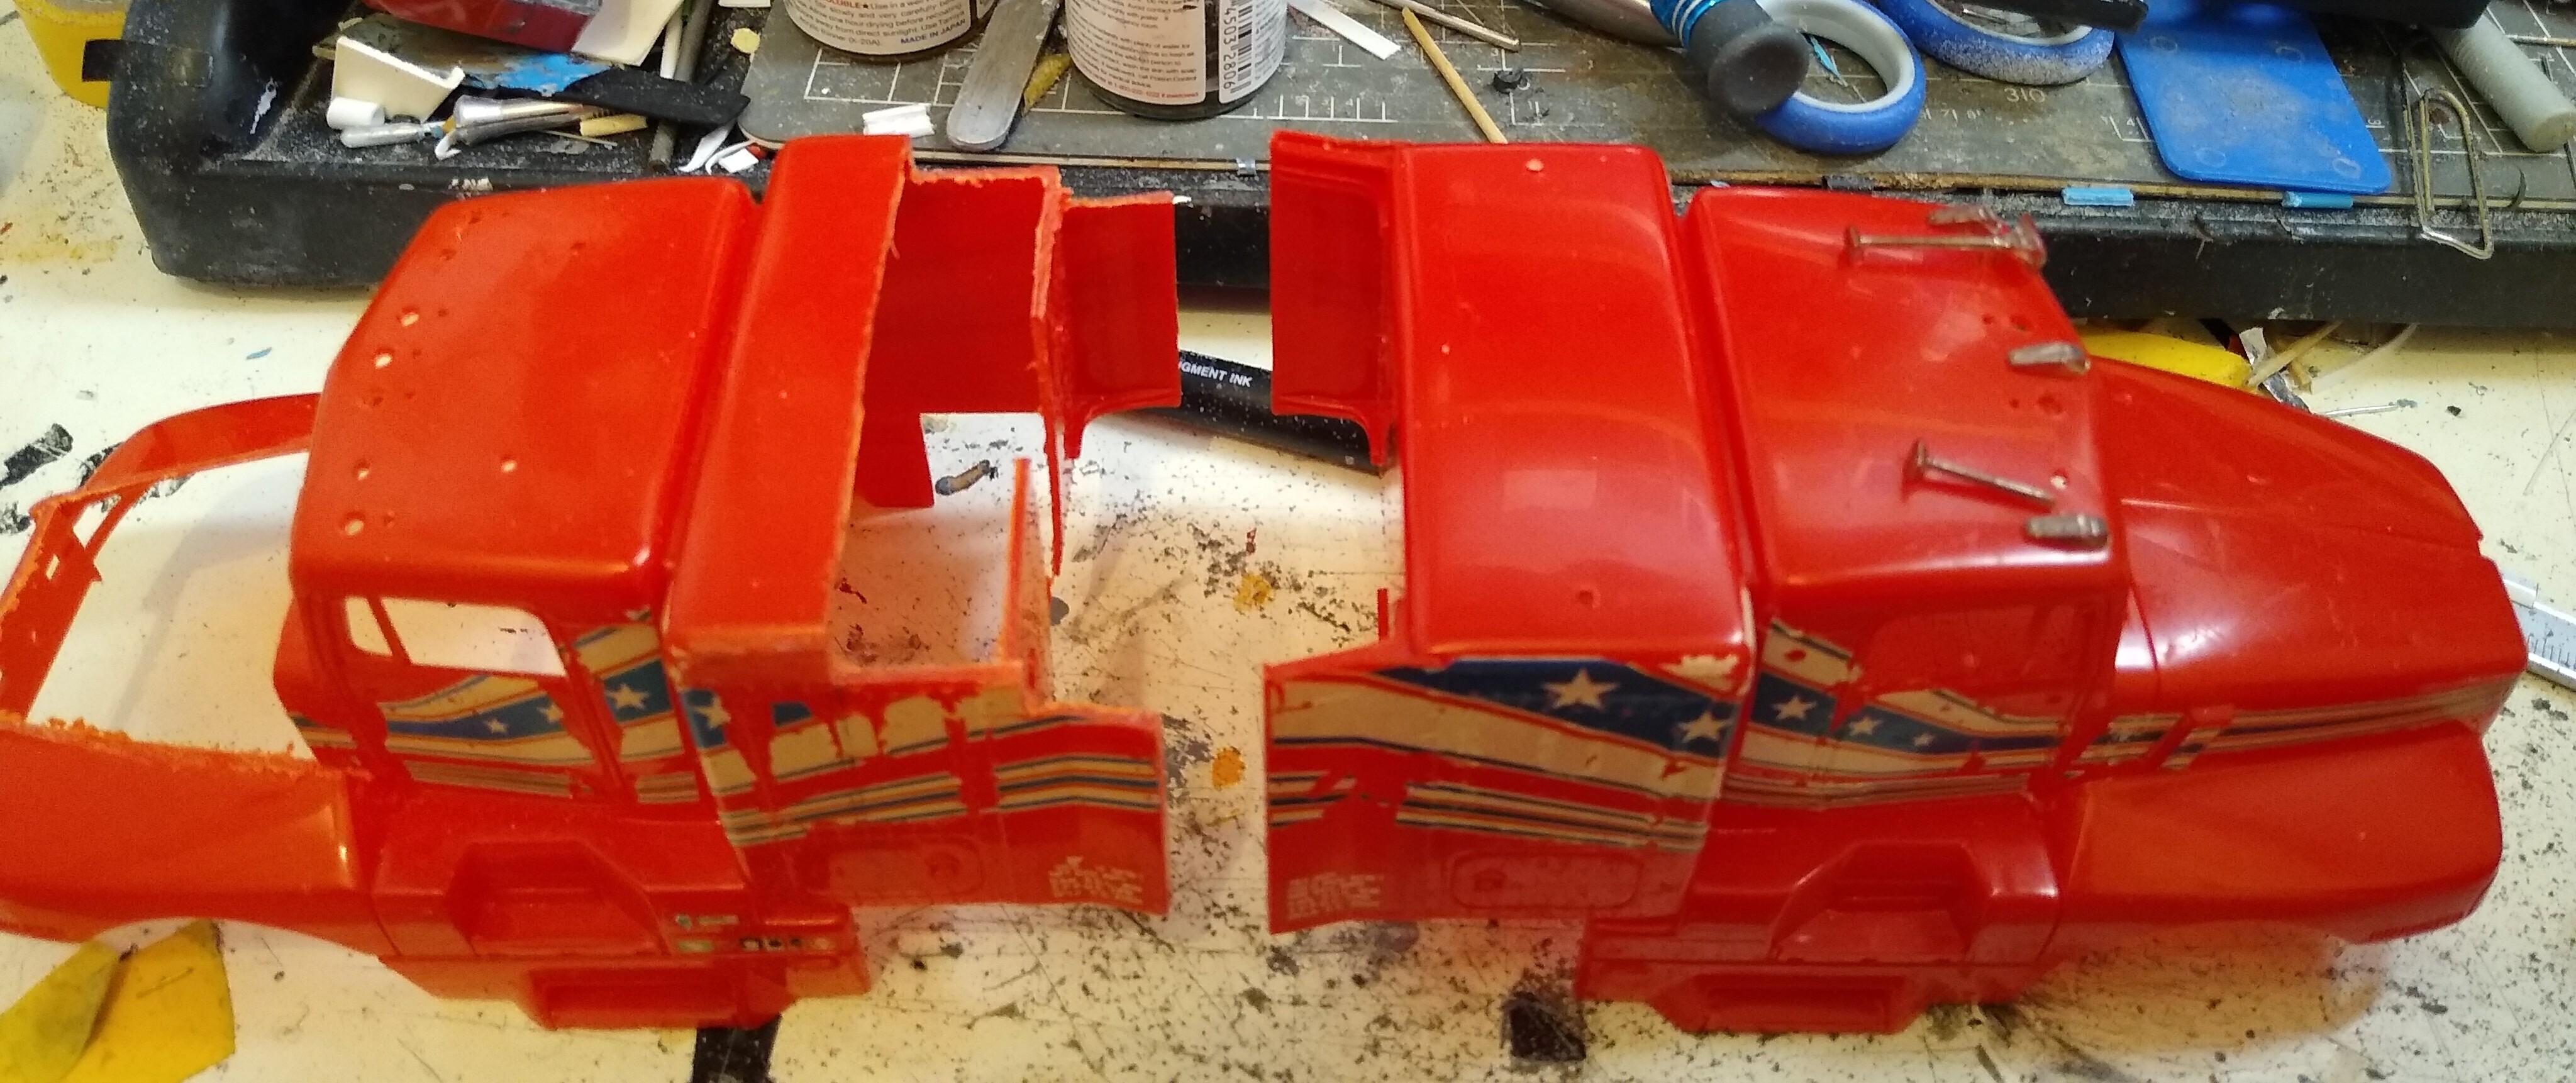
I know it's been done so many times that it's become a cliché but like many in our hobby, my love of American trucks sprouted from the series Movin'On. In GB in the 70s Sonny's truck looked like something from another planet! With no internet it was a real quest to find out more about this stunning vehicle. I've loved that KW ever since and built poor copies from the AMT W900 in the late 70s, working from memory and the odd photo. When I built my 1/32 W900 Aerodyne I realised that this kit would make a good Pruitt motor but wasn't prepared to take the risk on that kit. However, a week or so ago three built snappers came up on eBay for £30 starting bid, one was another AMT 1/32 Snap-Fit. Mine was the only bid so I got the kit for £10 all in, at such a price, I am prepared to take the risk! I stripped it down and set about cutting the Aerodyne cap off. I used the rear section of a Monogram T600 cab to make up the roof. I also used the sleeper roofs to start forming the sleeper roof cap. I need to replicate the dome of the sleeper roof but wasn't sure how to achieve it. In the end I measured the sleeper on the kit, 43mm deep. Then I put some masking tape on my tablet screen and blew a picture of the real truck up until that measured the same, then I traced the roof cap profile onto the tape and produced a profile on card. This I can use as a template Monogram wheels added, stacks built and mocked up, different truck! Before I carry on, gotta to strip the paint. Many thanks to Force for his help on this already.
-
Another 'red' Project
Rockford replied to GLMFAA1's topic in WIP: Model Trucks: Big Rigs and Heavy Equipment
That'll look great when it's done. -
2021 Pierce Ascendent Tower
Rockford replied to Chariots of Fire's topic in WIP: Model Trucks: Big Rigs and Heavy Equipment
I think you need a medal for even considering it, I'd run away screaming! It'll be real achievement. -
Very clean and sharp. The details do become almost endless don't they?
-
I'm really glad to see this back on the bench.
-
1965 Chevy C 80 with gravel trailer
Rockford replied to leafsprings's topic in Model Trucks: Big Rigs and Heavy Equipment
To me it was a time when American vehicles were American, not the same as the world over. Excellent job on this. -
Looks really impressive that
-
Nice looking rig mate.
-
That looks excellent mate, well done.
-
Looks tasty, well done for hanging with it. It would be in the bin if it was me m