Rockford
-
Posts
1,944 -
Joined
-
Last visited
Content Type
Profiles
Forums
Events
Gallery
Everything posted by Rockford
-
Not a patch on yours but it's only a Snapper.
-
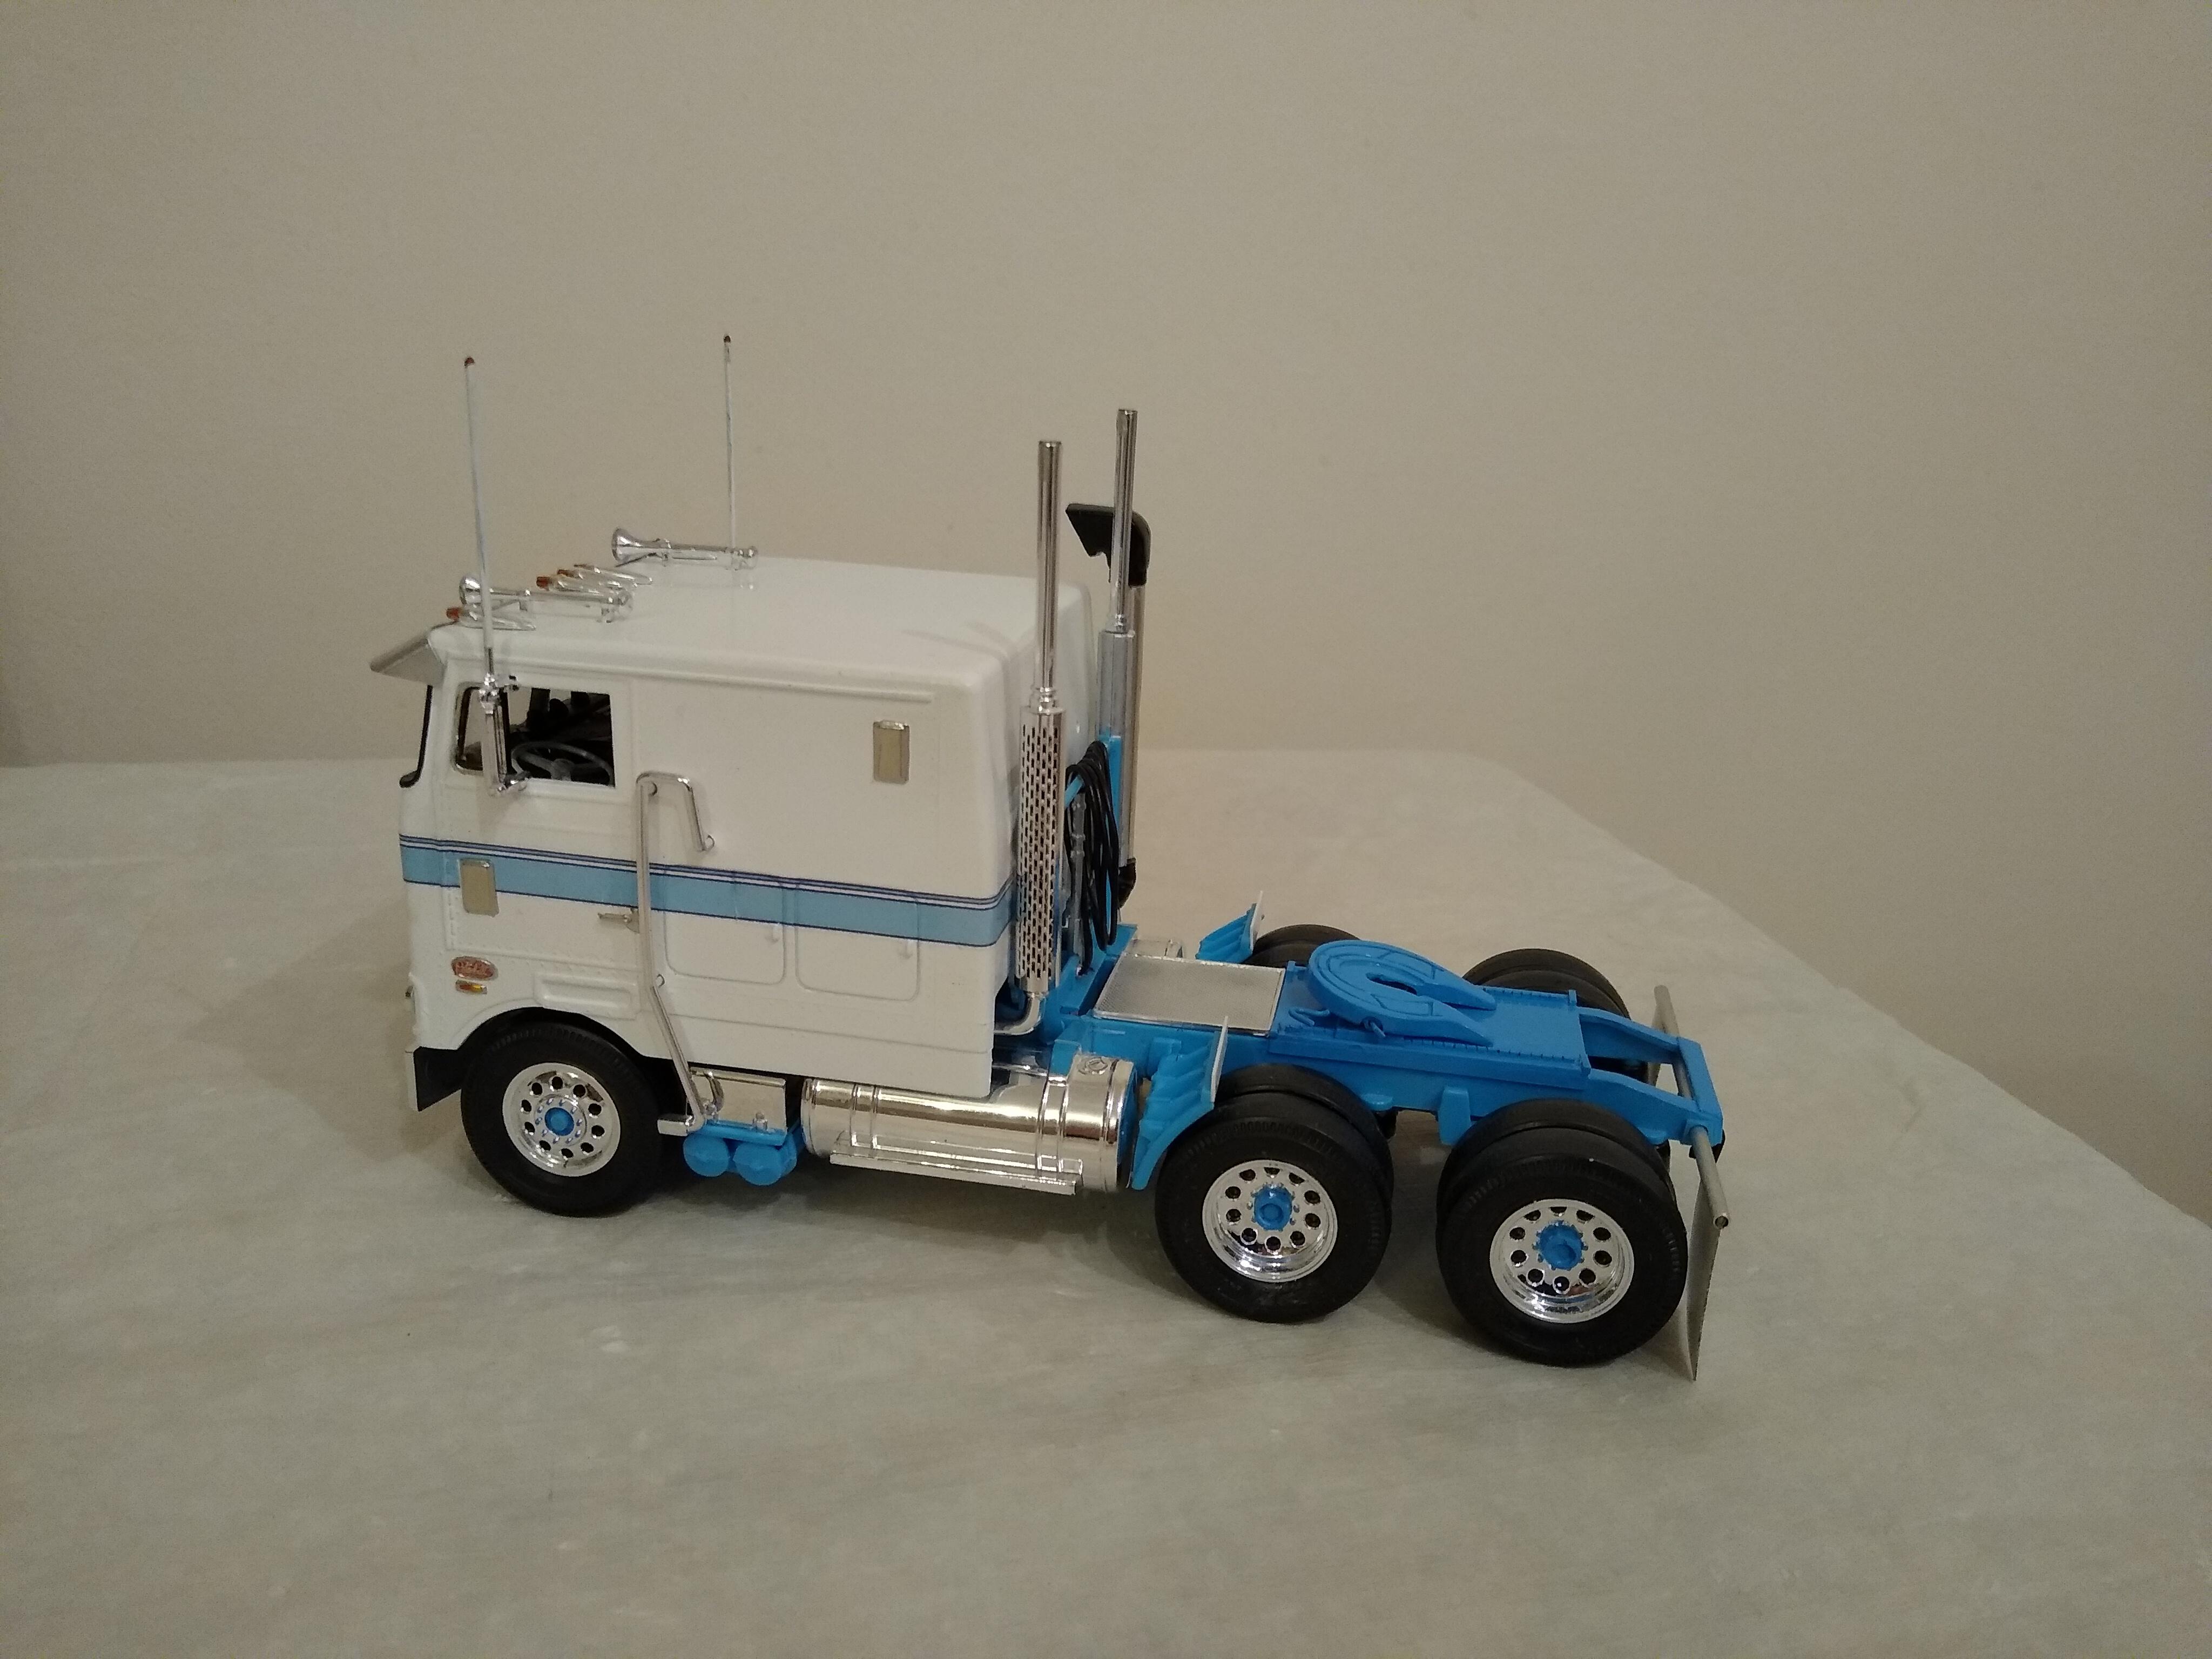
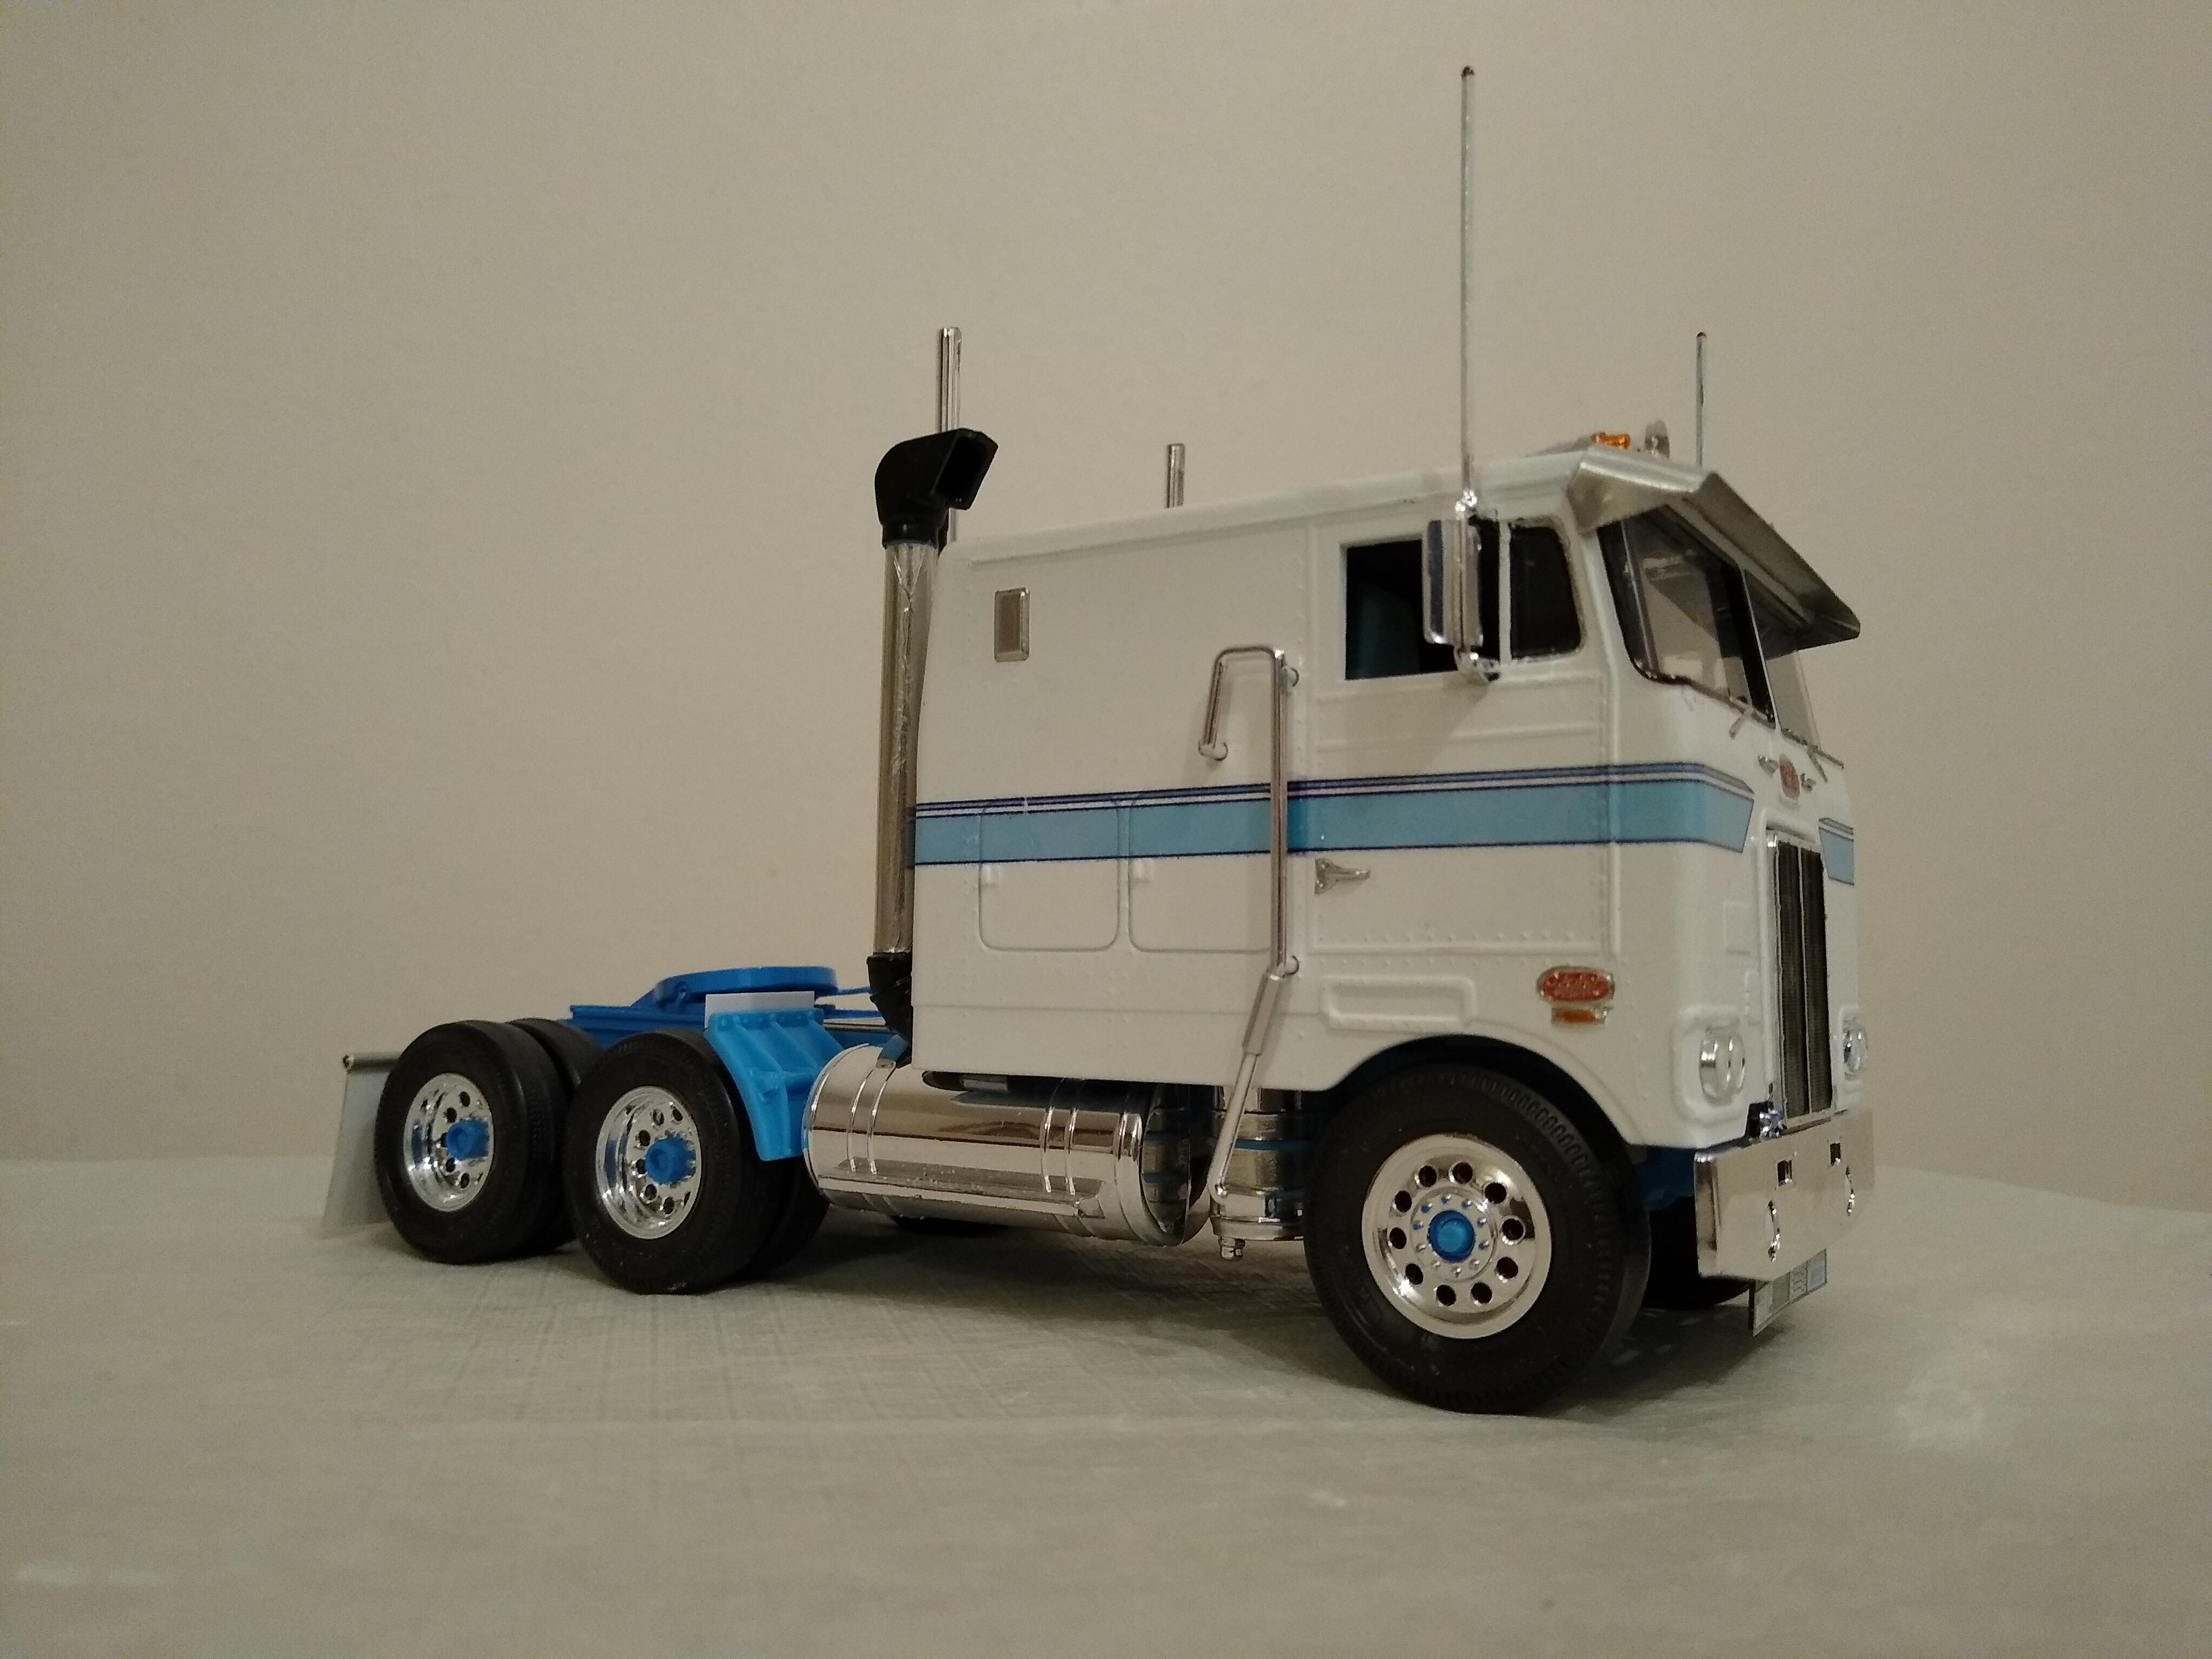
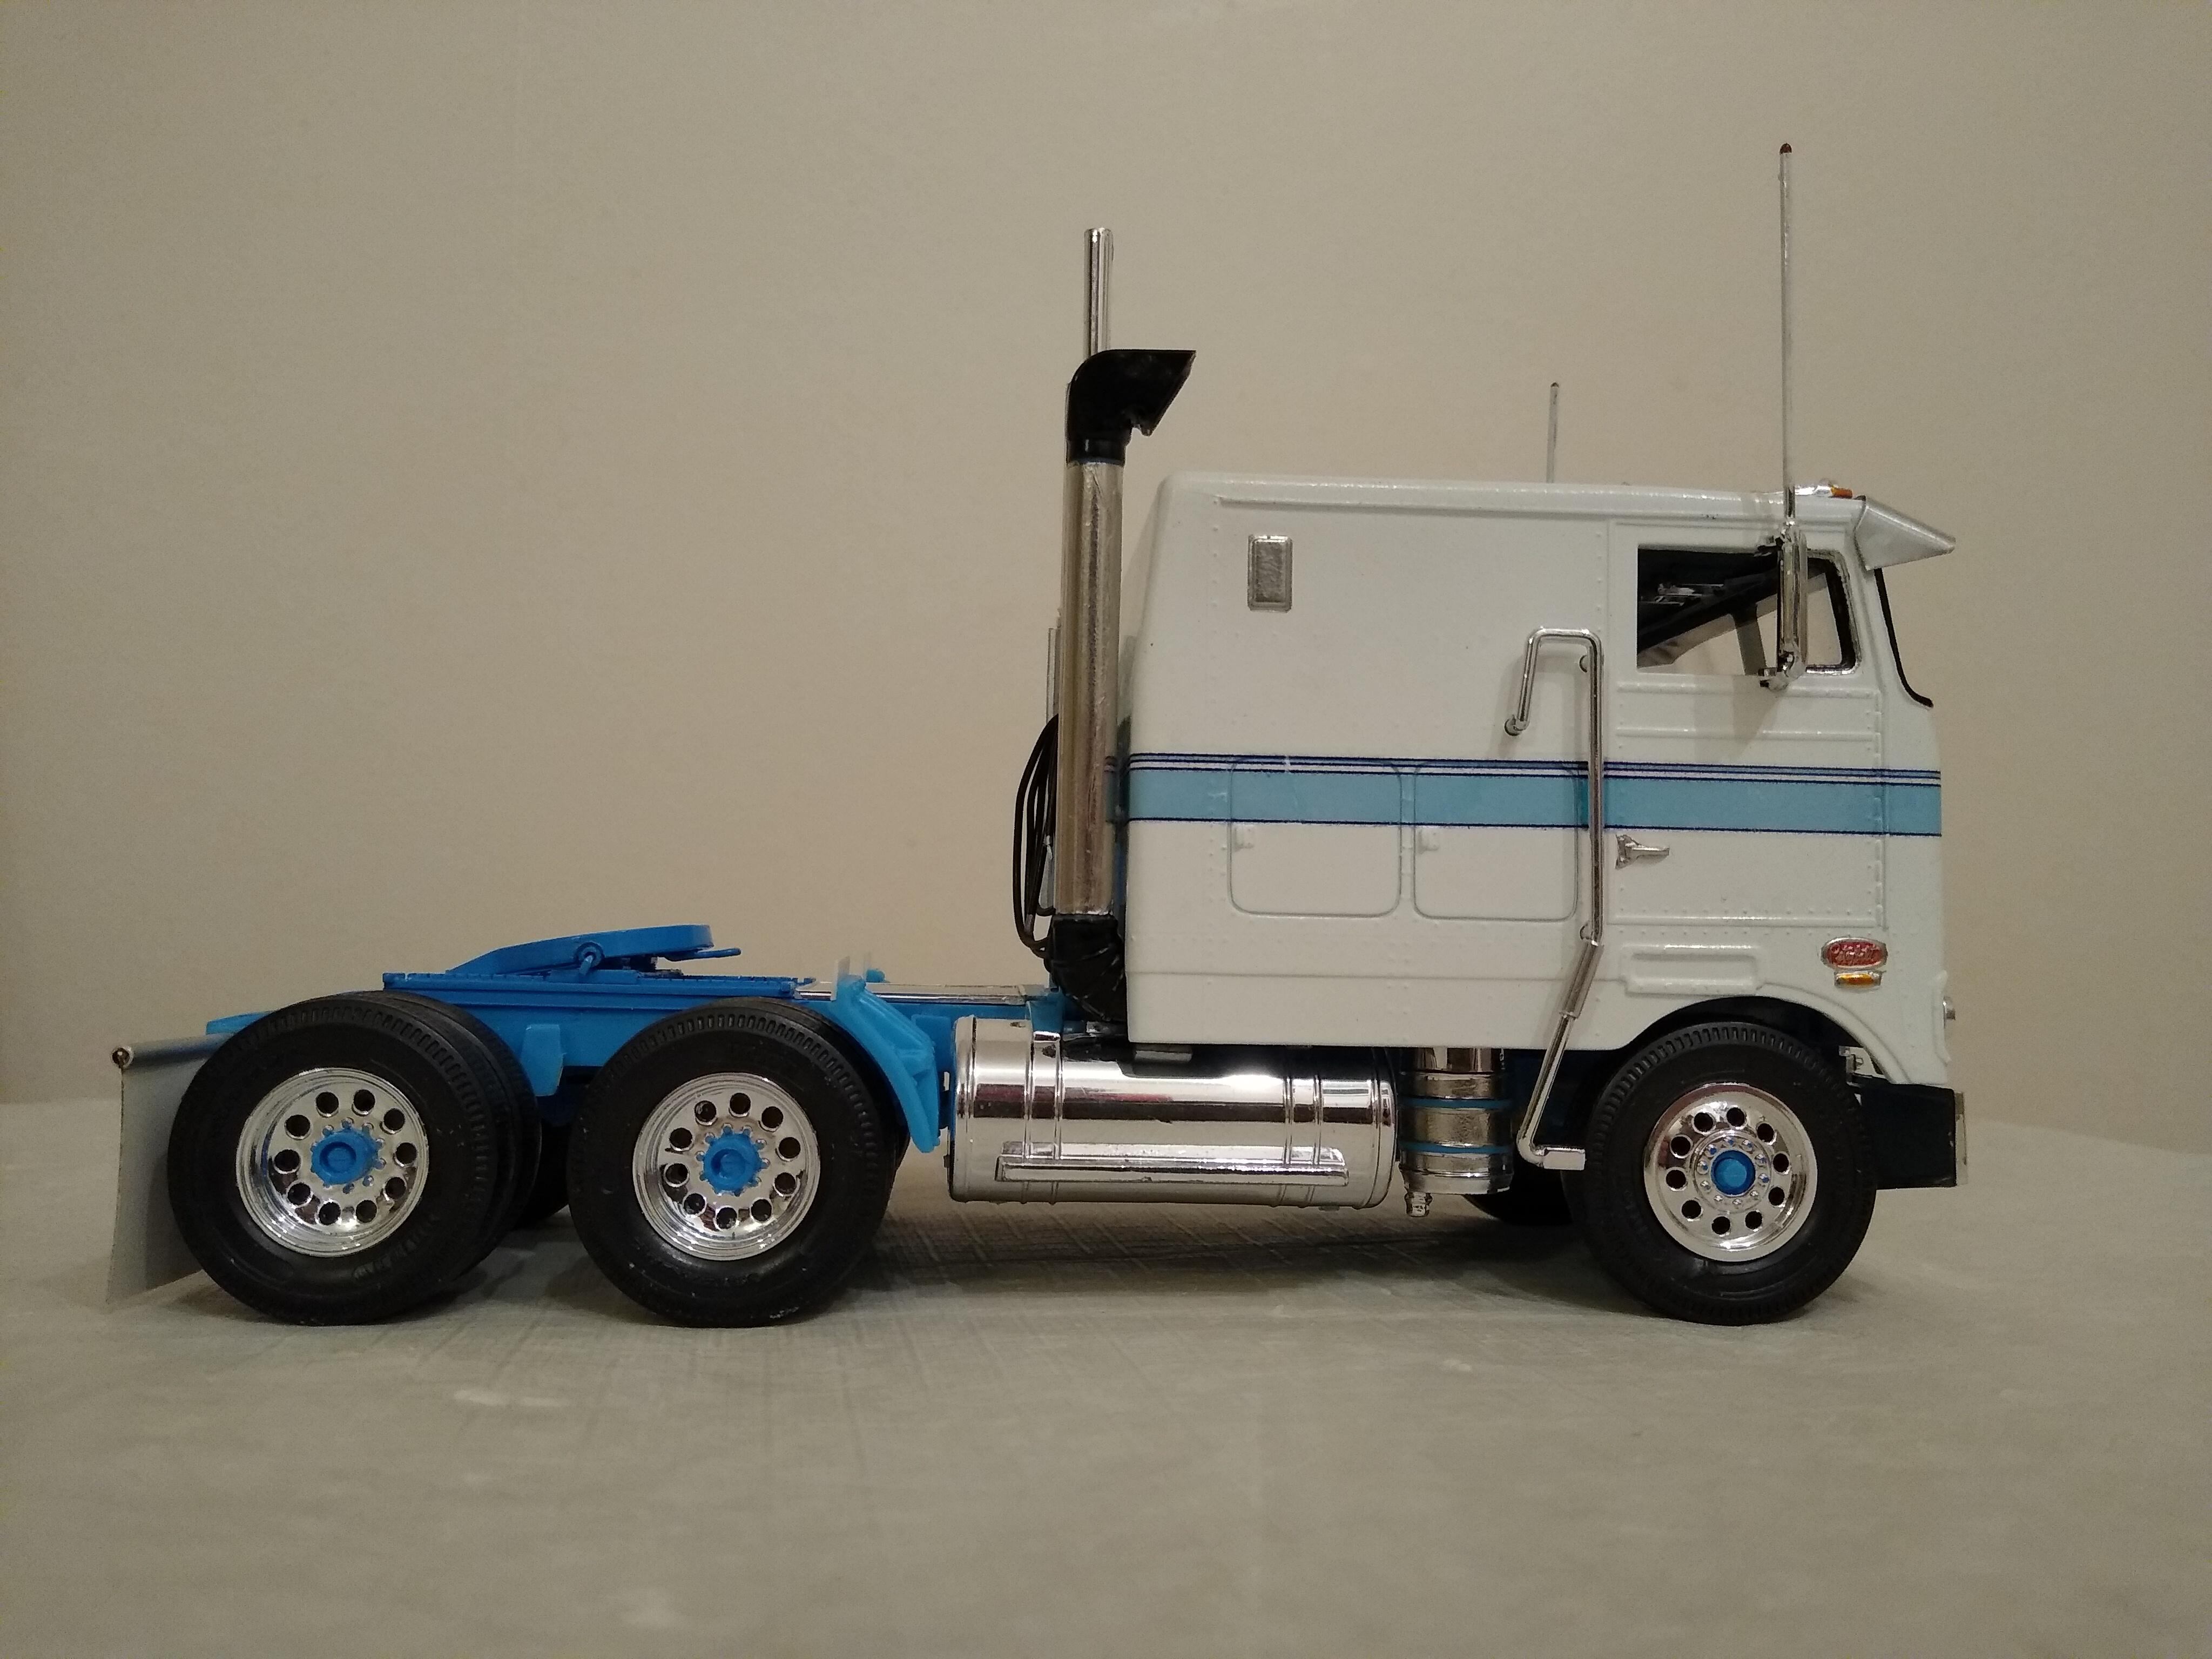
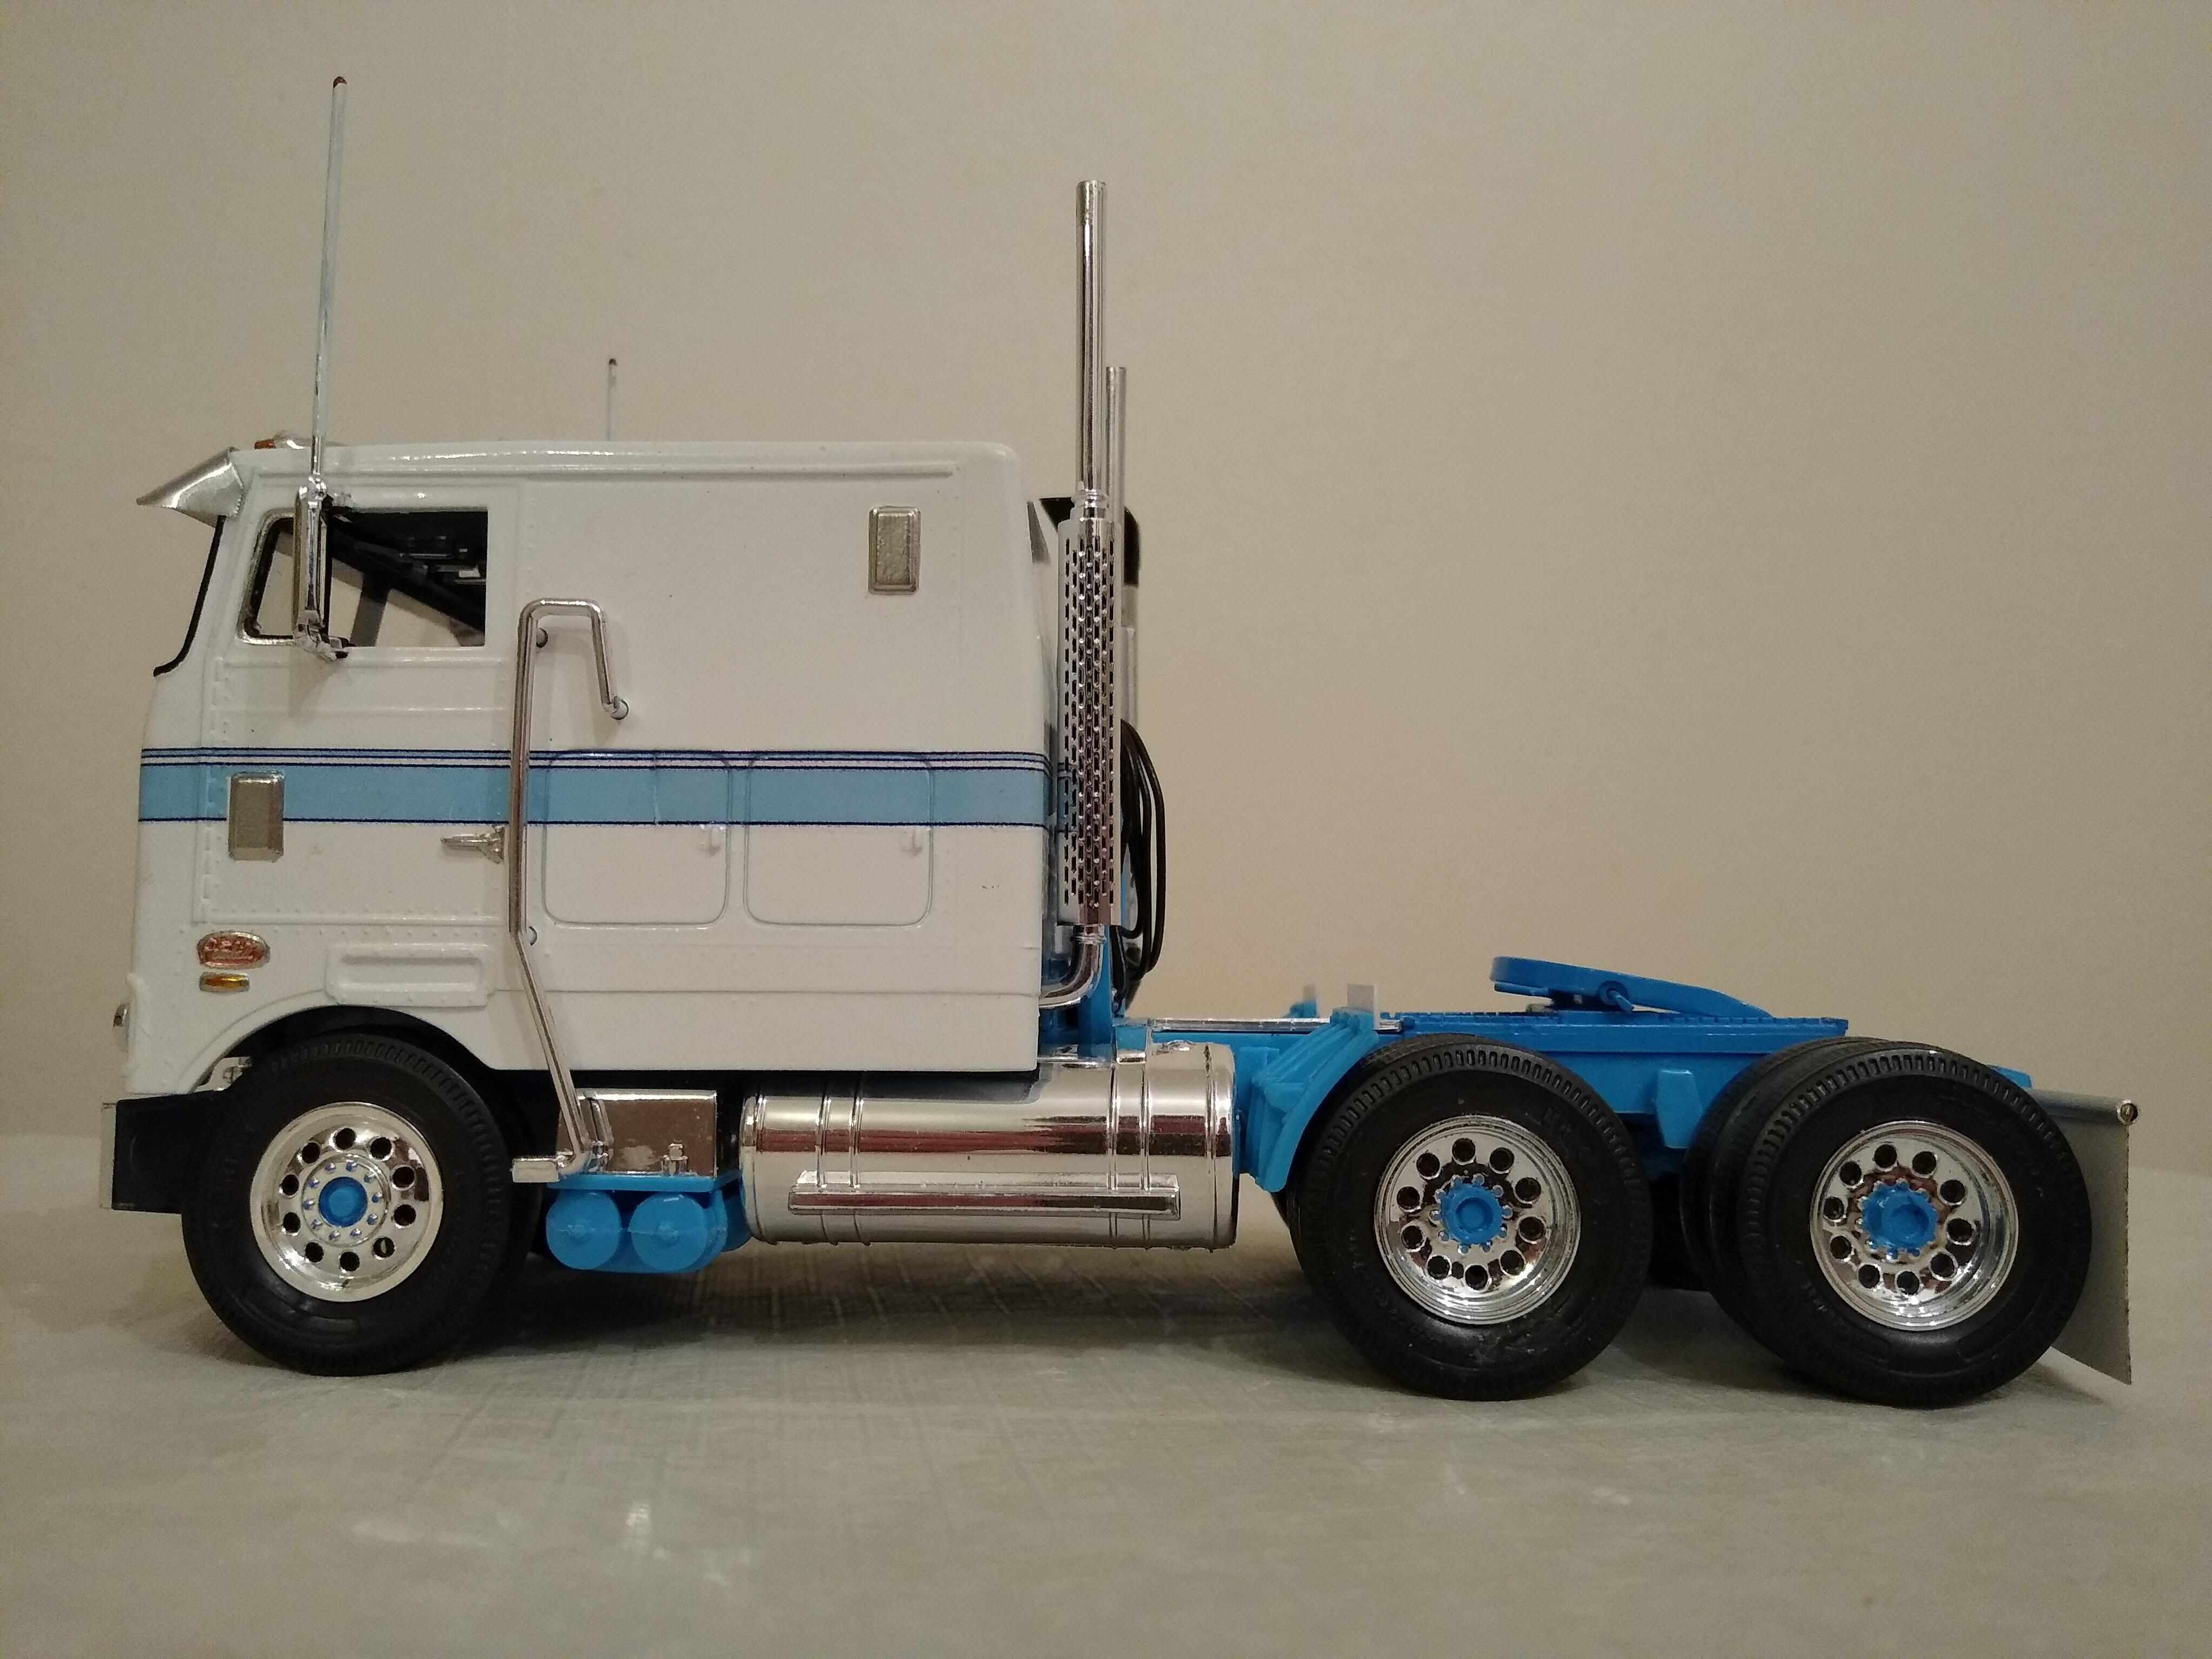
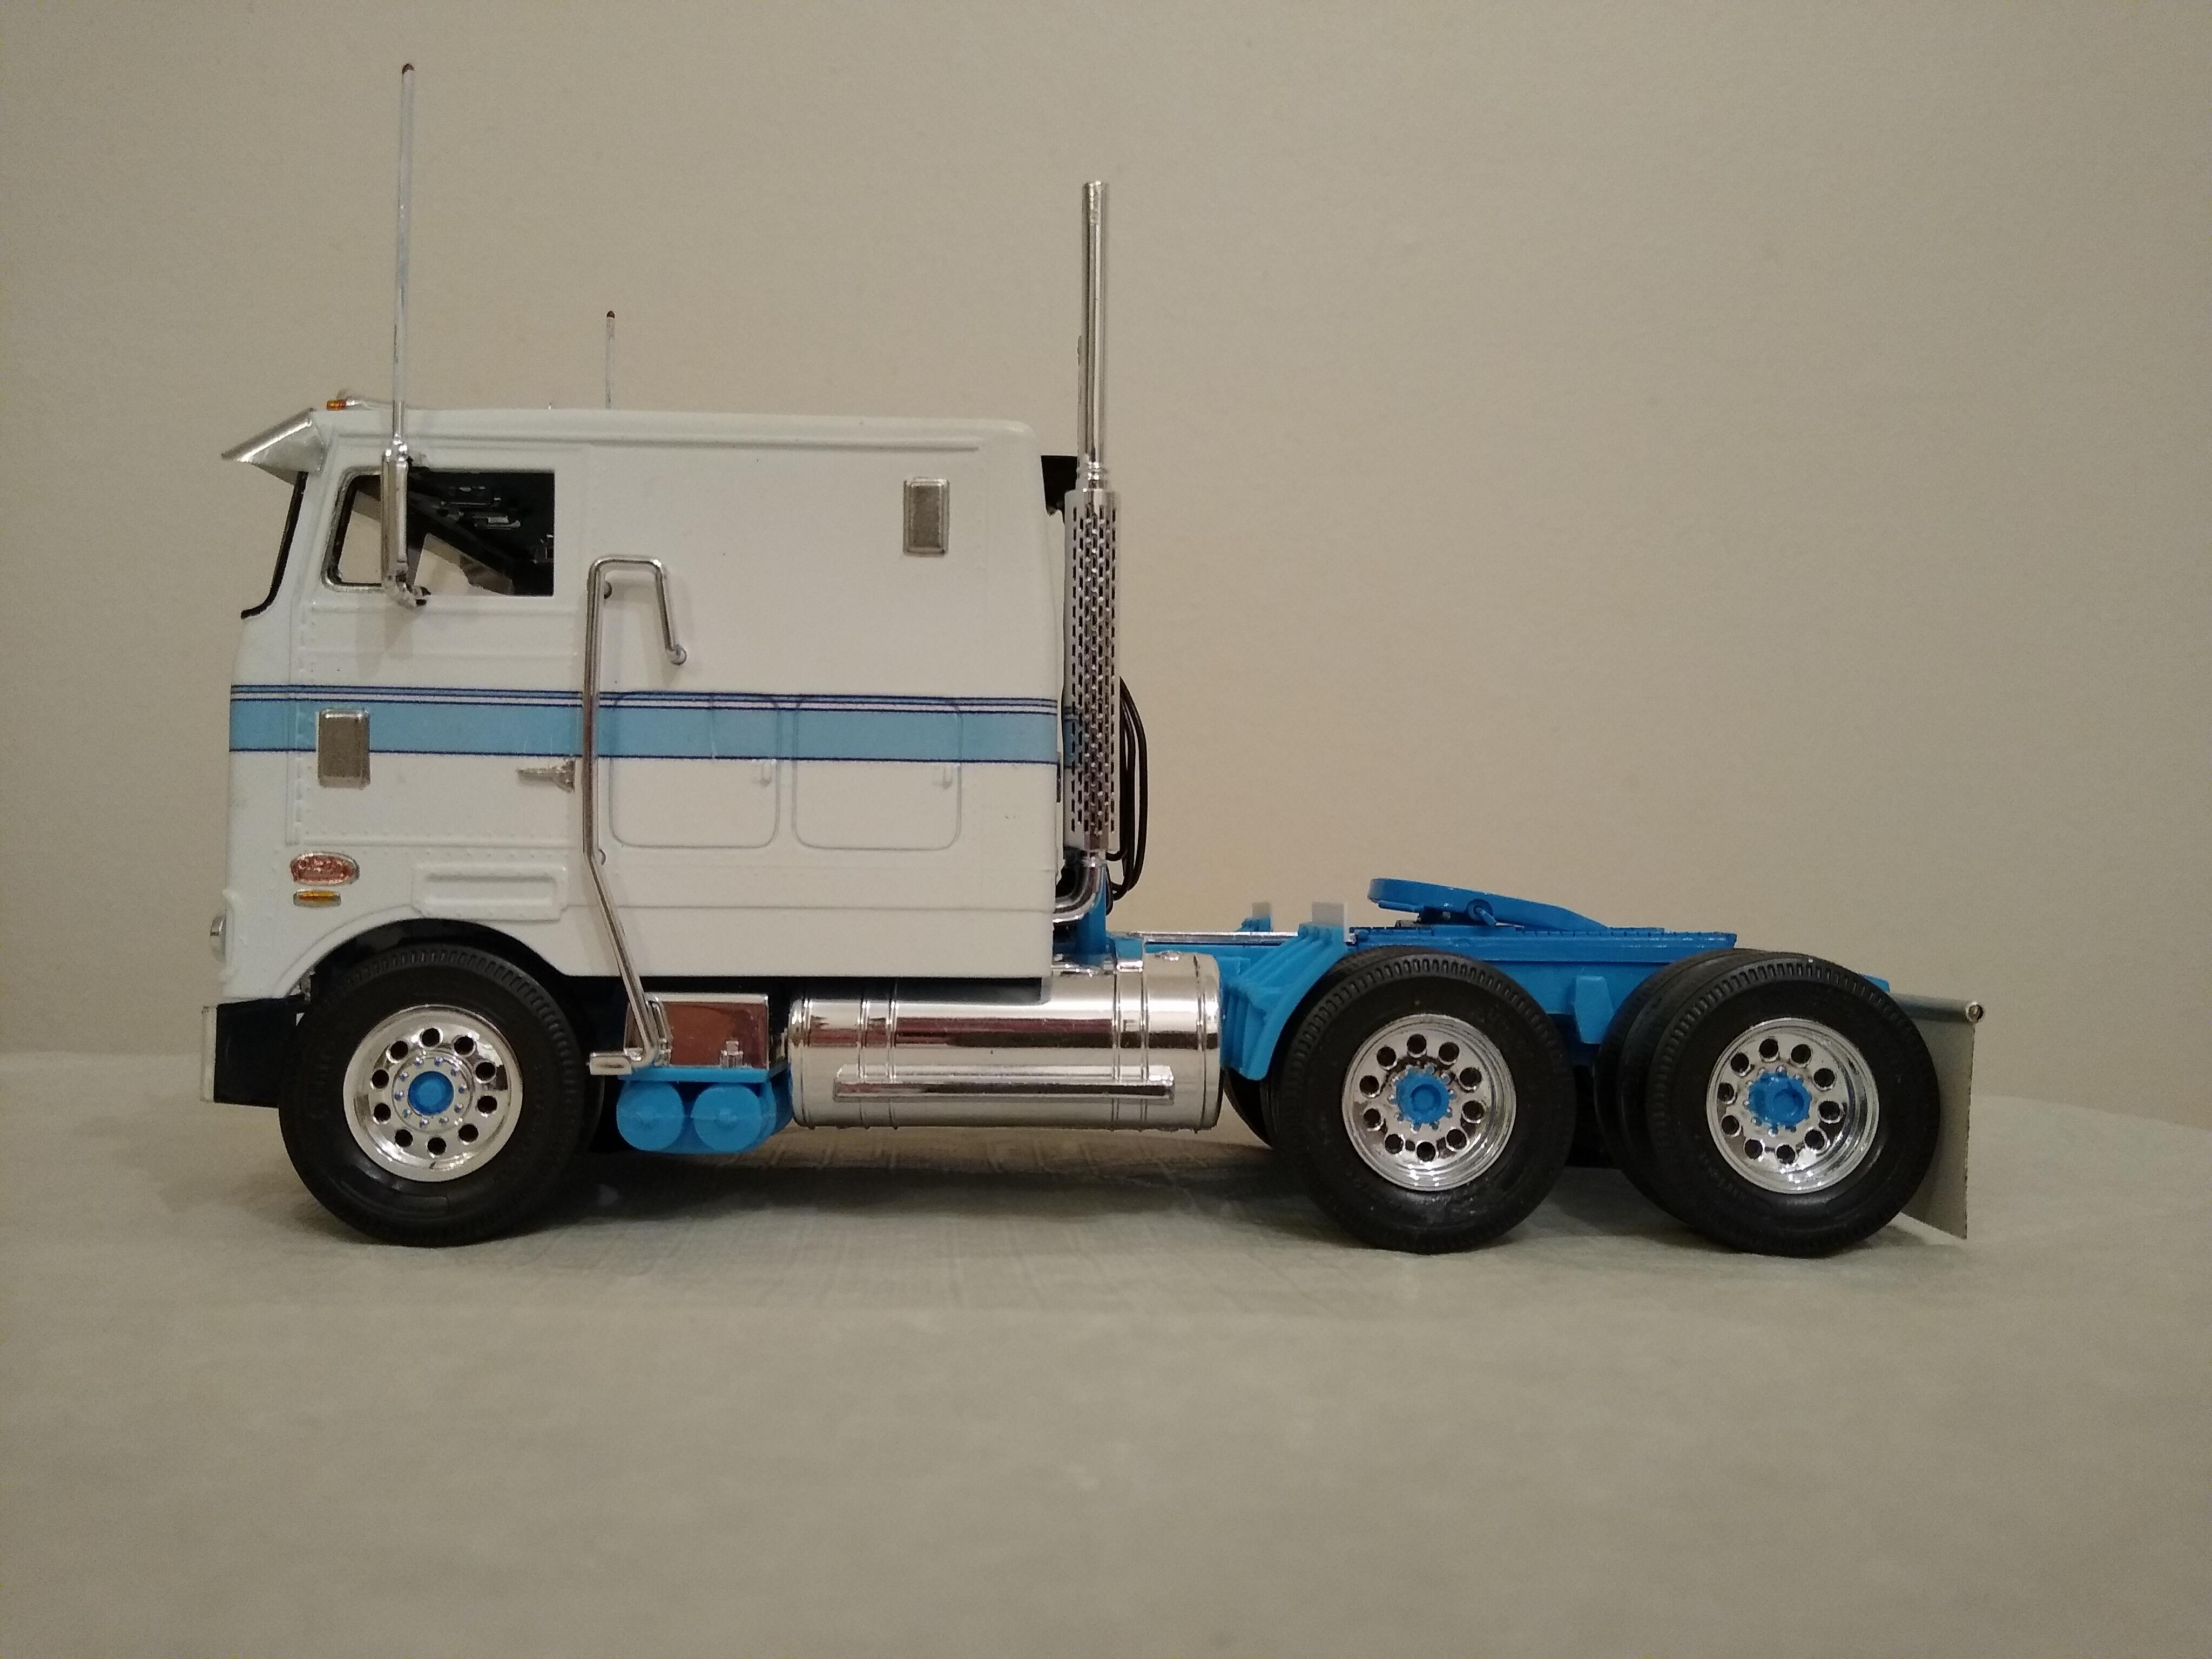
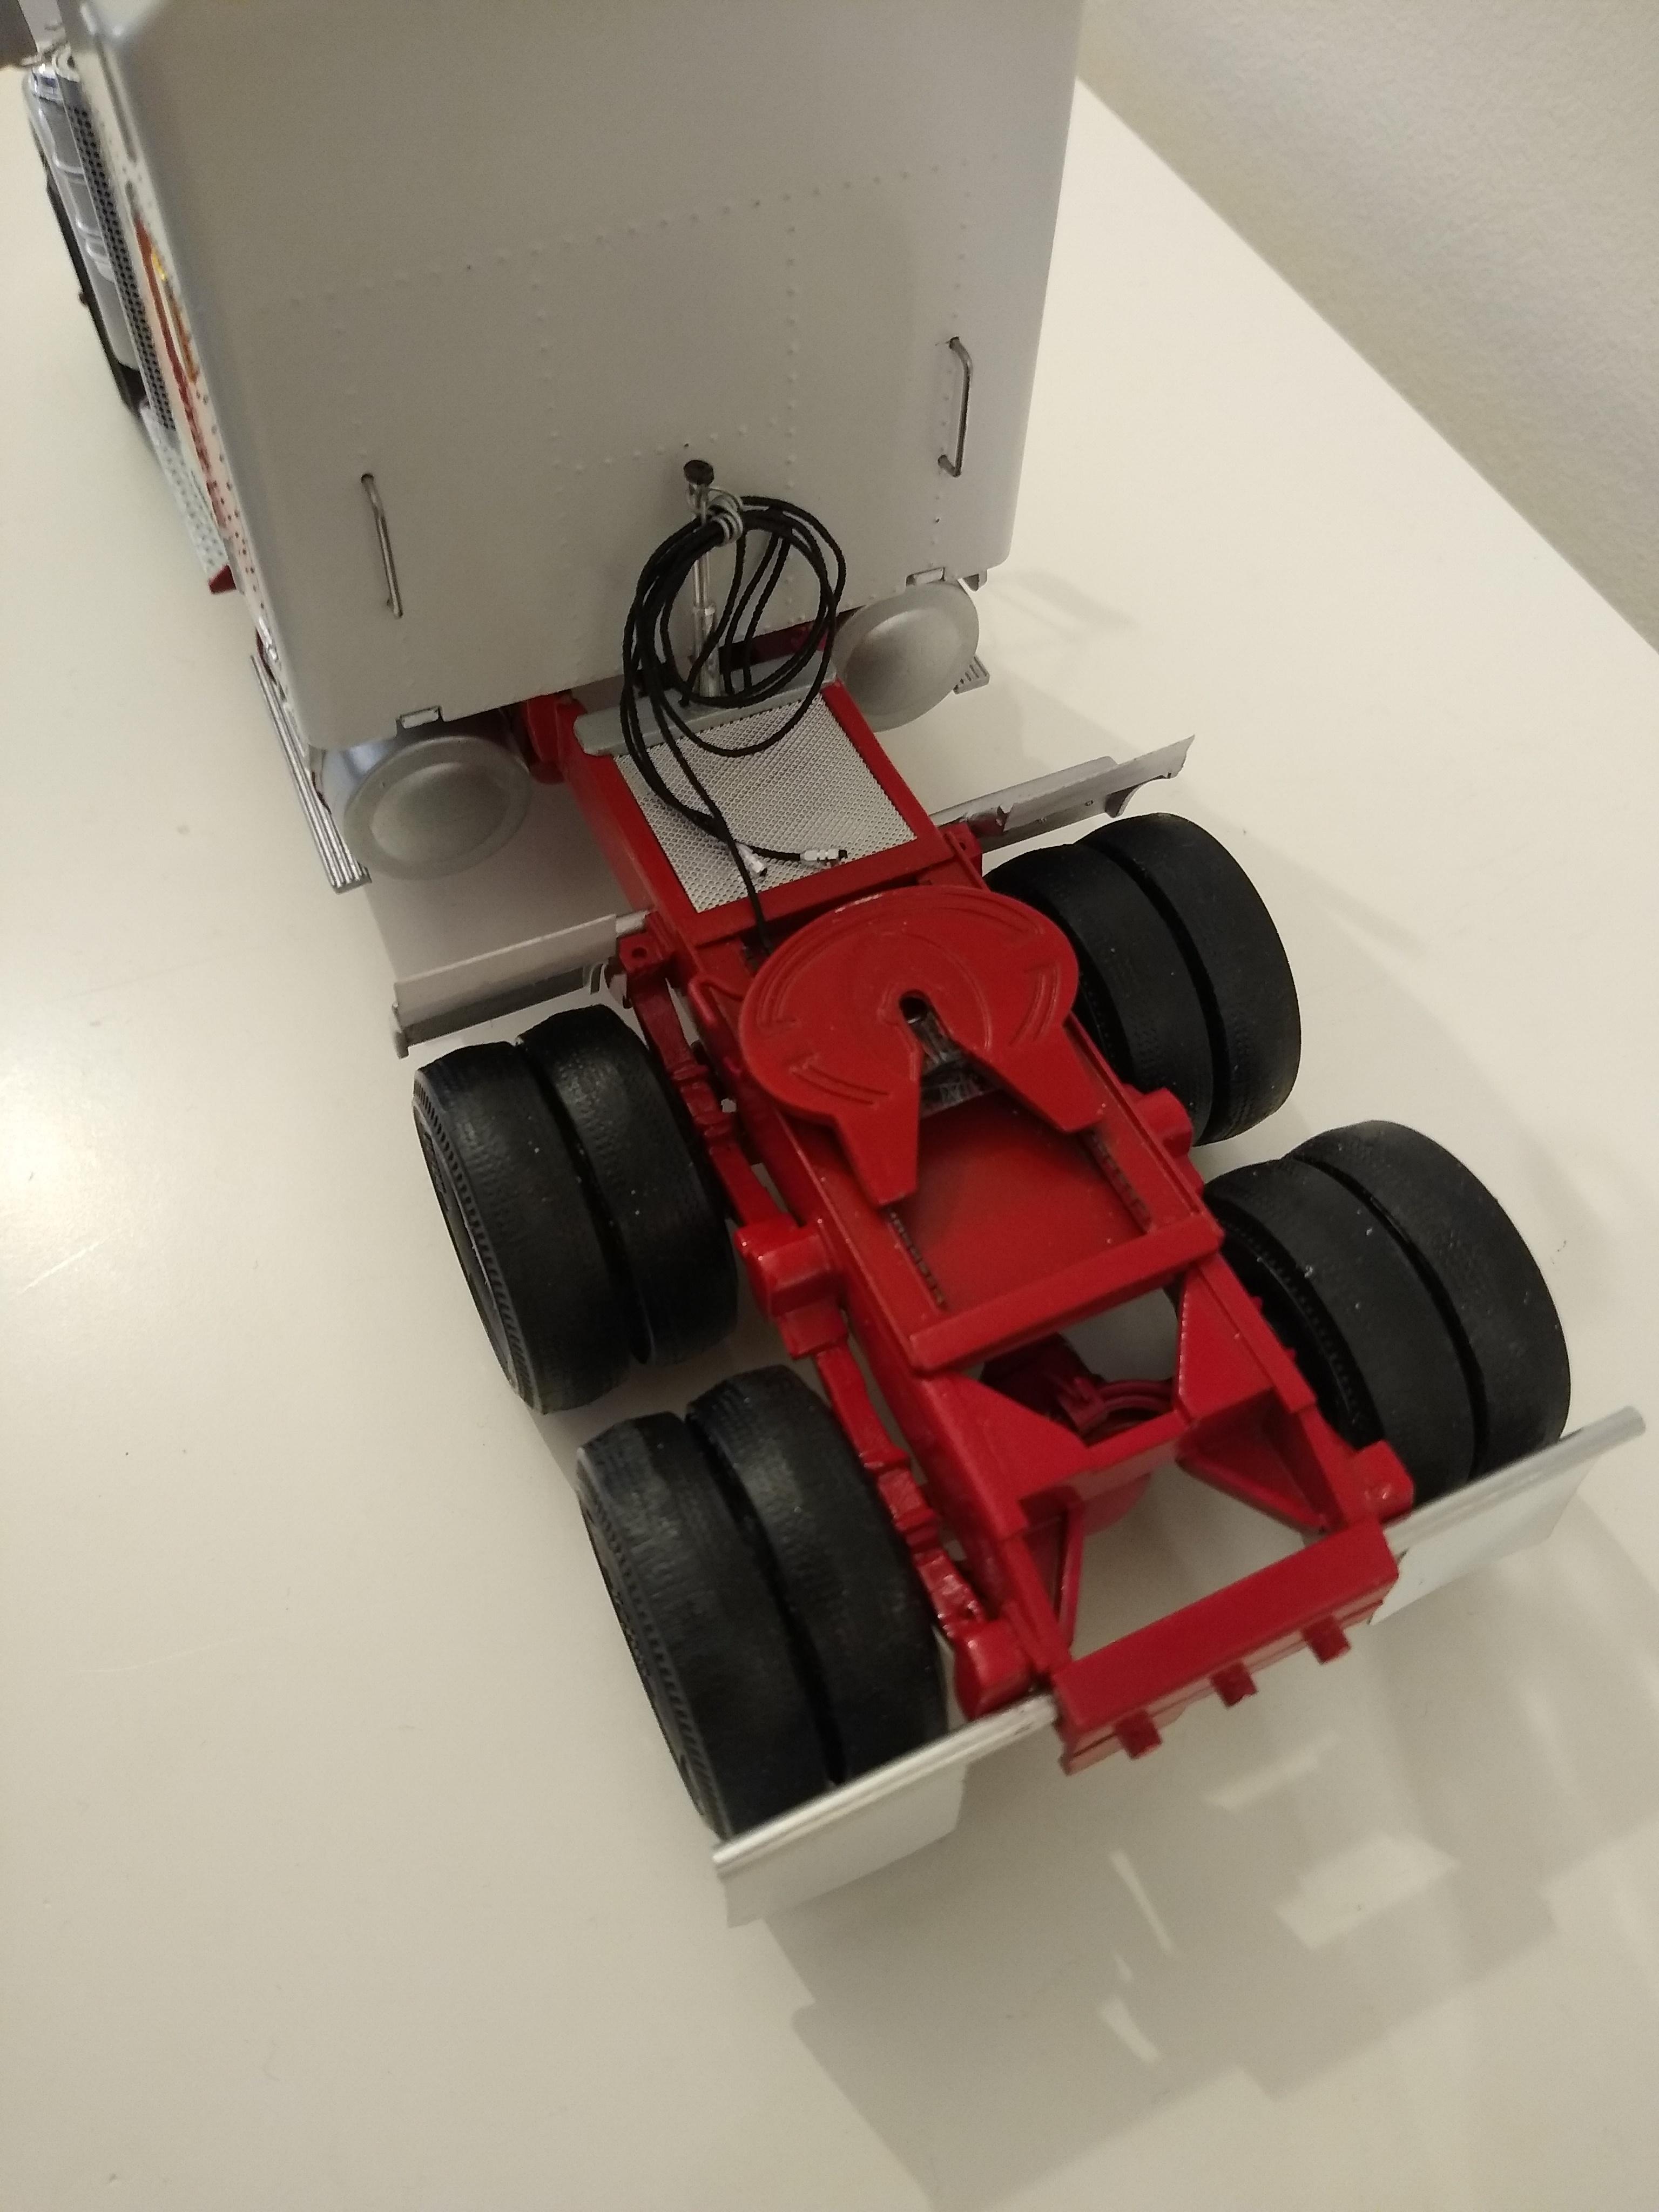
Left the cab as per the kit @ 110 inch and cut the chassis just behind the stacks, then moved the battery box and air filter up to the front axle, worked out how much space I needed to fit the fuel tanks in, and cut the rest out of the frame. I didn't want it to become another marathon project but I had to do something with the chassis length, it was getting on my nerves. The truck looked awkward and the 5th wheel was in the wrong place. I didn't even want to paint the chassis so I mixed some Tamiya blue and white to match as close as possible for the slide plate and the hubs. I like it much more now, it looks business like, ready for work, not just posing.
-
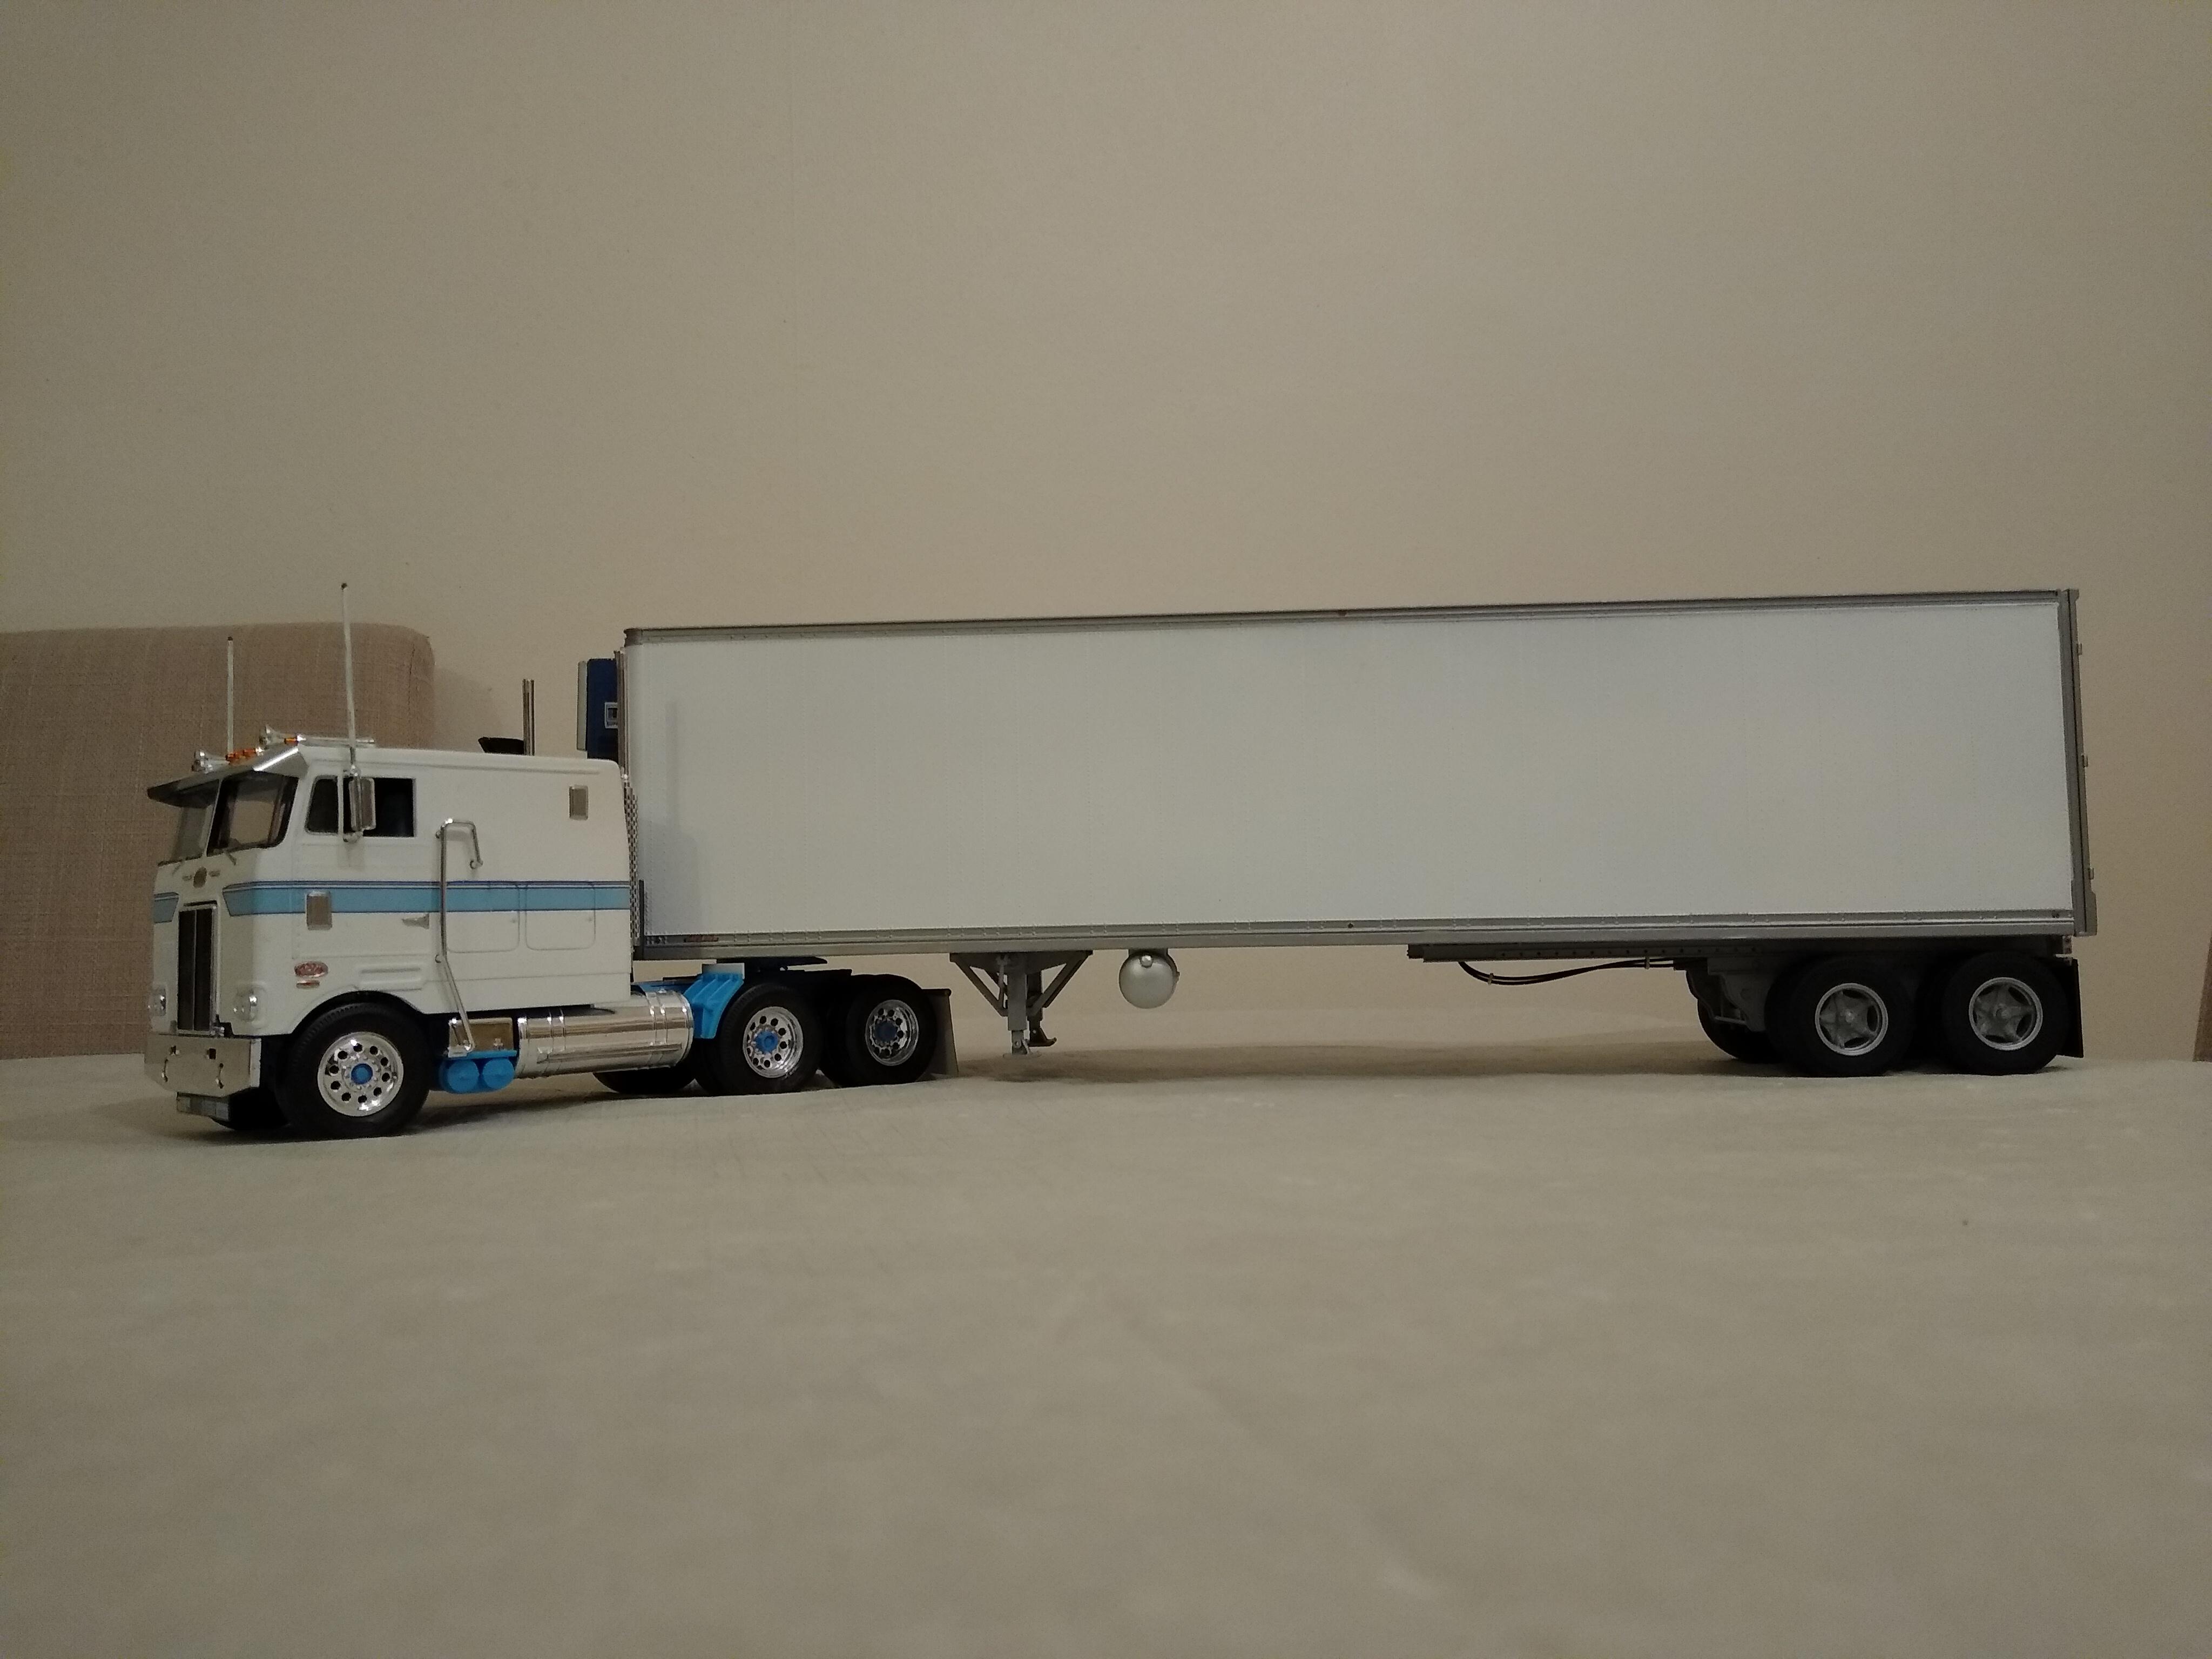
This was a 2020 lockdown, 12 year hiatus, one eyed, no shops build. Here he is in raw form, too much space between the tanks and the fenders, and the battery box. I just wanted to add a sliding fifth wheel but I snapped a fuel tank off and butchered the fifth wheel mounting so I had to go further. I removed a scale 30in. New quarter fenders. Built a catwalk using 1mm extruded aluminium sheet. Added rear axle hubs. Pulled the stacks closer to the cab. Looks much better. The whole point of cabovers was to save space so the smaller the better. The shot next to the single sleeper demonstrates the efficient use of space. I tried amending the chassis whilst keeping the length but it just didn't work, had to shorten it. It looks so correct now.

-

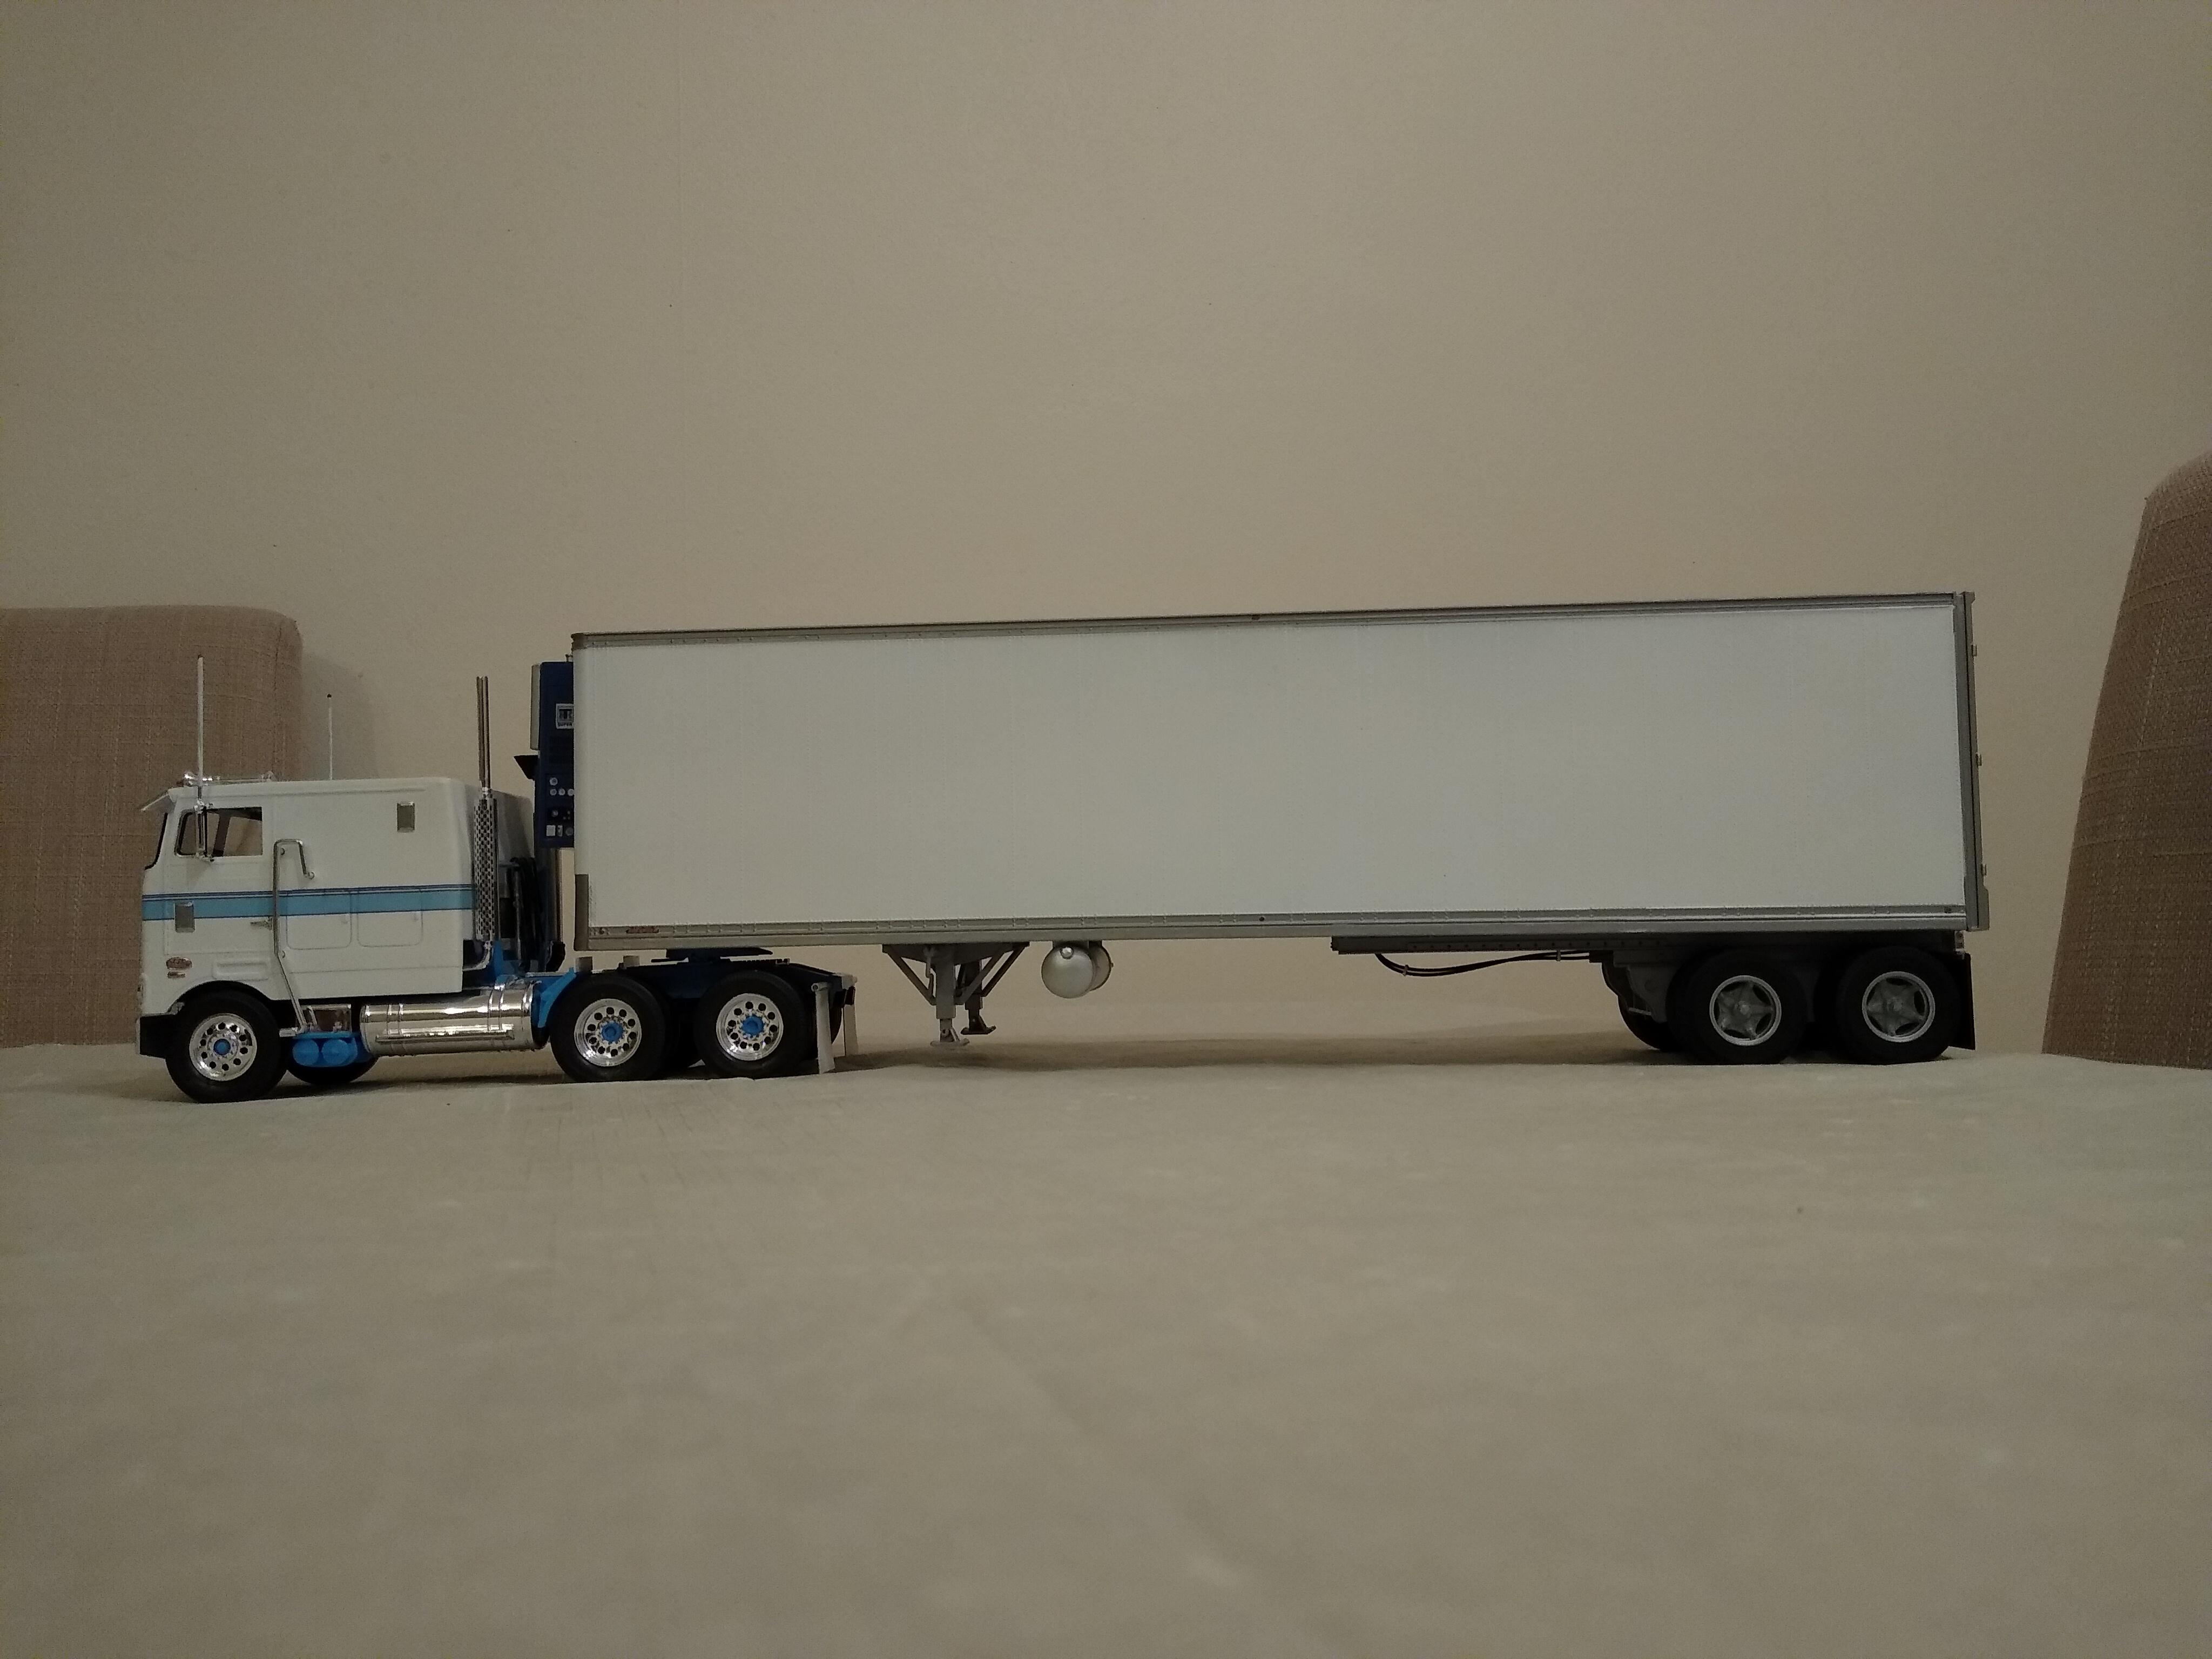
AMT Trailmobile Reefer
Rockford replied to Rockford's topic in Model Trucks: Big Rigs and Heavy Equipment
Thanks, that's very kind of you. -
AMT Livestock Trailer
Rockford replied to OldTrucker's topic in Model Trucks: Big Rigs and Heavy Equipment
Great job. I'd love to build one of these in 1/32 but I think it would finish me off! -
Nice custom rig.
-
Peterbilt 352 double bunk
Rockford replied to Bronzekeg's topic in Model Trucks: Big Rigs and Heavy Equipment
Great looking Pete. I like the chunkiness of it. -
BRGB W900 Aerodyne
Rockford replied to Rockford's topic in Model Trucks: Big Rigs and Heavy Equipment
Thanks everyone for the generous comments. I am really pleased with the finished product, I don't think I could do it again! It was worth it though. If I was more adventurous I'd have de-aerodyned it and made a 1/32 Movin'On replica but I couldn't risk spoiling it, opening up the hood was scary enough. -
Here goes nothing
Rockford replied to JerseeJerry55's topic in WIP: Model Trucks: Big Rigs and Heavy Equipment
It would have to be the "right" orange to work with the blue, but it can be done I'm sure. -
Here goes nothing
Rockford replied to JerseeJerry55's topic in WIP: Model Trucks: Big Rigs and Heavy Equipment
Good start, nice kit, light blue chassis? -
Gaines Foods IH 4070A
Rockford replied to TruckerAL's topic in Model Trucks: Big Rigs and Heavy Equipment
Very nice, the weathering really makes a difference, adds depth to the truck. -
Started this today
Rockford replied to JerseeJerry55's topic in WIP: Model Trucks: Big Rigs and Heavy Equipment
Is it a Caterpillar? Red plastic, I hate red plastic. -
De-Aerodyned K100
Rockford replied to Rockford's topic in WIP: Model Trucks: Big Rigs and Heavy Equipment
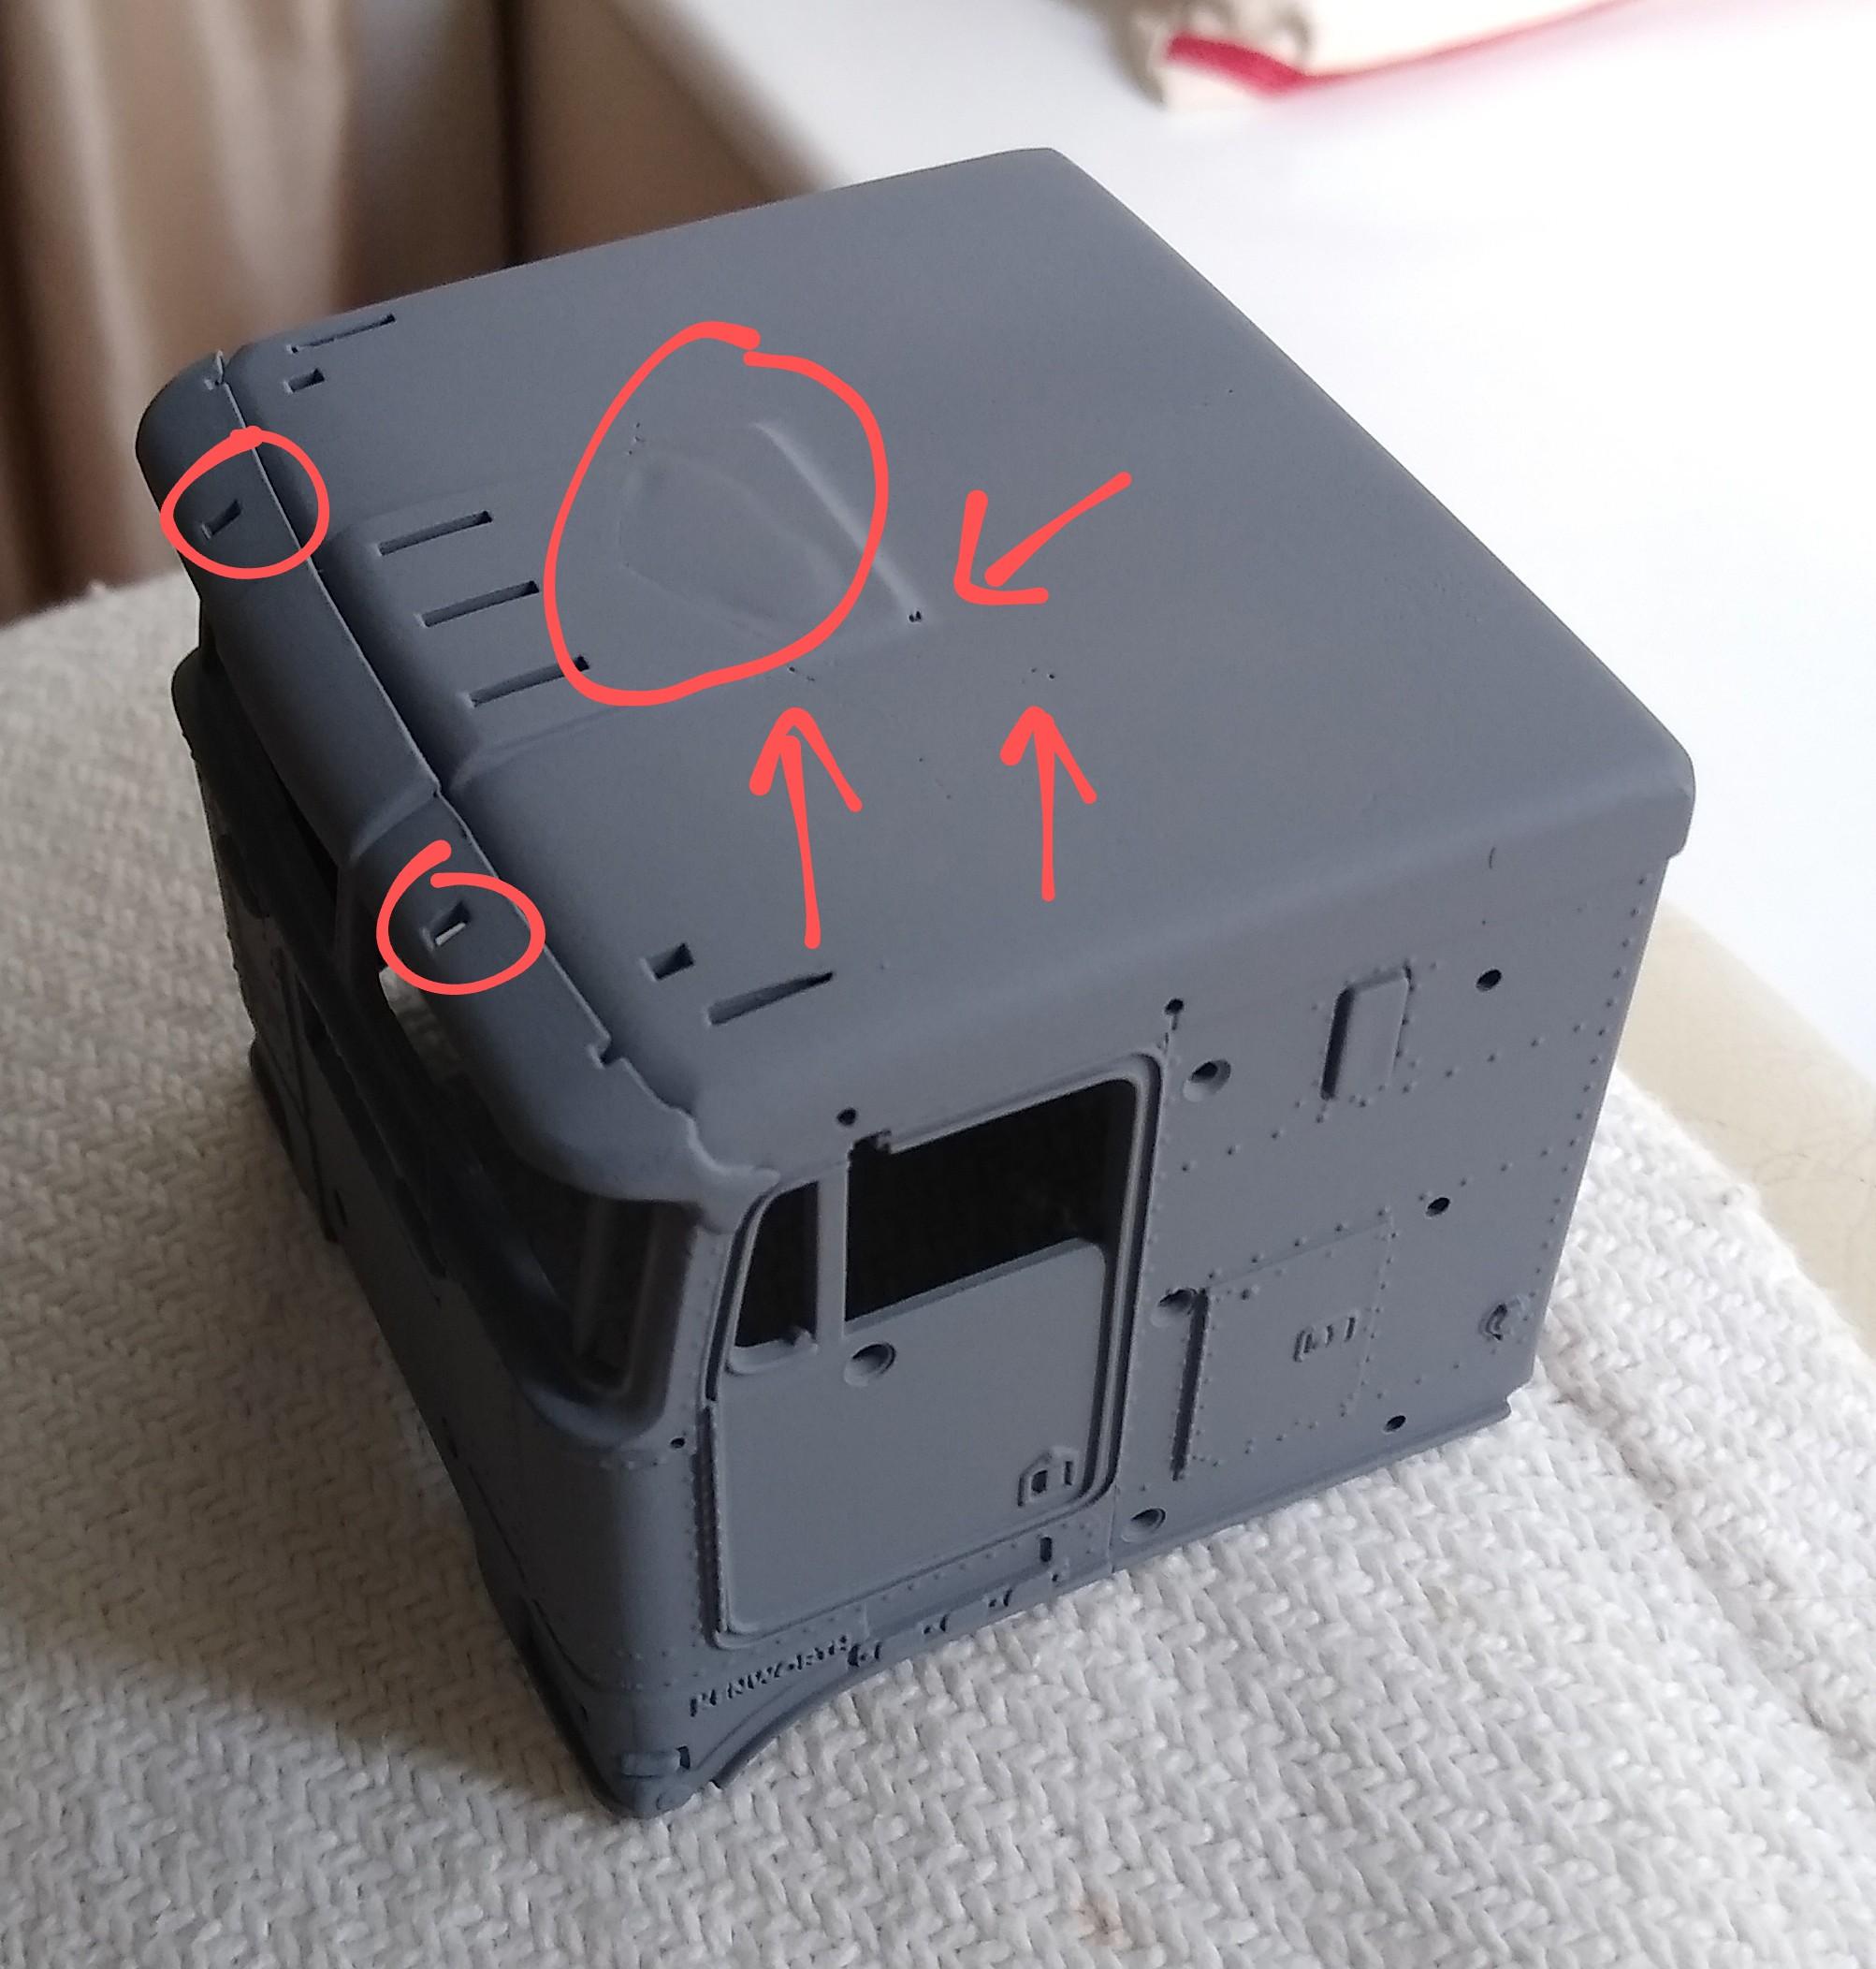
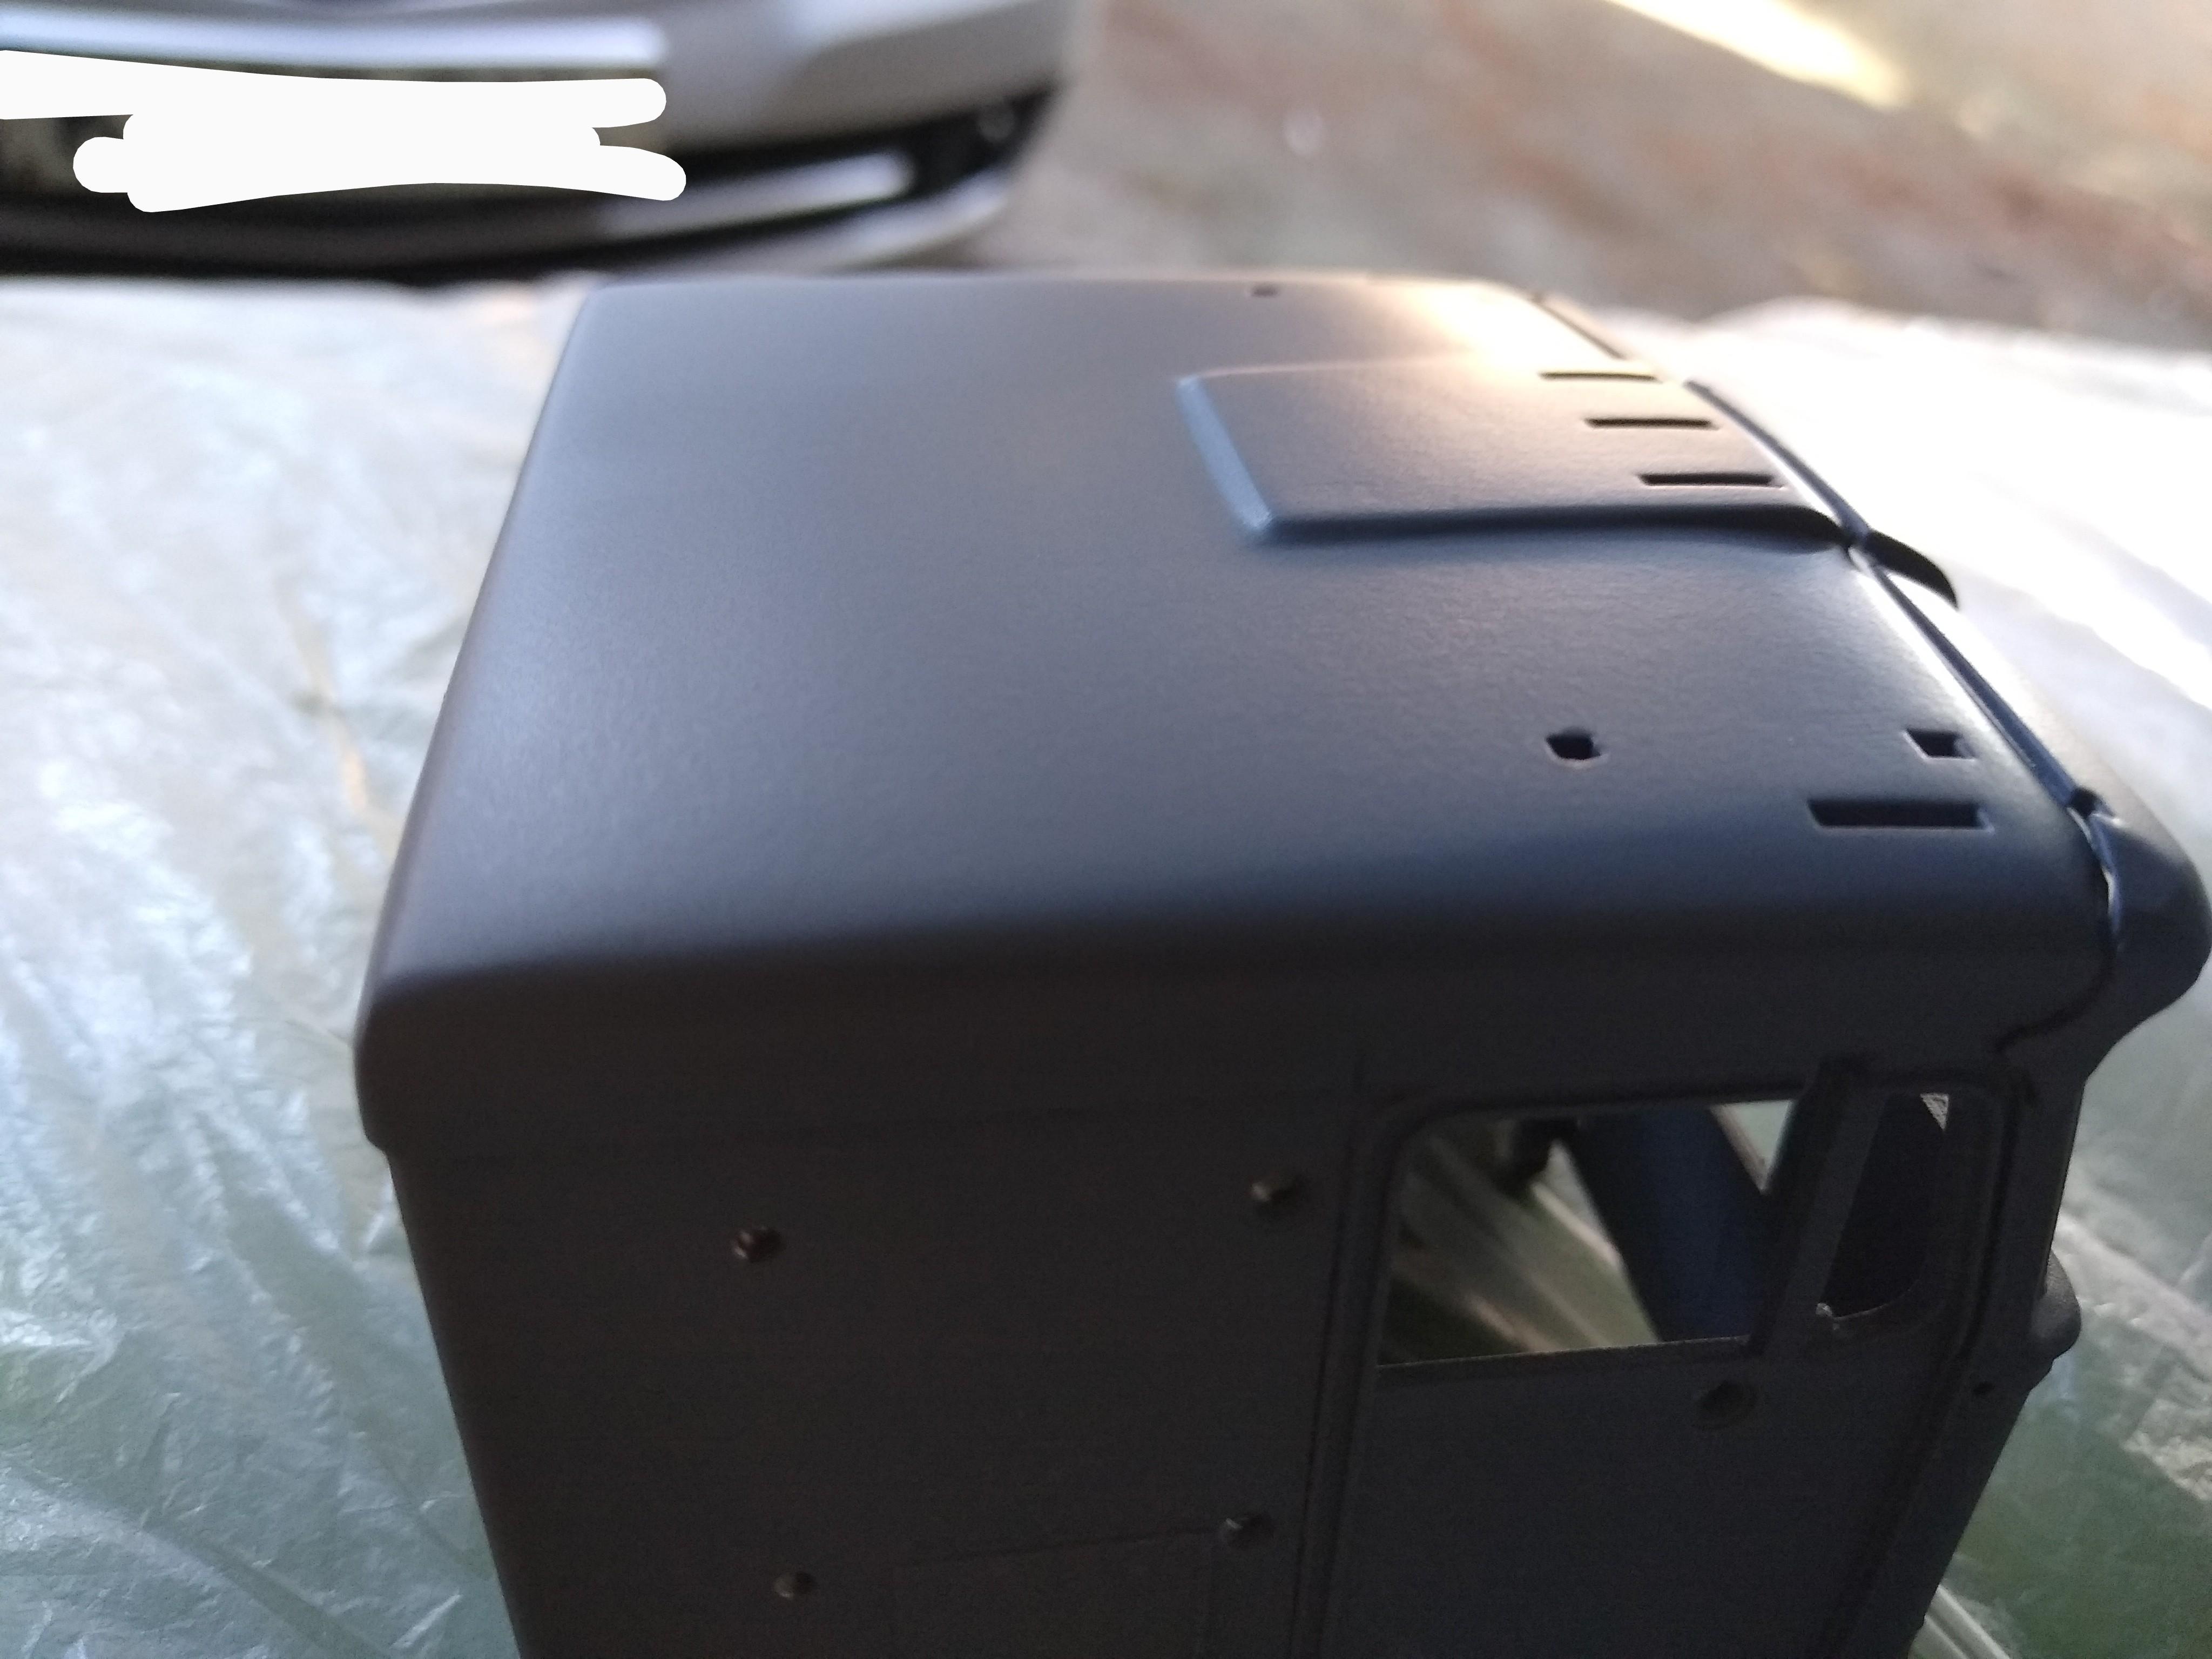
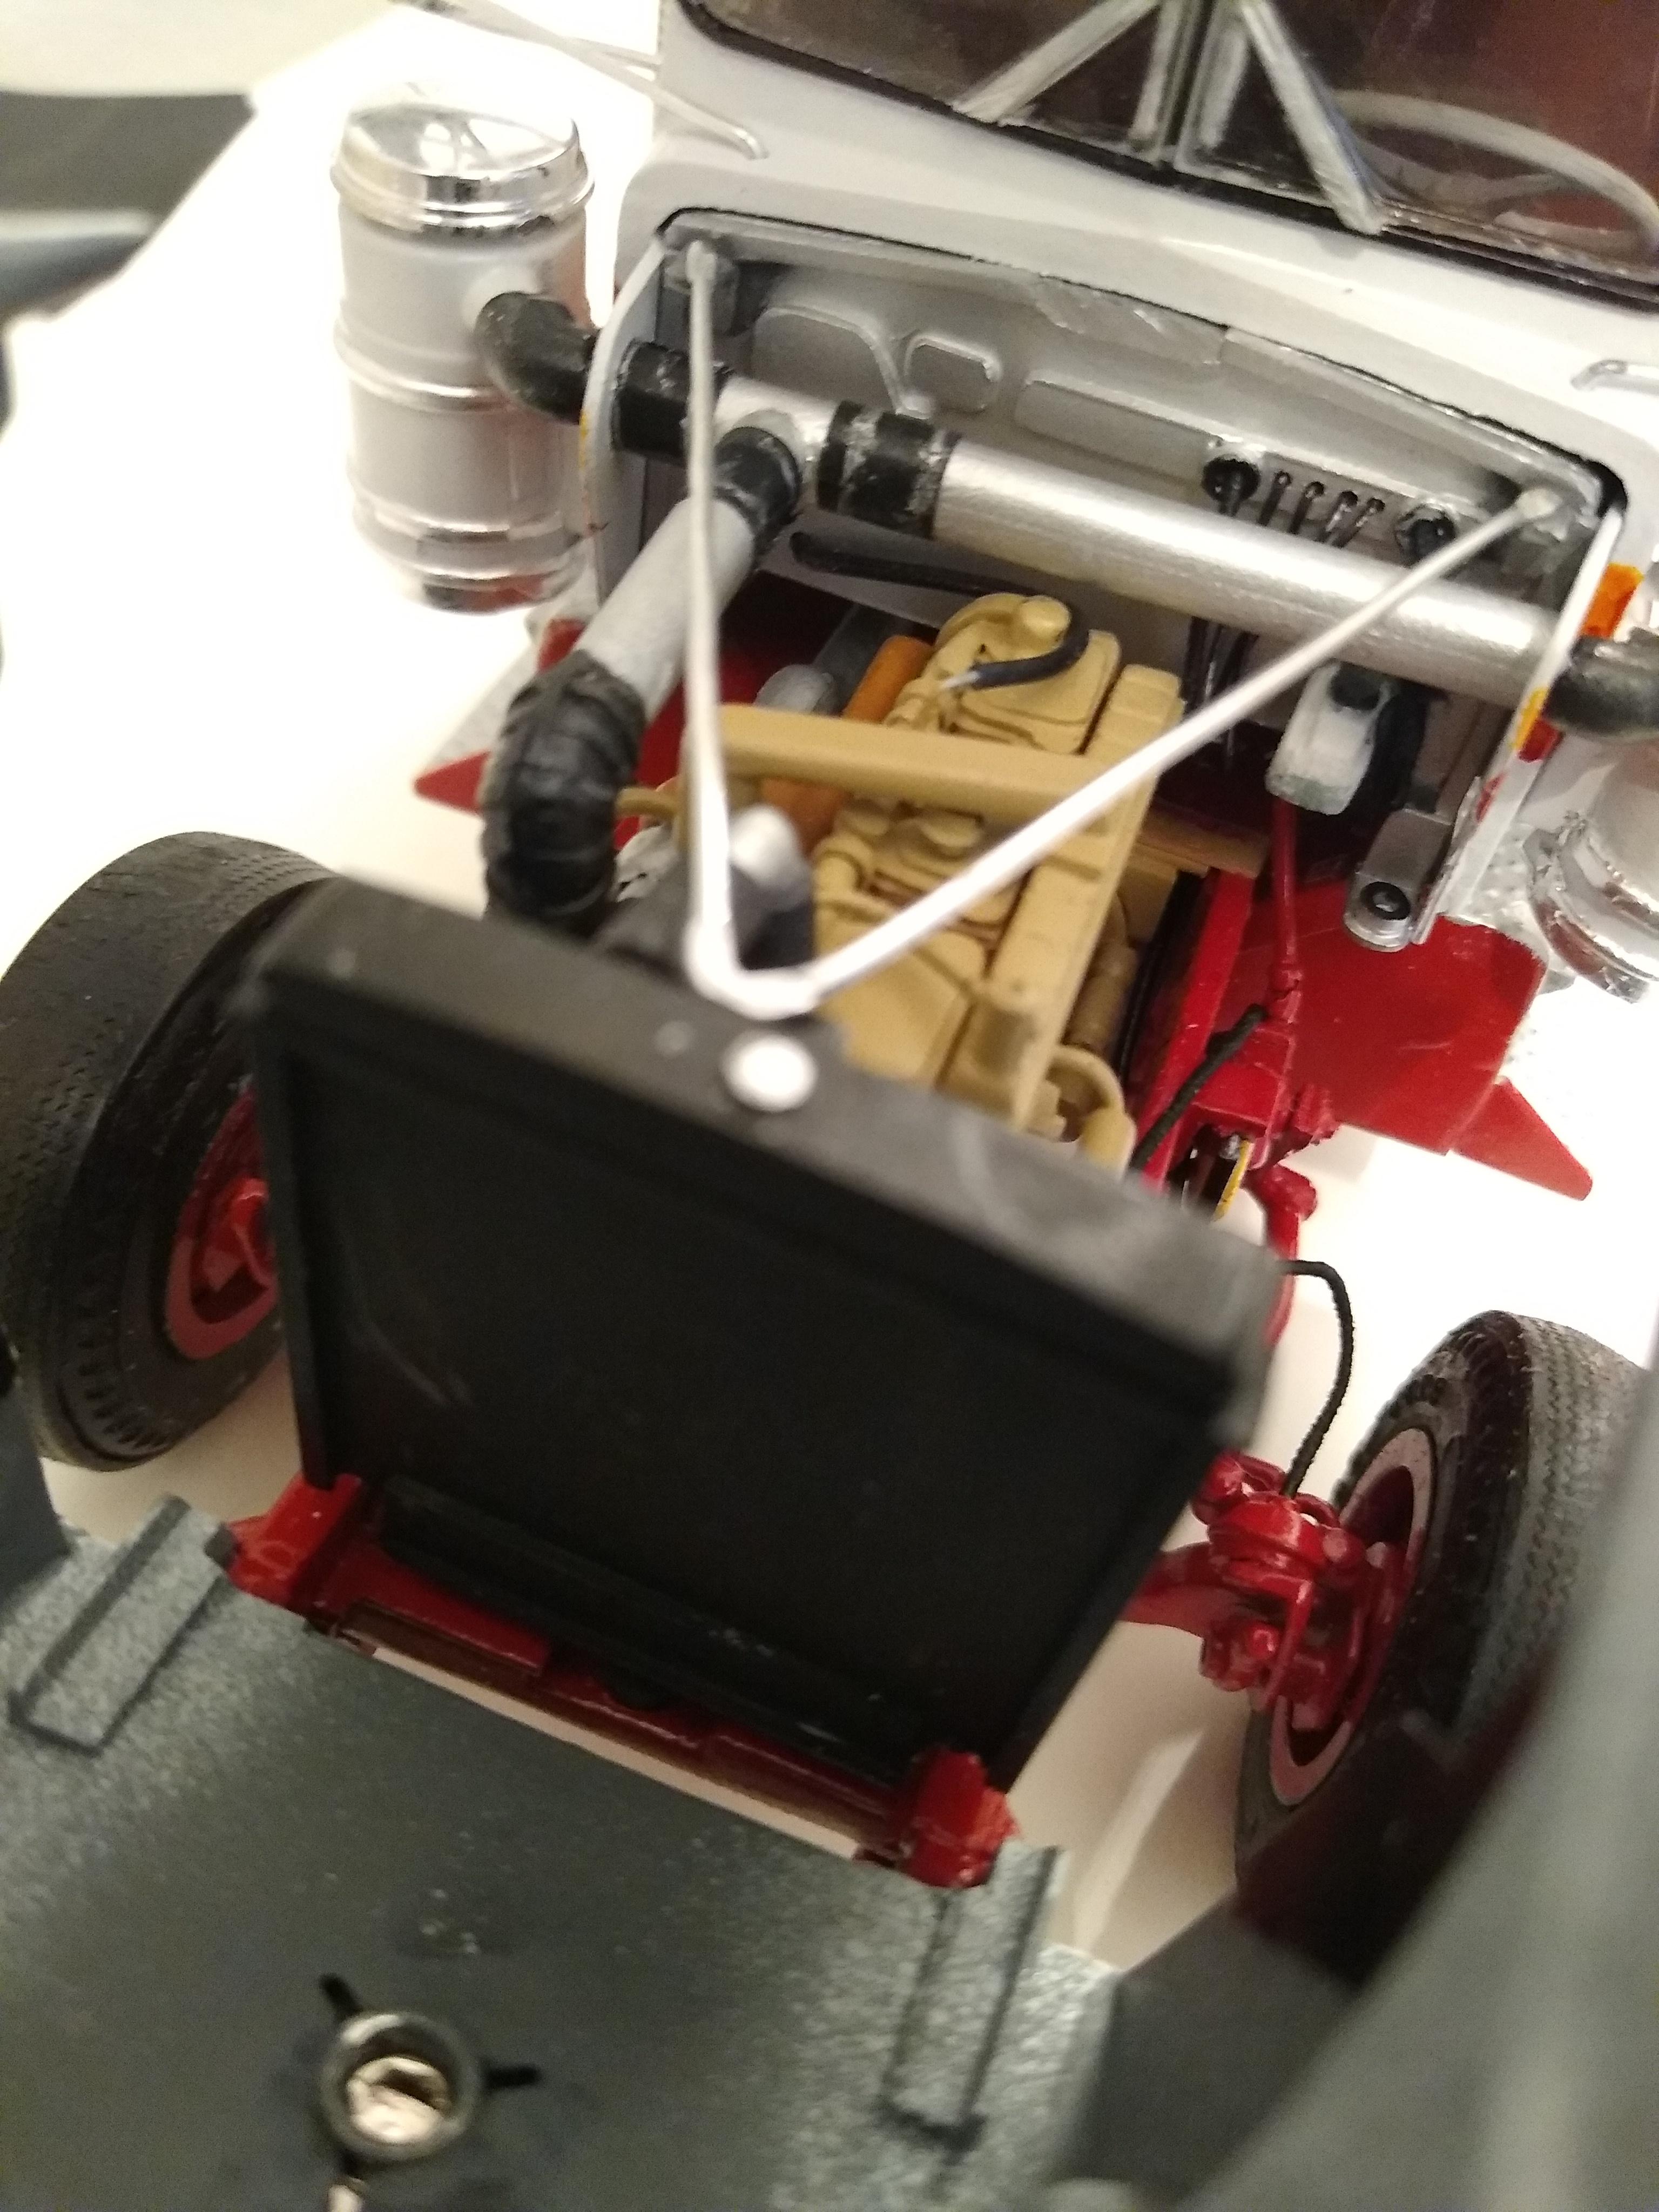
There's no substitute for preparation. I rubbed the roof down and then shot a few coats of primer. The results were good but there were some obvious issues. Pinholes, holes I'd completely missed and a sunken area where I'd glued one piece on. I gave it another very thin skim and went over it with a 600 grit sanding pad, wet. Gave it another two coats of primer and it looks great. Looks like one piece, as intended. The paint gives your eyes so much more detail and the stopper seems to blend better. Because of the lousy weather I'd usually feel the pressure to accept it warts and all, but I've done so much work I thought I'd try again. Boy did it pay dividends!
-
Peterbilt 379 and Moebius Flatbed
Rockford replied to TruckerAL's topic in Model Trucks: Big Rigs and Heavy Equipment
Excellent work, well done. -
1/25 Revell Peterbilt 359
Rockford replied to JamesBC's topic in WIP: Model Trucks: Big Rigs and Heavy Equipment
Haken, as usual, you're right. I've got a bit confused! -
1/25 Revell Peterbilt 359
Rockford replied to JamesBC's topic in WIP: Model Trucks: Big Rigs and Heavy Equipment
If a truck's brakes were caged for towing all you'd see is the bolt head, it wouldn't stick out like in these Revell kits. The only way that would happen is full service air pressure, all brakes released and cage bolts screwed in just a few threads. Not something that would happen in normal use. Weird. -
1/25 Revell Peterbilt 359
Rockford replied to JamesBC's topic in WIP: Model Trucks: Big Rigs and Heavy Equipment
You're right Force, it puts a wrinkle in my socks every time I see those brake chambers, they just shouldn't be there. -
De-Aerodyned K100
Rockford replied to Rockford's topic in WIP: Model Trucks: Big Rigs and Heavy Equipment
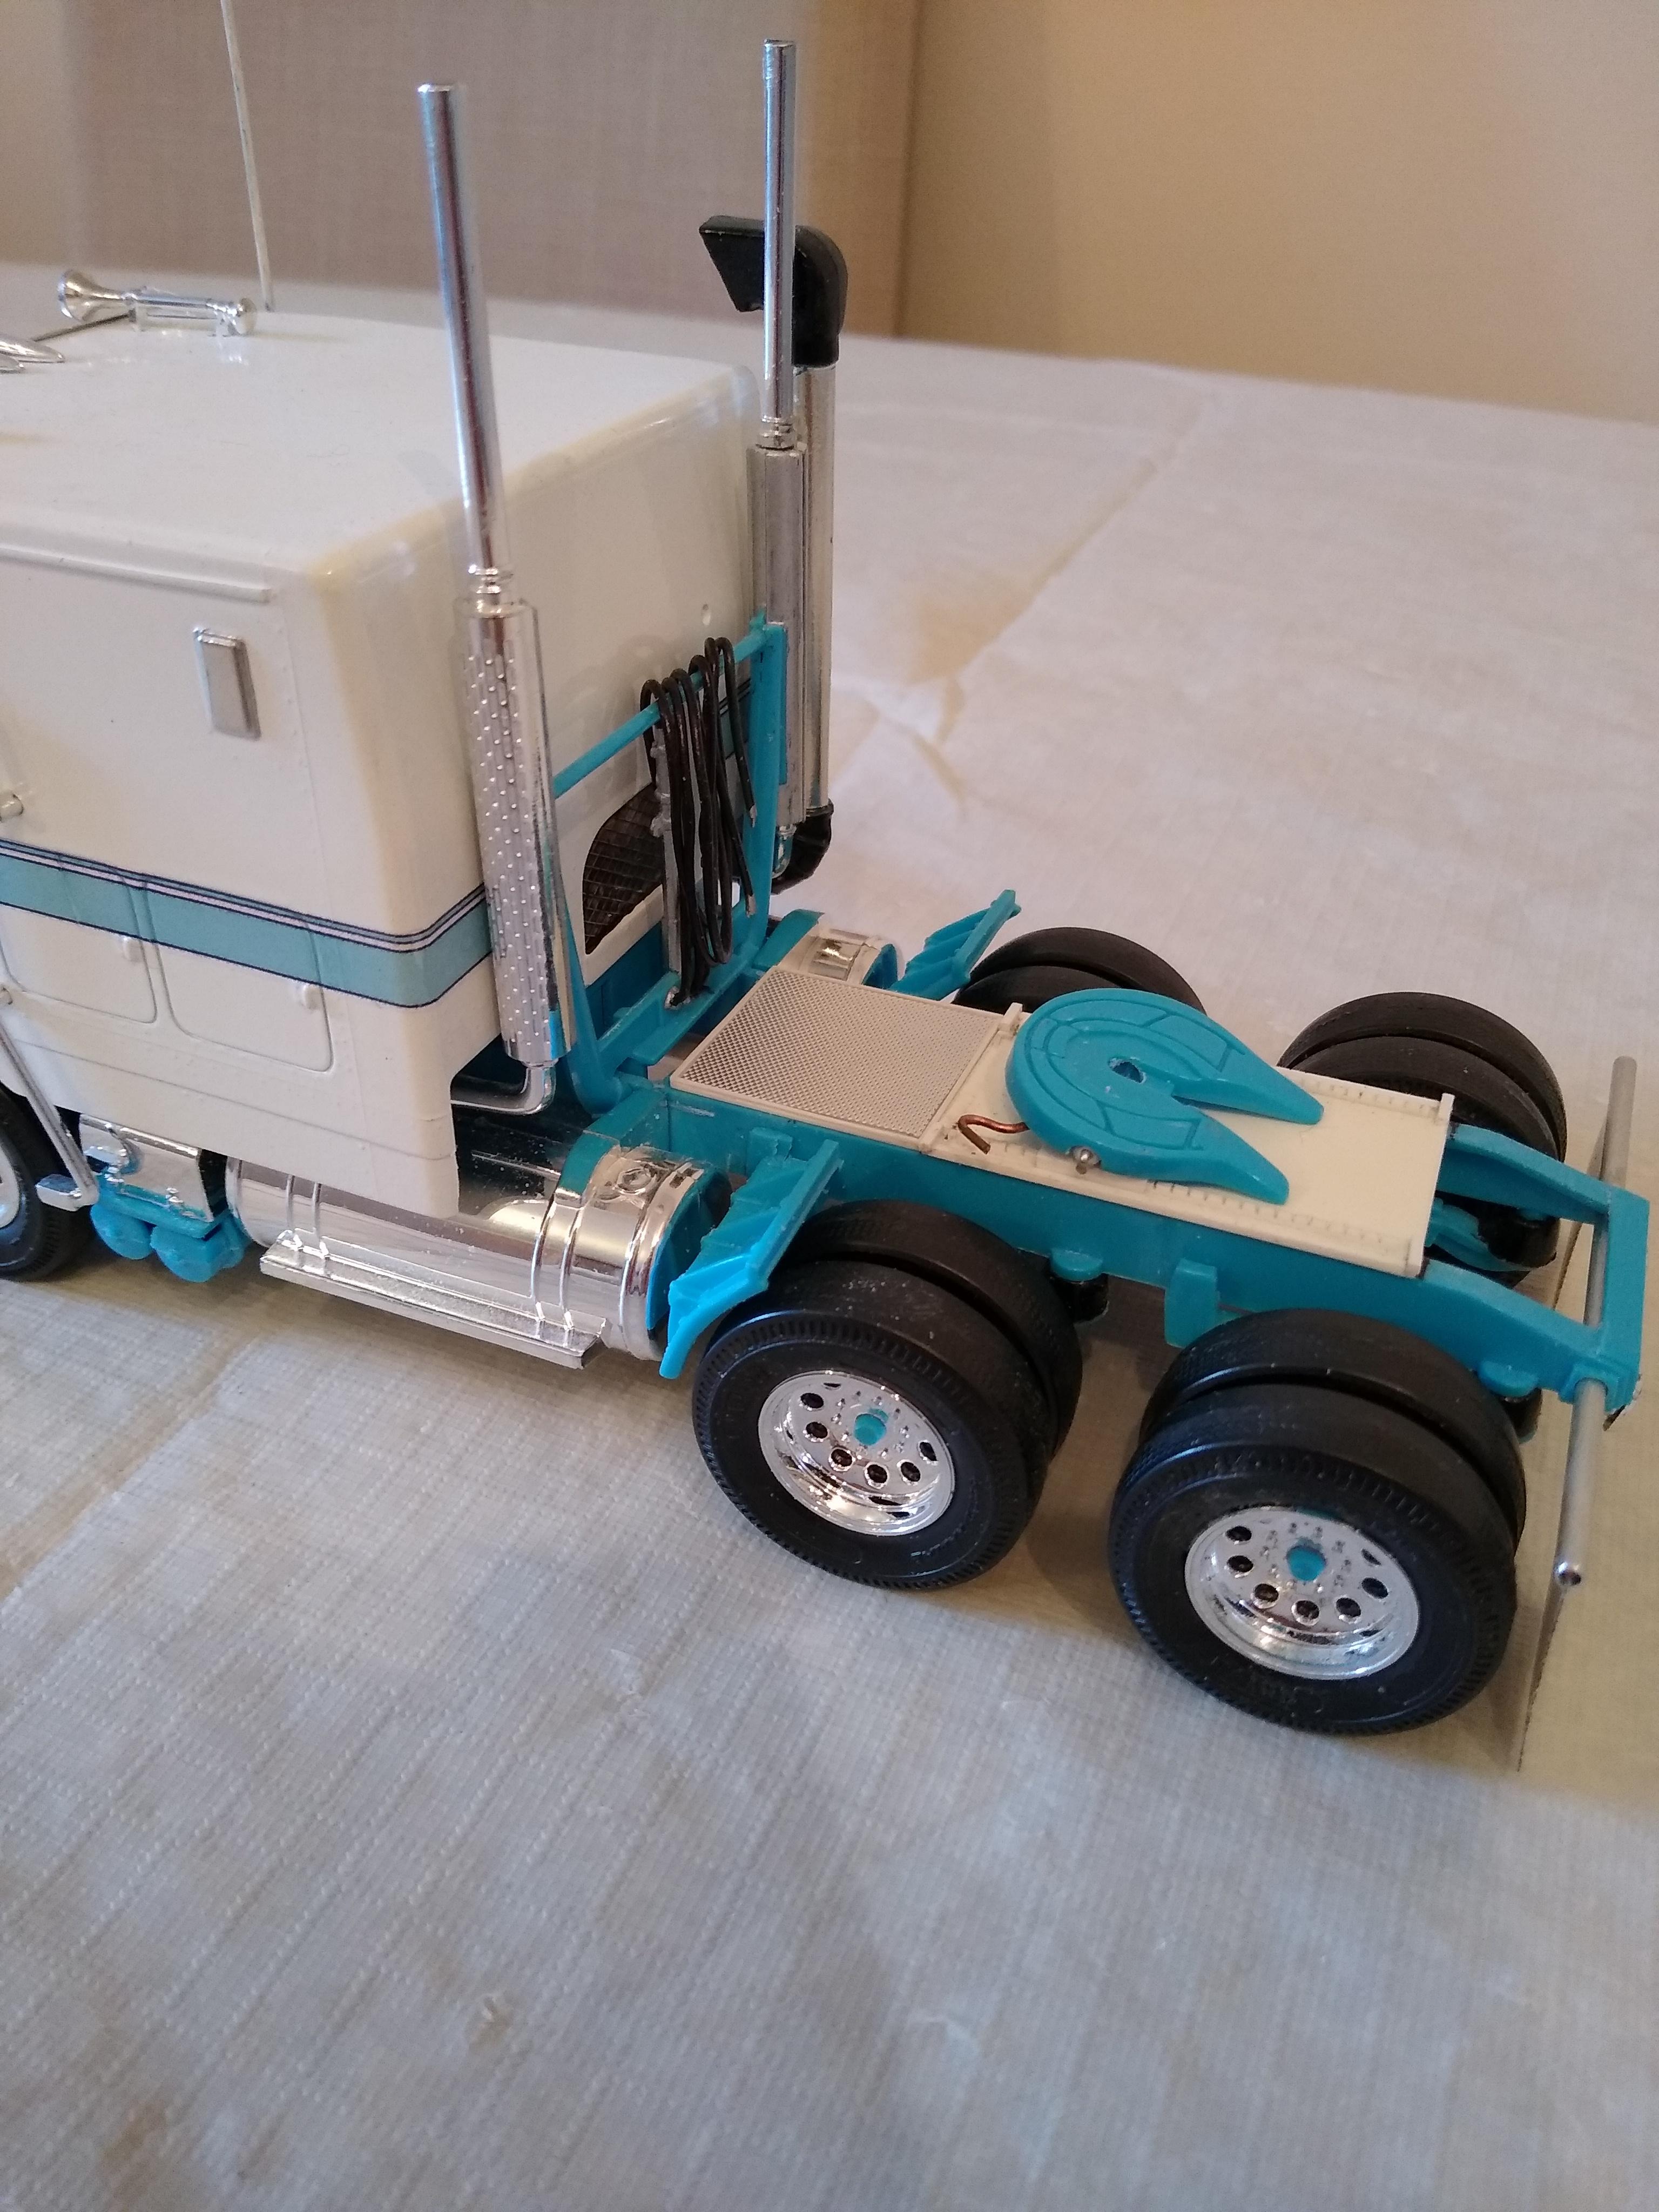
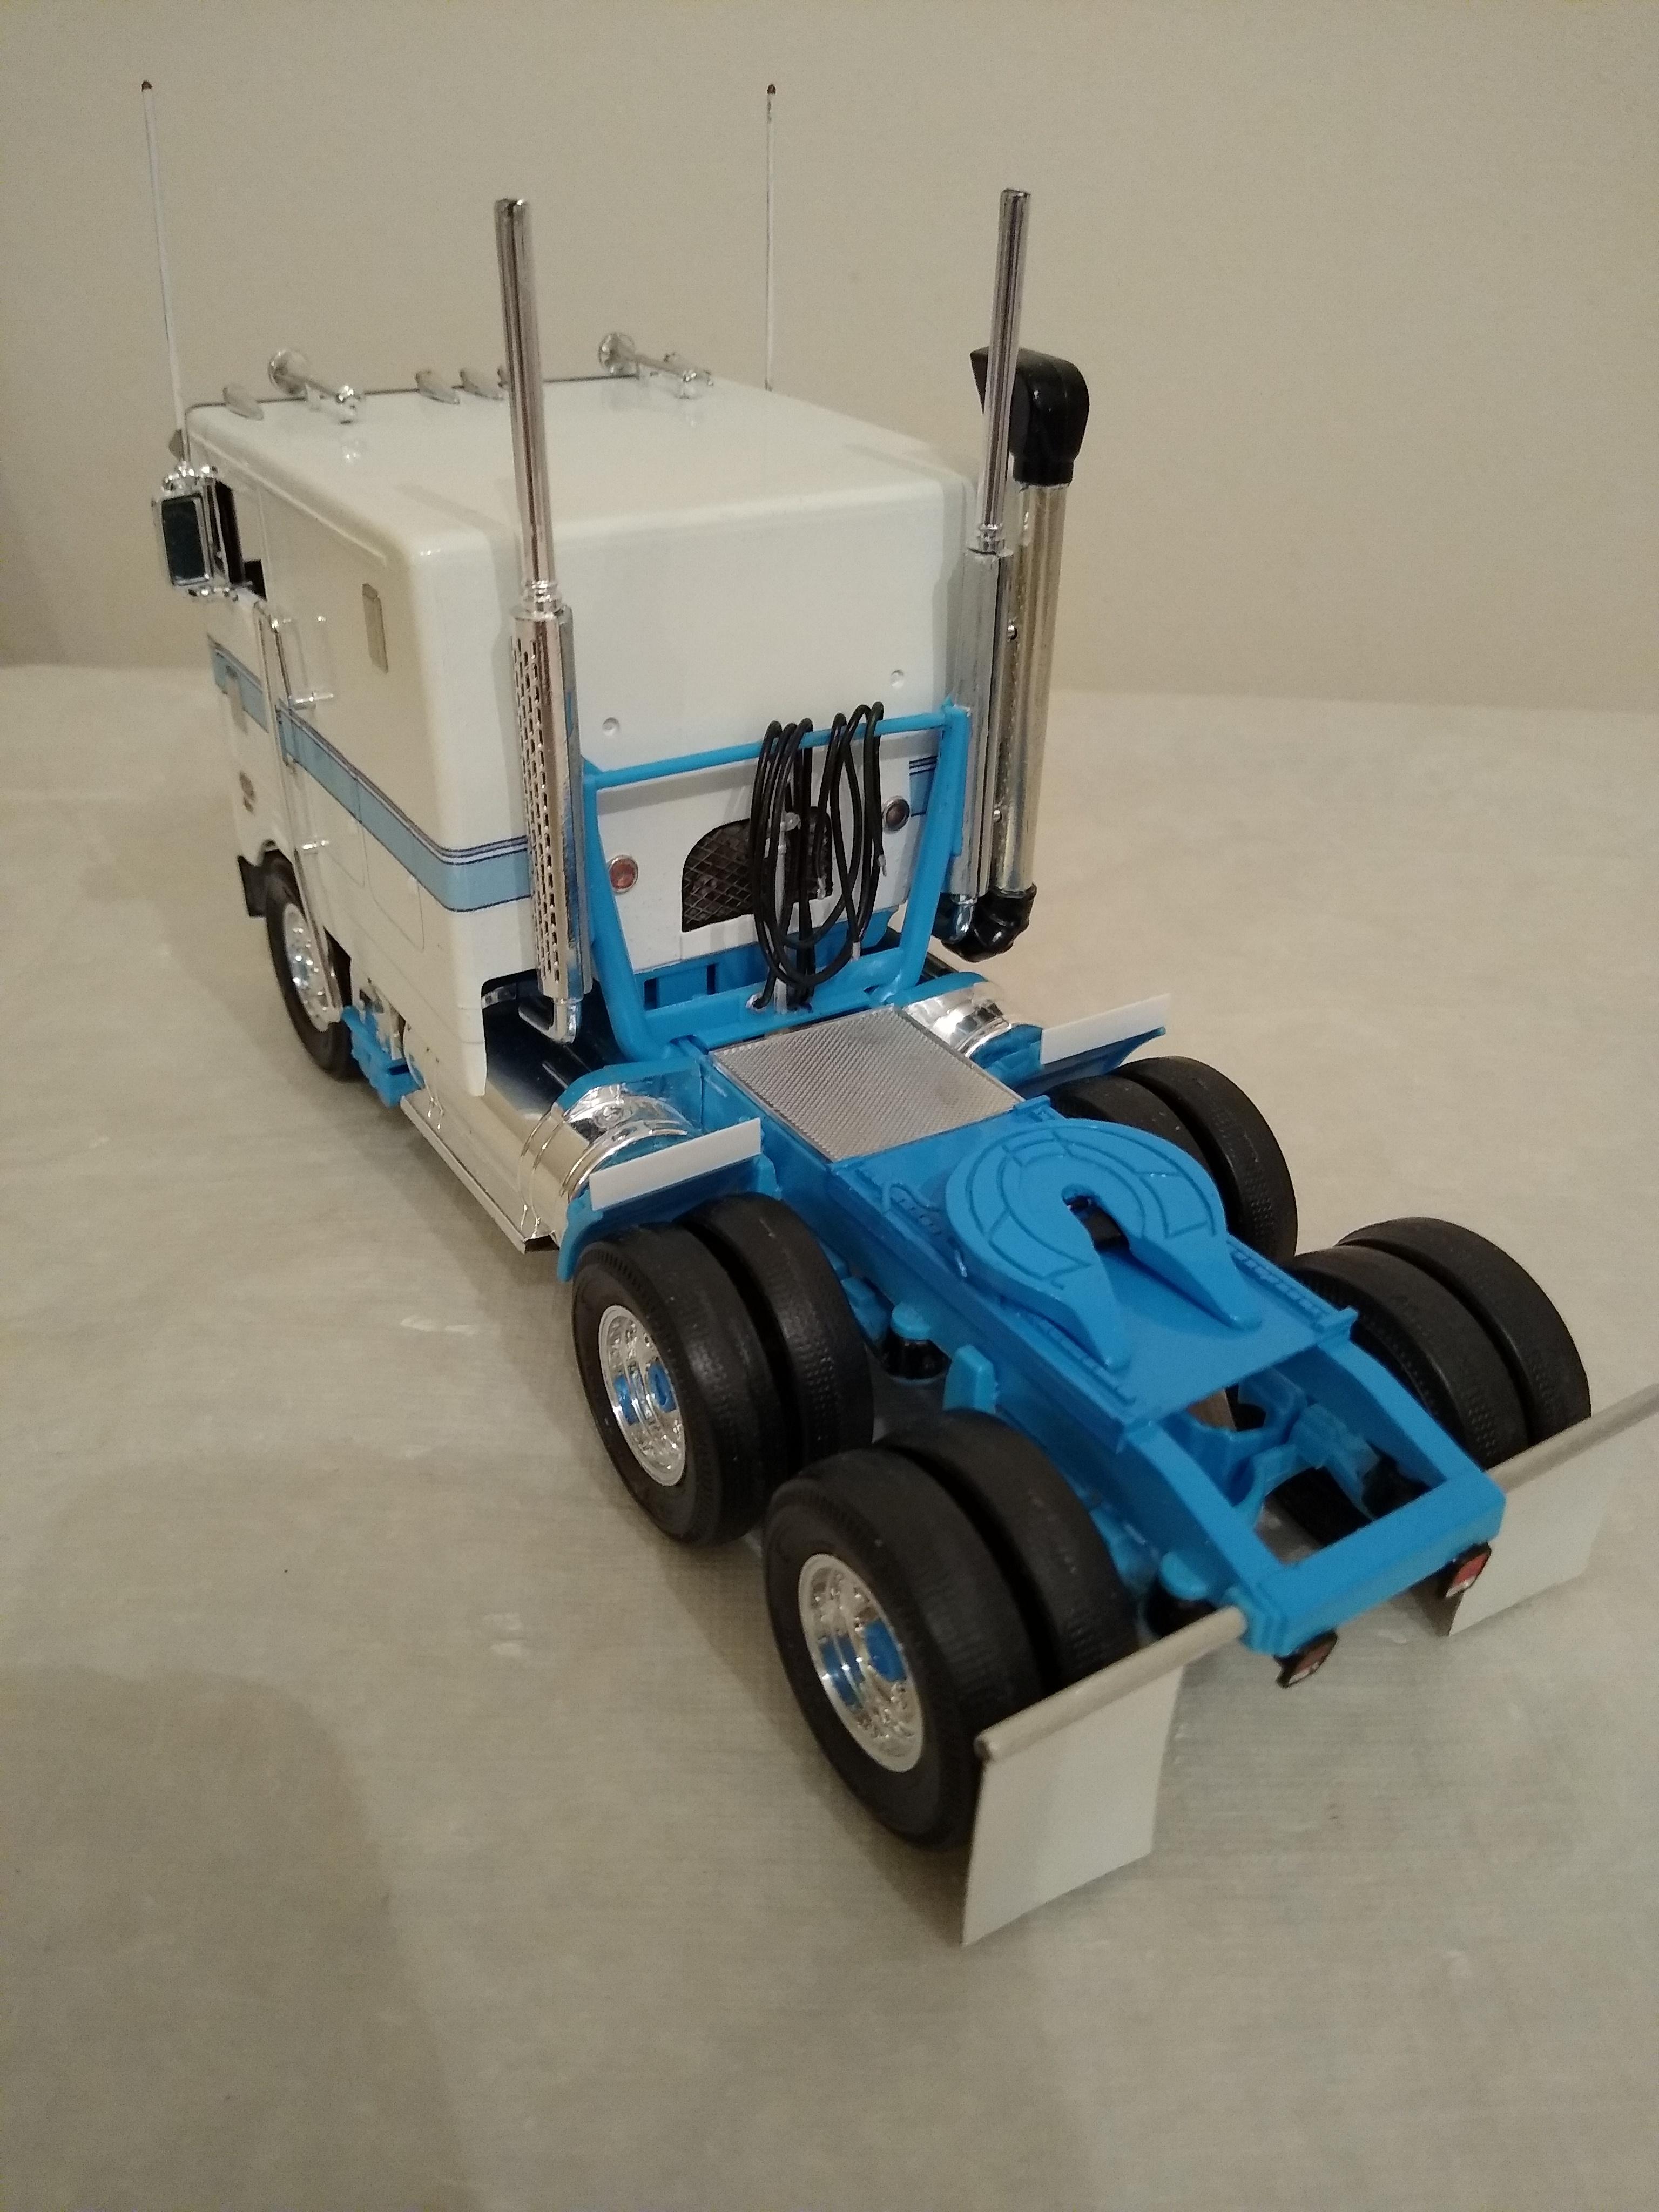
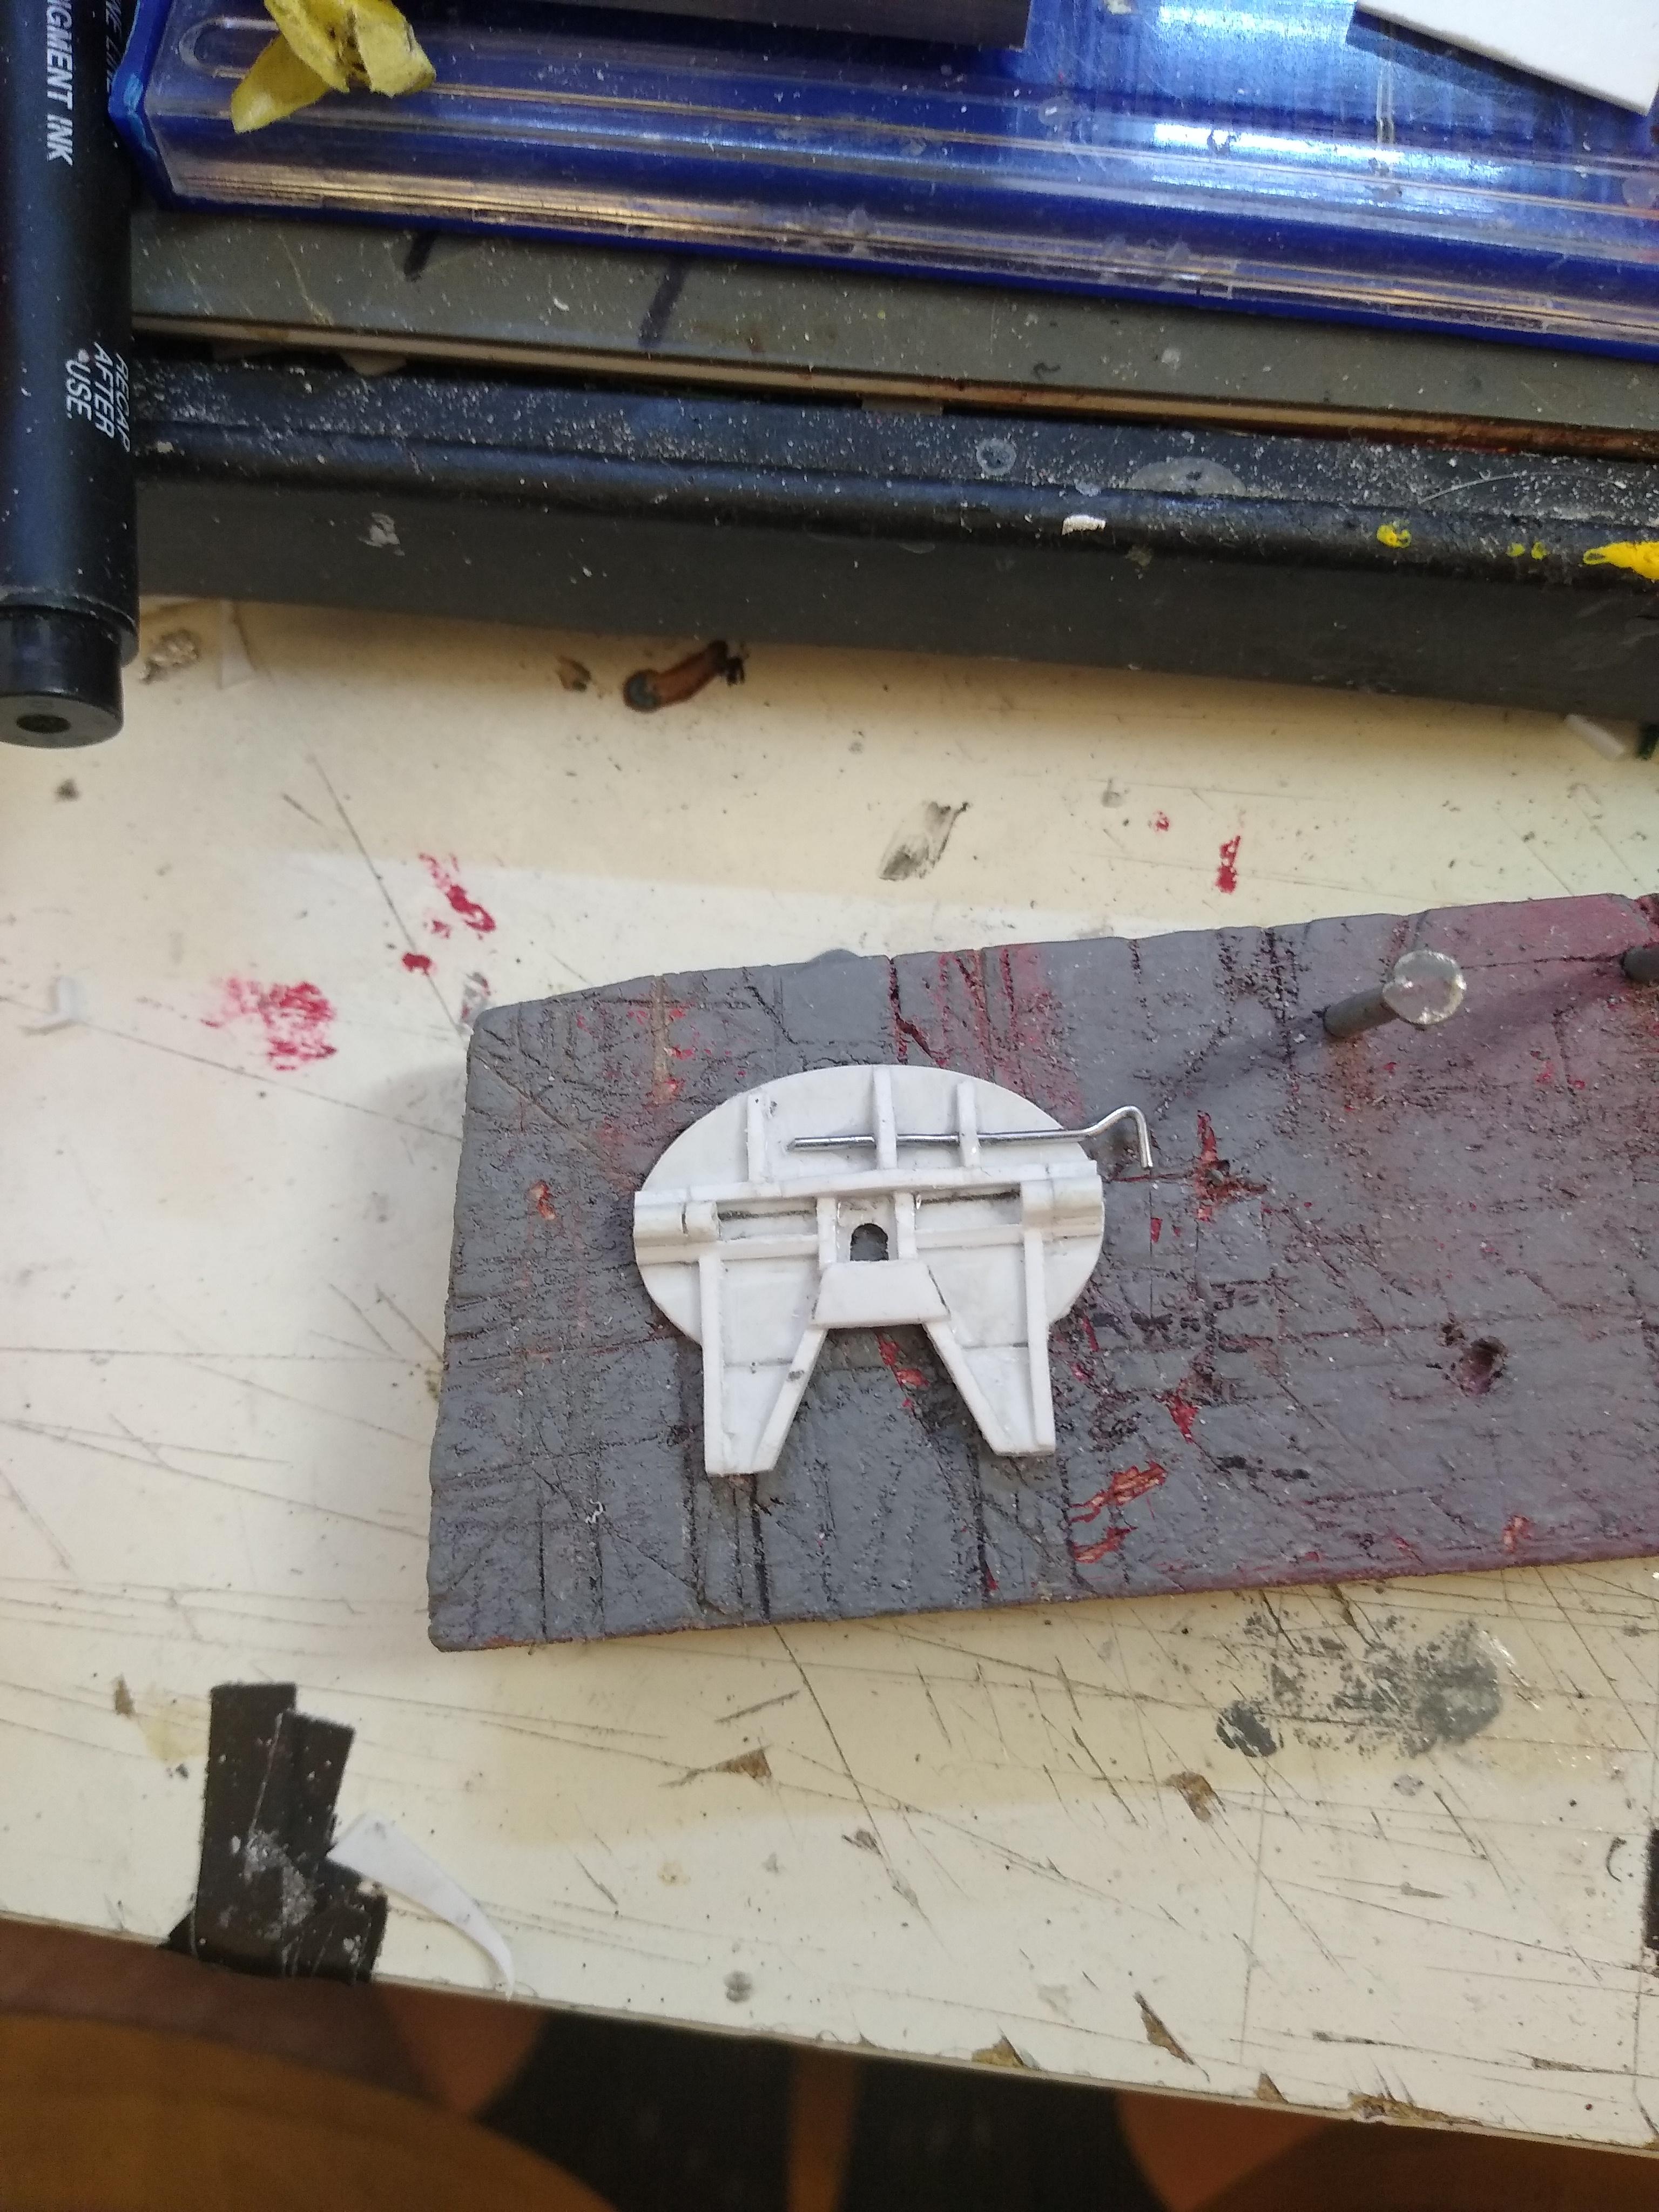
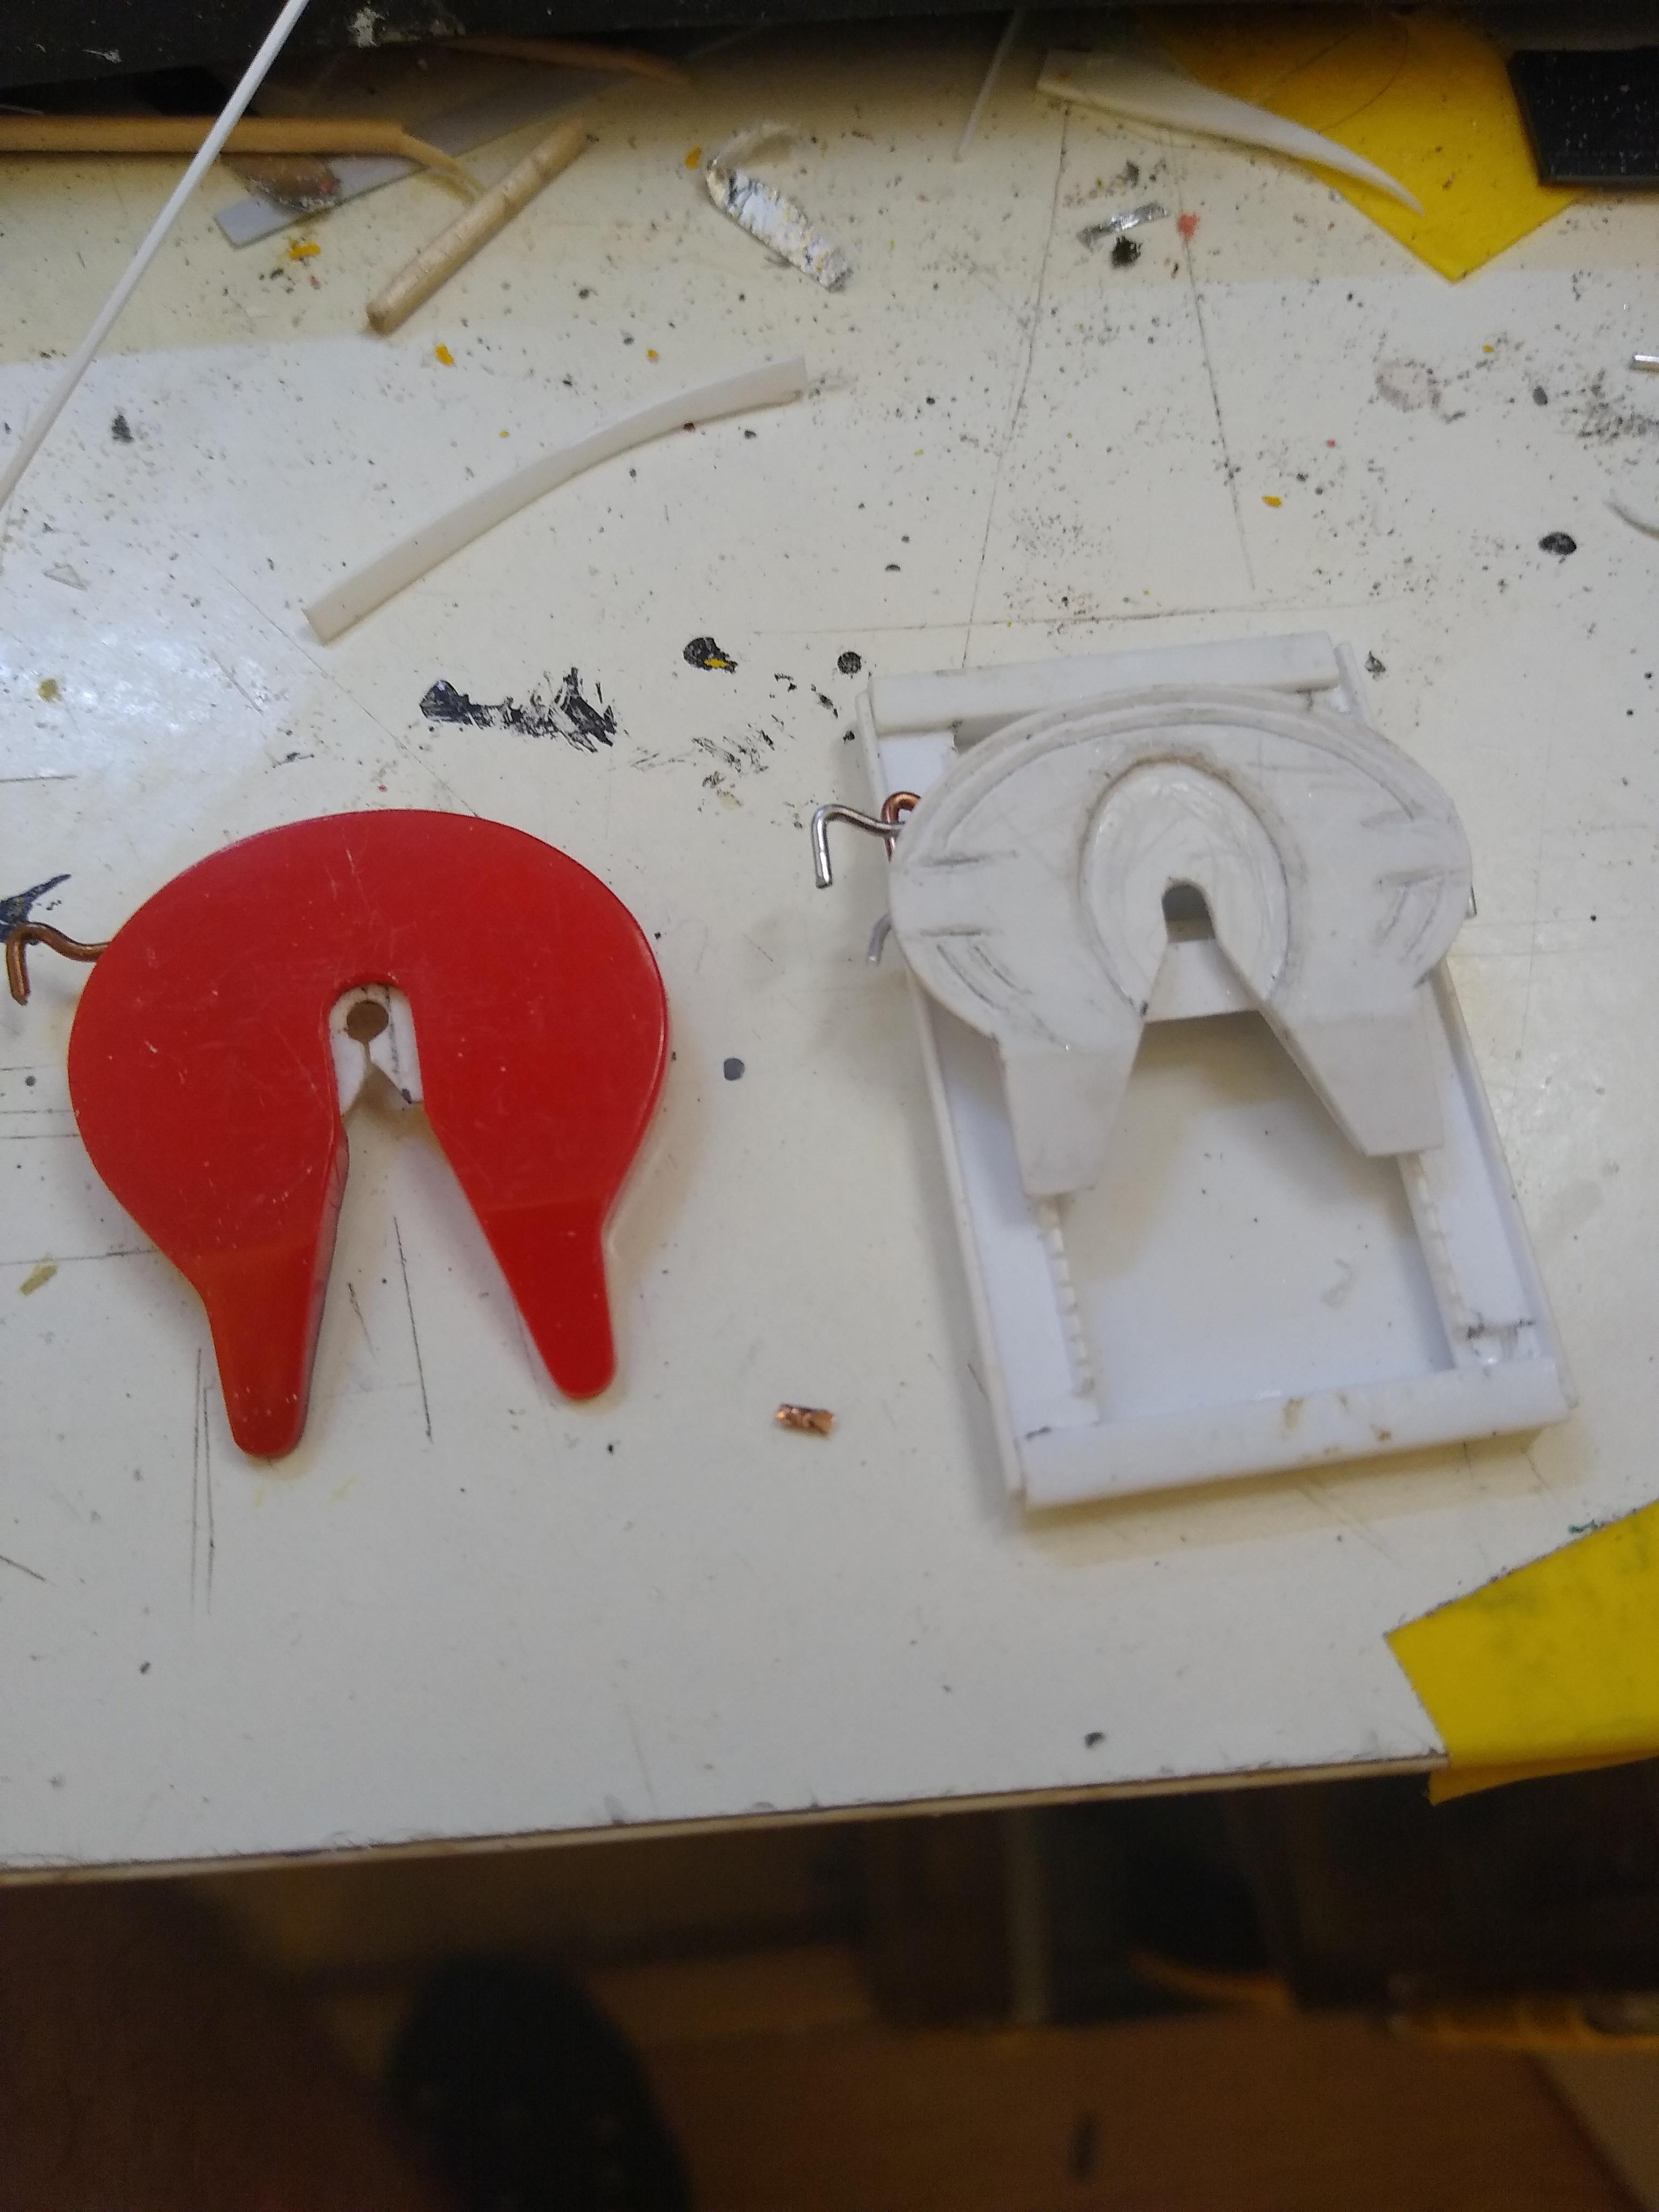
Now the W900 is finished it's back onto the K100. I had started making a cast iron Holland fifth-wheel rather than the pressed steel type I had. I love the shape of the Holland unit, it's real 1970s in my opinion. I used a pair of pointed callipers to scribe the grooves on the plate, following the outer edge, then deepened them with a triangular file. Turning it over I added gudgeons, the substructure and the release handle. Fitted it to the sliding frame and it looks much better to me.
-
AMT Trailmobile Reefer
Rockford replied to Rockford's topic in Model Trucks: Big Rigs and Heavy Equipment
Like the Sunkist truck, looks great. I'm jealous of your Ford CL9000, they're as rare as hen's teeth now! There's a couple of the Snap Fit LTL9000s on eBay but, as usual, exorbitant prices that I can't (and won't) pay. -
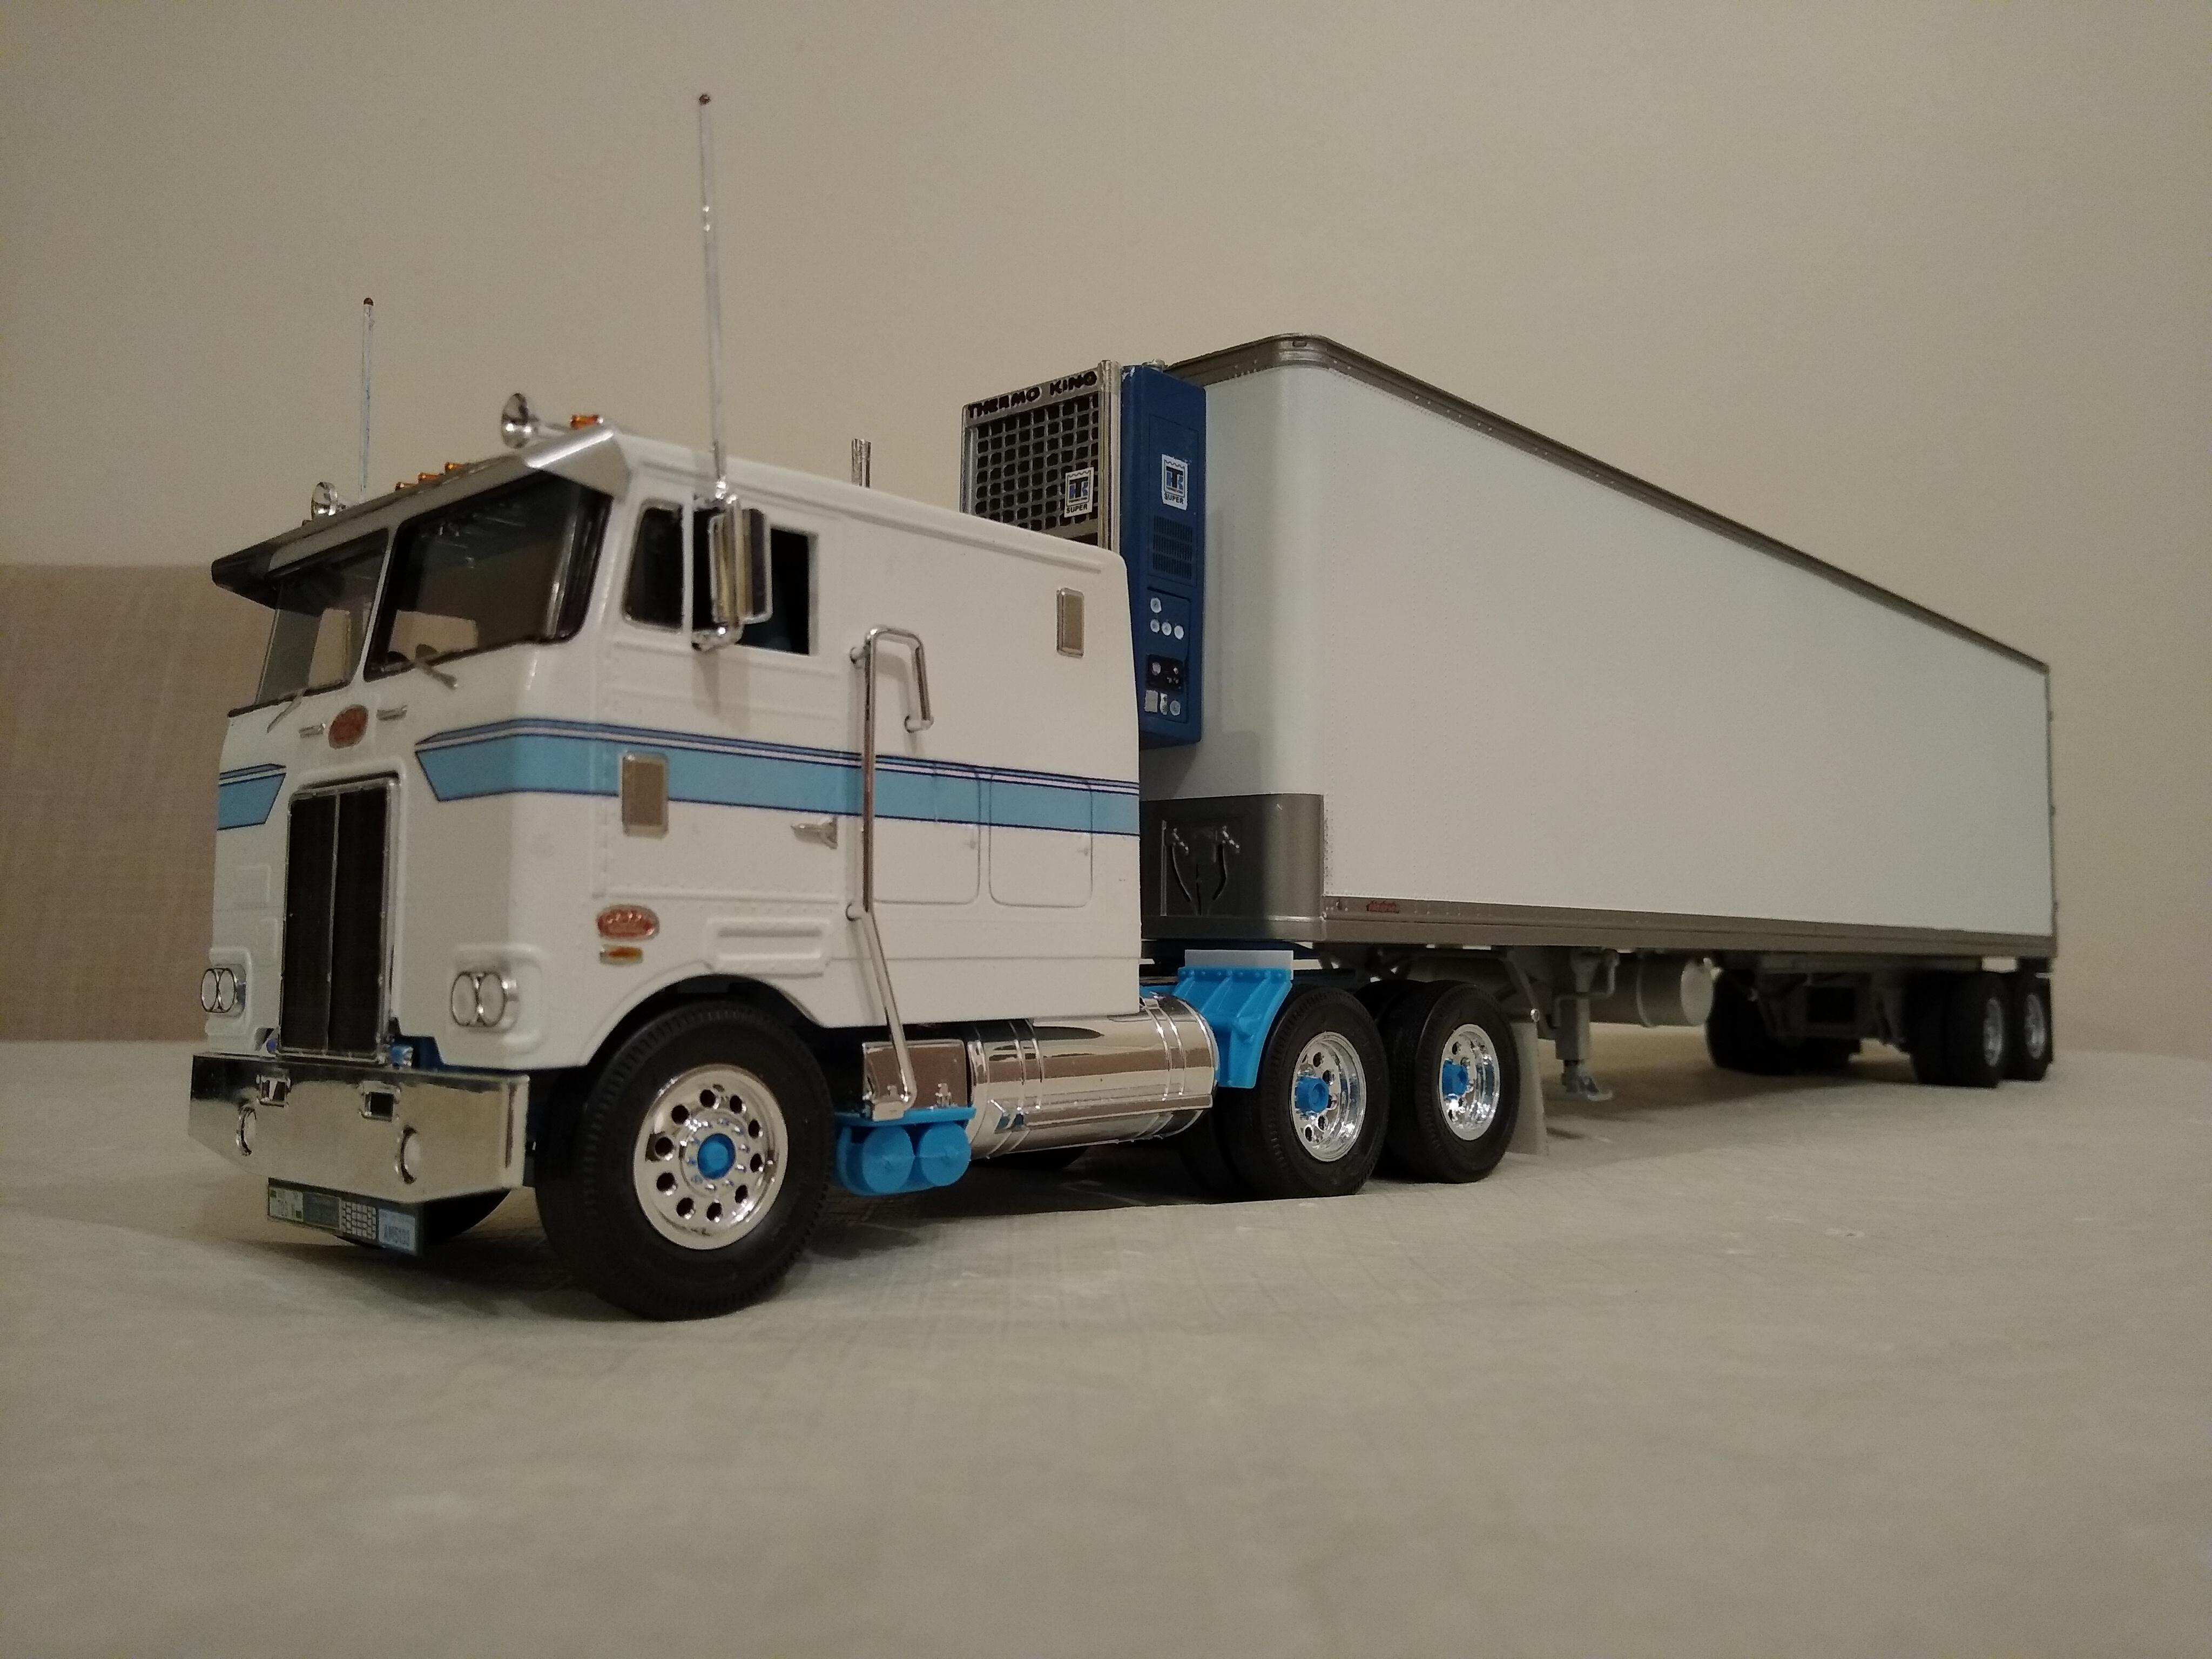
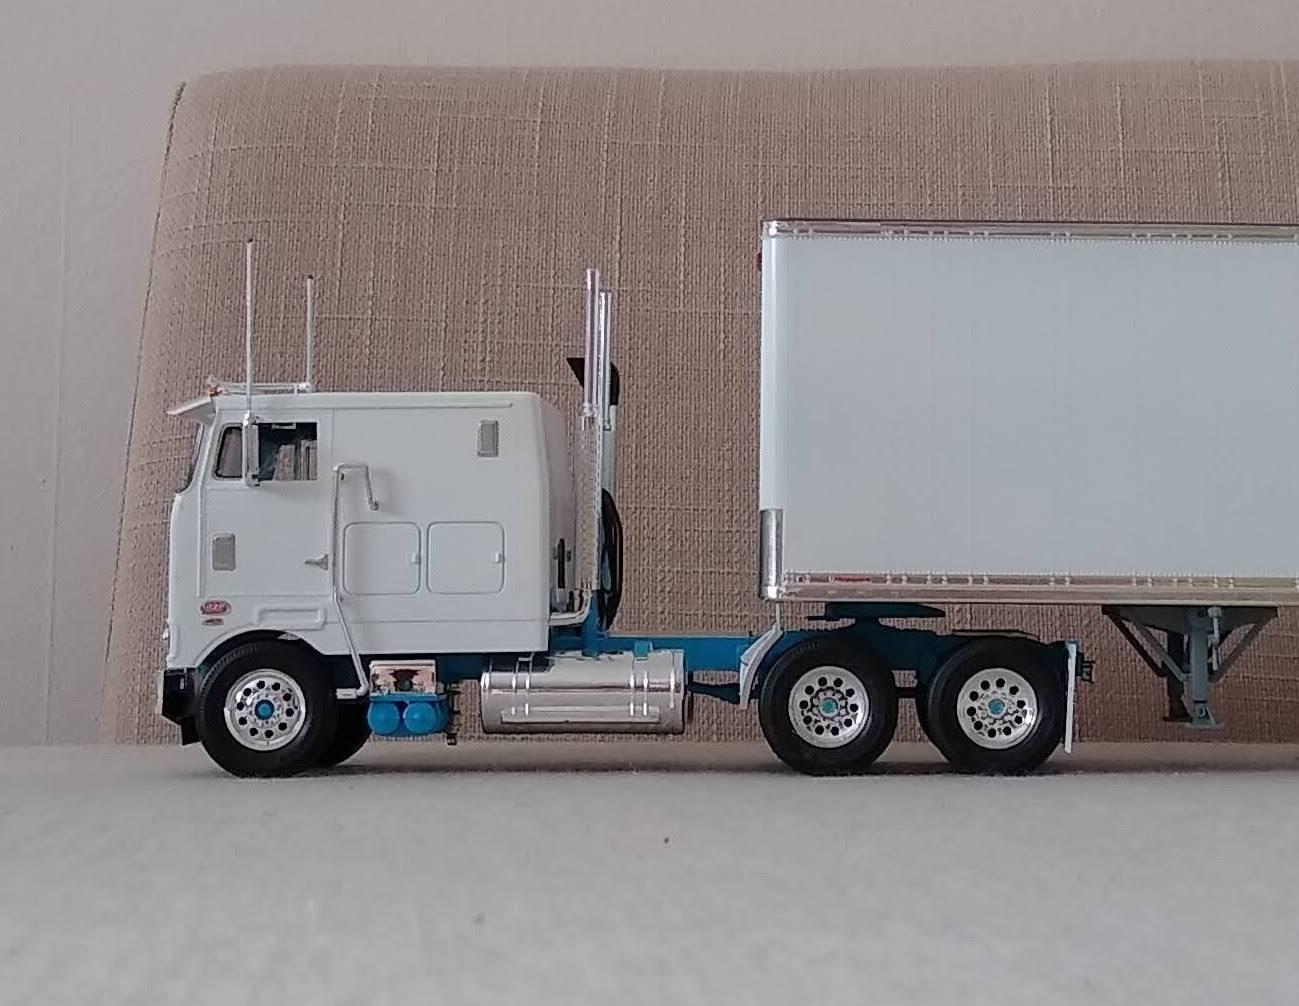
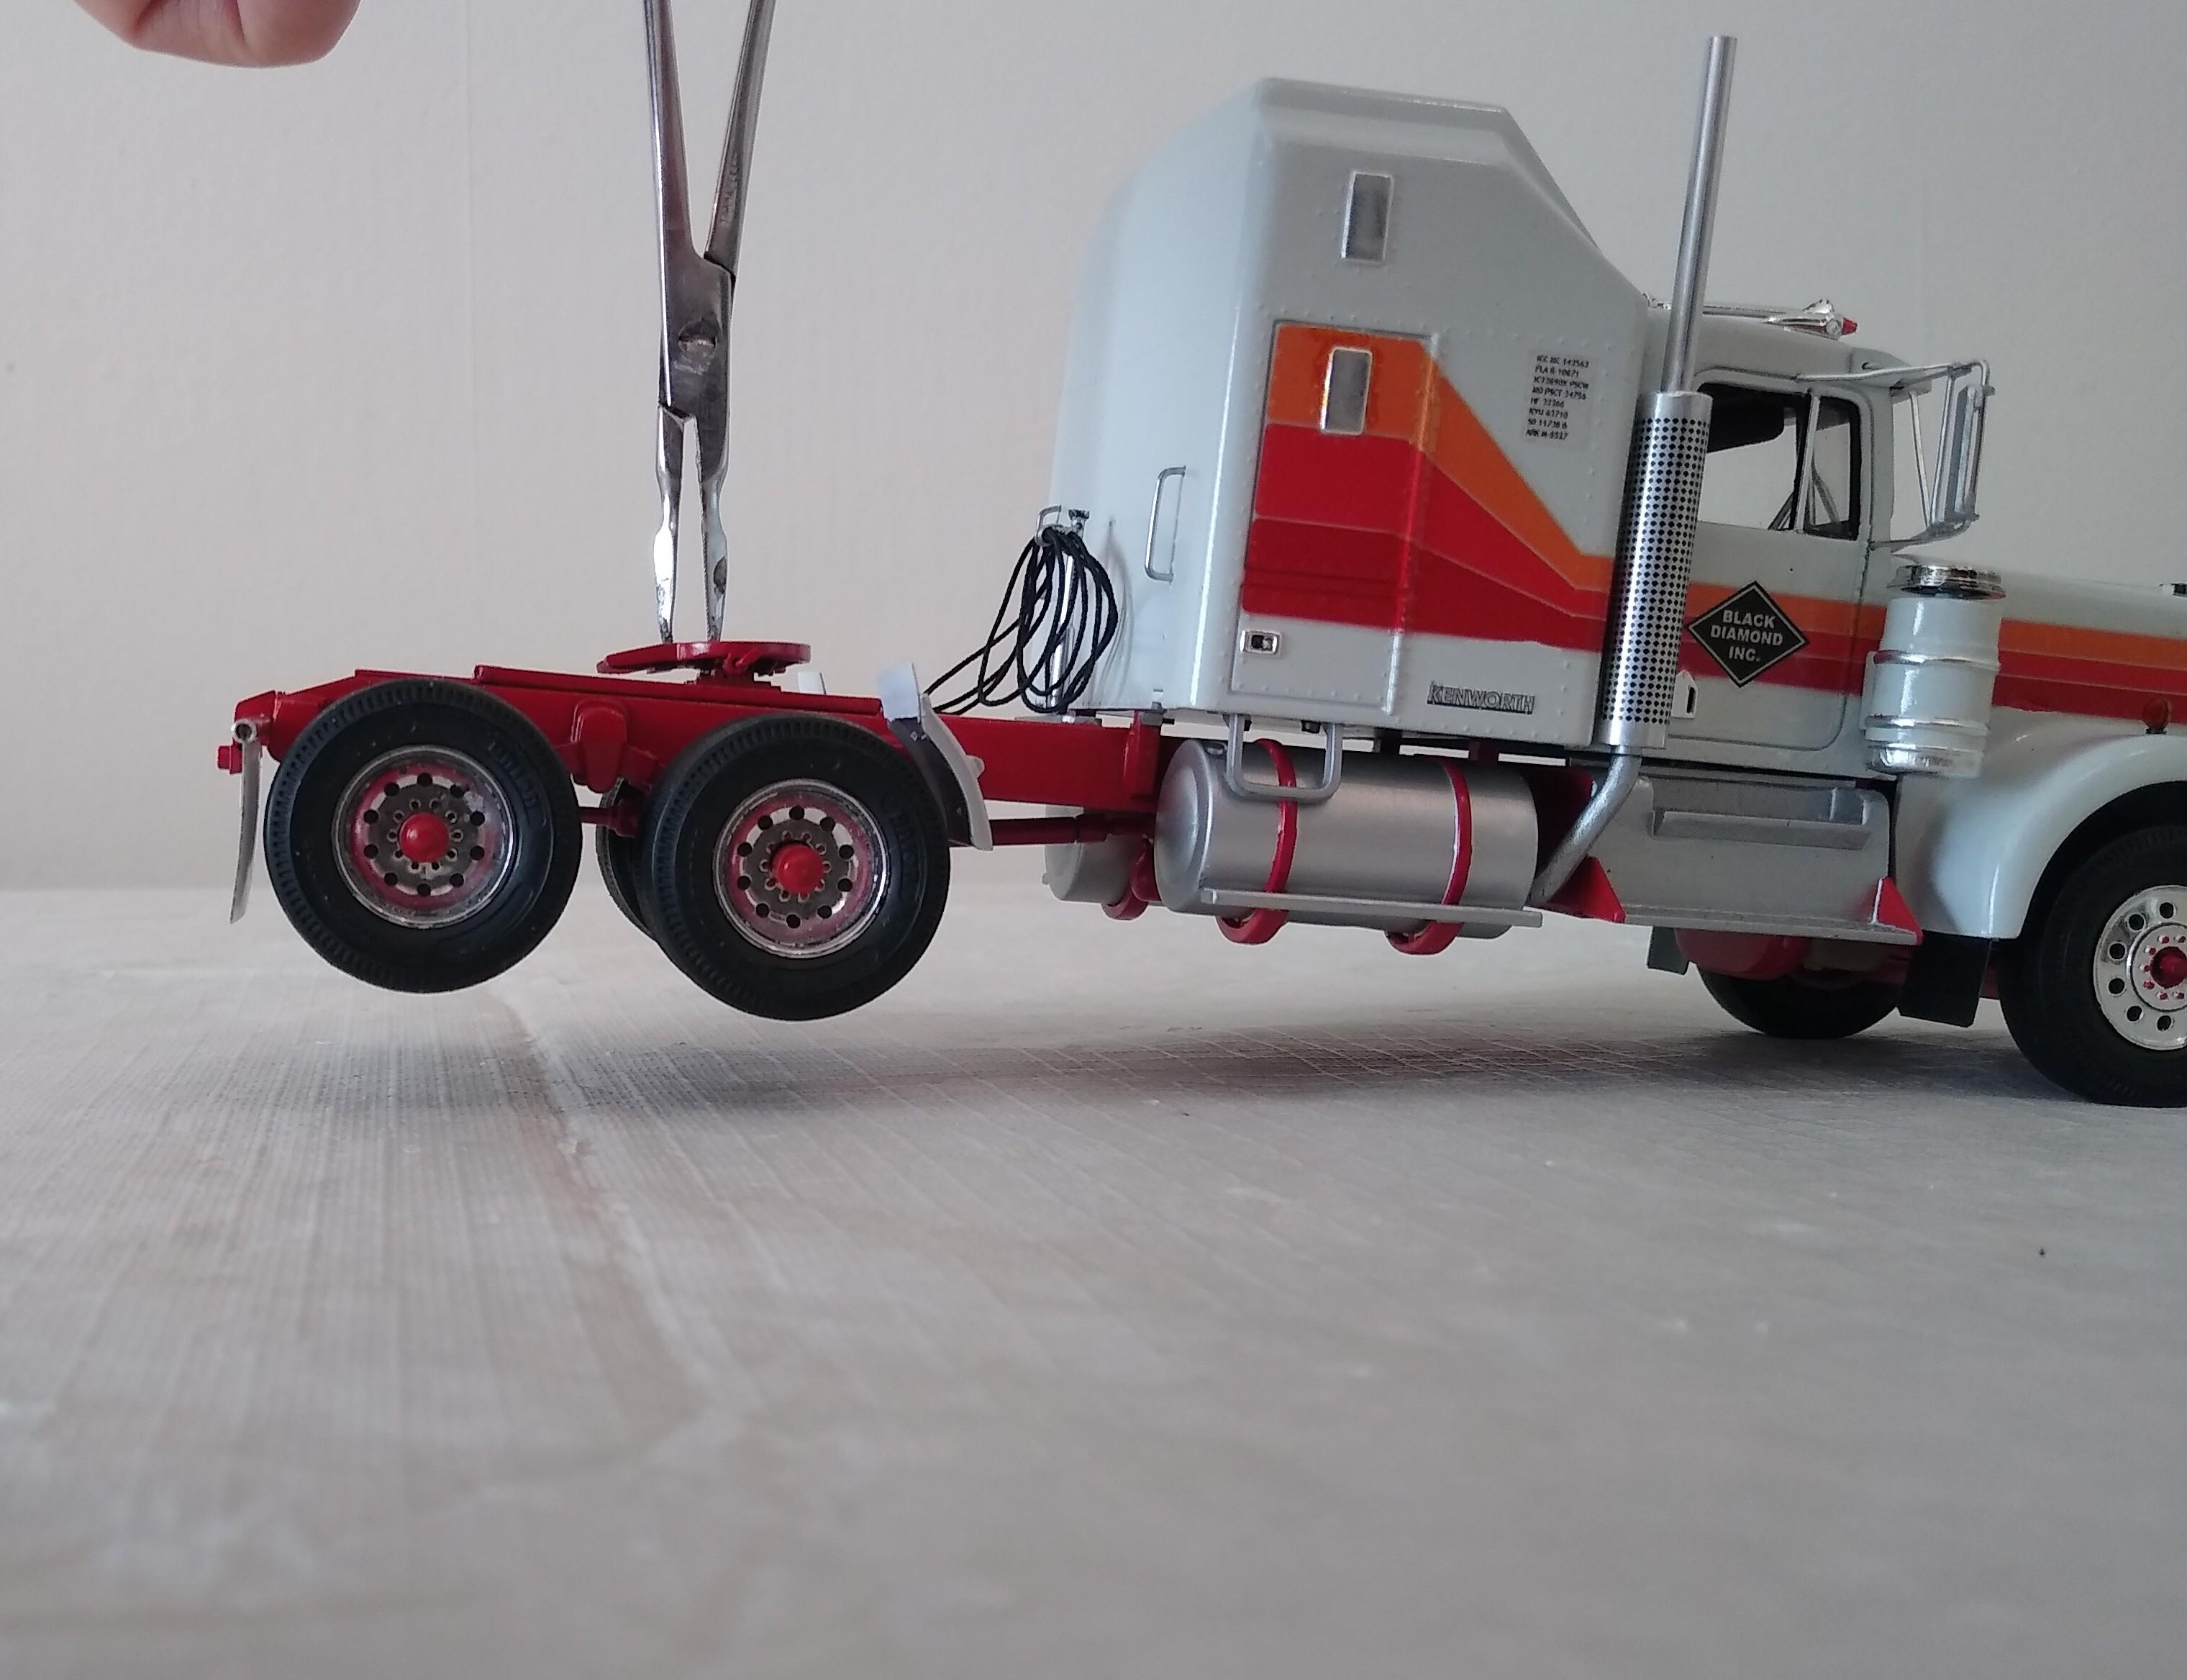
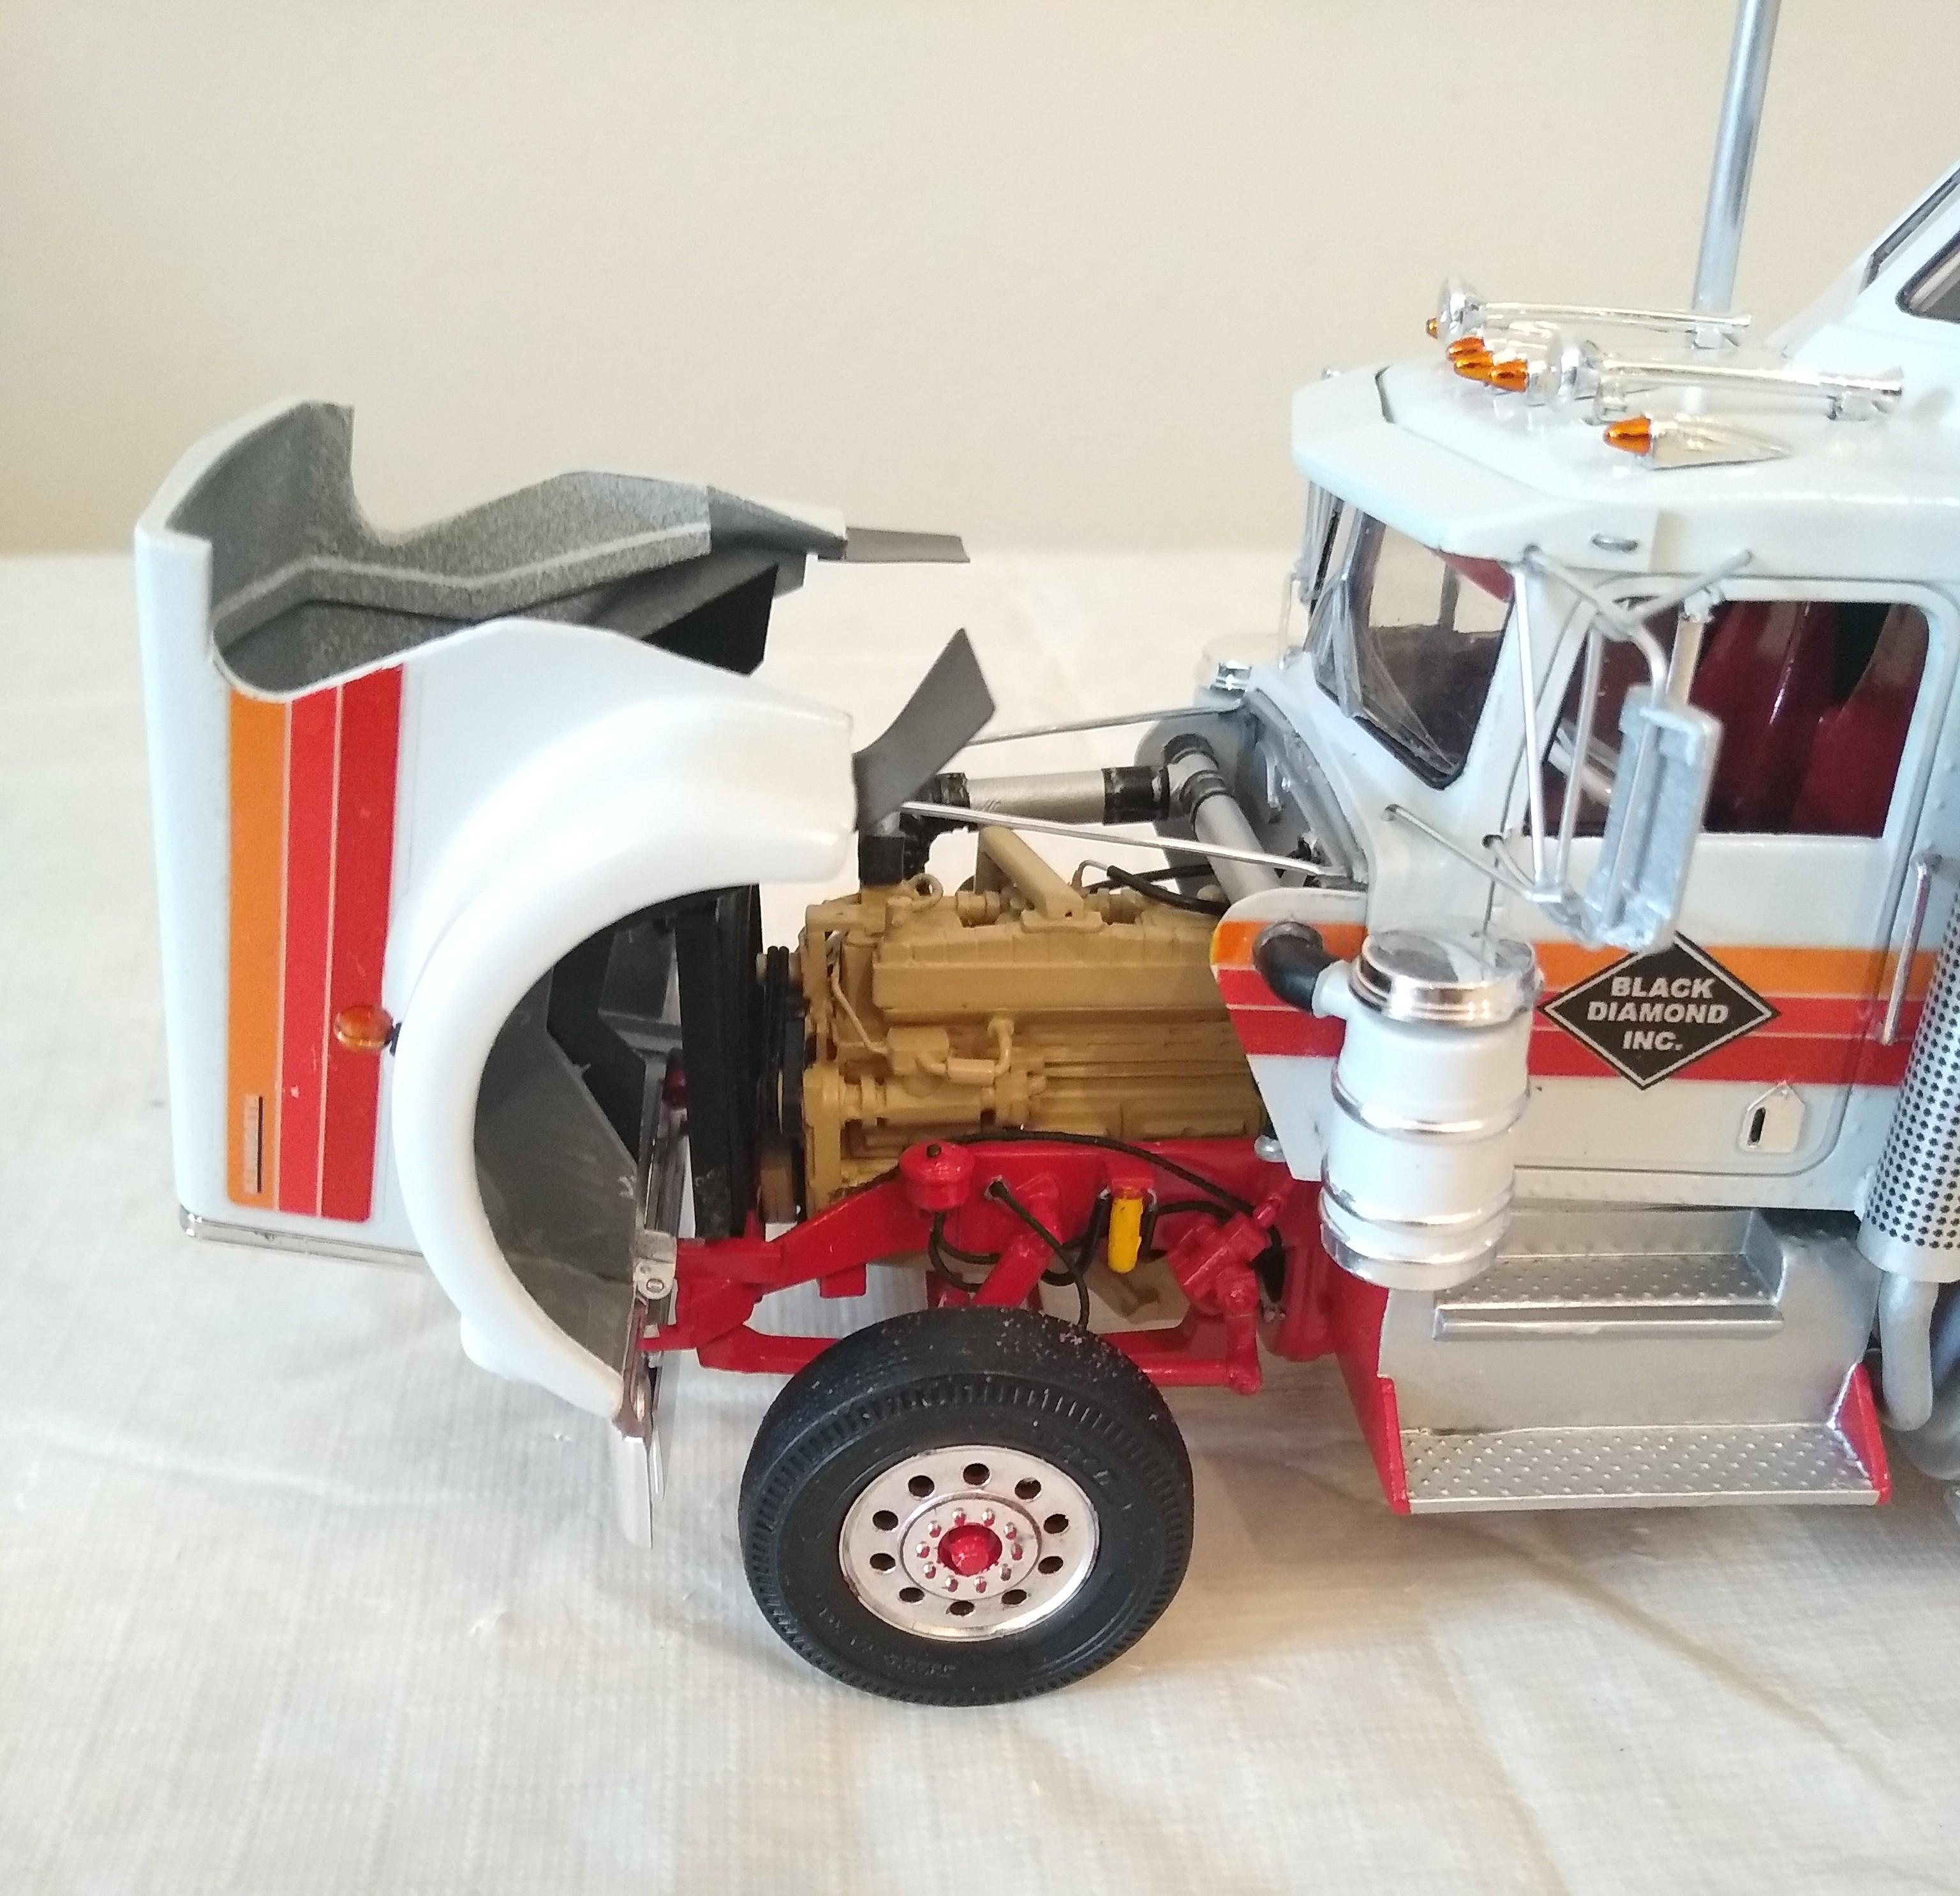
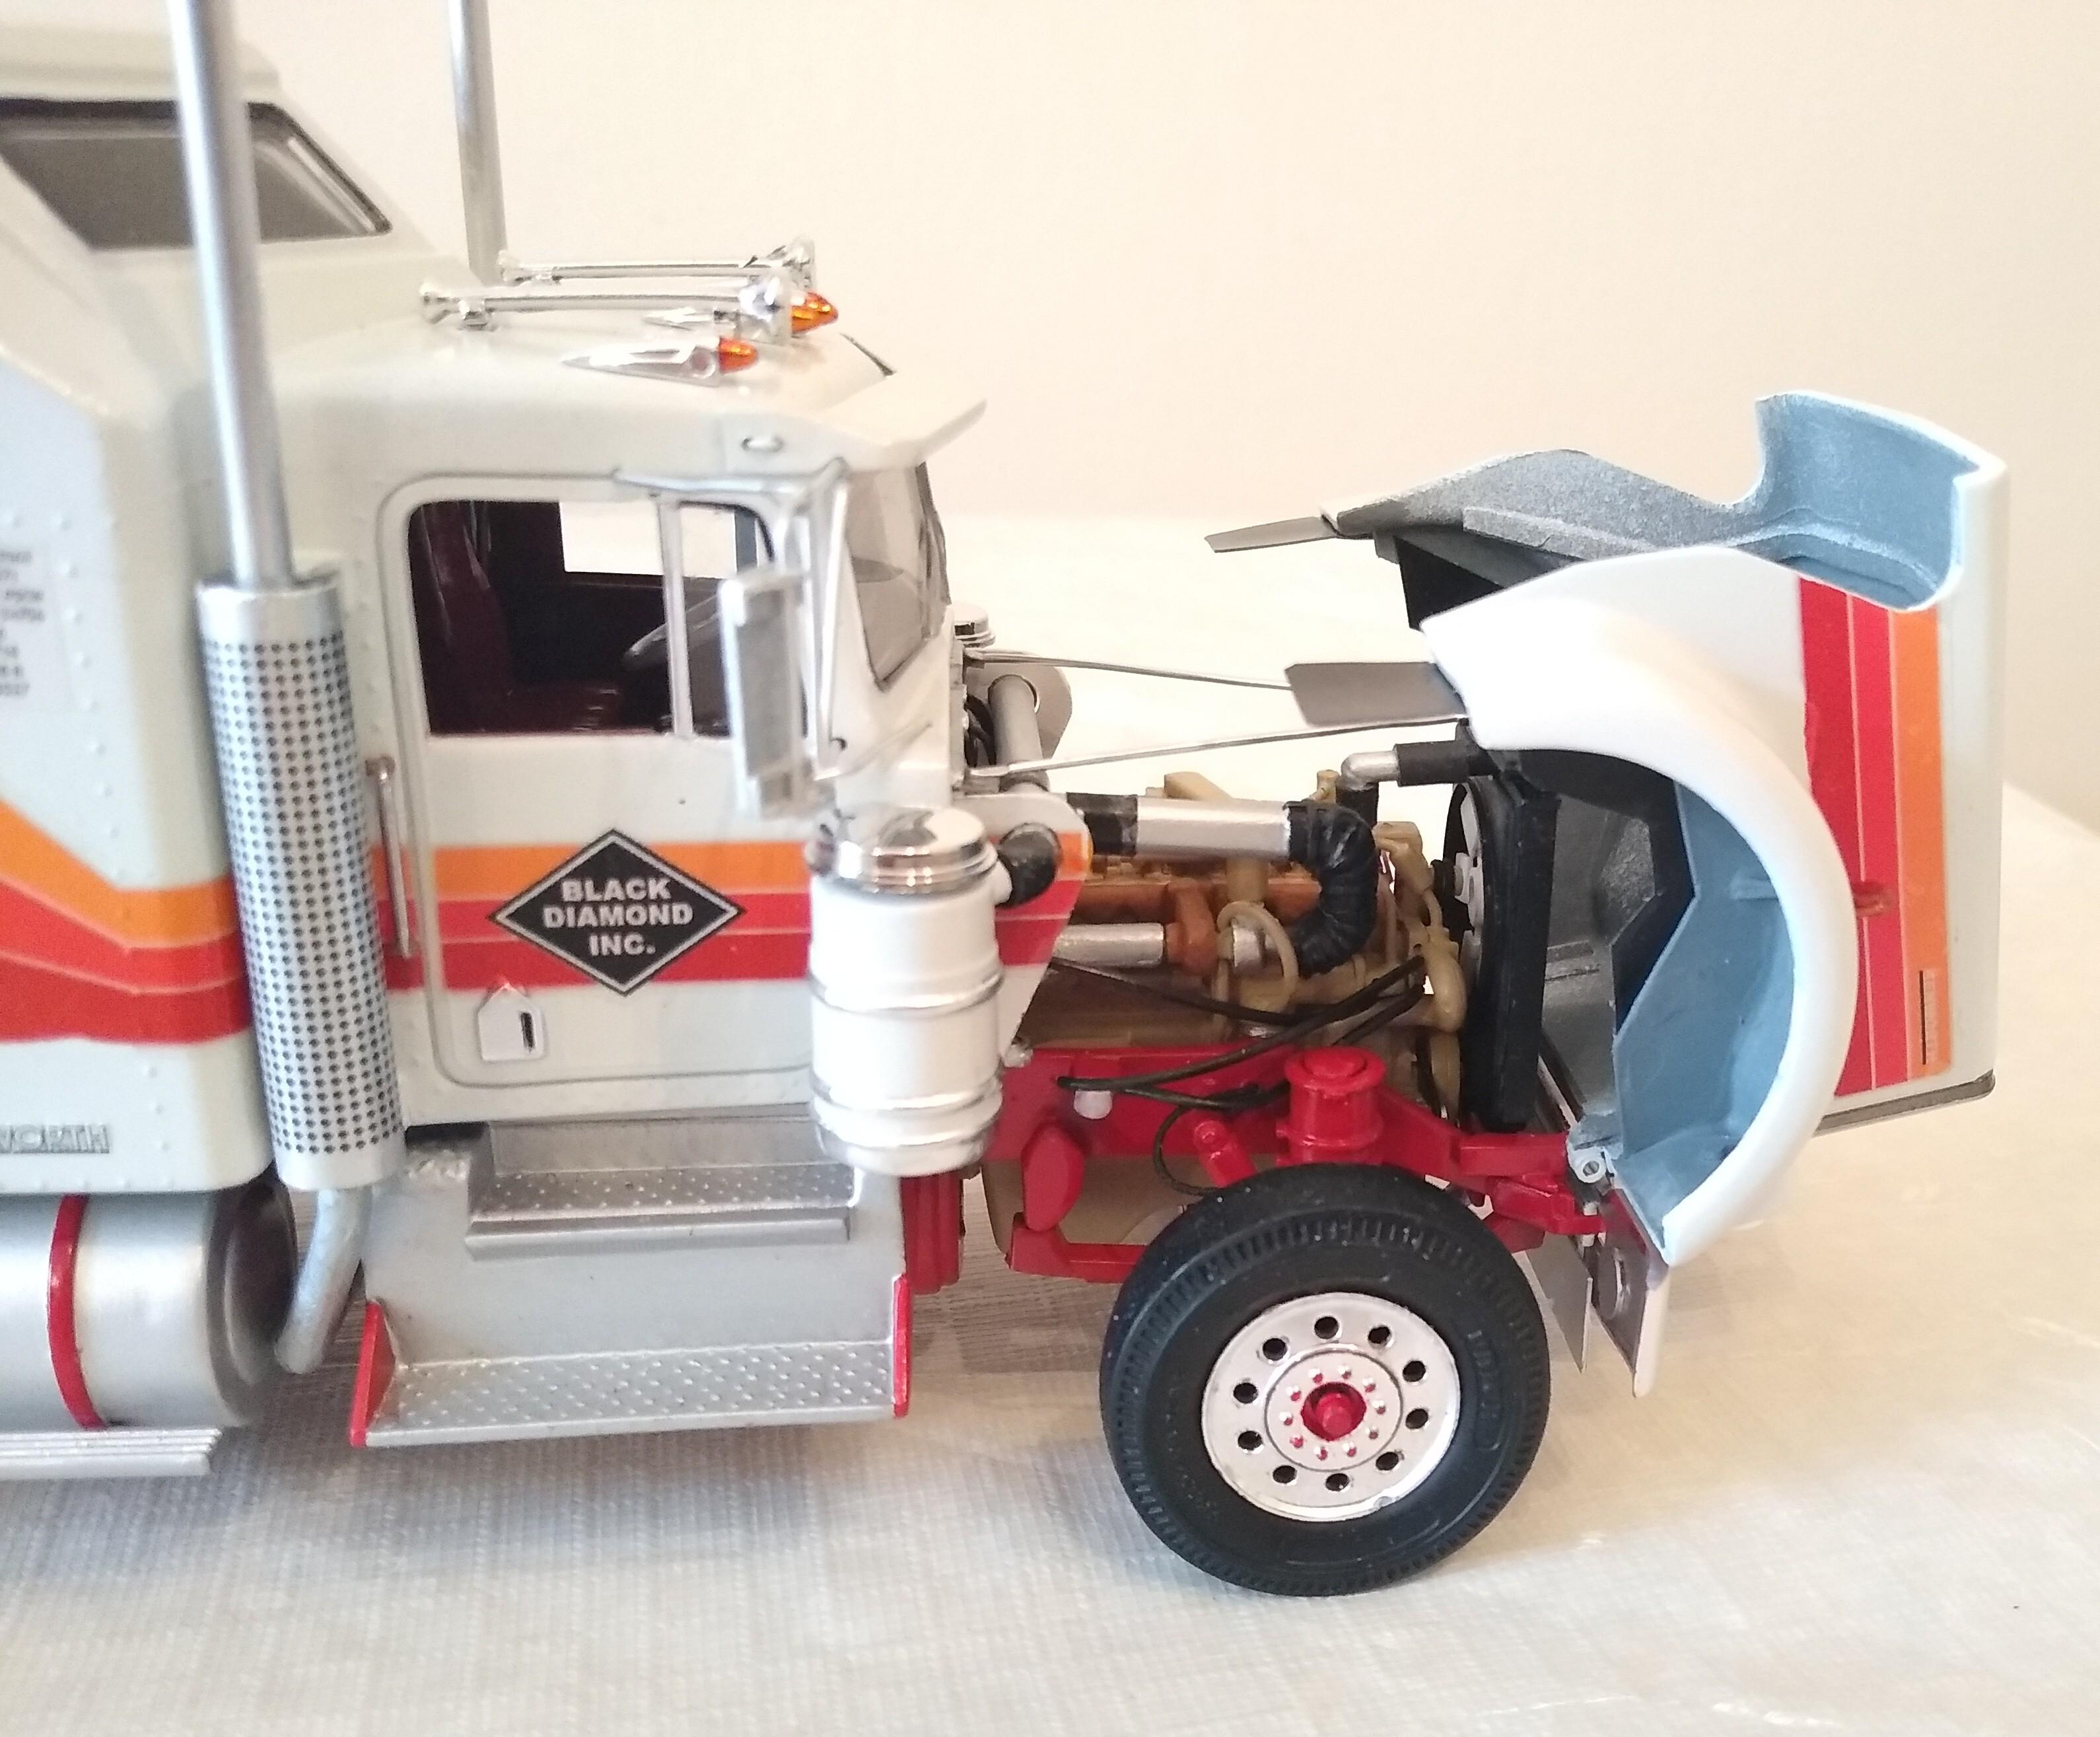
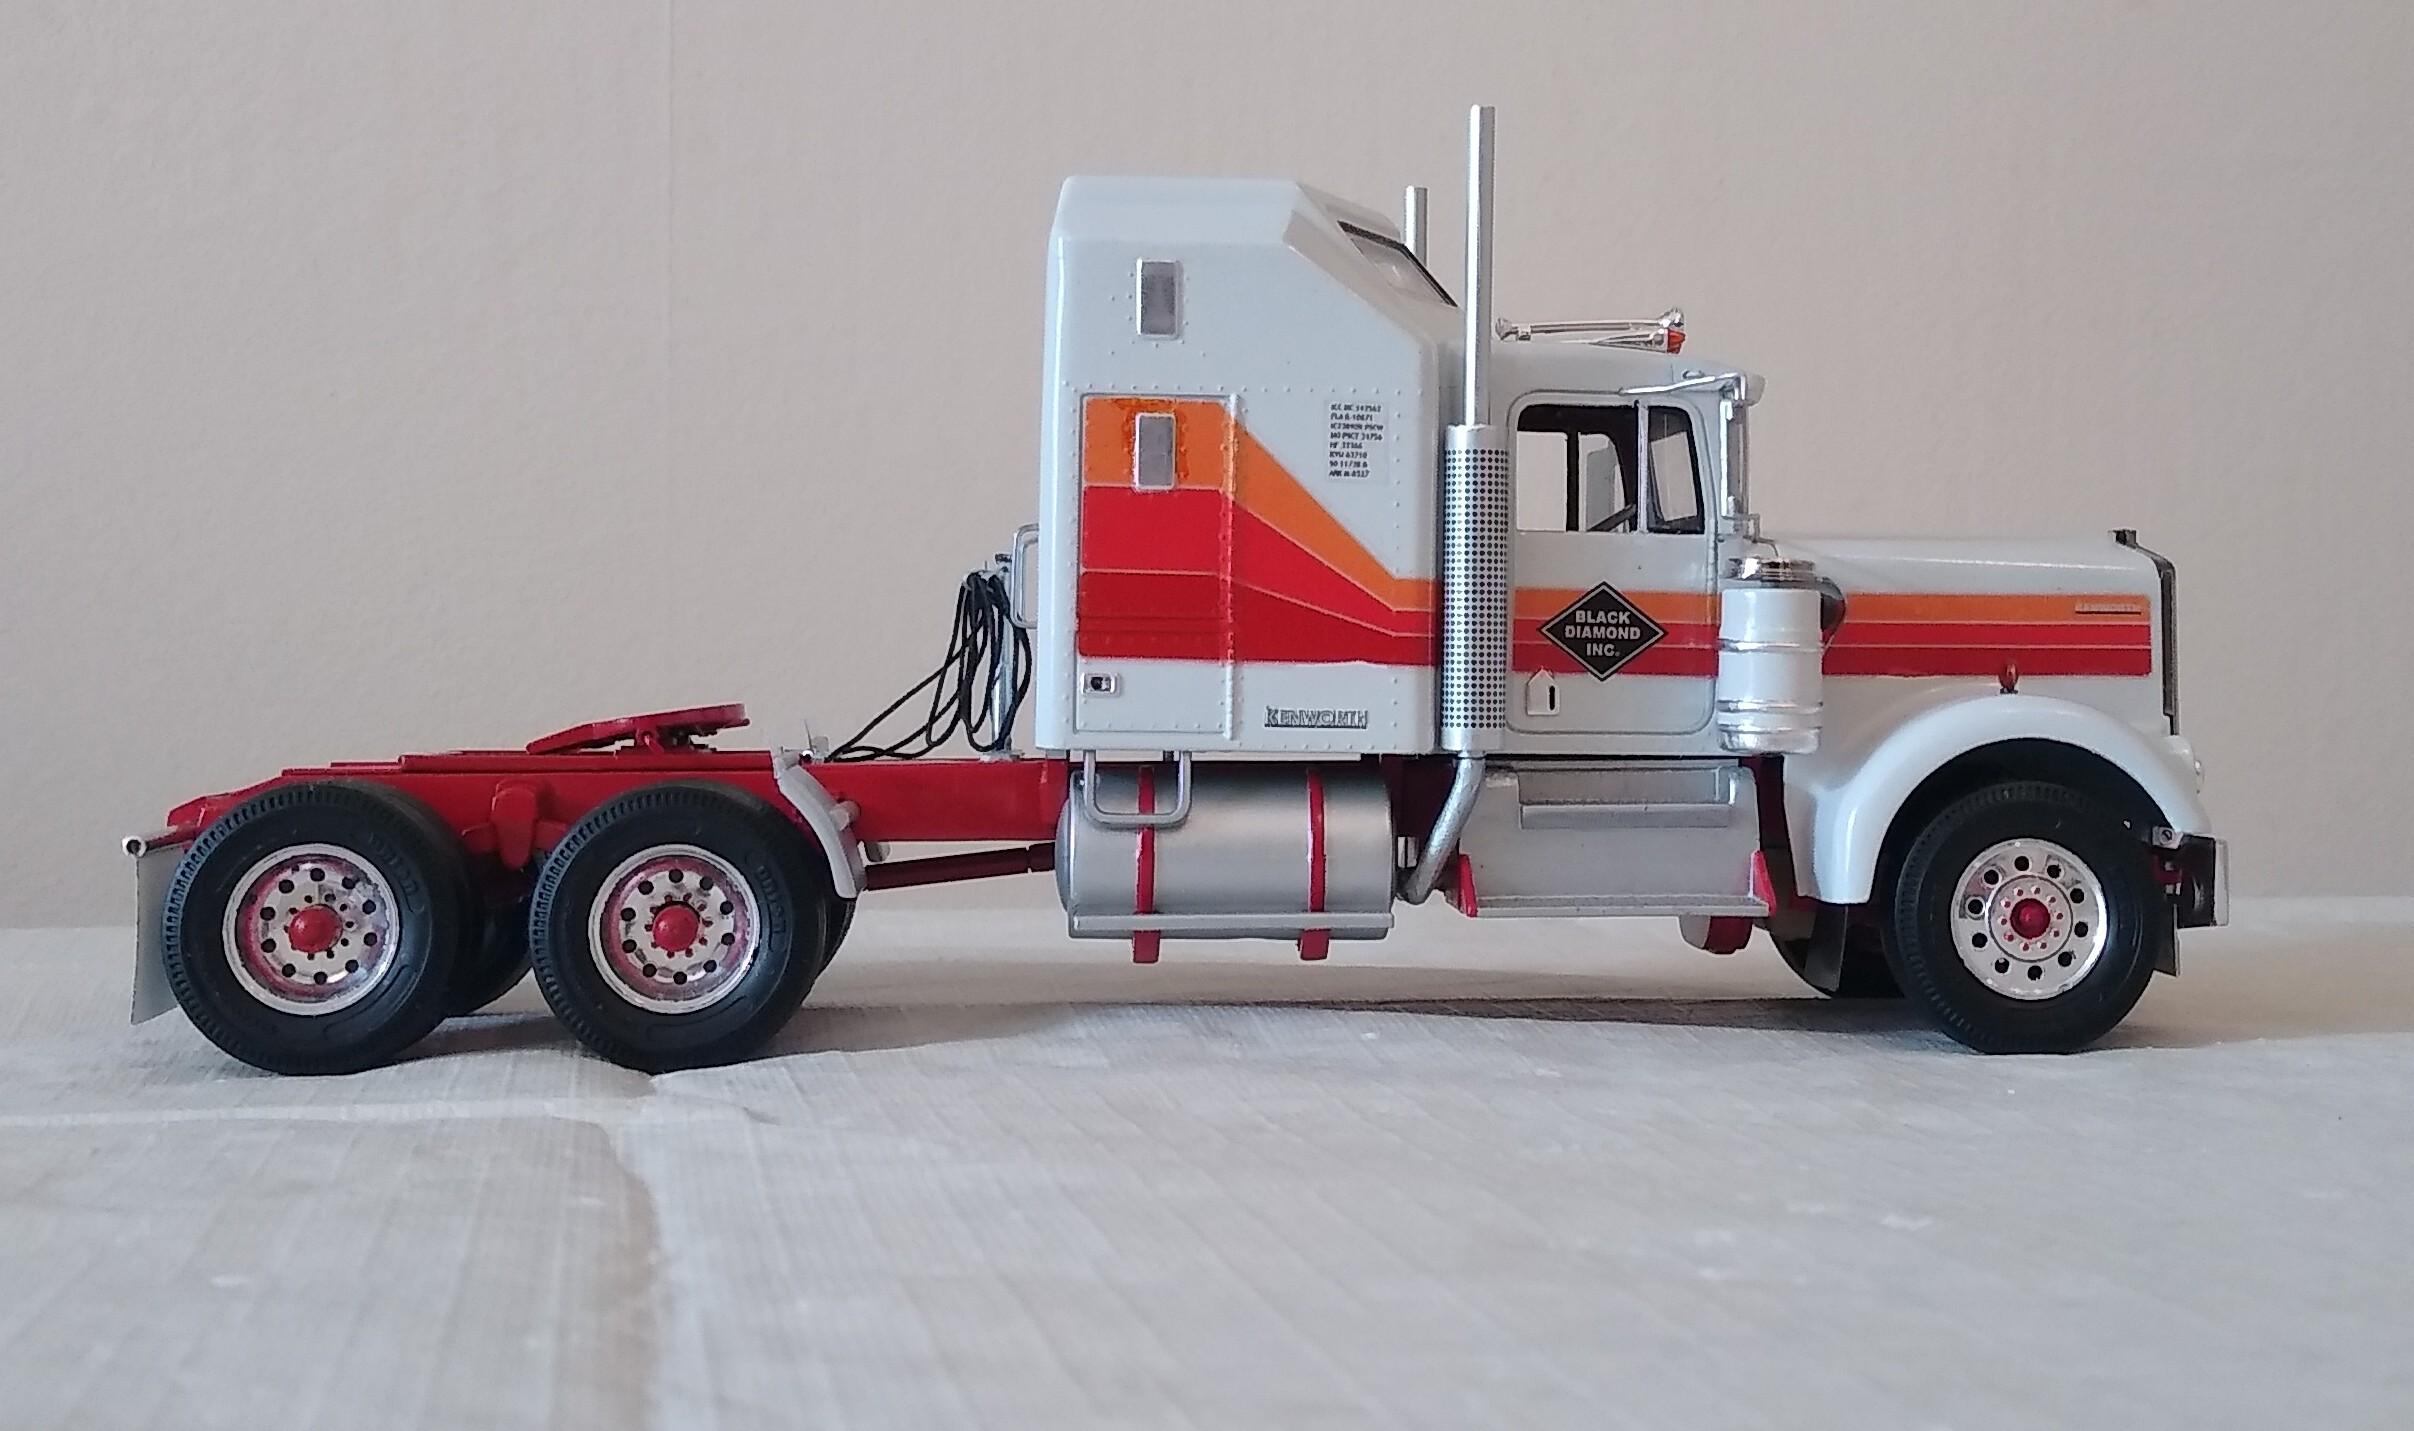
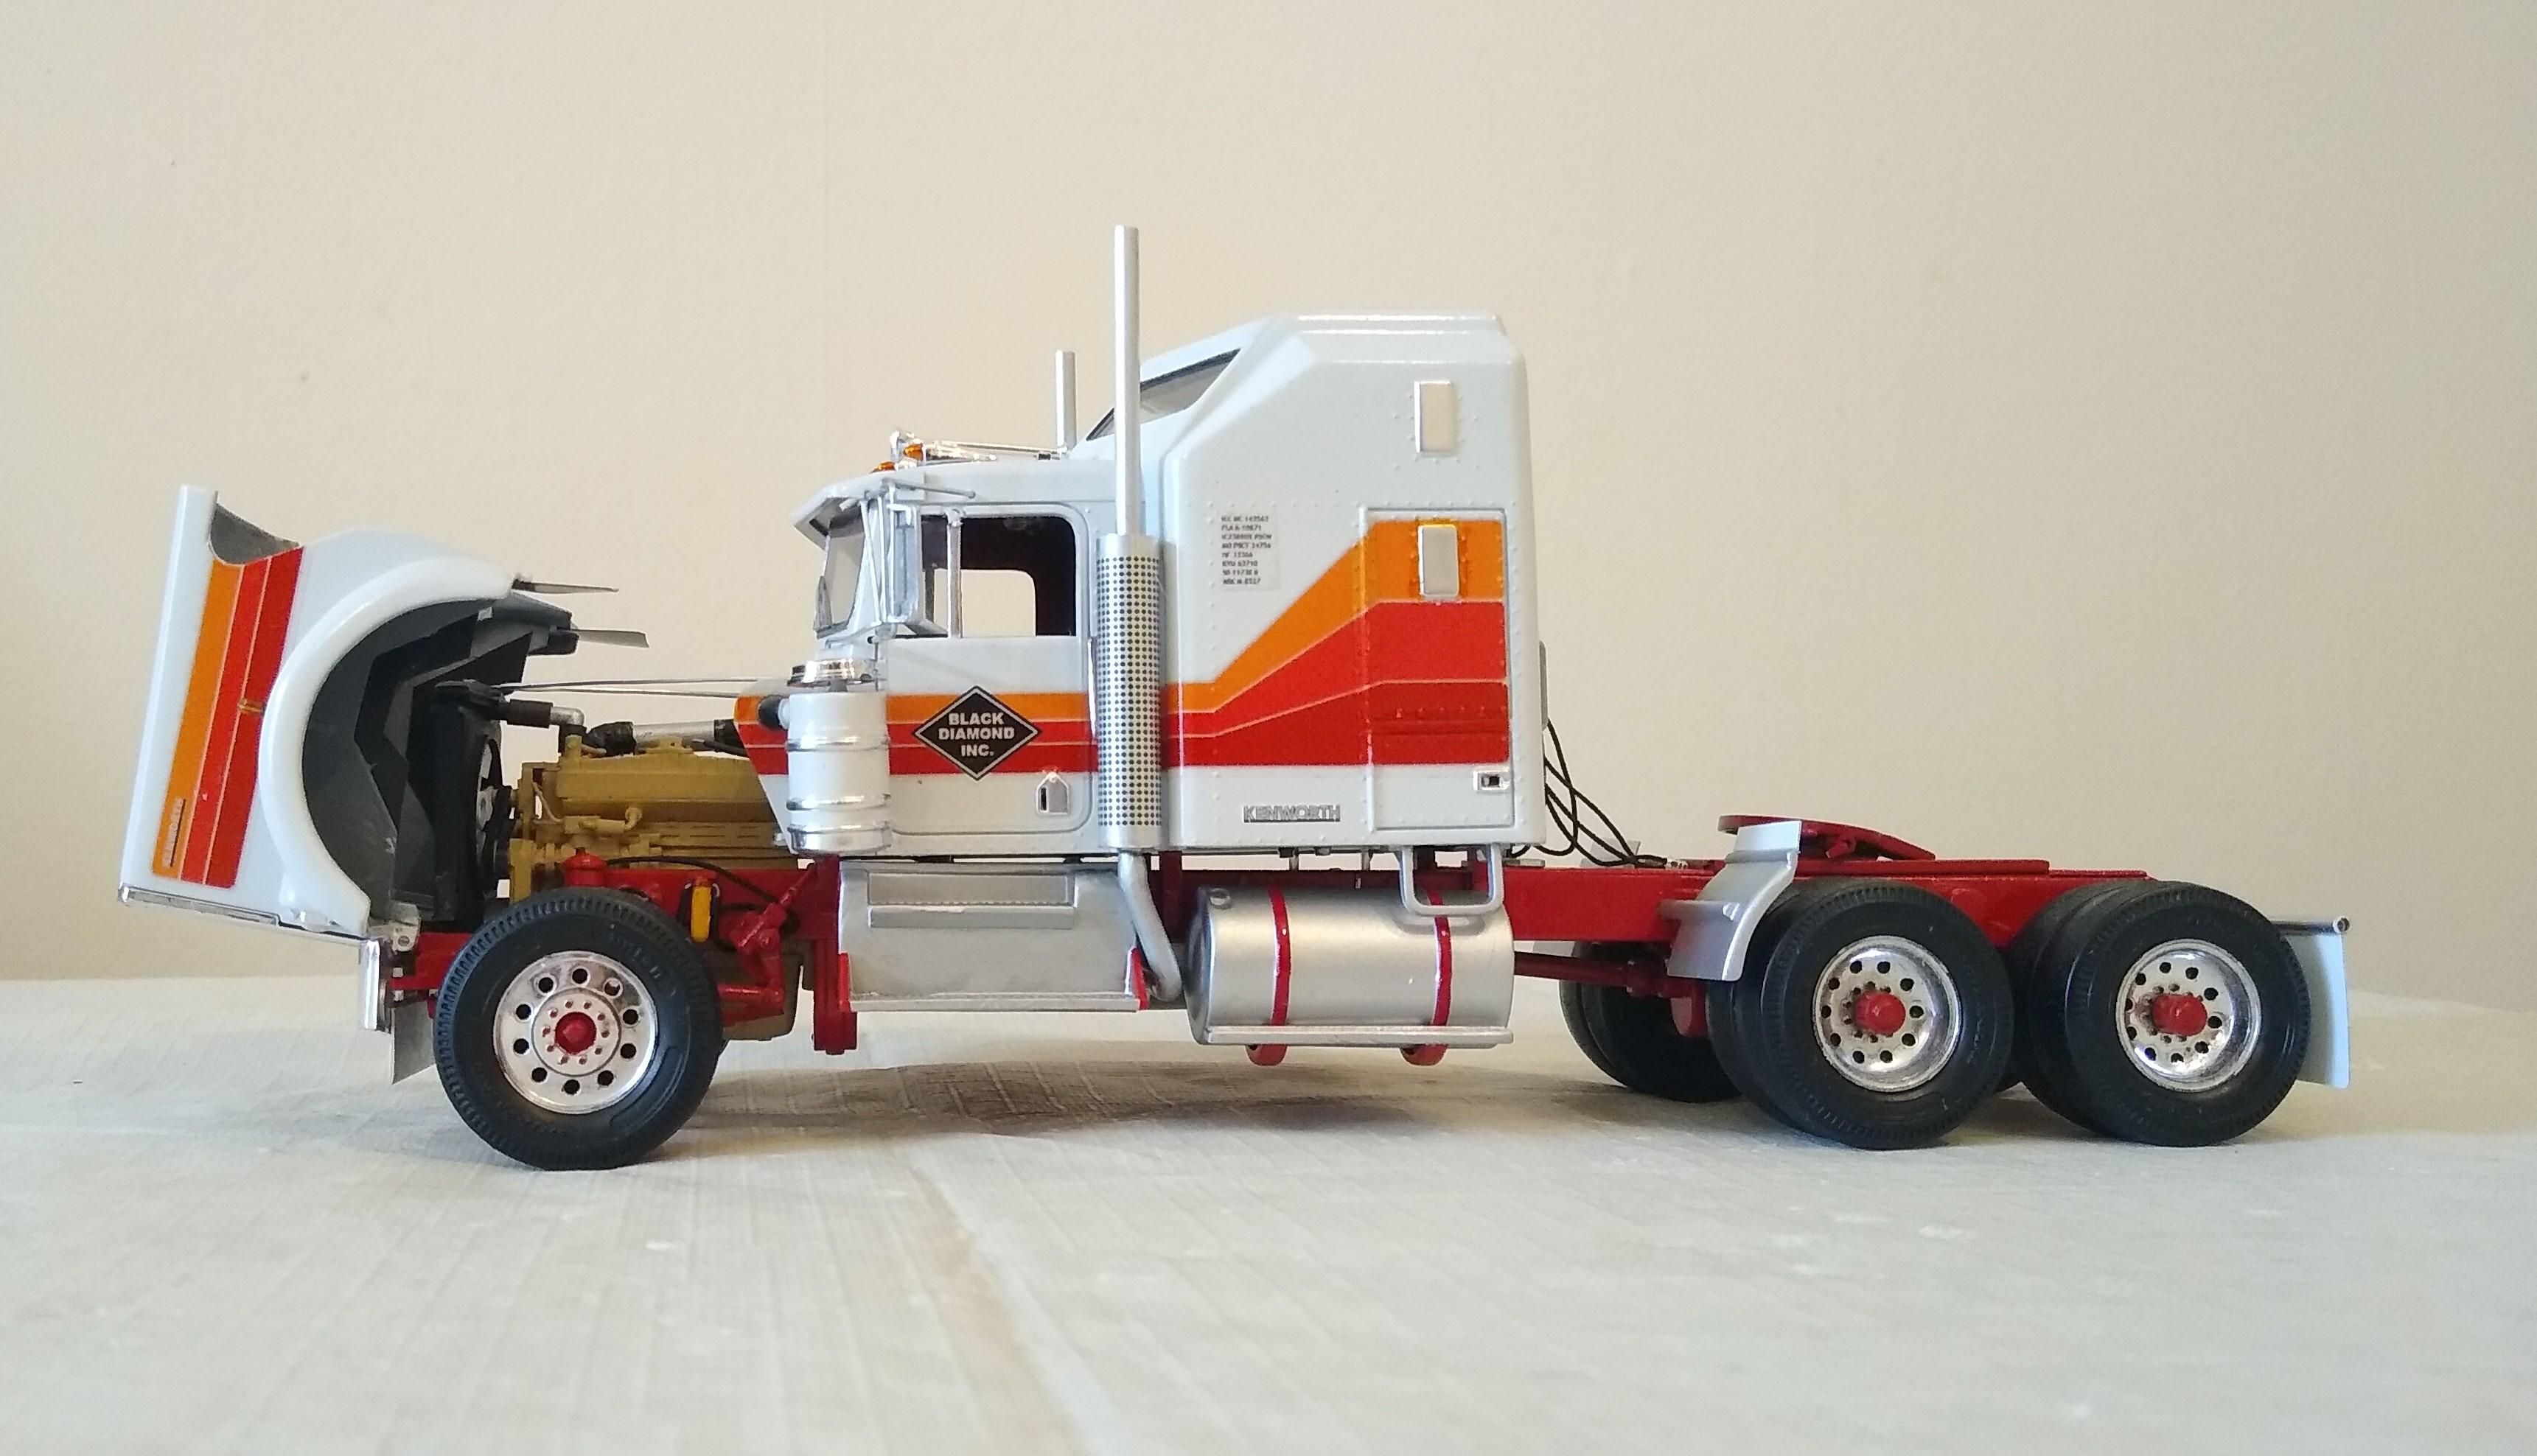
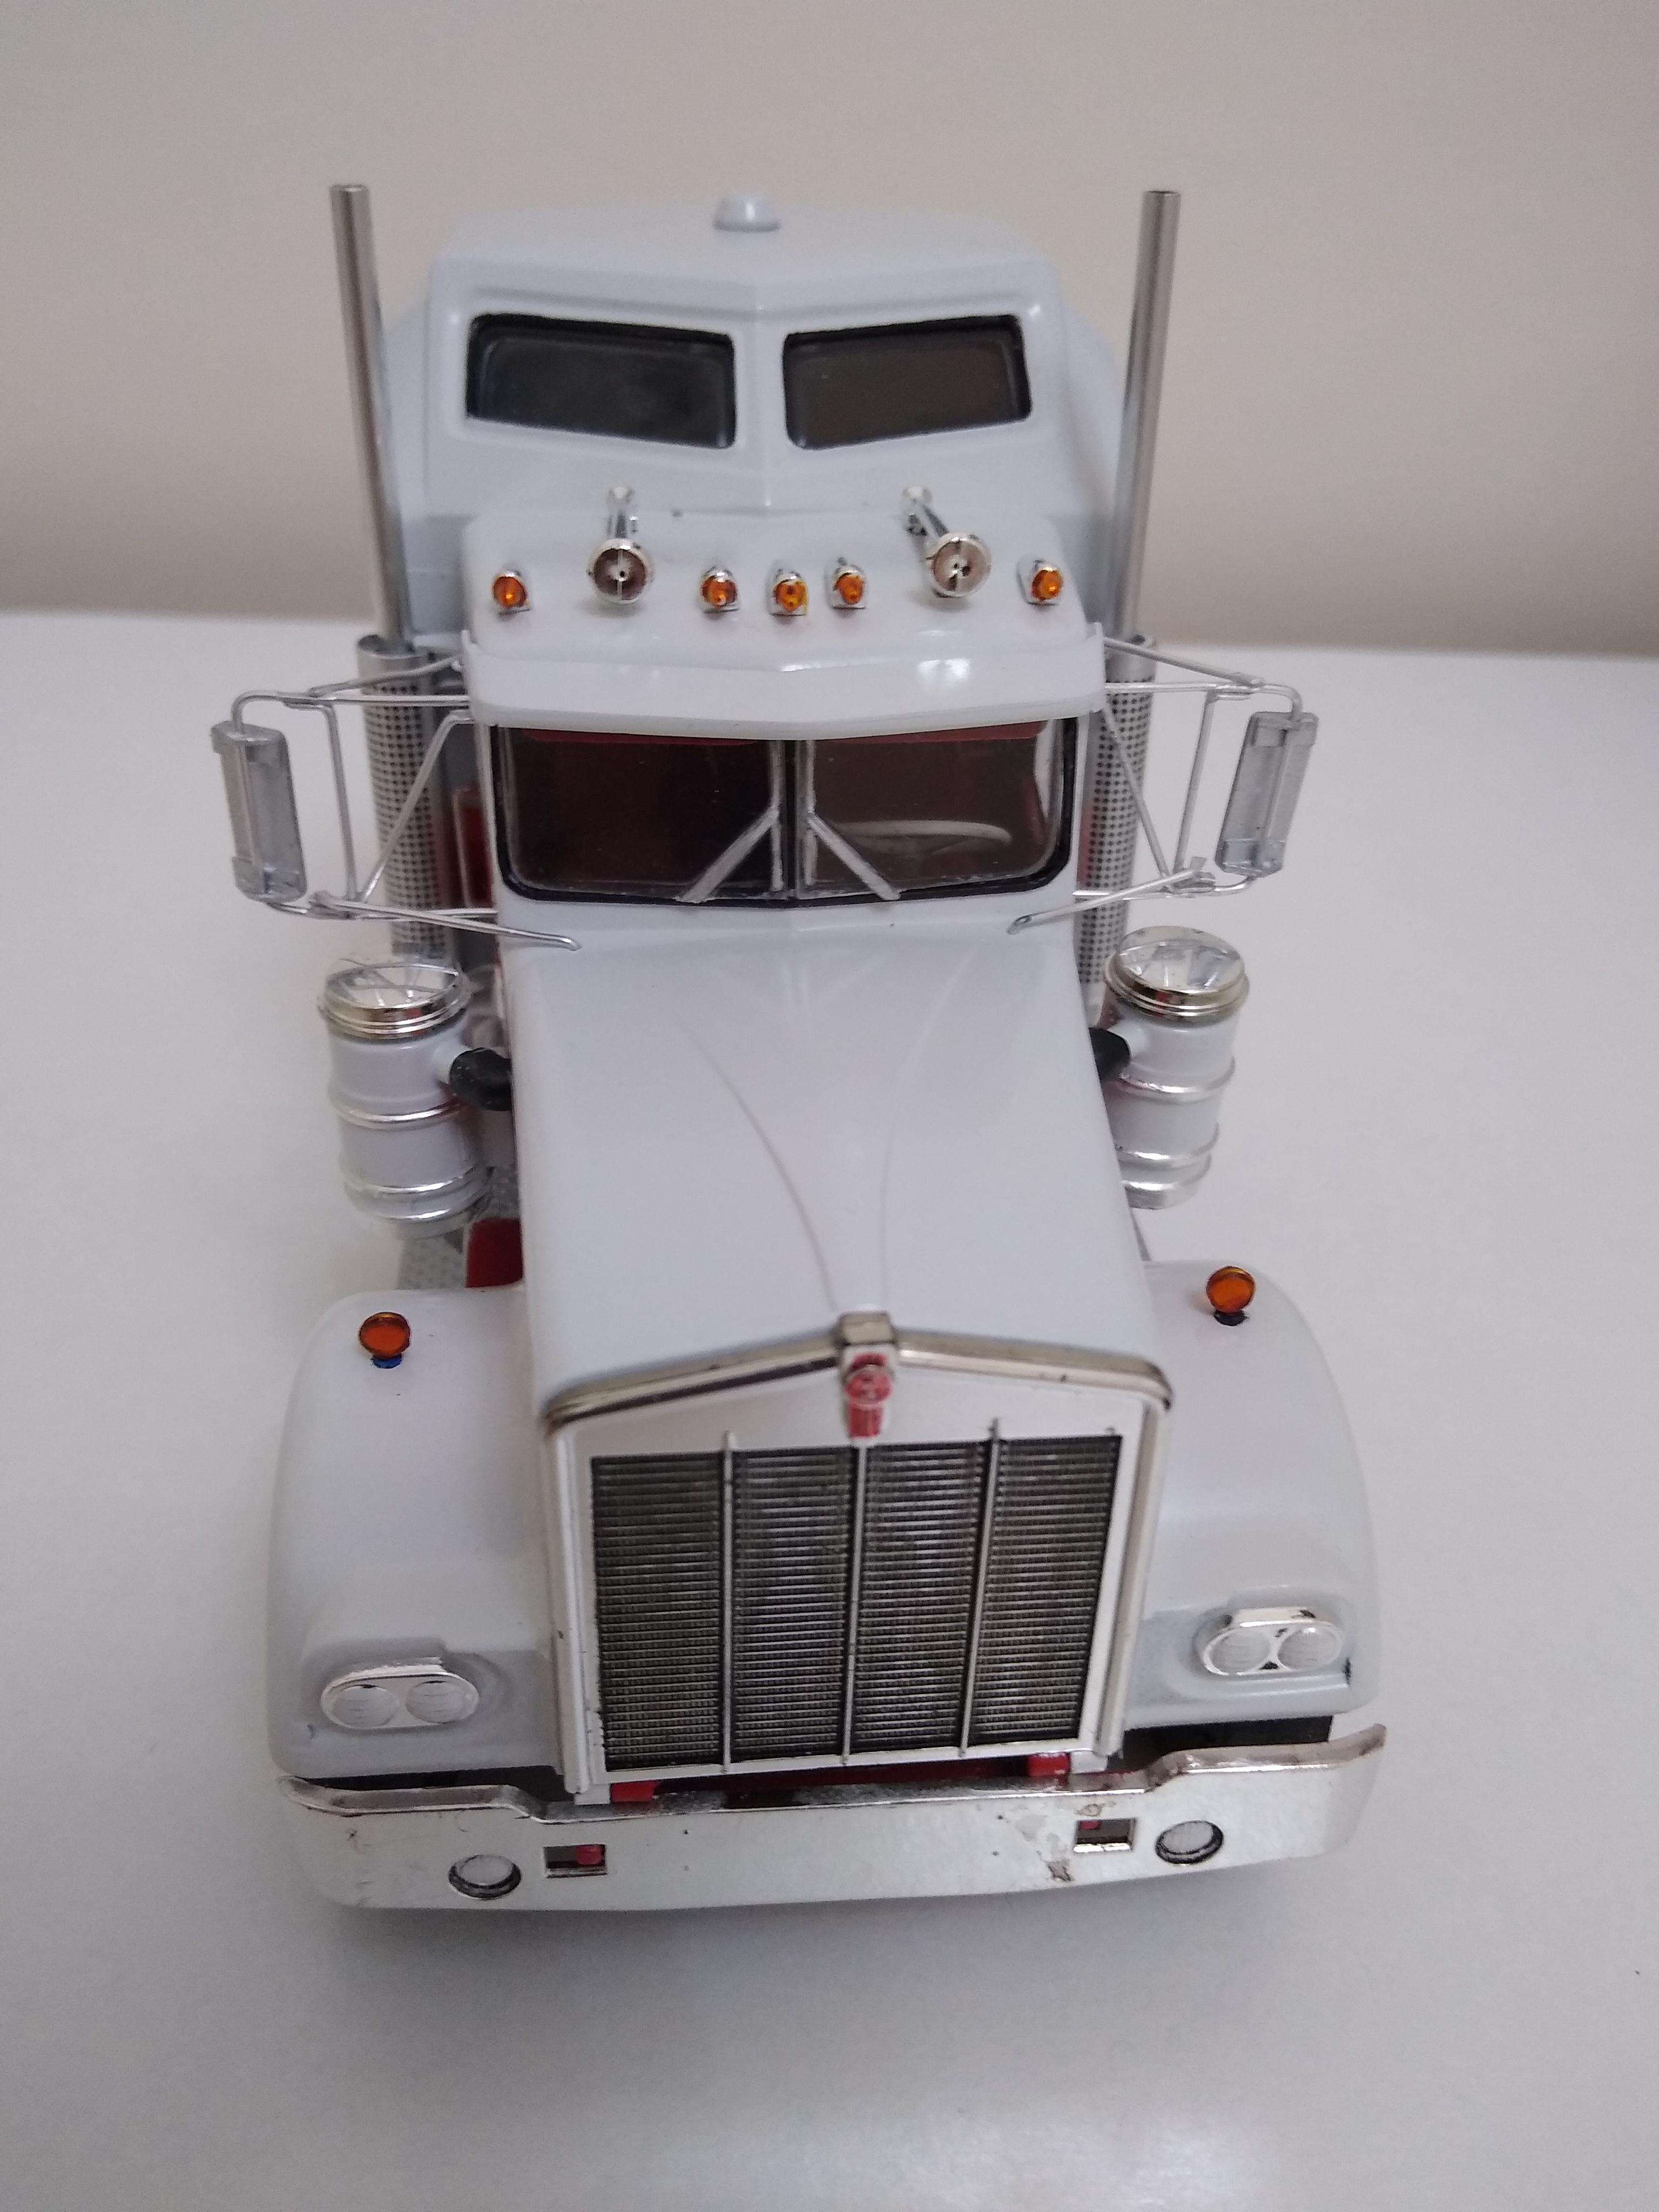
Well, this has been a long time in the making but I've loved every minute of it, it really was a labour of love. The W900A just epitomises what the American truck is for me (It's very closely followed by the 359 of the same era, especially with the Unilite cab and small aircleaner). This is the AMT Snap-Fit/Fast 1/32 Aerodyne. If built box stock it is very poor and I couldn't allow that to happen to my iconic truck so I entered into about 30 alterations to make it look right. I think the only parts that haven't been altered in some way are the steering wheel and the headlights (and that's because I had no spare Monogram ones). Mudflaps from insulation tape, Reyco rear suspension, Monogram wheels and tires, scratchbuilt (S/B) rear hubs, modified quarter fenders, S/B operable fifth wheel slider, S/B pogo stick, repositioned & de-chromed fuel tanks, S/B air tanks, S/B driveshaft, deepened battery boxes, S/B steering box and linkage, S/B PAS reservoir, fuel, water and bypass oil filters, S/B brake chambers, S/B radiator and engine, opening hood - detailed underneath, Monogram K100 bumper, plumbing and wiring (inc the firewall), S/B lights on the front fenders, S/B washer reservoir, flush fitting windscreen, S/B sunvisor, S/B mirrors and arms, S/B exhaust system, S/B cab mounts, repositioned sleeper steps, S/B firewall and self drawn stripes and license plates. I'm especially proud of the perfectly aligned hood and my sliding fifth wheel that doesn't fall off every time I move it, indeed I can pick the rear of the truck up with it! Less happy with the mirrors and arms, they fought me when I fitted them and the driver's side ended up a little funky but they don't dominate the truck and your eye seems to realise that they're in the right place, unlike the kit pieces. Pictured here with some of my trailer fleet.
-
2023 BRGB Movin' On Kenworth
Rockford replied to leafsprings's topic in Model Trucks: Big Rigs and Heavy Equipment
Looks brilliant mate. You can be duly proud of that. -
AMT White-Freightliner to Optimus Prime
Rockford replied to Devyn's topic in WIP: Model Trucks: Big Rigs and Heavy Equipment
That does look good. Well done! -
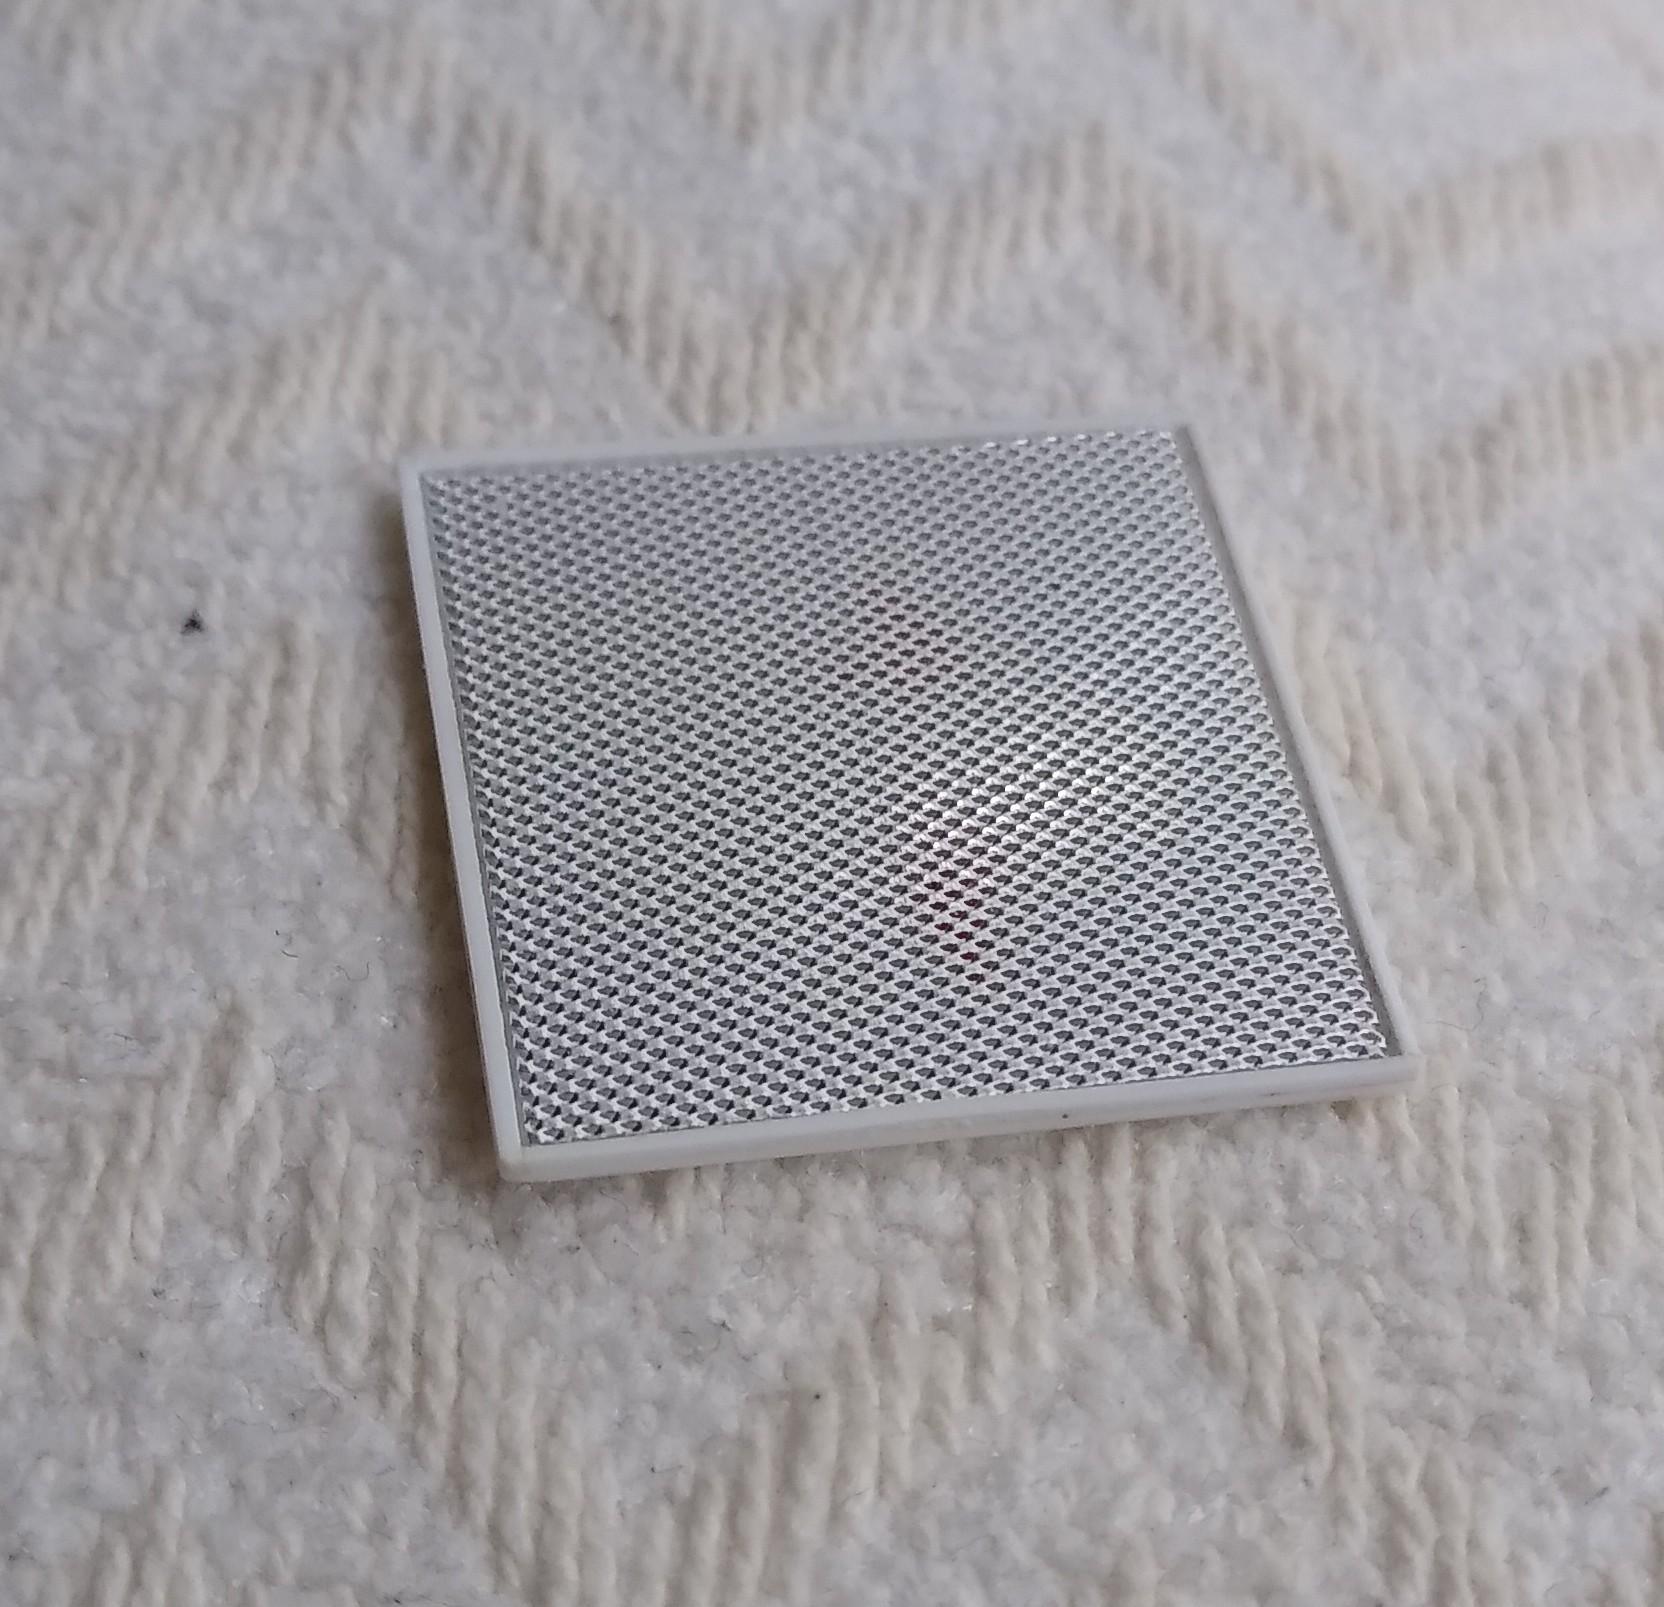
Thanks Graham. I'm really happy with it. I'm nearly finished with it now. Did some final fitting today. Bought some 1mm aluminium mesh and cut it to lay inside the chassis rails as a treadplate. Installed the mirrors but that didn't go as smoothly as I hoped. They look ok but not as good as I'd like. Built a screenwash bottle for the firewall from five pieces of plastic sheet. I've got to sort license plates now and that's it I think.
-
AMT Lowboy Trailer.
Rockford replied to OldTrucker's topic in WIP: Model Trucks: Big Rigs and Heavy Equipment
You might need patience, he might shelve it for another 30 years! -
AMT White-Freightliner to Optimus Prime
Rockford replied to Devyn's topic in WIP: Model Trucks: Big Rigs and Heavy Equipment
Well done Devyn, a typical episode for a modeller, from the depths of despair to elation thanks to some small amendment! Looks good.- 32 replies
-
- 1
-

-
- amt
- freightliner
- (and 1 more)