Rockford
-
Posts
1,944 -
Joined
-
Last visited
Content Type
Profiles
Forums
Events
Gallery
Everything posted by Rockford
-

1:32 Revell Kenworth Aerodyne
Rockford replied to XYHARRY's topic in Model Trucks: Big Rigs and Heavy Equipment
You're talking my language mate, well done. -
This is some second project mate! Beautiful work.
-
Impressive work.
-
De-Aerodyned K100
Rockford replied to Rockford's topic in WIP: Model Trucks: Big Rigs and Heavy Equipment
Thanks for your positive comments gents. Managed to find some time to work on the K100. Did some mundane things like true the rear wheels up as they were all over the place. Chamfered the chassis edges. Reskimmed the cab roof and will leave that for a week before I rub it down. It seems to shrink. Dechromed the fuel tanks. Added filler caps and fuel pipes. Built some front shock absorbers from plastic aluminium tube. I'd like to think about paint but the weather still isn't playing ball, too cold. I now have several projects awaiting paint. Very frustrating.
-
BRGB 2023 - INTERNATIONAL 4070A
Rockford replied to J.B. Customs's topic in Model Trucks: Big Rigs and Heavy Equipment
That's a great looking rig. Well executed. That's the kind of unsung hero I love to see. It's amazing the amount of work it takes to de-bling a truck but you did it well. -
1969 Peterbilt 359
Rockford replied to Needlenosehunter's topic in WIP: Model Trucks: Big Rigs and Heavy Equipment
"Tinkering"? You can hardly call work of this quality tinkering! Amazing stuff, so clean. -
1/25 AMT Chevy Titan 90
Rockford replied to cifenet's topic in Model Trucks: Big Rigs and Heavy Equipment
For a first attempt that's a fantastic job! Looking at the finish you are obviously very experienced in another field of the hobby. Looking forward to seeing your next project. -
You're right, if you build this box stock it comes out a Picasso, but I'm trying to make it a Norman Rockwell. If only I were that good.
-
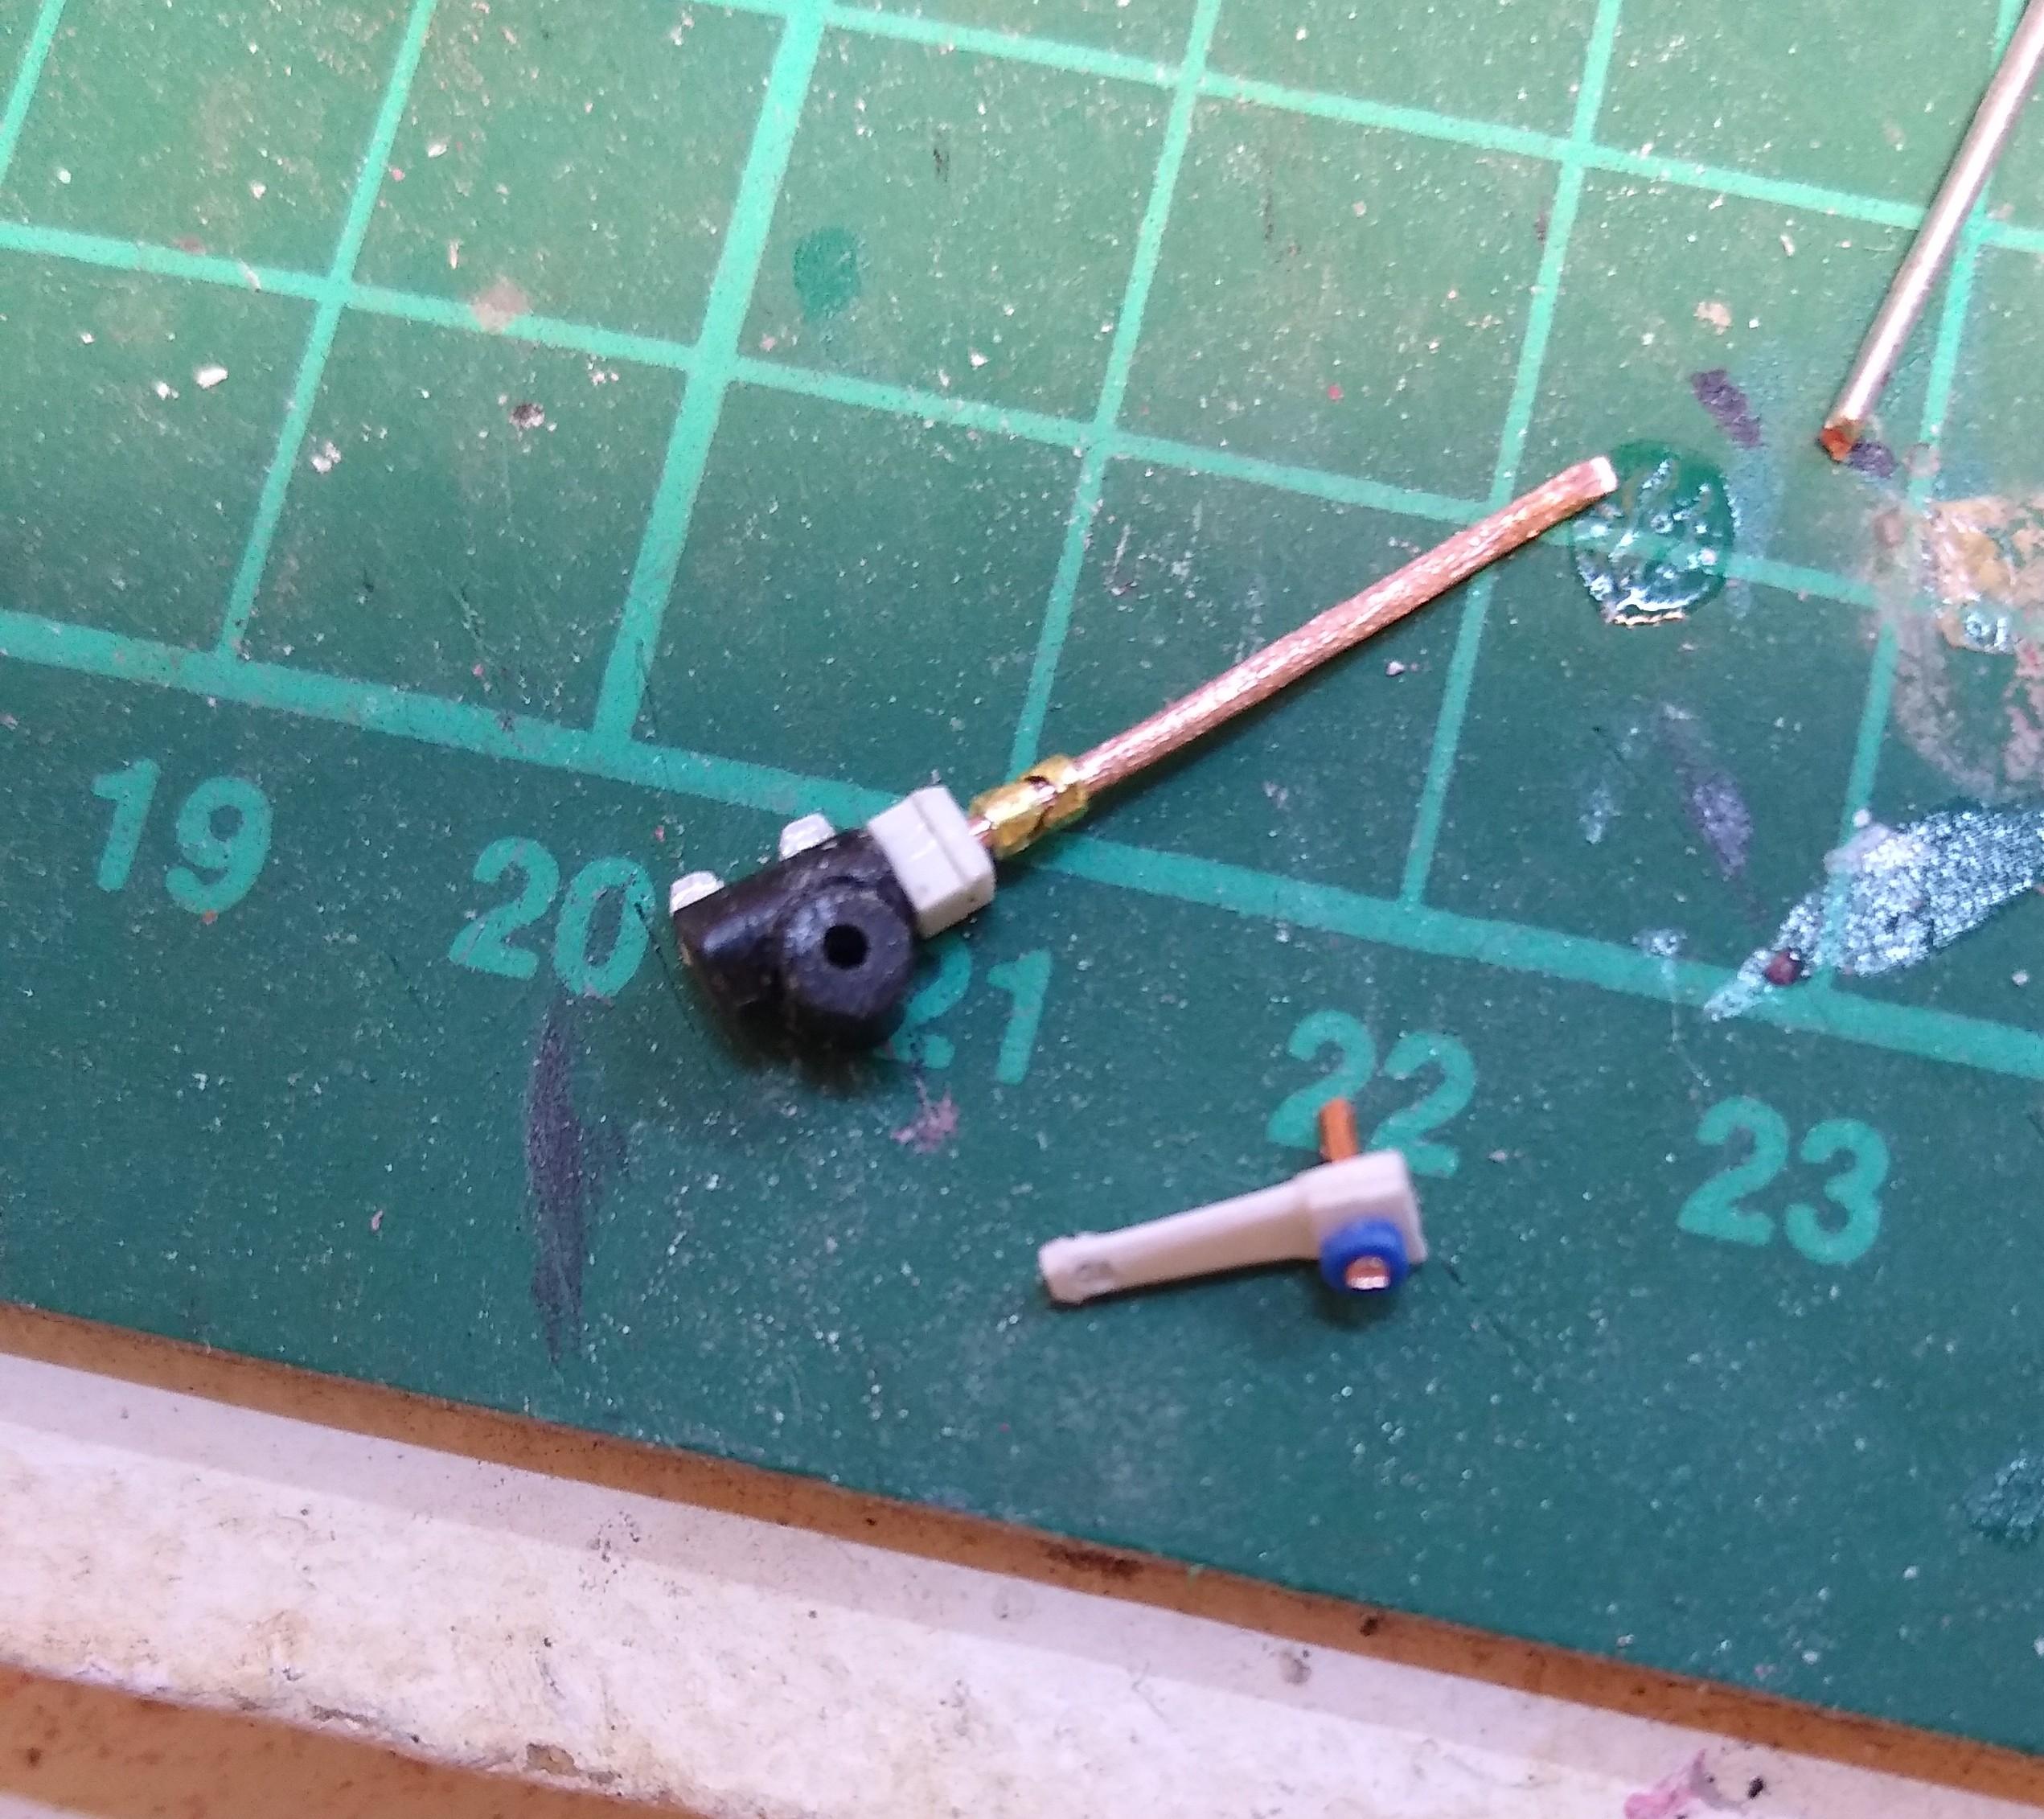
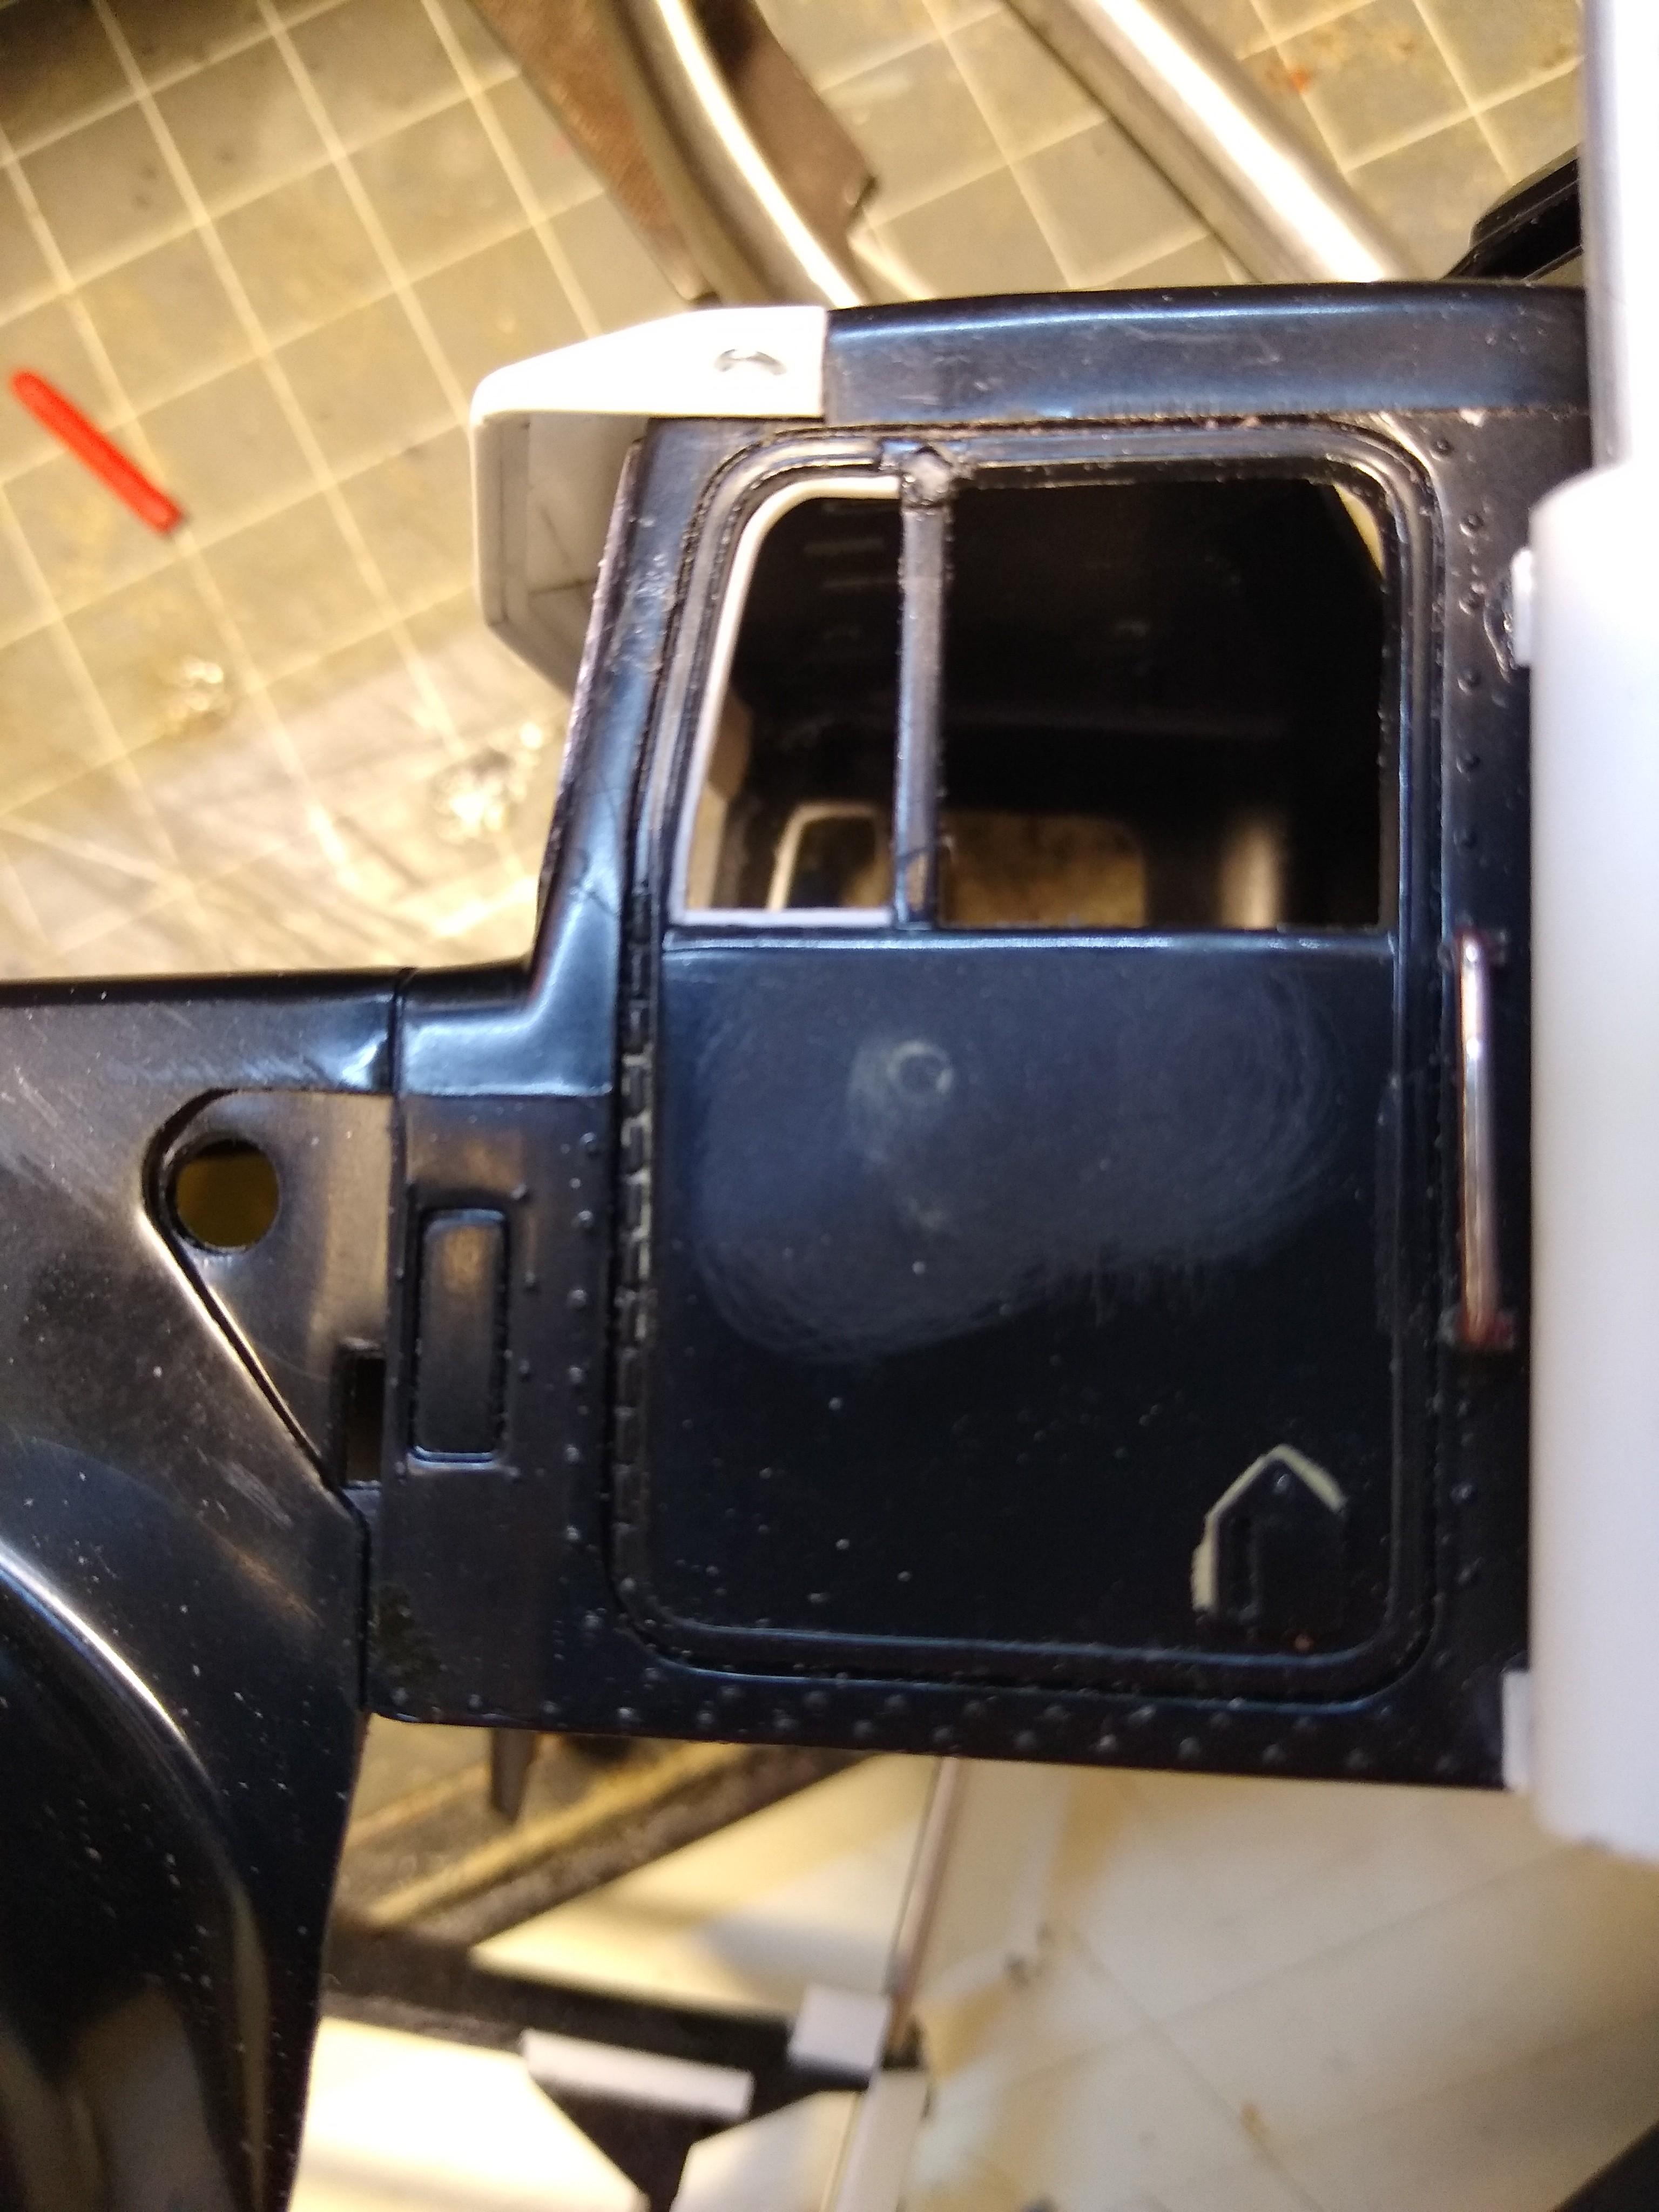
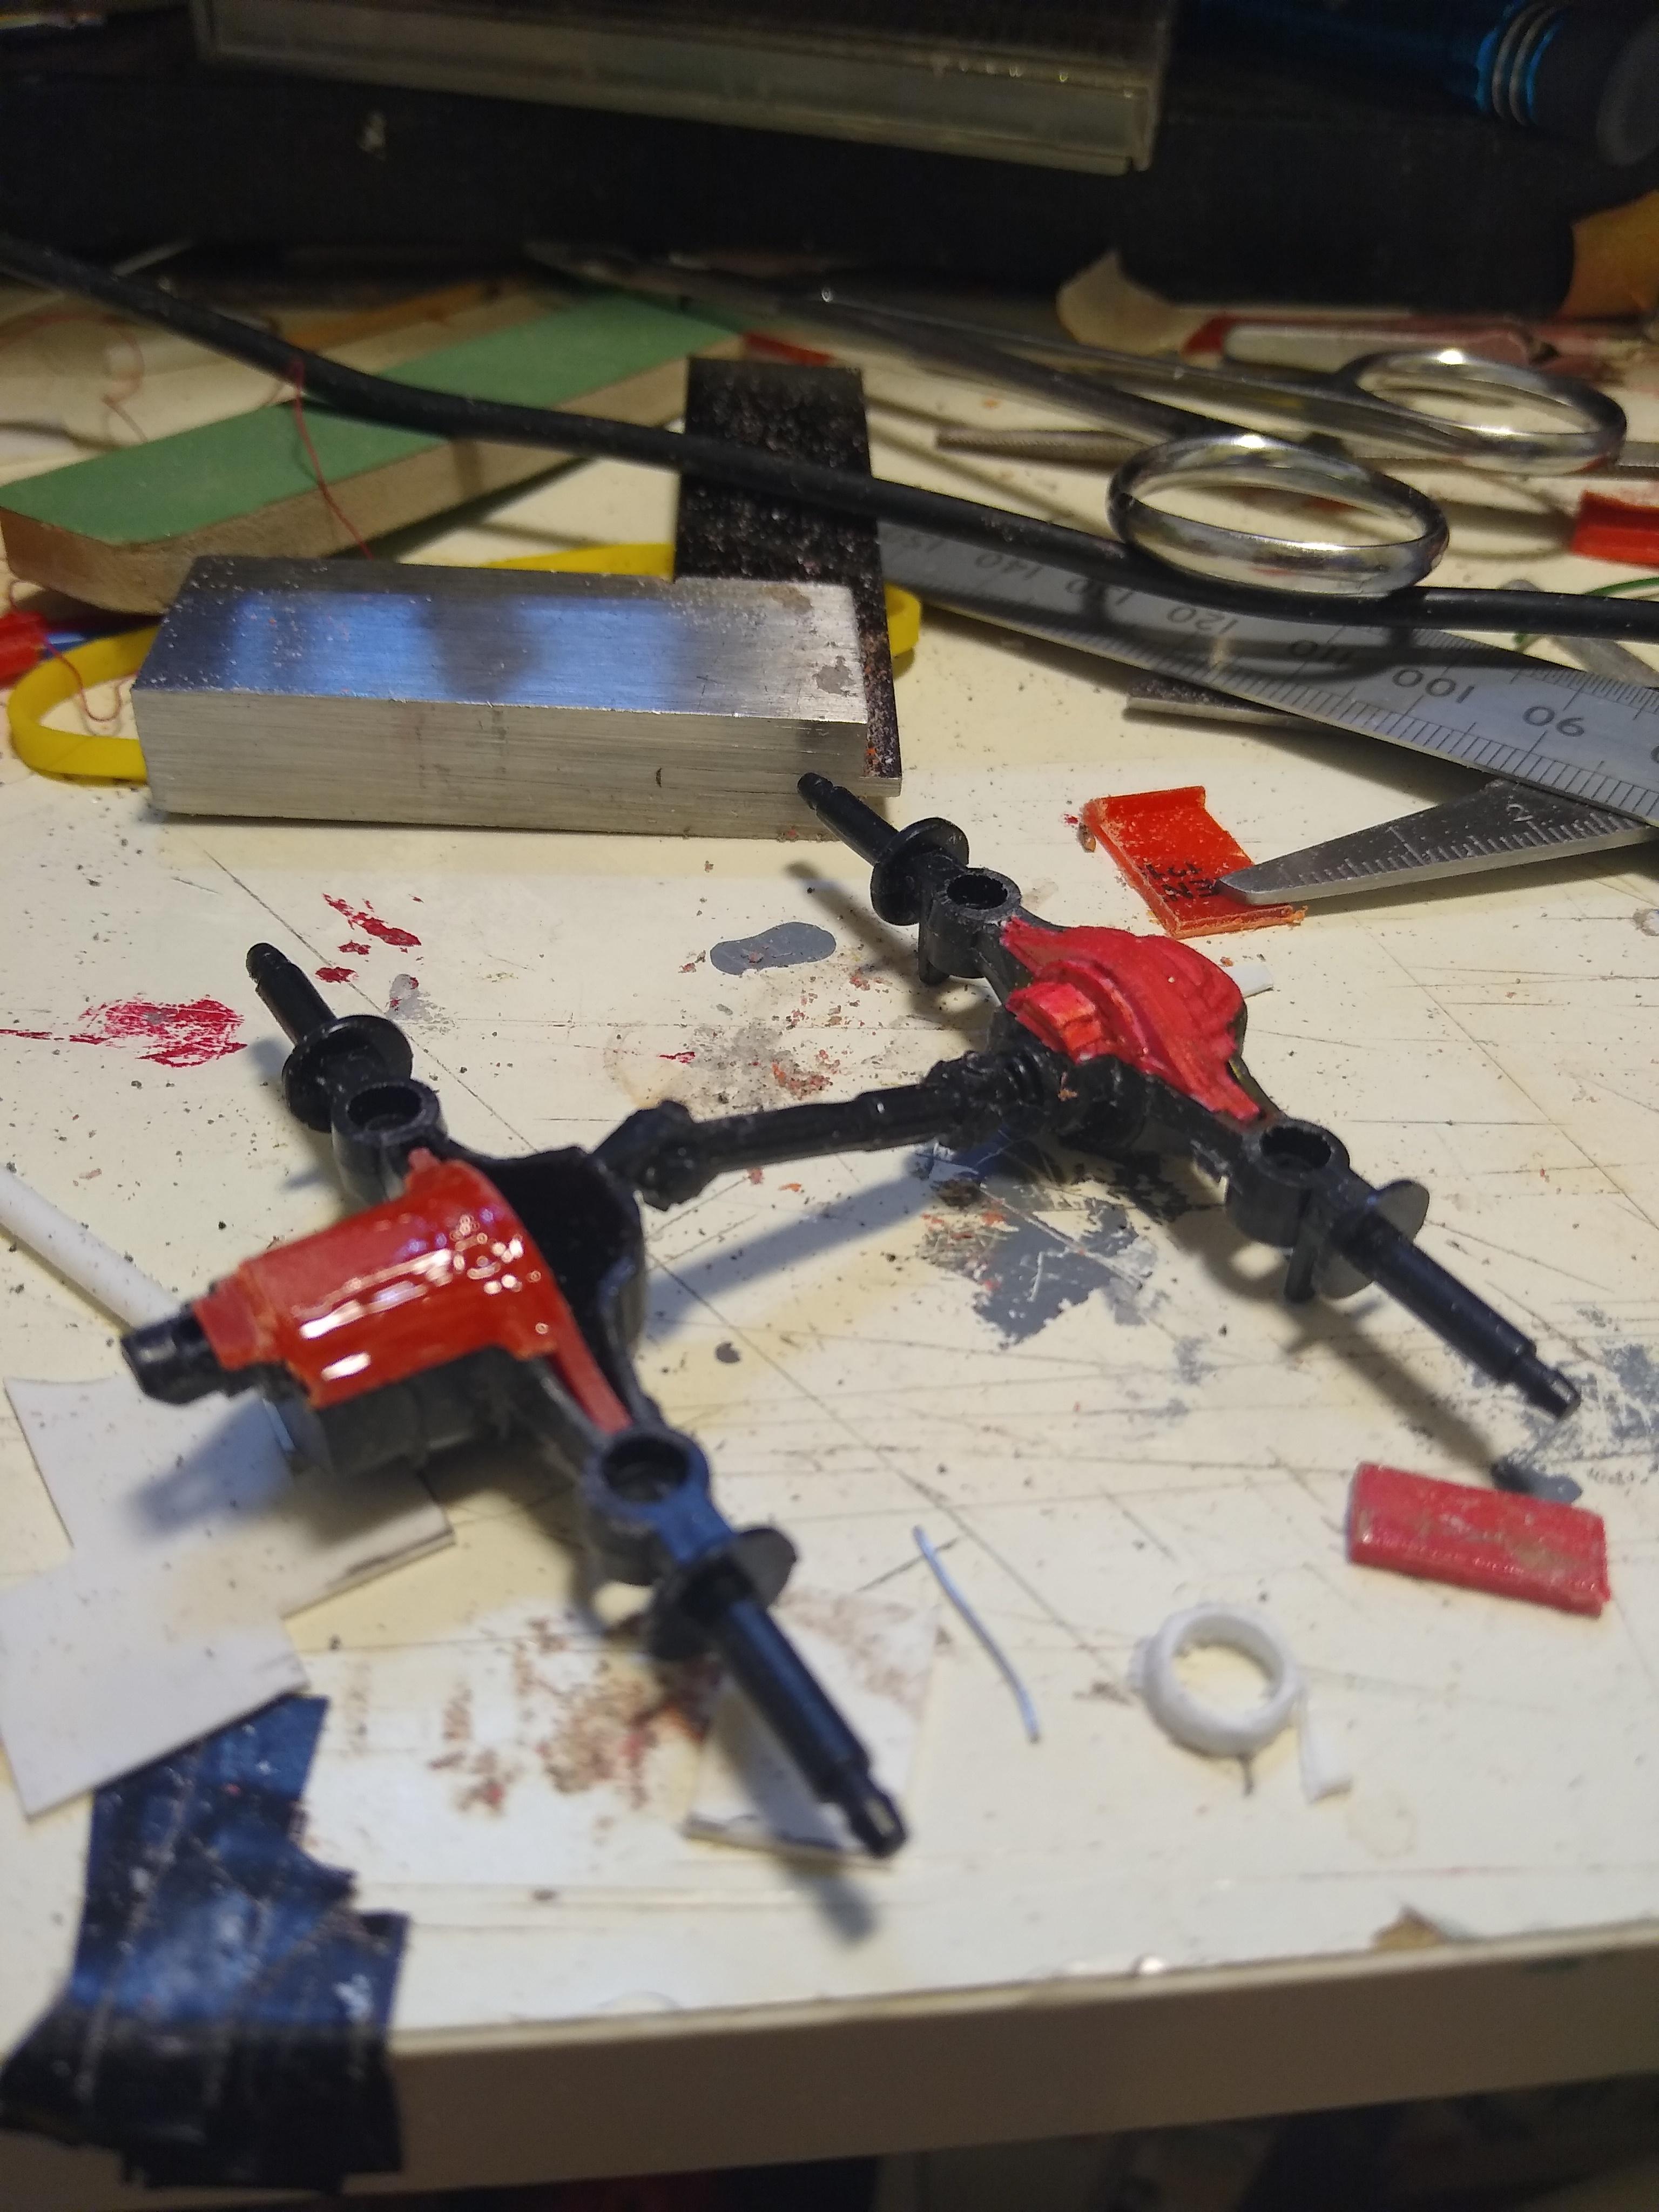
Decided the little quarter light windows on the cab lacked detail so I clamped a piece of aluminium against the inside to act as a backing piece and then fed a length of .75mm square strip into the front and bottom of the aperture. Looks better, I can silver this to give the frame of the window. Then I decided to build a steering box and drop link to the axle. I used two pieces of sprue for the box, with some 2.5mm square on the top for the valve body. I added 0.9mm copper wire for the lower column with a little brass UJ made of 3/16 tube. I used 2.3mm plastic tube and slices of insulation off the wire to fab the rest. Looks ok.
-
Mclean White Road Commander
Rockford replied to DRIPTROIT 71's topic in Model Trucks: Big Rigs and Heavy Equipment
The casting doesn't look rough anymore! What a great looking rig. Well done. -
Thanks gents, I'm not happy with the lights I made, I need something smaller I think. These are too crude and too big. I'm on the lookout for a suitable piece of plastic shrapnel to utilise.
-
Steve Magnante’s Altered Wheelbase Models
Rockford replied to JimC's topic in General Automotive Talk (Trucks and Cars)
I was just about to do the same, post a link. Well done Jim. I love Steve Magnante's videos, he's so informative and the information just flows out of him. His models are great too. I love the way he builds many without a hint of paint, then others are so detailed! I still remember the original article series about the Wilshire Shaker in Car Craft, so sad that the full magazine disappeared. -
BRBO2023 Italeri 378
Rockford replied to TruckerAL's topic in WIP: Model Trucks: Big Rigs and Heavy Equipment
Rapid progress! Well done. Looks great. -
De-Aerodyned K100
Rockford replied to Rockford's topic in WIP: Model Trucks: Big Rigs and Heavy Equipment
Cleaned the fuel tanks up today. Added my wire & sprue indicator lights rather than accept the rubbish ones on the mirror brackets. Look great. They're dead easy to do. You 1/25 guys would love them.
-
Had a go today. Piped up my brake chambers and added top rails to the chassis. Tried making the "motorcycle lamps" for the front fenders but I don't think they turned out so well. Jammed one behind a headlamp bezel and I'm not sure at all. They're a bit too big and clumsy looking. I need something more demure.
-
White Road Commander
Rockford replied to DRIPTROIT 71's topic in WIP: Model Trucks: Big Rigs and Heavy Equipment
They were a handsome truck, the RC2 and are all but forgotten. They even sold them here in UK for a while in the 80s. -
White Road Commander
Rockford replied to DRIPTROIT 71's topic in WIP: Model Trucks: Big Rigs and Heavy Equipment
Going to look good. Don't see many of these around. -
2023 BRGB Movin' On Kenworth
Rockford replied to leafsprings's topic in WIP: Model Trucks: Big Rigs and Heavy Equipment
Sonny Pruitt's truck is my favourite truck of all time. The proportions, the colours, the chrome, it's just the archetypal 70s truck. I can't wait to see it coming together. -
I've reached a bit of a hiatus with this project because I don't know where I'm going to go next. I'm thinking of building a Cummins for it and making the hood tilt but I'm worried I might ruin it. I threw the air filters together and fiddled with the bumper mounting. Also bent up a half fender out of aluminium but I'm not sure if I want to use it. What do you lads think?
-
De-Aerodyned K100
Rockford replied to Rockford's topic in WIP: Model Trucks: Big Rigs and Heavy Equipment
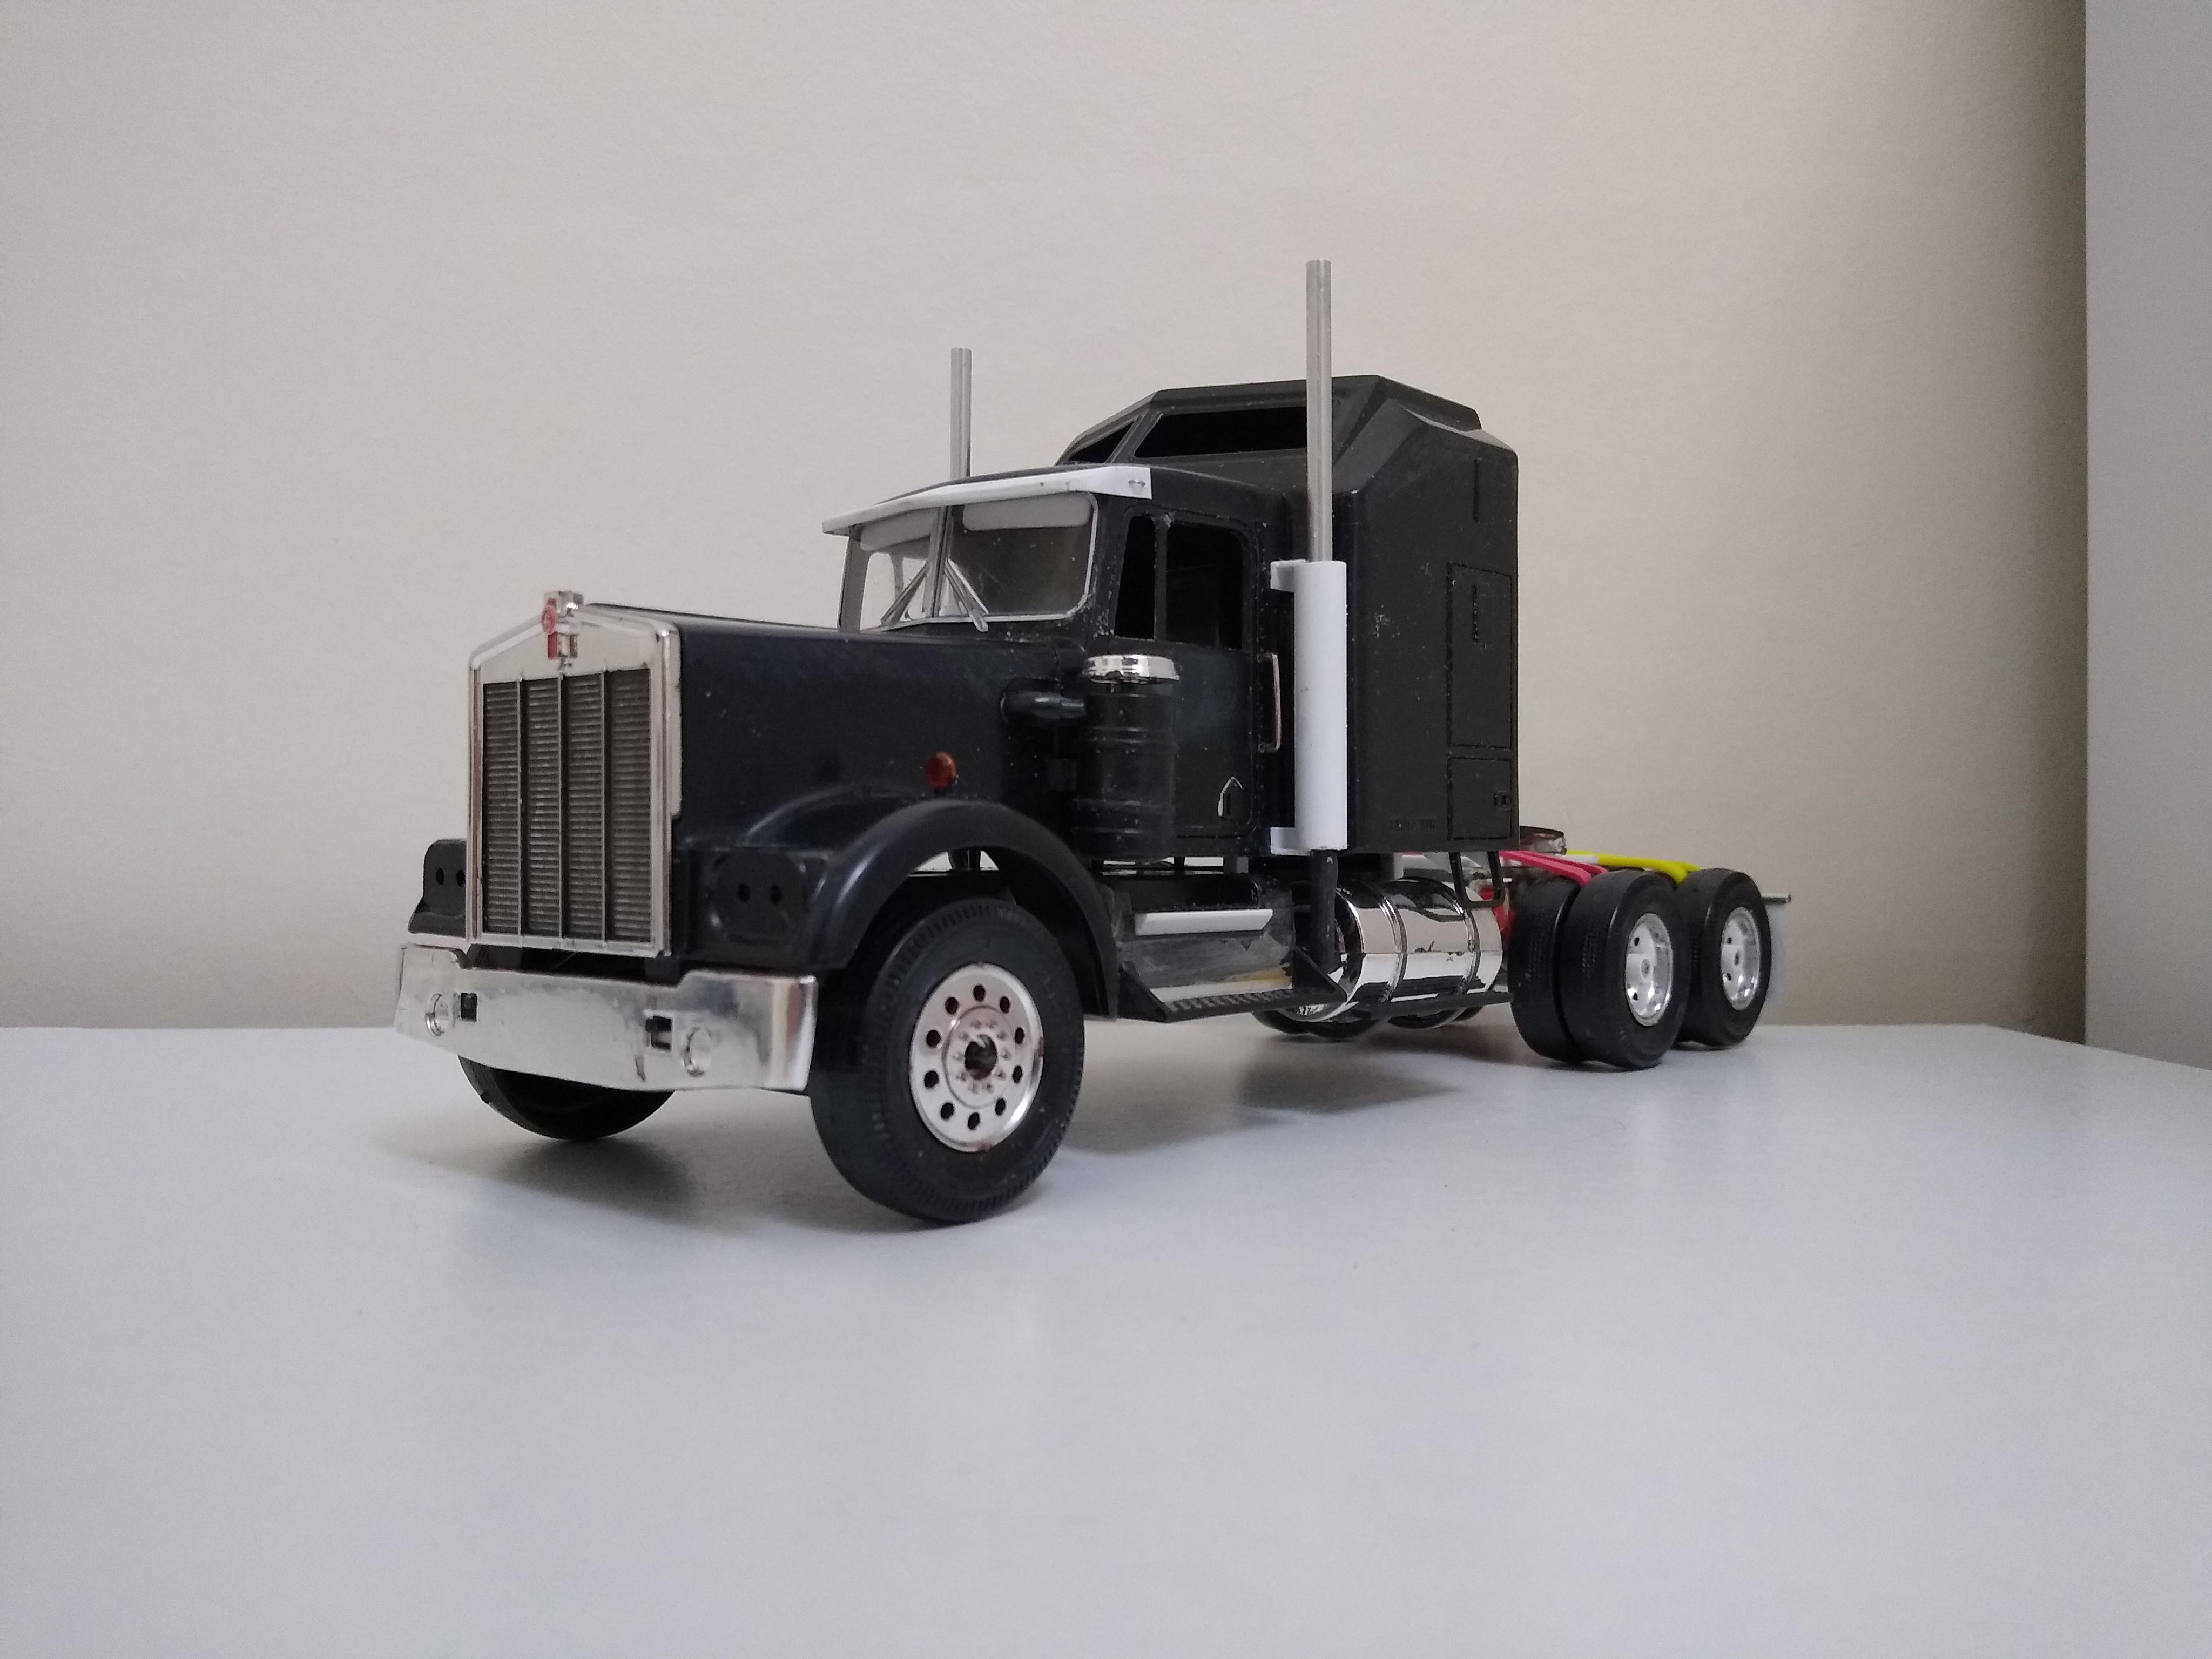
My usual slow progress on this one. Had to cut down the Aerodyne interior to a single sleeper. I cut it just behind the seats and fitted a new bulkhead. In the cab, I glued a pelmet just in front of my bulkhead. Then I glued two partition pieces behind the seat backs and added the closed curtains from the interior. The pelmet hides the top of the partition. Looks ok. Piped up the brake chambers. Look ok when the fifth wheel is in place. Also added the side bars in the windshield. They're moulded into the windshield piece but it looks better as part of the frame.
-
Great scratchbuilding on the trailer! Your General is a brute.
-
Italeri Mercedes 1844
Rockford replied to iamsuperdan's topic in Model Trucks: Big Rigs and Heavy Equipment
Nice Merc, good and clean. Shame you struggled with the plumbing. -
De-Aerodyned K100
Rockford replied to Rockford's topic in WIP: Model Trucks: Big Rigs and Heavy Equipment
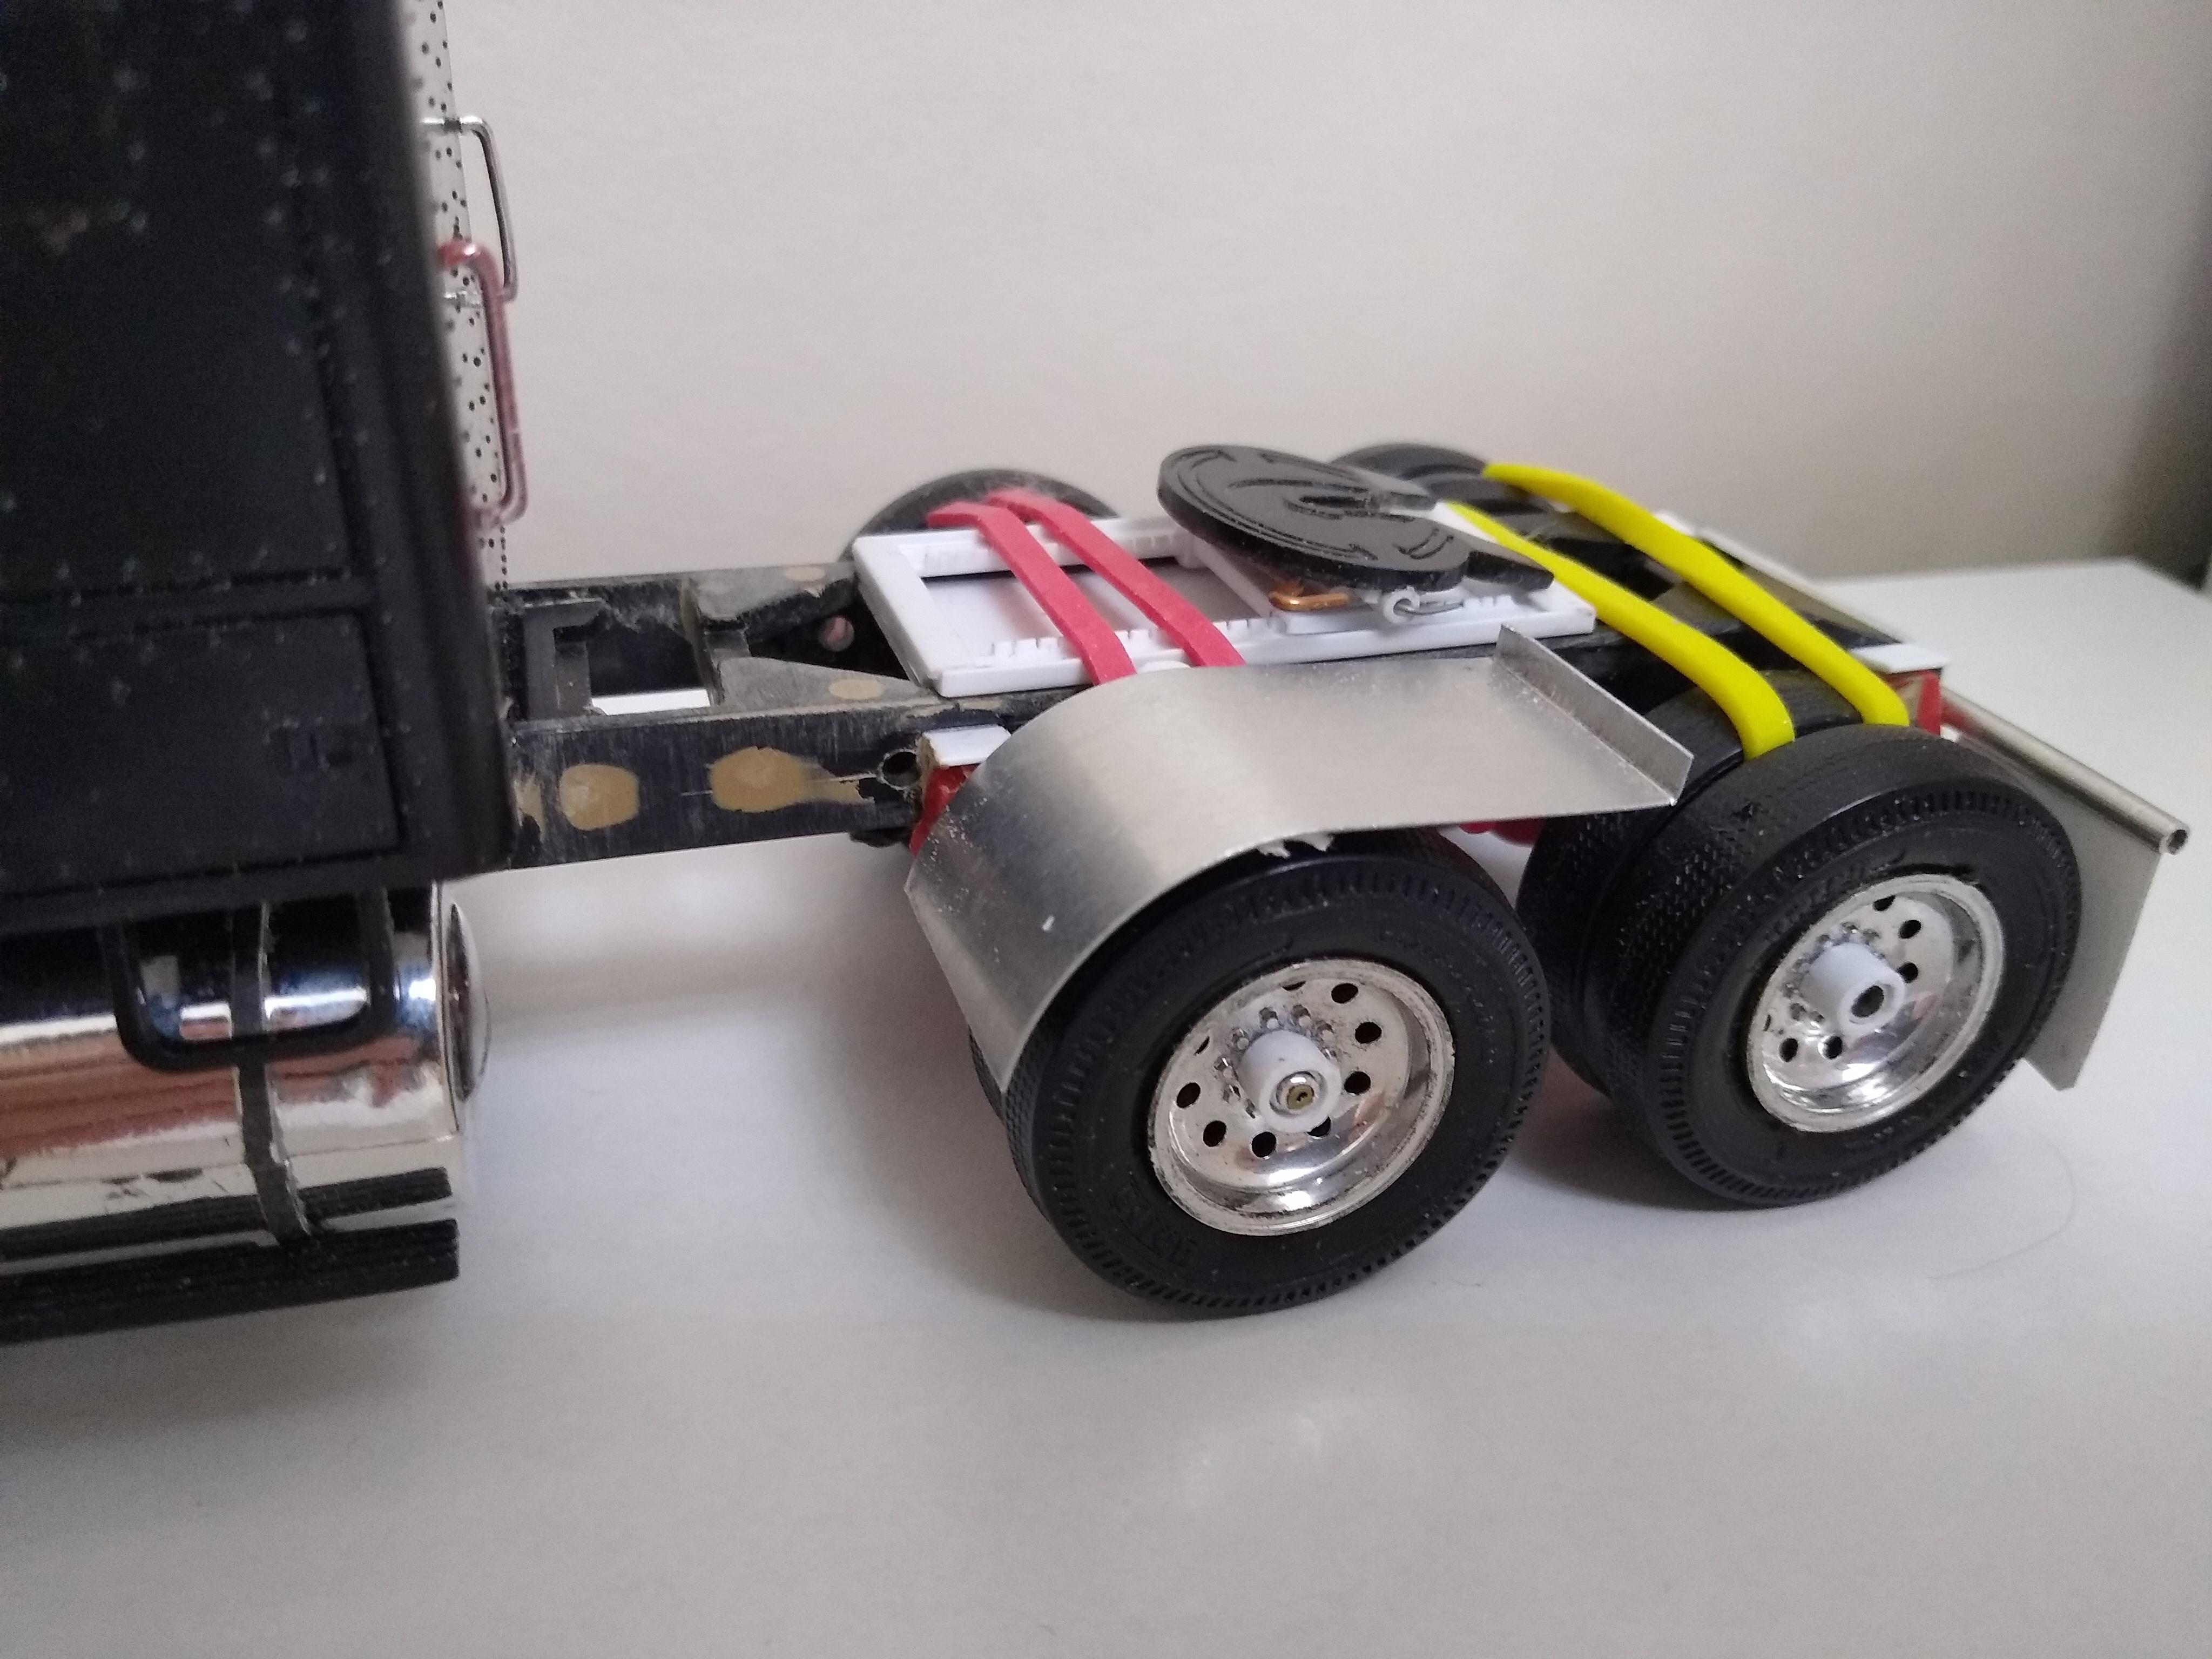
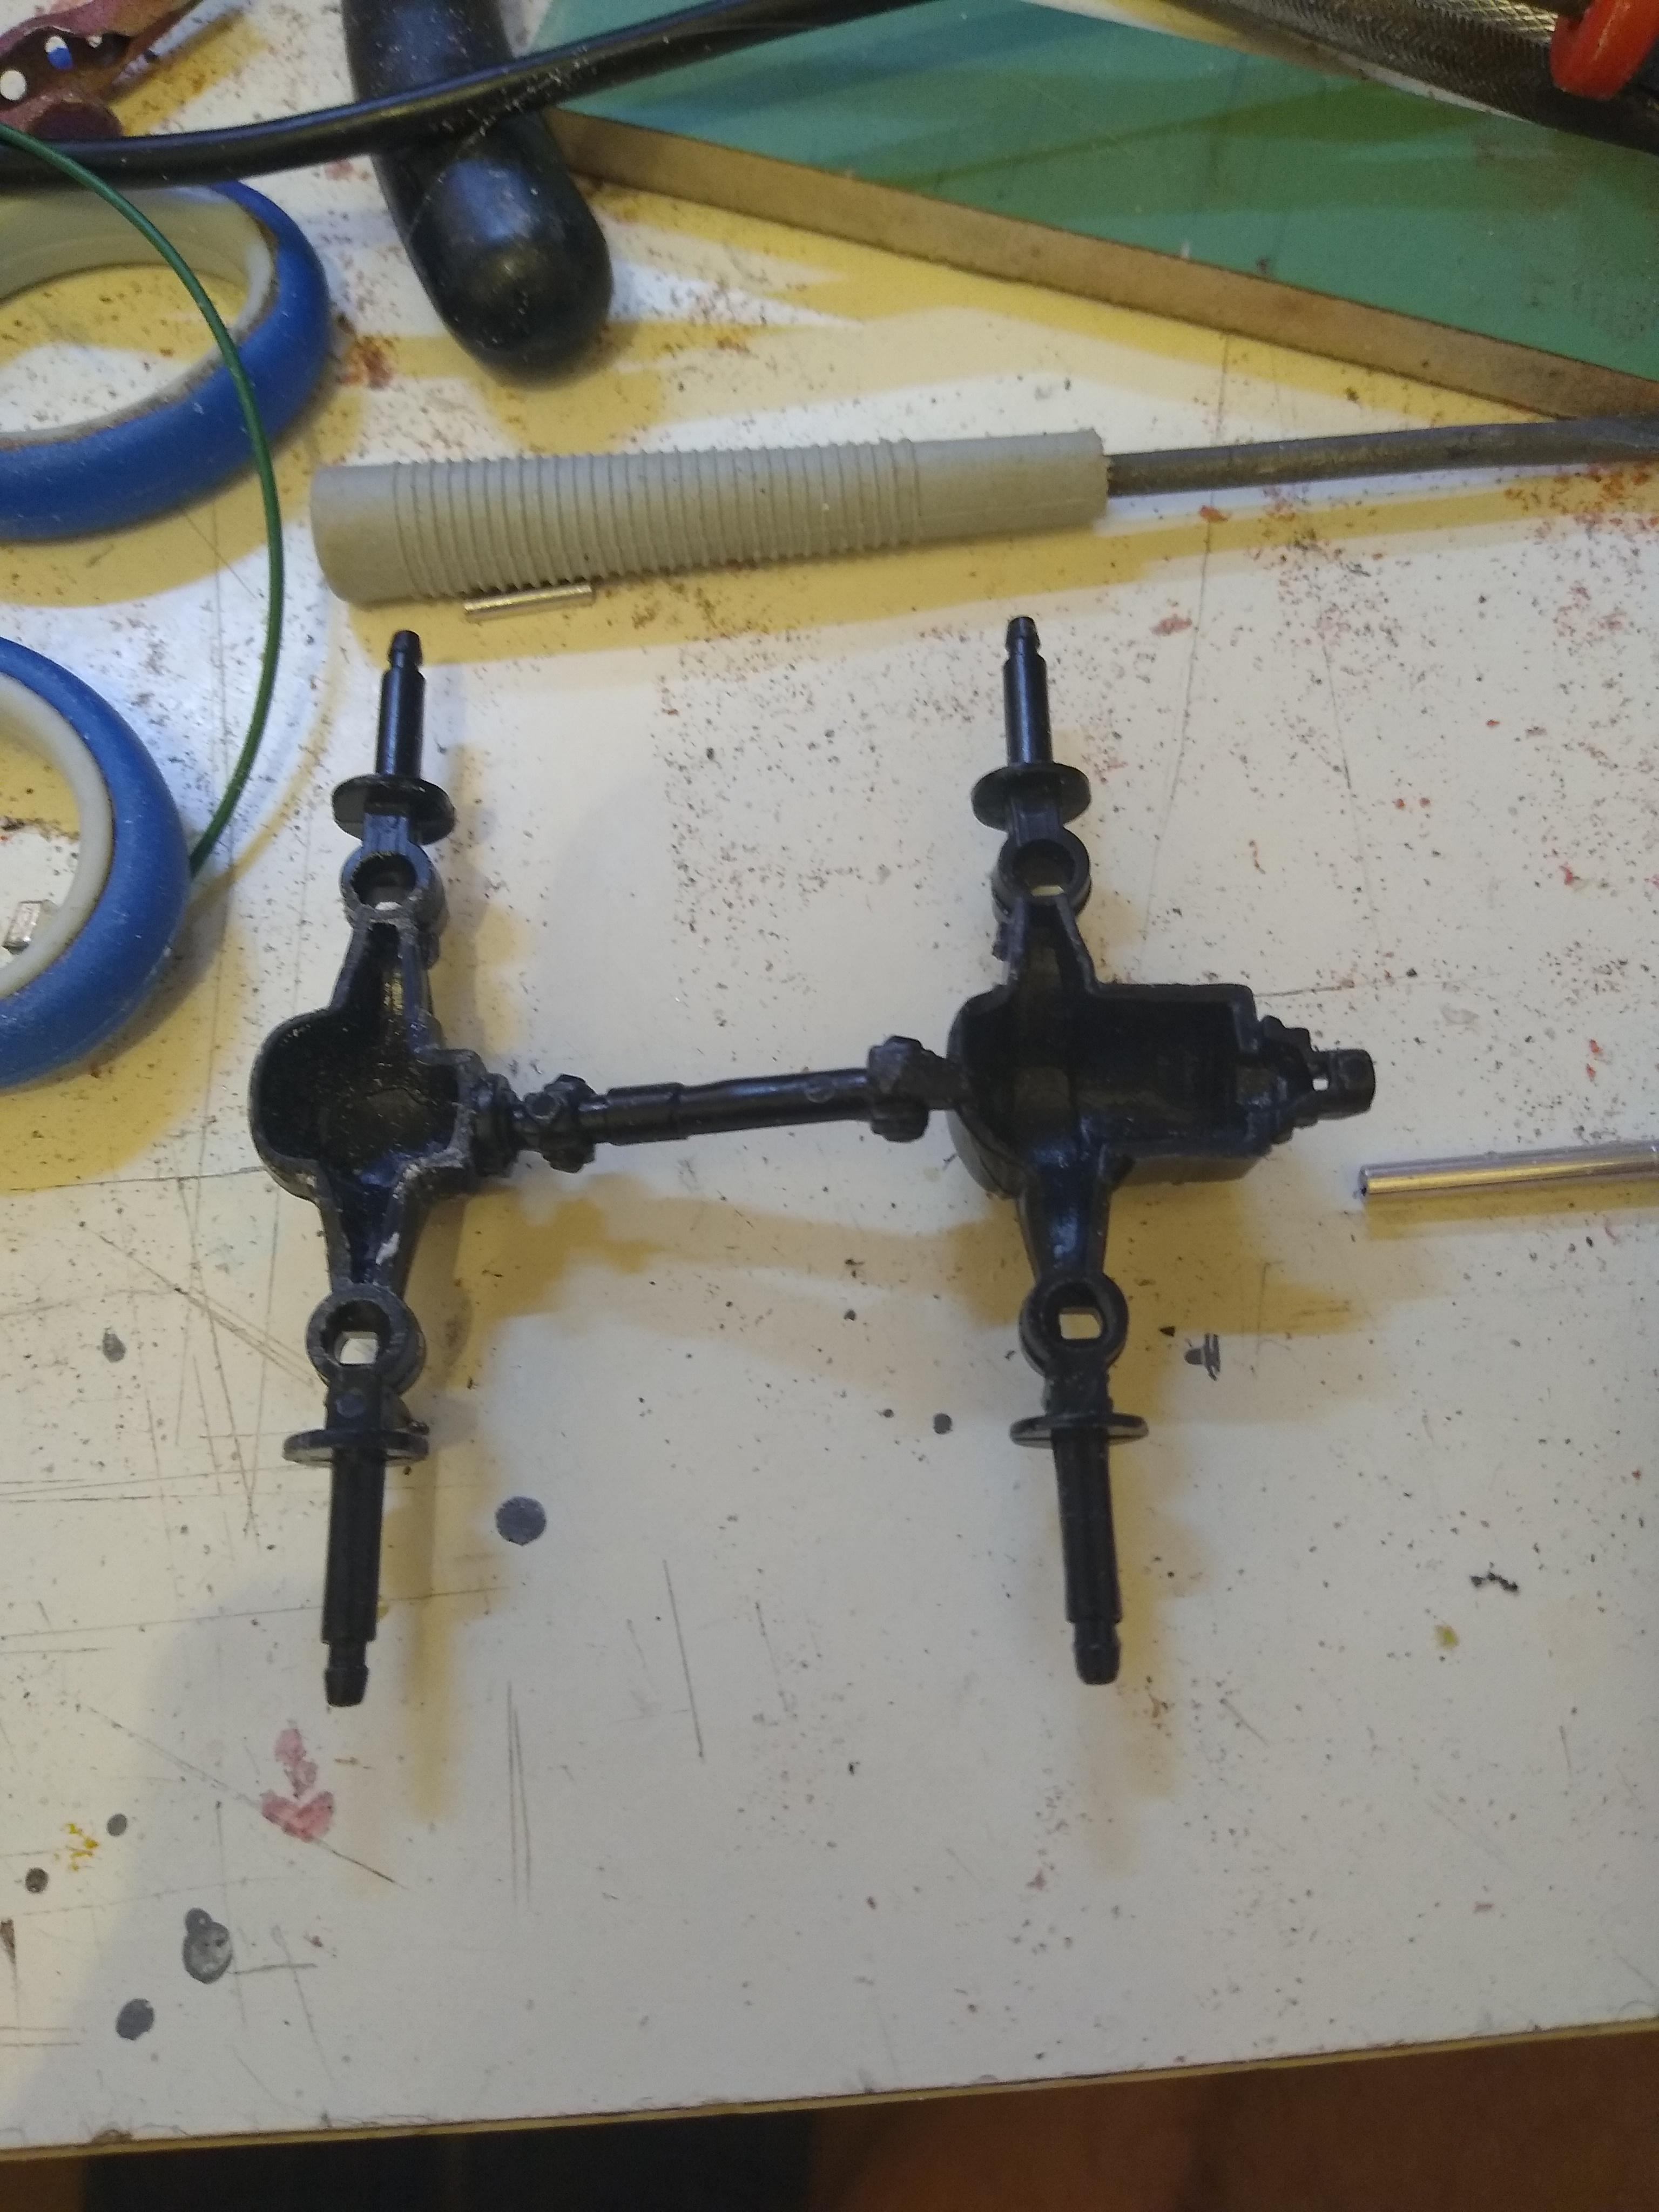
I've had a few heavy weeks so couldn't get to anything until today. Made myself a pogo stick out of ali tube, drilled it and bent up a hose holder from wire. I never intended to use this chassis and for some unknown reason I'd glued the rear suspension together. Now, I had two empty diffs which would be on view to all. It's too far into the job to start cutting the tandems off. What to do? I realised that I still had the unused axles from the AMT W900 and they're exactly the same moulding.Using scrap card and plastic shrapnel I built two cassettes that I could shape to fit the voids. Once set I just dropped them into place on the K100. Look acceptable from most angles and the clutter around the chassis will hide any failings.
-
It does look a little Alaskan. Remarkable progress! The word you were looking for is "sprue". Nice variation on the General.
-
2023 BRGB Ford LTL9000/Great Dane refer
Rockford replied to tbill's topic in WIP: Model Trucks: Big Rigs and Heavy Equipment
You'd never know with the stripes, but that Cummins will leak oil everywhere if you leave it upside down.