Brutalform
-
Posts
2,833 -
Joined
-
Last visited
Content Type
Profiles
Forums
Events
Gallery
Everything posted by Brutalform
-
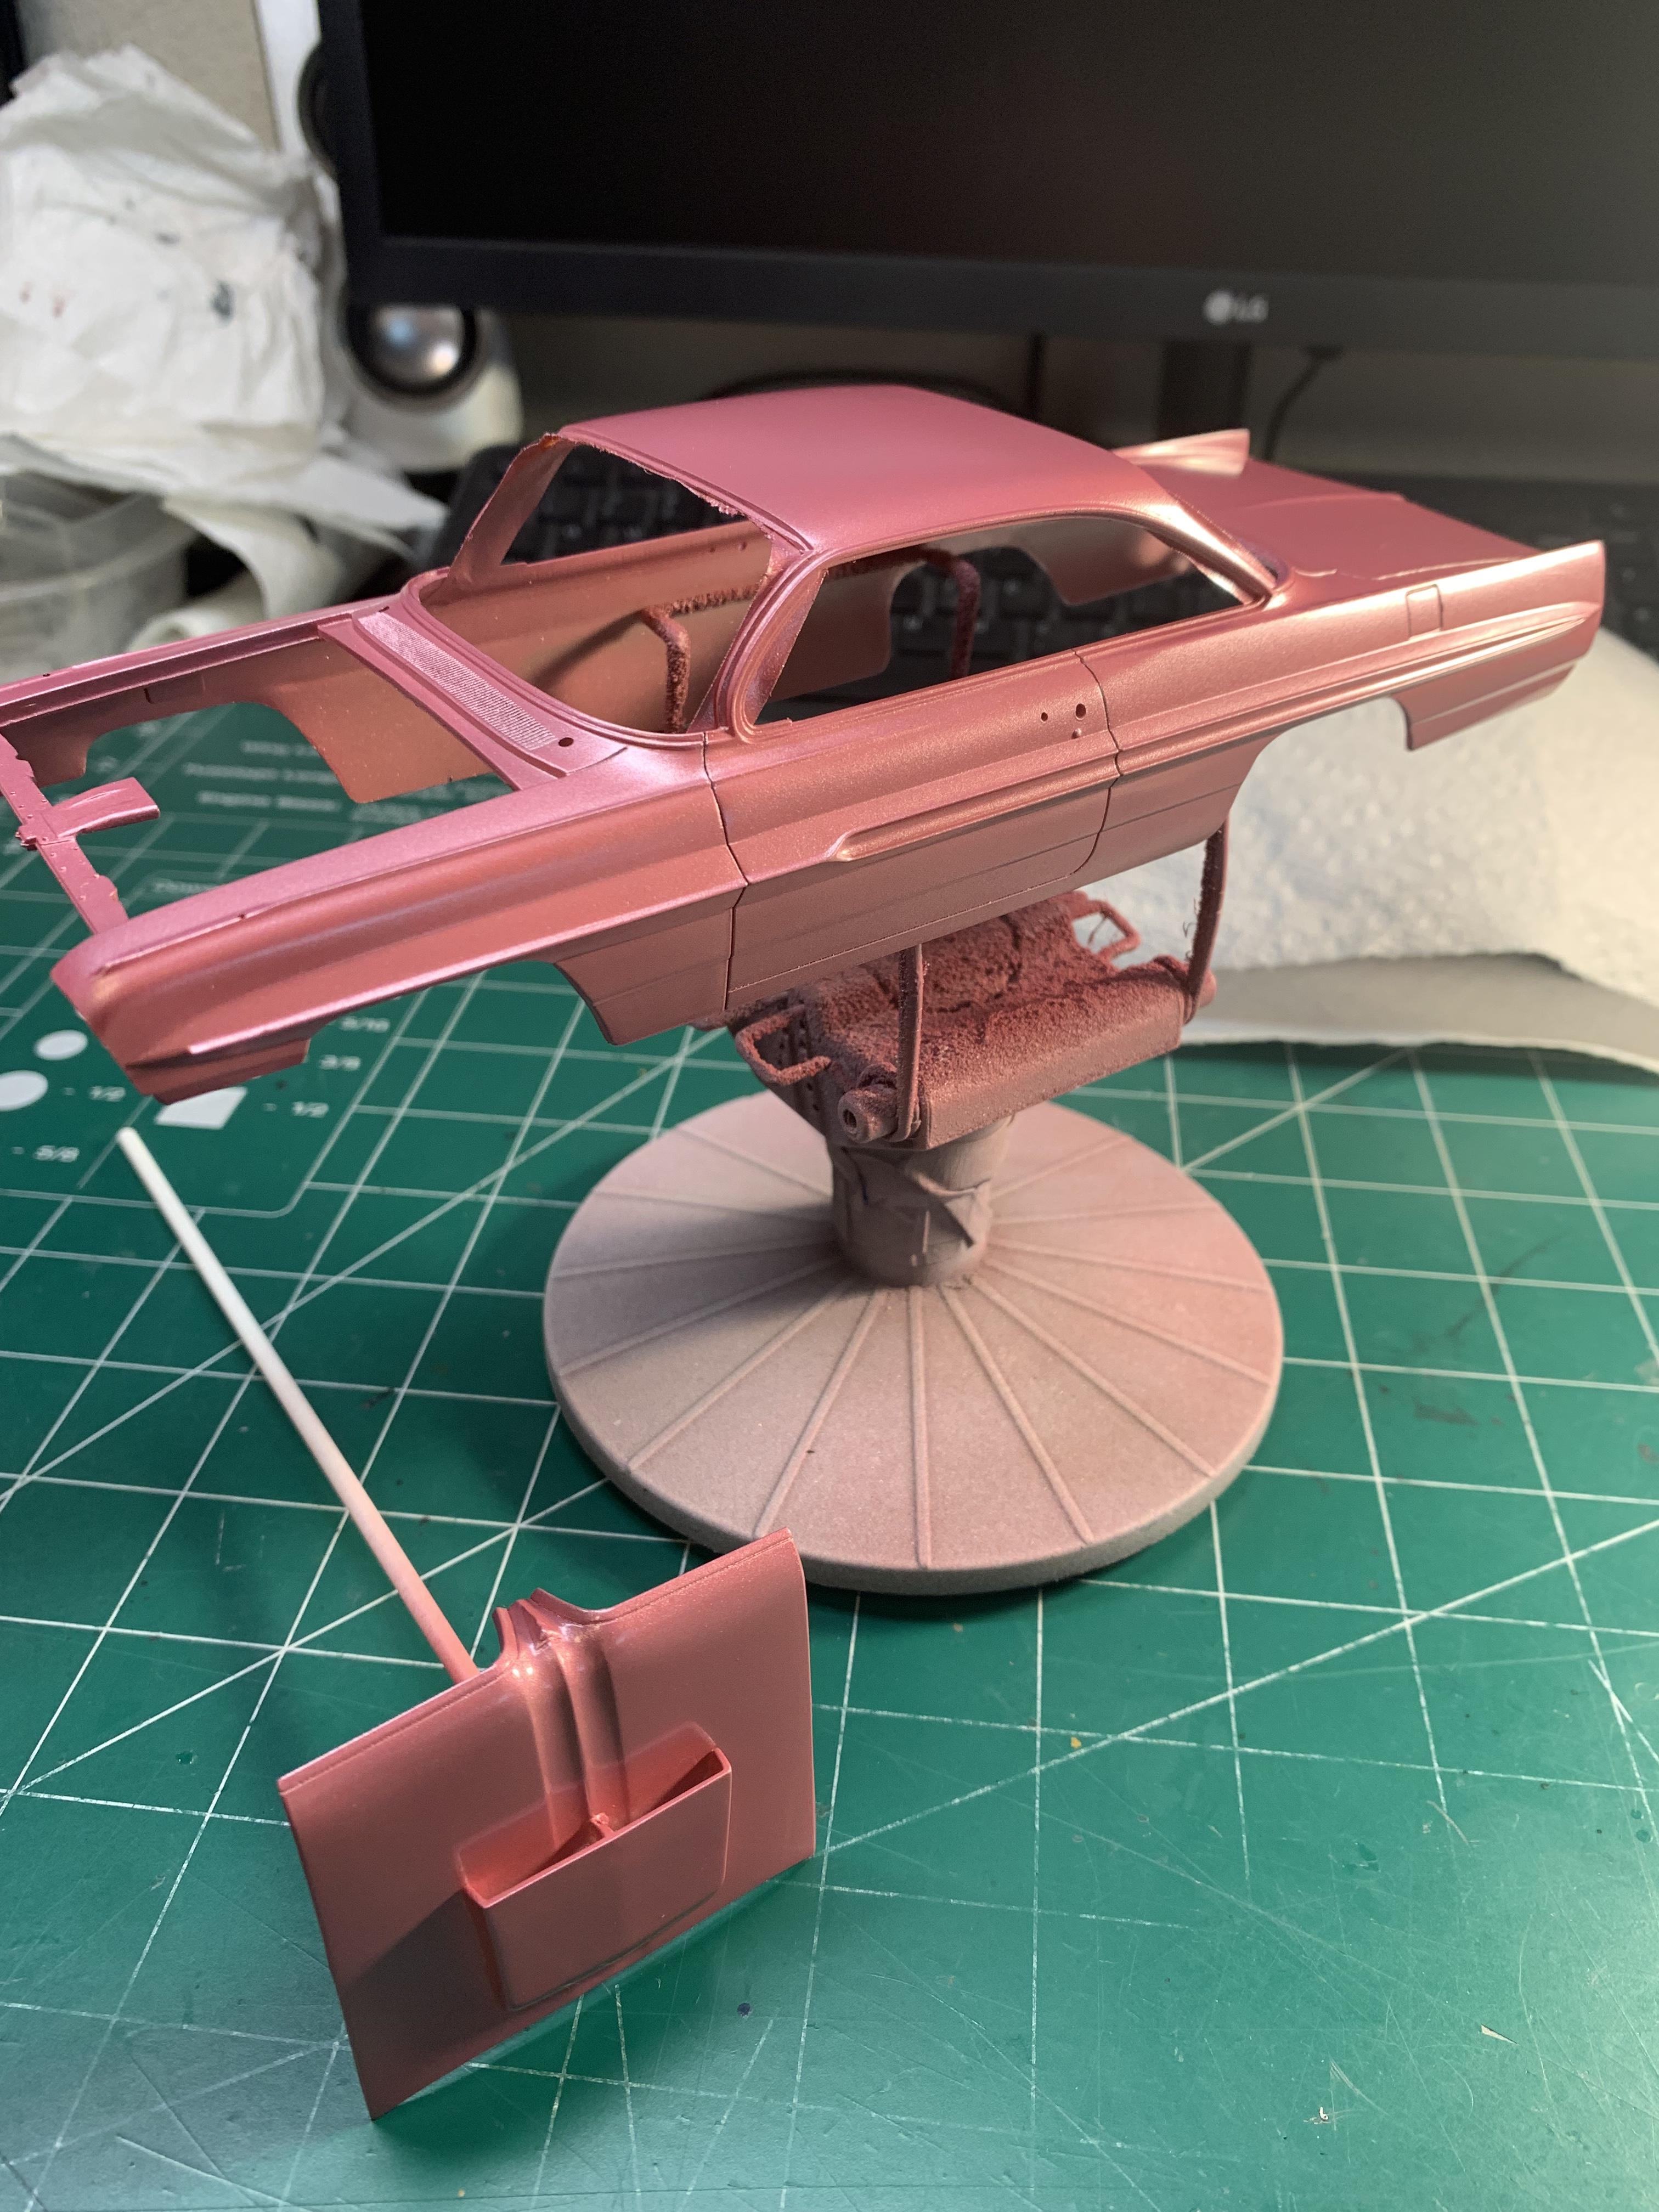
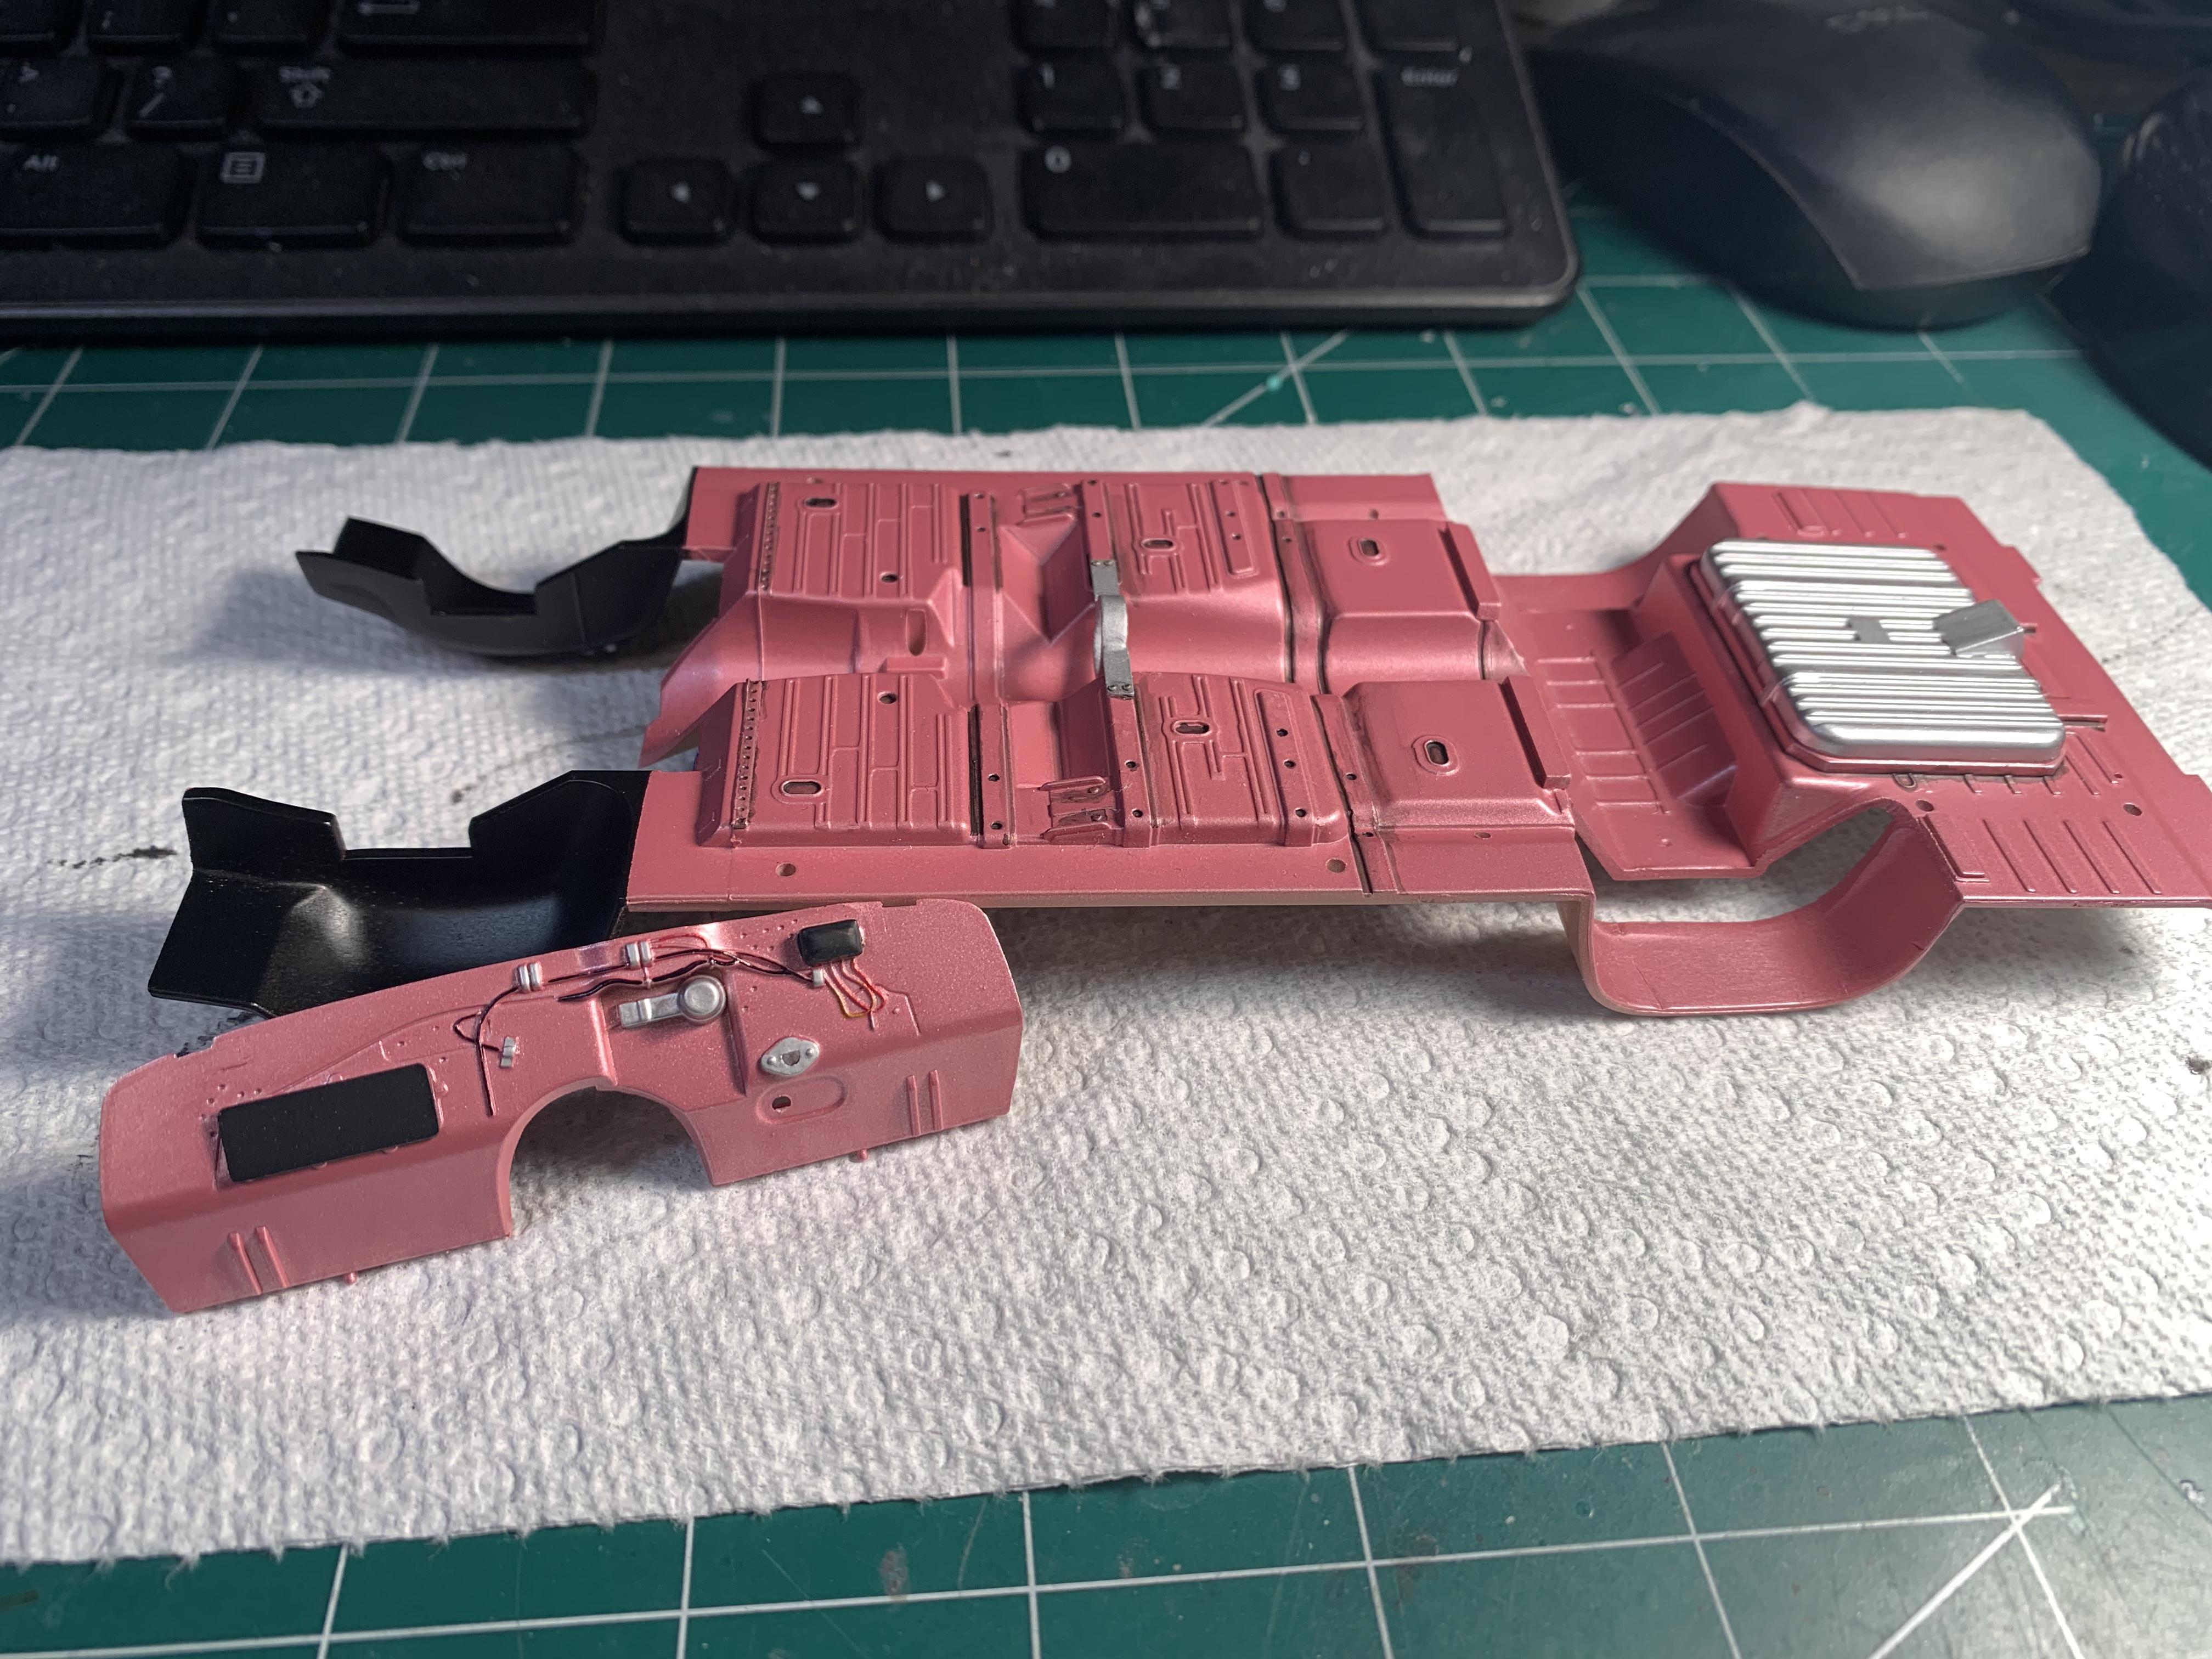
I put the interior, roll bar, seats, and harness, together. Everything fit nice into the body. Laid down four coats of Tamiya Pearl Light Red. I only encountered one little hair on the roof that I removed and sanded between coats. Gonna let it sit for a week before I lay down the Tamiya clear coat.

-

Mod Podge, tacky glue, Elmers?
Brutalform replied to TonyK's topic in Model Building Questions and Answers
Though it might not be for everyone, but, this is the stuff I use. Pretty hard to get messy with the pin size applicator. You can get two tubes for about $11 and it will last you many years. I still have my second tube in the box, unused.
-
Mod Podge, tacky glue, Elmers?
Brutalform replied to TonyK's topic in Model Building Questions and Answers
It doesn’t fog, but its not invisible on clear plastic if it gets on it. The tube has a fine, pointed applicator, that enables you to apply it around the windows in a controlled fashion. Never had any problems as of yet, and I’ve used it on many many winnows and windshields. -
Two more quality builds of Super Stocks.
-
Aftermarket parts
Brutalform replied to LL3 Model Worx's topic in Model Building Questions and Answers
Check out ProTech model parts. Charlie has a lot of informative tips on his website. Also has descriptions of what fittings and lines go where. Quality stuff. -
Mod Podge, tacky glue, Elmers?
Brutalform replied to TonyK's topic in Model Building Questions and Answers
I use watch crystal cement almost all the time. I just tape the window in, and add the cement around the perimeter, pull the tape off after it dries, and add some to where the tape was. The reason I like using it, is because it “tacks” up pretty quick. -
Thank you. I appreciate the comments.
-
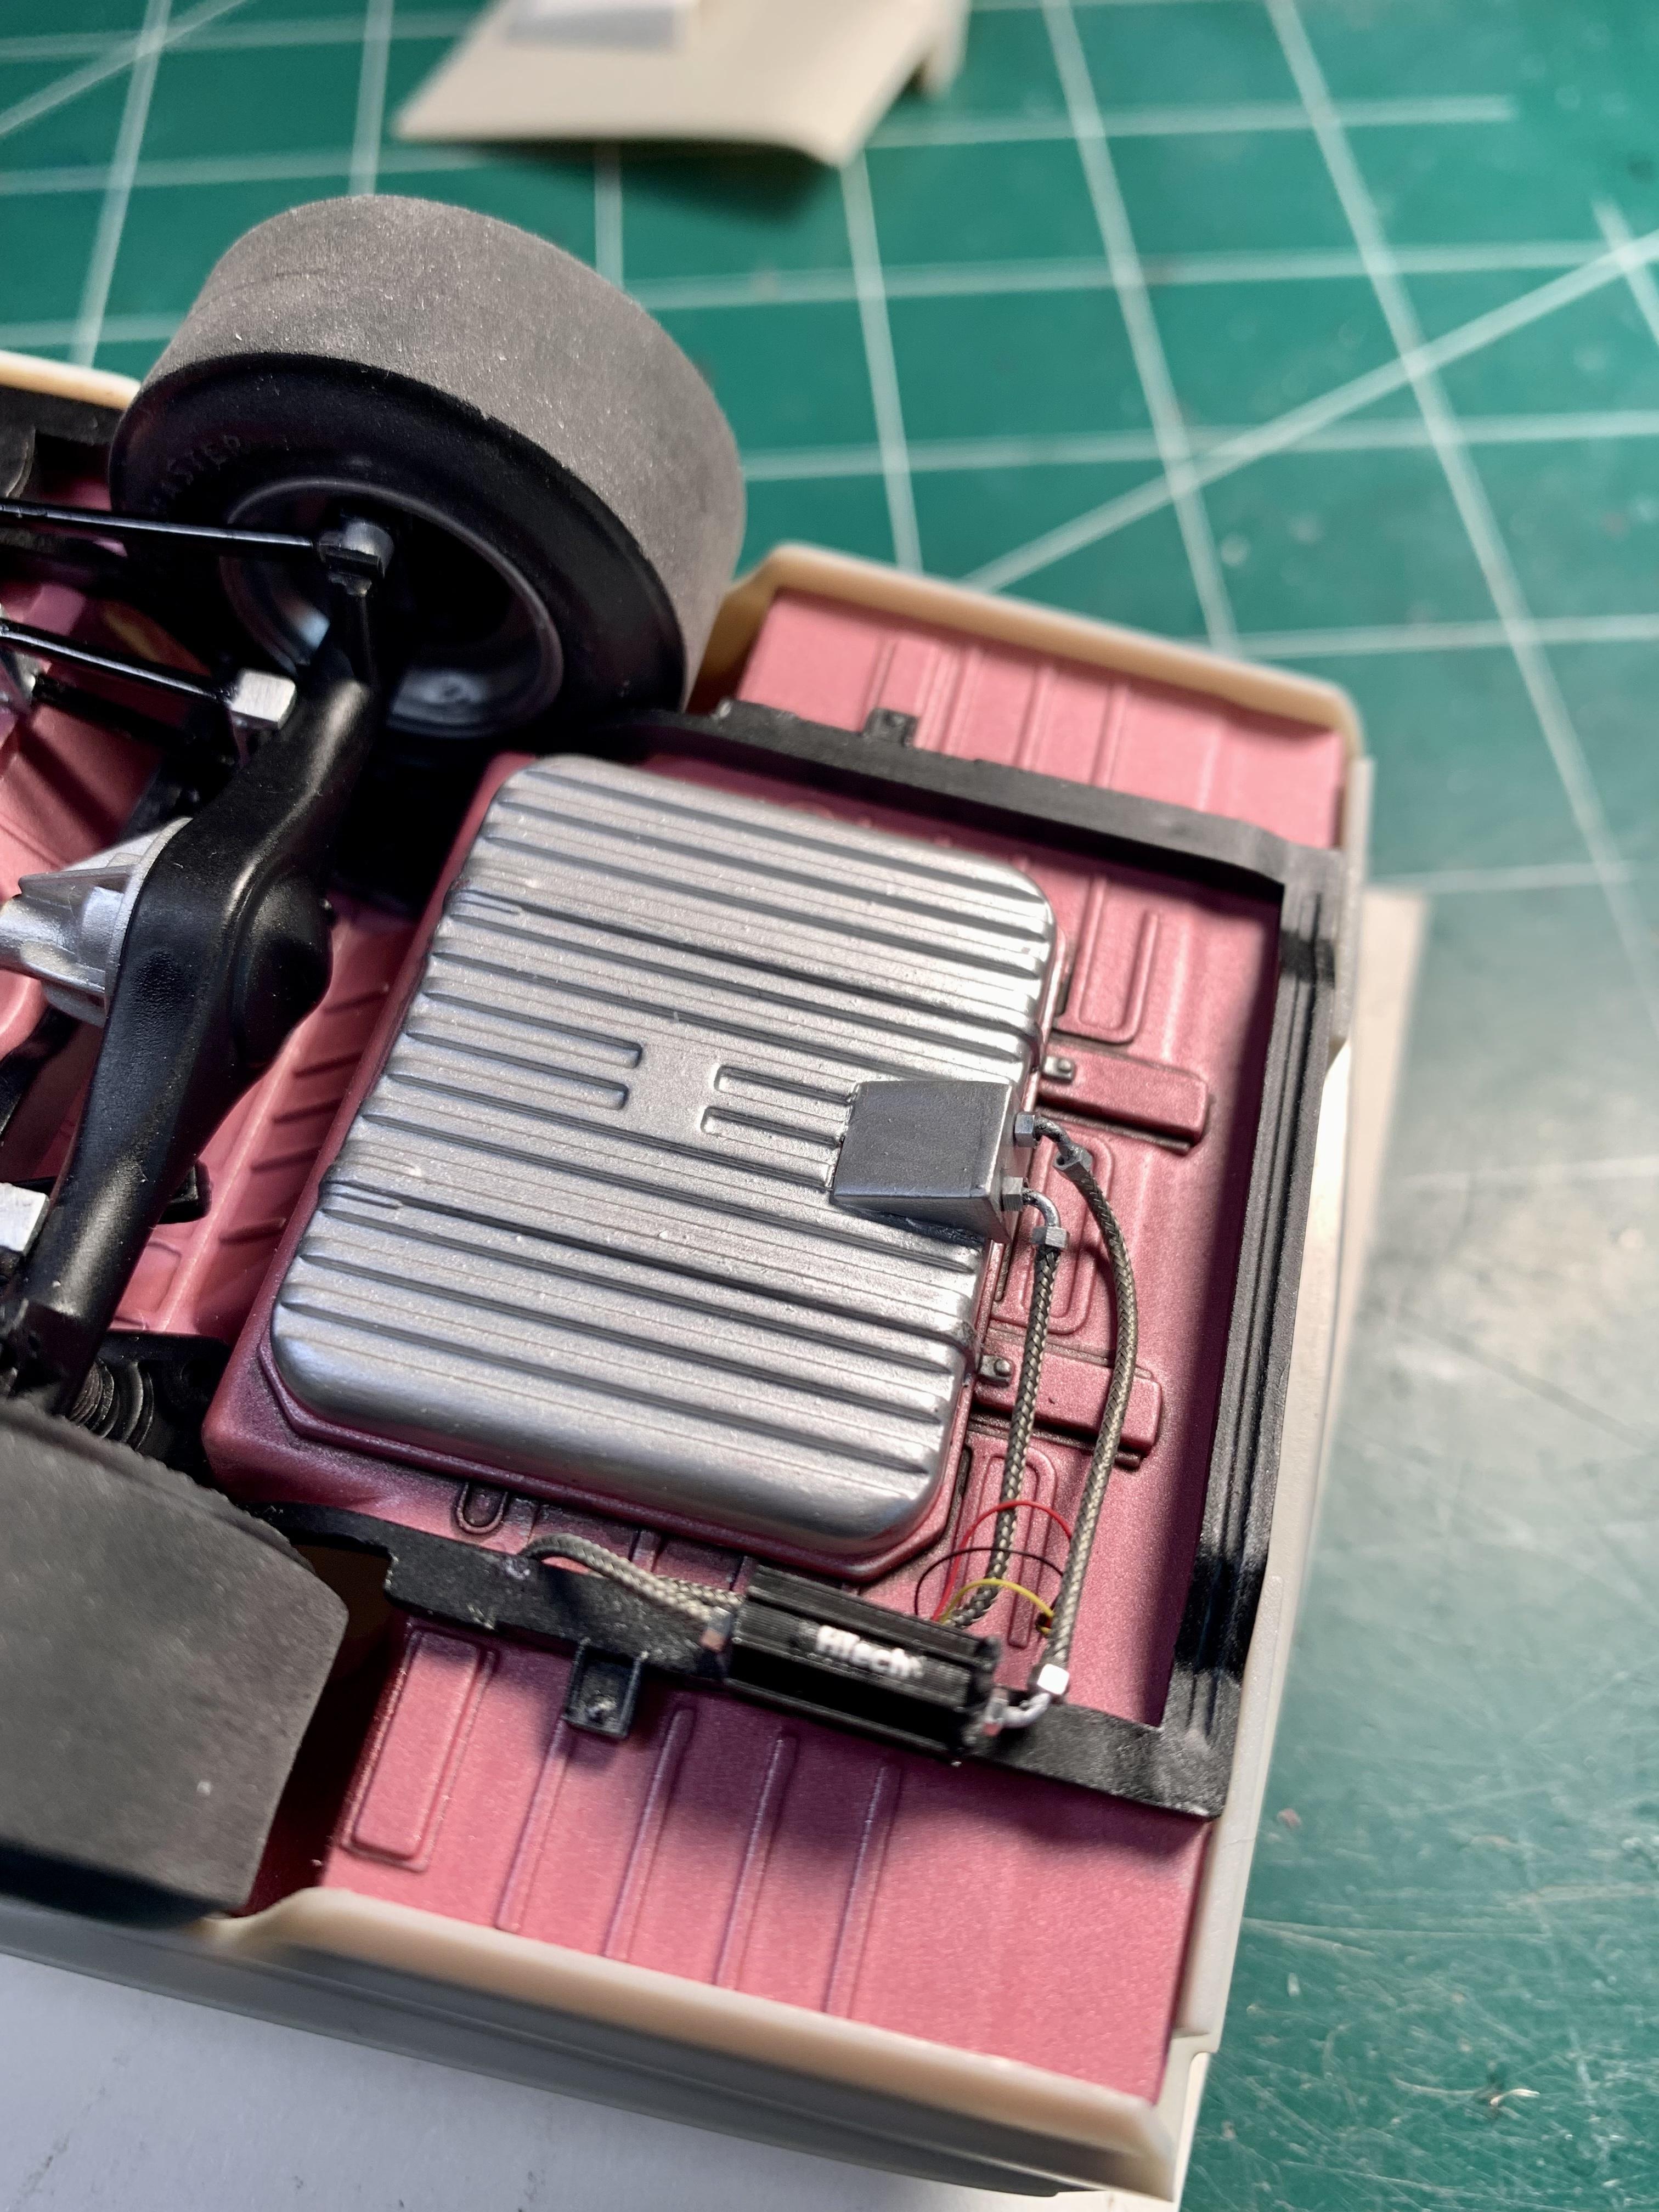
Pretty much completed the chassis and engine install. Had to mock up the body to make sure everything will fit together on the final assembly. Thanks to Joseph at Fireball on this beautiful EFI set up. Didn’t hook it up as per the web pics, but sometimes you have to improvise. Used ProTech line and fittings on everything. Also changed the scoop since its now EFI, and I really don't need to cover those carbs. Now to start the assembly of the interior, with safety harnesses, and then test fit the body one last time before it gets primed and painted. I might even try to fab up a window net.
-
Can anyone recommend a good horror book?
Brutalform replied to Mike C.'s topic in The Off-Topic Lounge
Not only a SK reader, but I also collect first edition, first printing SK novels, and a few that always come to mind is The Apt Pupil, The Stand, The Mist, IT, are some of my favorites. Not classified as “horror” but his detective novels are really good reads also. The Hodges Trilogy, which contains Mr Mercedes, Finders Keepers, and End of Watch. Then check out The Outsider, which is kind of a continuation of the three previous novels. Check out H.P. Lovecraft if short stories interest you. Some of his stuff is a bit weird, and IMO a bit “wordy”, but there are many good scary short stories. Murder as a Fine Art by David Morrell is another story that comes to mind. Not a bad book at all, from the author of Rambo’s First Blood. Ghost Story by Peter Straub is another one I’ll never forget. The movie is ok, but nothing like the book. -
You did another fantastic job on another S/S build, John. Not one detail is left out. I agree that this Revell kit is a pretty good kit representing the 62 Impala. I built the Zintsmaster car using this kit a while back. Are those the Carter carbs from Joseph?
-
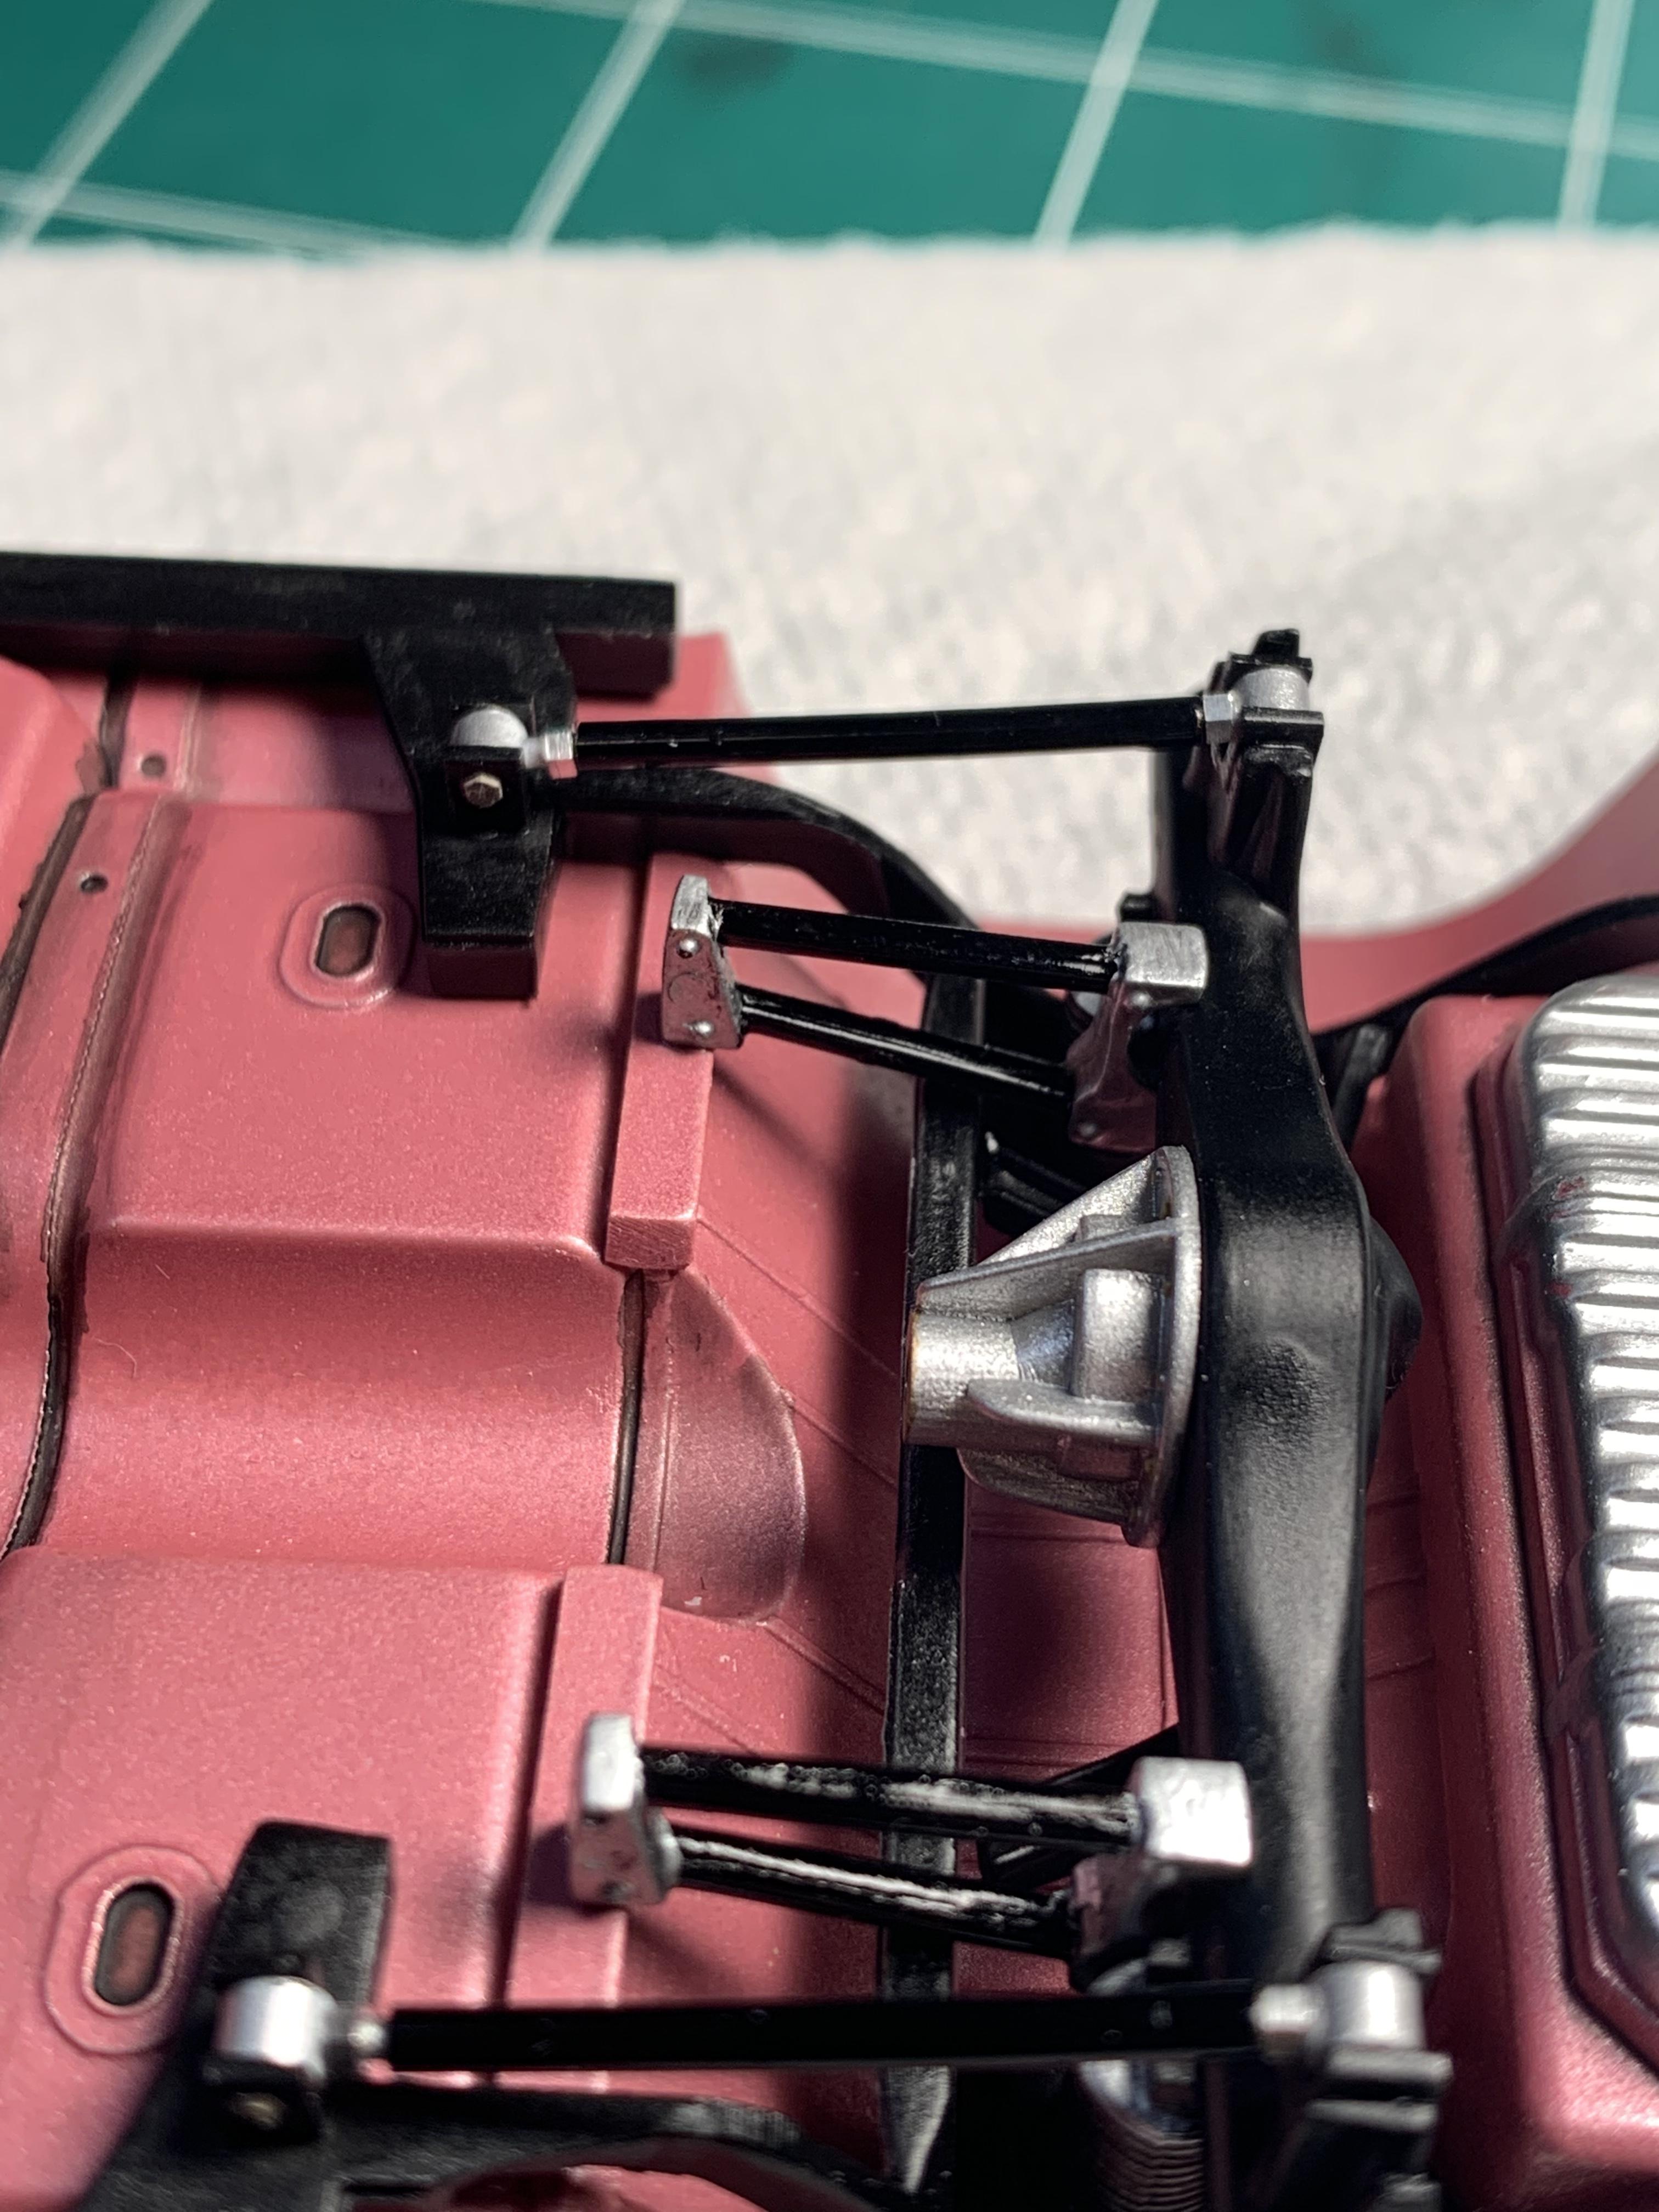
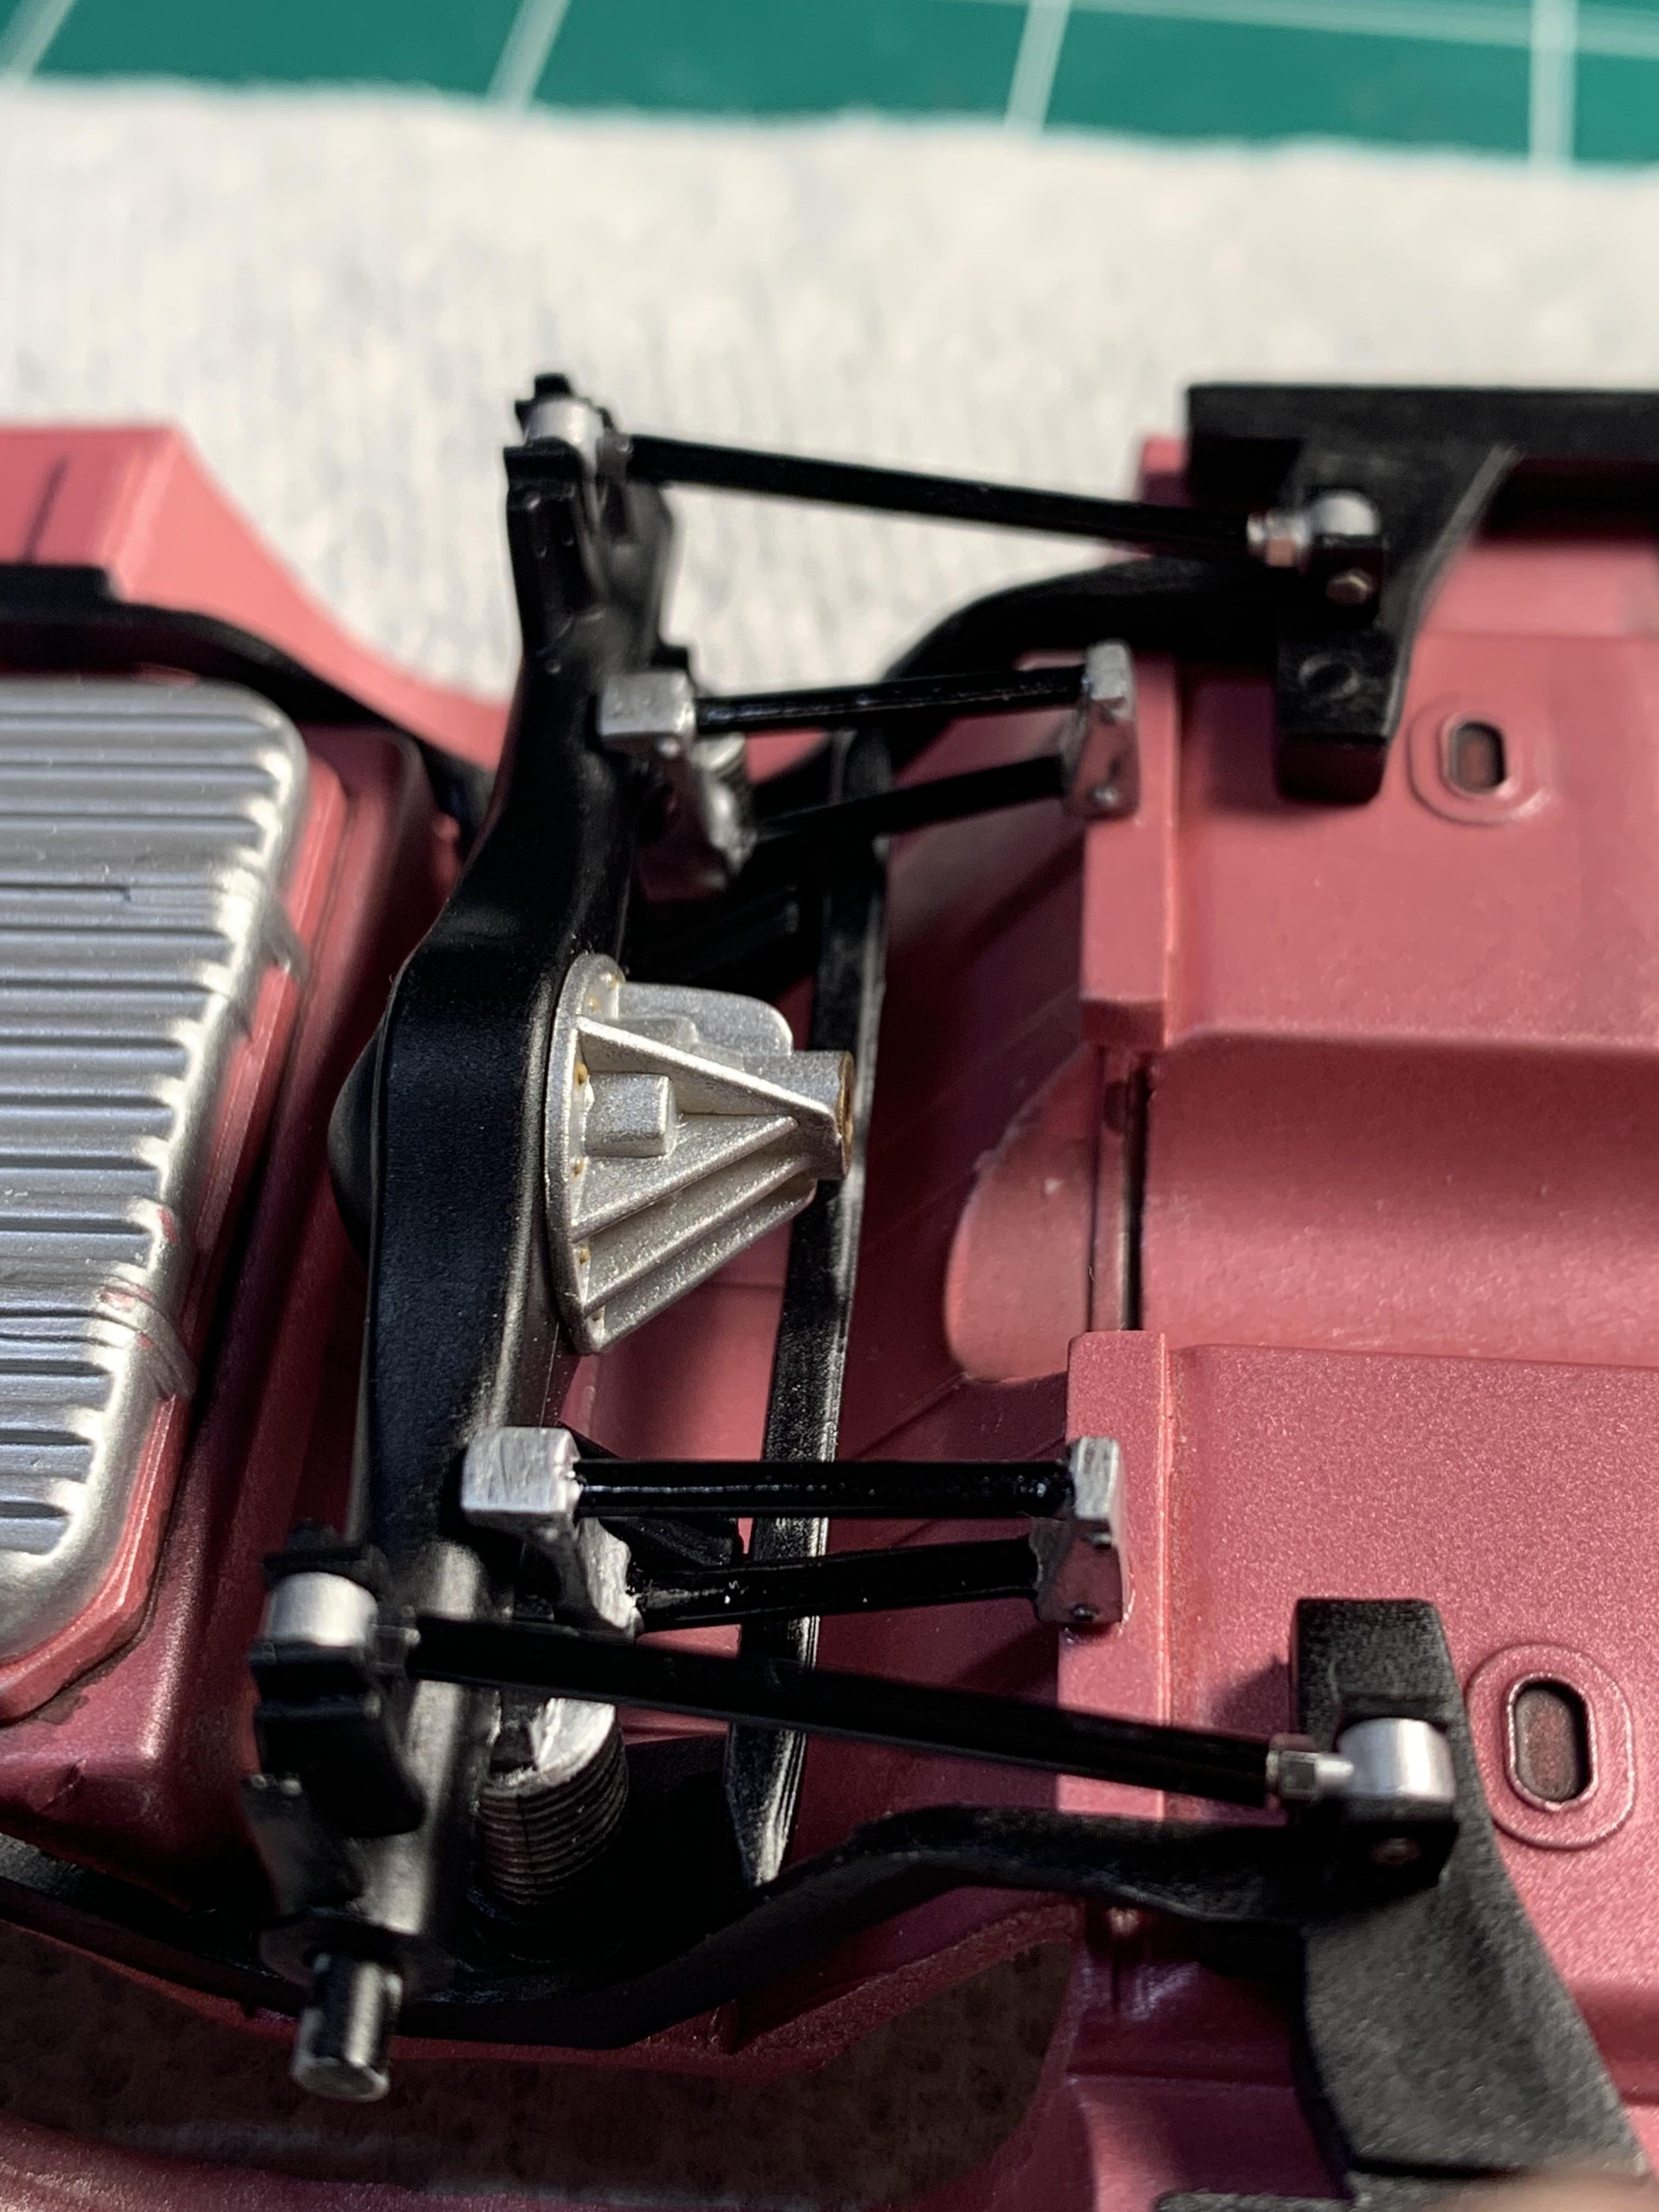
Thanks Larry. Installed the frame and the scratch built lower control arms with adjustable heim joints, and the rear end. Gonna take a break until tomorrow. Time for a cigar.
-
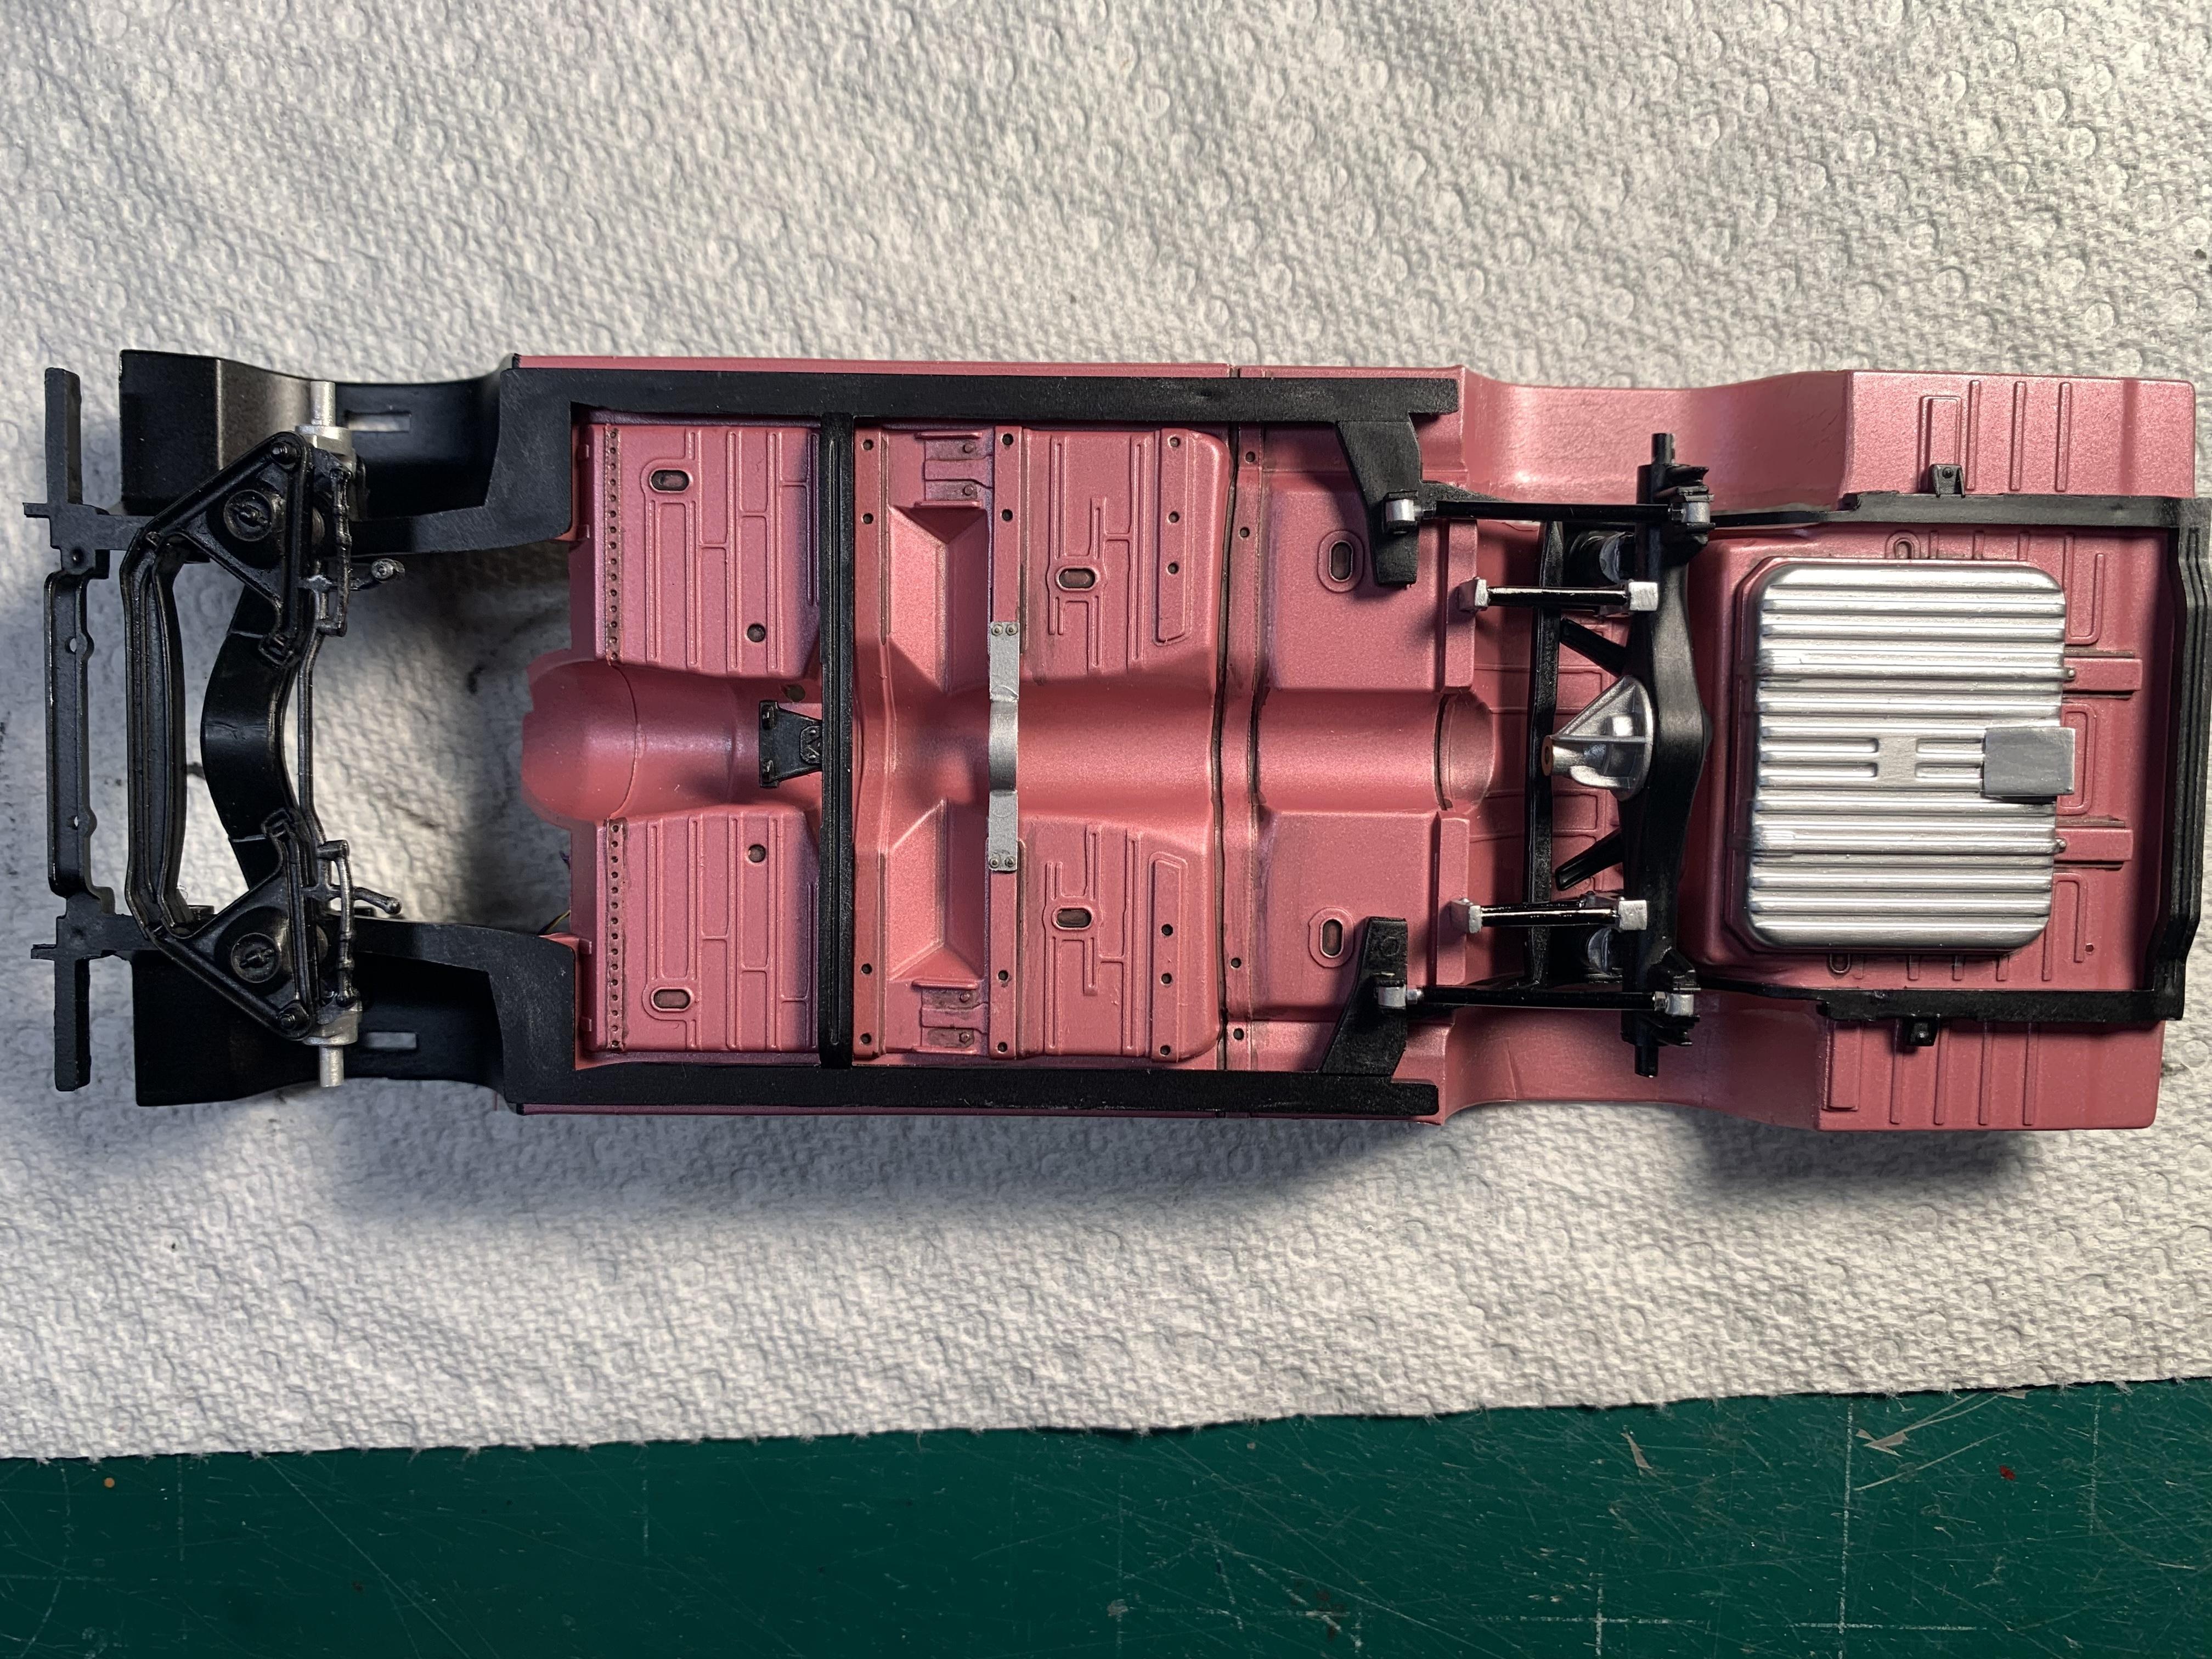
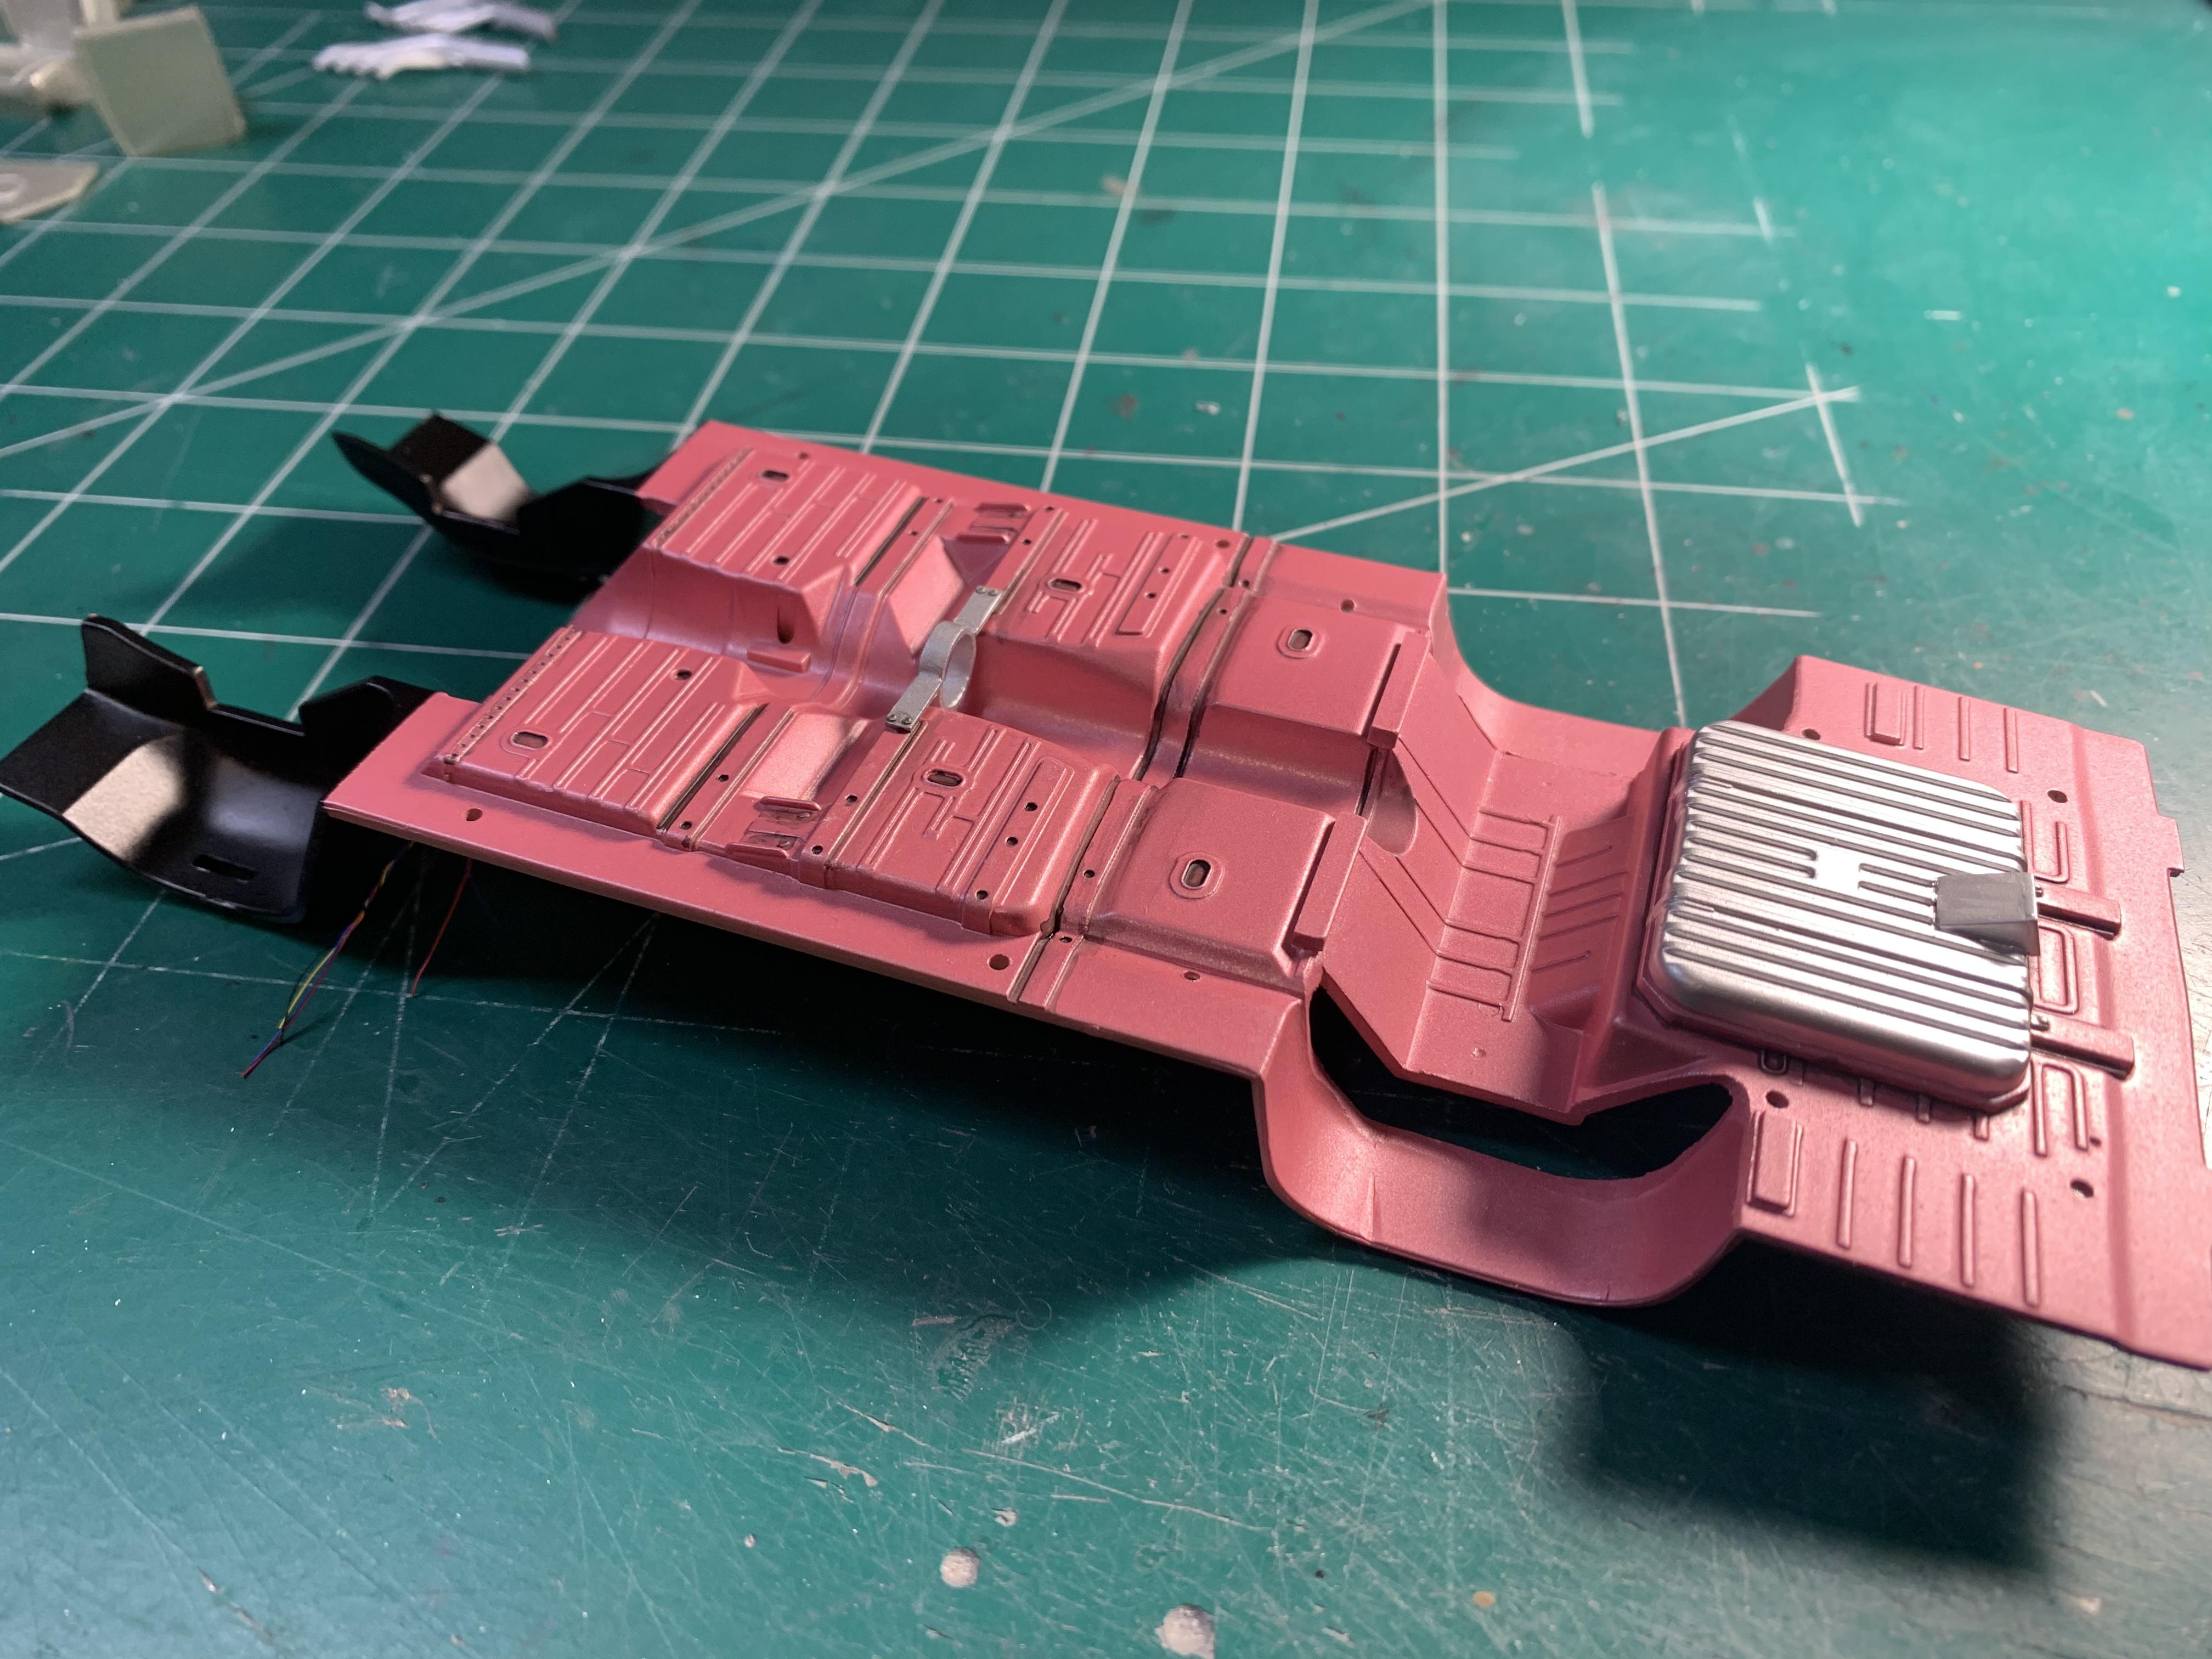
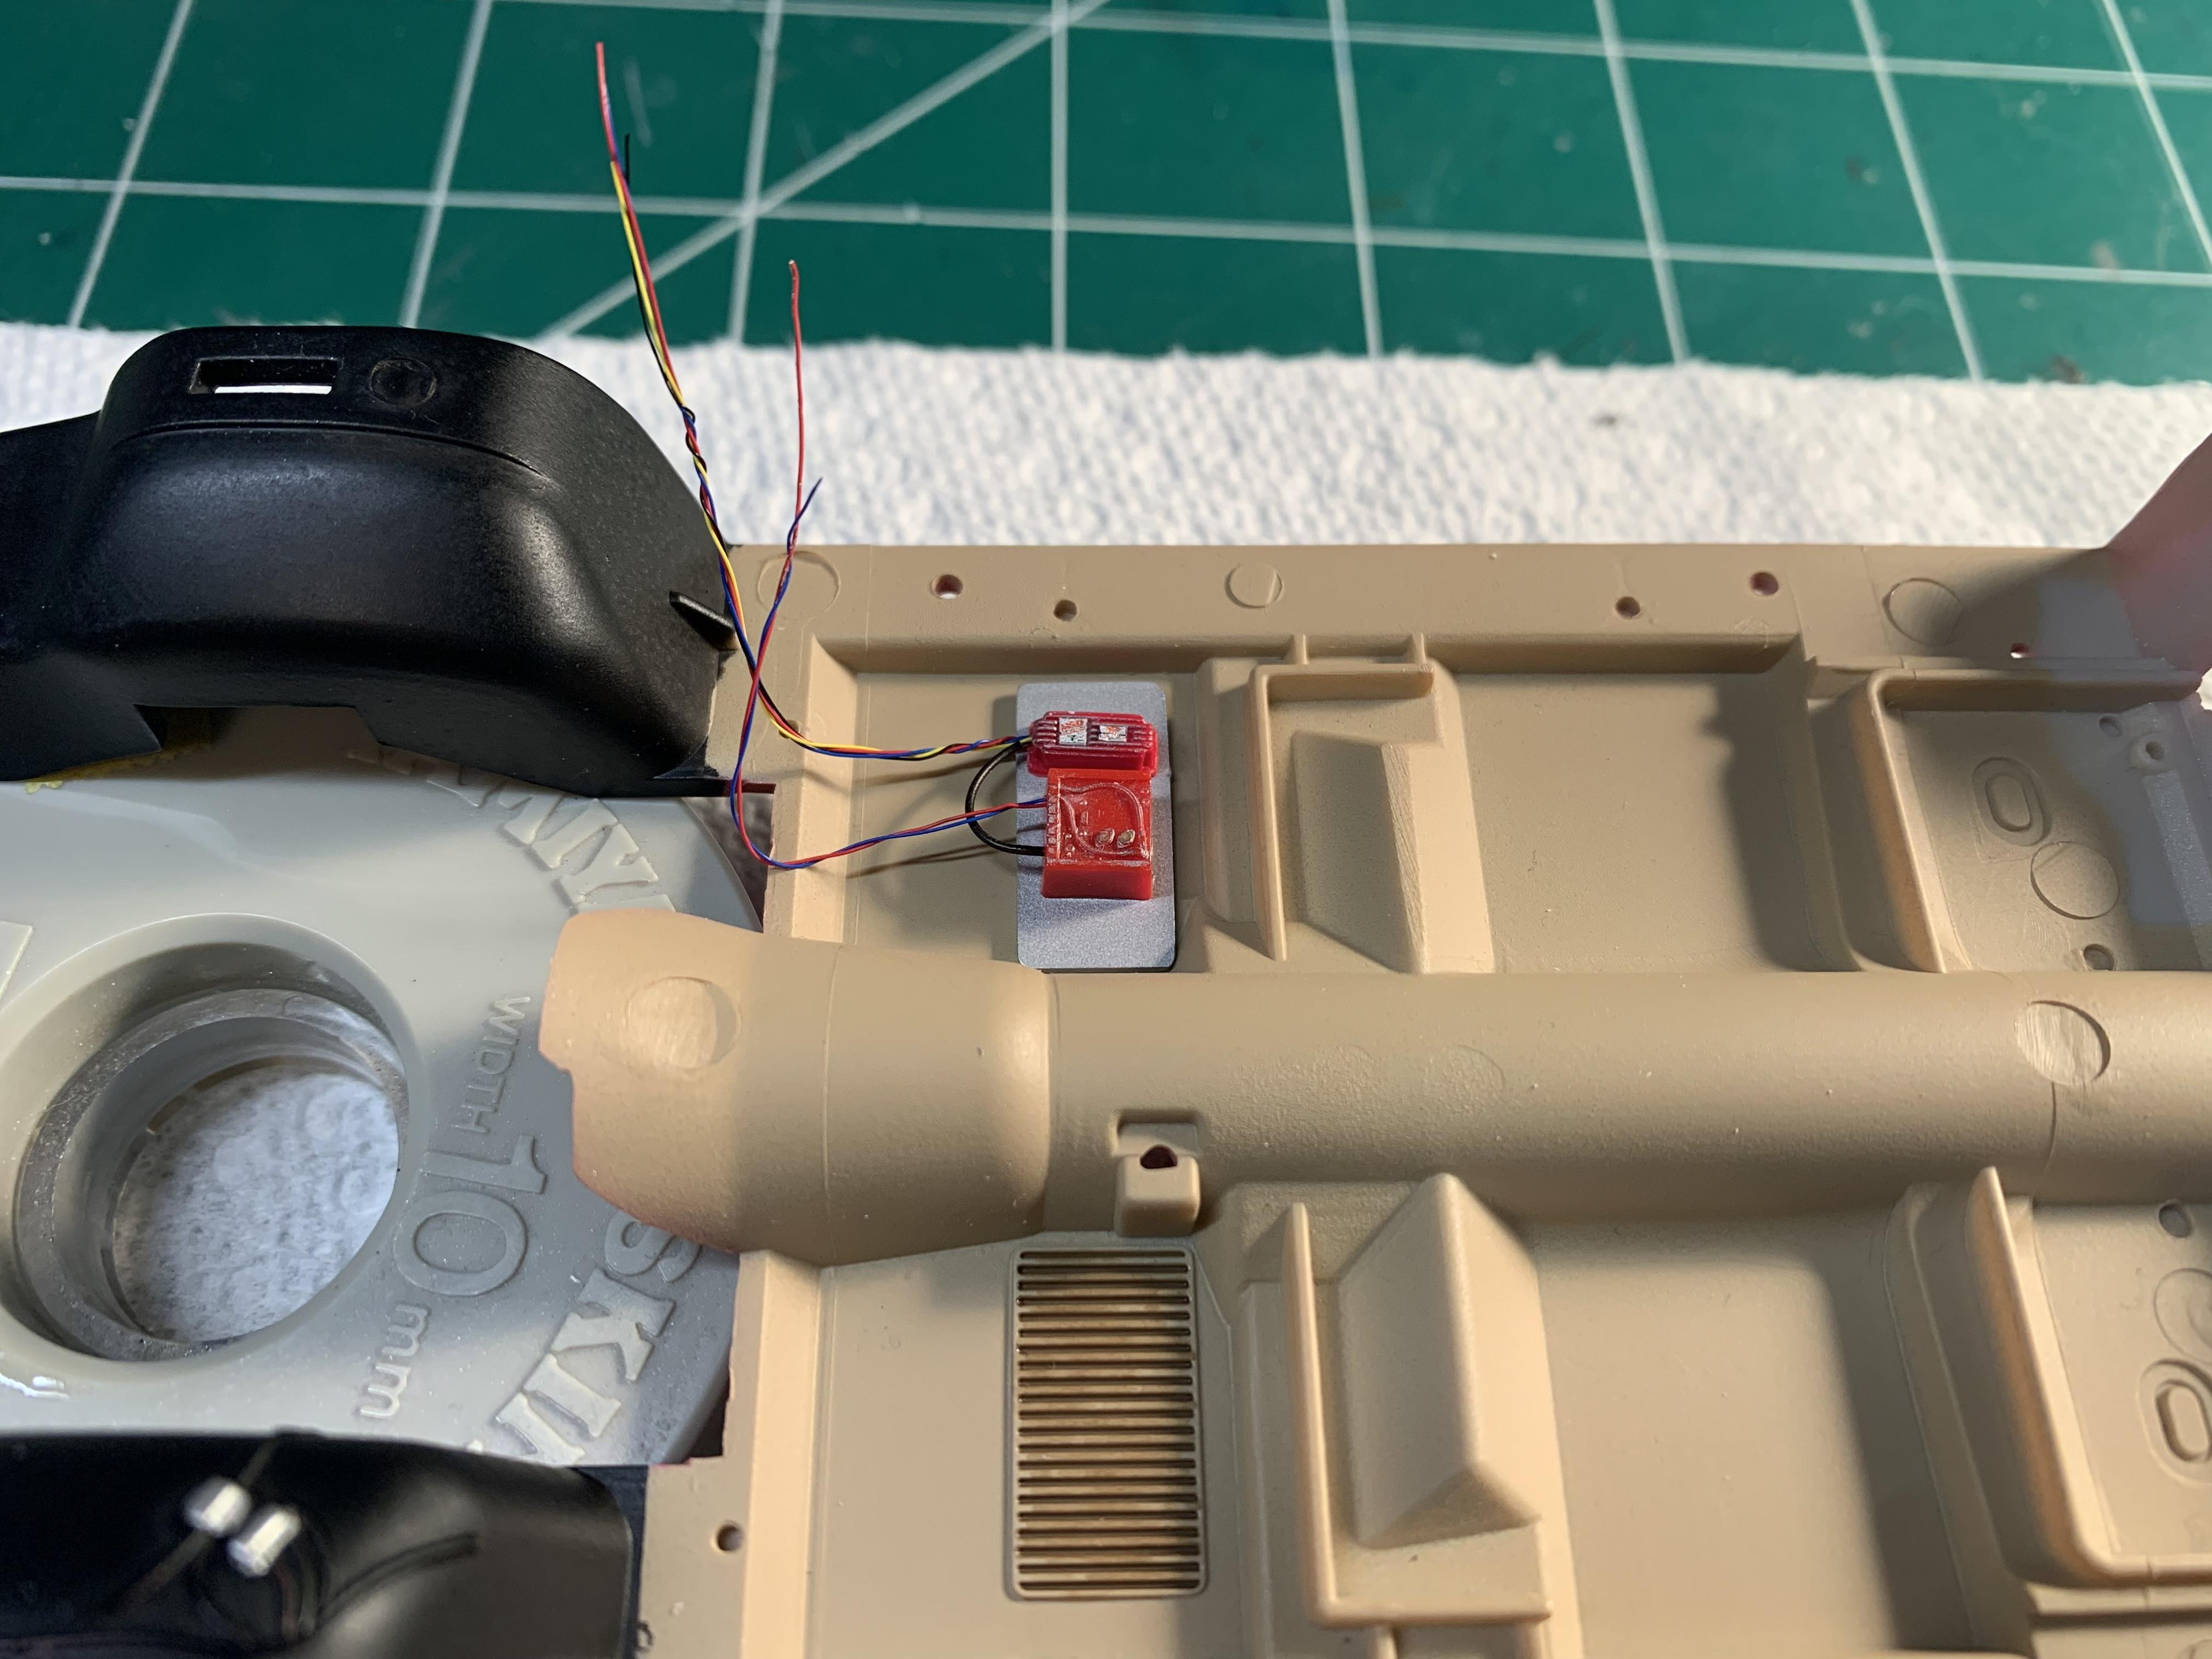
Also was working on the under carriage. I shot it with some dull cote after I painted it. I wanted to dirty it up a bit in some areas also. Got the interior floor painted, and some of the electronics installed also. I also scratch built a driveshaft safety loop.
-
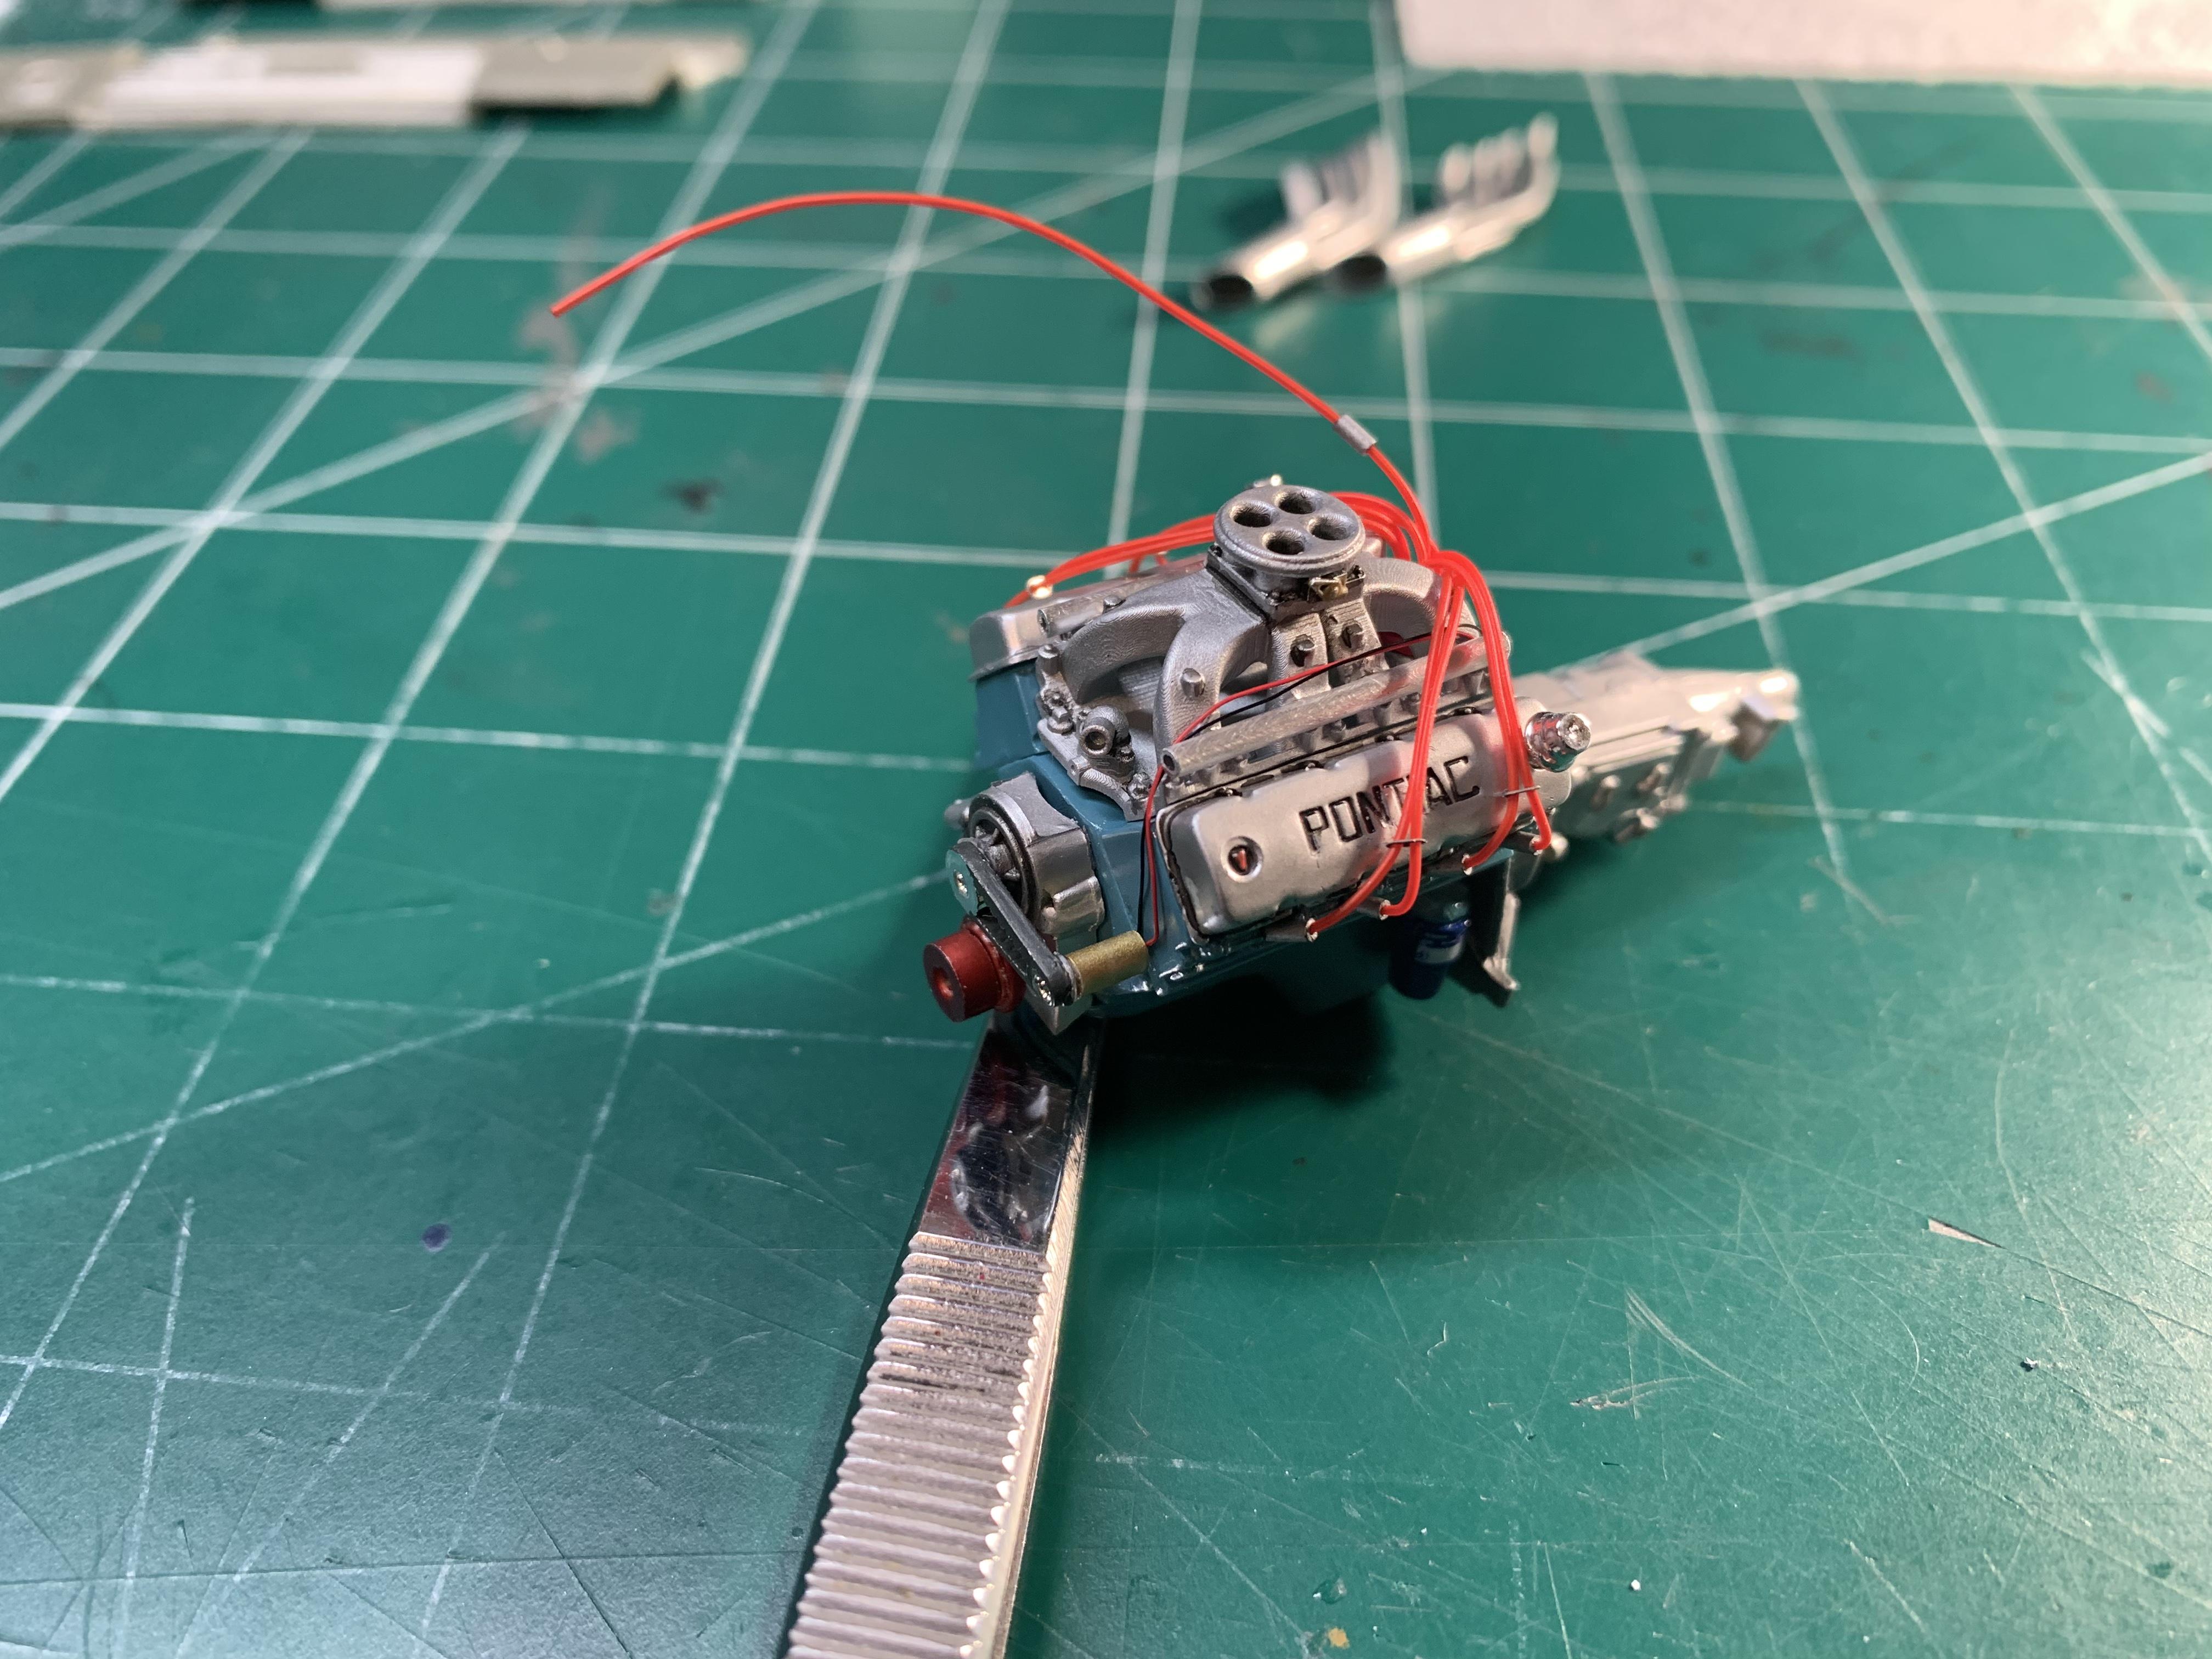
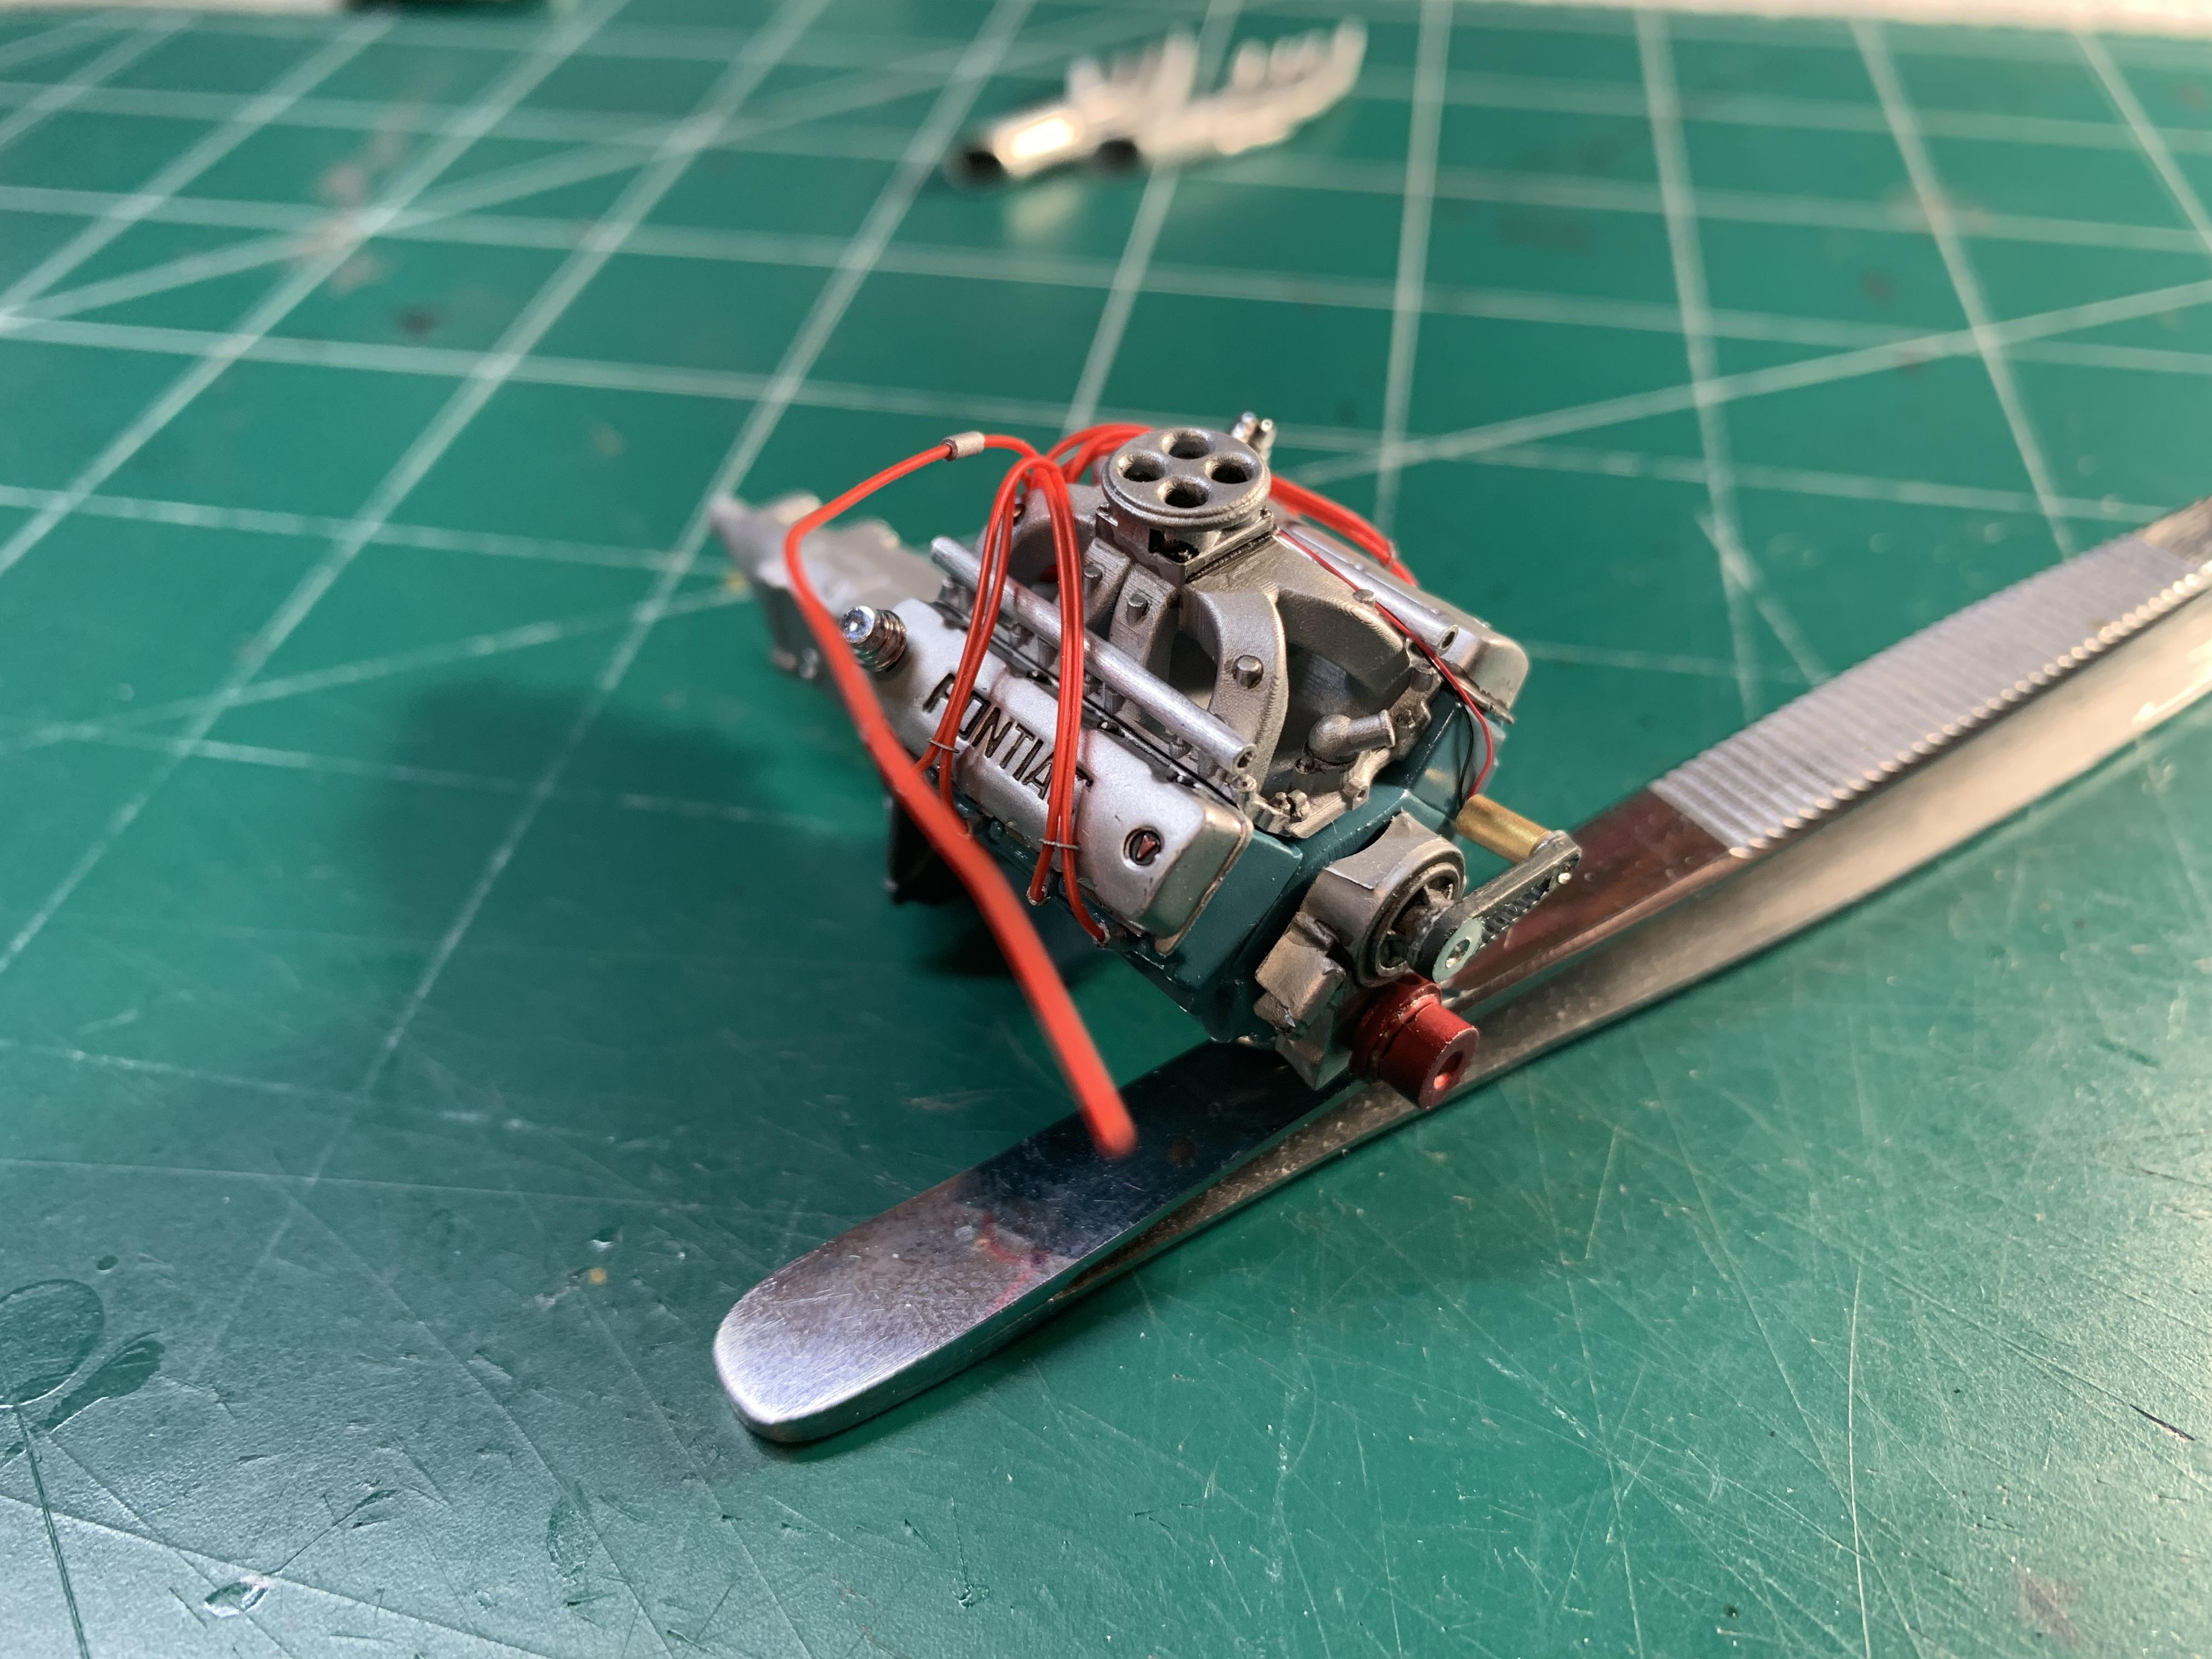
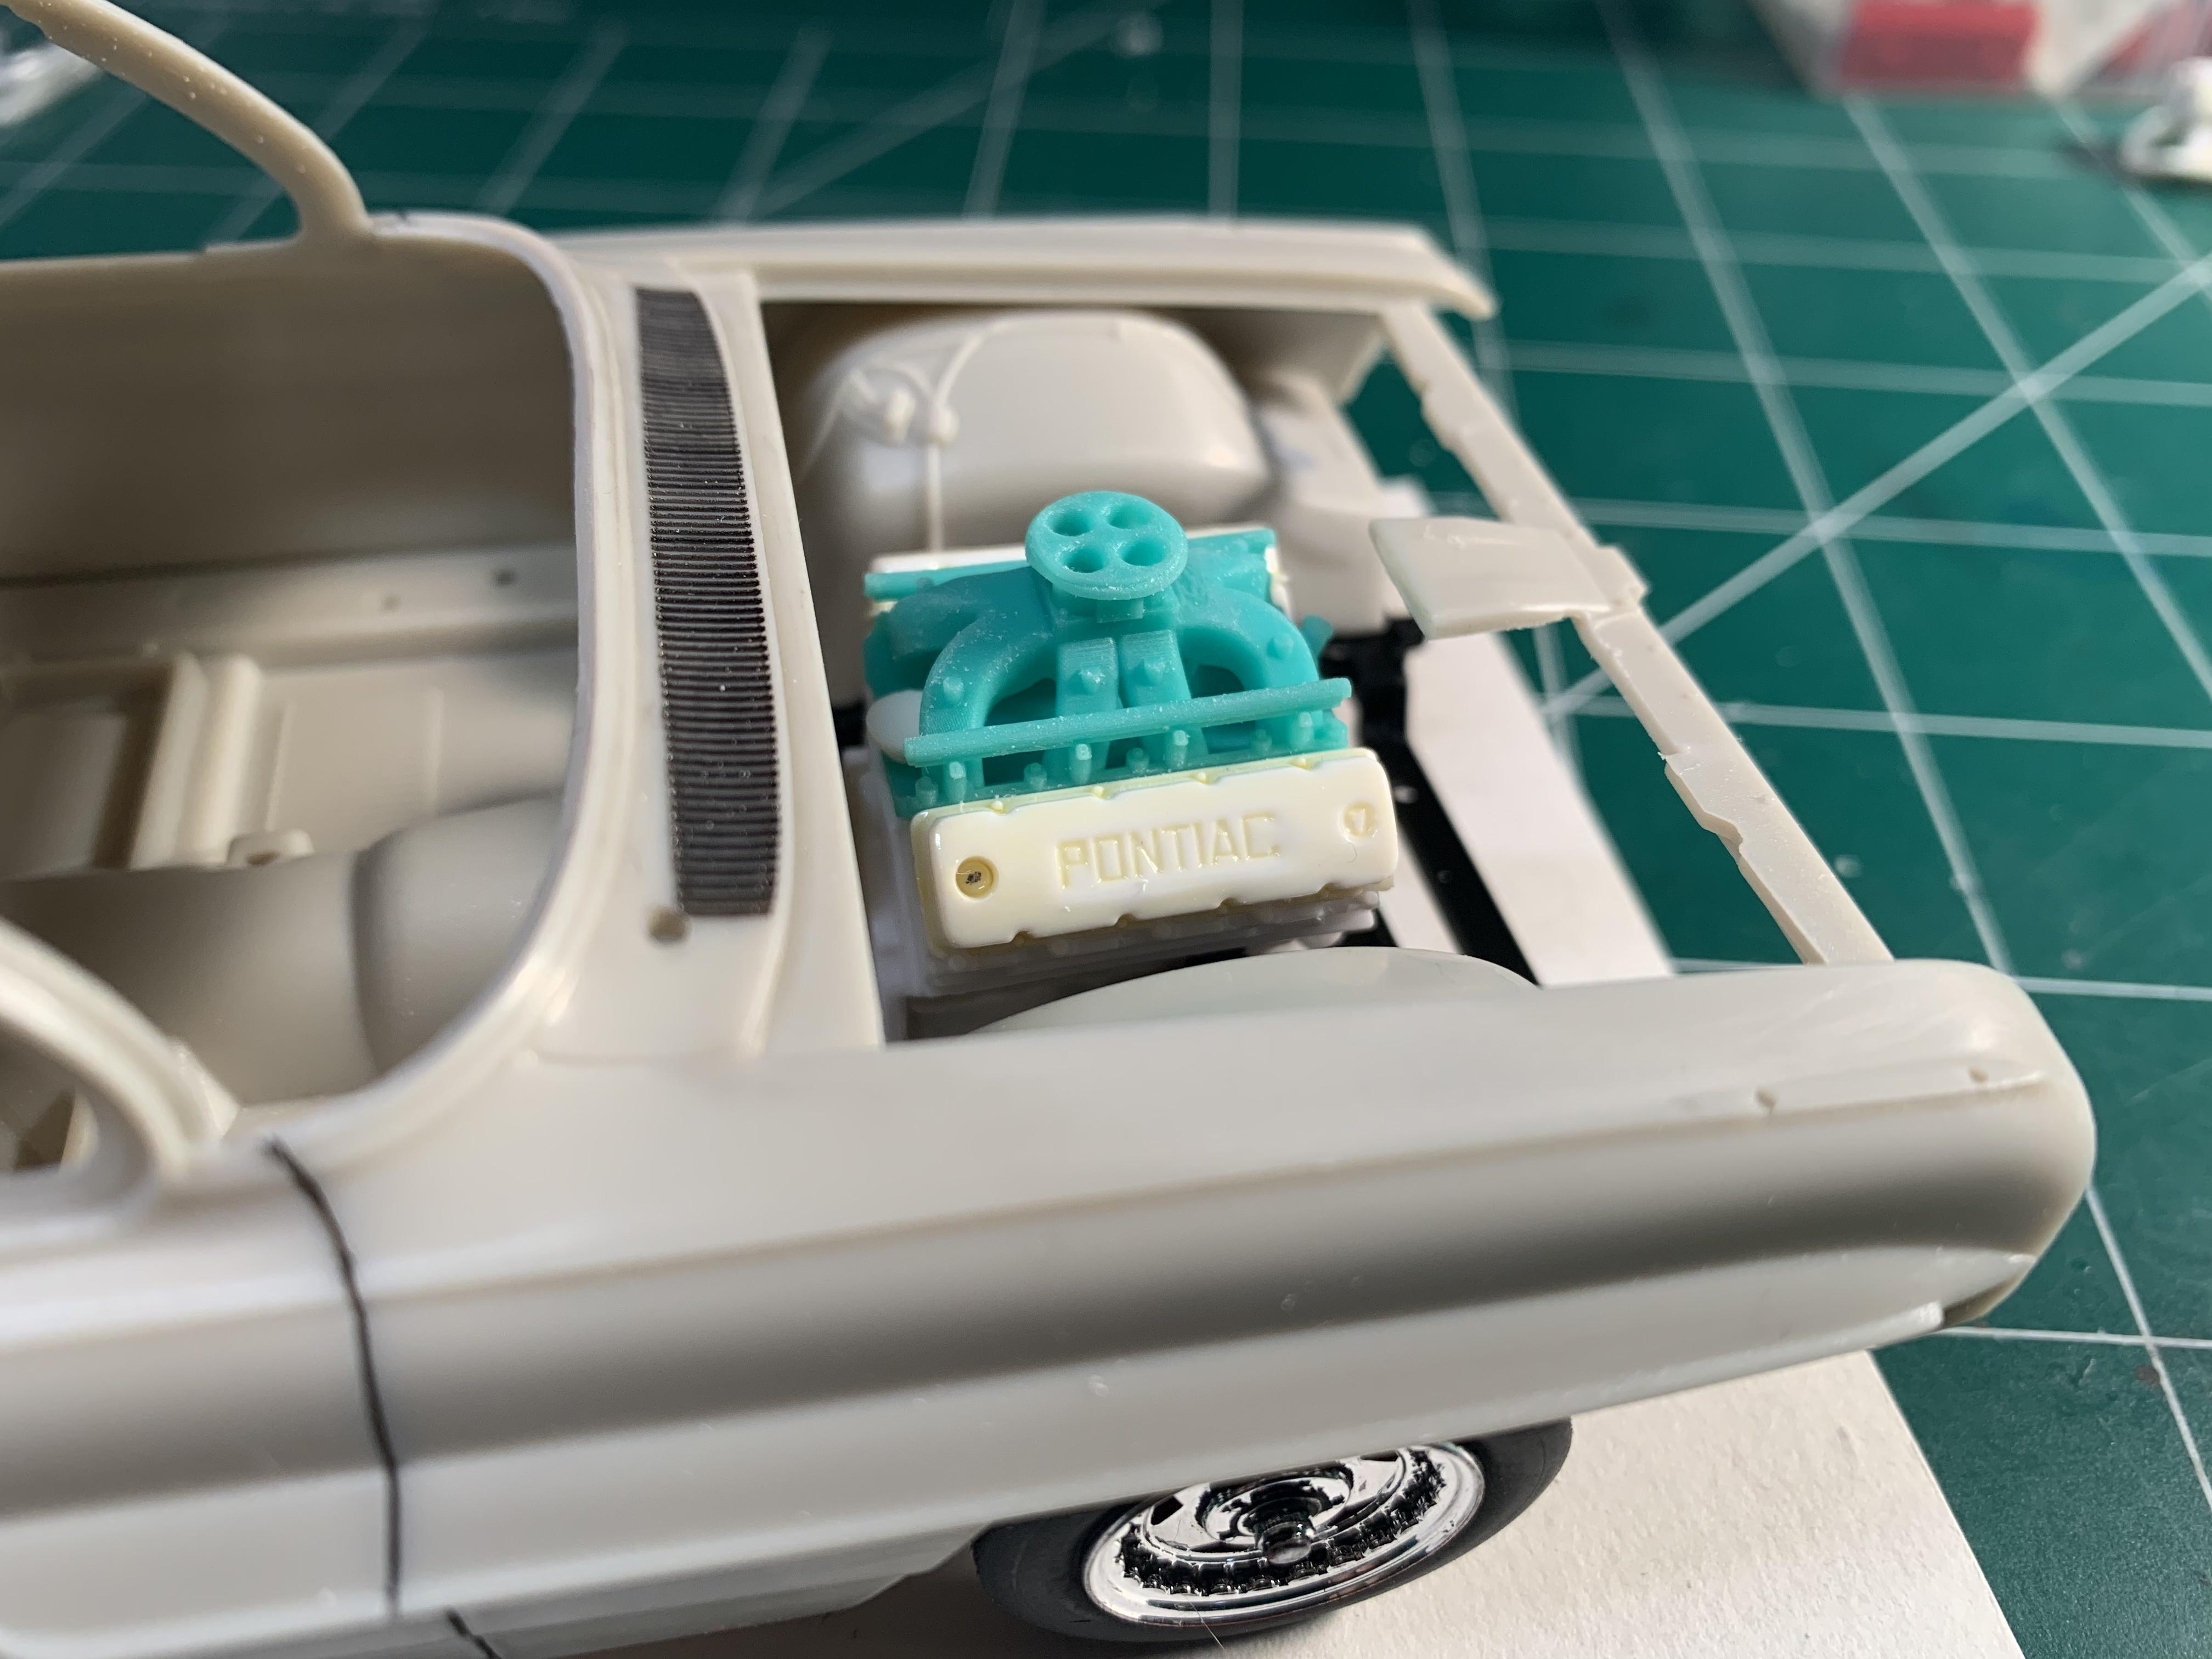
Was chipping away at the Pontiac today. Got the engine mostly detailed. I plan on adding all the braided fuel lines when its installed in the car.
-
They are from the 55 Chevy Sportsman kit. Im pretty sure the block and heads are too.
-
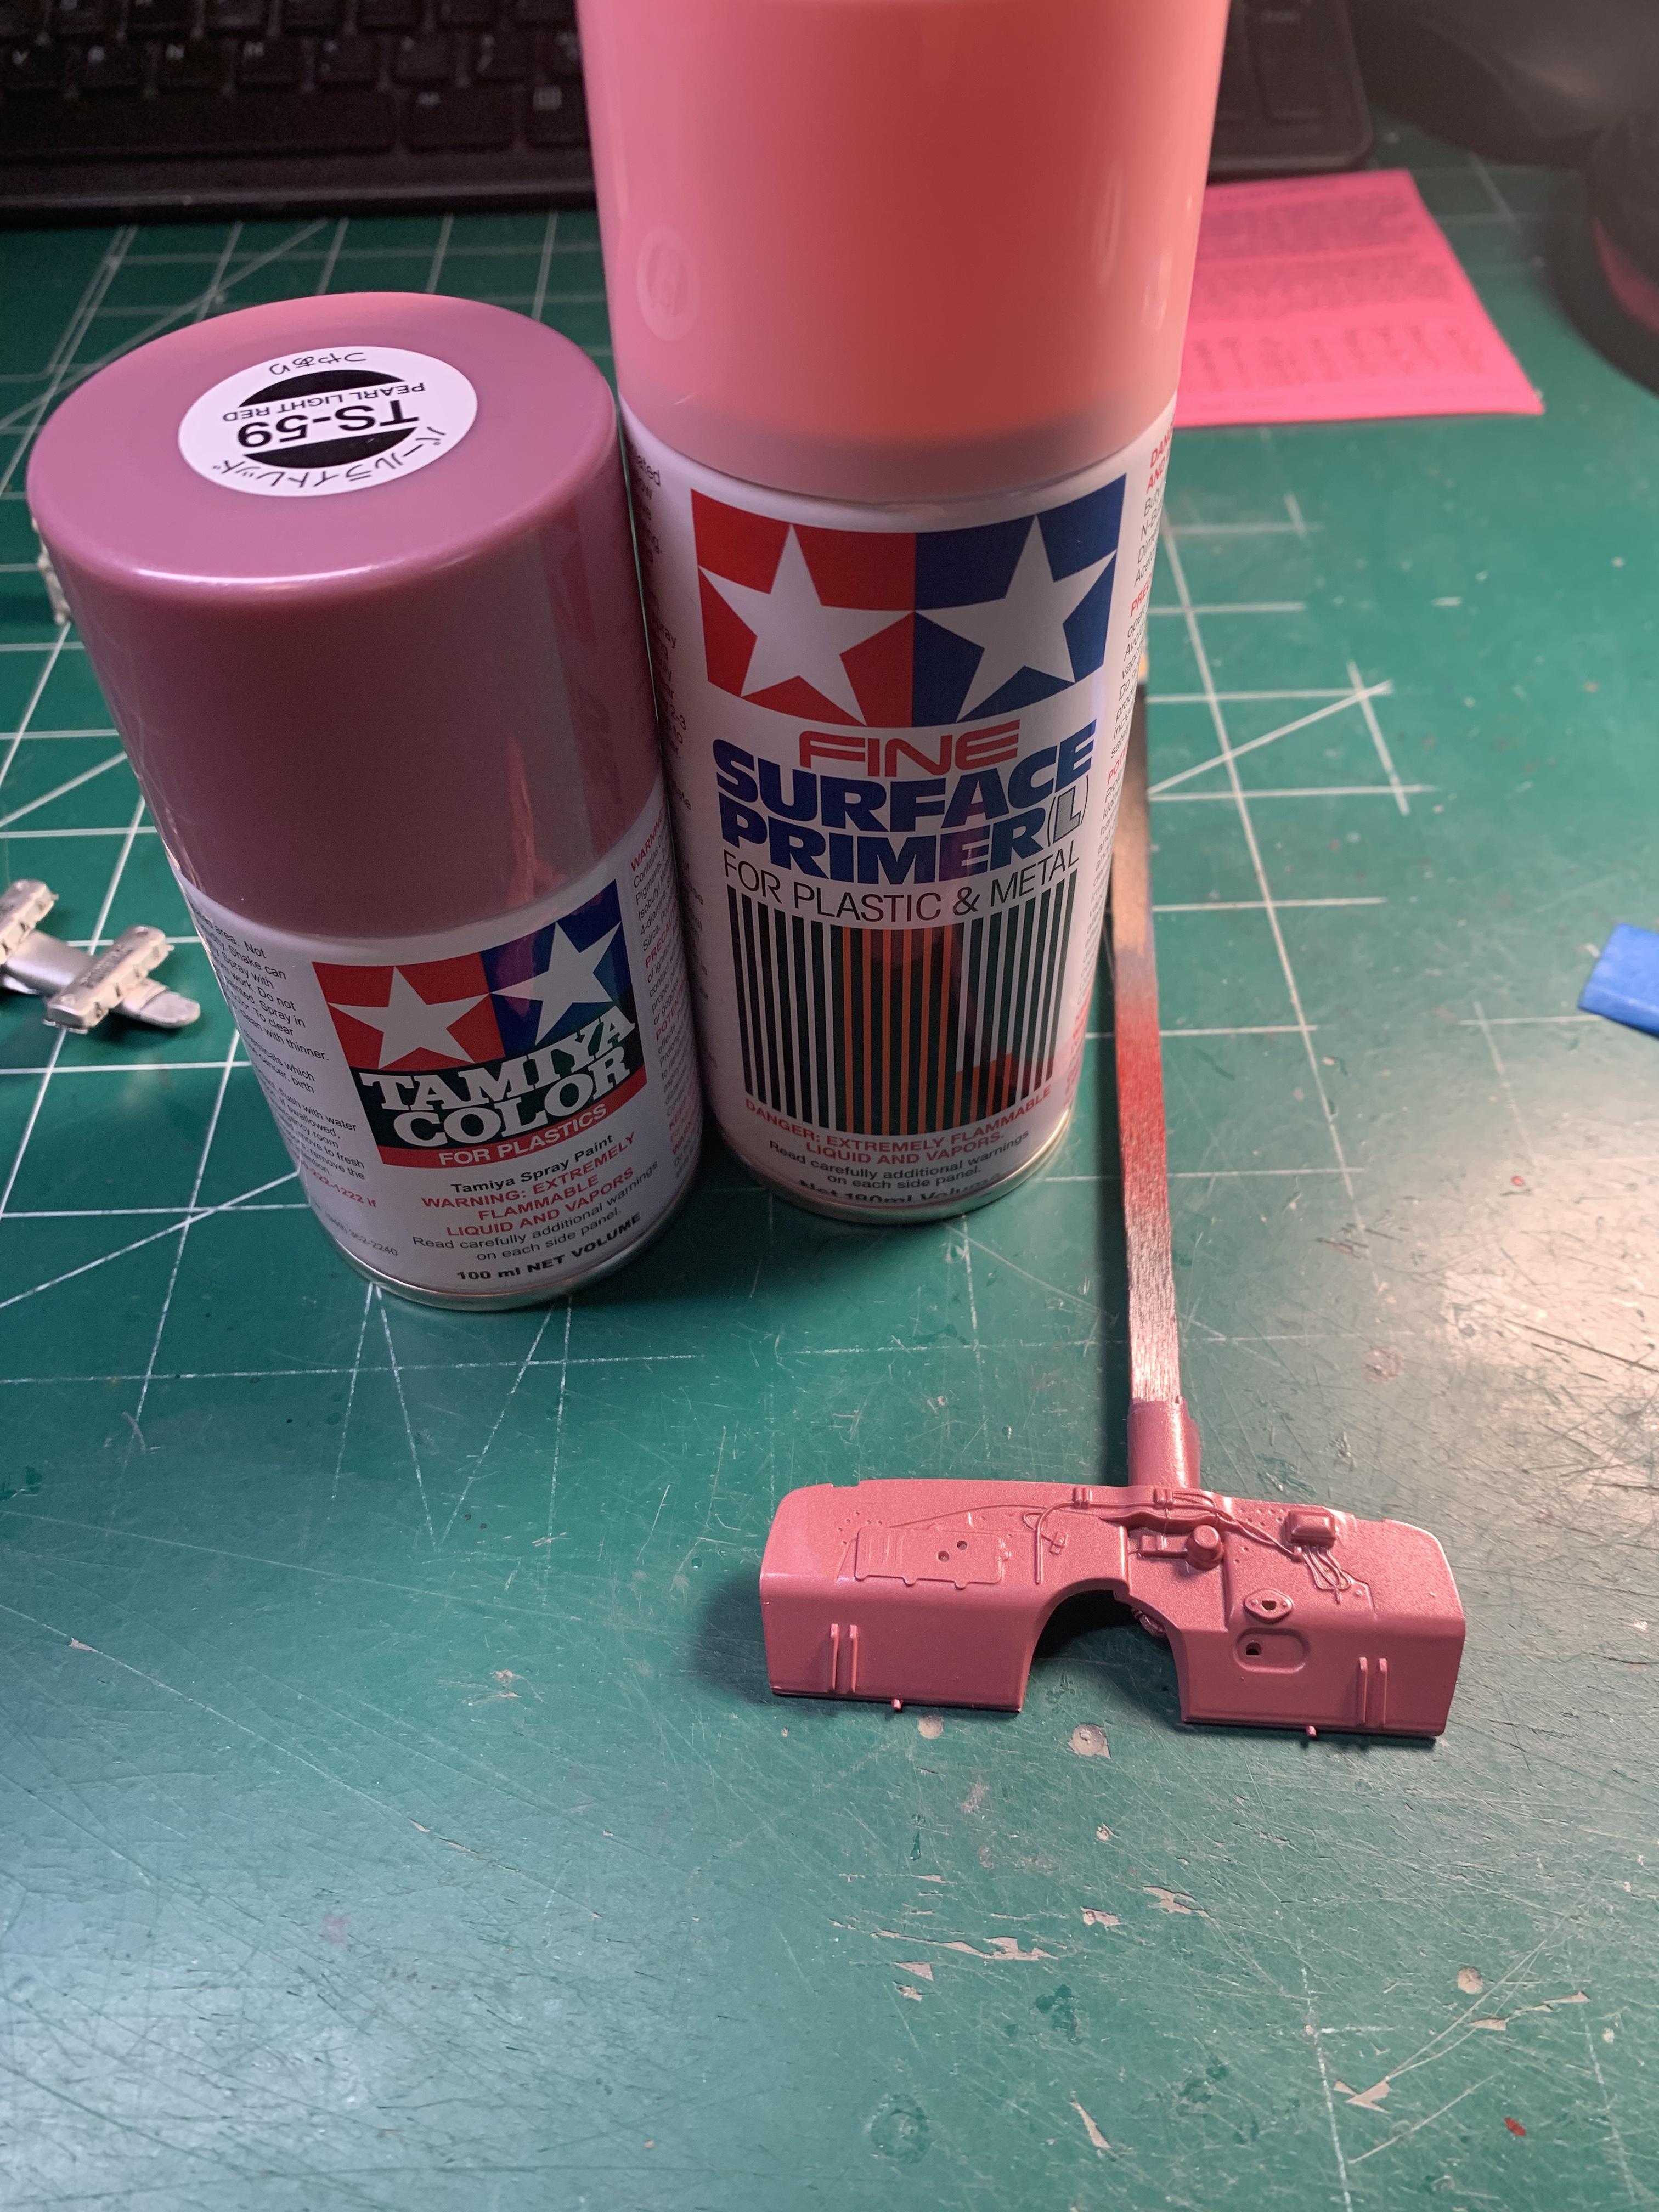
Also tried some paint with a Tamiya primer I’ve never used before. I laid down some pink primer on the firewall, and then covered that with Tamiya TS-59 Pearl Light Red. Im really liking the results. Looks like a cool color like the car that inspired the build. With all the trial fitting, and re checking of parts fit, it seems paint is a while off yet. But im hoping to get the body shot in a another day or two.
-
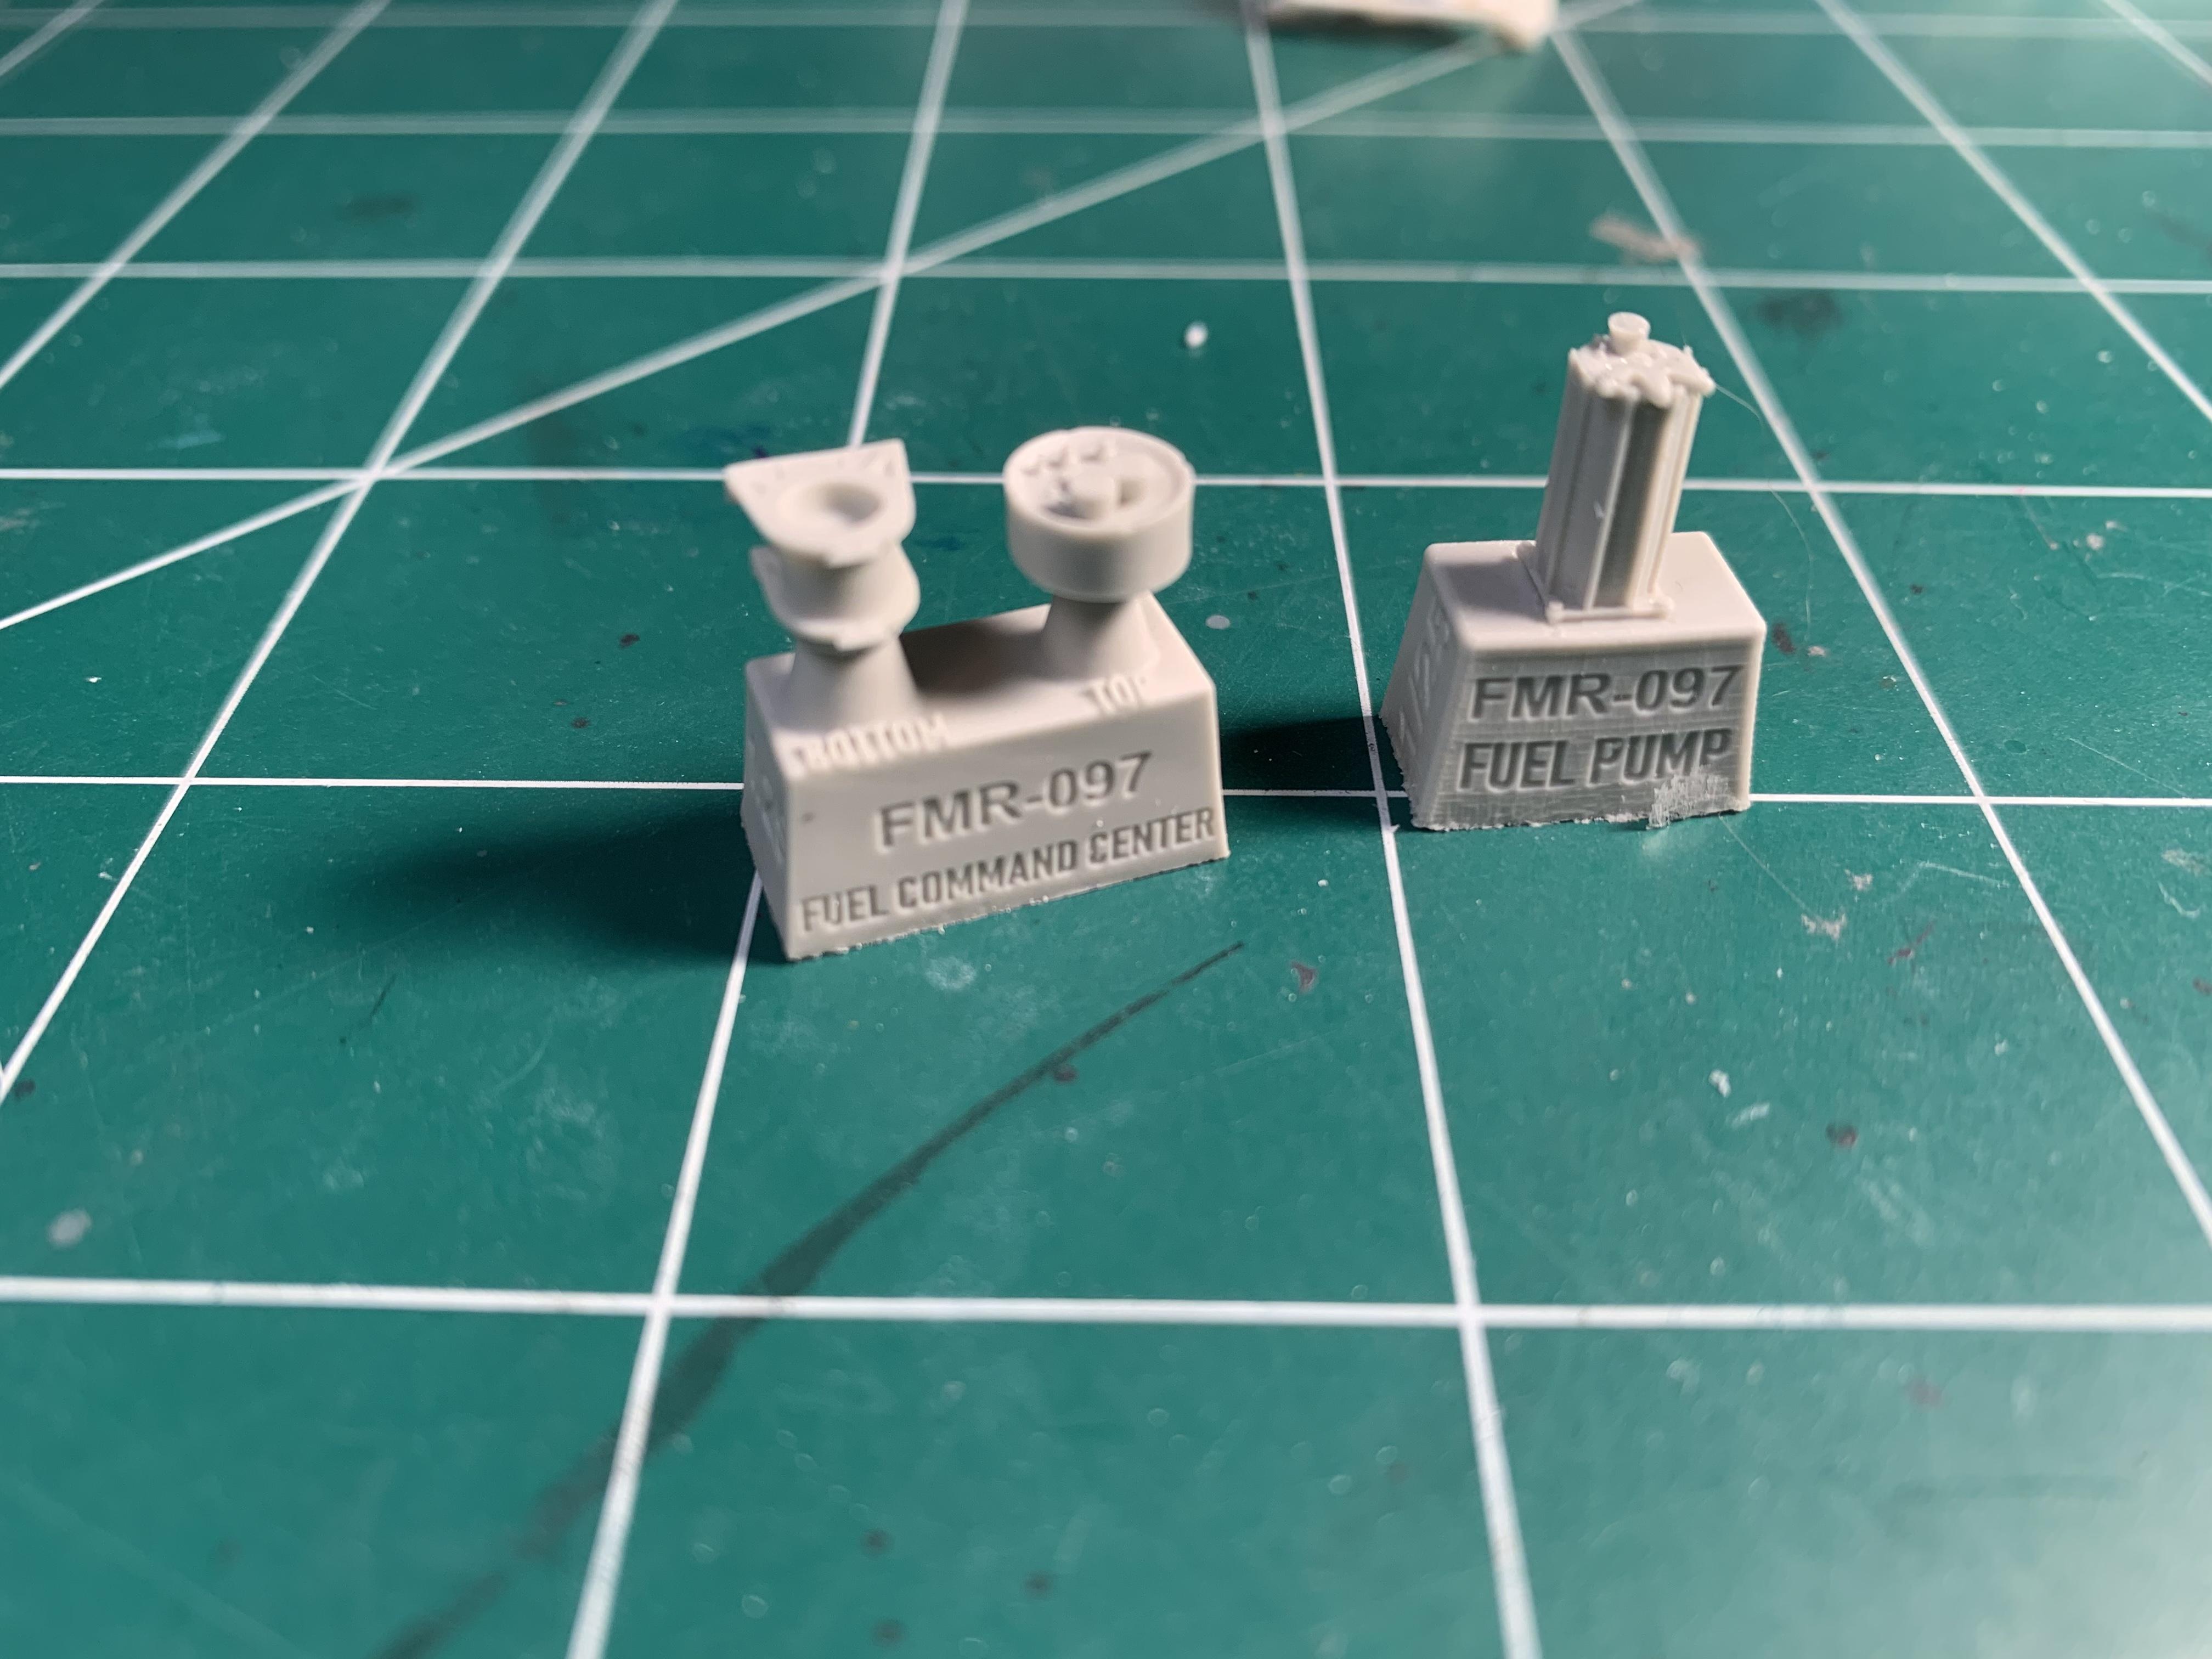
A small update, but still progressing. I changed my original plan, and decided that the Ventura will have an EFI engine. Joseph at Fireball makes an excellent casting of the FITech fuel system parts. So I decided to put them to good use. I took the cast rails off of this manifold, and added some 1/16 aluminum tube for the new rails. Now I wont go nuts trying to drill the tiny holes in the original rails, when its time to add the braided line, and fuel fittings. Since this manifold has a throttle body already, i wont be using Fireballs body on this.
-
I like this.
-
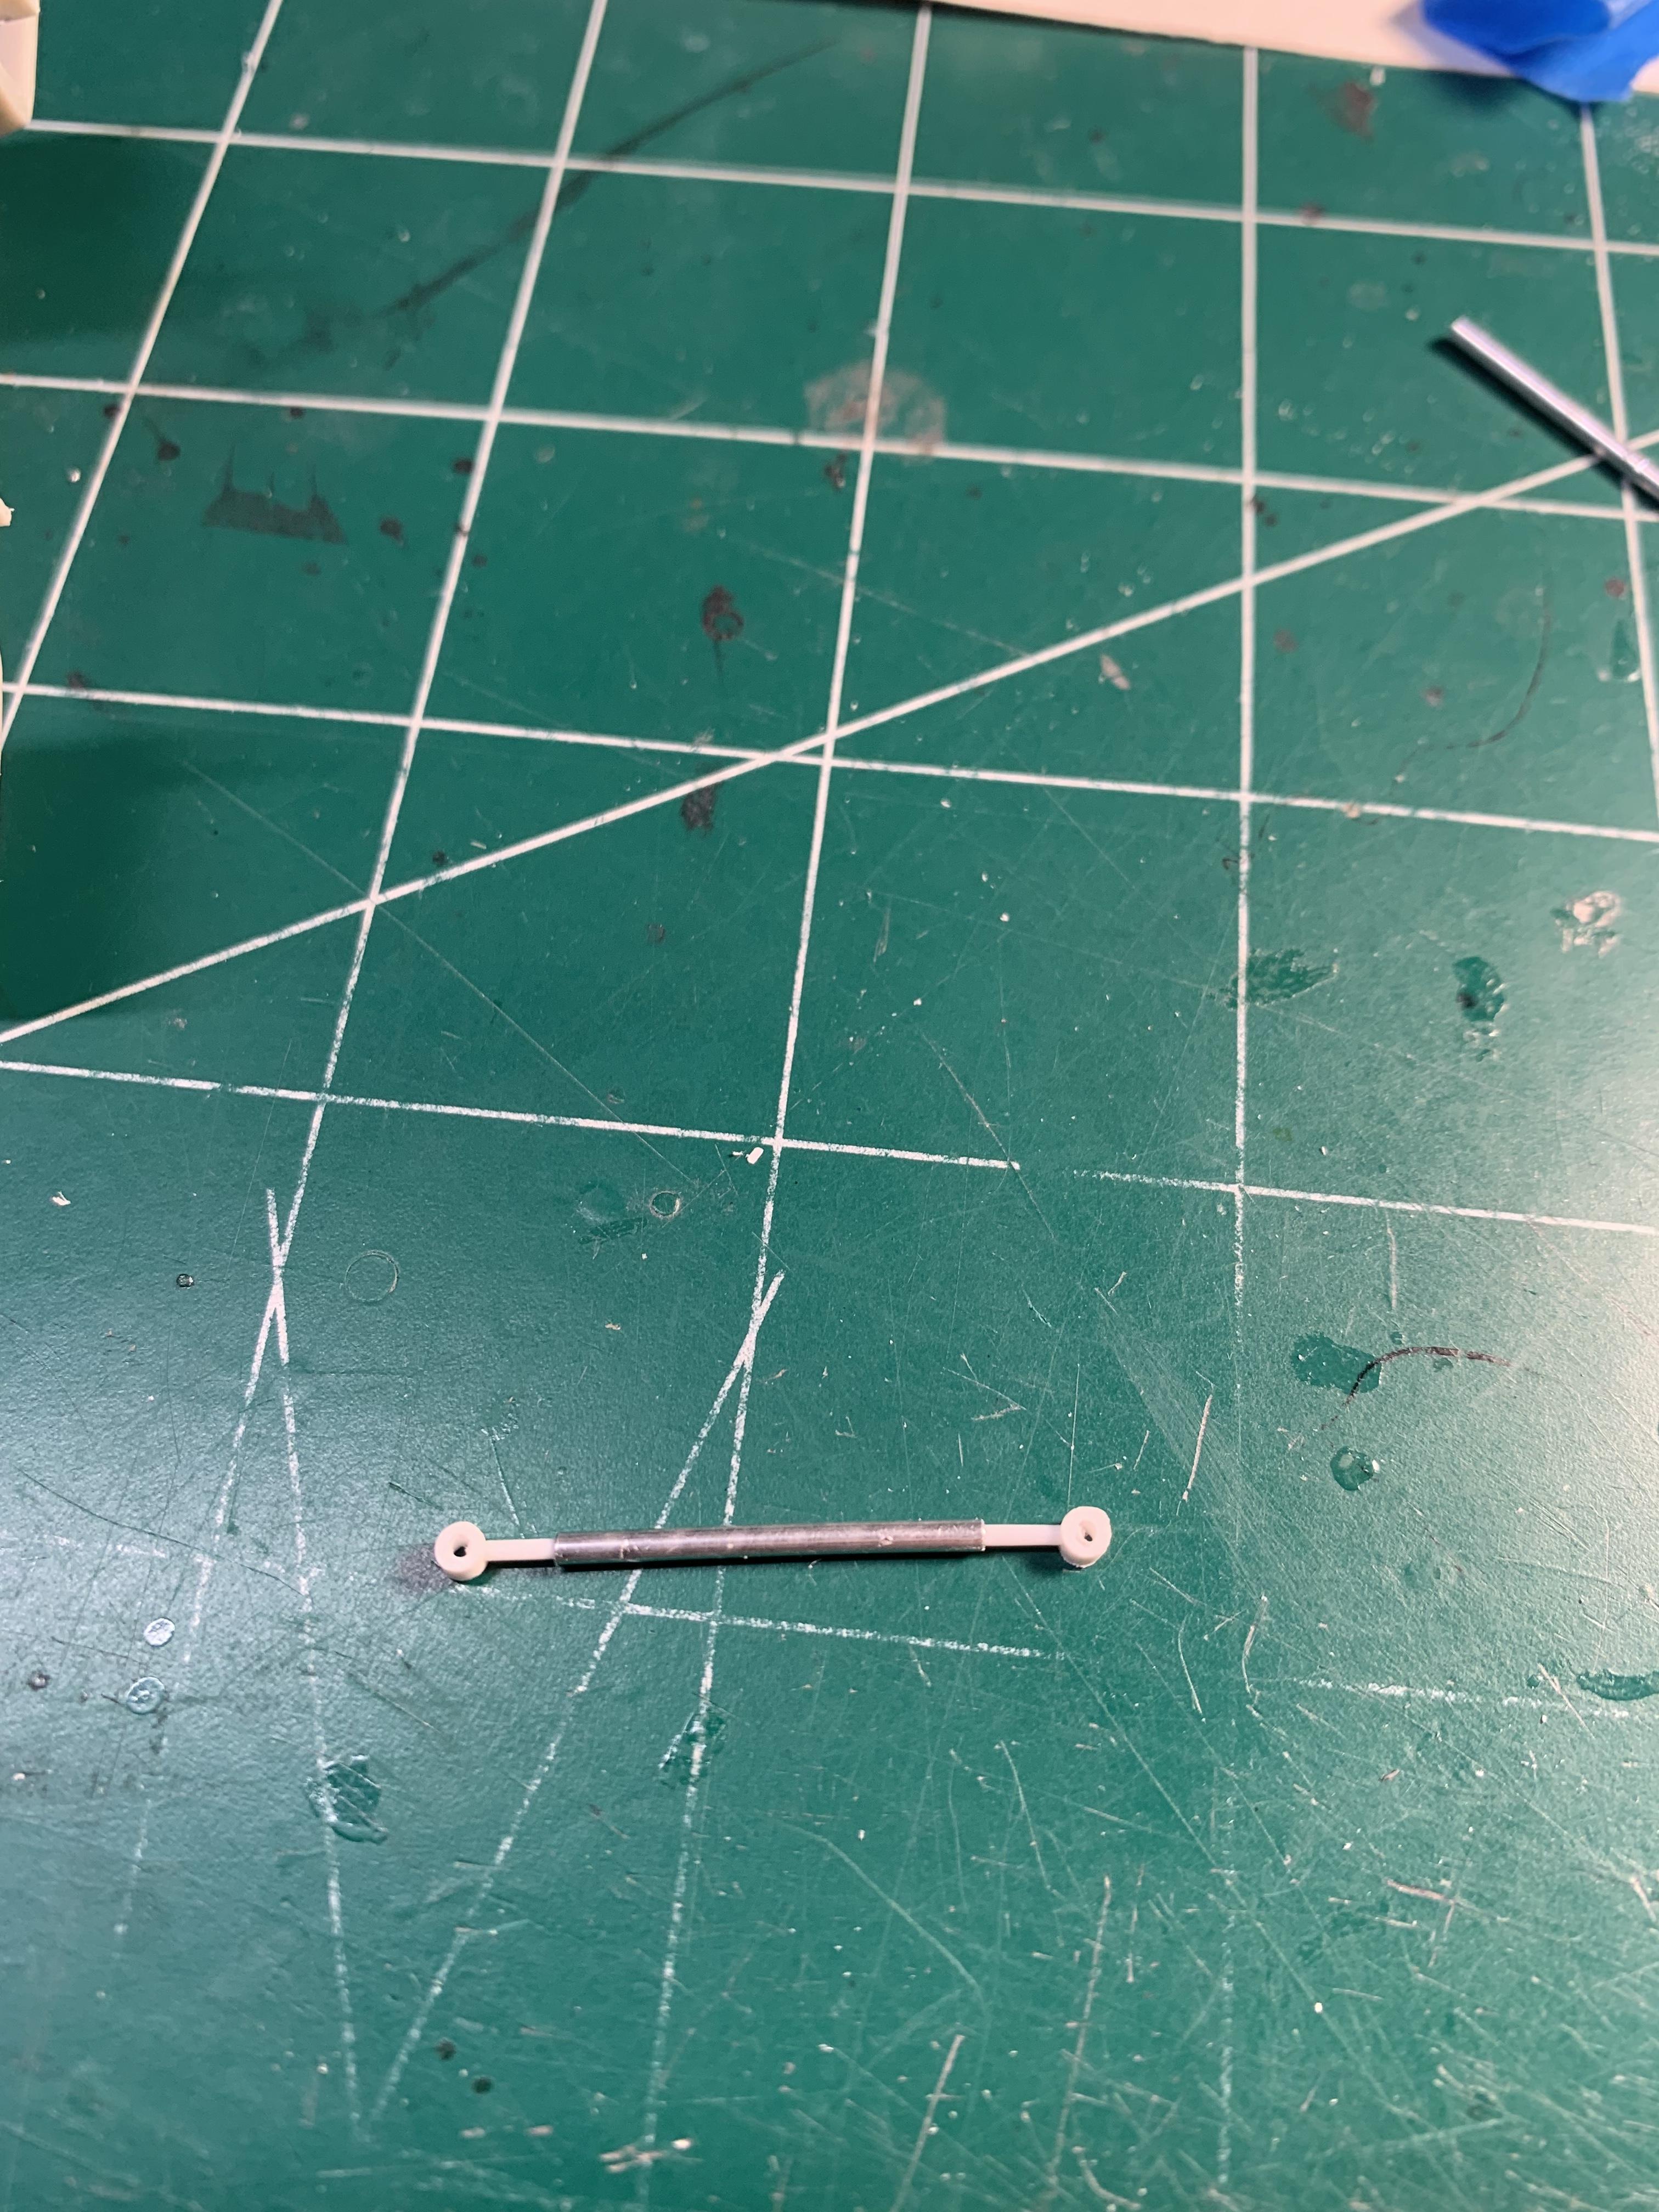
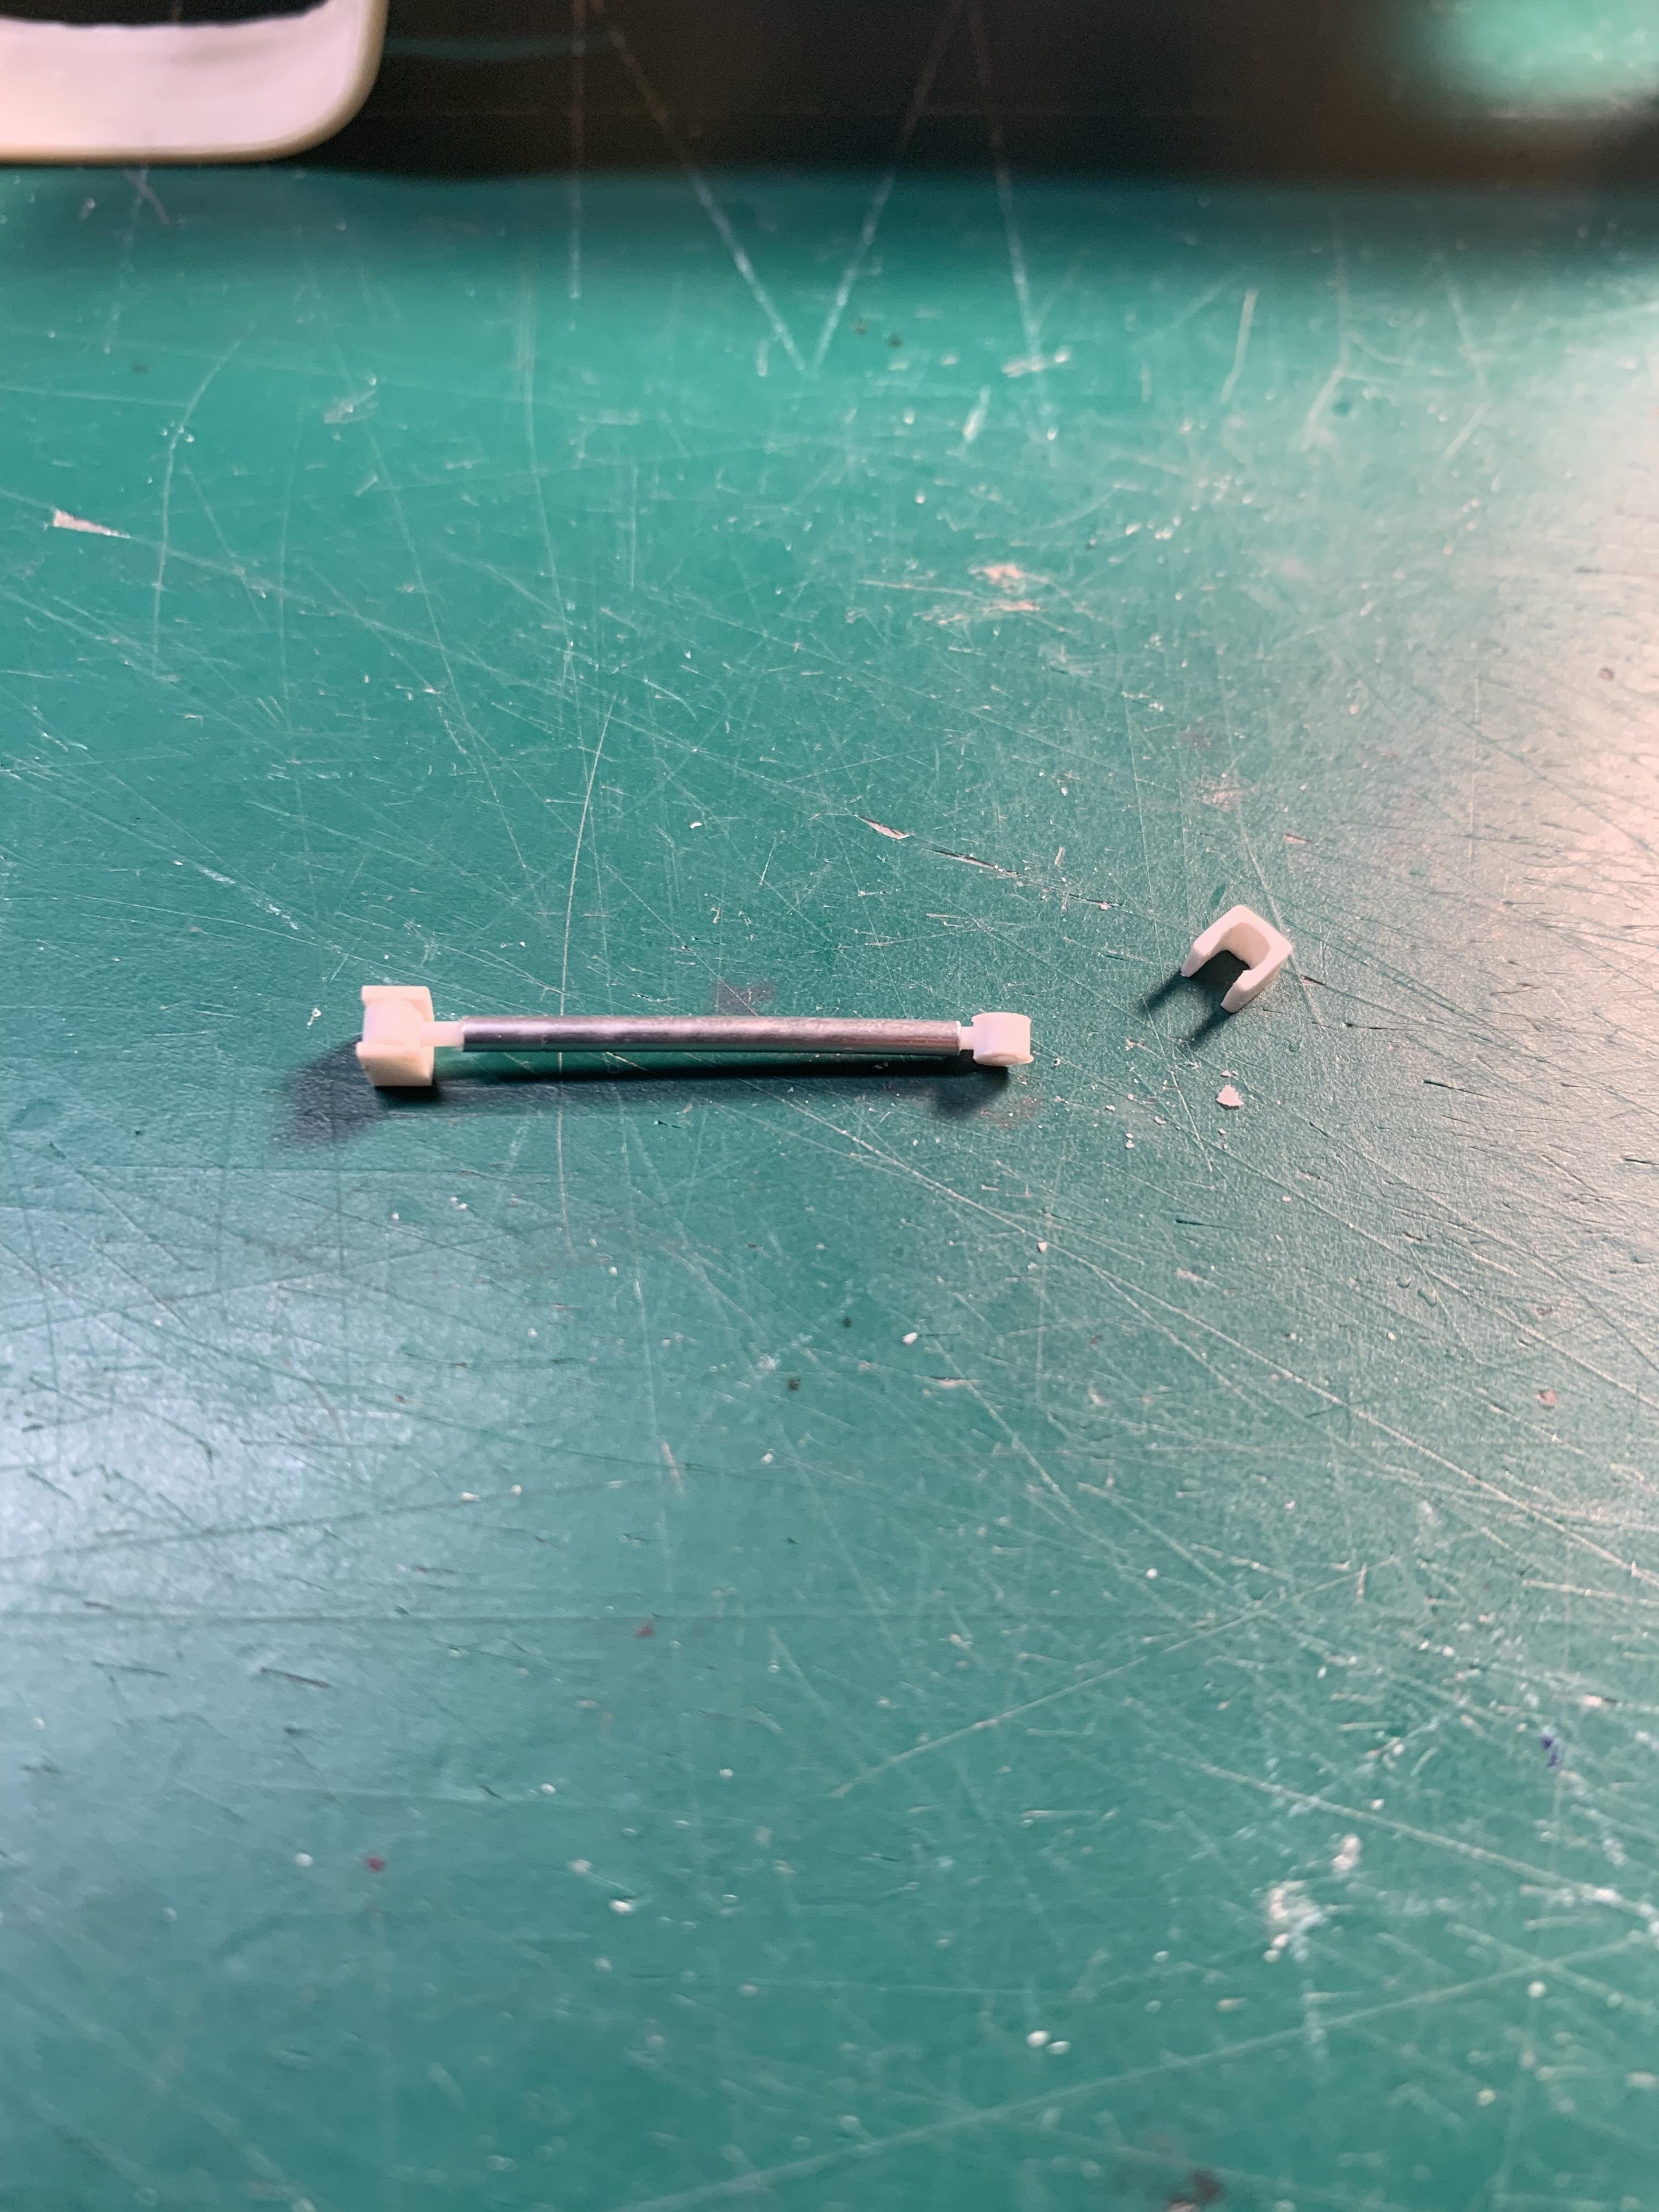
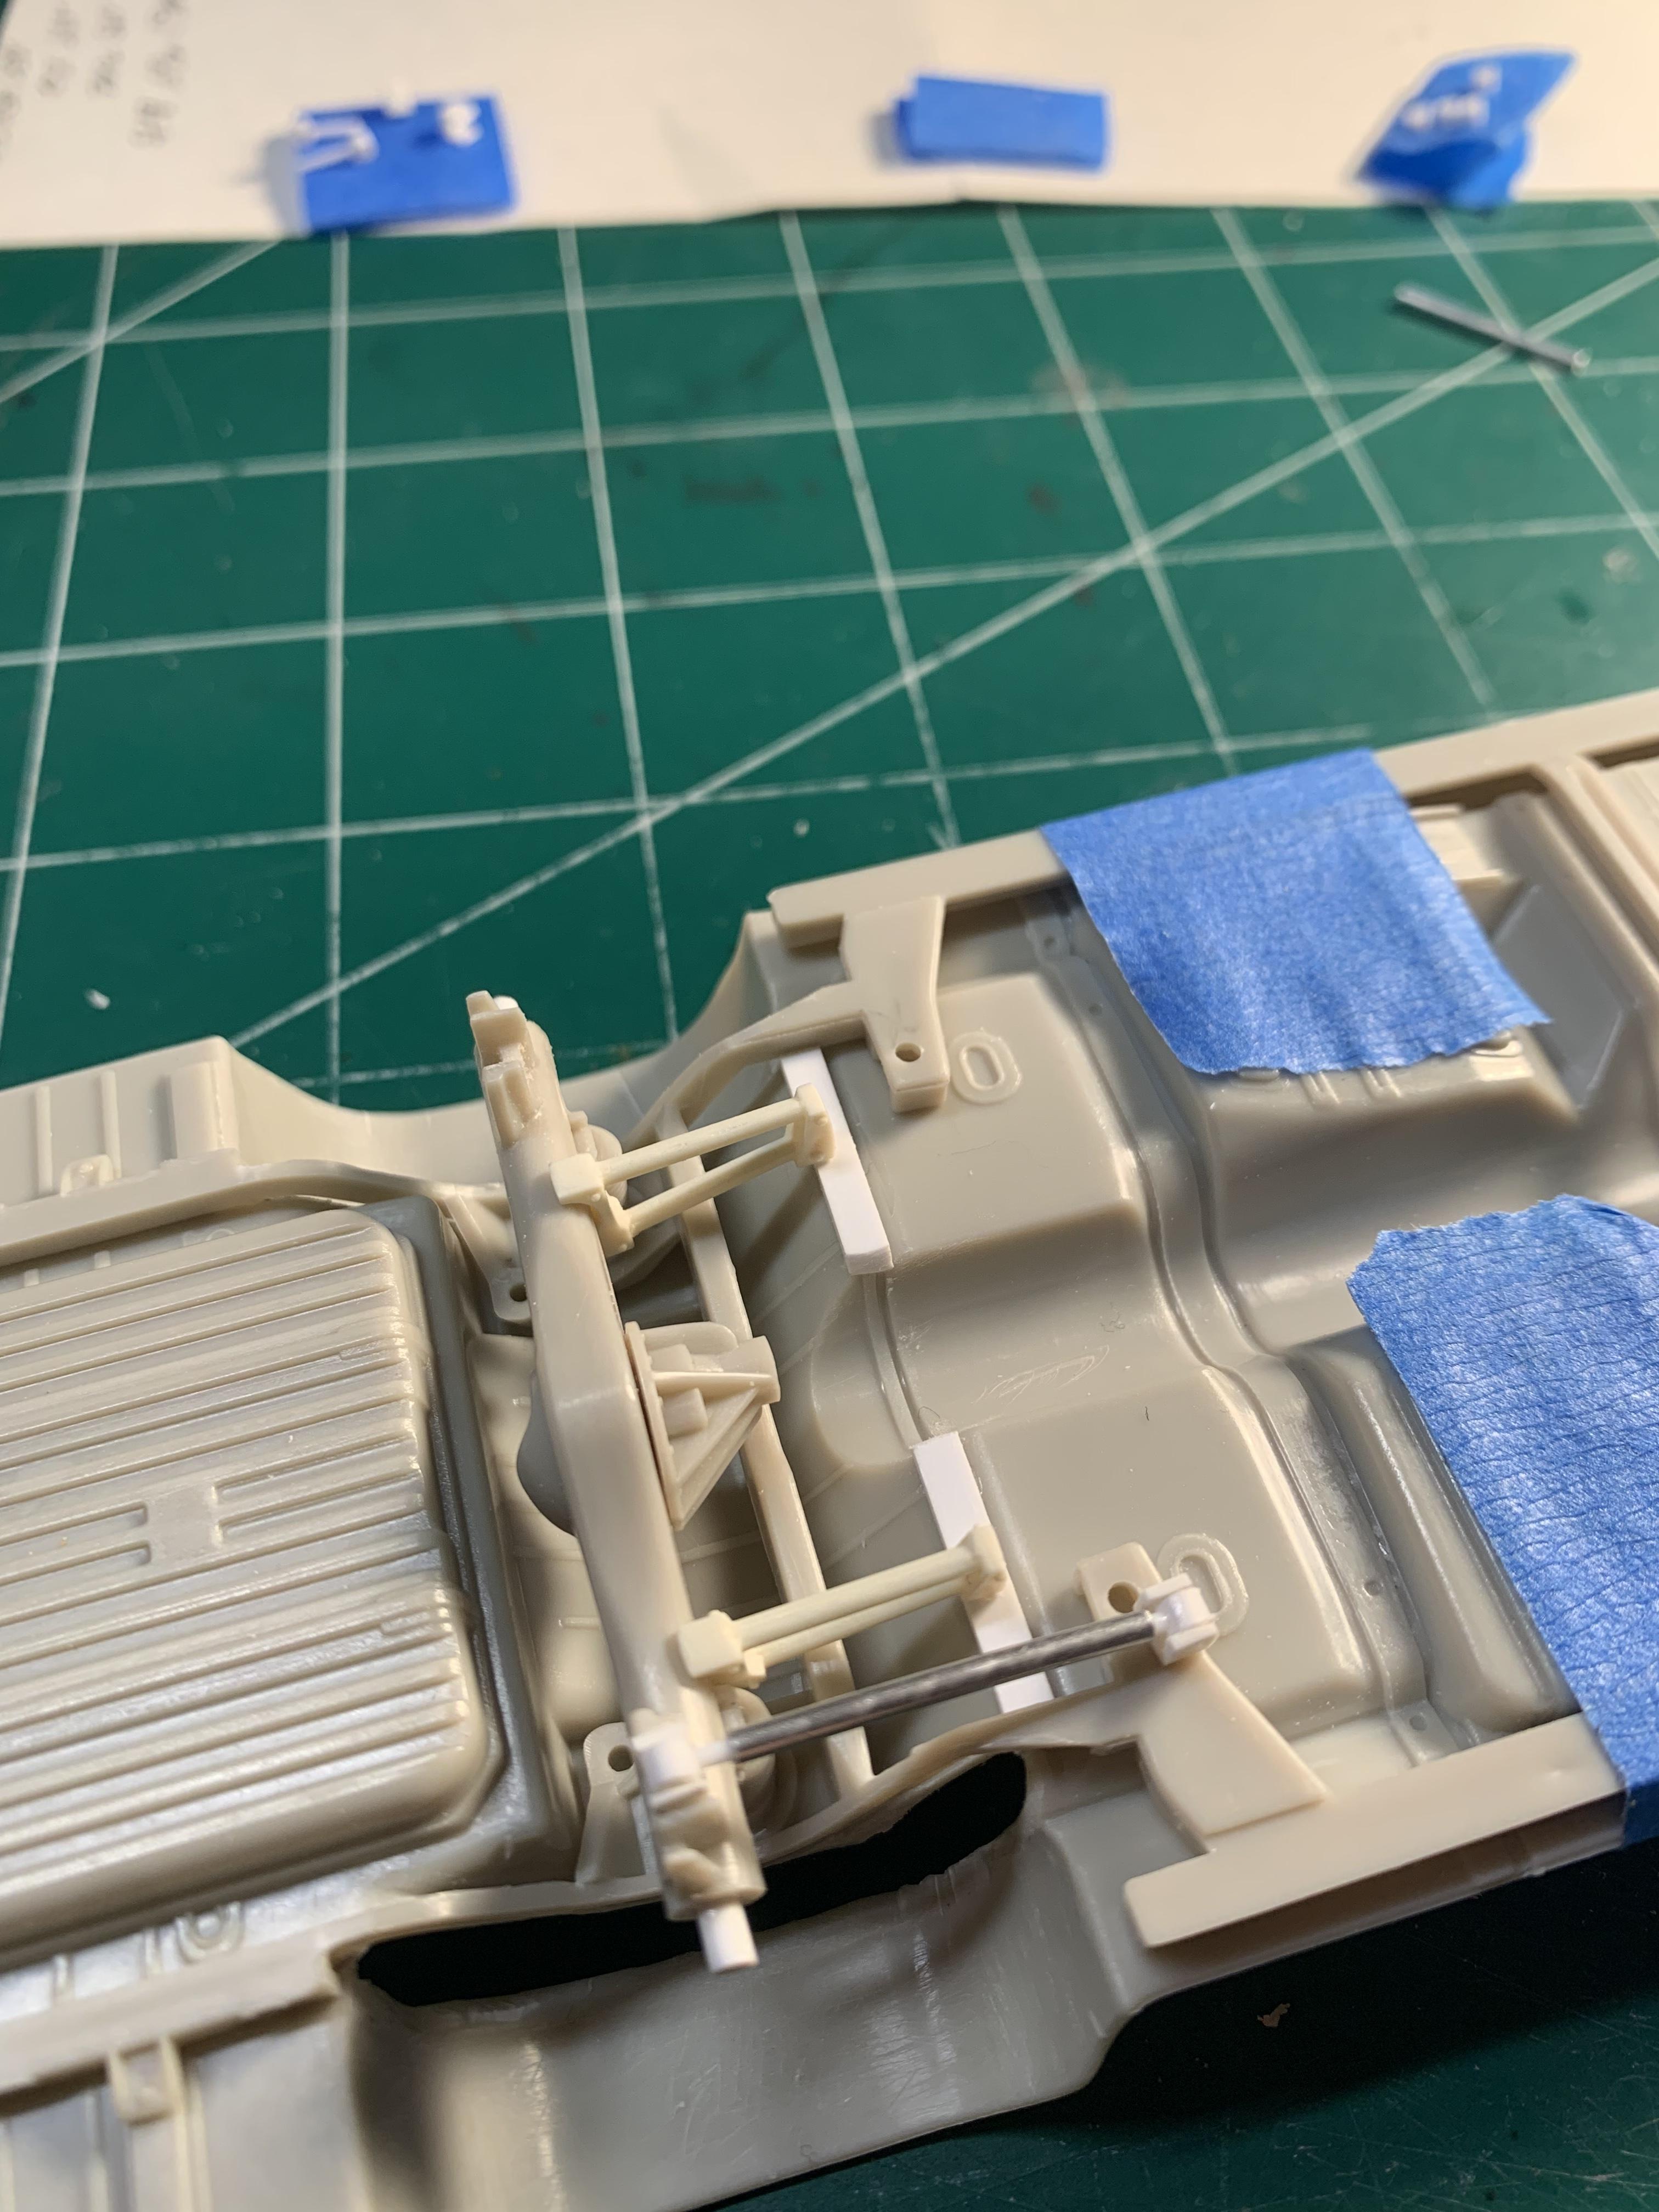
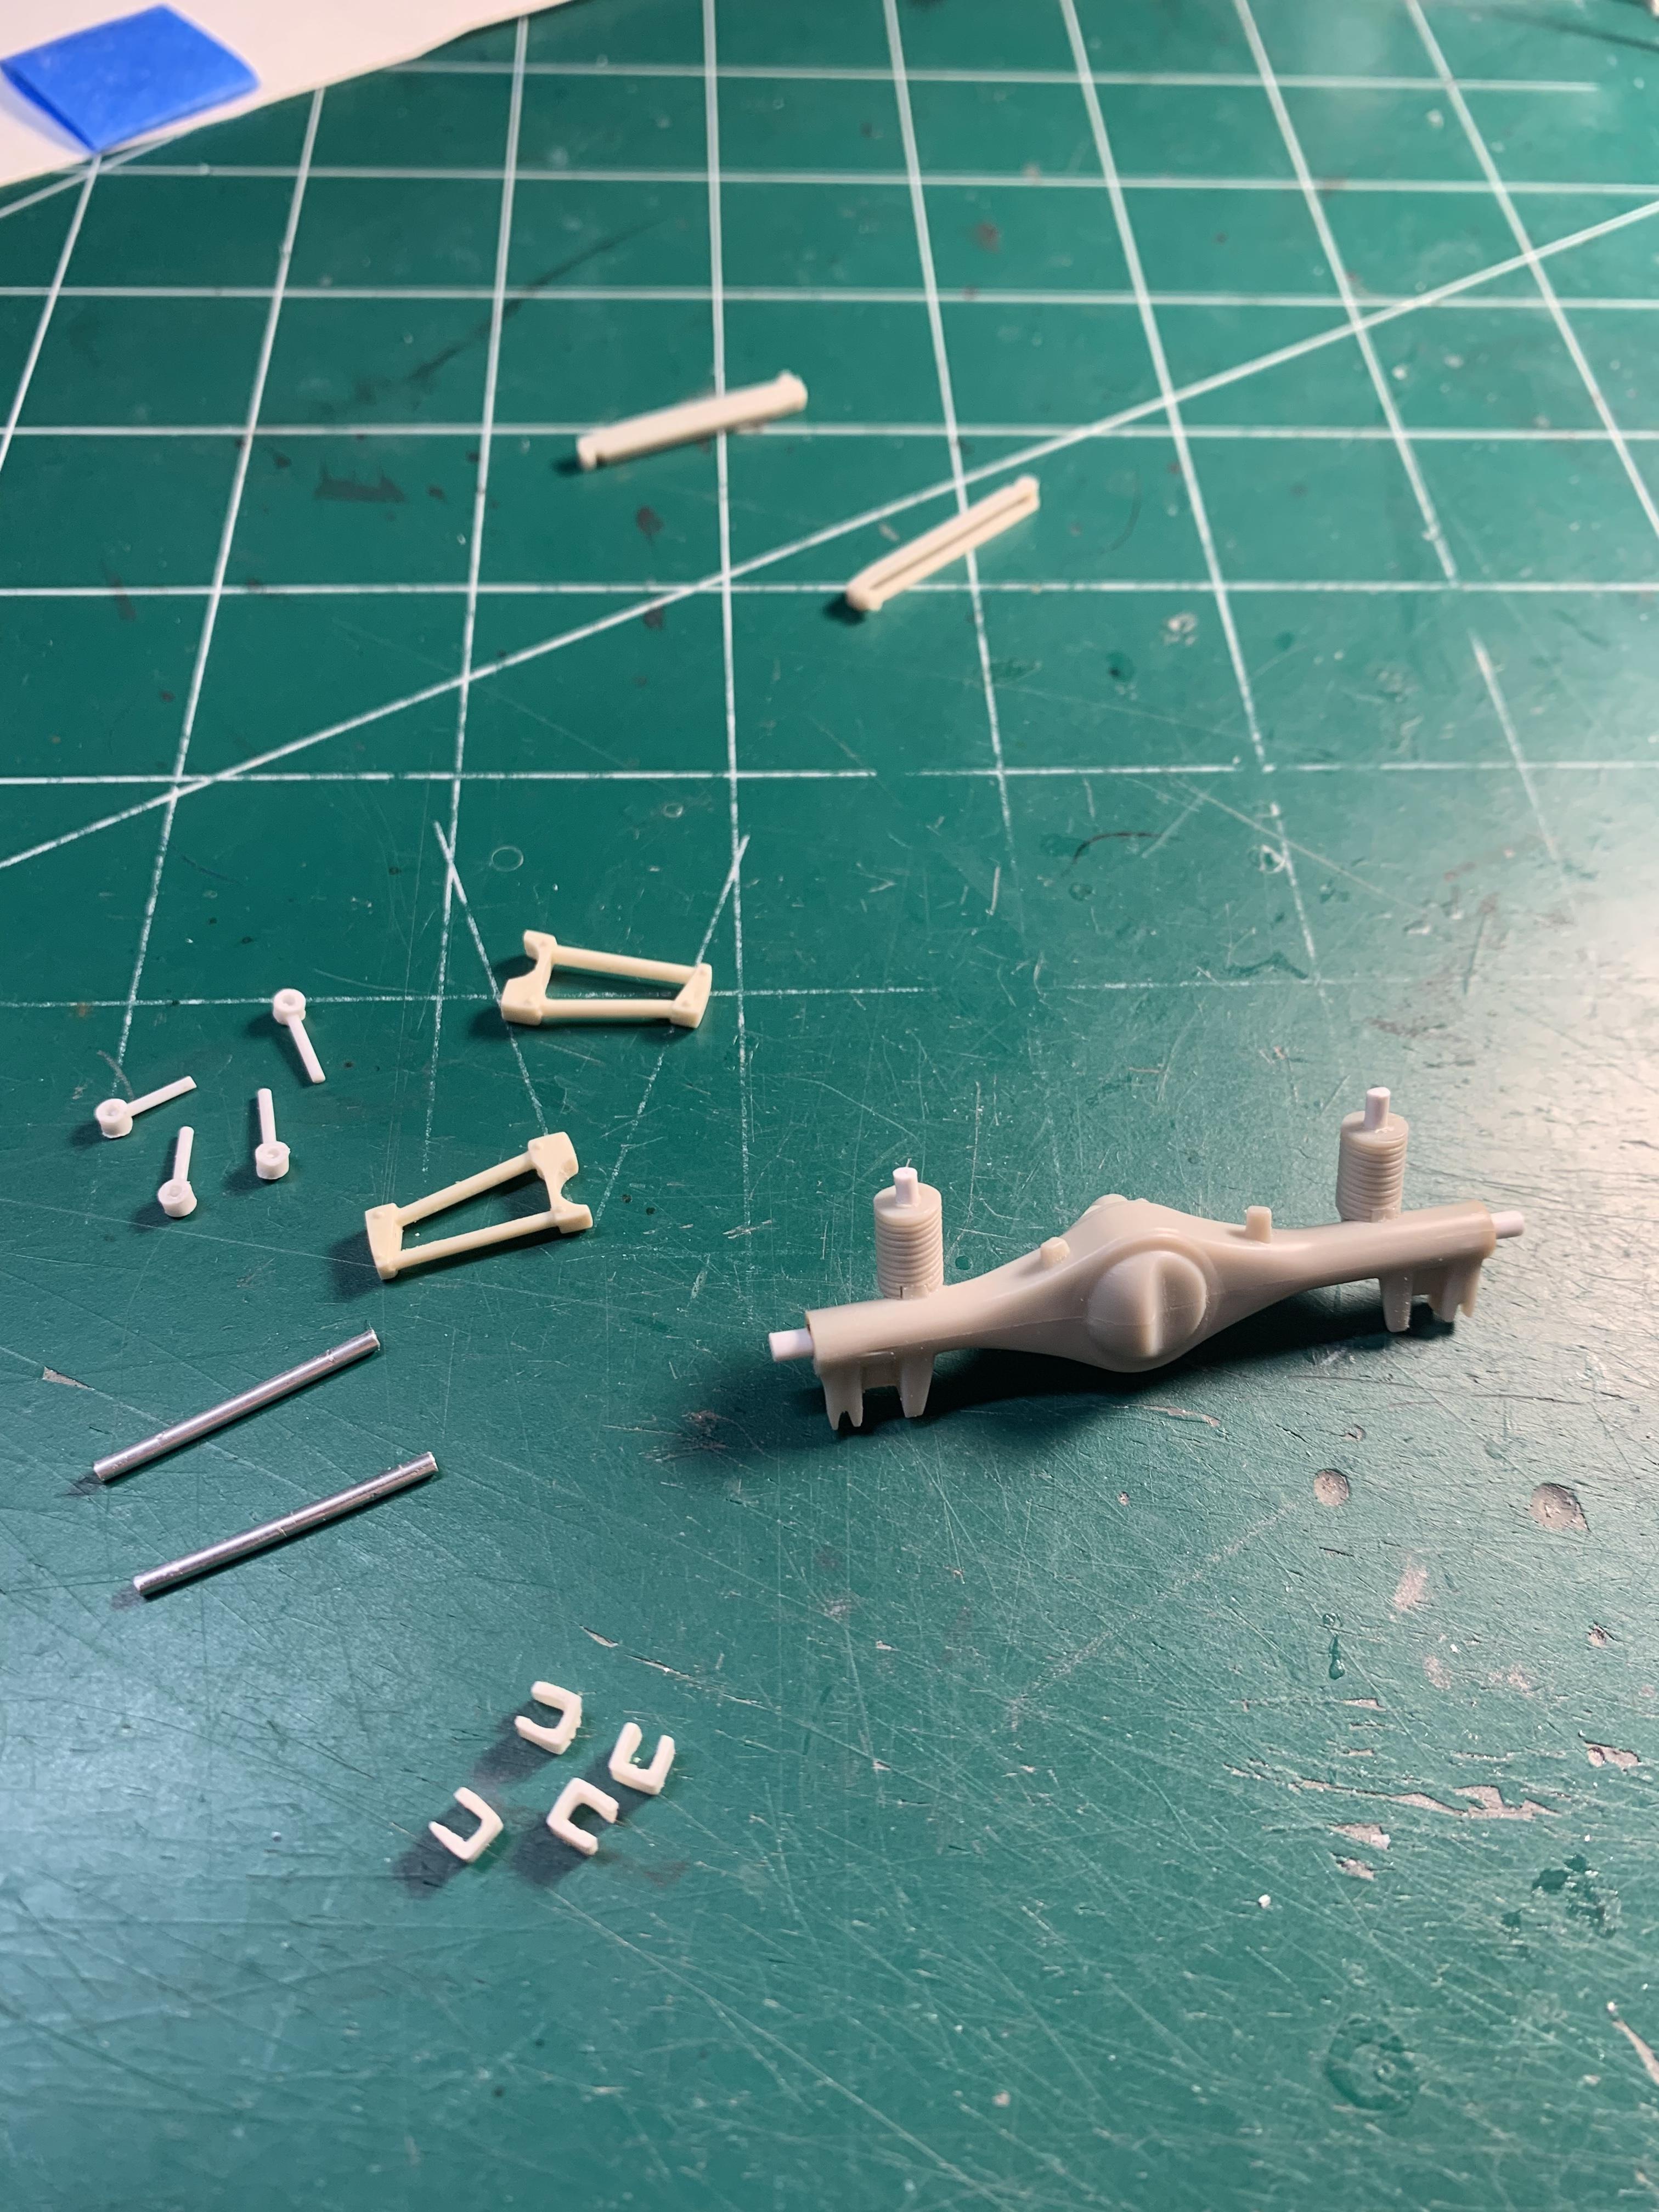
I have to wait for some aluminum hex jam nuts then I’ll be able to clean everything up, and tweak it all so it fits nice. I do have some now, but they are all already painted red and blue anodized, for fuel fittings, so I got another set coming from ProTech. I’ll have to fill the holes in the frame, where the stock bars would mount. Just wanted to upgrade the rear so it doesn’t look totally stock.
-
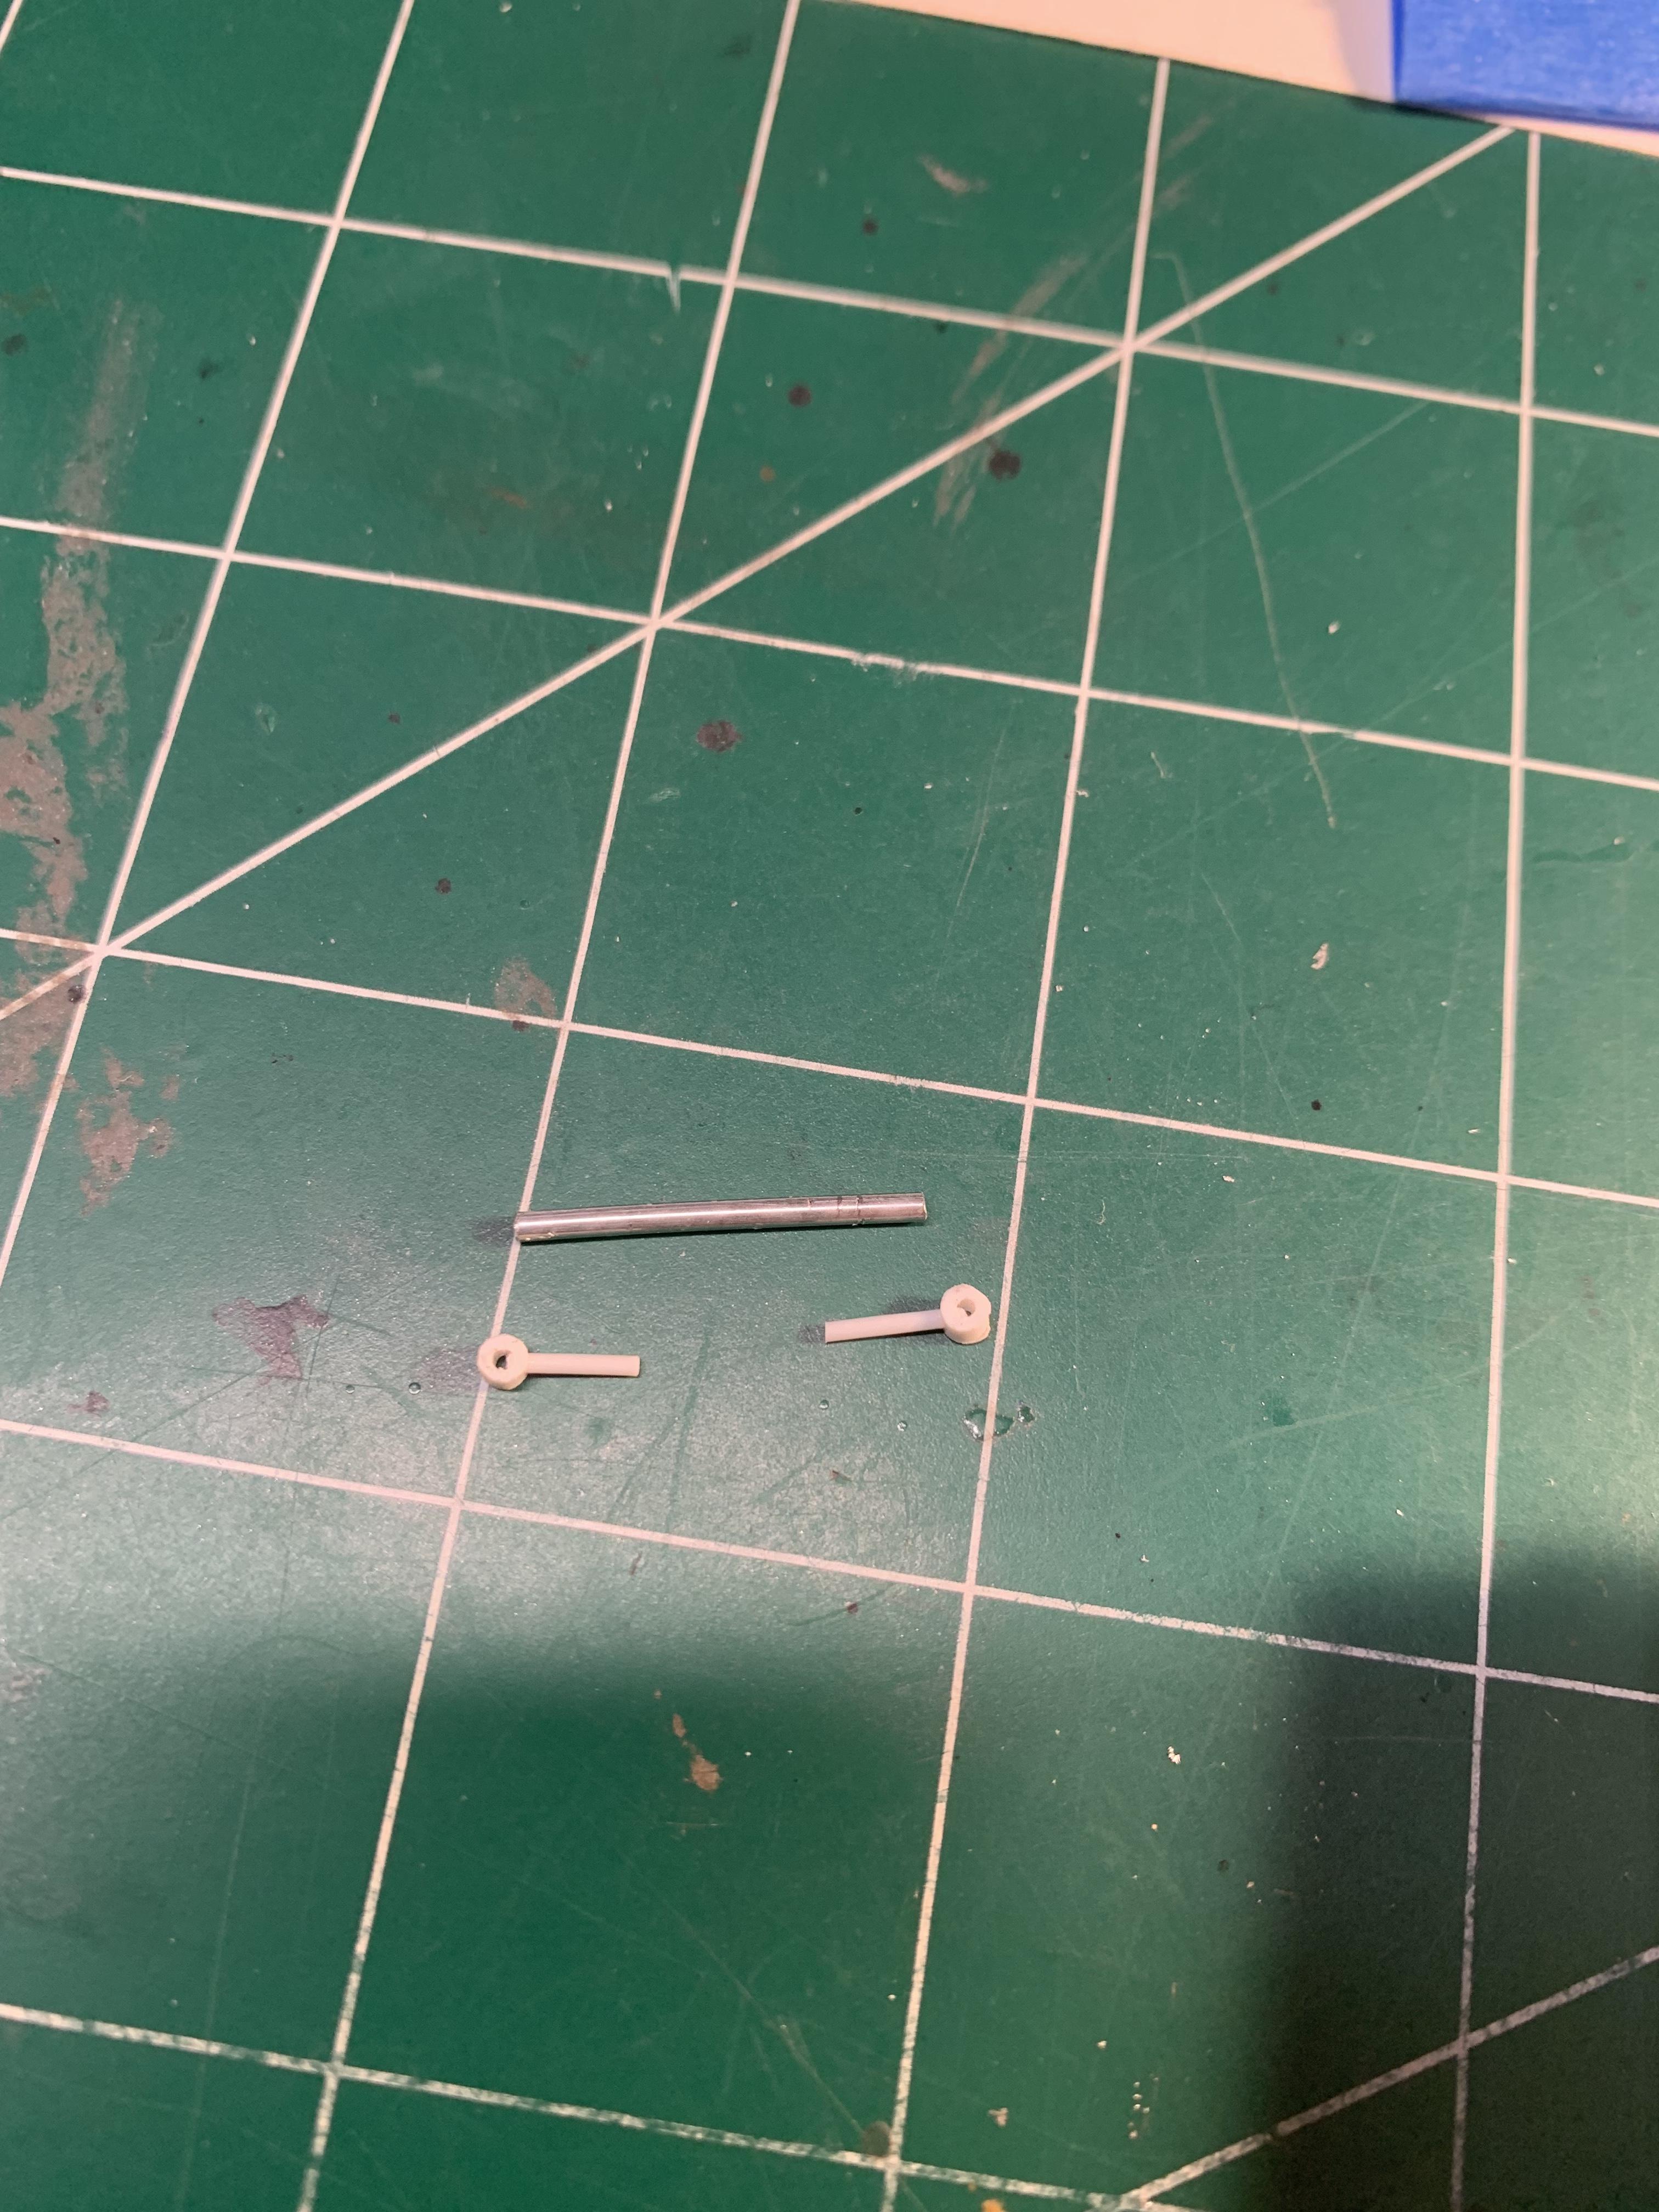
I got two resin adjustable bars from the stash, and cleaned them up. Then I used some various Evergreen rod, and tube, and square tube as well. Also some aluminum tube to make the adjustable bars, with heim joints.
-
It’s been a while since I even looked at the Ventura. I decided to mess around with the suspension. I just didn’t want it to look totally stock, in the rear department. The flimsy pressed factory control arms just won’t cut it, so I made a more beefier, adjustable set. May not be correct to a real race car chassis, but it’s better than stock.
-
Lol… hot Canadian men, or just mediocre Canadian men? I can move to Canada if it’s the latter.
-
Thanks. I get ya! I kinda felt a little weird asking, because I wouldn’t want to start a debate and have a thread locked. “Models” is a pretty broad term to be searched by Google. Just last night, my wife and I were talking with the TV off, and we don’t have Siri anywhere in the house, and when we turned YouTube on, the suggestions were in relation to our discussion. But that’s where we are at today I suppose. Thanks again.
-
I understand that the rules on this board are there for a reason. But what I don’t understand is why do some of the ads on this board conflict with the rules. Example: Donkeypox is destroying America add seems to pop up regularly, conflicting with the “no politics” rule. But the one that really gets me is the ad I’ve seen with a woman with these large, rubber latex lips, that looks like a sexual device. I must have a dirty mind to think this, but I just think about some of our younger users on the board viewing this. I dunno, maybe it’s just me? Rant over.
-
Thank you for the replies. Much appreciated.
-
Calling all Super Stock gurus!
Brutalform replied to Oldcarfan27's topic in General Automotive Talk (Trucks and Cars)
Or as Mark stated. I was probably typing as you were posting. Sorry.