Brutalform
-
Posts
2,832 -
Joined
-
Last visited
Content Type
Profiles
Forums
Events
Gallery
Everything posted by Brutalform
-

Moebius Truck Wheel info
Brutalform replied to Brutalform's topic in Model Building Questions and Answers
Thanks for the pic. I appreciate it. -
Moebius Truck Wheel info
Brutalform replied to Brutalform's topic in Model Building Questions and Answers
Looks awesome! Where did you get those steer tires and rims? I might just strip the trim rings, and paint them. I normally don’t bash kits, but this thing had tons of flash, and it seems that several parts on the engine, had the holes not lining up with the studs, and contact between parts. Definitely not for a beginner. I’ve spent more time cleaning up parts, than actually building. -
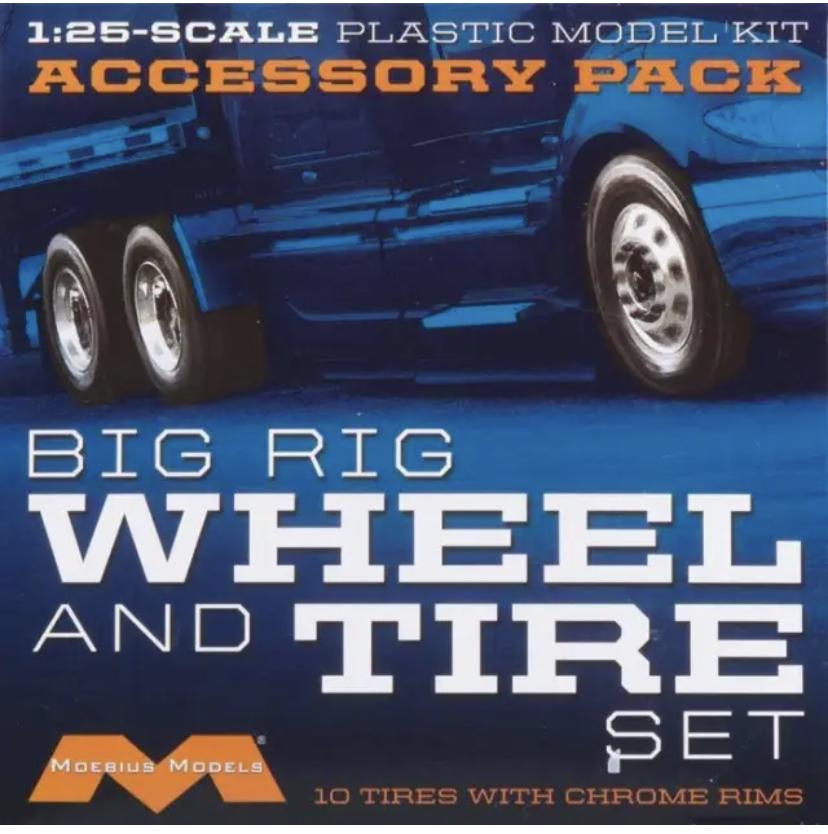
Can anyone possibly please post a picture of the back sides of these particular truck wheels. I don’t want to buy a set unless I’m sure I can use them. I’m working on the AMT Peterbilt Wrecker, but the kit supplied wheels are pretty beat out of the box, missing and broken trim rings, etc. I already did the necessary cuts to narrow the rear tow platform so the wheels protrude to the fender line like they should. So pic would be very helpful. Thanks.

-
Can anyone please provide me with any info on who might sell those perfectly sized, white model car, cardboard boxes? I’d like to buy some in “bulk” if possible. I plan on selling 50 or so, built models. These boxes are perfect to ship a built kit, undamaged. Thanks
-
I haven’t been posting on the board, or have been at the bench much, but, I posted a video from YouTube that was about the passing of Chris Cortel. I’ve never spoke to him personally, but, I watched his videos frequently. Then I found out that Roger passed also. He was always kind, and would be happy to share his knowledge of kits, and his building. His builds were very inspiring. Recently turning 57 myself, and Roger being 56 is WAY TOO YOUNG, to be leaving this world. I’d like to send thoughts to his family, and to the other members on here, that called him a friend, and that knew him better than I did. Life is short. Live it to the fullest.
-
I was going through YouTube, and this sad video came up. I really enjoyed the many hours I’ve watched of Chris’s builds over the past couple years. You will be missed.
-
I gave up waiting for this kit. From what I have heard, it was supposed to be released late fall, early winter.
-
If I remember correctly, I paid $8.00 for the Lindberg issue at Ollie’s, about a year ago. So yea, where are they going with the prices?
-
I’ll believe it when I see them. The 65 Dodge AWB was supposed to be out last year.
-
And let’s not forget about Pele.
-
Behind you and the bench
Brutalform replied to KC FitiWerks's topic in General Automotive Talk (Trucks and Cars)
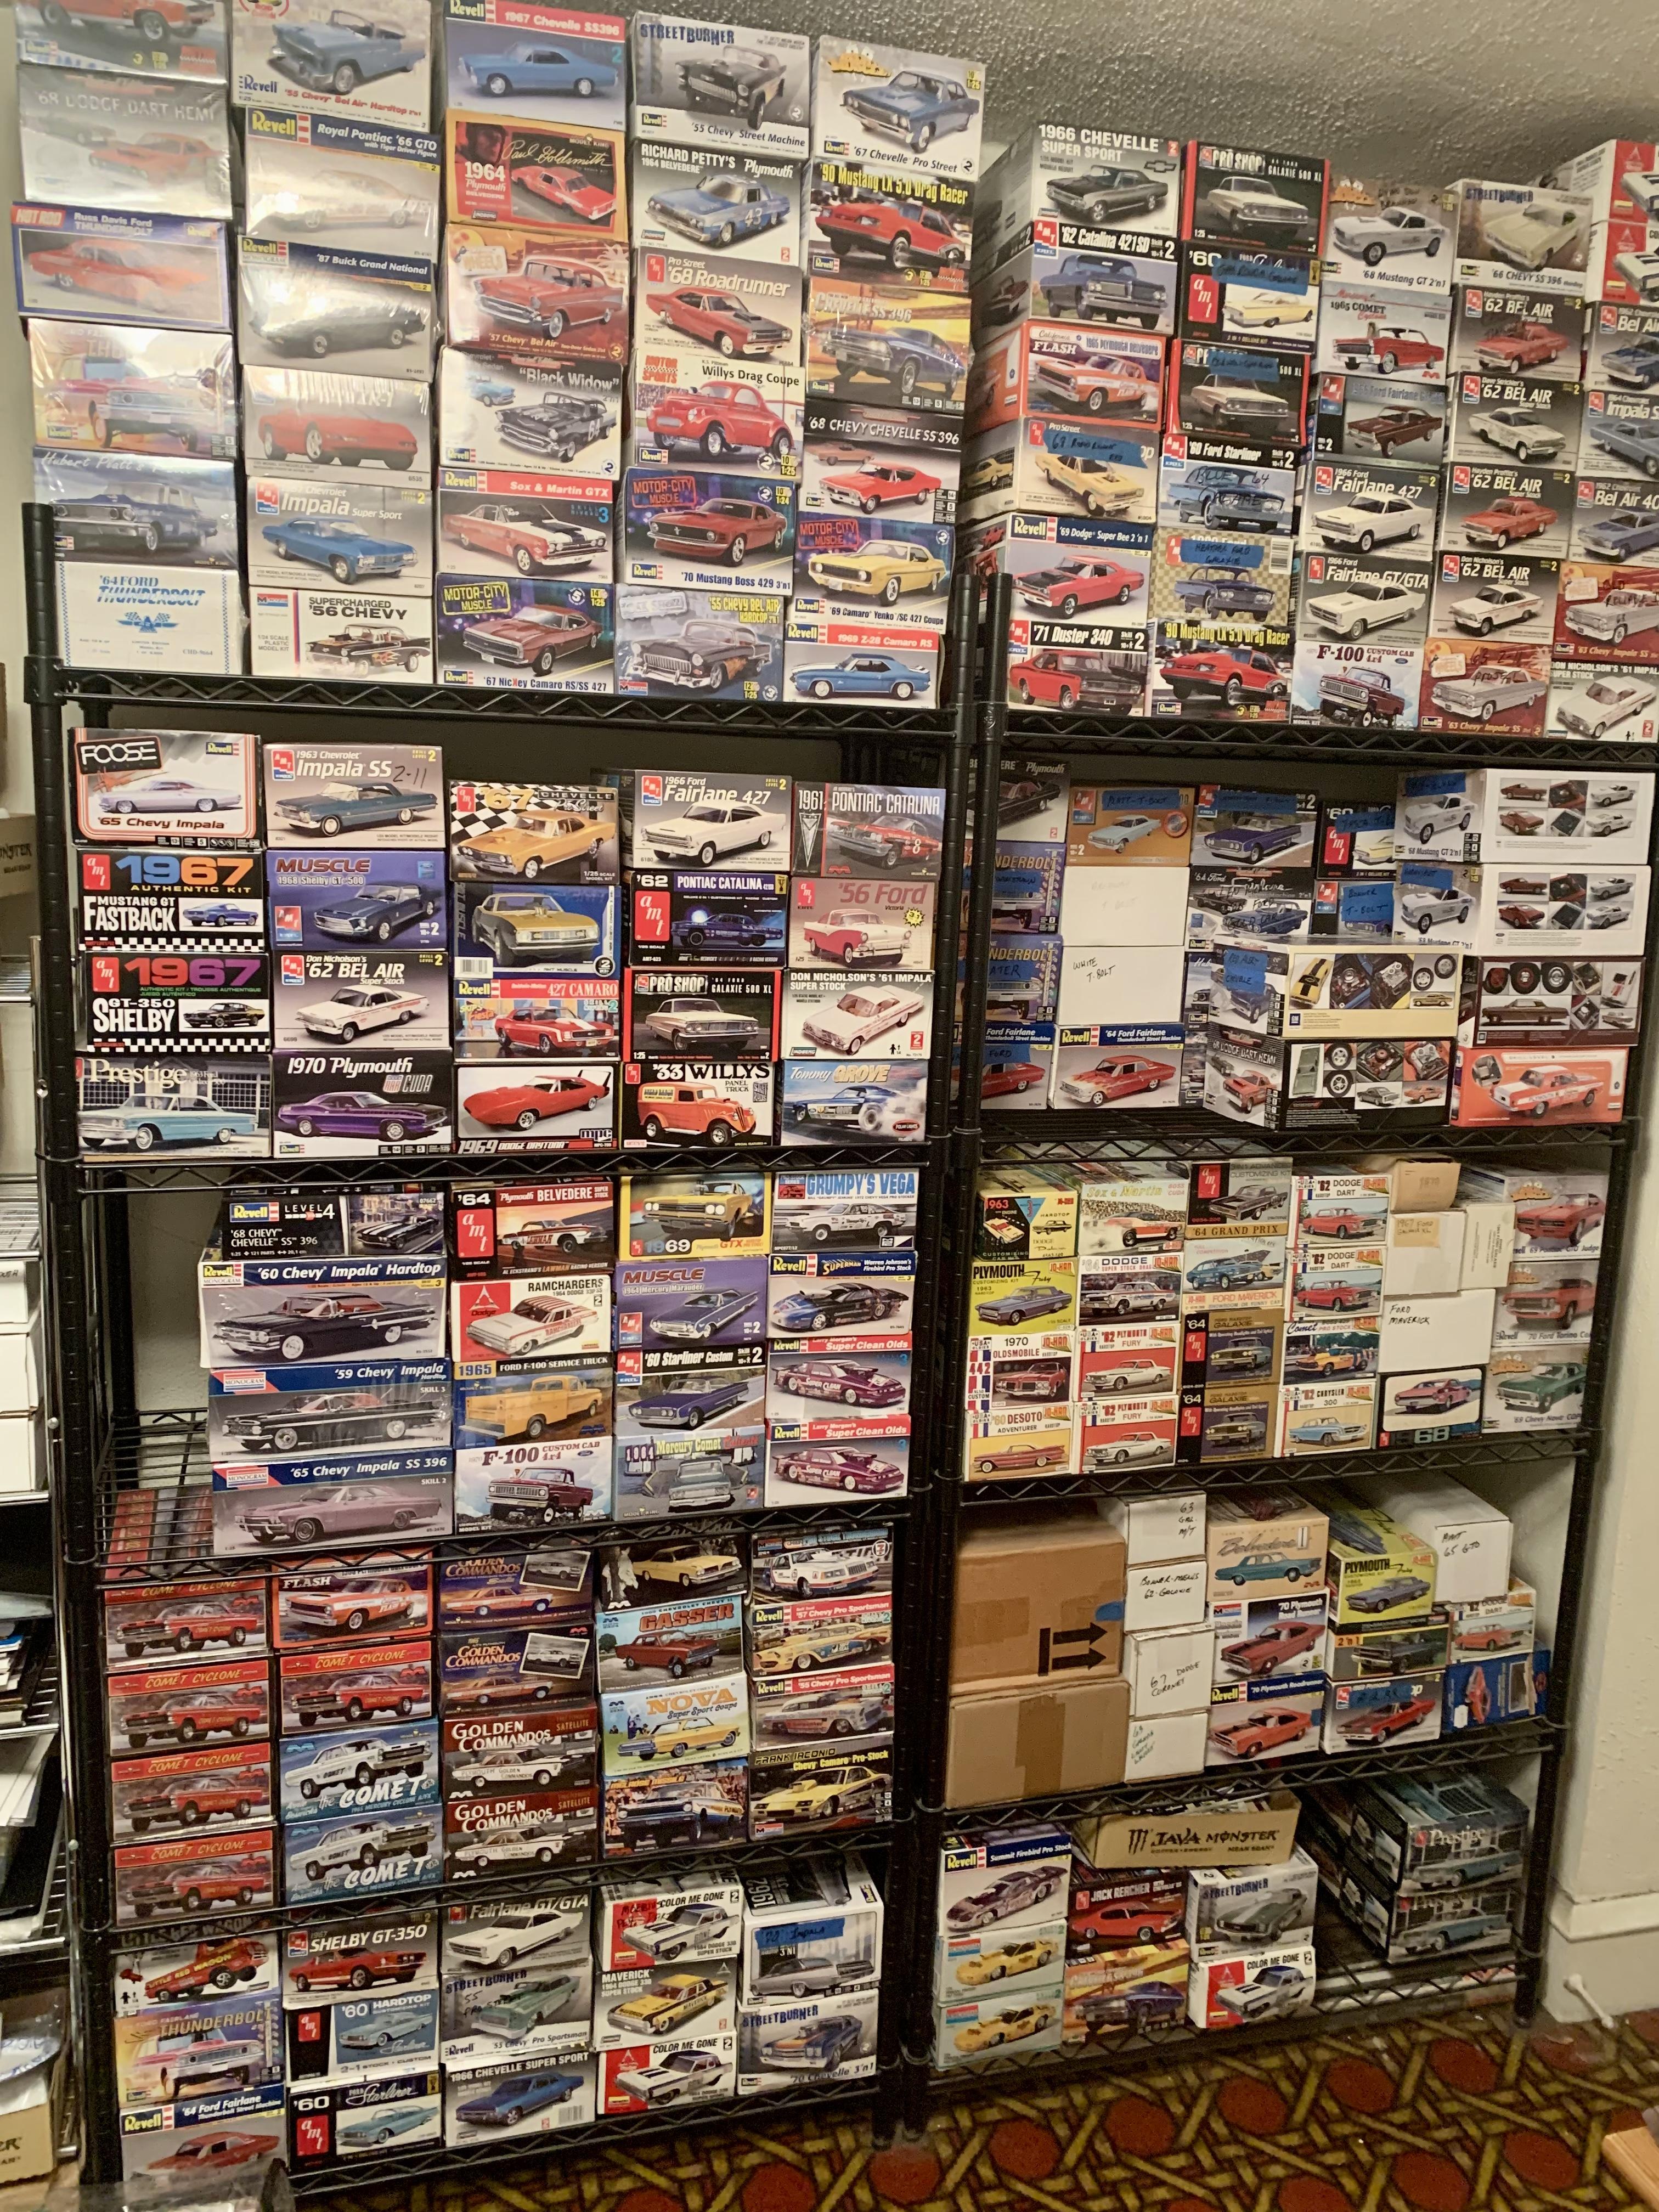
And back. Also with some of my favorite old, rare kits.
-
Behind you and the bench
Brutalform replied to KC FitiWerks's topic in General Automotive Talk (Trucks and Cars)
The side
-
Behind you and the bench
Brutalform replied to KC FitiWerks's topic in General Automotive Talk (Trucks and Cars)
The spare bedroom, that’s a mess, that no one goes into but me. It’s the only outdated room in the house too, with crappy carpet. Here’s the front.
-
TAMIYA X-20 Thinner
Brutalform replied to 1972coronet's topic in Model Building Questions and Answers
I use the ole regular Testors enamel thinner to clean up the Panel Line Accent. Works just fine. -
Thanks everyone. Much appreciated.
-
Does anyone know if there are any decals out there for various sized, fender, side marker, red and amber lights? I looked through my decal stash, and my kits, and even checked out Slixx. Mostly interested in the rectangular style.
-
'65 Nova Pro Street Update 11/14/22 Completed Chassis Photo Pg. 5
Brutalform replied to Plowboy's topic in WIP: Model Cars
Looking good. Glad to see this kit being built as a pro street car. -
1965 Oldsmobile 442(from an AMT '64 Olds 442) - FINISHED
Brutalform replied to crowe-t's topic in WIP: Model Cars
I don’t know how I missed this. I just love this type of build. You’ve covered every detail that I’ve seen in the pictures. Just goes to show how far you can go with a build like this. Especially on a car you don’t see very often being built. -
Radiator Hoses / Connectors & Something Else
Brutalform replied to Duntov's topic in Tips, Tricks, and Tutorials
Bill hasn’t posted in over two years, and this particular thread is twelve years old. The pictures were most likely on a server that no longer exist. -
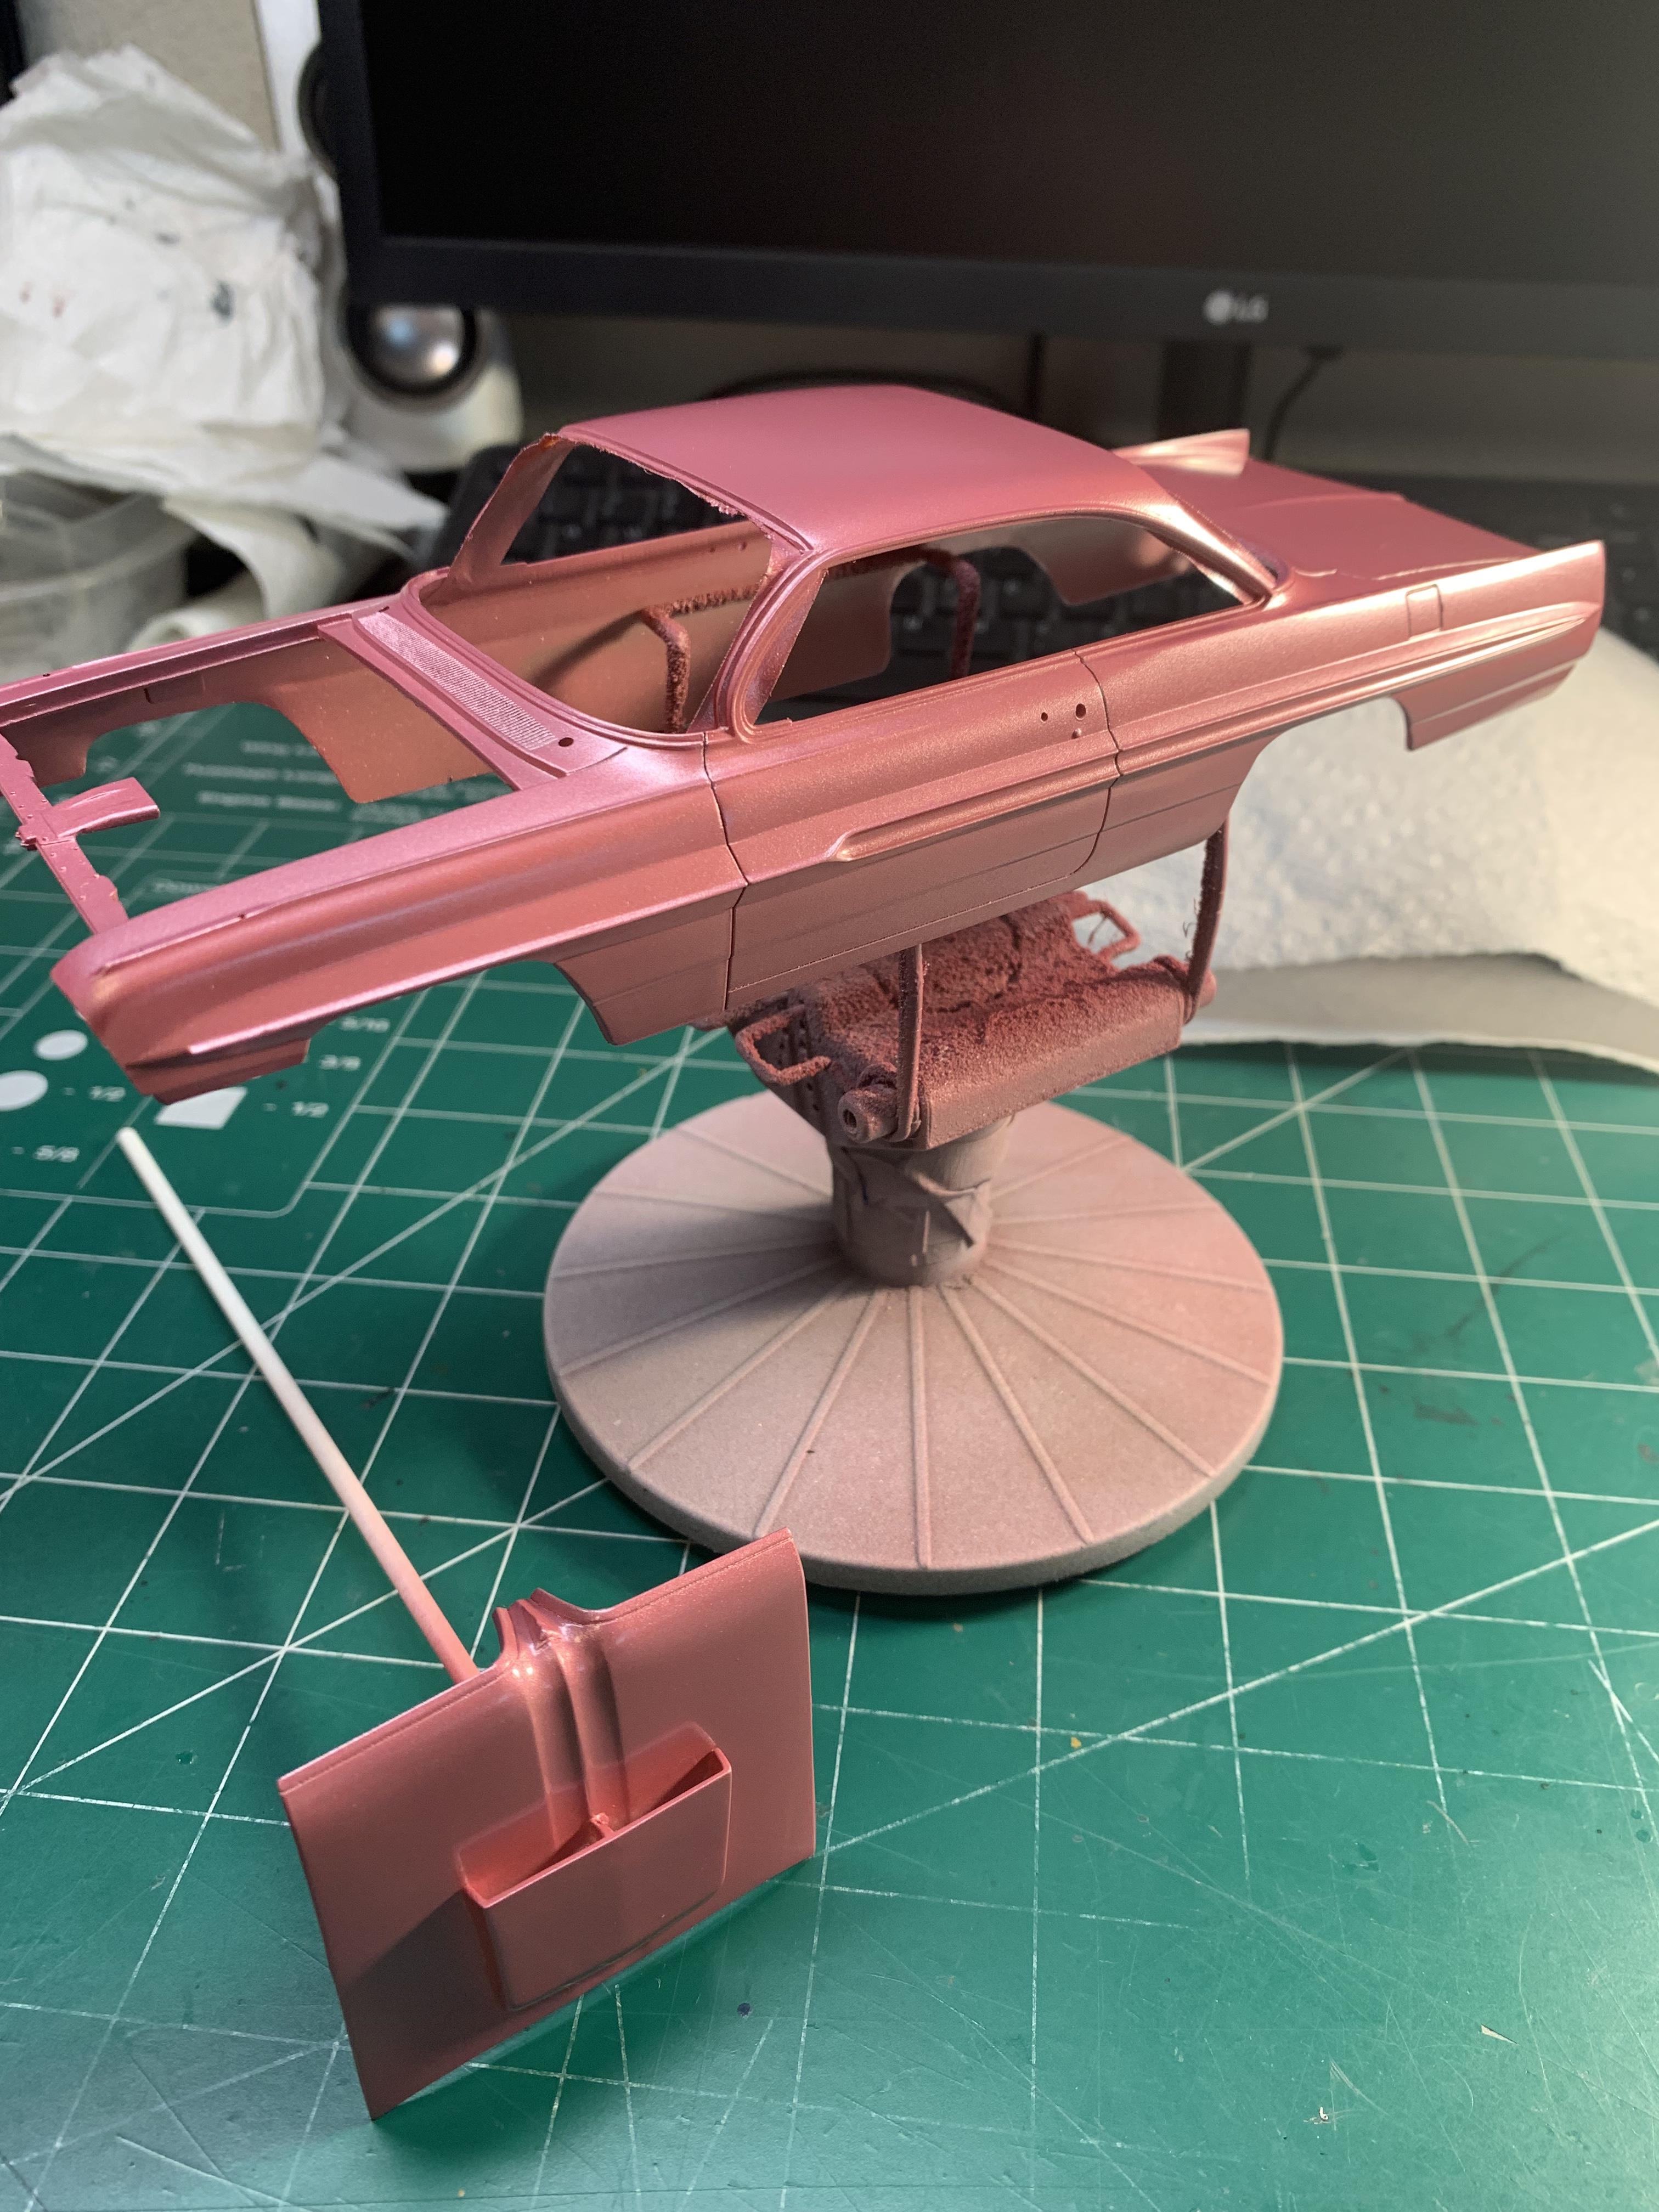
Thanks John. I really enjoy your super stock builds. I really enjoy building them myself. One thing I forgot to do was, paint the strip down the side of the car. It’s done now, but I really should have did that first, and saved on the masking big time. This color is one that isn’t a color I normally would do, but it’s close enough to the real car I saw. Hoping to clear tomorrow or Monday
-
Thanks everyone. Probably going to clear it tomorrow or Monday.
-
AMT 1966 427 FAIRLANE SUPER STOCK THE ULREY BROS.
Brutalform replied to M W Elky's topic in Drag Racing
Its nice to see this car built. Great build on a great subject. I’ve tossed around the idea of purchasing the decals and building this car quite a few times. Very nice job on the build. -
Mod Podge, tacky glue, Elmers?
Brutalform replied to TonyK's topic in Model Building Questions and Answers
I know what you mean. Kinda hydraulics itself out. -
Mod Podge, tacky glue, Elmers?
Brutalform replied to TonyK's topic in Model Building Questions and Answers
No problem. I figure if its used on fine watch crystals is ok for models. -
I put the interior, roll bar, seats, and harness, together. Everything fit nice into the body. Laid down four coats of Tamiya Pearl Light Red. I only encountered one little hair on the roof that I removed and sanded between coats. Gonna let it sit for a week before I lay down the Tamiya clear coat.