TimKustom
-
Posts
366 -
Joined
-
Last visited
Content Type
Profiles
Forums
Events
Gallery
Everything posted by TimKustom
-
I remember these builds well. Nice stuff. Thanks for making this kid feel old! ?
-

McBurnie Coachcraft 'Ferrari' Daytona Replica - 'Miami Vice Style'...
TimKustom replied to crowe-t's topic in Model Cars
Agree with what others have said about this model and it has me shaking my head in delight. Most would have no idea what went into this, but looking back at the WIP thread, this is solid model building. Hats off to you, you made Sonny proud! -
Minimizing issues with those pesky super glue bottles!
TimKustom replied to DanR's topic in Tips, Tricks, and Tutorials
I agree with this. I've tried the bigger bottles only to get frustrated with clogging, and dried up guck. Since moving on from that I Iook for the cheapest small tubes I can find and just keep them "in stock". The smaller tubes even dry out before I finish them any way. Nice to have a fresh bottle when time to use it. -
Just came across this thread, and a beautiful build is going on here. The interior is quite inspiring! Keep it up!
-
Yes, more models need mascots! I had every intention of using one in my custom Comet since the raccoon was included with the custom 63 Thunderbird parts I used. I reshaped him to look more like a cat and he's painted/flocked to match the car. He was to sit on the package tray but I decided at the last minute to go with the speaker grille because it fit better and made more sense with the Hi-Fi in the rest of the car. I'll incorporated him into a '60's style display for the model sometime in the future. Back to your build though, I still keep going back to check it out. The gator makes me smile every time. Just. Awesome.
-
Yes, I know of one in development. Other than wheels and obvious items, what would be on everyone's wishlist? My recently acquired kit from Michaels also had an ill fitting hood. Will try the hot water treatment. Contacted Revell as well.

-
Thanks Bernard, You can click on my name and there are threads for the others. I just noticed that the Bugatti pix are broken. Some of the '32 in progress appear broken as well. I will see if I can get that fixed. They were built in 2013 & 2014. The lavender Model A was completed in 2020 and those still are there. Hope this helps.
-
PRO-TORINO: 1972 Johan Torino pro-touring
TimKustom replied to Claude Thibodeau's topic in Model Cars
Smooth! Nice build! -
Super clean build. Wheels are awesome!
-
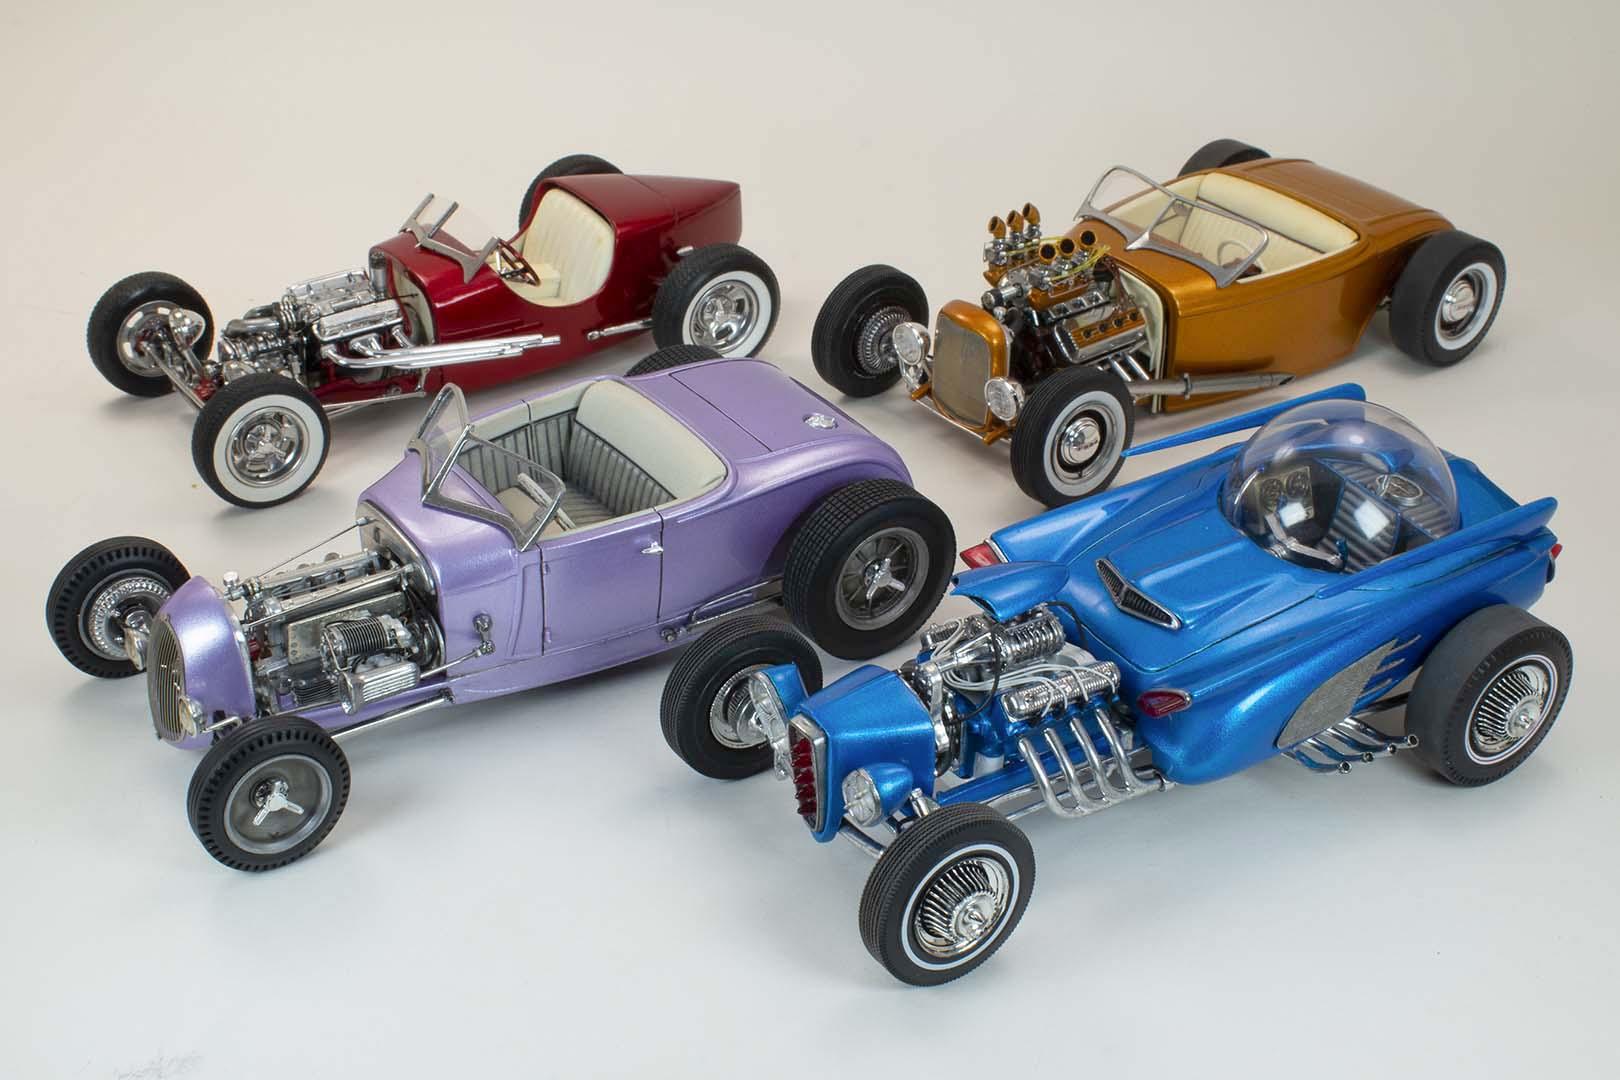
Thanks again for all the nice comments. Here's a pic with the whole "gang". The Comet was my follow up to the lavender Model A. I didn't want to do another Hot Rod, but the Comet does share some of the others themes. Gearing up for my next one, I think it's gonna be built straight out the box, but I'm unsure if I'm ready to leave the bubble yet... Stay tuned.
-
Whoa, that is super laser clean. Incredible paint work and photography. Informative video as well. Superb build!
-
I just LOVE it. Every. Little. Thing. Superb job with theme, parts selection (the Gator is my Fav) and the craftsmanship involved in finishing it. Looking forward to seeing your next “custom” if it turns out as half as nice as this.
-
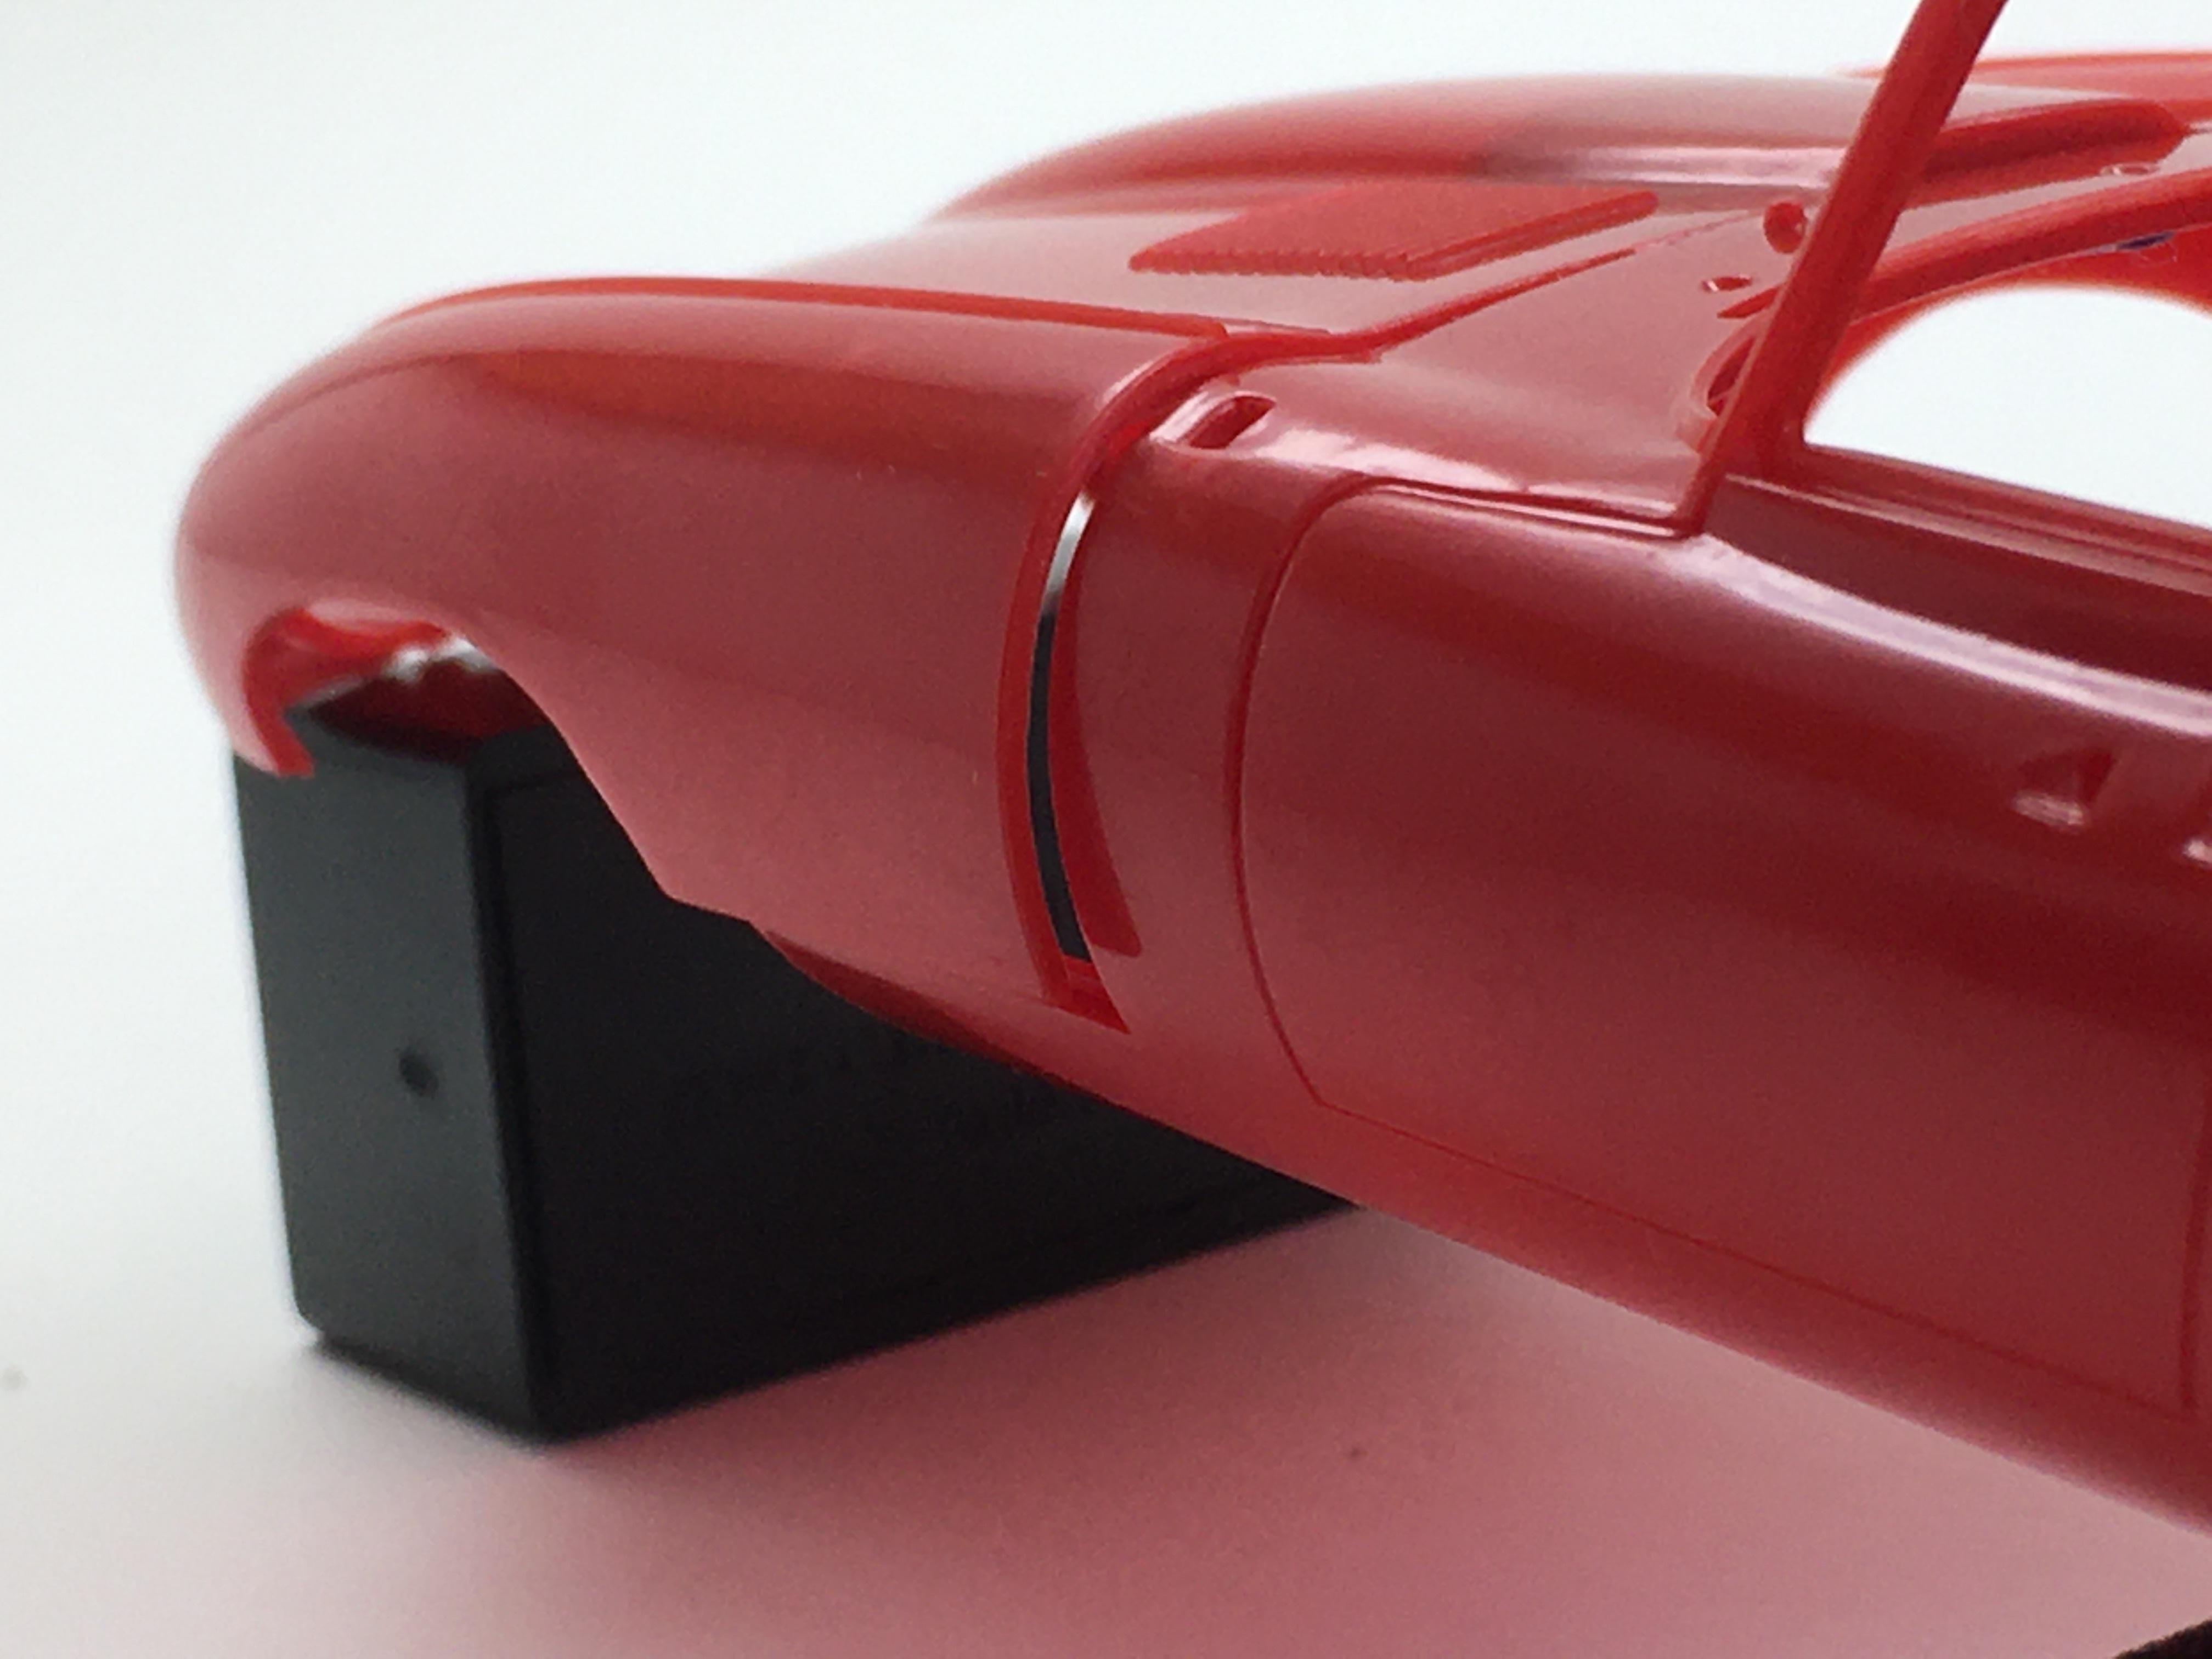
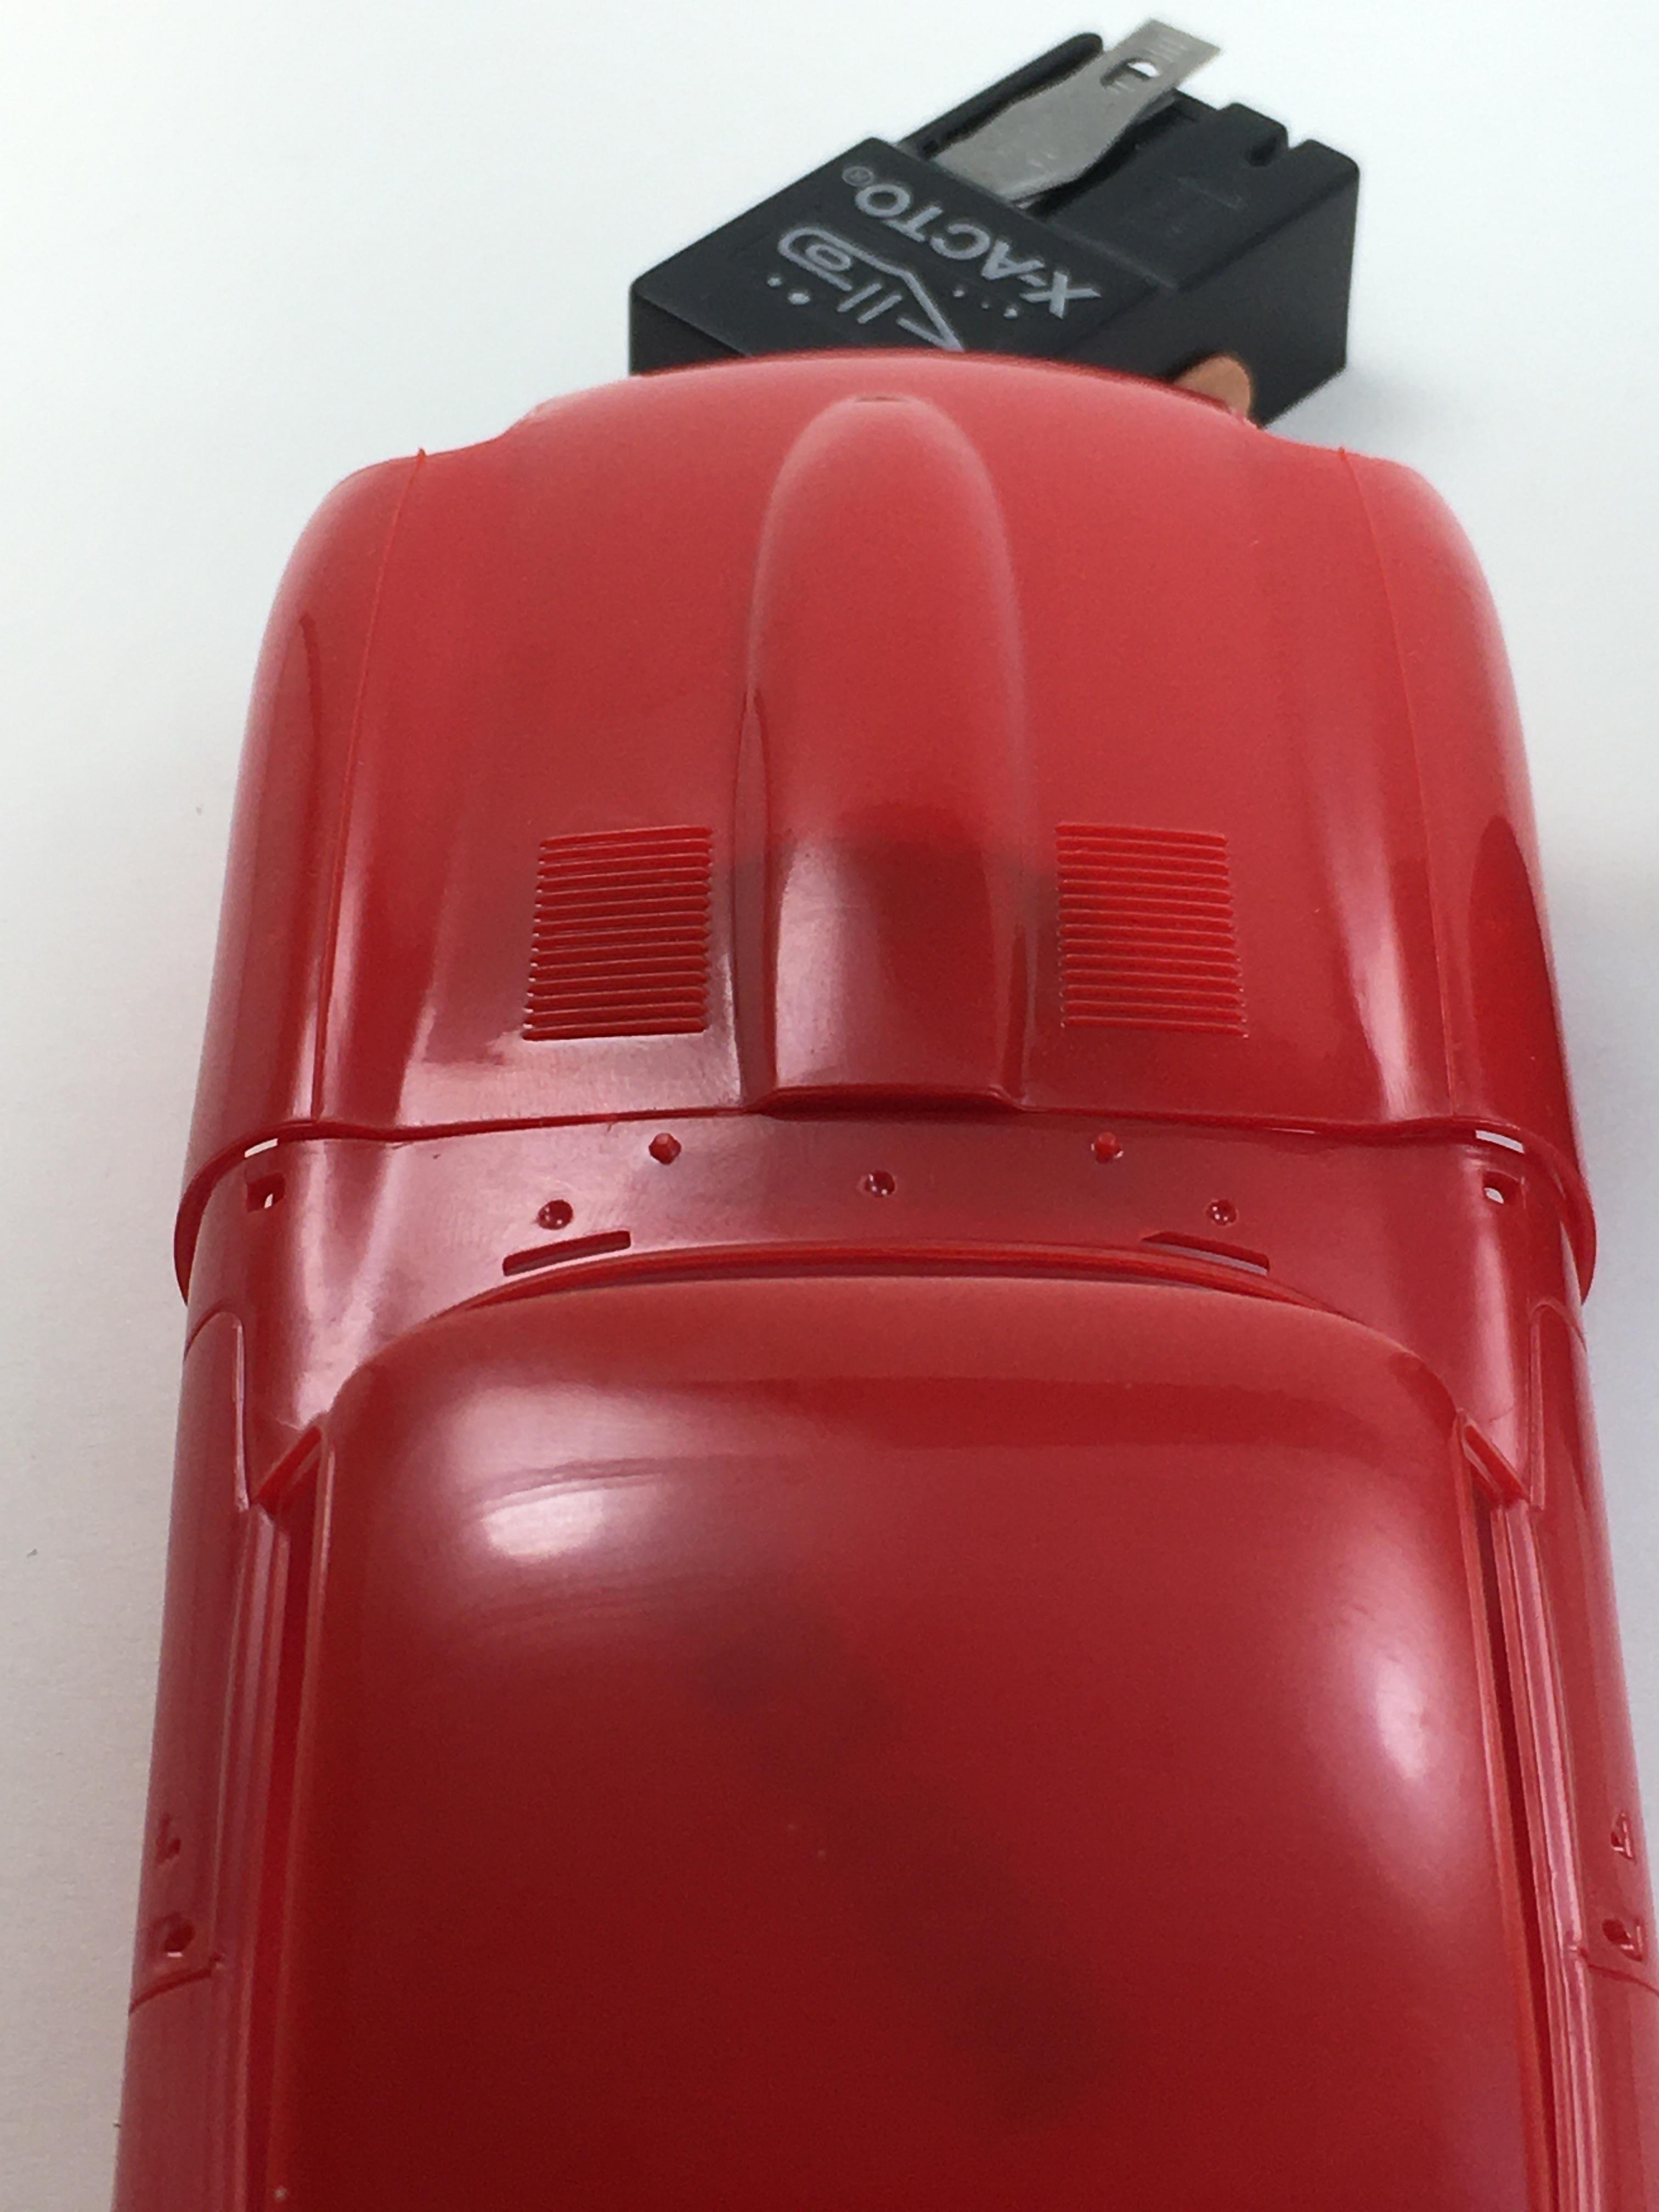
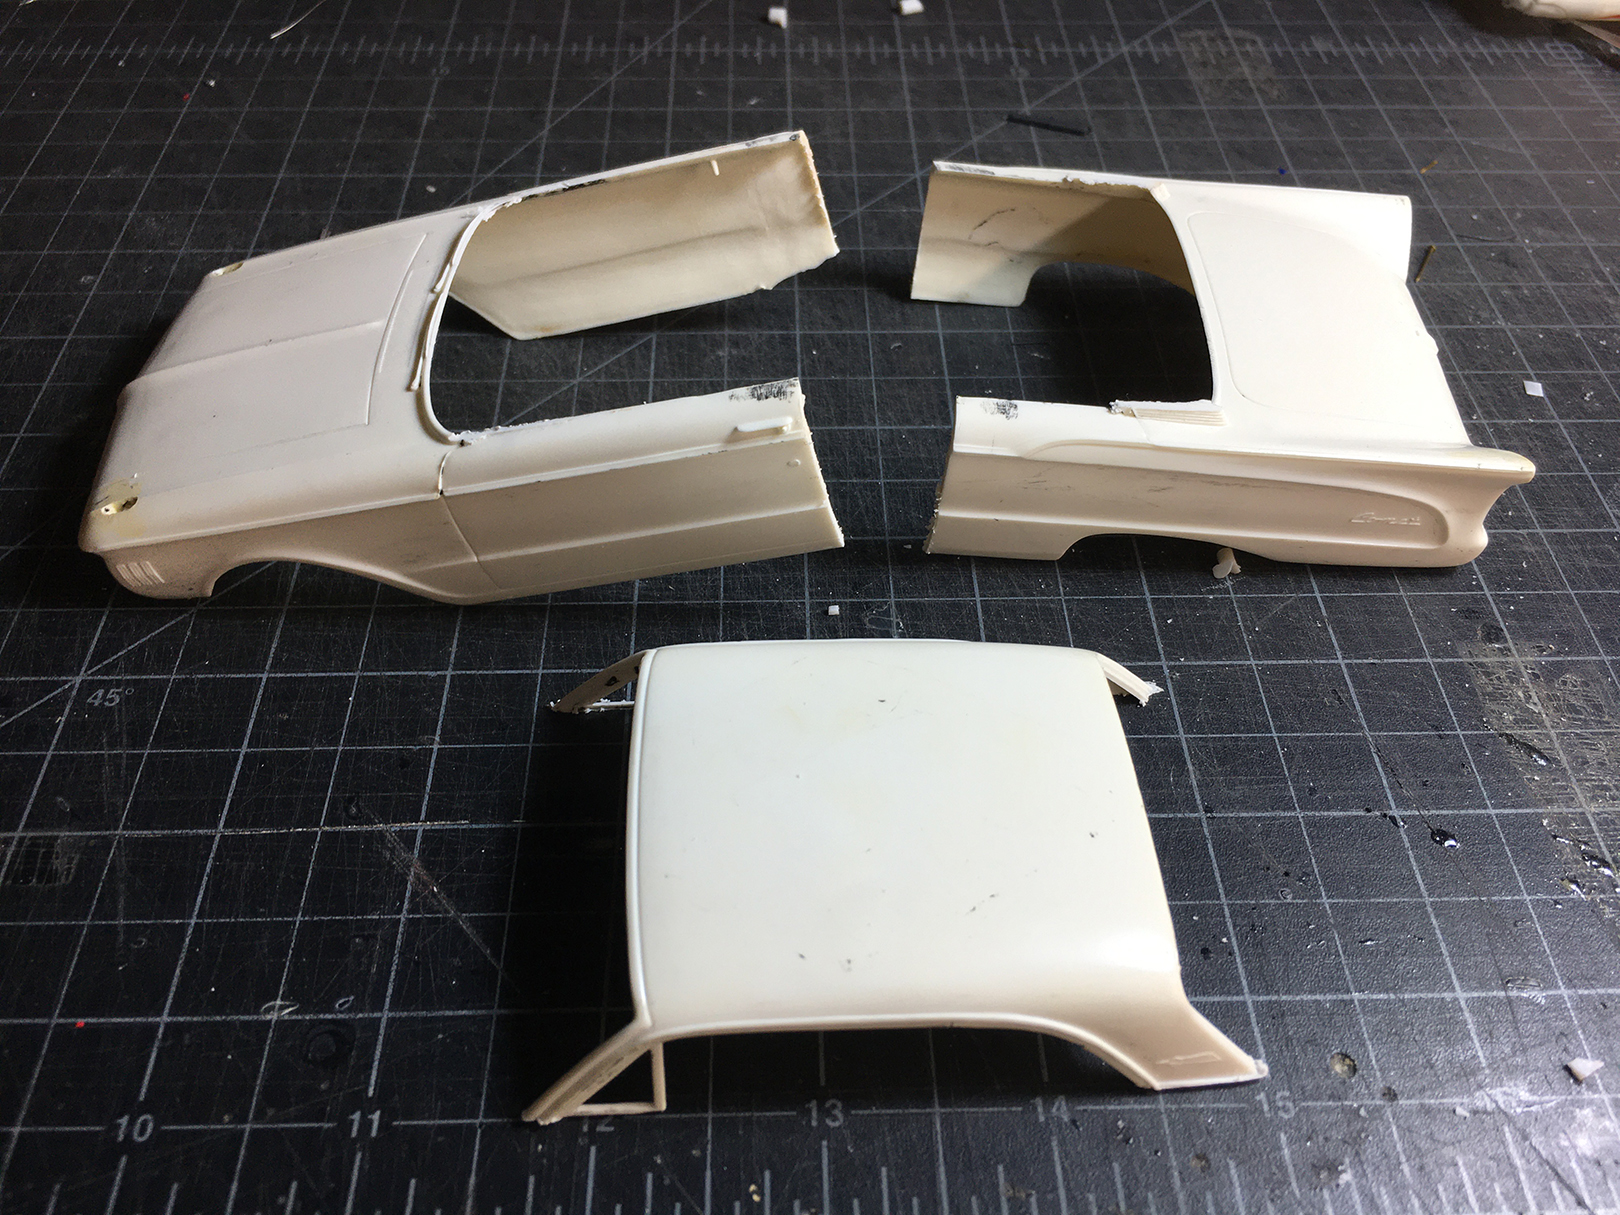
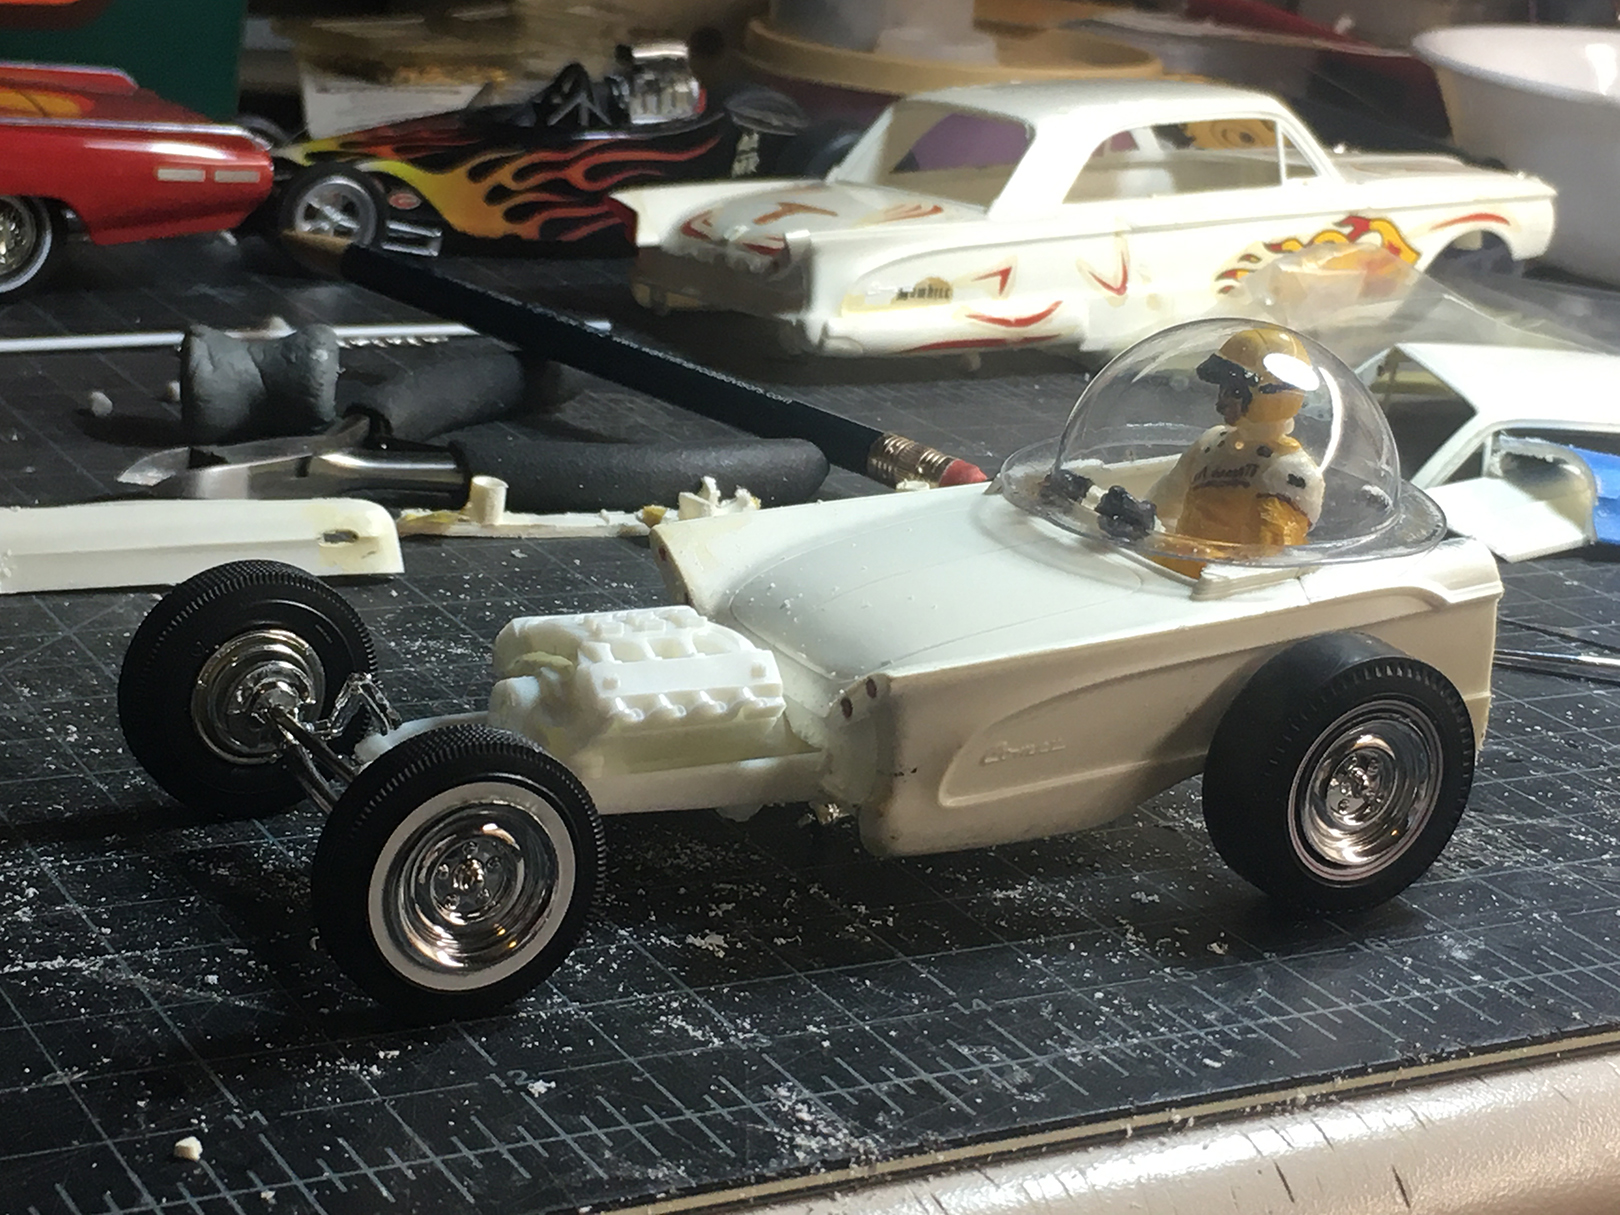
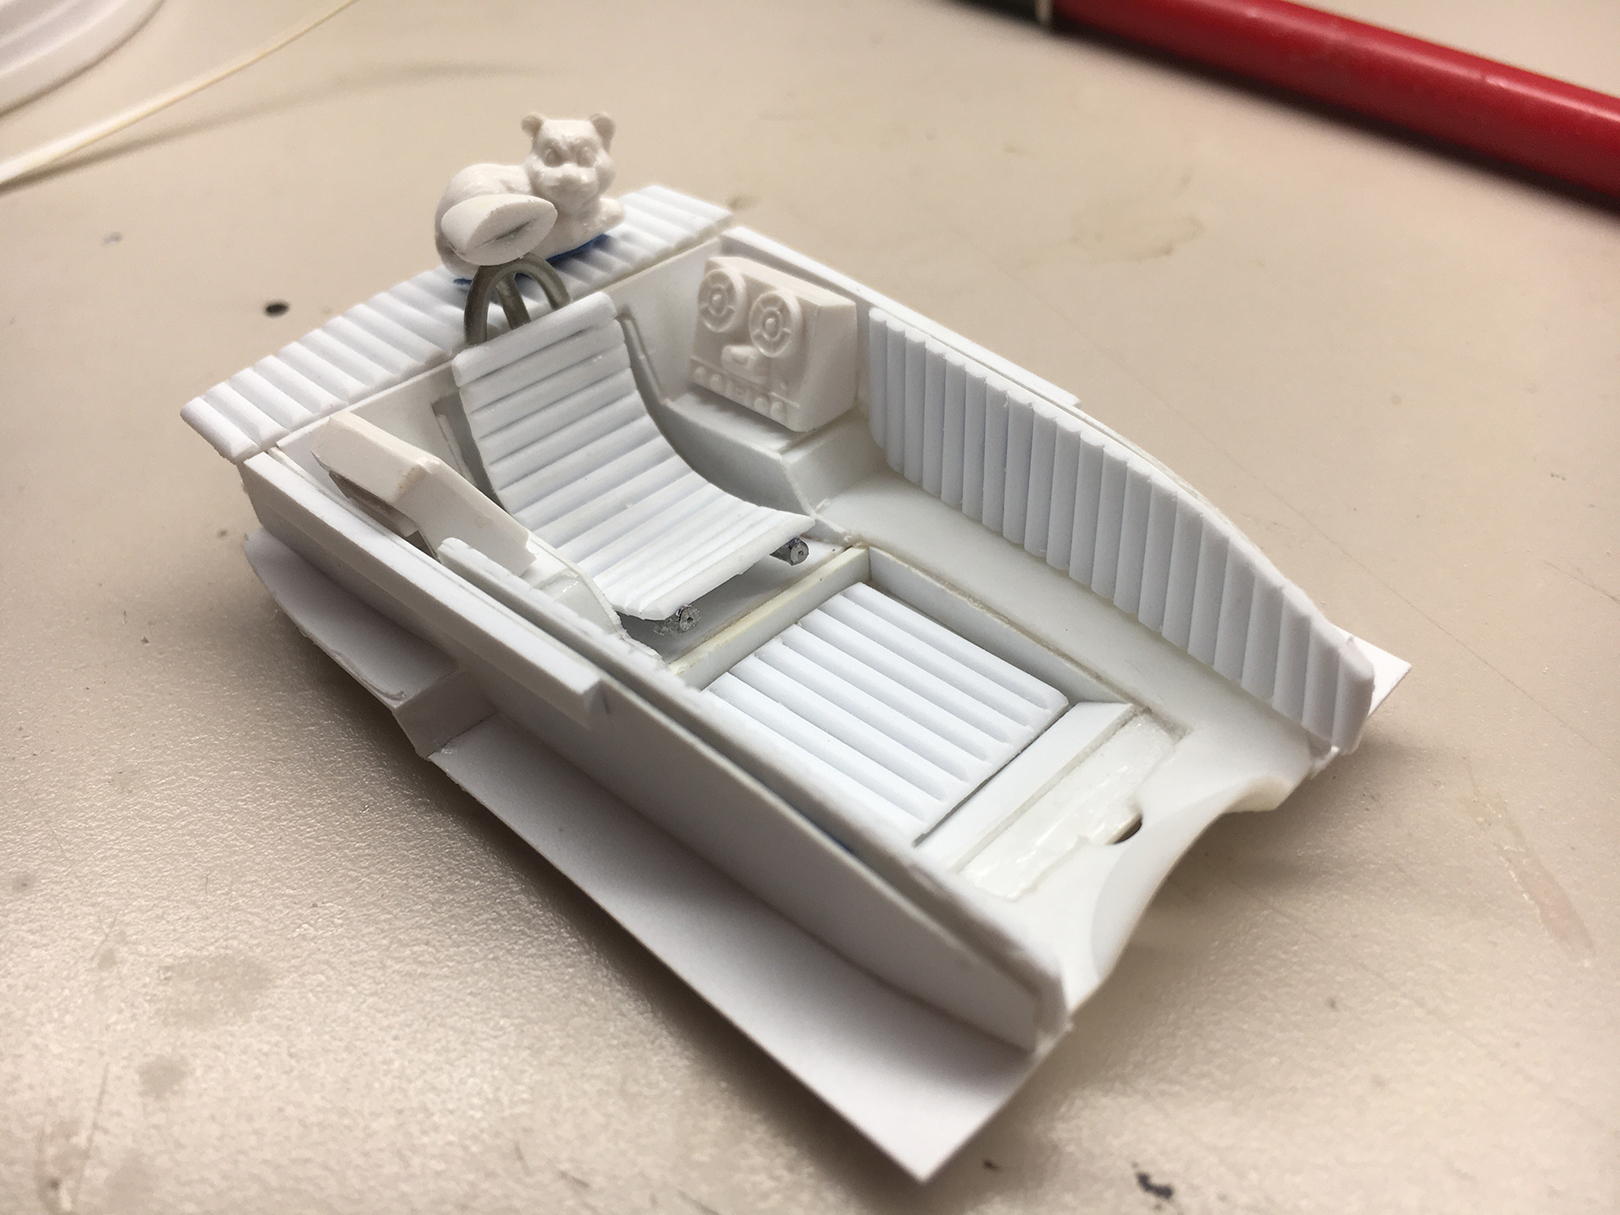
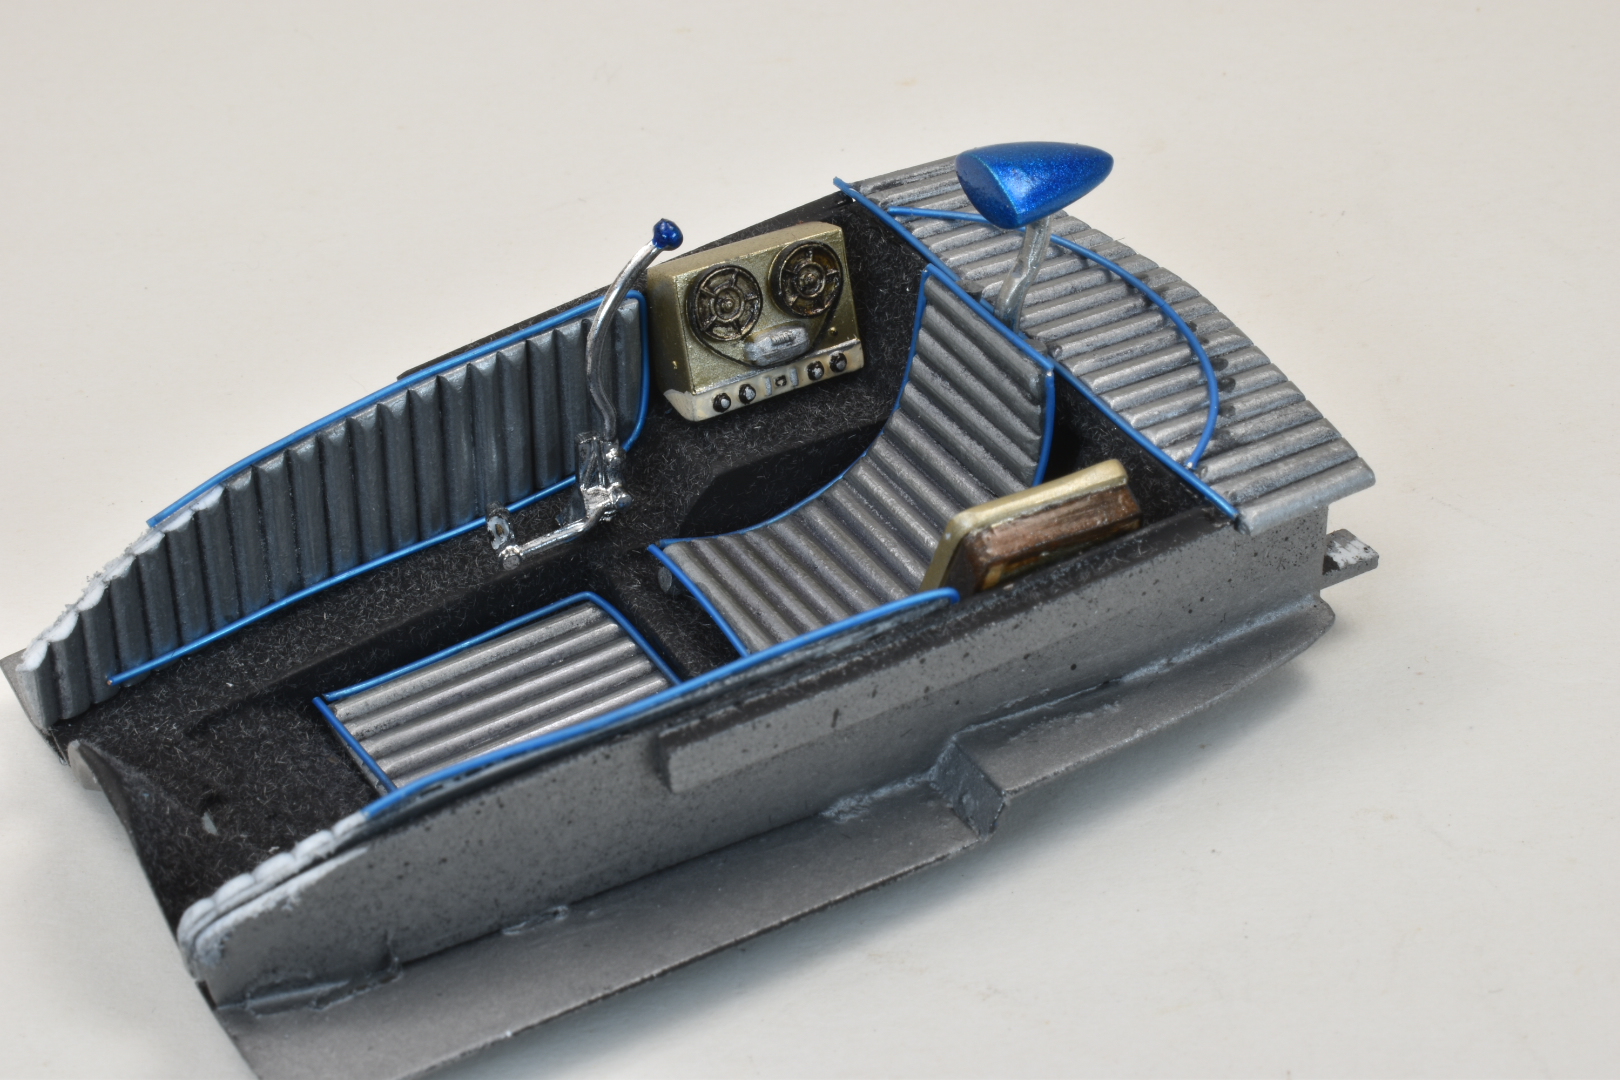
Wow, thanks for all the nice comments. It really was one of the most fun builds I have done and the best part was searching for parts that felt "just right" for this model. I'm not very good with WIP's because I can get sidetracked easily. Looking back I started this model on September 9th 2020. I worked a few things in between but that is sort of how they go. Thought I'd share some images of how it came to be. Here is the body after the first couple of cuts. I started by removing the roof then separated the rear at the door lines. I tried to keep in mind how I might cut a 1:1 version during the process. The rear part then had a about a half inch taken out of the middle. This kept the trunk line in tact. The front piece had the fenders separated from the hood and then the hood had about 1/4” taken off each side to match up with what was taken from the trunk. One of the first mockups of the body on the AMT Model T chassis. A 1/24th scale driver figure is in place to ensure an real human could fit inside. The first round of major surgery is complete. The location of the bubble is marked out and that material would be removed with a dremel. The bubble had now been fitted and this is the start of playing with scoops and fins. An unmolested Comet is behind it. The grille shell is in progress here. It was basically a bunch of laminated plastic pieces until the shape was right. The custom coves from the 1963 Thunderbird have been added also. Solidly in the filler, primer, repeat stage the model is starting to look like the final car. A leftover piece from the hood would be grafted into the trunk to give the driver a bit more legroom and the custom scoop could give some airflow. I also like how the peak matched the peak behind the bubble. The grille shell would also be peaked to match the peak in the engine scoop. The interior had to be mostly custom made. The floor from the Model T was used as a base. The center was cut out so the driver could sit lower between the frame rails. The roll and pleated seat, floor mat, package tray and side panels are all separate pieces of cut half round plastic stock. The seat frame was made from solder. Here it is getting close to the start of the paint and finish process. Most of the parts are pinned together allowing it to be assembled and disassembled over and over to ensure the parts fit once painted. Due to reflections in the bubble top, it is difficult to photograph the interior. Here it is prior to final touch up. The floor has custom mixed flocking, a “control panel” cut from the Comet’s custom grille and the custom TV from the Thunderbird. The screen was ground out and a separate piece was created to aid with painting. Several coats of various Alclad pearls were used to replicate the ’60’s style glass screen. A view of the other side showing the shifter (believe to be a Revell parts pack piece) and the reel to reel tape player. 1/64th” Chartpack tape was used for the “tape” in the player. The headrest is carved plastic but the cushion has not been added yet. Hope this model inspires you to raid those parts boxes!
-
I think this looks pretty cool. This kit is currently on my workbench. I hate the green plastic too, but I think you did a great job making yours Jolly!
-
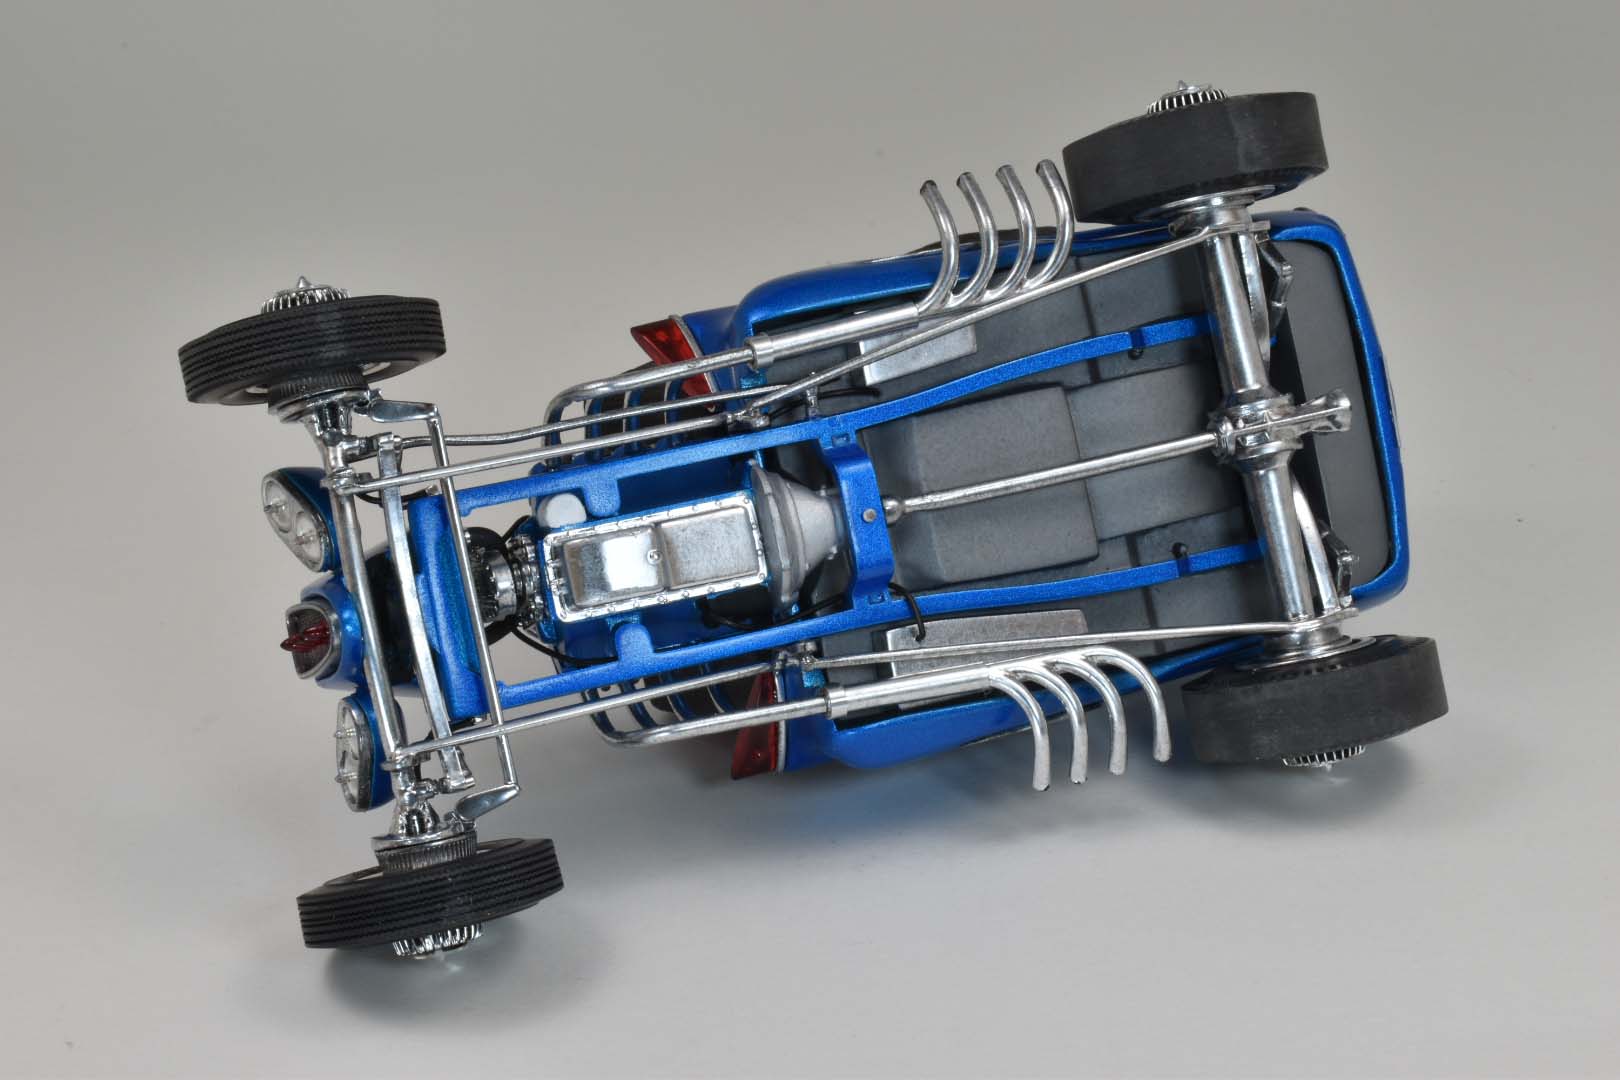
I wanted to share my latest model. This is one I’ve had in mind for a long time. Inspired by the cars of Ed “Big Daddy” Roth, this is my “AstroRod”. Starting with an AMT 1961 Comet. I sectioned it lengthwise and widthwise then turned it around backward. It was then mounted to a 1925 Ford Model T chassis from an AMT Double kit. The same kit would supply the Lincoln engine. At this point, a few themes started to develop. I felt it would be kool to have it all “MEL” so an Edsel grille was sourced from an AMT parts pack and inserted into a scratch built grille shell. Five tail lights from original issue Ala-Karts (yep 2 kits) were added to cover the Edsel letters. Headlights were sourced from a custom grille from a AMT 1953 Ford pickup with scratchbuilt buckets. The next theme that developed was all the parts so far came from pre-1964 kits. I decided to keep that theme going and try to use only found objects (the bubble came from my collection of packaging) and parts produced before 1964. I scored all the custom parts from an original AMT 1963 Thunderbird on that auction site. Many of these found their way into the build inside and out. The custom roof panels were the same shape as the Comet quarter panel coves, so they were grafted in and three spears were added to the insert panels. The custom hood scoop was grafted into the trunk. The side upper “spears” came from a bunch of unidentified early ’60 custom parts I had collected. Tail lights were machined on a dremel from red sprue. The interior features the TV set and reel-to-reel player from the Thunderbird. It also uses the custom gauge panel and steering wheel. The rear speaker came from the Comet. The rest of the interior is scratch built from evergreen half round to simulate tuck and roll. This was trimmed with blue wire to simulate piping. The Lincoln engine got a supercharger from an AMT 1957 Chevy. The scoop came from the unidentified early ’60 parts stash. I considered wiring it with waxed thread, but decided against it and used modern detail wire. The exhaust uses a double set of headers from the Model T double kit with the second set flipped side to side to make the zoomie pipes. The wheels are vintage Aurora custom parts with center caps made from the velocity stacks included in the Model T double kit with bullets cut from AMT 1949 Mercury custom Cadillac taillights. Modern AMT parts pack tires were used because vintage tires can be problematic. The paint is Testor’s Diamond Dust, followed by several coats of Tamiya Clear Blue, then topped with a light coat of Testor’s Blue Galaxy then cleared with Tamiya clear. The interior is Testor’s Stainless Steel Metalizer, toned with AK washes. The chrome is Alclad. This is easily one of my favorite models I’ve built and it was a ton of fun creating it. Please enjoy the photos and I hope you can see it in person at a show in the future.
-
Super nice blending of parts. This one is right up my alley!
-
Cool save! That's one on my grail list. Hope you saved those custom parts. They can come in handy!
-
Fabulous model! Love the color. Did you use the MCG kit on for the interior details?
-
Nice job! That's one kit I'd like to get in my stash!
-
Thanks for all the nice comments on my Roadster! I'm glad so many have enjoyed it. Hope you can see it in person at show in the future. Yes, the follow-up is in progress... Stay tuned!
-
very cool build. Love the stance, top treatment and color choice. 2 Thumbs up!
-
Got the pix fixed. Hope they stay that way. Glad everyone still likes looking at it.
-
How to get perfectly straight HT leads?
TimKustom replied to Funkychiken's topic in Model Building Questions and Answers
That will be a fun one to wire like that. It can be done when you are very careful and have patience. First start with a quality wire. I recommend the Detail Master wire. I've used them all from every aftermarket to Radio Shack strapping wire. Detail Master's is the best as it was custom made for the model car hobby to be in scale. Next, as others said you probably want some photo etch wire looms. Get those from Detail Master or Model Car Garage makes some nice one as well. So on to getting the wires on the engine... You will need to drill out where the wire starts and where the wire goes. It's best to have the holes as deep as possible and of the correct size so the wire fits snuggly. After that is done, now it's time to get the wire straight. Pull it between your fingers and rotate it. Once it is straight, use your exacto to cut lengths longer than what you will need. Then in the case of the Testarossa, start at the distributor and glue them in (superglue or 5 minute epoxy), making sure they stay as straight as possible. Once the glue is dry, slide on the looms. Now it's time to bend the wire. Start with the one closest to the distributor and carefully bend the wire to the shape in your picture. Then cut the length so you have enough to put into the hole you previously drilled into the cylinder head. Thread it into that hole. If its snug, you likely won't need any glue. I like clear enamel for this part since it sets up slow and will hold without showing. Repeat for each wire. Use the exacto and fine tweezers to keep everything lined up. It takes practice and perseverance to do them real nice. Don't give up if it's not perfect. Just try to make your next one better. Hope this helps! https://www.detailmaster.com/products/dm-2360-wire-looms-1?_pos=3&_sid=8f5c7aa0d&_ss=r https://www.detailmaster.com/products/dm-1103-red-detail-wire-0075-2ft?_pos=10&_sid=7ca100220&_ss=r -
The EXCLUSIVELY '32 Roadster/Cabriolet ONLY thread. Show us what you got!!!
TimKustom replied to mrm's topic in Model Cars
Thanks. The engine has a Latham Supercharger with manifolds to run the 6 carbs vertically. I have a pic of the 1:1 setup somewhere. Paint is Alclad Candy Yellow over Gold Base topped with LMG "Super Gold Pearl" & fogged "Orange Accent." Old thread is here: Some of the in progress pix aren't showing up. Trying to locate them. -
The EXCLUSIVELY '32 Roadster/Cabriolet ONLY thread. Show us what you got!!!
TimKustom replied to mrm's topic in Model Cars
Thanks Dave!