Codi
-
Posts
2,675 -
Joined
-
Last visited
Content Type
Profiles
Forums
Events
Gallery
Everything posted by Codi
-

1/16th 2018 Camaro Promod stratch build made mostly of brass
Codi replied to Romell R's topic in WIP: Drag Racing Models
Agree wholeheartedly with Ray and it's a nice surprise to see you post here once more. Looking forward to your progress Romell! cheer, tim -
Eliminating 3d print lines on small parts
Codi replied to Codi's topic in Tips, Tricks, and Tutorials
Thanks for the reply Doug. KJ, I believe it was their "smooth" finish which is also their best/most expensive option currently available on this part. cheers, tim -
Eliminating 3d print lines on small parts
Codi replied to Codi's topic in Tips, Tricks, and Tutorials
So you can print the ape block for me with no lines but I have to pay you to draw your own files up to make the part I want. Did I understand that correctly? If so isn’t that going to be more costly for me? -
Eliminating 3d print lines on small parts
Codi replied to Codi's topic in Tips, Tricks, and Tutorials
Now you've got my interest Doug. Checked out your facebook page. Can you print the AJPE engine that I included in this thread? I don't have the CAD? files to do so. Someone else designed it and offer their products on Shapeway's. What material should a newb spec out to get "lineless" prints and is it reasonably priced compared to other materials? Thanks in advance for any insights you might share. Tim -
Eliminating 3d print lines on small parts
Codi replied to Codi's topic in Tips, Tricks, and Tutorials
Thanks for sharing those links Pete. Bill, the bad news is this is really only good for small parts as a technique in my opinion. It only comes out in a small stream/area and I know you could use larger media material but to do an entire body this way would take forever and use a lot of the material at the same time. Plus I'm not sure what the larger material might do to the body itself. I'm afraid that for bodies we're stuck with sanding. I've got the same issue you have and I wholeheartedly agree that you'd have to be a masochist to enjoy the sanding etc. If my pro mod mustang body that I started prepping was any indication, I'd say you should be able to get a 1/25th scale body in very good shape for paint in 8 to 10 hours of sanding & priming. I hope! For those interested, I bought the media blast air brush kit and material at TCP Global for about $50. cheers, tim -
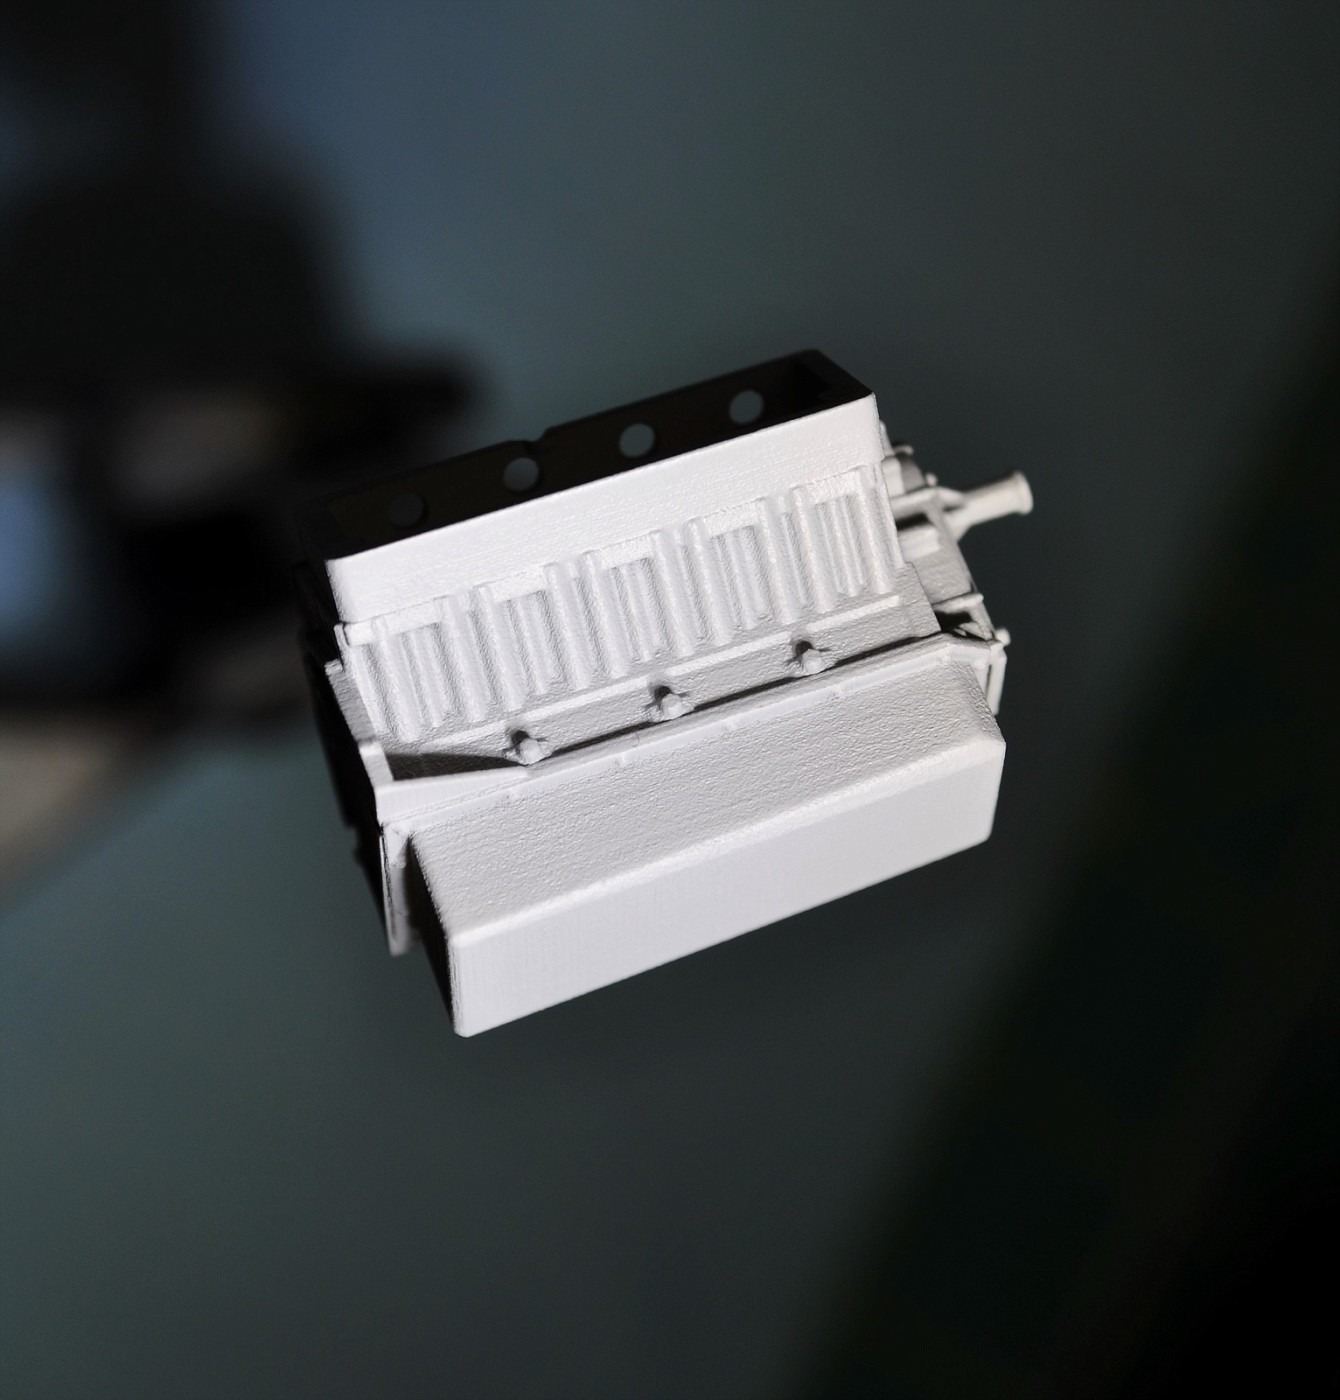
I did a test on a 1/25th scale AJPE engine block from Shapeways. The print lines on the side of the block where the "ribs" are were pretty bad. You can't sand that area of course so I took my media blast kit from TCP Global and the Paasche Eraser Compound (very fine btw) and shot it at 45 PSI. It did an awesome job of eliminating the lines while not messing with the rest of the material. You'll see some lines on the oil pan but I only passed over that area twice very quickly. Shot at a distance of 1/4". I think this is very workable for small parts but for larger items, bodies for instance, not a great idea. Cheers, Tim

-
Whop Whop Whop..........what a view it is Dave. No wonder you've been spending some much time on it. See you later this summer! tim
-
Nicely done Ray. Did the decals come with the kit btw? Cheers, Tim
-
Burgers and dogs not ready yet so I thought I'd take a moment and acknowledge all of the comments about the paint. BobtheHobbyGuy - Many thanks to you as well. Chris, thanks man but it wasn't as complicated as your Vega paint. Two colors and some simple masking (or so I thought).......but I got a good result at the end of it all. Dave(comp1839) great catching up with you this morning Dave. Looking forward to a ride still and how you're progressing on the BIG big block. Thanks too for the "WOW". Paints not my forte so I'll take this one for sure. John T. - You've been a great mentor on the painting stuff John. The sharing of your experience was most helpful but so was the encouragement to be PATIENT (not my strength) and take it one step at a time. Thanks! Ray (CobraMan) As you can tell Ray from my comments above, it fought me a bit. Appreciate the thought! Daniel- "can't wait" yup, that sums up my attitude on this as well. I refuse to consider this the eternal project. It WILL be done sooner than later. Art- appreciated too sir! Mike (from Germany) & Gilles (from France) thanks gentlemen for popping by and checking it out. It's coming together once and for all and this was the final big step towards completion. Cheers to everyone!!! Now I'm going to go enjoy the cook-out!
-
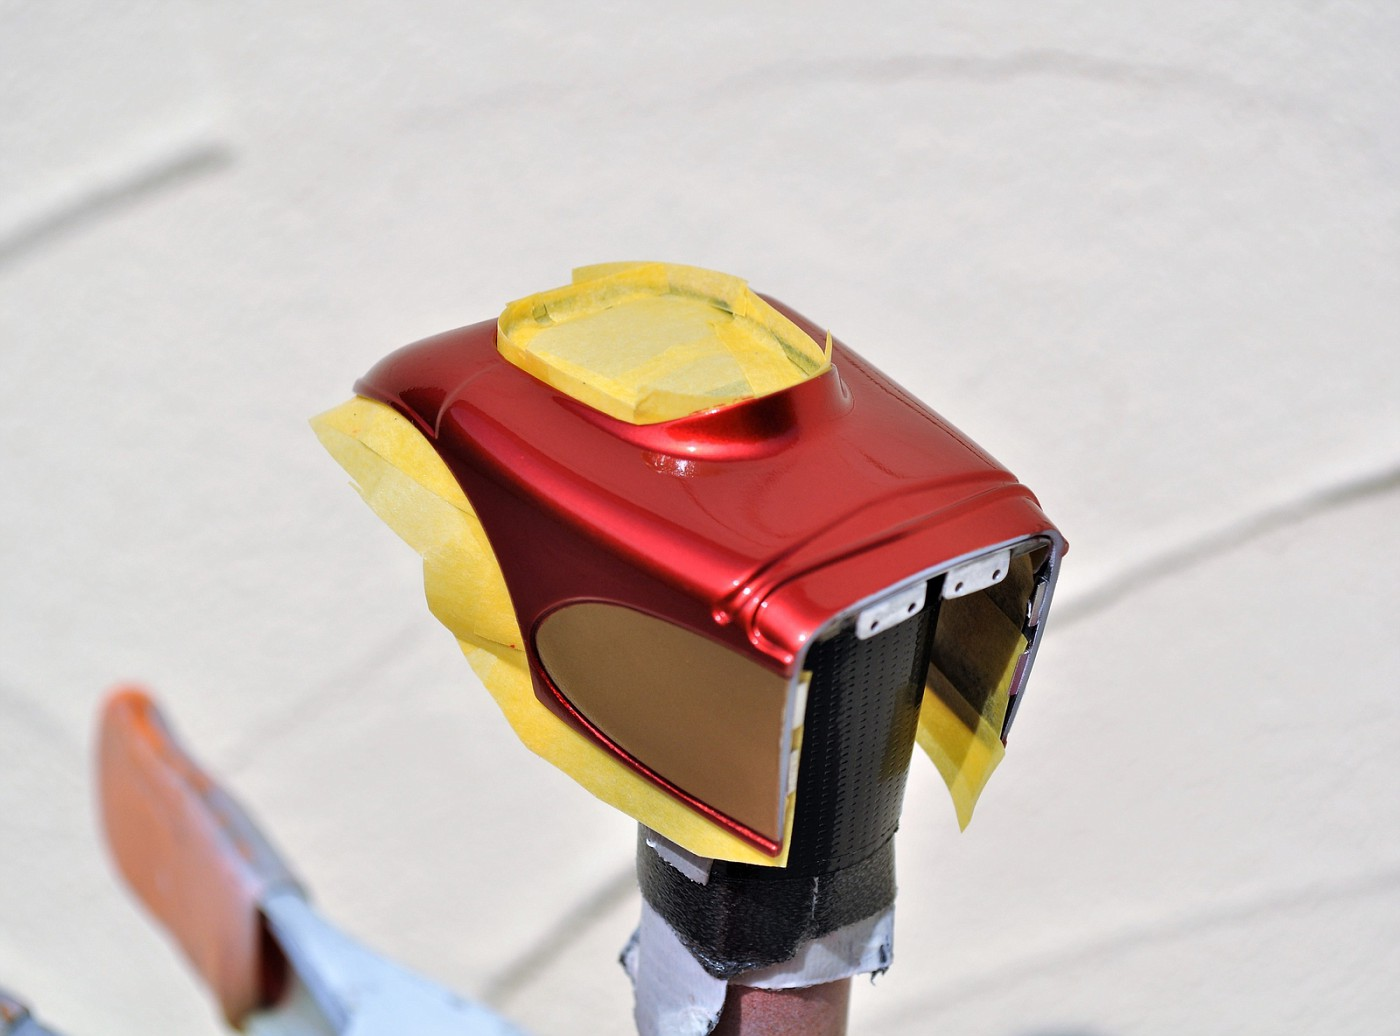
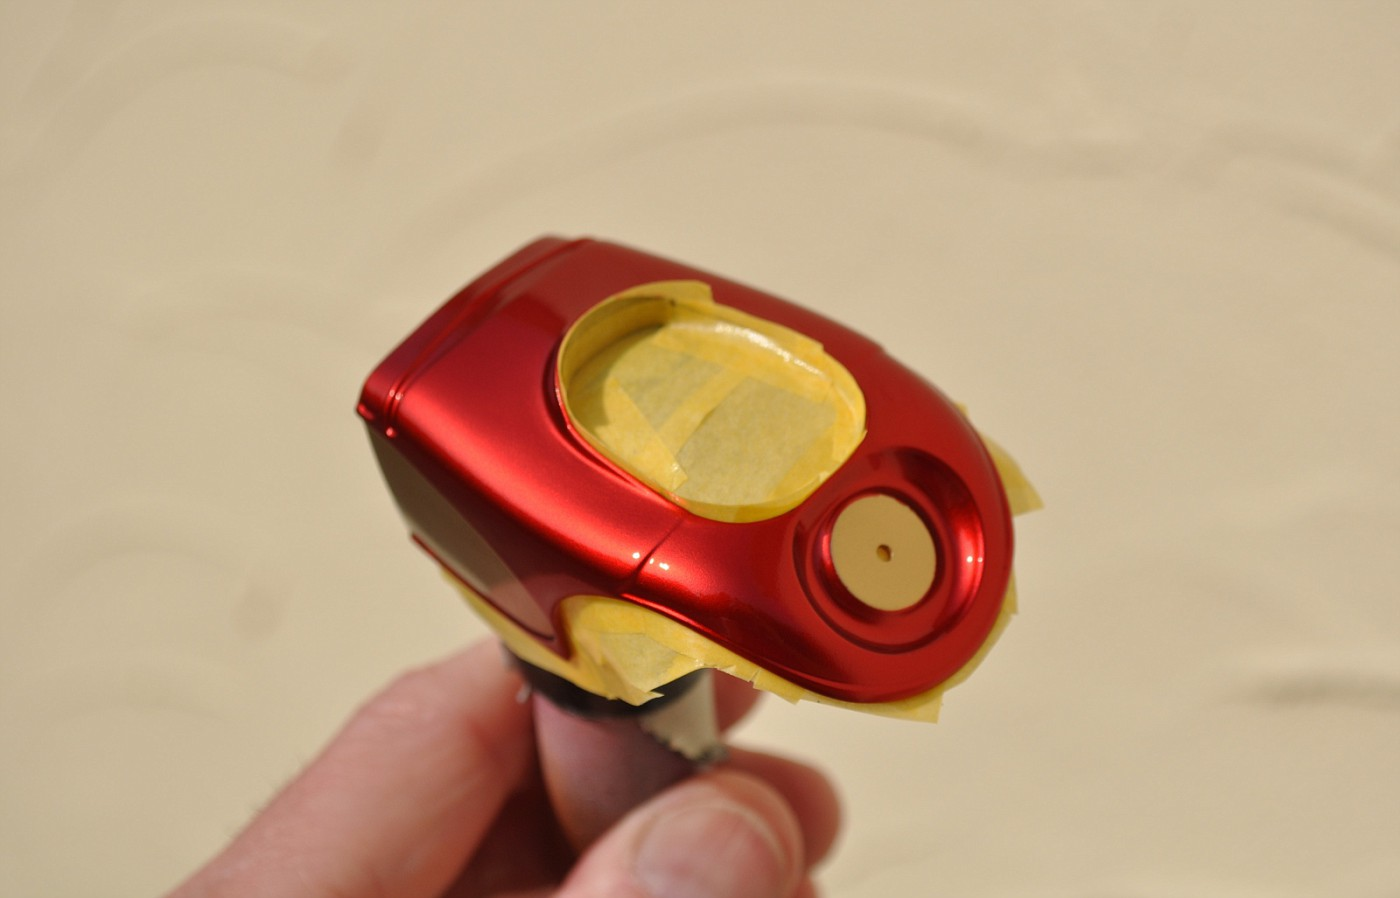
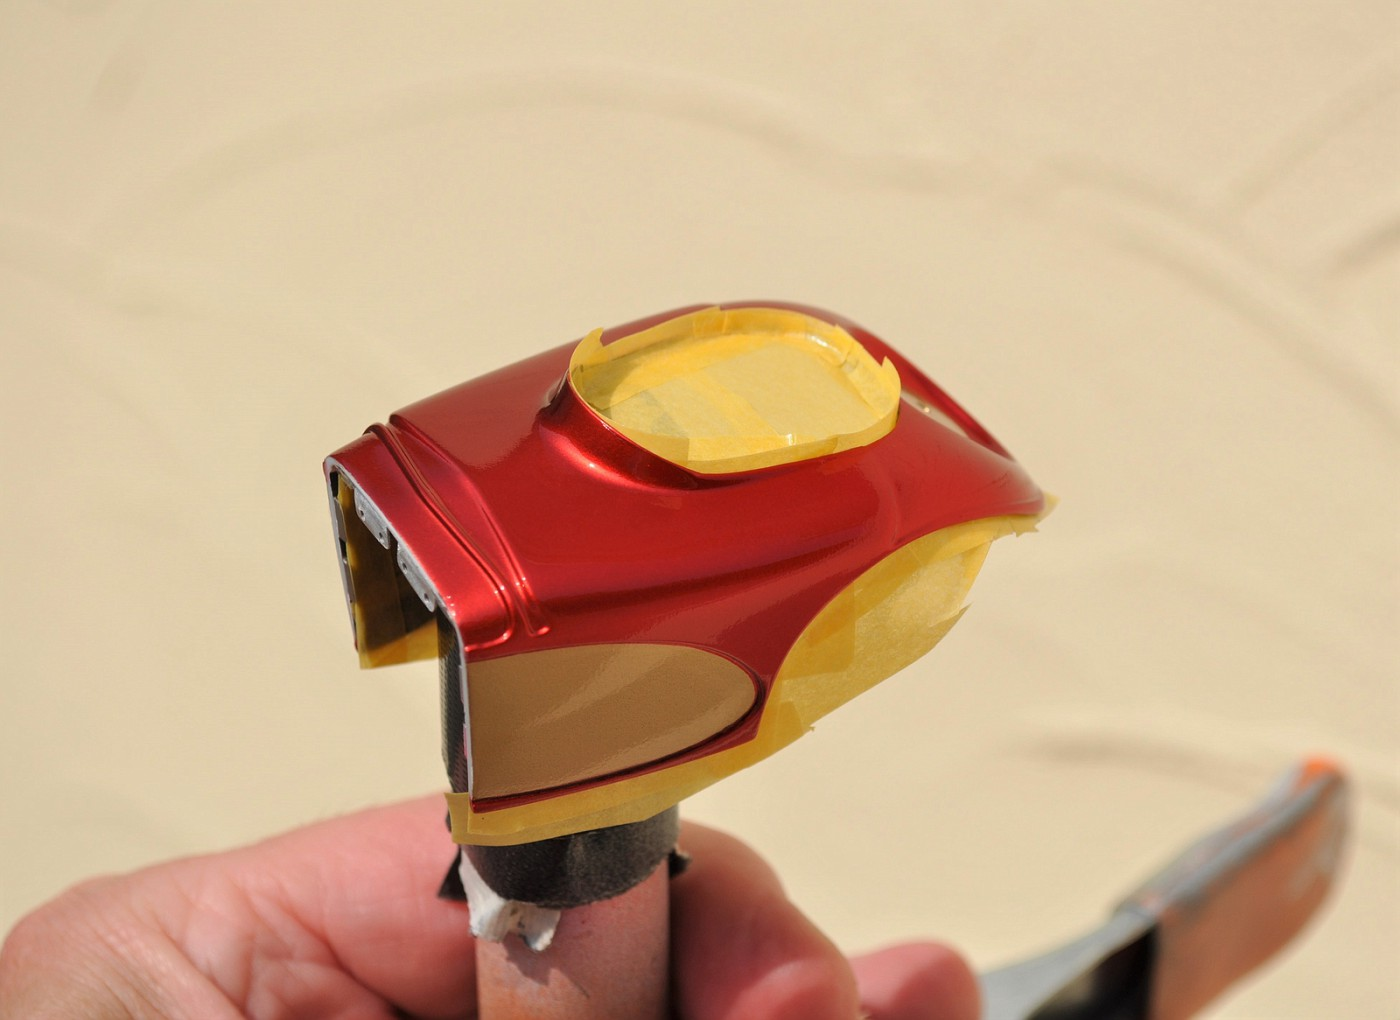
Took a while but the paint is done. Thank you John Teresi for the advice & encouragement to correct the mistake and see it thru. I've got to polish and possibly re-clear the radiator shell to get on with the final assembly. The pics are of so-so quality and I'll try to shoot them later with a white background v. the pale yellow you see here. The colors were all Alclad 2. Happy 4th of July to all! Tim
-
Love the subject car and how yours turned out George. Great color! cheers
-
Junior Fueler--More Of These (Darn) Injectors?! 02/01/19
Codi replied to Straightliner59's topic in WIP: Drag Racing Models
Great job there Daniel. I'd love to see the pics with better lighting as I don't think the pics do the car the justice it deserves. It IS nice! cheers, tim -
Gorgeous build and paint as always Donn. You've still got it man! cheers, tim
-
That is a stunning paint job. Sorry, did I say "stunning", I meant to say stupidly stunning it's so nice. Congrats on a great job on the car so. cheers, tim
-
I remember these cars when they actually raced as a kid and they left quite the impression upon me. With your skills, this should be one VERY impressive build Mark. cheers, tim
-
That paint polished out beautifully. LIke the color a whole lot! cheers
-
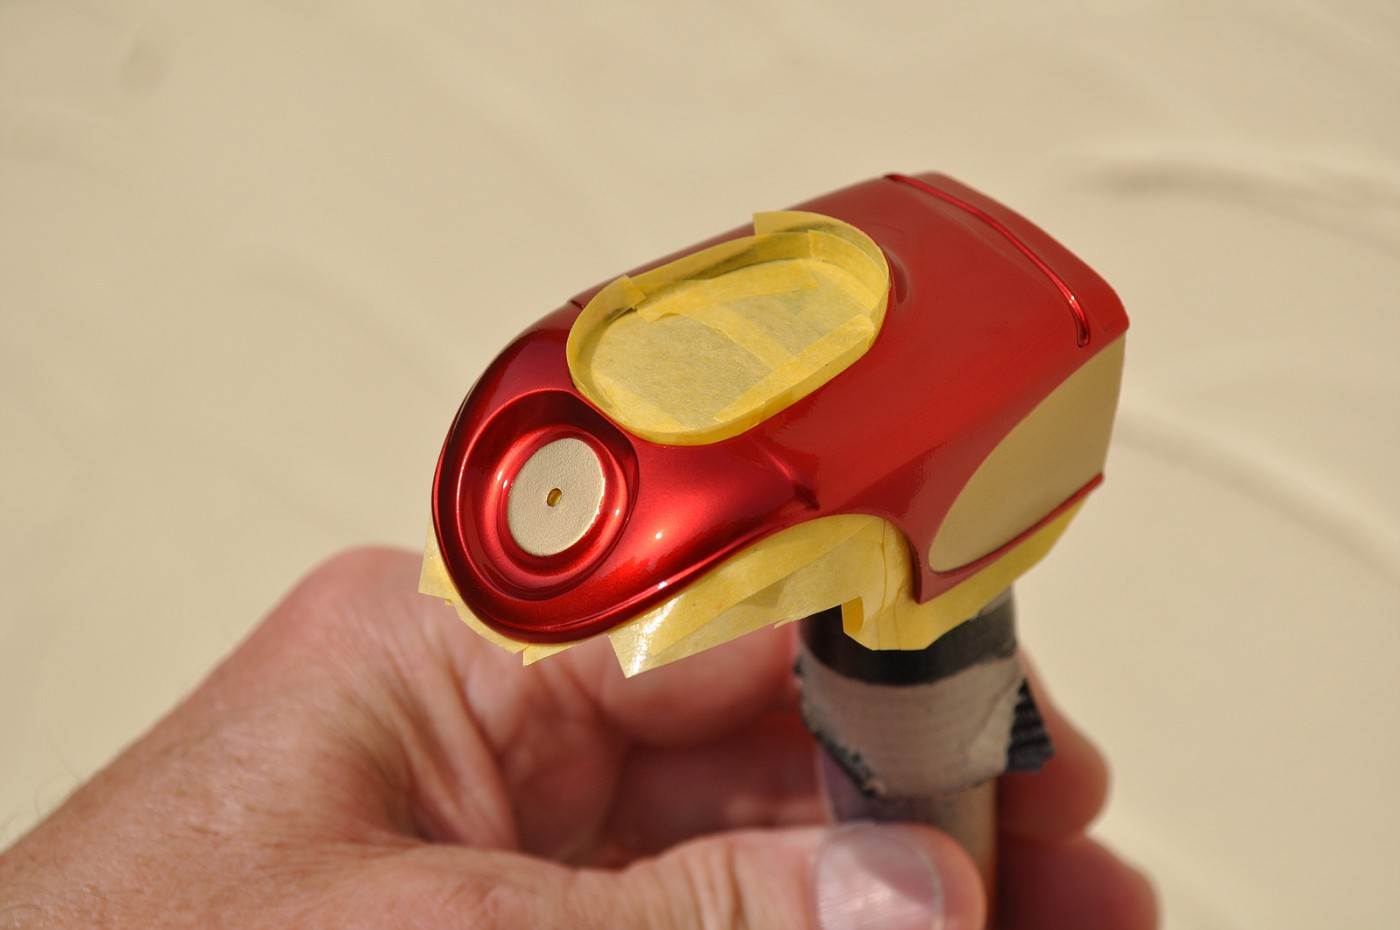
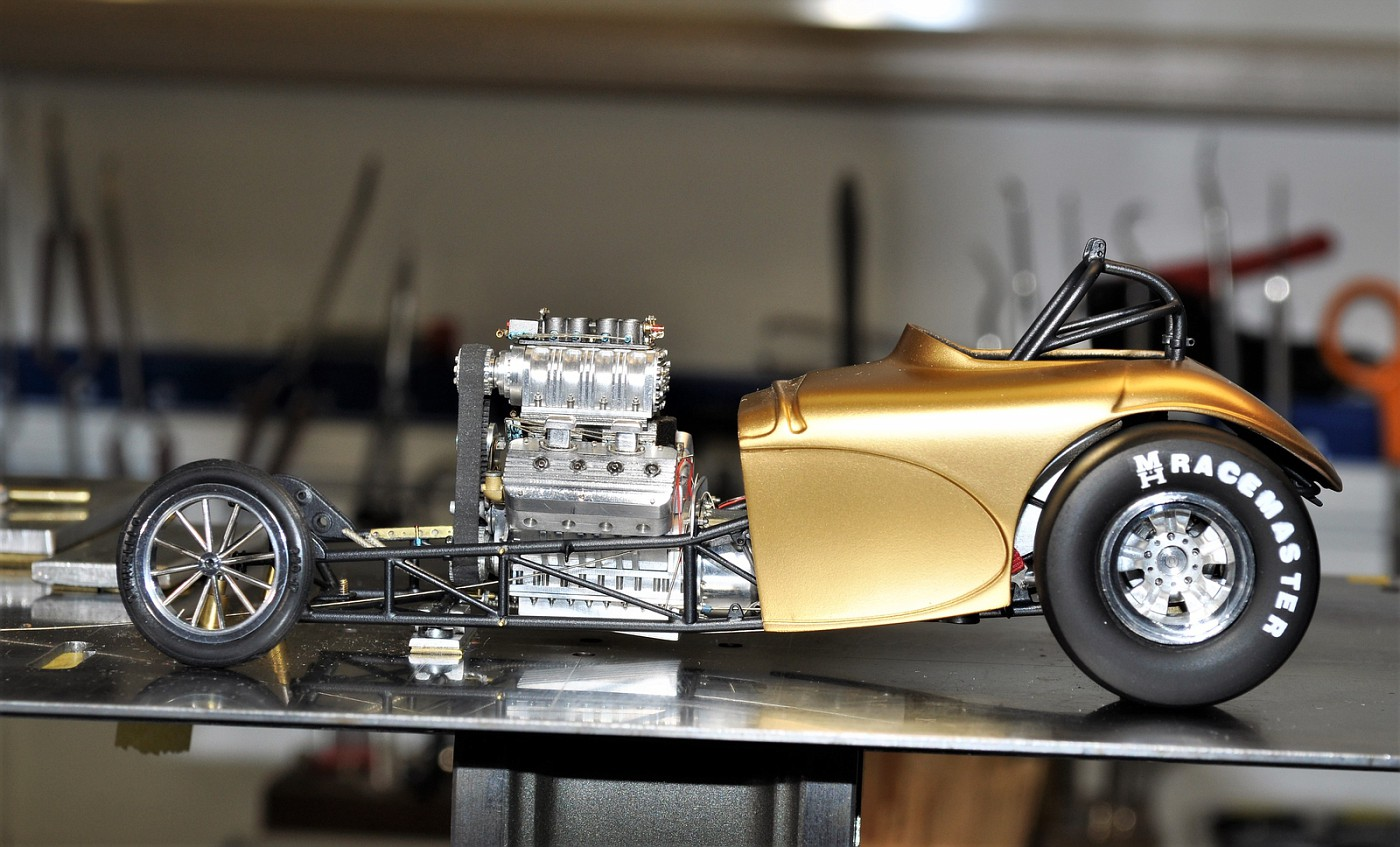
Thank you guys for your posted comments above......it's been 2 weeks and I've been painting etc. So I got the candy red on and the pic doesn't do it justice. At all. Just a slight bit of orange peel and the body has yet to be polished & cleared. I'm very pleased with the color trust me BUT you can see from the pic that I ran into a problem at the bottom edge of the body when I pulled the tape. UGH! So, I paint so infrequently, but didn't panic and knew who to reach out to.........yup, that master painter John Teresi. He shared some ideas on how I can save the paint job and repair/blend the paint on the edge. I'm just waiting on some more gold paint to arrive Monday and I'll get after it. We're having some great paint days this year and next week we'll have a couple more. Also started the detailing of the magneto and plug wires. I've seen John T. & Clay Kemp detail their plug wires with stencils and thought I'd give it a try too. I used Woodland HO train dry transfers to put the stenciling on the plug wires. I took a piece of renshape and used a ball mill to cut a shallow groove to keep the wire straight while applying the decals. About 90 minutes to do all 8. Pic 1 shows a plug wire about to be detailed and the second shows a bunch of the completed lines. Plug boots & looms to be added upon install to the mag and engine. Hopefully have some good pics of the body next week if I can fix it right. Cheers, Tim
-
Now that put a big ol' smile on MY face. You're off to a crackin' start Chris on the mill. Congrats and I'm sure we're in for a real treat as your skills improve over the coming weeks/months. You're on your way to having a COMPLETE tool box that only a few modellers possess. I see you getting a CNC some day and marrying it with your crazy CAD skills. Glad to see you back sir! cheers, tim
-
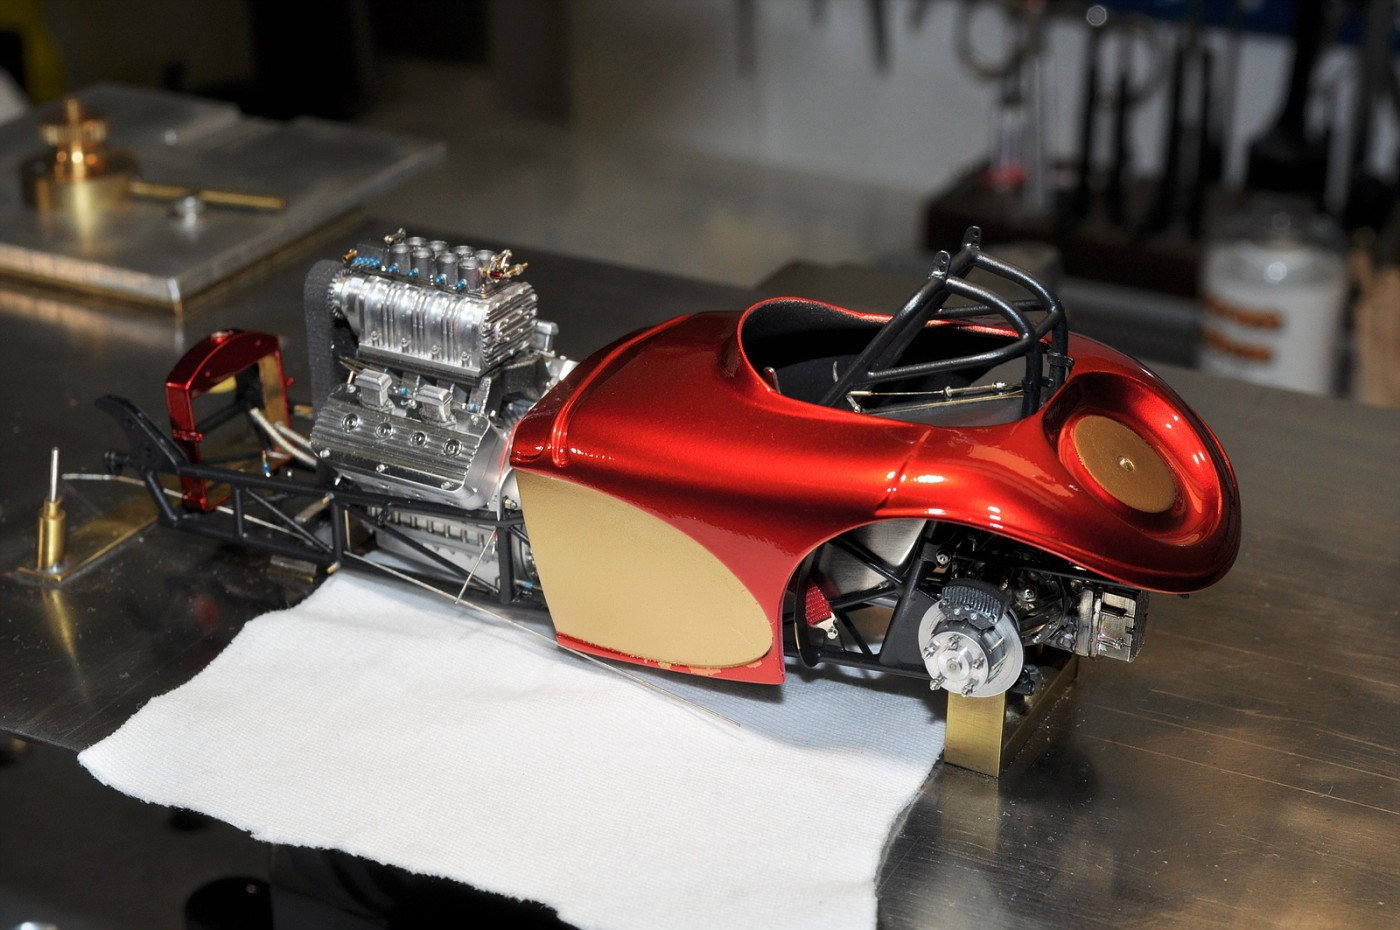
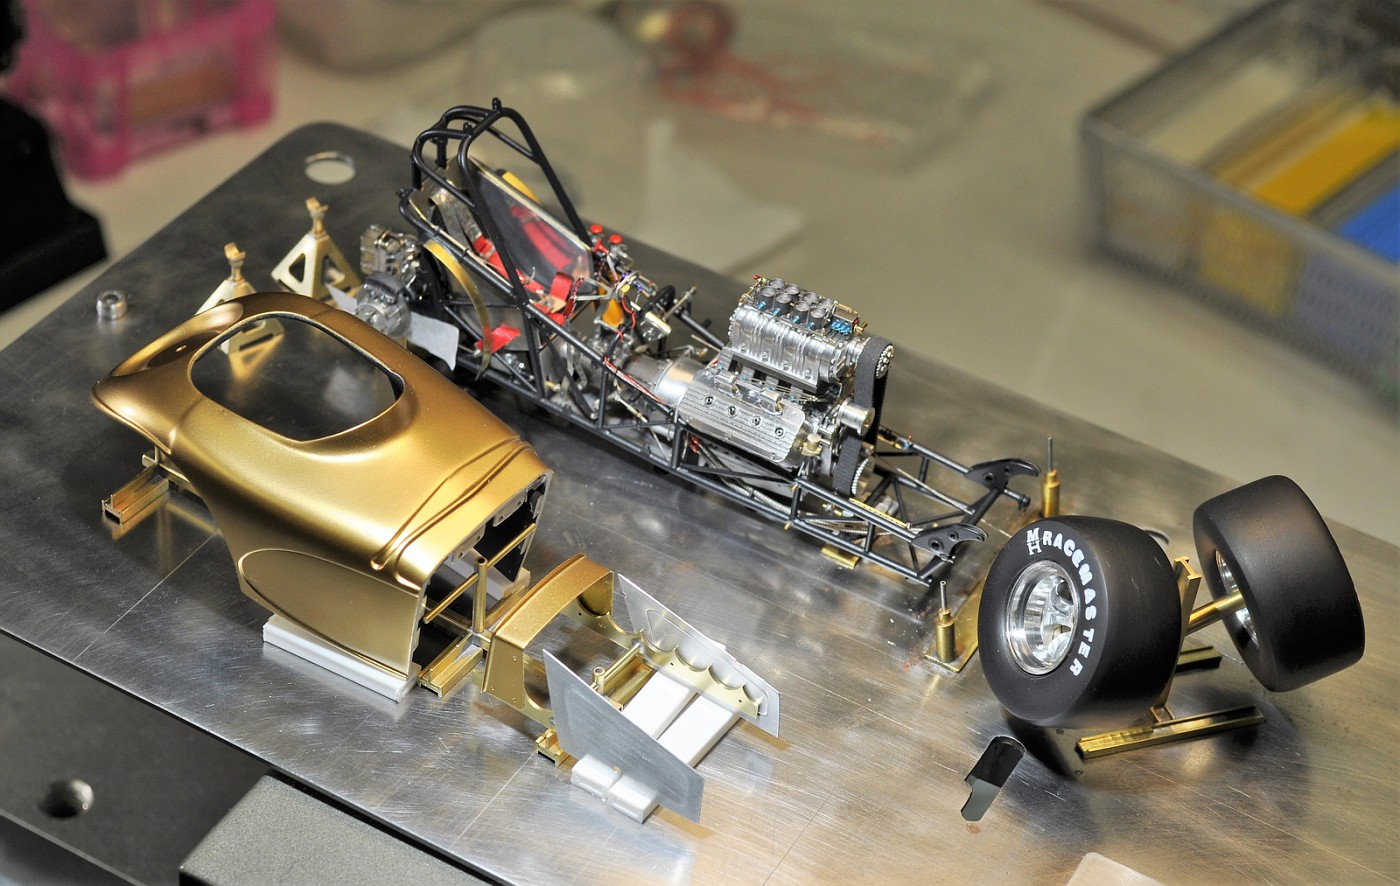
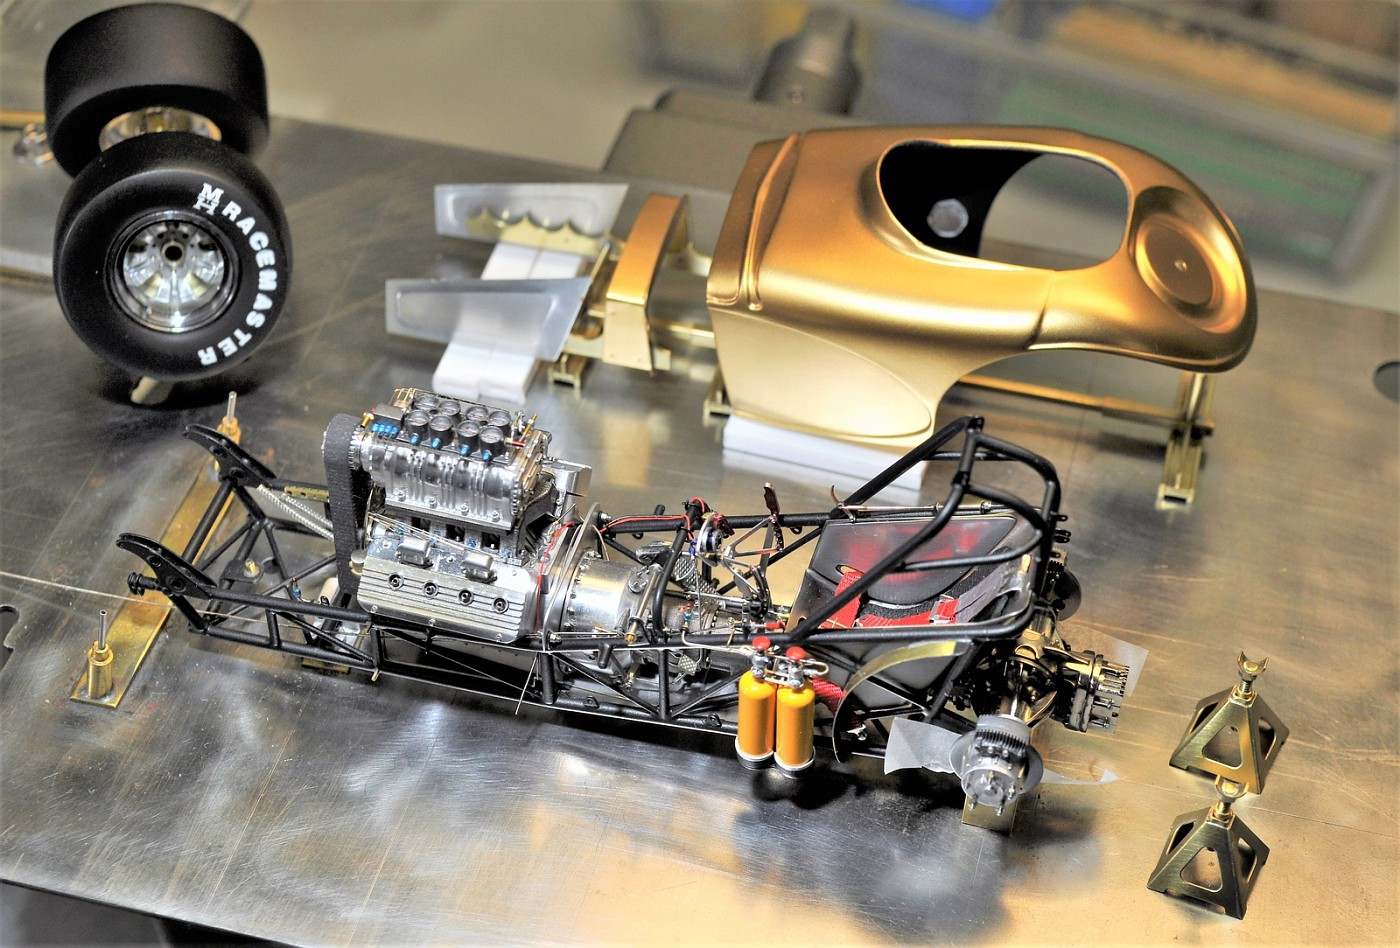
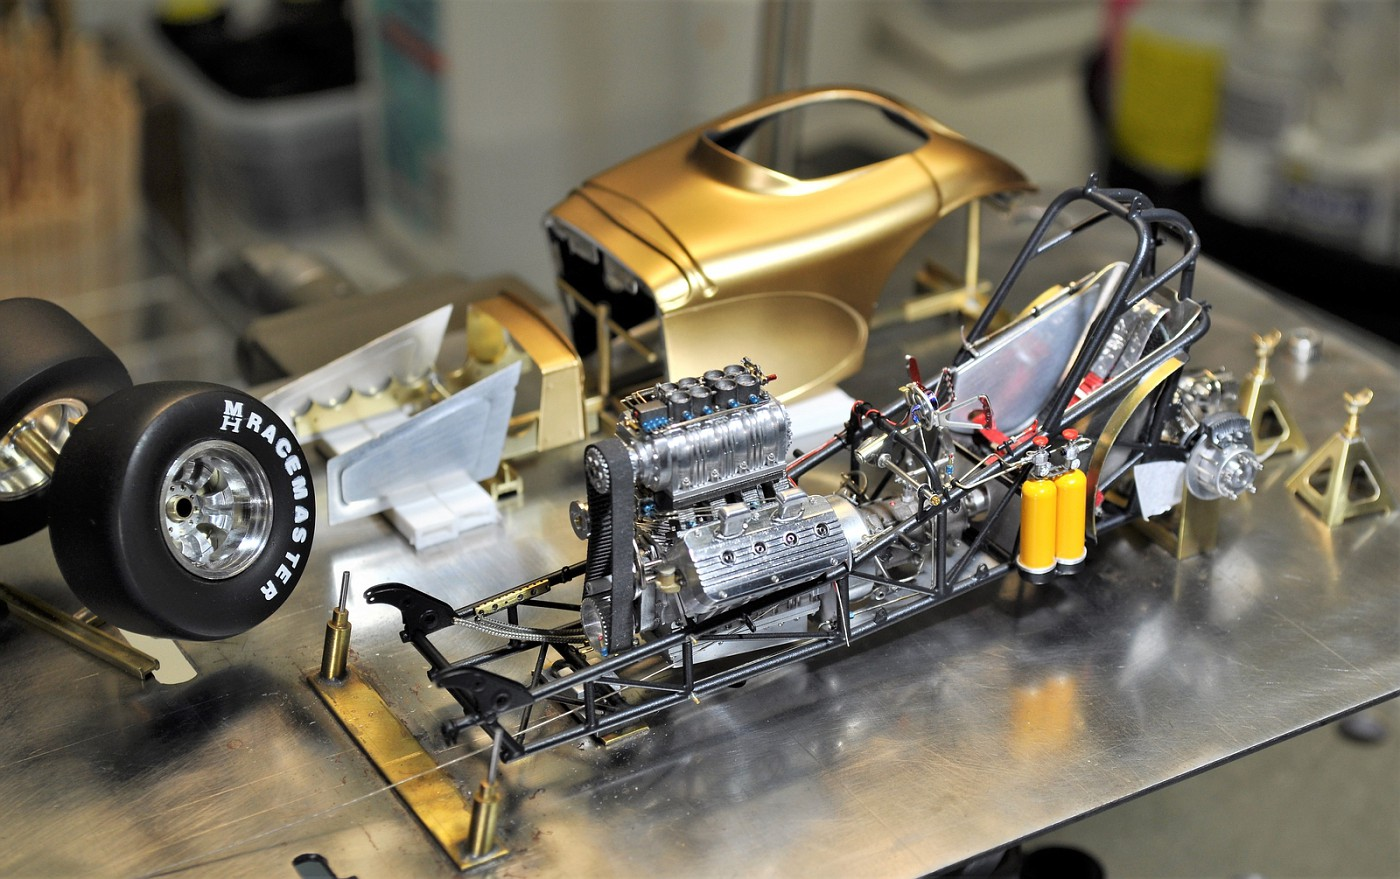
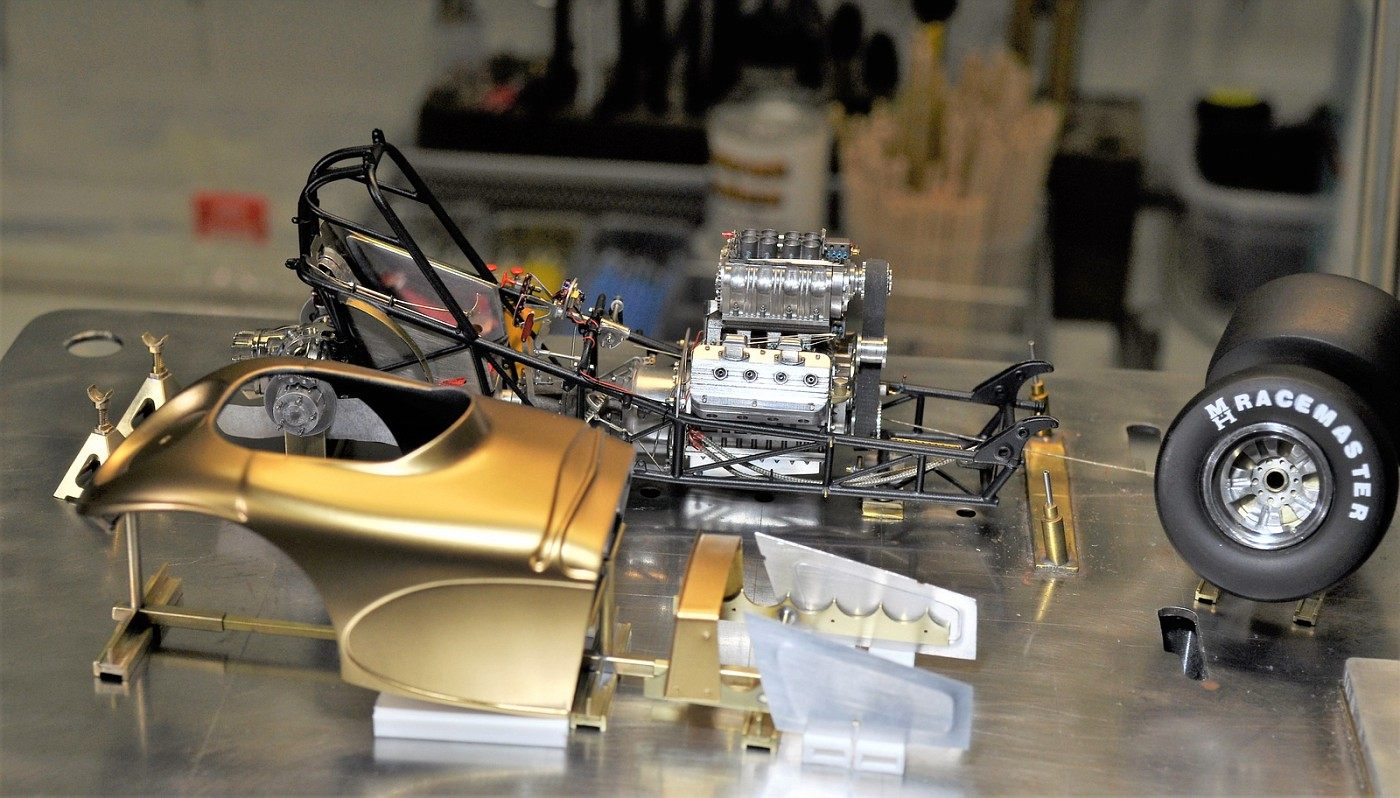
Many thanks to each of you for your comments and interest. It's amazing how things move or "grow" during assembly. I put the rear body tree on to support the body and finished the rear brake lines. So I thought I'd do a last minute check on the clearances for the inner fenders to the body and the magneto. Mag is great.......inner fenders, not so much. I massaged them to the point of proper fitment but for the life of me I don't know why it was necessary. It was completely fine when I fabricated them in the first place. Oh well. I took a second while I had the body on to check the clearances and took a quick mock up for an idea of where it's headed. Happy Memorial Day to everyone and all my respect to those that are either serving or have served. Cheers, Tim
-
I applaud your vision on this project and better yet, your execution of the idea. The body looks great and like the others, hope you continue with it. cheers, tim
-
Jim, absolutely gorgeous paint and the body mods are pure perfection. cheers, tim
-
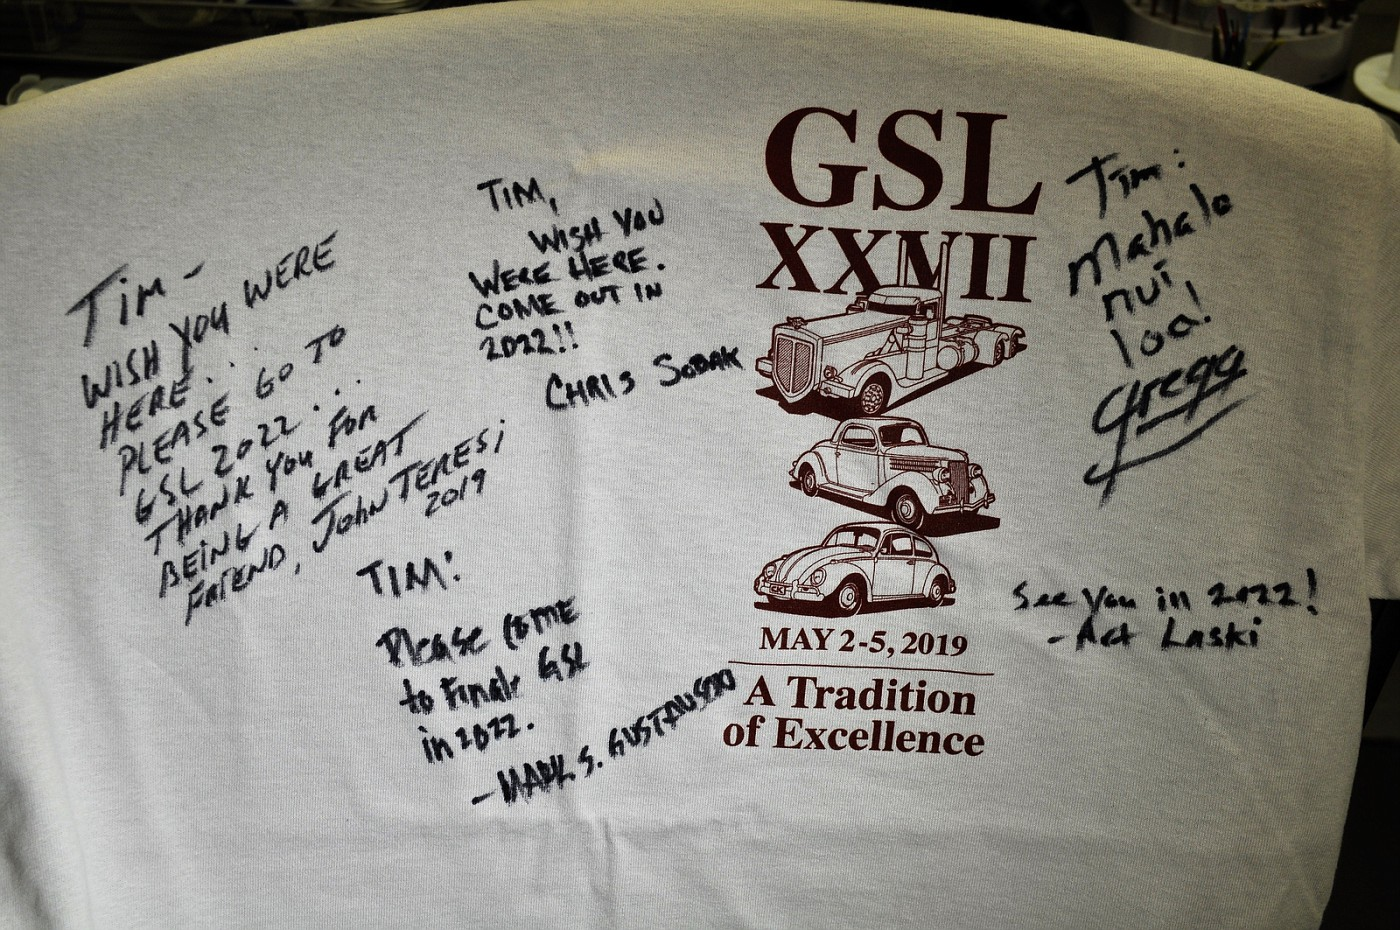
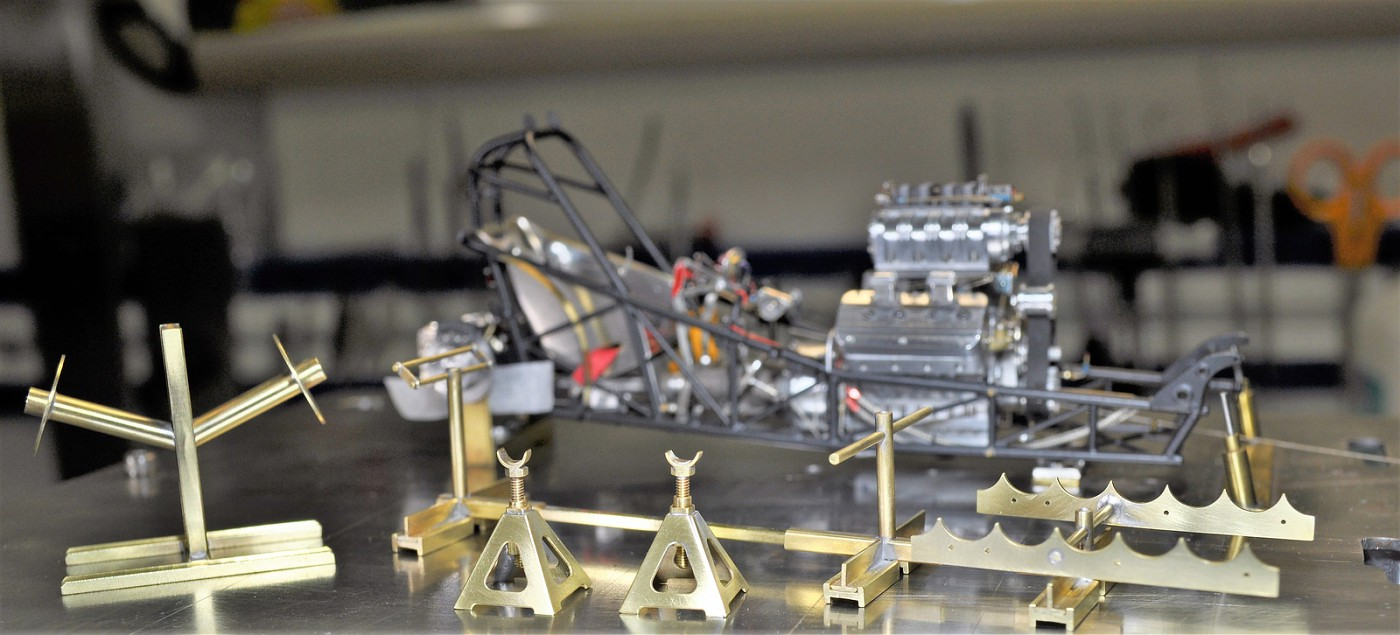
Thanks Dave, here goes. The 1st pic I'm sharing is the surprise gift John Teresi sent from the GSL. An official GSL t-shirt with some great sentiments and signatures from people I'm sure you'll recognize. Thanks again fellas. The other pics are of some pieces I fabbed for display purposes. The body "skeleton", adjustable height jack stands and a rack for the slicks/rear wheels to show the hubs & brakes. The jack stands were heavily modified dirtmodeller pieces btw, only the pyramidal base was used. Paint weather has arrived so I'll finally get onto that so I can finish the car. Cheers to all and thanks again Dave for the efforts you're making to have the Forum perform better for all. (fingers crossed as he prepares to down load pics this time) YES!!!!!!!! It DOES work now. btw Dave, the pics did download faster than I've experienced in the past which I'm sure reflects some of the changes you made while doing the site maintenance. Good job.
-
After several attempts to post pics, I gave up. Each time I get the "uploading" image box at the bottom that says "image qued" and nothing happens. It will not upload the pics I've copied and dropped from Fotki like I always have. Just an fyi for the administrators.
-
Resistance Soldering Questions
Codi replied to Straightliner59's topic in Model Building Questions and Answers
I have to echo Pete's comments. I've used the American Beauty 250 watt model for 5+ years now. It allows me to do a lot of different work and has a finesse that I couldn't (others can) master with a standard soldering iron. As you gain experience with it you'll wonder how you ever did it any other way. Not a cheap unit as you described though. I've learned to file tips down and shape them for a given job. Even bent the electrode ends in varying degrees to get at hard to reach places. I use Tix solder and flux whether resistance or flame soldering and the absolute BEST BOOK on the subject of soldering (IMO) is "Model Building with Brass" by Kenneth Foran even though they don't discuss resistance soldering per se. Have fun experimenting!! -
Claude, don't know about "good for the soul" but it DOES put a smile on my face to be near the end of this one! Thanks Dave, you're a good mentor and better friend. QuikTimz, I get it, I have had and continue to have many inspirational builders on the forum that I look up to.......not to offend or omit anyone by accident, but I think it safe to say that Comp1839(Dave), ClayKemp, Chris Sobak, John Teresi, RandyD and Lowlife among others were those that influenced and inspired me. If I'm on YOUR list I can only sincerely say thank you. Hope to see your work in the future. Mike, thanks man, I mean that. The photos you had provided were VERY helpful along the way on this one. I'm glad you're still following along and I should have some pics to post soon. Cheers everyone!