kenlwest
-
Posts
277 -
Joined
-
Last visited
Content Type
Profiles
Forums
Events
Gallery
Everything posted by kenlwest
-
Yes. The process of creating an accurate model involves many design iterations. The order in which the parts are designed will minimize the number trials.
-
I assembled the parts together. Just for fun, I placed the valve covers from the 78 kit on the heads. I noticed 2 issues right away that will need to be corrected before the final print. The intake is too shallow, and the heads need to be angled more in the front view. More to come..

-
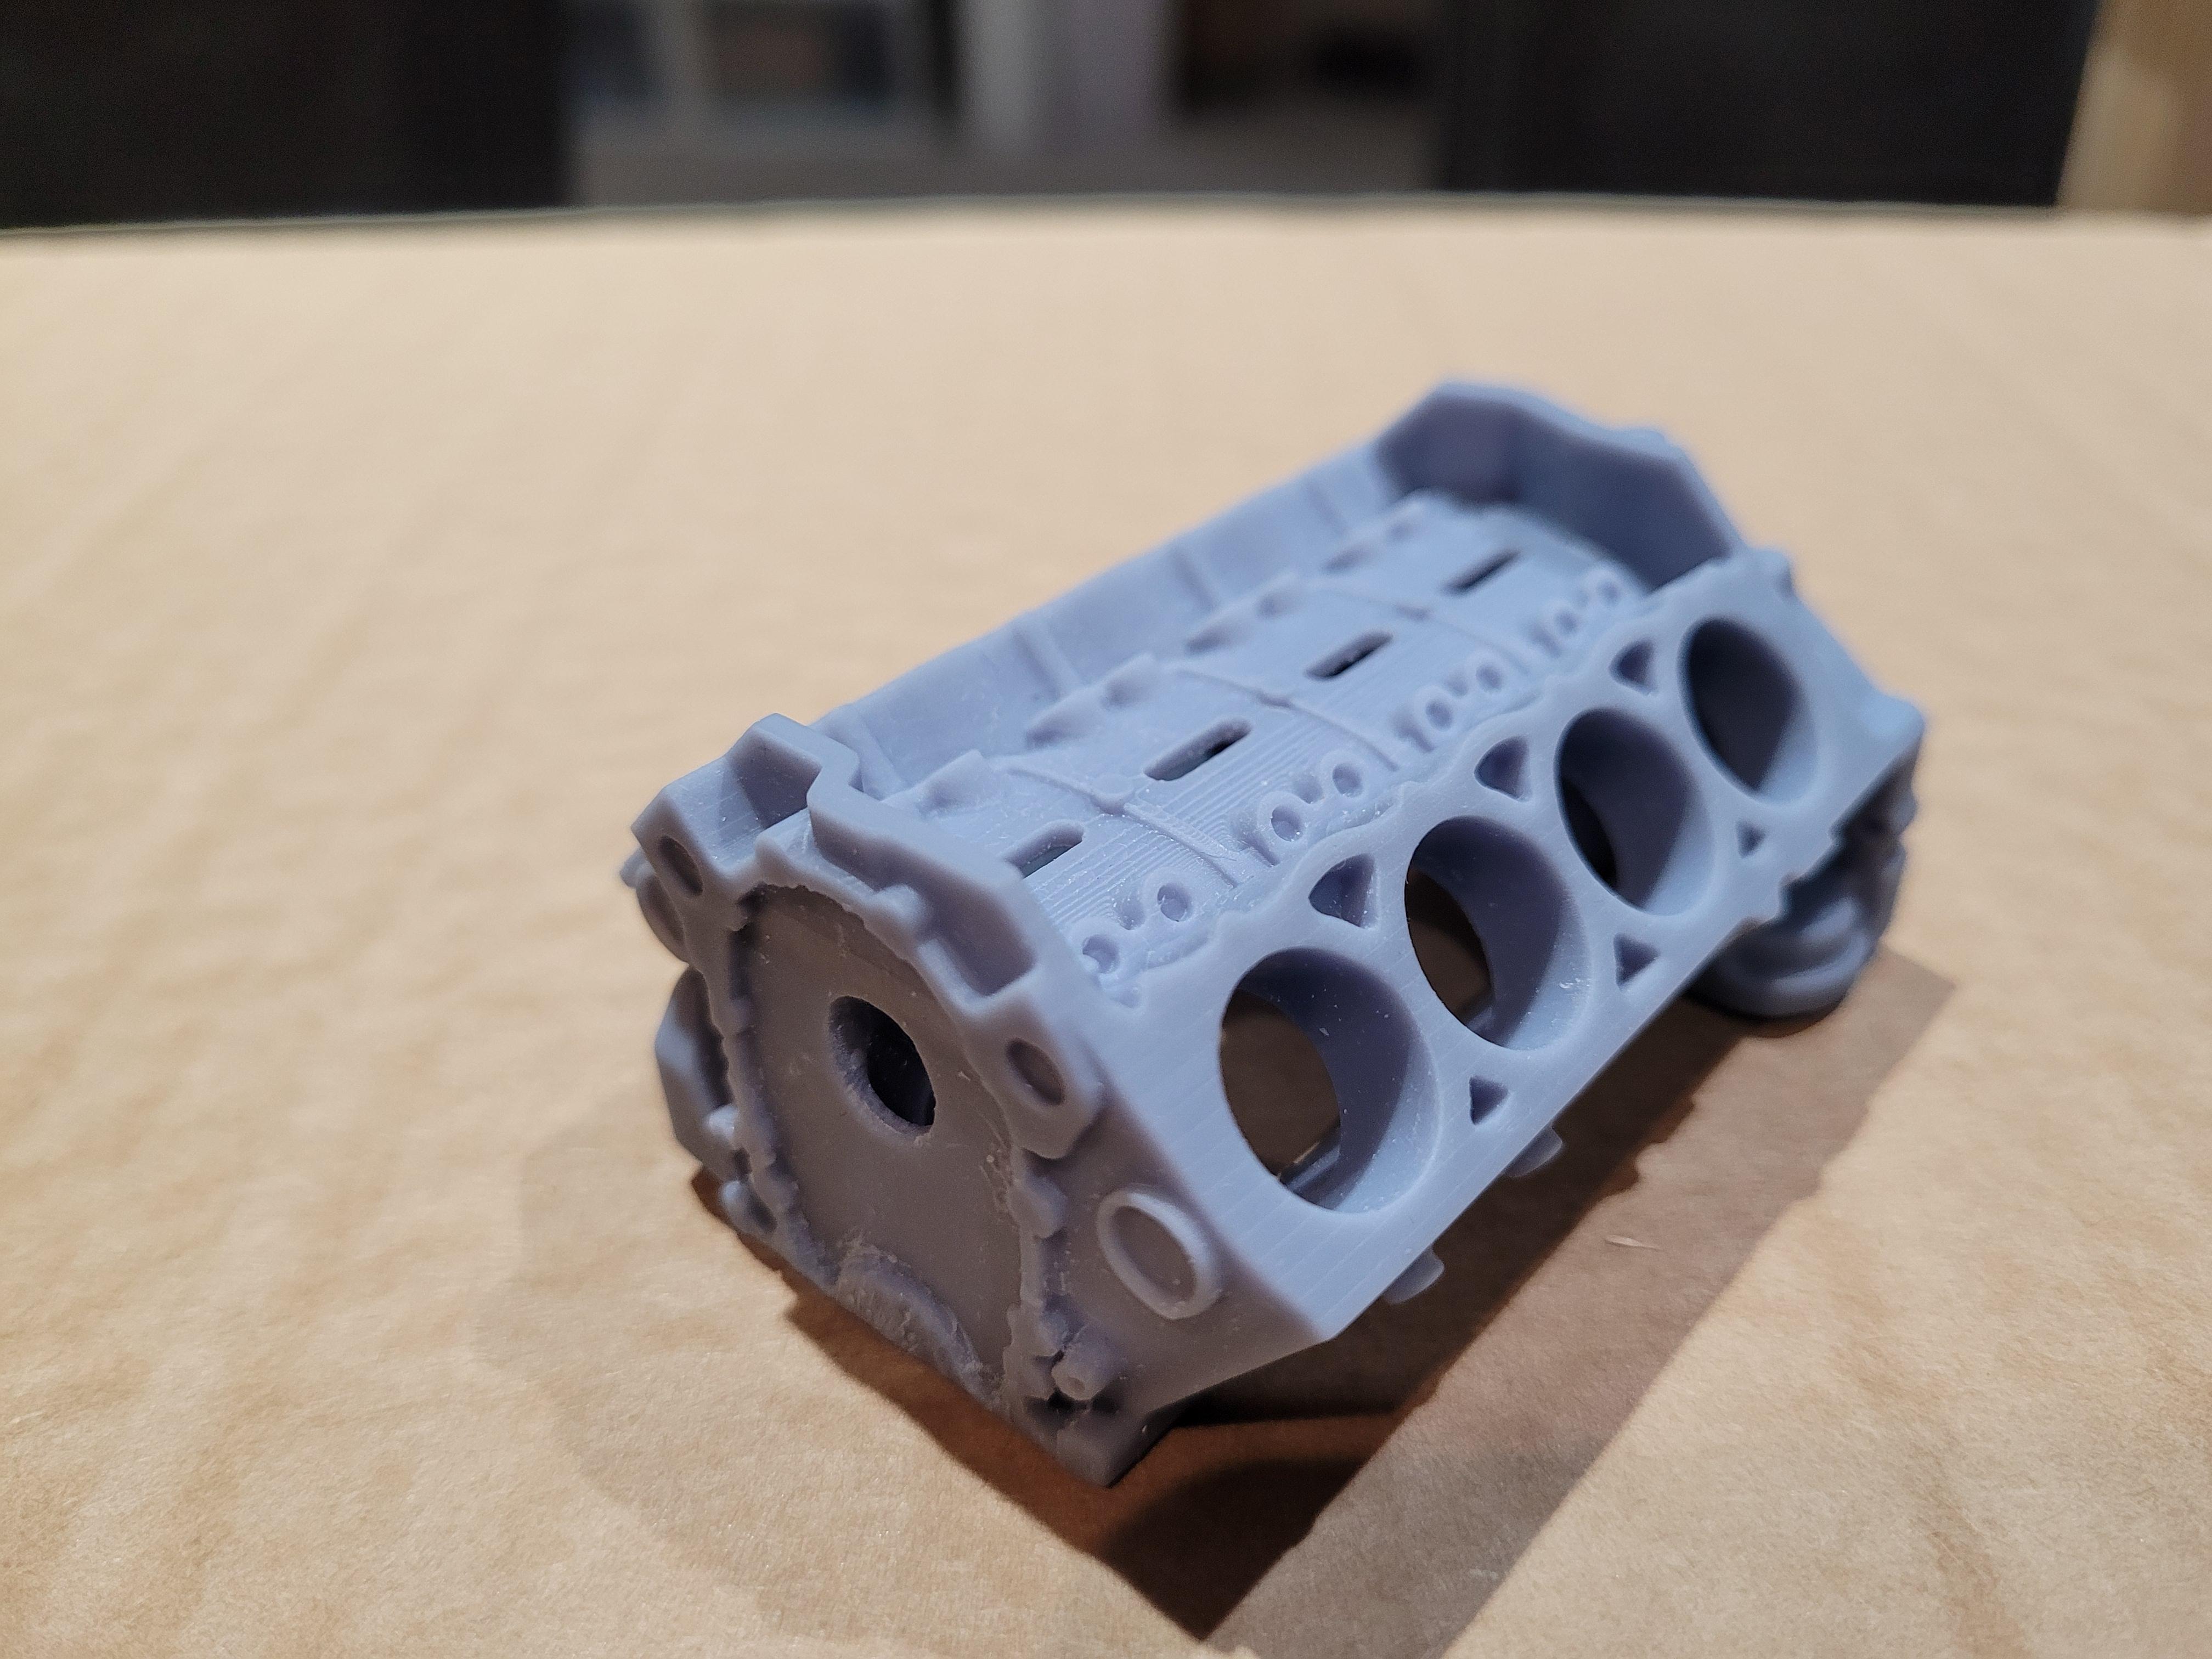
There are many variations of 350 Chevy intake manifolds that were used over many years. I modeled mine after the spread bore manifold that was used in model years 72 and 73. Here you can see both the printed part, and the intake/carb part that came in the 78 kit.
-
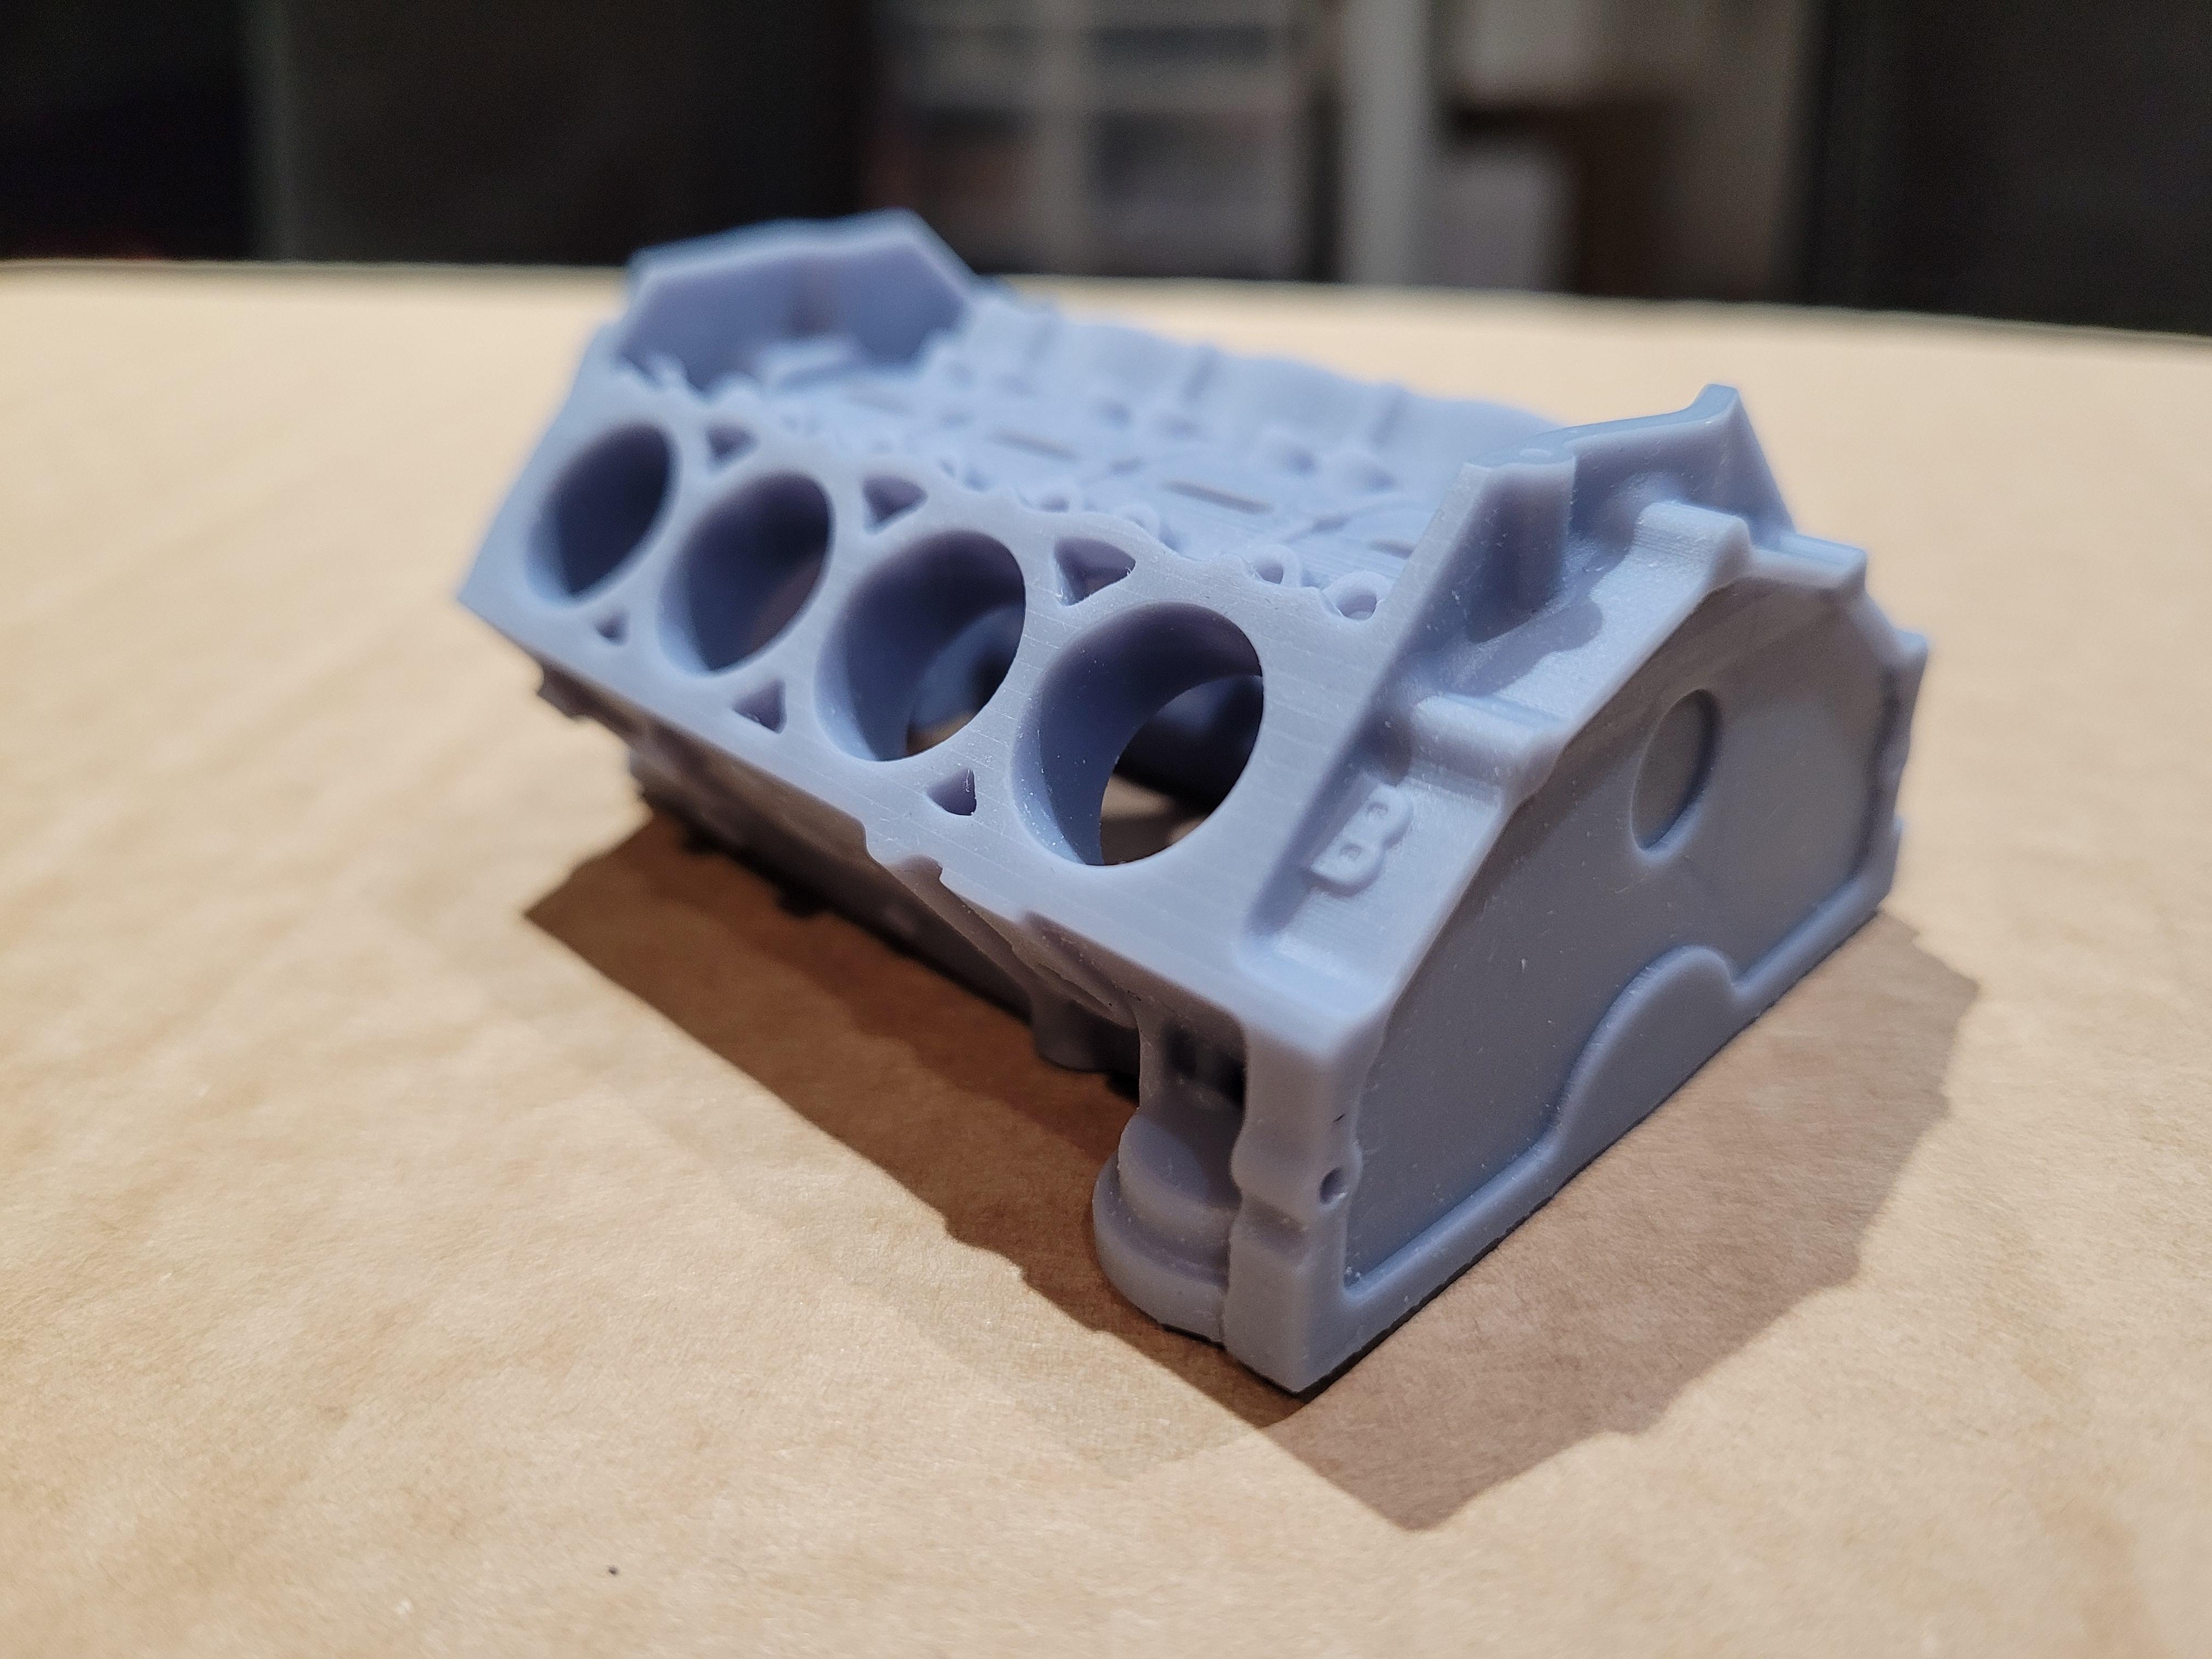
I printed out the heads this morning. I temporarily mounted them on the block - I couldn't help myself. Notice the spark plug holes... the plug wires will be attached to boots and plugs, to be printed later in the process. Next: intake manifold. Stay tuned.
-
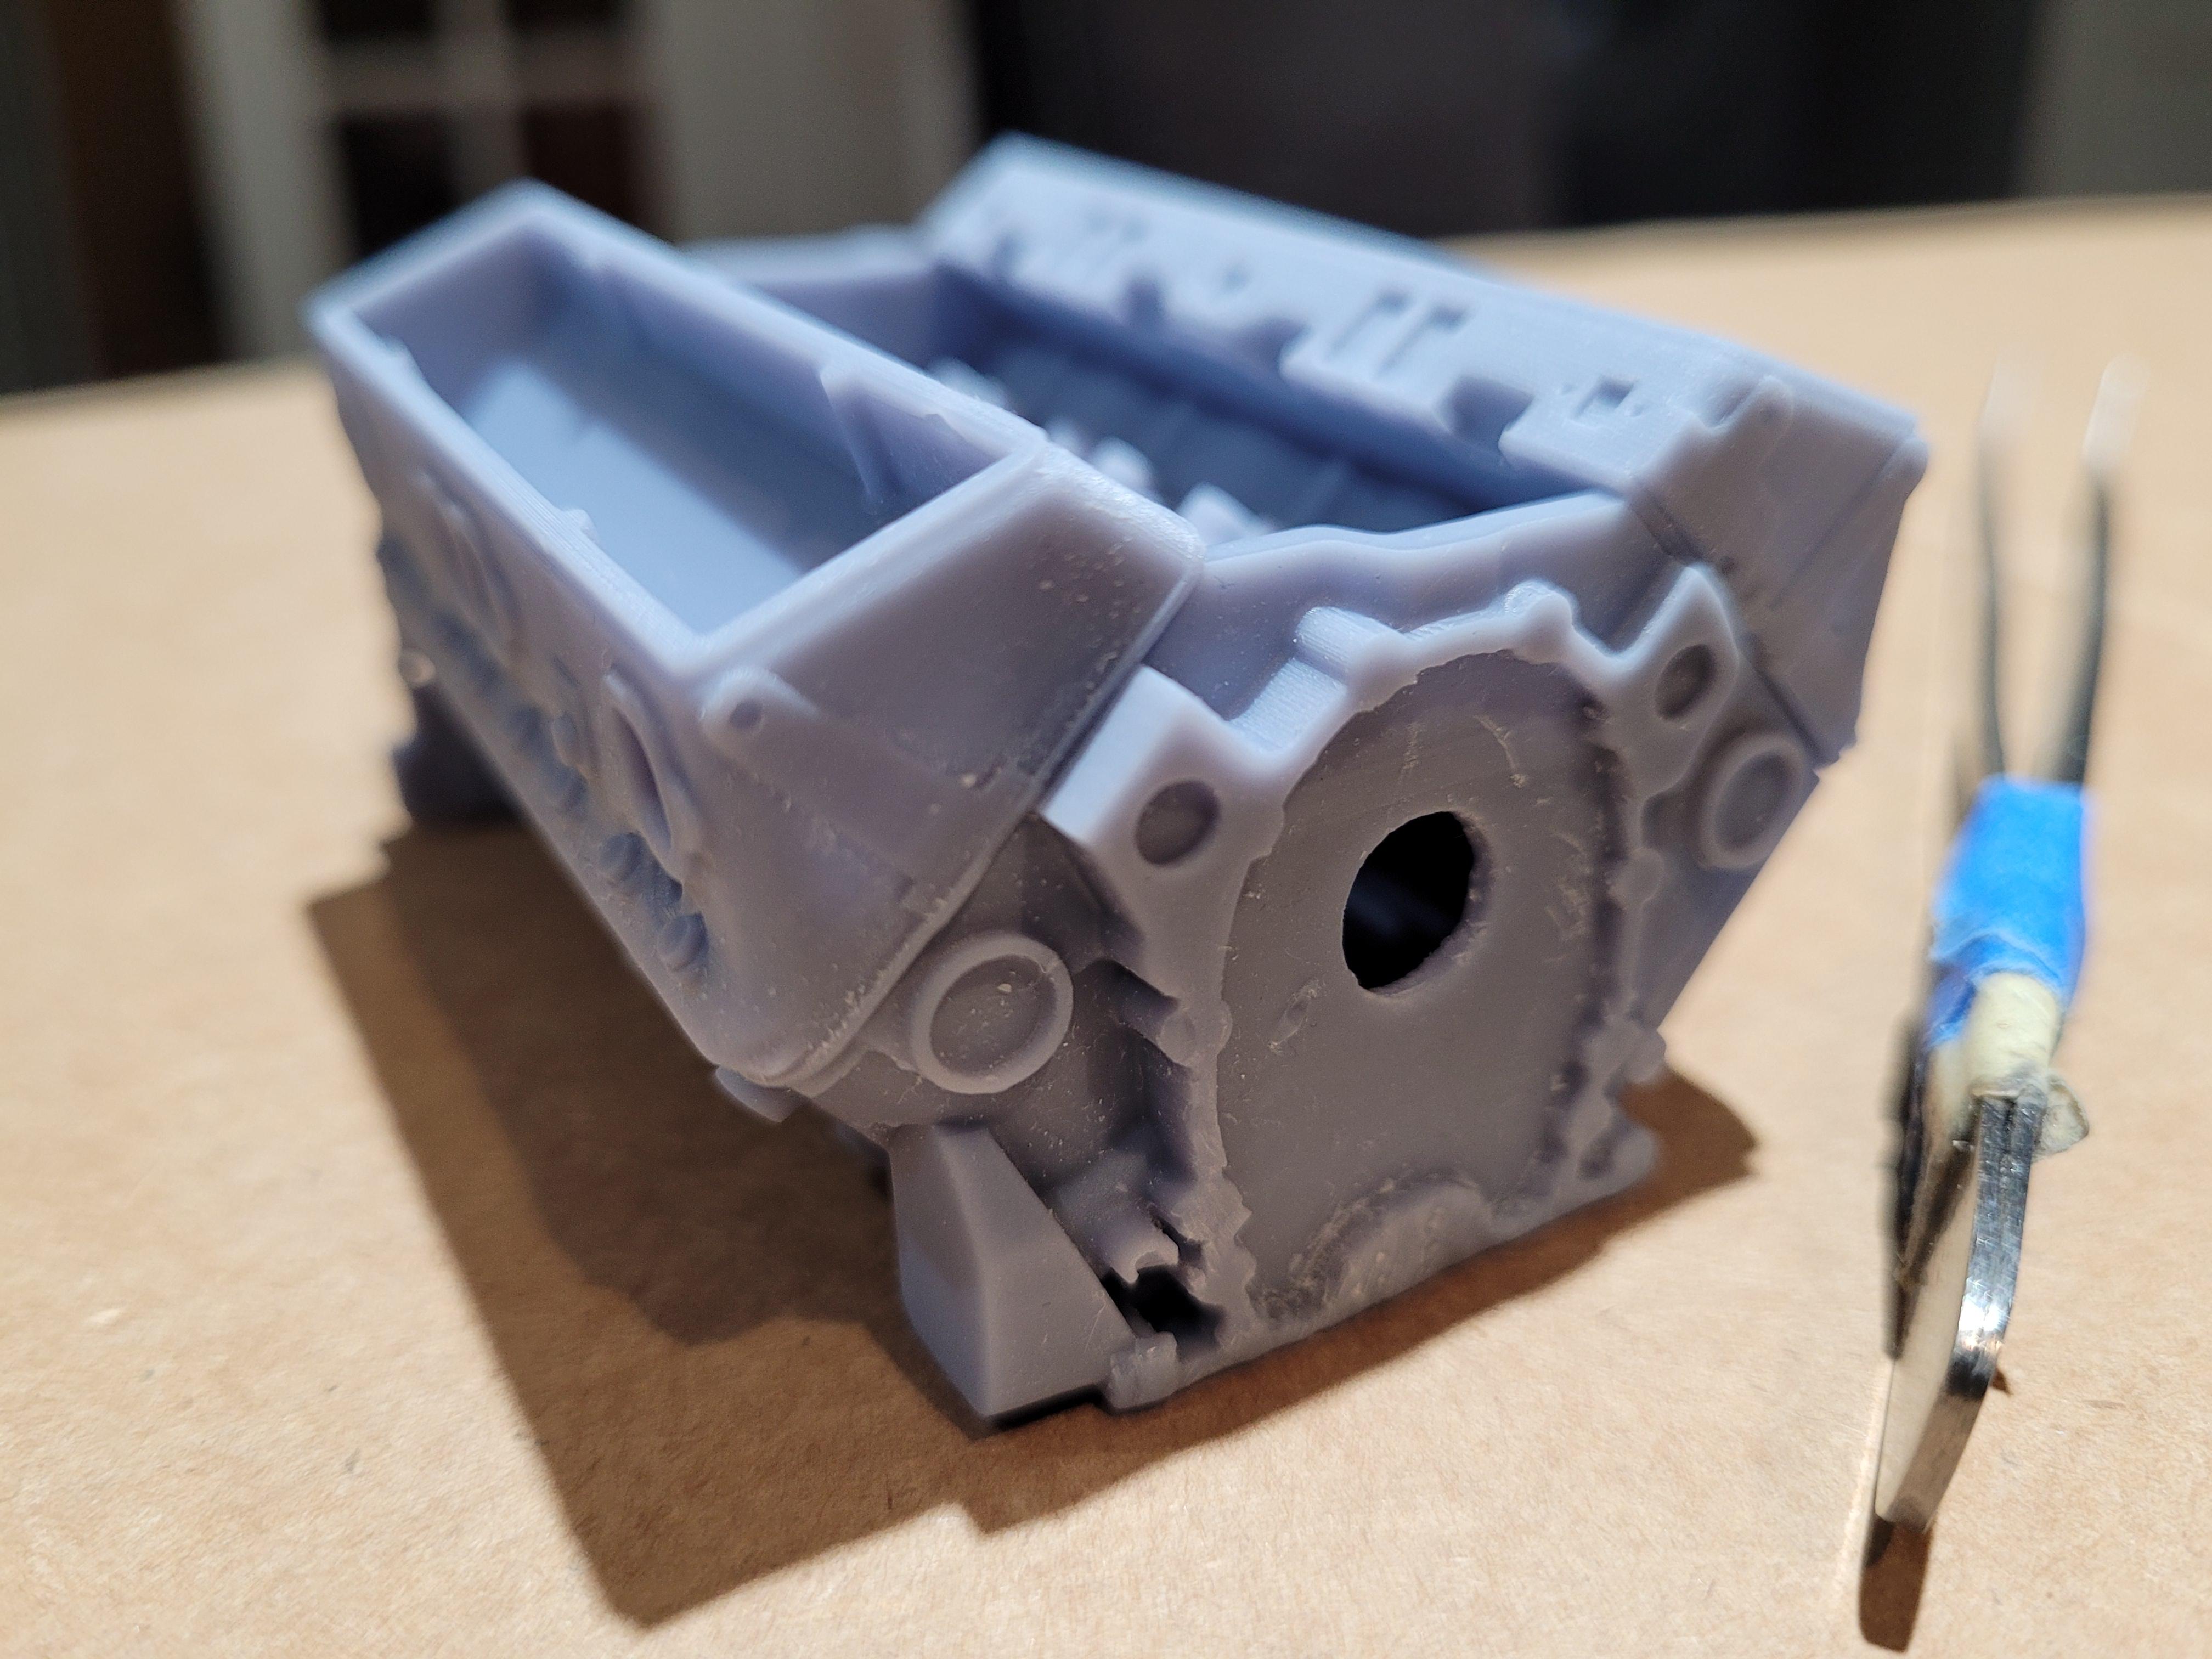
I started working on the engine. Just pulled this off the printer. I got a little carried away with details that won't be seen after the engine is assembled, but it will provide a preview of where the project is going. You can see the comparison between the monogram engine and the detailed block.
-
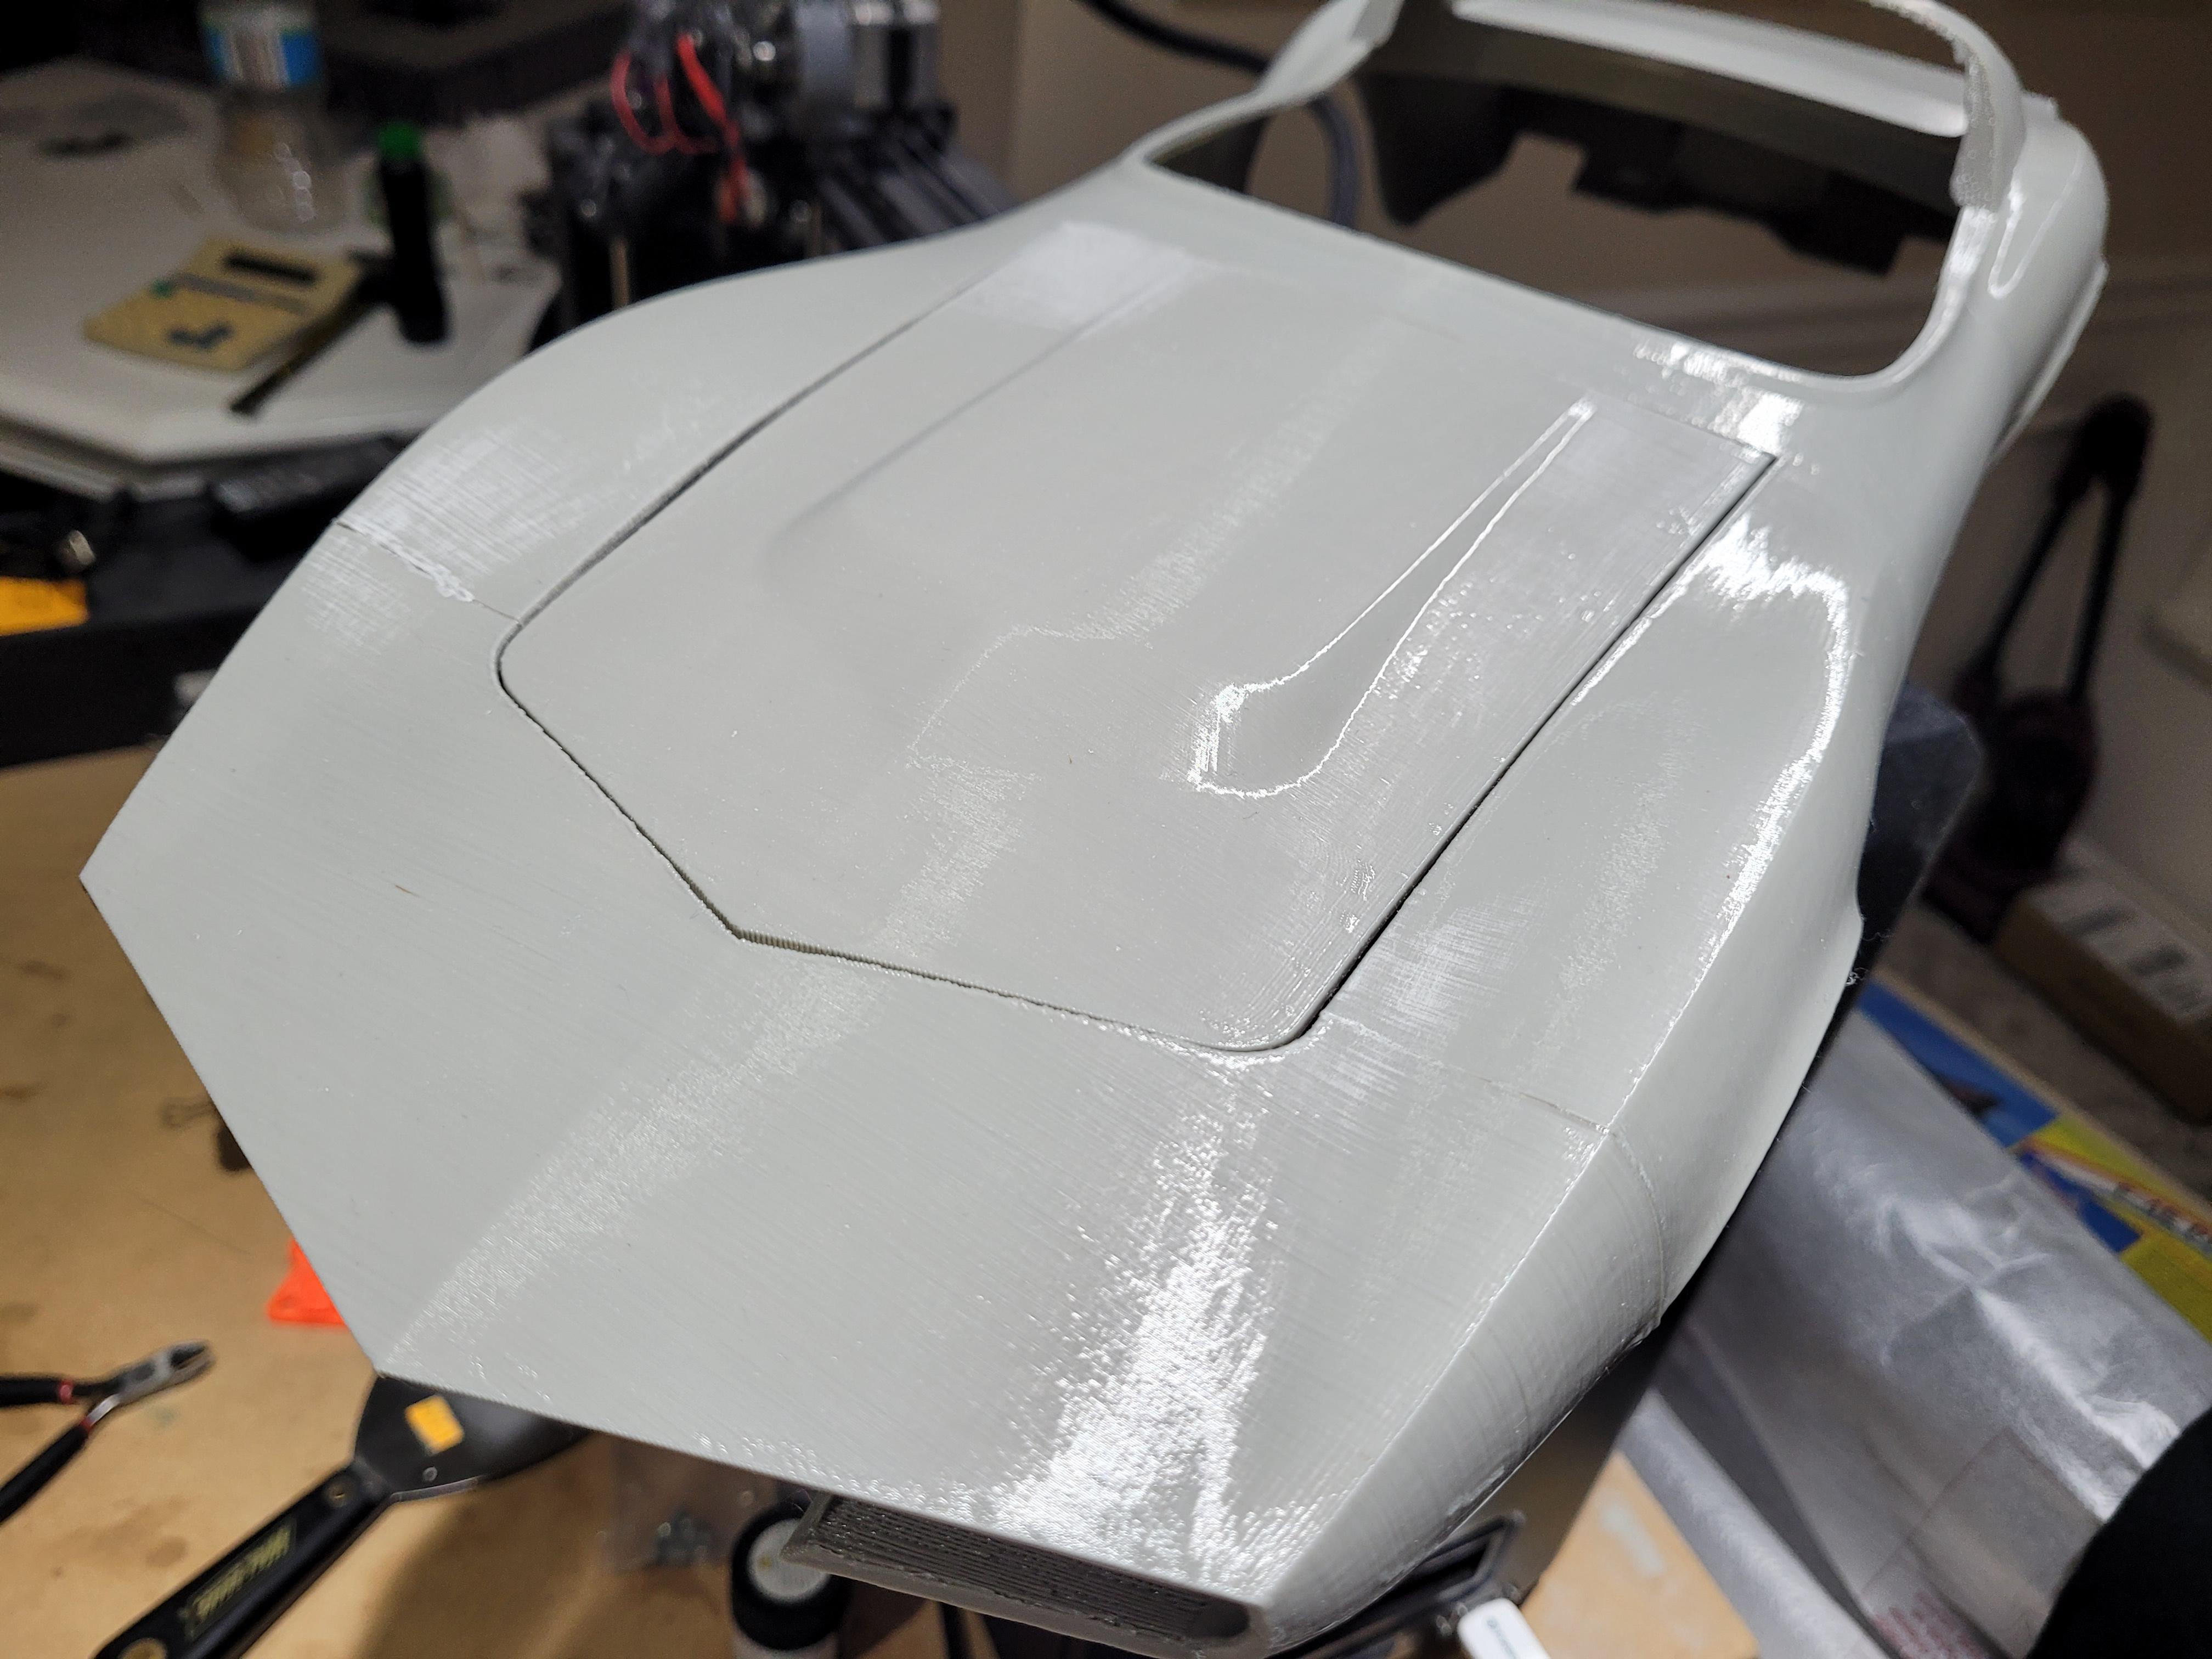
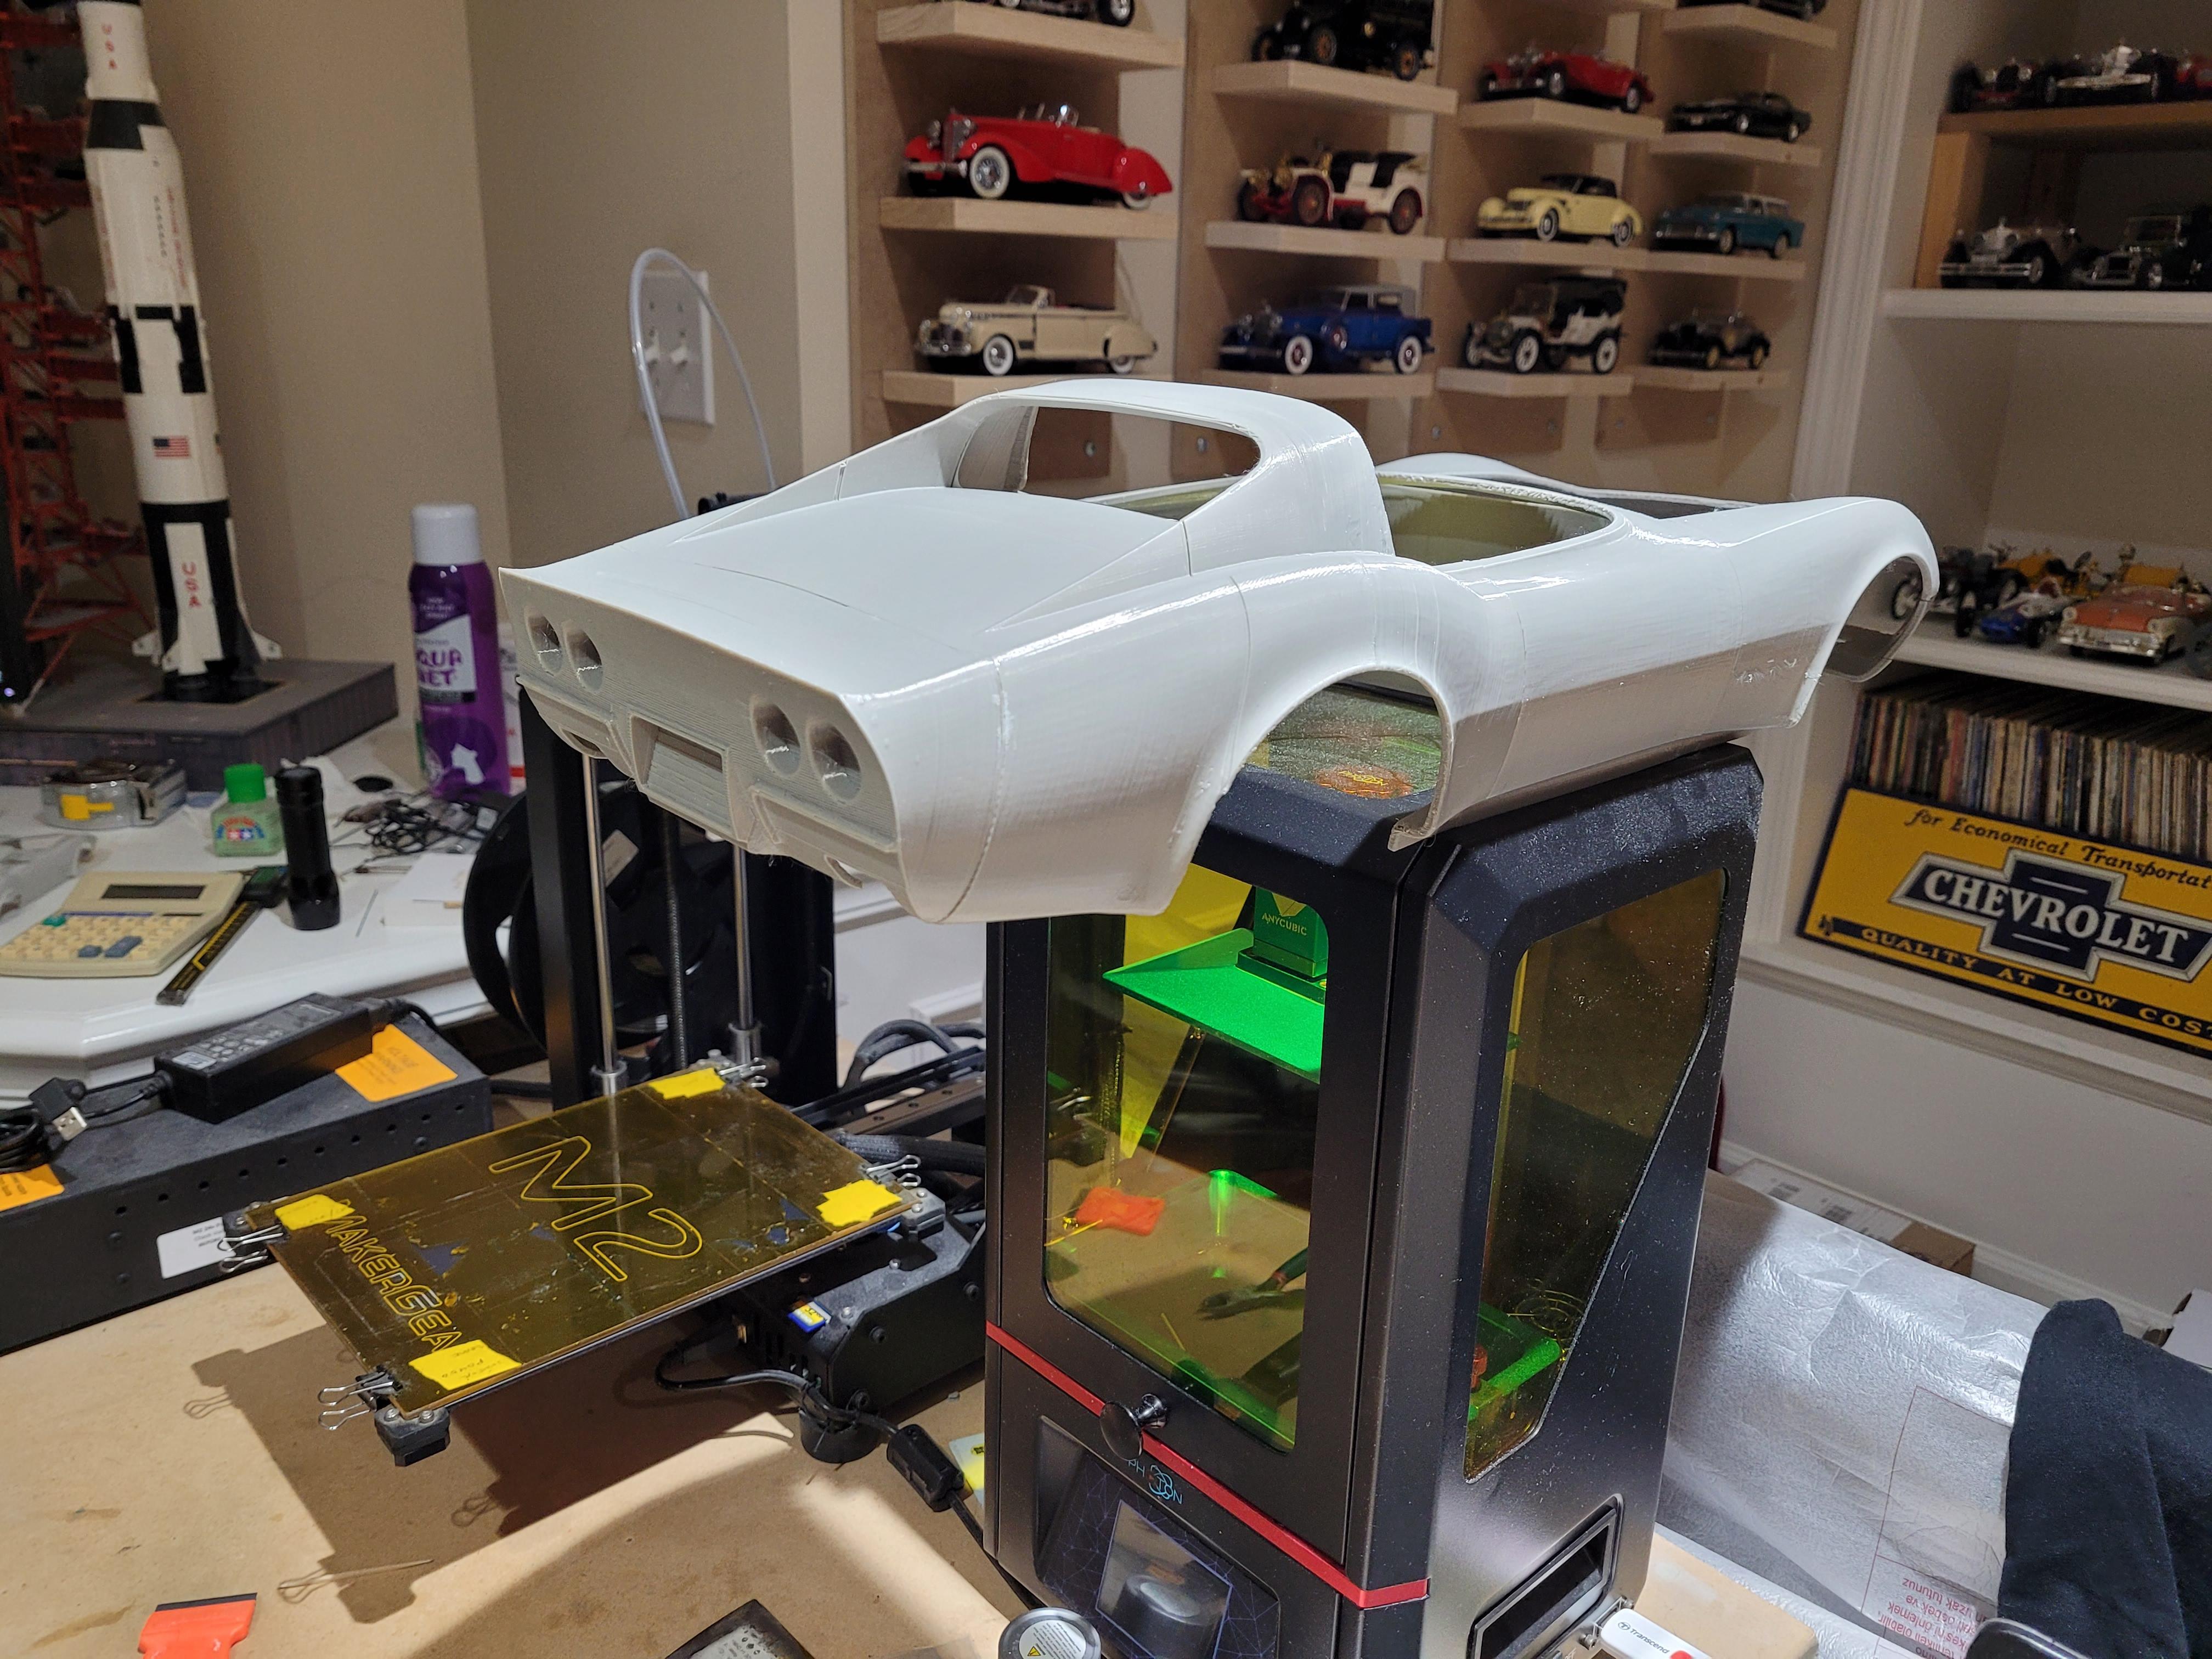
The printing method used for the trial is called FDM. It is an inexpensive way to make quick prototypes and fitting trials. The final prints will be using a process called SLA or FDM. But that is ways down the road. Many trials will have to be made along the way. Here is the hood, fitted to the opening. Next, the structural cage..
-
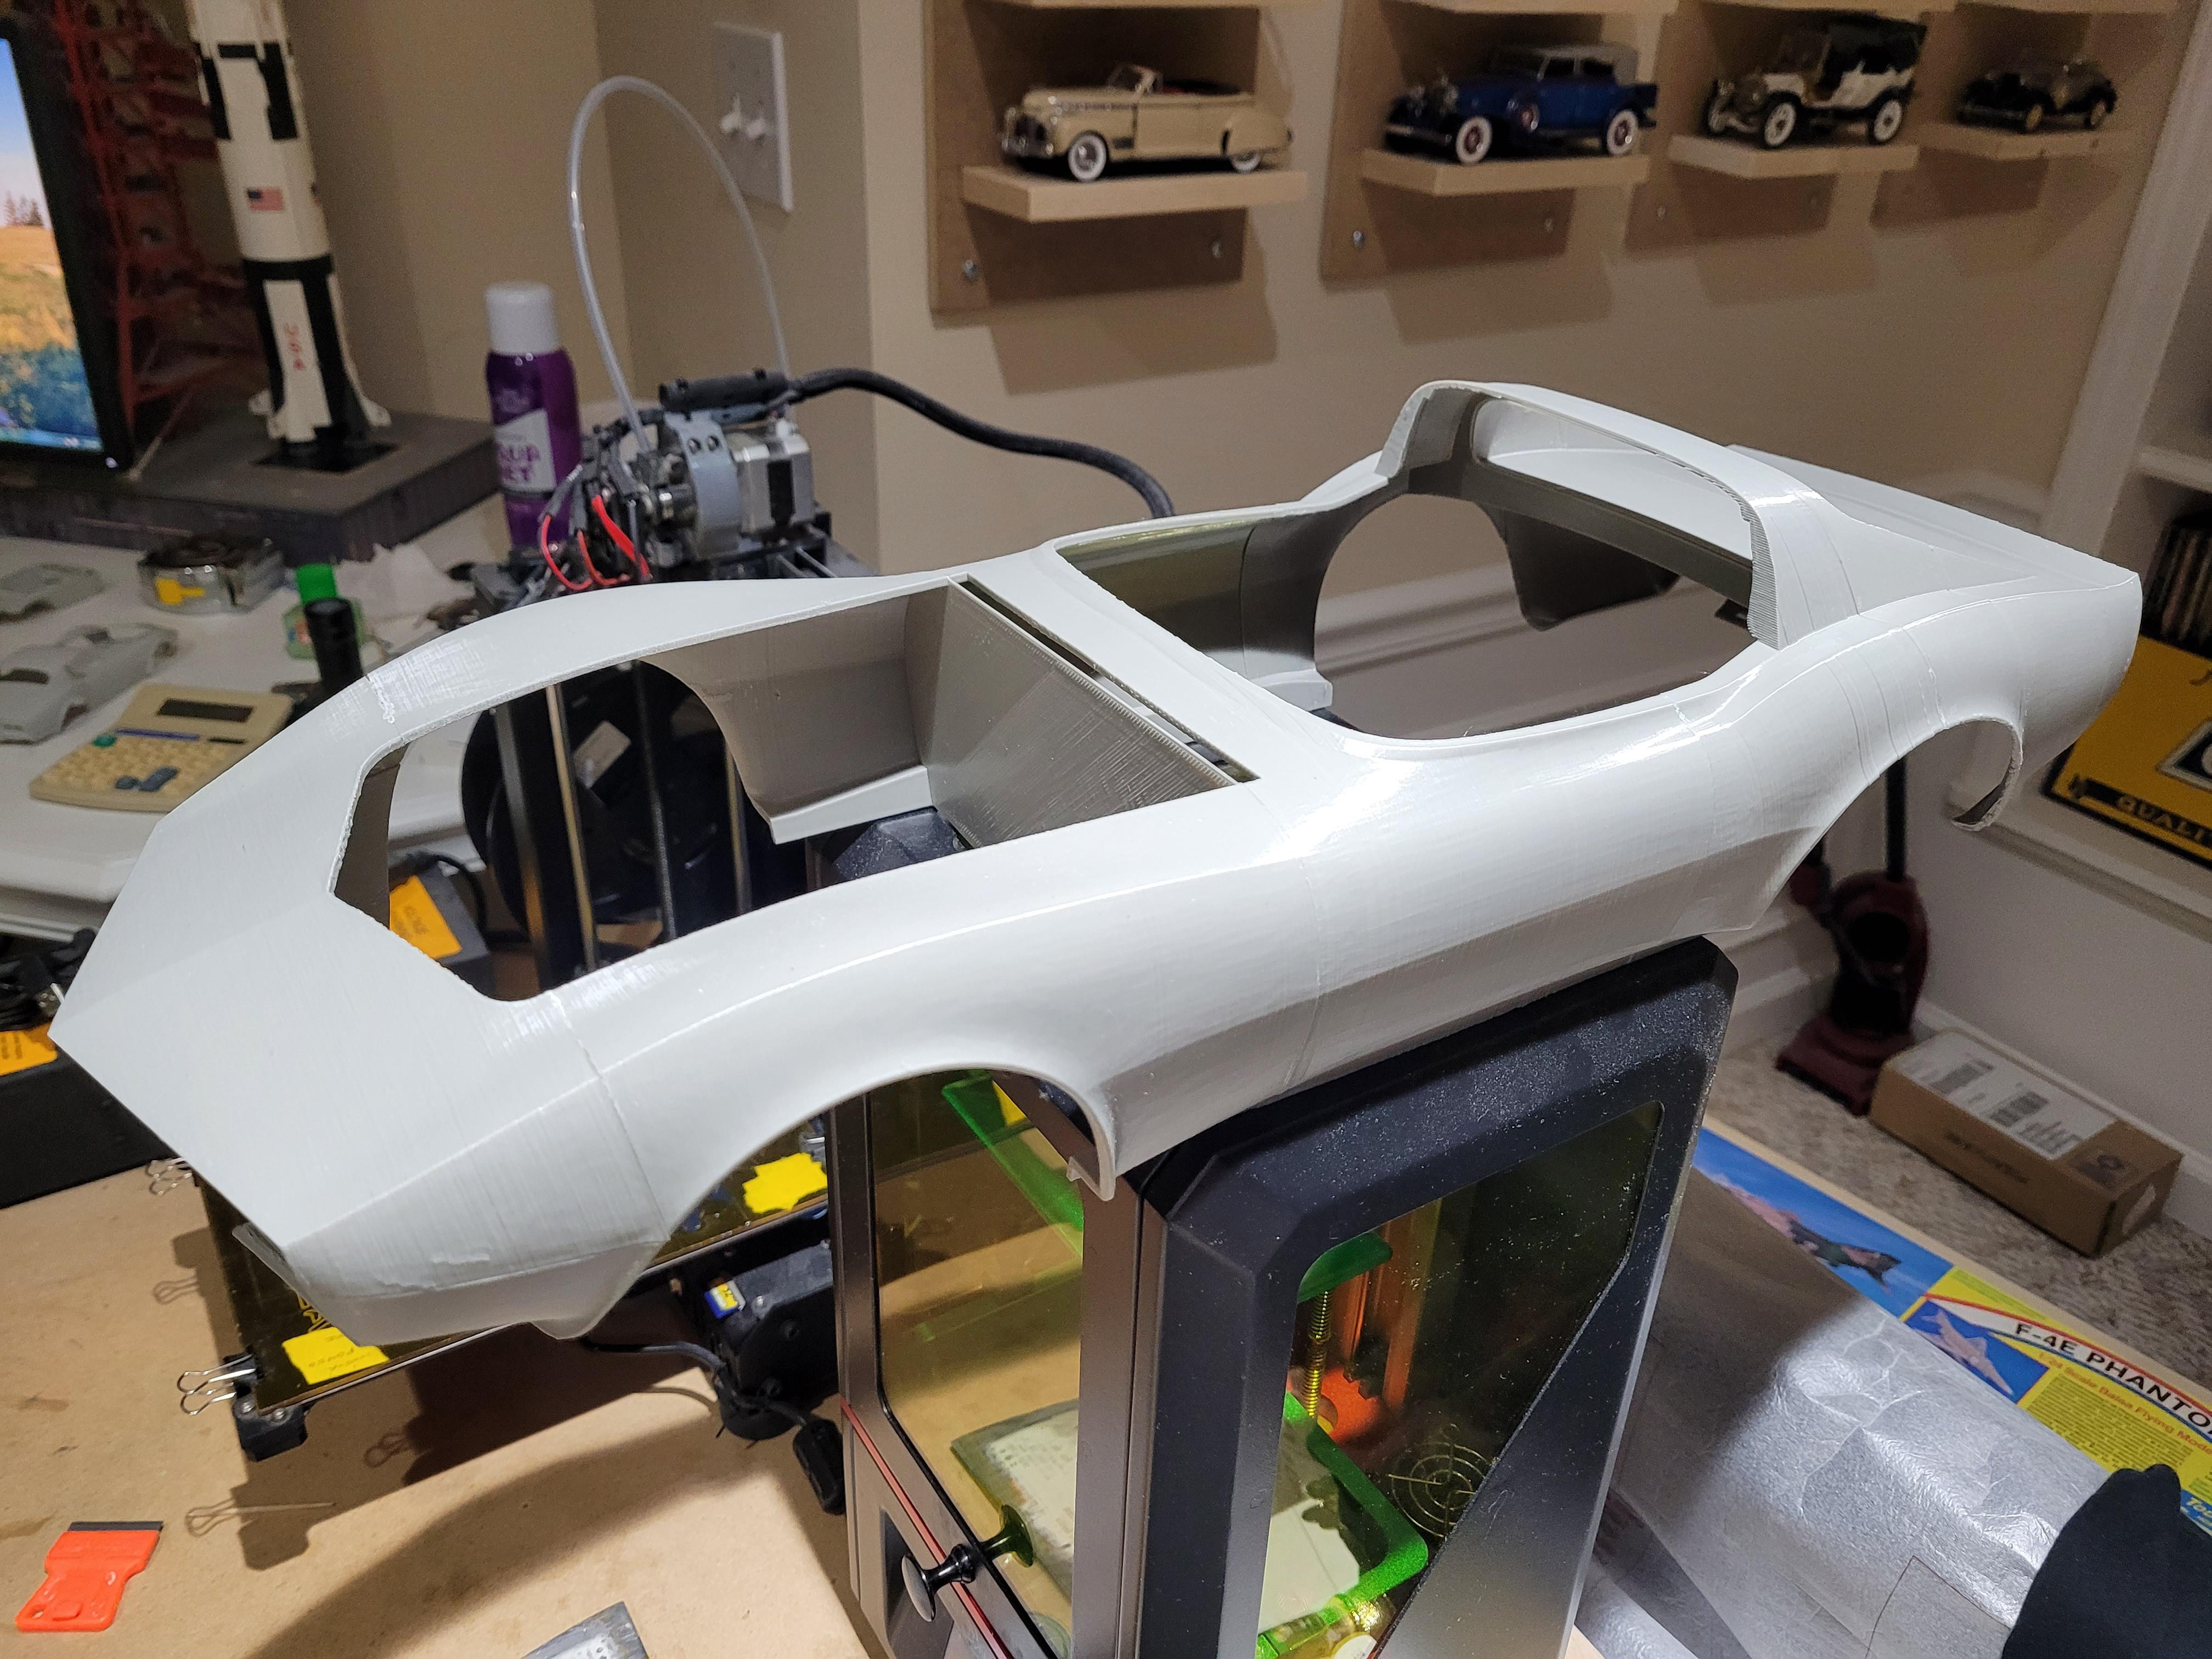
Hello to all. I have been a lurking member for a few years, and I enjoy looking at the many fantastic models that are showcased here. I thought it was time to share a project with you for a change. I recently purchased a Monogram 1/8 Corvette, and I know most of you are familiar with the Monogram 1/8 Scale subjects. I have had a couple of real Corvettes over the years, and the C3 is my favorite. I decided to design and build a 72 Corvette, and use the 78 as a basis for it, and 3d print the parts for it. Although they may appear very similar, there are significant differences between the 72 and 78. In addition, I will try and correct some of the inaccuracies that are present in the 78 body shape as the project progresses. What you see here will not be used in the model. It is what I call a "Surface and Highlight" test print. This will be used to analyze the reflections, shapes, and scale. Next step will be to incorporate the slight changes into the computer model. This project will take a few months to complete. I hope you enjoy the journey, and PLEASE. comment as appropriate for anything you feel needs to be pointed out!
-
Awesome! I owned a 66 Coronet RT convertible (maroon) back in the early 70's. Torqueflite tranny quit and my Dad got tired of seeing it parked in the barn, so he sold it for $125.00. I was only 17 back then, but I still knew that somebody got way more than they paid for. I would give ANYTHING to get that car back! Anyway, thanks for the memories!
-
Are your parts printed from ABS or PLA? I print with PLA, then use superglue for assembly. I use oil-based kilz primer (several coats) to fill in the layer grooves, then sand the parts. Works great. I can tell by the way you explain splitting your parts and using a dremel to remove support, and your points about fiddling with the printer, and printing larger scales, tells me that you have been experimenting with this for awhile. One of these days I'll post some of my printed models. I specialize in Brass-Era cars, and I have several; all done in 1:12 scale. I have hesitated to show them on this forum, since most members are polystyrene builders. I should also add that I am in complete AWE of the scratchbuilding and detailing that goes on here! Stunning! If some of these scratchbuilders ever get a handle on CAD and 3d printing, no telling to what heights they may take us. Mike is what I would call an electronic scratchbuilder. Amazing stuff!!
-
Just some quick notes regarding 3d modelling and 3d printing: There has been much discussion, pro and con, regarding 3d modelling and subsequently printing out parts to create scale models. Since CAD tools are used to design the real 1:1 subjects, it only seems natural that scale models can also be rendered/created the same way. Printing out the parts using suitable materials that can withstand temperature changes, and maintain structural integrity over time, accept glue and paint, and printed with reasonable quality and cost, is another matter; at least for the time being. If cost is not a consideration, then most of the cons mentioned above are no longer an issue, if you outsource the print job to a vender having an SLA industrial-quality printer. If you have been following the development of personal 3d printers (Makerbot, Up, etc..) you will quickly see that many owners of these printers rely on others' .stl files to create frogs, owls, whistles, and similar gigitry. In other words; the printer is a toy. The ability to create 3d models worthy of printing seems to be the greatest obstacle for most people who own printers. Obviously this thread showcases outstanding talent that is not as typical or commonplace as you might think. As a designer working in the automotive field, I can tell you that the greatest challenge for people wanting to create 3d models of cars, will be in aquiring the skills to create class-a surfaces for the bodies. Class-a is a term used to describe automotive surfaces that reflect highlights correctly, and balanced proportions that imitate the 1:1 subject. This is not an easy thing to do for the 1:1 cars, and I suspect it's the same for scale models. Check out the scale cars on any download site, take a look at a car you are familiar with, and you will see what I mean. Here's the good news: Hi-end CAD is getting more affordable. 3d scanners are still pricey, but steadily coming down. The modelling skills shown here in this thread clearly illustrate the talent needed to learn advanced modeling used to create exterior surfaces. In my humble opinion, 3d modeling and printing is coming; it's only a matter of time; probably sooner than later. The technology will not be the constraint in creating and printing 3d scale models; it's the CAD/design skills. If you want to consider this as an extension of your hobby, start learning CAD now, and let the hardware affordability and quality catch up with you. Ken
-
Horrible? Looks like the centerpiece of any model collection to me! Nice Job - and thanks for posting!
-
Kurt Wilson`s: 23 T` Bucket new project 10/9/12
kenlwest replied to John Teresi's topic in WIP: Model Cars
Generally speaking, I just like to lurk around on this forum, but after seeing this masterpiece, I just had to comment. This has to be the most beautiful thing I have ever seen rendered in plastic! It could easily pass for the real thing! The radiator cap, and steering wheel; EVERYTHING!! absolutely speechless... Congratulations! Ken -
You did an excellent job on this! Don't we just long for those days when you could see the oil-stained ground through the engine compartment?
-
I am just STUNNED! What a beautiful execution to one of the greatest classics of all time! AWESOME!
-
Nice job on those Olds models! Ken, from Lake Orion - we are almost neighbors!
-
One Word! BEAUTIFUL!
-
A high school friend of mine had one of these beauties. Black, with white interior. It had a 390. It amazes me to this day how he never wrapped it around a tree. BTW, beautiful job!!!!! Terrible kit??? could have fooled me...
-
When I was a kid in the early 70's, I owned a blue 1966 Corvair; 2 speed automatic - leaked like a sieve. But for its time, it was a nice car. I also had a white 1965 Corvair; with red interior! It had a 3 speed manual. I wish I still had 'em. Thanks for the memories! You don't see these very often.
-
Wow! I was scrolling well into the pictures of the models before I realized that only the second picture was real!!! Amazing work!!
-
I really like the Chevy Tri-Fives. Nice job on this one! I have noticed several models on the forum that show "pupils in the headlights". I usually cut out a small circle of BMF, and stick it over the hole, cut the plug off the back of the lens, then glue the lens in with Elmers White Glue. Dries clear.
-
You know, if I had this model, I would permanently encase it under glass and mount it behind the bar! AWESOME!!
-
Very Nice! If this is your first try at "modelism", I can't wait to see your 10th! Color is PERFECT!
-
WOW! I am now sold on de-chroming and alclad! Makes it all the more REAL!
-
In looking this over again, I just realized that the hood opens both ways! I wanted to reach in there are pull out a spark plug!
-
I really like this one. Can I assume this to be the 1/32 Pyro?? Nice Job! Ken