
JasonFL
-
Posts
966 -
Joined
-
Last visited
Content Type
Profiles
Forums
Events
Gallery
Everything posted by JasonFL
-
Boss Trike
JasonFL replied to crazyjim's topic in WIP: All The Rest: Motorcycles, Aviation, Military, Sci-Fi, Figures
Now that is crazy! You think with the name crazyjim you'd get outa that comfort zone more often, this is one killer custom bike build. I'd hate to be the guy riding that if the back tire ever blows out..haha. Nice work. -
99 Silverado in pink
JasonFL replied to crazyjim's topic in Model Trucks: Pickups, Vans, SUVs, Light Commercial
Really nice looking truck Jim. I like the mild drop with those rims and color. Deffintatly not the kind of pink I was expecting but what I really like most are the headlights and the little chrome strip grill. Are they the normal set flipped around, a different set, or is that how it's supposed to be and I'm crazy? -
Great lookin build. That beautiful smooth wet paint with the trim are the first things that just popped out at me right from the beginning. Very nice build, would love to see some underneath photos, maybe some of those eraser airbags.
-
I just use my imagination, to me there are hidden headlights behind that slick killer lookin grill and on that big smooth round ass I see thin LEDs down by the plate that light up behind the paint when you hit the brakes. Haha...see, it's all there, no ones looking hard enough. By far one of the baddest lookin Rivieras I've ever seen Albie. Another great looking build. Nice job fixin the paint, that red looks beautiful.
-
Have to say I like both options. First one looks good laid out like that but I was gonna say go with the 2nd set and slam that rear down some more. Either way it'll look sick. Love to see these slammed, not many people do them like that. Look forward to seeing the progress on it.
-
Wish I woulda saw this before, I'd really appreciate it if you could send some photos over. I'd like to build the air ride set up for my Merc and this new van I got. I think you'll love what I'm gonna do to the van. I'll try and get a photo for you.
-
Not sure how I missed this one but this thing is one killer beetle. I really love those rear rims being deep dish with no camber laid out on the ground. Another nice build James.
-
1940 FORD OLD & LOW
JasonFL replied to bpletcher55's topic in Model Trucks: Pickups, Vans, SUVs, Light Commercial
Really like the wild bills speed shop logo on the doors. Just an overall great looking build. -
Slammed 09 Silverado
JasonFL replied to aksarben's topic in Model Trucks: Pickups, Vans, SUVs, Light Commercial
I'd have to agree with James, thing is sick! It is something you would see in StreetTrucks. Very clean and simple, very nice build. -
Really cool build. Love the placement of all the decals and the rust on the bottom makes it feel like a real daily driver. Nice work
-
Custom Ford P/U (Done)
JasonFL replied to James2's topic in WIP: Model Trucks: Pickups, Vans, SUVs, Light Commercial
Really like what your doing here. Flipping the rear fenders was money! Looking forward to seeing this one done, keep up the good work. -
Ah, ok. This has all been a big help. Goin to come in handy with some ideas Im having. To bad to hear about your paint job, sucks. I'm sure the next one will come out looking even better just keep at it.
-
Project: "Inferno" 49 Merc - *Update p17* 3/13/15
JasonFL replied to JasonFL's topic in WIP: Model Cars
Thanks James and Todd. Thanks Joe. I think your gonna dig what I did with the front, look mean. -
Project: "Inferno" 49 Merc - *Update p17* 3/13/15
JasonFL replied to JasonFL's topic in WIP: Model Cars
Thanks Albie. I really appreciate that. A lot of the inspiration comes for you guys. I have a few more cool details I think will really make this Merc set apart from the rest. After its all together you'll still be able to see the notch from the back window, I think you'll like it. Thanks for sticking with the build, I'll try and update more. -
Awesome, thanks Codie. You did a great job with them, Ill have to try doing a black wash sometime.
-
Beautiful job on this. Love all the different touches you did to it, just flows nicely. Nice touch with those rims, now I'm gonna be on the hunt for a set. Could you lmk what year they are? Thanks. Keep up the nice work, I like your style.
-
Very nice clean. Build. Love that color. Nice work.
-
I really like the stance you got going on. I'm more a fan of the first set of rims you had on there in the first photo. I also love the big cowl, gives it a real aggressive look. Keep it going, nice work do far.
-
Very cool build, clean. Love what you did with it. I'll keep my eye out for it in Under Glass. Nice work
-
No worries man, I appreciate you taking the time to answer my questions. The paint work looks great, can't wait to see it all together. I have a bunch of straws I was just not sure how to go about using them. I always thought they'd be to flimsy or that the glue would warp them. Thanks for the help. As for filler, right now I use a combo of super glue and baby powder until I can get some filler. It works pretty good actually. Thanks again on the info. Keep up with the build, it's lookin real nice.
-
Project: "Inferno" 49 Merc - *Update p17* 3/13/15
JasonFL replied to JasonFL's topic in WIP: Model Cars
Having to go with side pipes was a big game changer for the Merc. All original plans went out the window. Instead of the small skirts I'm going to go with the big ones, extend them a bit, shape them to flow with the body lines, and flatten the bottoms. Then I'm going to drop the front/rear bumpers all the way flat on the ground and this will give me that aggressive slammed clean look I was going for. Here's a mock up, let me know what you all think. Thanks for looking. -
Project: "Inferno" 49 Merc - *Update p17* 3/13/15
JasonFL replied to JasonFL's topic in WIP: Model Cars
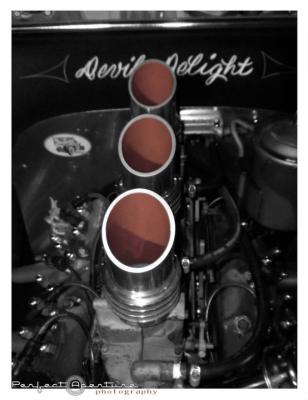
I was going to use this R/C antenna cover for exhaust, bend it into place and then use a piece of plastic pipe to attach it but that was a big flop. So i resorted back to my parts tree stash and decided to make my own exhaust I cleaned them up and used a drill bit to make holes for a more realistic look. You can see how far I drilled in the light. I also rounded the edges off to flow better out of the fender. And there you go, custom side pipes. -
Project: "Inferno" 49 Merc - *Update p17* 3/13/15
JasonFL replied to JasonFL's topic in WIP: Model Cars
Since I'm making the side pipes thicker then the rest of the exhaust I'm going to use the clamps off the muffler to help blend all the pipes together. Started out by running a drill bit through the center. Then cut the end off with the clamp and attached it to the pipe. The 2 pipes connected (still need cleaning up) -
Project: "Inferno" 49 Merc - *Update p17* 3/13/15
JasonFL replied to JasonFL's topic in WIP: Model Cars
I needed to shorten this pipe to clear the rim on the passenger side. So I cut the pipe down. Then I tapered the ends to fit the clamps. First I made a slight cut with the saw all the way around the pipe (ex:top part of pipe right side) then sanding it down to the right thickness (ex:bottom of pipe left side). I used the clamps off one of the extra exhaust ends, drilled out the center, and used it to cover were I attached the 2 pipes. This is the clamp and the piece of pipe (pass. side) that connects to the header. -
Project: "Inferno" 49 Merc - *Update p17* 3/13/15
JasonFL replied to JasonFL's topic in WIP: Model Cars
As you can see, there's no room for an exhaust to run out the rear so I had to change the plans. Instead I'm going to go straight pipes right out the side. I started by taking the old exhaust, flipping them to opposite sides, and piecing them together. How the exhaust is supposed to sit stock: The exhaust flipped to opposite sides going out the fender.